
HOLIDAY DONATION DRIVE - SUPPORT MSW - DO YOUR PART TO KEEP THIS GREAT FORUM GOING! (Only 36 donations so far out of 49,000 members - C'mon guys!)
×


popeye the sailor
-
Posts
16,007 -
Joined
-
Last visited
Content Type
Profiles
Forums
Gallery
Events
Everything posted by popeye the sailor
-
 hey there Phil! you've made quite a bit of progress since I last looked in..........the ship looks splendid! the fittings and structures look really good too.......coming along very nice!
 -
I've never done a vac kit.......they look very daunting you did a superb job! really like the paint work.......did you stencil the insignias or are they decals?
-
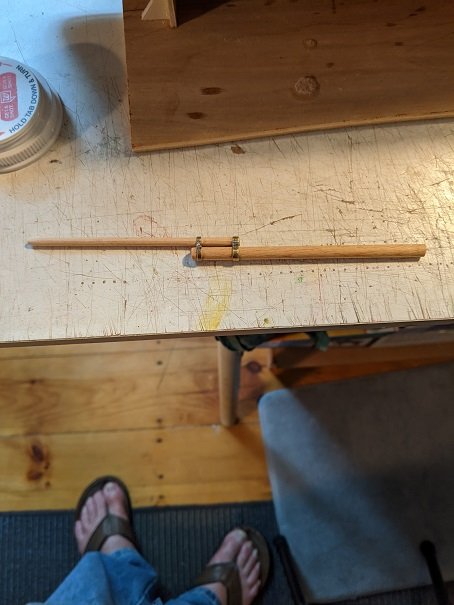
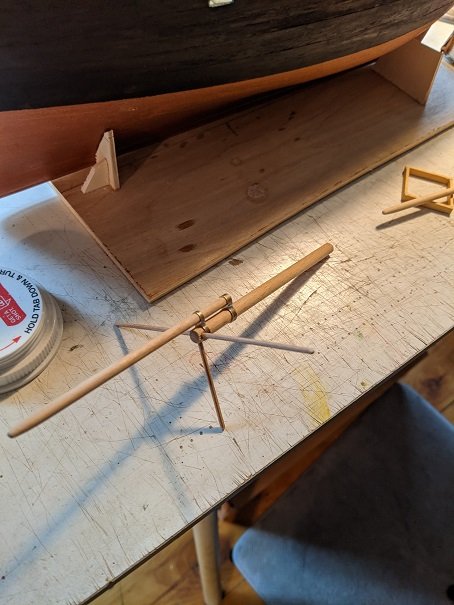
I spent a bit more time on the Agilis than the Clotilda. they are both together on the table. if your following the Clotilda build, you read that I had made up two bow spirit assemblies....I fleshed out the one for the Clotilda first. the glue hadn't set on this one yet, so I applied a bit more and set it aside. this one will have the spreader as well, but will also have a double striker. I will need to create a cap for the spirit, since I didn't leave enough jutting past the fitting to drill. the hawse holes were drilled into the bow.......they will be fitted with metal eyelets. I had shown in the past, where I fell into the possession of an entire box of different size eyelets, used for shoes, and various leather goods {anything that requires lacing}. they have come in handy quite a bit....and I still haven't put a dent in the amount that I have. I was being rushed by this time.........errand day .......so I had to stop what I was doing. the last thing I did was mark out the deck for planking. I'm not going to get as fussy, as I did for the Clotilda, but it will still look good I may add a couple more lines mid ship........those fields look a bit too wide. we'll see thanks for look'in in and your patience......

-
I had another good day of playtime hoping that my train hadn't left the station, I'm trying to get my bearings on where I left off. I had cut a bunch of dual ring mast fittings as I recall.........time to try them out. since this is somewhat of a dual build, I cut two bow sprits and two booms. they were assembled using these fittings.........I need to cut more {I was also going to make different sizes and band combinations. I used the admiral's phone again.......I'm really starting to like it. I can still size down the pictures, cutting down on the picture file size. the original picture is over 2 megs.......by sizing it down, I bring it down into the kb's..........2.98mb down to 104kb. the other one is for the Agilis.........I fleshed out the Clotilda first. drilling three holes, one on the underside of the spirit and another straight through the spirit horizontally, I added the spreader and striker. small diameter dowel. there are some small fitting bits to add before I can mount it.
-
my admiral is big on that.........."you can make that".....she seems to think I can make anything news blip....someone hit our house! they took out the bulkhead {doghouse} for our cellar! not much more info other than they got the guy already jee,..........all we need now is a dumpster fire! your making it hard on me, you know.........now I gotta make stuff like that!..... nice job.......not even aftermarket can duplicate the effort I'm not big on the resin stuff for that reason.......true that some of it can enhance the model, but in other cases, the kit part wins out. you just need to research to see what would be better. the more you dabble with fabrication, the better your gonna get keep it up!
-
amazing work inventing the wheel...........really nice work! the brass work is super.....WOW!
-
good start on an interesting subject interesting way to learn another language too following along
-
jaw droppingly good! shaping up nicely Ekis........love the 3D concept for the stairway {can't wait to see that part done}. I also love the evolution of complexity. don't stop now!
-
checking in on your progress....great tutorial on sail making I've never used that type of stuff before........most I've made have been cloth. sorry to hear of the covid issues.....hope all are doing well. she a beautiful ship!
-
hi Dave......can't put a like to that last post........what a frustrating predicament ! neat base you've put together......some great progress.
-
15' Dinghy by Bedford - FINISHED - 1:1 scale
popeye the sailor replied to Bedford's topic in Non-ship/categorised builds
seriously nice boat Bedford! well done...........the fittings look awesome! -
sure will John here as well, I felt bad not showing any pictures. I took a couple......... the sun comes into the spare room quite well. the grates are cemented in place, and I drilled and placed the hawse holes on the deck, on each side of the main mast. the fore deck and the other structures are dry fitted still....I'll get to them after the cap rails are in place. I still need to make the catheads and run the anchors. it's all progress my friends thanks for being patient everyone.........more soon
-
hello John....glad to see your following along!
-
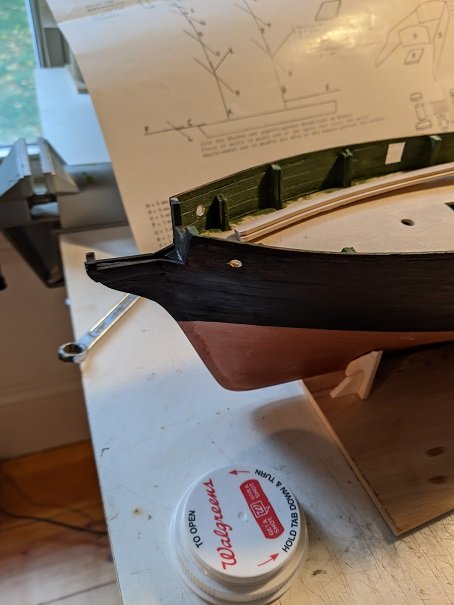
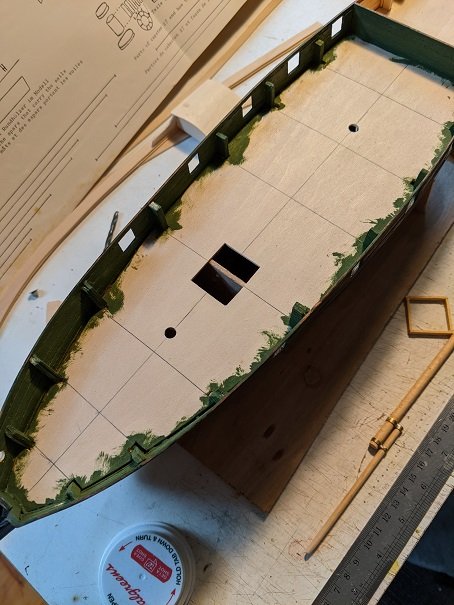
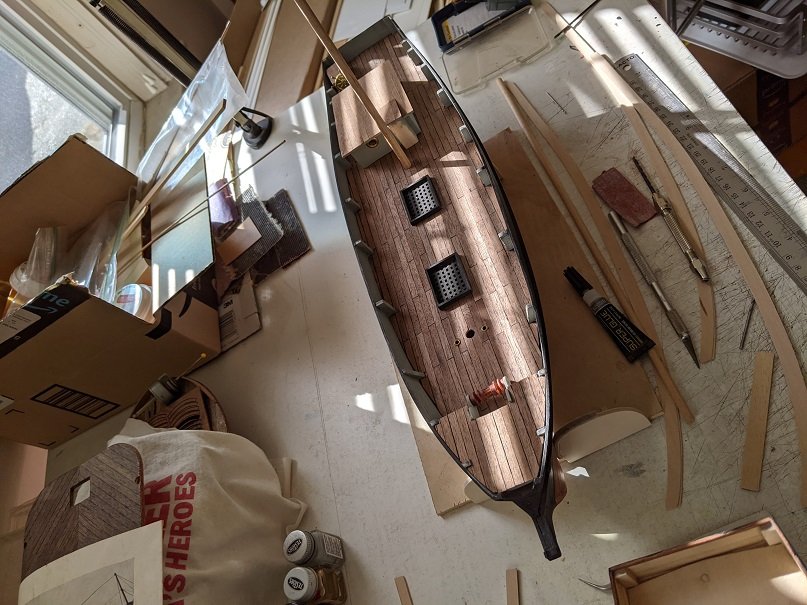
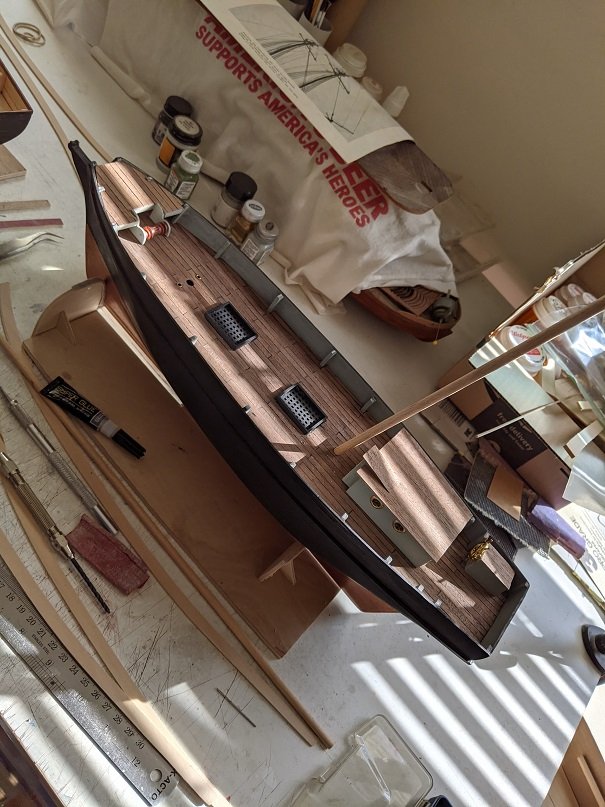
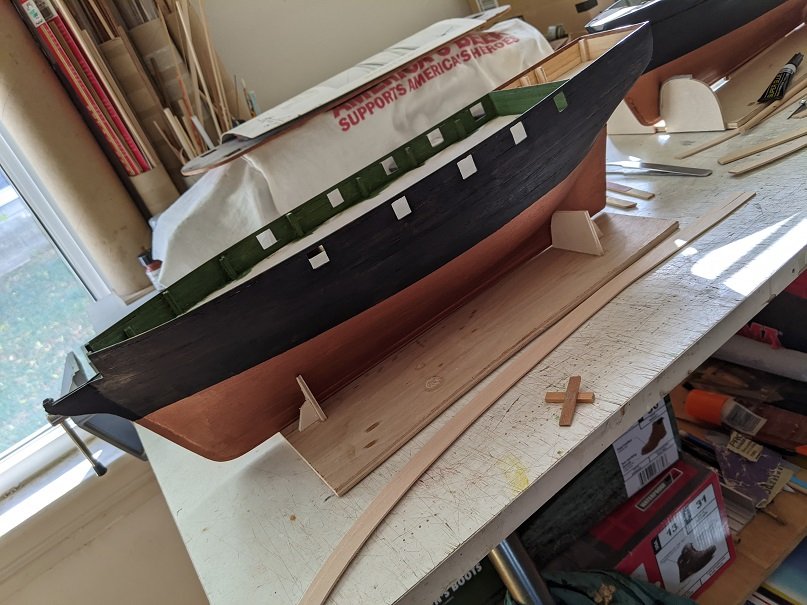
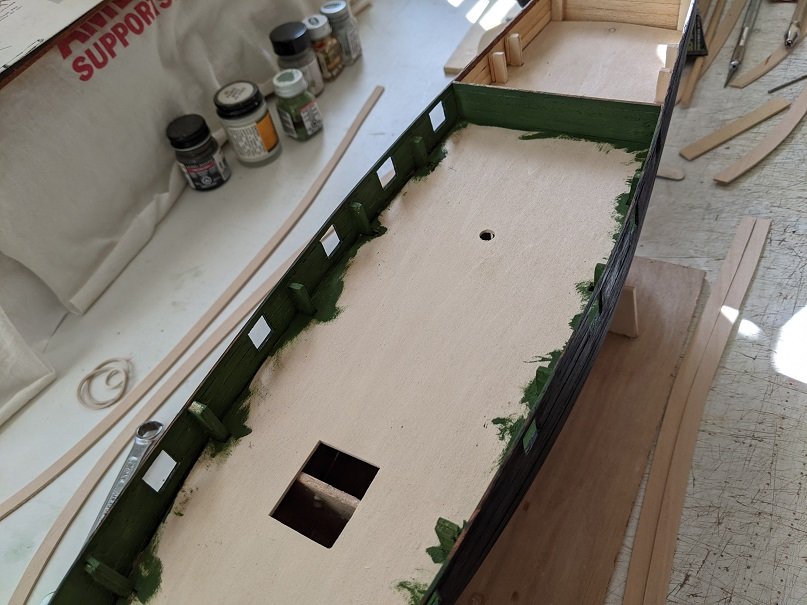
hi there Ed I'd have probably been better to have bought up a bunch of those throw away cameras ....I'd have likely gotten better pictures I can't see myself buying one of those fancy cameras.......I probably wouldn't use half the functions....that's why I prefer the cheap cameras. I want to get back to wood........I kinda miss it {slight lean towards the semantics of it all}. there is another wood project to throw on the pile........I think this bugs the current Mrs. Wenzel more, than my want of a new camera .........lemme take the puppy out.........I'll be back so.........yea, I felt bad that there are no pictures to show, so I used the admiral's phone and took some. .......just a few to test the theory out. if I go this route, I will need to be mindful of the camera angle........it creates odd shots. the bottom paint is copper........the upper hull is painted with Billing's flat black. I should have left it as it was........the first coat looked to be similar to dark walnut stain. but instead, I gave it a second coat and will leave it at that. very little wood grain shows through, but it gives the hull a worn look, which I kinda find appealing. after all, it's an older vessel, and I'm sure maintenance wasn't a priority I also added the chock to give the bow spirit that upward sweep. the inner bulward color is a medium green. taking the pictures, I wasn't seeing the color and was afraid that it might not show in the pictures. I'm glad it does the 'tool' you see in the foreground is how I'm going to gauge the rub rails. the deck will be planked and I will need to make a grate for the hold. I will likely go up another 4 mm for the aft deck.....giving more height to the cabin. I might add some port holes.
-
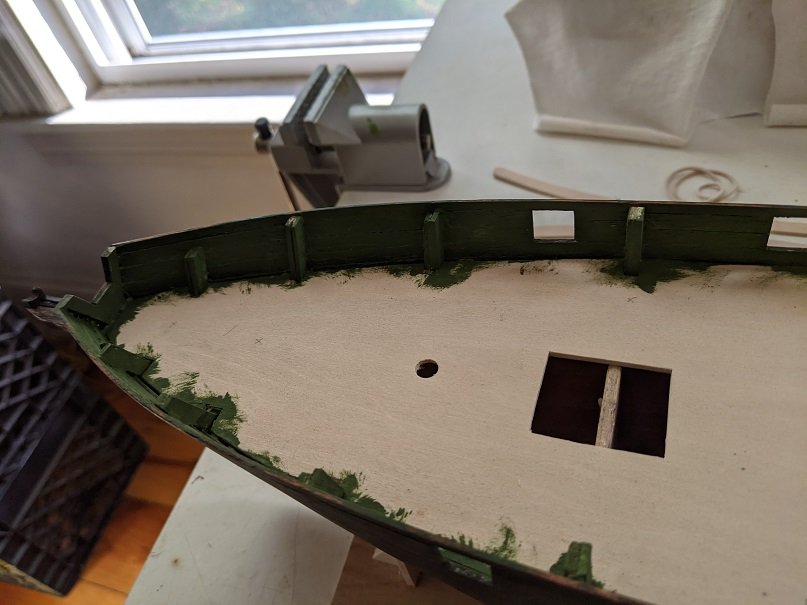
sorry to all who posted........the big change here........the virus........and my shift from wood to plastic, has distracted me somewhat. worse is the focus issue i've been experiencing..........but I think I found redemption by using my own #13 boot to help me along not having a suitable camera has also been a thorn..........I hope to remedy that soon as well. the last picture showed a bare hull.....the gun ports have been established along with the aft cabin, which will be capped with the aft decking. there has been some progress.....the outer hull has been painted, upper and lower, as well as the inner bulwarks. I'm looking towards an open bow with the usual windlass set up, to make it easier I think. next will be to plank the deck and add the rub rail along the outer hull...........then the cap rails. naturally, the progress will move forward once I can get a decent camera, I can show you what I've done so far. to be continued....... I haven't looked at the Billing's Cutty Kevin.........do you already have the kit? I used photoshop to enlarge the parts panel diagrams for the Danmark, to fit the odd parts that I have for the model. I basically enlarged the diagrams to around 150%.........to be more exact would have been about 153%. this brought me to around a 1/8th difference in the numbers and size of the bulkhead parts....they were all I was interested with.......I can scratch build the rest, since all corresponding measurements now will be different {once started, it will snowball from there ). of course, this one is not a priority, considering that I probably got somewhere in the neighborhood of 15 or so active projects going on, I won't be getting back to it any time soon so be assured that the Clotilda and this brigg is still in the works....given the condition of the kit that I'm building them from, they are coming along surprisingly well. JCT was able to create a decent model from the box.....it inspires me to press on
-
it took a bit of effort, but as you can see, I've found where this build fell in the phylum I know......I haven't updated in a while, but being distracted with everything going on around me, I haven't been able to focus......sucks to be sure but these last few days have been somewhat of a breakthrough........I managed to get a little done on this model. sadly, I still don't have a camera good enough to show you what I've accomplished, but I hope to have a remedy for this soon. it not much.........cemented the grates in place on the deck........drilled the holes and grommeted the anchor hawse holes on the deck. I plan to add the cap rails and cement the rest of the parts I have ready on the deck........put some progress on this 'ole girl! 👍 ....to be continued
-
when getting 'round to the end of the build.......it's like walk'in on eggshells. .....so afraid to knock something off!
-
she's a sweet looking model.......great subject count me in too OC!
-
fantastic job on the Harrier OC........super looking base as well good that the little nuances towards the end of the build didn't take away from the finished results
-
very nice start!
-
I think you should Tom.........obviously, you have untapped talent flaunt it!
-
superb work on the stencils..interesting you did the blue background last the cockpit looks awesome!
-
cockpit and wings look really good did you pre curve the leading edges?
-
I haven't finished the other two guys yet. then again........I still haven't painted the rudder. I cut the cabane cables too short on Kempf's plane, so I need to figure out what to do with that plane.
-
you've got a really nice collection..........and a good eye for 'battle' paint. they look like they've been taken right off the battlefield! truly great job!

