
HOLIDAY DONATION DRIVE - SUPPORT MSW - DO YOUR PART TO KEEP THIS GREAT FORUM GOING! (Only 36 donations so far out of 49,000 members - C'mon guys!)
×


popeye the sailor
-
Posts
16,007 -
Joined
-
Last visited
Content Type
Profiles
Forums
Gallery
Events
Everything posted by popeye the sailor
-
 I have the dashboard pieces on my desk........thinking what I can do about instrumentation. gotta clear the Fokkers first
 -
thanks Lou........I wish I had found it sooner. I try now NOT to keep my soda so close to the printer
-
pok'in my head in here looks really good! yea......I wouldn't recommend this kit as a 'first build', but then again, when I started, I didn't pick the easiest model to start out with either. you did something rather neat with the copper plating......just paint below the waterline copper, and dry brush it with flat medium green...downward strokes to the keel. the kit does have it's shortcomings......the railings are the worst. if your following my log, feel free to copy my method. there are links there too....one will take you to a museum that has some really nice pictures of the rigging. your able to zoom in and rotate the pictures, so you can see different angles. the rigging is similar to most clipper ships that you'll find here, but pay a mind to the Cutty.......at one time she had barque rigging. the belaying pins were another aspect I replaced...you'll read it in my log as well. one thing you will learn with this kit is scratch building.........a very good bit of experience. I learned it early on, but then......I didn't see it that way......I thought I was just being creative I got a lot of my stuff from Cornwall Model Boats - Static display and radio control model boat kits including period wooden model ships.Model Ship fittings, Caldercraft Boats there is a lack of life boats with this kit too........you can find them here.......just bear in mind the scale of the model, and you will do fine I don't know of too many folks who have finished this kit. I hope to get back to mine. keep up the good work........and don't worry about how it looks now. it will all come together when you finally get some paint on her look the best when finished.......just think of it as riding on a train........miles of track and many curves along the way. mind if I follow along?

- 74 replies
-
- 2
-

-
- mantua
- thermopylae
- (and 1 more)
-
are you sure I can't con you into another one of these builds? just kidding who threw the pie?

-
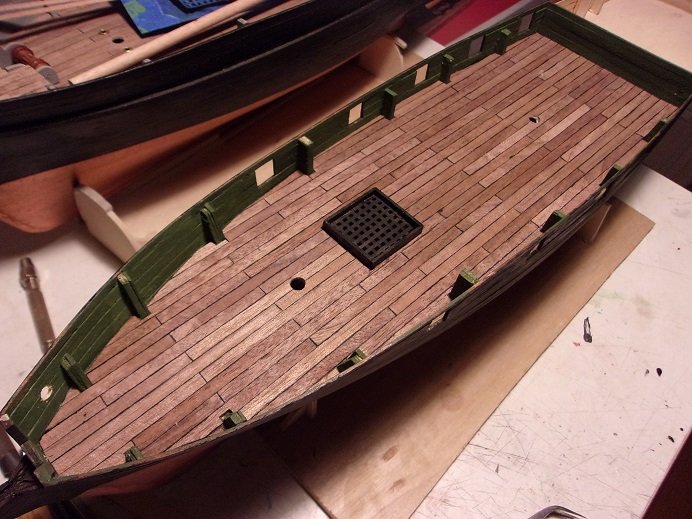
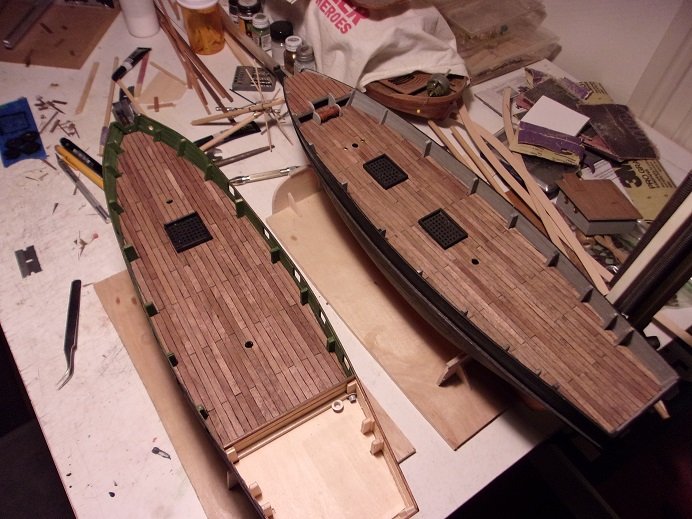
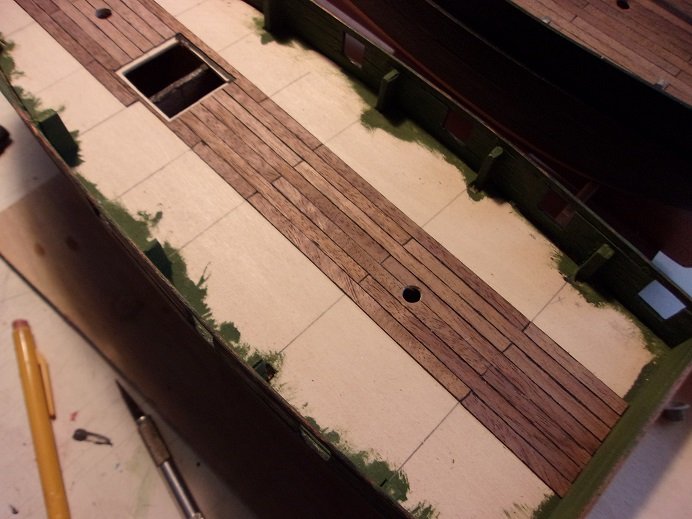
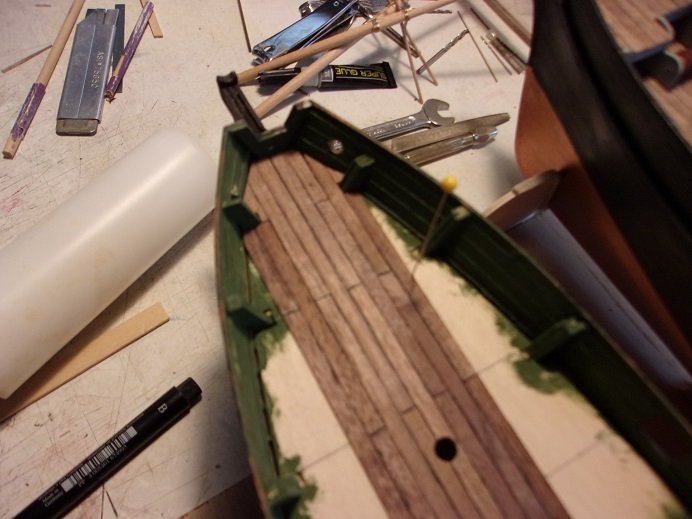
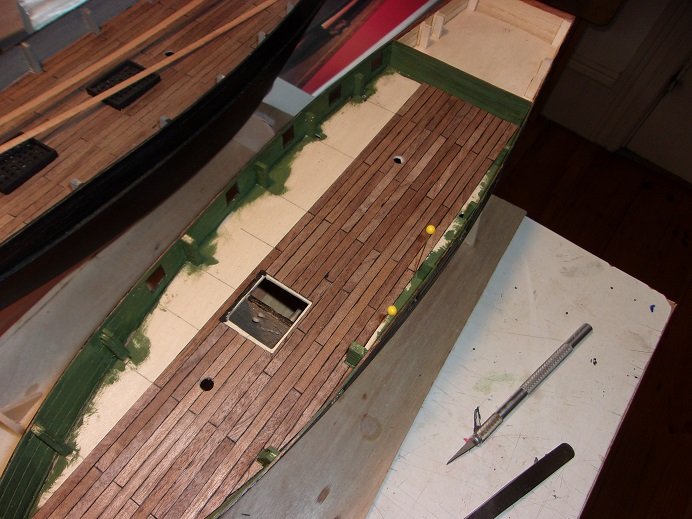
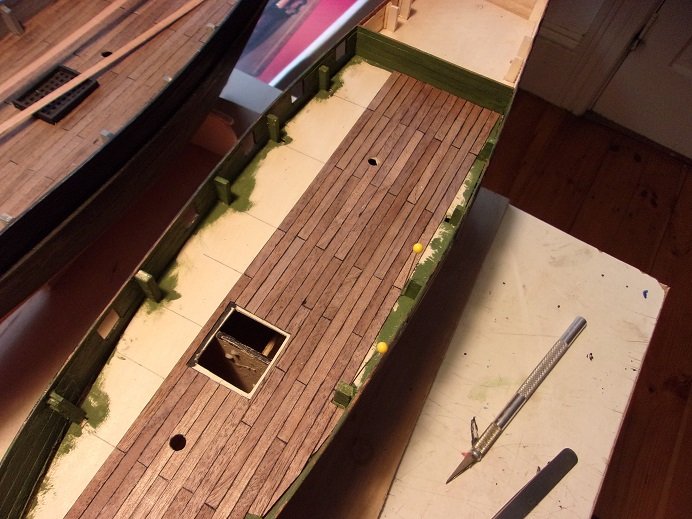
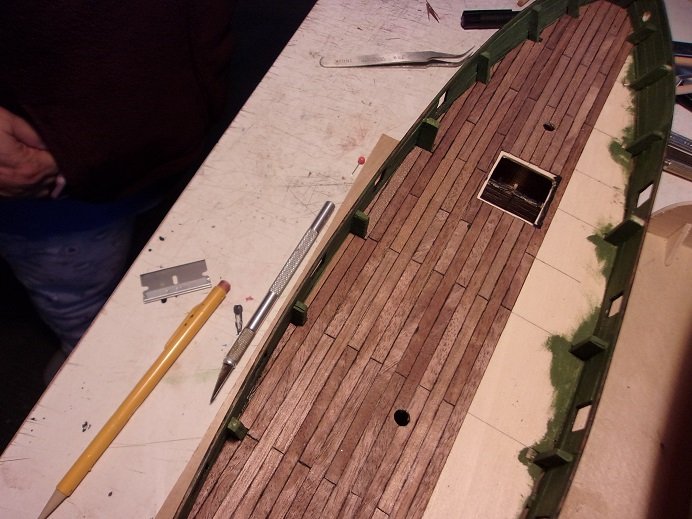
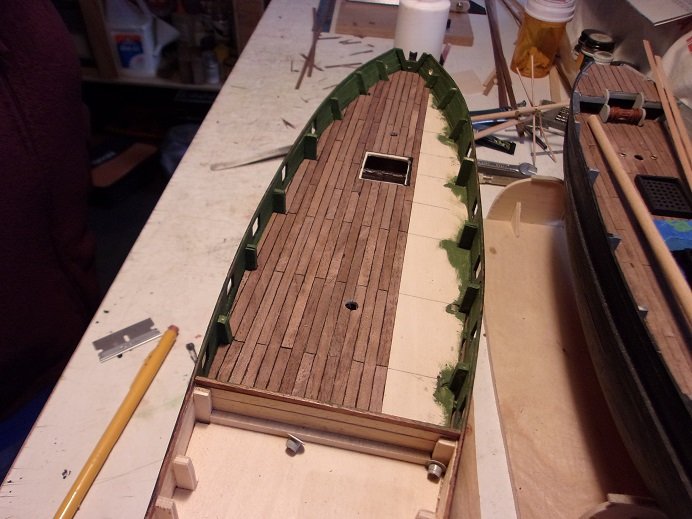
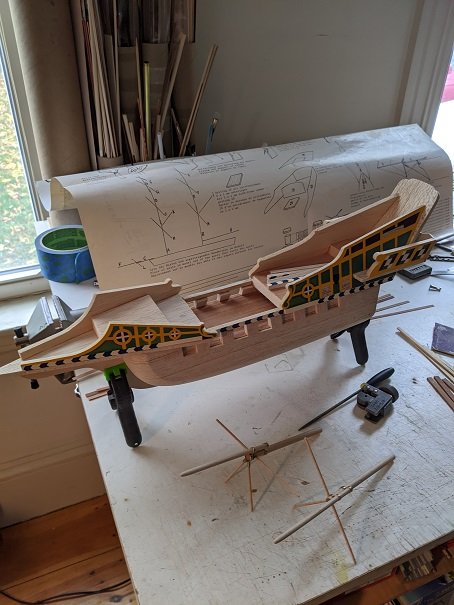
the deck is finished.......I still have enough wood strips to do the aft deck. I also found that I had cut a fore deck. it still needs to be fitted if I intend to use it. I wanted to flesh out the catheads too, but the errand changed the plans. I will try. here you can see the contrast between the two decks the grate has been cemented in place. more to come
-
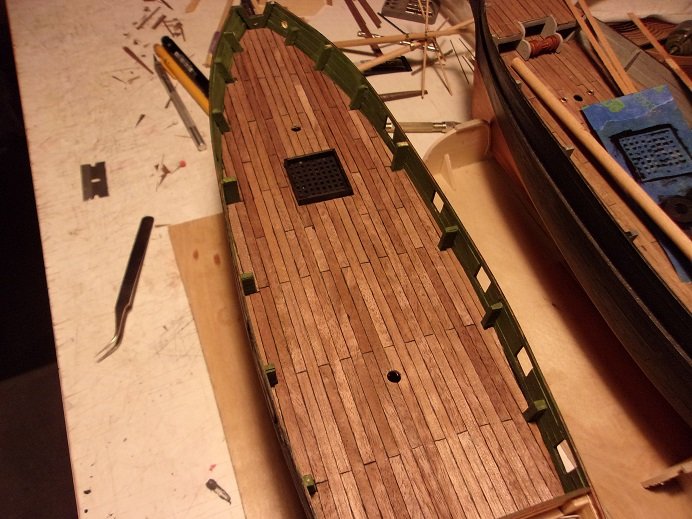
today was deck planking day I already started it.......the fun continues. I'm still getting used to the new camera......these beginning pictures are with flash. as I was planking, I fleshed out one more mast collar and painted the grate and the collars flat black. I added the couple extra lines for the butt staggers. it did add a bit of confusion, but in the end, it creates a fairly interesting deck. the flash started to get blurry...... now with the other camera, I never used flash........I didn't have to with the lighting I've been using. at this point I turned it off. Almost to the portside bulwark......I thought I had waited too long to take the picture. cameras with auto focus usually go out of focus if you wait too long.....I took a second. here I only waited a couple seconds......something to get used to the port side is completely done now. I had to leave it here.......seems the admiral wanted to go shopping. I'll finish the starboard side when I get back.
-
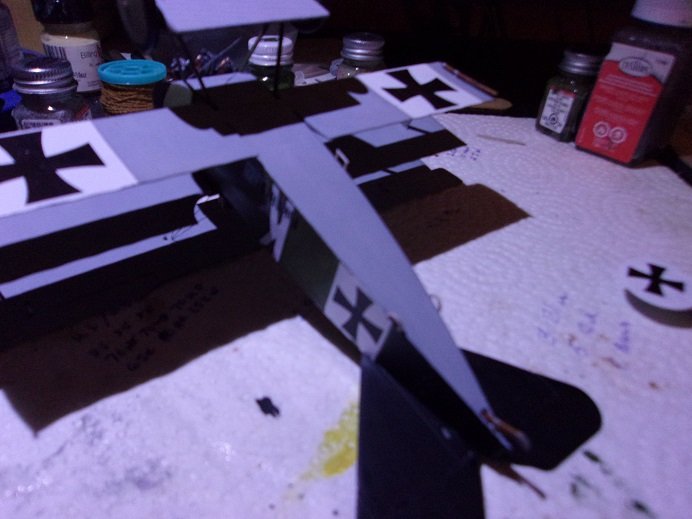
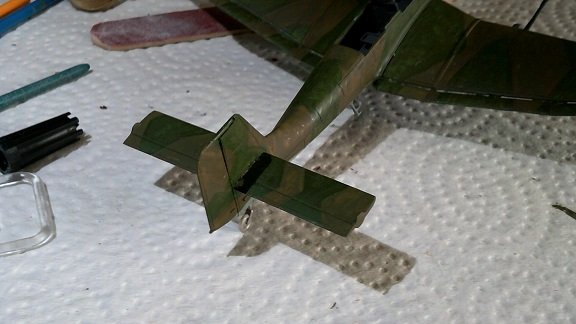
dug this one from the archives.......two problems with this model are the control cables to the top wing.....I cut 'em too short. I don't have enough to cross them, so I'll run them straight {small problem}. the bigger problem is the time factor........these decals are junk. the one on the underside of the bottom wing has shrunk and split.......I have it back down at the moment, but the cracking is still there. this and a few other areas that are now chipping, I will need to touch up with paint. the rudder is now prepped out with the cable levers and decals have been added. this is using flash........I had to retake the next one due to the flash whiting everything out......the step and grab loops have been added, but not painted yet. no flash equals moonlight.........that's amore {nobody did it like Dean}
- 157 replies
-
- 11
-
-
the new camera is better than the other one......very short window for the auto focus. better than none at all I suppose there are only a few parts left to add to this model.......as mentioned, a larger scale would present more detail and challenge. it's an effort to clear the table. definitely need to take'em in better lighting, rather than rely on flash the decals were a tad on the brittle side....a couple did pose a bit of an effort to get them to line up.

-
I put a bit more to this model......really not warming up to the scale very well. perhaps a larger one will turn up......one day I found that I had a couple of pictures from June that I hadn't posted yet. I had added the stabilizers and braces. ....and that's where I left off. in moving forward with the model, I put the decals on. I should have pictures soon.
-
look'in good
-
interesting assembly very nicely done!
-
nice progress Chris...will you have to calk in the seams?
-
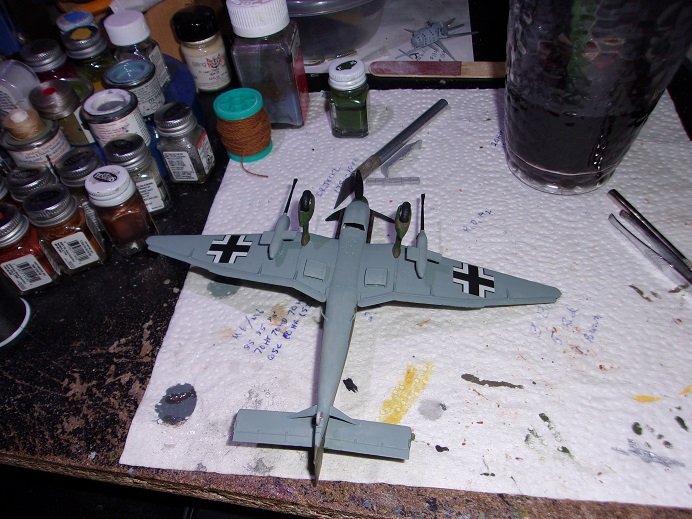
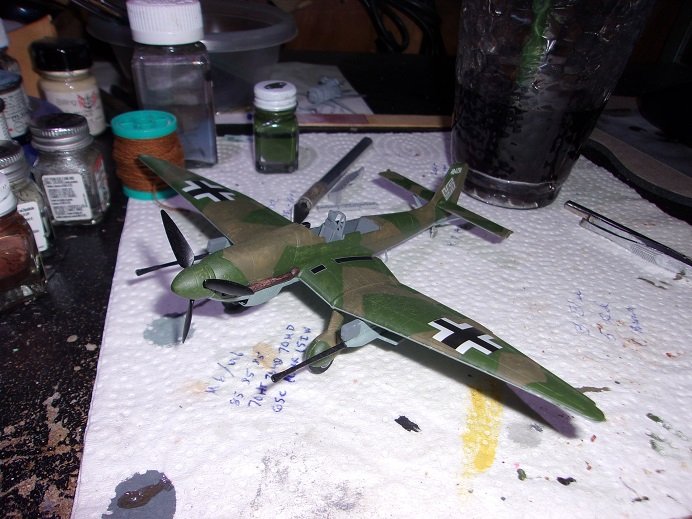
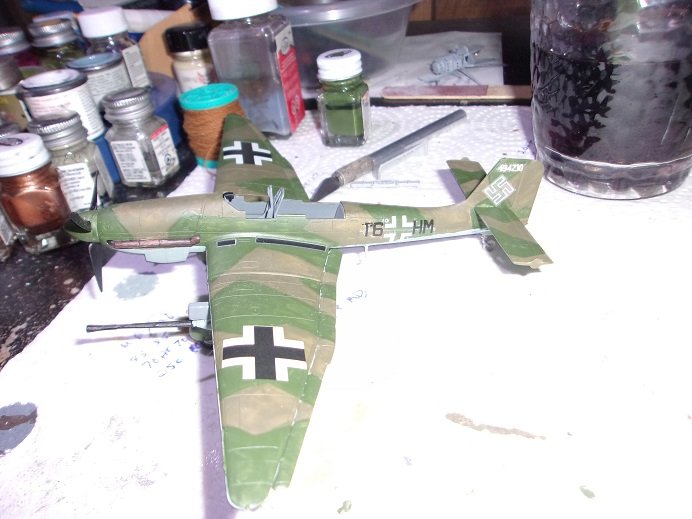
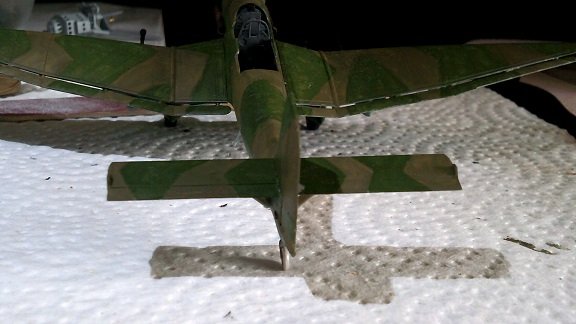
nice start Bob......I've wanted to get one of these kits. the Germans had a plane like this that I've been interested in as well welcome to Plastiland!
-
where do you put your feet? ......I've acquired a stash...but nothing like that! it is nice to see you back. looks like a good repair to the roof, but what are you going to do about the splint?
-
looking really good OC........the interior looks awesome you're really tempting me to start the Osprey.......the interior is almost the same! nicely done!
-
superb progress since I last looked in the lord's house is very well done.......the detail you're putting into it really shows! to see the village in its entirety is awesome.......seamless when it's all put together. being one that has seen your work from the start, I can see your evolution as well you've come a long way my friend!
-
thanks John
-
hello J........hope you had a great time camping out now git back to work ya sot! gotta see another project from you!
-
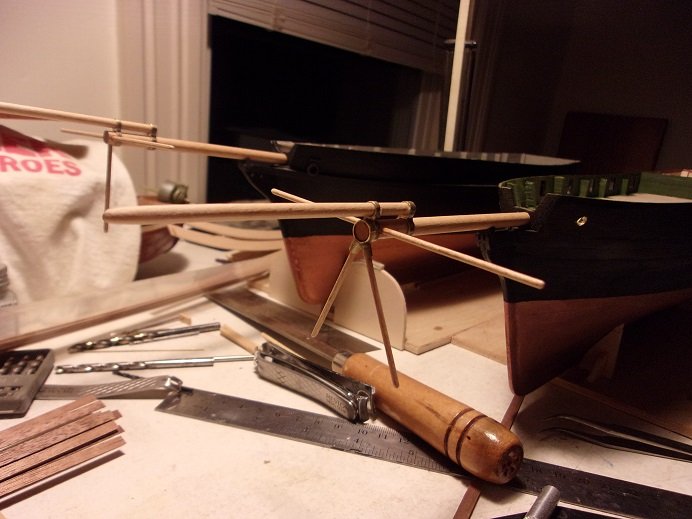
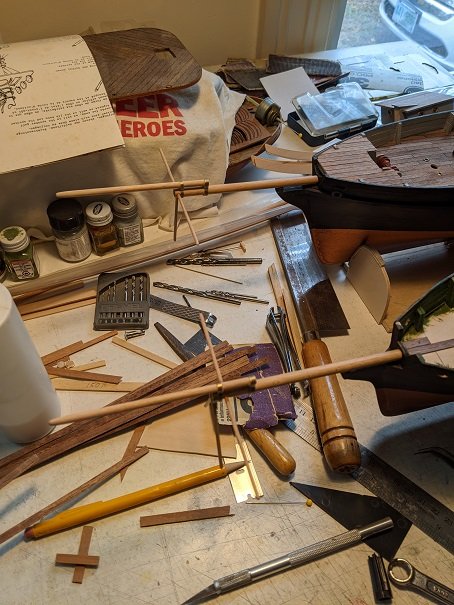
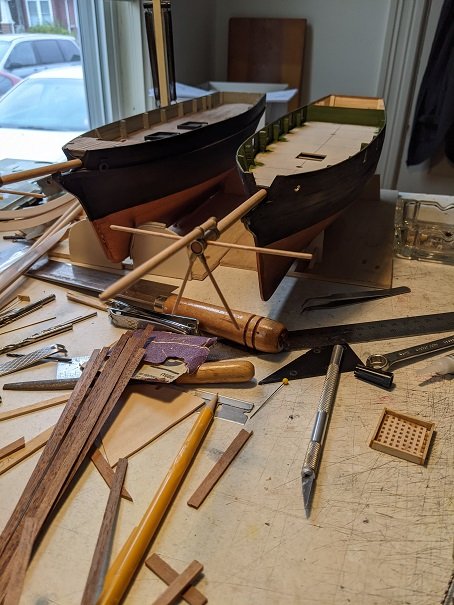
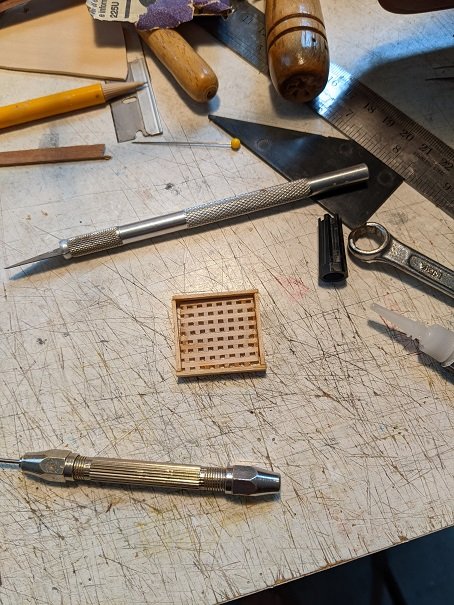
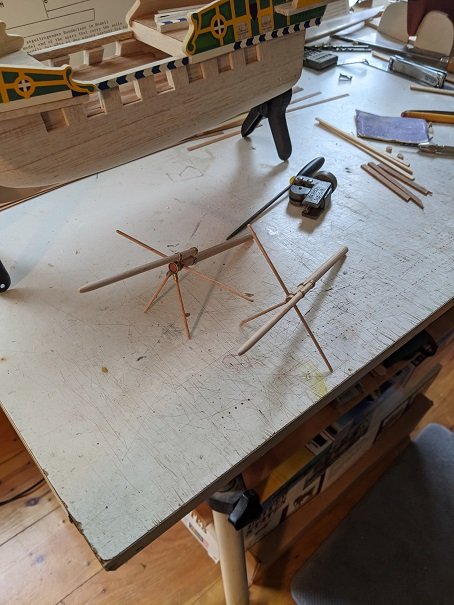
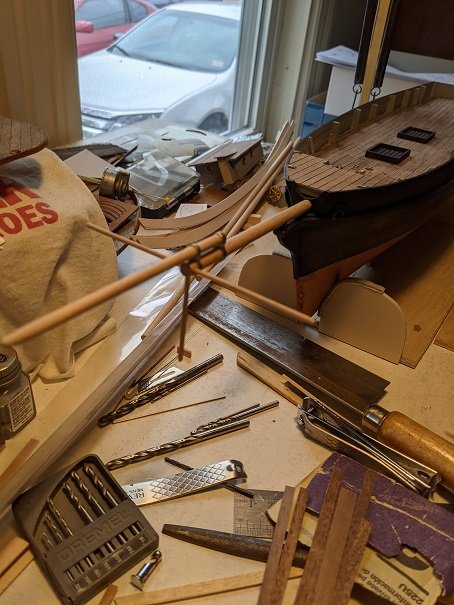
thanks Kevin I made some progress on the Agilis today......fleshed out the bow spirit some more. I was able to give it a dual striker......I was concerned, since I didn't leave enough of the spirit jutting out the front. knowing how tough it would be to solder it { a mast ring with two sockets}, I used Ca to assemble it. I bought a new camera today........I was gonna wait for the next update to introduce it, but I don't have a picture of the assembled bow spirit, so I ran in a snapped a quick picture. it's a Kodak PixPro Fz43......metal flake black, as opposed to lima bean green, which was the color of the Kodak easy share I used to have. there was just enough of a stub to slip it on. here they are both dry fitted in place.....I added a bit of brass rod on the butts of each one as a guide pin shown here also is the grate I made for the hold I also began to plank the deck...the same wood I used on the Clotilda's deck. it's a start ...another picture with the new camera
-
thanks Ed.......yepper, leave it up to me it will remain to be seen though......pardon if I don't do a log on it. I'll be sure to let ya know if I make a breakthrough on it I am glad that your still look'in in.........glad that you all are still here I did make some progress in the camera dept today.......I bought an 'up to date' phone........I feel like George Jetson 🚀 it has a built in camera........it fit the budget, but the guy didn't give the camera quality a high rating. I felt insecure, so I also bought a camera too. this one is probably a step up from the Kodak easyshare I use to own.......the one that fell into the glass of soda having to download the manual for it, I gave it a read........and then did a couple of test pictures. we're back in pictures boys!..........let the good times roll. once I get the hang of the phone, I'll try the camera out, to see if the guy was right.......or new on the job I wanted to update the Agilis log, but got pulled away on this little adventure. I'll be doing that in a moment.....just gotta put my sandals on thanks for look'in in folks!
-
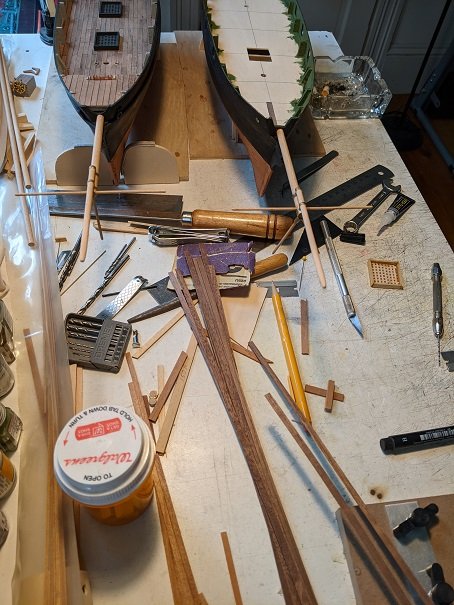
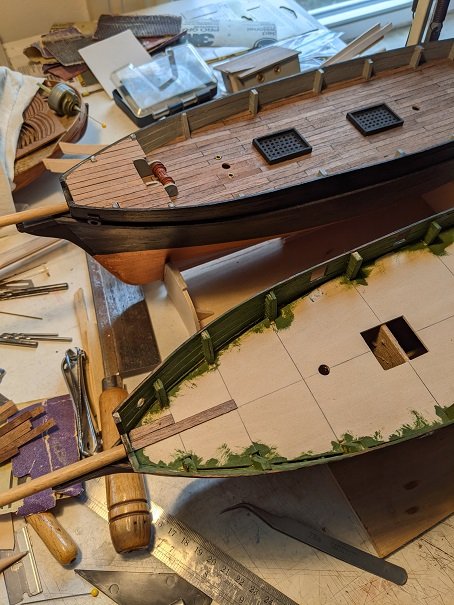
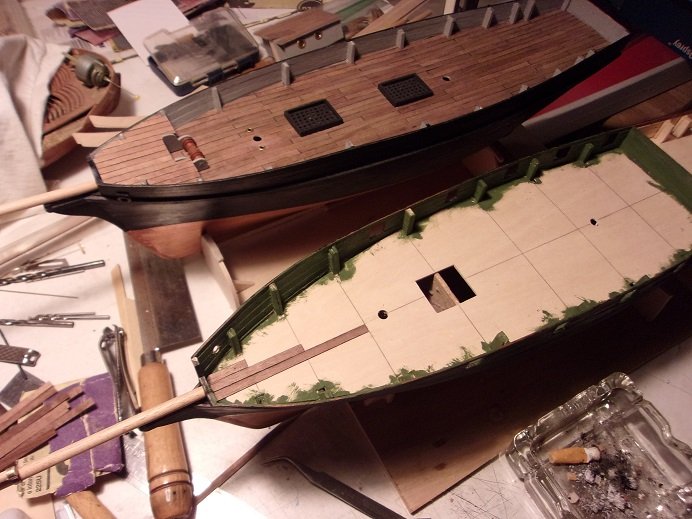
yea John........the camera phone is a bit more revealing {must remember to wear pants! } thanks Richard......slow at first. once I can get some decent session time, I can really get more done. I got a bit more done on the Agilis bow spirit......here are the two and the difference. .......as mentioned, the camera phone is a bit more revealing. I'm sure some are scratching their heads wondering what that monstrosity is in the picture. a while back, I was browsing through the old model kits site, and I saw these two kits from Model Aerodrome Limited...one was of the Victory and this one of the Golden Hind. they listed for $89.00, which I thought was pretty cheap for a wooden kit. I showed them to the admiral......she liked the Hind better, so I ordered it. Model Aerodrome is an old company, that specialized in flyable model aircraft.....wood for the most part. the kit is actually produced from another company called Marinecraft. it's been a while since I researched the kit, these two companies either merged or was bought up, going under the name, Model Aerodrome. I don't recall if the company is still in business, but was located in Birmingham, England. it's pretty lame construction, made mostly of Balsa........two words would be primitive and poor. the admiral laughed........"you bought it......you build it!" so....that's what I'm doing. I bought it a while ago.....took some time to come up with ideas on how to make it a better looking model, and here it is now. I guess you can say that I'm going to put the old adage to the test..........how much paint will it take to cover this much sin? I've added a guide pin to the bow spirit and dry fitted it to the Clotilda's bow.... I'll go hide now...............
-
thanks Kevin.....and thanks to those who hit the like button yea......I think it's about time I got back to this duo. the kit wasn't that good, but I think there is a neat little model in the box somewhere. I've seen a couple finished models........there are a few things out of whack......like the mast height being the most obvious. J and I figured that out quickly and.....well, J is done with his....so I guess it's my turn. this was my idea.........go figure
-
10 weeks..........REALLY!!!! superb model James..Holy cow!!!!! my best is 4 1/2 months congratz!!! she's a beauty!
- 117 replies
-
- 2
-
-
- vanguard models
- yacht
- (and 2 more)
-
hey there! I see your well on your way with the lady since this is a double planked hull, you don't need to fuss too much with the first planking......shape it to the desired contour. some will use filler if needed. your best bet with the second planking would be to use 0.5 thick planking. it will be easier to work with and can be purchased in a variety of woods....dark walnut...beech, to name a few. keep it tight and taper where indicated I used to use pencil for simulated caulking....I've even tried crayon and 0.5 x 0.5 mahogany thin strip. I done everything but thread......but I've had the best result using the Pritt archive Pen. you did a very nice job with the deck. I agree with Glbarlow......butt shift patterns should be done as the deck planking is laid. some have done well penciling them in, but mistakes are costly at this point. it looks good......I'd leave it. I think I have only one model where I double planked it.......to me, if the first planking looks good, I go with it and avoid wasting wood. in cases where the hull is to be painted, a single planking is enough. planking is an art.......there are many here far better than me. keeping the plank line straight, tapering and using stealers and Jogging planks help in keeping the line straight. as you've seen there are a few methods. take your time and keep it up......it only gets better from here!
- 26 replies
-
- 2
-
-

-
- First Build
- lady nelson
- (and 2 more)
-
I'm a B 17 fan as well......heck, I've built three plastic models of 'em I think it would be neat to see how one of these models are built.