HOLIDAY DONATION DRIVE - SUPPORT MSW - DO YOUR PART TO KEEP THIS GREAT FORUM GOING! (Only 36 donations so far out of 49,000 members - C'mon guys!)
×


popeye the sailor
-
Posts
16,007 -
Joined
-
Last visited
Content Type
Profiles
Forums
Gallery
Events
Everything posted by popeye the sailor
-
 looks great!
 -
look'in good OC !
-
if you read the blog, I have made the choice as to whose plane to model. I was test fitting decals from the Roden kit, and Ltn. Josef Carl Jacob's plane is a good fit. looking at the ailerons, it can be seen that they have the single wing rib curvature. what the probability gods giveth, they also taketh away.........the good with the bad. a comparison between the two planes does show a visible difference in size the fuselage seems a good fit.
- 100 replies
-
- 10
-

-
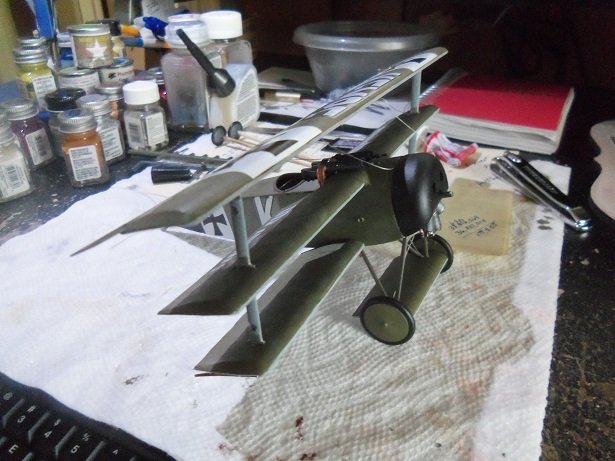
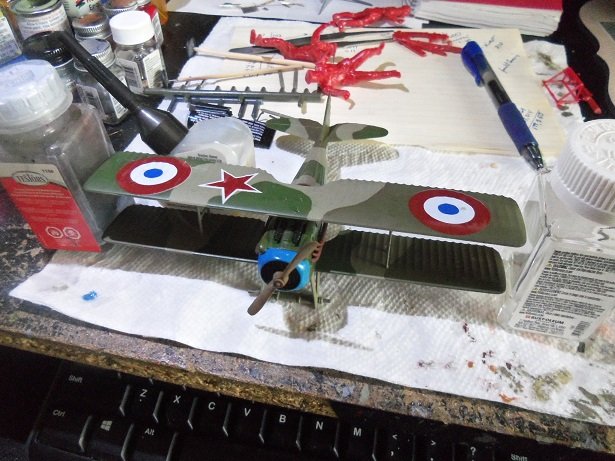
I went ahead and put the top wing on the plane..........I'll touch up the upper cabling later.
- 157 replies
-
- 13
-
-

-
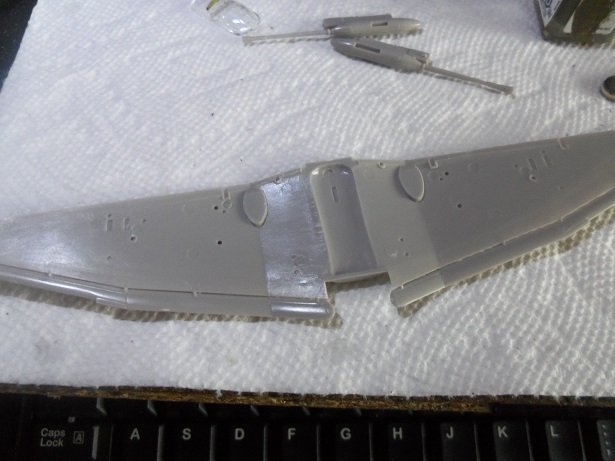
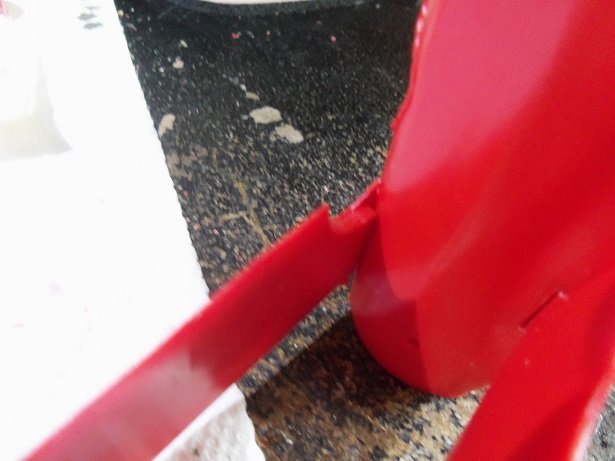
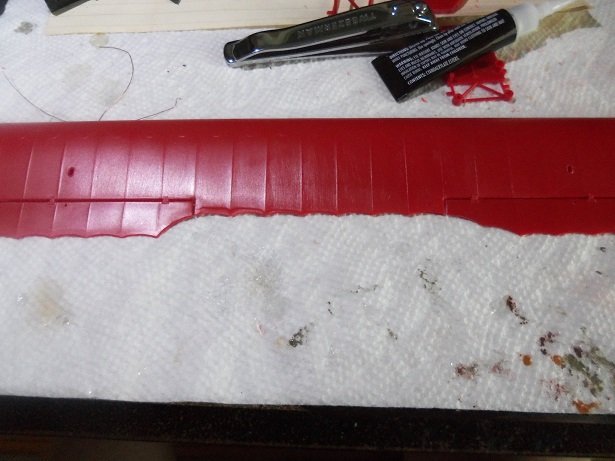
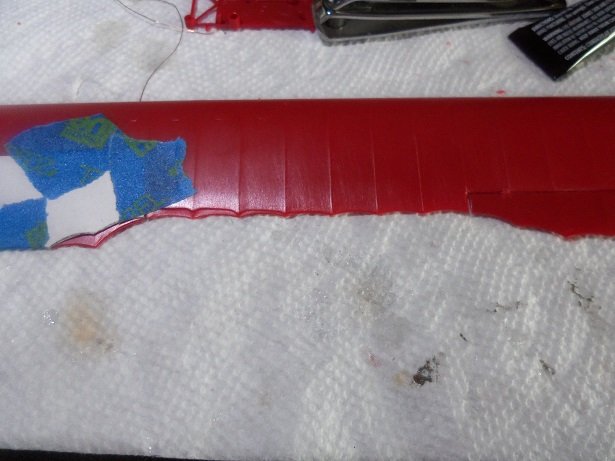
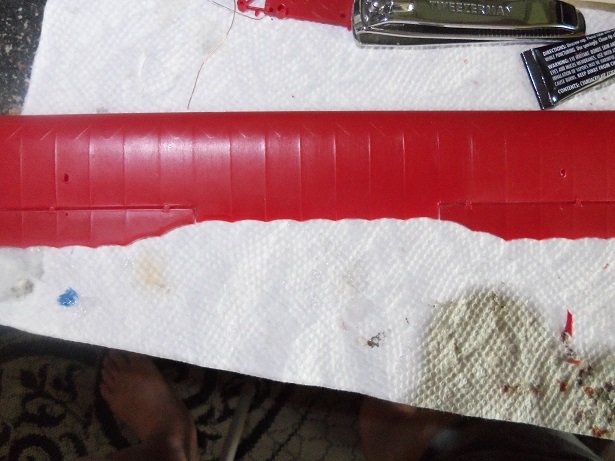
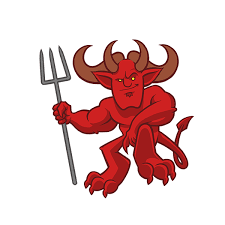
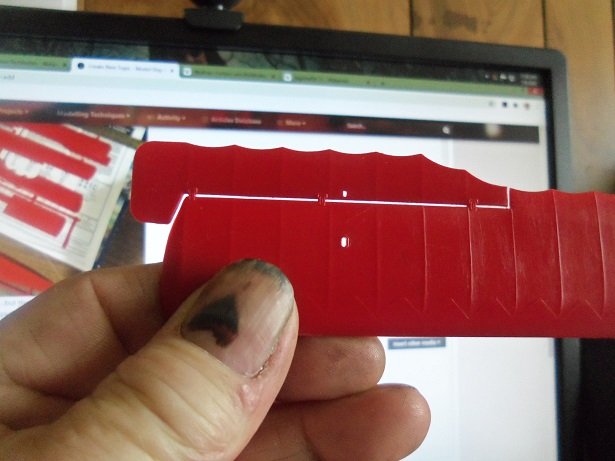
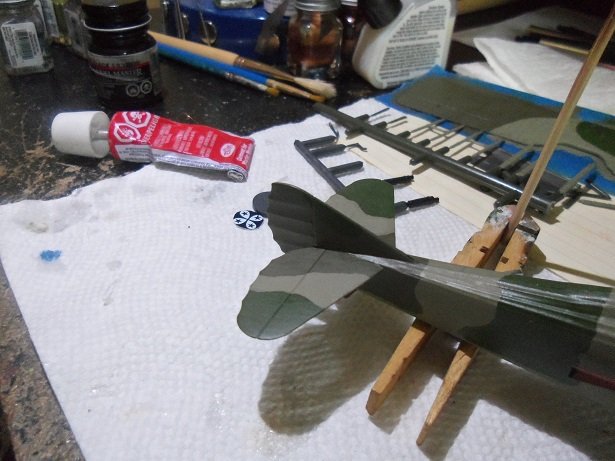
clean up of the parts has been the task of the day. with most of the parts being off the sprues, it made me leary of dimples and pitting......but it hasn't been too much of a problem so far. fitting the main parts, like the bottom and middle wings to the fuselage....doing it now will cut down on the handling later. the mold stamp date was on the bridge of the bottom wing........I sanded it off. the middle wing has the fuselage cap molded to it. it took a bit to get it to fit. one thing I noticed was that the four corners of the cap drape over the fuselage, but have gaps underneath. perhaps some putty will fill them in........................ now........for the problem at hand........the ailerons. I only have one option here........ taking a piece of paper, the starboard aileron was traced out. I went further down, to use the edge as the guide. it was then taped over the port aileron, which will expose how much material needs to be removed. using the convex nail clippers, the excess material was cut off, and then sanded to shape. I think it passes muster painting has begun as well........


-
I did something yesterday, that I haven't done in quite a while..........I wrote a blog! https://popeyesquadron.wordpress.com/2020/07/09/the-fokker-dr-1/ I'm sure that a lot of folks have bought a kit, only to find that it either doesn't fit the subject, or that it's riddled with inconsistencies. to be able to repurpose the kit or make it correct are the options one has. I've had quite a few myself the next update will show what I'm going to with the aileron dilemma.......
-
it was an enjoyable journey following along Michael........let's hope this chap takes good care of her. history, no matter what it is, should be preserved
-
persistence has its rewards great job!
-
love the looks.......they are so cool! I'm not familiar with acrylics.......every time I mix paints, I get crape
-
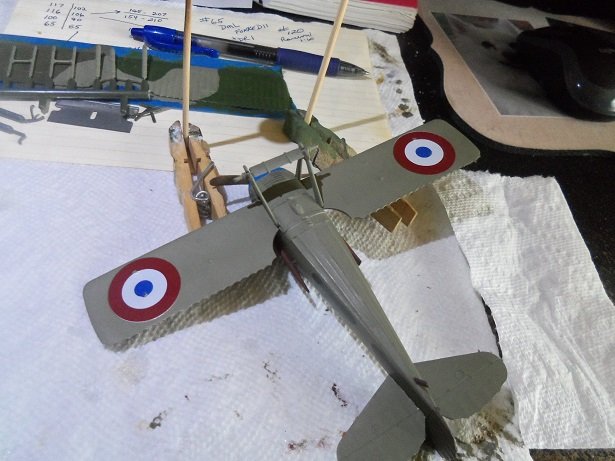
thanks Mike yea.......the wheels, the outer interplane struts and the cabane struts.......and yepper, it would be finished. this is the first french plane I believe I've ever done....I've done plenty of British planes. thanks for the likes folks!
-
now THOSE are a couple of Kick-AZZ trains Gene! you've got me wanting to get another one! the admiral hates you......by the way I love the use of colors.......very striking! I'm glad that my log helped you.........you did the wood perfectly! five ⭐'s my friend!
-
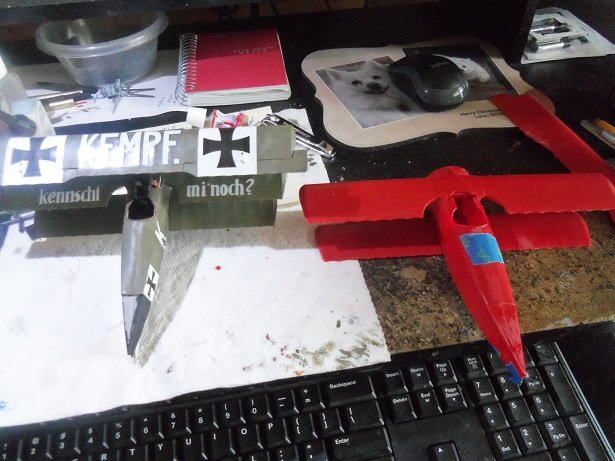
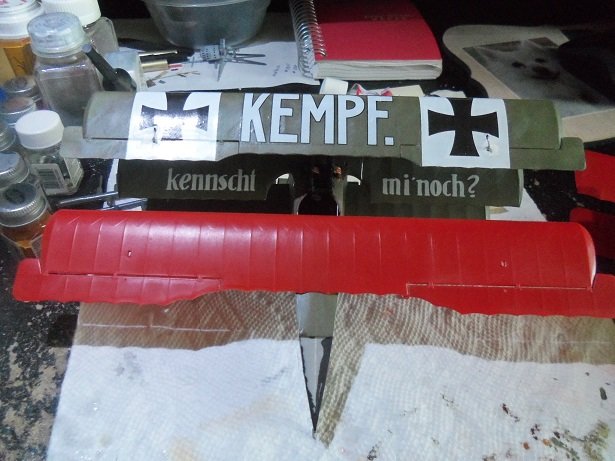
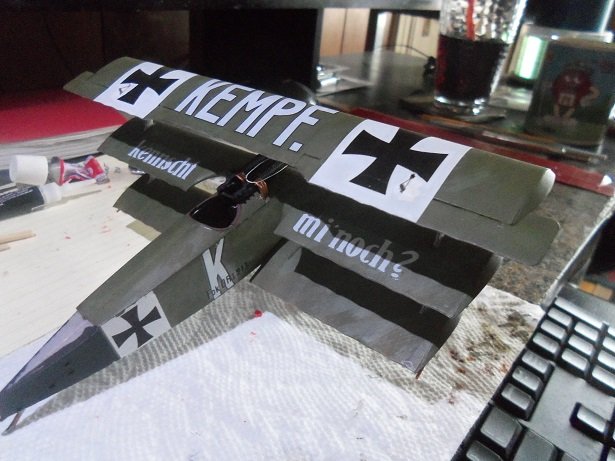
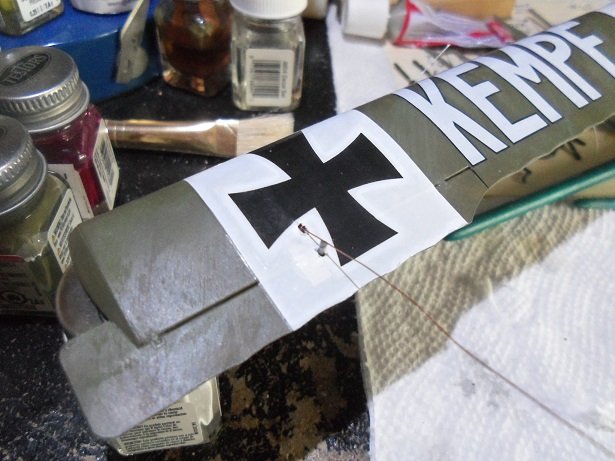
incomplete reporting.....I hate it........don't chu? here are the pictures of the fuselage and top wing decaling......... here's what I need to do with Kempf's plane........once I paint the topside cabling more soon!
-
where's my red union suit and pitchfork?
-
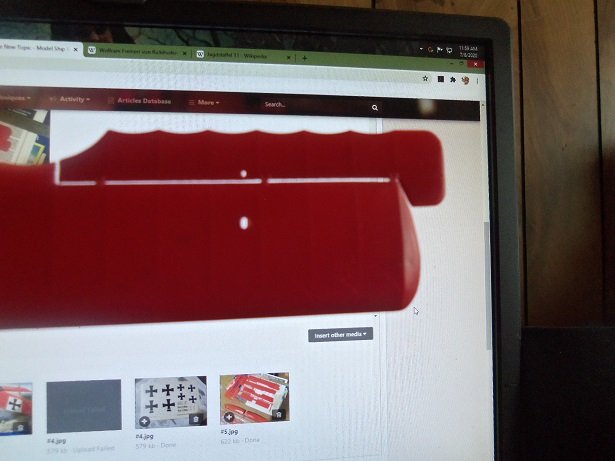
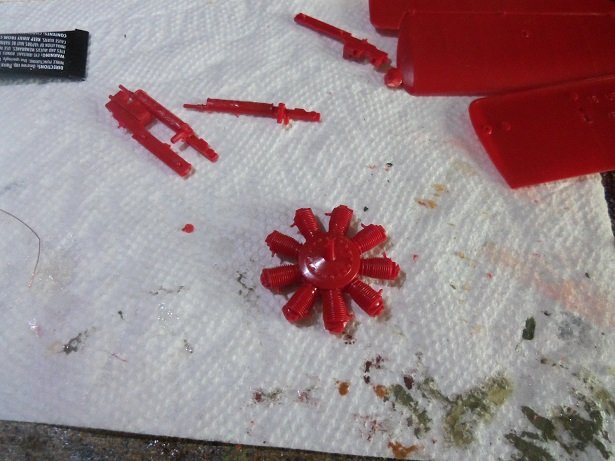
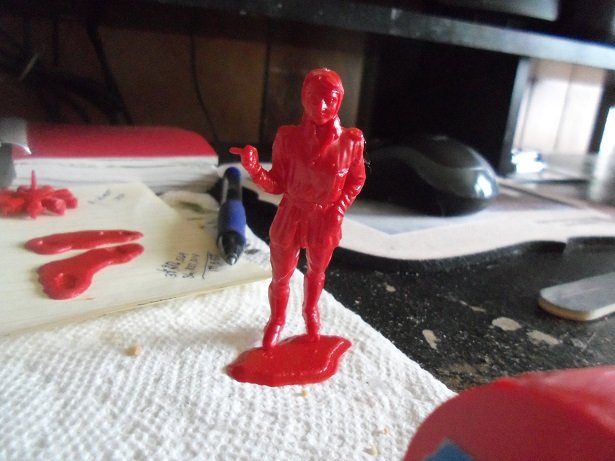
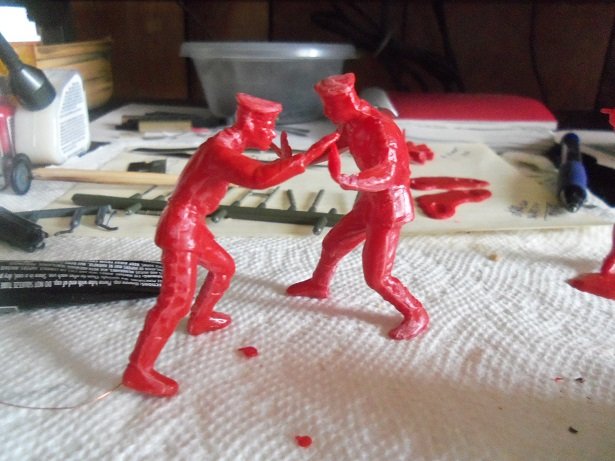
welcome to the party all.........one of my rarities OC. I hardly ever do the figures. these kinda look cool......and the size isn't too bad either I may do a dio..........one pushing the other into the spinning prop........call it ....."murder on the tarmac" nawwww.....that would go against one of my prime directives ---->classified<--- this is one of those kits that show one subject, but the contents produce another. it's not a lost cause though........in thinking about repurposing the kit, I think I can get away with decals from the Roden kit. it's a 1:32 scale kit....the decals are quite large and might work on this model well enough. I can still use the supplied insignias. I did look into the Werner Voss kit that OMK offers....I'll have to e-mail him because there is an availability notation on it {I should have gotten it sooner }. I still want to look into the F 1 / Dr 1 aileron aspect due to the conclusion I have arrived at. it would also explain my seeing it in some pictures and not in others.........interesting how often I've seen it, knowing that only two F 1's were ever produced {and they weren't in service very long either}. I had errands to run today.......barely time to go through all the parts and clean them up some. I just measured the fuselage on Kempf's plane, and it is 5 1/2 inches long { minus the cowl}.........the 1:28 fuselage is 6 1/2 inches long. I think the decals will work it will be interesting seeing these two planes, side by side. to mimic the size of the D VII, it look like I'll need to find a 1:16 model of the Dr 1 anywhoooooo.......as you saw, the ailerons are molded to the top wing.......booooooooooo. noting that there is somewhat of a gap between the wing and the aileron, I thought to clean the flash out of the gap...might make it look better. I know I'd feel better.........don't you? note the open holes for the cables........luv'in that bit of detail I also assembled the engine halves........the first cement besides the figures the guns are there too, but I haven't touched them yet {besides cleaning}. more soon!
-
no doubt Patrick.........I thumb through all the model kits out there {on different sites}, and I wonder to myself.........did some of these actually exist?! it boggles the mind to find out that it actually did. it is interesting that armor and aircraft kits are more apt to cover lesser know subjects, than say......model ships. the practice of converting vehicles into rail cars {even self propelled is known by some, but rarely covered. good find 'n look'in good
-
thanks OC..........see.....your not the only one with decal troubles goes with the territory my friend.
-
interesting set up.........coming along nicely Mike
-
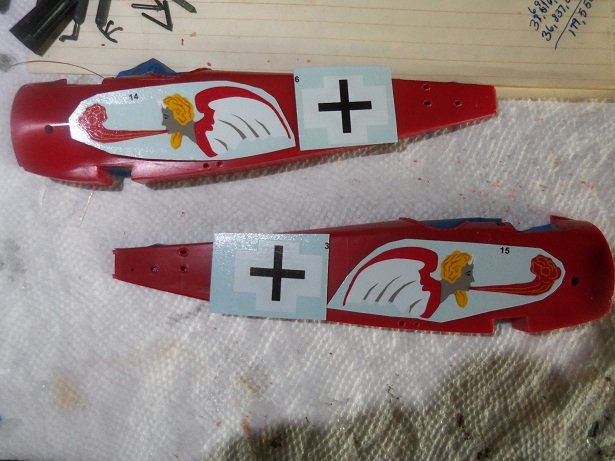
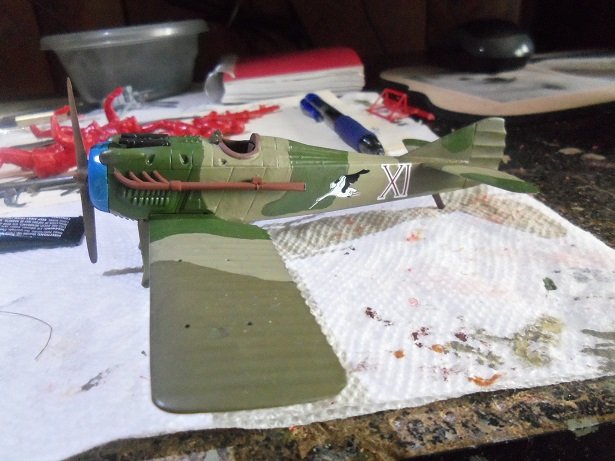
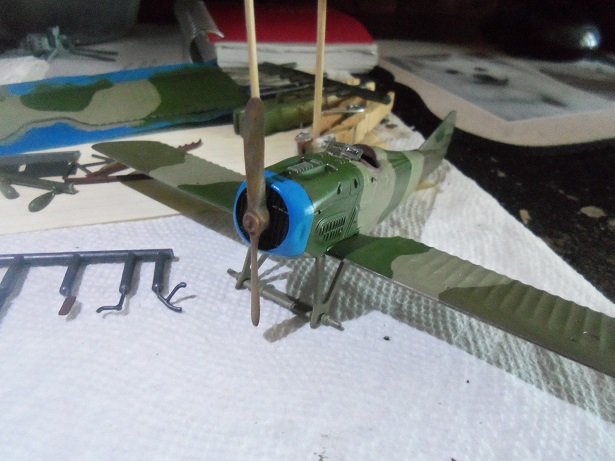
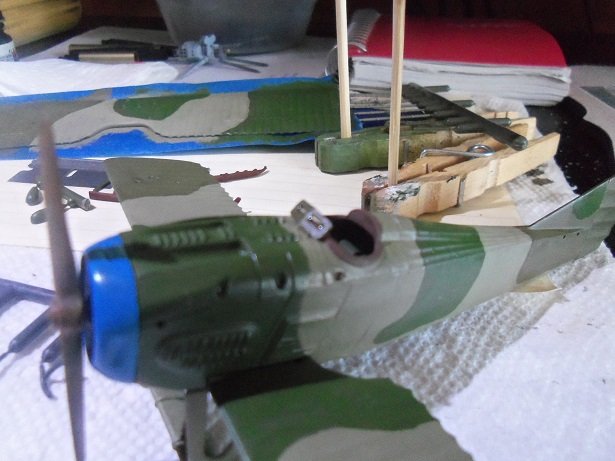
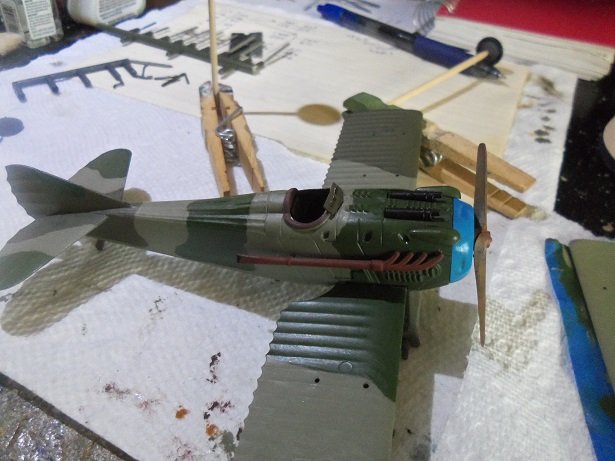
looked in the camera to find that I had not posted these pictures from last Friday. the cowl and prop assemble was added to the model then the exhaust was added.... then the horizontal stabilizers then it was time to put on most of the decals. I couldn't do the vertical stabilizer, because the horizontals were still curing. ran into a tiny problem here due to the raised detail on the wings. the decals were touched up with paint. the machine guns were added the two bumps on the top sides of the cowl were added....... they cover the top part of the engine. I did the fuselage sides and the top wing decaling too, but apparently, I failed to get pictures. more to come

- 24 replies
-
- 10
-
-
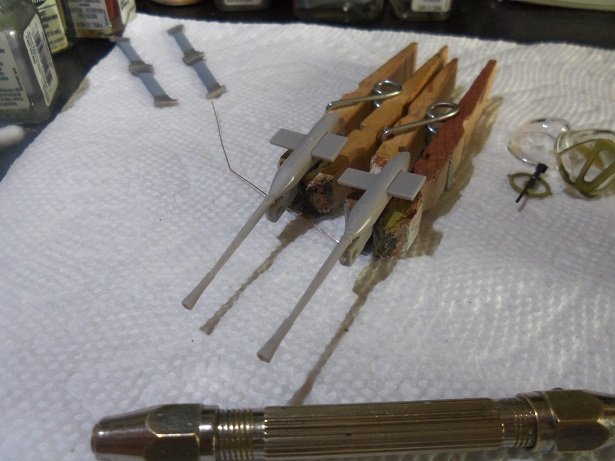
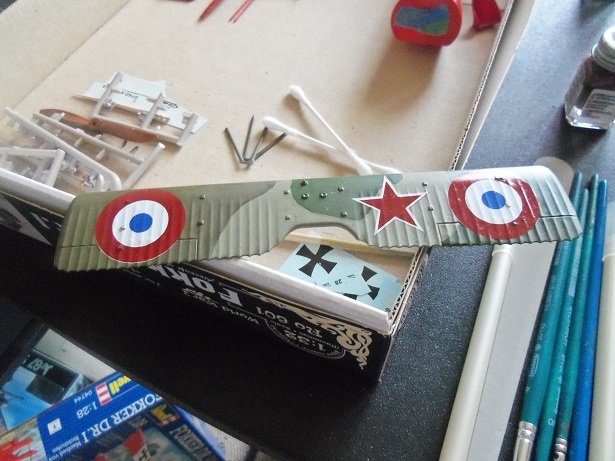
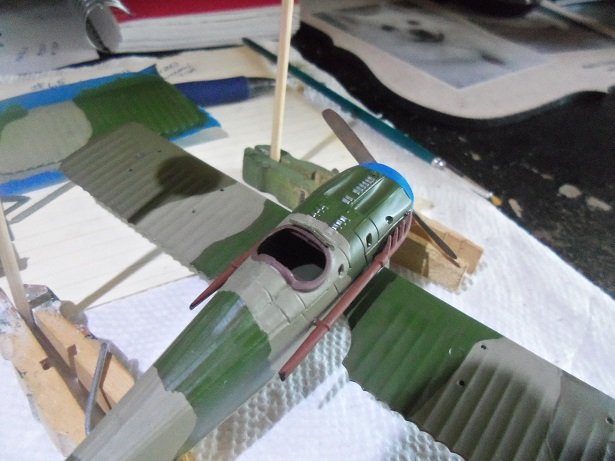
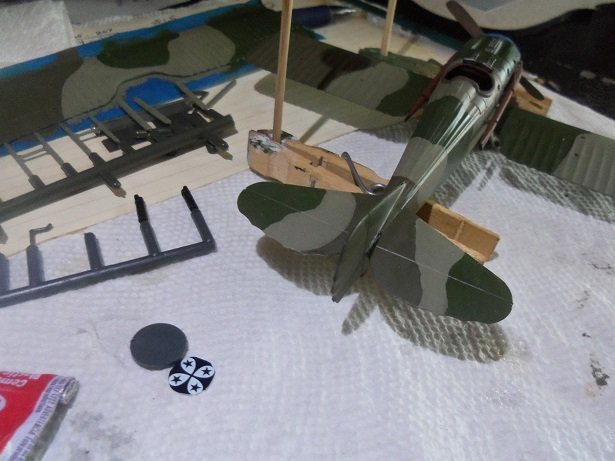
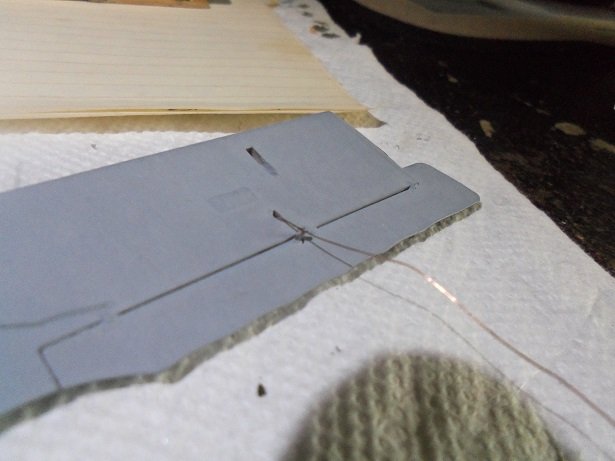
a little bit more was done on the top wing. I wanted to get this out of the way, so the top wing can finally be cemented on the plane. the decaling got damaged due to some of the raised detail.......I had to touch the decals up. after I trimmed the white fields, I saved the trimmings, and used it to repair the decals. I also touched them up with flat white paint. with the levers in place, I took the thin wire and ran the aileron cables. these will be painted aluminum I've yet to cement the wing on.......still need to touch these two cables up. try to get this done this week
- 157 replies
-
- 10
-
-
WOW! that looks sweet! I've seen a few variants myself.........the kit is really good if you want to change 'er up some very nice job!
-
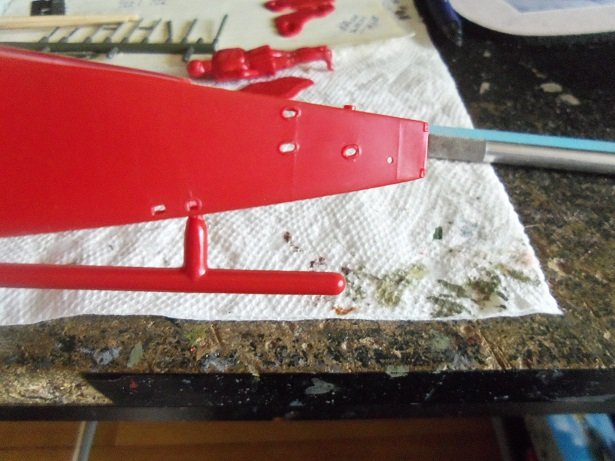
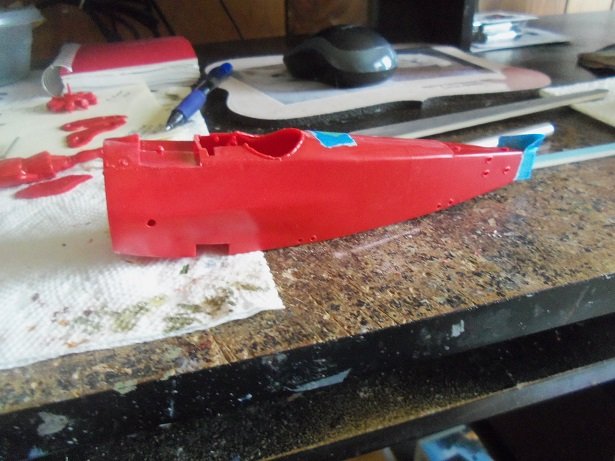
I messed with it a little last night, while playing a video game. I was happy to see that the cable holes are molded into the parts...this will be nice when it comes time to rig it. after cleaning and sanding the flash, the 6 1/2 inch long fuselage was taped together. I had to clean and sand just about every edge on the darn thing. the kit comes with figures......for the fun of it, I assembled them. they are not solid. here is the pilot: he looks like he thumbing for a ride or telling the other two knuckleheads to take a powder.........they were either wrestling or playing Patty-Cake........ they had some nasty seams...required some sanding and trimming. in thinking about the aileron detail further, it could be perhaps the result of the V 1 modification. I recall that Richthofen complained about the handling of the V 5. his comment on the F 1 was that the plane banked better to the right than the left. soon after, the Dr 1 variant came out and it's my guess that the ailerons were matched up to solve that issue. something to look into. I was just looking at the Werner Voss kit @ oldmodels.com...........the ailerons are different { it appears}......looks like both are identical. they also describe it as a Dr 1........already proven that he flew an F 1.........he died in it! like I said..........strange. I'm cleaning parts up at the moment.......I have a decal hunt to do. I'll be back
-
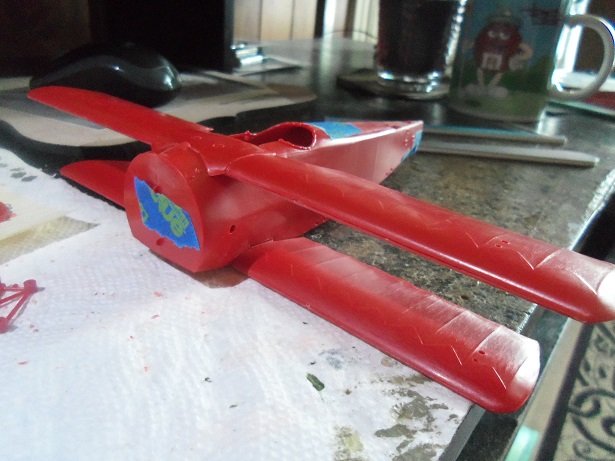
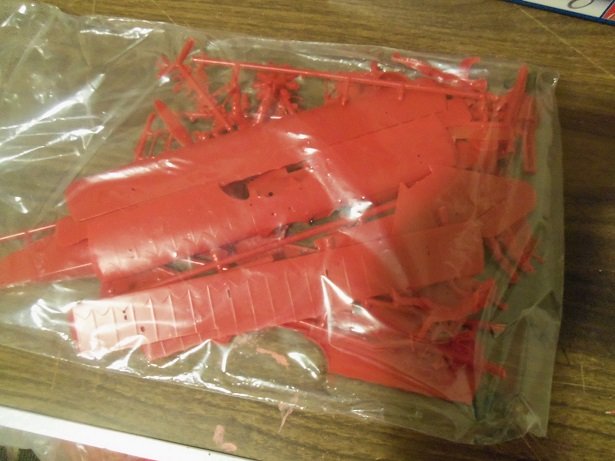
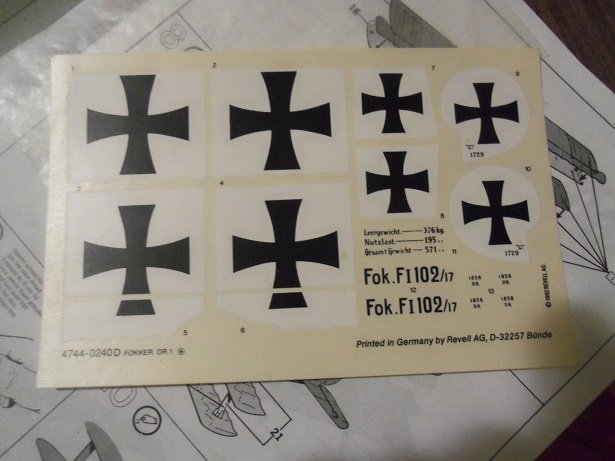
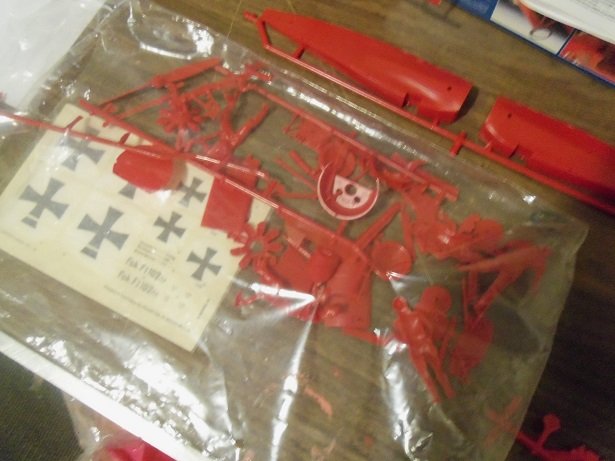
it finally came in..........mailed on the 24th of June, this has been the longest delivery time I've ever had with oldmodels.com I was going to ask for the tracking number and try tracing it.......I do wonder why they didn't include it in their e-mail, that they were shipping it. the box has a few creases........tells me it has been shuffled around a bit. the truth to that statement became even clearer, when I pulled out the parts bag. quite a few of the parts were off the sprues! the instructions are nice........has a real good illustration of the rigging process. I do see one area that can be done a bit differently........but I'll get into that later. I'm not keen on it being molded in red, but it should paint over alright. if not, I can prime it first I will never get use to scale either..........the Fokker D VII I built has a wingspan of 12 inches. this being a 1:28 scale kit, I was surprised that the wingspan is only 10 inches. coupled with the other dimensions, there is a big contrast between the two. the next reality check came with the decal sheet. the model is focused on Manfred Von Richthofen's Dr 1........the box art depicts the correct plane number. but the decal sheet is for an F1........102/17 is Oberleutnant Kurt Wolff's plane. the aileron separation for the top wing decals is nice........I should have thought of that when I put on Kempf's wing decals. they are also printed as a flat, with no sheen. I will have to look around for an alternate set, since it would be hard to imitate the unusual font. the 'Red Baron' plane is a nice subject, but having built a few already, I don't feel like building another one anyway. I have a thought of acquiring decals for Jasta 18 and Jasta 11. Jasta 11 is interesting, because there are many accomplished aces......Manfred and his brother Lothar, Werner Voss, Wolfram {a Richthofen Fourth cousin}, Ernst Udet, and a Richard Wenzl {my last name is spelt Wenzel} {may be a connection there???} the kit was produced in 1992 by Revell Germany from molds dated 1981. the kit does have some annoying flash. the fact that most of the parts are off the sprues, tells me that this the harder plastic styrene. there is some cockpit detail....which is nice..........but there are a few pin marks that I will need to deal with. looking over to be sure, this is a Dr 1, and not an F 1. Revell does make another kit depicting Werner Voss's plane........I have a suspicion that it is probably the same kit. also, I see another instance of the different ailerons on the top wing. this is seen in some of the pictures I've looked at........the F 1 version aileron on the port side, and the Dr 1 modification on the starboard side. I've mentioned this before........it's kind of odd.......pictures I've seen from bonafide articles and pictures show that they match. equal on both sides. I haven't been able to find any info on this. the scalloping of the ailerons is one of the differences.......strange that it is seen in different ways. now that the big parts have been removed from the bag, I'll need to decipher the 'shake' it's a good thing I know where all these parts go......I should, I've built enough of them


-
hello all.......I finally got the chance to poke in here yes OC.......your correct.....the stuka was called a dive bomber. it had the ability to get in and get out quickly. as I mentioned above, it was good in that respect, but it was a terrible fit for a fighter. it had poor maneuverability in close quarters.........so it was used mainly for ground attacks. the earlier versions were under powered........it went through a few variants before it was fitted with the Jumo engine. two names stand out in the early concepts.......Ernst Udet and Wolfram Von Richthofen. I have been looking through the KG 200 book for information.......let you in on what I find later, when I get out from under the work scourge thanks for the interest.......I hope to get into it more this week
-
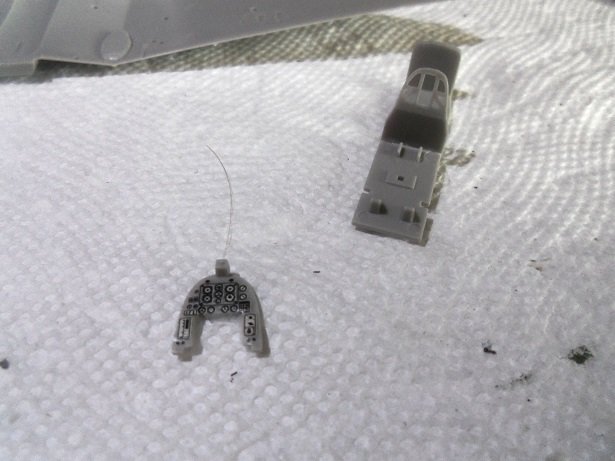
I pulled the kit out again during the last week of June.........the intent was to start this log then. I held off because I'm still about paint. I have some paints that are close, but I have the Humbrol and White Ensign paints that Lou sent me, that would be more suited for this task. I did a few bits of assembly with the cockpit, that can be painted.
- 89 replies
-
- 10
-
-
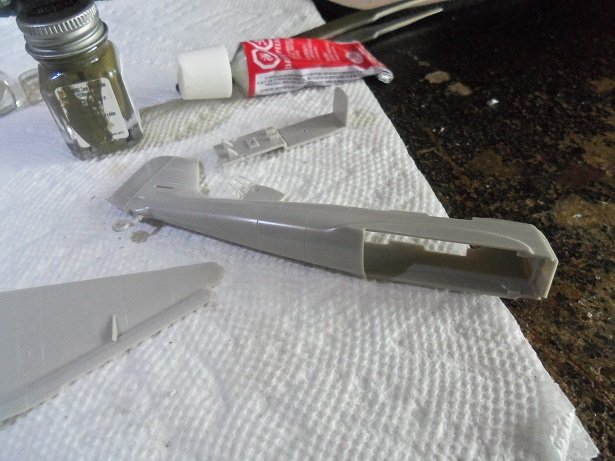
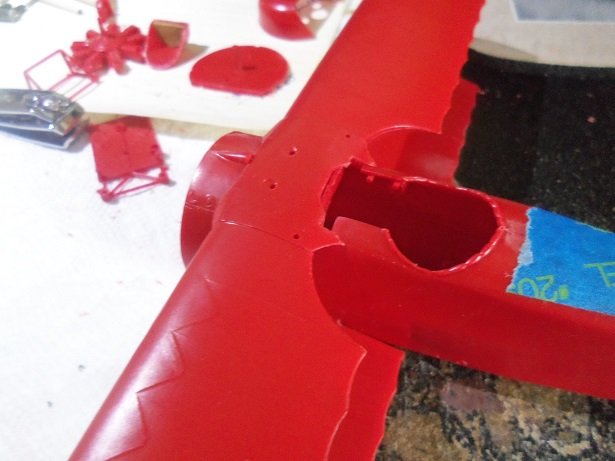
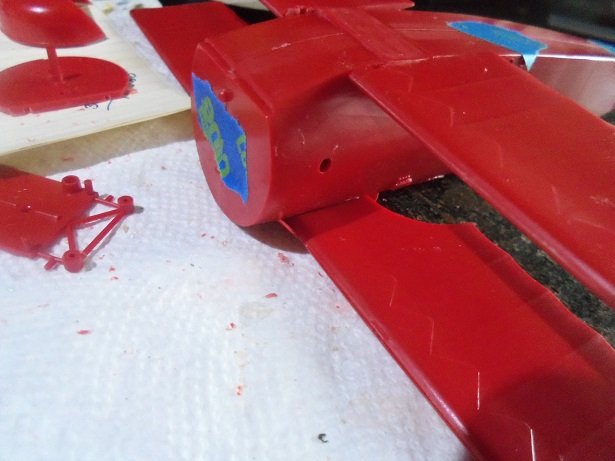
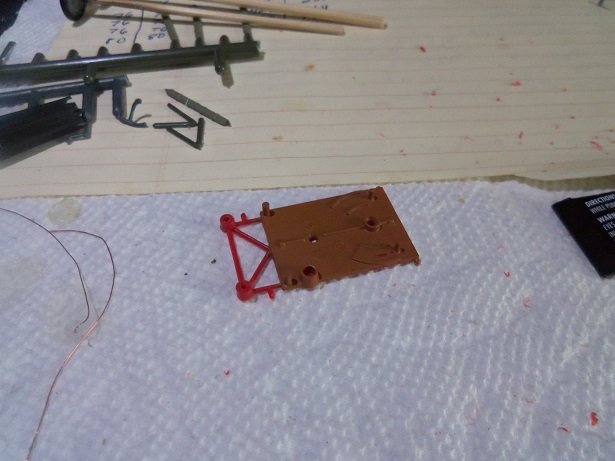
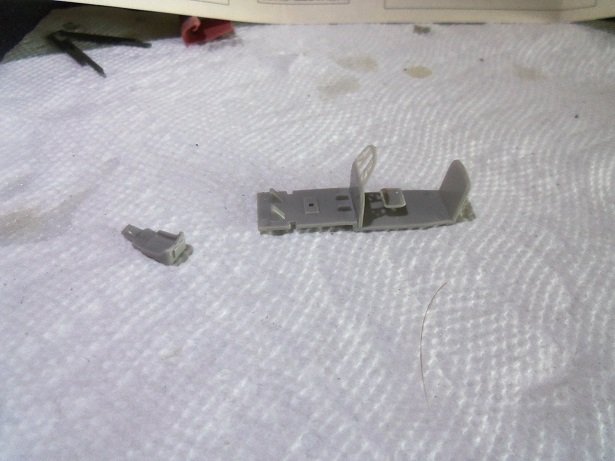
I received this kit back in mid May. I pulled it out at the end of the month, and started to clean up some of the parts. note the slot in the center for a stand........the holes for the cannons were drilled out. the kit supplies the bomb pods too, but no bombs to fill them out.......so I won't add the pods and drill out the holes for them. I might look in my spare parts box to see if I have some that will work. I do wonder though, if they would be there, even though there are no bombs supplied. the cannons were assembled........need to clean up the cannon barrels {really soft plastic}. the fuselage halves were cleaned up...the fit is good debating on paint........