HOLIDAY DONATION DRIVE - SUPPORT MSW - DO YOUR PART TO KEEP THIS GREAT FORUM GOING! (Only 36 donations so far out of 49,000 members - C'mon guys!)
×


popeye the sailor
-
Posts
16,007 -
Joined
-
Last visited
Content Type
Profiles
Forums
Gallery
Events
Everything posted by popeye the sailor
-
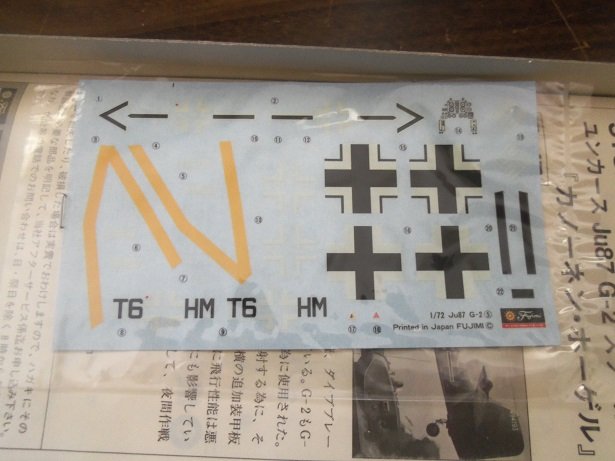
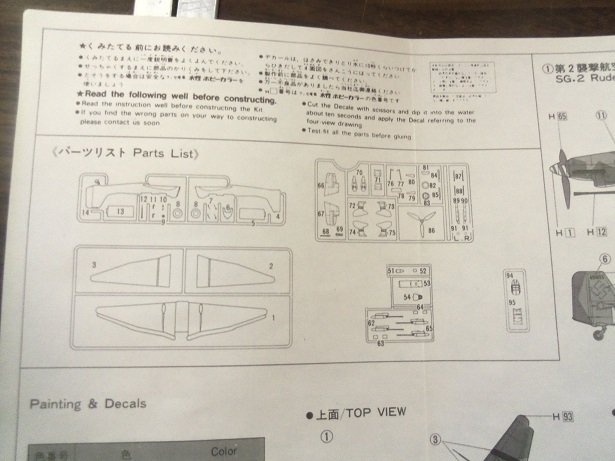
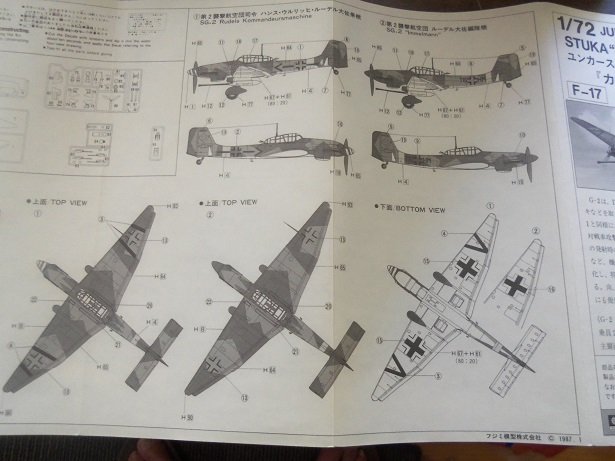
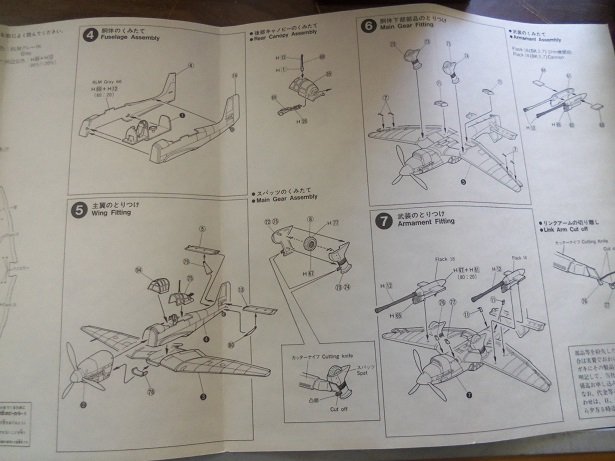
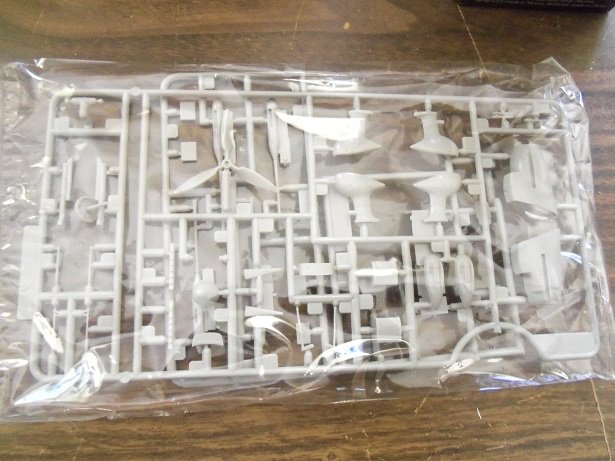
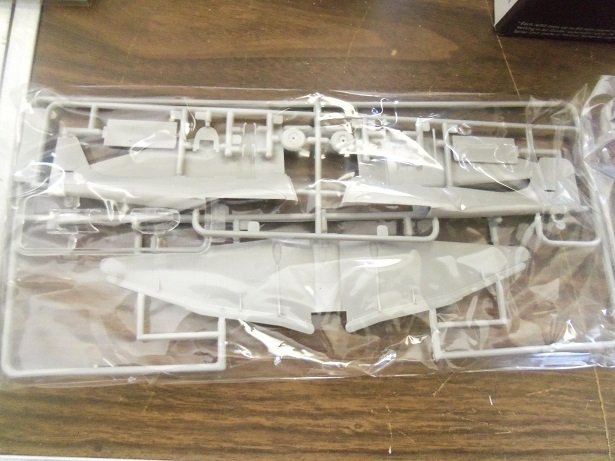
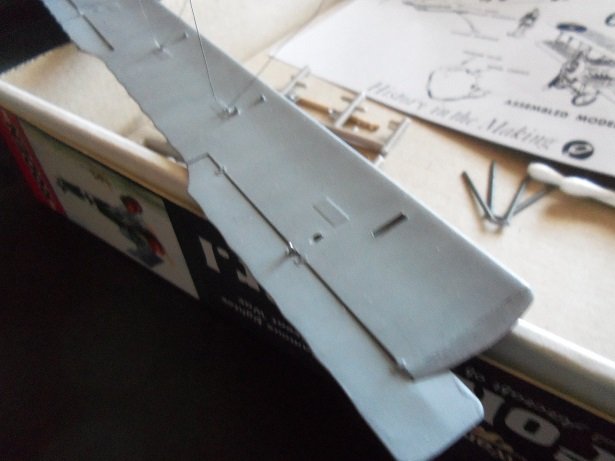
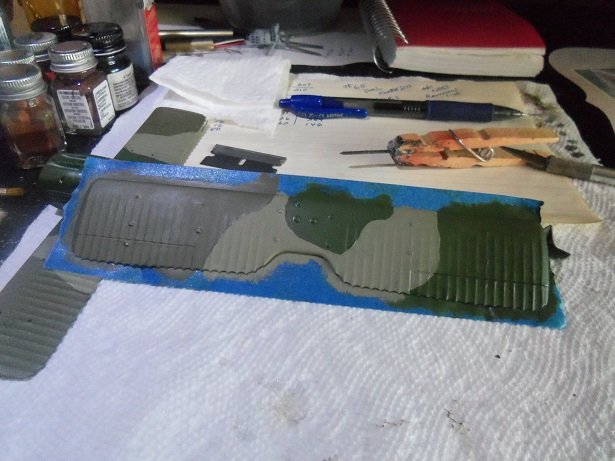
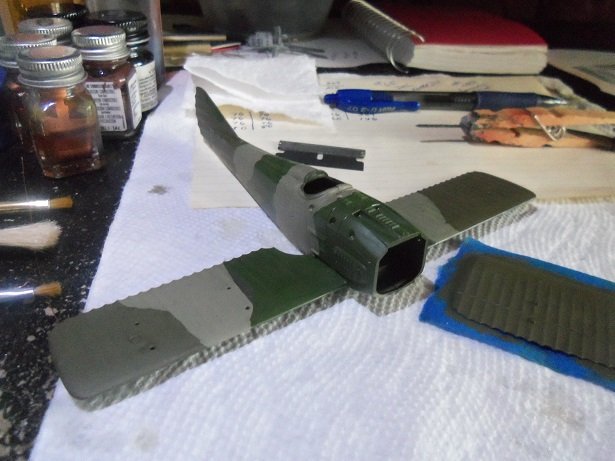
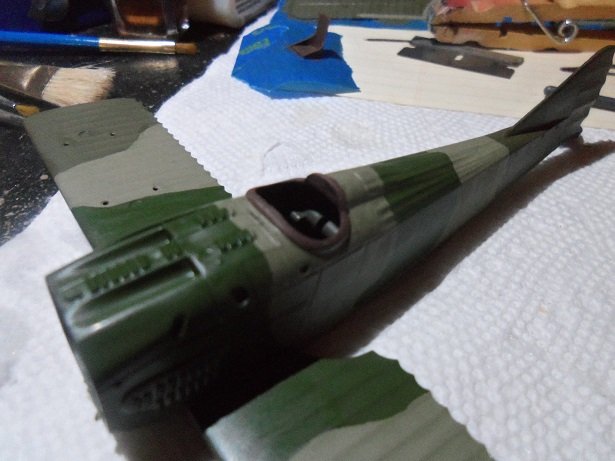
 I started on this one a while ago too........nothing major really. this is a model company with an extensive history. Fujimi mokei kits were imported for U.S. sales as far back as the mid 60's by companies UPC and AHM. during the 70's, Bachmann Industries imported the kit, and in the '80's, Testors Corp. imported kits. an interesting thing here, is that all of these companies boxed their kit with their logos. this particular kit doesn't have any U.S. logo, although it was imported by IMS Trading. research into the company was fruitless, although I did find that the company has been sold off.......I forget when. other companies at the time, like Revell......and I think Monogram did too.....boxed kits made from Fujimi molds. this kit is an direct import from Fujimi.....right down to the text instruction sheet....printed in 1987. the stuka was the workhorse of the German Luftwaffe......it was a superb tactical fighter plane, as well as a dive bomber. though it had a shortcoming of not being a long range bomber, it had the ability to get in and get out quickly. an interesting feature of these planes, was that they were fitted with a siren, that emitted a piercing screaming sound , to intimidate and sometimes even strike fear, into the troops on the ground. the bombs themselves were also fitted with an apparatus to emit sound as well. gull wings allowed the Stuka to carry larger ordnance, than the Focke Wulf or the Messerschmitt {though produced later to supersede the Stuka}. this made the Stuka an all purpose aircraft. it was used extensively during 1935 through 1942. used in a number of conflicts to date, it became clear that maneuverability was an issue........it was poor in the close combat arena {up there}. by 1945, the Focke Wulf FW 190 had replaced the Stuka in many ways, but it was used until the end of the war. one roll that the Stuka was very good at, was air to ground attacks. the Stuka went through different variants, until they rolled out with the G variant. this variant was fitted with a pair of 3.7 cm {1.46in} Bordkanone gun pods. the Kanonenvogel { cannon bird} is a 'tank buster', used at the eastern front. originally born from the 87D variant, it was used to destroy Russian tanks. it did a fair job, though it had some handling problems. the G-1 variant addressed some of these problems.......and when the developed the G-2, they had come up with a tool against the Russians. it made its debut at the Battle of Kursk, although the D variant was used in greater numbers. the landing gear can be seen here....the sirens are shown attached to the outer shells. on this model, they are to be cut off per the instructions, which indicates that the G-2 may not have had them fitted. I was hoping for a larger model of this plane...........perhaps the future.

- 89 replies
-
- 10
-

-
I was at the local Hobby Lobby one day, and I got a chance to speak to a person that does that very thing. she takes a room and outfits it in interesting ways. as she said, her 'houses are larger than a regular doll house........no wonder why I wanted to build a dollhouse for my granddaughter.......the admiral told me that she was too much of a tom-boy. recently, I got to see here and I brought it up........should have seen her eyes light up! so.......who knows, it might be on the table again it can be tough when you have a critic in the family
-
superb progress Kp........the body finish is awesome! the engine is a work of art as well..........and yes, we use similar engine stands around here. gonna be a sweet look'in model when finished
-
very nice progress Ekis.......the bakery looks super! add a vote for me too.....this form of modeling in very interesting.
-
very precise fittings Michael..........nicely done
-
superb model rebuild KP.........an all around great job
-
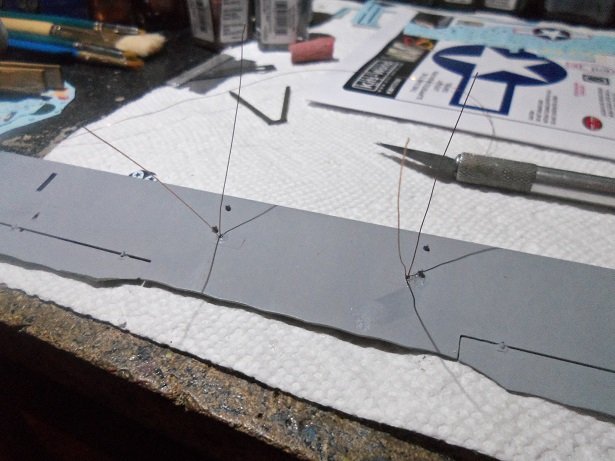
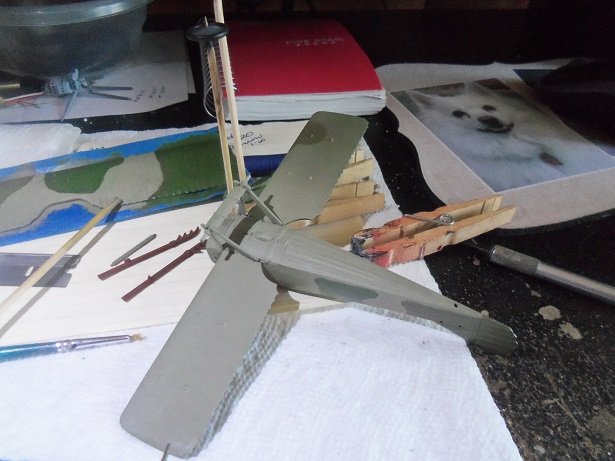
I need to get moving on this plane.......this one is close to the finish line as well as the others. I still need to paint the white on the stabilizer and rudder....I hate white paint. I did get to add the control cables to the underside of the top wing. I probably posted this picture already. these have now been painted steel. I've also added the levers to the ailerons.....just got to run the control cables to them and touch them up with steel. then I can deal with the tail section. more soon
-
superb progress Grant........shook my head when I read the part about the leaf springs. very good solution........bet that stiffened them up!
-
you've made some great progress OC.......jeep and equipment look super figures are coming along really nice as well!
-
look.....if you drive off with this thing when your finished, I'm hang'in up my x-actor looks great !
-
this has kind of a 'Men in Black' flavor to it.........is there a movie that your focusing on? looks good
-
looks good........skills get better, the more you use them very nice.
-
I would agree...........you can use photoshop to create the decals and print them in your home printer. I make decals all the time nice job with the interior.......looks great!
-
I wonder if the dollhouse scale is the same for these models. at the Hobby Lobby I go to, they have a section for dollhouses...quite a bit of stuff there are different types.....I'd check it out to see if you could substitute it. they even have wiring. I'm sure there are shops like H.L. where you live
-
MRAP ATV by CDW - FINISHED - Rye Field - 1:35 Scale
popeye the sailor replied to CDW's topic in Non-ship/categorised builds
my word! the interior look real!!! definitely detail overload awesome job! -
a flight sim?........I've never tried one. I'm too busy swing'in swords and sling'in arrows my favorites are Gothic, Diablo, and Divine Divinity. thanks for the good word!
-
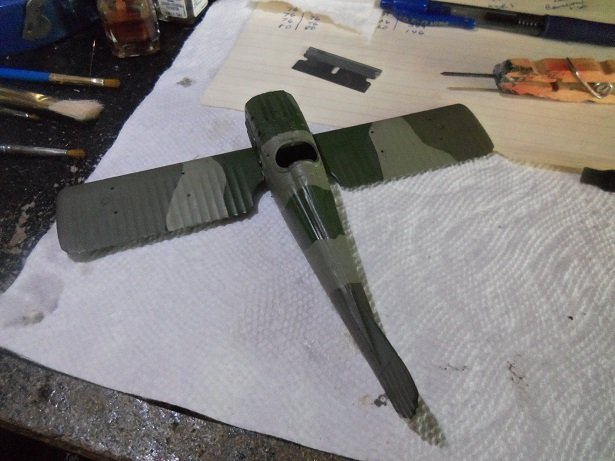
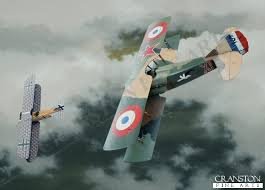
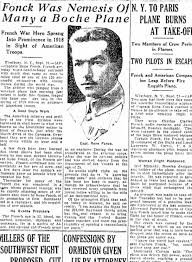
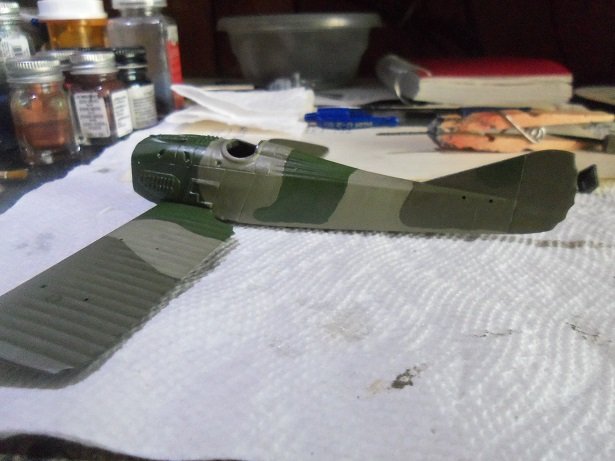
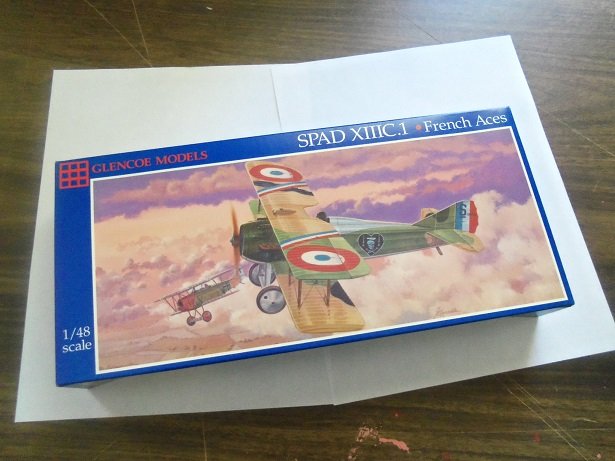
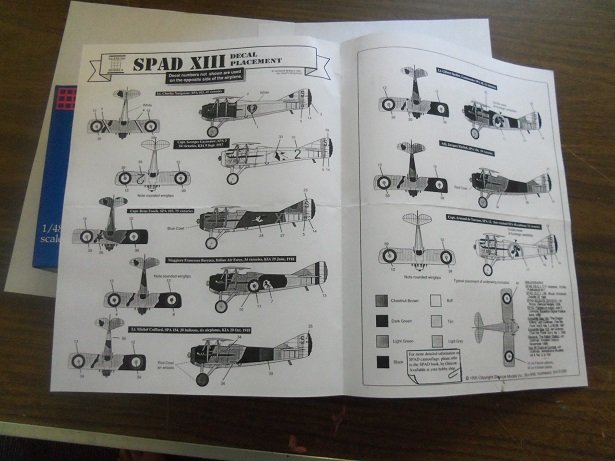
hello ED thanks for the kind word! I was going to use the airbrush, but I wasn't keen on the masking...........so I did it freehand with a brush. that was the only place where there was a lot of flash......the rest of the kit was pretty good. the fit is nice and had to drill one hole so far. it's too bad that there aren't any color pictures of the camo.......would have taken out a lot of the guesswork. I did a search on Capt. Rene Fonck and looked in the images page.....quite a bit of info there, along with other planes that the kit covers. Eduards has a kit out on the Spad XIIIC as well........it was developed after the Spad XII......began use in 1917. production was stepped up after the initial testings, and became more prominent by 1918.
-
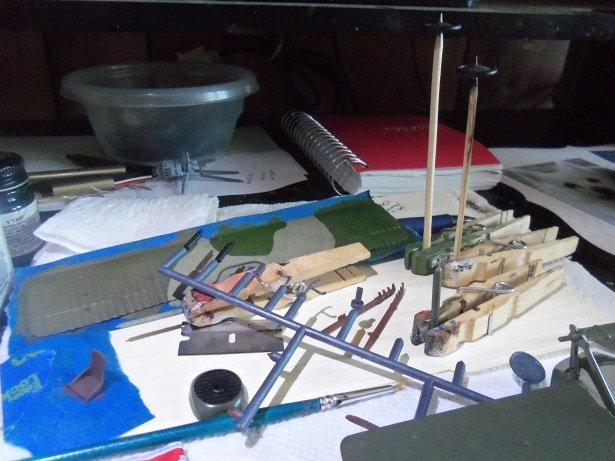
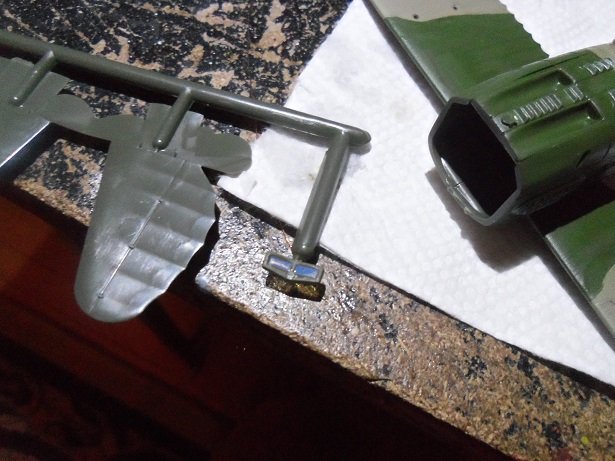
I'm waiting on the Dr 1 to come in.........I got an e-mail saying that it was about to be shipped. that was the 23rd of June. .........anyway....... the main landing gear was added to the fuselage, before I painted the underside of the bottom wings. they are to be the same color more painting.......... the radiator cowling will be painted a light blue..........the seat, a flat brown. the prop was painted in various shades of wood browns......dry brushing...... the undersides of the horizontal stabilizers were painted, after the flash was removed. the underside of the fuselage and wings were painted when the landing gear was dry enough. the build presses on.........

-
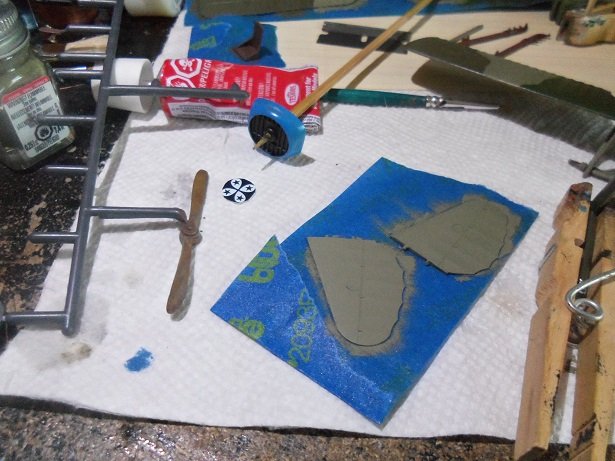
so....as mentioned, I've done a little to it already. since there is no cockpit detail, the fuselage halves, lower wing, and cowl top has been assembled. I can put the seat in later. going online and looking at images.......I plan on building Capt. Rene Fonck's plane.......I find that his camo and marking are different than shown in the instructions. I'll get it close anyway....... so I painted up the fuselage and bottom wing tops. then I did the top surface of the upper wing... next was to paint the leather around the cockpit opening. there is a windshield for this plane........the frame was perfect for window maker this is a bit on the light side........next picture... I wanted to show the amount of flash at the locator pins of the horizontal stabilizers.....thought I didn't get a picture of them. I was glad to see that I did. other parts were being painted as all this was going on. the build is progressing quickly.....
- 24 replies
-
- 12
-
-
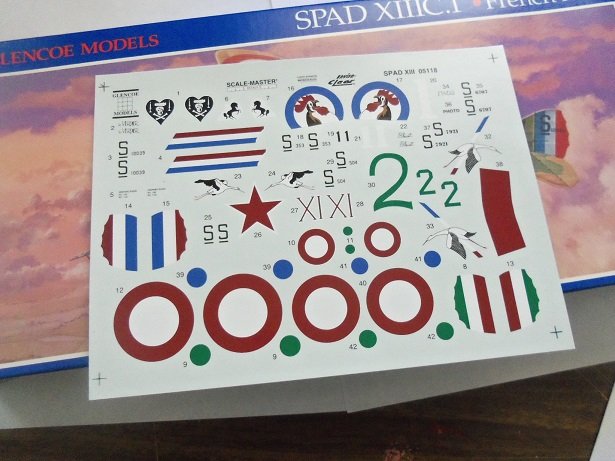
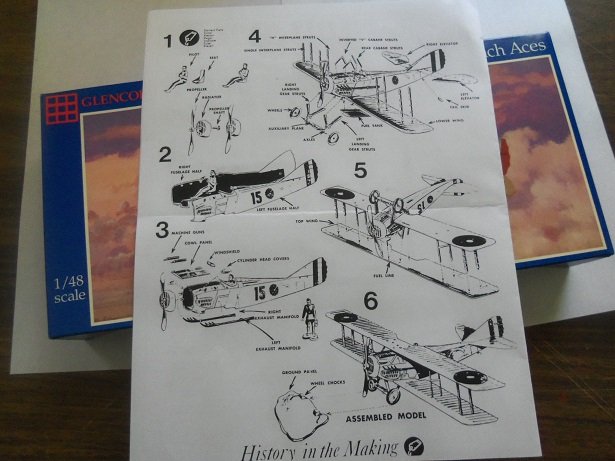
I've never built a Glenco kit........looked kinda cool. usually, I'll take pictures of the contents, but with this one, I kinda missed it. I pulled it out earlier and did a little to it....but it ended up back in the box because of the painting involved. I didn't want to get too far into it before that happened. there really isn't much to the model.......no cockpit to speak of, just the seat. one thing I did notice though, is that there are injection pin marks in places one wouldn't want to see them. the kit dates around 1995.......the box is like new. the kit has decals for several different planes......they are produced by Scale Masters and they look really good. the instructions aren't much to speak of.......the parts are not numbered on the sprues. they are named...... the number of parts in the kit doesn't cause too much calamity, but it is neat since it gives the modeler a sense of what the parts are called. I miss that with the newer kits.......older kits used to do that.......number them as well as name them. this is it as far as the assembly goes. as can be seen, there is a small 'display' that comes along with it. I can envision this on a wooden base, but I have no interest in it and I chucked it. the bad thing here is that the sheet is in black n white..........hard to discern what color is which and where. a saving grace is that two of the planes are in color on the bottom of the box......a third plane is shown on the top of the box. they do offer a book that shows French and British camo and markings....48 pages #7801 we'll see what planes jumps out of this box
-
I think it looks awesome........flaws?..........I don't see'um a cozy place to read.......
-
I dip the decals in water and lay them on the table...of course they tend to curl a bit. when I see the paper has relaxed, then i'll try to move the decal with a finger. if good, it goes to the model, sliding it off the paper. sometimes I need to dip my finger tip in the water and touch the decal....it will leave a little extra water, that can be blotted up once the decal has been positioned correctly. I use a warm water, or at room temp. older kits can be problematic concerning decals.......if the paper is curled, then you know that the sheet has been exposed to humidity. some even experience micro cracking......exposed to humidity and heat.......changes in humidity and temp. the older, thicker decals can take some abuse, but the newer, thinner decals need to be handled more carefully. age will cause them to shrink........I've even gotten what I thought was a new decal sheet, only to find out that they are old and the cracking has occurred. the model looks super........bombers are such great subjects I see you didn't add weight to the nose {inside}.........what you can do is make a base and cement the tires to it......CA works best congratz on a really nice job!
-
I look for the small 'Mom & Pops........some of the best food comes from them sorry to hear of the problems you've had with the finish. I think it has a lot to do with the 'texture' of the finish........the powder may be weakening it. so, when you remove the masking, it takes the surface along with it. I wonder if there is a way it could be mixed........it would be a more uniformed paint.
-
great look'in tank Mark.........at first, it looked like it was a Rhino {had to squint}. as for the unit numbers, it would depend on the color.......white, red, white outlined in black, red outlined in white, that would designate the unit it belonged to. none the less.....it looks super! look'in forward in seeing the King