


JamesT1
-
Posts
57 -
Joined
-
Last visited
Content Type
Profiles
Forums
Gallery
Events
Posts posted by JamesT1
-
-
Gary/Allan many thanks for the information...
Just had a look at Vanguard models site... . so Allan in a moment common sense ( I wimped out) and bought the carriages for the 24lbrs.... mainly because they have all the brass fittings with them
I'll save the scratch building for another day
some very nice things on the site so bookmarked for some future moments of weakness
Many thanks for your help and information much appreciated
Jim
-
Good evening all
I am opening up the main gun deck on the Caldercraft Agamemnon 1781,,, can somebody please point me in the direction where I can find the carriage dimensions for the 24lbrs carried by her,, many thanks
Jim
-
-
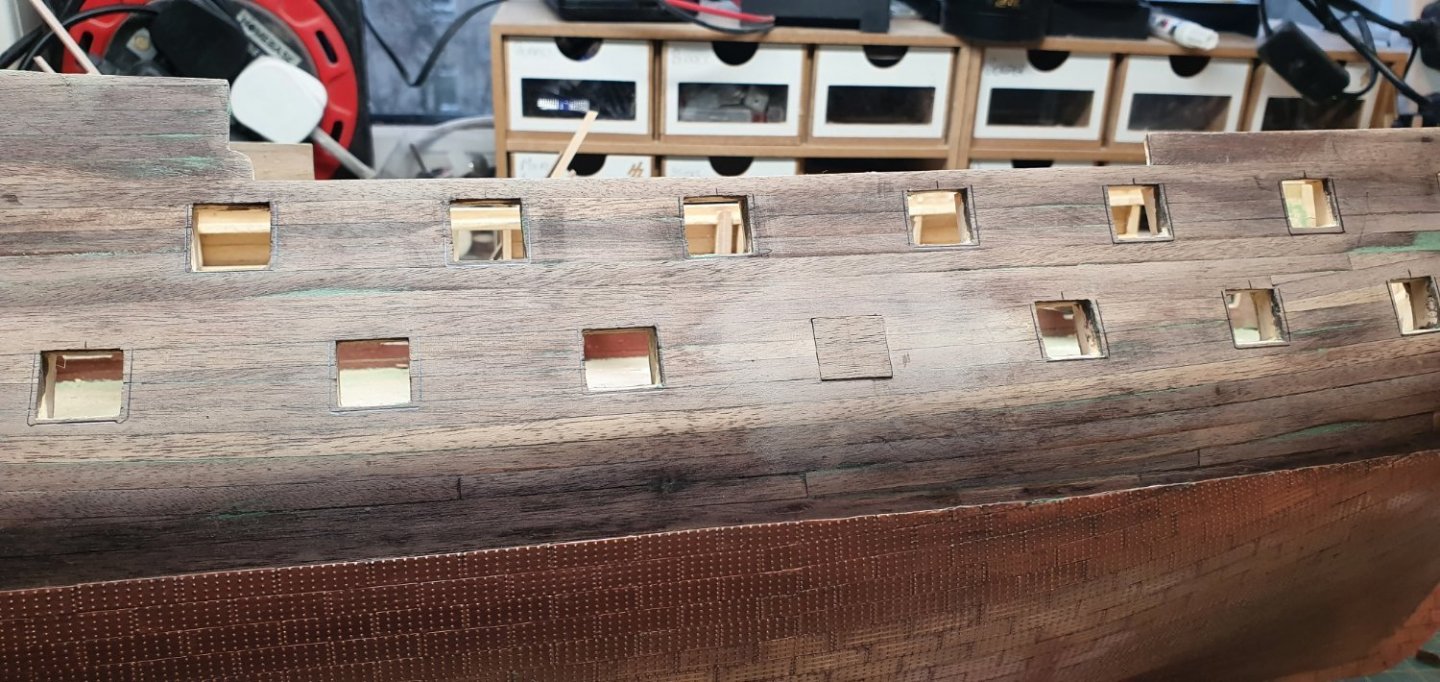
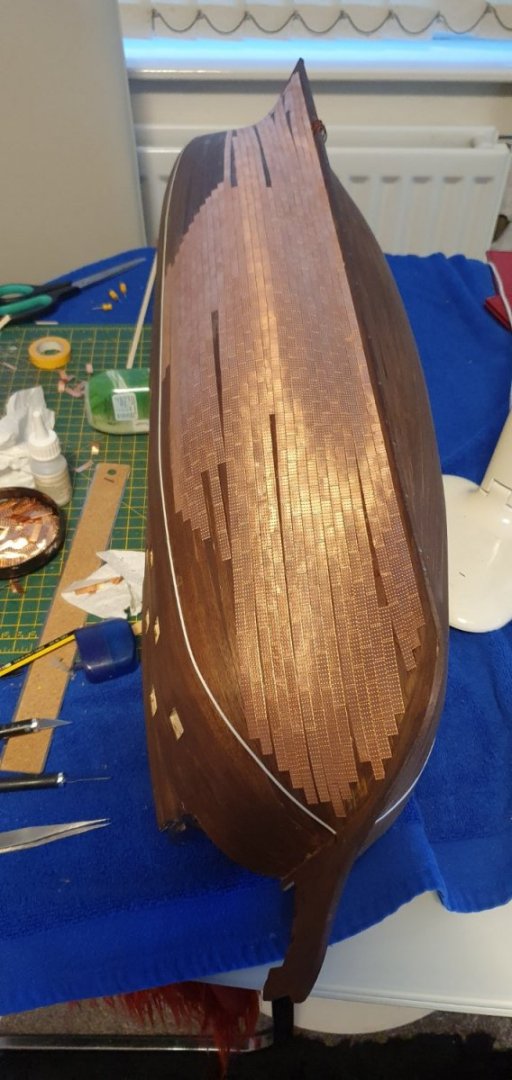
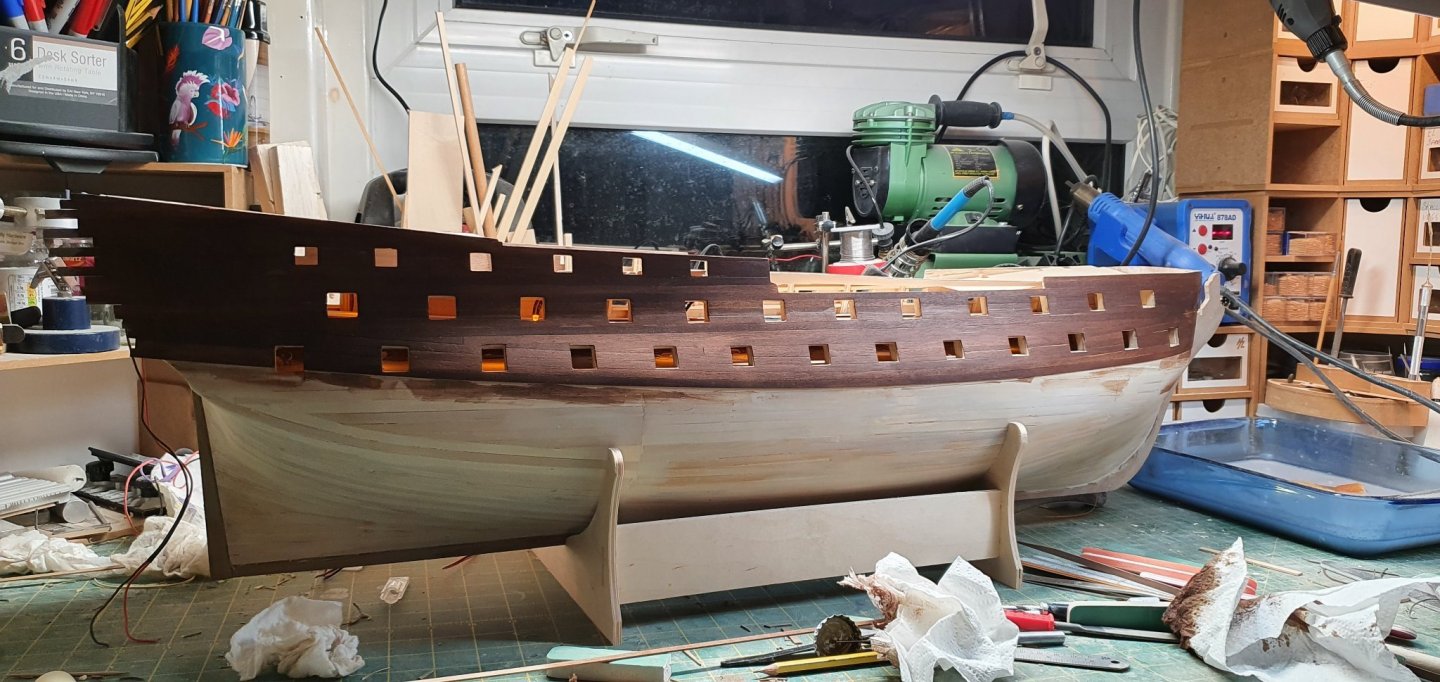
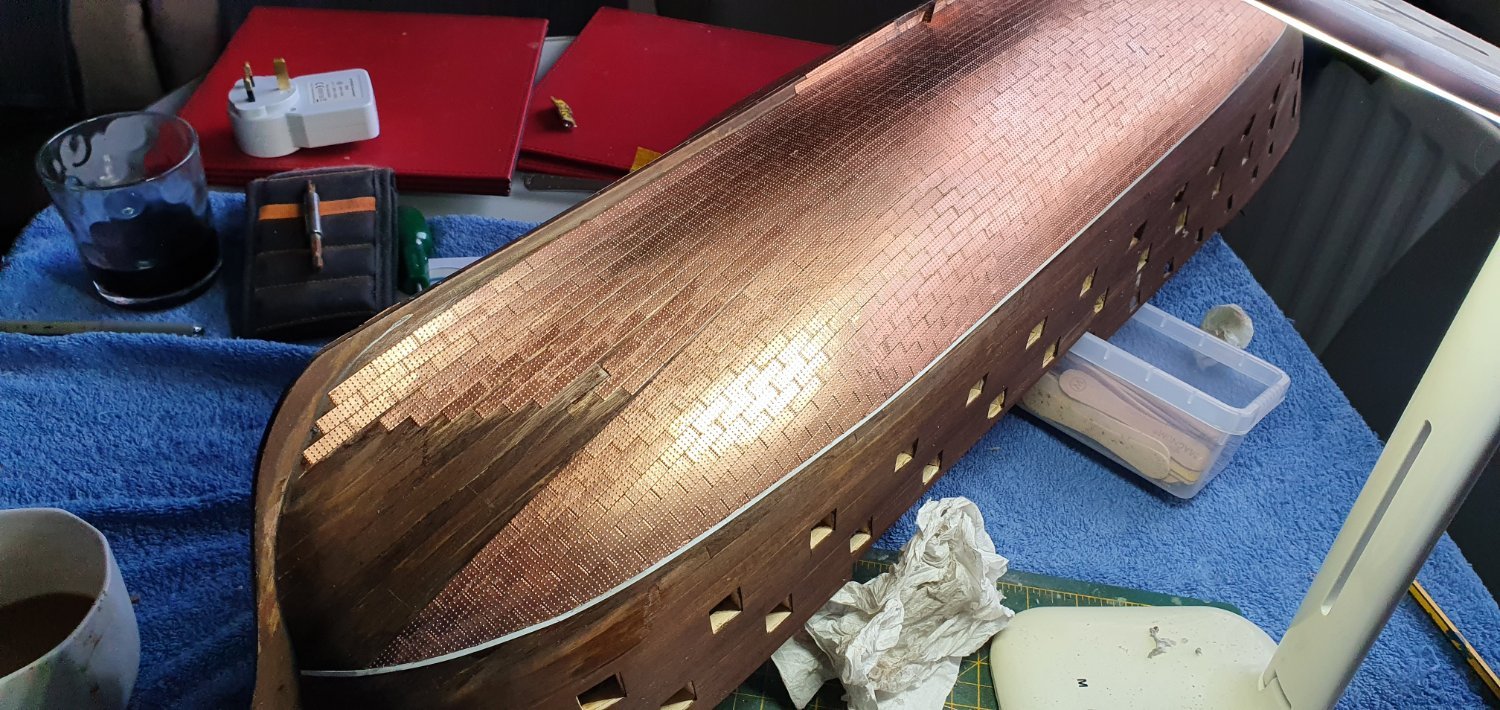
Plates completed at long last,,,,,,, that really tests your patience,,,, couple of small repairs to take place after removing the plastic waterline strip I had put onto it.....
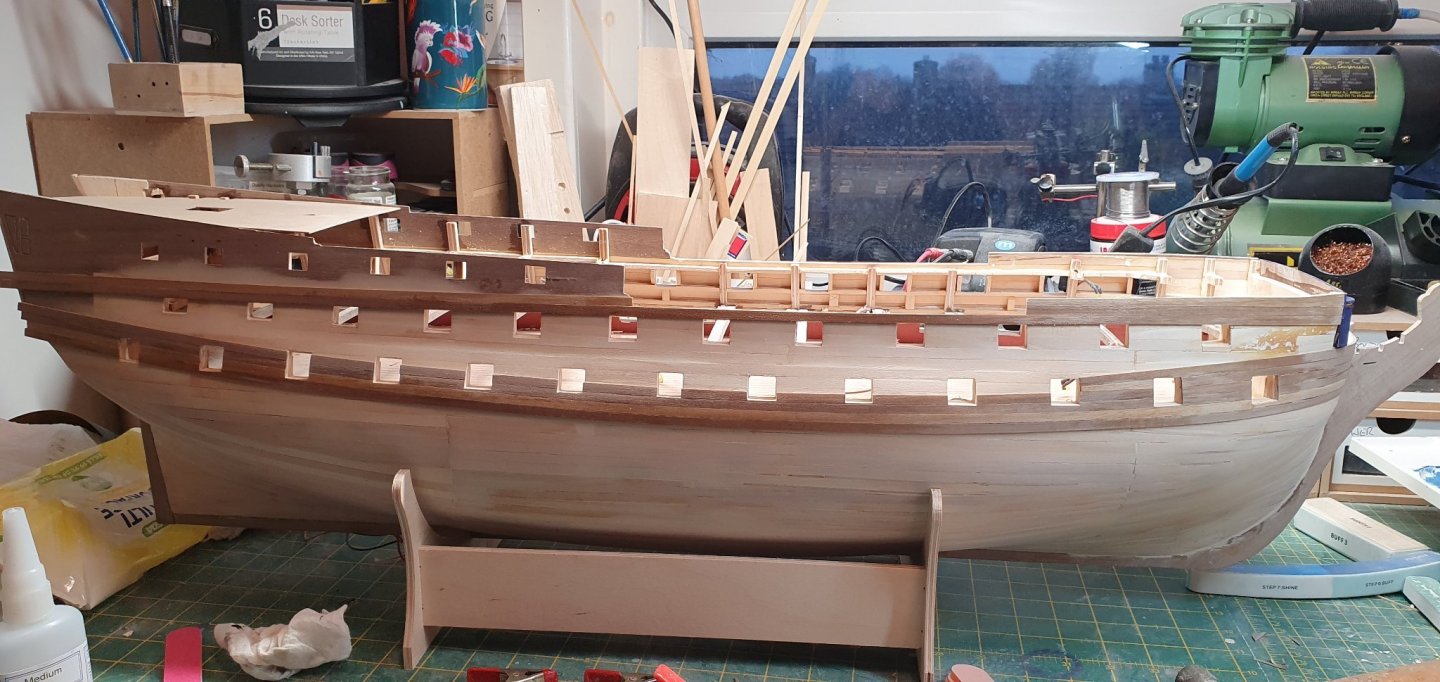
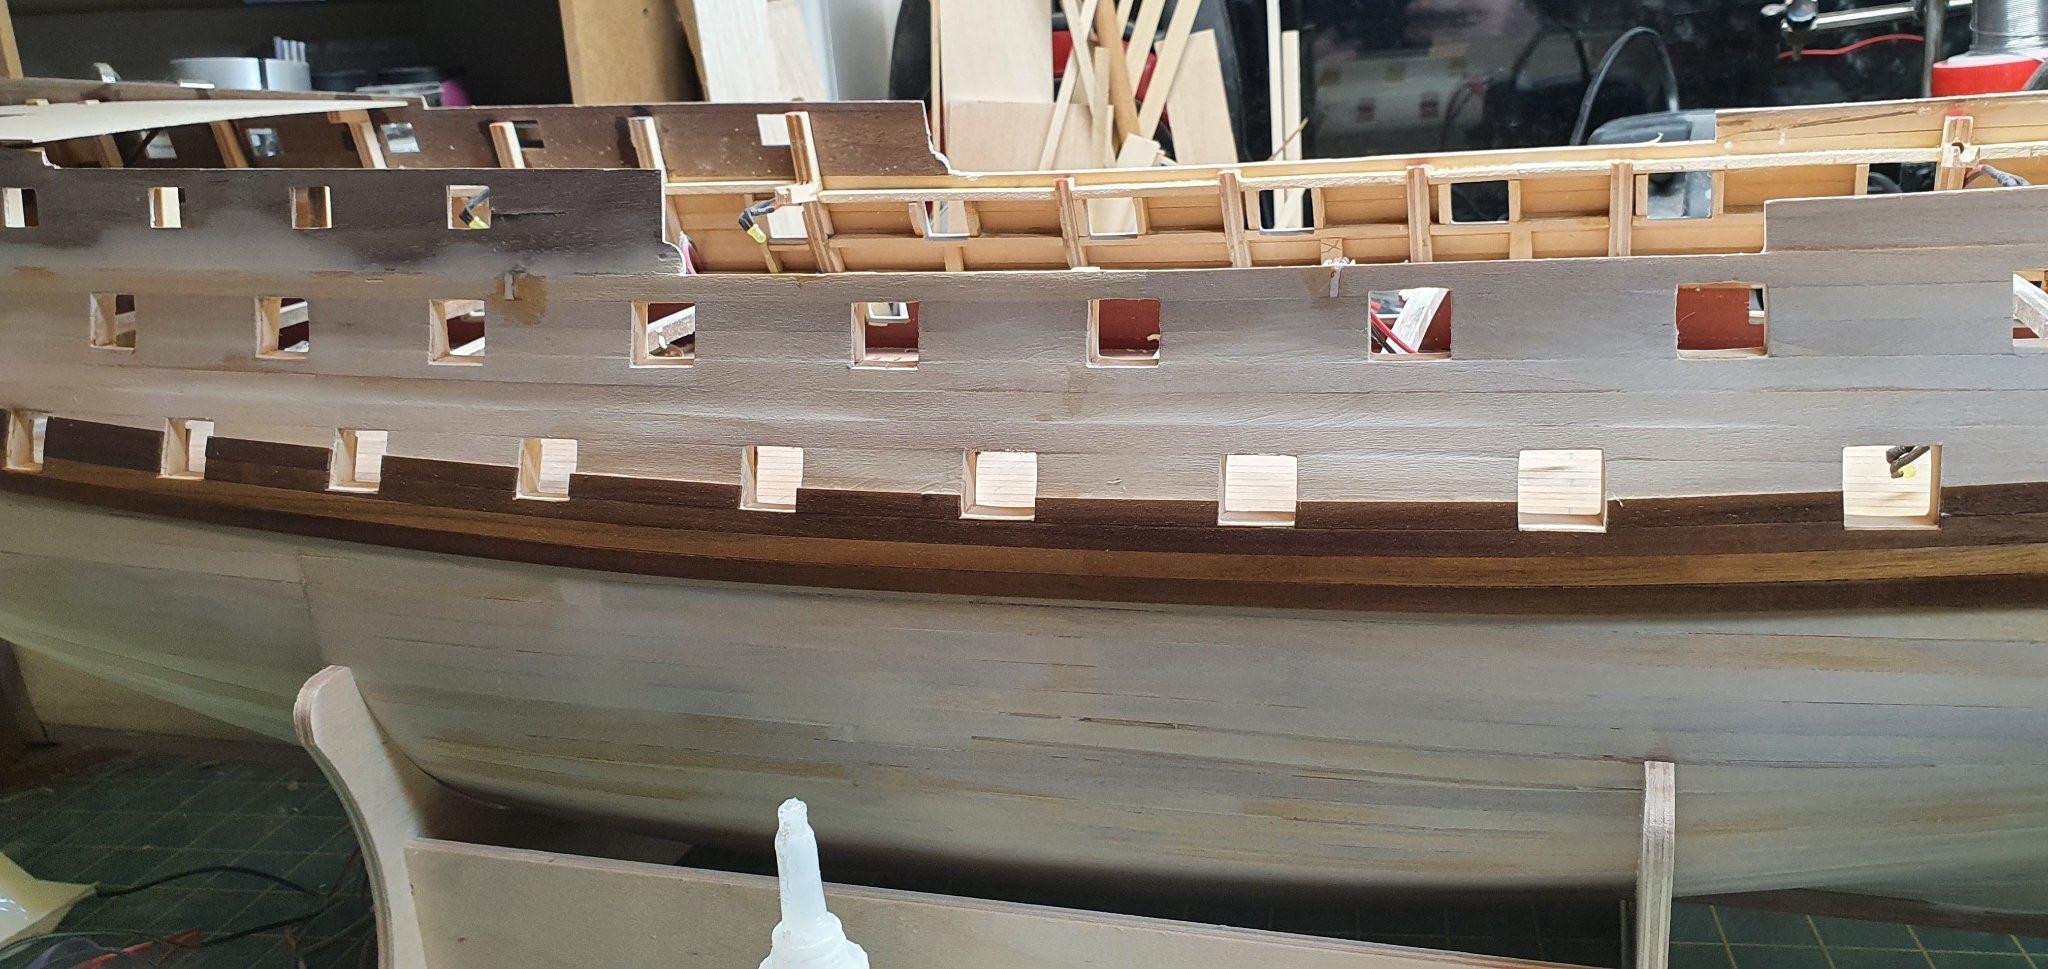
So starting work on the gun ports to ensure they are the correct size for the hatches


-
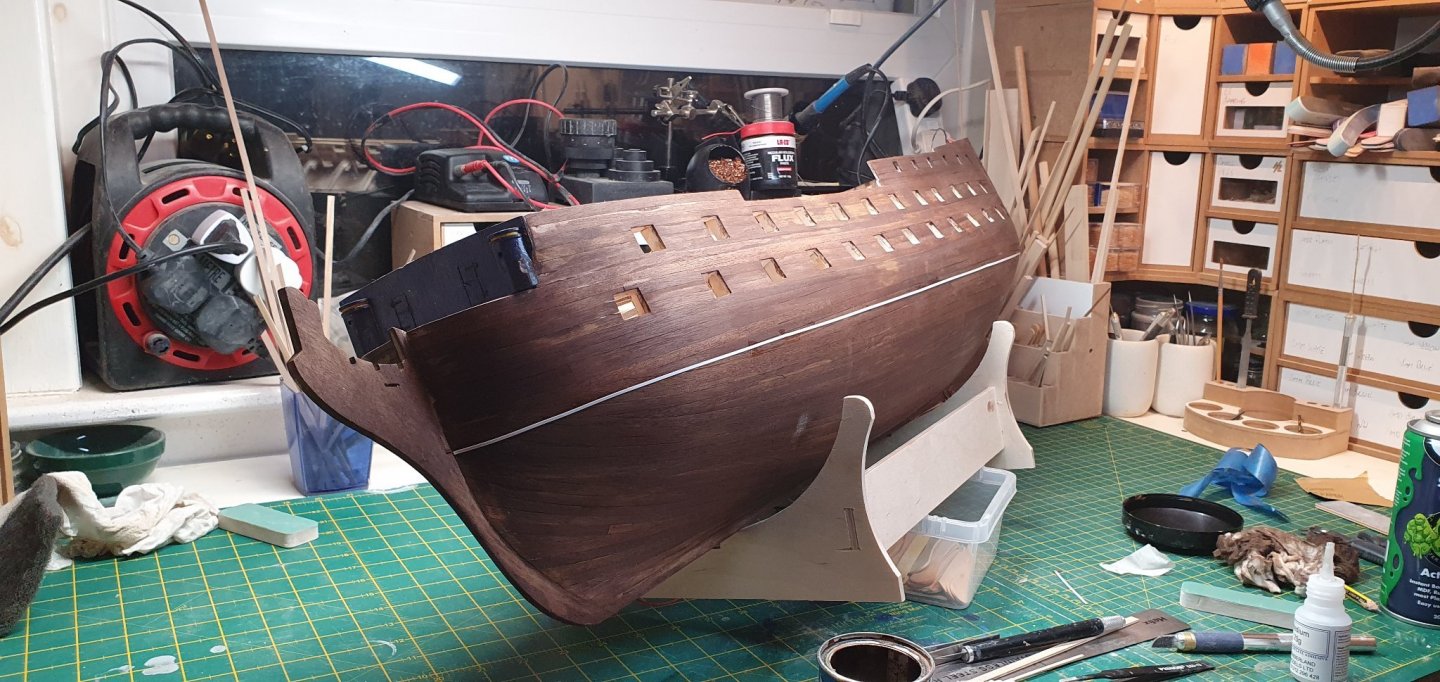
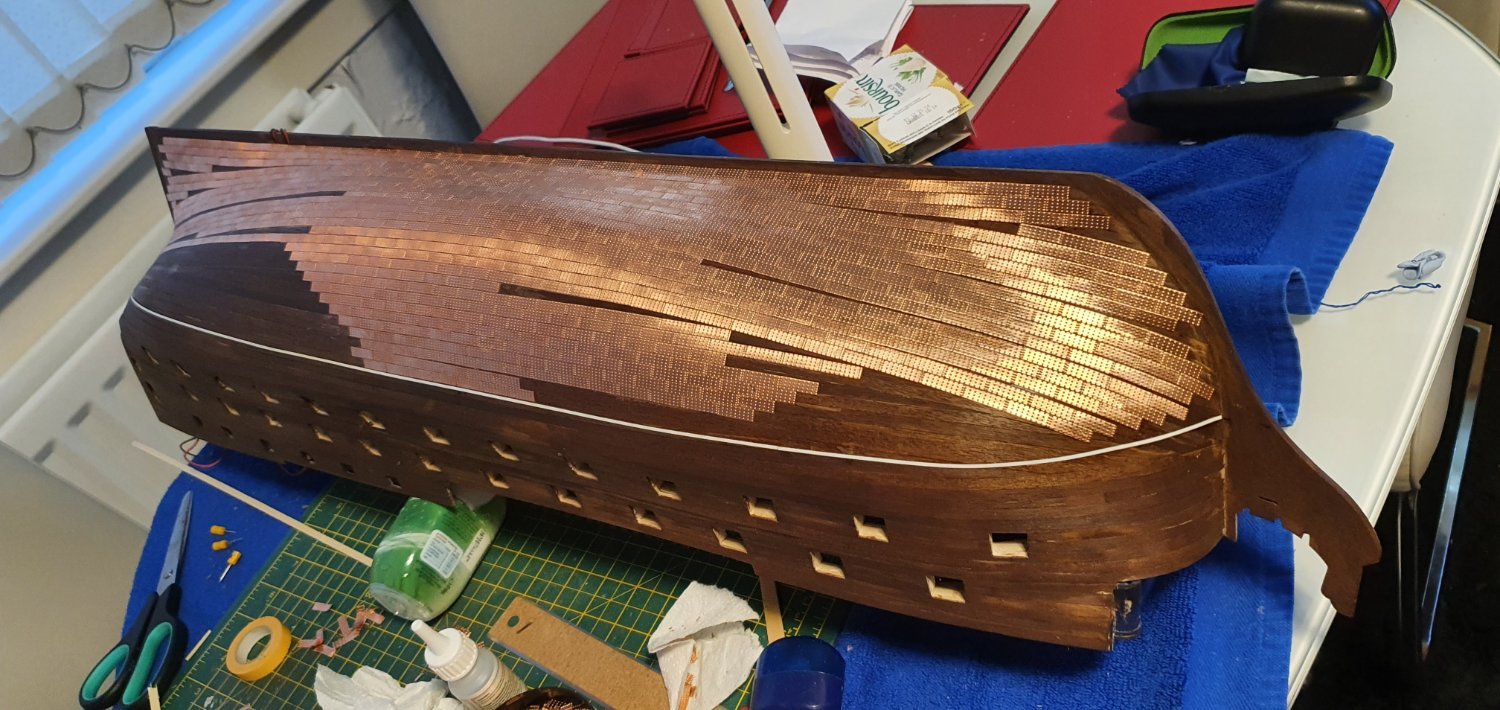
On 1/21/2022 at 8:36 AM, JamesT1 said:
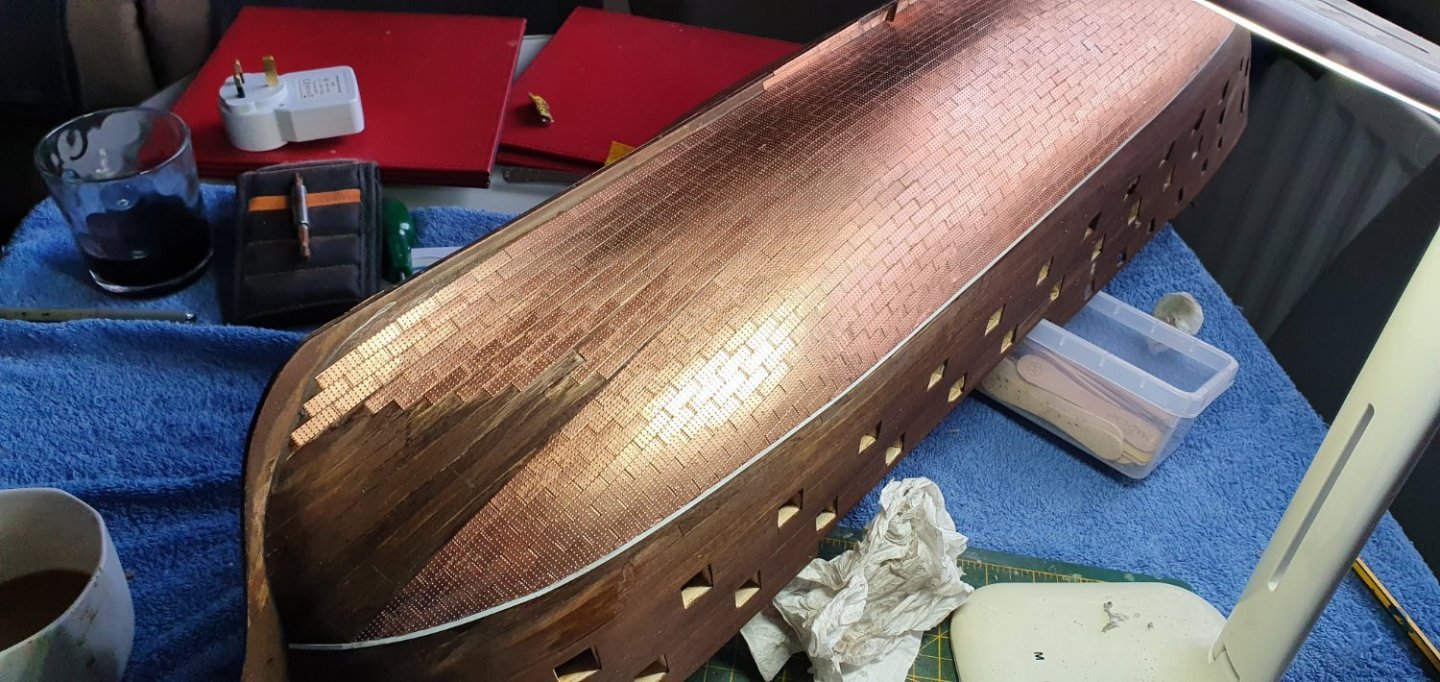
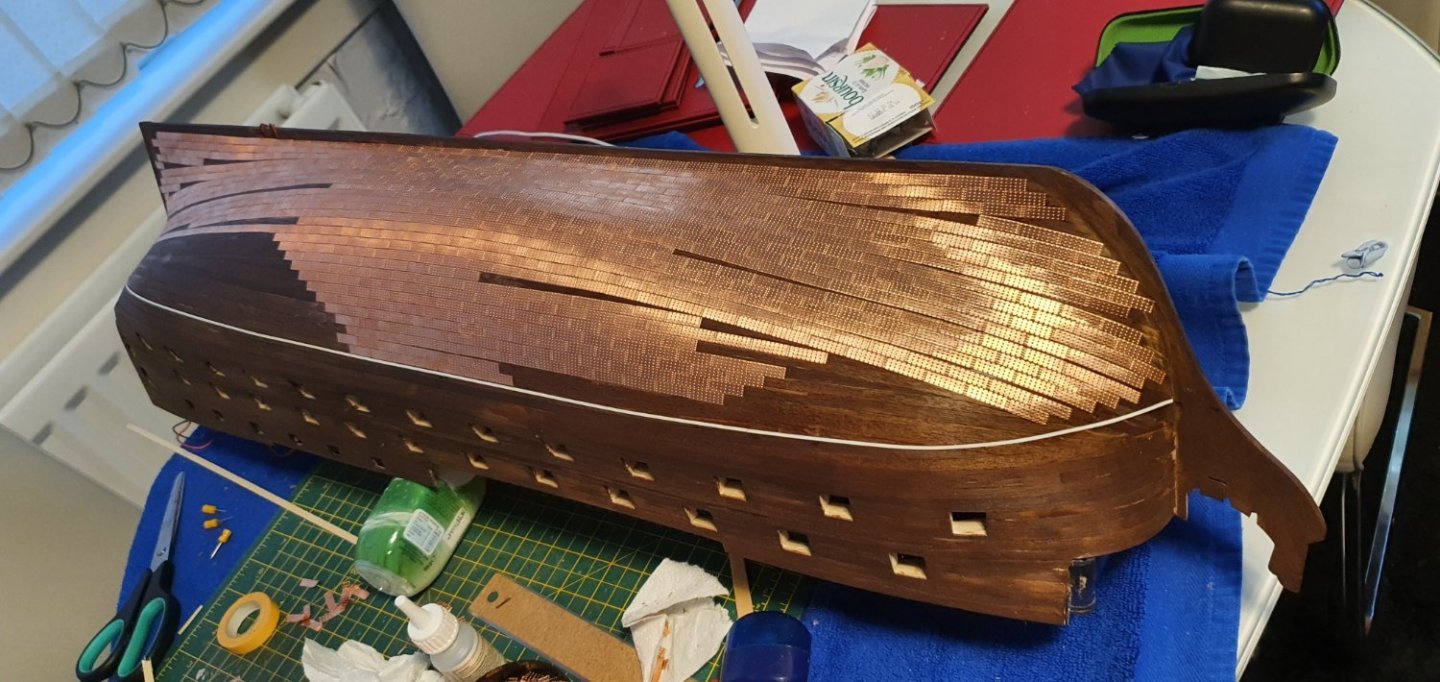
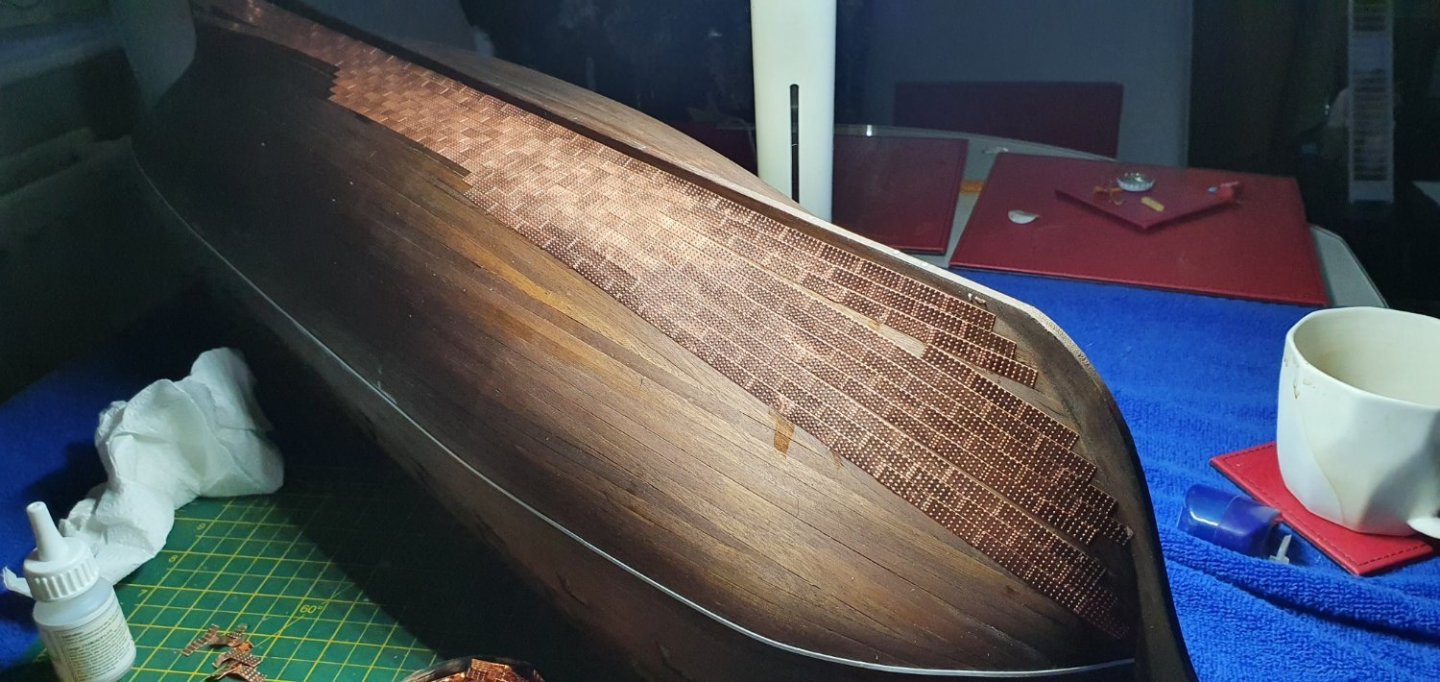
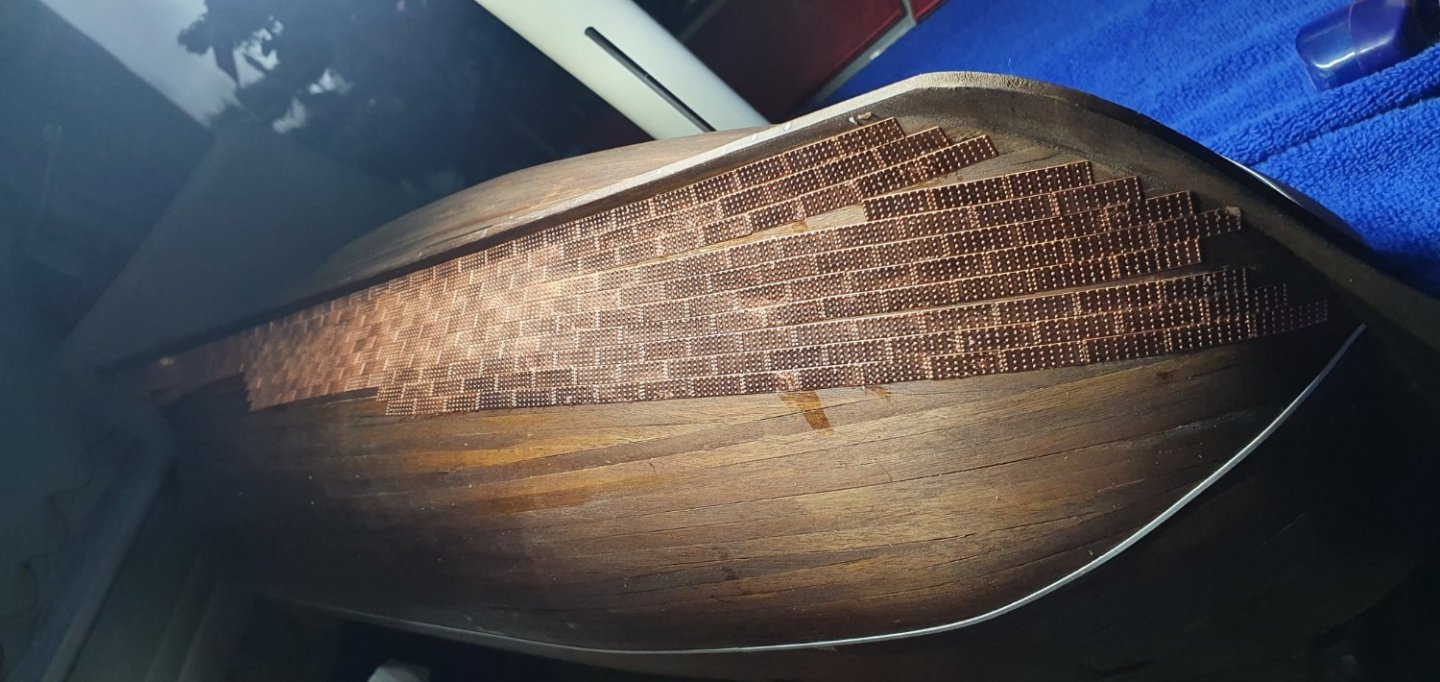
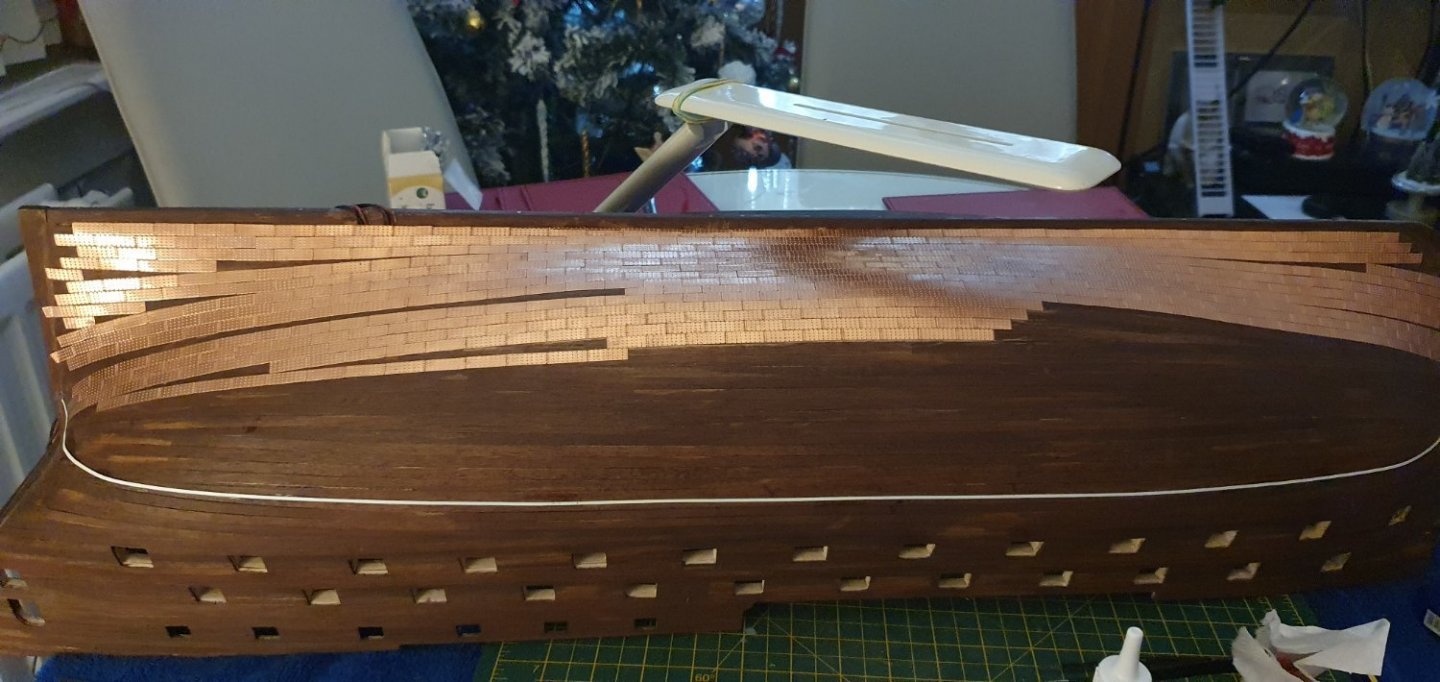
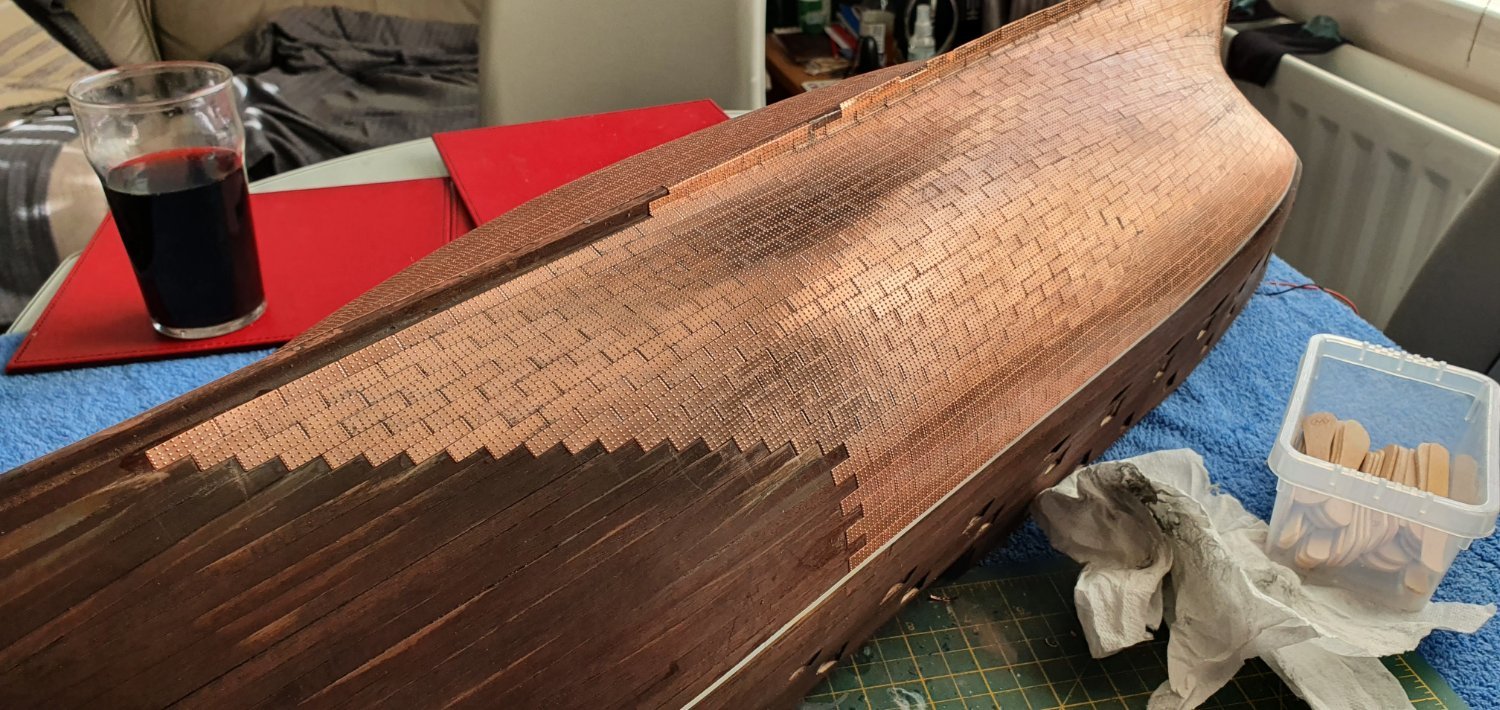
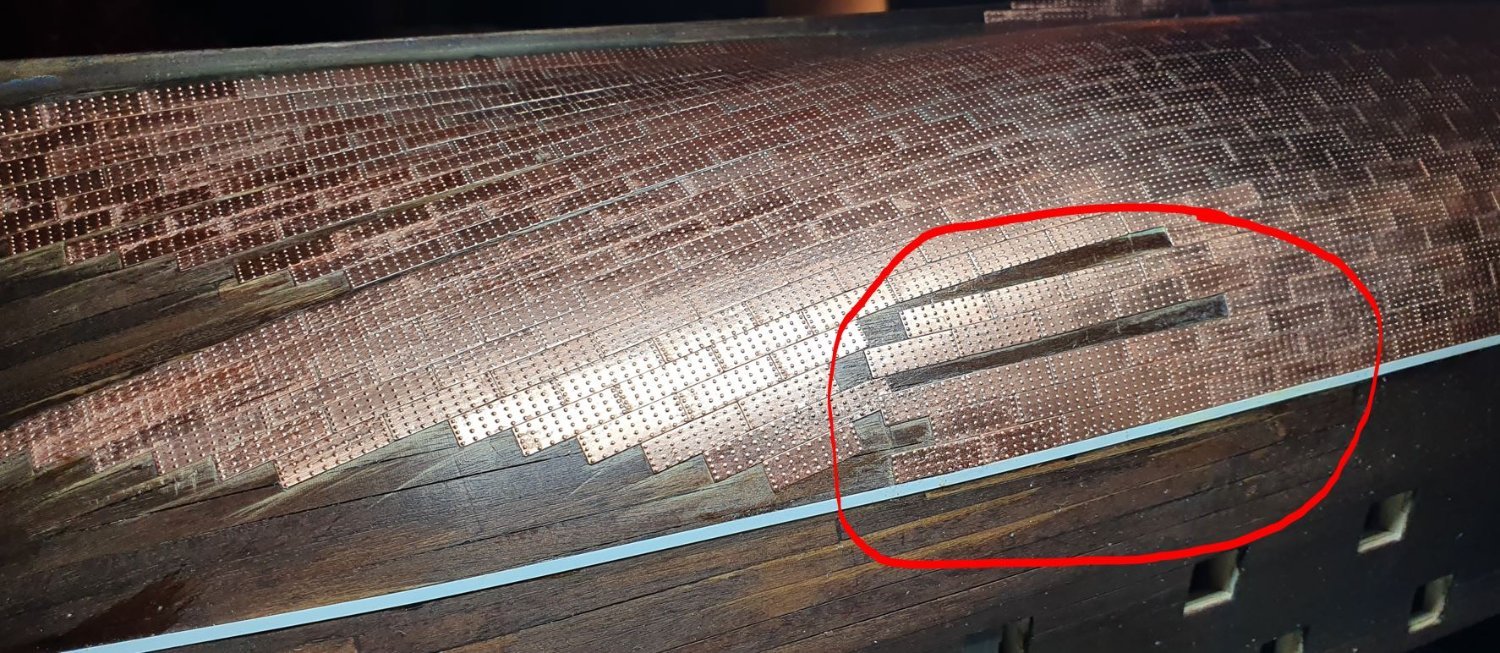
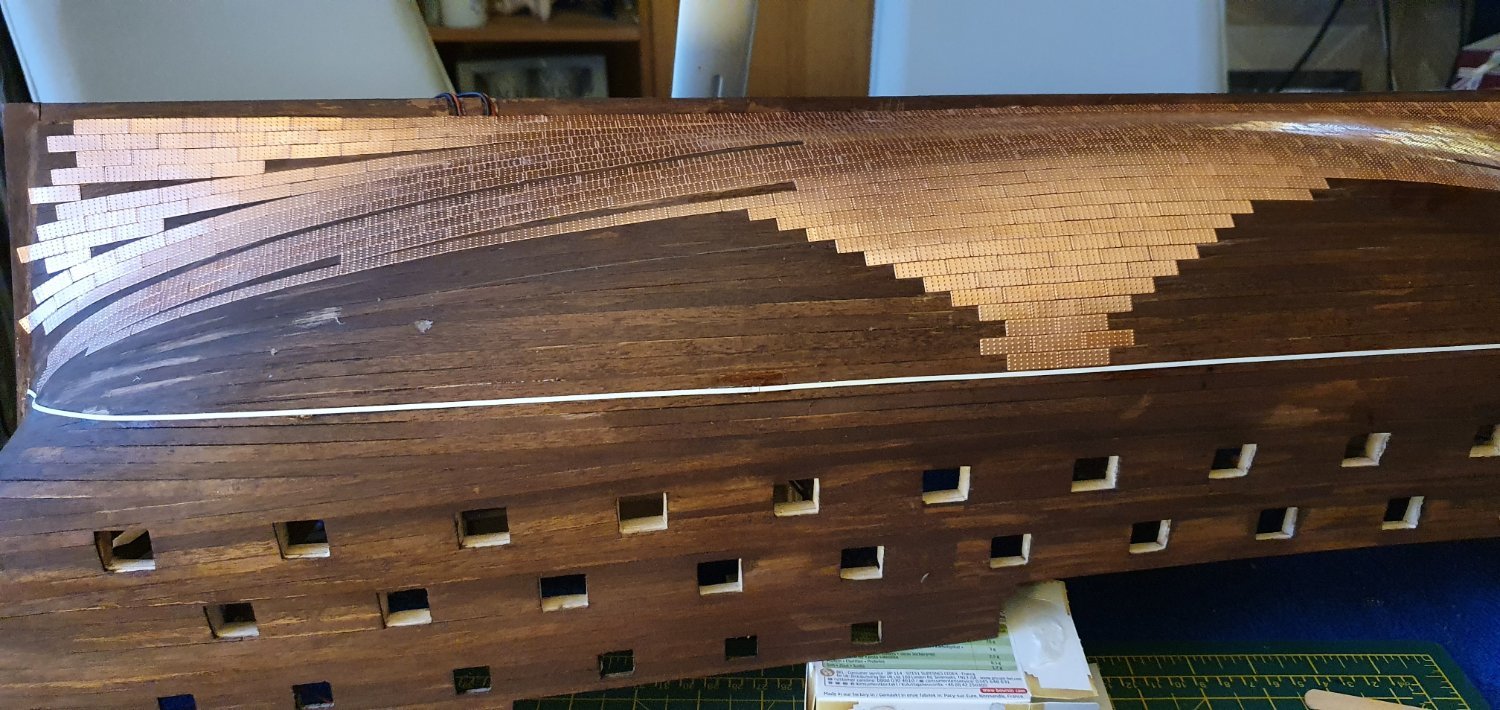
After completing the port side I decided to try a different way os laying the copper plates for the Starboard side,, however I think I may have been a wee bit over enthusiastic and made an error...
Working from the centre and up from the keel I laid them in layers, however at the waterline I laid then straight, resulting in a mismatch, circled in red.. I believe I should have just followed the natural curve of the plates up to the waterline... so a wee bit of repairs to be done


Looking back through the photos, even although I had laid the plates differently I had also made this error on the port side without realising what I had done.... this probably cost me quite a few hours of work cutting plates to fit ,,,
So now I know for future projects,, never to old to lean
-
On 1/21/2022 at 6:39 PM, yvesvidal said:
I have come to the stage where I need to copper plate my Bellona. I really dread that process since I have never done it before.
Your technique (and mistakes, too) will come handy when I tackle that monstrous project.
Yves
Morning Yves
One other wee thing... I found that some plates have a small lip around the underside,, making them sit proud when placed on the model,,, I started scrapping the underside with a scalpel 2 or 3 times before placing them on the model..
Jim
-
Tom,, just caught your build... some very nice excellent work there,,, really like your rigging.....
A we question if you don't mint.... the deck gratings,, is that the ones that come with the kit..... the spacing looks a bit big to me for the scale,, or is it just the way I'm looking at it
Jim
-
Many thanks for the comments guys.... Tom I agree about laying the plates in the same manner as the planks,,, this is my first try at this and I believe I improved as it progressed..... I have Diana impatiently waiting in her box.... and when I do that then I may give that method a try...
Yves,,,, good luck with your Bellona..... I have found the plates enjoyable however it is very repetitive as you may have guessed... I found it easier working on it for a couple of days,,,4 - 5 hrs per day then leaving it for a couple of days,,,
Jim
-
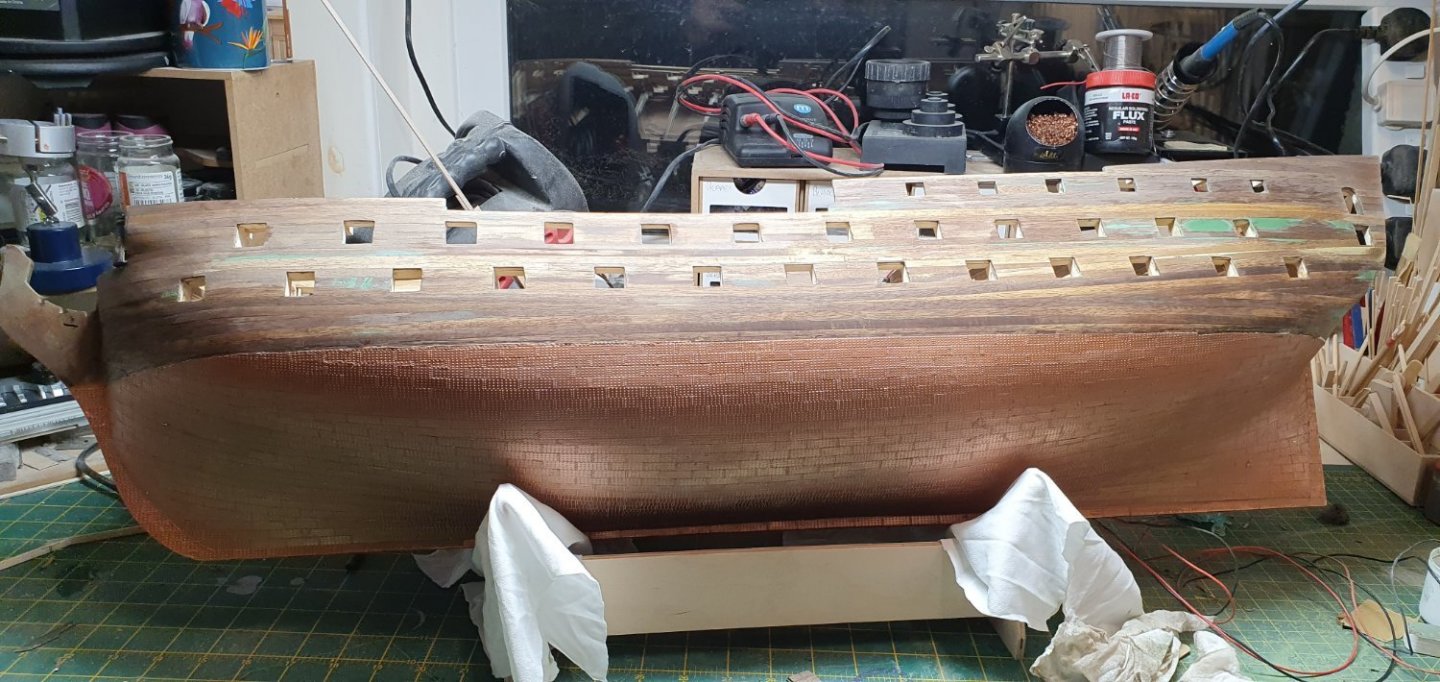
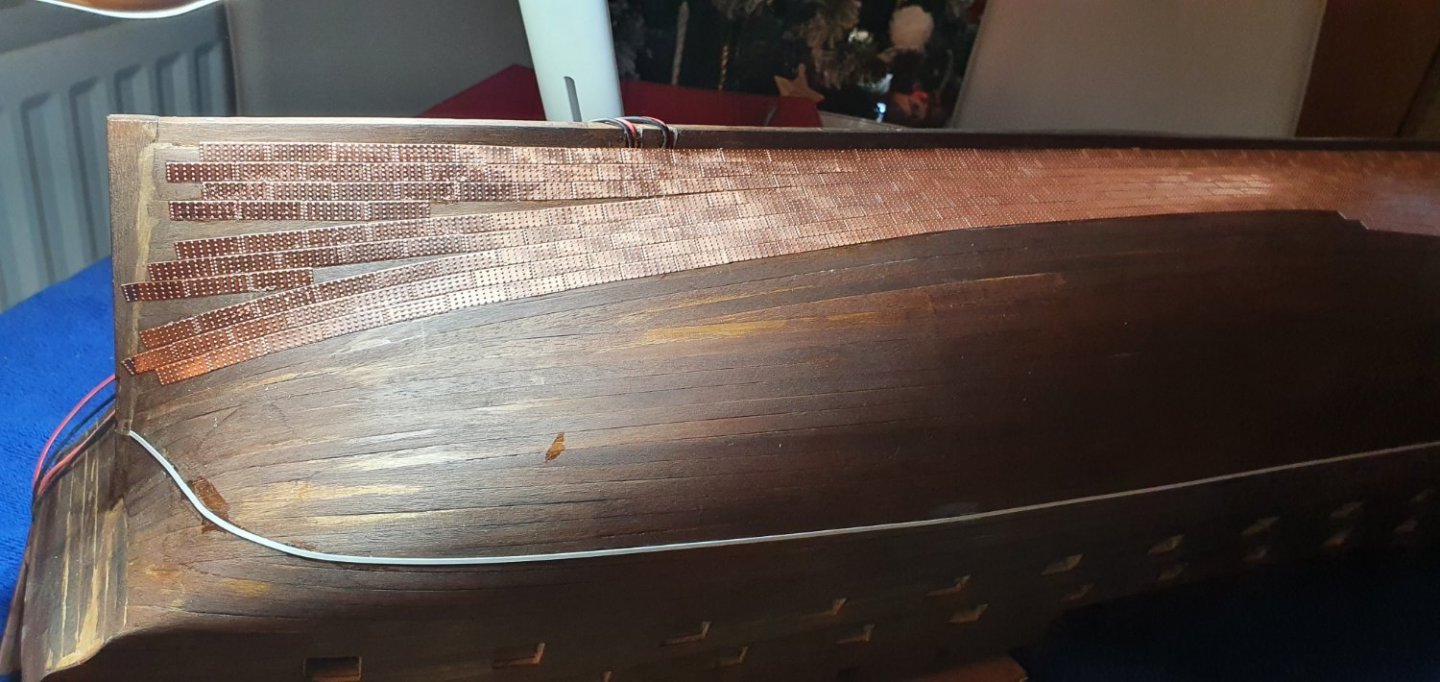
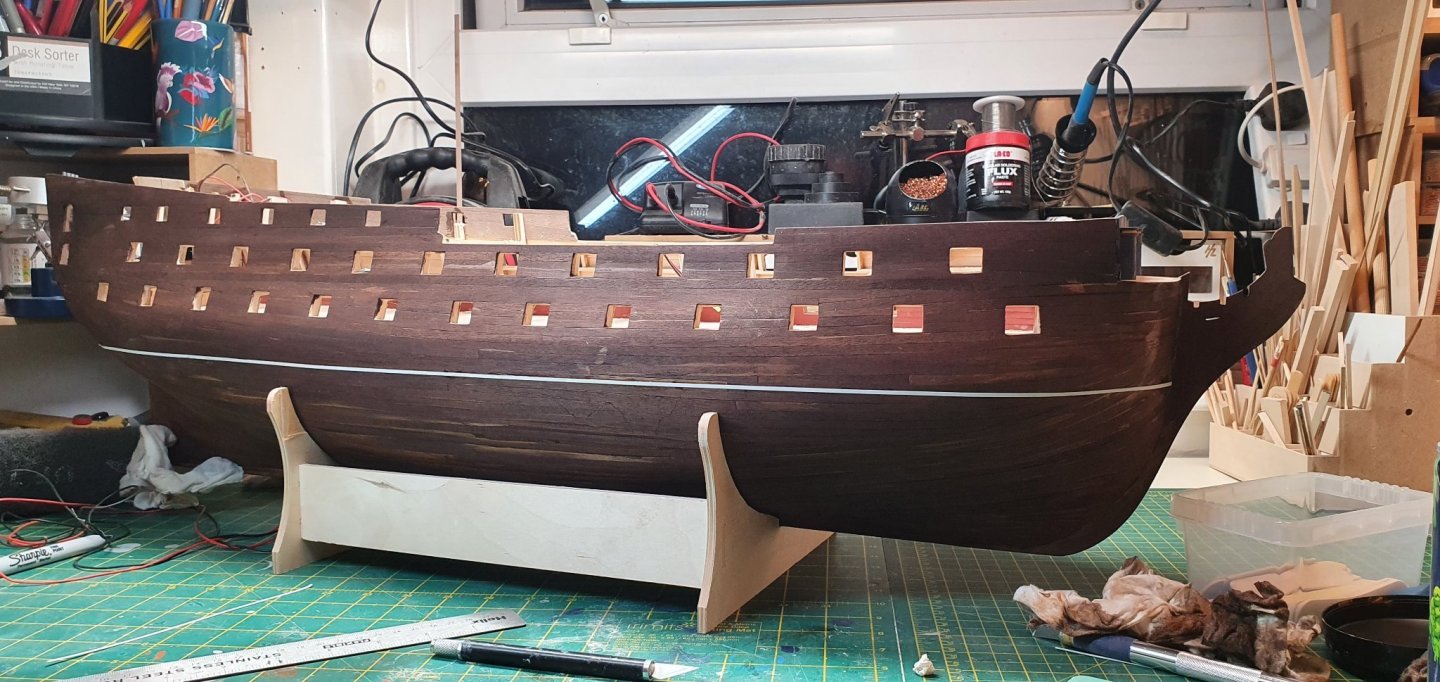
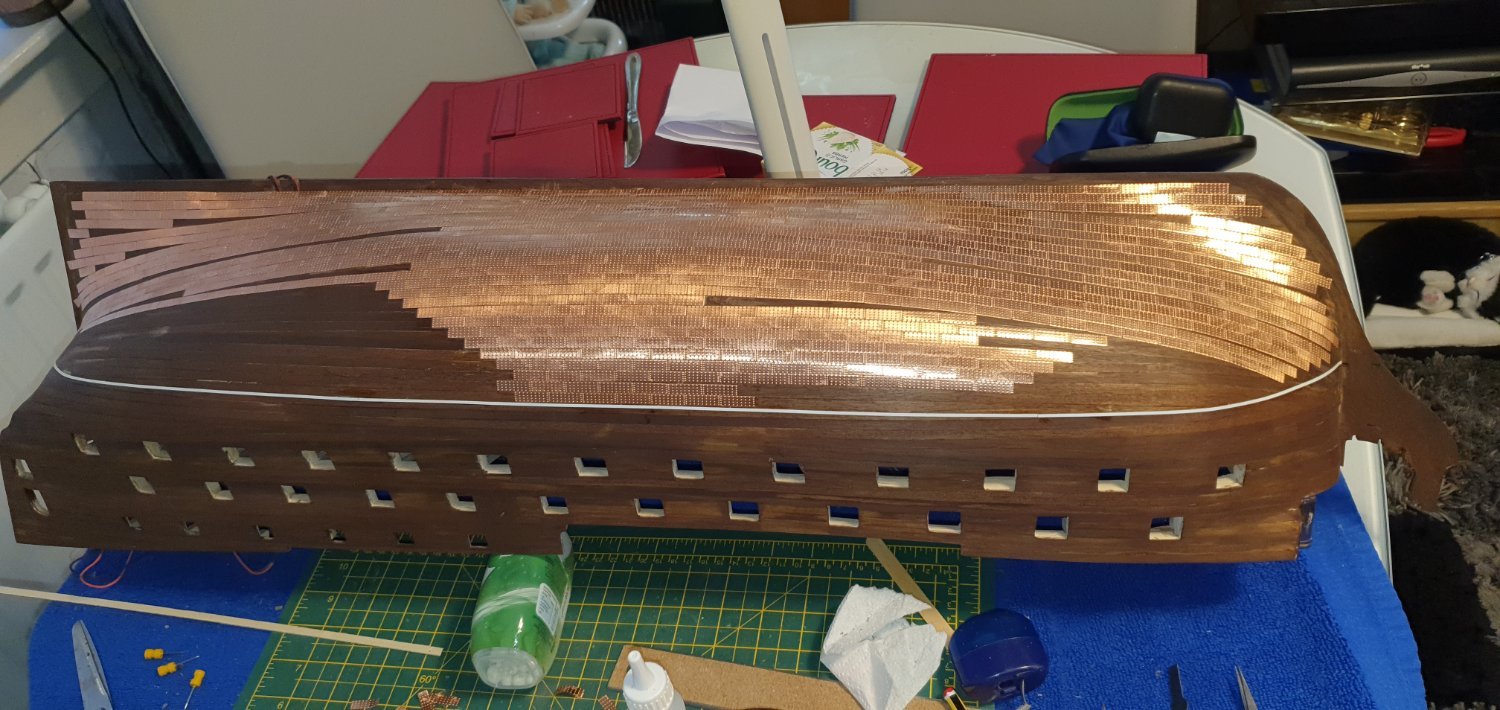
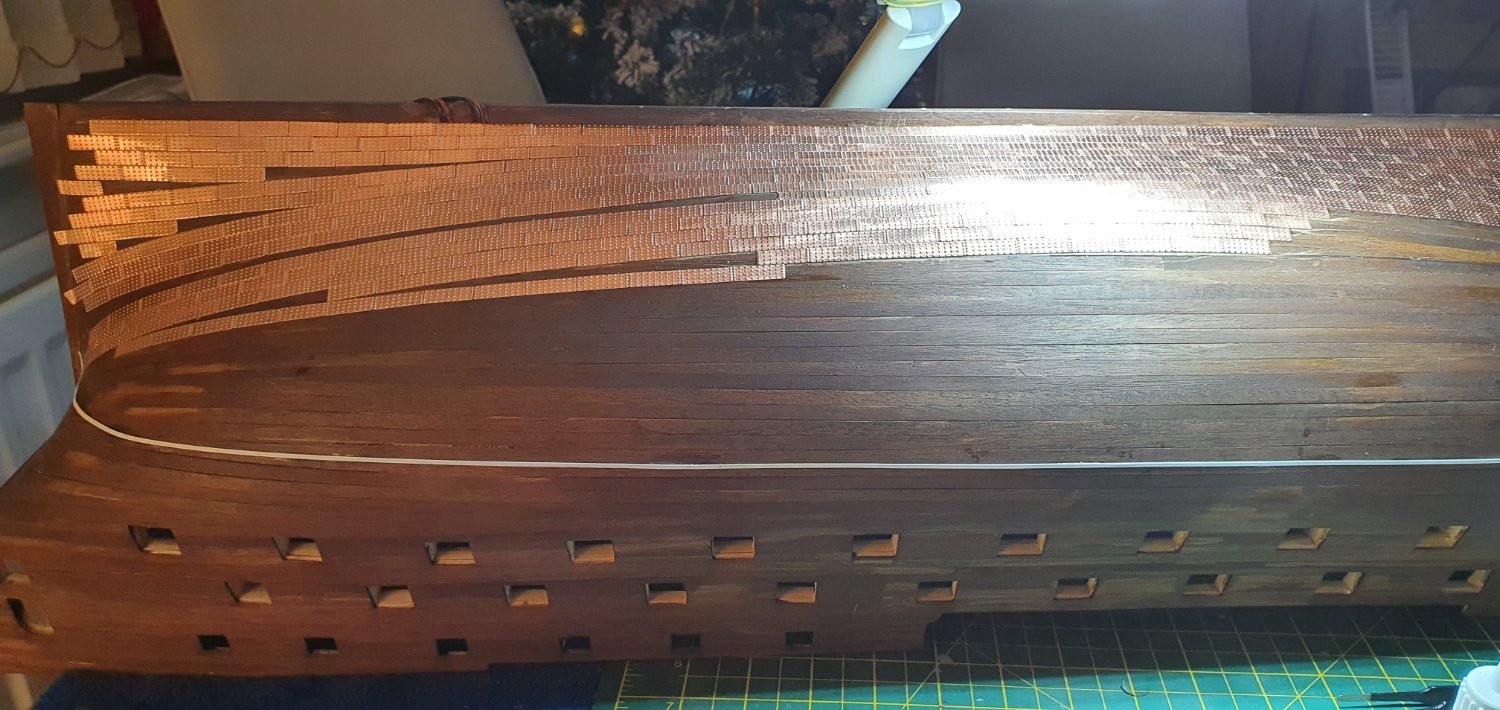
error plates ripped off an replaced,,, its getting there


- mort stoll, yvesvidal, Henke and 3 others
-
 6
6
-
After completing the port side I decided to try a different way os laying the copper plates for the Starboard side,, however I think I may have been a wee bit over enthusiastic and made an error...
Working from the centre and up from the keel I laid them in layers, however at the waterline I laid then straight, resulting in a mismatch, circled in red.. I believe I should have just followed the natural curve of the plates up to the waterline... so a wee bit of repairs to be done
- ccoyle, yvesvidal and mort stoll
-
3
-
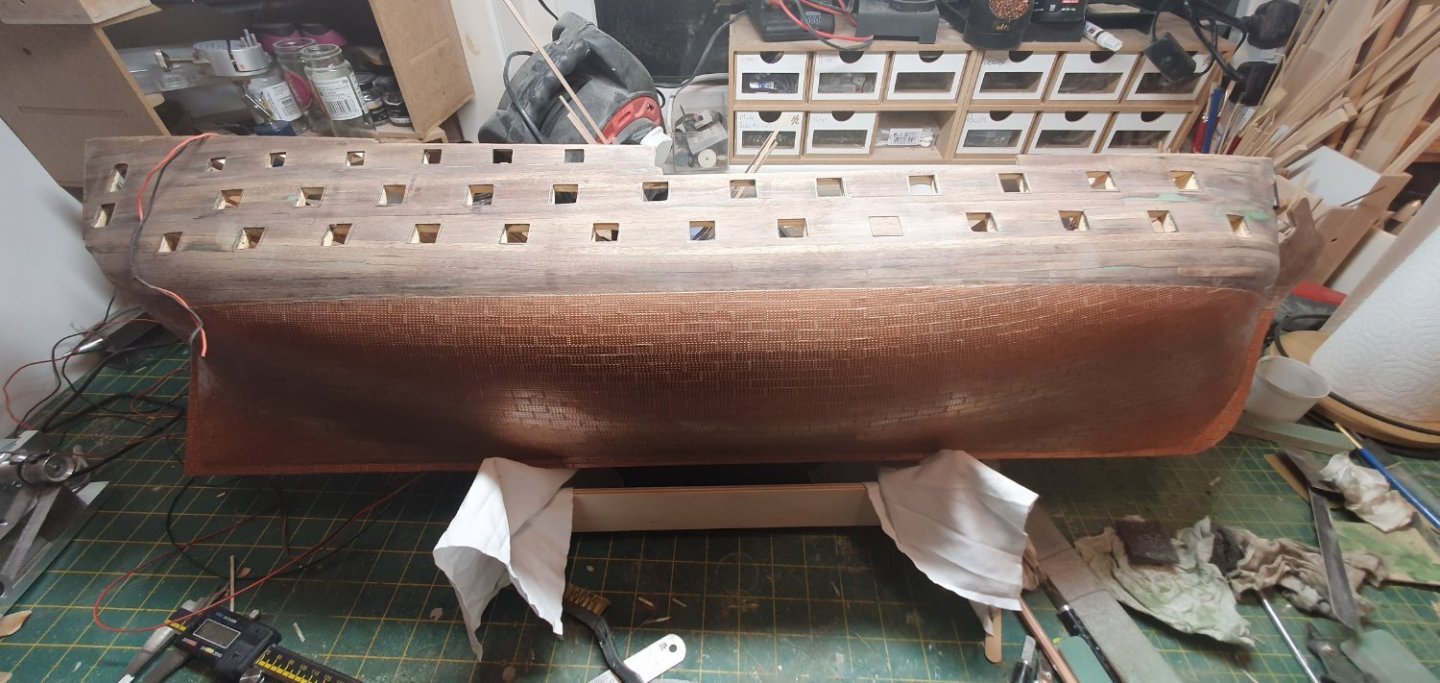
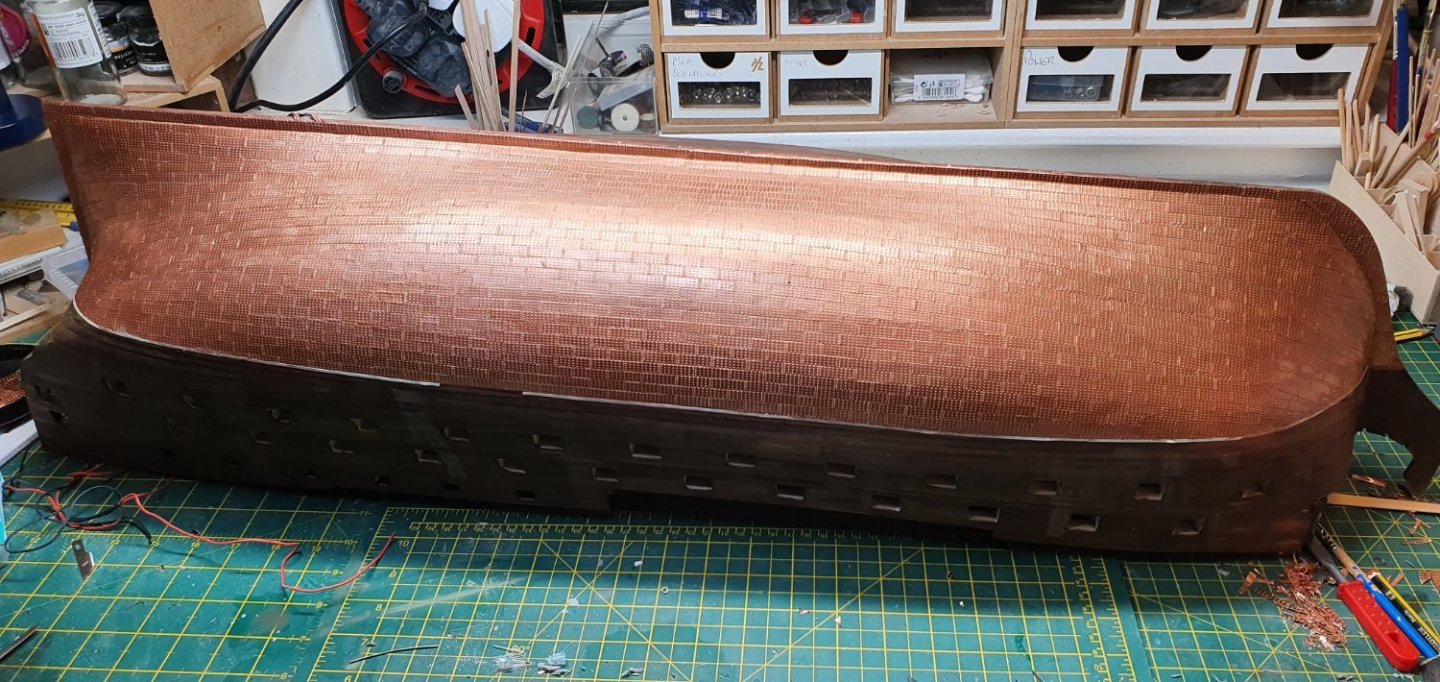
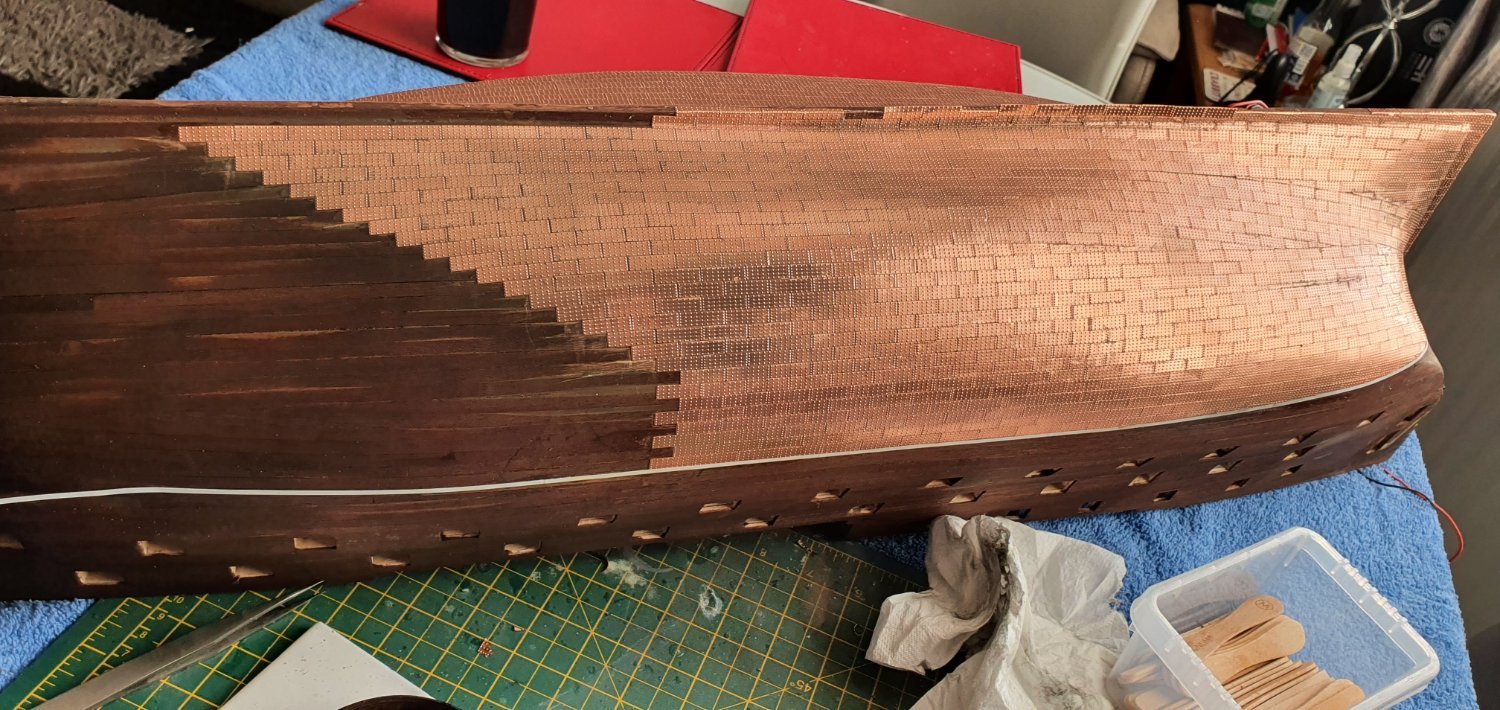
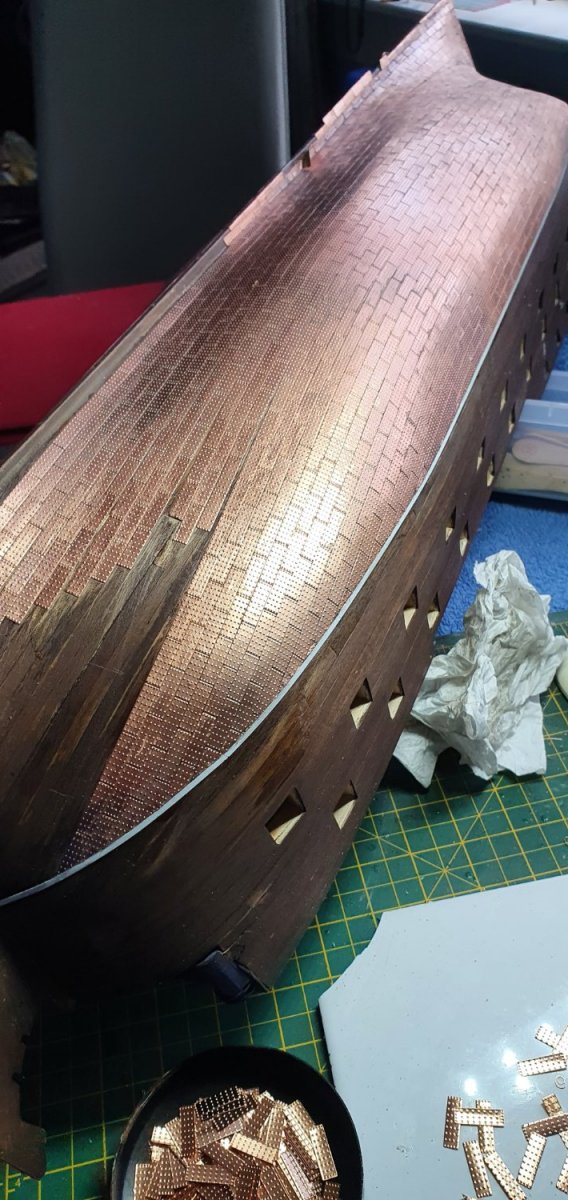
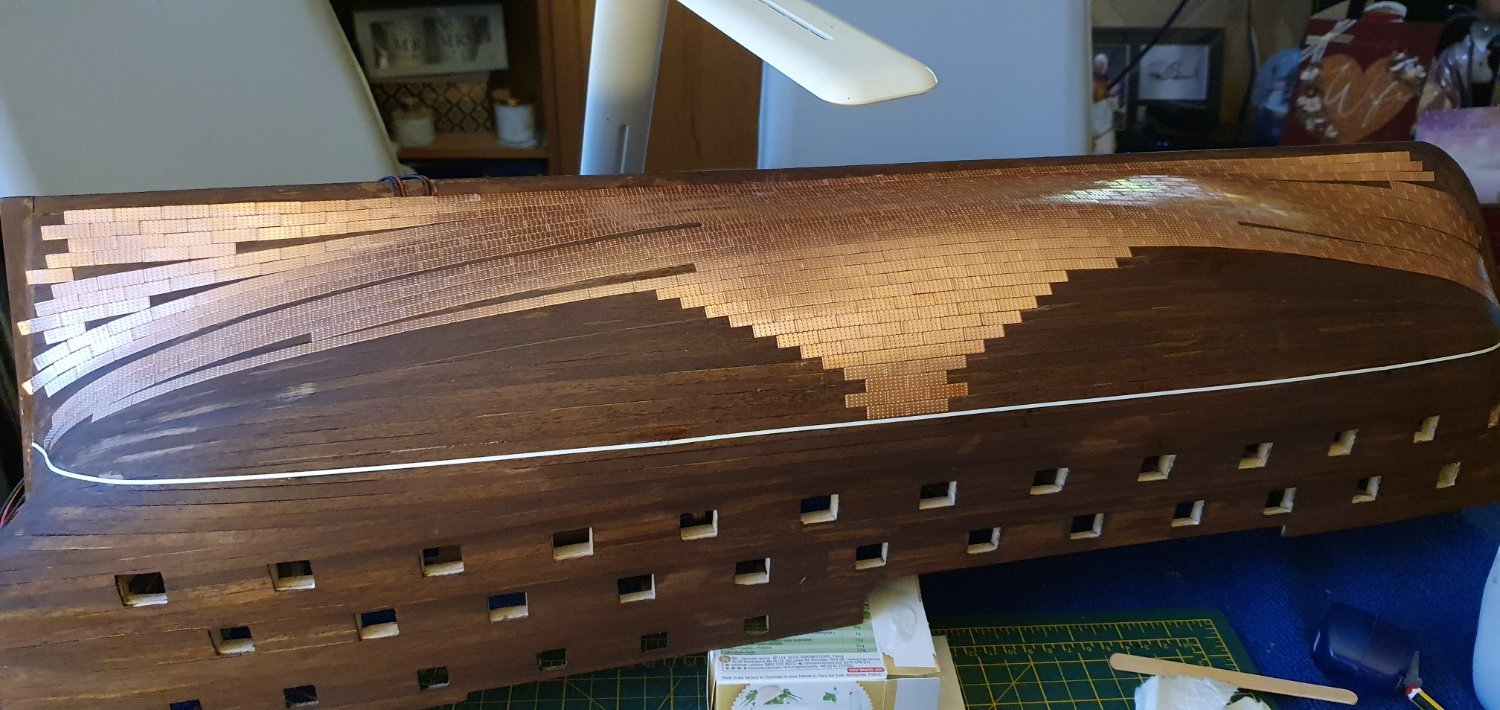
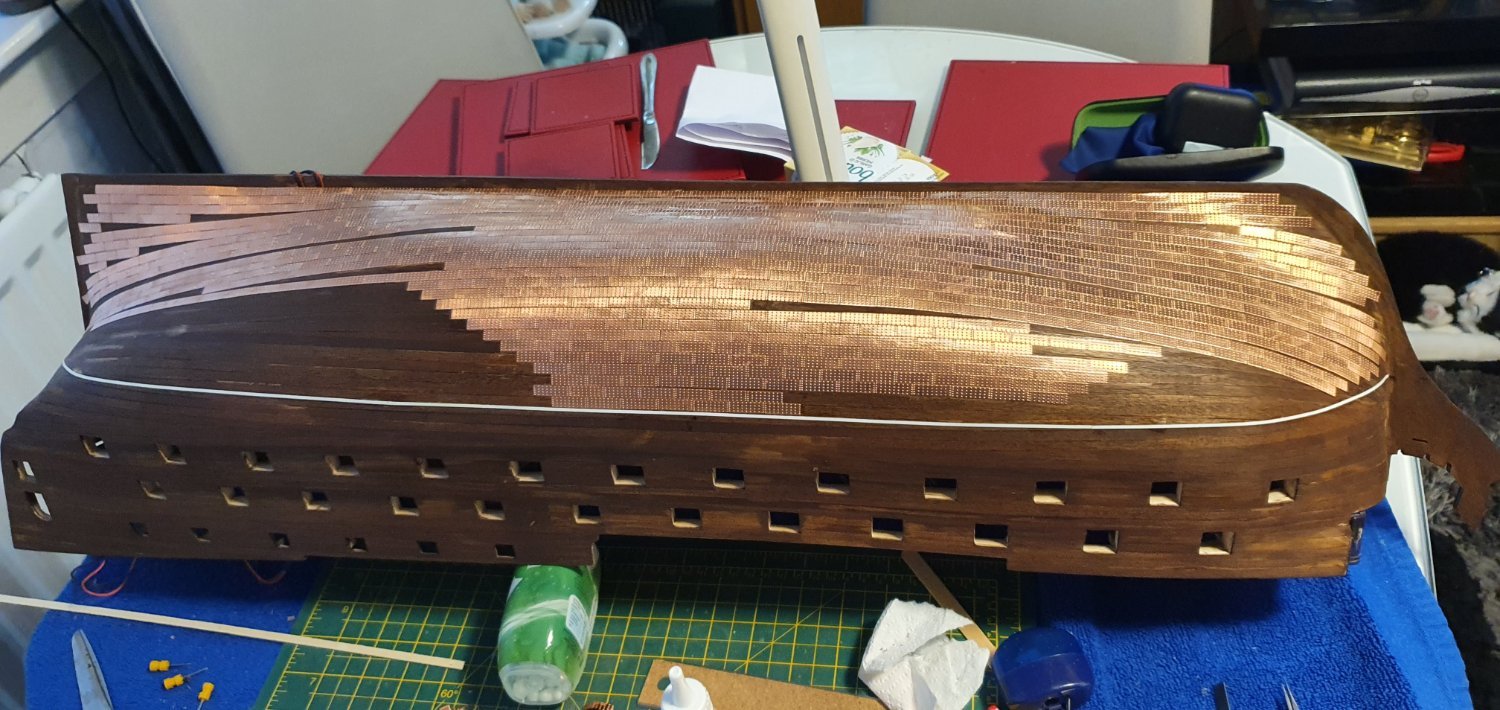
Well I've reached the half way stage at last,,,,,.. filling in the gore lines appears to last forever.... especially getting to the narrow strips... for the other half I'm thinking of doing it a slightly different way in trimming the full plates slightly on the ends where required to try and get as many full runs as possible


-
-
14 minutes ago, Kevin said:
i found that applying a salt wash over the tiles helped tone down the rivets and therefore not looking so prominent, as the build progresses they tend not to look out of place anyway, if i was to do my Victory again i would go for the copper tape
Thanks Kevin,, your plates look fantastic....
I've never heard of a salt wash... can you tell me what it consists of please
Many thanks
Jim
-
-
Good Morning all
I hope you all had a very nice Christmas
Many thanks for the information on the copper plates.... for the Agamemnon I think I'm too far along to change how the plates are being laid... I had looked at others who had overlapped the plates... I don't know what it was but something looked a wee bit off in the 64 scale.... it may have been a combination of the overlap and the rivets that didn't look quite right to me ( it may have been as you are saying they are a wee bit over scale) but as I normally build in 35th and 24th scale I thought it was just how I was looking at things,,,
I currently have Diana impatiently waiting in her box so this is one area that will receive more attention with her.... maybe with Allan's copper tape or with Mikes idea of slightly hammering the plates first....
Allan if you use the copper tape method would you make small indentations in the tape to simulate the nail heads and give the impression of their presence
Jeff/Henrik,,, I had noticed the small gaps being left by the rounded corners of the plates plus some small errors on my part,,, my plan for this is to give the area a wash in copper coloured paint to try and make them less obvious,,,,
One thing I am thinking about is lightly sanding the plates once they are on the ship to reduce the size and prominence of the rivets, however as the copper is very thin it would be a easy to overdo this and ruin it..... I will put together a small test section and try it,,,
do you know of anyone who has tried this in their models and what the effect was
Many thanks for the information and help
Jim


- Henke, mort stoll, boris279 and 1 other
-
4
-
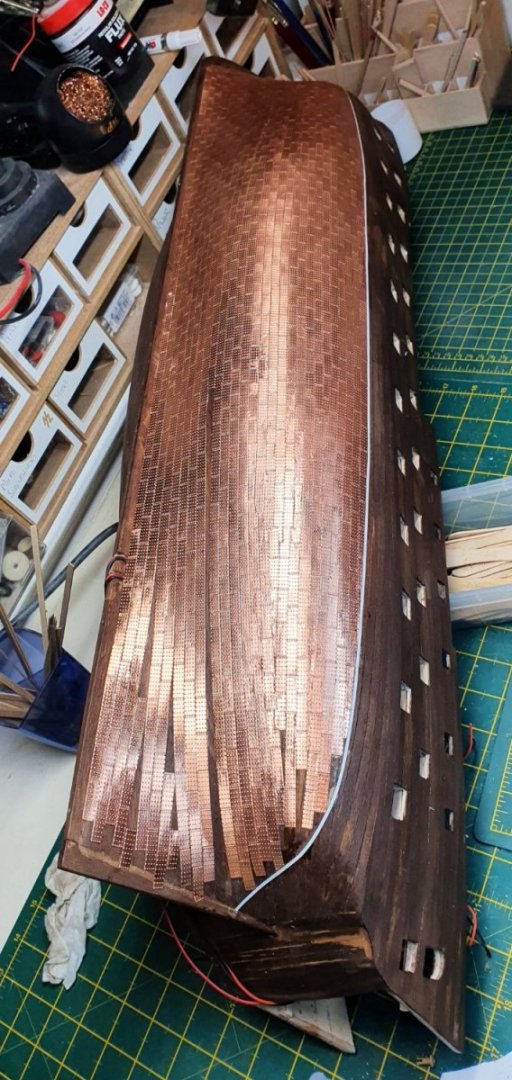
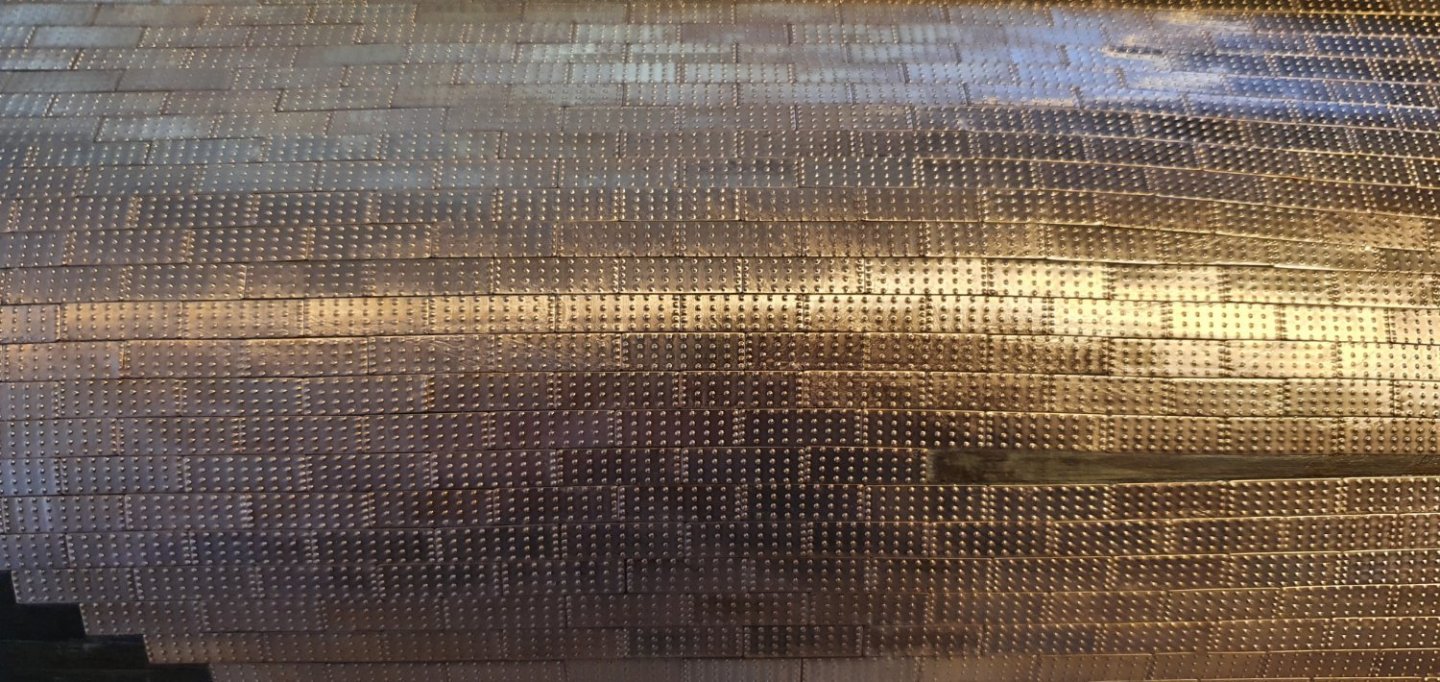
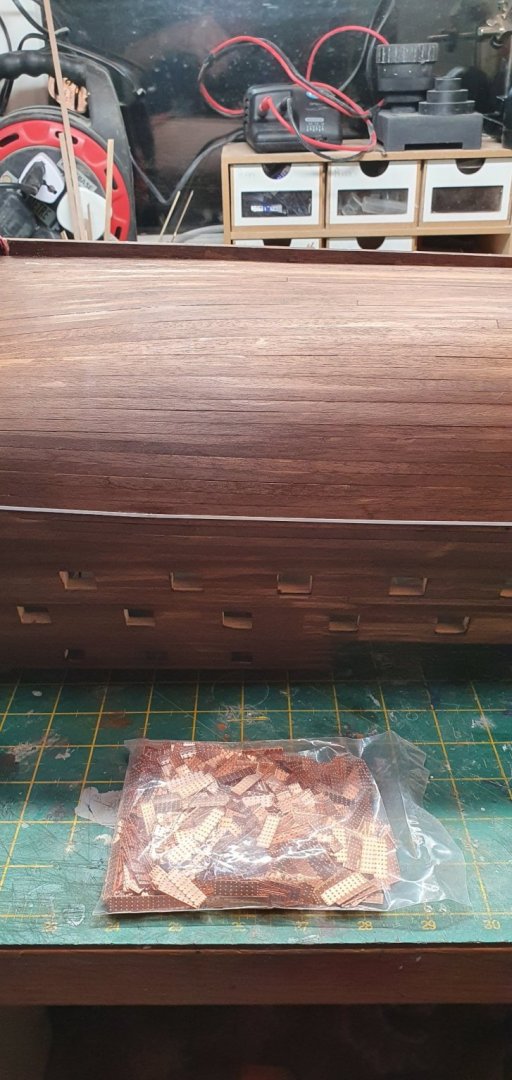
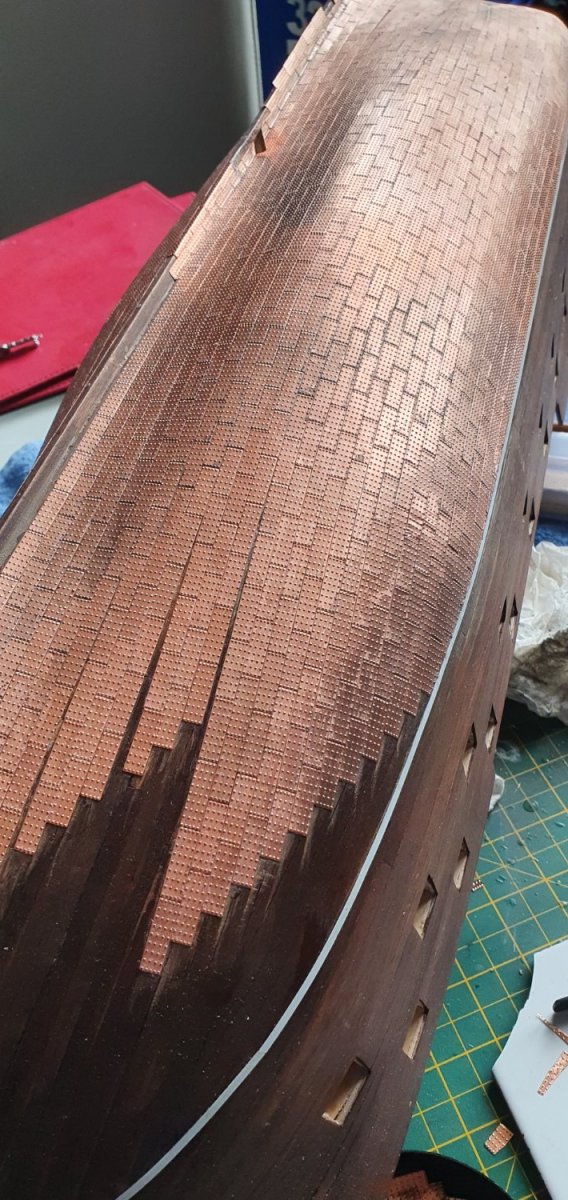
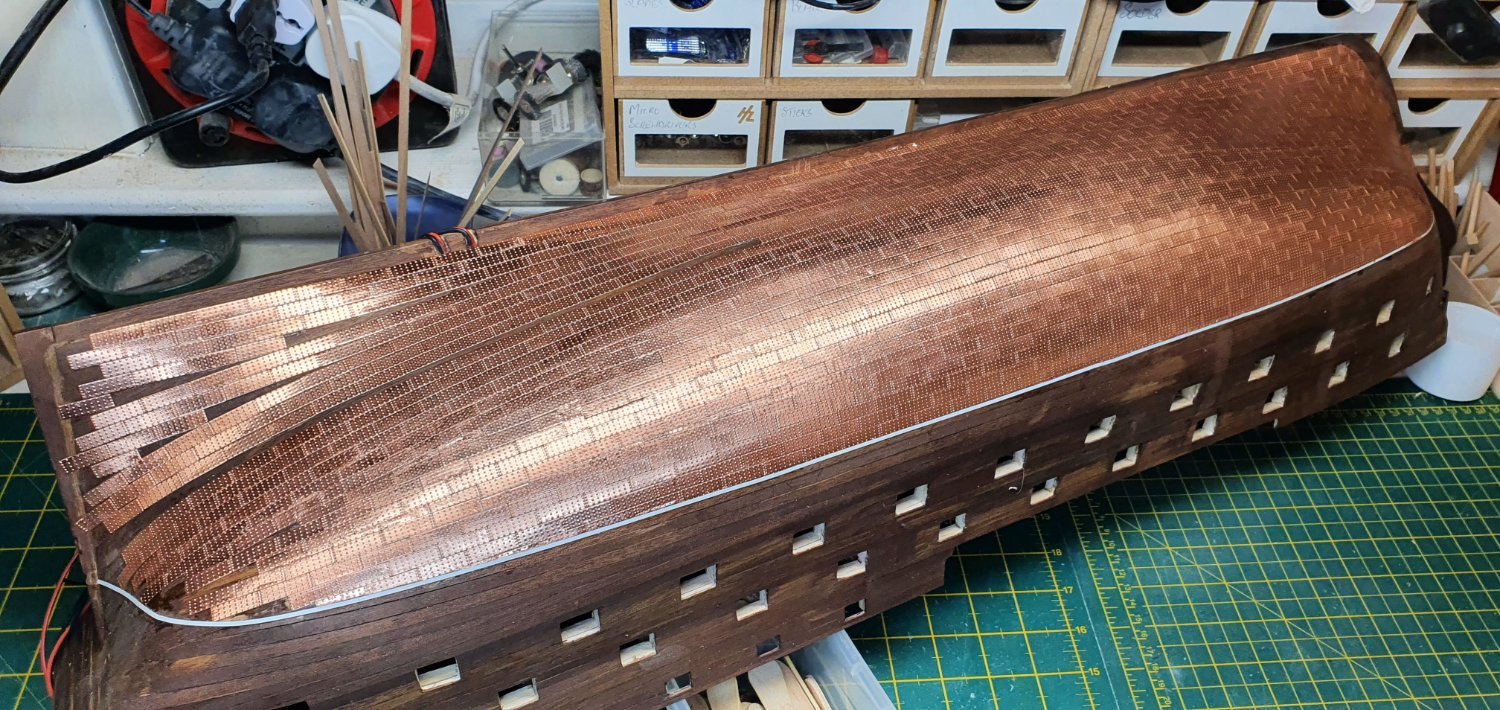
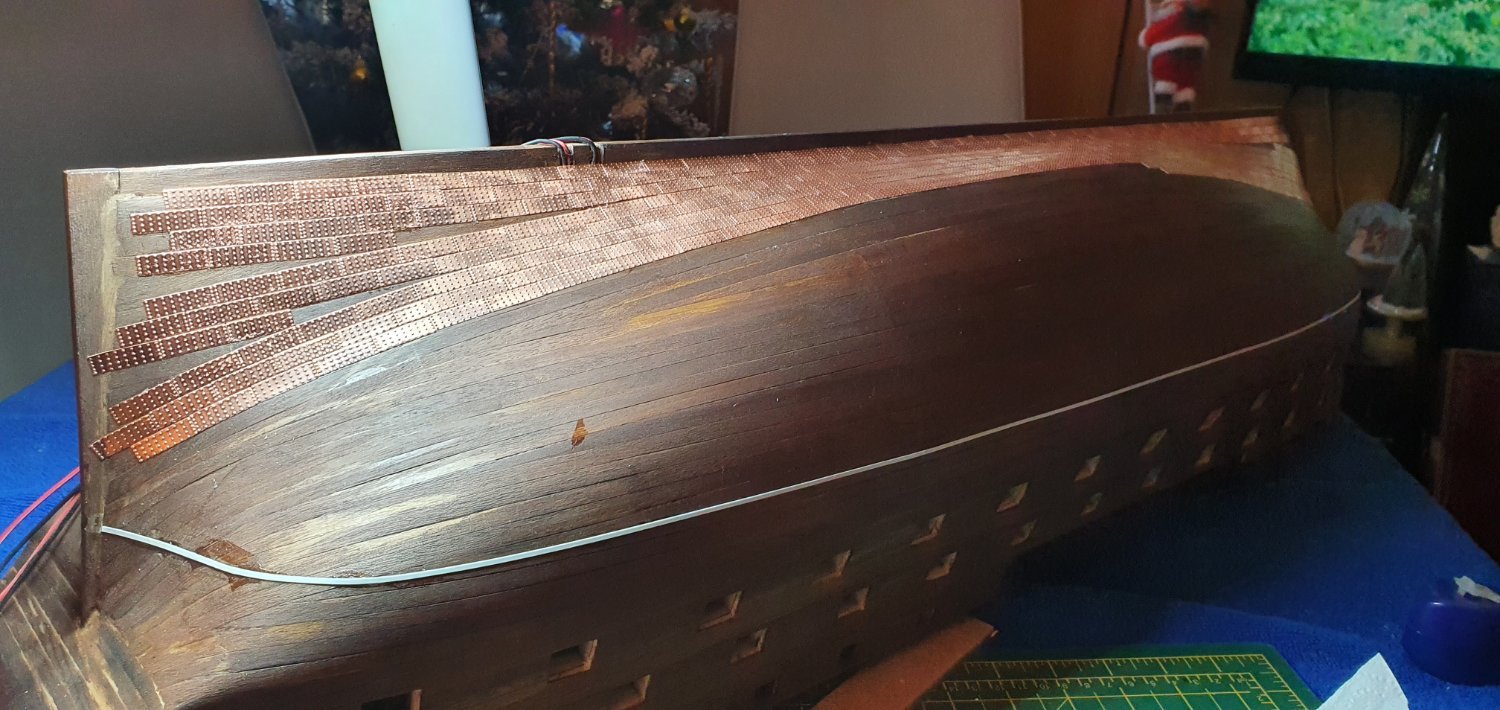
Slow progress on the coppering,,, this is 2 days work......
After some errors in the early stages I'm finding it better if I work on 2 rows together working from the central point, to try and get the natural curve with the hull....
What I think is working for me is I use a spare plank piece to get the curve from the central sections and draw a line about 2 inches long then use that as the guide to start the 2 rows..... end result will tell I suppose
Normally I'm in the model room working away whilst my wife is watching her soaps on TV...... yesterday I suggested I sit at the table doing the coppering (as its not a real messy job) and keep her company whilst she's watching them,,,,,,, I don't know what part she regretted more after all the comments I was making about all the stupid things they put into these programmes.....
I'm now barred from the room during these times.... I wonder if that means I can go to the pub whilst she's watching them and I'm not working on a model


- Landlubber Mike, boris279, Henke and 3 others
-
6
-
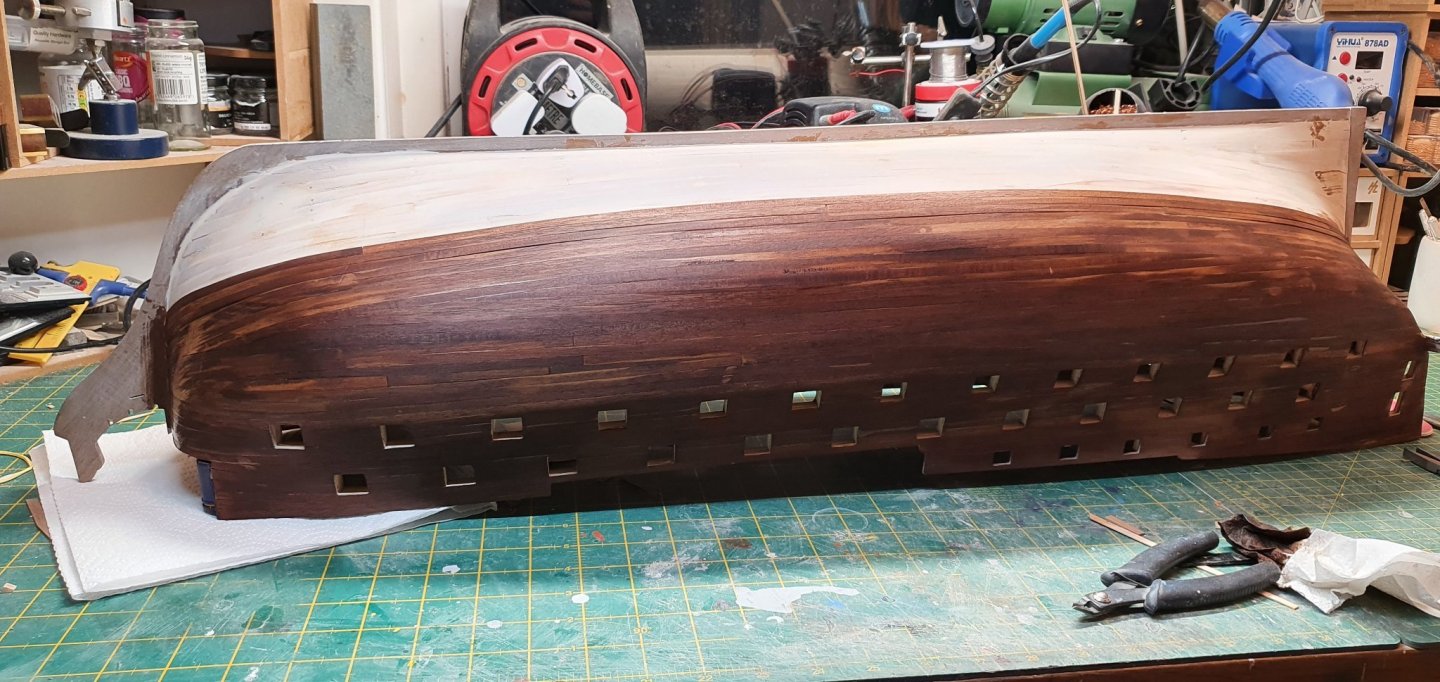
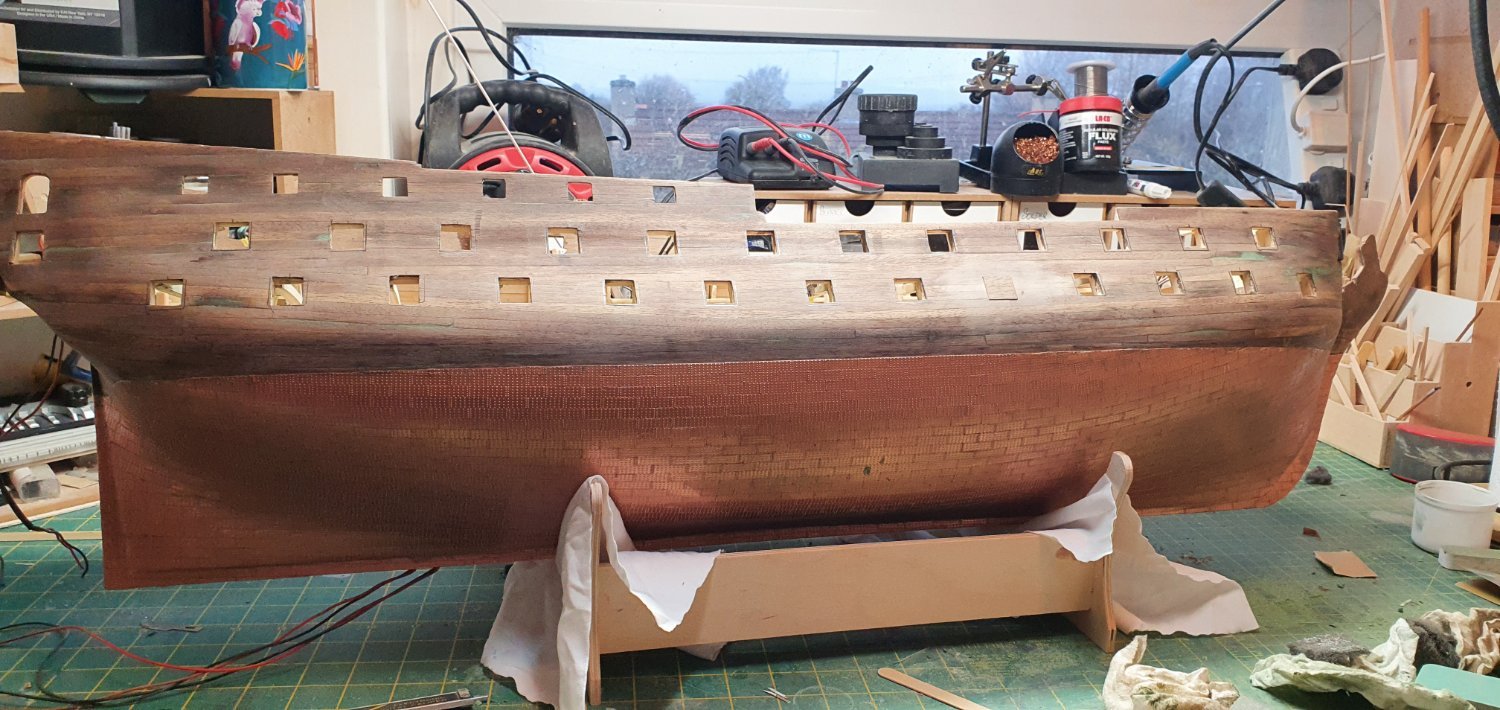
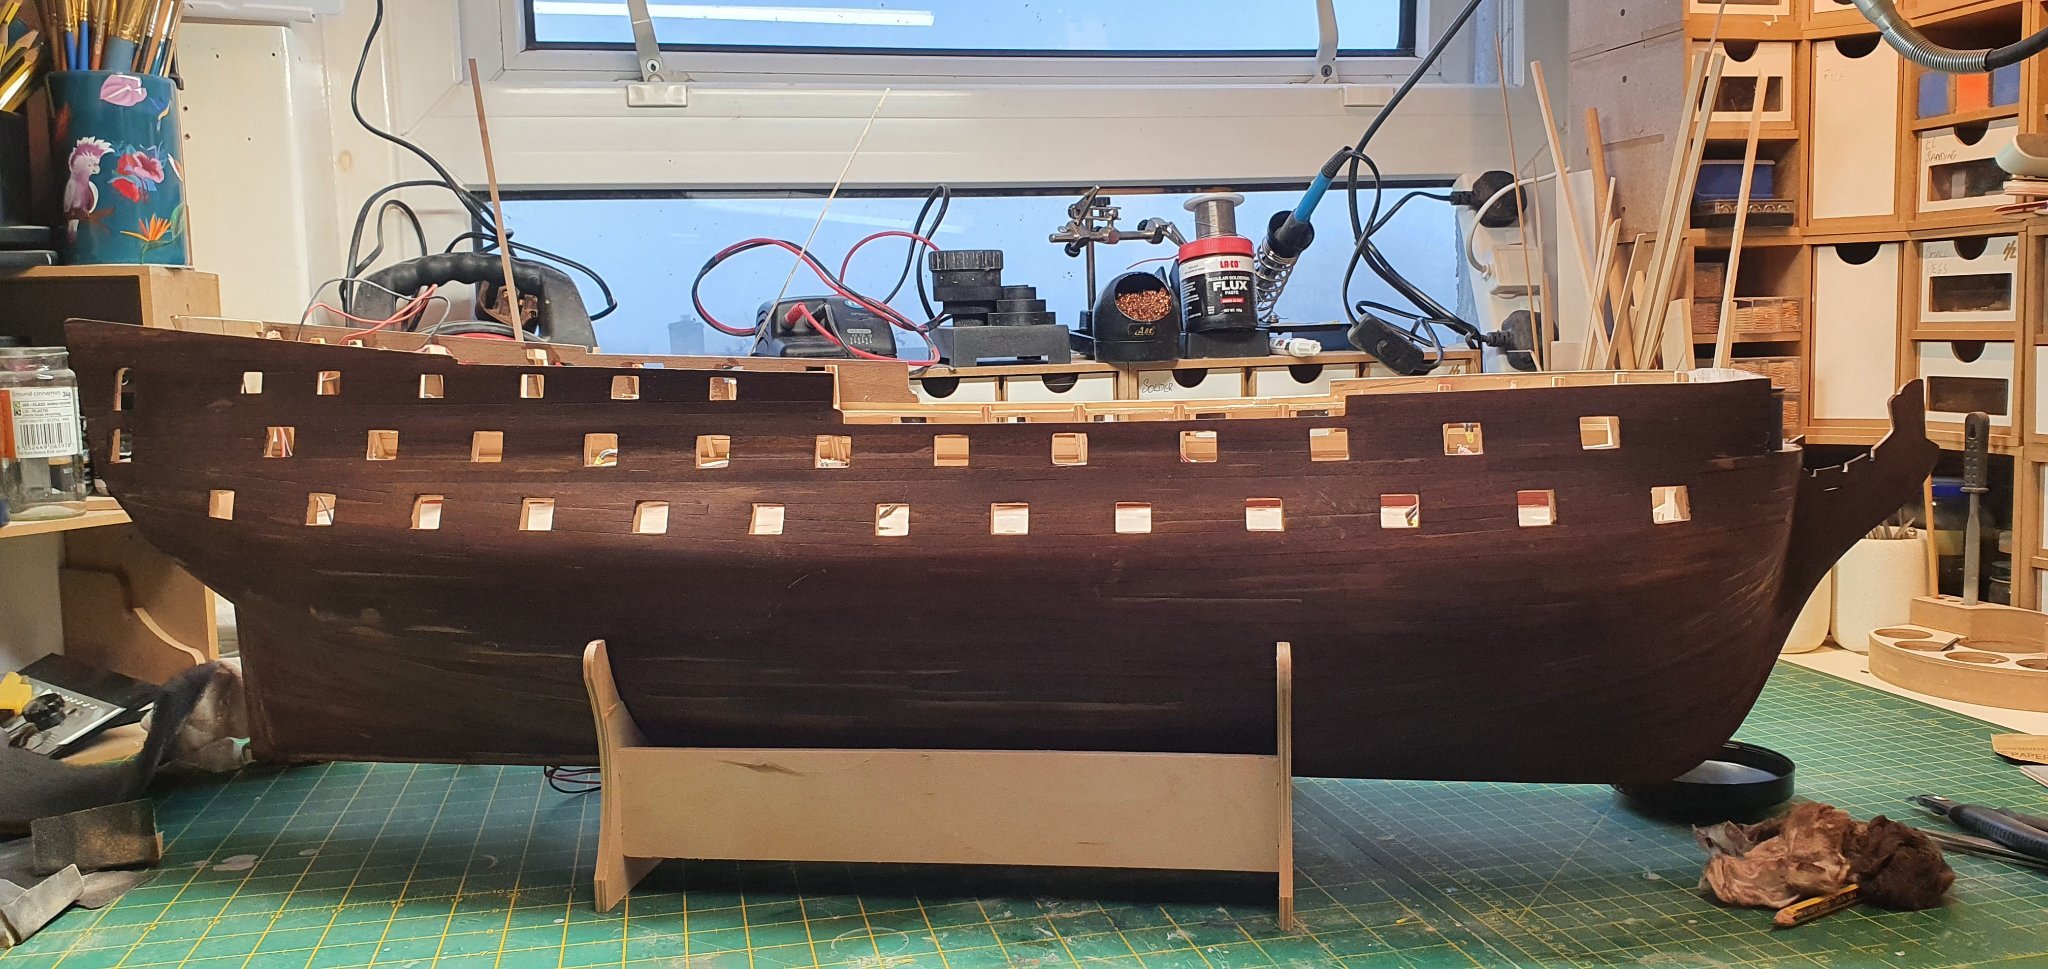
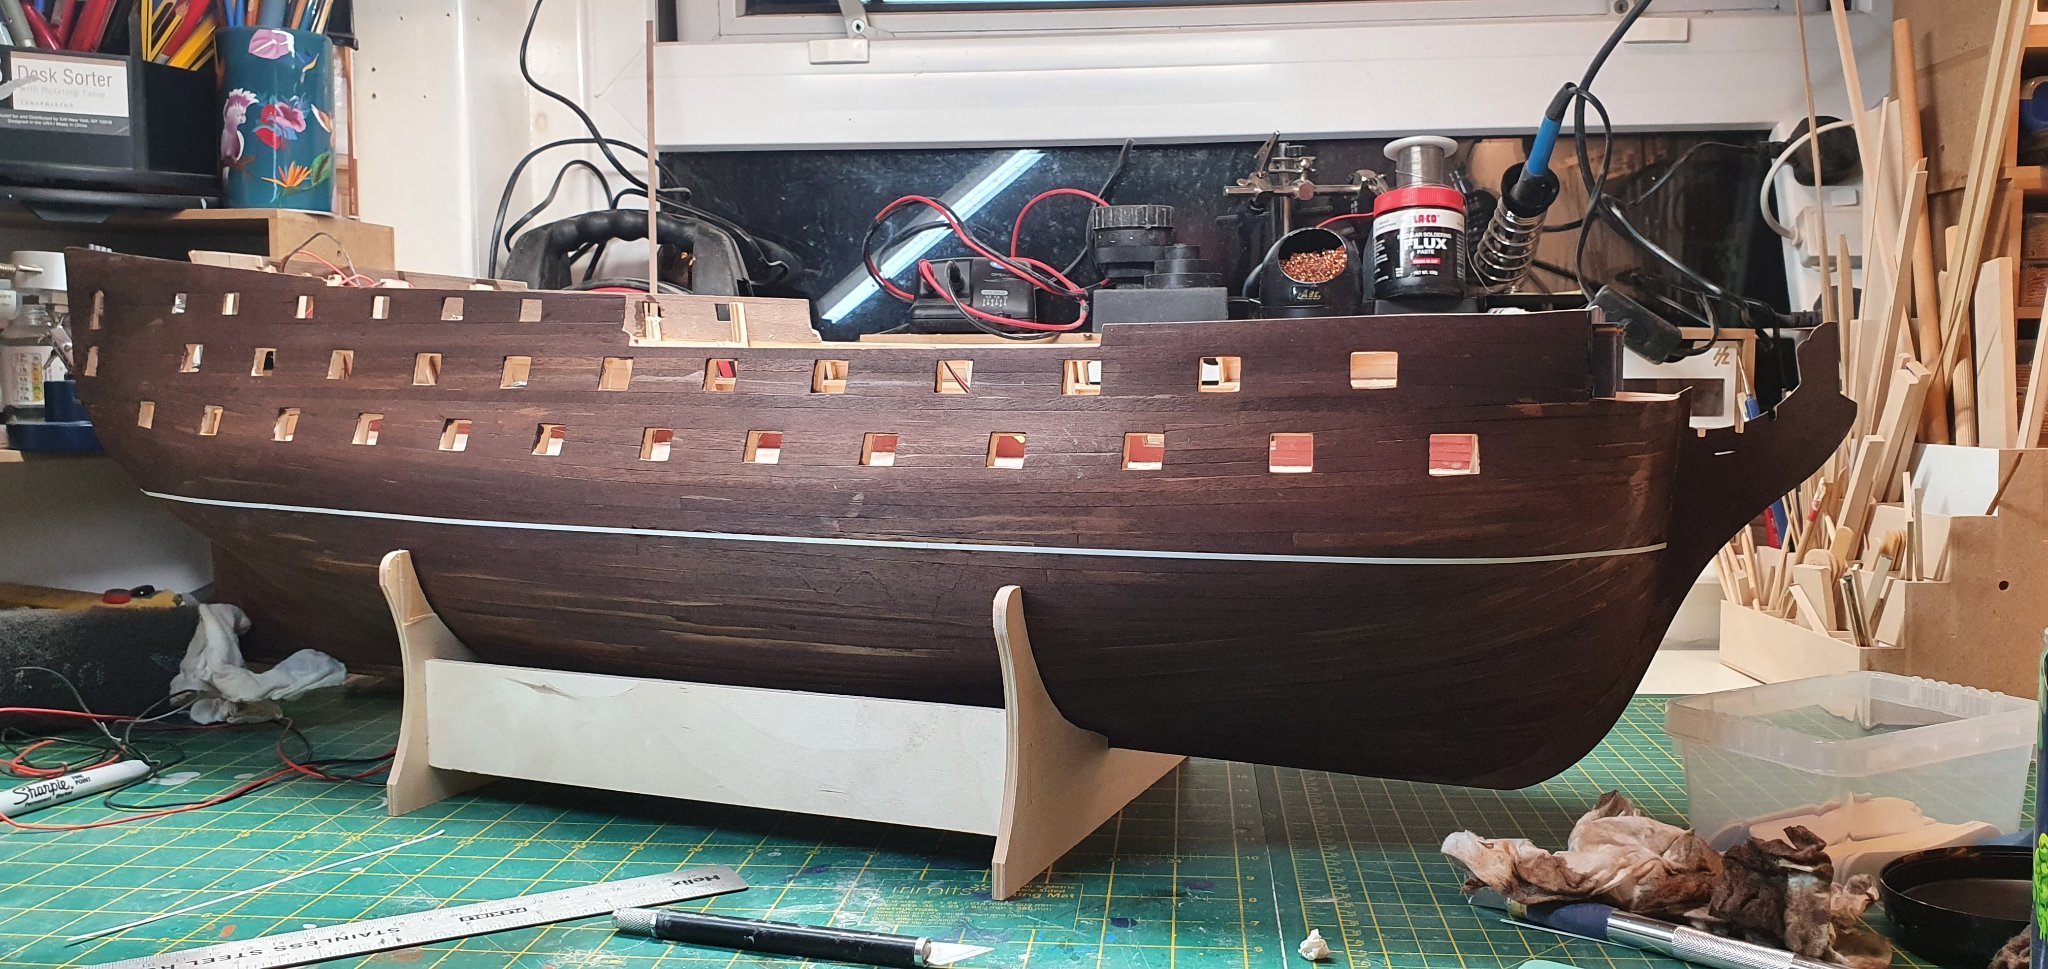
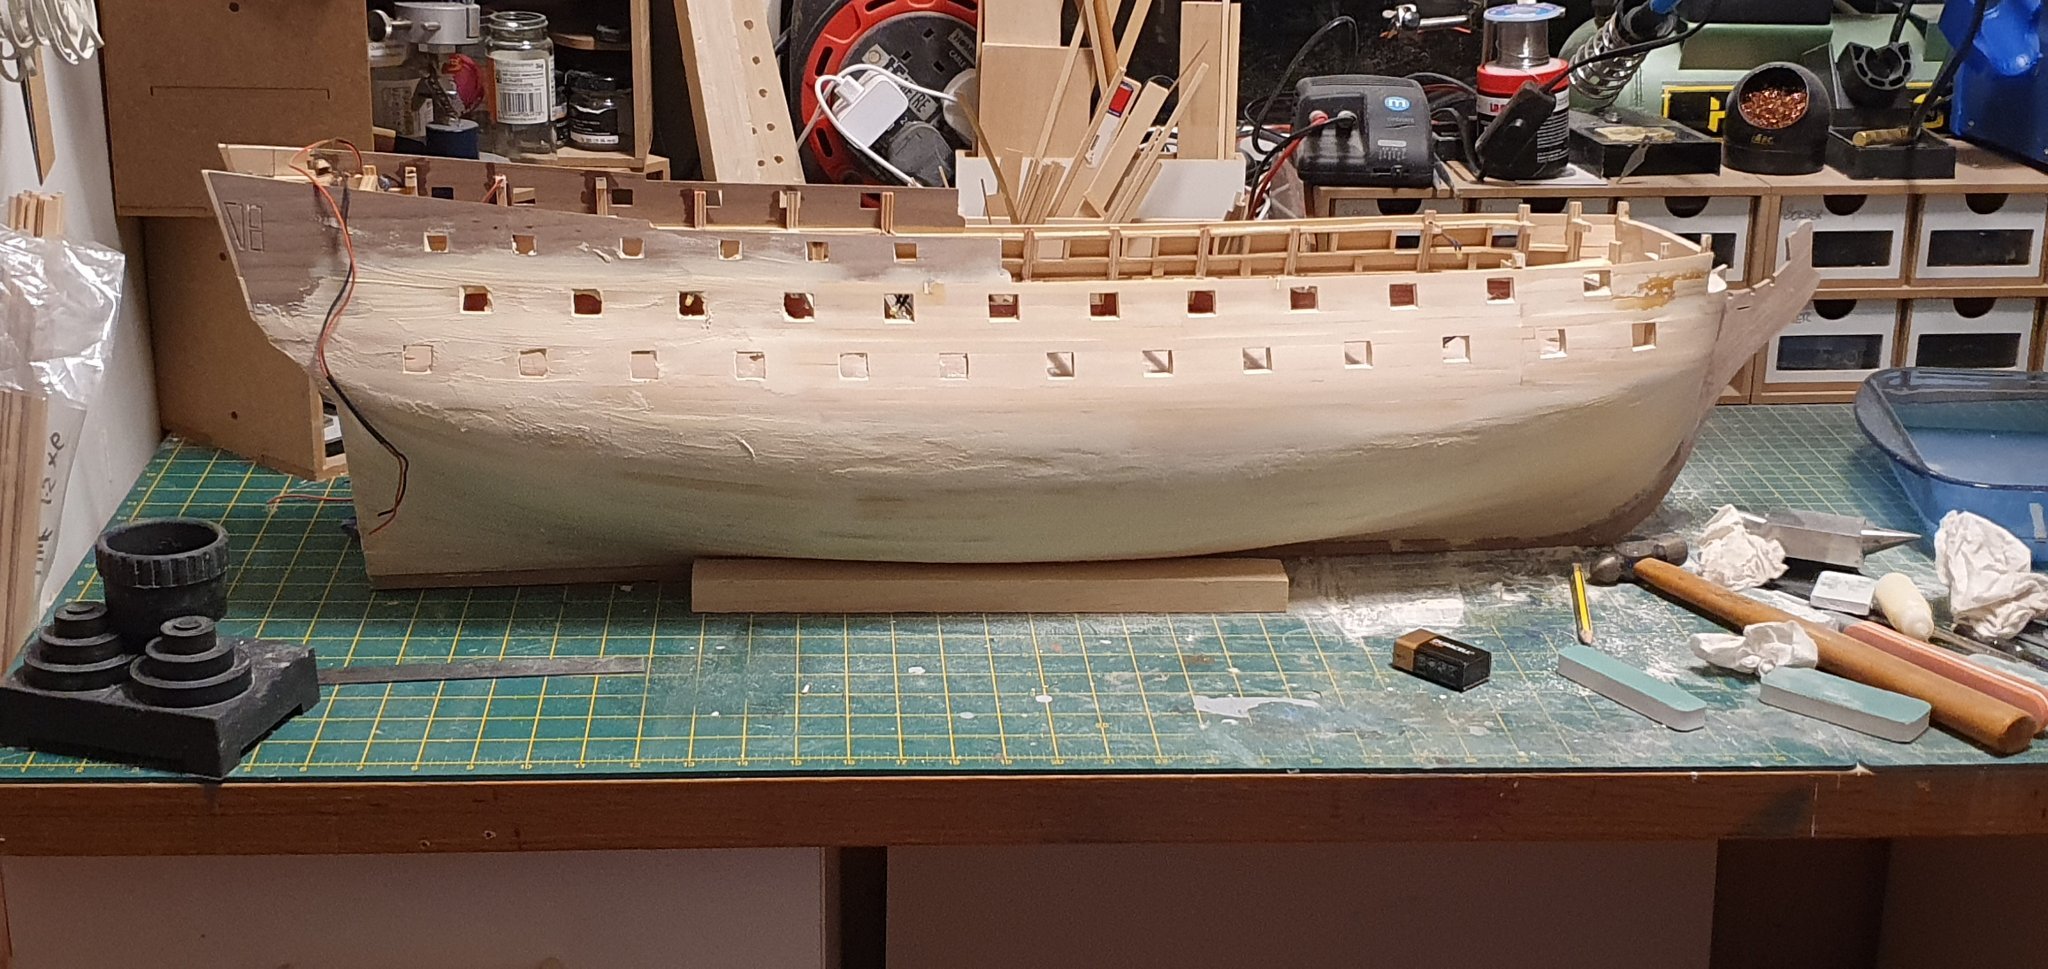
Planking all complete,,,( I hope)... after sanding it down I put a stain onto it,,, I'm hoping this will help when it comes to painting,,, water line marked up and started the 5 minutes job of putting on the copper plates.....
I've been wrestling with the notion of weathering her, however as this is by first build and I've never had to dirty up a wooden model I'm more and more leaning towards keeping her fairly clean,,,, she will also be sitting in a basic dry dock when finished


-
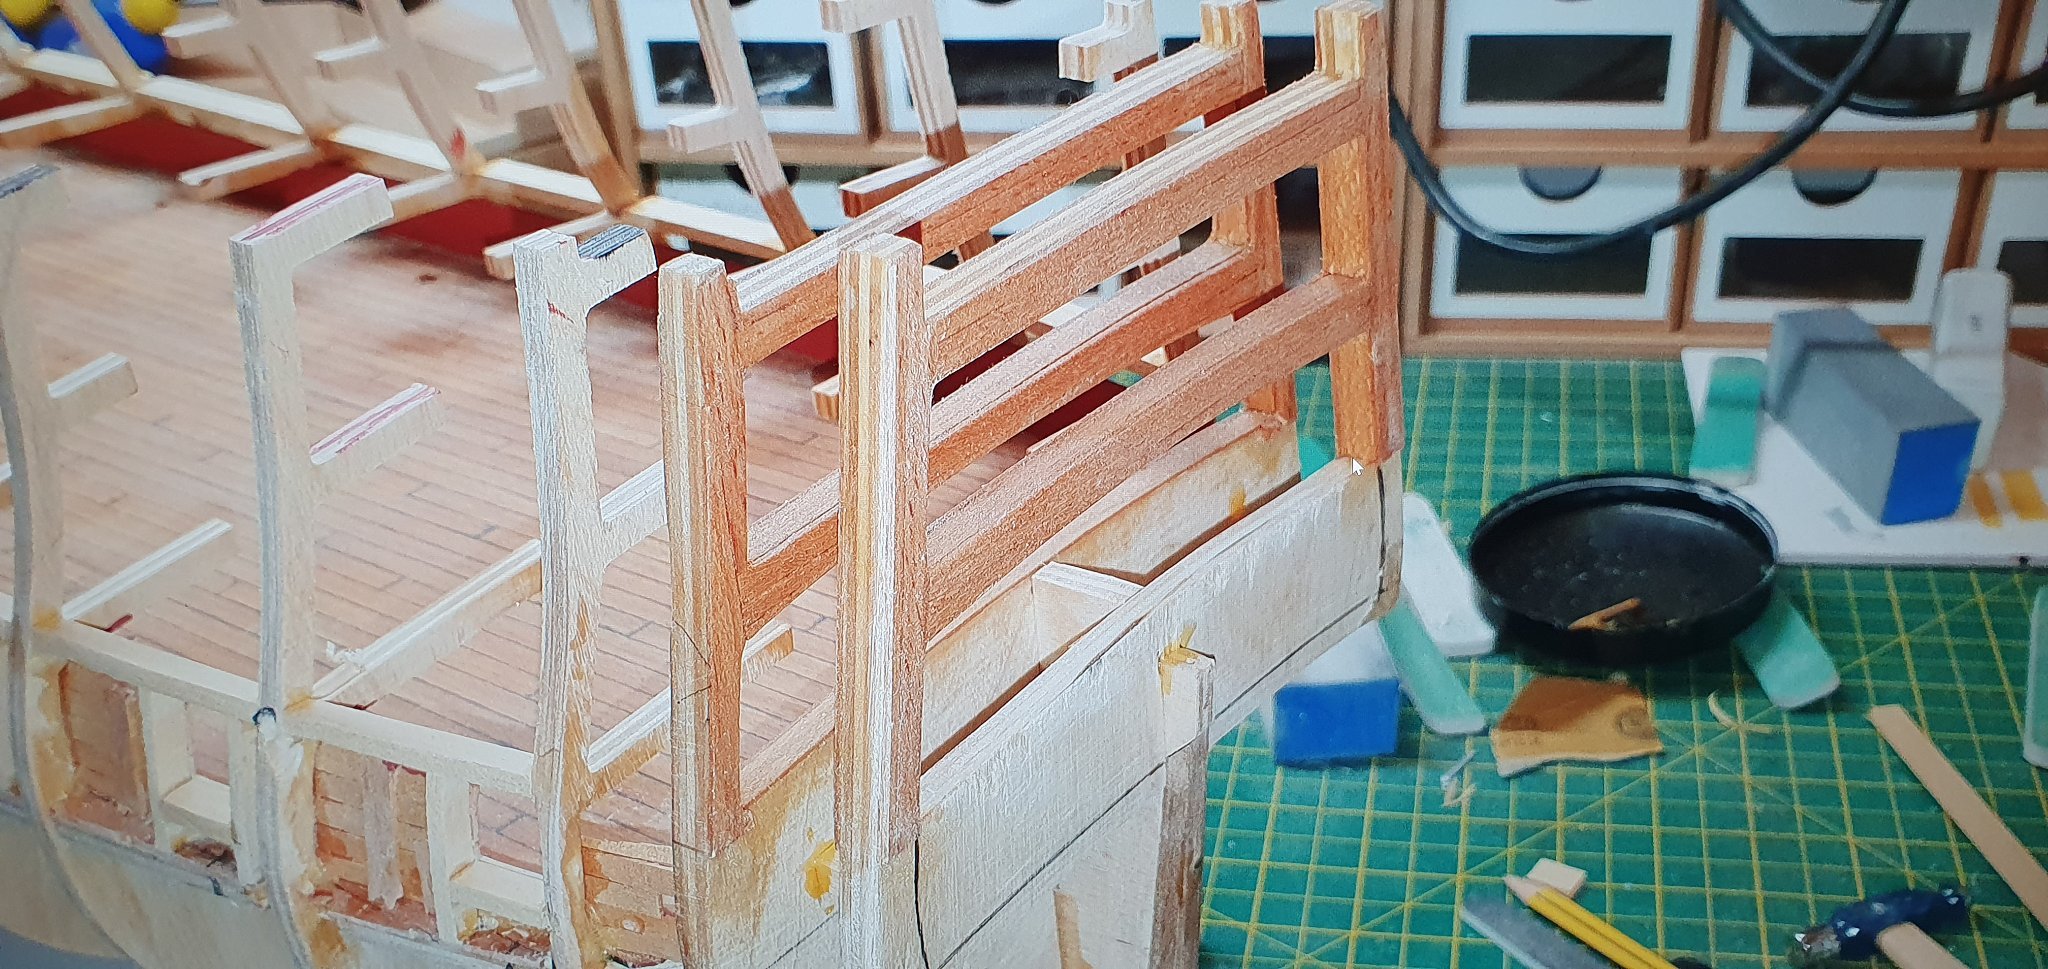
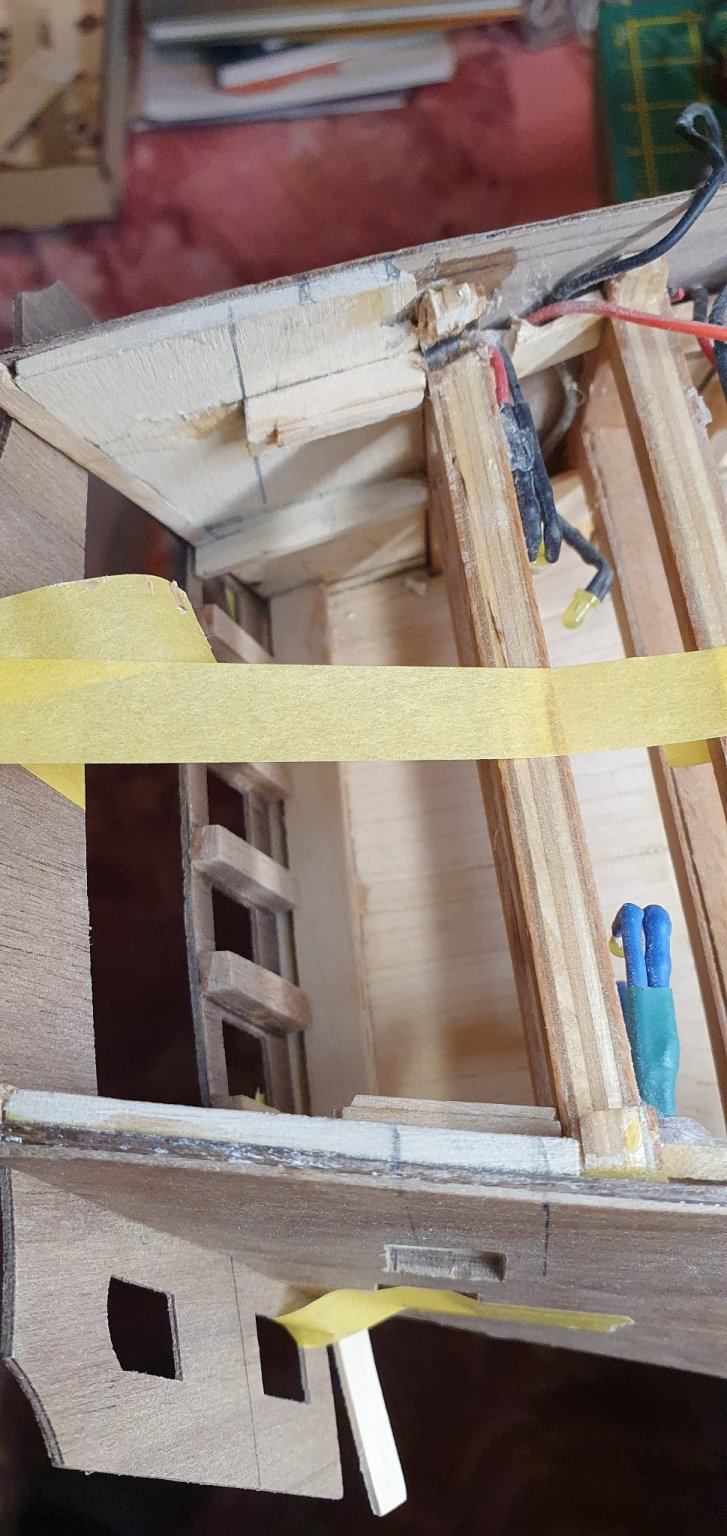
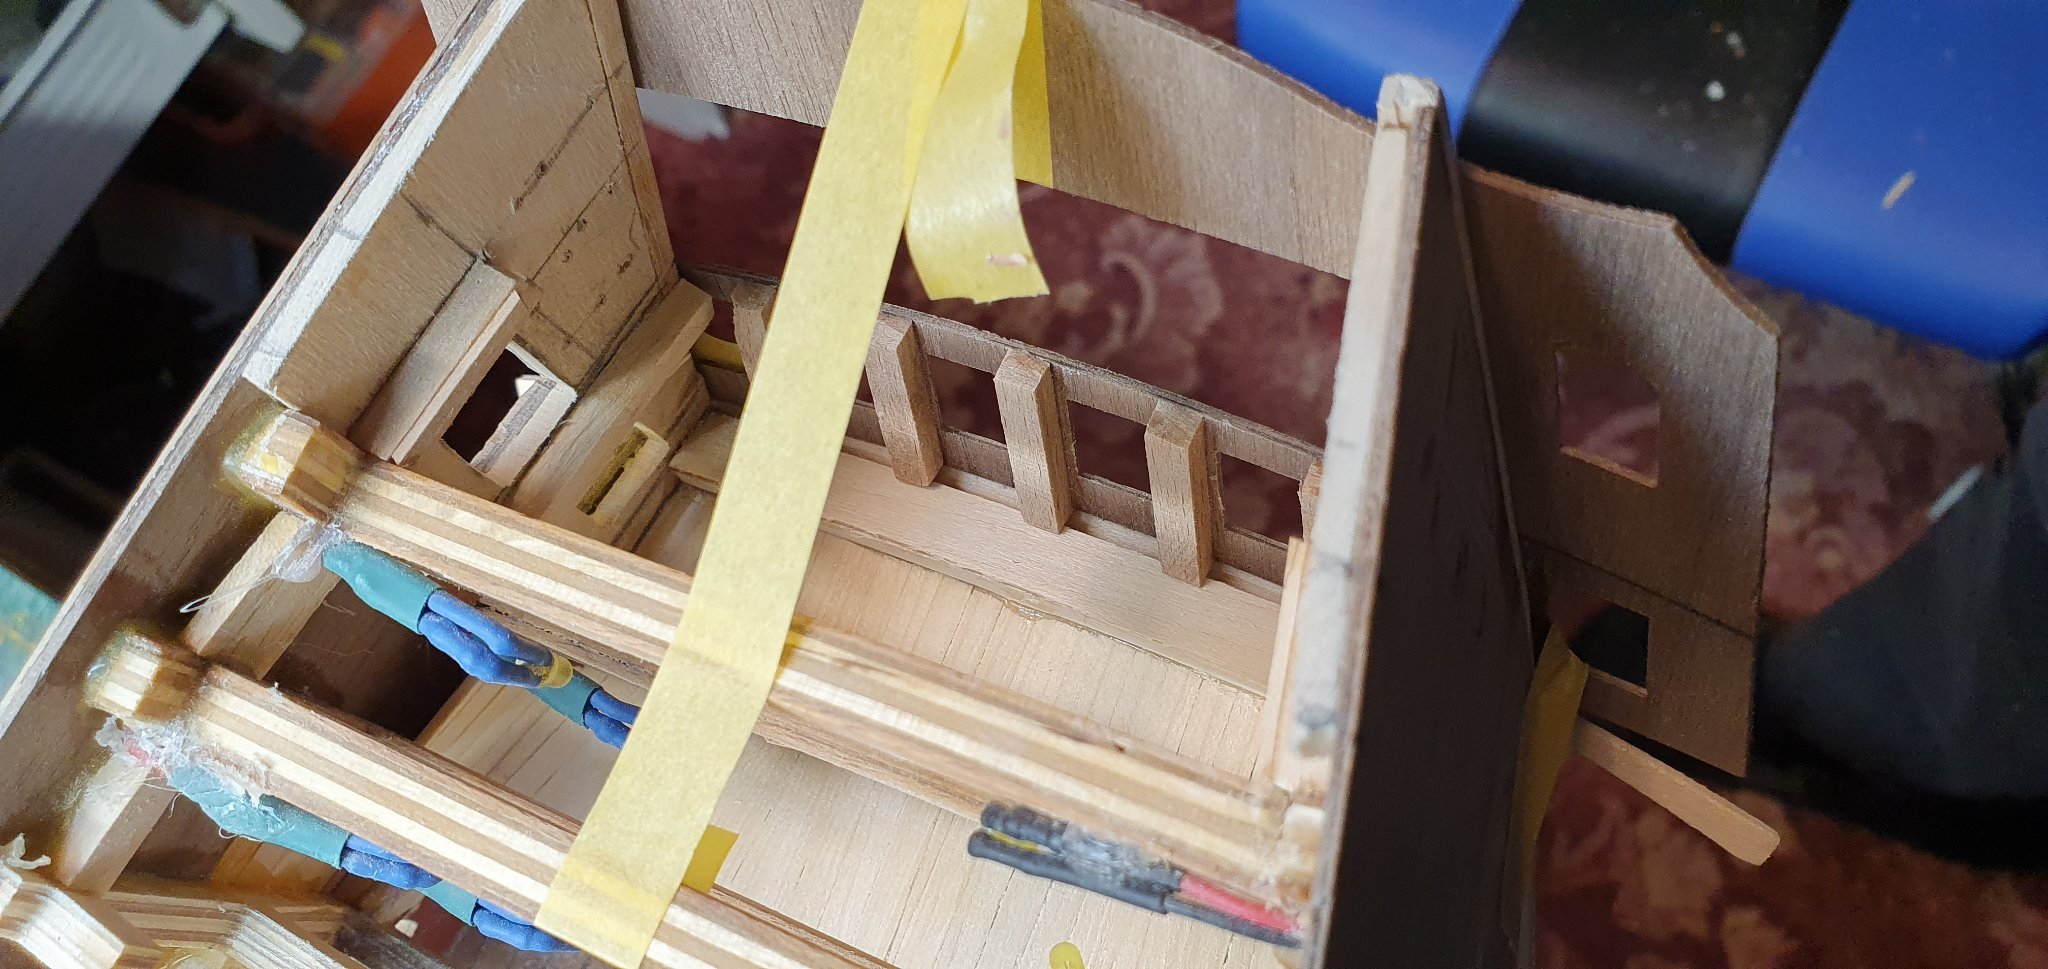
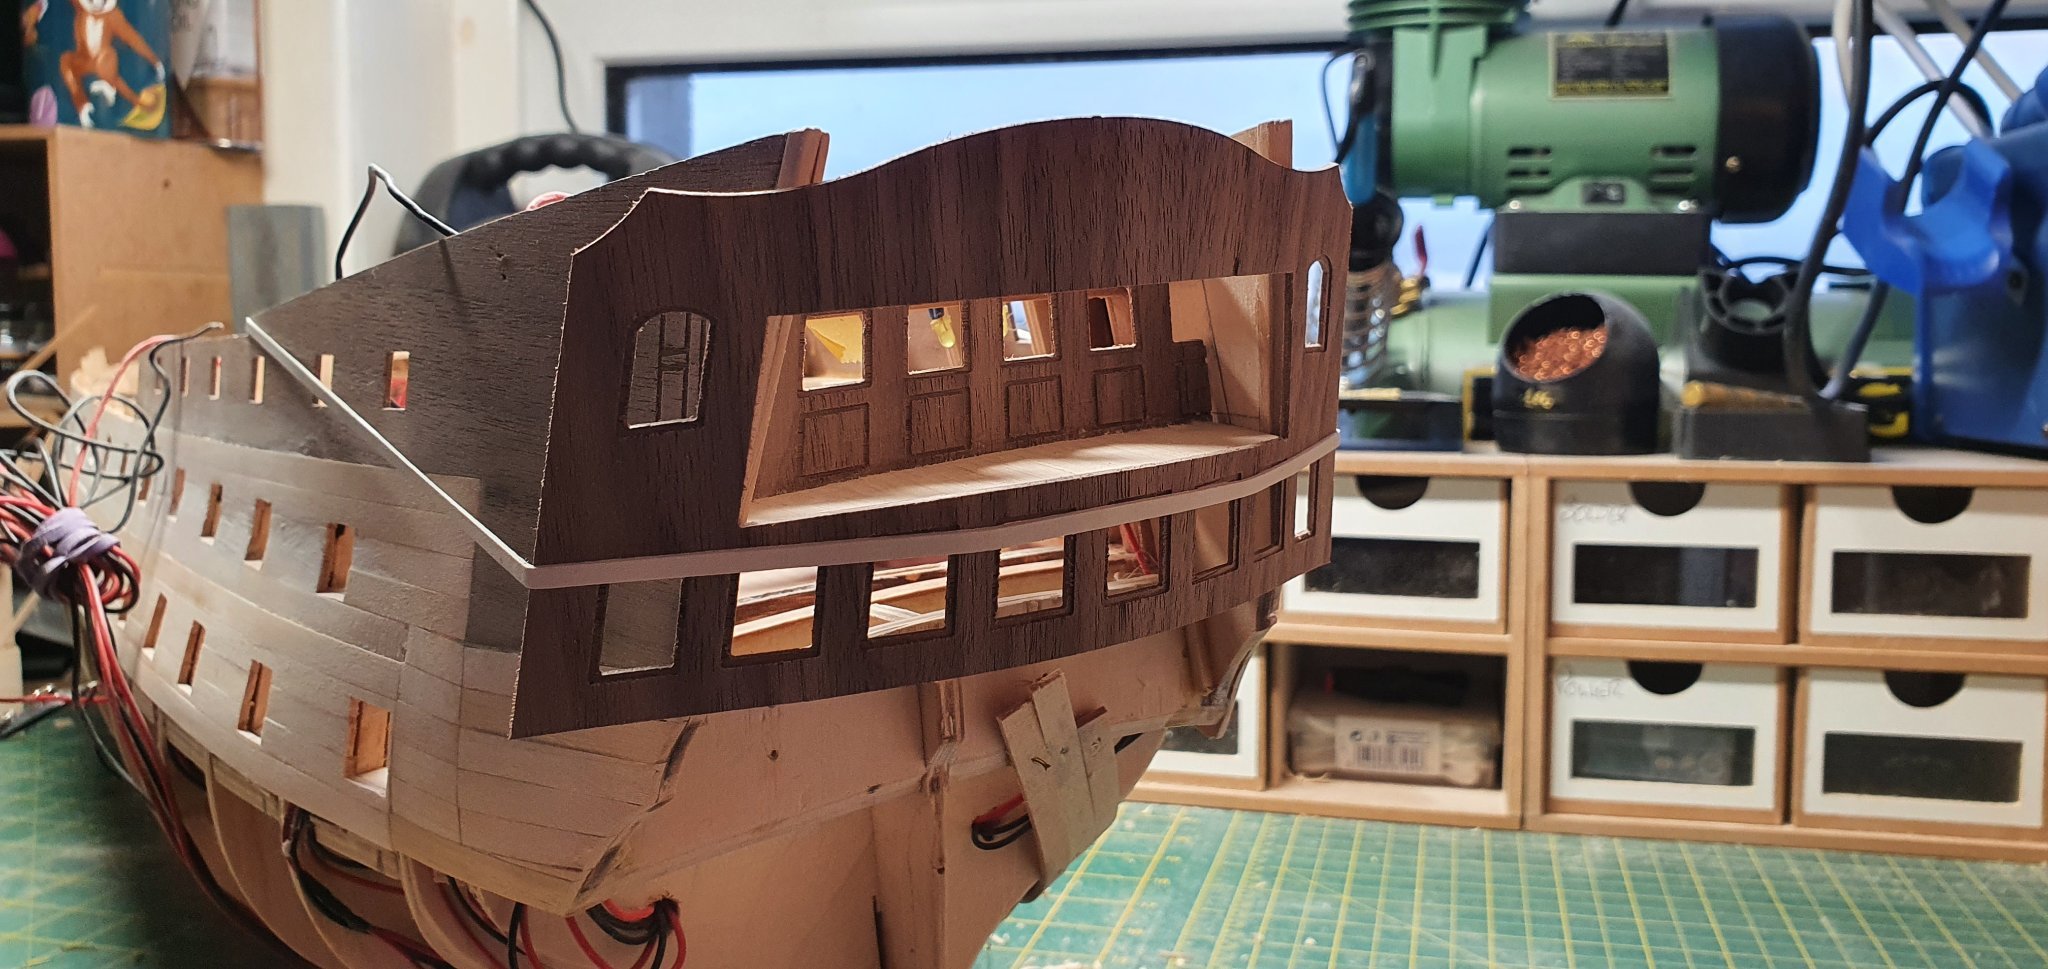
Started scratch building the cabins... just the basic at the moment, as the majority of the work will be carried out after the planking and copper plates are completed...


-
Excellent job on the Wales,,, and I agree with Mark,,, Personal artistic flair should also be incorporated in models,,,, after all it is yours and should be one of a kind
- hollowneck and mtaylor
-
2
-
14 minutes ago, mtaylor said:
One would have been for senior officer's use depending the ship and time period. On some, junior officer's heads were littterally at the head of the ship. On many ships, one gallery was for the Captain's exclusive use... some used it for a private office. As I said, a lot of variation and depends on the ship. Be a bit more specific to era, nation, and better which ship and answers can be more specific.
Many thanks Mark
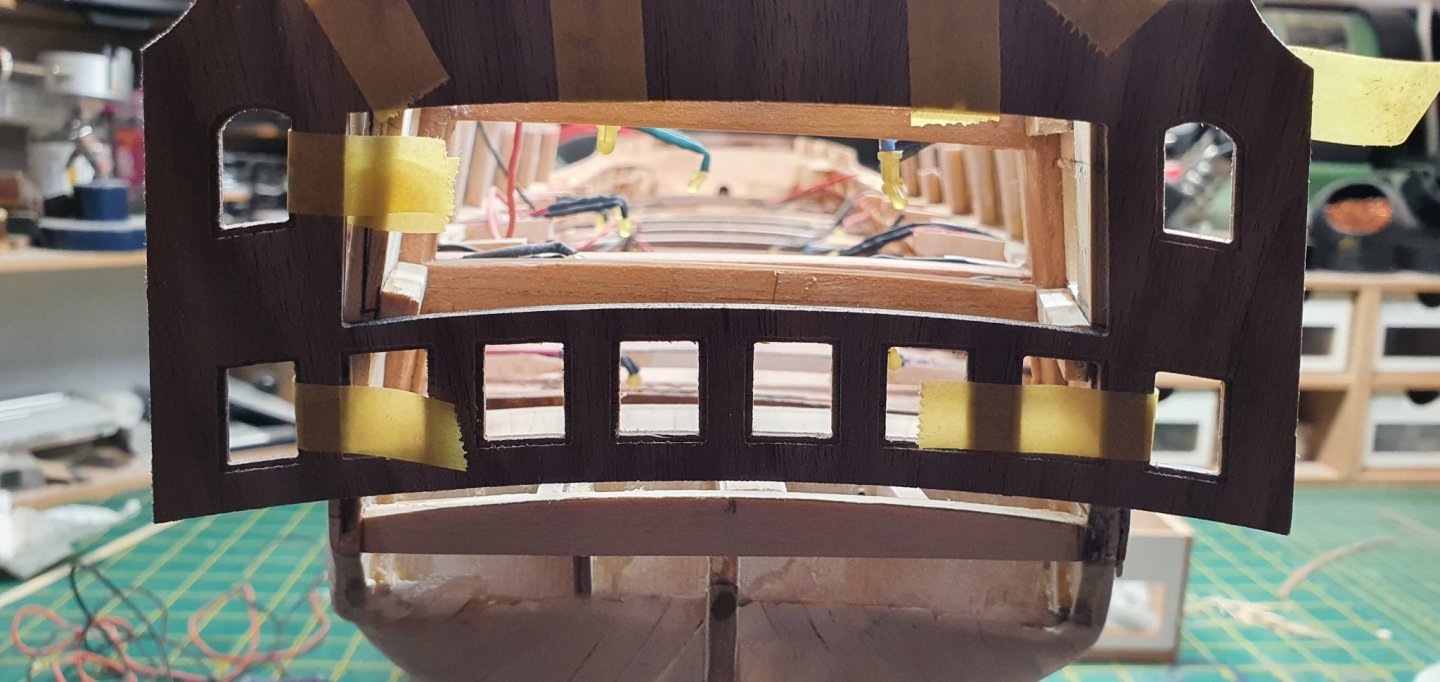
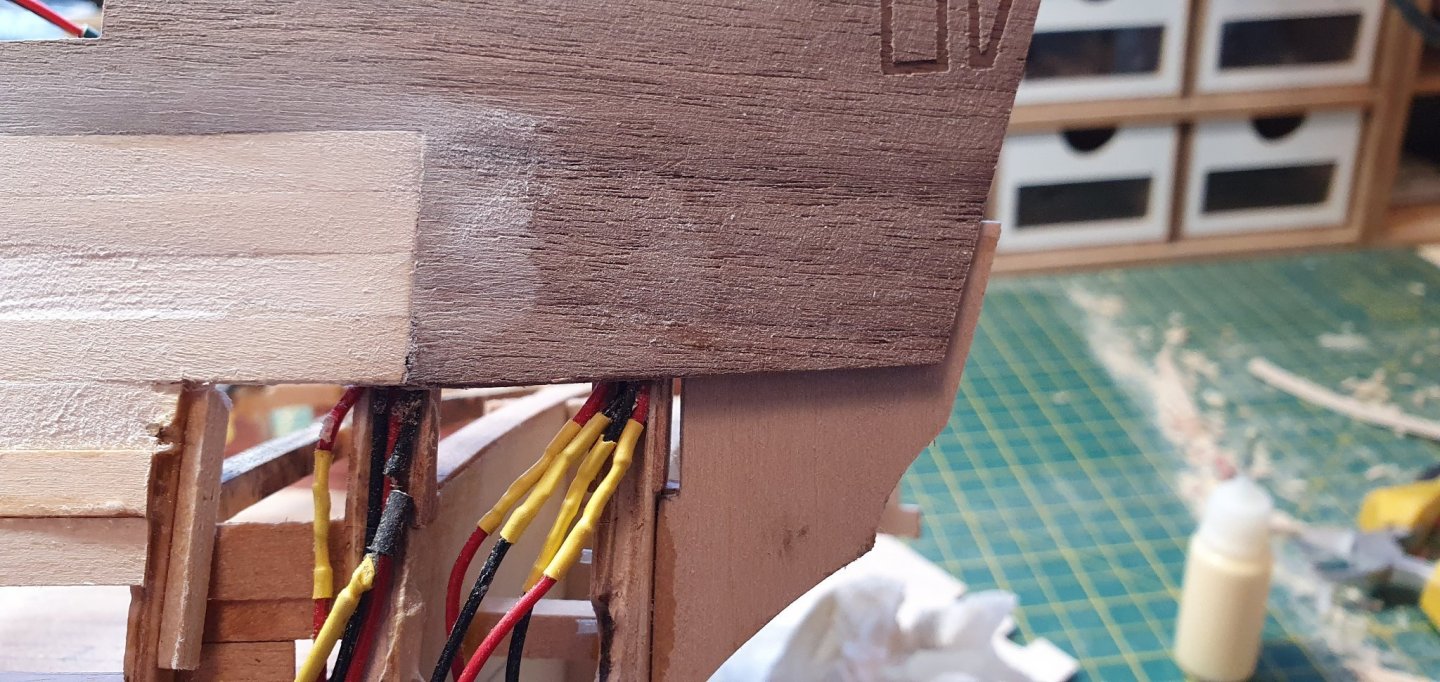
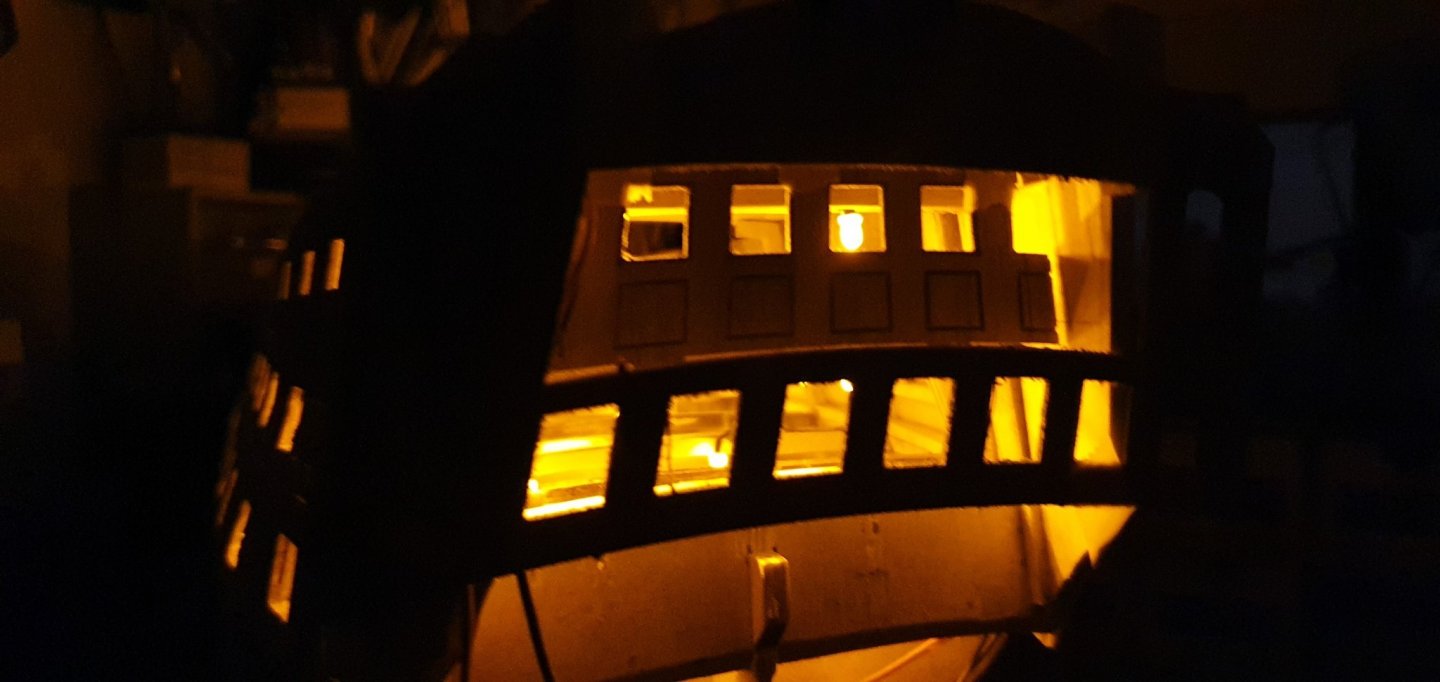
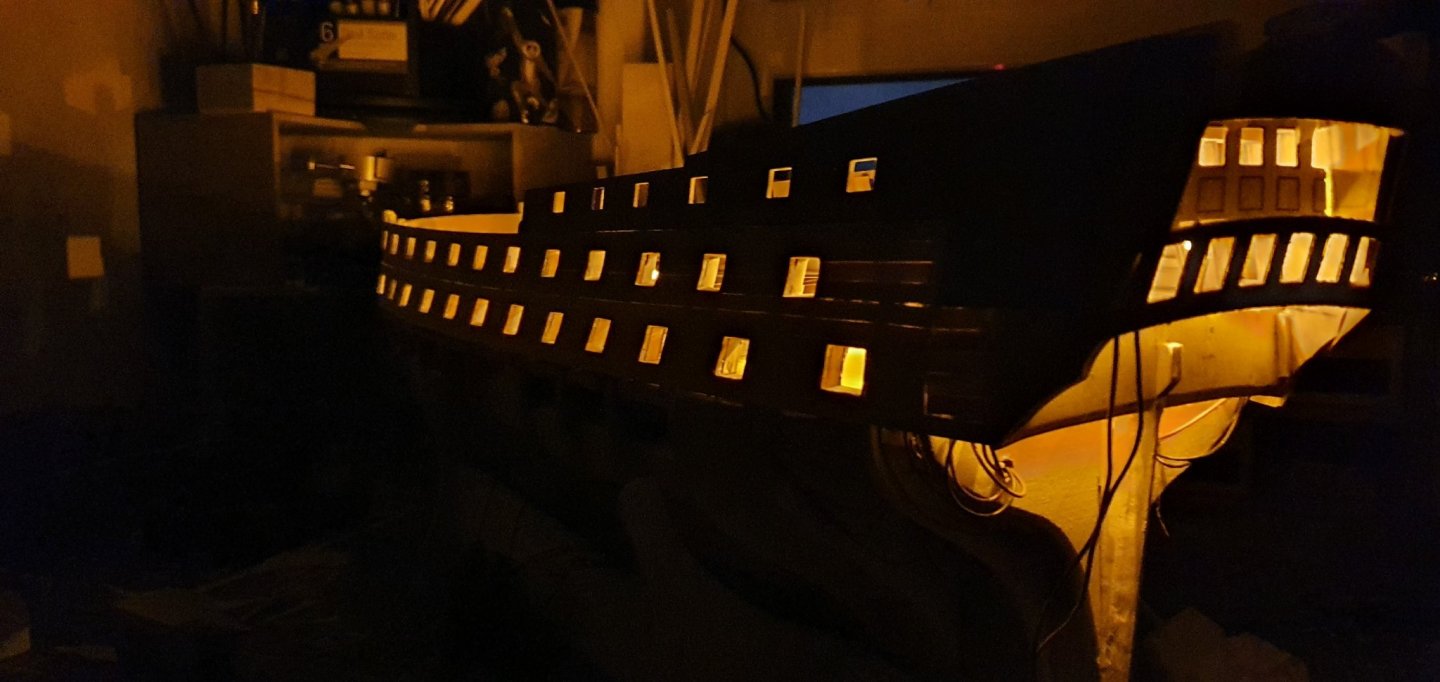
I'm currently working on HMS Agamemnon 1781... I've put led lights into it and am currently scratch building the cabins at the stern.... my plan is to have open doors leading to the Quarter Galleries so the light shines through...
I can see the galleries level with the upper gun deck having a toilet on each side,,,, but didn't think the Captain would require 2 so I thought it may have had another use
Many thanks
Jim
-
-
17 hours ago, allanyed said:
Hi Jim,
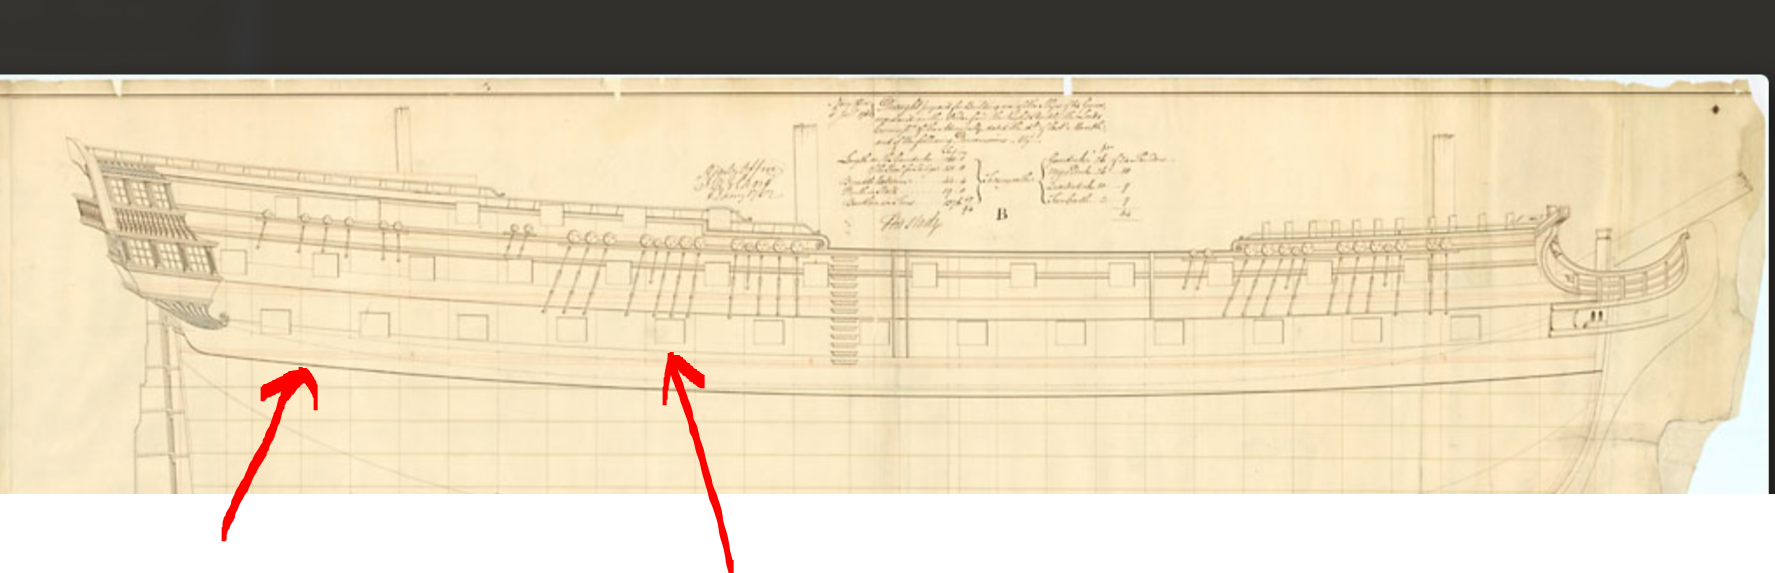
That drawing looks like Agamemnon 1781. Can you share how did you came to find this is from 1876? The reason I ask is that the British were building ironclads by 1876 and the vessel in the plans is surely 18th century, not late 19th century. Your signature has you building the Caldercraft Agamemnon which is the 1781vessel so a little confusing (or maybe a typo 😃)
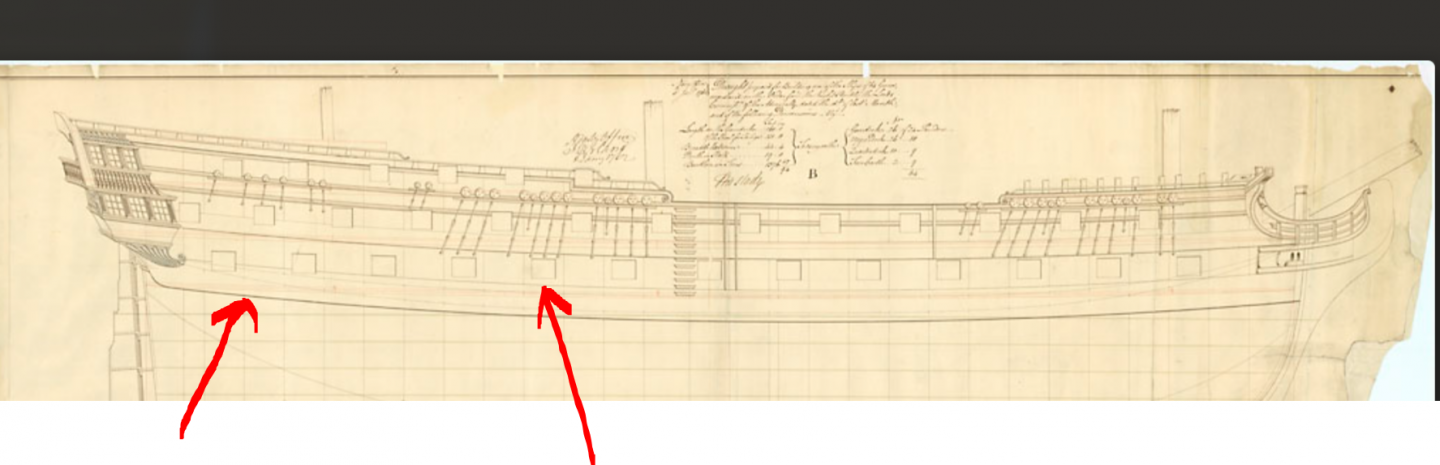
Mike may be correct, but assuming this is Agamemnon 1781 the arrows might not be the top and bottom of the wales. The bottom arrow looks to be pointing at the wales but the top arrow is pointing at what may be the black strake, which is not part of the wales as it is not as thick as the wales. The main wales of a 64 like Agamemnon in 1781 were 7" thick and later in the century went to 8" thick. The main wales on a 64 were 4' 2" broad (0.78125" at 1:64) The strake on top of the wales (which I believe is also known as the black strake) was 6.5" thick and 16" (0.25") broad. The planking above this strake was 4" thick. These figures are from both The Shipbuilder's Repository 1788 and Steel's Elements and of Naval Architecture 1805. As an FYI, the Establishments up to 1750 gave a thickness of 7" for a 60 (there are no 64's in the Establishment scantlings). The strake above the main wales in the Establishments was 5.5" thick.
Allan
Hi Allan
Sorry senile moment... I meant 1781.... haven't a clue where I got 1876 from... that was a couple of years before I was born....
Many thanks for all the other very useful information
Jim
- Kusawa2000, allanyed and mtaylor
-
3
-
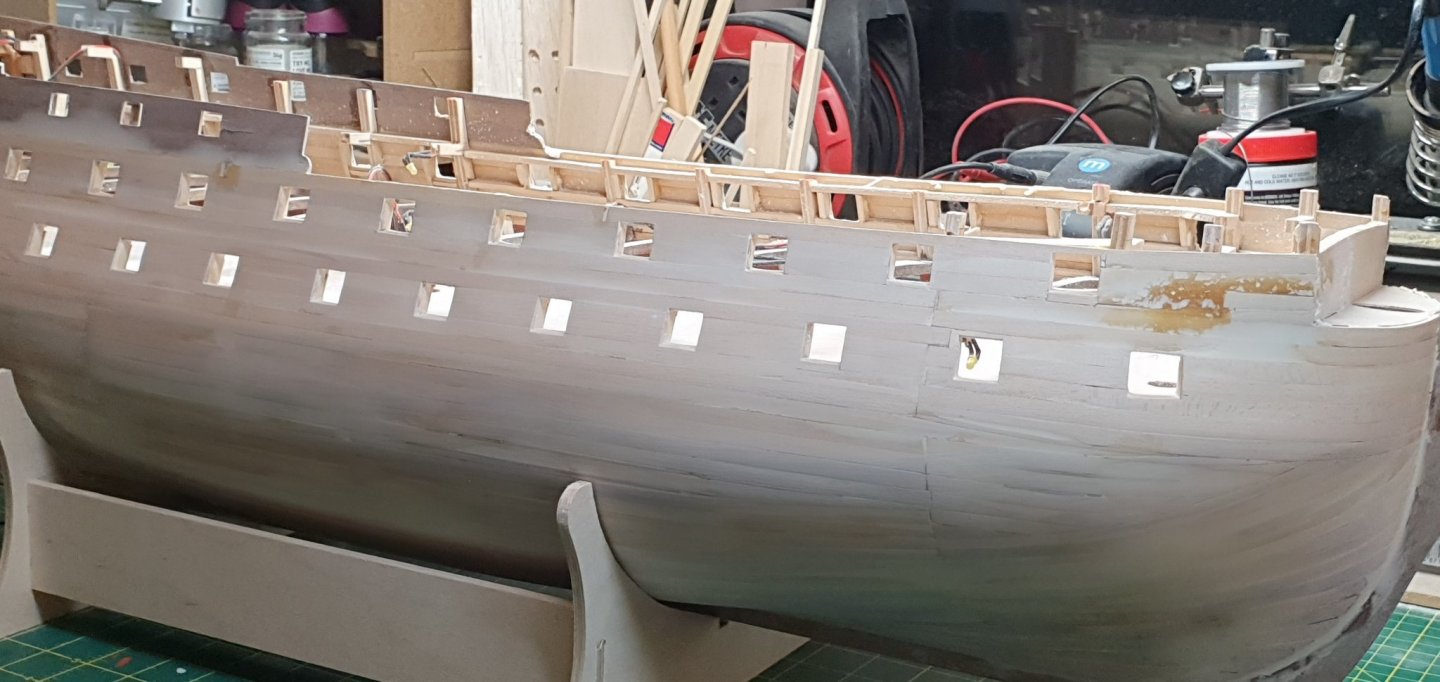
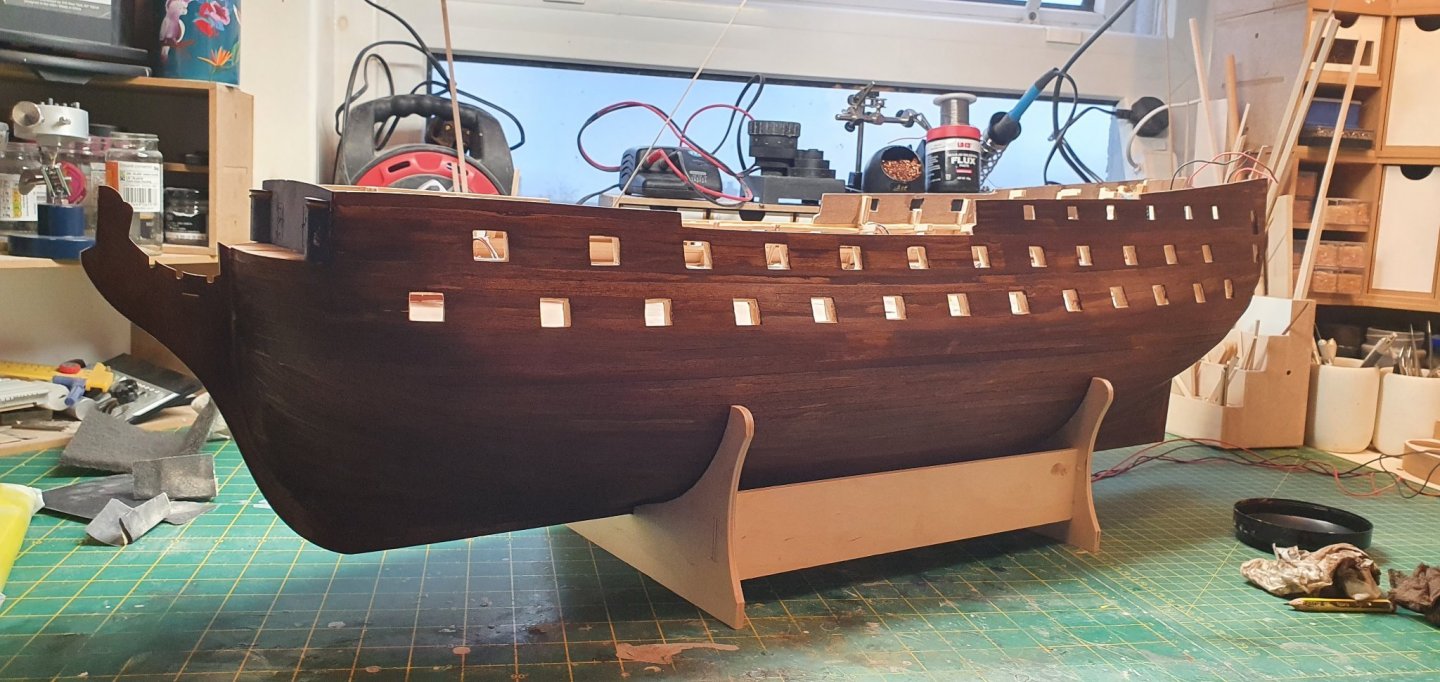
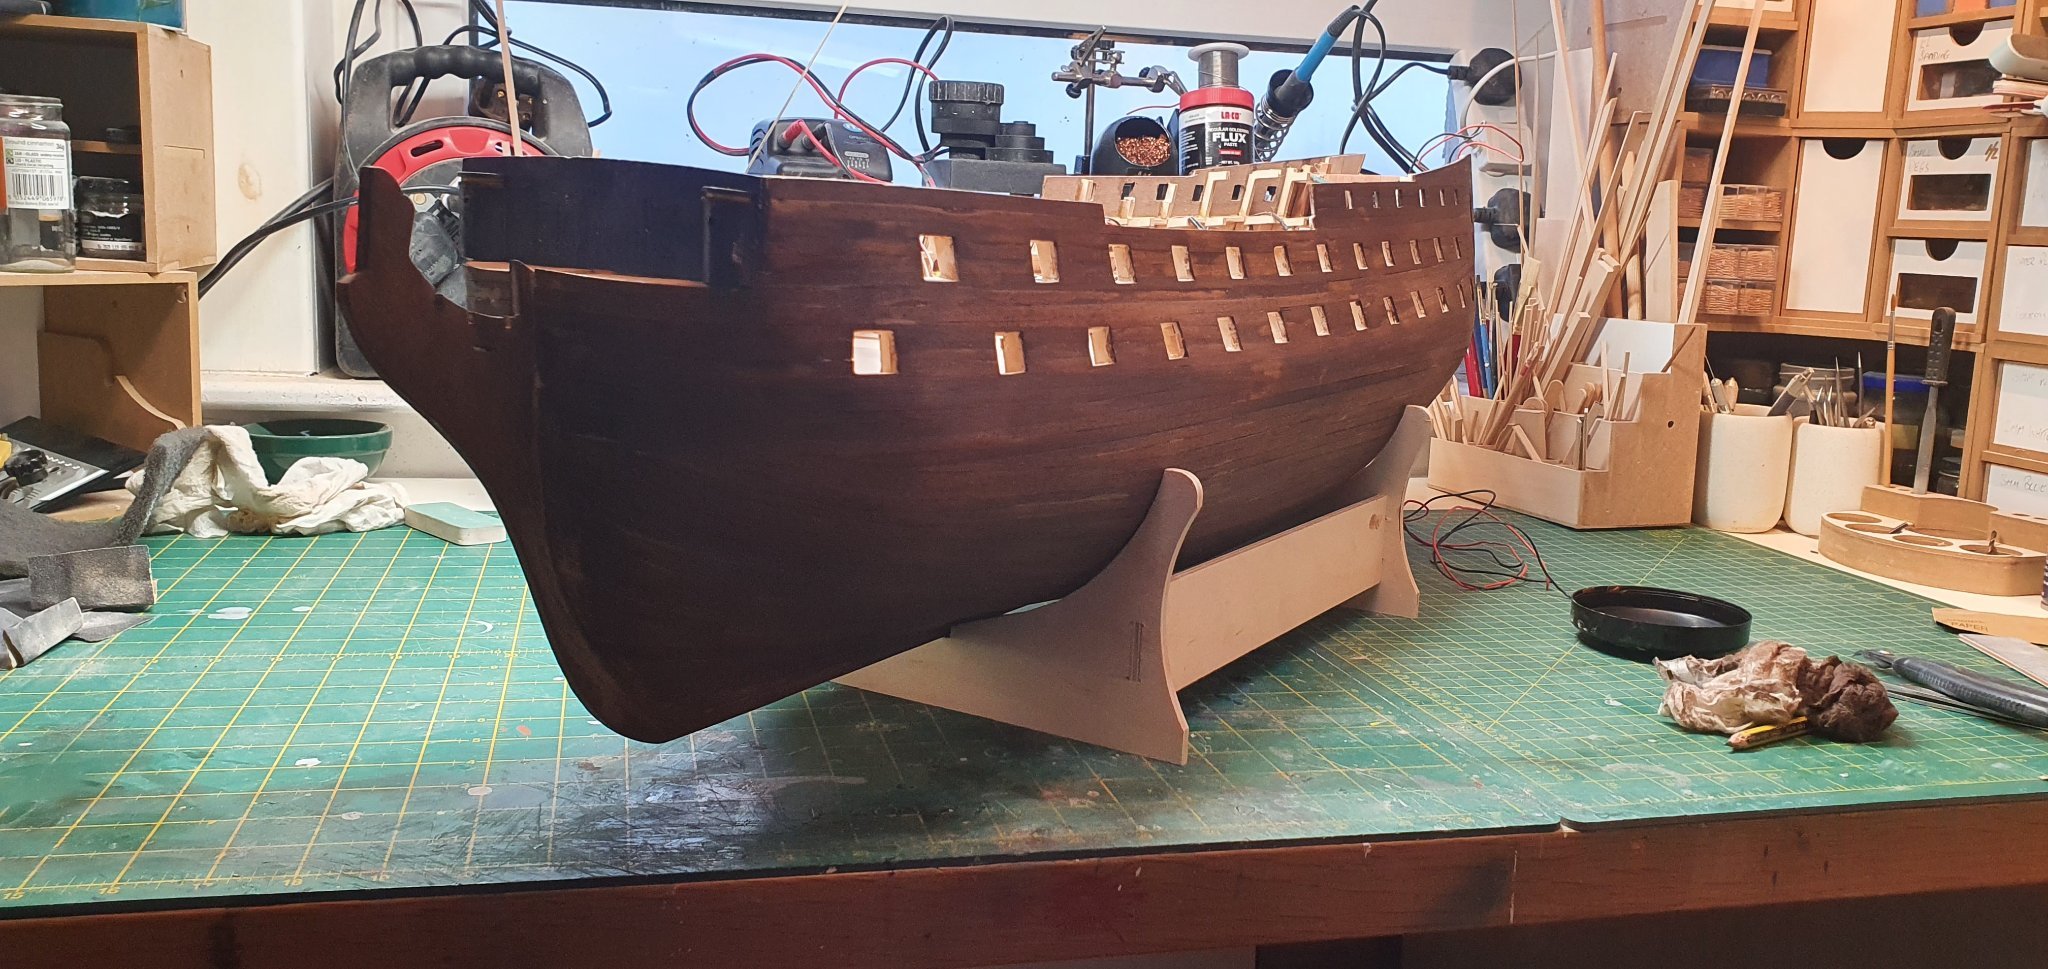
Good evening all
can anyone tell me if the two lines I have indicated in red are the upper and lower limits of the main wale on HMS Agamemnon 1876
Many thanks
Jim
-
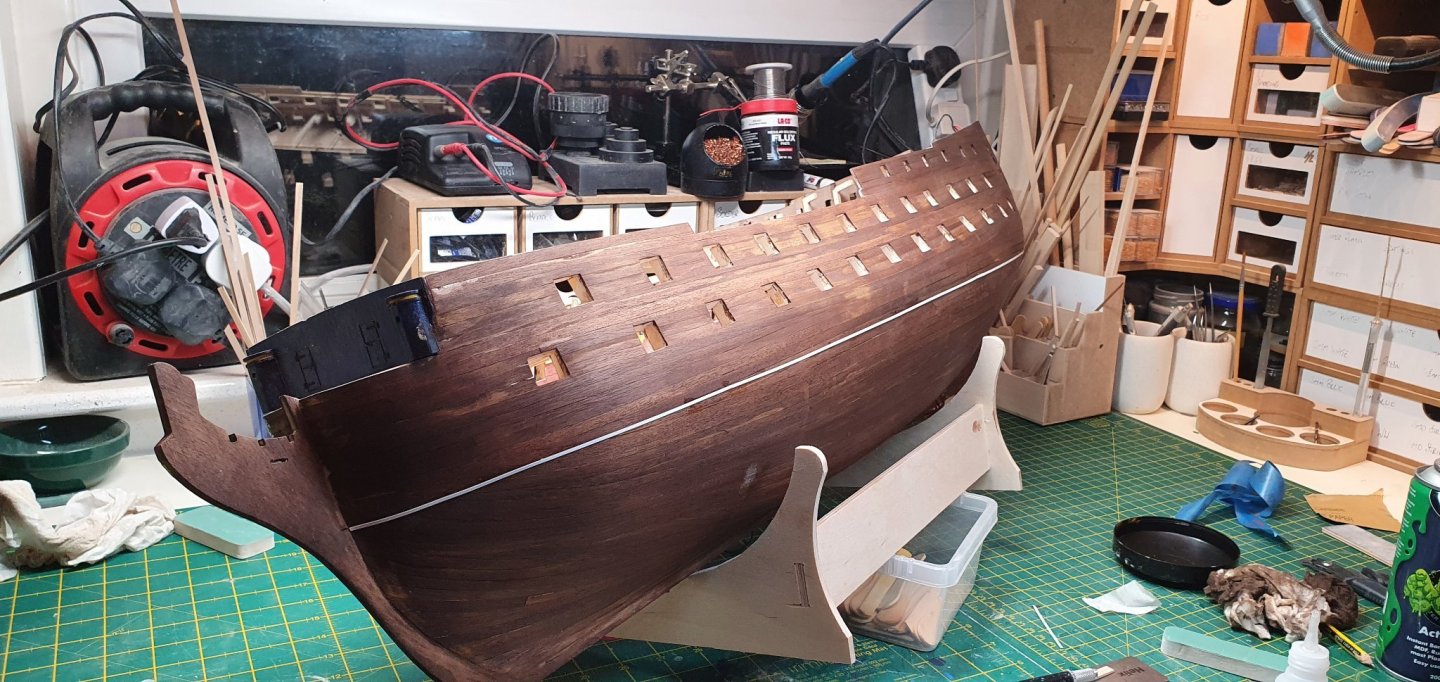
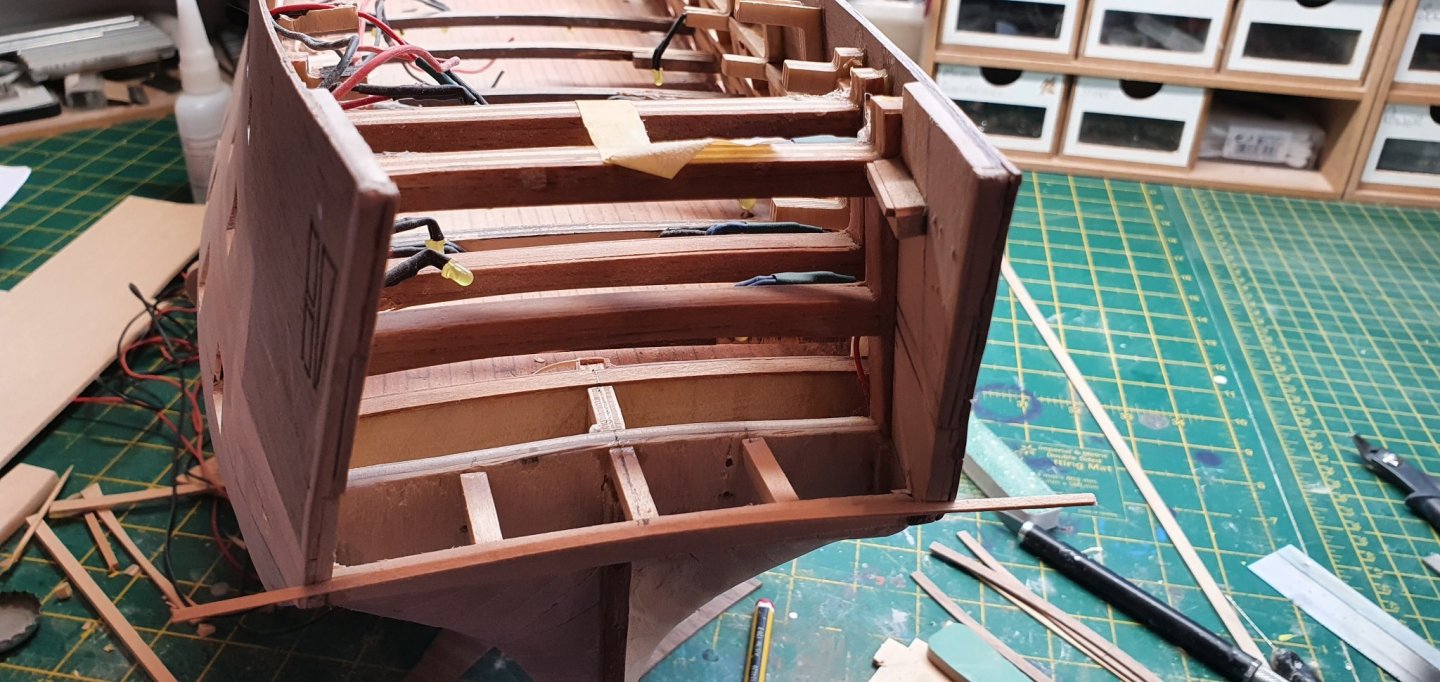
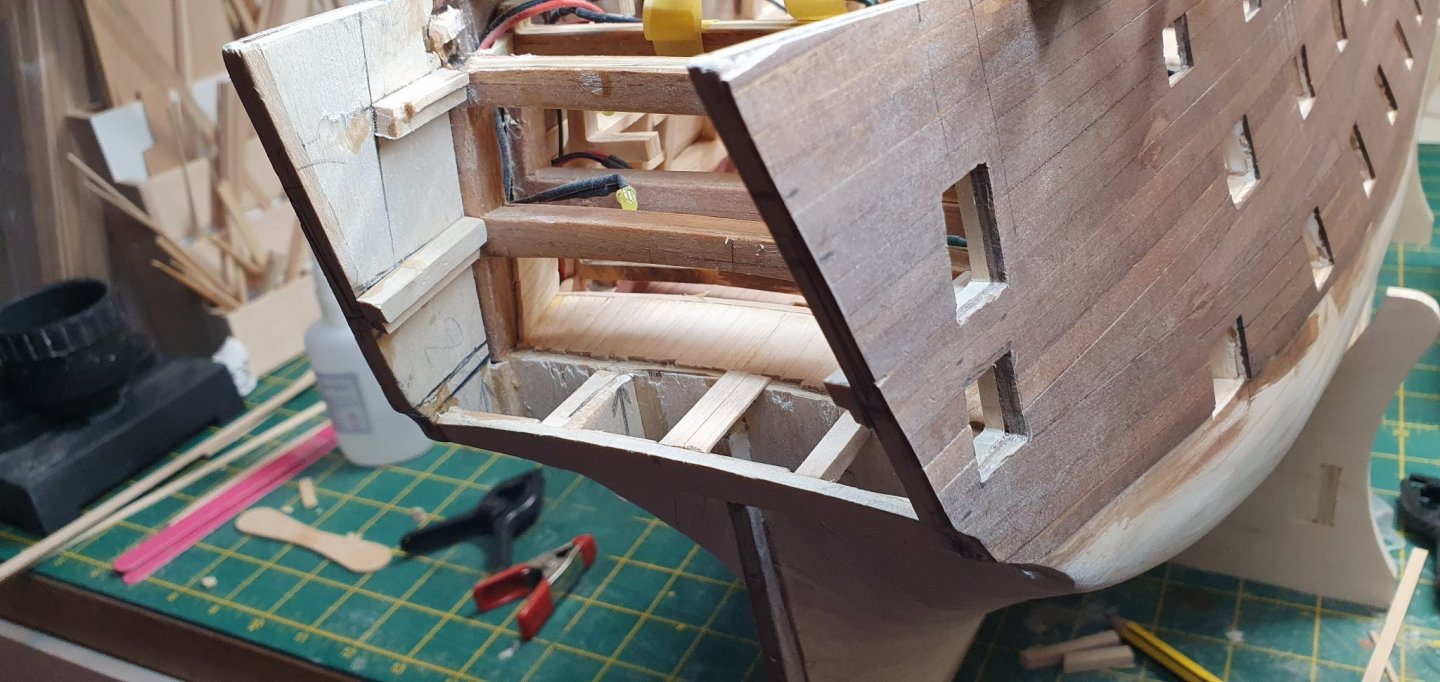
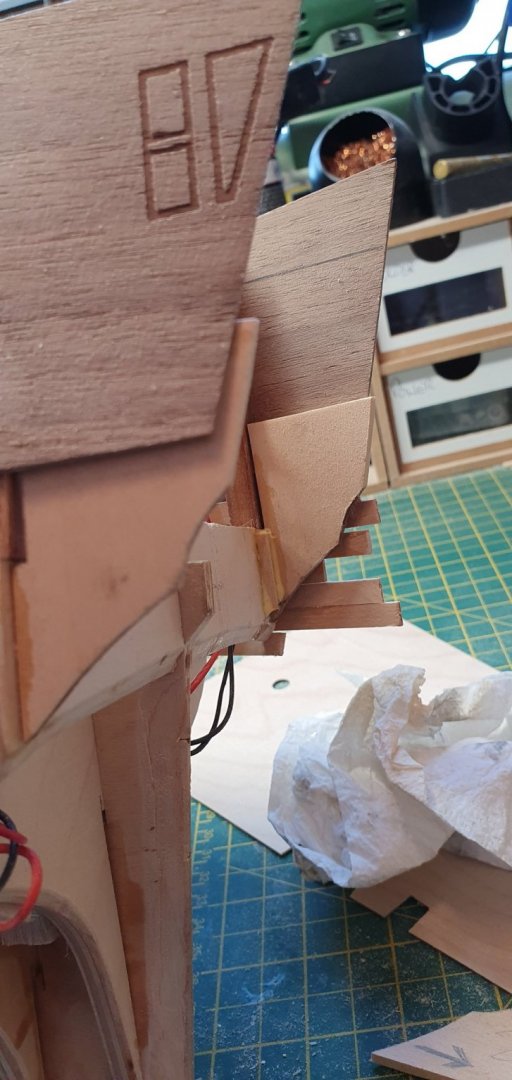
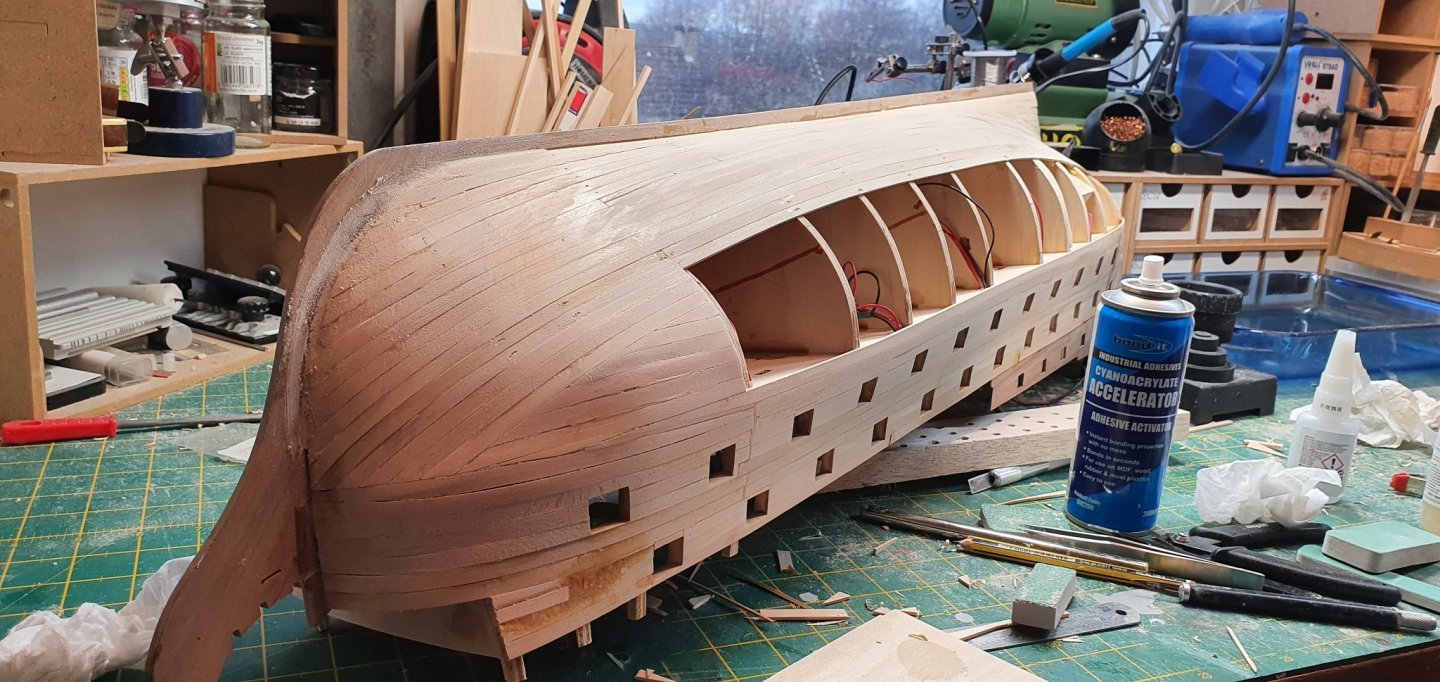
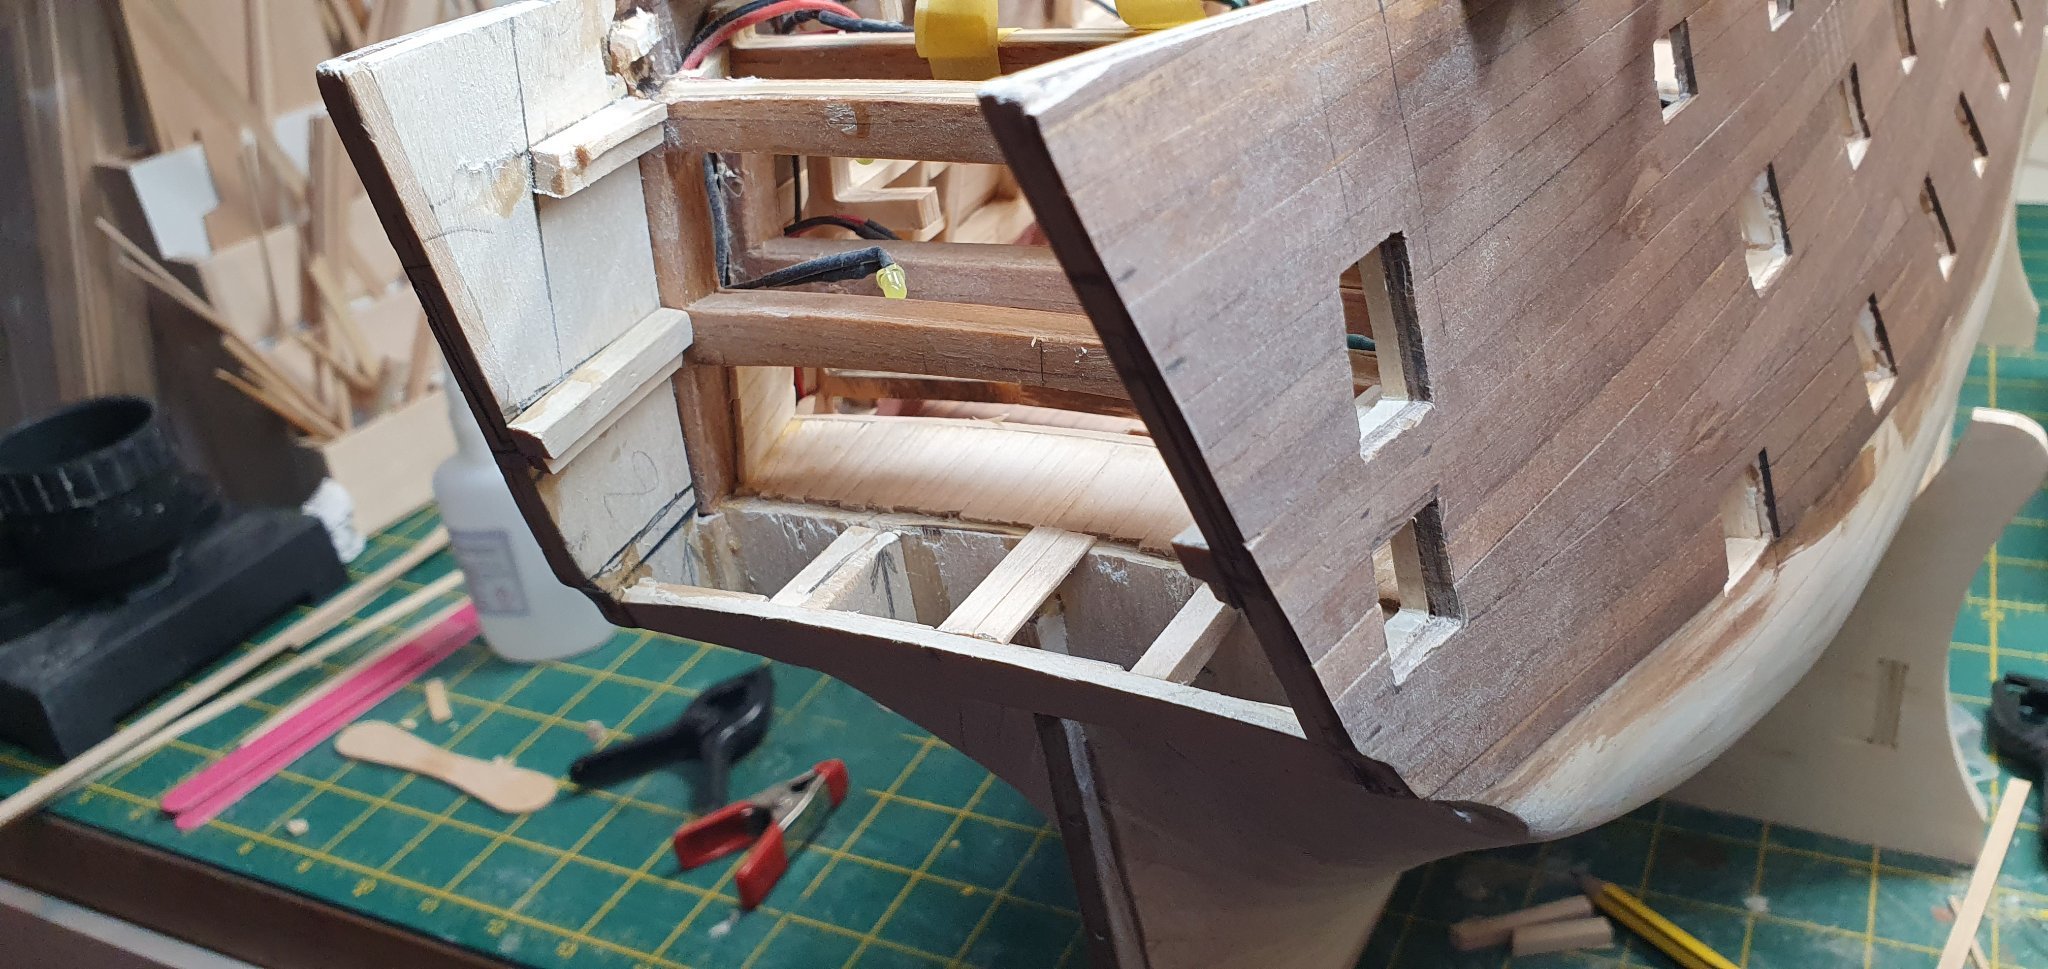
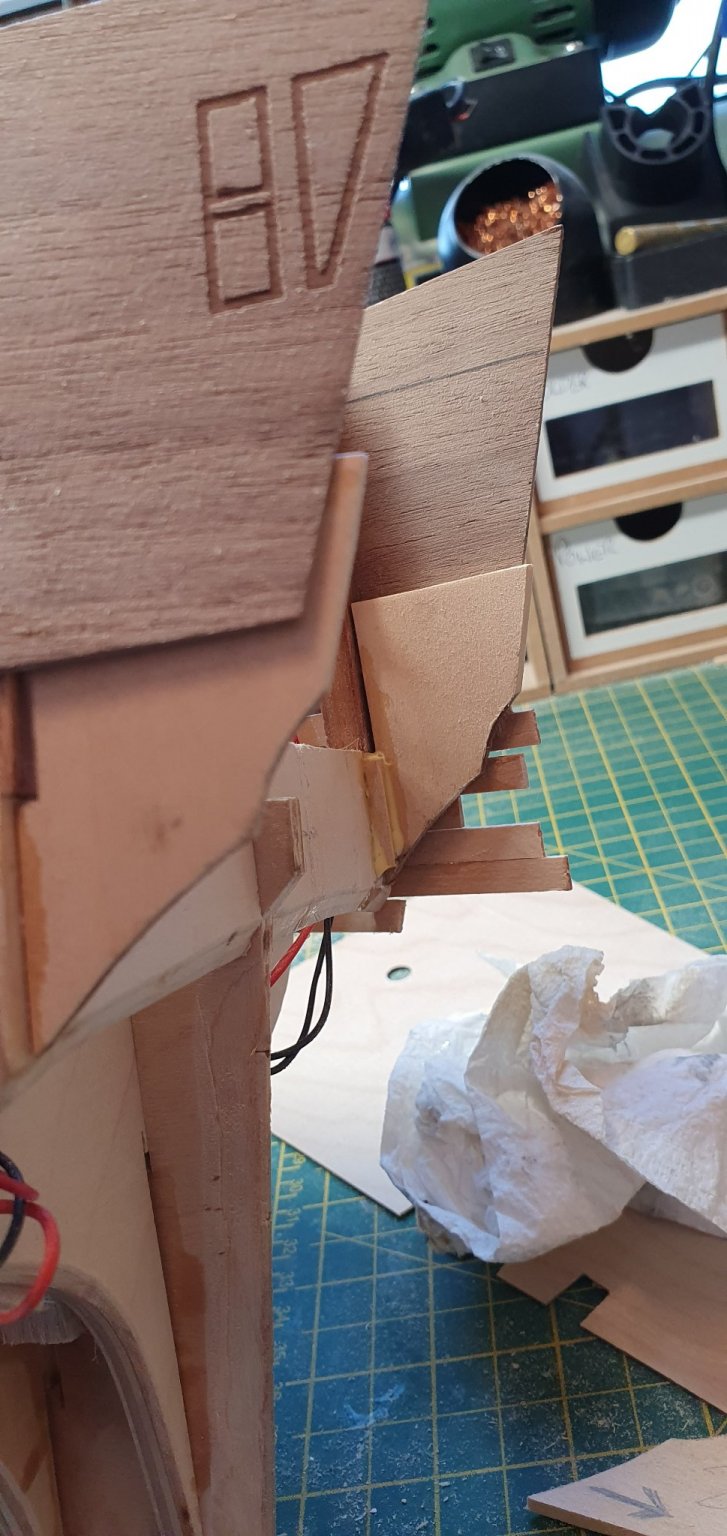
Earlier in the build I had decided to leave off part 27 and 28... The Stern Counters.. this is to help when it is time to build the cabin interiors,,,, I had also cut out the bulkheads for this at that time....
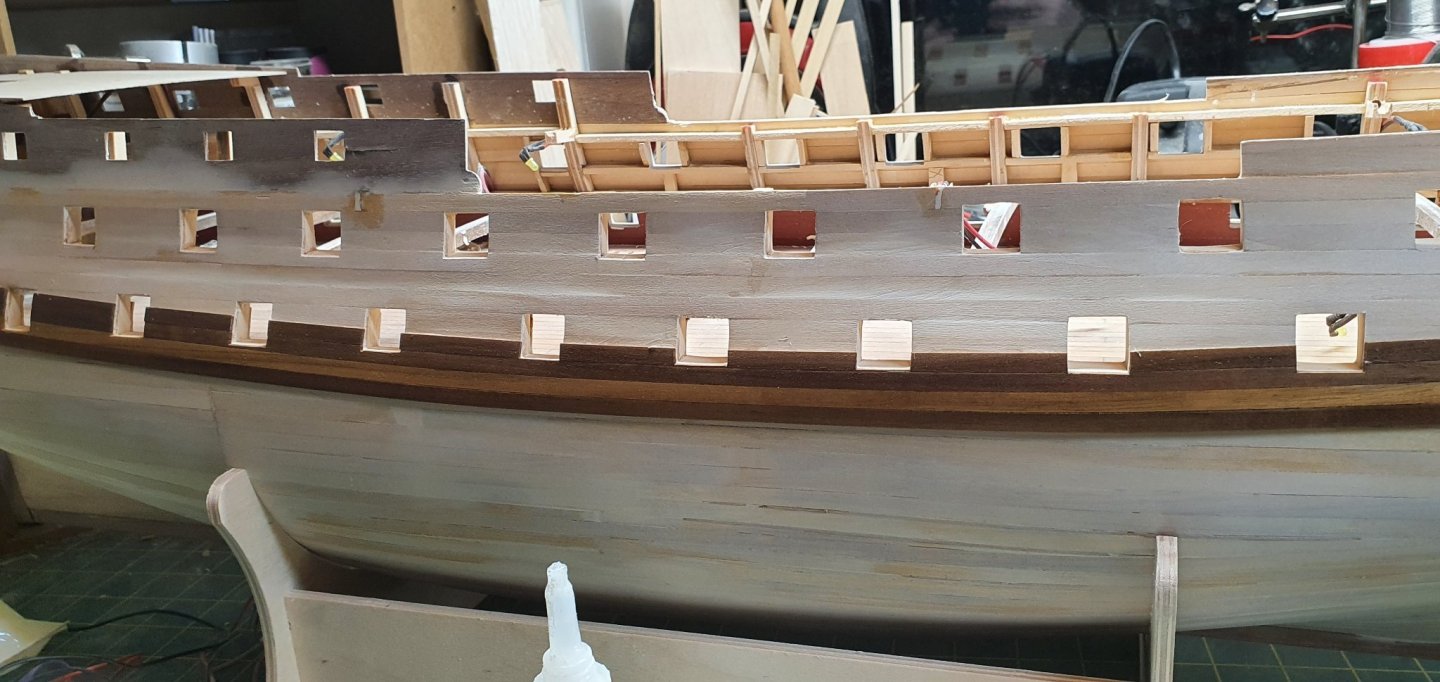
Leaving off part 28 the outer stern counters was probably a mistake... as a previous post said I had an issue with the placement of the bulwark patterns,, parts 61 and 62 in the kit... I hadn't realised part 28 is used for locating the bulwark patterns,,, it turn out the bulwarks are now about 3mm too far forward and about the same too high..... not the end of the world..... so lesson learned ( apart from cutting through the light wires when trying to adjust),,, a bad day that day....
1st planking completed.... filling done and sanding mostly completed,,,,, a wee bit more to do... then onto main wale and 2nd planking


- yvesvidal, mort stoll and Henke
-
3


Agamemnon 24lb Carriage Dimensions
in Discussion for a Ship's Deck Furniture, Guns, boats and other Fittings
Posted
Thanks for the head up Allan, I'll keep a watch for the type when they arrive,,, I've downloaded the guide and it tells you to round them off