-
Posts
4,035 -
Joined
-
Last visited
Content Type
Profiles
Forums
Gallery
Events
Everything posted by glbarlow
-
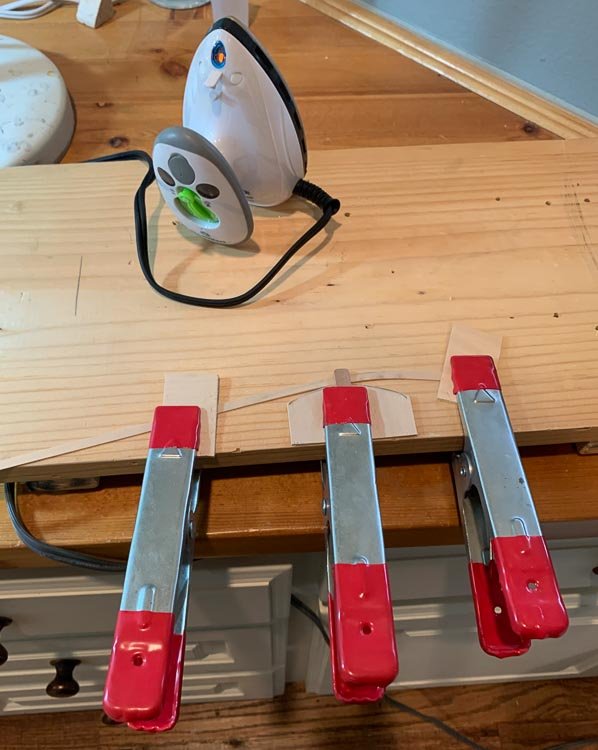
Never mind - I finally found in your log that you created that by bending some 1x5mm board. It just seems surprising to me they'd create such an obvious curve on the model and not provide a part to fit it. And as significantly the neither manual included with the model nor the plans ever say or show anything about it. My Pegasus had a similar height shift on the hull and there was a part for it. Not cool Chris Watten and Amati, not cool So now I know I need to make something. Thanks for the trouble...
-
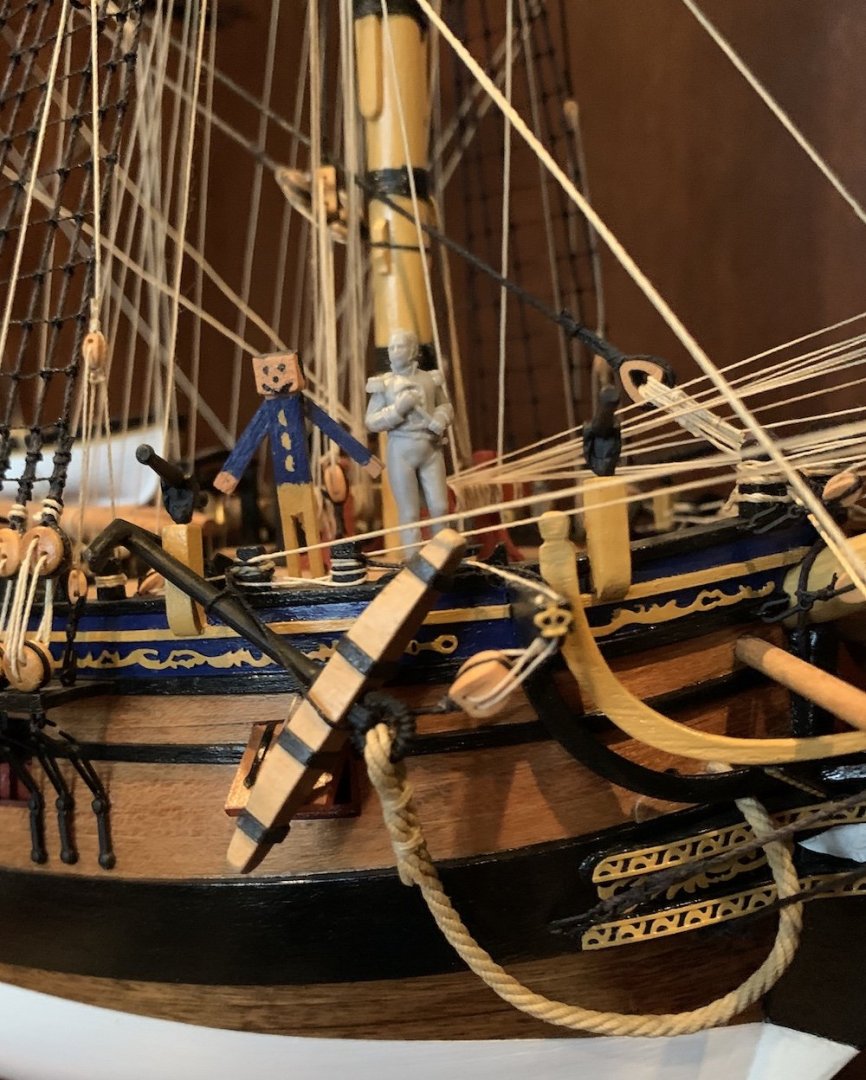
No, not part 180. I have the poop rail end. Refererring to the cap rail itself. It steps down just where that rail handle ends, the drop is curved. And about ¾ inch from top to bottom. I thought it easier to attach a photo. I don't know why it's upside down, lol. Thanks again for the help
-
Referring to the small, short curved pieces that connect the longer rails where the hull changes heights. I see them on your model but can't find them. It seems that like the larger curved piece connecting the poop deck rail to the deck they would have to be on a 5mm sheet but I don't see them, nor are they numbered on the plans. Thanks for replying, you have a great model.
-
Where did you find the curved pieces for the cap rails? I cannot locate them in my kit.
- 14 replies
-
- vanguard
- model shipways
-
(and 1 more)
Tagged with:
-
Surely I'm missing something in my Amati Vanguard kit. There should be 6 curved pieces that are part of the cap rails 2 curving from the poop deck 2 near midships, and 2 from the forecastle. I see them installed on other Amati Vanguard build logs but I cannot find them in my kit or on the plans showing the parts. Can someone point me where to find them in this kit? I must be looking right past them, its quite frustrating knowing they must be there somewhere
-
Can i live without a BYRNES TABLE SAW
glbarlow replied to shihawk's topic in Modeling tools and Workshop Equipment
I have both the Byrnes saw and disc sander. They are more than worth the cost, spending money on any other saw is a waste. I find many uses for both and frankly don't know what I'd do without them or how I did anything before I got them. There are 4 pages of replies as testament to how good they are. The answer to you question is yes, you absolutely need them. -
Continuing to making progress. The Vanguard is now fully decked and the main deck is finished. Next step is the various rails on the forecastle and poop deck plus the cap rails and finishing up the poop deck furniture. As you can see in the photos for now I'm not planning to add the masts, so I have stubs cut to finish off the mast holes. These aren't glued in so I can come back some day and add them if I want. Its simply a case of not having a place to put a finished 3 ft long, 3 foot high model. Plus I've been there, done that with my 7 prior models. This one is just about building a '74 on a relaxed pace without the extreme attention to detail and accuracy of models like my Pegasus. I deviated from the plans with the support beam for the poop deck. Like I had to do with the beams where the boats will sit and the finished beam for the forecastle, I cut a notch in the bulwarks the exact right height and width required to match the beam and decking. I added a rope to the wheel that wasn't mentioned in the plans. Not sure why, now that the poop deck is installed, it will never be seen again - but I feel better about myself :-) I also decided on simple breech rope rigging for the cannon - I've done the full blocks and tackle on my prior models, but it required ordering custom blocks. The ones supplied with the kit are way out of scale for this purpose in my opinion, with as little as the cannon are seen and this 1/72 scale of this model I am content with the simpler approach. If I didn't mention it earlier, the decking is 4mm ash supplied by Hobby Mill. I like the its bright natural color, I've used this on my last 4 models and will continue to use it for any future models. The discoloring is more pronounced in the photos than it actually is, this comes from the water based Poly I use to seal and finish all painted surfaces. It also doesn't shine like it appears as a result of the camera's flash. The bulwarks were done with swiss pear, also from Hobby Mill mostly because the 4mm width seemed more to scale - but then it was painted red so this expensive wood's nice color is lost. Still the right choice - the 5mm walnut just looked to big (its used on the gun deck, but that really can't be seen much now). The cabin bulwark matches the color scheme I chose (or made up I guess) but again its lost from view with the poop deck installed. Its a really big model, with all the wood, pain and glue now on it, its also getting pretty heavy. I'm glad I modified the hull way back in the beginning to better anchor the mounting screws. If I'd just followed the plans and put them just through the keel the model would have split off the mounting base a long time ago.
- 101 replies
-
- victory models
- amati
-
(and 2 more)
Tagged with:
-
Turns out I needed only about 25 copper plates to finish - so about $50 and 3 weeks later I've finished the coppering and have plenty of copper for some other project. It's weird that I had enough for the starboard but not enough for the port. If anything I was more efficient on the port. Oh well, its done. The ship is very heavy now. I've finished the upper gun deck - as far as I'm coning to finish it. I've decided I've built out enough cannon kits in my life so only those gunport that didn't havet lids have cannon mounted, plus a few extra for whatever you might be able to see once the main deck is installed. The gunports with lids are closed and will remain that way. I did all the cleaver work of open ports on Pegasus. Vanguard is enroute with no imminent threat of attack so the ports are closed:-) If you look close at the photos you'll see some plywood spacers between the outer hull and inner bulkhead. These insure both hulls have some extra support and were helpful in holding things steady when the gunports were cut. The cross beams that will remain exposed by the main deck were a bit of a challenge. There is no "kit" way of mounting them, basically they are force fit between the bulkheads which is fine if you ship is built perfectly, unfortunately mine isn't so I had to sand a few to make them squeeze between the bulkheads. Gluing, aligning to the plan measurements, and not wrecking the bulkheads took some pre-positioning and dry-fitting to get it all right. I did two things to help myself. I did the measurement work to determine where the ship's boats tie downs need to be and drilled those eyelets in before installing the beam. The cradles are a bit tall, I figured I'd break one in the remaining build process so I'll not install those to later. I wasn't comfortable with the "squeeze fit" for the beam that supports the forecastle of the main deck. So using the stock the beams came from I created a new beam that was long enough that I could cut notches (very carefully to get the right depth) into the bulkheads. I'm now confident this beam will support the weight and any pressure I might apply during the rest of the build. It also took a bit of sanding on the edges of the beams after installation to ensure the main deck is flush to the deck amidships. If there is one absolute of modeling it is that dry-fitting is an essential skill as in pre-planning what is easier now that later (which the instructions or plans never offer) like the eyelets for the ship's boat's tie downs. It's not that it can't be done later, its just that its so much easier to do some things before installation (or before the installation of something else that obstructs the path getting to it). So now on to the main deck. My two year break is apparently over.
- 101 replies
-
- victory models
- amati
-
(and 2 more)
Tagged with:
-
Looks like I'm back in business. Cornwall has shipped the copper I need. Once in I can finish the coppering and move on to something more interesting. I put a keel board (I've been gone so long I've forgotten the proper terms) on the keel to finish off the copper there using a 5mm strip of hull planking and stained it natural. Looks much neater than just wrapping the copper. There is no good way I found to finish off the bow and stern except a single width of copper plating. (that's what the book says to do anyway). I have to say I'm proud of a lot of the work I've done on past ships, the Pegasus especially, but I'm not particularly proud or thrilled with my copper work. Its on (mostly) and it looks ok, but not something I'll EVER repeat. It single handedly stopped me from building ship models for 2 years until I finally decided to just do it (maybe inspired by Nike commercials) but I don't recommend it. Though I'd done it on my much smaller Pickle I think there is enough copper on the Vanguard to (if converted to 14 gauge wire) to wire my work room. Yay... I'd post a photo but the port side looks like the starboard side above...
- 101 replies
-
- victory models
- amati
-
(and 2 more)
Tagged with:
-
Need Copper Plating for Amati Vanguard - HELP!
glbarlow replied to glbarlow's topic in Wood ship model kits
Keith, Thank you for the link. I had searched Cornwall's site and failed to locate the copper plating. With your link I was able to place the order, I appreciate it! -
This is depressing, just noticed a lot of my photos are gone and I can't find my Pegasus build log - it was the best thing I've done. Admittedly it was a while ago, but still sad to see it gone.
- 101 replies
-
- victory models
- amati
-
(and 2 more)
Tagged with:
-
Need Copper Plating for Amati Vanguard - HELP!
glbarlow replied to glbarlow's topic in Wood ship model kits
Thanks - I sent them and Cornwall an email along with Amati. Seems like something you should be able to find. Any other suggestions would be appreciated. -
Need Copper Plating for Amati Vanguard - HELP!
glbarlow replied to glbarlow's topic in Wood ship model kits
I have but no response. -
I came up about two rows short of port side copper plating for my Amati Victory Models Vanguard. I had just enough to finish the starboard, I don't know why I came up short on the port side, I had very little waste. Anyone know where I can get about half a sheet of port side copper plating for this model?
-
I'm back after a 2 year absence. My model has been just sitting in the work room with me looking at the copper free port side. I finally got back to it, got all the way to the last two rows of copper plate....and ran out. I don't understand this. I had plenty of extra for starboard but not enough to finish the port side. Anyone know where I can get about a half sheet of port side copper for Amati's Victory Model Vanguard?
- 101 replies
-
- victory models
- amati
-
(and 2 more)
Tagged with:
-
It's been a while since I've had an update, and this isn't much of one except to celebrate a small victory, not the big HMS Victory, but a small HMS Vanguard related victory. I've finally managed to complete the coppering...of the starboard side... I was fortunate to have enough plates to finish, earlier in is this log I noted I ripped off 5 rows at the bow to do it over, glad there were enough extra in the kit to allow for mistakes like this. I'm not excited about turning it over to see the bare port side I now have to do, so I procrastinated by completing the rudder. Interestingly the brass straps provide in the kit do not appear to be designed to fit over a coppered rudder, the folding points for the two 90 degree turns to wrap around either side are 5 mm wide, the width of the wood, but not with two copper plates attached to the sides. Doesn't matter for me anyway as I always choose to use thick black paper, easier to do and frankly for me it looks better once I glue it on and finish it with water based poly painted lightly on to harden and season it a bit. Ok, off to the port side. Until this is done I can't get back to the wood working part I like to do. I have to admit though, as big a pain as it is to do it does look pretty nice on the ship.
- 101 replies
-
- victory models
- amati
-
(and 2 more)
Tagged with:
-
I understand the decision, same one I made for this build. Difference is I'm stuck on copper plating. Just so boring and tedious I haven't been near my vanguard for more than a month. At his rate I'll be done in four years as well. I keep looking at my Pegasus for inspiration but it isn't forthcoming. Great job Len, nice log ang excellent model. I'll watch for your next one.
- 122 replies
-
- bellerophon
- victory models
-
(and 1 more)
Tagged with:
-
Any thoughts on copper plates vs copper tape on hulls? I'm finding copper plating my HMS Vanguard going very slowly and not especially exciting. While I'm sure everyone would say the plates are more accurate and show better, I'm considering plating one side and taping the other. It will be displayed in such a way only one side can be seen, so that's not an issue. Part of my question is how well the tape conforms to the curves and bends of the hull (without kinking), how well it adheres, and how easy and fast it goes on compared the the tedious work of the individaul plates? Does using a ponce wheel come help (the Vanguard plates are only embossed, not actually engraved)? I realize this is copping out to a large degree, but its not a part of the process I enjoy, I want to make it back to the wood and decks sometime before I get old
-
I broke the code, at least for me anyway. My trick was to quickly "acknowledge" the change from straight on the keel to the upward and inward curve of the bow by laying in a short row trimed to allow for the taper. I had done that the first time but one I waited to after the third row to adjust, and two I tried to match the trimming to the space and was not happy with the results (the perfectionist in me again). The tiles are so thin its easy to overlap the tiles a little bit, the key there being to overlap the upper row over the lower which is trimmed to be larger than the space required - then you don't even see it and it looks like a good trim job. Just takes some planning (Iused and index card and pencil to determine the natural flow of the lines, "stealer" length and width and curve) to get the trimming right. I rebuilt the 5 rows (just the bow, not the whole ship, its all good 3-5 inches back from the stem) I tore off earlier today so I should be good to go from here. I get a little nuts about these things, but in fairness, though 7 ships completed, this is only the second I coppered, the Pickle being the first and a long time ago and a lot smaller. Pictures to follow, I want to make some more progress. Thanks for the encouragement and help.
- 101 replies
-
- victory models
- amati
-
(and 2 more)
Tagged with:
-
No worries, I'll sort it all out. I started today by tearing off 5 rows at the bow area. It's going better already, just have to figure out the curves. Now I have to hope the kit included plenty of extra plates, I've definitely wasted more than a few.
- 101 replies
-
- victory models
- amati
-
(and 2 more)
Tagged with:
-
Thanks Rusty, it's the bow that's giving me fits. Did you work from the keel up the whole way, or come from both bottom up and top down? Yours looks great, it looks almost as though there were three distinct "belts:" the top 2 rows, a middle straight, and a bottom curved?
- 101 replies
-
- victory models
- amati
-
(and 2 more)
Tagged with:
-
Thanks Rusty. I've started the coppering, I really don't like it. I will take me a while. I can't quite sort out how to account for the curve of the hull, not quite as simple as tapering planks. I still may go for the aluminum foil route I joked about earlier, not I'm think it may not be such a bad idea. This is my 8th model ship, but the only one I coppered was the little HM Pickle. It would take 10 of them to equal the amount of copper needed for the Vanguard. Oh well, one plate at a time...
- 101 replies
-
- victory models
- amati
-
(and 2 more)
Tagged with:
-
Last update before the coppering – really I’m serious this time. Unless I go off book again and build the ships boats…. Here is the completed stern including the galleys. It takes a lot to get to this point. I think the design and plans support the work, though glad I don’t need to rely on instructions anymore, they are pretty thin on description here. Fortunately there is an extra booklet that comes with the Vanguard laying out the hull build. It is far more valuable than the instructions. For any new builders my advice is learn now how to use the plans and don’t depend solely on the written instructions, in the end its far less frustrating and more rewarding. Also while I'm offering unsolicited advice, invest in good quality paint brushes. I use Loew Cornell http://www.hofcraft.com/loew-cornell-3000-series-comfort-grip-brushes.html brushes, my multiple 18/0 and 10/0 spotters got a lot of work in the building of the stern and galley. I like the spotters and shaders more than the round sizes for detail work. Something I didn’t mention n the last post but is worth passing on. As careful as I was with the gun port pattern alignments on both sides, they did not wind up even with the center keel and bulwark structure across the back. They were even with each other, effectively that meant a slight curve of the stern. This is reinforced by the multiple small pieces that make up the side galleys having a bit of angle to them. That would be no problem for the walnut ply piece that makes up most of the stern, it bends easy enough, however the stern decoration is cast from a molded plastic, it has absolutely no bend at all. I ended up having to fit a shim to bring the rear portion of the galleys near equal to the center point of the center keel portion of the stern so as not to break the plastic decoration, meaning flat across the back, not curved……….ok I did that after I broke the plastic decoration trying to get that slight bend. Fortunately it was a clean break and I easily (if angrily) fixed it and touched it up to be invisible. I was impressed with how 30+ brass etched and ply parts come together so wel to form the galleys. The alignment of parts all look right when its done. I had to make two changes to the plans for it to work – which probably are my fault somehow and not that of the plans. The wood trim below the “rails” is supposed to be 1x1mm like the other three. I had to use 1/x2mm otherwise the lower columns would not have line up with the windows. I also placed the three little decorative pieces differently, they wouldn’t fit where the plans call them. That’s minor stuff – overall the designer did well with this subassembly. Also, the soft cast metal pieces I didn’t use on the stern did come in handy as the two lowest trim pieces. Wood trim wouldn’t have made the both front to back and top to bottom bending required to fit here. Off to do the coppering…unless I can figure out some way to avoid it once again.
- 101 replies
-
- victory models
- amati
-
(and 2 more)
Tagged with:
About us
Modelshipworld - Advancing Ship Modeling through Research
SSL Secured
Your security is important for us so this Website is SSL-Secured
NRG Mailing Address
Nautical Research Guild
237 South Lincoln Street
Westmont IL, 60559-1917
Model Ship World ® and the MSW logo are Registered Trademarks, and belong to the Nautical Research Guild (United States Patent and Trademark Office: No. 6,929,264 & No. 6,929,274, registered Dec. 20, 2022)
Helpful Links
About the NRG
If you enjoy building ship models that are historically accurate as well as beautiful, then The Nautical Research Guild (NRG) is just right for you.
The Guild is a non-profit educational organization whose mission is to “Advance Ship Modeling Through Research”. We provide support to our members in their efforts to raise the quality of their model ships.
The Nautical Research Guild has published our world-renowned quarterly magazine, The Nautical Research Journal, since 1955. The pages of the Journal are full of articles by accomplished ship modelers who show you how they create those exquisite details on their models, and by maritime historians who show you the correct details to build. The Journal is available in both print and digital editions. Go to the NRG web site (www.thenrg.org) to download a complimentary digital copy of the Journal. The NRG also publishes plan sets, books and compilations of back issues of the Journal and the former Ships in Scale and Model Ship Builder magazines.