glbarlow
-
Posts
4,127 -
Joined
-
Last visited
Content Type
Profiles
Forums
Gallery
Events
Everything posted by glbarlow
-
 Very precise work. Well done.
 -
Thanks, yes they are on the 4 ultra now but sill around. $300. I’m looking forward to your tutorial on fittings.
-
I looked on Amazon to find many and a wide variation of 3D printers. Thoughts and suggestions for a good, easy to use, one to make ship model sized parts?
-
Very clever approach to using the scrappers. The fit and finish on the bow, including the planking is exceptional work. Well done.
-
It would be nice to have some limits. I’ve always tried to buy what I need and on occasion frustrated because a particular thing is out of stock. Even if I bought all the rope and blocks for a particular model it wouldn’t approach hoarding levels. Good for your bottom line but hard on the more sensible among us. Maybe 5-10 thimbles on a model……
-
Are you going to offer files for your blocks before you retire? Not sure I want to get involved with learning a 3D printer but this might make it worth while.
-
Scraping molding was a trial for me as well, but it’s kinda fun once you get the hang of it. Yours are well done. It’s one of those details that really stands out on the completed model.
-
Thanks, I may yet. Just hard for me to take on a large project right now, a lot going on.
-
Quite the masterpiece! Very impressive design with your focus on the details. I’m enjoying watching it come together.
-
The counter sunk weight kept it from tipping over. Simple contraption but it has been useful.
-
Seems like a good idea. The dowels can be installed but the pumps not added until after mast rigging is complete for easier access to bitts…
-
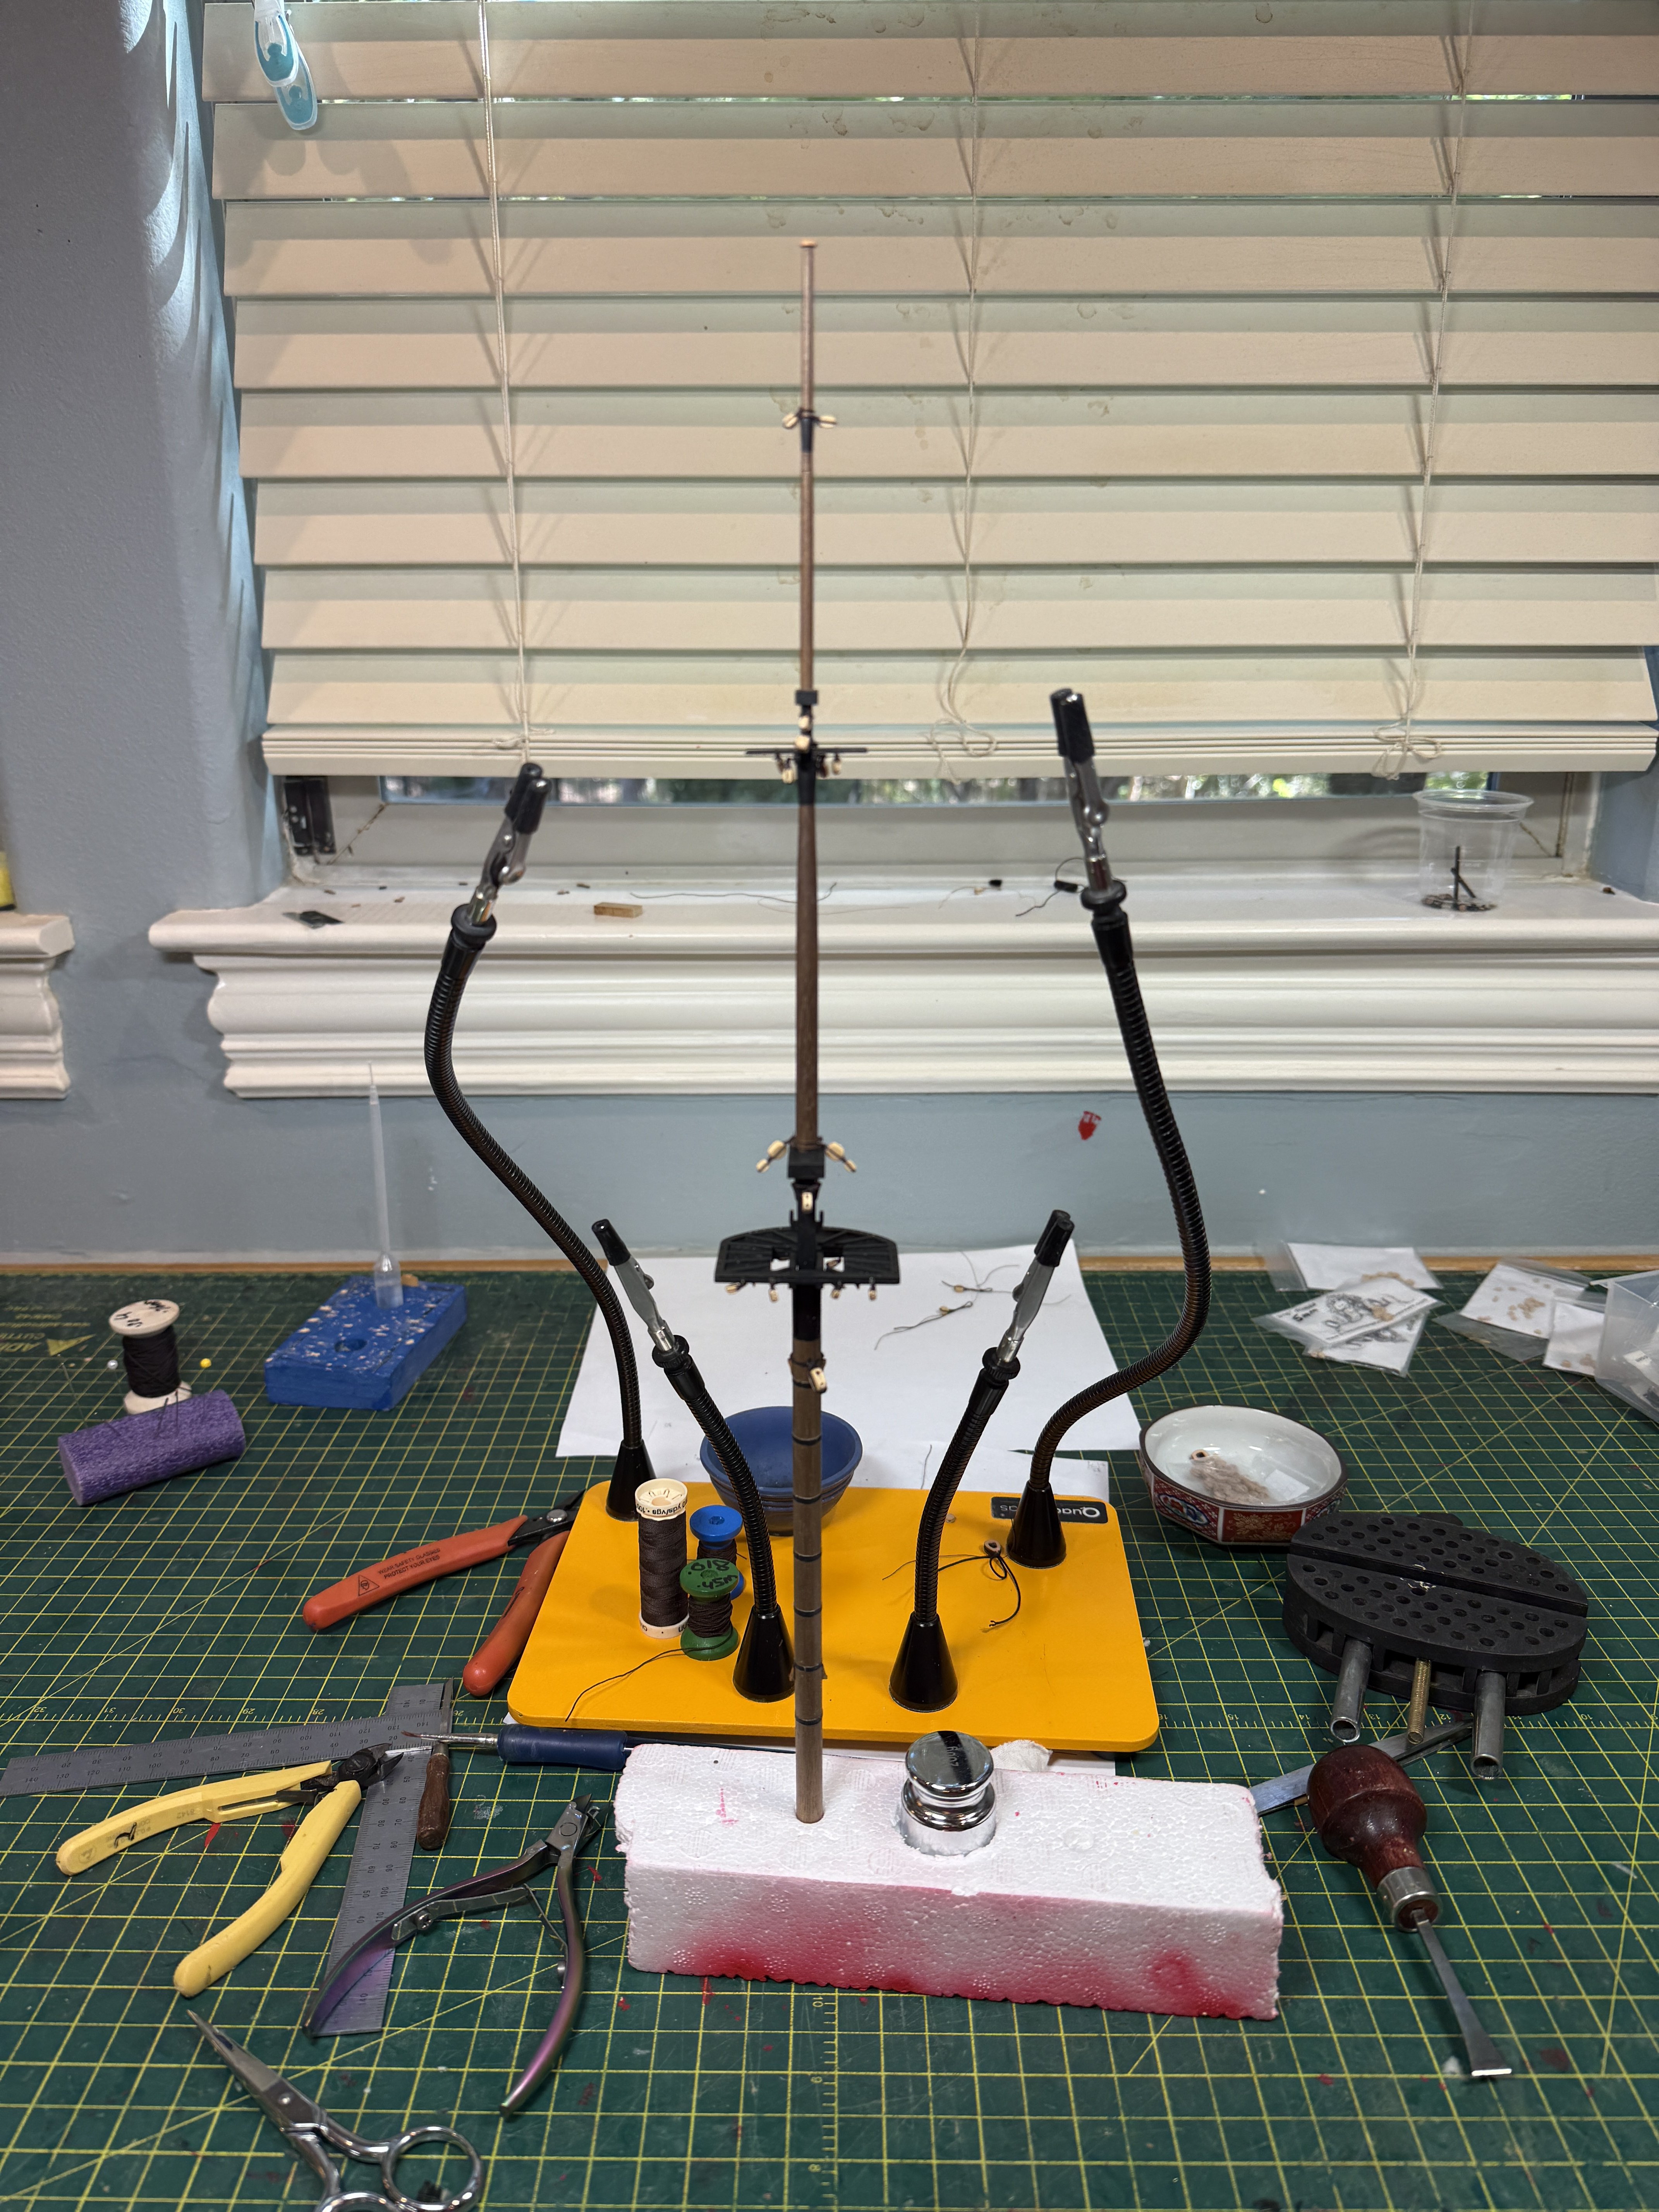
I’m not doing the best job with this log. I’ll do better with Surprise. Plugging along. I’ve now completed rigging blocks both masts and bowsprit off the ship, there are 22 on the foremast alone. After three years on Winchelsea and then the 1:26 scale Long boat I’d lost the skill of repeatedly rigging 3mm blocks at 1:64. I’m amazed at how many different tools I use to do them. I know I’d be lost without this helping hands stand. Moving on to rigging on the ship starting with the bowsprit. Just discovered the boomkins are needed for later rigging, I didn’t add them when building the ship, adding them now should be fun…

-
Very happy for Donna and family. These machines are unequaled by any other, I have them all.
-
Too bad Crafty Sailor went out of business, they had nice ones.
-
Well I am old school 😁. Appreciate the clarification.
-
I understand the the thought and the limitations but I still prefer wood. Stropping blocks is a pain, but it’s part of the process for me. Now it there was a way to eliminate laser char I’m all in😁
-
I hope you’ll reconsider not continuing to share as you have always done. I think the majority of us enjoy watching the development process. On the other hand there is no need for the designer to respond or justify every decision based on awkward and unnecessary commentary from the many arm chair experts about. A simple “this is my decision and direction, thank you for your comment,” then ignore it and move on. Your sharing as you do is in part what makes Vanguard special. Doesn’t mean every comment deserves or requires a response.
-
Best wishes to you and your wife Glenn
-
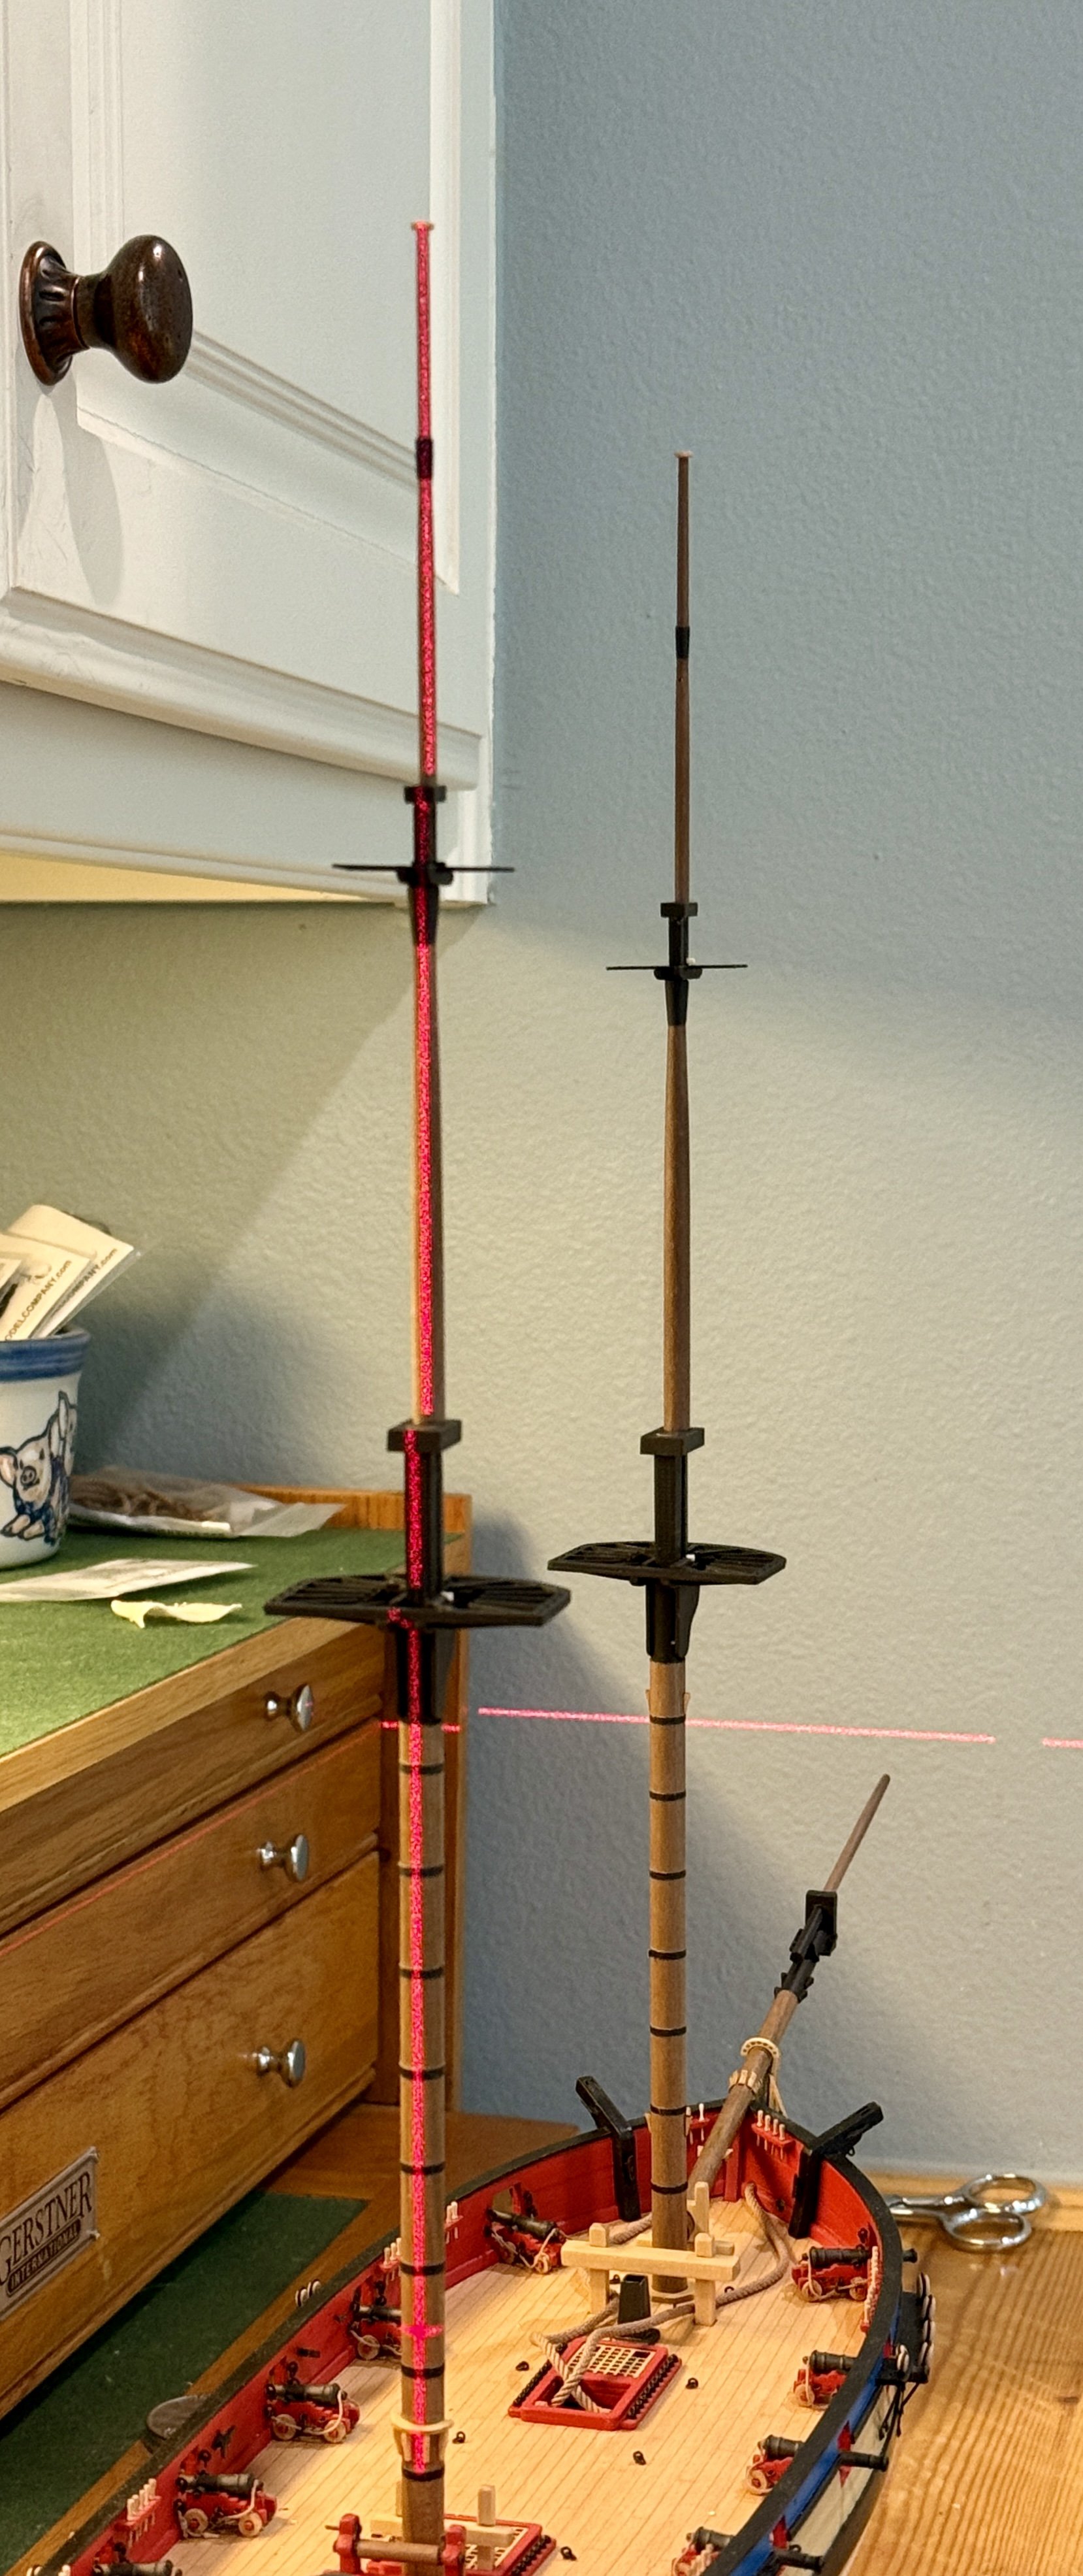
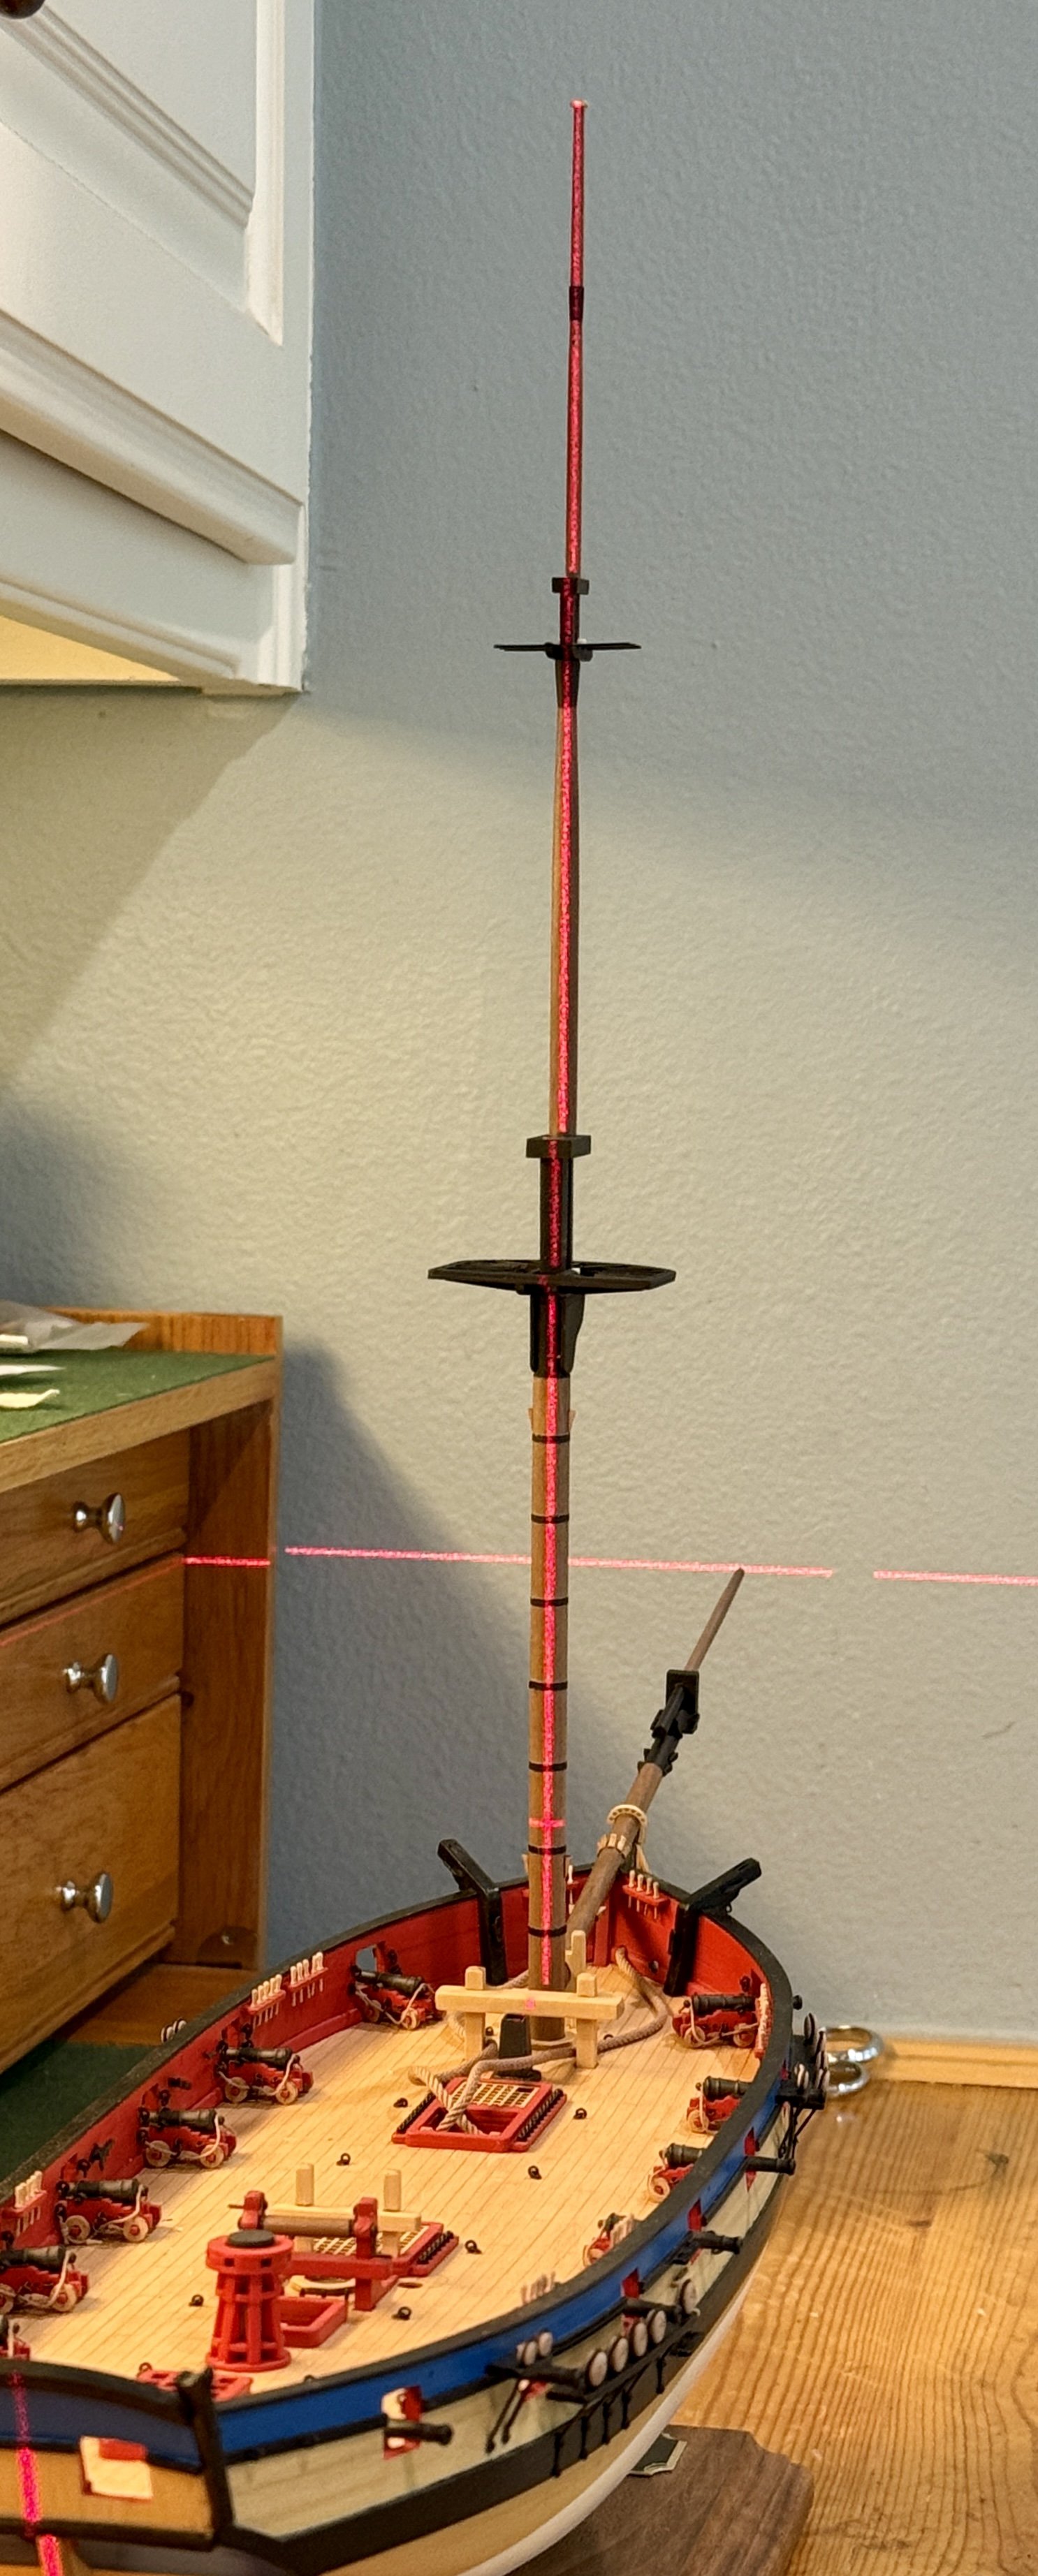
Mast Assembly The plans for Flirt are well designed, mast assembly is simply a matter of following them. No real instructions aside from the plans are needed, nonetheless Chris and James provide nice photos and a few hints in the manual for referral and maybe a little positive affirmation. I couldn’t add anything so I didn’t repeat them here. The real challenge is getting three masts with their accompanying platforms stacked up in a straight and level line. That takes some patience, time, and a great deal of care in the fitting. The laser level is invaluable for this process. I glued and leveled each mast one level at a time from bottom up, waiting for the glue to set before the next was added. While I used CA in some of the subassembly, I used Titebond for quick setting with enough time to twist and turn for stacking the masts. Next up tying all the various blocks, including the bowsprit, and adding dead eyes before installing on the ship. There are a lot of blocks…


-
Much faster than I managed, looks great.
-
I’m pretty sure I planked three sides of a hull on Cheerful, fortunately with Winchelsea I got better. Maybe only 2 ½. With single planking you have to do it right, wood filler doesn’t cut it.
-
The obsession over these figures itself is humorous to me. They are incidental to the ship being modeled and mostly obscured once the model is complete. To me they are only of interest in demonstrating scale. But it’s hobby, whatever makes people happy. I’ll give mine to my granddaughter to paint however she wishes.
-
Your usual meticulous work, well done!