glbarlow
-
Posts
4,127 -
Joined
-
Last visited
Content Type
Profiles
Forums
Gallery
Events
Everything posted by glbarlow
-
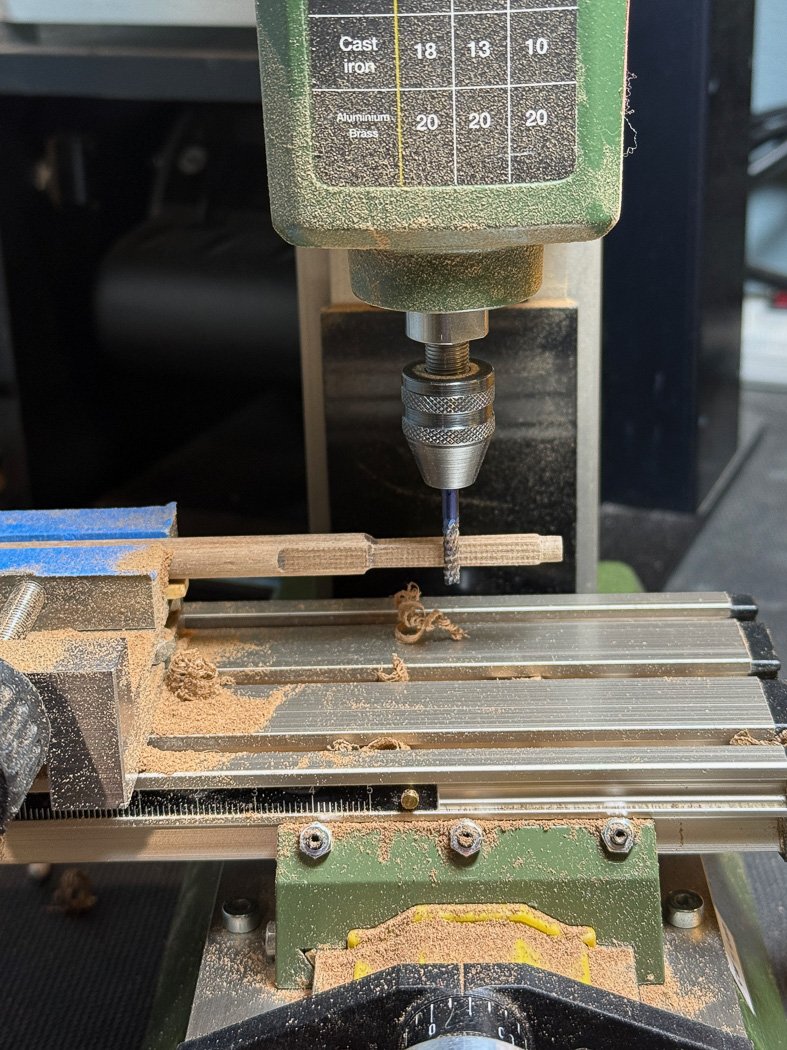
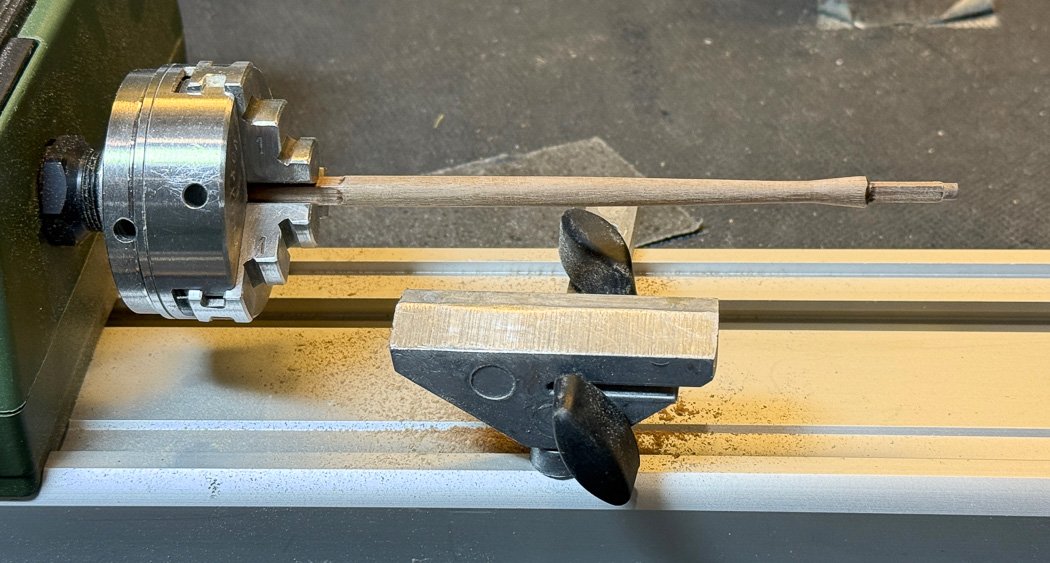
 Masts I decided to make all the sticks first, if it doesn’t work out I can always start a small fire. And because I can use the fun tools I haven’t used in a while. I have a friend who has a mill, lathe, planer, sander, and table saw. His take up most of his garage, mine all fit in the corner of my much smaller workshop. His of course are a bit larger. First up the mill. With Cheerful and the Long Boat I started with square stock and rounded them. I’m back to doing the opposite. I have the Limited Shipwright edition of Flirt, everything is cut from boxwood. Everything except the same old walnut dowels. The mill makes the squaring off a fairly easy task, just have to get the measurements right. I was going for the 5x5mm required by the plans and despite my careful measurements my cuts were off. I was thinking I needed to start again until I realized I was off by 0.24mm, seems like an acceptable tolerance. These precision tools…. Because it has been 4 years and I stopped before doing this, it seemed like a good time to check the now shaped main and fore mast will mount up ok. Good that I did, I had to pop off the mast bases, easy as I’d used PVA, and correct minor straightening issues, much easier than after the full mast is completed. All good. Next the lathe, an easier way to spin the dowels to create the semi-hour glass look of the tops. A log of spin-stop-measure following the plans. Even more so since the main and fore tops are identical. This photo was after the fact for the photo. I wrap whatever is in the chuck with blue masking tape to prevent marking. The Proton lathe is nice for many reasons, one is the ability to insert the dowel deep through the housing so the part being worked is closer to the chuck. I’m enjoying my return to Flirt - thought there are still a lot more sticks to make, and the opportunity for future kindling if that doesn’t work out. Trying to get back in the swing of writing logs. Hopefully I can make them more interesting as I proceed. Thanks for stopping by.
-
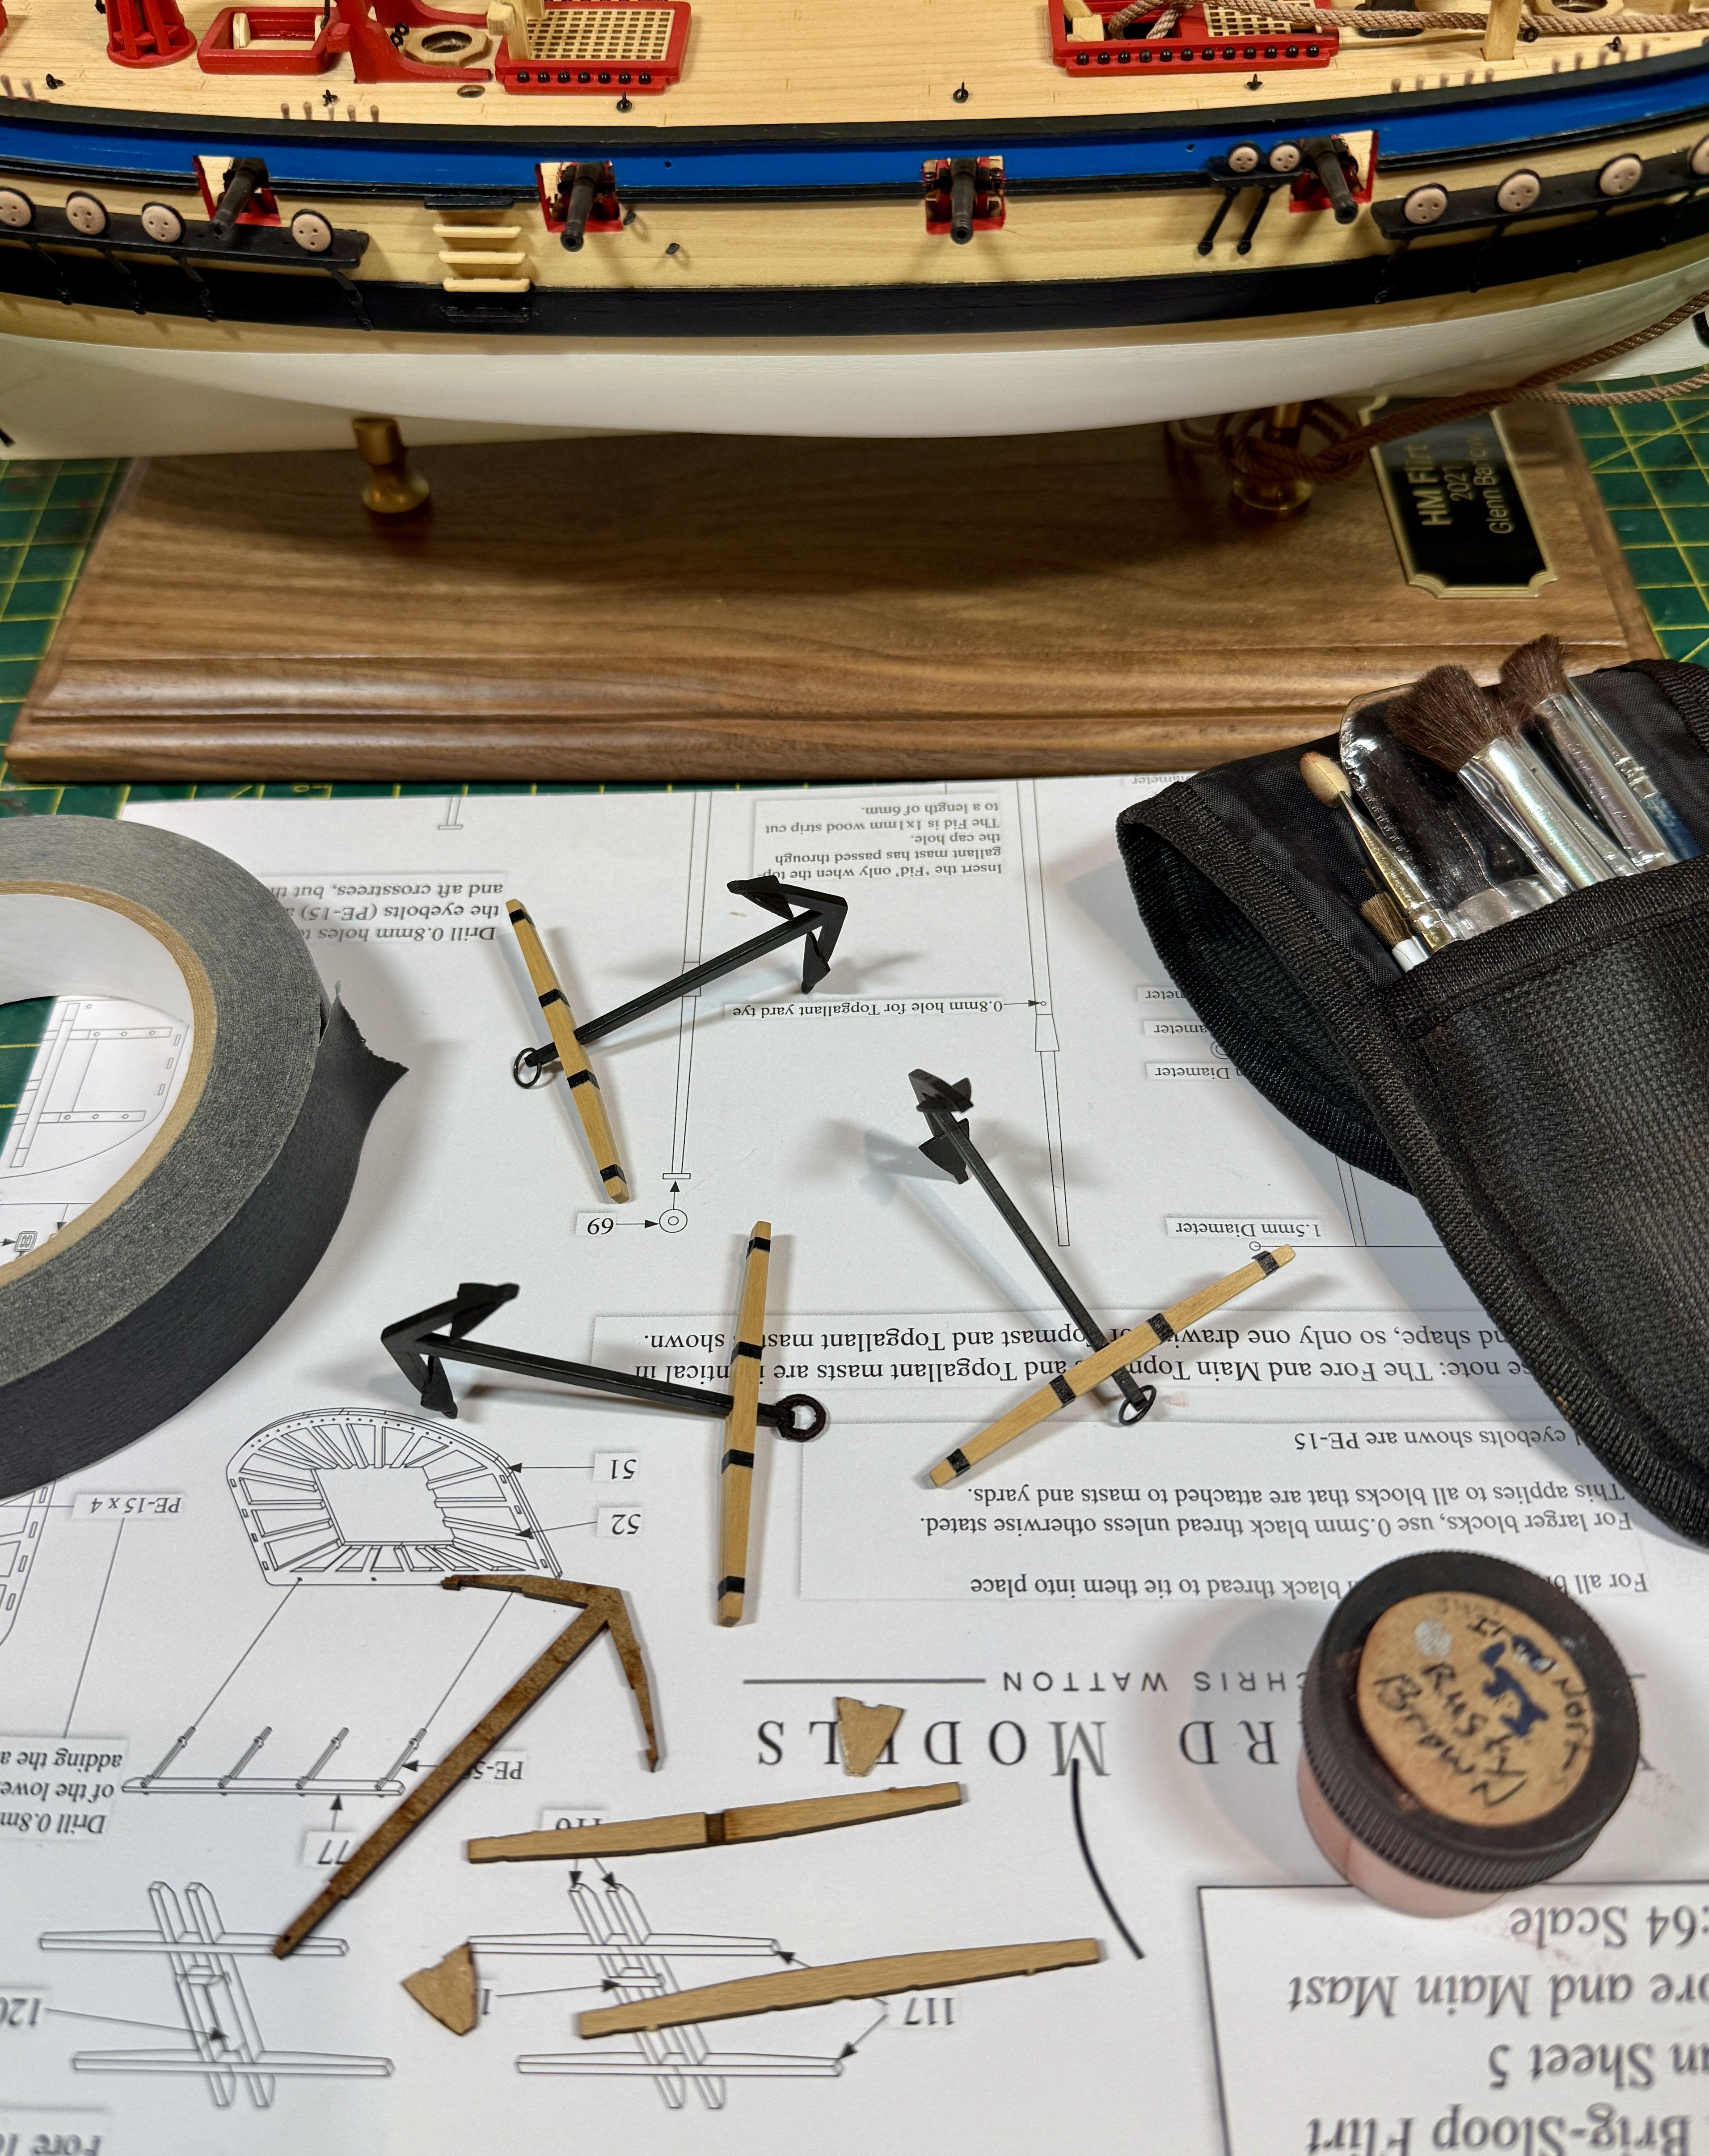
A slow re-start, beginning with the anchors. Amazing how 5 pieces of wood can be turned into realistic anchors with Admiral Ironwood Black paint and Rusting Red weathering powder. I made the rings with 22 gauge wire, going for a larger ring than the PE one supplied with the kit. I did the puddling on one, but not sure I like it so held off on the other two for now. Flat black masking tape was used instead of the traditional black card, I find it a better look. It’s not going anywhere after applying WOP to the stocks. Not very exciting I realize, but it’s a start. The box has been on my shelf four years now waiting for this re-start. I decided an inventory to get reacquainted was a good idea. I was once again amazed at the quality of Vanguard instructions, and especially amazed at the detail of the rigging plan sheets. I’ve already starting shaping the masts, I also need to get back in the habit of taking photos. Since completing my Winchelsea log I’ve built both the Syren Royal Barge and Medway Long Boat, but didn’t do a log for either. As those of us who create build logs know, it’s a chore to keep up with both building and posting, hoping others find the latter useful. Back to the masts.


-
Nicely done. The soft sanders are great, I use their adhesive sandpaper with them, though it’s hard to find it theses days.
-
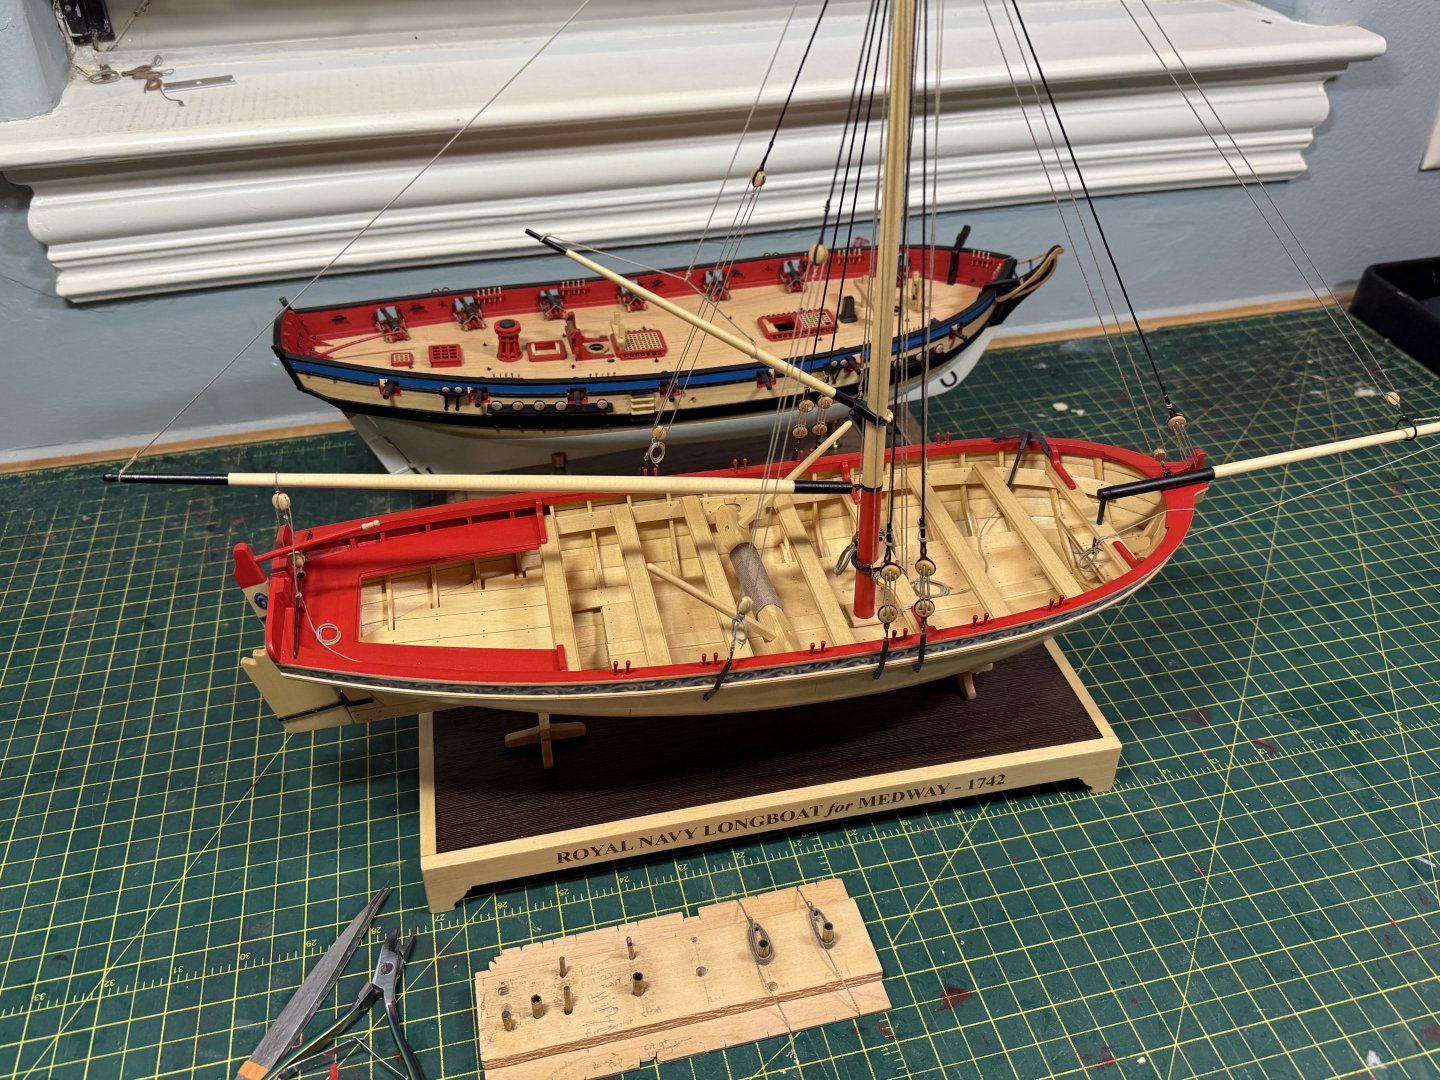
Turns out my Flirt did gather dust for a long while. Following the 3 years to build Winchelsea, then a few months with the Royal Barge and with just a few extra rope coils for my Medway Long Boat it’s time to revisit Flirt for some masting and rigging fun. Interesting to see the difference between 1:26 and 1:64 scale.
-
That’s a lot of precision cutting. I’d be interested to see your plank cutting method. I can never seem to get a consistent thickness, making my Byrnes planer an essential tool.
-
So far as I know there are no records of how ships were painted and for the most part captains could paint it as they wished, using their own money for the paint. As none of my models are destined for the Smithsonian I choose to paint them as I wish. I would say though painting beautiful boxwood should be considered a crime 😁
-
Chris, do you send packages to the US via the Royal Mail? I read they are now refusing to accept packages to the US until they launch a new system that charges more. I believe it was mentioned Ages of Sailis your US distributor but I don’t see your products on their website, did I misread that? I am considering ordering Harpy, but not sure how I’ll get it.
-
I used 24 gauge wire on Cheerful, really something I don’t like doing, but it was necessary for by build quality for that model, especially at 1:48. Honestly for Lady Nelson, the kit PE was sufficient for me.
- 83 replies
-
- 1
-

-
- Lady Nelson
- Amati
- (and 2 more)
-
It would be challenging to cut a new rabbet with the first planking installed. It isn’t necessary, you’ll be fine without it. Sandpaper is fine, never heard the glass thing, seems totally a waste of time. All my models are finished with 320 and 400 grit. For some items I use 600. There are many good paint brands, just don’t go cheap. I finish wood surfaces with Minwax Wipe on Polyurethane. Not sure if it’s available in Australia. Hope that helps.
- 22 replies
-
- 1
-
-
- first build
- Lady Nelson
- (and 2 more)
-
Not accepting a .5-1mm variance, taking the time to do it over, is the sign of an exceptional modeler. Well done!
-
Sign me up for the first kit with the CNC block option. Years ago I would frequently check the Jotika website waiting for the completed prototype and kit ready to sell. Never understood why they left it on the site unfinished (it’s still there). No doubt I’m better off having the Vanguard version anyway.
-
One of the most amazing models I’ve ever seen on this forum, or anywhere else!
-
Nice work on the fine details. It is these little mini-projects that make this model stand out above all others. Glad to see you making the time to do them right.
-
Another excellent model BE, congratulations! I have followed your detailed and instructive logs for years now, they were a constant reference for me for my own Pickle and Pegasus. I like the display and the partial matting, a unique presentation. I have the goal to create a book on my Winchelsea, inspired by your creating one for all your models. looking forward to what’s next.
- 332 replies
-
- 3
-
-

-
- Harpy
- Vanguard Models
- (and 1 more)
-
Congratulations to you and your family!
-
Just recommending the top rail go to the skirt, not cut off just short as shown, but what do I know…
-
Well done. I imagine in the “refined” version the figureheads butt will be closer to sitting on the head rails (if that’s the right word, head rails,not butt)😀
-
Glad to hear, PE is so “kit-like…”
-
I was able to mold it to fit once the Elmer’s glue stick was applied. If it doesn’t work, isopropyl alcohol will easily remove it and you can try again.
-
Not sure what that means, so are the rudder and stem two halves glued together or a solid piece?
-
Been waiting for this ever since Caldercraft showed a prototype they never finished years and years ago. Let’s go! Hoping that’s a spare rudder and stem another something made from two layers? Those gun carriage sure make use of available space:-)
-
Limited Edition series 2? 😎 I’d be interested too should things change. Something I could build with my grandson.
-
Not sure how I missed the finished model post nearly a year ago. Try belated congratulations on a job so well done. So many fine points about your build, the one I find especially impressive are the splices and seizings in your rope work. Well done!
- 562 replies
-
- 2
-
-
-
- vanguard models
- alert
- (and 2 more)