


glbarlow
-
Posts
4,133 -
Joined
-
Last visited
Content Type
Profiles
Forums
Gallery
Events
Everything posted by glbarlow
-
 Nice work on a tricky part!
 -
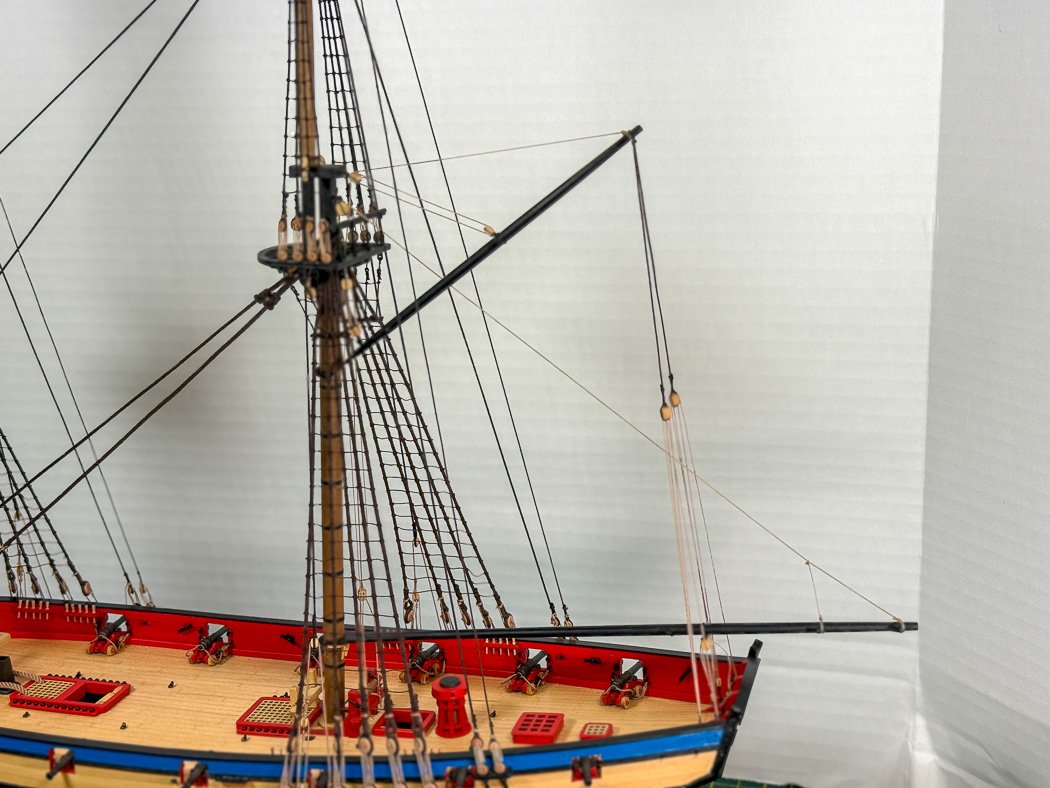
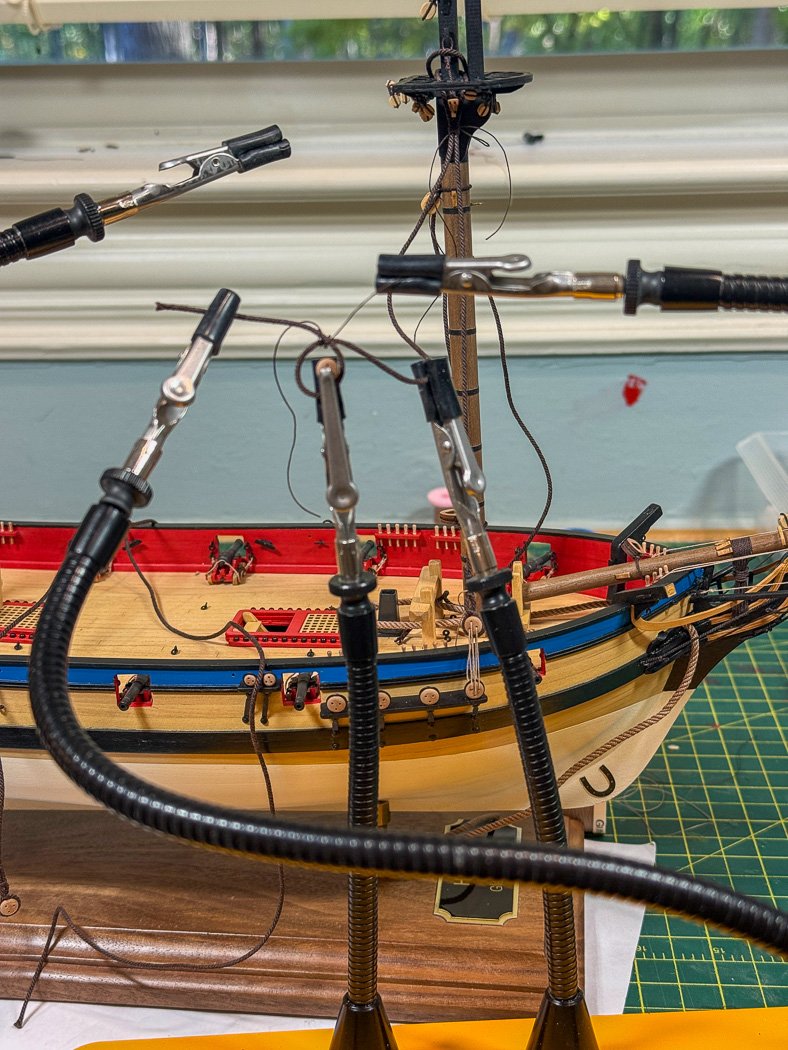
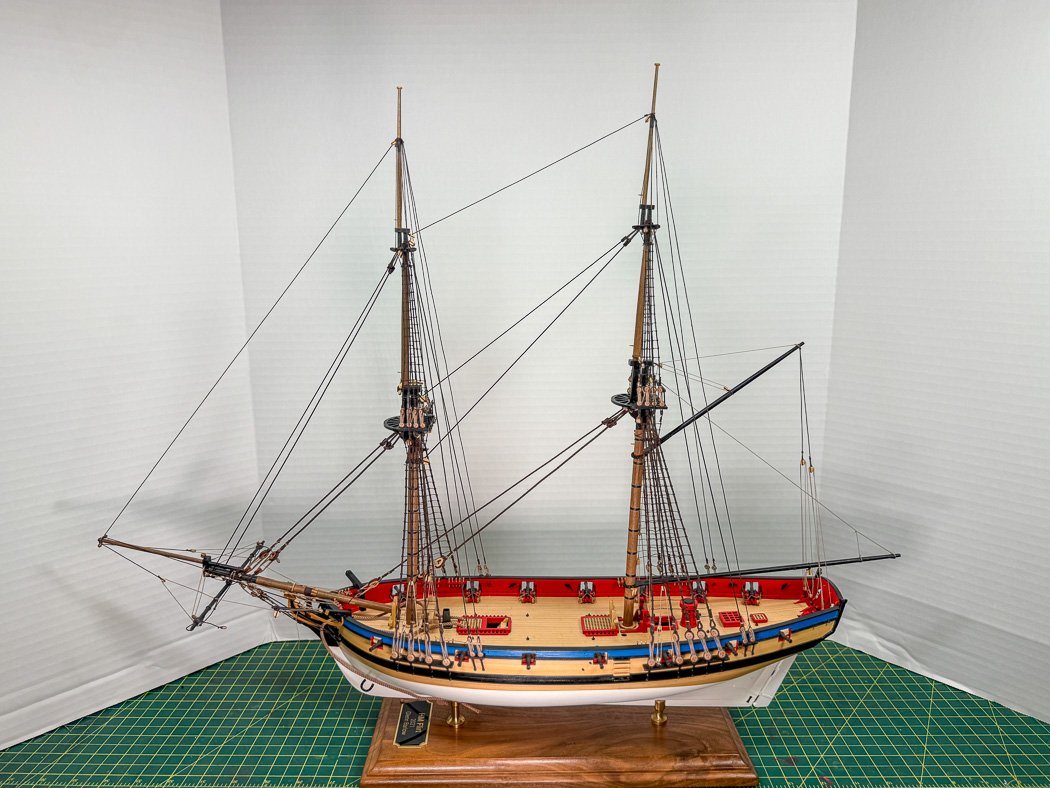
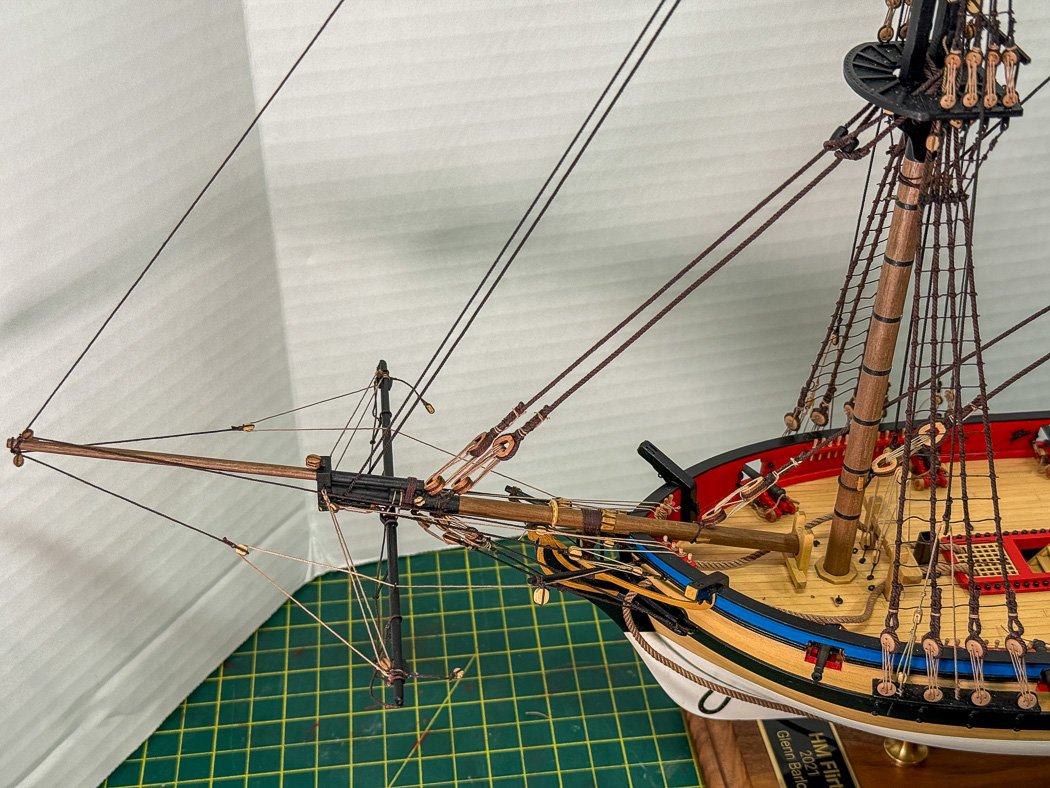
t’s been a long while since I posted. Mostly because there isn’t much new I can offer on rigging. However I didn’t want to abandon a log on such a nice Vanguard model, so here’s a bit of an update: The standing rigging is complete other than the crows feet, not sure I’m going to add them. Once again, I do like my quad hands, really not sure what I’d do without them. All sorts of angles and height I can reach, not to mention a steady platform for tying the endless amount of block and rope combinations. I’m using all Syren rope, great stuff. I’m also using my leftover actual wood Syren blocks, hopefully I have enough to finish. Nothing as exciting as the meditative peace achieved by the tying of clove hitch after clove hitch. Long ago I adopted the method of both using scaled grid templates (easily made with Excel) behind the shrouds each marked for every 10th and 5th lines. I tie the 10 marks first then the 5 then alternating the remainder in between. All finished off with watered down PVA brushed lightly over each knot. I sorta like the rigging process one minute and want to toss the whole model the next. It is a challenge to work in ever tighter space, especially at 1:64, keeping the run of the lines straight and not crossing each other incorrectly. Didn’t take any photos of the process, so here’s Flirt with the standing rigging complete, against the most basic of backdrops. As I’ve said earlier in this log and others,Vanguard makes a great model including this one. In my opining there is no better 1:64 model on the market than Vanguard, everything else is a distant second. Thanks for stoping by. Merry Christmas to all.


-
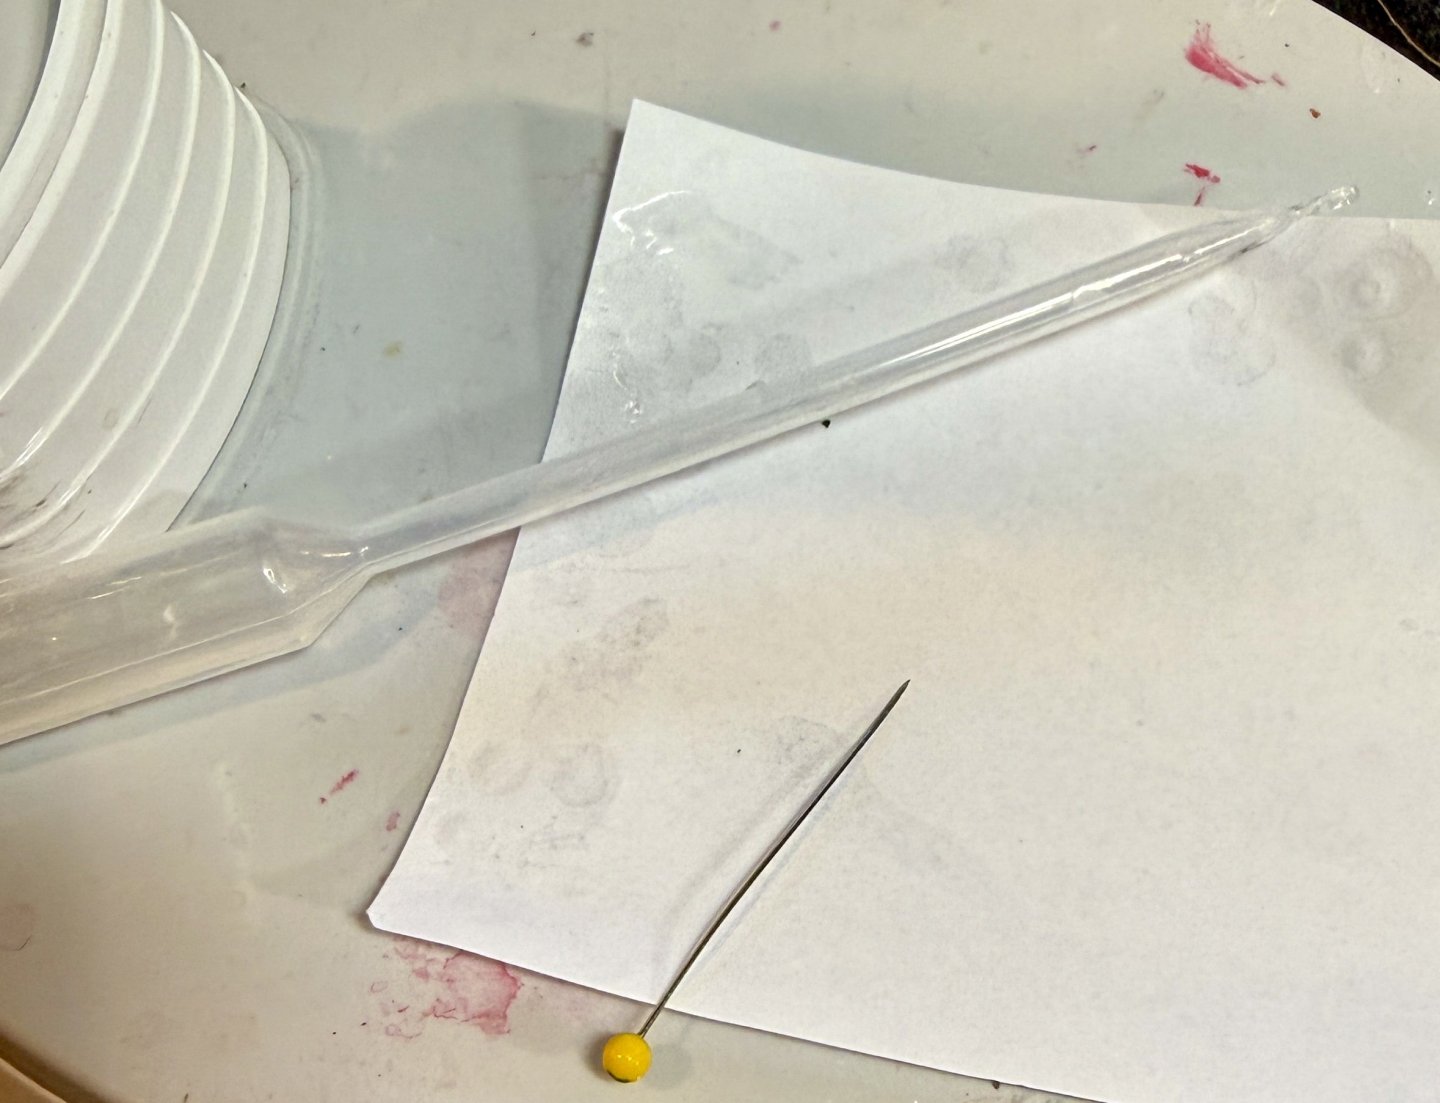
More methods and practices. Other than planking when I use just the applicator 90% of the time I need no more CA than I apply with a straight pin lifting the glue from a little puddle on the paper.
-
My oldest model (20 years) and several after it are planked with walnut using CA, they are fine. Again I think this an issue of quality and viscosity of the glue used in your tests.
-
This doesn’t happen.
-
Just for balance, many experienced modelers will recommend using it. It’s all about experience, practice, and the use of a quality product. I agree with James, those so against using it are old school, more power to them. I appreciate your effort testing it but as Greg noted I wonder if you were using an inferior grade (all CA is not the same), a thin viscosity, or both in your tests. If one is over applying it that much they probably shouldn’t use it. As others noted acetone, not isopropyl alcohol, releases the bond.
-
Glad to see so many using the medium CA from Bob Smith Industries as I have for years now. My oldest model is 2008, the CA is just as strong now as it was then, there are zero issues, it was done almost exclusively with CA. While I now do use Tite-bond and PVA for certain applications I am more than confident using CA. All my models are planked with CA, including my single planked, unpainted, Cheerful and Winchelsea with no visible glue stain. I’ve never had the problems with running, cracking, or discoloring described by some. I also have no issue with oder, perhaps because I keep it in a syringe applicator, never an open bottle. One application I use it exclusively is with rigging. As Chuck noted it takes very little. I apply it by dipping the tip of a common straight pin in a little puddle I place on a piece of standard printer paper cut into 4 inch squares (I create new tiny puddles frequently and replace the paper when it’s covered). It takes no more than placing the tip of that pin to lock a seizing or knot in place. Base on my current experience it will still be there for at least the next 20 years. There are so MANY MANY strings in this forum on this topic, funny thing is it’s a lot of the same people commenting, including me. Bottom line as always is use what you’re comfortable using. My comfort is using CA. I do wonder though, is there a string that questions the use of PVA…
-
Those headrails sure were fun.
-
Those are some big boy tools there. Nice work, enjoying your progress.
-
That’s s quite some interesting software
-
Congratulations Chris. Such a big step forward in growing your business.
-
Enjoyed the interview, Chris you handled it well! Sad that one, very understandable, reason for not designing a Constitution is recognizing he’d be raked over the coals about every detail. It would be funny to have an American frigate, but his is a British company. He’ll never run out of British ships to choose from. How about one us Americans sunk or captured 😂🤣😂
-
Well said and well done. The decisions are made and we’re moving forward. Great news that you’ve outgrown your current space, despite the effort involved to locate a new one
-
I’m glad of the flag set too and have been a customer of Vanguard since its first model. Chris works so hard to get things right and to communicate so effectively on this forum I just tire a bit when someone nitpicks at his choices. I did learn a new word though, had no idea their was one for the study of flags.
-
Wow, just wow.
-
Ruin, with the design of a flag, seems a bit harsh. You can make your own, one consistent with your views on vexillology. In fact I never put any flag on a model, distracts from the build.
-
Sigh. It’s a flag. How many would ever notice. Good call Chris, more will identify with the books and movie than the actual ship.
-
Nice work, cool design on the tiller. If you haven’t glued in yet I recommend sitting it aside for a while. Easier to work the rigging in. I’d also recommend jumping a head to add the iron bar and block on the transom (where the boom is rigged) while you have room to work. Don’t have to glue it in yet either if you so choose. . At this point reviewing the rigging plans is helpful. There are certain eyebolts easier to get at now than later even if it’s just drilling the holes for them in advance. I love Cheerful, such a great model, yours is looking excellent. Congrats!
-
All in on the display, very nice! Congratulations, you’ve come such a long way from the start of Vanguard!
-
I get everything from a US based website. These Linstrom ones have proven to be best. I’m sure they are available at other places, I think it’s a European brand. I don’t recall where I got the razor saw, it’s relatively common and other than a round wooden handle identical to Chuck’s design.
-
Chapter 12 covers any minor deviations at the bow. I also really enjoyed chapter 3 after months on planking and infrastructure.
-
Frank, After winding the wire on the bit I slipped the coil off and cut the rings with a high quality flush cutting wire cutters I get from a jewelers making website. It’s just about holding the cutters 90 degrees to the coil and cutting a few at a time. There is a little bit of waste for the first and last few, but I made hundreds this way. I have the razor saw and it is useful in many other ways, I tried cutting the rings with it but was less successful than with the fine edge cutters. Jewelers tools are excellent for modeling, especially metal work. I made the lid rings and eyebolts the same way as the ones on the deck but with 28 gauge
-
I love the effect of weathering powder, especially on turning resin cannon to a realistic gun metal color, oddly using Rusty Brown ( a Chuck trick I learned building Cheerful). However it’s messy and at least in my case has to be applied to parts off the model. This approach would seem to allow a more ‘target specific’ alternative and maybe not end up everywhere like, again for me, the jar of powders do.
-
For those of us that failed art class please explain this😀
-
I’ll hold on to the new tutorials and watch for the rope walk. It would be a nice change from shrouds and ratlines I’m doing now.


