Adrieke
-
Posts
1,625 -
Joined
-
Last visited
Content Type
Profiles
Forums
Gallery
Events
Everything posted by Adrieke
-
 hi dragzz good to see you have recoverd from the mishap hope to see you better soon so you can continue
 -
thanks Wim and good to see you back
-
hi all thanks for all the holiday wishes I am back home now and shall continue the build soon
-
sorry to hear of this mishap Dragzz hopefully you get the replacement parts soon
-
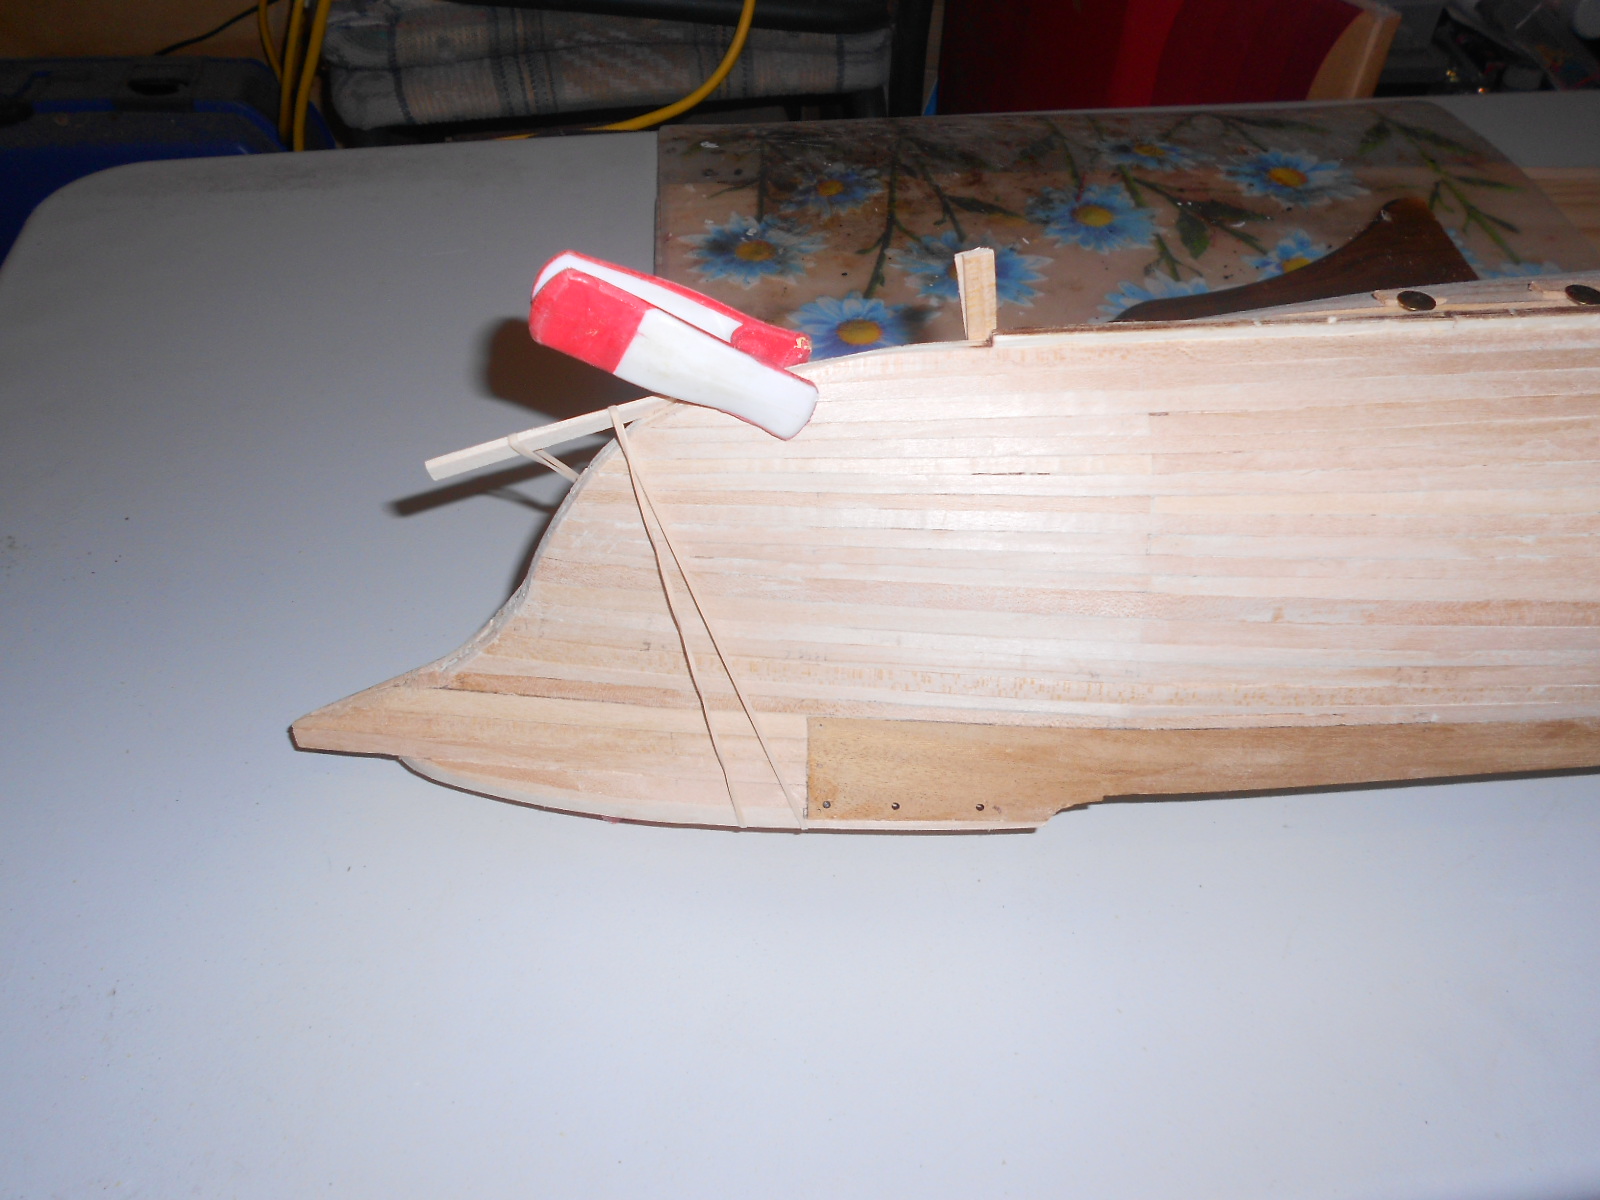
thanks Popeye and Sjors yes lots of sanding and filler needed but no painting yet . there will be a second layer of planking with 7x0.6 strips once I got the hull nice and smooth like it should be I intend to do the second planking without the need of filler and sanding should be limited to getting it nice and smooth for the paint I have now finished the first layer of planks . hare a few pictures : unfortunately I will be away the rest off the year so I will be putting away all tools and covering up the hull till I am back not sure if I will have the opportunity to go online , so if not I wish you all happy holidays and see you in the new year


-
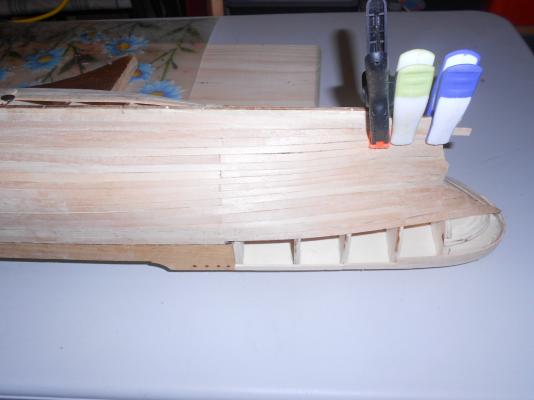
thanks Mick and don't worry we all have these days where you don't feel like doing much . they l pass thanks Mobsie thanks Dragzz and for Sjors here some pictures look from the stern . only 3 planks to go . you can see the 2 planks curved around with the bottom one sticking out a fiar bit. this is where I tuck the curved planks underneath bottom bit al ldone Sjors . from this view she actually looks all finished last plank on this side all shaped and waiting to dry. due to the extra plank and that the plank is wedged in I don't need anything to hold it down. I didn't push it all in in case I couldnt get it out without breaking for the final glueing


-
I will take some tomorrow especially for you Sjors I am actually only 3 planks away from finishing the first layer initially I thought I was going to have lots of difficulty but after a bit more fairing of the stern bulkheads all went well and the extra plank I bended around the stern made it easy to pre bend the planks as I could use it to hold the plank in place
-
i have now finished the planking on the bottom and have started on the rounded stern section will be slow progress
-
Thanks Piet its double planked and painted
-
Sjors if you want here is a link to an online countdown timer for pc http://download.cnet.com/Free-Countdown-Timer/3000-2350_4-75330413.html so yuo can countdown to the day you cna start the aggy
- 1,873 replies
-
- 6
-

-
- occre
- san ildefonso
- (and 1 more)
-
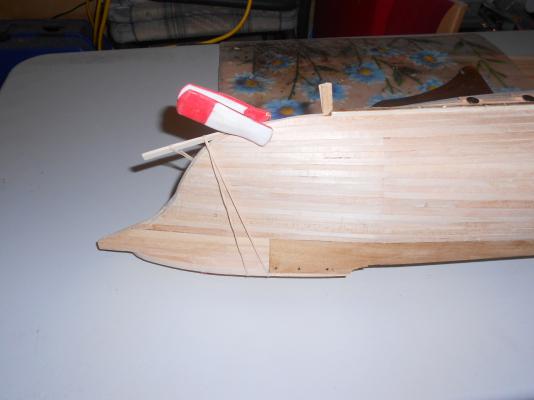
thanks Popeye. no rounded section but what i did do is added a second plank bended all around that is higher then it should be. that wil give me something to plank against . it wil need to be sanded down to half height but i think it wil help a lot with the prebending and holding the plank while it is glued down thanks Sjors , i am already looking to buy some filler as i am running out but have to wait till i get some christmas money thaks sailor
-
here some pictures of how far along I am as you can see there are some gaps that will need filling but overall after only a bit of sanding the hull feels smooth apart from a few small bumps that need sanding down
-
only 2 planks left on one side and about 6 on the other until the lower gap is closed i promise i ll get some pictures soon (after a bit of cleaning up )
-
wow Rick all the enhancements you are putting in. and it seems so easy for you
-
thanks Piet and Robbyn yup the Gorch Fock will get all my attention now
-
seems so but mine is only a small one . only removed 2 planks and need to do a bit more fairing so they ll lie better this time
-
more training for when you are at the same point on the aggie
-
thank you Mark,Robert, Sjors, Anja, Popeye, Mick, Ron, S Coleman and JPett and others for your comments and support during this build, it has meant a lot to me to be able to share this journey with you all
-
this week finishing the KoM has been taking up all my time but now I am back working on the planking only a few more rows are left at the bottom, but the stern top is a bit of a challenge with the complex curves ( had to rip out a few planks as I was not happy with them)
-
I have uploaded some images to the gallery see my signature
- 1,038 replies
-
- 2
-
-
- King of the Mississippi
- Artesania Latina
- (and 1 more)
-
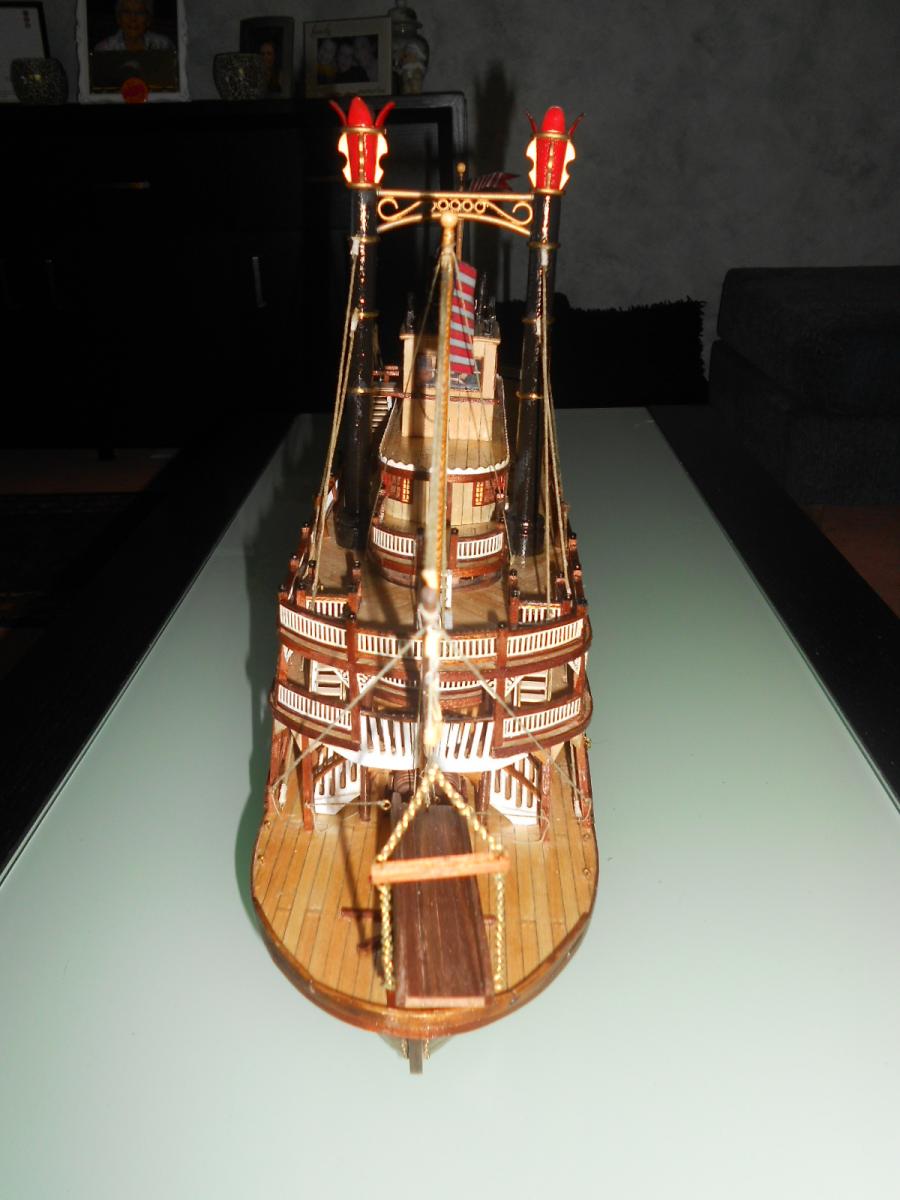
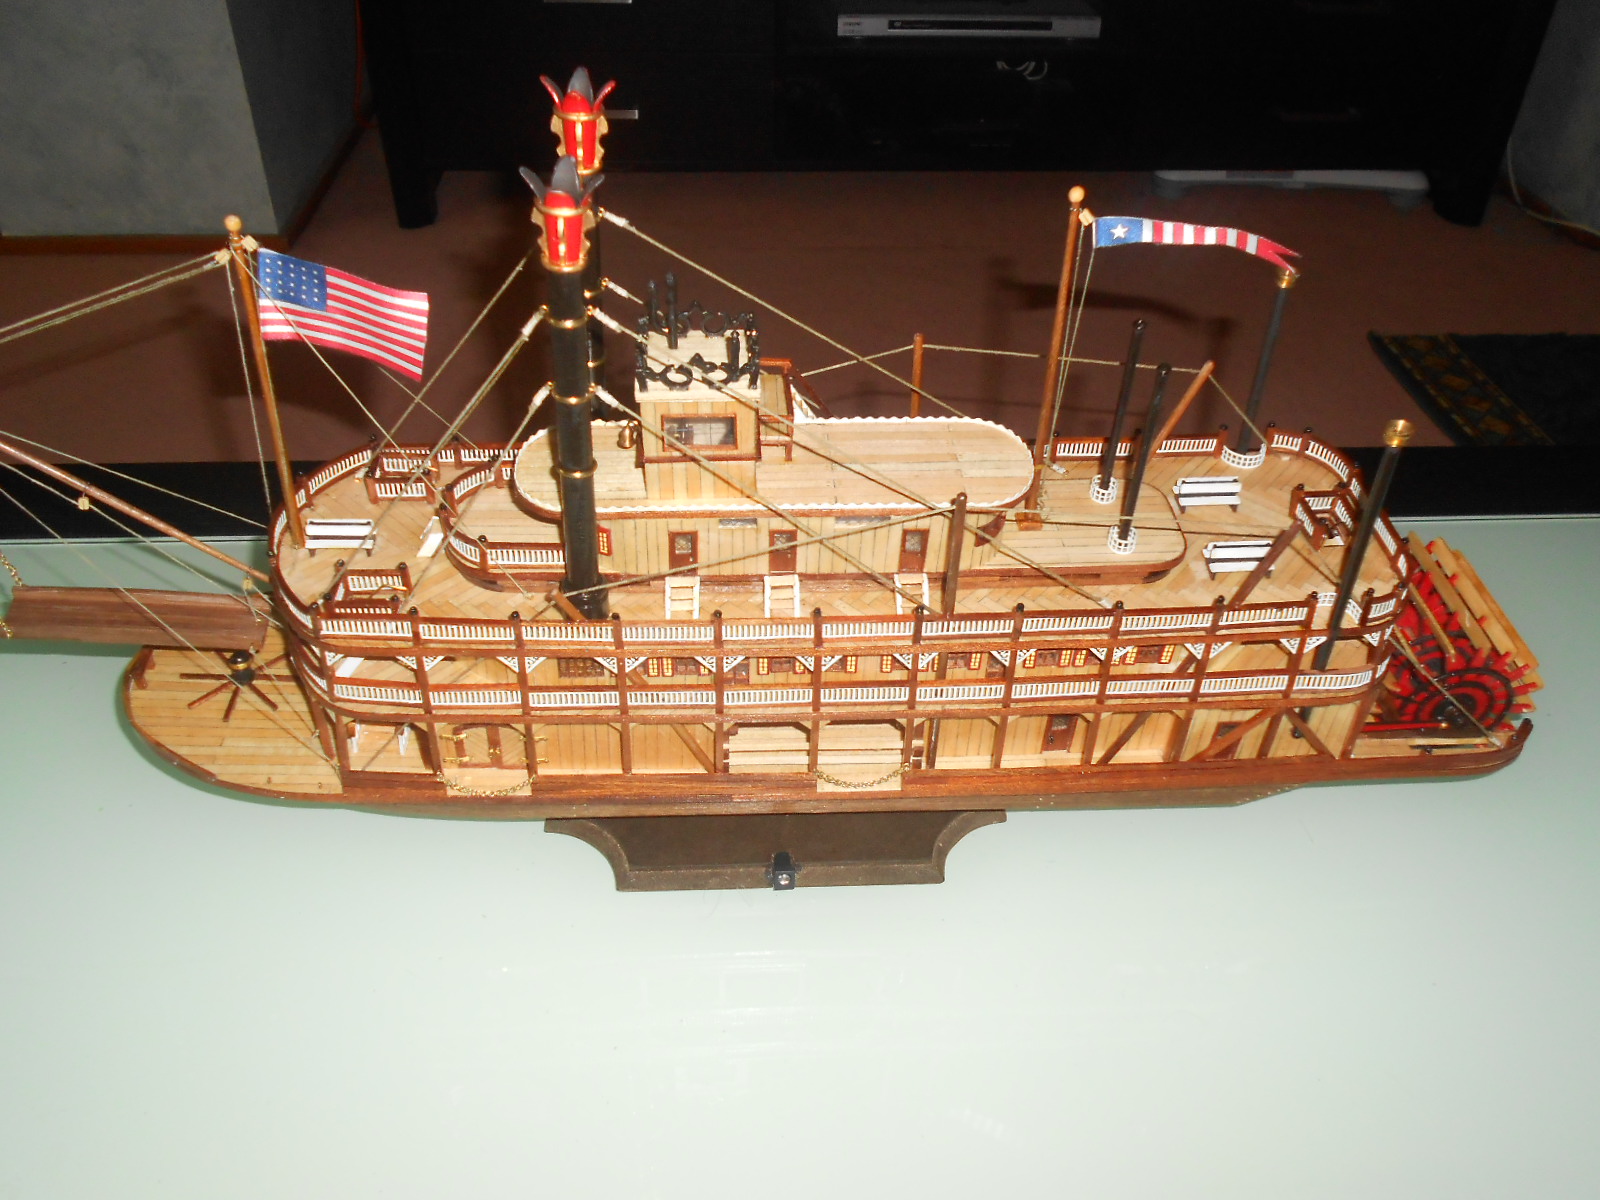
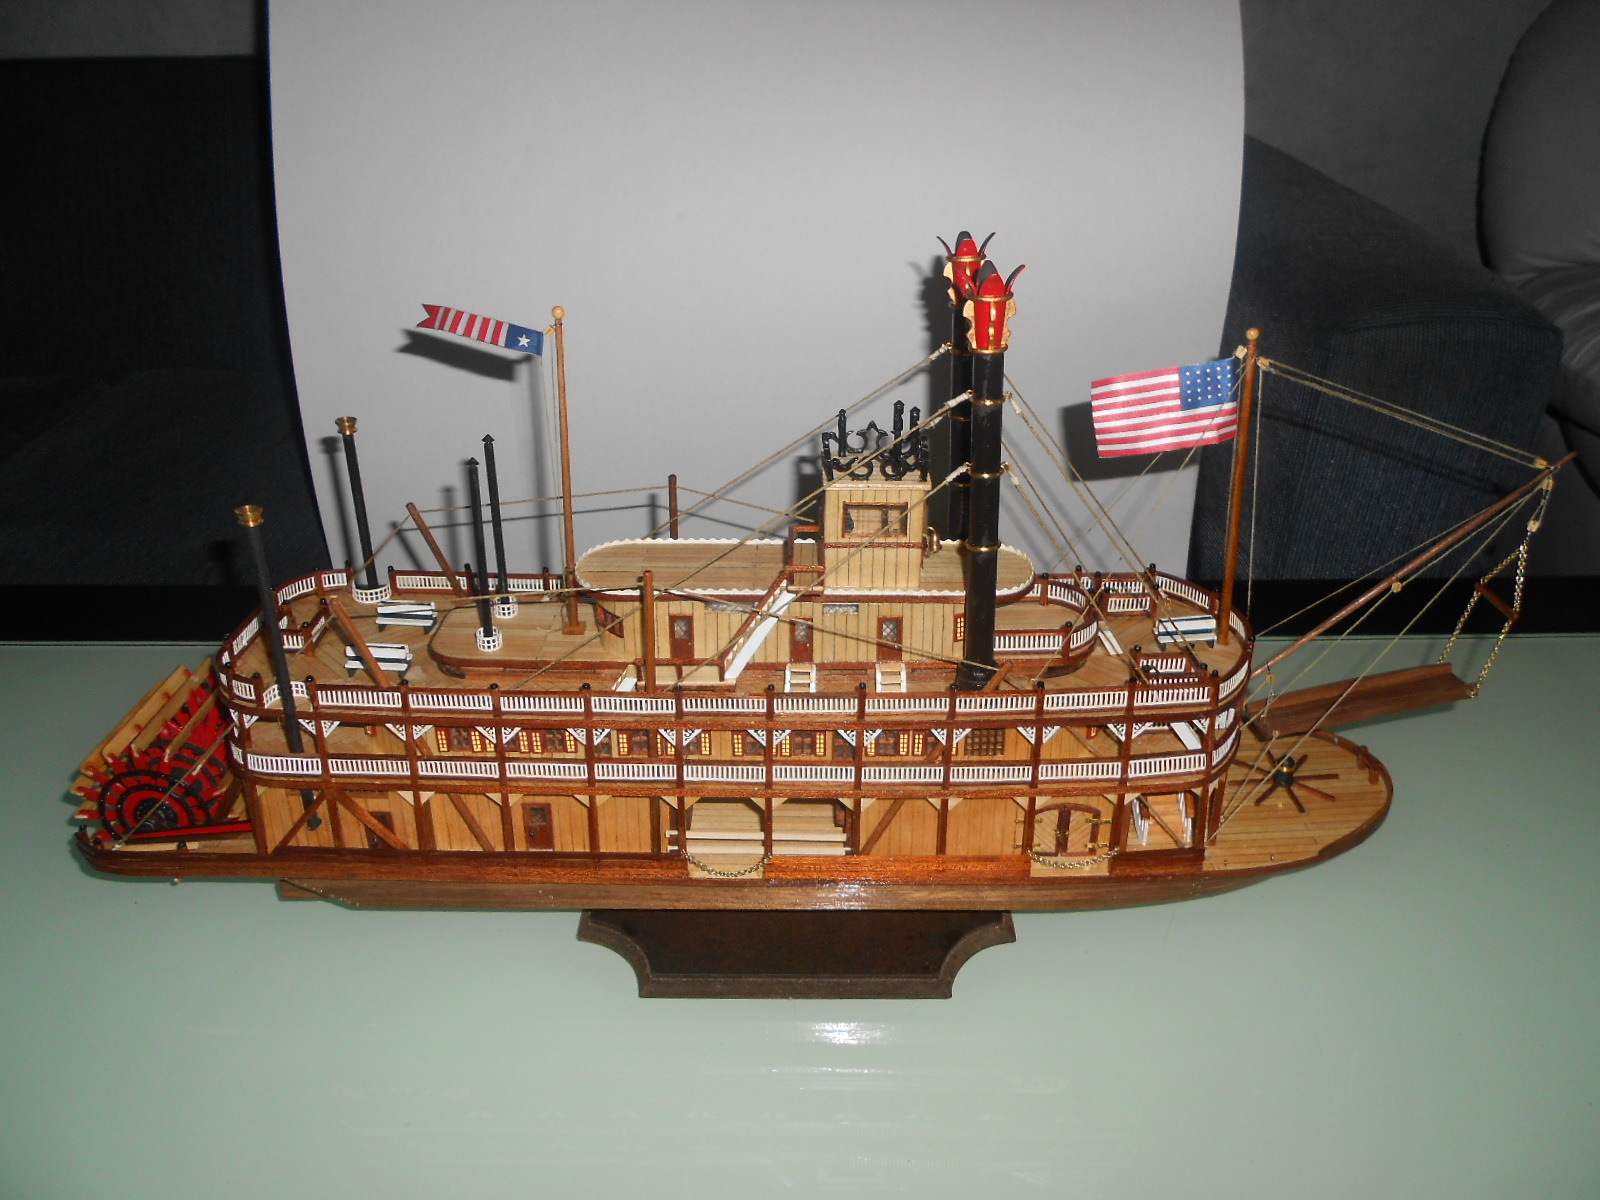
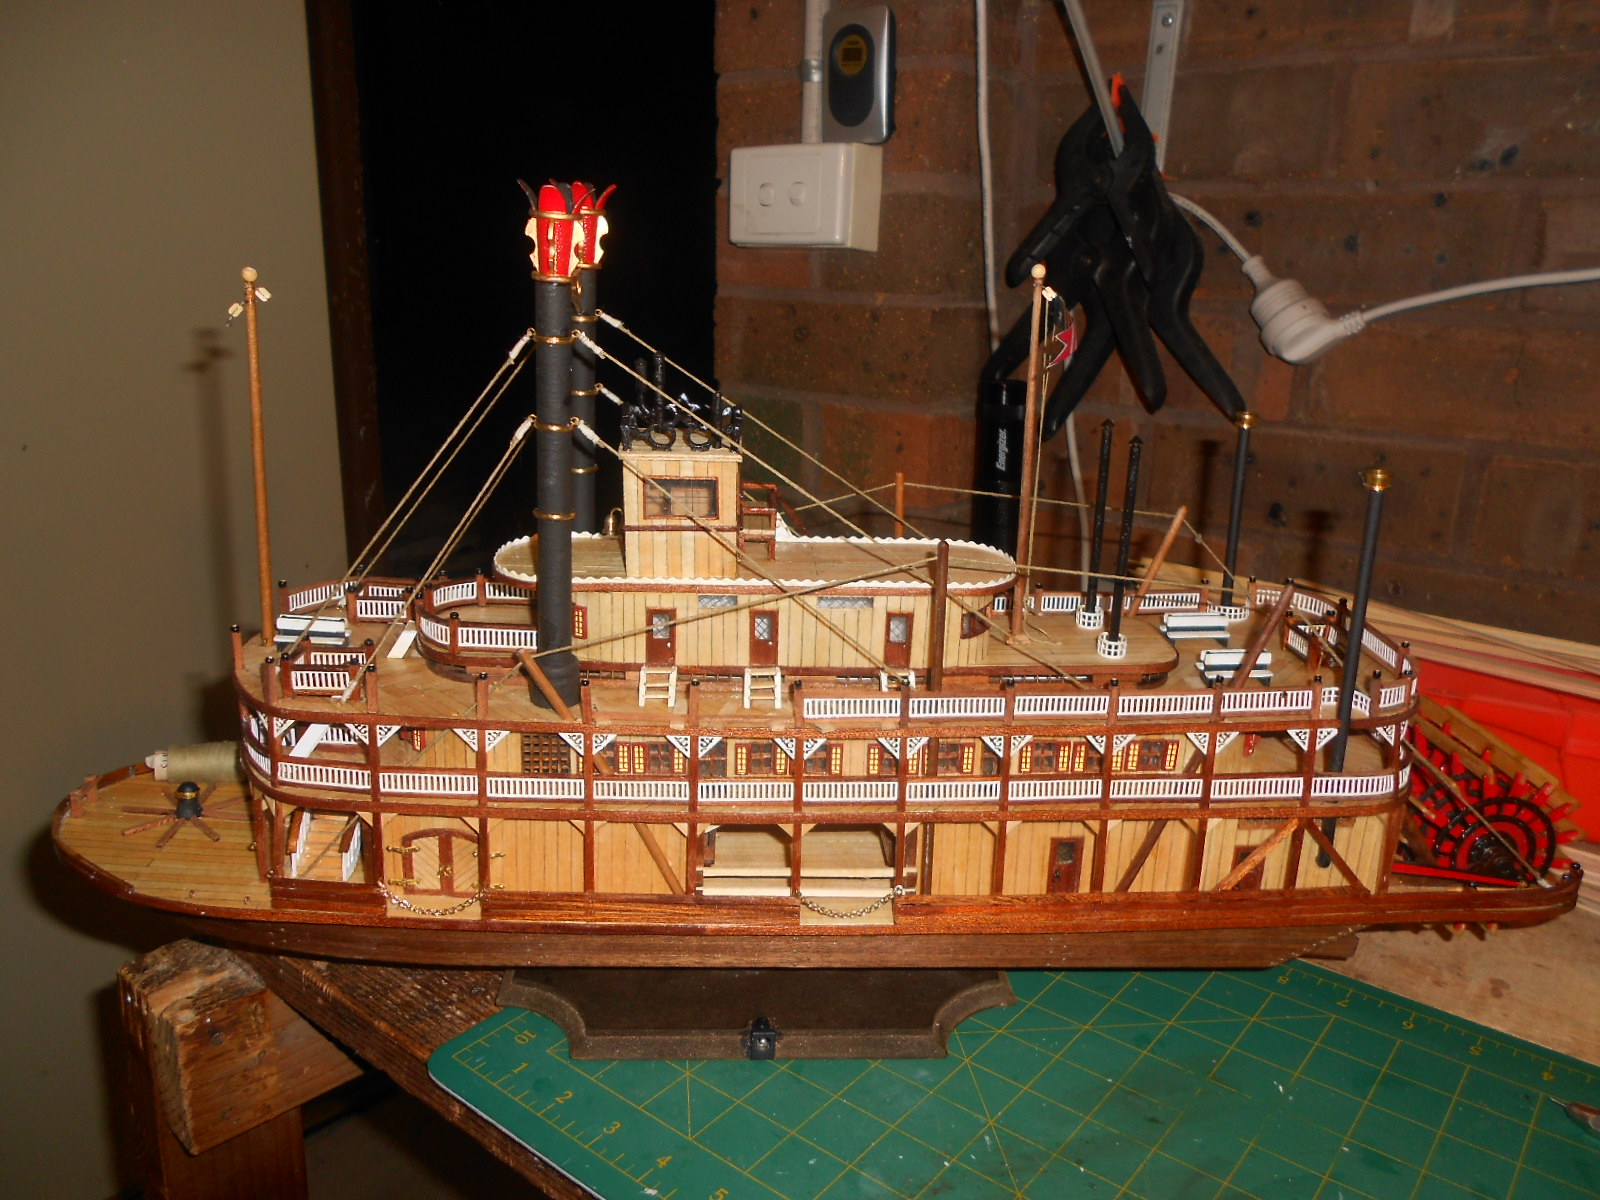
on 8/12/13 at 2:30 PM I put the last piece in place I started this build august 2012 I had 2 months of no building due to hull planks being off the wrong size which meant there weren't enough of them during the build I decided to add led lighting which added a lot off extra work a few months ago I also had almost a 2 moth break because of an infection and allergic reactions during this build I also lost a good friend who was also building this model finishing the model at times was partially sad and frustrating but I was determined not to give up now that she is finished I feel a load has lifted and although with every look I take I see the many mistakes I made I feel proud here a few quick pictures, I will take some better pictures including with lights on for the gallery


- 1,038 replies
-
- 10
-
-
- King of the Mississippi
- Artesania Latina
- (and 1 more)
-
thanks Mick yes I am happy not long now Sjors last update picture before she is finished

- 1,038 replies
-
- 6
-
-
- King of the Mississippi
- Artesania Latina
- (and 1 more)
-
sounds good Dragzz, I myself used the supplied nails and drilled a hole In the doors and cut off a bit of excess at the back. the heads stick out a bit to give a bot more depth