HOLIDAY DONATION DRIVE - SUPPORT MSW - DO YOUR PART TO KEEP THIS GREAT FORUM GOING! (Only 20 donations so far - C'mon guys!)
×


Adrieke
-
Posts
1,625 -
Joined
-
Last visited
Content Type
Profiles
Forums
Gallery
Events
Everything posted by Adrieke
-
 hello Don I think the purpose is to make it easy to plank. it gives you how the planks will need to flow yes it needs to stick out 3mm which is the thickness of the other planks so they fit nicely against it if you haven't done so yet make sure to bevel the grove the same way as the outside of the bulkhead to ensure the depth of it is 2 mm and the plank will stick out the 3 mm
 -
sudomekh I have learned never to trust instructions (especially AL ones) but my skill set at the moment is not high enough to do anymore. don't forget those hand railings are only 2x2 mm wide and sapeli wood which is not good for fine work. maybe in a few years thanks Robbyn yes very close I am fighting to urge to go quick and finish her lol
- 1,038 replies
-
- 4
-

-
- King of the Mississippi
- Artesania Latina
- (and 1 more)
-
Sjors for display maybe you should think about what I am planning : this is an OZ website but I am sure they will have these in the Netherlands too : http://www.shopsupplies.com.au/showcases-glass/tower-showcases expensive but you can display 4 ships in there and in the end you pay less then if you buy 4 separate display cases
-
beautiful and clean work
-
very nice recovery Augie i tend to use too much glue and PVA wipes of easy, but it would certainly cut down on the waiting game with the thick CA
- 2,191 replies
-
- 1
-
-
- confederacy
- Model Shipways
- (and 1 more)
-
thanks Robert thanks sudomekh. the stairs and railings are done according to the manual. all I will do is sand and clean up a bit
-
sudomekh unfortunately the only power tools I have is my rotary tool and a handheld drill thanks Augie I think I have decided 600 mm board with the pedestals 300 mm apart so tomorrow get the board and the screws then add some reinforcements to the correct place and drill a hole for screw
-
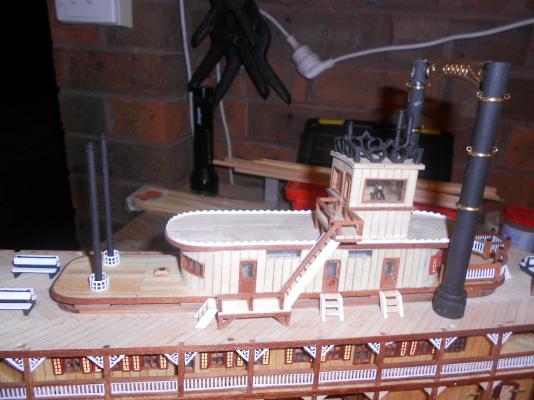
thanks dragzz finished the walkway to the steering cabin all that is left now is to drill the holes for the eyebolts for the cabling that secures the smoke stacks then I will varnish the decks after that : steam stacks (4 off them) poles that hold up the first deck 2 masts walkway capstan railings almost
- 1,038 replies
-
- 3
-
-
- King of the Mississippi
- Artesania Latina
- (and 1 more)
-
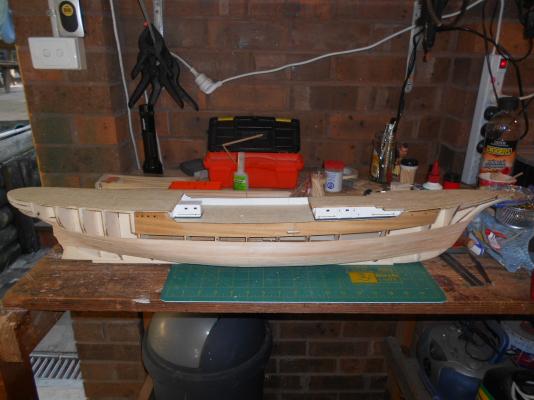
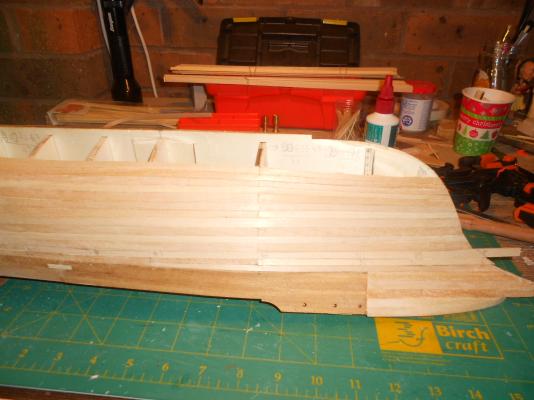
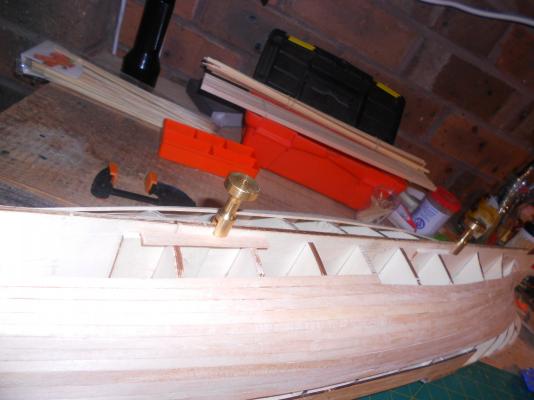
planking continues the last plank at the top front for the pedestals I need to cut 4 mm of the top so that the keel will fit in to it snugly. I am hoping I can do that with the cutting disks of my little rotary tool tomorrow I ll also be looking for the display board I am thinking about one with dimensions 600x300 (the ship is 950x260)

-
hi sudomekh I assume you are talking about the picture in post number 371 ? those cuts happened when I was sanding the edges of the planks. I have to recheck but I am pretty sure they will be covered up by the railing so I didnt bother fixing them up.
-
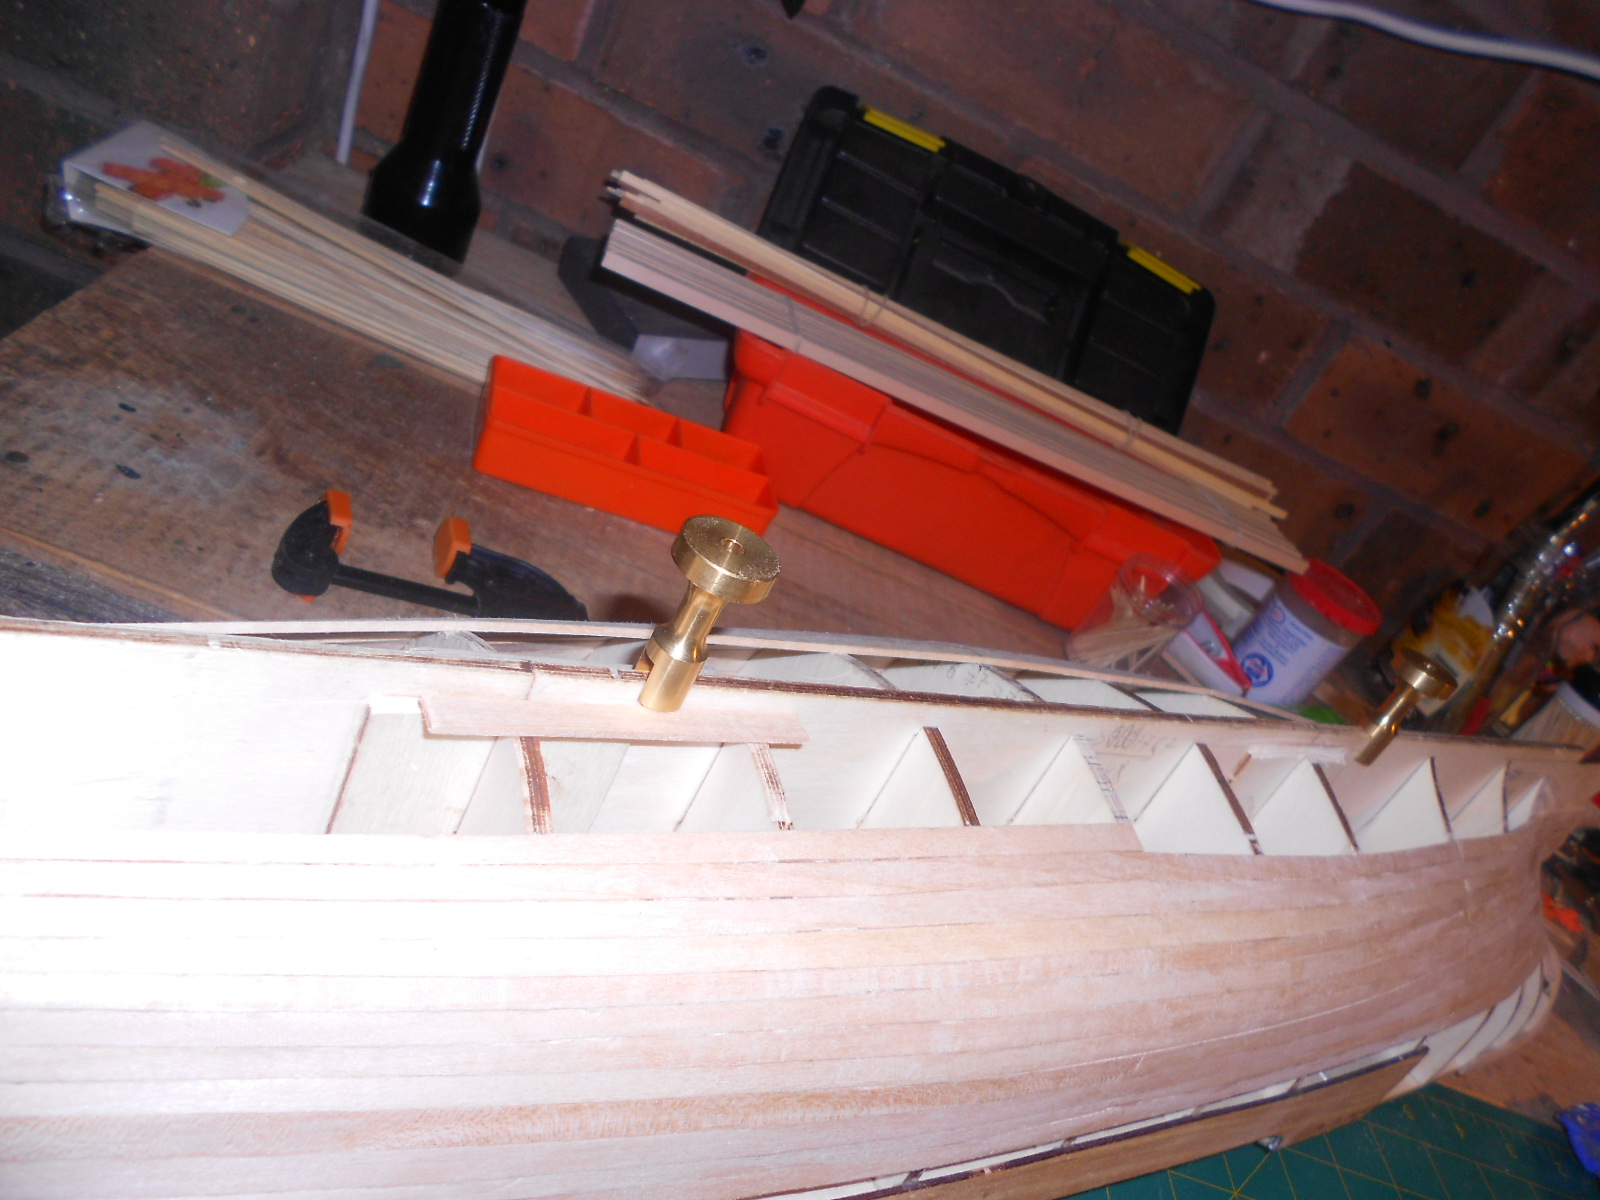
ordered yesterday , arrived today they will need to be cut down a bit to fit the keel

-
thanks Popeye i have ordered 2 pedestals and hoping they ll arrive by friday so i can make up my mind where to place them and drill the necessary holes when i ordered them i had a look on the stores website and see what else i needed (to avoid paying almost as most postage as what you order) i stumbled across a special : AOTS : the ships of christopher columbus. i have considered building the Santa Maria but so far resisted to buy the kit. with this oportunity i have now made up my mind and the 3 ships will be my first scratch build projects . dont get too excited as this is stil years away before i attempt that (need the required tools and skills )
-
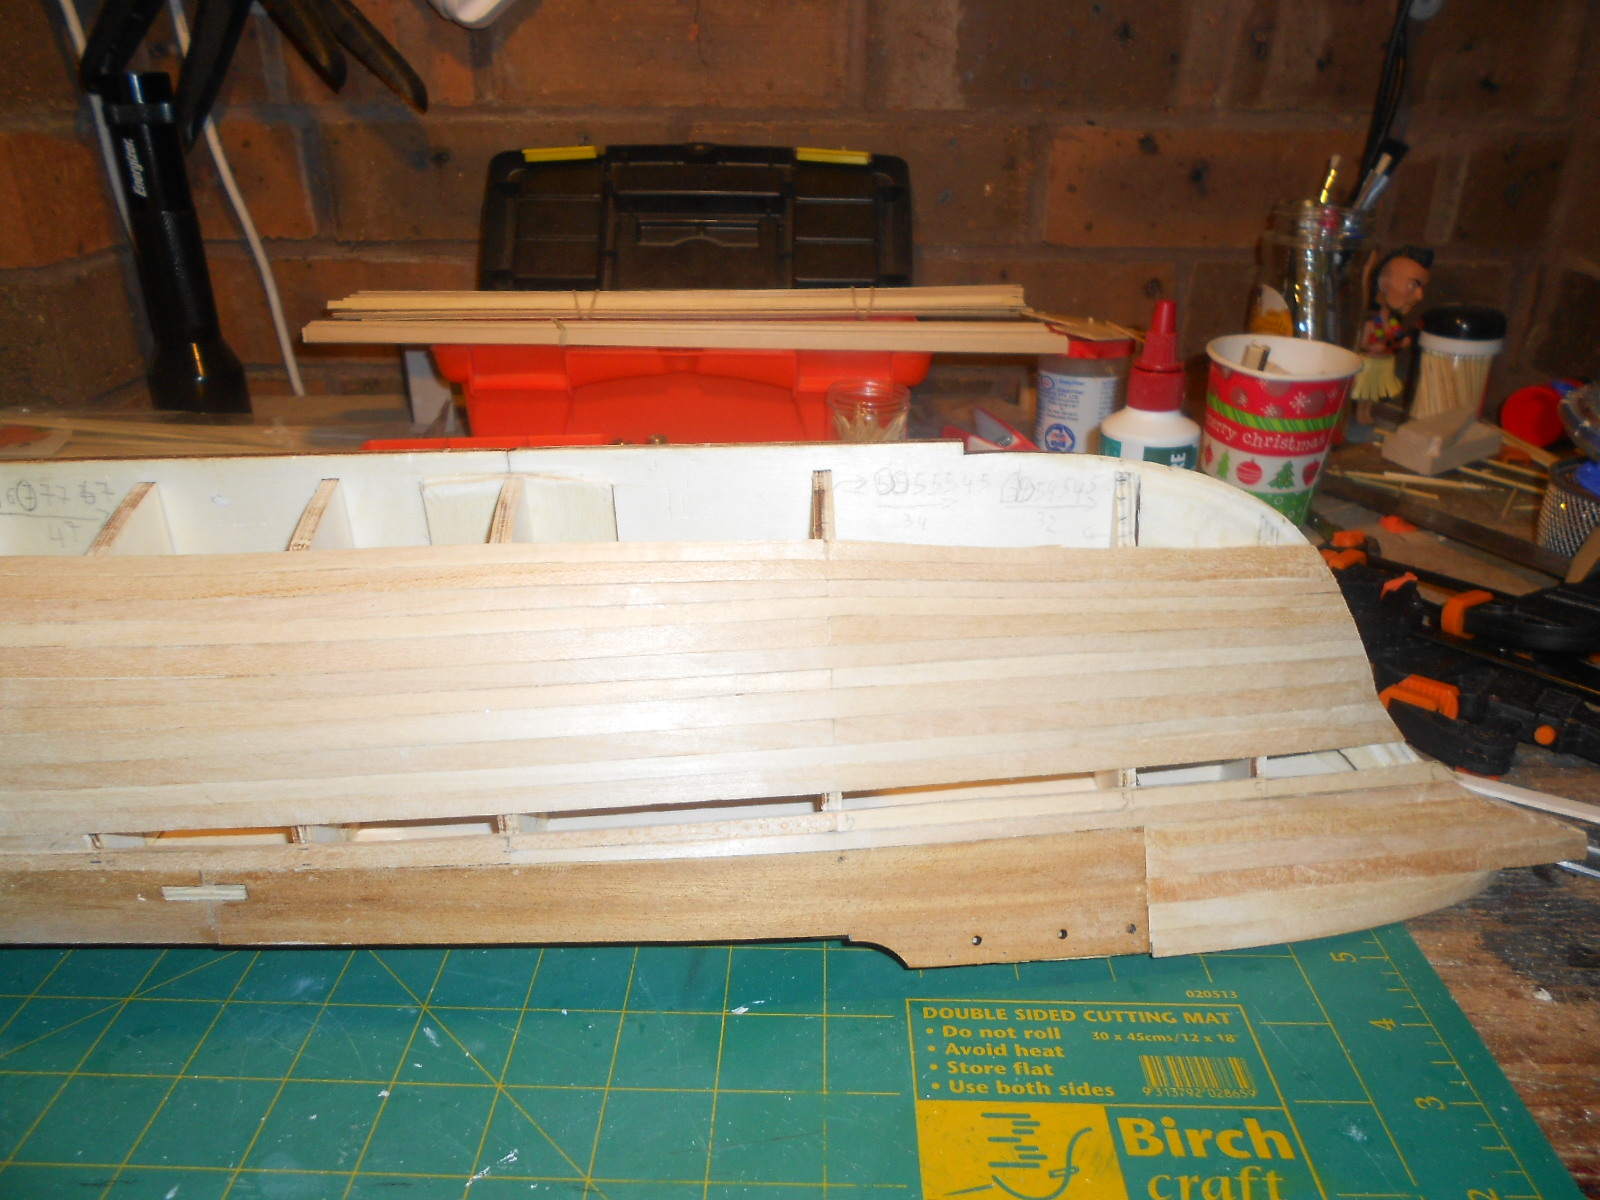
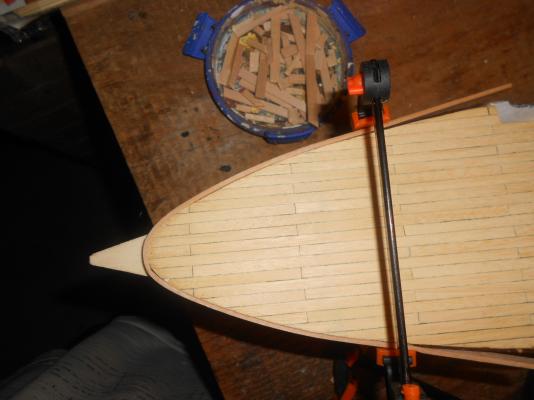
now I know why they used the vertical planks in the picture you see that I had to use a wedge to fill up the gap not a big problem but, and you cant see that in this shot, there is a lot of sanding to do to get it to the right curve. with vertical planks there would be a lot less of that

-
Piet if they did , they certainly miscalculated thanks Piet . One day i ll try that scratch building popeye no bulwharks, just the wave catcher (atleast thats what i think it is) the rest wil be railings not sure what you mean with cradle , but in th eplnak i just bended i need to drill a hole for the bowsprit to slide in
-
thanks Ron i agreee will look much better thanks Mobsie. i assume the only reason for the vertical planks would be to make it easier to plank and since she ll be doubled planked with the veneer planks it wil not show up either way. the main reason i tried it was to see if i could get a sharp curve like that without bereaking the plank. there is a slight little bump on the inside but that wil be coverd up . for me this is all about learning how to plank without having to worry to much about the end result as she l be painted abyway thanks Mick. actualy it is not so dificult. the hot water makes this wood really bendy. just went very slowly and steady. plenty of spare planks so i was prepared for a few breaks
-
I halted the planking towards the keel til I have figured out what I want to do for display stand at the top according to the instructions small bits of vertical planks need to be glued against the bow and stern I decided to bend the planks around here the bow plank which was soaked for 5 minutes in hot water and then gently wrapped around and clamped til it dries
-
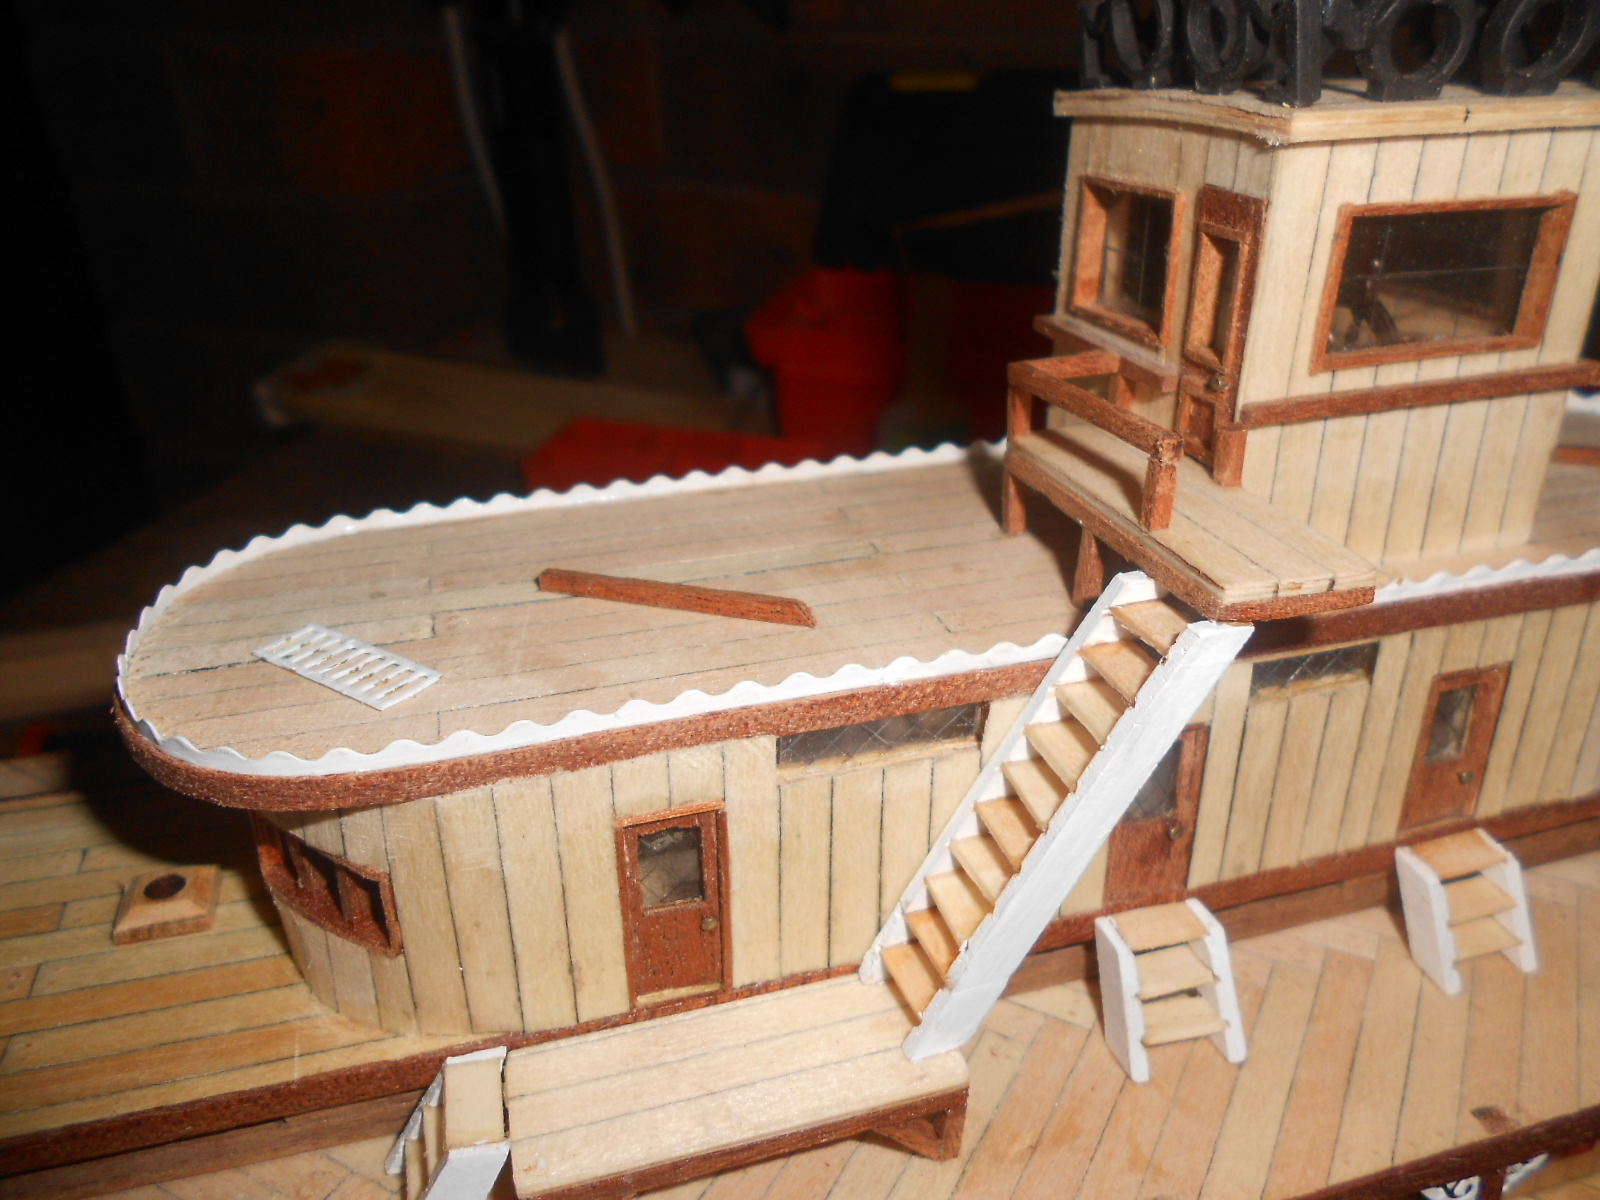
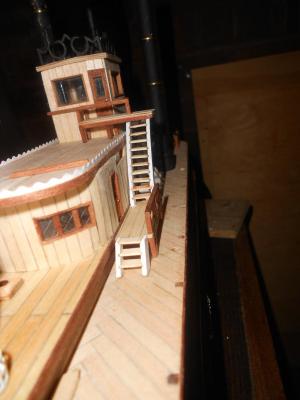
ok here before correcting the mistake you can see that the outside of the ladder is flush with the top walkway but not with the bottom one the handrail going up would be on an angle if I left like that with the diving board extended more the ladder is not flush with the top walkway leaving room for the handrails witch will be straight now

- 1,038 replies
-
- 6
-
-
- King of the Mississippi
- Artesania Latina
- (and 1 more)
-
last night when i was working on the last stairs i realised that i made a mistake the top walk way at the steering cabin (the diveboard) inst sticking out enough so the ladder was against the 3rd deck . that wouldnt have been an issue but the handrails wouldt be on the edge anymore (i ll explain better when iupload the picture) so i had to remove the whole top assembly (all is stil intact) and ladder i am repositioning the feet so it will sit properly this time
- 1,038 replies
-
- 1
-
-
- King of the Mississippi
- Artesania Latina
- (and 1 more)
-
by the time i finish a few more kits i wont need to be any wood for a scratch build;) now that i am almost closing the lower gap i am thinking of whta i am going to do to display her with the King i use to drawerknobs and made them in to 2 pedestals and drilled a hole through them so i could put a screw through it i am thinking of something similar but since the GF will be very tall i am worried that after a while it wil start to fail and break off
-
Robert about the problem yo posted on Dragzz buildlog : the forward posts that hold up the lower deck i have he same issue. for me it was too late to move the lower holes forward a bit so what i am going to do is bend them a little so the will sit against the corner the bend is unnoticable unless you looko really close up
-
Robert I use the standard white wood glue to fix the wooden parts to the posts and CA to fix the bras railing parts to the wooden parts
- 1,038 replies
-
- 1
-
-
- King of the Mississippi
- Artesania Latina
- (and 1 more)
-
some more progress pictures. 6 rows of planks left to the keel I was a bit worried about the amount of planks I had left until I looked in the box and found another bundle I am going to have a whole heap left . am I missing something or did they add plenty of spare planks