HOLIDAY DONATION DRIVE - SUPPORT MSW - DO YOUR PART TO KEEP THIS GREAT FORUM GOING! (89 donations so far out of 49,000 members - C'mon guys!)
×


kscadman
-
Posts
258 -
Joined
-
Last visited
Content Type
Profiles
Forums
Gallery
Events
Everything posted by kscadman
-
 Beautiful work Thomas. The curvature you put on your head rail timbers is fantastic. Three cheers to you! Richard
 -
Hi Ron and thanks. The keel jig is the Fair a frame sold by Model Expo. (some assembly required) It works really well as a holding device.
-
Wow Augie, you are doing some beautiful work. Its simply amazing. I really like the windows, and your castings really do look like wood. They blend well, great choice of paint! Richard
- 2,191 replies
-
- 1
-

-
- confederacy
- Model Shipways
- (and 1 more)
-
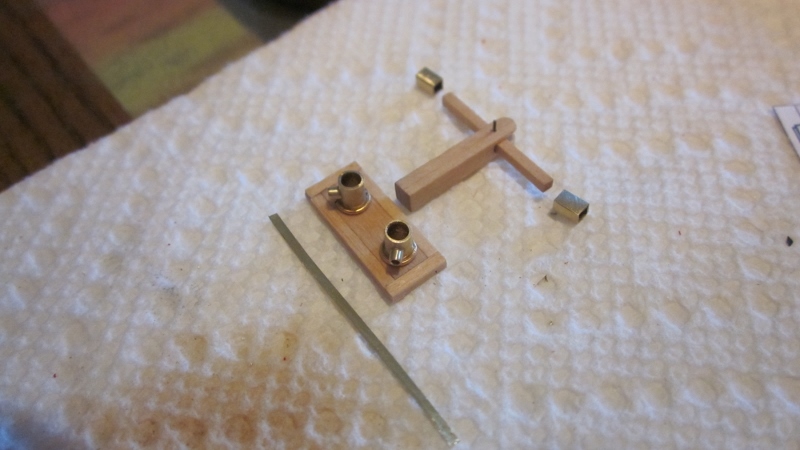
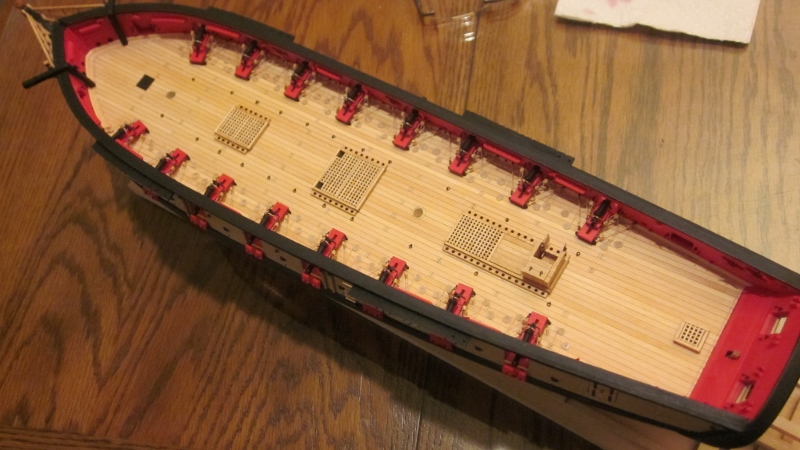
Augie, thank you for the information. I was wondering how that would work under fire. CPt_D thanks for the comments and I hope you get your Syren soon! Its a joy to build this kit. I credit all the members on this site for their help in my success so far. The comments, tips & tricks, etc. have been invaluable. Just start a build log once you begin and you'll do fine. So far I've been able to complete the most of the bitts & pump. On the pump I started out making everything out of wood and paper but I just couldn't get it right so after a bit of frustration I turned to brass. The local hobby store had 1/8" & 1/16" brass tubing as well as 3/32" square tubing which worked out well.I also went ahead and made the galley stack out of the brass tubing. I wasn't able to get the handles exactly on center but I'm happy with the result. Richard


- 227 replies
-
- 9
-
-
- syren
- model shipways
- (and 1 more)
-
I originally wasn't going the use the kit provided wheel and ordered a wheel from model expo. That wheel turned out to be too wide. I used the Humbrol "sand matte" its number is matt 63.
-
To all thank you for the compliments. Am celebrating 2 years of work on here this month and I'm realizing how tedious the small bits can be, but I do like the results when finished. Augie - you were right, the tiller rigging passes over it nicely. Richard - I know how projects can keep a person away but I hope to see updates on your Syren - she's coming along great! Thomas - Thanks as always! Scott - I see your point, but I'd be more worried about having the tiller hitting me while manning the cannons if the ship went hard to port or starboard. Chuck - Thank you - coming from the master I'm feeling good about my progress. I've completed the steerage and tiller rigging and I'm currently doing the prep work (sanding, staining, etc.) for the fife rail, bitts & stack. Also I'm still looking for a smaller bell for the binnacle. Richard

- 227 replies
-
- 8
-
-
- syren
- model shipways
- (and 1 more)
-
Hi Robbyn, saw build log under the update list and thought I'd drop by. You've got a great start, especially the extra filler blocks. In hindsight I wish I would of done that. I too send my well wishes to your mom. Richard
-
Augie, your work is amazing. Cant wait to see if finished. Actually the enjoyment is in watching the build. Richard
- 2,191 replies
-
- 1
-
-
- confederacy
- Model Shipways
- (and 1 more)
-
Hi Thomas, your work is simple perfection. I bow to the master each time I check in on your build. Richard
-
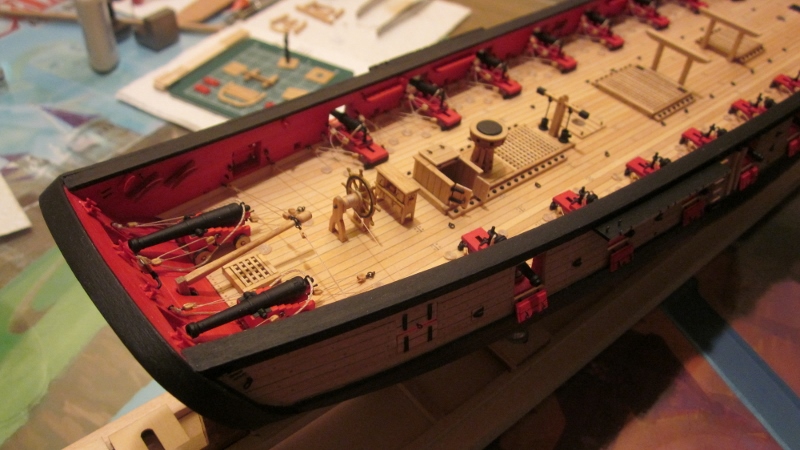
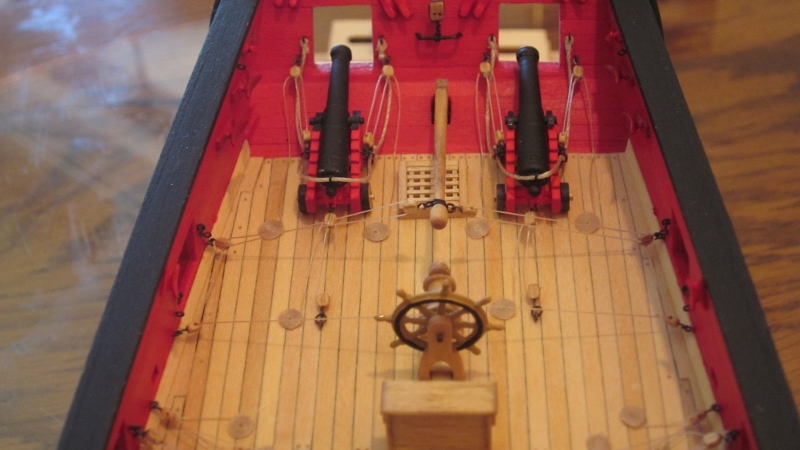
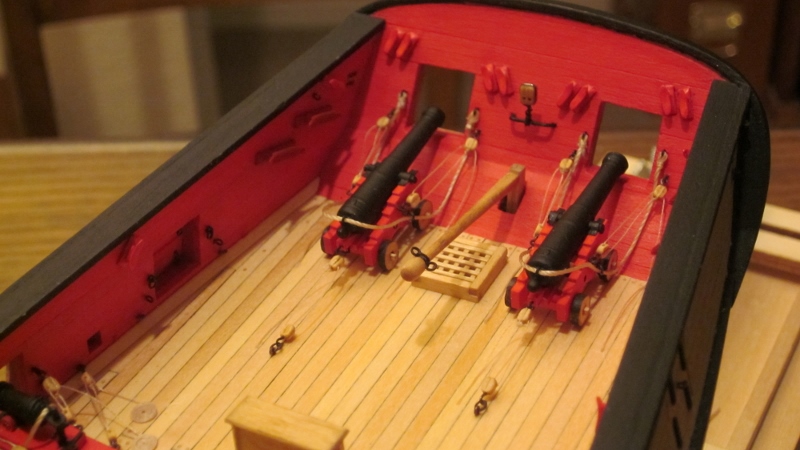
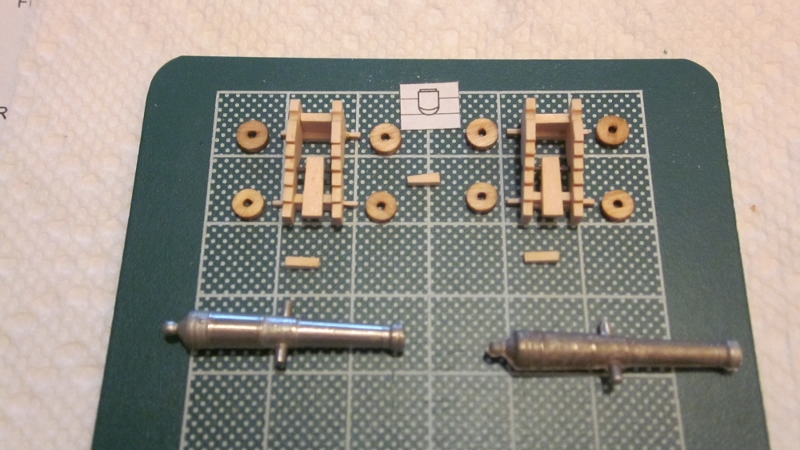
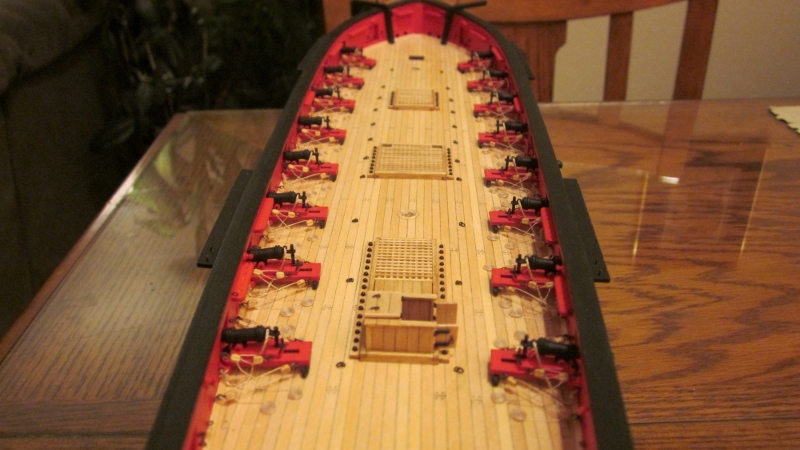
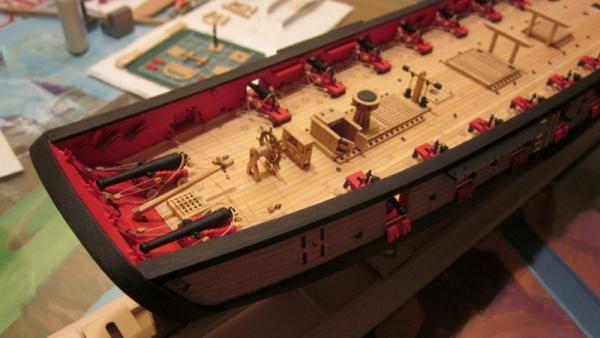
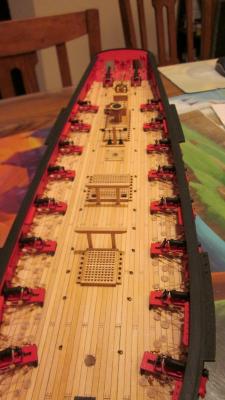
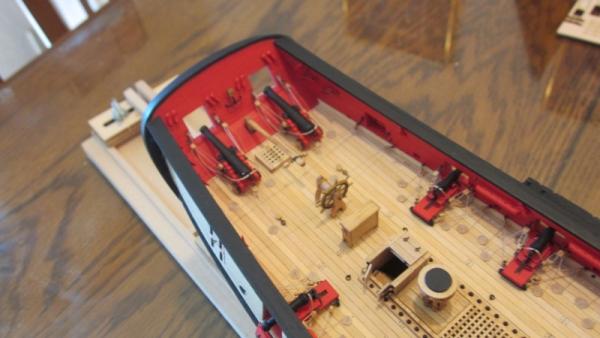
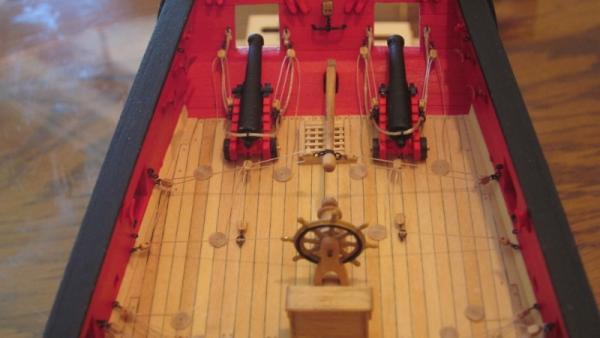
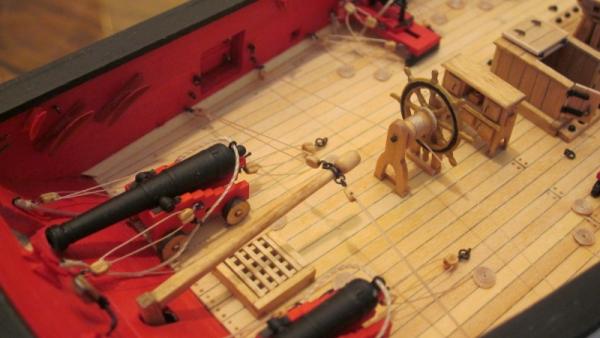
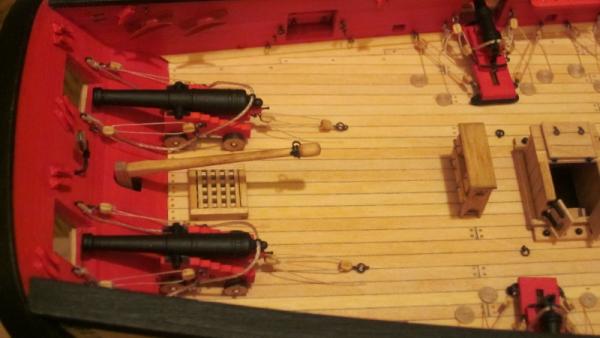
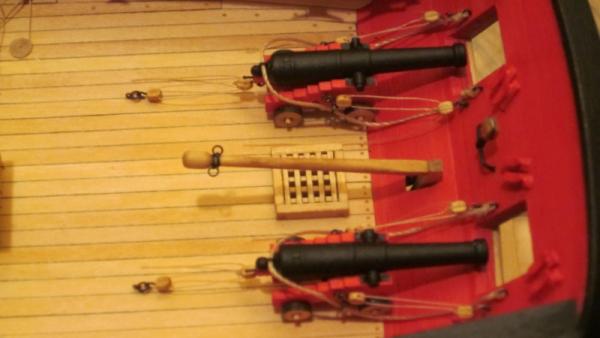
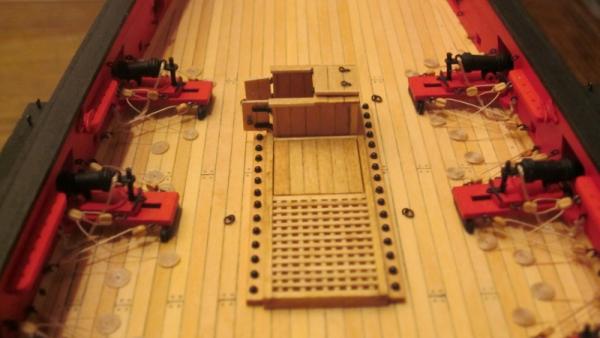
Augie & Bala, thank you for the comments. The stern is progressing. I've managed to get the stern guns made and installed. I decided to add the train tackle to the guns. I'm not sure if its appropriate based on how close it is to the tiller rigging but I like the end result. Guess I'll find out soon enough when I finish the tiller. Richard


- 227 replies
-
- 11
-
-
- syren
- model shipways
- (and 1 more)
-
Lets see if I can explain this right. Whenever I cut the long end of an eyelet off I would save it. So I took a couple of them and sanded them down on fine grit sandpaper (I think 400 grit) to about 1/64" then I cut about a 3/32" length. Then I bent them at a 90 degree angle and then dipped them in blacken it
-
Hi, Richard, what I meant by soak is I let it dry for at least an hour after wiping off the excess after 15 minutes. Guess I need to work on my communication skills..lol. Sorry. Richard
-
Hi Richard, I found your log and its coming along great. I agree with Augie, prestain works miracles on the basswood. I was afraid to use a 50/50 mix if I needed to rework anything. So I made sure to sand with a 320 grit then let the prestain soak for at least an hour. On my deck I used the same process except I used the natural stain. I hope this helps. Richard
-
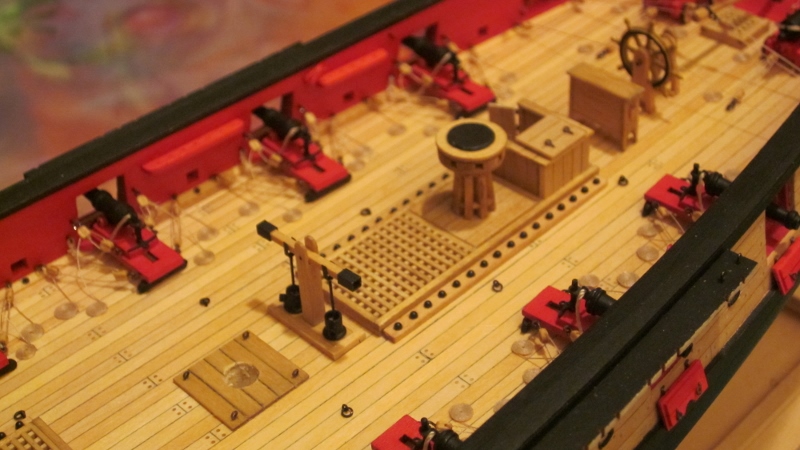
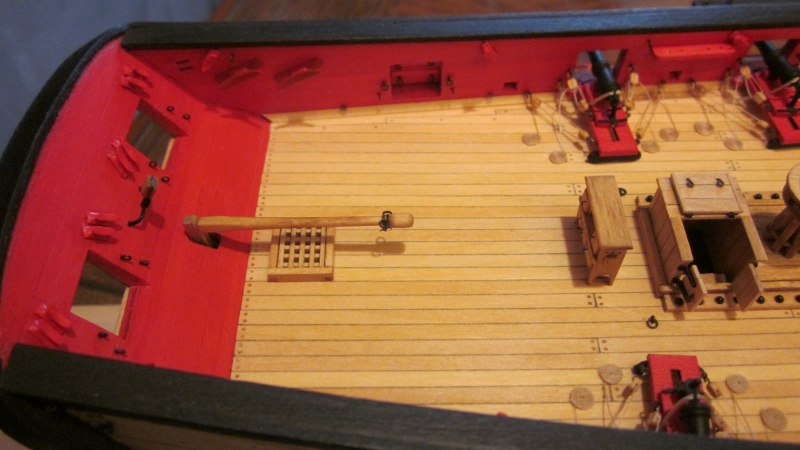
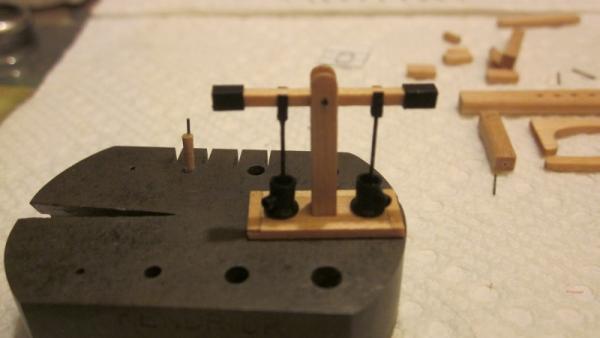
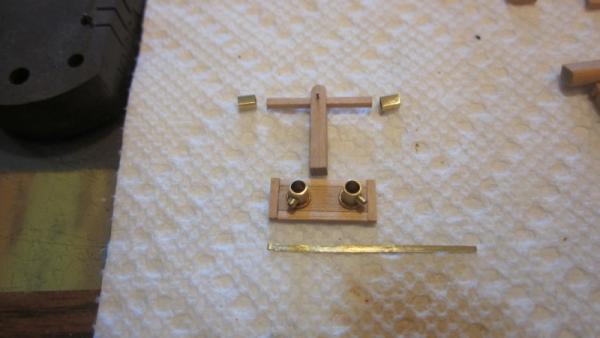
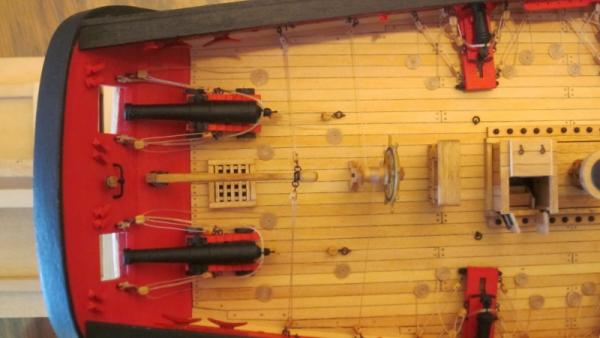
Well lets see?..... Single digit temperatures, 10 inches of snow and sleet - good weekend for doing some modeling! Scott and Ronald thank you for the comments! Ronald, The jig I have is the model shipways fair a frame. I bought it cheap on ebay and it does a good job of holding the ship in place. Richard, I'm honored to hear you have a picture of my ship on your workbench! Thank you! I hope you get your deck to work to your expectations.. I've made some progress this week. The quarter galleries are coming along slowly but surely. And I completed the tiller and the binnacle as well as getting a good start on my 12 pounders. Does anyone know where I can get a smaller ships bell, the one included in the kit looks way too big when set on top of the binnacle. Richard


- 227 replies
-
- 3
-
-
- syren
- model shipways
- (and 1 more)
-
Todd and Marsares, I hope to help out if I can. I have the basic idea as to how I'm going to complete it, but as with all things they're subject to change. Should have a new post with pics soon. Thomas, as always, thank you for the compliments! And I will take into account the slant to the quarter galleries.The drawings show that the galleries follow closely with the shear of the planking so I'm going to follow that line.
-
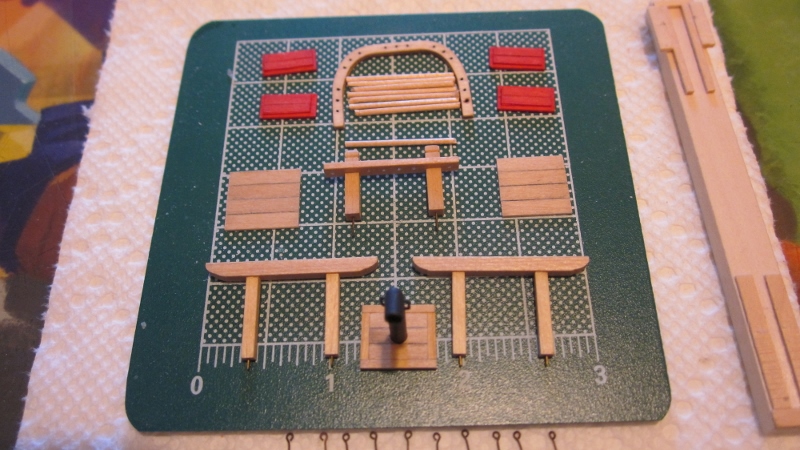
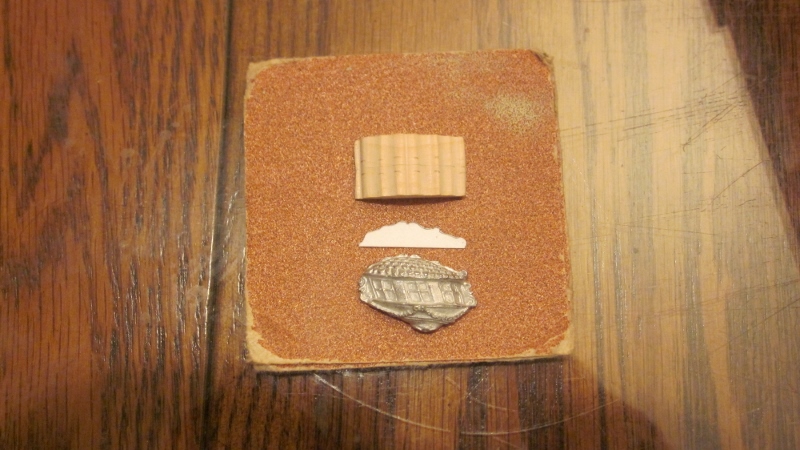
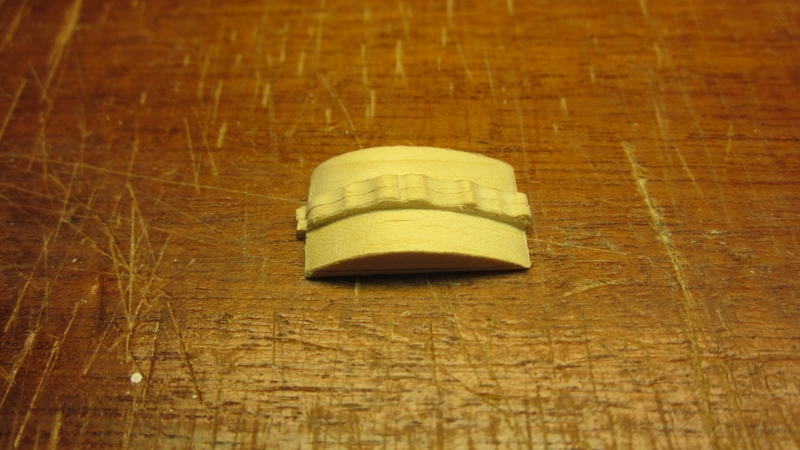
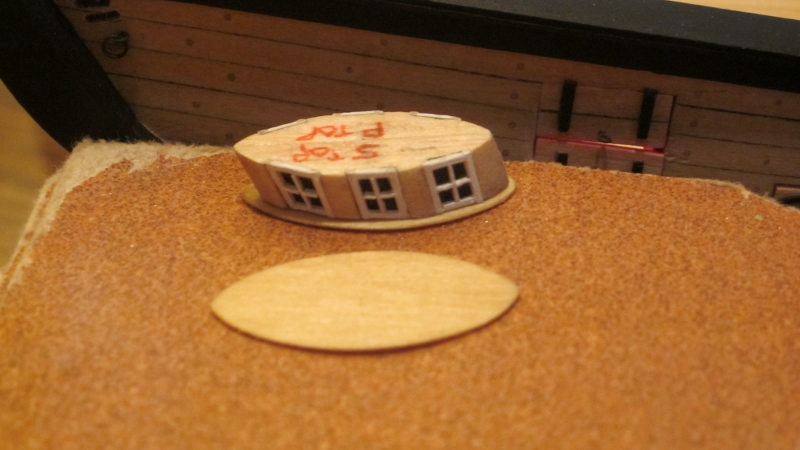
Well I've decided to back track a bit and work on my quarter galleries. Since I wasn't too thrilled with the detail on the castings, and I couldn't mix any combination of paints to match the color of the hull, I decided to make my own. But I am using the castings as a pattern to get my measurements from. This probably isn't the best way of doing it but I'm giving it a try. (comments, critics, and most of all ADVISE are highly welcome at this point) I'm going to do it in 3 sections, Top, middle & bottom. So far I've completed the middle section. I started by spot gluing 2 pieces of basswood together and getting the basic shape then I filed out the 3 slots for the windows which I wanted them to be 6/32 x 6/32 (scale 1'-4" x 1'-4") but I forgot to follow the measure twice rule and ended up with 1' x 1'-4" windows. Then I used HO scale 2" x 2"s and 1" x 2"s to make the frames. I sanded down 2 pieces of scrap basswood to make the trim for the top and bottom of the windows. Once I get them sanded down a bit more I'll glue them to the windows. Here's some pics of my progress.


- 227 replies
-
- 7
-
-
- syren
- model shipways
- (and 1 more)
-
Augie - aye aye Admiral awaiting further orders. And congrats on making Admiral. akle, Sometimes you just have to "do it"
- 227 replies
-
- 1
-
-
- syren
- model shipways
- (and 1 more)
-
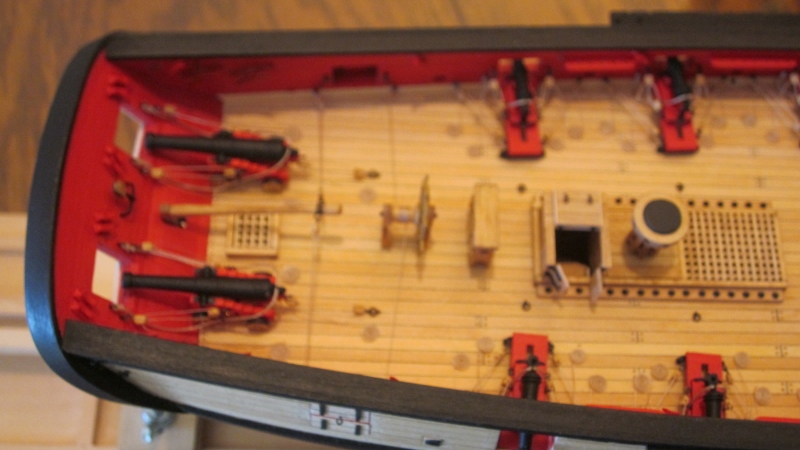
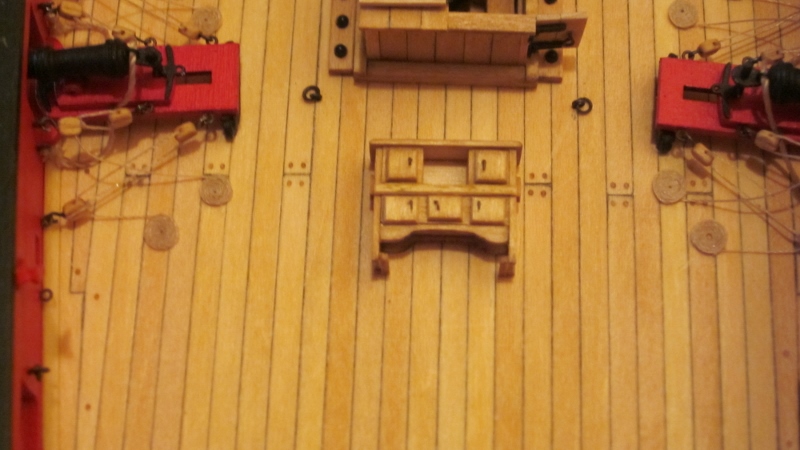
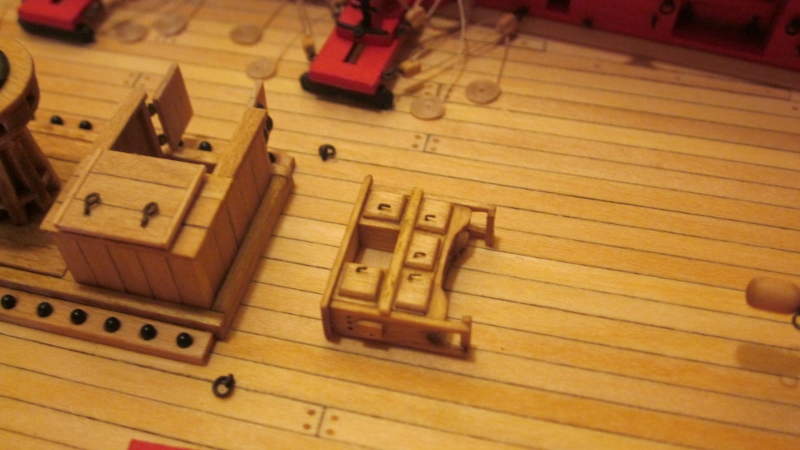
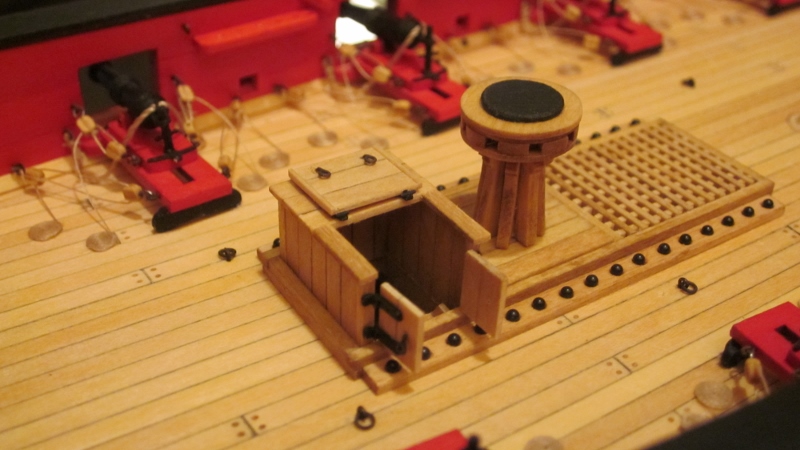
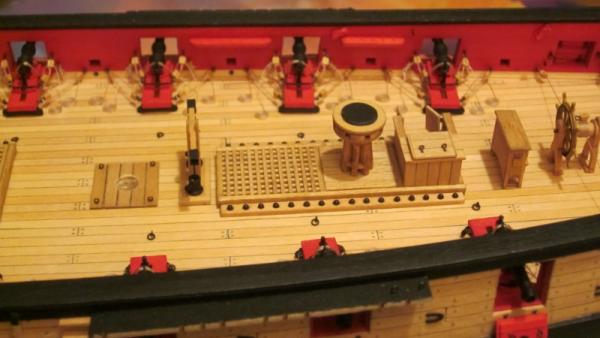
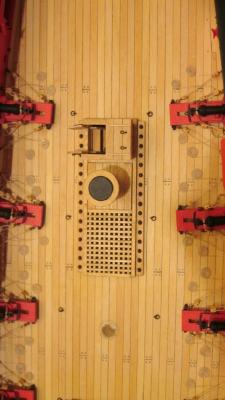
Hi guys and gals, its good to be able to finally make a post. Haven't been able to do much on the ole' girl. But I have managed to get thru the cannon rigging and adding the coils. Also I've finished the companionway and ladder. Currently working on the capstan. Just need to add the "fiddly bits" (chocks) and then it'll be on to the binnacle. Richard


- 227 replies
-
- 5
-
-
- syren
- model shipways
- (and 1 more)
-
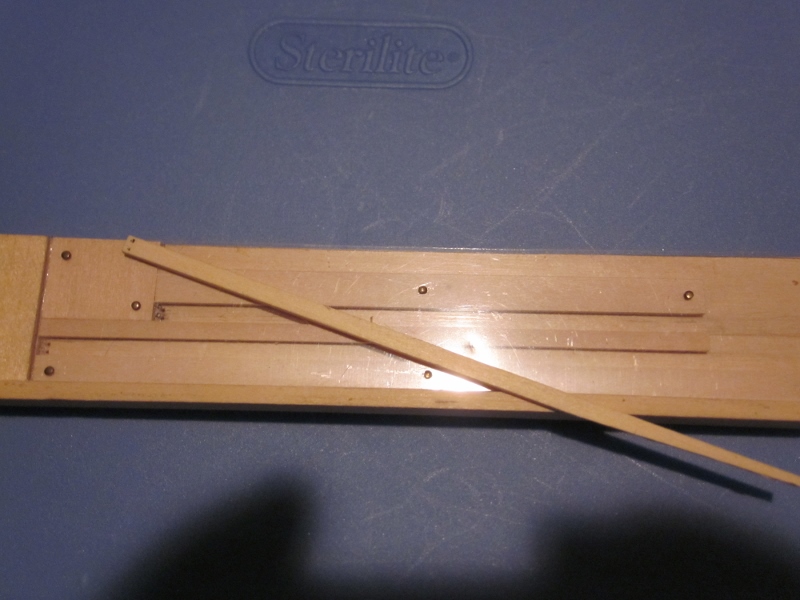
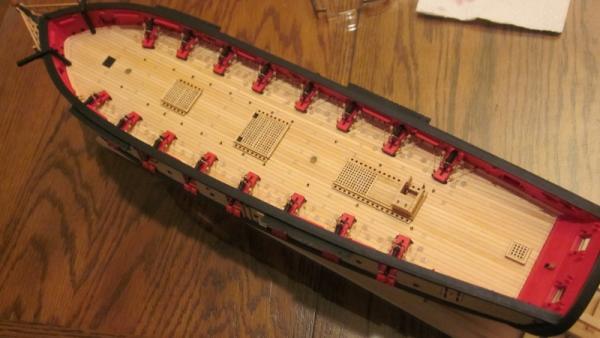
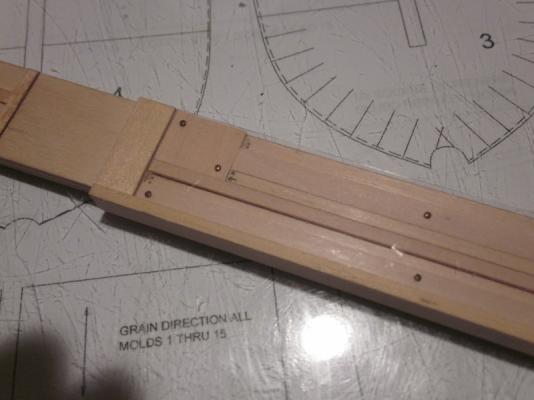
Gahm, looks like I have lots of downloading in my near future. Thanks for the "heads up" Polygothian, The base is made from 1" x 1/4" basswood plywood that I cut to a rough length of 7". I sanded down some basswood strips to 1/16" thickness. Then I glued the strips of basswood to the base making sure that they were parallel and 1/8" from each other, this way I was able to get consistent size planks. The middle and bottom slot is for 1/8" x 1/16" planks and the one on top at the edge (when viewed in the pictures) is for 1/8" x 3/16" planks. I squared off 2 pieces of scrap basswood and glued them on the ends of the slots (the square and rectangular pieces in the middle) these were used as "stops". Its hard to see but if you look at where the stops are there are 2 holes drilled into a piece of clear plastic that I have nailed on top. These are used a guides to drill the treenail holes. In picture 2 you can see how I inserted a plank into the middle slot. If a plank wouldn't fit in the slot then I knew it was too wide and if it had some "play" then I knew it was too thin and if it didn't butt flush with the stops then I knew it wasn't square on the end. Once it fit right then I used the holes in the clear plastic to drill the treenail holes, then I would turn the plank around and drill holes in the other end. I hope this helps. Richard
- 227 replies
-
- 1
-
-
- syren
- model shipways
- (and 1 more)
-
Beautiful work Thomas, I can't wait to see your headrails. Are you going to make those out of pear as well? Richard
-
Personally I'd go with the Heller Pinta or the Revell Santa Maria. Heller also make the Nina & Santa Maria. Richard
- 118 replies
-
- 2
-
-
- jolly roger
- lindberg
- (and 2 more)
-
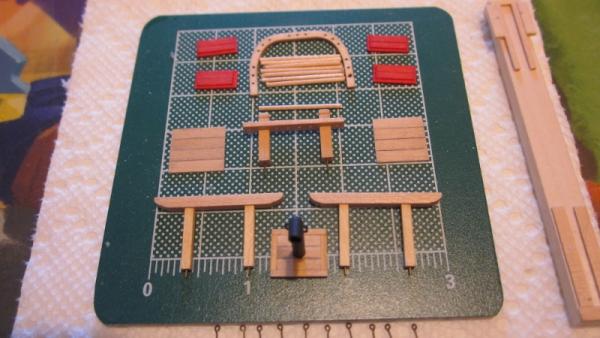
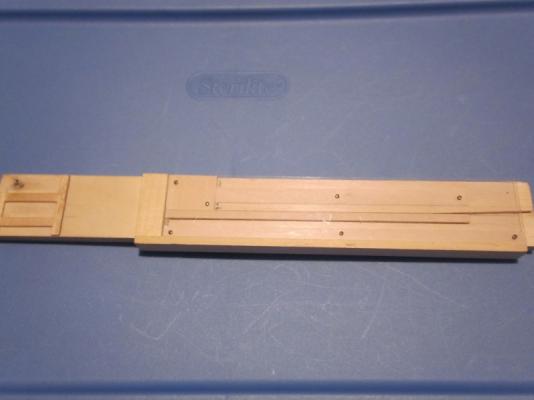
Charley & Joe, Thanks, glad I could help. I've been getting help from alot of members so its good to give back. Jim, this is my first POB kit, actually its my first wooden ship kit. I've built the plastic ones but there's no comparison to wood. And yes I do work off my dining table. I live in a small apartment so space is limited. Pygothian, thank you, and yes they are real tree nails. I used my scrape basswood left over from planking. I cut the 1/8 x 1/16 in half lengthwise and pulled them thru my draw plate. I was only able to do about 10 to 15mm lengths at a time but I managed to get them down to 1-1/2 scale inches (roughly.05mm). then I made a jig that used to drill the holes in the planks. The pictures show the jig. Each slot has 2 pre-drilled holes in the clear plastic on top that I used as guides. Then I glued them in using with diluted "stainable" carpenters glue. I would cut each plank to length then install the tree nails then sand them down. Hope this helps. Floyd, welcome aboard and thanks for the compliments. Your Harvey is coming along great. Can't wait to see your Syren build log when you start it. I hoping to have pictures from before the crash uploaded just as soon as I figure out how to load them all in one post. Richard

- 227 replies
-
- 2
-
-
- syren
- model shipways
- (and 1 more)
-
Ive noticed that a few members have posted their build log pictures from before the crash and I'd like to resubmitt all my pictures from before as well. So my question is how can I post the dozens of pictures when there is only a 10 picture limit? Richard
-
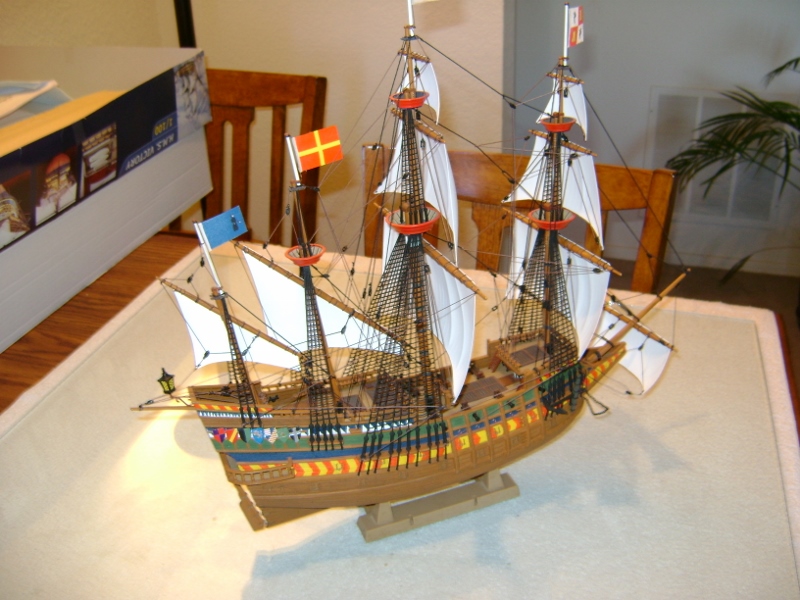
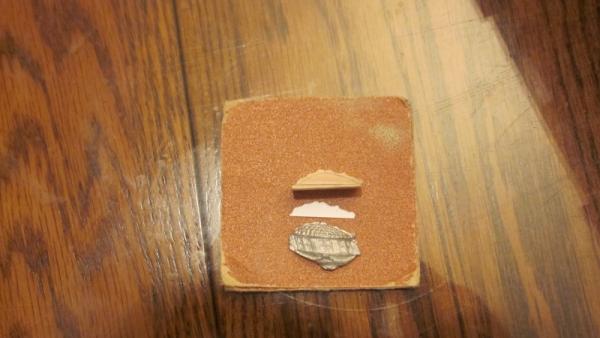
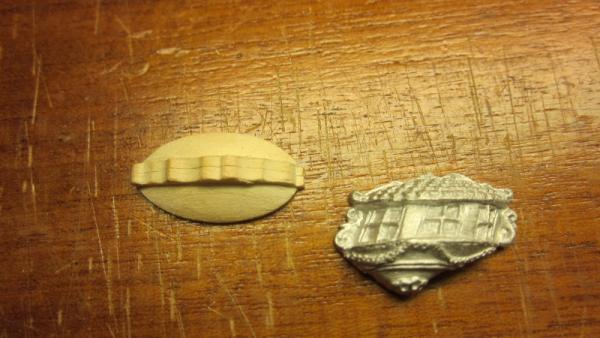
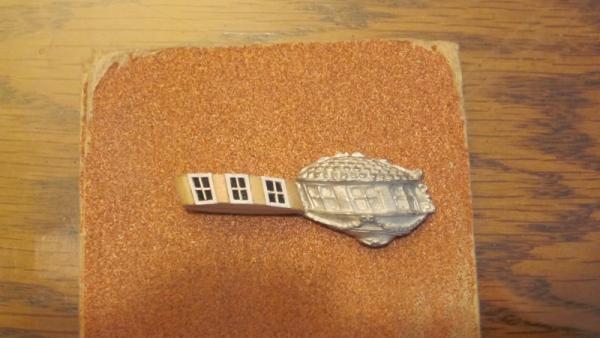
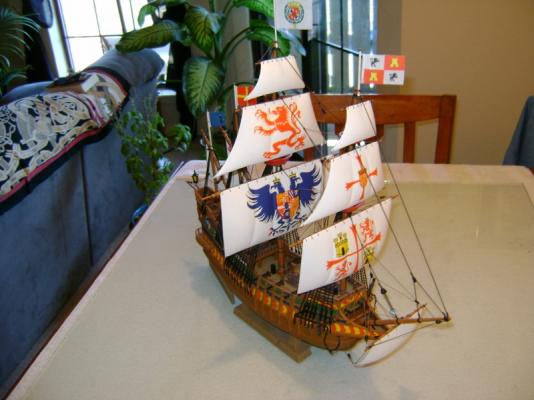
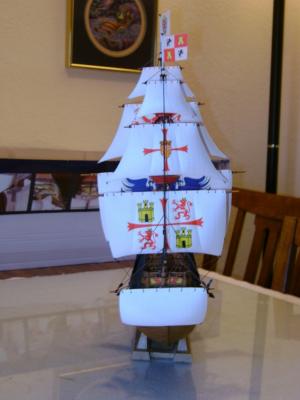
Kimberley, it looks like your getting alot of help. I agree that if you were to get the Golden Hinde, that would be a good ship to work on. Its made by ertl / imai. You'll need to look for it on ebay. That company also makes a Spainish Galleon and a Chebec. I've built all three and are fairly easy to assemble. The instructions are good unlike lindberg models. But if you want to stick with a Revell model then I would suggest the Cutty Sark (no cannons). Its a 1/96 scale model which doesn't have too many small parts. Attached is pictures of the ertl/imai Spainish Galleon. Richard


- 118 replies
-
- 4
-
-
- jolly roger
- lindberg
- (and 2 more)