
HOLIDAY DONATION DRIVE - SUPPORT MSW - DO YOUR PART TO KEEP THIS GREAT FORUM GOING! (89 donations so far out of 49,000 members - C'mon guys!)
×


kscadman
-
Posts
258 -
Joined
-
Last visited
Content Type
Profiles
Forums
Gallery
Events
Everything posted by kscadman
-
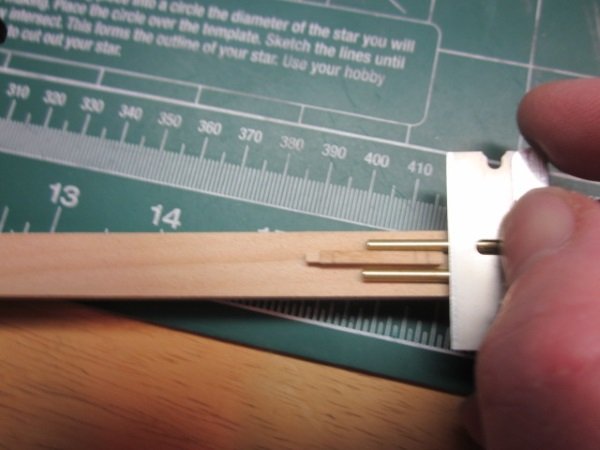
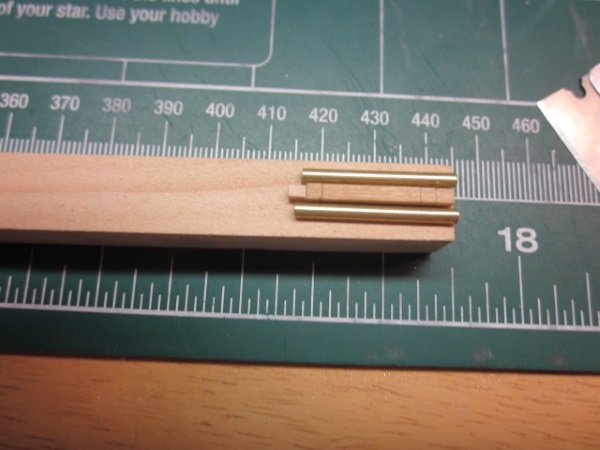
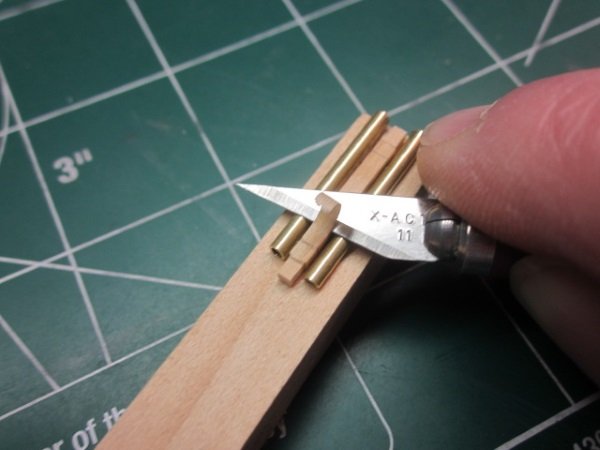
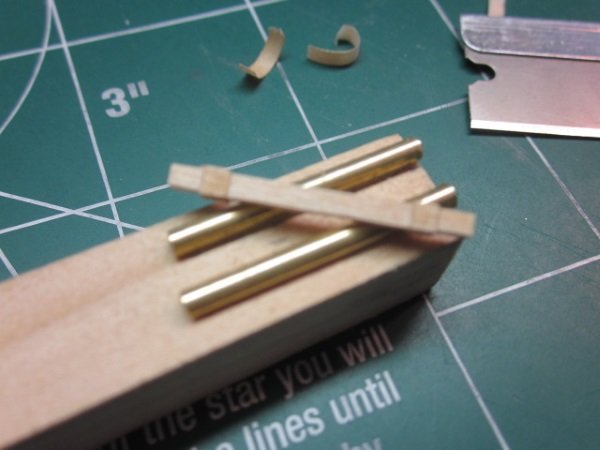
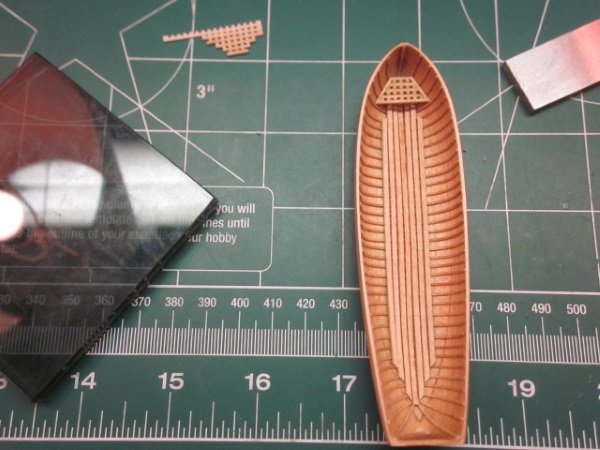
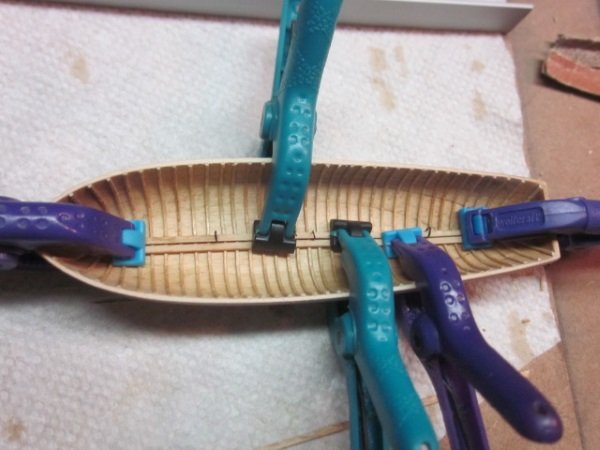
 Happy Thanksgiving to all that celebrate it. After much turkey eating I was able to get some work done on my long boat. I completed the thwarts and added a mast step. When making the windlass I had a bit of a time figuring out how to get the the cuts correct. So I decided to make a jig. I took some 3/32 brass tube and filled down one side about 1/64 which made a nice flat spot in order to glue it onto piece of wood. On the ends I used a straight razor and just glided it along the brass tubing once I made my stop cuts. It gave me nice level smooth finish. The middle section was tricky. I used a #11 blade and repeated the process but I found that it would try to cut deeper into the wood. But after 2 more attempts I managed to get a fairly good result. I used a flat diamond file to finish the diagonal cuts. Now I need to make the cap rail. The one that came with the kit was a little too short lengthwise.
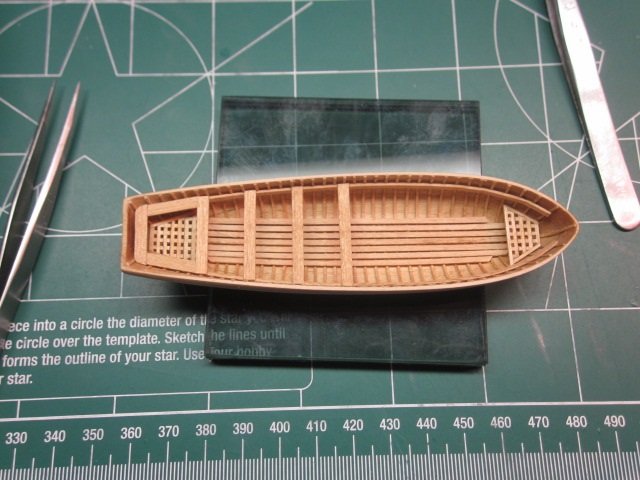
- 227 replies
-
- 8
-

-
- syren
- model shipways
- (and 1 more)
-
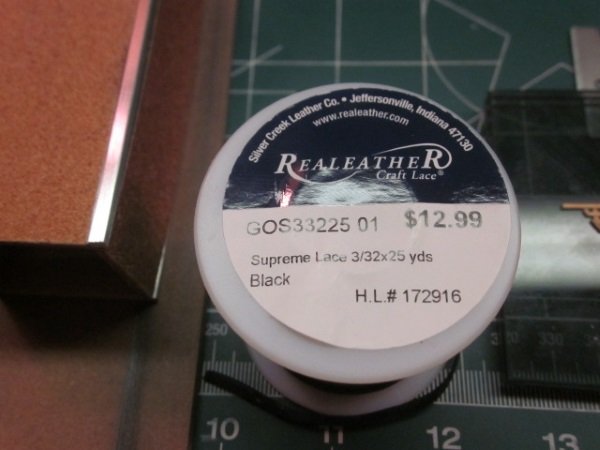
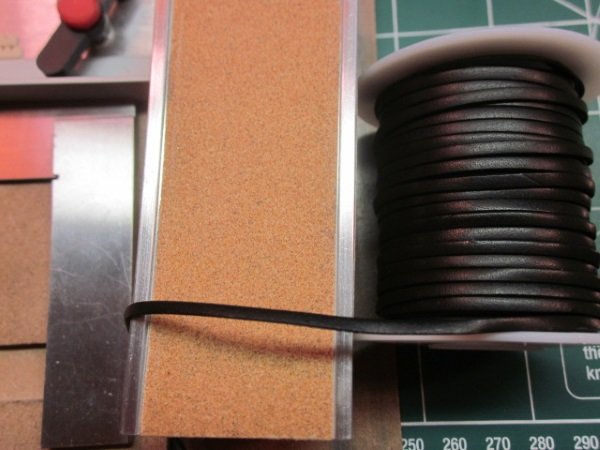
I continued with the gripes for the stern jolly boat. I found some leather strapping at the local arts and crafts store. Its scale size is 6" width X 3" thickness. I discovered that I could use a straight edge razor and scrape the underside of the leather strap to thin it to a scale 1" thickness. I've been finding many ways to secure the gripes, but nothing definitive, so I may have to go with my best theory as to how it is secured. I have a question as to how to secure the davit block ropes. I've seen some where it is secured to an eyebolt on the outer side of the davit and I've seen some where the rope goes thru the davit. Any help as to which is correct?
-
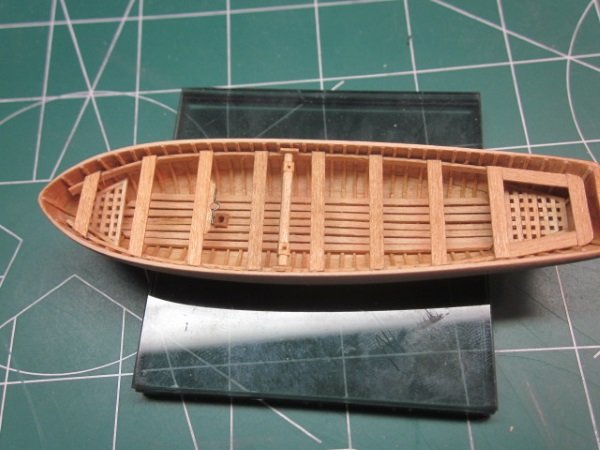
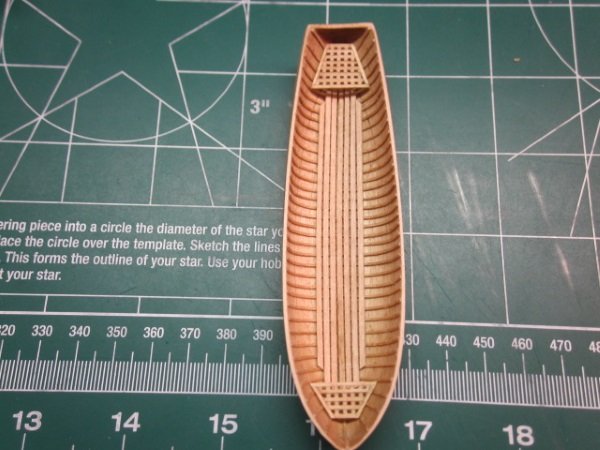
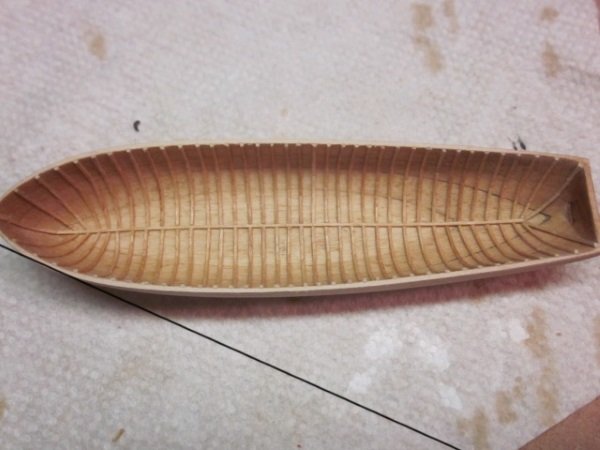
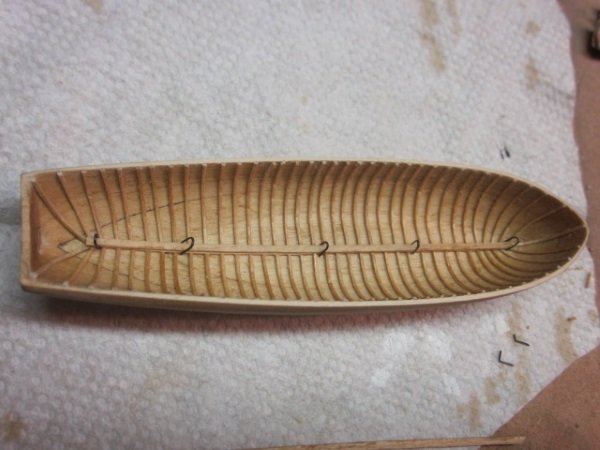
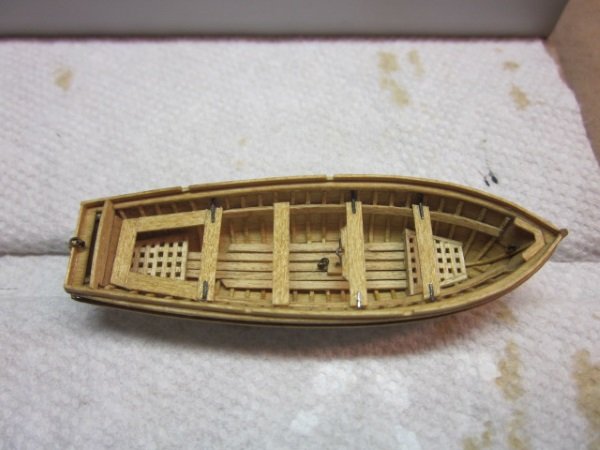
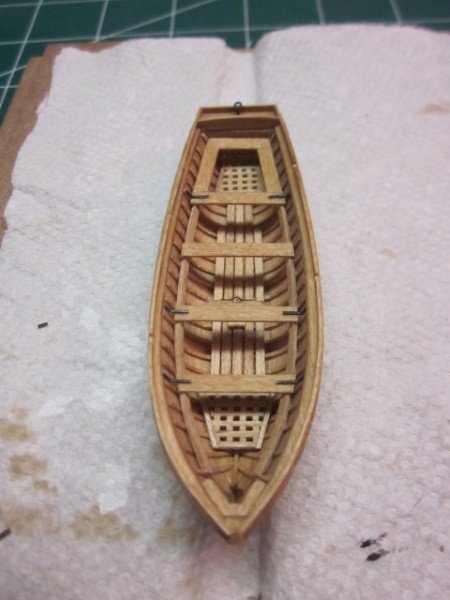
Its been a good weekend for working in the shipyard. I completed the floorboards, grates, and thwart supports. I needed to enlarge the plans so I could locate the thwarts properly so I made a PDF of part of the sheet and enlarged it to 118% which passed the "measurement" test.
- 227 replies
-
- 8
-
-
- syren
- model shipways
- (and 1 more)
-
Beautiful and crisp work as always Thomas!
-
Great work Peter. Your planking is coming along nicely. Richard
- 242 replies
-
- 2
-
-
- syren
- model shipways
- (and 1 more)
-
Hi Mike, thanks for the heads up on 2 hammocks per crew member, I hadn't read about that yet. My Syren had a crew of 120. I wonder who's crew were short. The two ships are comparable in size and armament. From what I've researched, its my understanding that the hammocks would help in defense when under attack. Either way, I'll be following your lead and adding the hammocks as well.
-
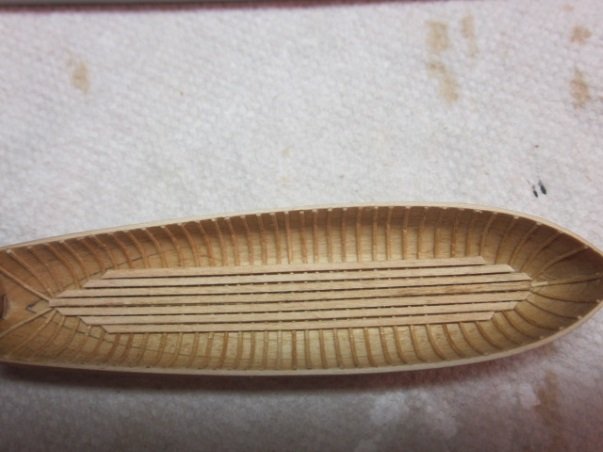
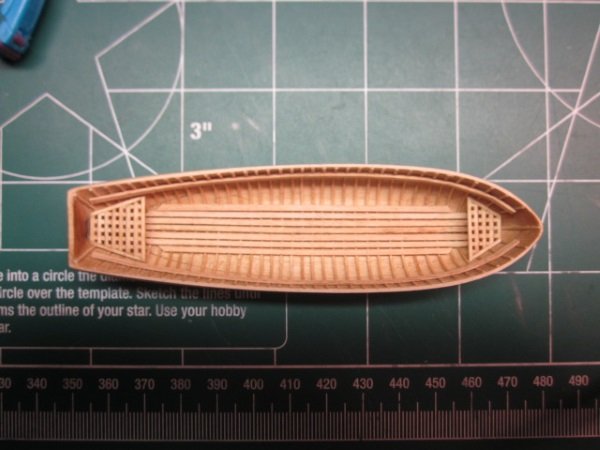
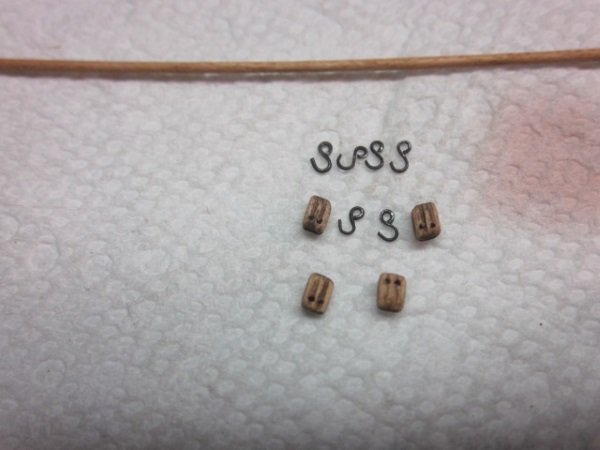
I finally found some time for modelling. I managed to finish installing all the ribs and added some floor boards. I used some scrap .028 wire that came with the kit to use as spacers between the floorboards. I just bent them until they friction fitted over the installed floorboard. It proved to work well. Also I made the tie down hooks and the hooks that will go on the davit blocks for my jolly boat. Richard
- 227 replies
-
- 7
-
-
- syren
- model shipways
- (and 1 more)
-
Syren Copper plating
kscadman replied to Jim Rogers's topic in Building, Framing, Planking and plating a ships hull and deck
Hi Jim, considering I've been thru it, your answer is too many. I divided it up and cut roughly 100 per side and applied them then started the process over. It may not be the best way of doing it but it took some of the monotony out of it. Richard -
Very nice work Mike!!. She looks great and no damage! Did you make enough hammocks for the full compliment of crew? Richard
-
Hi Jeff. It looks like a quality kit and I will definitely be following along. Looks like you have a great start! Richard
-
Welcome aboard, enjoy the site. Years ago I built the Ertl Chebec, it was an enjoyable build. I'll be interested to see your Chebec. Richard
-
All I can sy is be very careful drilling your pilot holes. It sounds like it will be a 2 man job if you hve your masting and rigging done. I used the same set of pedestals for my Syren so you shouldn't have trouble with splitting. Richard
-
I hear your frustration! Its taken way too long for me to get where I'm at. Do you have a build log for your Syren?
-
Thank you Thomas.
-
Sorry fnkershner, I guess I should of added that. My bad To be honest I tippy-toed my way thru this. Once I got my lifts glued together I used 120 grit sandpaper to slowly sand the outer hull. Once it looked close to the drawings and pictures then I switched to 150 grit and checked my progress using a pair if calipers. I didnt use a big piece of sandpaper, I folded the sandpaper about 3 times so it was about 1 inch by half inch so I had more control over it. I used the 6 lines under the plan drawing as section cuts and thats where I took my measurements at. Once the outer hull was close, I Did the same on the inner hull (which was a pain). I'm still not pleased with it. The stern was the hardest part. It was hard to get that crisp angle between the transom and the "side planking". And again I used the calipers to get it down to 1/32. Next time I do a boat using the lift method I'm going to sand the "laser cut" burn marks off. I assumed they would disappear as I sanded, but it didnt. As far as the staining is concerned I've been using minwax products. Just the natural stain and the golden oak. but I make sure to use the pre-stain which I leave on for about 10 minutes before staining. Then I apply the stain (just a single swipe each way) and wipe it off after about a minute or so. Yes, I did soak the ribs before fitting. I used some old kappler lumber I've had from my model railroad days. The 1/32 x 1/32 strips that came with the kit were terrible. I spent alot of time trying to sand it properly, but after a while I just gave up and I found out that a HO scale 2 x 2 is almost the same as 1/32 x 1/32. I hope this helps. Richard
- 227 replies
-
- 5
-
-
- syren
- model shipways
- (and 1 more)
-
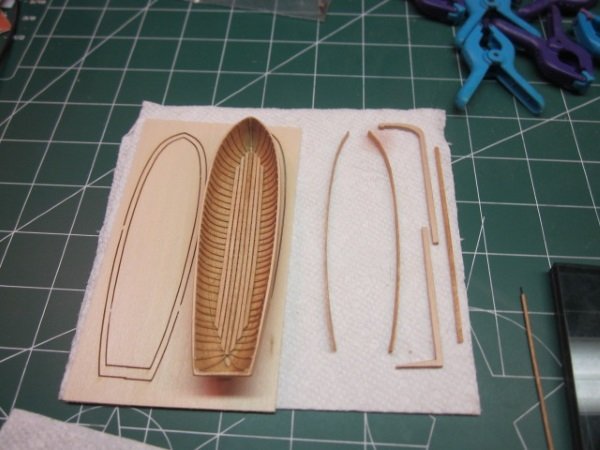
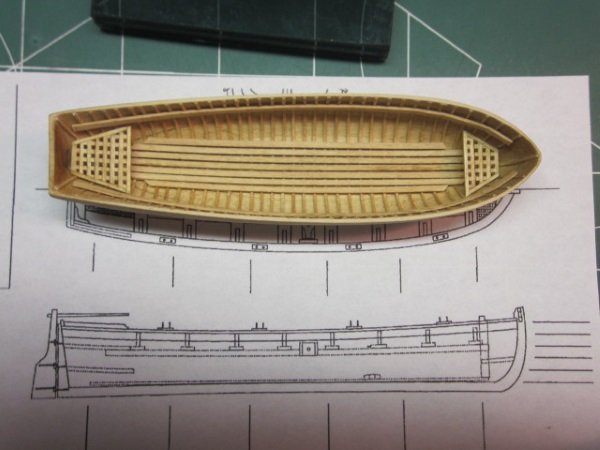
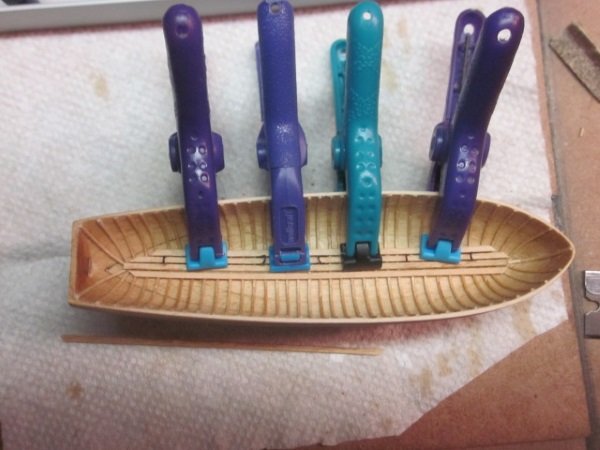
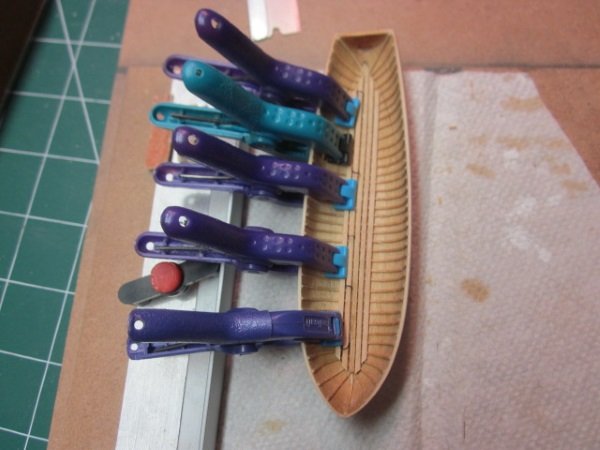
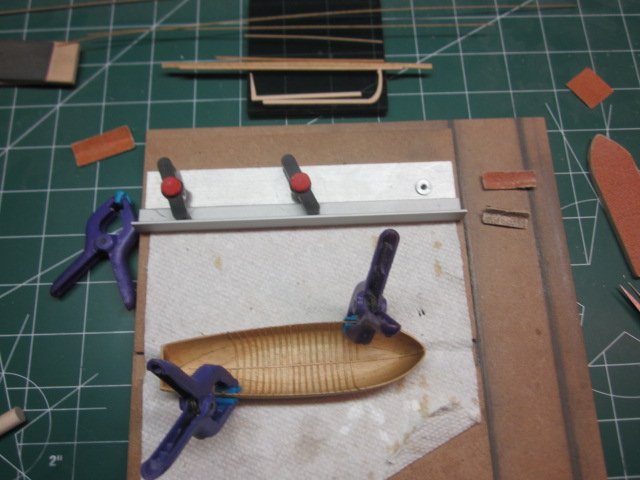
Progress on my long boat continues. I finally have the hull sanded down to the proper thickness and started adding the ribs.
.jpg.305a7149c8d329beb98d1b2b17c50917.jpg)
.jpg.ae89a11ea71b5401eca9874bdbcc63d2.jpg)
.jpg.849e3d2e8301a66f61debd61567d00e1.jpg)
.jpg.29f03e13338bcc21be214122cb3602e1.jpg)
- 227 replies
-
- 3
-
-
- syren
- model shipways
- (and 1 more)
-
Hi, Nils. I just ran across your Chebec and I will be following your build. Your work is very impressive and look forward to seeing your progress. Richard
- 692 replies
-
- 3
-
-
- eagle of algier
- chebec
- (and 2 more)
-
Amazing work Thomas
-
Whats the difference between the PVA and the Elmers glue. I've been using Elmers for years and haven't had any troubles with it. Nut I'm always looking for a better way. Richard
-
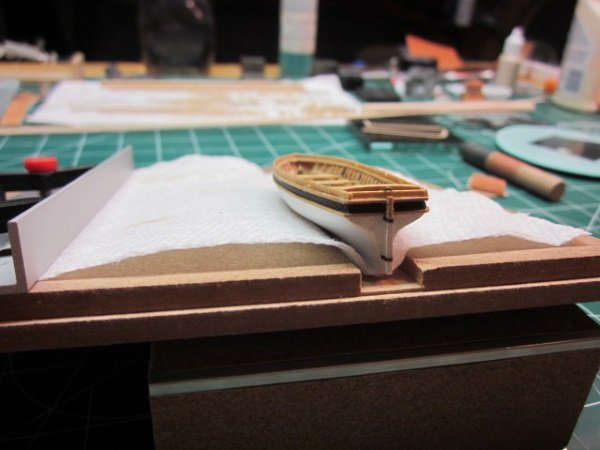
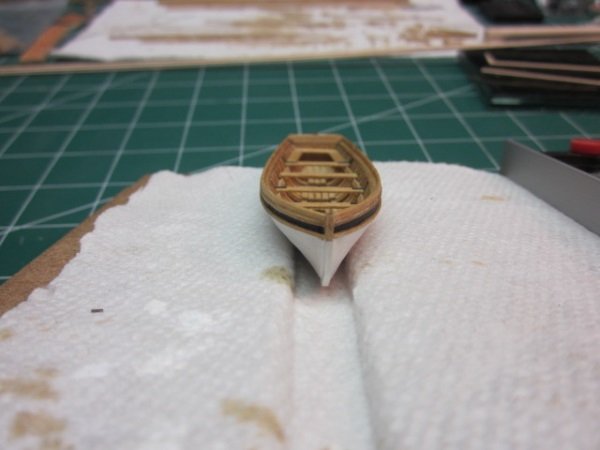
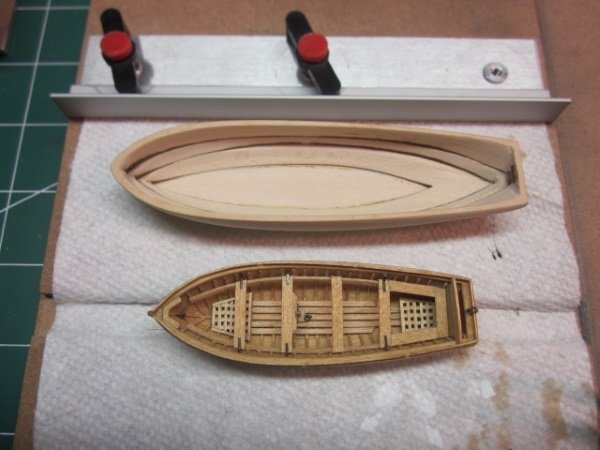
Feeling good this weekend! Finally finished my yawl for the aft davits. Its not exact to a true yawl but I like the outcome. I'll need to learn more before I make another. On to the long boat.

- 227 replies
-
- 13
-
-
- syren
- model shipways
- (and 1 more)
-
Hi Allan, sorry you went thru the trouble. I should have added USS to my initial post. Its the USS Syren kit sold by Model Shipways that I am working on. I'm using The yawl as a pattern for ships boat that will hang from the stern davits. I was looking into using a jolly boat but I found more information for the yawl so I went with that. Richard
-
I have a "throw off" table I use. Its big enough to hold the plans and keep them flat.