HOLIDAY DONATION DRIVE - SUPPORT MSW - DO YOUR PART TO KEEP THIS GREAT FORUM GOING! (89 donations so far out of 49,000 members - C'mon guys!)
×


kscadman
-
Posts
258 -
Joined
-
Last visited
Content Type
Profiles
Forums
Gallery
Events
Everything posted by kscadman
-
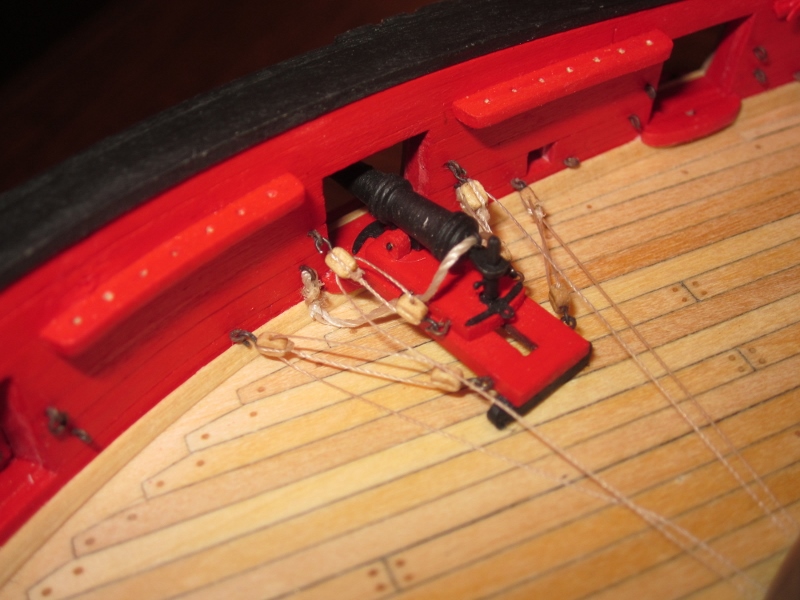
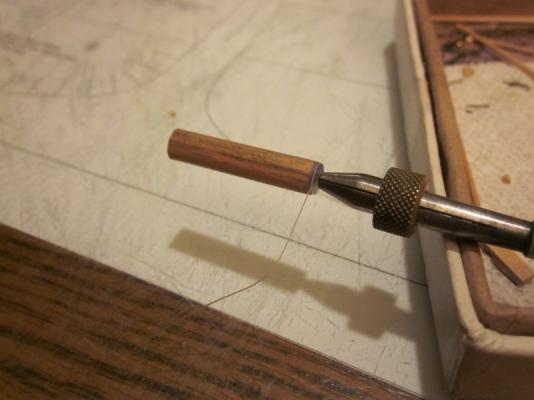
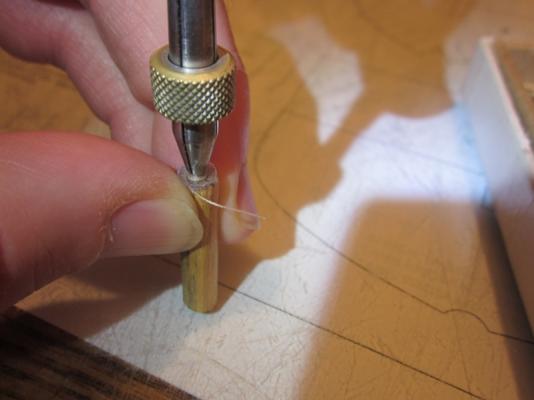
 Thank you Augie Thomas, Charley, & Joe. Slow and steady seems to be the order of the day. But I think I might want to take more pictures as I go. I get to see the mistakes. I tried to make sure the "hold down rings?" were directly behind each carronade, but to me they seem a little off center, both on the carronade and its partner across the deck. I'll just have to be more attentive as I go. Augie, glad to see your smiling, but are you sure its just from my work? its been rumored by another member "realworkingsailor" that your training some paper cannonballs from your Conferderacy on others in the fleet. Charley, Ive attached some pictures to help explain how I made my coils.It probably isn't the best way, or the easiest but its what I came up with. First thing was to cut a piece of 1/4" dowel. then I made 2 discs out of clear plastic. I used some "Midwest clear plastic that I had at hand. (I took 2 pieces and tried to glue them together with my carpenters glue and it didnt stick after letting it cure for an hour so it was good to use) I glued 1 disc to the dowel and drilled about a 1/8" deep hole in it that is the same diameter as the post I used (scrap length of the supplied eyebolts) I layed the other disc on top, center punched it then drilled a hole in it. To make the coils I just soaked a length of thread (2-5/8") in diluted glue leaving about an 1/8", 3/16" out of the glue then I put the dry end into the hole in the dowel. I inserted the post into it holding the thread by friction. Then I put the second disc on top and put it in the pin vice. Then I put the pin vice in my "third hand" and twisted the dowel section to wind it, keeping a steady pressure on it. I let it dry then removed the pin vice and top disc carefully (if not then you get a really nice spiral) I remove the coil from the center with a pair of tweezers and cut the excess from the underside and end and then voila! a coil is made. Sorry the explanation is so long but I hope this helps. Richard
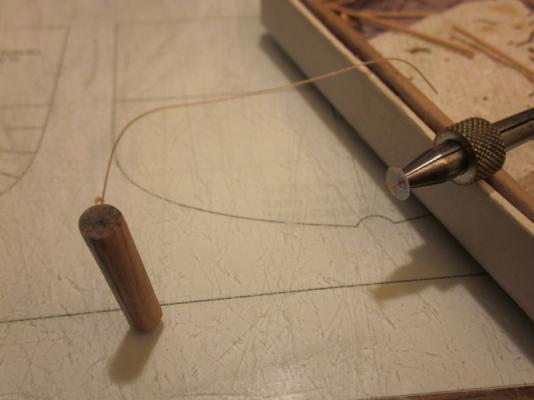
- 227 replies
-
- 4
-

-
- syren
- model shipways
- (and 1 more)
-
Titanic Sinking Mystry Solved: New Evidence Emerges
kscadman replied to Hank's topic in Nautical/Naval History
I noticed no one mentioned the Britanic, What was she - the redheaded step child? -
Hi Kimberley, as you can see there are so many helpful members, and with each comes a different style or technique. That's what I enjoy about MSW. Personally I use the soft brushes, round and flat tipped, I find that it gives me more control. I tend to lightly sand areas where the paint "bleeds" or use a new #11 blade to carefully scrape the area if its small. Hope all these tips help. Richard
- 118 replies
-
- 4
-
-
- jolly roger
- lindberg
- (and 2 more)
-
All I have to say is 2 down 14 to go. Who would of thought making coils would take up so much time ( and be soo frustrating). But I am happy with the result. Richard


- 227 replies
-
- 3
-
-
- syren
- model shipways
- (and 1 more)
-
Hi Kimberley. I would suggest using Testors spray paint for the larger pieces and parts like the cannons. Then for the smaller parts you can use the Testors paint in the bottle. That kit should give you a list of suggested colors. There was probably a stand where you bought your model. I've used Humbrol paints on plastic models, but I've had to order them on line. Just make sure you get the "matte" or "flat" paints. As far as getting a straight line, I use the scotch blue painters tape and cut it to size. It doesn't pull the paint when I remove it. Richard
- 118 replies
-
- 5
-
-
- jolly roger
- lindberg
- (and 2 more)
-
Brilliant work as always Augie! But I'm still imaging the size of that 12 pound cannon ball. Richard
-
Sporty goatee there John, It looks good! But I have to admit you had a good Santa look going. Richard
- 2,250 replies
-
- 1
-
-
- model shipways
- Charles W Morgan
- (and 1 more)
-
Need help with Revell U.S.S. Constitution
kscadman replied to Kimberley's topic in Plastic model kits
Hi Kimberly, don't think of it so much as "survival" but more as a grand adventure. Richard -
Hi Thomas, fantastic scroll work. And I like your usage of the pear wood! Richard
-
Need help with Revell U.S.S. Constitution
kscadman replied to Kimberley's topic in Plastic model kits
Congats, Kimberley! Once you break the ice with your first one then the rest will come easier. But I would suggest sticking with the supplied thread. The DMC thread is too "stretchy" for this type of work. Richard -
Very true John, very true. But I do have deck furniture to work on when it becomes too repetitious. Hope your enjoying your trip. Richard
-
Hi Spyglass, if you use artist acrylic paint and a "good" brush you shouldn't have to worry about brush strokes. If you use the brush to mix the paint with water then you can get the proper consistency. Richard
-
Thanks John. And thanks for taking us along on you trip. Richard
- 2,250 replies
-
- 1
-
-
- model shipways
- Charles W Morgan
- (and 1 more)
-
Hi Augie, your doing wonderful work, and fast work as well. At this rate you ought to have her launched by spring. Richard
-
Hi John, I finally got to go thru your log and your Morgan is looking fantastic. And I really like your Mystic photos. Richard
- 2,250 replies
-
- 1
-
-
- model shipways
- Charles W Morgan
- (and 1 more)
-
Thank you, Augie John & Thomas for your comments.Their just what the doctor ordered as I continue to make another 70+ hooks. Richard
-
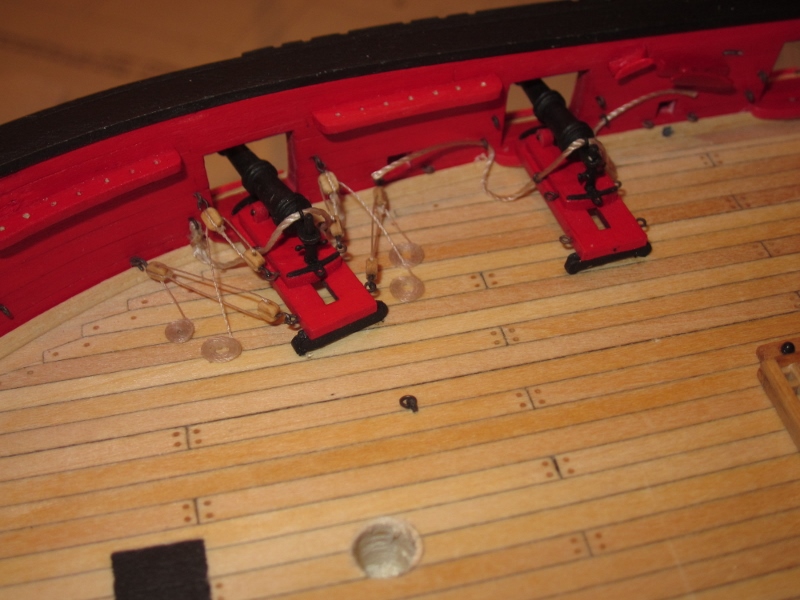
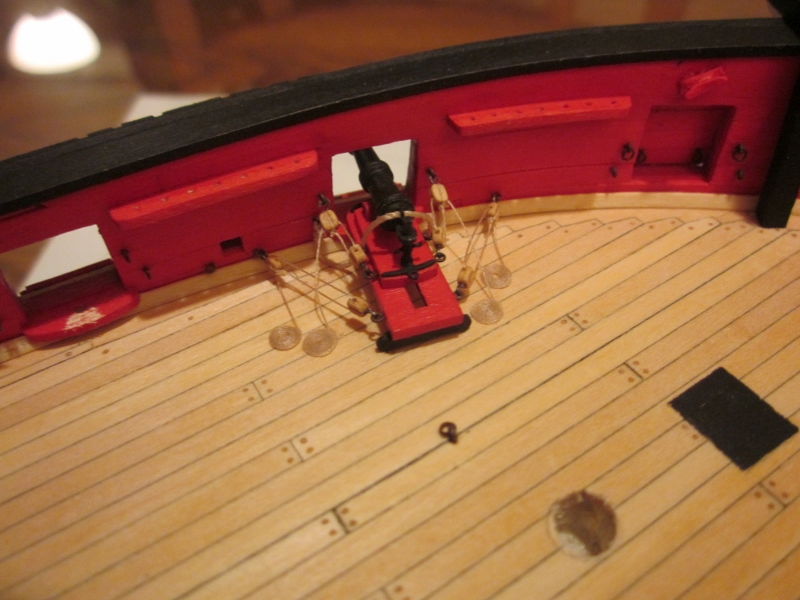
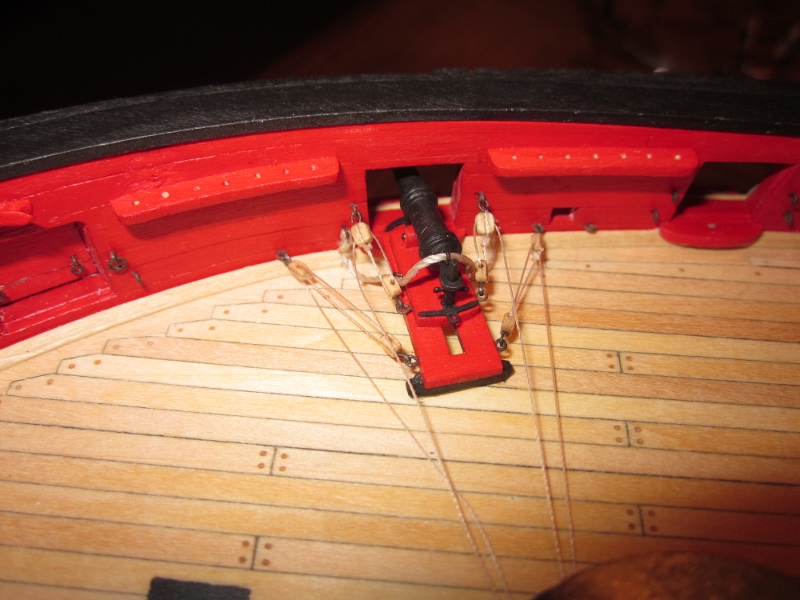
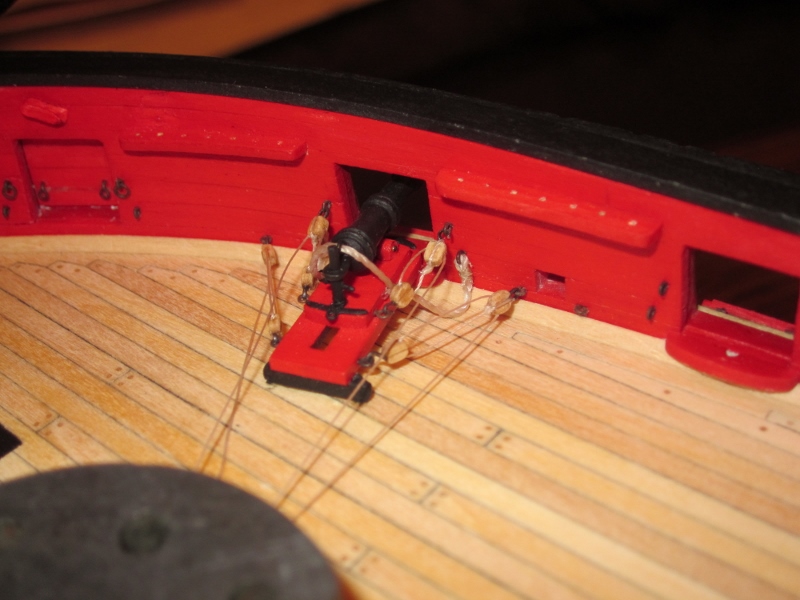
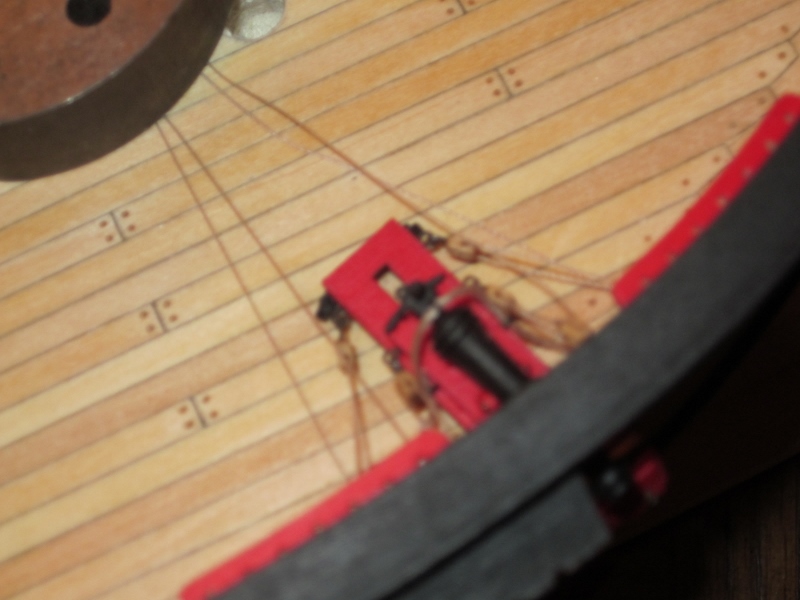
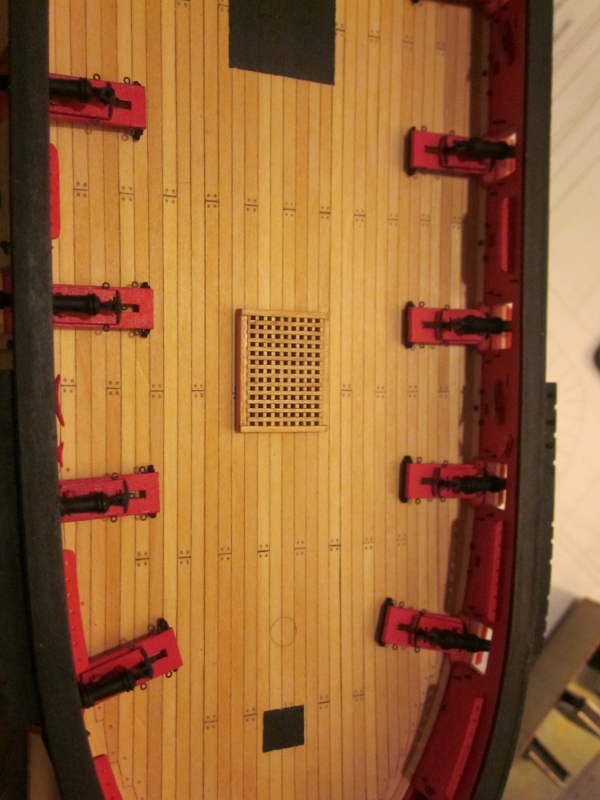
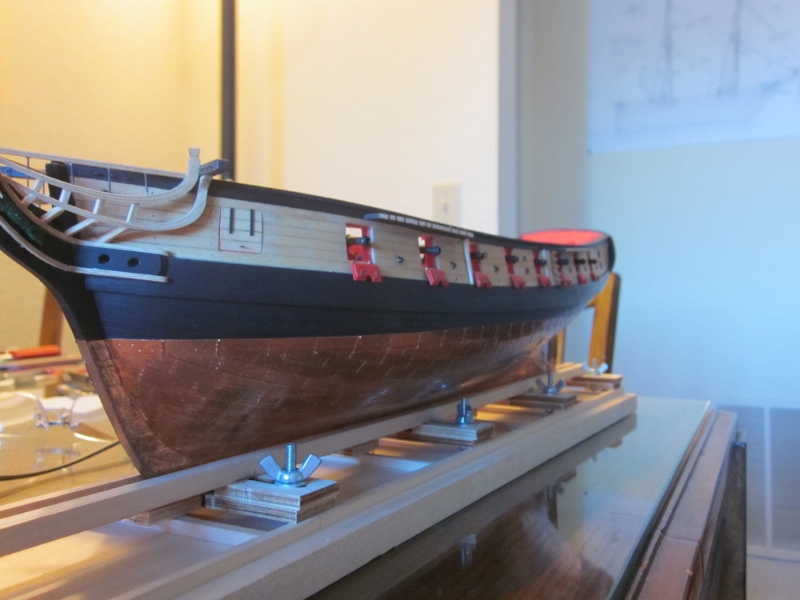
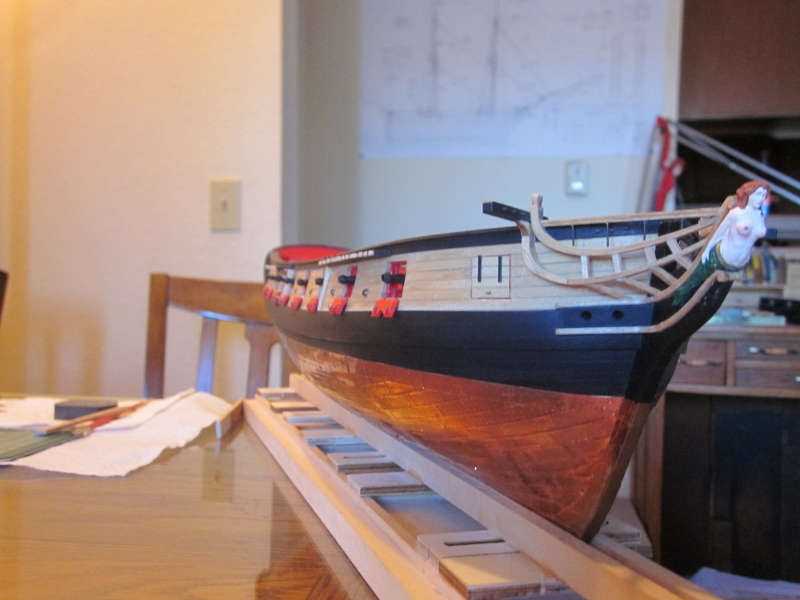
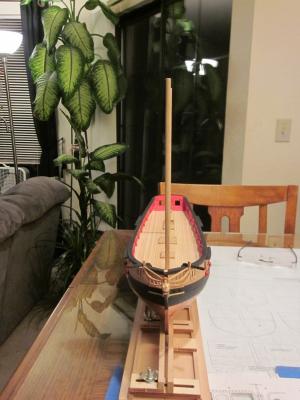
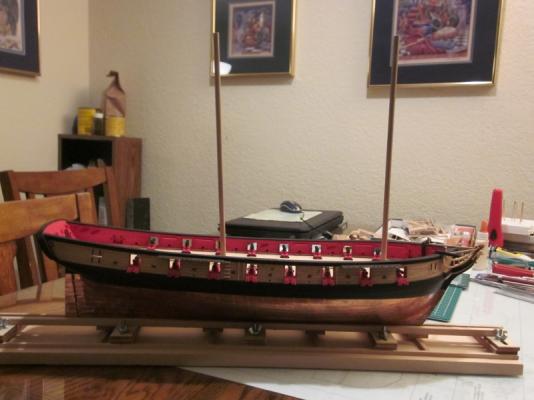
Ok, hatch grate mistake has been fixed, cannonballs have been installed and I've got the companionway walls glued together. But mainly I've been able to rig my first carronade. Here's some pics and I need a little feedback on how they look before I glue the tackle and make the coils. I read a post by dirk on breeching rings on carronades and after a little reasearch I decided to go ahead and add the breech rings."They really are there, just a little hard to see them in the photos. Any thoughts?? First time rigging so I'm kinda tiptoeing thru this. Richard


- 227 replies
-
- 8
-
-
- syren
- model shipways
- (and 1 more)
-
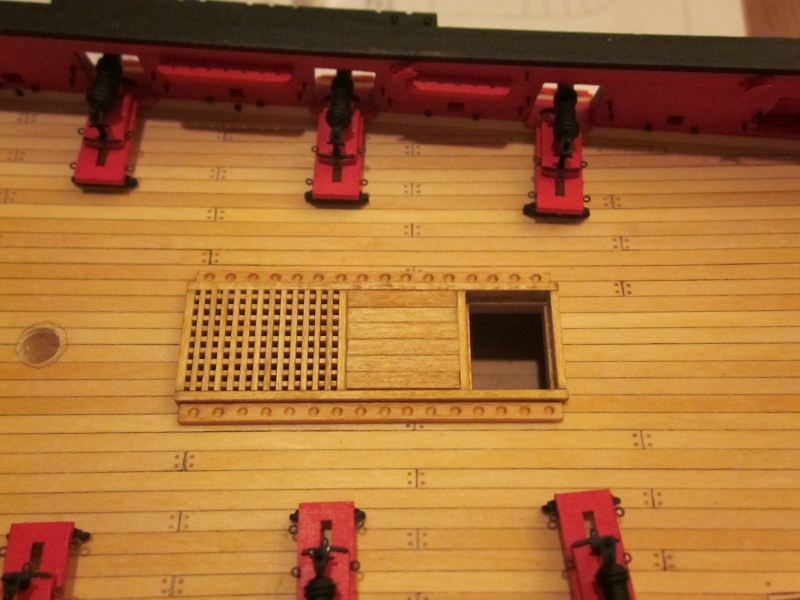
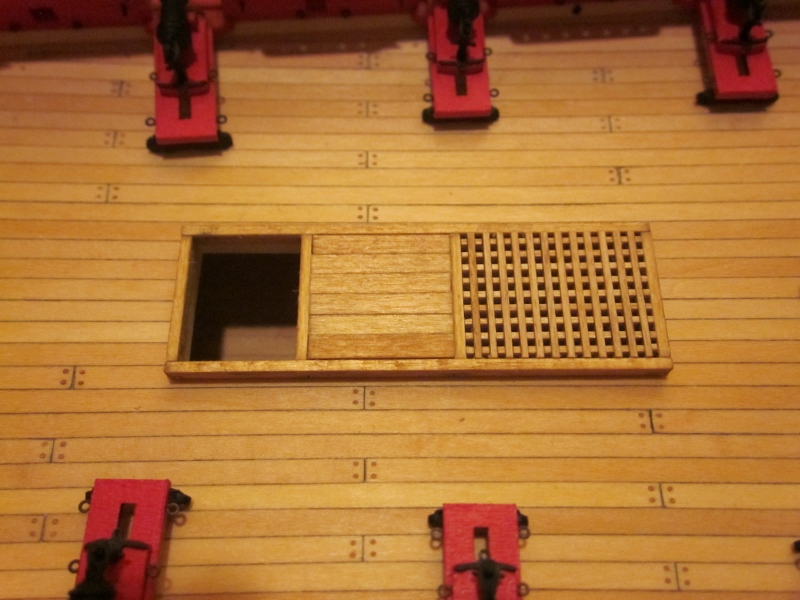
Thank you Thomas for the compliments, they are always appreciated. Especially considering the BIG mistake I just found and need to correct. Augie, THANK YOU, THANK YOU, THANK YOU!! If you hadn't mentioned the anchor lines I never would of realized my mistake till it was too late. Once I re-read about the anchor cable I discovered that my grates were backwards!! Ok, momentary delay on the carronade rigging whilst I fix "ye olde" mistake Richard
- 227 replies
-
- 1
-
-
- syren
- model shipways
- (and 1 more)
-
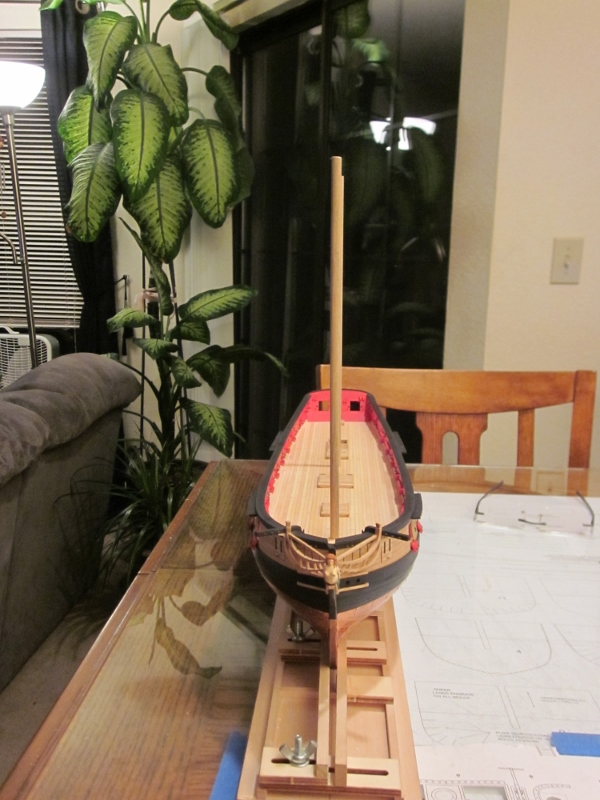
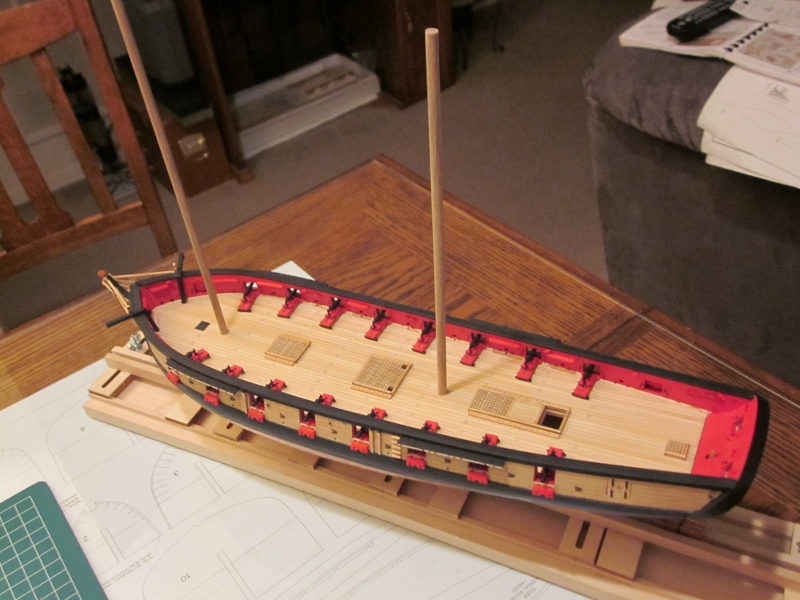
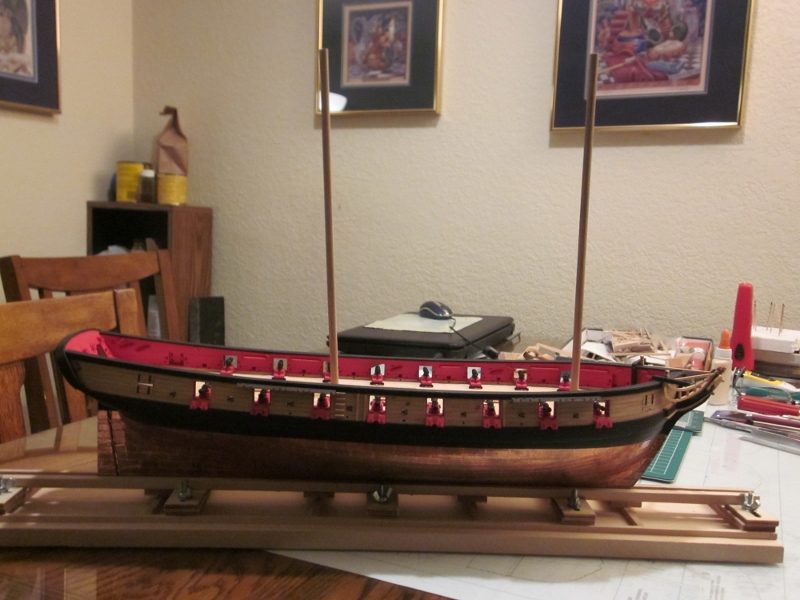
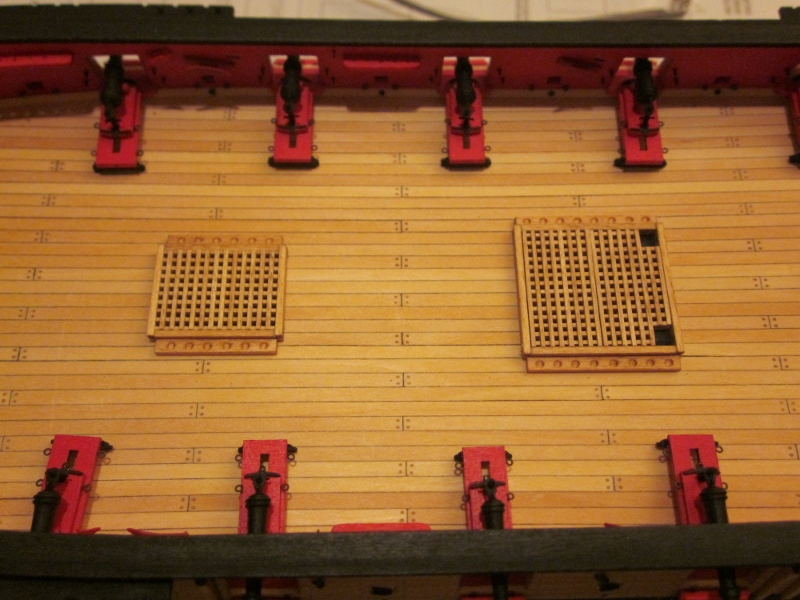
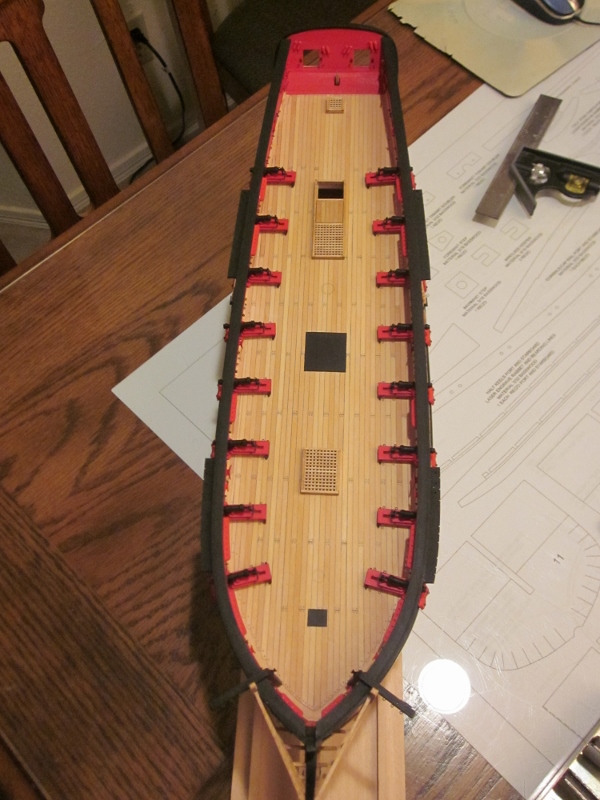
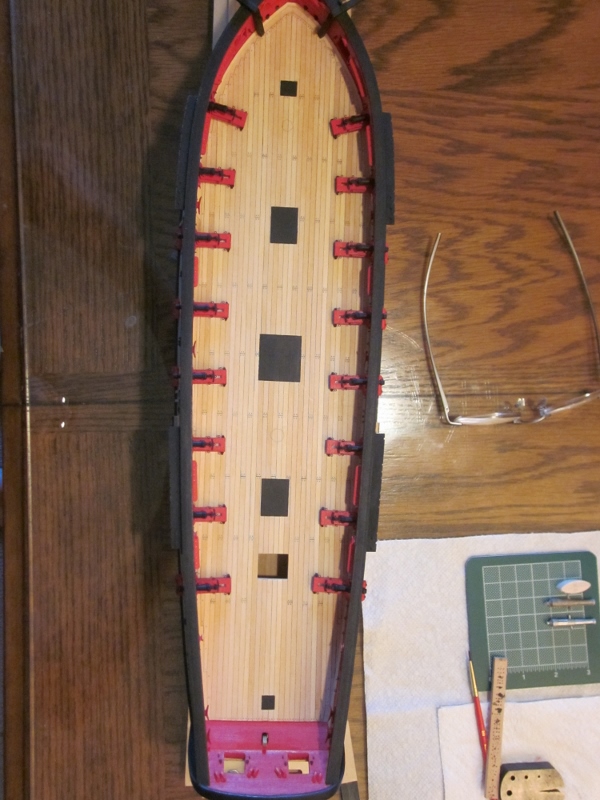
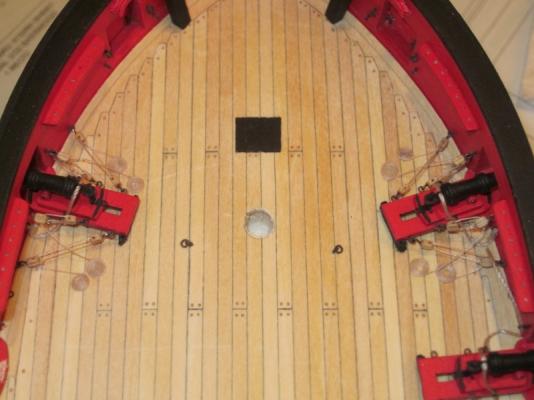
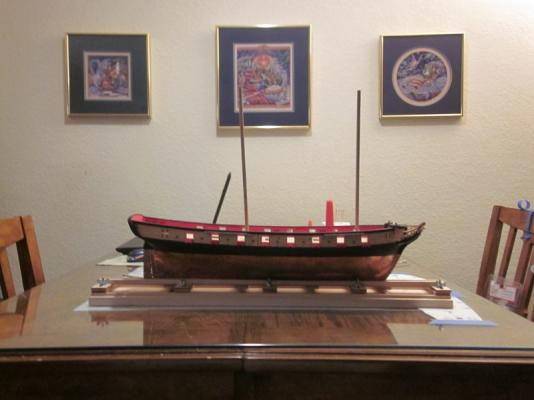
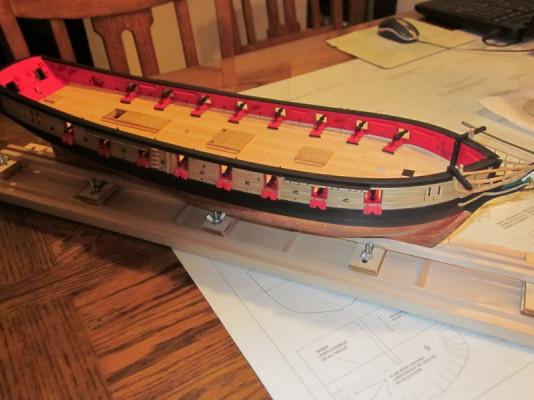
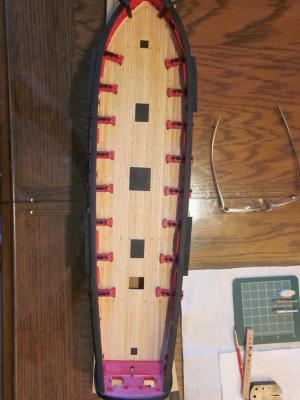
Hatches & grates are finished. Companionway ledge & shot racks are installed. Mast holes are drilled (tricky) but I think I have the mainmast rake correct. Just need to glue the cannon balls in. (Already lost one - I'll have to add it to "Whats on your floor" post) Now its time to quit procrastinating and rig my carronades. Richard


- 227 replies
-
- 5
-
-
- syren
- model shipways
- (and 1 more)
-
Thomas, I totally agree with you. It can get a little disheartening staring at an empty deck. I cant wait to see how you do on yours! Richard
-
Thanks Augie, its been so long since I read that chapter. I completely forgot about the anchor lines. Richard
-
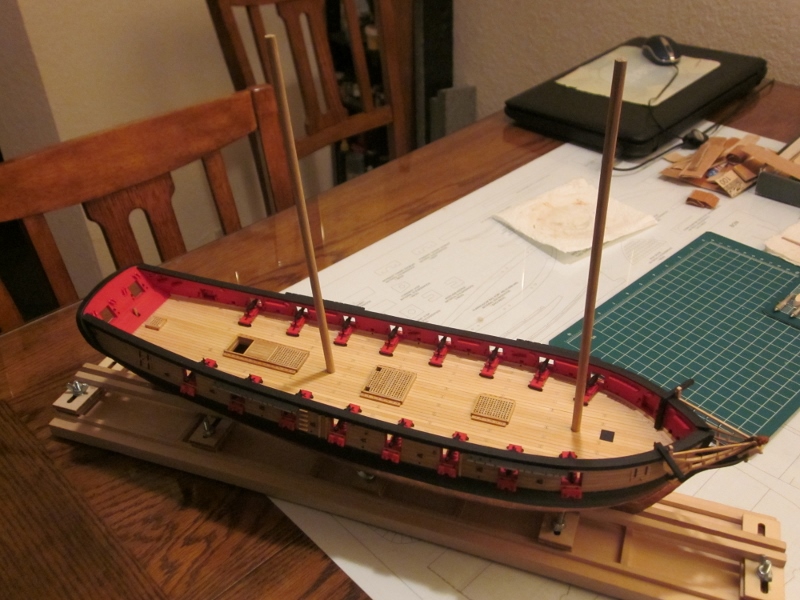
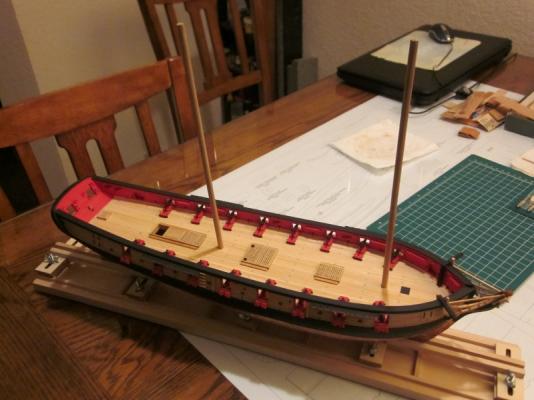
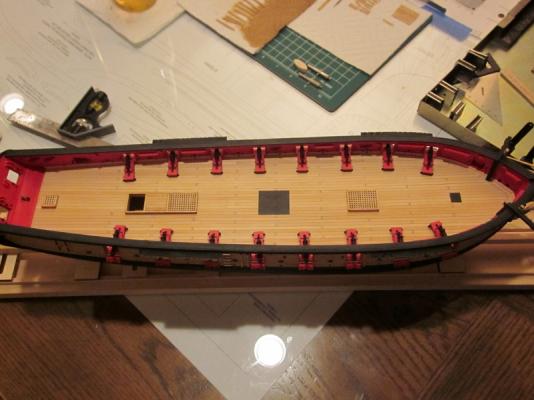
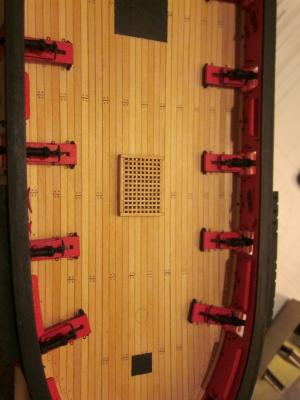
Thanks John, I'm glad to help out. I almost went with the Niagara but I found a better deal on my Syren. Once you start your Niagara I'll definitely be sitting in the front row on that build. I also went into the forums and found some good posts on carronades and from what I read I might go ahead and put in the breeching rings. But my first hurdle is to figure out which thread is the .028. I tried using my micrometer but the thickest tan thread I have measures at .023. Is the breaching thread the thickest of the tan threads? Anyway, here's some pics of my slow yet steady progress I have all my carronades finished and dry fitted and a couple of the hatch & grate assemblies complete. I Still need to drill the holes for the masts. It looks like the plans show the foremast perpendicular to the deck. I'm I correct? Also, on the main hatch just foreward of the mainmast is the grating supposed to be in two sections and what is the purpose of the two square holes on either side? I've never seen that and I cant seem to find out why. (Unless, of course, it was to keep the sailors on their toes Richard


- 227 replies
-
- 4
-
-
- syren
- model shipways
- (and 1 more)
-
Hi Thomas, thanks for the info on the Caldercraft guns. I'll have to remember that for a future build. Your cleats are looking good and I like the way you fastened your stern gunport lids. Richard
-
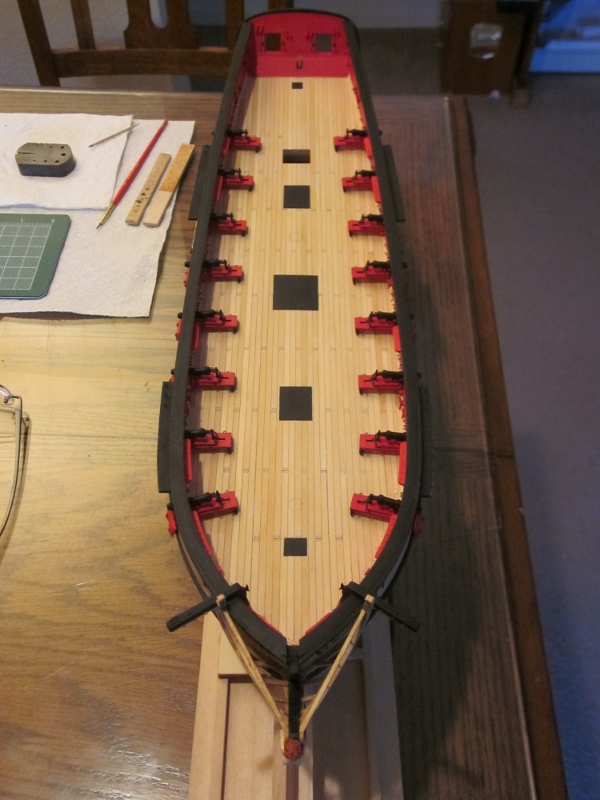
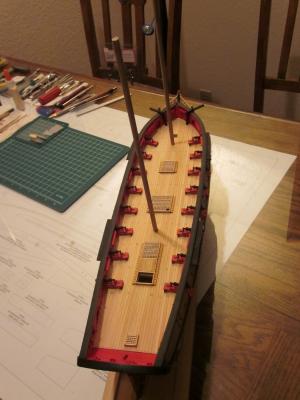
Whew, the carronade assembly is done! They're dry fitted for now because I'm thinking about assembling the gratings & hatches then taping a piece of fine grit sand paper on to the deck in order to get the right camber. Then I can permanently install the caronades and break out the rigging thread! Richard


- 227 replies
-
- 8
-
-
- syren
- model shipways
- (and 1 more)
-
Hi Augie, better late than never, and it looks like I arrived just in time. Great start on your new "gal". I'll be watching intently. I do have a question. I read earlier in your log that you steam ironed your plans to get rid of the creases. How did you do that? Richard