
MORE HANDBOOKS ARE ON THEIR WAY! We will let you know when they get here.
×


druxey
-
Posts
13,185 -
Joined
-
Last visited
Reputation Activity
-

 druxey reacted to hamilton in HMS Echo by Hamilton - Admiralty Models - 1:48 - cross-section
A small update on Echo. I've made and installed the spirketing plank above the lower deck waterways on the starboard side. As noted above, the port side is asymmetrical to the starboard and the waterway curves inboard as it runs aft. I made a spirketing for the port side, but this curved waterway means that I need to sculpt the plank a little bit more than was the case with the starboard side....I'm considering not planking the port side lower deck to avoid this....and rationalising this choice by deciding to alternate the full planking port and starboard...anyways, there's lots of time to make decisions...
I also started the lower deck planking - beginning with the strakes just outboard of the hatch/mast partners. These have to be notched around the hatch, which is wider than the partners, and a notch needs to be cut in for the passage of the outboard chain pump shafts. I marked these cut-aways out and removed the wood on the scroll saw, cleaning them up with some needle files after. I will be planking the deck fully on the starboard side, but will only install one or two other strakes outside of the currently laid one on the port side. These planks are as yet unfinished - a light sanding and sealing will happen once all the deck planks are in place.
Happy modelling and bye for now
hamilton
-
druxey reacted to jpalmer1970 in The Hayling Hoy by jpalmer1970 - 1:48 scale - First POF build
Indeed! I sometimes think it might be easier to make a full sized ship rather than a model! 😀
-
 druxey got a reaction from KARAVOKIRIS in The Hayling Hoy by jpalmer1970 - 1:48 scale - First POF build
Great start. I'm sure that you see how awkward it would be to fair the cant frames last with all the other frames in the way!
-
 druxey got a reaction from robert952 in Norwegian sailing pram by Kenchington – Model Shipways – 1:12
Nice complication, pocketing the battens! That is not beginner level.
-
 druxey got a reaction from jpalmer1970 in The Hayling Hoy by jpalmer1970 - 1:48 scale - First POF build
Great start. I'm sure that you see how awkward it would be to fair the cant frames last with all the other frames in the way!
-
 druxey got a reaction from wefalck in Did I ruin my brush?
You will need an appropriate solvent to clear the heel of the brush. If it is acrylic paint, soaking in isopropanol (rubbing alcohol) will do it. For oil-based paint, something like acetone - but only in a well ventilated space, please!
-
 druxey got a reaction from FrankWouts in HMS Portland 1770 by scrubbyj427 - 1:48 - 4th rate 50-gun ship
Interesting hybrid construction technique.
-
druxey got a reaction from robert952 in Did I ruin my brush?
You will need an appropriate solvent to clear the heel of the brush. If it is acrylic paint, soaking in isopropanol (rubbing alcohol) will do it. For oil-based paint, something like acetone - but only in a well ventilated space, please!
-
 druxey got a reaction from cotrecerf in The Hayling Hoy by jpalmer1970 - 1:48 scale - First POF build
Great start. I'm sure that you see how awkward it would be to fair the cant frames last with all the other frames in the way!
-
 druxey got a reaction from thibaultron in Did I ruin my brush?
You will need an appropriate solvent to clear the heel of the brush. If it is acrylic paint, soaking in isopropanol (rubbing alcohol) will do it. For oil-based paint, something like acetone - but only in a well ventilated space, please!
-
.jpg.d84ec4dad1d7791e855dca06210ab6f3.thumb.jpg.f45209242e851d4409eca1a09293165b.jpg) druxey got a reaction from hollowneck in HMS Portland 1770 by scrubbyj427 - 1:48 - 4th rate 50-gun ship
druxey got a reaction from hollowneck in HMS Portland 1770 by scrubbyj427 - 1:48 - 4th rate 50-gun ship
Interesting hybrid construction technique.
-
druxey reacted to herask in Yet Another Pandora 3D build
Druxey, it is if I forget to change the weather. 🤣 but, to my defense, today was sunny around here, so yeah...
counter frames and head pieces done. I know, counter frames are just hanging there, but for now they will stay so, until other timbers that connect them are done... and NOW square frames will follow...
-
druxey reacted to herask in Yet Another Pandora 3D build
making progress with square frames, albeit really slowly. those irregular futtocks shapes really don't help. frames around forecastle are done...
-
druxey reacted to jpalmer1970 in The Hayling Hoy by jpalmer1970 - 1:48 scale - First POF build
I finally found some time, and the courage (!), to make a proper start on the fairing of the inner aft cant frames. I was worried that these might be fairly fragile and that sanding could cause some problems but with the little filler bock holding the tops of the frames together the structure is remarkably strong. Even so, I took things quite slowly and sedately. I realise now that I should have really started the fairing much earlier, after every two or three frames perhaps. because I did find it difficult to get a tool or sanding stick into certain areas now that all of the aft cant frames are in place. I experimented with almost every sanding type tool I could find to see what worked best in this scenario, using dremels and a variety of sanding pads and discs, sanding sticks, home made sanding sticks, scrapers, riffler files, sanding blocks, and the Proxxon pen sander at one time or another! The little Dremel Lite and the flat sanding pad has done most of the work so far.
I have only sanded one side of the model so far and this is just the first rough shaping. I don't want to take too much off too soon so I may just now focus on smoothing this side out out before tackling the other side to make sure they are symmetircal.
-
 druxey got a reaction from bdgiantman2 in L'Amarante by marsalv - 1:36 - POF
Lovely work, but is seems a pity to hide all the framing that you've done so nicely.
-
 druxey got a reaction from oakheart in HMS Thorn by Kevin Kenny - 1:48 scale - Swan-class - David Antscherl practium
Henry: cumulative error means that the first thing one does is a tiny bit off. The next, measured from the first, is a little more off... and before you know it, everything has become way off. It's the rolling snowball effect. The only way to avoid this problem is by repeatedly re-measuring and checking things, be it a distance or an angle. With a scratch build like yours or Kevin's, it's imperative. One can't be even a bit careless and get away with it. Ask me how I know!
-
druxey reacted to 3DShipWright in Nate's PANDORA in 3D
Framing update: prepping for the aft cant frames. Working on the deadwood pieces. Getting the stepping cuts to precisely follow the bearding line has been a challenge. Another challenge is that the siding (room and space) calls for aft cant frames at 10 inches, but that is a measure of the outboard siding. Inboard of the stepped scarf - where the frames abutt the deadwood - is actually smaller, which is why the second frame in each pair on each step appears narrower than the forward partner. The width of the aft frame is not even consistent, rather, it is a mathematical function of the angle.
Translated into English... Yuck! Super slow-going, but I hope my attention to detail will be worth it in the end...
-
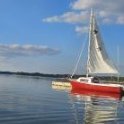
druxey reacted to Kenchington in Norwegian sailing pram by Kenchington – Model Shipways – 1:12
I am still making progress with the pram, though other demands have drawn me away a bit. I have finished the sail and bent it on to the yard. It's getting late here, so I don't have time tonight to explain the details and my reasoning but, to prove that I have not been entirely idle, this is how the rig is looking so far:
-
druxey reacted to Kenchington in Norwegian sailing pram by Kenchington – Model Shipways – 1:12
Yesterday, I made a first attack on my pram's tiller, taking a Dremel to the hardwood piece. I ended up sanding a bit too far in one place (down to 2mm thickness, when I intend to stop at 3). I will keep going with it all the same. Even if I cannot use it in the end, it will give me a better way to determine the shape that I really want in a second effort.
Today, with an unseasonable snowstorm, I turned instead to Step 48: Sailmaking.
I don't pretend to any expertise at that trade, but I've had to learn enough of the real thing to be able to maintain my own (full-size) sails and to once convert a foresail for points reefing. Even so, anyone who wants to know all that I do of sailmaking (and a whole lot that I forgot soon after reading) should get hold of Emiliano Marino's "The Sailmaker's Apprentice". I had read a lot else before coming across that book but I doubt there is anything that he did not cover better than most others have done.
One thing to understand for those who have only built sails for models: Normal cloth has limited stretch in the (perpendicular) directions of the warp and weft but almost no resistance to stretching at 45° to those fibres. (Spinnaker fabric and the ultra-modern materials of today's racing sails are different, but those are not of concern here.) The pram kit's instructions edge towards that point, calling for the provided cloth to be spread by length and width, before gently pulling on the corners. Then its sail pattern indicates that the warp (or weft) should run vaguely diagonally across the sail. But it does not explain why. Why is because unsupported edges of sails must be aligned with either warp or weft, otherwise, they will stretch out of shape, while casting wind-disrupting creases across the sail. In the case of our pram, the leech must be aligned with the fibres of the cloth -- or as aligned as can be, given that the leech is curved (curved into a "roach" by the universal usage of modern sailors, though in the days of working sail convex edges were called "rounds" and "roaches" were concave). The pram's sail's head will be supported by lacing to the yard, while the lesser forces on the luff and foot can be adequately supported by tabling and roping.
Those are full-size requirements, of course, but ones that can be replicated at model scale, within reasonable bounds.
In the case of the pram kit, the intent is to produce a firm, flat sail, suited to a display model. It will have all of the obvious features of the real thing but none of its curves, folds or flexibility. In practice, the first task was to iron the supplied cloth and smooth out the deep creases produced by its packaging. To iron it, then iron it again and then once more before all was smooth. (Not a problem: I had a load of laundry to work through!)
In parallel with that, I printed off three copies of the instructions' sail pattern:
That proved to be printed to the proper size (6-inch or 150mm length of foot) in the booklet but persuading my computer to output a hardcopy at the same size was annoying. One of the three copies, I trimmed to the size of the finished sail. The other two I cut up to show the four "tablings", meaning the extra layer of cloth along each edge of the sail. Tablings are not hems, or they should not be. (Some sailmakers economize by making "rolled tablings", which are hems by another name.) A tabling is a separate, extra piece of cloth, with warp and weft aligned with those of the main layer of cloth. In the case of the pram's sail, three of the tablings are just straight strips but the one for the leech must follow the correct curve. Its outer edge will be trimmed later (along with all other edges of the sail) but the inner edge will show on the finished sail and hence must be cut carefully -- which needs a paper pattern. Besides, while plenty of cloth is provided in the kit, getting all four templates out, while preserving the correct orientation of warp and weft is a bit fiddly. Having the patterns to push around helps.
The instructions call for the assembly of the sail to be done on a clean cutting board but other build logs report that that isn't enough to prevent staining of the cloth, so I followed the usual recommendation and first taped plastic food-wrap to my board, then the cloth on top, carefully laid flat and taped down. The instructions then call for diluting white glue "to about the consistency of cream" (with no hint of the grade of cream) and painting the cloth with it. I found that even the small amount of water I added needed a whole lot more glue before I got anything thicker than skimmed milk. However, I kept on adding more until it was somewhat thicker than homogenized milk but far short of whipping cream (let alone the Devonshire clotted cream of my childhood!). That seemed to work well enough.I brushed it on liberally:
It was fun, slopping on the glue with no need for the precision required when bevelling planks and transoms. Once all was dry, the whole-sail paper pattern could go over the larger piece of cloth, its leech oriented to the weave, and the four corners were marked in pencil. The key marks, though, are the locations of the ends of the inner margins of the tabling. Those have to be aligned properly, whereas the outer edges will be trimmed along with the rest of the sail. Then the tablings could be cut out, given fresh glue on one side and placed on the sail.
Next up were the three battens (marked on the pattern), which are cut from 1/32 x 1/16 basswood stock provided in the kit. To simplify their placing, I marked each with the point where it should cross the inner edge of the leech tabling, while letting it extend across the tabling to the position of the leech itself. The cloth at that time extended much further, so cutting the sail out later would meant cutting to the end of each batten. Now, the kit instructions say to glue each batten to the sail, while wetting its other side to stop it warping. Though I have read of, often used and sometimes seen, various alternatives for handling battens (right up to the complexities of Chinese lug rig, being constructed by two ladies at the maritime museum in San Francisco), but I have never heard of a sail batten being glued to the sailcloth. I am confident that that was only intended as a simplified alternative for the novice model builder.
What the full-size pram most probably has is a pocket for each batten, made of an extra piece of cloth sewn onto one side of the sail. The inner end of the pocket would have a piece of elastic, to force the further end of the batten against the stitching of the leech. In order to get the batten in and out of the sail, such a batten pocket has a diagonal extension at the leech end, where the extended bit is not sewn to the tabling, leaving a slit into which the batten can be inserted. So I cut suitably shaped pieces of cloth (from the pre-glued and dried material), then glued those over the battens. What I had not allowed for was the 1/32 stock being much too thick for scale, so my "pockets" turned out as slight covers. At least they stopped the battens from warping and they can be easily replaced if necessary.
Once all that was well and truly dry, I followed the instructions, freed the developing sail from the cutting board and turned it over. Its four corners then got reinforcing patches (as a full-size sail would) that end up as triangular but, when first glued down, can be any convenient offcuts from the glued-and-dried material, provided that they are large enough to span the corner of the finished sail. The instructions would leave the cloth of the sail at that point but it is about 6ft (full-size) from leech to luff at its maximum. Nobody makes sailcloth that wide. I opted to "make" my pram's sail from three lengths of cloth, arranged parallel to the leech. In reality, I glued narrow strips, representing seams, down the sail from head to foot. One turned out wider than the other. That's OK by me: "Broadseaming" is one way that a sailmaker adds curvature into sail!
At that stage in its development, the sail was an ugly mess:
However, once all was dry again, the mess could be released from the cutting board, flipped over and trimmed to match the pattern, using a straight edge and a curved Exacto blade. I muffed the curve of the leech a bit but nothing too bad:
It still needs "eyelets" (for which the instructions offer a rather neat solution), some trimming of the corners around those, plus roping (which I will explain once it is done). But that's for tomorrow, when I should also get serious about the standing rigging.
Trevor
-
 druxey got a reaction from eatcrow2 in Yet Another Pandora 3D build
Lovely atmospheric work. It it always sunny there?
-
 druxey got a reaction from MBerg in Did I ruin my brush?
You will need an appropriate solvent to clear the heel of the brush. If it is acrylic paint, soaking in isopropanol (rubbing alcohol) will do it. For oil-based paint, something like acetone - but only in a well ventilated space, please!
-
druxey reacted to petervisser in Did I ruin my brush?
For a deep clean of your paint brushes, you might want to try TSP which you can purchase at Canadian Tire, seeing as you're in Canada. Give give the paint brushes a soak overnight using the recommendations on the container and rinse with water. I hope this is a help.
Cheers, Peter
-
 druxey got a reaction from empathry in FULMINANT by HAIIAPHNK - French stern castle
Too true. I'm actually writing a novel on time travel using a steam powered machine. Definitely dangerous!
On a more serious note, the 'blank' panel of the lower gallery is logical, as it balances another blank one on the foremost panel.
-
 druxey got a reaction from mtaylor in Looking for ideas for work area
First consideration: how big is the space? That will often dictate what is practical and what is not.
-
druxey got a reaction from mtaylor in location of carronades on a RN 74 gun ship
I think cut and move the third timberhead from aft is the reasonable. The fourth might be omitted altogether and the fifth moved aft.