

Boccherini
-
Posts
376 -
Joined
-
Last visited
Content Type
Profiles
Forums
Gallery
Events
Posts posted by Boccherini
-
-
A happy and prosperous 2022 to all and sundry.
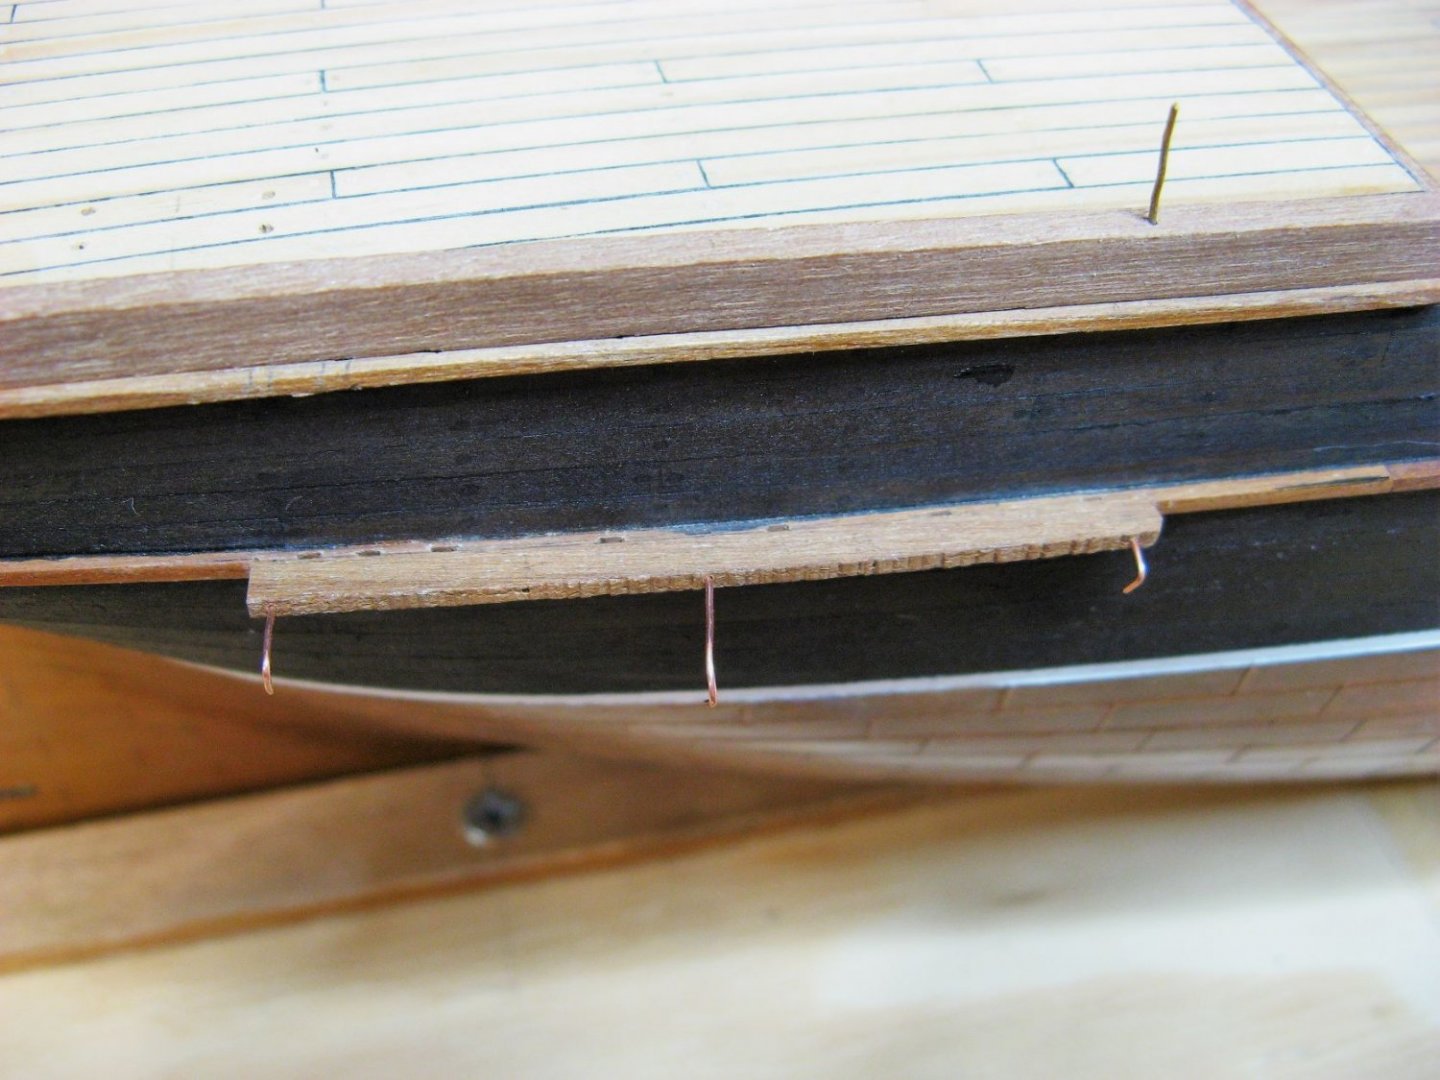
I have entered the terminal phase of life.......retirement. I celebrated this by staining the starboard side (this will be the "dark" side when it's finally displayed) of the hull, the result is quite pleasing. I won't have to paint the inboard bulwark planking white as there was no bleeding through the planking.
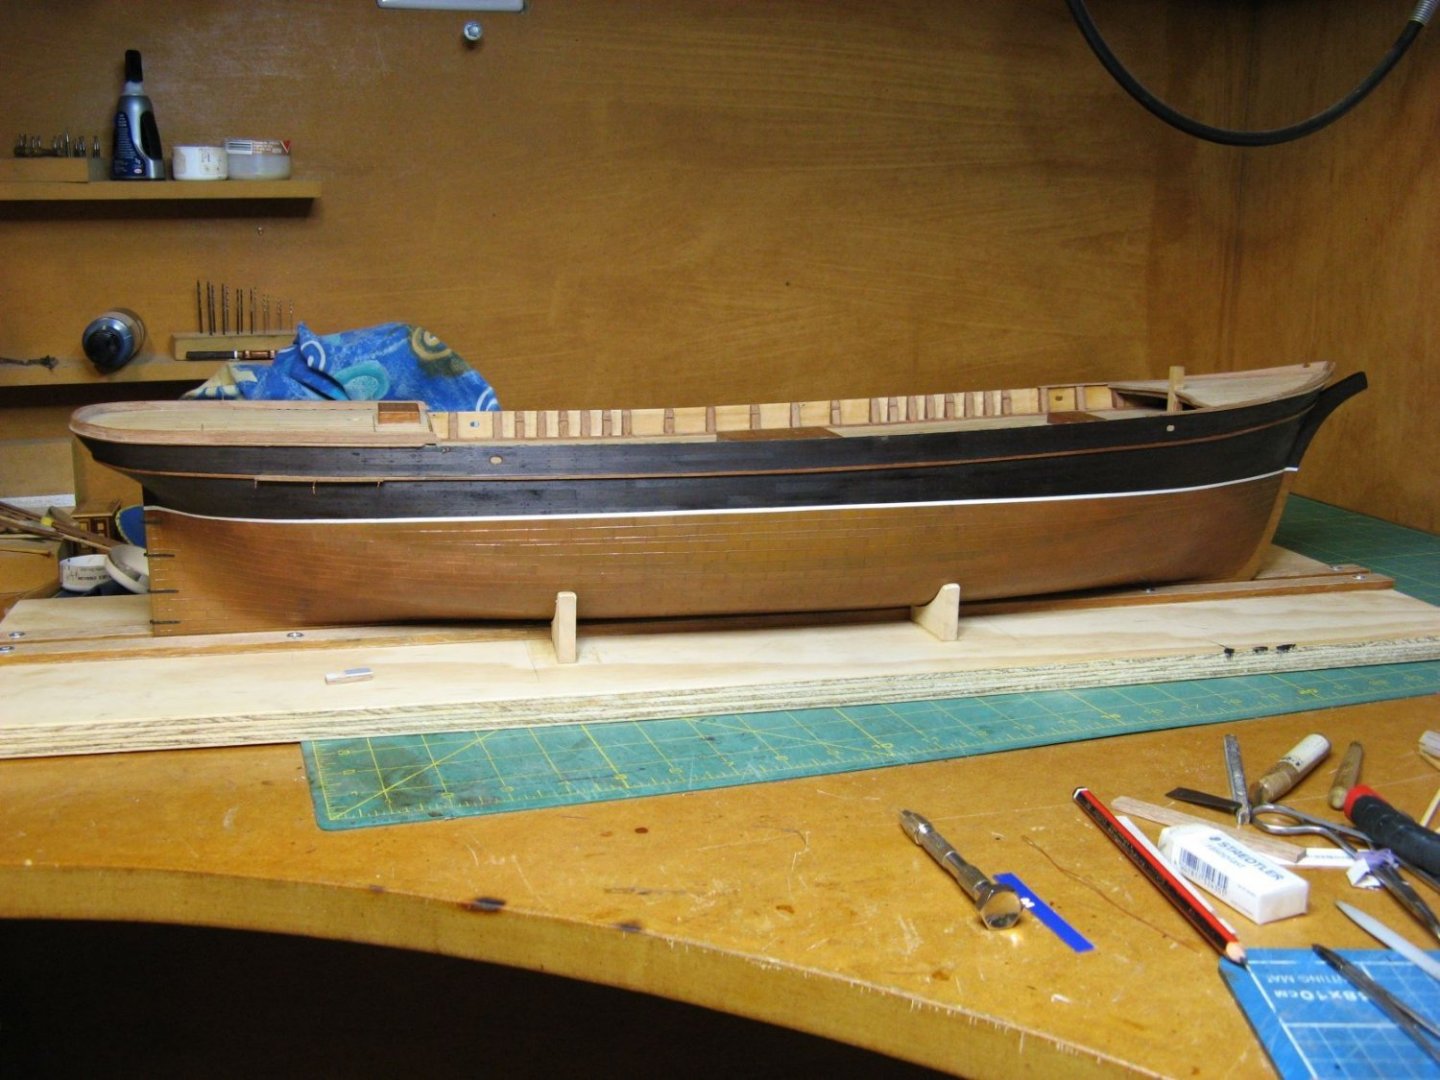
I've been dragging my feet over cutting the slots for the mizzen chainplates, not being sure about how to proceed. Finally settled on taking one section of timber out, rather than seven small notches, I think the repair this way is probably neater and easier. Mr Underhill suggested the other option.
Regards,
Grant.
- Roger Pellett, ccoyle, GrandpaPhil and 4 others
-
 7
7
-
-
Do acrylics bond onto a solvent based sanding sealer?
Regards,
Grant.
- DaveBaxt, thibaultron and mtaylor
-
3
-
This hobby can be frustrating at times. Two issues have recently set me back, i) the need to be several steps ahead in your thinking, ii) check your measurements (a variation on measure twice, cut once).
I made the assumption the gaff was hauled up. It is in fact meant to be fixed in place like the boom, the shrouds obscured this detail on my plans. I had, of course permanently fixed all the pieces on the mast, making it an awkward job.
I forgot to check the wire diameter for the mizzen deadeye strops, and used .6mm wire instead of .5mm. It doesn't sound like much, but it looked way out of proportion.
The gaff blunder and fix:
(Small).JPG.1185716980181d429f76992eb59c1b7c.JPG)
(Small).JPG.b99c7b43bda8e125713f6d5b1e1b6313.JPG)
Re doing the strops turned out to be a great way to become familiar with the latest addition to the workshop, a Smith Little Torch. The ability to control and localize the heat makes this work easier, uses less solder and makes a neater job.
(Small).JPG.21570e1fd6ca61c36cc6698b1676a88d.JPG)
(Small).JPG.7fa60e45e5e5c515f11f189bc7aef14f.JPG)
.JPG.14381523a3fb051afeea36b5f84b0c4c.JPG)
-
-
-
I'm currently making a mizzen top mast, there is supposed to be a "fid" going through the heel of the mast to hold it in place.
What does a fid look like? Dimensions? The barque is from the 1860's.
Grant.
-
Thanks Tony.
Wefalk,
I don't envy you working on such tiny stuff. My belaying pins are 0.5mm for the pins and 0.8mm for the head. I tried drilling 0.5mm holes in 1mm wire using the Proxxon mill. It cost 3 drill bits to do 30 pieces. The next batch will be done on the lathe, might work better. After brazing the bits together, I intend to try and shape the head with files holding an extended head piece in a collet on the lathe. I have no idea how well this will work as yet, as it will be a delicate operation. Apologies if I've not explained this process in a way that's clearly understandable.
Underhill filed his belaying pins while his friend was working a hand drill. I expect he was using wood rather than copper. Thank God for reasonably priced, mass produced power tools, I don't have any friends that obliging.
I've decided to purchase a genuine Smith Little Torch, too many potential problems with the Chinese knock offs.
Grant.
-
Thanks for the replies. Great video, thanks Bob. I decided to bite the bullet and purchase the genuine Smith product.
Grant.
- tlevine, thibaultron, kurtvd19 and 5 others
-
8
-
The spider band for belaying pins created some difficulty. Forming the rings and stem out of 1 piece of wire didn't work out well. The 2nd attempt was kinda complicated, but it worked.
.JPG.fcf239c714505c50c28b189c65f0fba5.JPG)
.JPG.13a21879234f8e12a16fc27d57f7beb1.JPG)
.JPG.0aba08b357e79a7e99ef9bce5dcadd68.JPG)
It required an 8mm thick piece of steel to act as a heat sink to protect the rest of the assembly whilst soldering the rings.
.JPG.4ef6a57c4ee42564423d0698214ff4ce.JPG)
A comparison between the 2 methods.
.JPG.69ec9a8bdaa8d57517a6bc8a74ec8407.JPG)
Cleaned up, blacked and in place with the rest of the mizzen "iron work".
(Small).JPG.4904c78b4c32a1d0cdfefcfc7c3ae630.JPG)
.JPG.ccf80eef6e3d3812d1acbcefb50c26a9.JPG)
I'm now officially fed up with my trusty butane torch, controlling the flame/heat is too difficult for this work. There were moments when it appeared everything was about to melt. I'm starting to look at a Smith Little Torch or one of the cheaper copies.
Grant.
-
I'm considering upgrading my current butane torch to a Smith Little or Smith Little "knock off". I noticed this kit:
https://www.hampdon.com.au/uweld-micro-torch-kit-for-cutting-welding-brazing
I've went and had a look at the kit, the handpiece seems reasonable, but the tips seem low grade. Replacement tips are about $7 AUD each. Has anyone had experience with this kit?
Grant.
- thibaultron and mtaylor
-
2
-
-
-
Wefalk,
thanks for the suggestion. I've previously tried a home made chisel (from the shaft of a broken 0.5mm drill bit), I found it awkward to use effectively. The diamond coated blade sounds like a good idea. None of my jewellers files are small enough. The tapered tips are ok, but they become too large too quickly for comfortable use. Any suggestions on where to purchase the diamond blades? I've found some blades for a jewellers fret saw, though they appear to be a rare item.
The block tumbler has worked out quite well. I based the design on Grant's (gjdale) version, with a few variations. There were a couple of flanged bearings (left over from a rope walk built several years ago) that came in handy. 65mm sewer pipe and some glue on caps provided the body and ends. The caps are not permanently fixed, the pipe ends were sanded down to allow the caps to 'slip fit'. I've used 3 grades of sandpaper: 180, 240 and 320. The drill powered set up with miscellaneous bits of packing and a vice for support will be temporary.....eventually. I'd rather be modelling.
.JPG.dd50dd68460d70ec4153c4d76061d4ff.JPG)
.JPG.b22f450958015359d1e0c0ce850d4674.JPG)
.JPG.51743a8d00aa309fdb23a6c8aec4b50c.JPG)
-
Thanks for your comment Tony.
I've decided to make a batch of blocks, there is a need for some for the bunt lines under the tops. There is still a reasonable supply of the lemon wood to work with. All the preliminary work was done with the mill, the rest is just old school: file, sand, cut and sand. The end result is not too shabby.
One of the "problems" with this hobby are the rabbit holes. Just when I get on a roll, I start to wonder if an additional piece of machinery might help. Work then stops to accommodate the new fixation.......in this case, a block tumbler.
.JPG.5a284f39cd3f39fcf3175baf4274e8ca.JPG)
-
Hey Joe,
if you are using a soft or lead solder with an electric soldering iron, I've been told the blackening won't work. It works on silver solders really well.
Regards,
Grant.
- thibaultron and mtaylor
-
2
-
Thanks for your interest Tony.
I've planked the tops, and made an ''iron'' rim for the mizzen top.
The rim was awkward, I brazed one end whilst flat on a fire proof sheet, then set the rim in a vice with wire to hold everything in place to complete the joint. Ended up having to re solder the opposite end to obtain the extra length to get it to fit the top. It's a good thing there was a bit spare to allow the adjustment.
I've ditched the phone and replaced it with my trusty, old 8MP Canon, so no more weird uploads.
Grant.
.JPG.b404d15188113637a6b730b5429036fd.JPG)
.JPG.3e35d78c1fc9de56334d78e16f6626d0.JPG)
.JPG.695d73ab4a7cbce205c653d54ffa7cc5.JPG)
-
Thanks Wefalk.
started working on the tops. At least one of the pictures is the right way up. I need to figure out why the pictures get inverted between my folder and the uploads.
(Medium).jpg.13b8bbf0b5b494ead580de2e3a97b65a.jpg)
.jpg.0f86bc77332189c4bc440a581e849f5d.jpg)
.jpg.ab388b8c53bc807453c9c8a11ad55c14.jpg)
- Ainars Apalais, GrandpaPhil, Tony Hunt and 4 others
-
6
-
 1
1
-
-
Thanks John, good to see you're still here.
Tony,
thanks. I tried the link, the only response: "An error has occurred" above a blank page. I tried going to the digital collections and searching the books name, and received a no response message.
Looking a bit further, it appears I need to become a member. I'll go down that route later.
Thanks again.
Regards,
Grant.
-
-
-
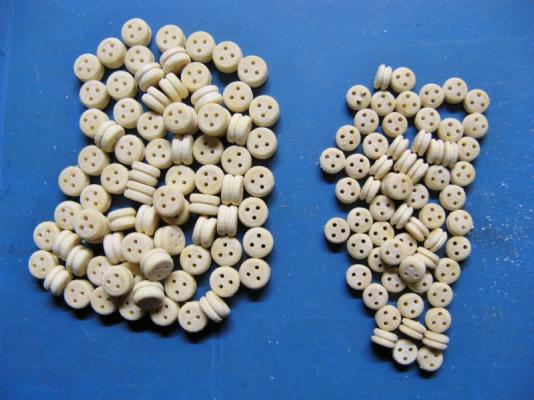
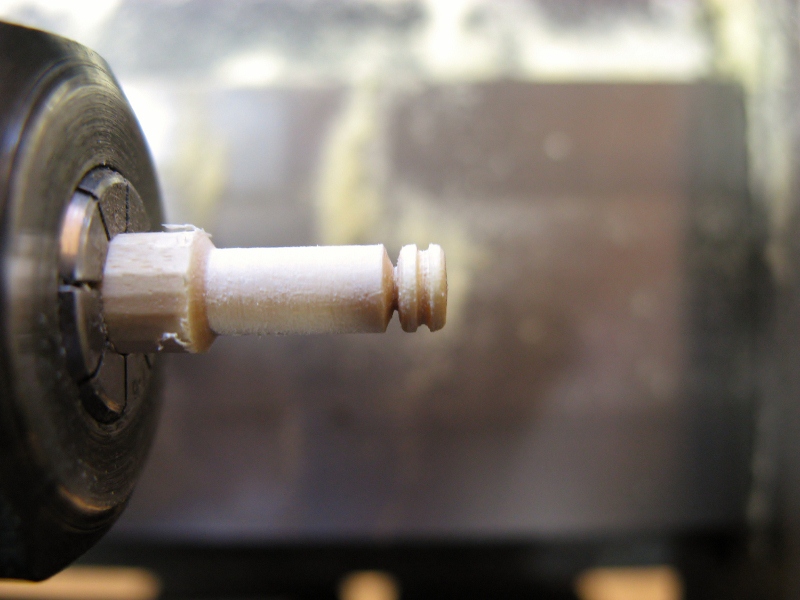
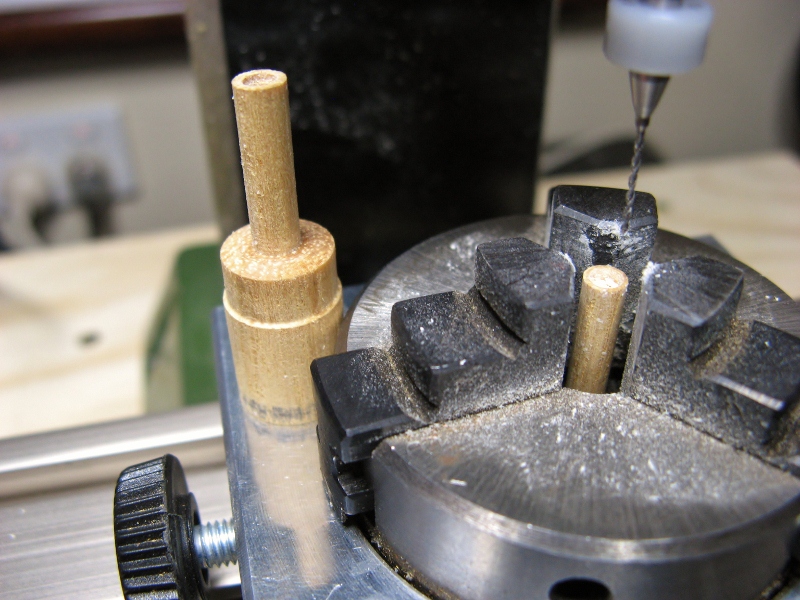
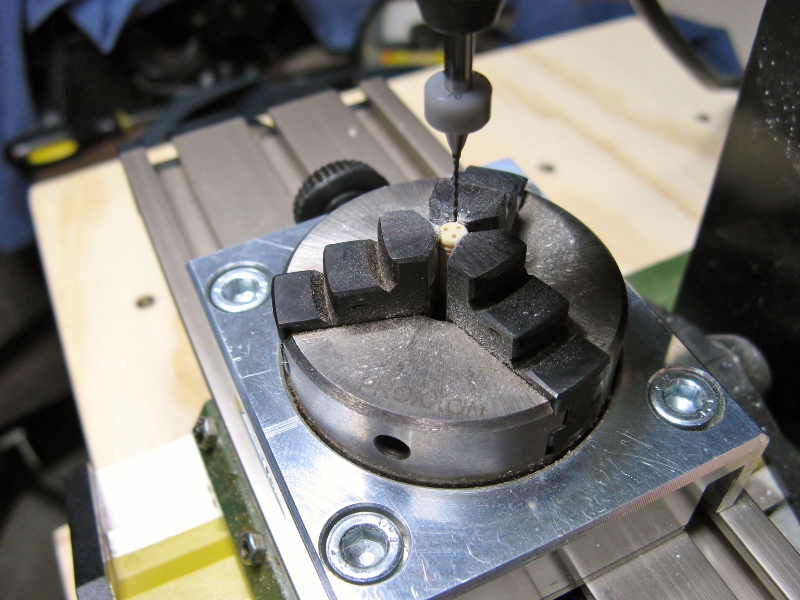
The dead eyes were rough formed with a shaped cutting tool and finished off with small files.

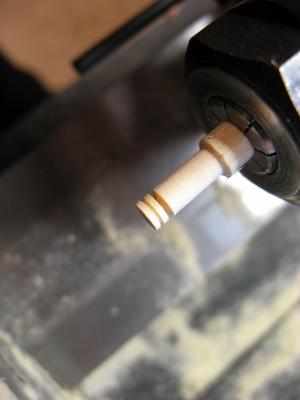

I initially tried drilling the dead eyes in the traditional fashion, without much success. The mill provided a solution, using the dividing head with timber posts turned to fit inside providing support whilst drilling. The top of the post are a slightly smaller diameter than the dead eyes, allowing the jaws to hold them firmly. The larger dead eyes are 4.9mm dia, and the smaller 4.1mm dia..

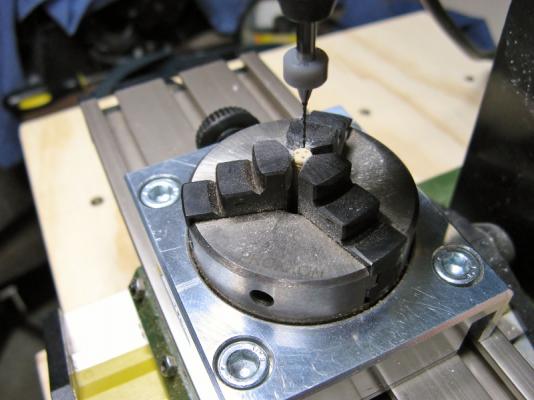
Grant.
- captainbob, wefalck, GuntherMT and 7 others
-
10
-
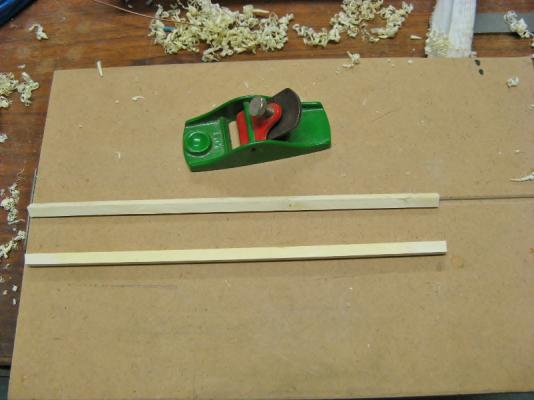
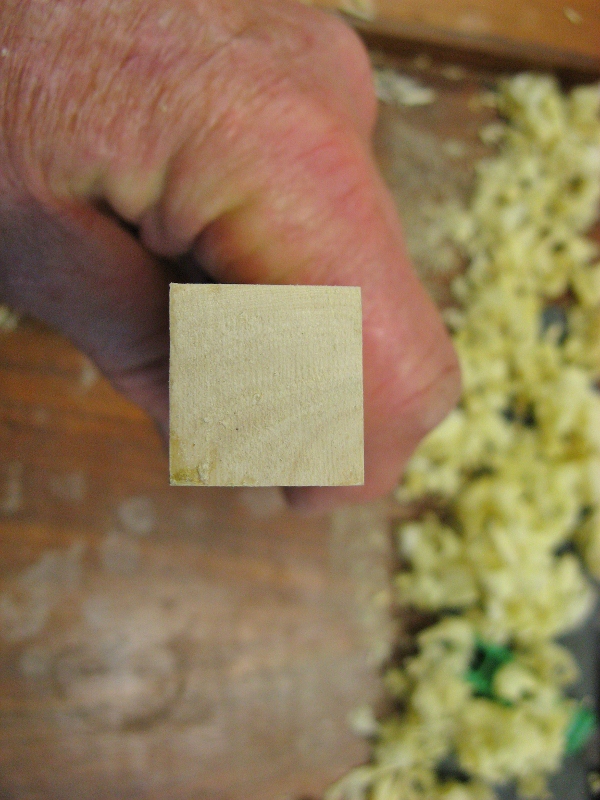
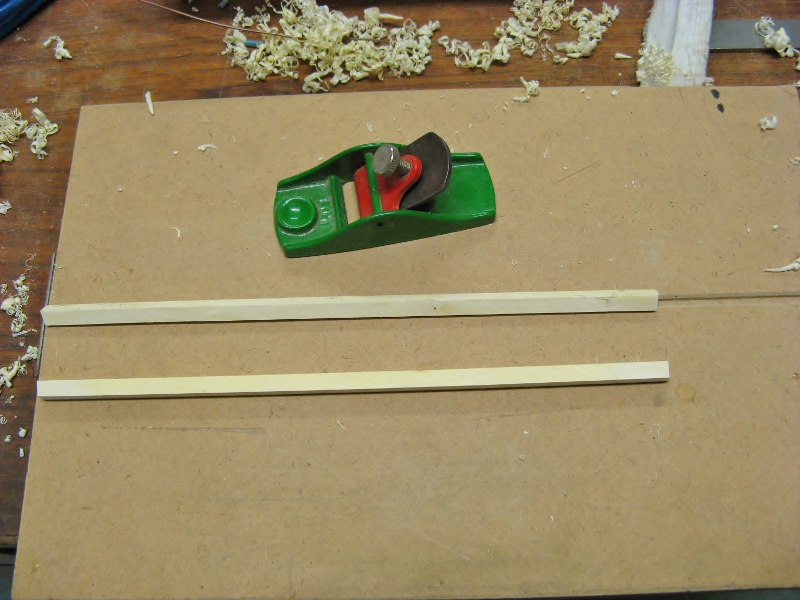
The dead eyes are made from lemon wood harvested from a tree cut down 7 years ago to make way for an extension to the house. It was quarter sawn, the ends dipped in wax, then left to dry in my workshop. The pieces used didn't warp too much, and were surprisingly easy to roughly square with a hand plane, then finish on the table saw.
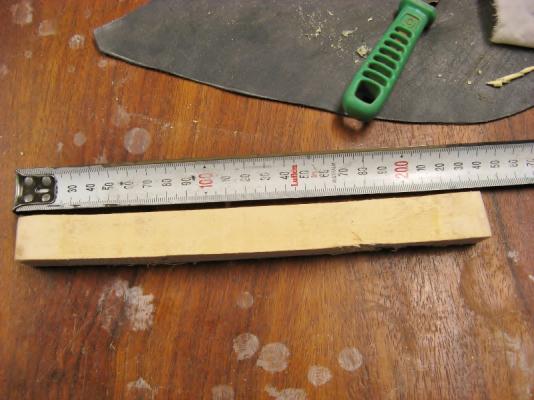

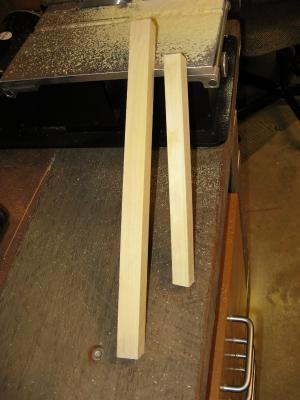
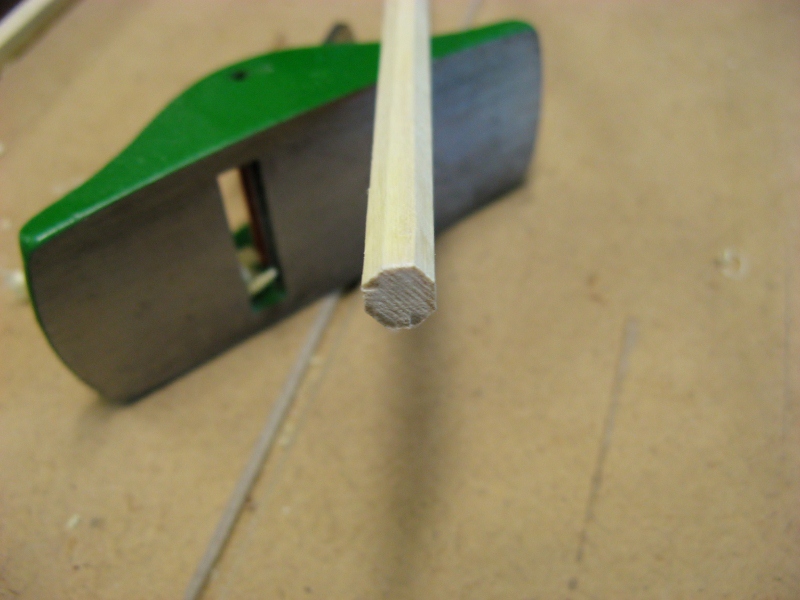
"Rounding" the square section timber was done in a simple jig using a thumb plane. The pieces ended up as 16 sided, and rounded enough to fit into the collets on the lathe.

- wefalck, GrandpaPhil, Torrens and 1 other
-
4


.JPG.de13142ce7c40359eb77e938baaae280.JPG)
.JPG.4e825a64502bf02bb9d574553b1b5f1f.JPG)
.JPG.7305f8bca6206e241f1cf588cbe52454.JPG)
.JPG.4206b172499bfdd73d03379a3b0489fd.JPG)
.JPG.2d073fa58a1ecd16078bbecd8f47ceca.JPG)
.JPG.0f0baf0966aad023f30d4da0f2ff3de6.JPG)
.jpg.11bdfd0c32f40140f8b68273b13875bd.jpg)
.jpg.406f23bdef8d266eb40aa10324381b26.jpg)


Harriet McGregor by Boccherini
in - Build logs for subjects built 1851 - 1900
Posted
Happy days indeed. Thanks. Congratulations to you also.