

.jpg.f26acc9a74319261612561bfa7da1303.jpg)
vaddoc
-
Posts
1,605 -
Joined
-
Last visited
Content Type
Profiles
Forums
Gallery
Events
Everything posted by vaddoc
-
Do you use a honing guide?
-
.thumb.jpg.6fd4c1b78768bb3efd745ab810936005.jpg)
French polish
vaddoc replied to DelF's topic in Painting, finishing and weathering products and techniques
Lovely model and a very rich web page! Undoubtedly tons of work gone into both. -
French polish
vaddoc replied to DelF's topic in Painting, finishing and weathering products and techniques
The wax should give some shine to a finely sanded surface. -
French polish
vaddoc replied to DelF's topic in Painting, finishing and weathering products and techniques
I had to google pumice powder, never heard of it! "Pumice powder is made from pumice, a kind of igneous rock that is formed when a volcano erupts. Pumice is abrasive, which is where much of pumice powder's usefulness comes from." Another thing, Liberon shellac is not dewaxed. It is not a big deal as the wax settles in the bottom if you leave the container still for a few days, then the pure shellac can be drawn from above. Vaddoc -
French polish
vaddoc replied to DelF's topic in Painting, finishing and weathering products and techniques
Derek, this has been just my experience though, maybe you ll fair differently! I ve spent a very long time experimenting though with finishes (in scrap wood, not the boat!). I ve come across this sealer in the past https://www.amazon.com/DecoArt-DS17-9-Americana-Multi-Purpose-8-Ounce/dp/B000YQJQ82/ref=sr_1_1?ie=UTF8&qid=1517916231&sr=8-1&keywords=americana+sealer It can be found in the UK for £2 a small bottle which goes a very long way and does a brilliant job, dilutes with water and dries in 15 min. My hull has only this sanding sealer on for now (2 coats) and is sanded to 0000 steel wool. It is very smooth and reflects light regards vaddoc
-
French polish
vaddoc replied to DelF's topic in Painting, finishing and weathering products and techniques
I think shellac is not waterproof so does not seal the wood well. Also I think it has a shelf life. I used it in the past but I liked pure tung oil better which gives a warm tone to the wood, shellac needed too many coats. Also, I find water based sanding sealer excellent and now use it a lot. It pretty much does the same as shellac. It is colourless but it can go on top of tung oil, using the oil diluted and allowing time to cure. It leaves the wood smooth and shiny. -
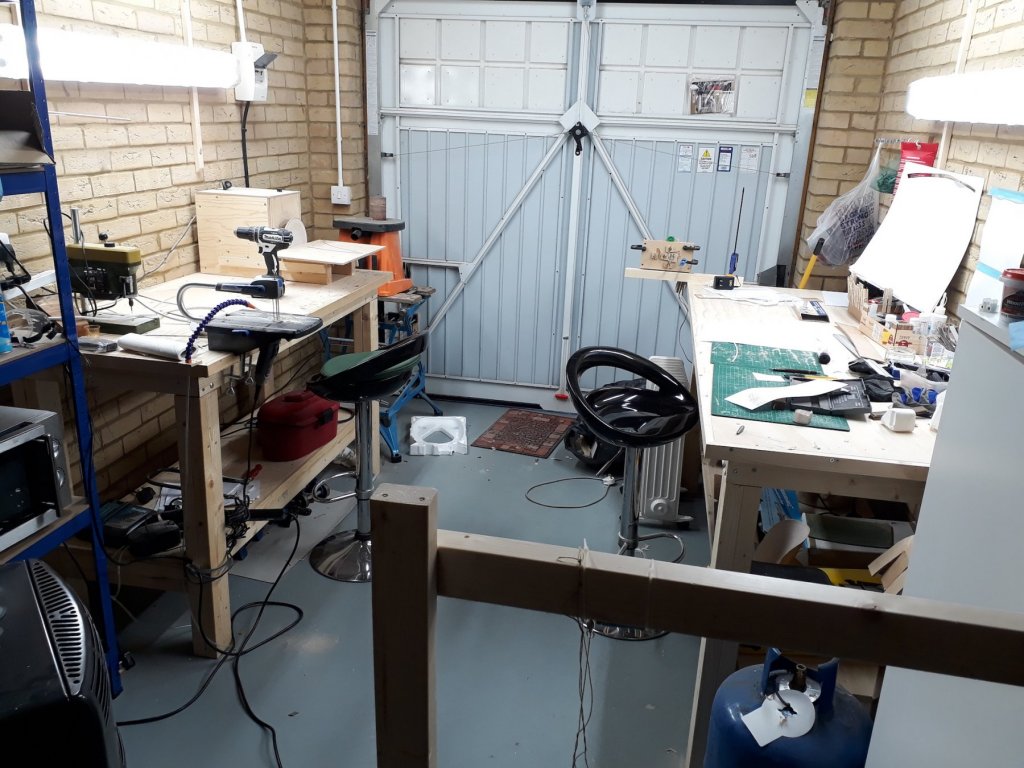
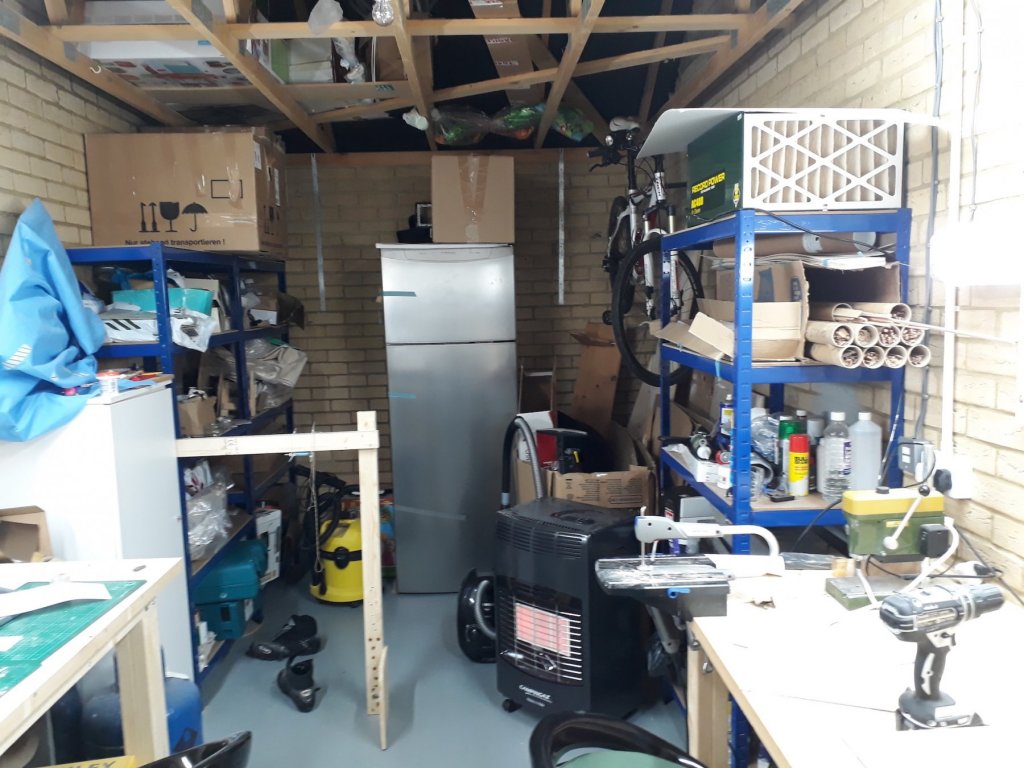
Thanks Hakan, it actually vary rarely looks as tidy! Regarding the lighting, I have around 36000 lumens but it is still not enough. I plan to paint the garage white when it warms up a bit.
-
Welcome Rob! With your background maybe we can expect some giant model boats?
-
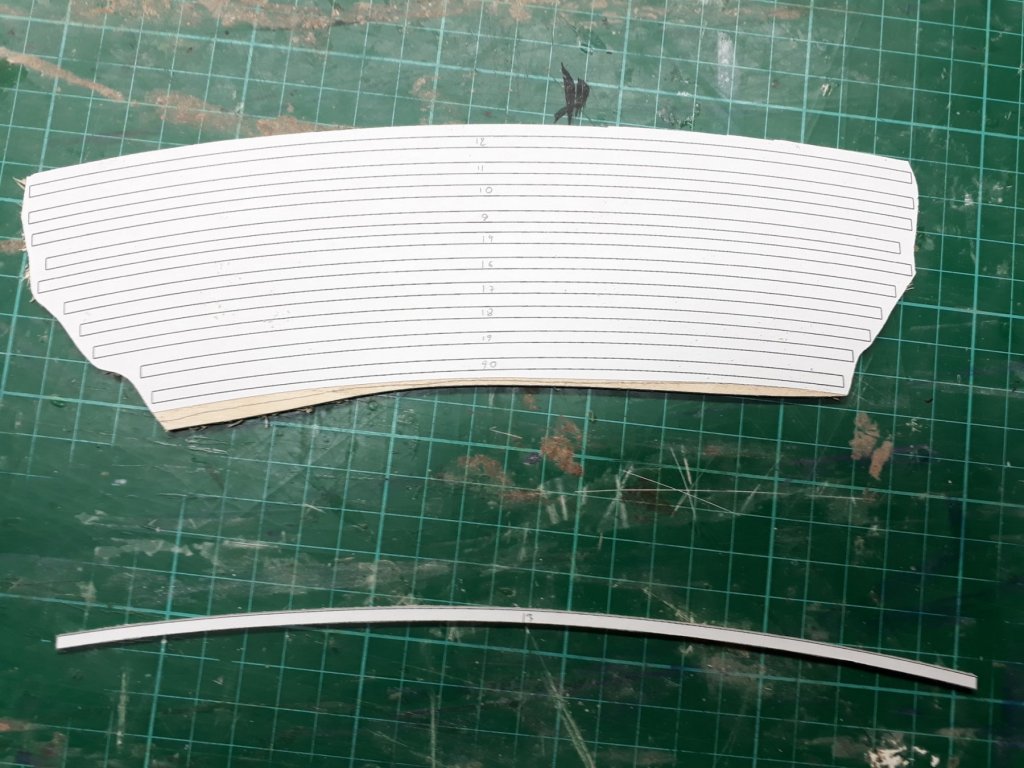
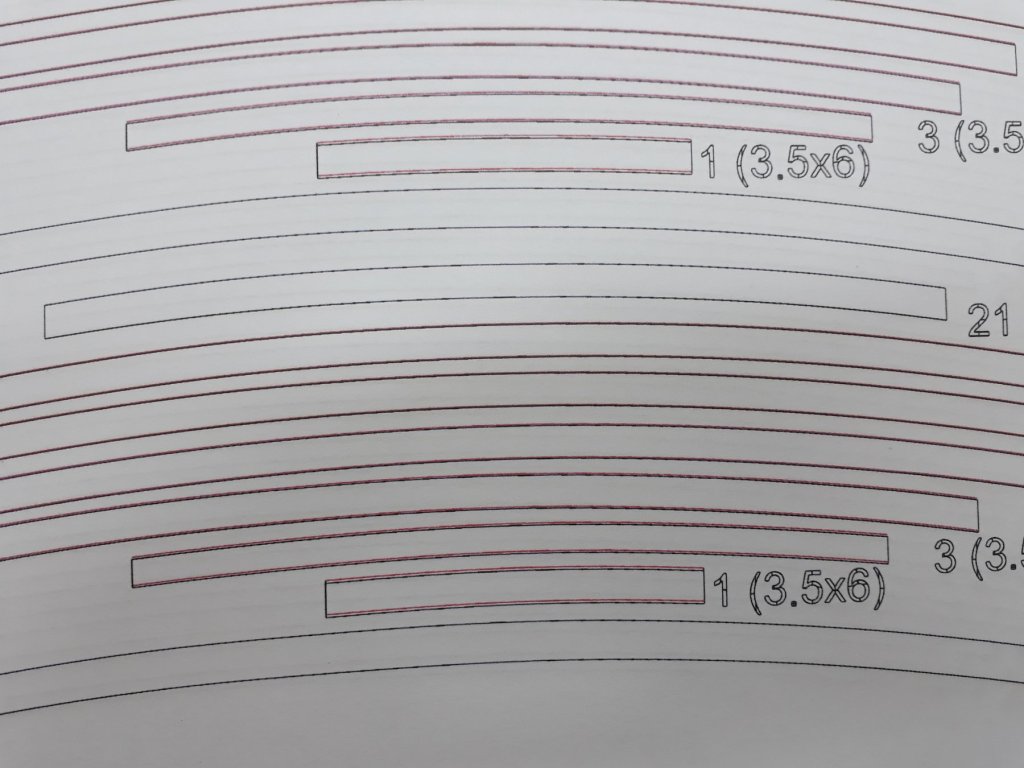
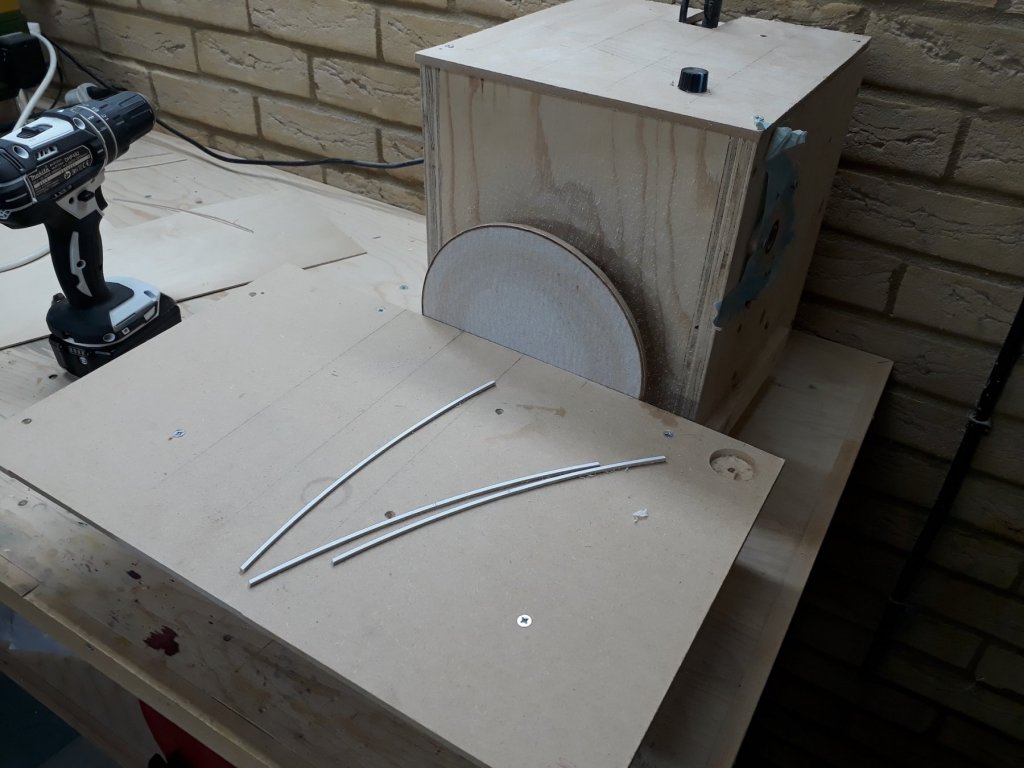
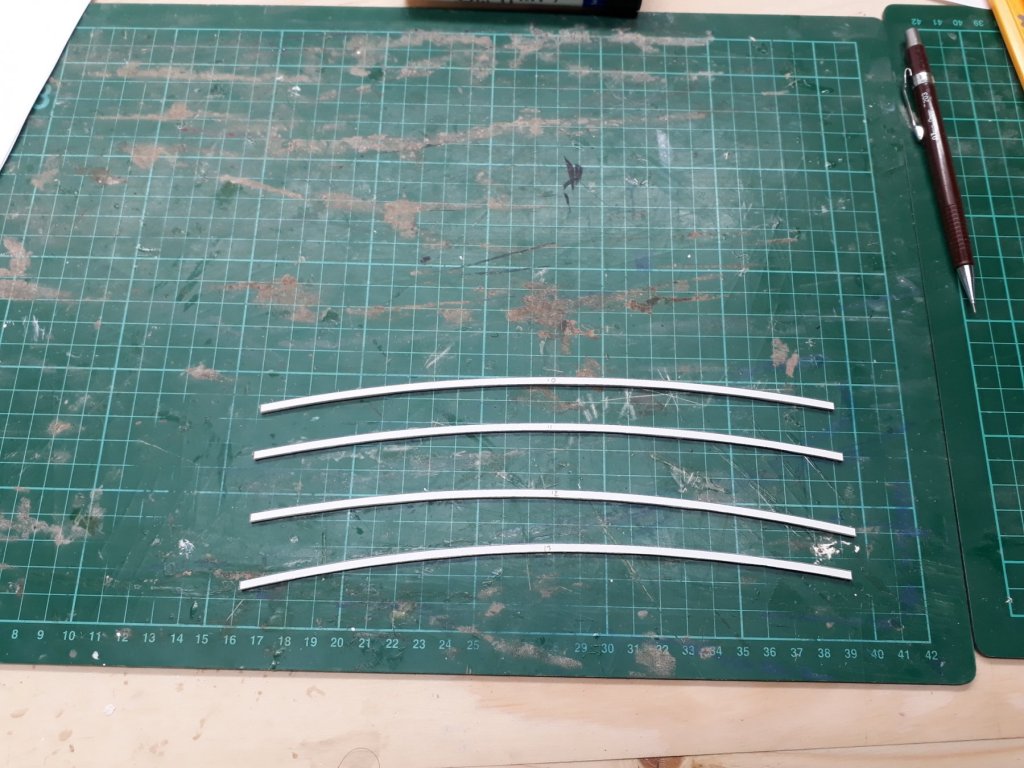
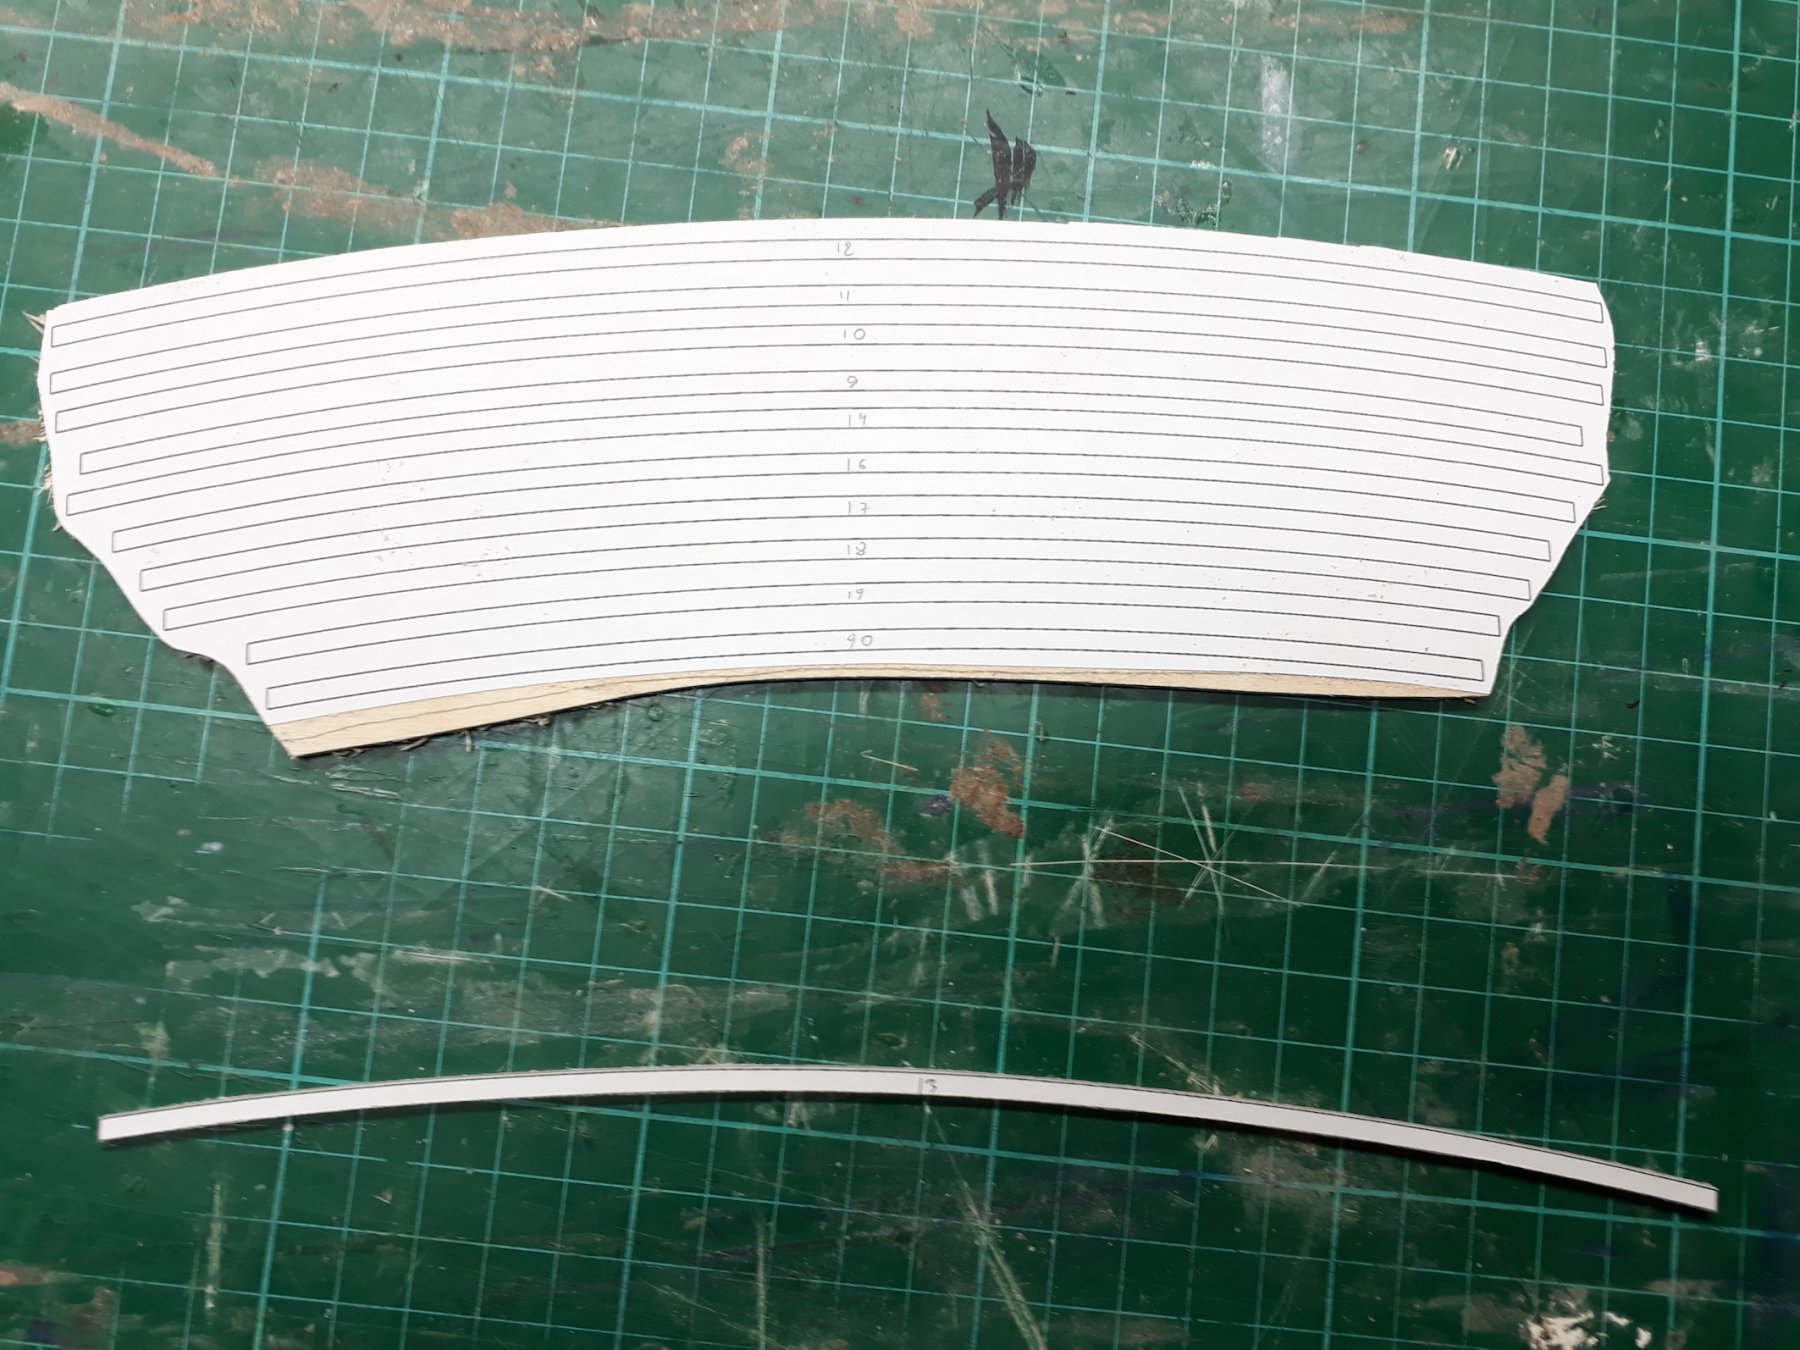
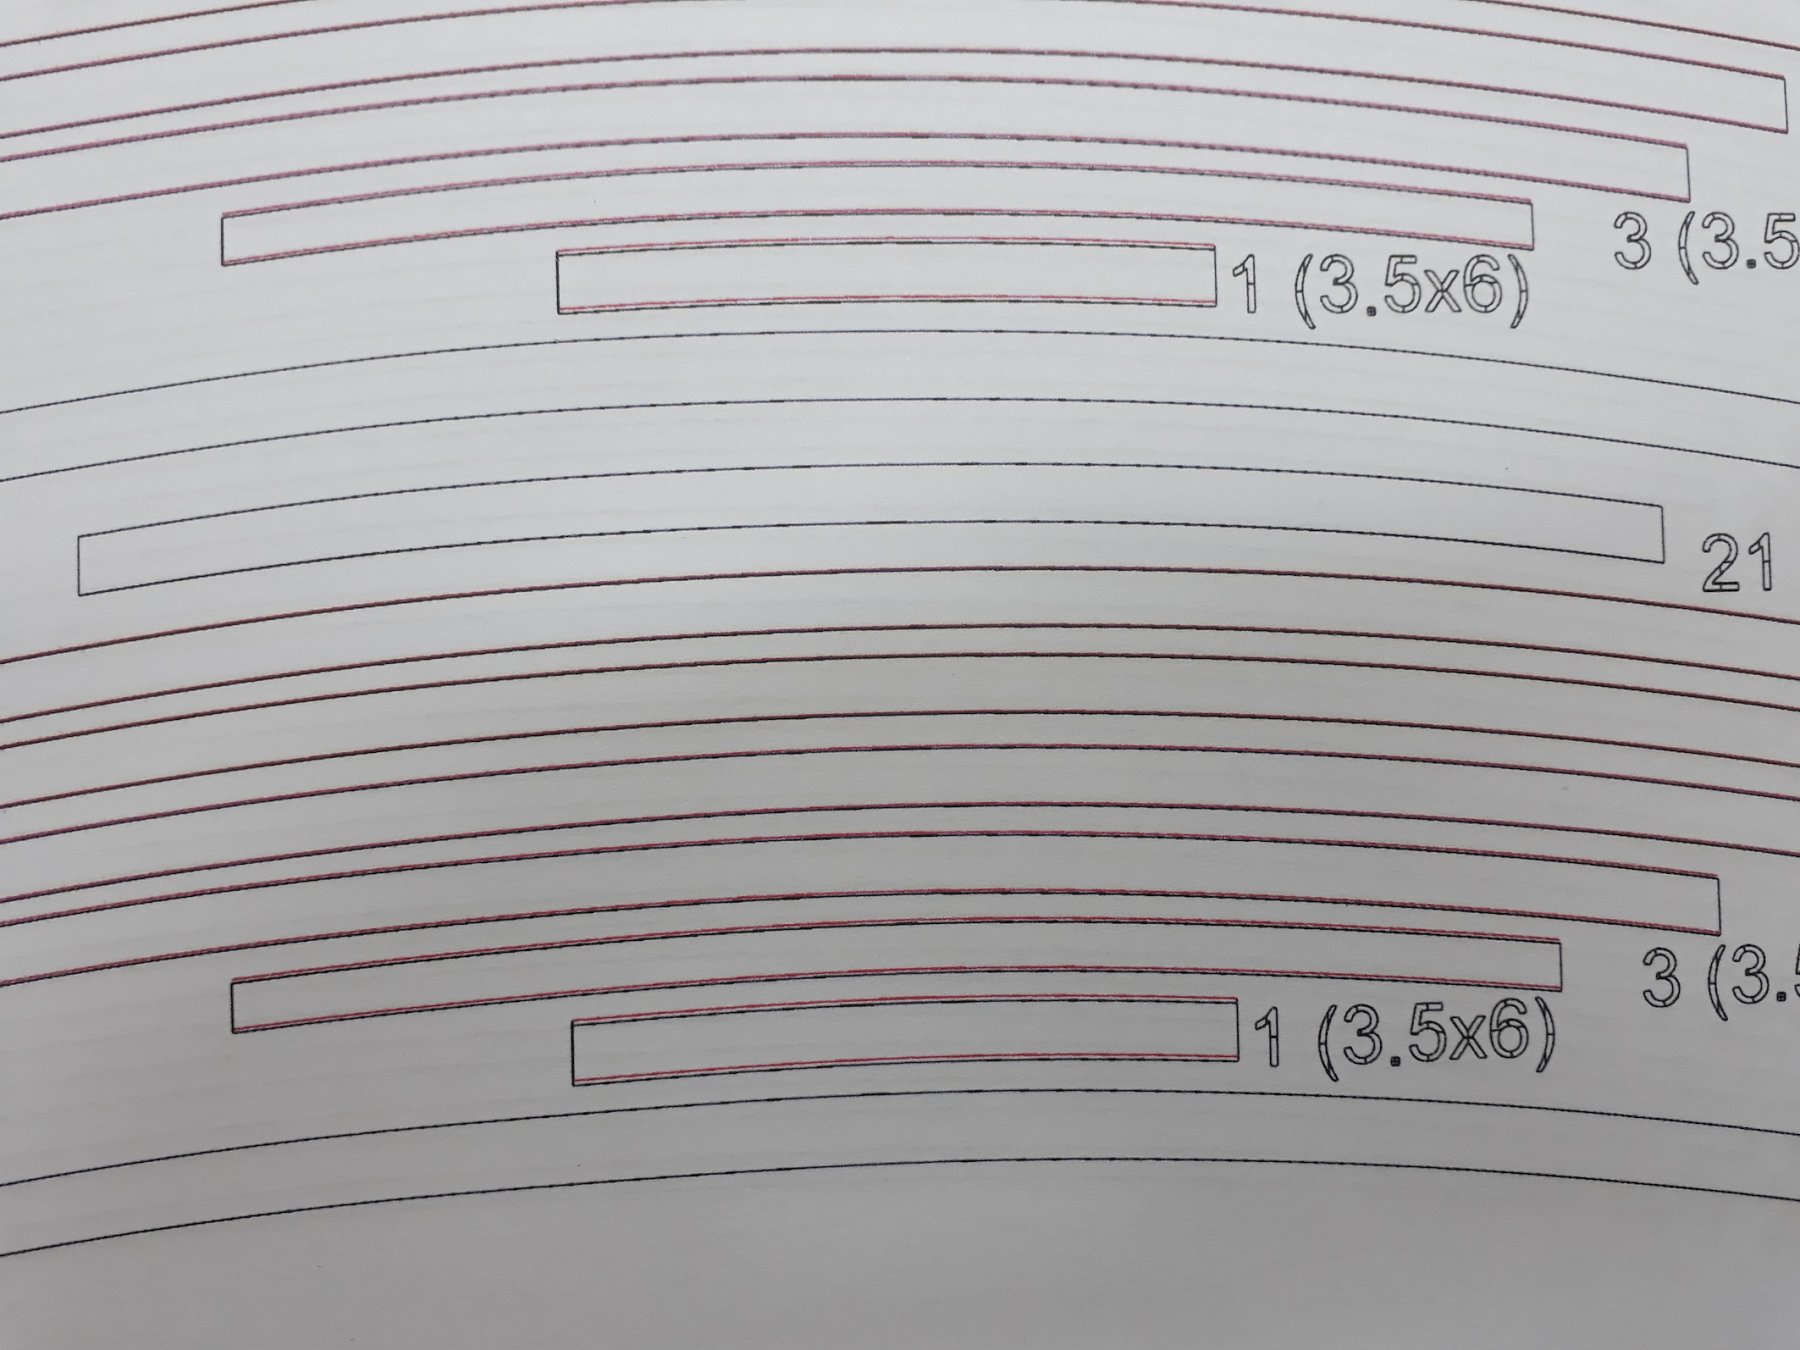
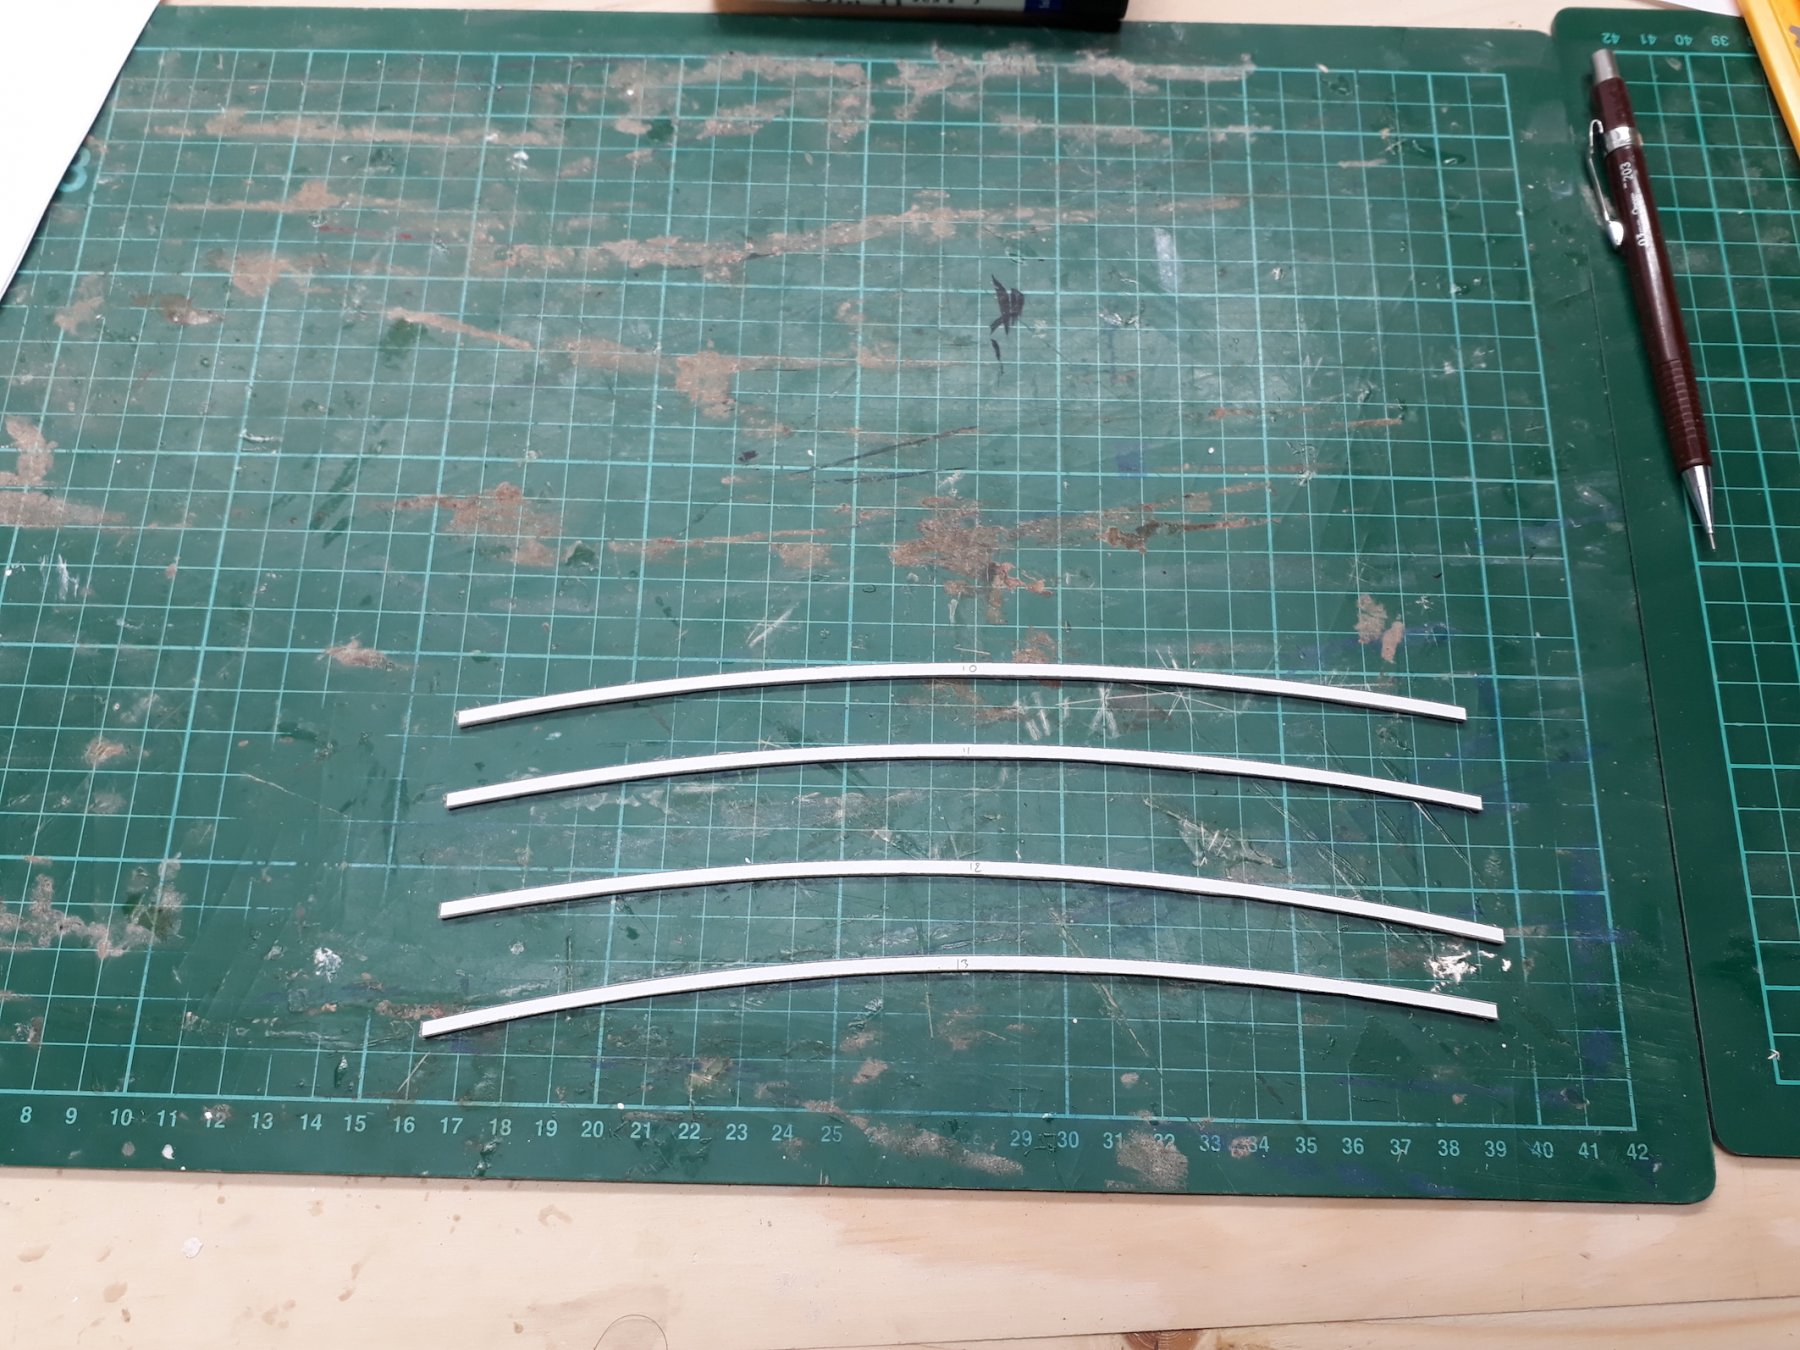
Thank you Hakan and John! After a long brake due to travelling, children's flu and work issues, I finally found some time to work on the boat and I designed on rhino all the beams. First I designed an arc based on the maximum beam and then used segments of it according to the length of each beam. The beams have 2 widths, 2 and 4 mm. All beams will be made from cherry (or pear) and I will install the 4mm ones. However, the 2 mm ones are short just going from the sheer to the sides of the cabin. I will make these initially from plywood and full length across, so I can arrange all the notches etc to the rest of the beams and after everything else is installed I will swap them for the real thing. I will not make these out of wood as the curve is too great and the grain will be too oblique. The longitudinal beams supporting the cabin top will be laminated from beech (or whatever 0.5 mm strips I have in my timber stash). I will attempt to use PVA glue although I think it is not really going to work. Enough talking, some photos. This are the templates printed out on paper and glued to 2 mm plywood. I calculated the bevels for the beams, but they are negligible. Only the first beam has a bevel of 0.5 mm, the next 8 beams, 0.2mm and the rest almost none at all. The first 4 plywood beams are ready. I forgot though to leave the edges flat so they can rest on the beam selves. My home made disk sander was playing up so it was time for a bit of an overhaul. Now it runs brilliantly again. Since my garage was today tidy, I though it would be nice to post a couple of pictures. The admiral has agreed that it will be used primarily for boat building. I have two large and very solid benches I made myself and a few power tools I have accumulated over the years. You can see my ropewalk, I need to experiment with a few new threads I got. This is the other side, selves with wood, chemicals etc and my air cleaner on top. The gas heater appears to be dangerously close to the flammable stuff but it is actually alright. I hope I will make some more progress over the next few days. Vaddoc
-
You are building the boat in an unusual way Hakan! I assume you put the keel on the frames to put the planks on but then you can remove it as the lapstrake acts as stringers. Are you going to insert frames or ribs afterwards? Looks better after the adjustment, you are on the right path. A thing to consider though, your scarfs are quite substantial and may cause flat areas in the planks closer to the sheer. Regards Vaddoc
-
I ve used heating irons, microwave, steam tubes, hair dryers. The thing that works for me is actually to throw the pieces in boiling water for a couple of minutes, then really quickly bend them to shape. The wood will easily take extreme bends but will start cooling down in just a few seconds and dries to an ambient moisture within 24 hours. A bit of a problem with the heating irons is that the wood gets very dry and somewhat brittle. To my experience, basswood/lime does not bend well. Beech and maple are superb.
-
Looks like you are progressing very well Hakan. My recent experience with spilling is that there is a learning curve and after a while it becomes quite consistent. Looking at your photos, I wonder if the garboard and first planks end a bit high at the bow and stern, maybe the rest of the planks will be a bit cramped? Your lapstrake looks very nice. Vaddoc
-
Welcome! Beware of lime, it does not hold an edge.
-
Thanks for the photo Hakan! The sapwood and the heartwood are very different. If you plan to use the sapwood, maybe check it first. I have some cherry wood and I found the sapwood feels very wet and not really nice to work with so I am discarding it. Nice rabbet lines!
-
A nice start Hakan. I 've never seen apple wood before but looks very nice. Much nicer colour than swiss pear. I gave up on spray glue as it makes a mess and leaves residuals on the surface that need to be removed with isopropyl alcohol. Water based glues like pritt much better, more controllable, easier to clean and much much cheaper! Does the boat have a balast keel/centerboard?
-
She is looking very good Patrick, especially considering how unforgiving close up photos are. I just love the gold paint!
-
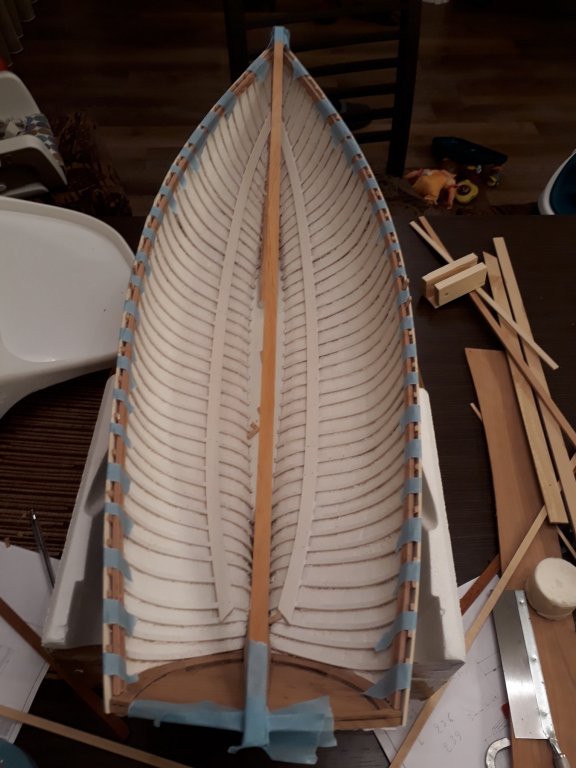
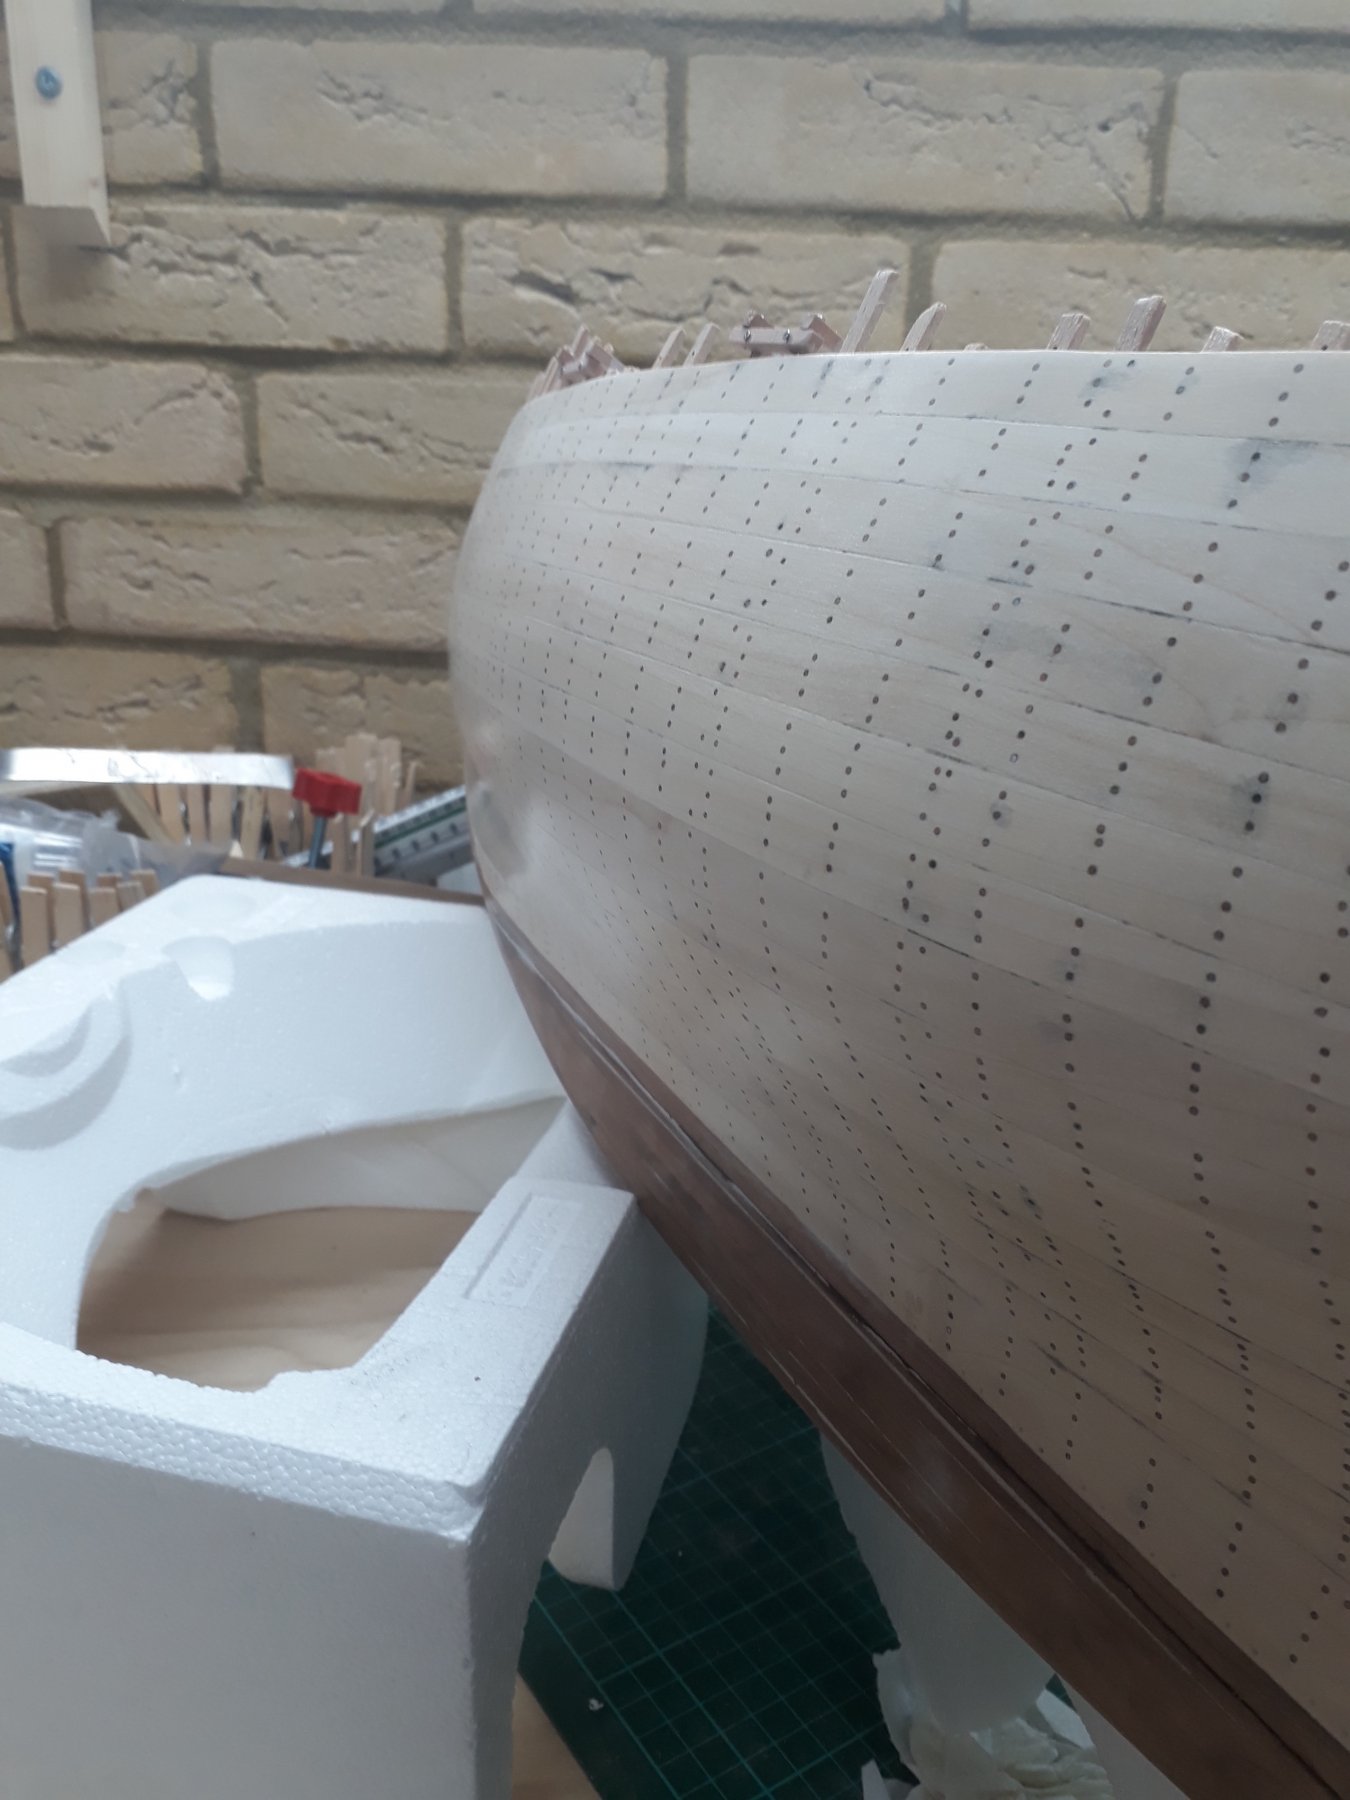
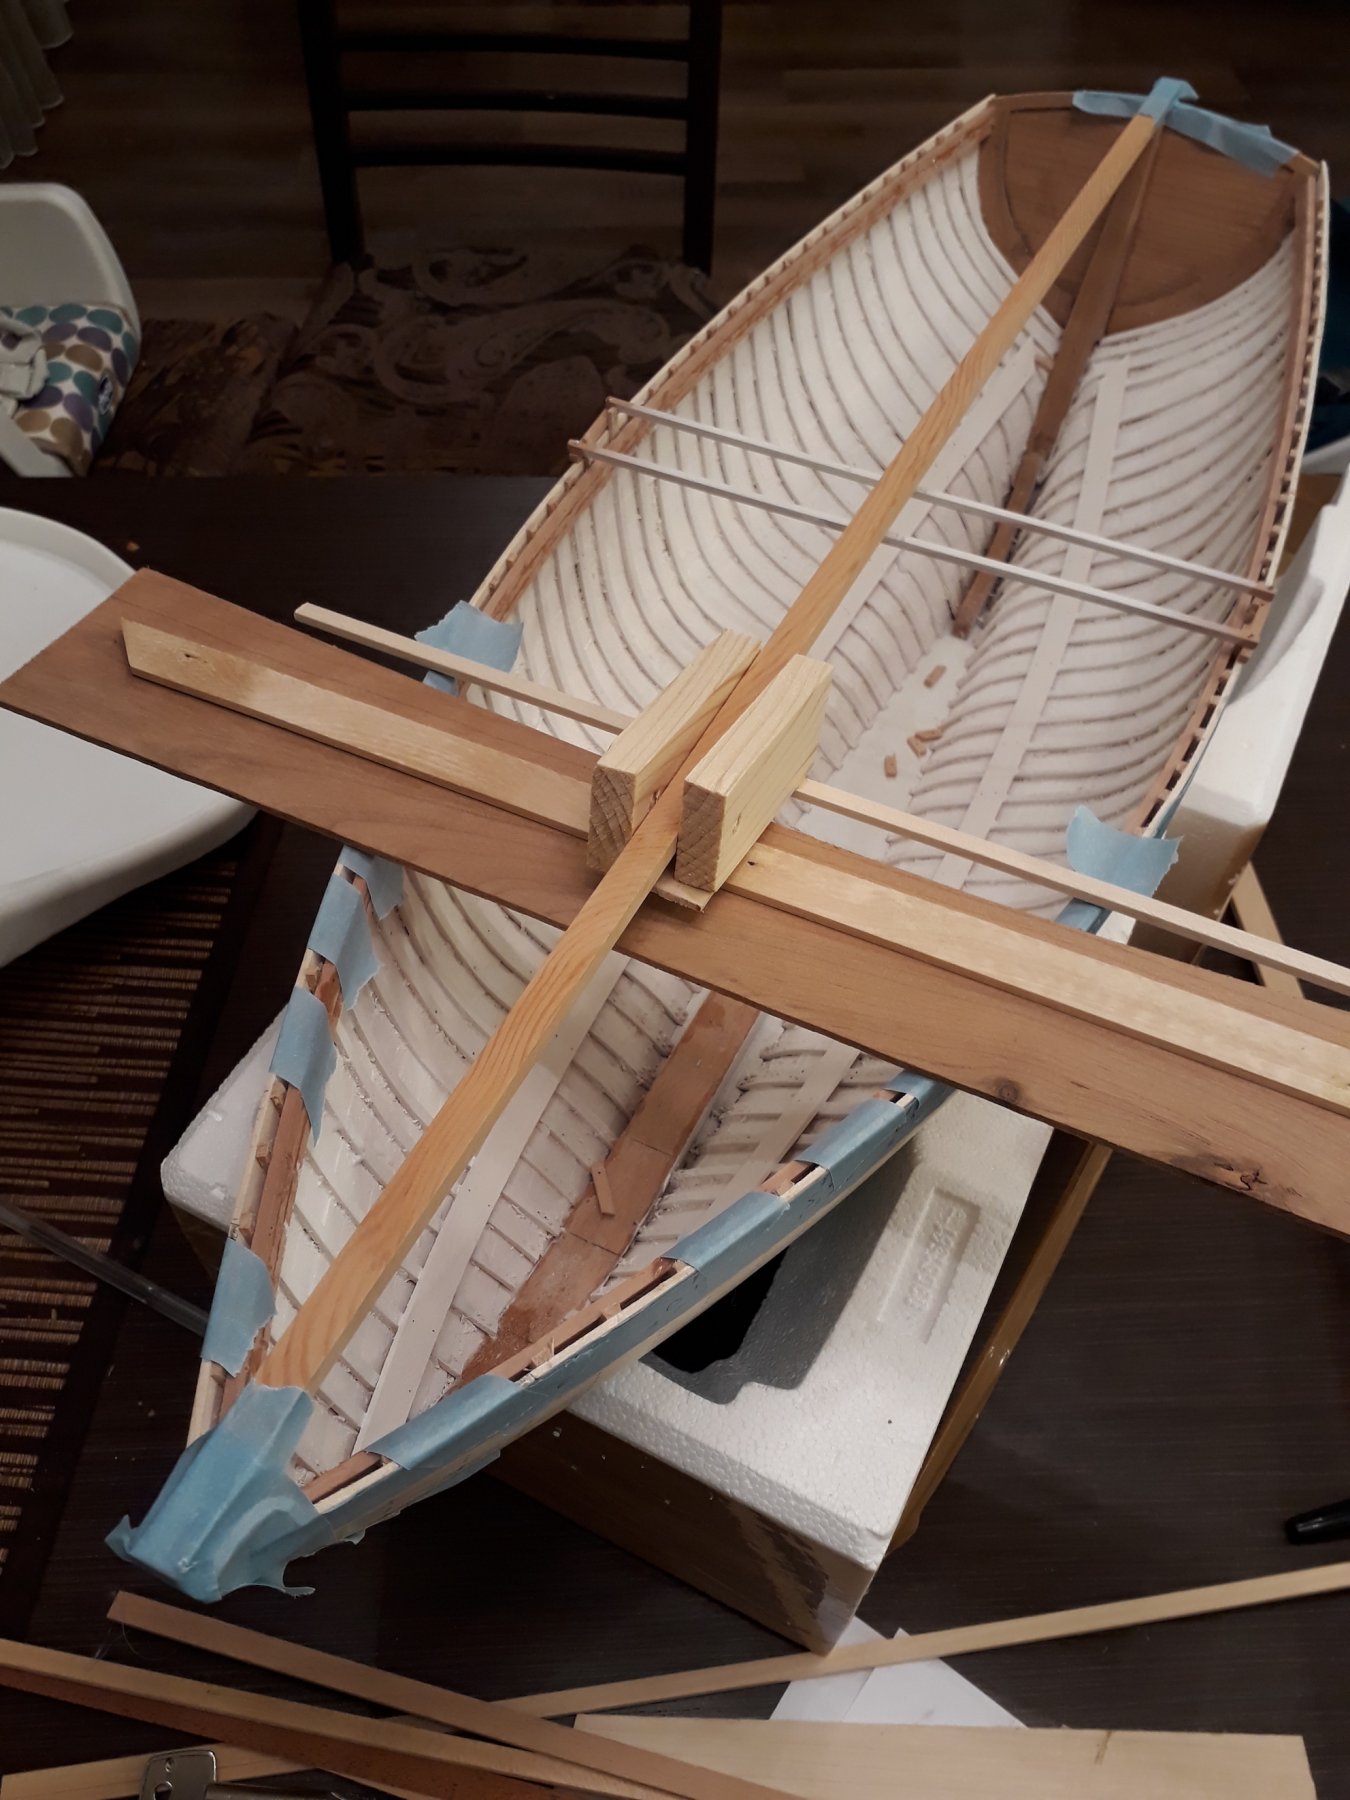
Dear Patrick, I never expected the hull would come out this nice. If I did, I would be more careful with the treenails, to align them better and use the same material throughout. Now the tree nailing is far from perfect. But I also have this desire to paint it green and red or something bright. Or maybe gold and fill the deck with pillows, you never know! Hakan, there is little info on this matter on the net compared to other aspects of boatbuilding. This is surprising as this is a tricky job. I had another look on the Whisstock website and I realised there is a forum area. I posted a question and George Whisstock very kindly replied. Apparently the plans call for a 7% camber (and 9% for the cabin roof) with translated to 17 mm crown, quite a lot more than the 10 mm I intended to use. This will result in a really curved deck but this should be fine as the actual deck areas are quite limited. I realised that the marking of the positioning of the beams was very inaccurate. Also, It was impossible to accurately mark the position of the beam on the opposite sheer. It took a day to finally come up with a way to do this without a massive jig. The straight strip on the port side has the positions of the beams and the sliding jig across the central rail ensures everything is completely square. I used tape to mark the positions as I need to also account for the variable thickness of the beams. I also put some order in my wood stash today, which was all over the place. I realised I have accumulated quite a lot in the last few years. The timber is now well seasoned but all the maple sheets are horribly warped, as well as some very thick beech strips. I did though the mistake of storing my wood vertically.


-
I ll be following your build from the back Hakan! I am interested to know how your homemade thickness sander will work. Vaddoc
-
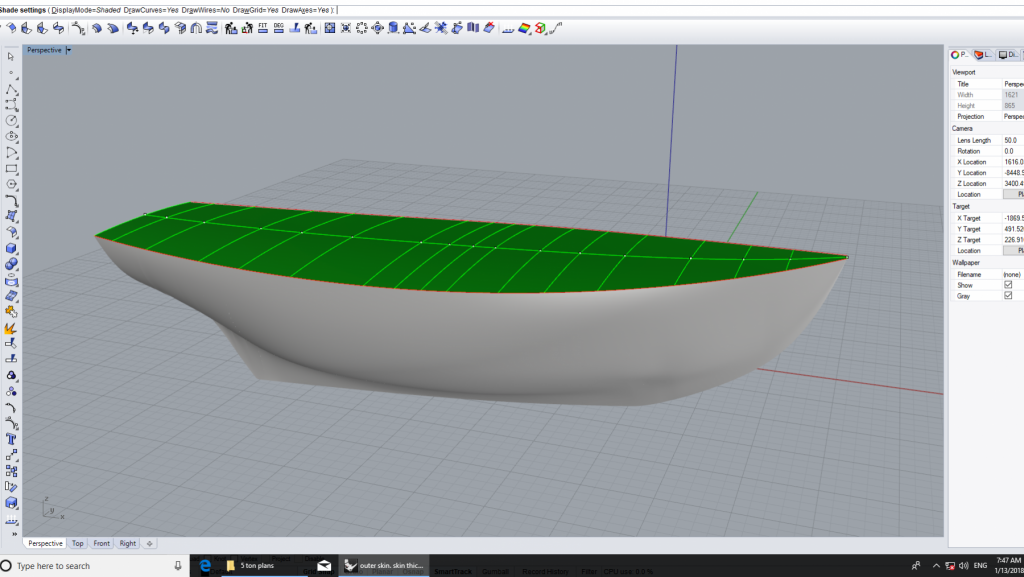
I am posting the conclusions I ve reached, as others may find it helpfull The first thing to decide when arranging the deck is the crown height or camber. It is usually between 1/2 and 1 inch per foot of beam. Then, find the maximum beam and draw an arc or parabola. There are a few ways of doing this but I used a 3D program. Following this, use the same arc for all points (beams) across the length of the hull. Keep the arc vertical to the waterline and not the sheer (bevelling/fairing will be needed for the beams to sit on the beam selves and the planks to sit on the beams.) Provided the sheer is fair, the deck centreline that will be produced will be fair as well. Nothing is easy in boatbuilding! Vaddoc
-
Well, I just measured the actual length and beam of the boat Length (to more foremost end of planking: In plans 703mm, actual 703. (!) Beam: In plans 236, actual 239. (a couple of frames were off sideways by a mm or 2, reason unknown) So the 3D designs for the beams correspond to the boat length wise but are off by 1.5 mm on each side of the beam. So I will need to re-do the beams but for making the cabin I probably will be able to fully use the 3D to cut the templates. Vaddoc
-
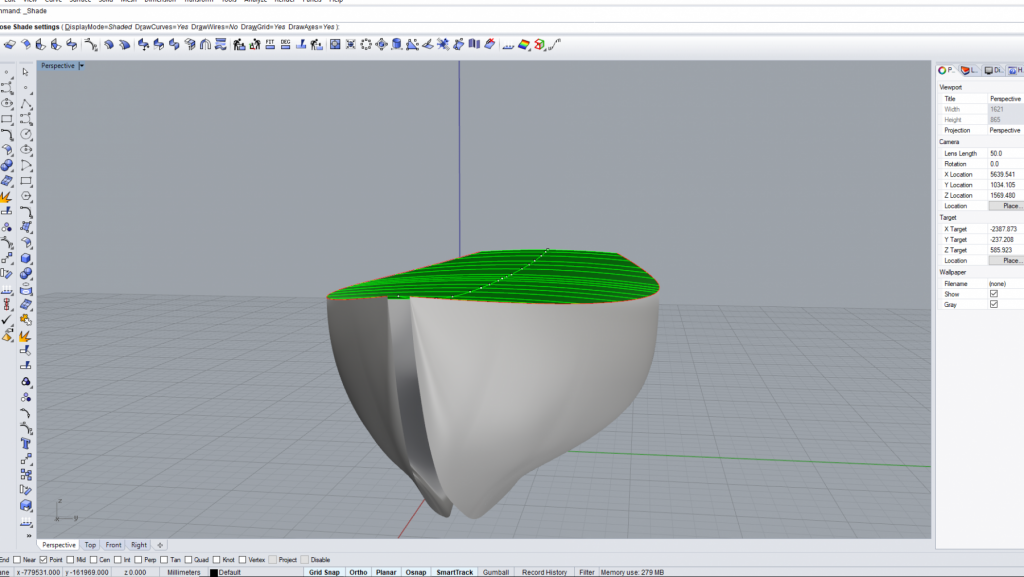
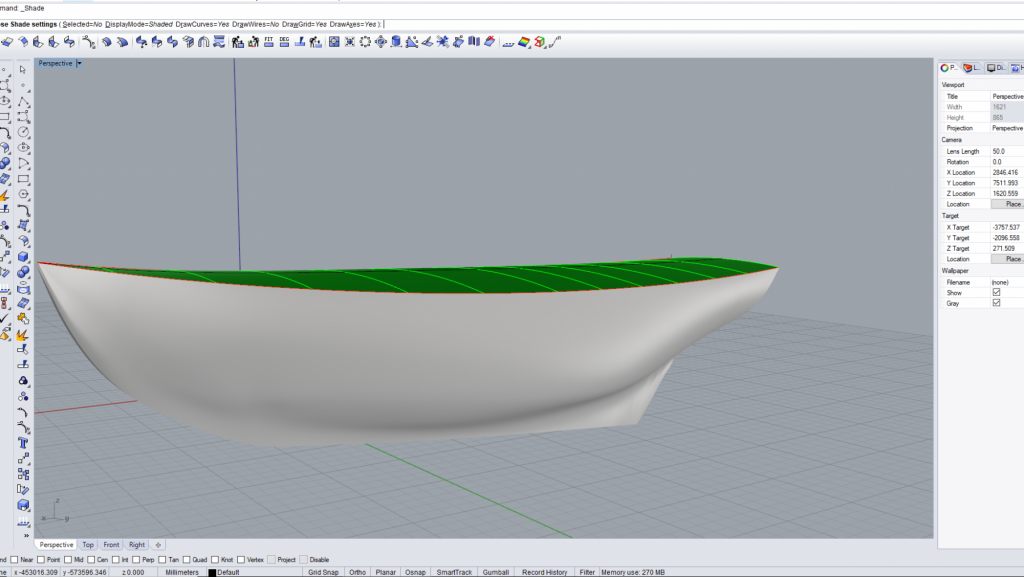
Druxey, Wintergreen and Mark, thank you all for your good words. I have been deliberating the deck issue for the last few weeks. Today, I sat down to the computer and did a bit of 3D. Initially, I decided that a deck crown (or camber) of 3/4 inch per foot, that is 7.5 mm in my boat, should look ok. Actually I thought that it would be too much. After adding the deck to the hull though, on 3D it is apparent that actually is not enough! I did it again with a 10 mm crown and this time it was better. I then made all the beams and the longitudinal members and trimmed the beams, I could not make Rhino work with a parabola but an arc looks ok. I used the same arc (as it came out at max beam) for all beams and indeed, the deck centreline worked it self out fine (I checked, it is very fair). and then added the whole thing to the boat I will check but I do not think My boat matches accurately enough my plans so maybe I will not be able to use these templates. Still, the 3D has been very useful so far not only to decide the camber, but also for the following reasons: Following the original plans, there is really a very narrow deck on the sides of the cabin, I think I will need to make it a bit wider. I had the concern that the longitudinal beams would have some crazy twist but they appear reasonably straight as the next photo shows Finally, as I decided to make the beams vertical and not perpendicular to the sheer, the 3D gives me more or less the bevel that will be needed I have also done a bit of thinking for the cabin. I think the side walls should have a slight tilt inwards and that the top should follow the sheer to a degree and of course have a camber. But this is for much later on. Regards Vaddoc
.thumb.png.c0743931545a2bf99e8d4076698f718e.png)
.thumb.png.a28df1830df2c855d1db5dfb0846f313.png)
.thumb.png.c1a0ea3e4d37c06b939e44d833993c9b.png)
.thumb.png.b1625dcb7b92483a1c749457a474aeb6.png)
.thumb.png.a21033cd6ac54ccbd6c081544a832c1e.png)
-
I just came across your log G.L, very very nice. I think that your deck looks fantastic. But just for your lofting using pencils and rulers without the help of computers, you have my respect! What do you use for brass blackening? Regards Vaddoc
-
Many thanks Mark, this was really helpful Vaddoc
-
Beautiful work Mark, very clean, you make it look so easy! Difficult to tell but you seem to have managed to plank the hull without a lot of spilling. The deck seems to have a very small crown height, I read that the typical height is something like 1/4 to 1/2 inch per foot of beam. How did you come up with the beam shape? I am currently struggling to understand decks! Also, did you brush paint the enamel on the keel? If so this is a fantastic result. Regards
-
Many thanks Lehmann, yes I ve come across this and I ll be using it


.png.d58ada0f25787682cb672f1d381a66d3.png)
.png.6085a997e998cba45b32147ec903d512.png)
.png.e7c943153d0c4b0c35afe7fee943e748.png)
.png.f736296dc3503c8b5a15420cae8d09f7.png)
.png.10a780868765195388f8bc5a4486e149.png)