.jpg.f26acc9a74319261612561bfa7da1303.jpg)
vaddoc
-
Posts
1,605 -
Joined
-
Last visited
Content Type
Profiles
Forums
Gallery
Events
Everything posted by vaddoc
-
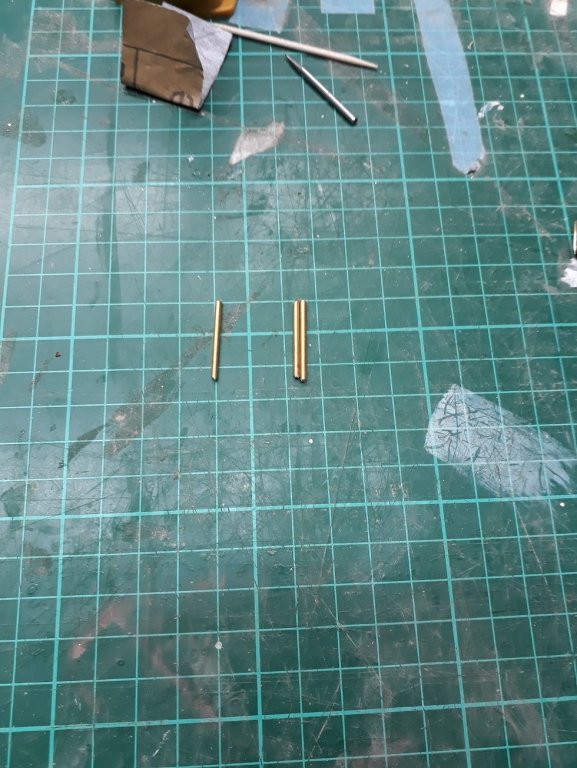
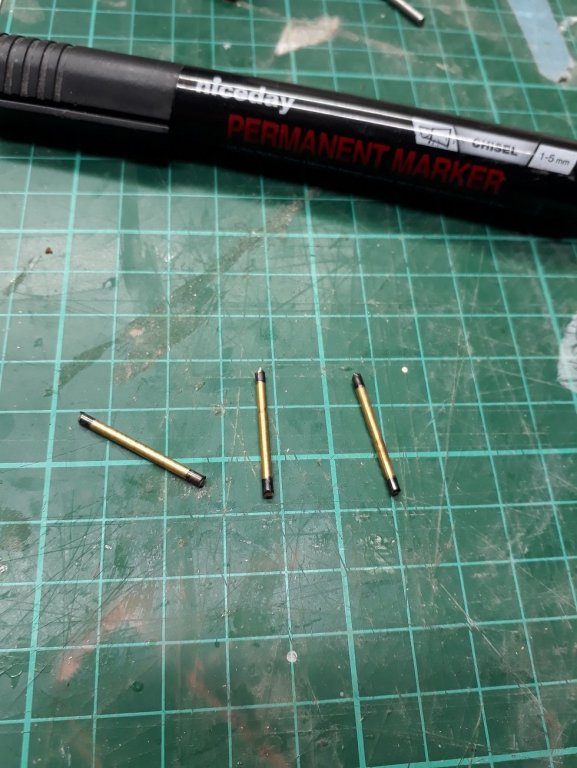
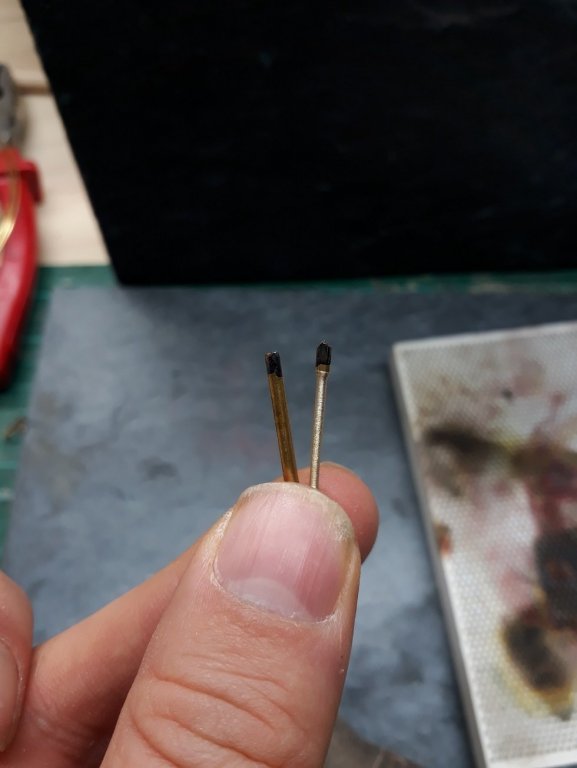
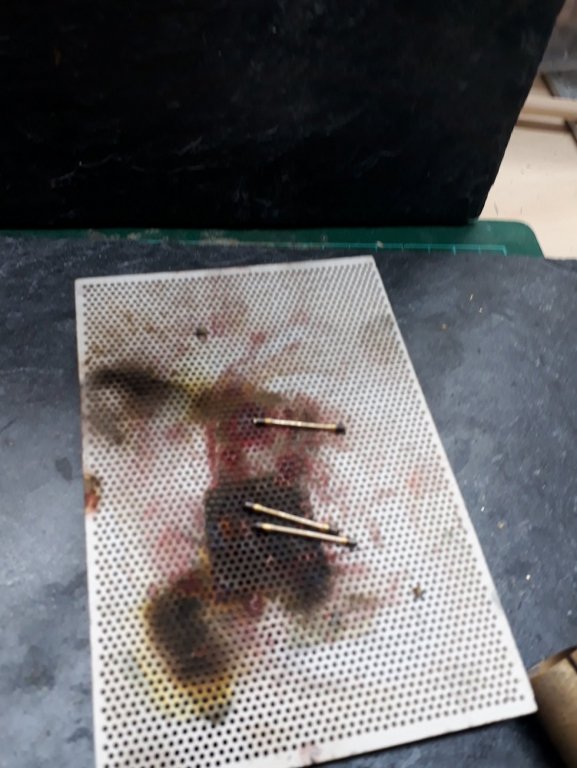
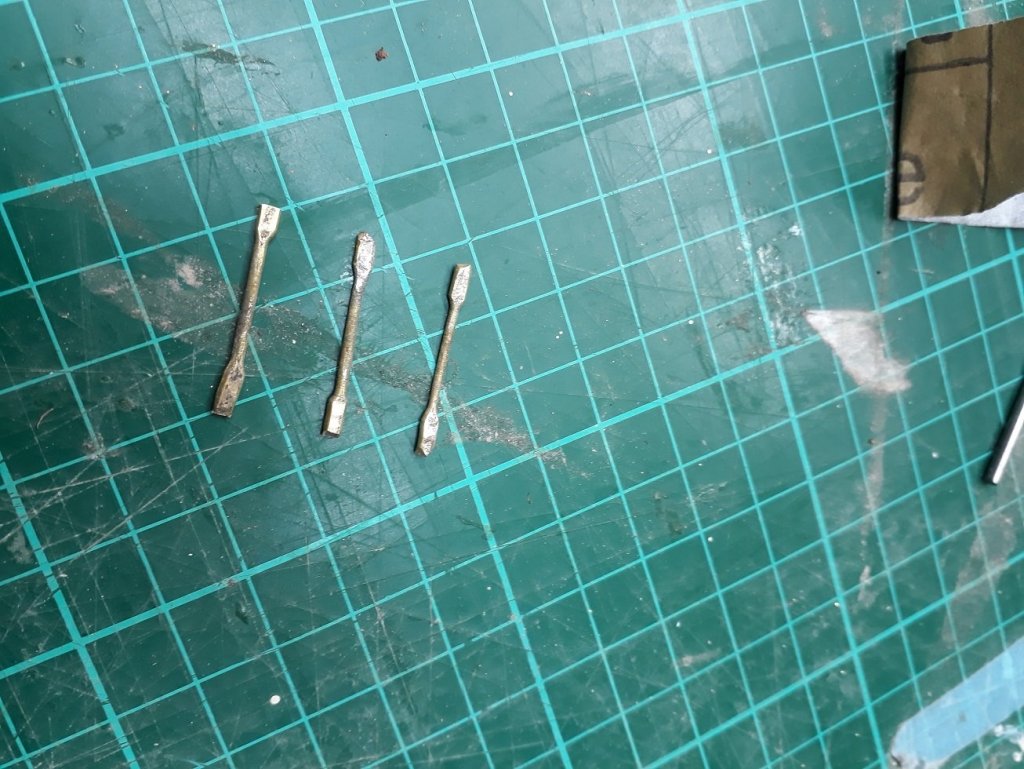
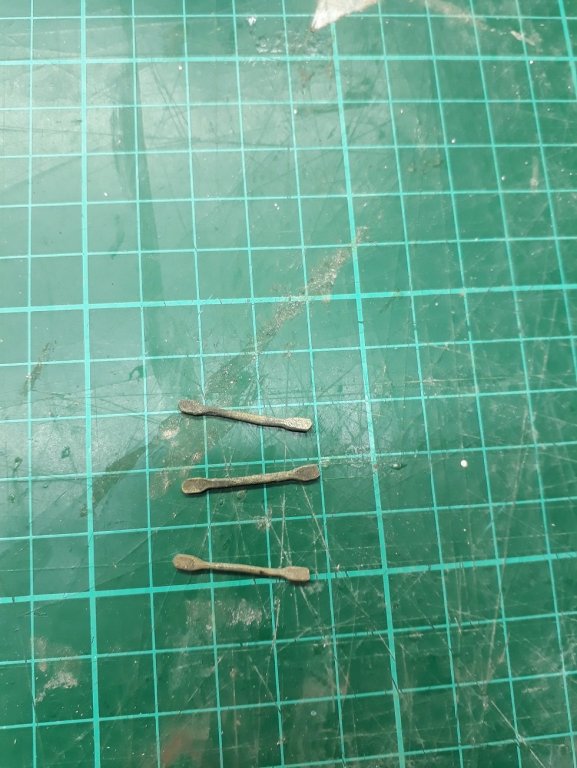
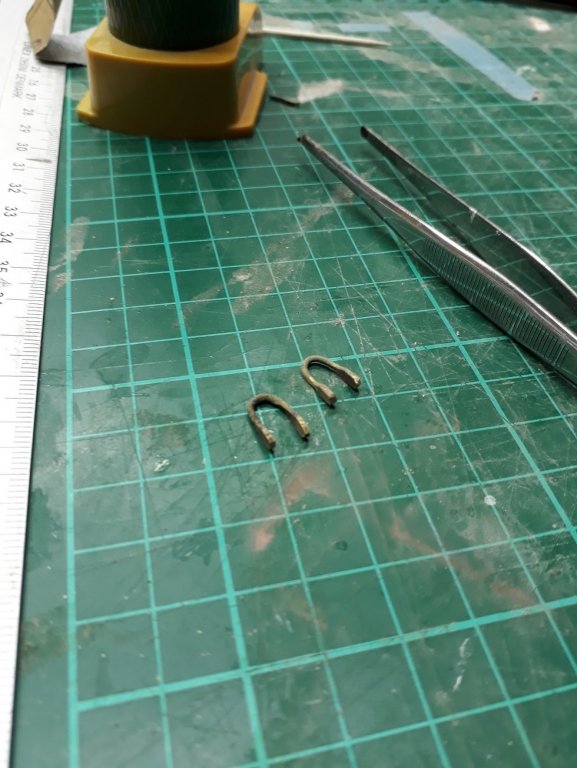
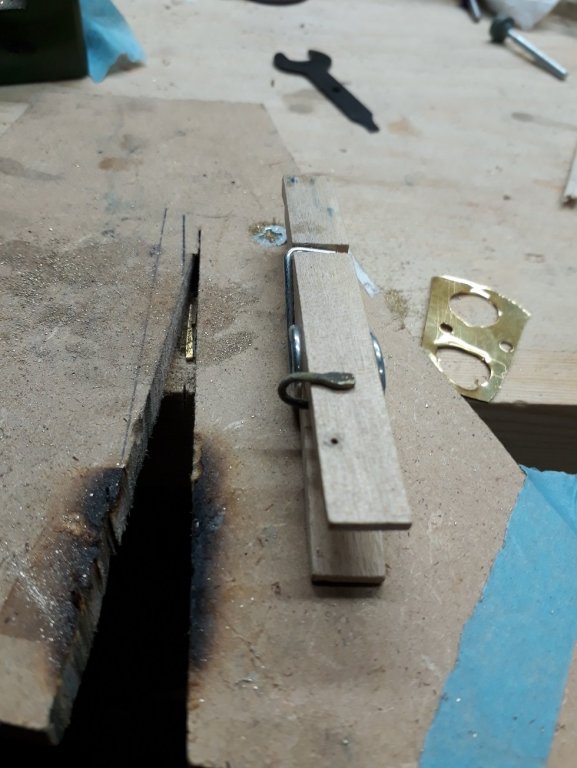
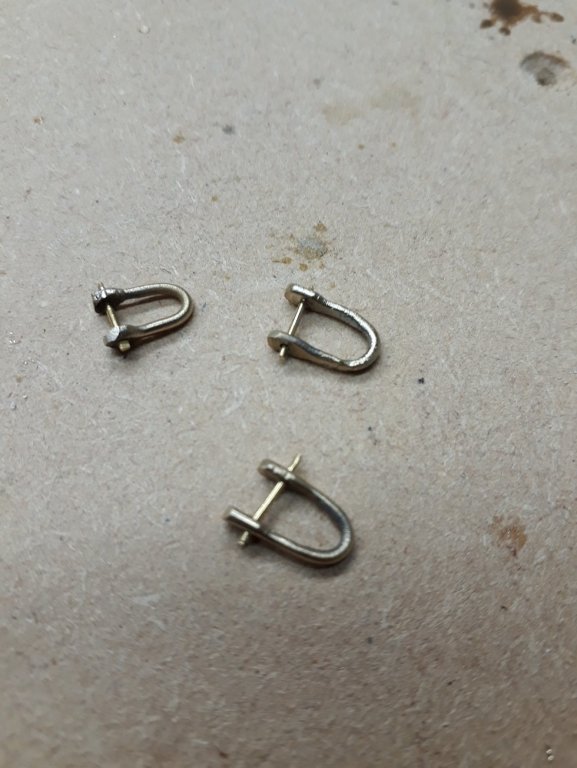
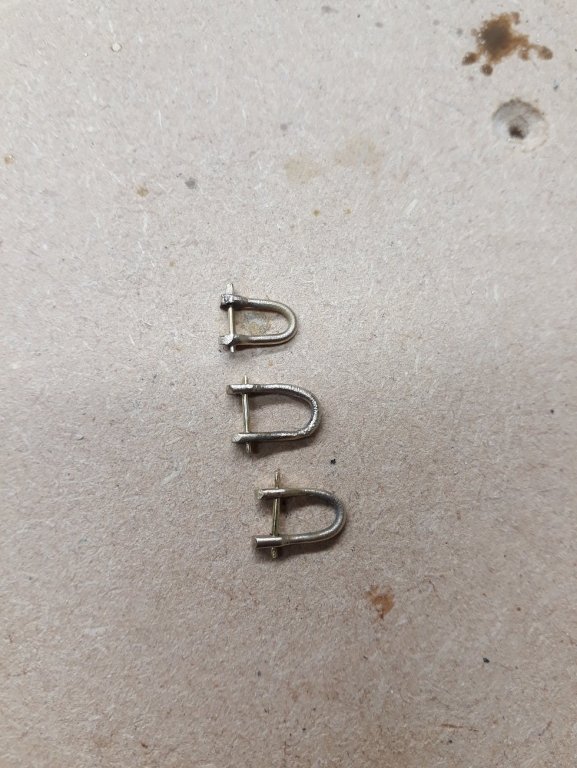
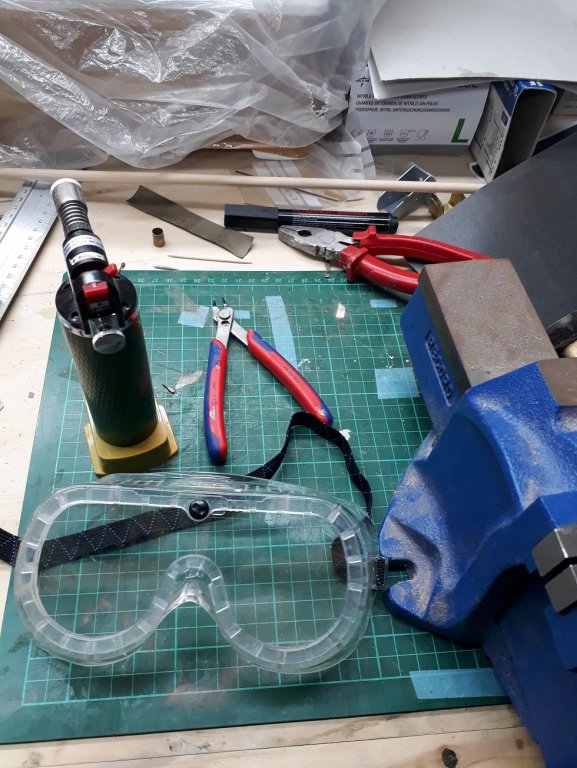
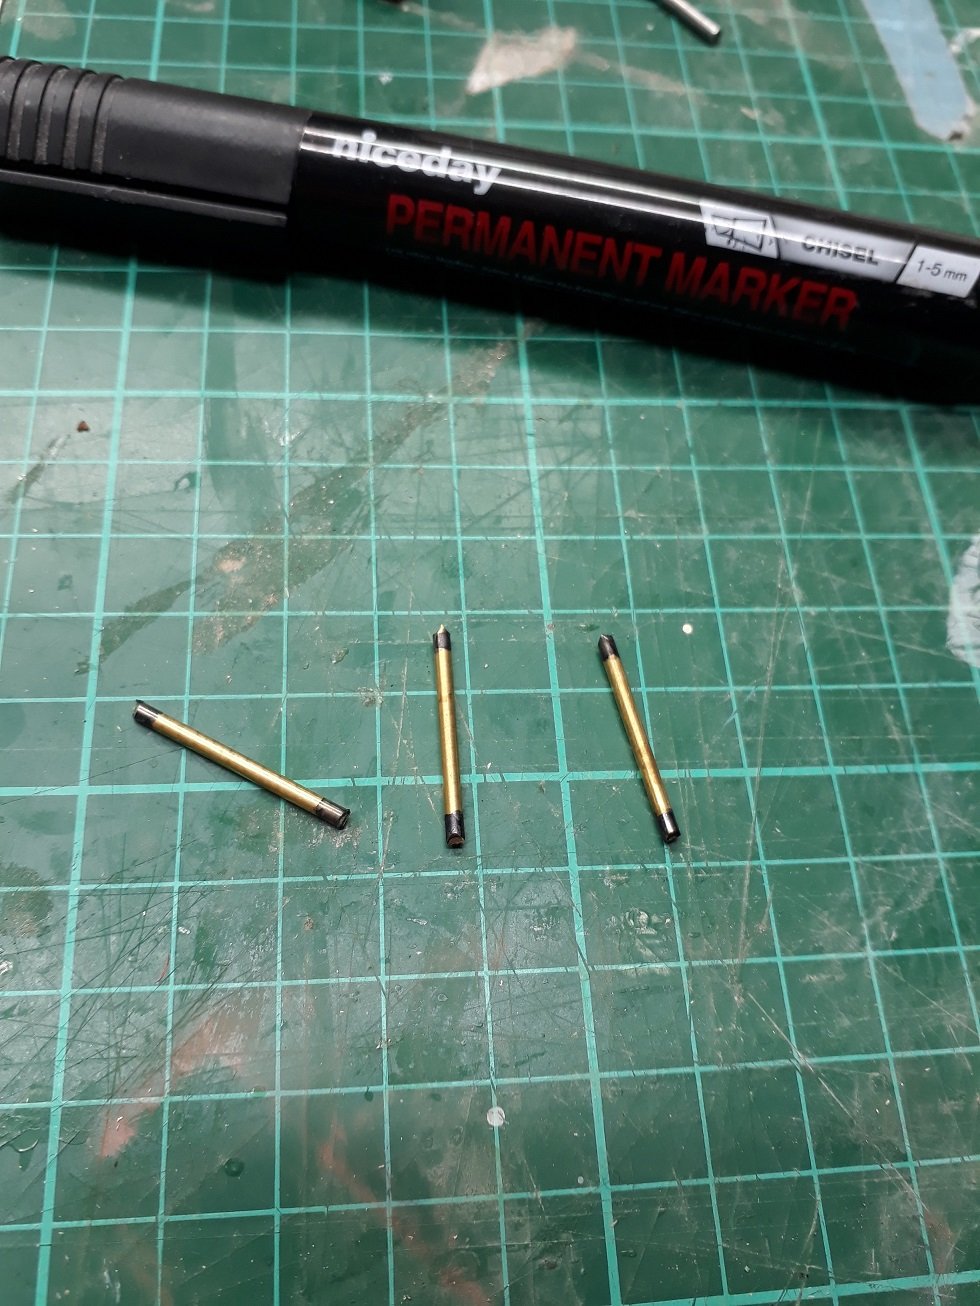
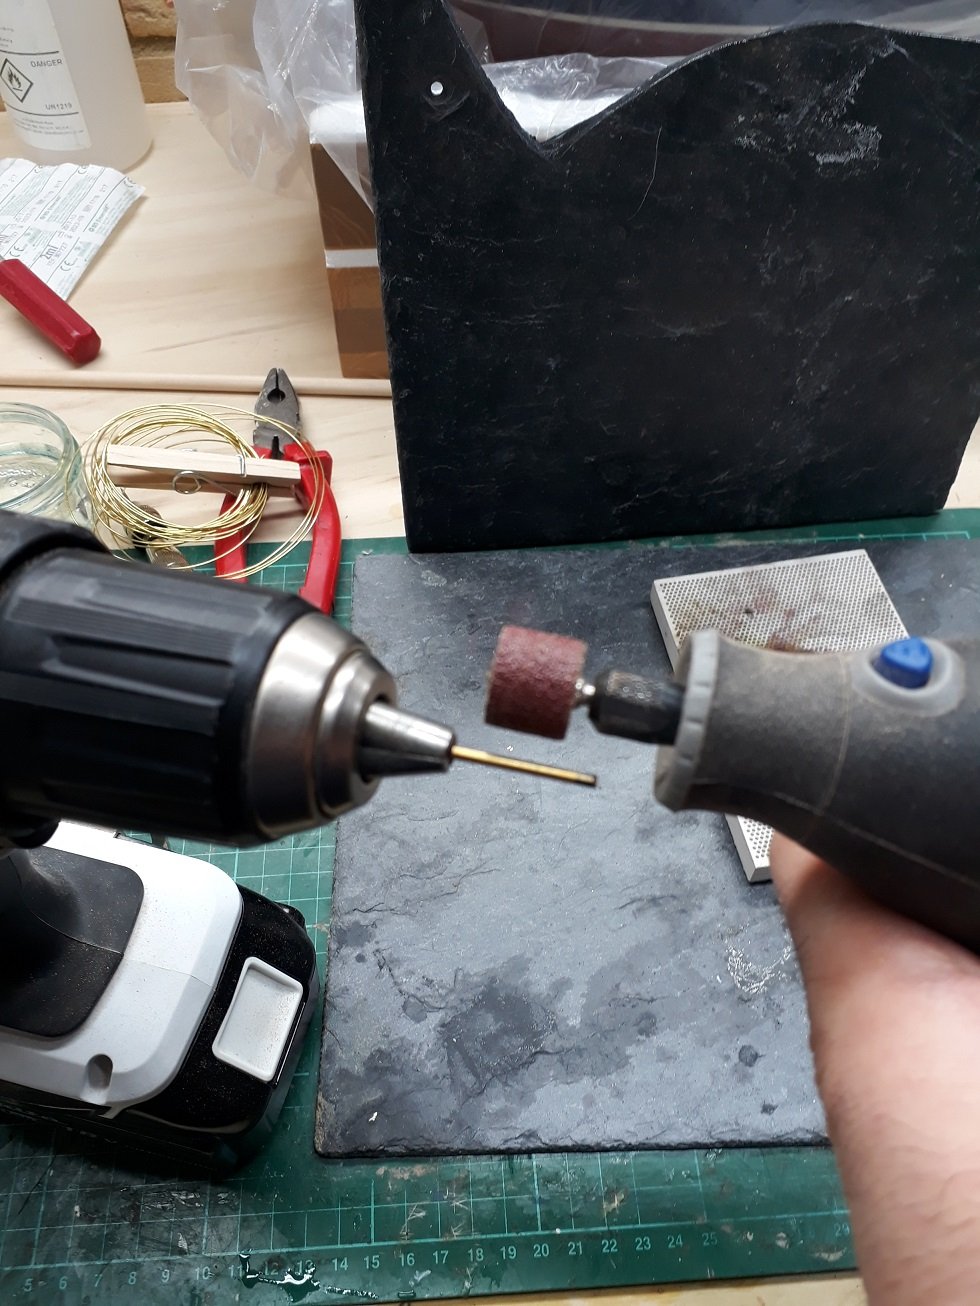
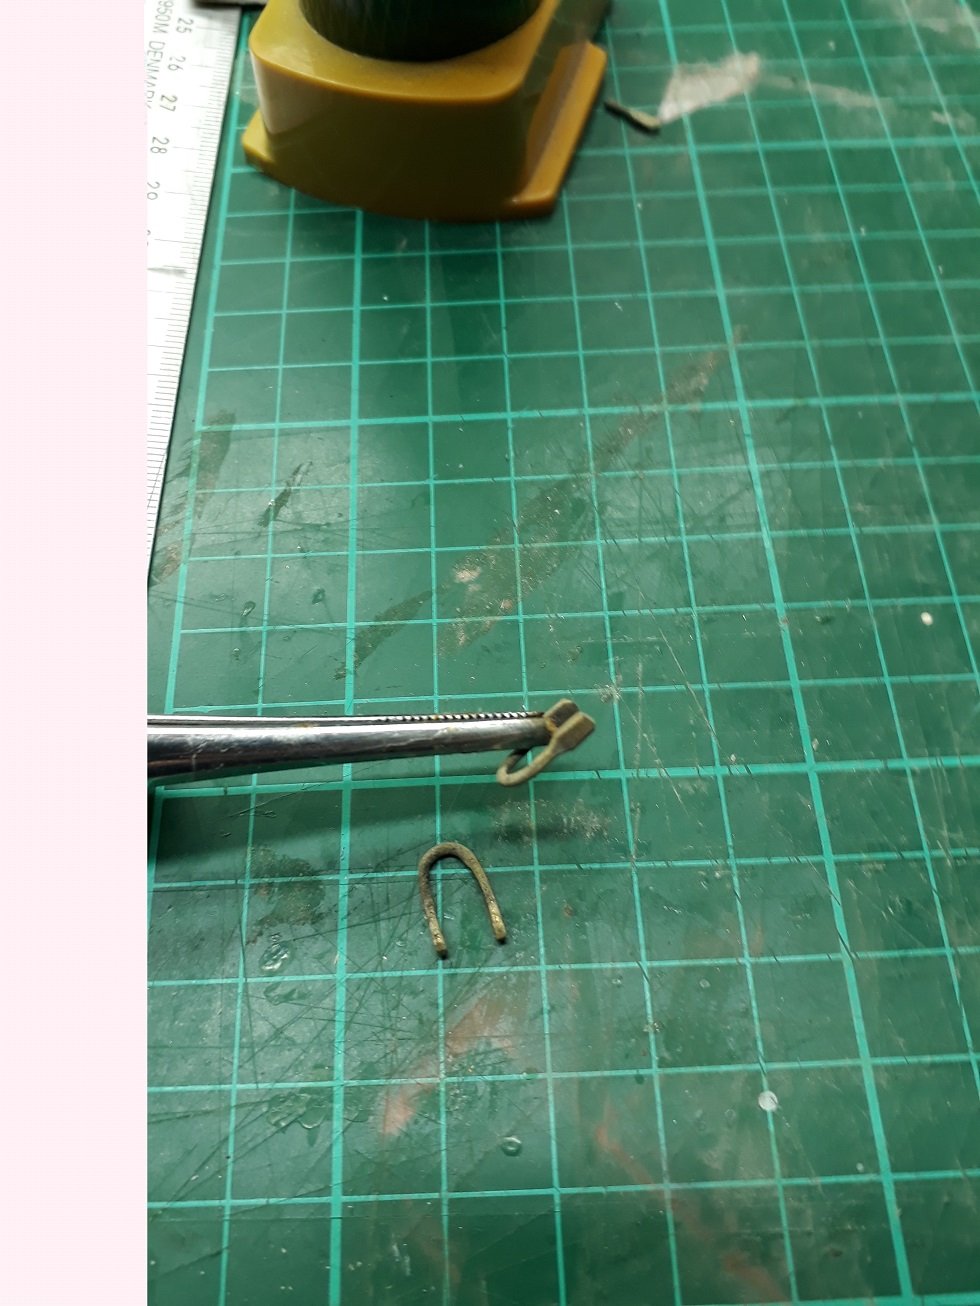
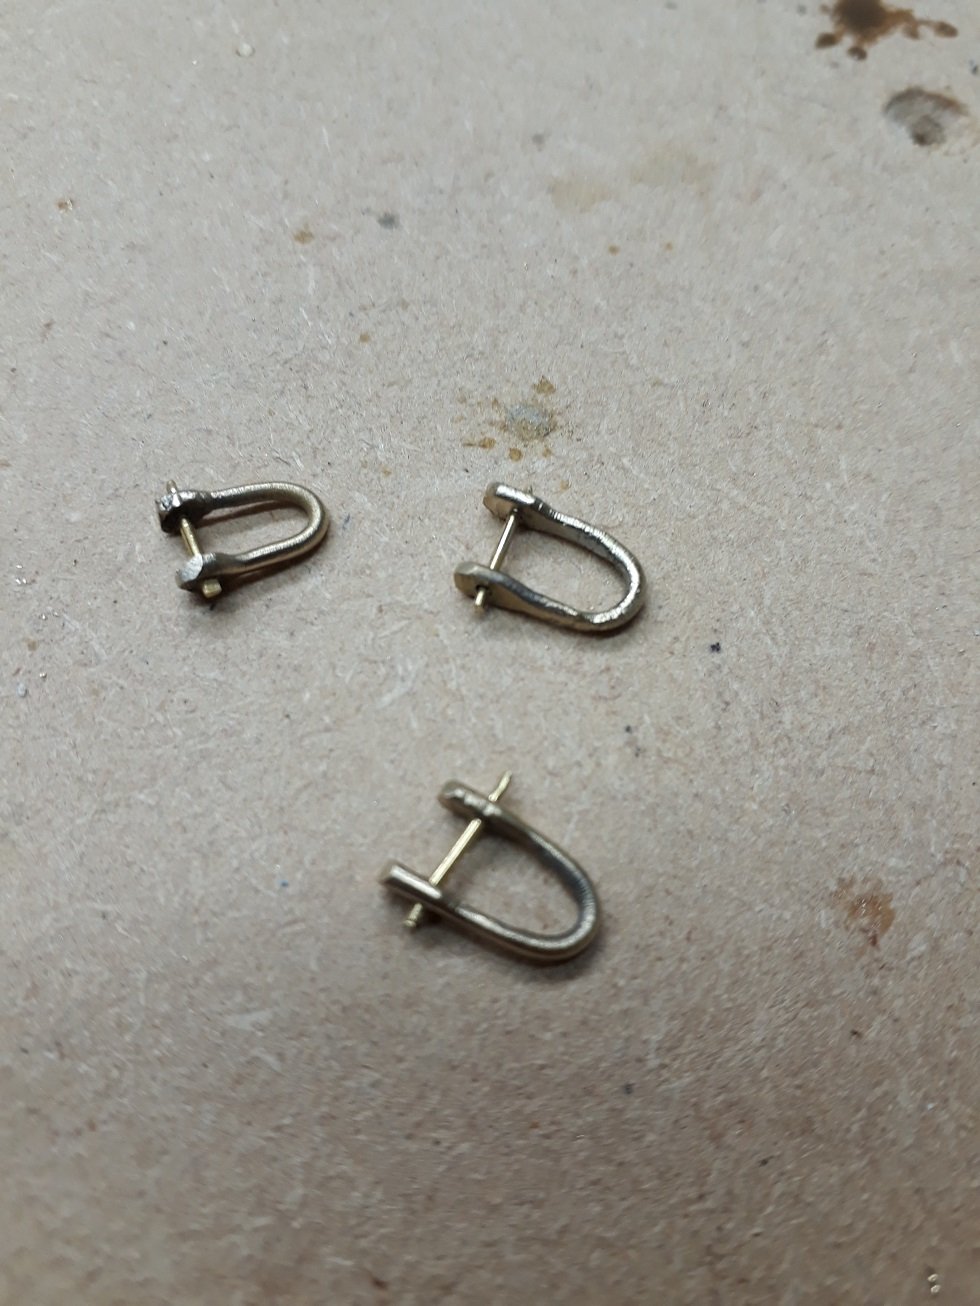
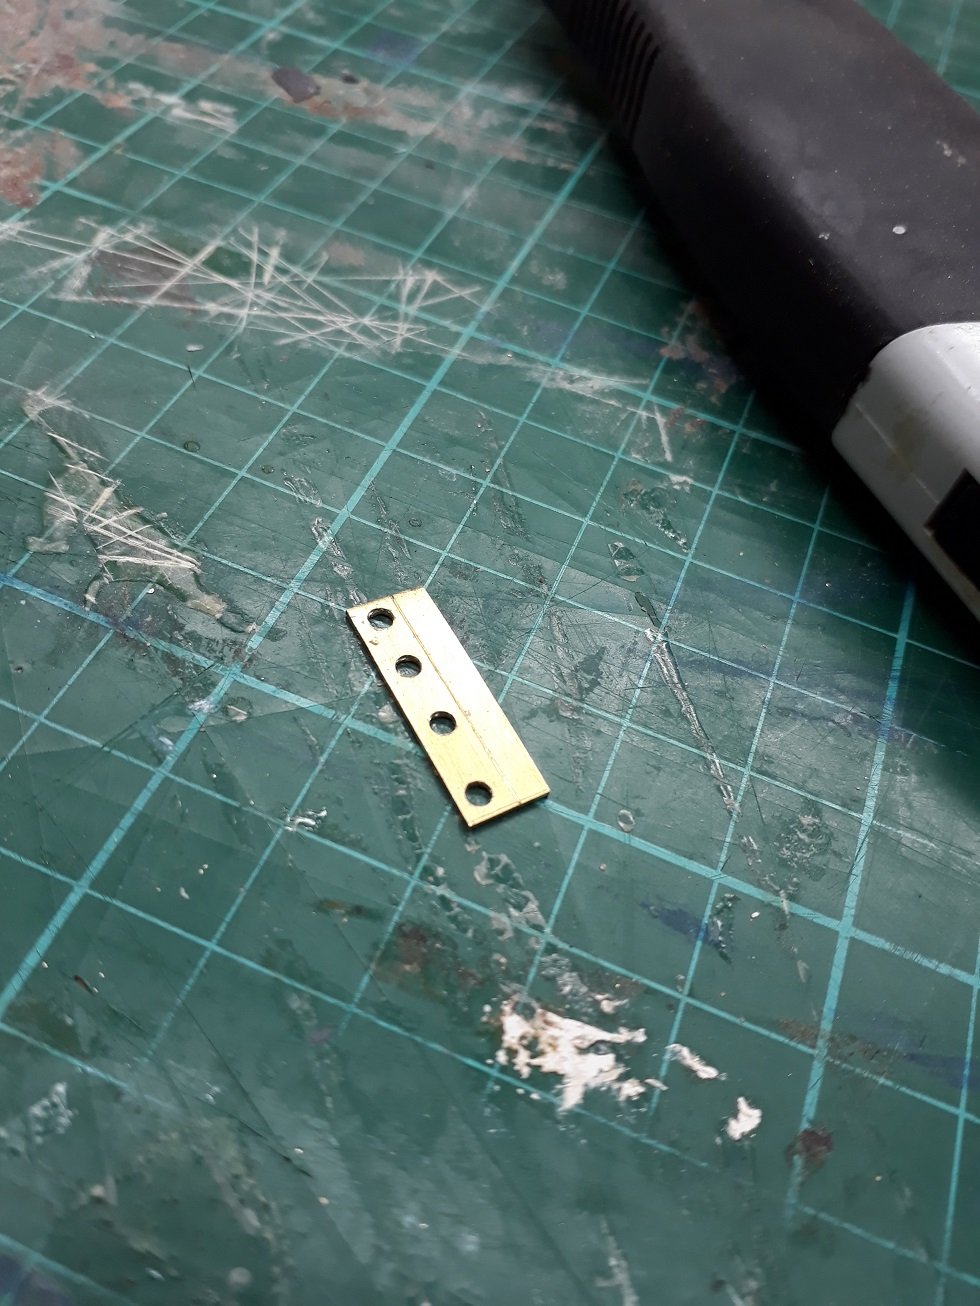
Dear all I will need many shackles for my 1:10 boat but at £1.5 each, they are incredibly expensive. I would very much like to make them myself. Michael Mott has posted a very elegant way of making shackles in this scale. Today I experimented in my garage and tried to standardised a much simpler version, using tools that I (and probably most modellers) own. So here it goes. Very very important: There will be clouds of flying debris and brass dust so do not attempt unless you have goggles that completely seal the eyes (they cost £1). A few more tools will be needed. Start with 2 mm brass rod, cut to lengths a bit over 2 cm. Mark the edges that will later be hammered flat with permanent marker. Then, secure the rods to a drill, just at the marked edge. Do not worry, it will be adequately rigid and secure. Set both the drill and the dremel spinning and with a high grit sanding drum, thin the middle of the rod. Then use 240 grit sanding paper to smooth the marks left on the rod. It should now look something like this. Now anneal the metal. This needs to be done regularly otherwise the rod will break. On a flat surface, hammer the edges. Anneal and hammer again. Use a sanding disk or files to shape and round the flat edges of the rods. Then bend around an appropriate steel rod/pin secured in a vice, carefully so that this is done symmetrically. (One rod broke in the middle). Half bend initially, anneal and then bend all the way, otherwise the rod will break. Do not do any minor adjustments without annealing again, the rods will break very easily, bending puts huge stress on the metal. It should now look like this: Drill the flat parts, no need to align the holes. Then take a length of 0.8 mm brass wire, pass through the holes, then with pliers crush the ends flat and trim the excess. Polish with a steel wire brush. Shackles are ready. They can actually be made reasonably fast, best to do many at a time. They are not very uniform but I think with practice they should improve. Vaddoc


-
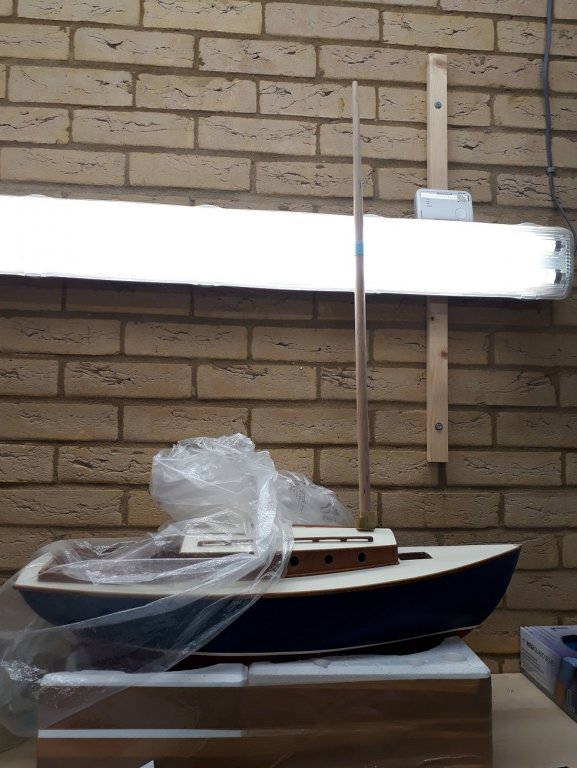
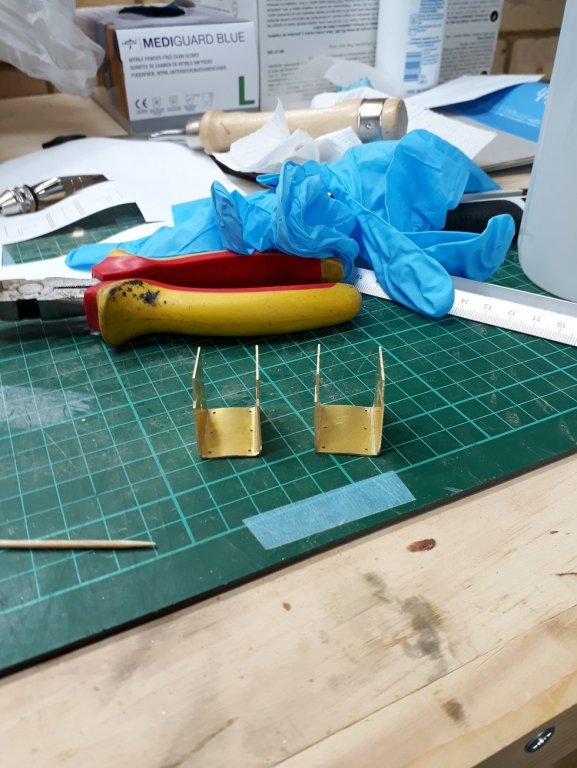
.thumb.jpg.6fd4c1b78768bb3efd745ab810936005.jpg) Oh dear Patrick! Me and the camera are not best friends! I do not yet have a clear understanding how the rigging will work but I think I will need some points at the tabernacle to attach sheaves. I used 0.7 brass sheet and silver soldered with solder paste. It worked well and came out fine! I run out of Humbrol primer and I used an automotive one, which I do not like but did the job. The mast sheath will be next. I will paint everything with the same off white as the deck. I experimented with a variety of lead free soft solder that has 3% silver. It produced very strong joints to the degree that silver solder might not be necessary for most parts. I used my mini torch but still the heat was too strong, I think it needs the heat iron. Also I ordered some Borax which is supposed to tolerate high heat, I realised that my flux burns out before the silver solder melts. I use a large butane torch that heats things very quickly but is rough on the flux.
Oh dear Patrick! Me and the camera are not best friends! I do not yet have a clear understanding how the rigging will work but I think I will need some points at the tabernacle to attach sheaves. I used 0.7 brass sheet and silver soldered with solder paste. It worked well and came out fine! I run out of Humbrol primer and I used an automotive one, which I do not like but did the job. The mast sheath will be next. I will paint everything with the same off white as the deck. I experimented with a variety of lead free soft solder that has 3% silver. It produced very strong joints to the degree that silver solder might not be necessary for most parts. I used my mini torch but still the heat was too strong, I think it needs the heat iron. Also I ordered some Borax which is supposed to tolerate high heat, I realised that my flux burns out before the silver solder melts. I use a large butane torch that heats things very quickly but is rough on the flux.
-
Wefalck, have you located an online supplier?. I would really like to try this thread. Vaddoc
-
Really good to hear these good news John! My best wished for a great new year! Regards Vaddoc
-
Michael, just finished catching up with your wonderful work. Too much to take in in one pass! Huge pleasure as always, looking forward for more updates. Such a shame the first half of the journey was lost! Regards Vaddoc
-
Dear Mark I really enjoy your work, it is a source of information as well as inspiration. Very very nice! I was badly defeated trying to make portholes and had to buy them, curious to see how yours will turn out. Have a very happy new year Regards Vaddoc
-
Just manage to catch up, very nice Patrick, full of your usual good vibes! Lovely details, the sculpture, the lump, the computers, also I would not mind having some of these rugs at my place... I wish you a wonderful, creative and healthy 2019! Vaddoc
-
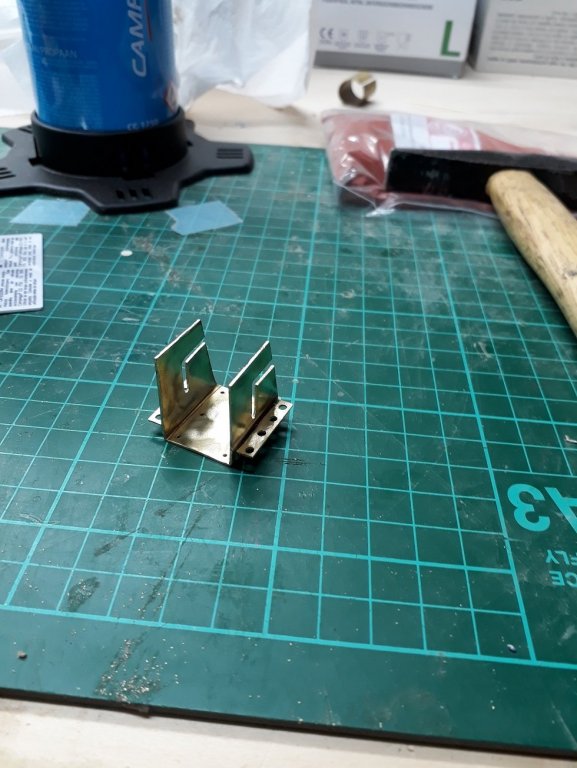
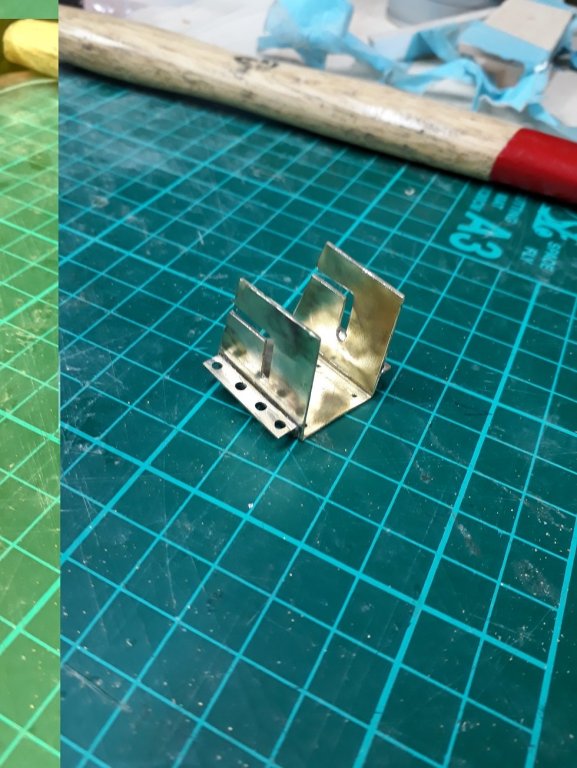
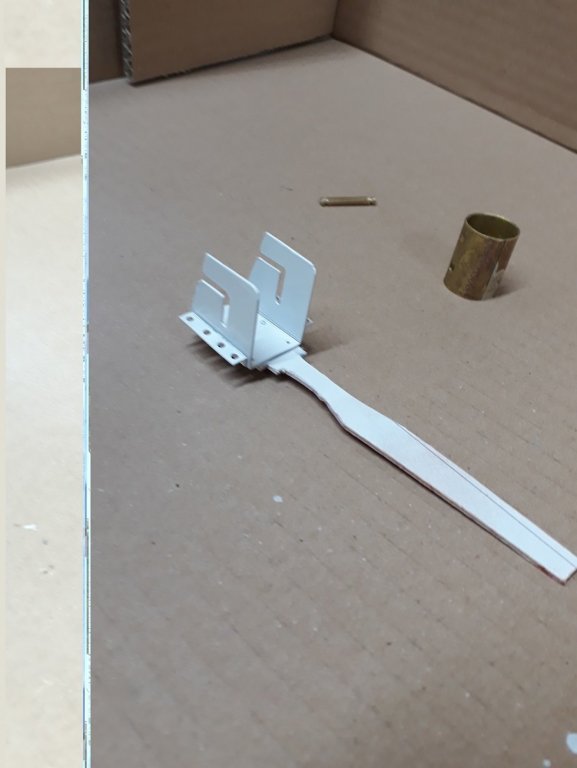
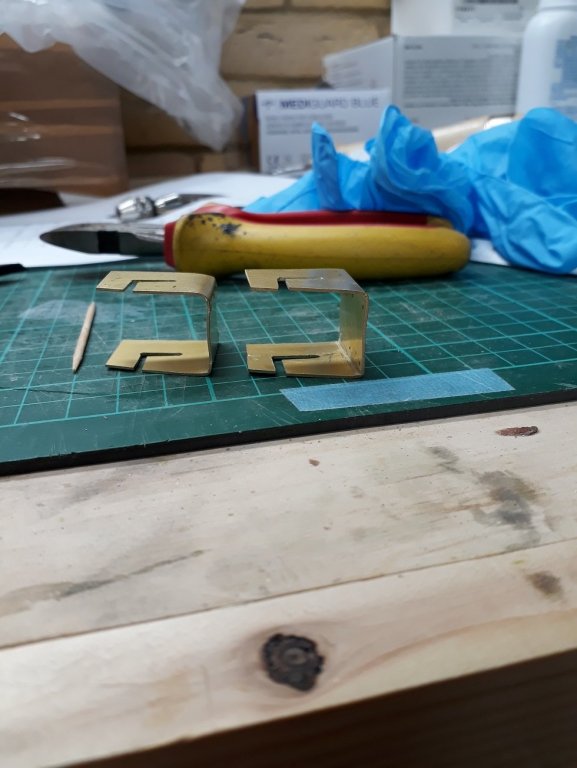
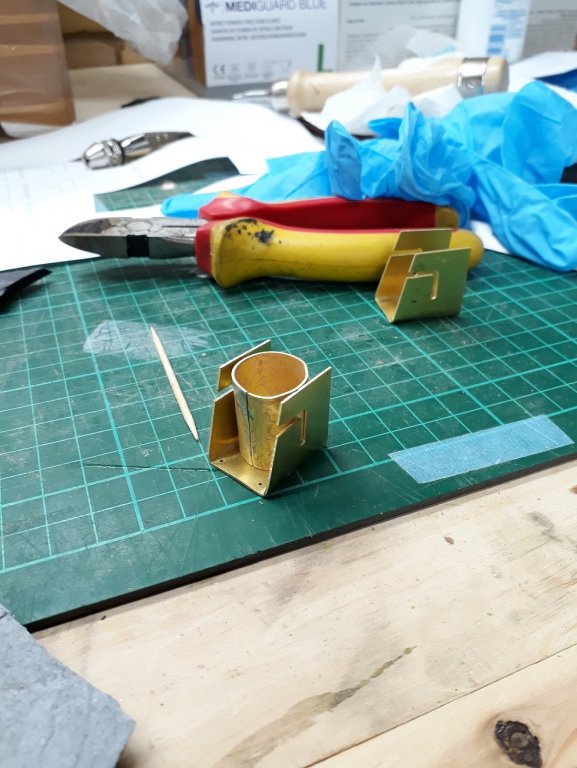
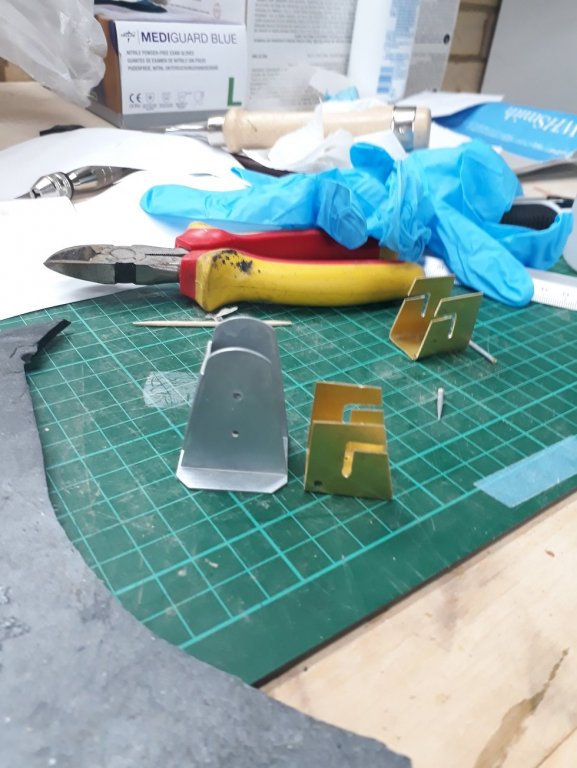
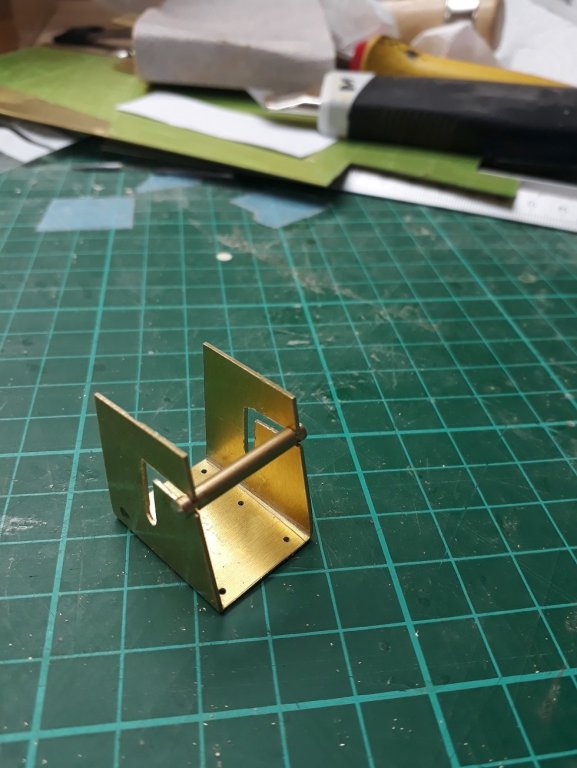
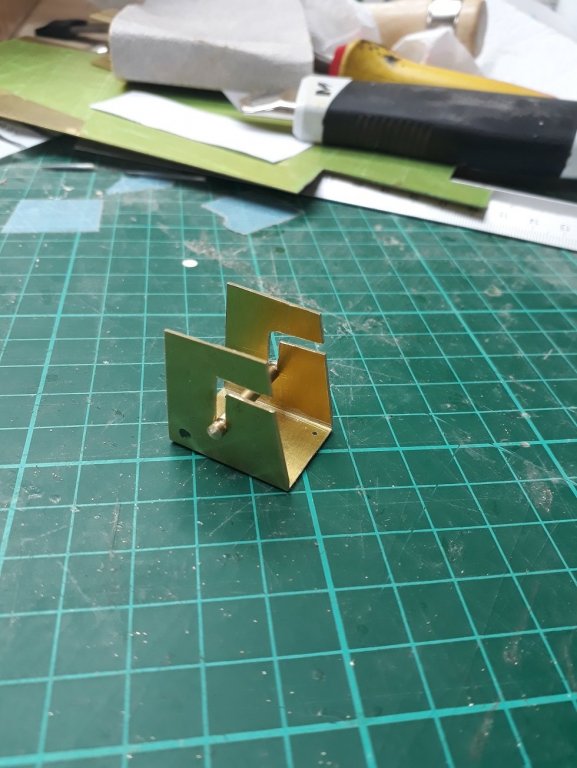
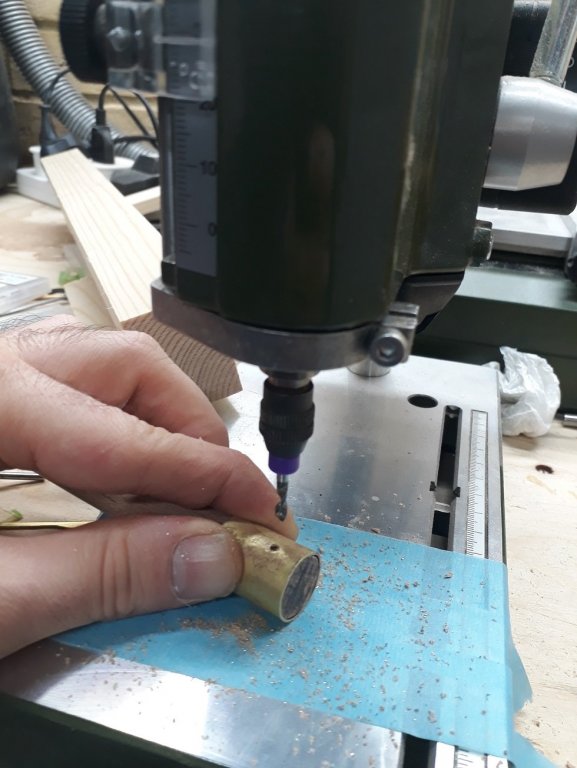
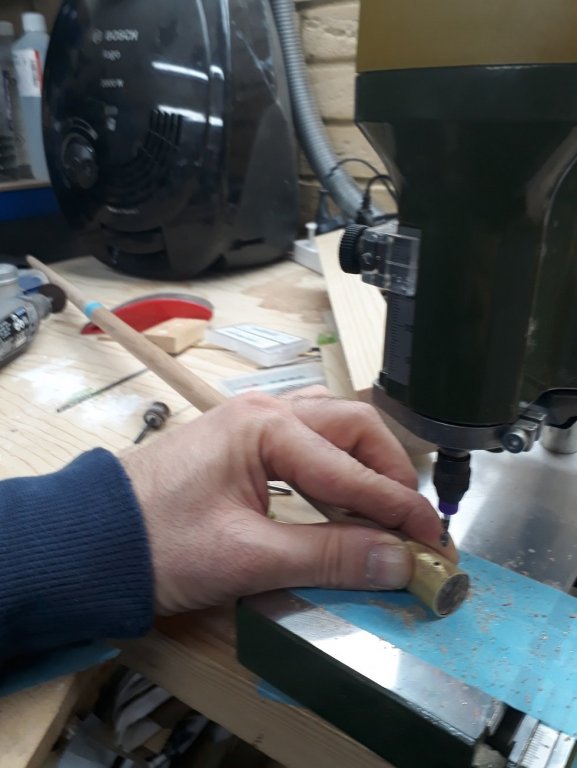
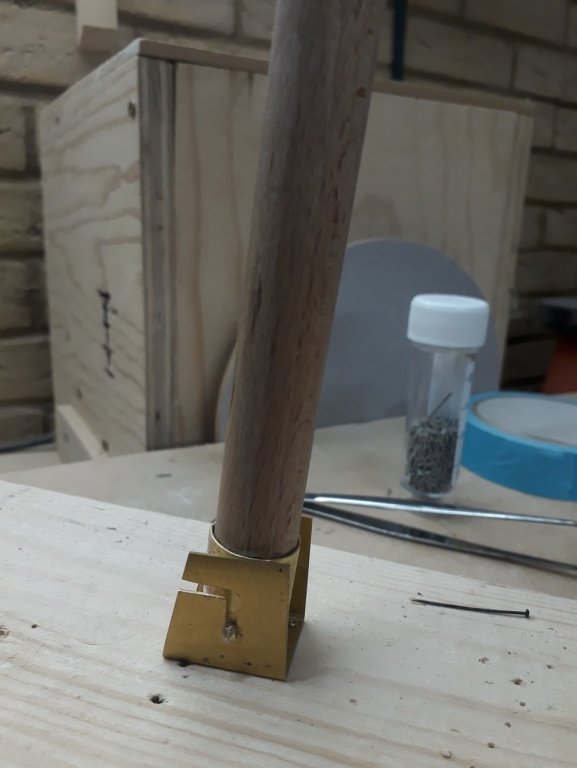
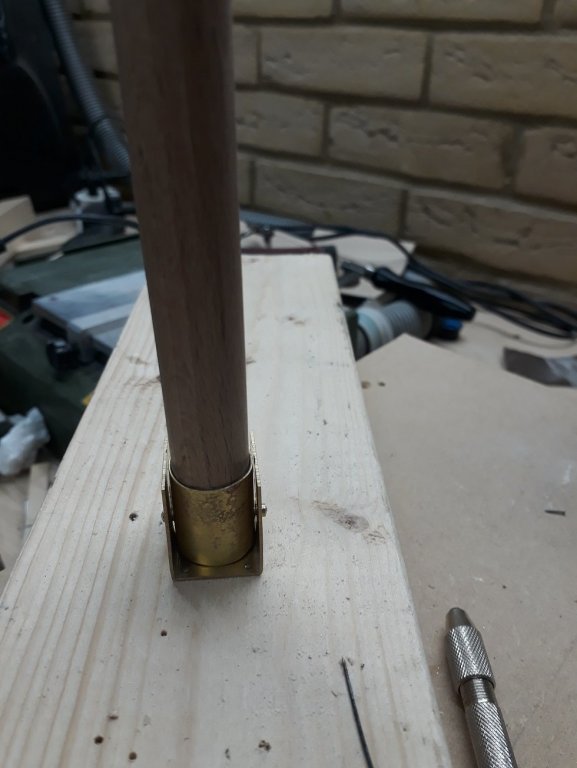
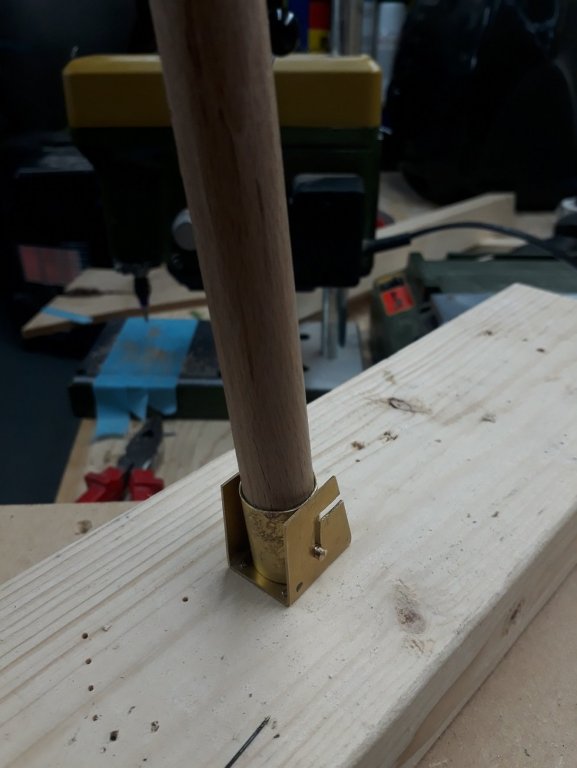
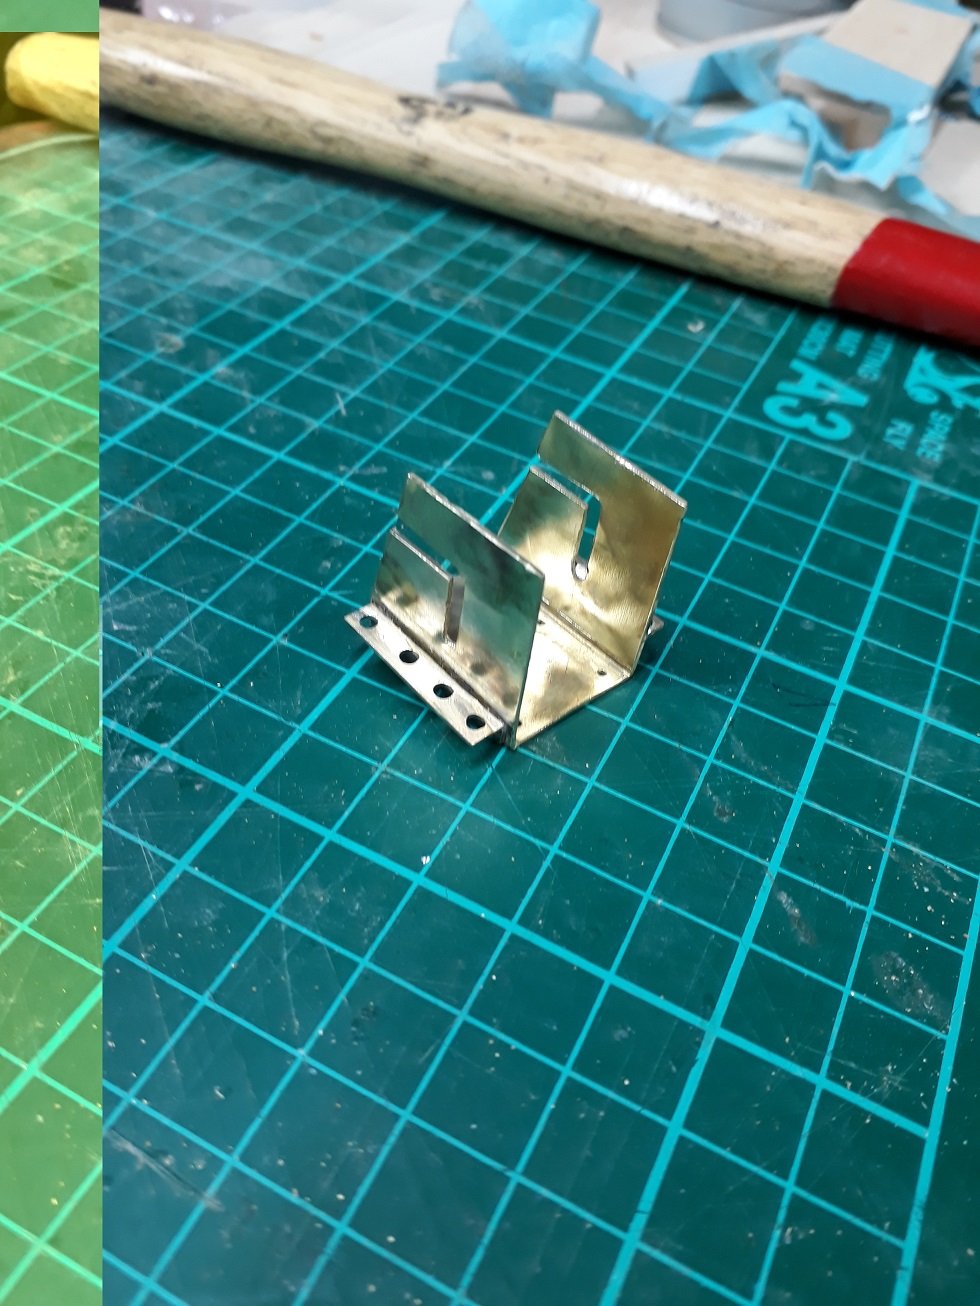
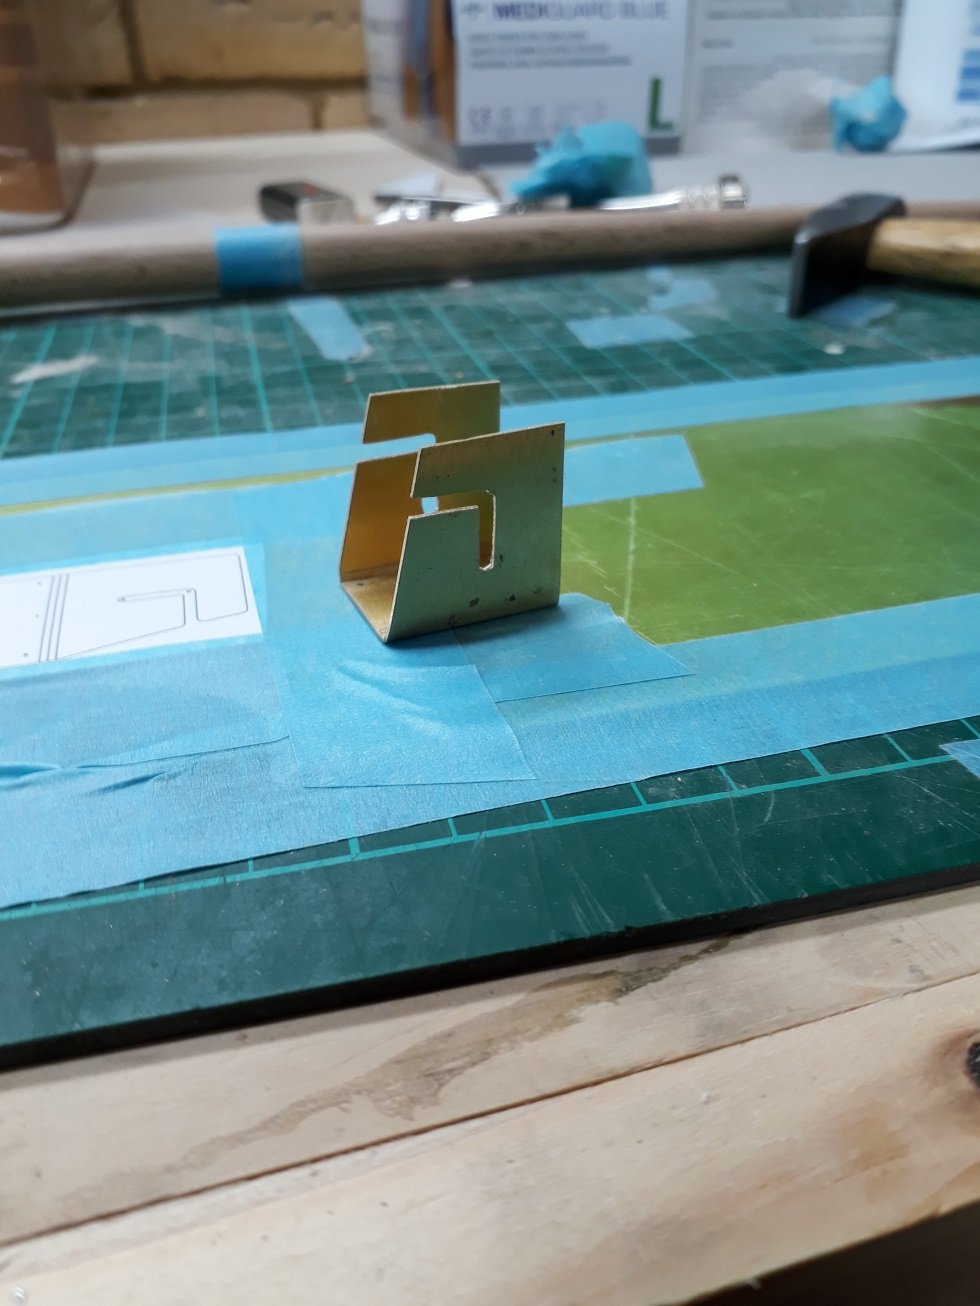
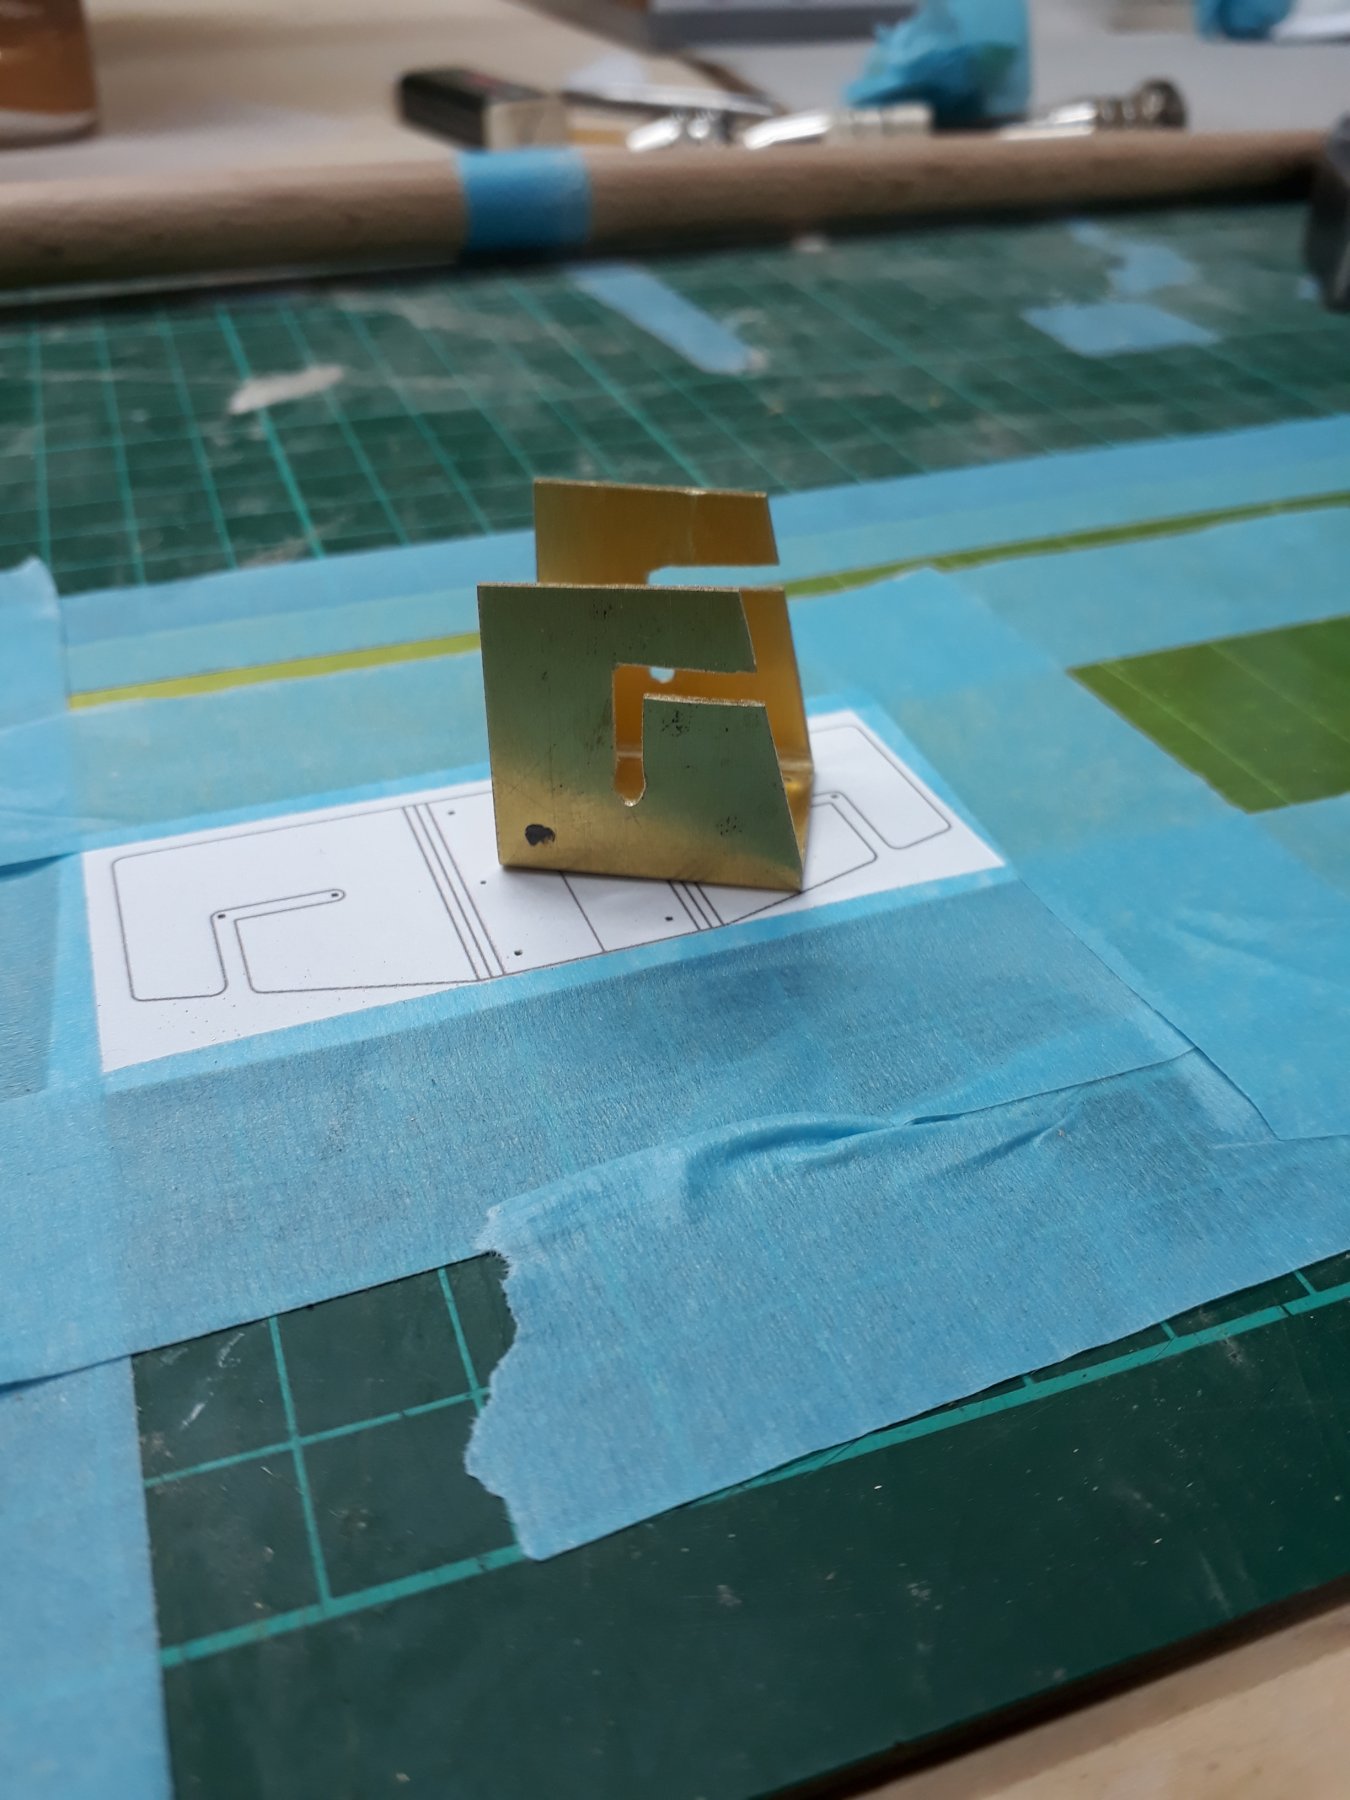
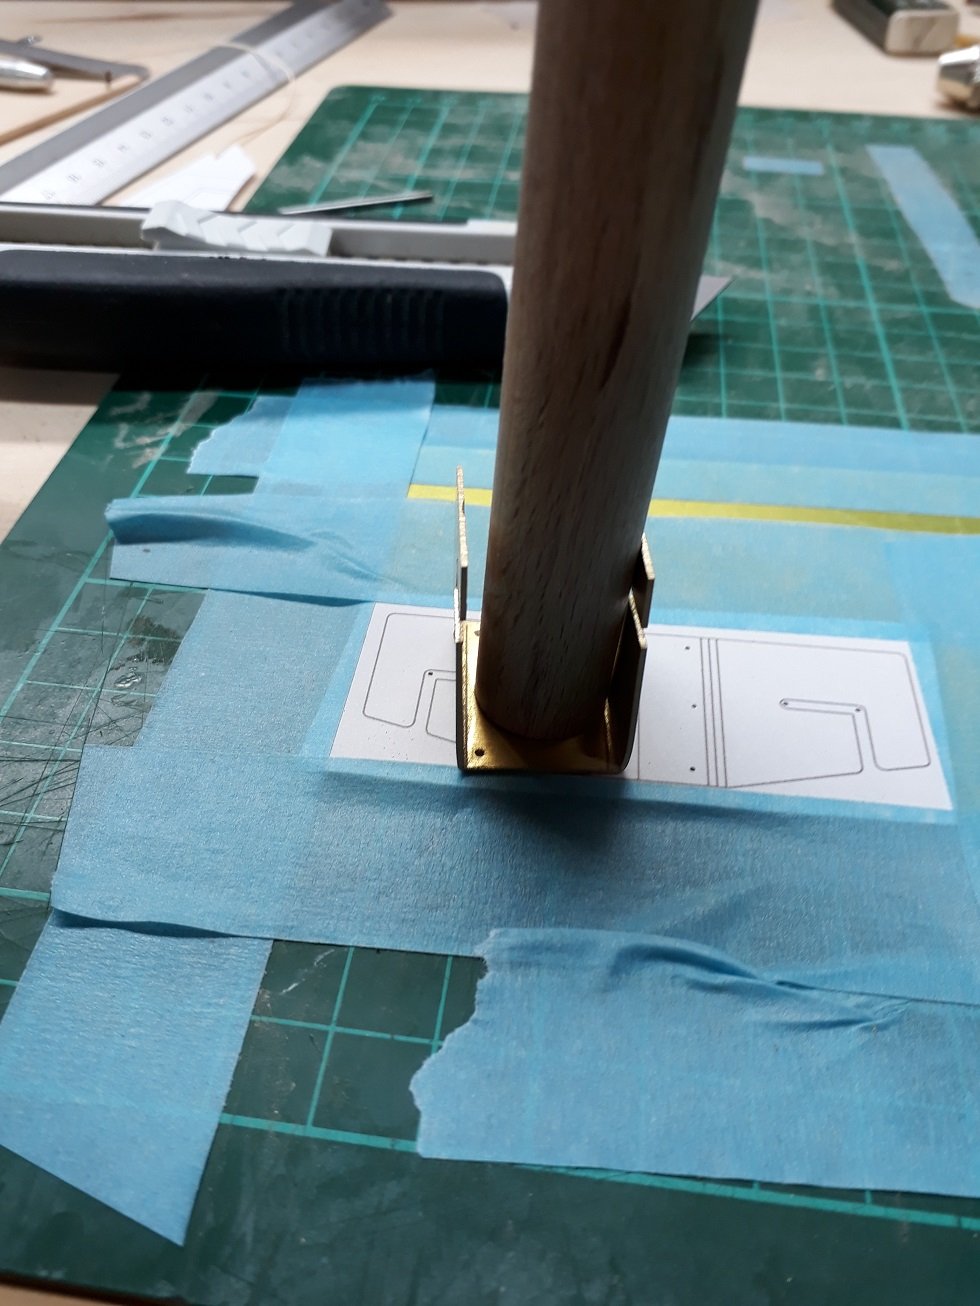
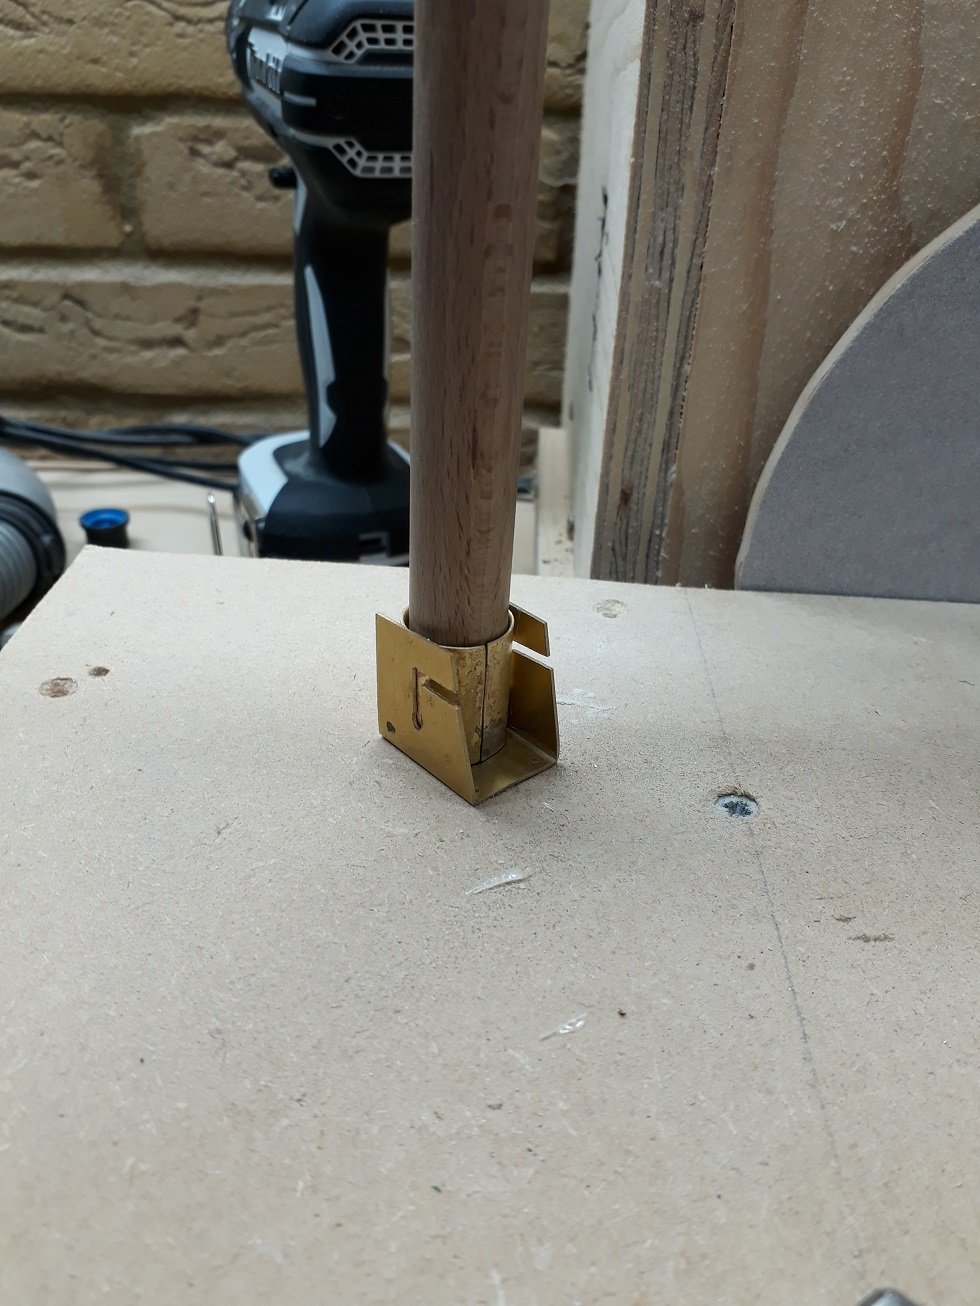
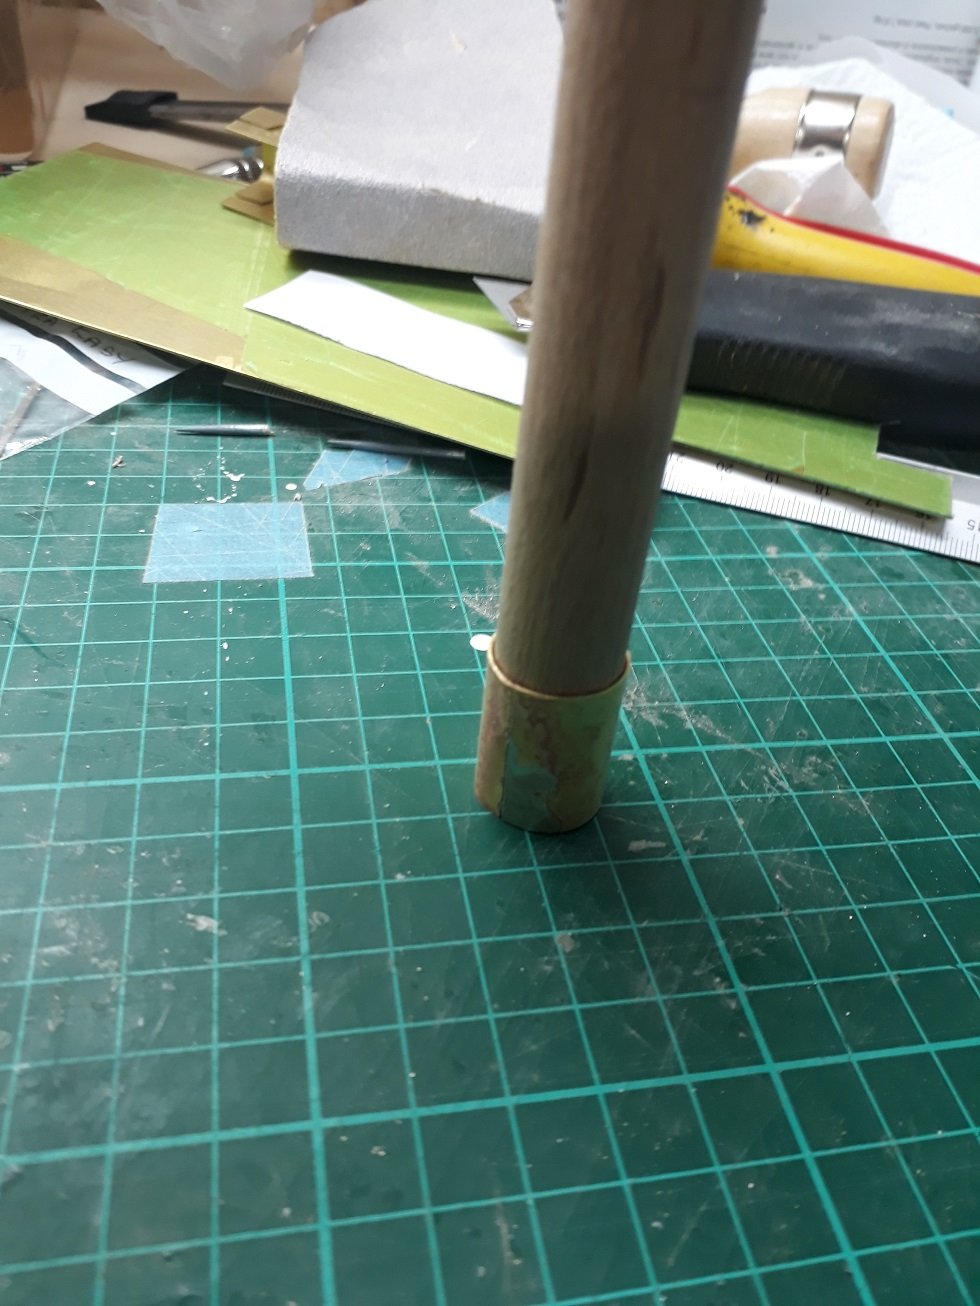
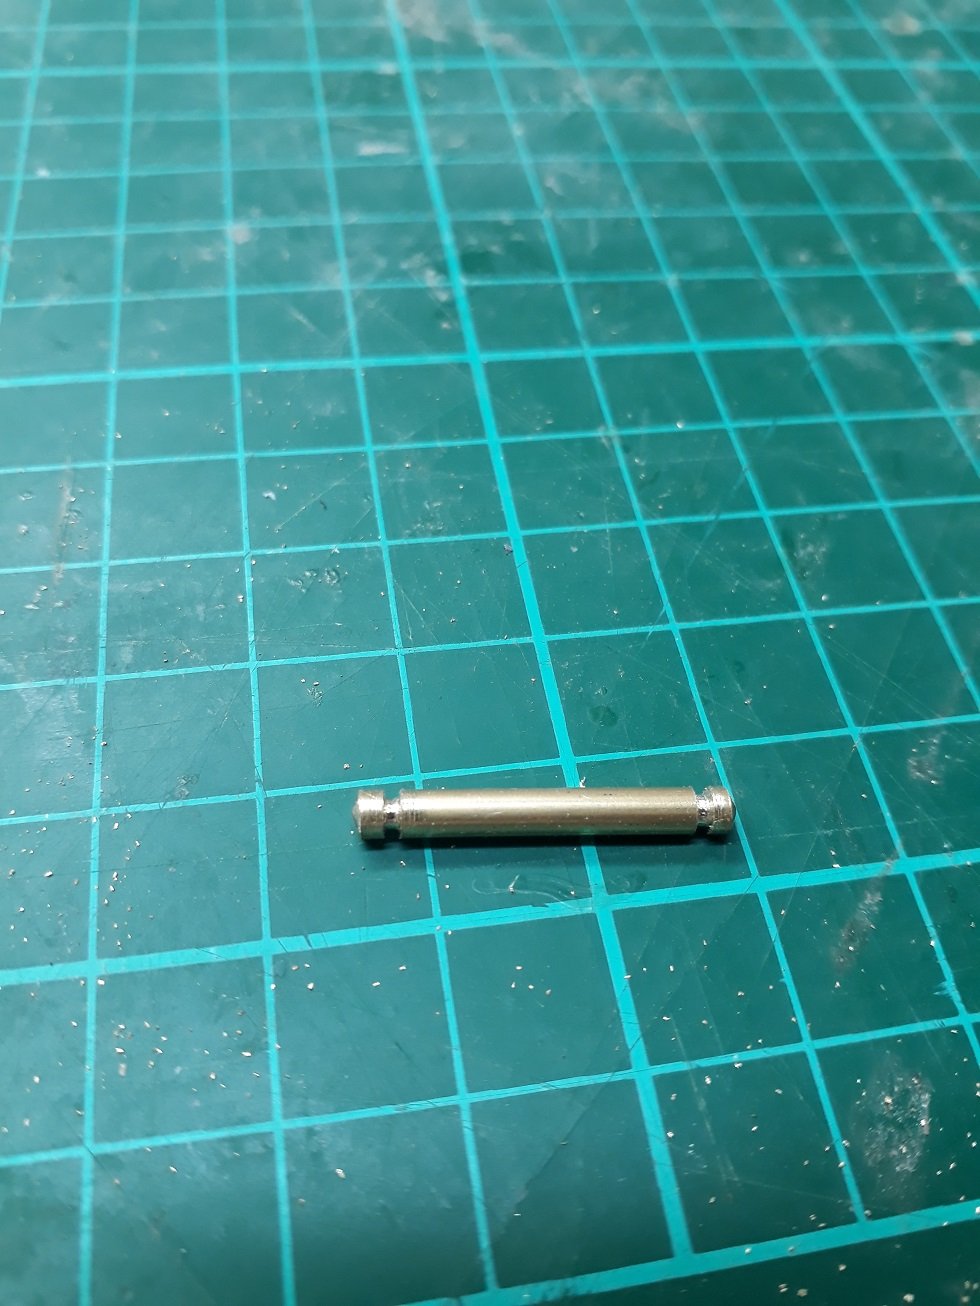
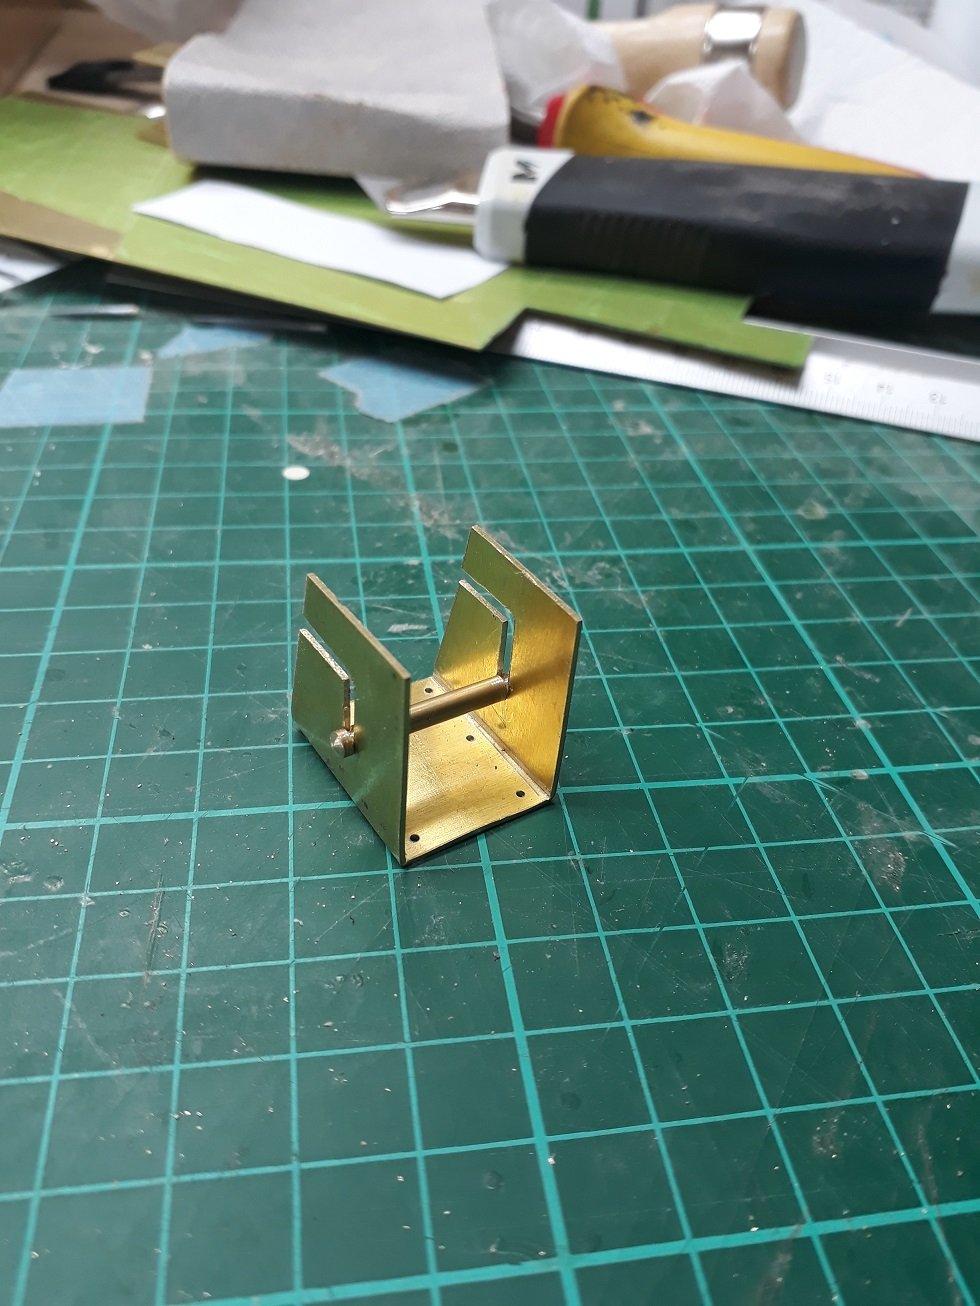
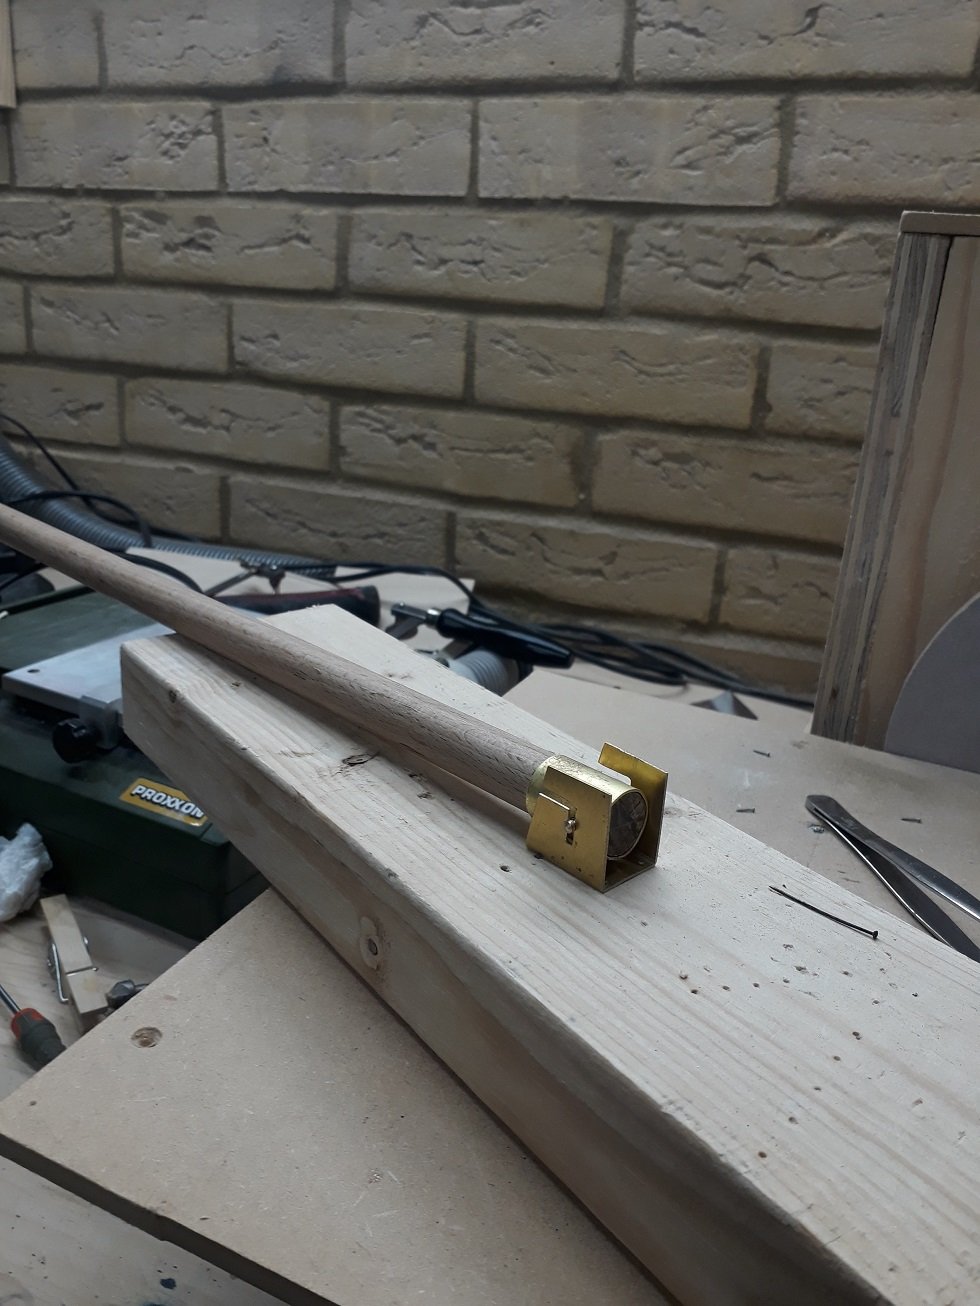
Finally, a proper update! I was able to spent some time in the garage, I heated up the place and did a bit of work. First the pattern for the new tabernacle was transferred to 0.7 mm brass. I drilled and cut the piece an then filed across the lines and bent the piece to shape. It came out fine but just a bit wide. I think the scale is more appropriate compared to the previous tabernacle I actually made a second one, about 1 mm more narrow. I did not file deep enough though so it did not bend as well. I decided to use the first one. I am not sure how it would work in the real boat, however I am thinking that having the base of the mast supported by just a through bolt might not be a long lasting solution. A metal sheath would transfer forces to the base of the mast much better. So I made one, again from 0.7 mm brass. I silver soldered it but poorly, as the edged did not touch well. I like this set up but the metal sleeve was not a very good fit. I cut the joint, sanded the edges and silver soldered it again. I had to lightly sand the base of the mast but overall a much better soldering job and a much better fit. I made the axle, 3 mm brass rod secured to a drill and 2 groves filed down to 2 mm. I finished the edges on the disc sander. It fits like a glove! Next, I drilled a 3 mm hole through the mast and the metal sleeve. A pilot hole was first drilled and then I used a massive 3 mm tungsten carbide drill. The little Proxxon drill did very well! I test fitted the whole assembly with the tabernacle screwed on a piece of timber. Everything came together perfectly! And not only that, the tabernacle actually works and the mast very easily comes down! It is also very stable laterally despite the huge leverage from the tall mast. I could not resist taking a short video! Now I need to clean, acid etch, prime and paint everything and then put on the boat. I might also solder a bar on each side of the tabernacle to provide points to attach cleats. It felt good working on the boat again! Best wishes for a Happy New Year! Vaddoc


-
I had a quick look, Gutermann Mara thread is pretty much unavailable in the colours and the small quantities we need, at least this side of the pond. Shame, I always believed that the "ideal" scale rope would be from man made fibers.
-
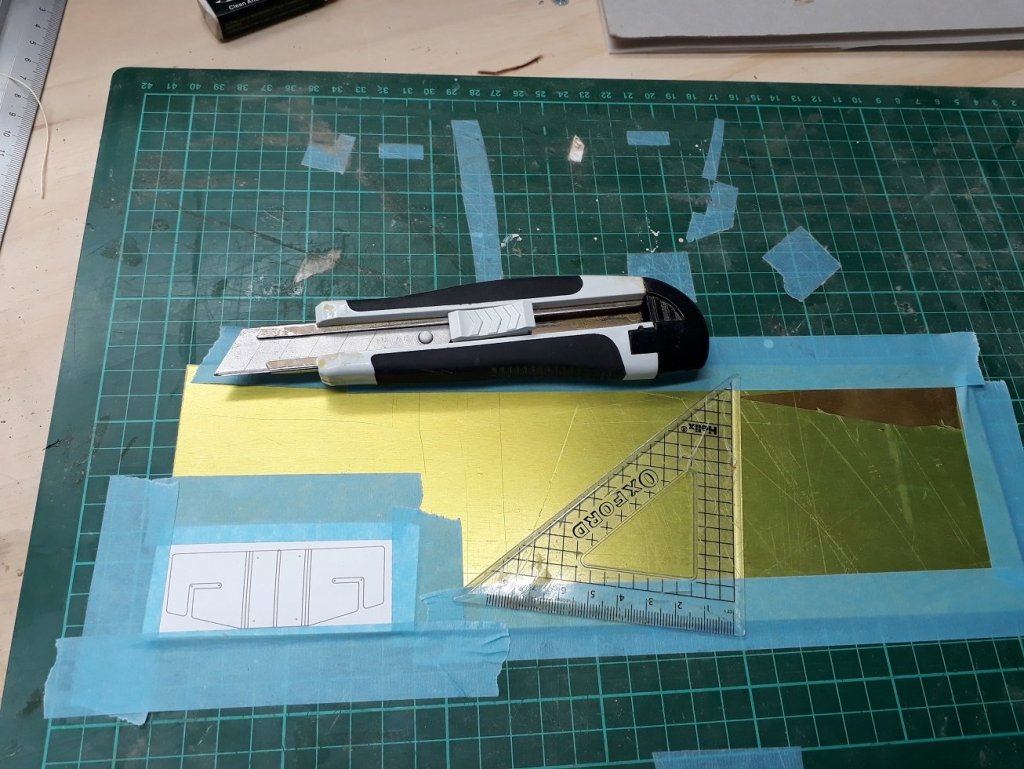
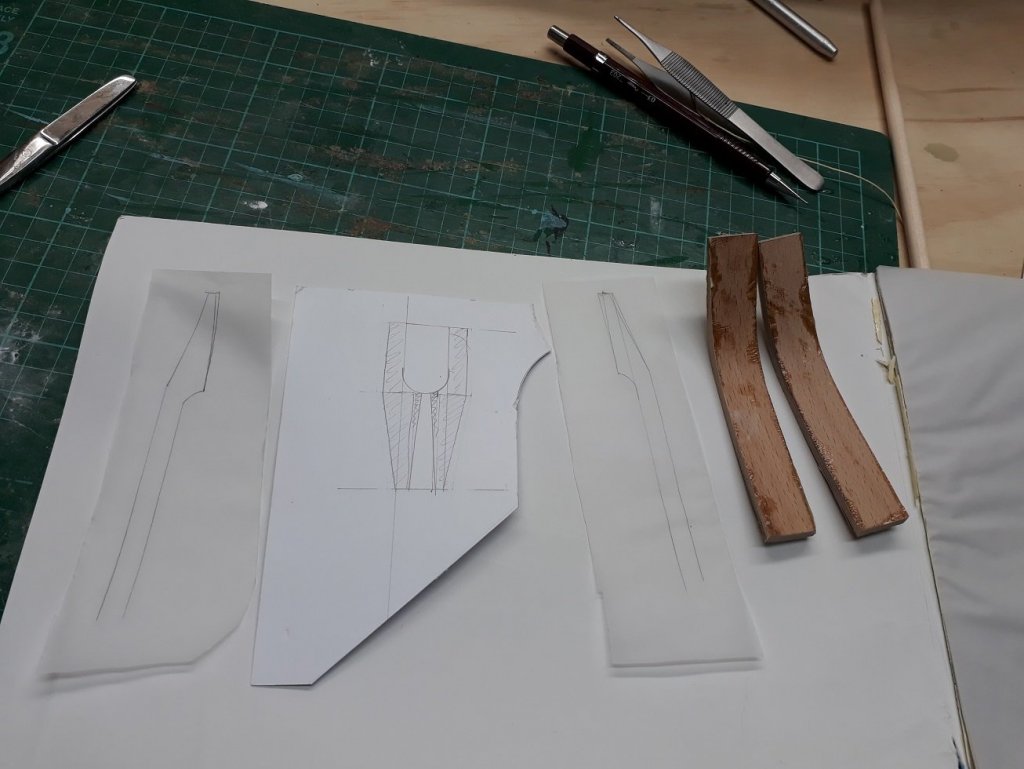
Thank you all! Your support is much appreciated. In between, fevers, teething, Christmas preparations and tons of work, I have not visited the shipyard. The boat, tools, timbers, all are frozen and dark with spider webs building! Still, I decided to make another tabernacle. It will be a different design, much smaller with fewer welds and I intend to paint it off white, the same colour as the deck. I stole an hour to design it on Rhino. I made two versions as due to the curved cabin top, some extra width may be needed. I also thought of a kind of through axle, grooved at both ends, to be used instead of a bolt. I may find some time in January to work on the boat and see how this design will materialise Regards Vaddoc
.thumb.png.dfca2a20cb138c493a0f4759310fb829.png)
.thumb.png.6ec656fc712a6c4f2185590f0d6e8b1f.png)
.thumb.png.2fb6fd3760b41ed42f9656fa14d2fbc9.png)
-
Very nice videos However, I looked for 01 steel blanks in the UK, cheapest 3x3 mm x 500 mm is £10 when a high end chisel is less than £20. Not worth the effort
-
A couple of issues to consider 1. There can be a massive difference between cheap and expensive in how the chisels are constructed, as microchisels have complex shapes (V, U) eg uneven thicknesses etc 2. They are much more difficult to sharpen than plain chisels and more easy to ruin My very cheap (non micro) chisels perform as well as my Narex one, but I can sharpen to a reasonable degree. I would invest more to the sharpening than to the chisel itself (although the chisel should be made of some reasonable steel) There is also that Russian chap that makes those wonderful microchisels, very reasonably priced. There are discussions with info somewhere in the Forum Regards Vaddoc
-
I have had excellent results with system 3 brushes https://www.amazon.co.uk/Daler-Rowney-System-Brush-Case/dp/B001DJ8EPA/ref=sr_1_1/261-5851405-9161227?ie=UTF8&qid=1545252558&sr=8-1&keywords=system+3+brushes or pro arte prolene plus. System 3 and Valejo (thinned with the hand bush media + retarder) produce great results, no brush strokes.
-
Thanks for the tip Roger, request sent to Santa along with reassurances I 've been a good boy!😁
-
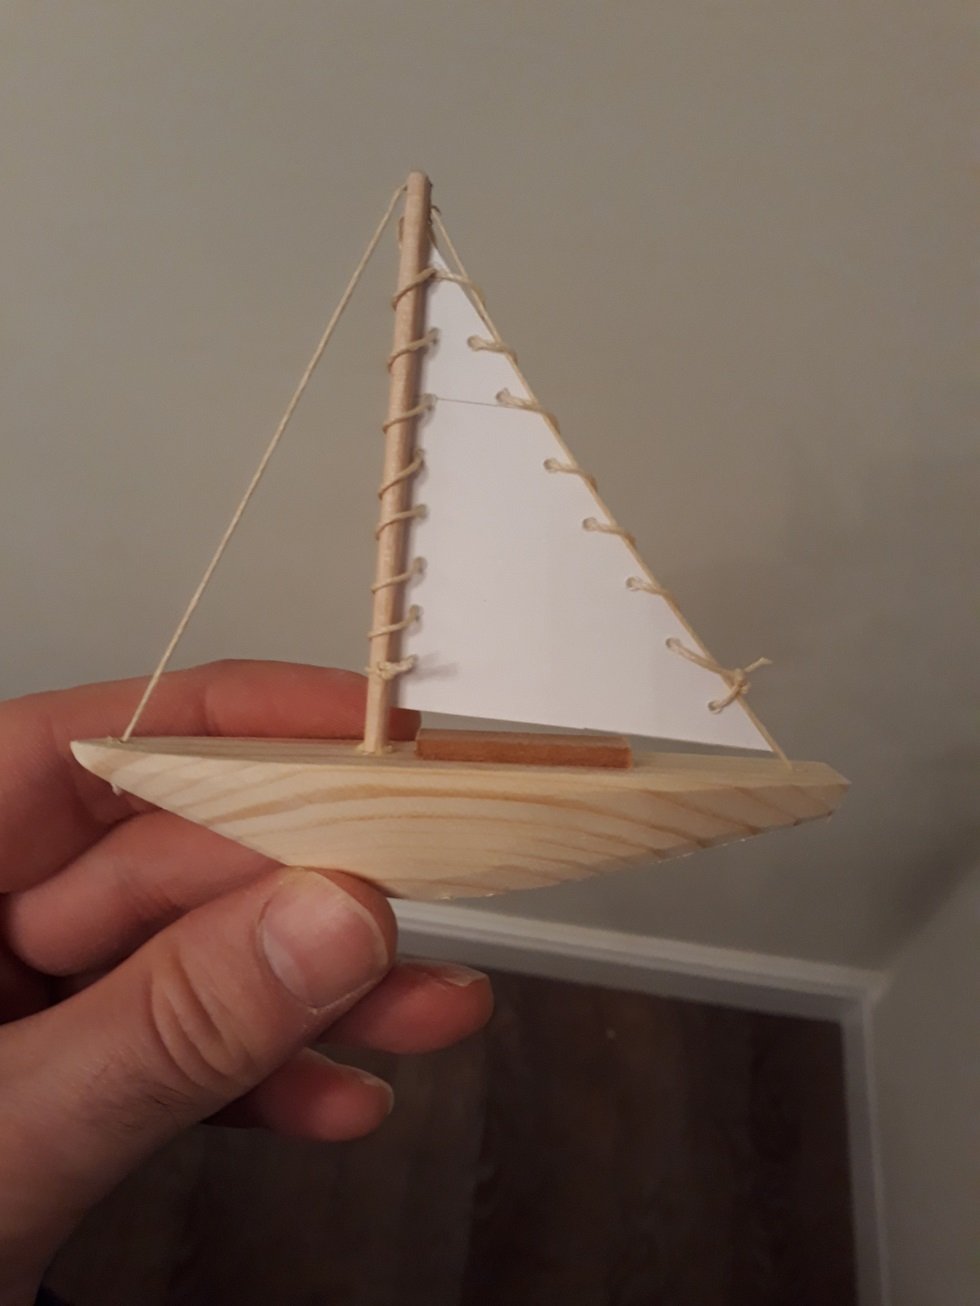
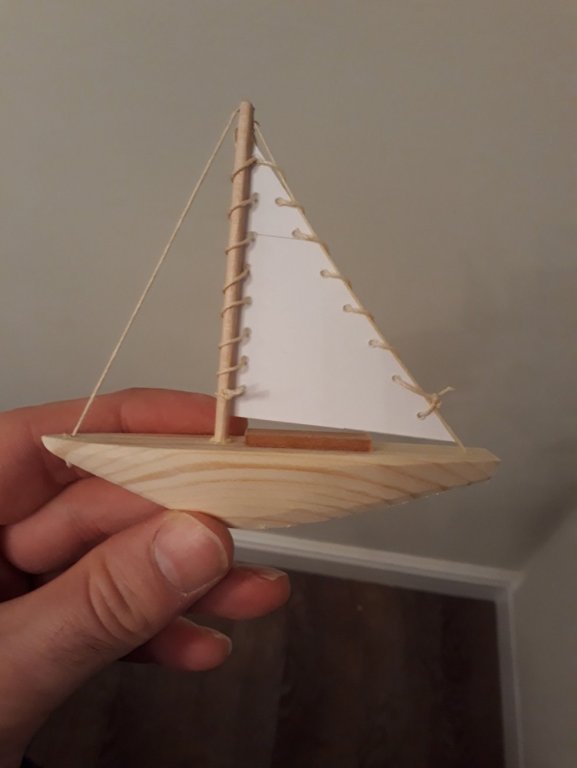
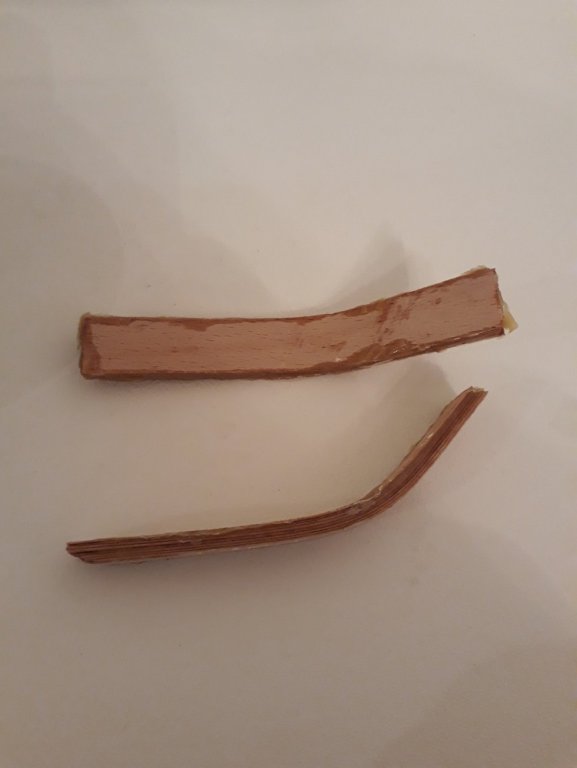
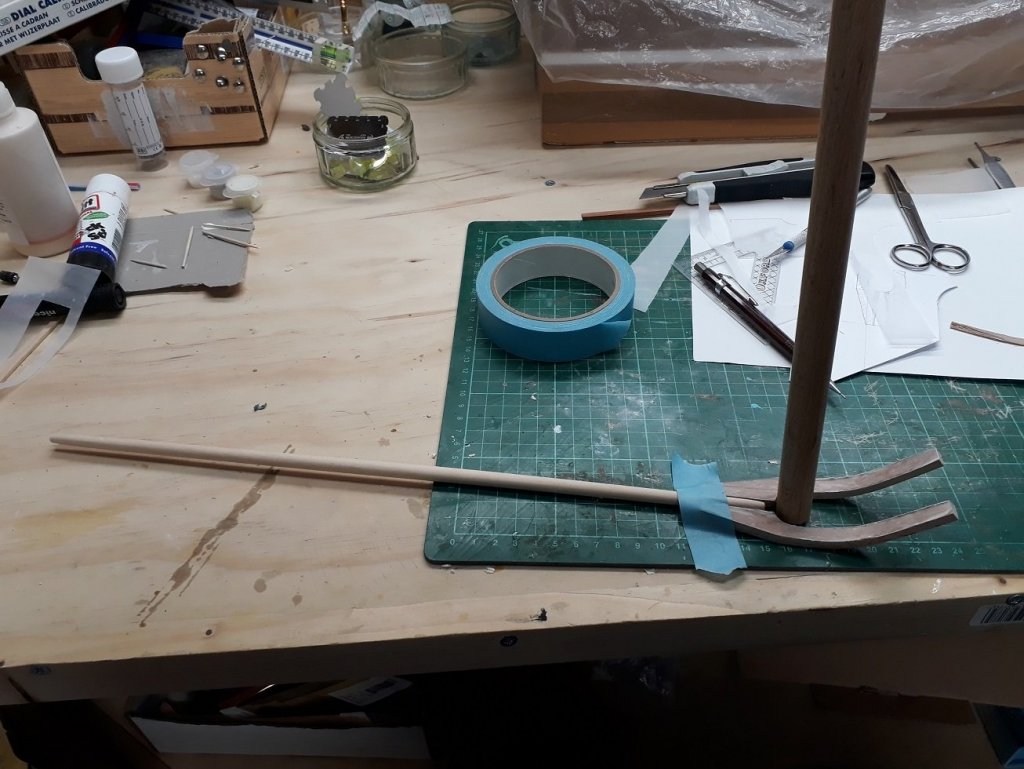
Following lots of testing I think I ll be alright for ropes. However life got so busy that I have not really been able to work on the boat almost at all. This is likely to continue for the foreseeable future. Very minimal progress in 6 weeks! The laminates for the gaff jaws came out fine. My 4 year old saw a piece of the jig I used for the laminates and told me it looks like a boat. Her face lit up when she saw this! The gaff jaws need a bit of wok but they are coming out better than I expected. Still need a lot of work and clearly are way oversized but I think they look promising. Best wishes to all Vaddoc
-
Ropewalk
vaddoc replied to Worldway's topic in Rope Making/Ropewalks's Rope Materials and parts resources
I think this is really important. This leads to a tighter rope at the small cost of few failures. Isn't rope making great fun? -
Syren Rope Rocket
vaddoc replied to DelF's topic in Rope Making/Ropewalks's Commercial sources for ropewalk machines
Thanks both I am overtwisting the rope but not setting it. I will try though to wet it and then stretch it in segments, I assume without distorting it. I think though that the problem is with the structure of the cotton fibres. They are straight and they can slide on each other, so the rope will always stretch more. Wool on the other side, has curled fibres that catch and do not slide, this is why a wool cloth that has been washed and shrank will never come back while a cotton t-shirt can stretch and stretch. Man made fibres have very long fibres that may be elastic but will not stretch permanently. I do not know about hemp and the other traditional fibres used in ropes but probably had very different fibre properties to cotton.- 42 replies
-
- 3
-

-
- ropewalk
- rope rocket
- (and 1 more)
-
Syren Rope Rocket
vaddoc replied to DelF's topic in Rope Making/Ropewalks's Commercial sources for ropewalk machines
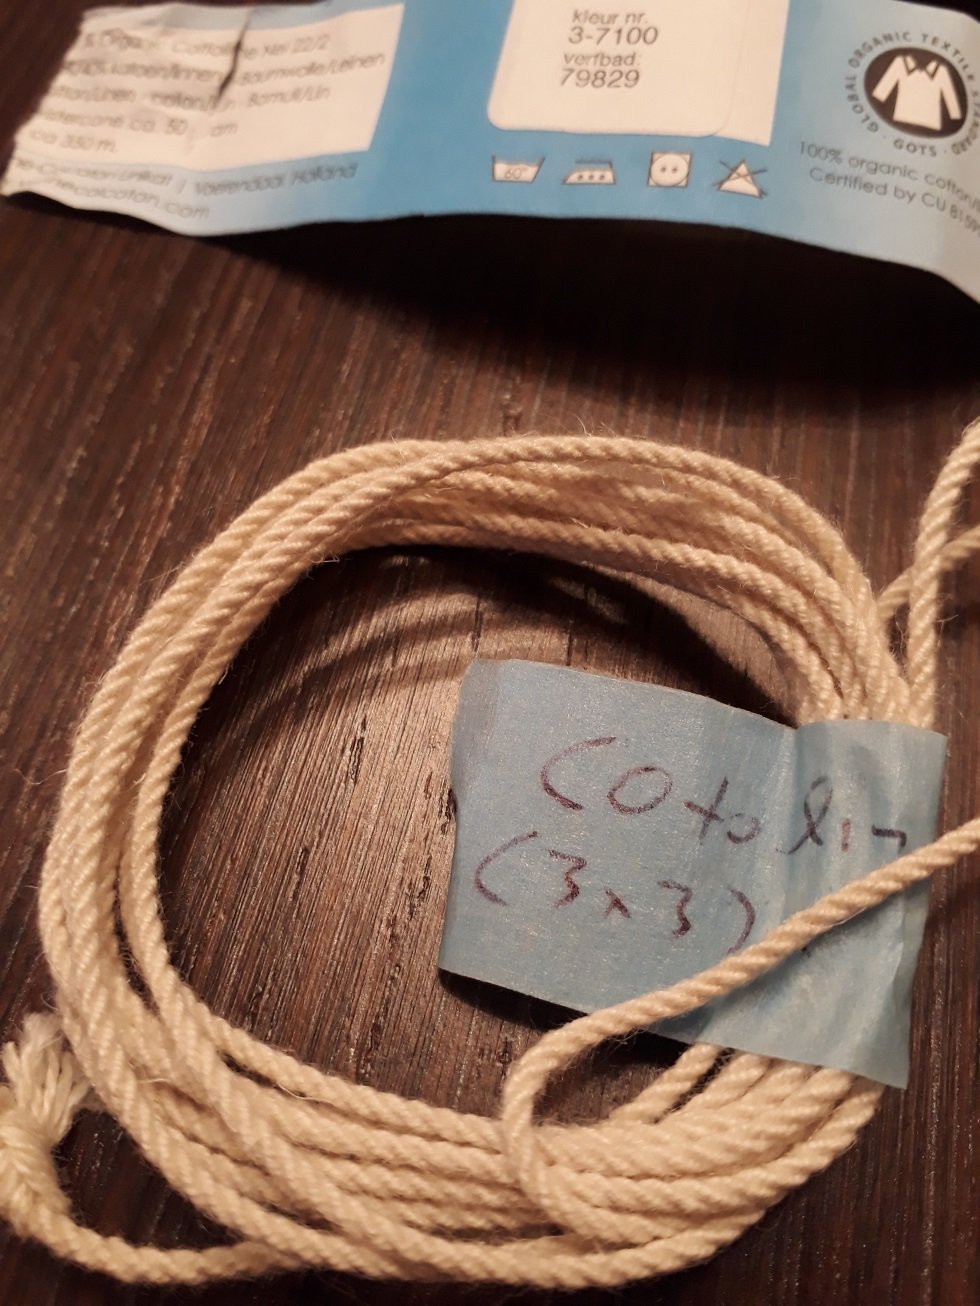
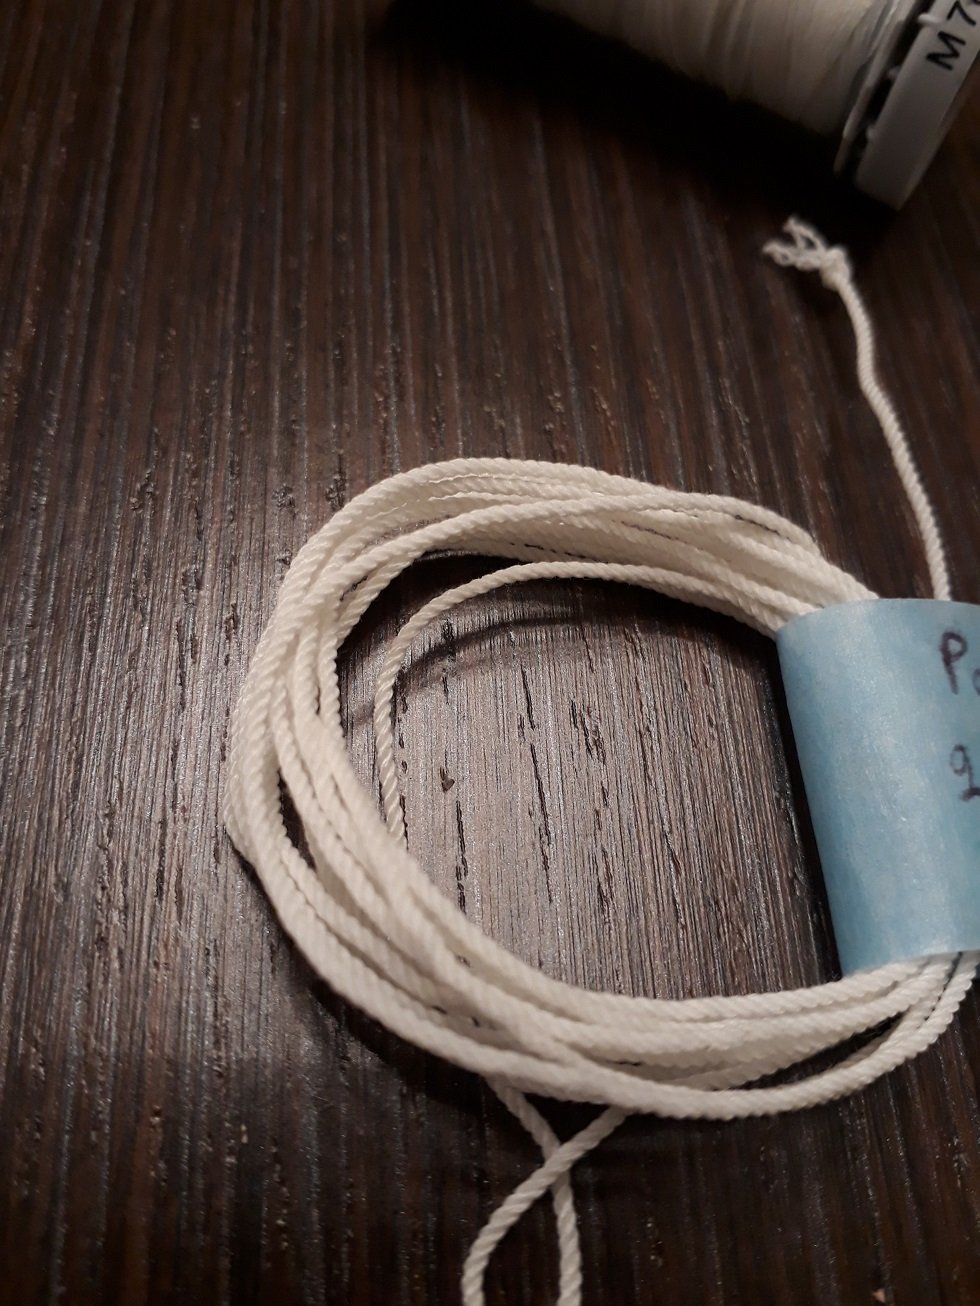
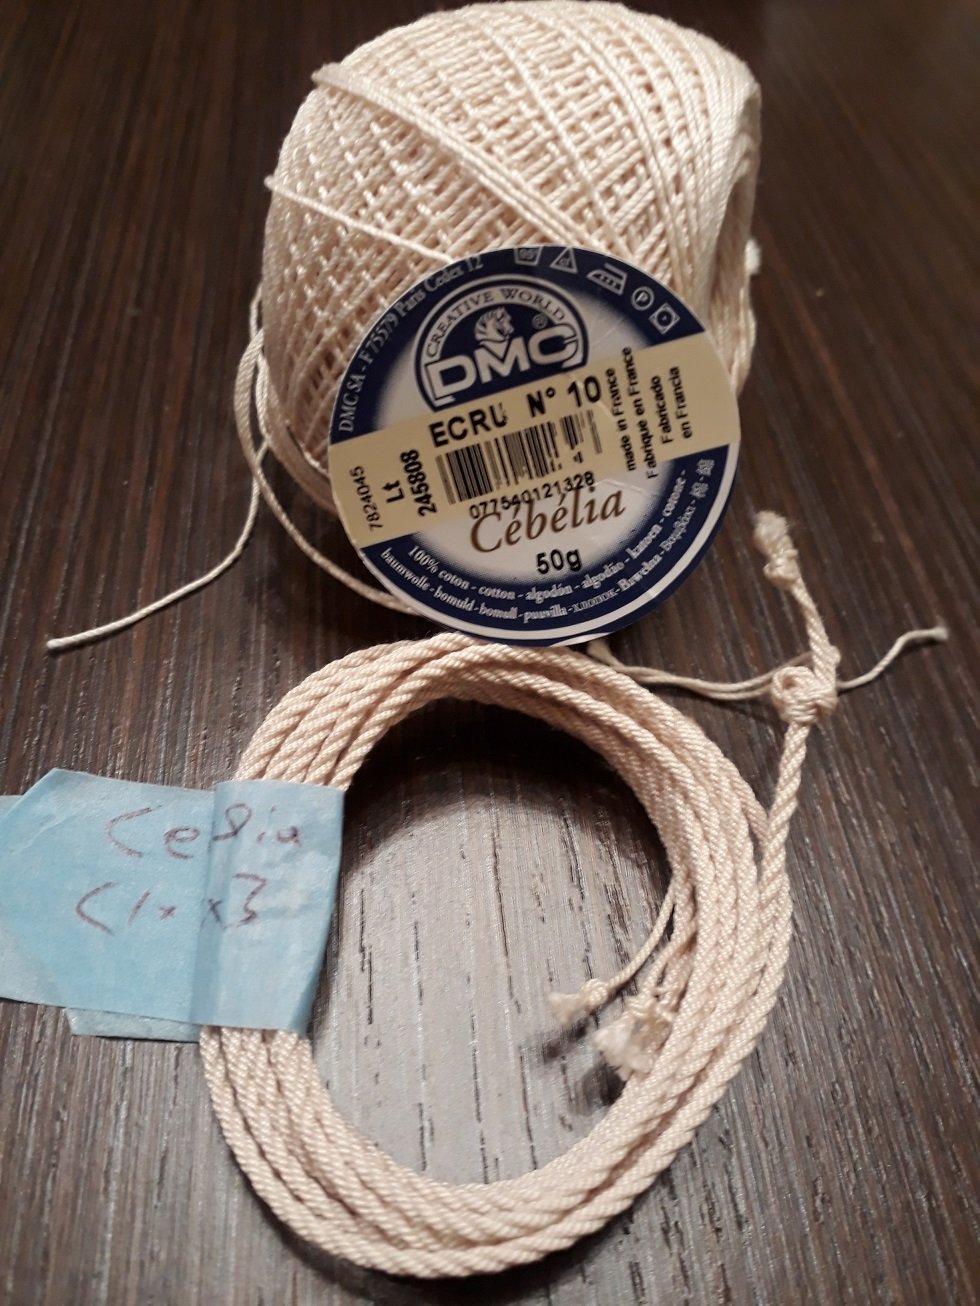
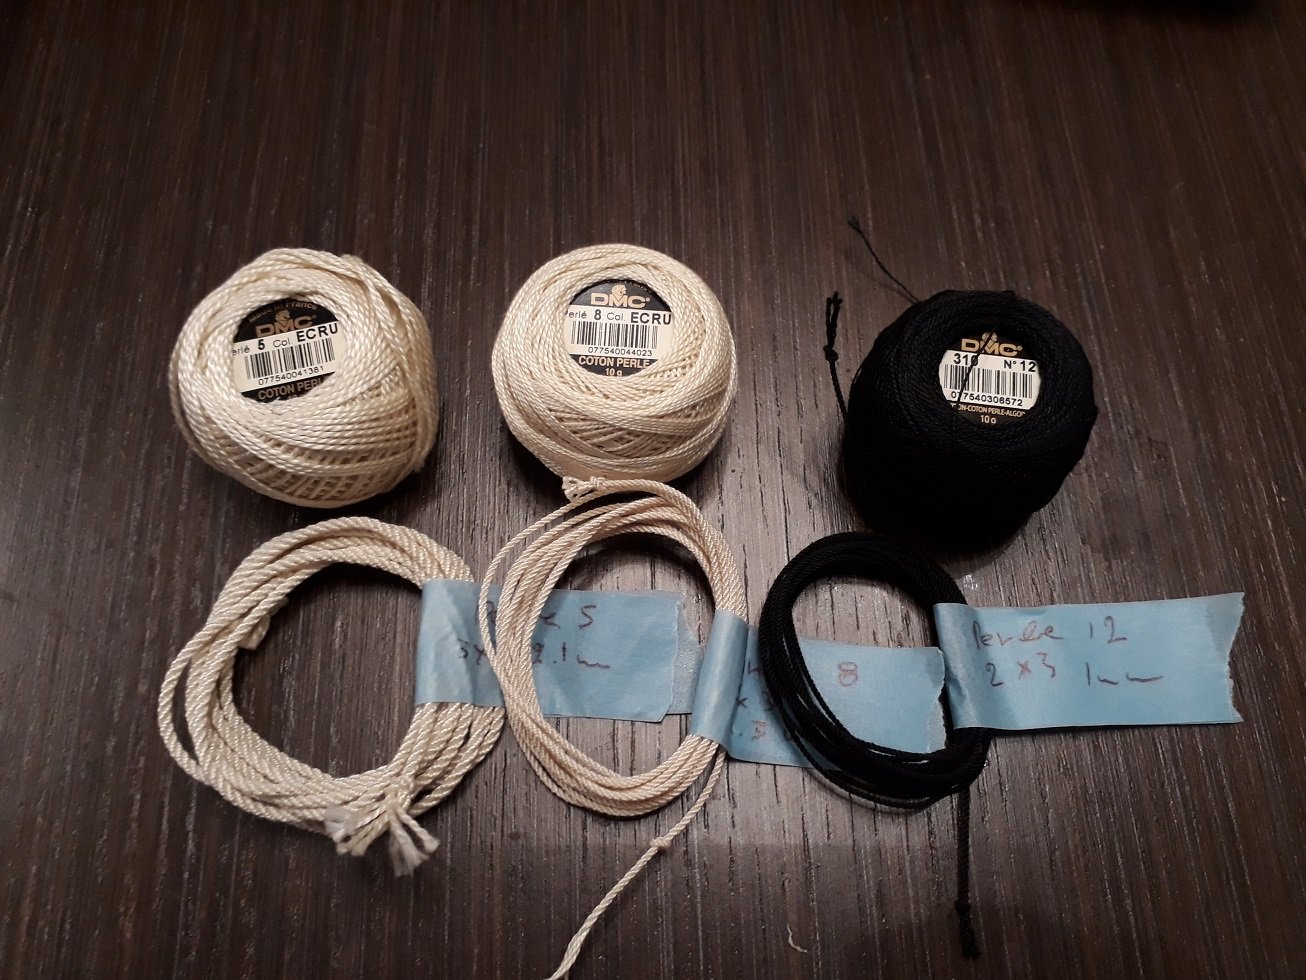
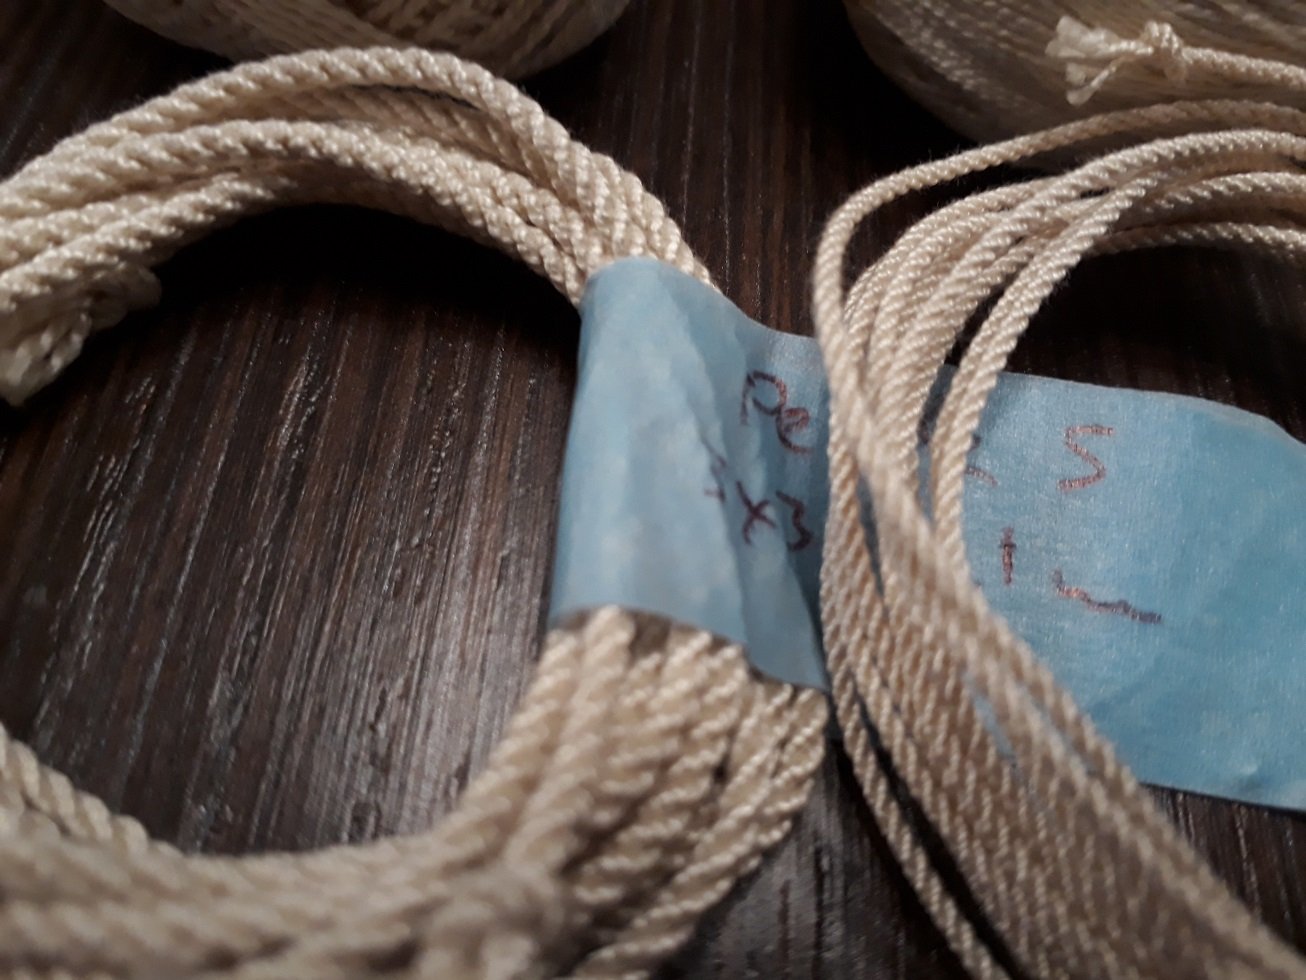
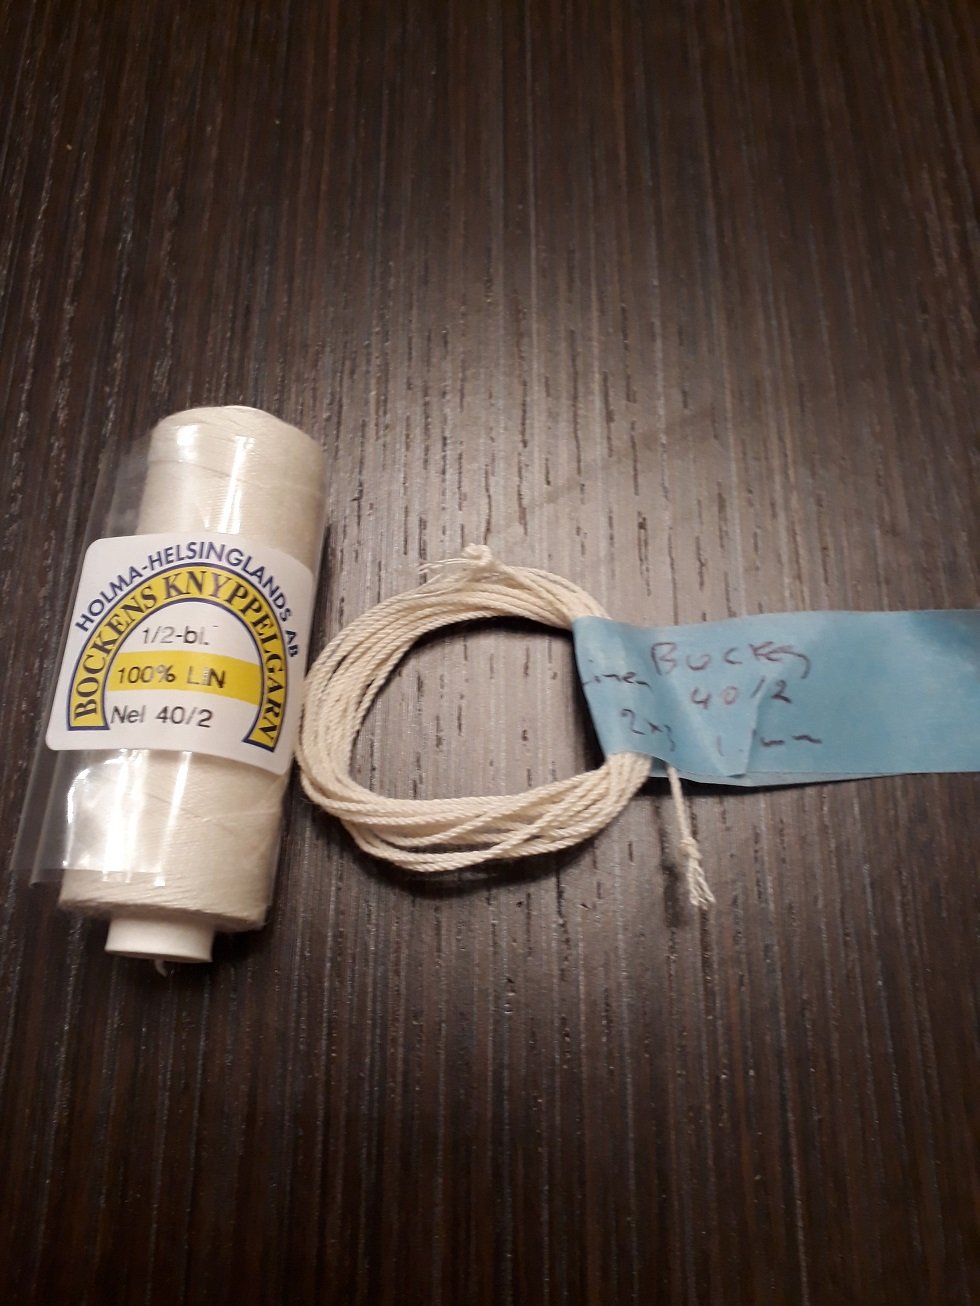
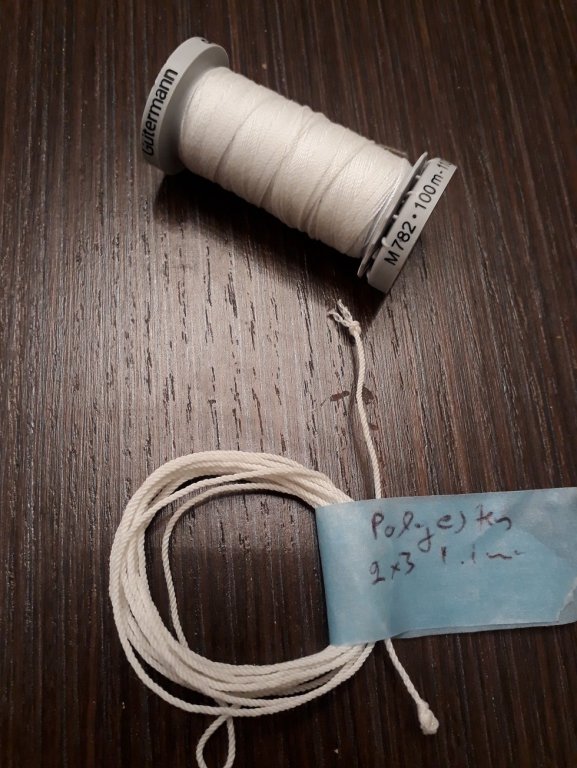
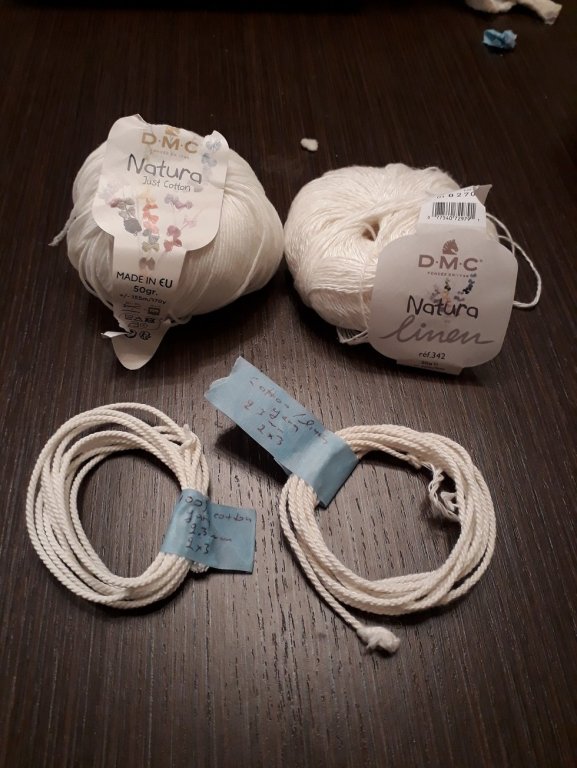
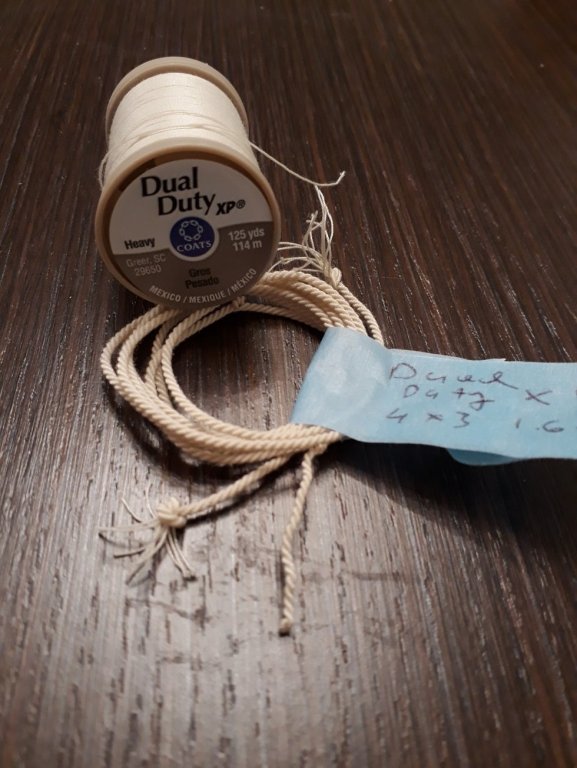
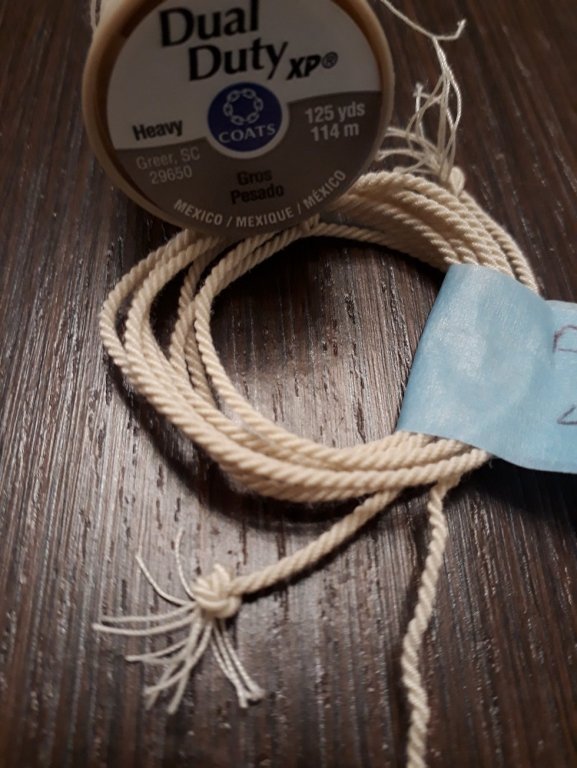
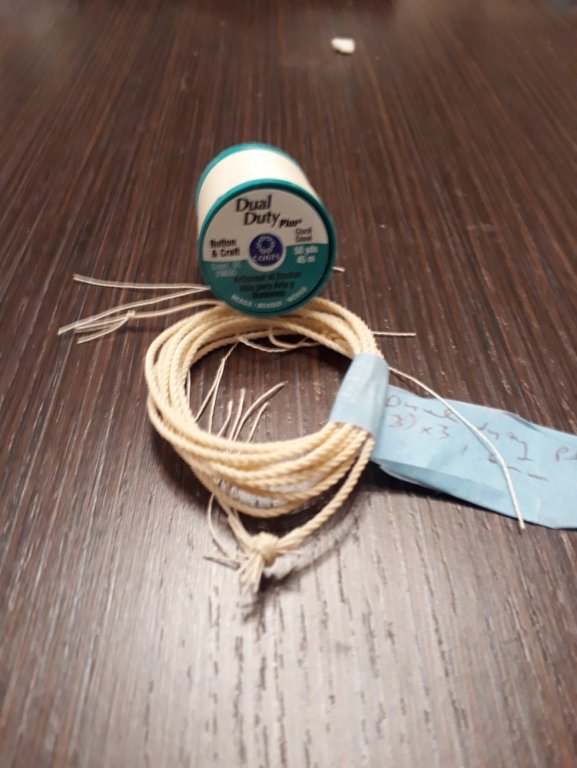
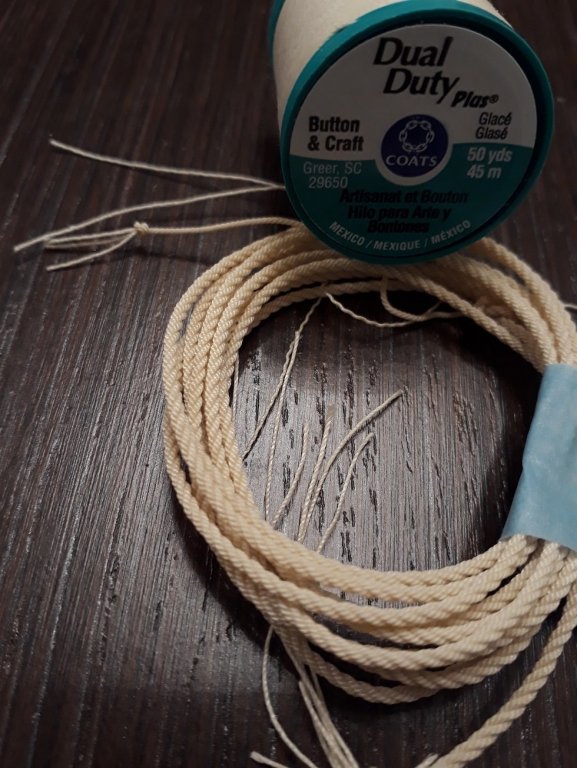
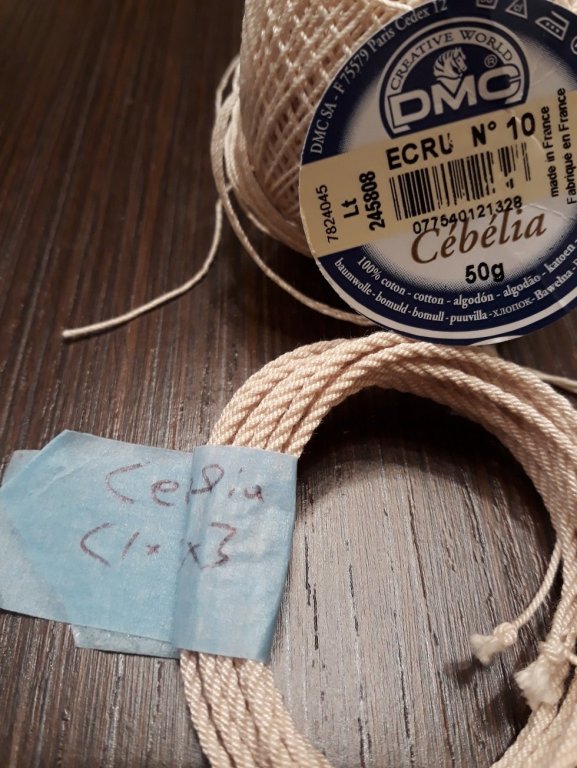
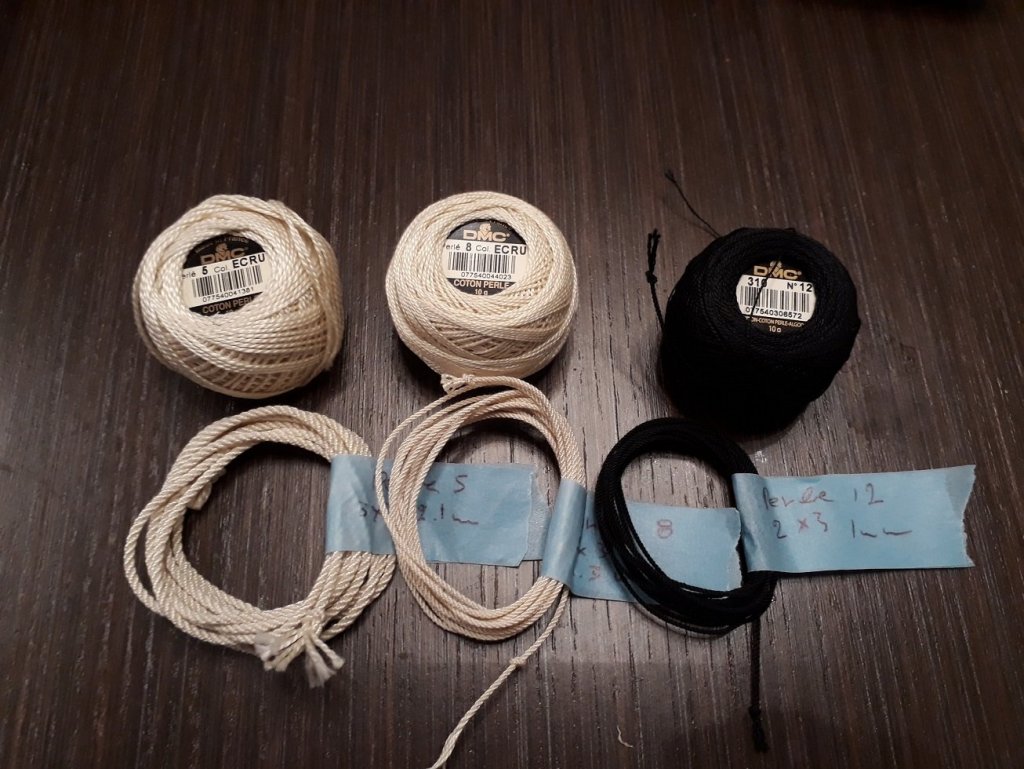
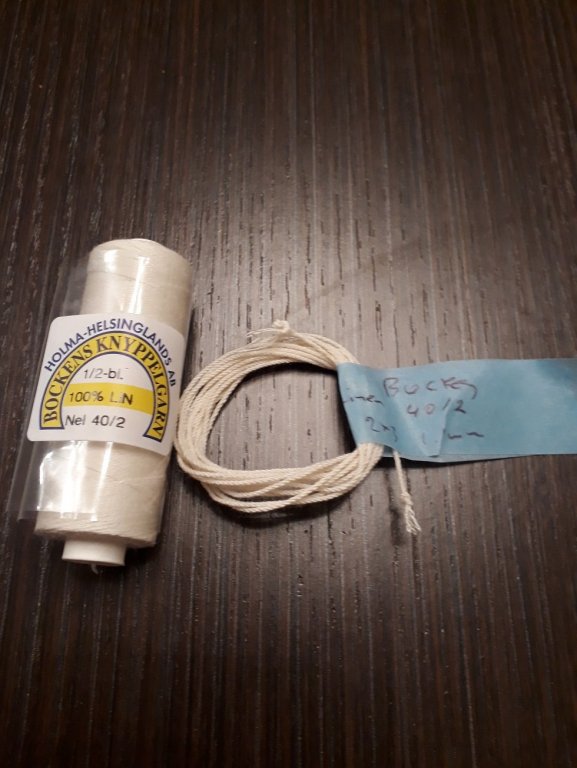
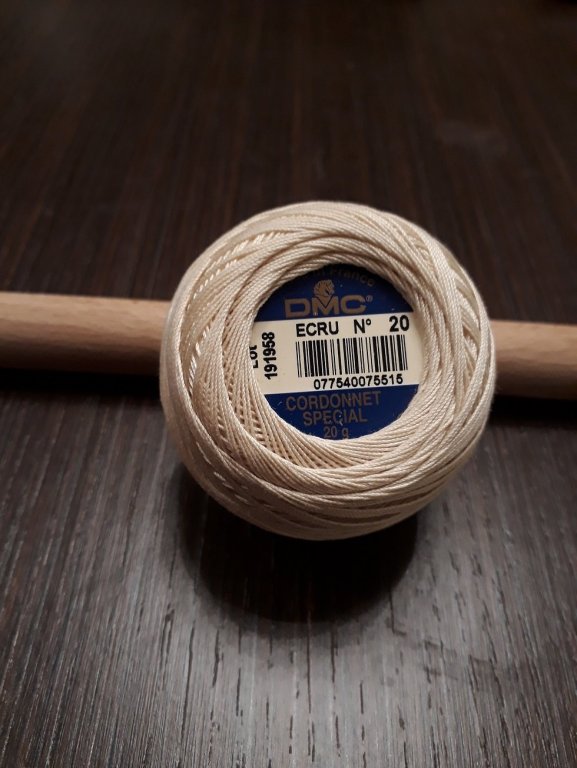
Maybe it would be useful to others to also post my results with rope making. I ve been using my home made ropewalk and have made lots of rope with DMC cotton. The biggest problem is that it stretches and the rigging loosens up and sags. I am not sure what to do to prevent this. So here it goes: When using 1 thread per strand, the twist of the thread is importand. When using multiple threads, it does not matter. Generally linen is fuzzy, maybe it can be burned with alcohol flame, maybe worth it if t does not stretch. 1. Cotolin, 60% cotton, 40% linen, 22/2, left twist. Very nice, supple, much less knots than the usual linen. Quite fuzzy though. 3 strands, 3 threads per strand, 1.9 mm rope 2. Gutermann extra strong 100% polyester. Right twist. Creates a rope with a very "plastic" feel, not nice. 2x3, 1.1 mm rope 3. DMC yarn Left: 100% cotton, No twist, very nice thread and very nice rope, 2x3, 2.3 mm rope Right, 50% linen, 50% cotton, not as sharp as it is fuzzy, no twist, 2x2, 2.3 mm rope 4. Coats Dual Duty XP, 100% polyester, right twist. Despite being polyester, it made an acceptable rope which probably will not stretch. Just a touch fuzzy, barely noticeable. 4x3, 1.6 mm rope. 5. Coats Dual Duty Plus. 75% polyester, 25% cotton, right twist. I had high hopes for this thread but it produced a rope with a plastic feel, not very nice. Left twist. (1x3)x3, 1.6 mm. 6. DMC Cebelia, 100% cotton, right twist. Wonderful like all DMC threads, excellent rope but the other DMC threads probably more useful sizes. Available in 10 weight that Cordonet is not. (1x3)x3, 2 mm rope. 7. DMC Perle. 100% cotton, beautiful thread, no fuzz, left twist. Sizes 3 to 12, lots of colours. Excellent rope. This is my favourite thread for the scale I work (1:10). Perle 5, 3x3, 2.1 mm Perle 8, 3x3, 1.3 mm Perle 12, 3x3, 1mm 8. Bockens 40/2, 100% linen. Left twist. Fuzzy like all linen threads, also quite a few knots. Not as good as cotton but maybe it does not stretch. 2x3, 1.1 mm rope 9. DMC Cordonet. 100% cotton, wonderful thread. Right twist, sizes from 100 weight to 20 weight. The 10 weight size has been dropped. Excellent for small ropes and small scale work. I could not find a rope in my stash but it is excellent. I suspect that the best thread may actually be some synthetic high tech one but these are usually available only commercially and in in huge quantities so unlikely we will be able to find out, test and obtain. If someone has a tip on how to avoid the stretching of cotton ropes I would be very interested. Regards Vaddoc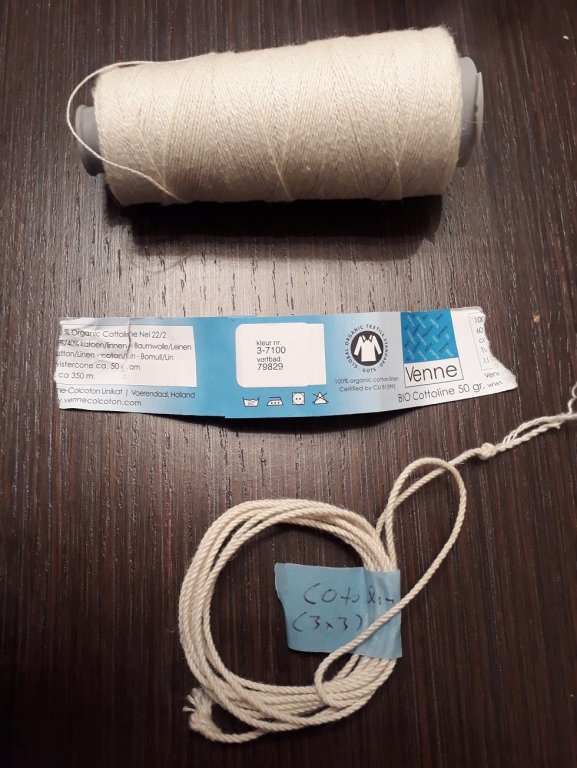


- 42 replies
-
- 4
-
-
- ropewalk
- rope rocket
- (and 1 more)
-
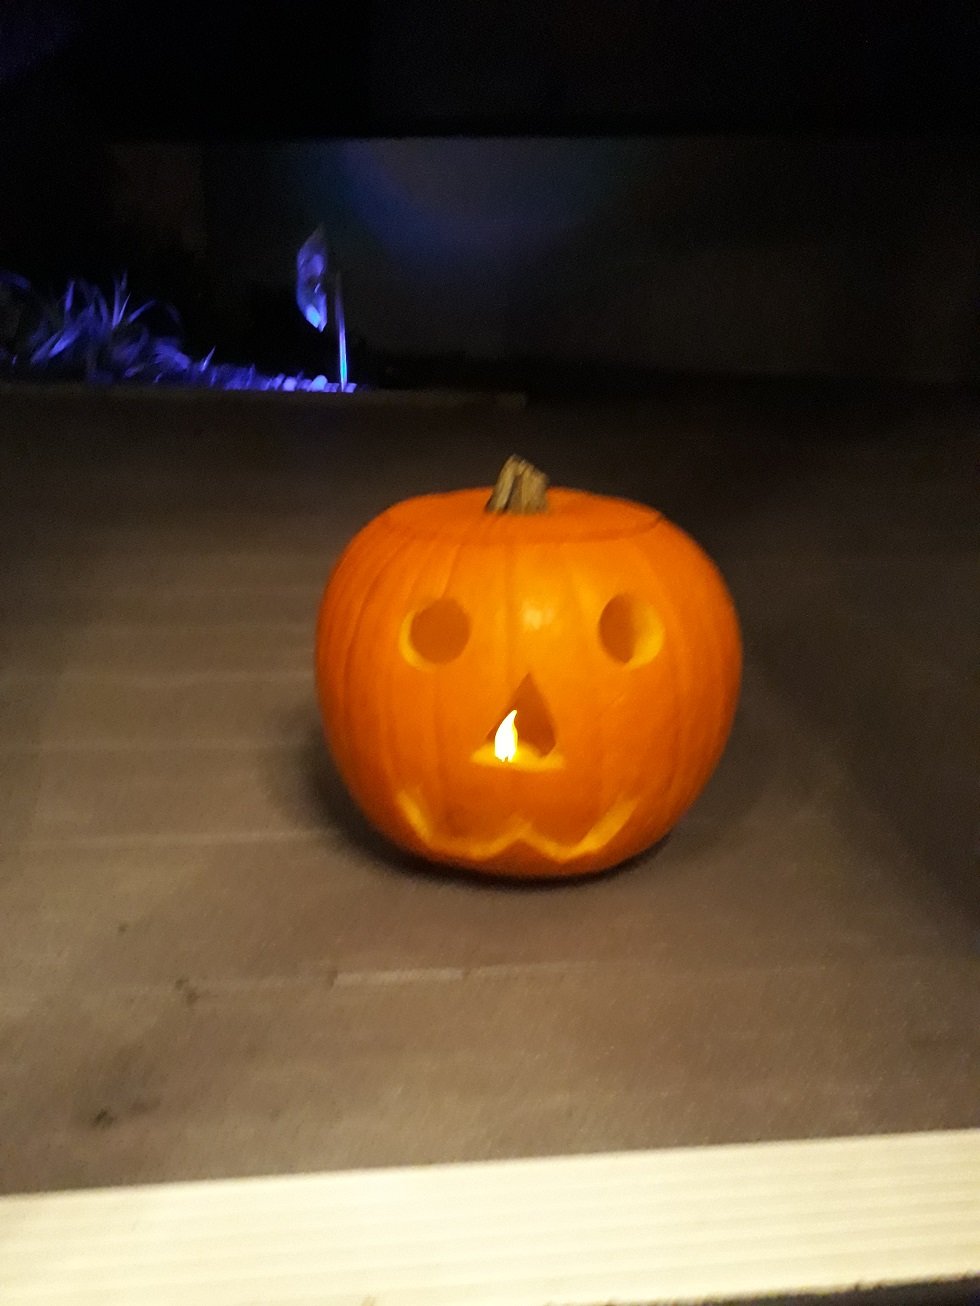
Many thanks Mark, I cannot find any info on rope sizes so your advise/experience is valuable. Druxey, spot on! I deepened the grooves and there was a massive difference. I still have problems with the bearing at the weight end of the ropewalk, it does not spin freely. I need to work on this. I have been making ropes for a few days now testing threads and sizes and I will post the results in a separate thread. I wrapped it up for today though, as I made a Halloween pumpkin with my daughters! I have ordered a few more threads and I will make a few more test ropes this week.


-
Ropewalk
vaddoc replied to Worldway's topic in Rope Making/Ropewalks's Rope Materials and parts resources
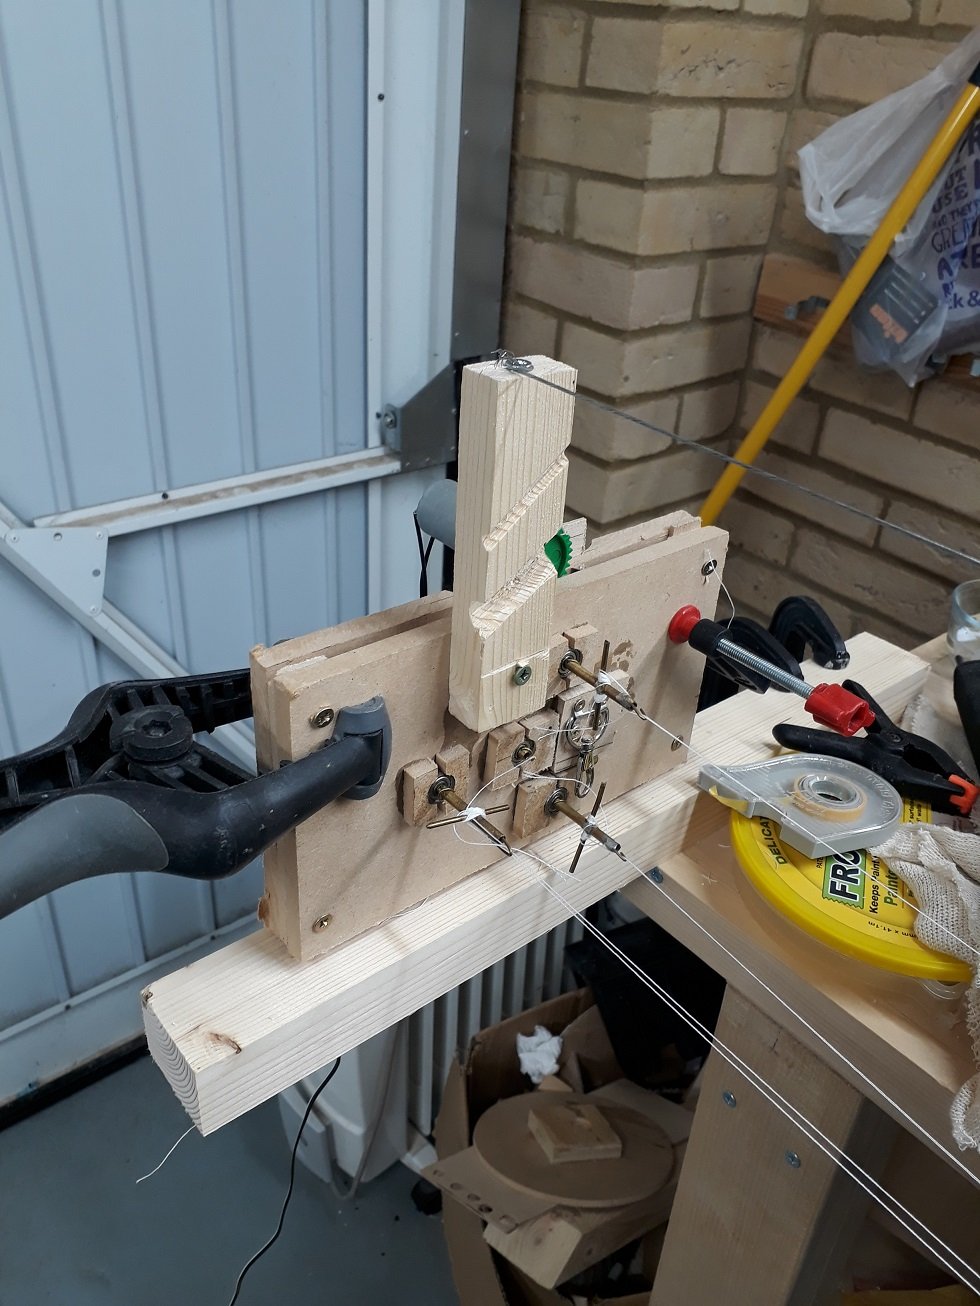
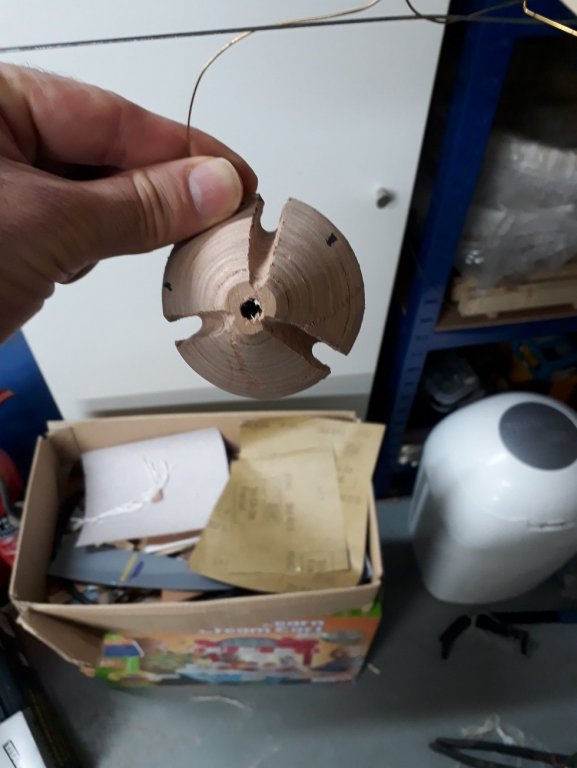
It is very easy and very cheap to make a rope walk by using whatever left over materials that are lying about and a few bits from ebay, like cogs and a motor. But it does need a fair bit of space, the rope machines available commercially are much more compact. My set up is in the photos bellow, theoretically I can make rope of any length but I am limited by the length of my garage so I get lengths of about 2 meters. Not elegant but very robust, it still goes strong after 5 years. It cost me something like £10 but many hours of work: rope making is very satisfying but time consuming. I think it produces good rope and I can make adjustments to improve the quality. This is an old video, I've since changed the cog for a proper cone. I will need lots of rope soon so I set it up last week to play a bit. It is probably more time and even cost efficient to buy Chuck's wonderful rope but I really like rope making, it is a bit of an art!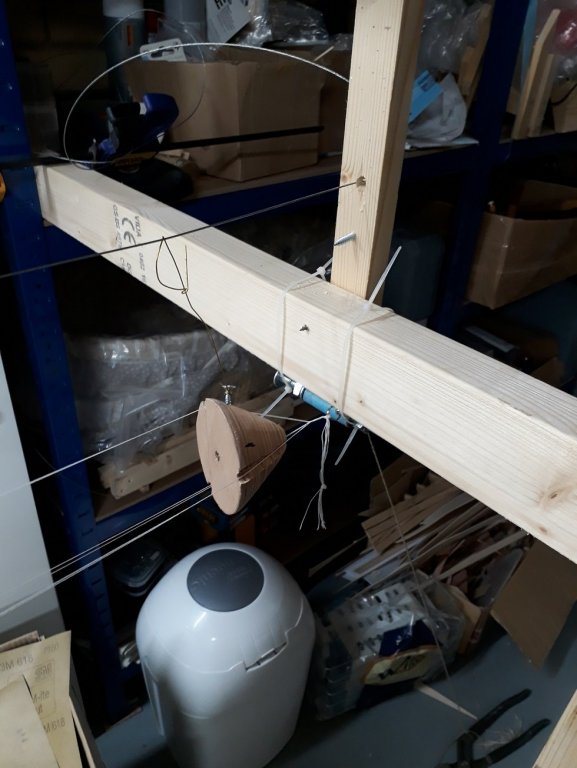


-
Mark, this is exactly what I am searching (guessing is a more appropriate word). I think 2 mm for shrouds, 14 mm and 10 mm for bowsprit, up to 12 mm for all other ropes. No idea if this is correct for this boat in 1:10 scale! I ll put three pairs of shrouds and spreaders. A bit of an overkill but I just want lots of ropes! Vaddoc
-
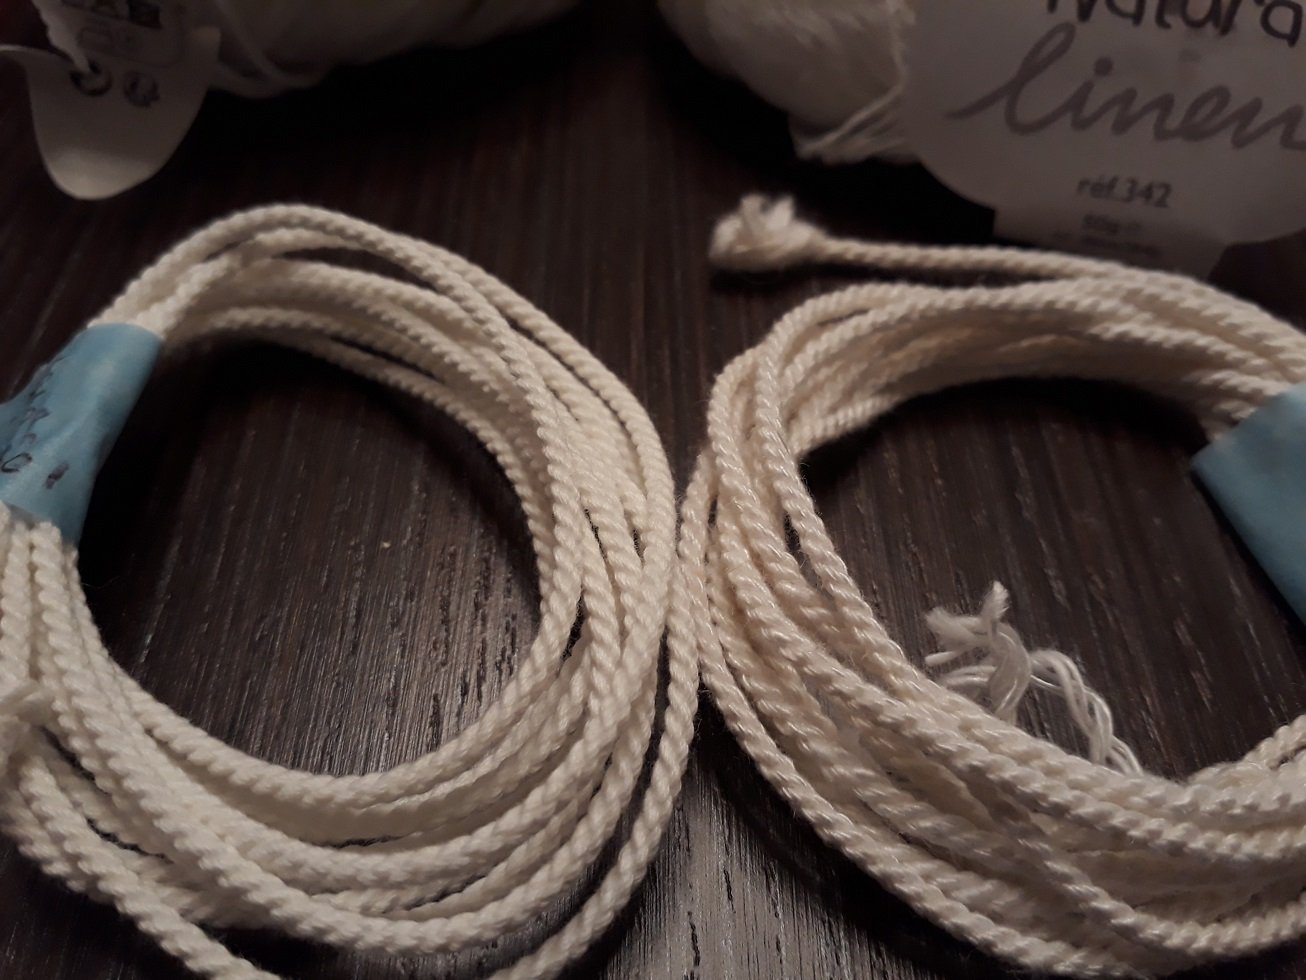
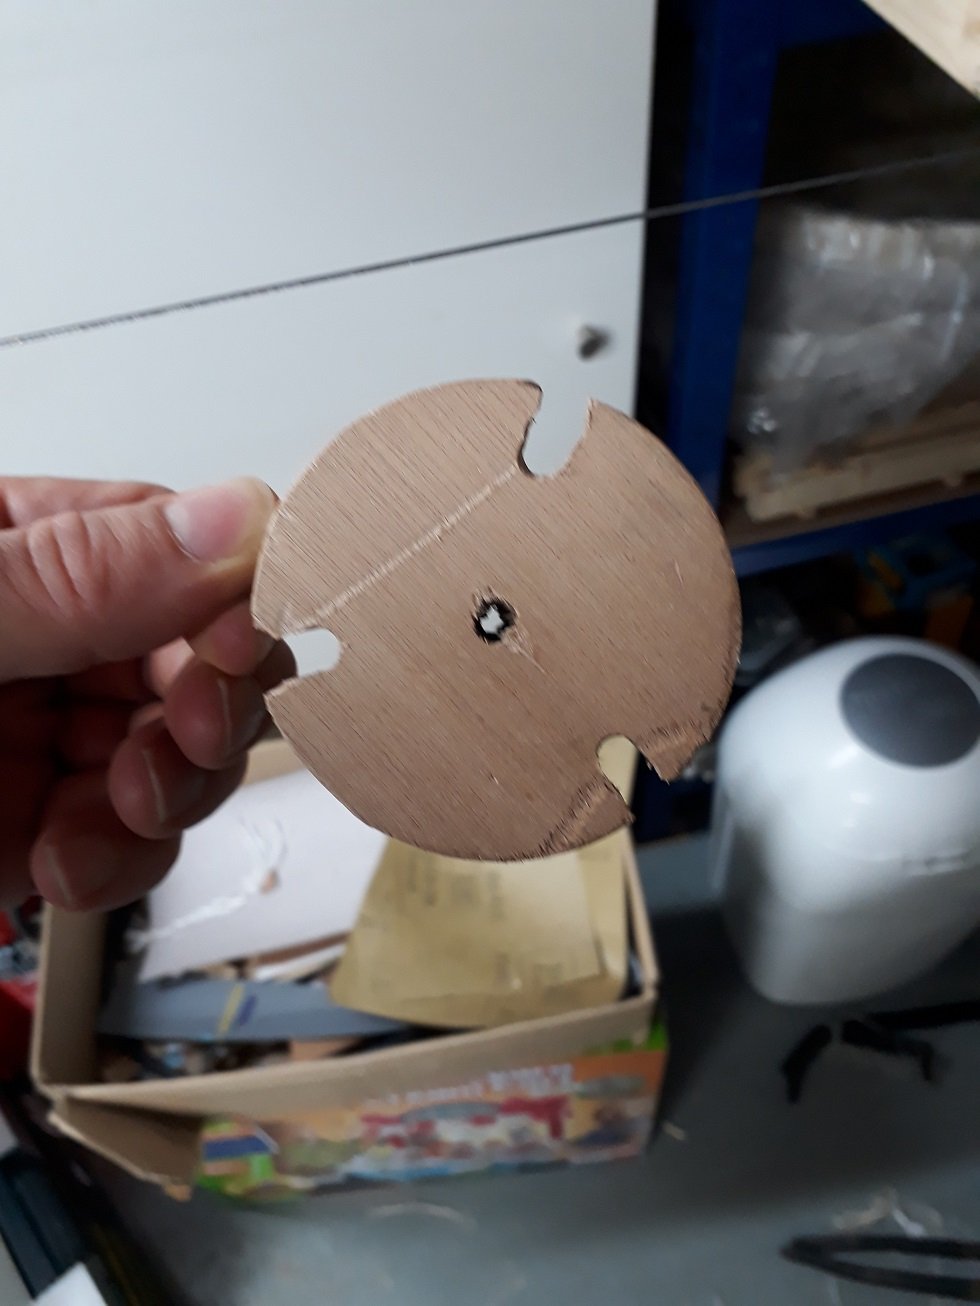
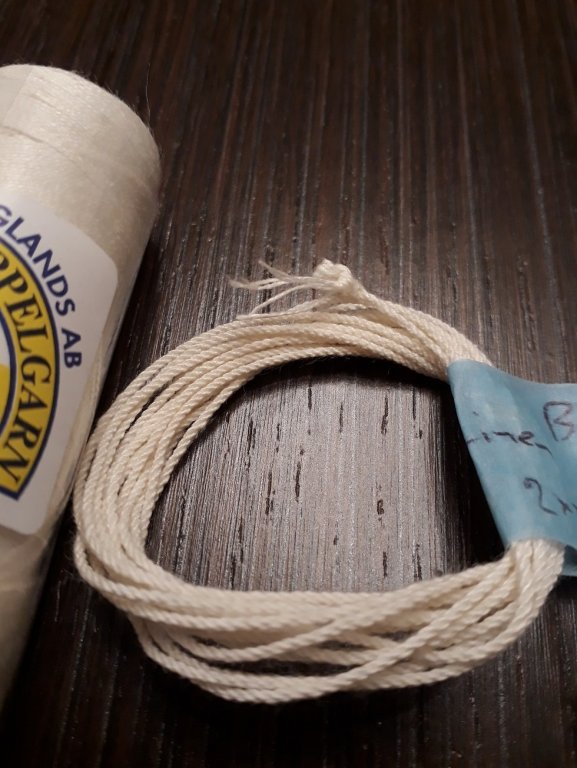
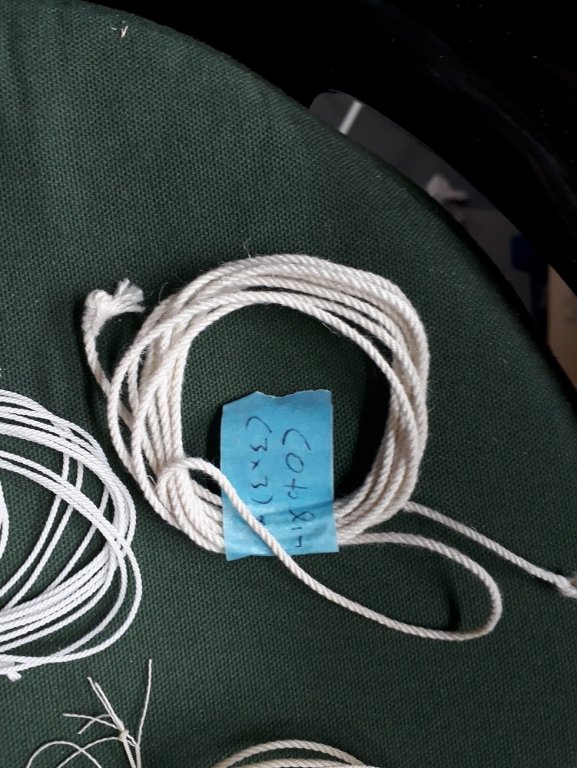
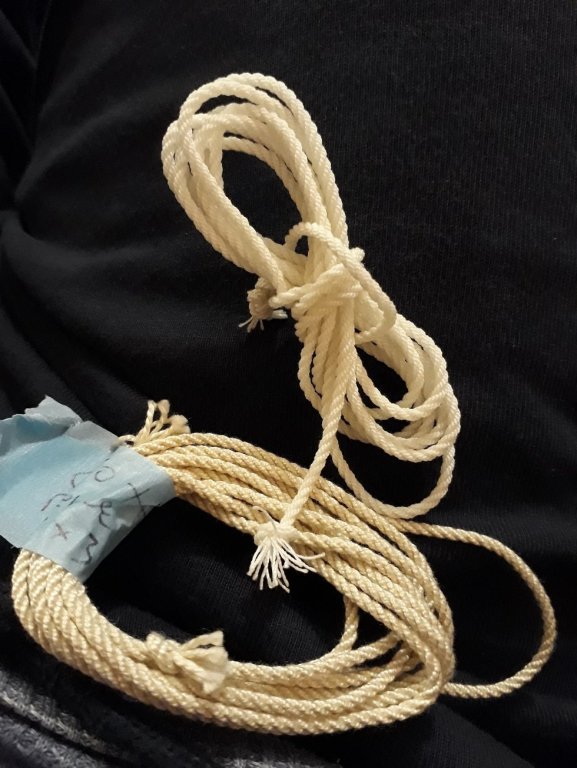
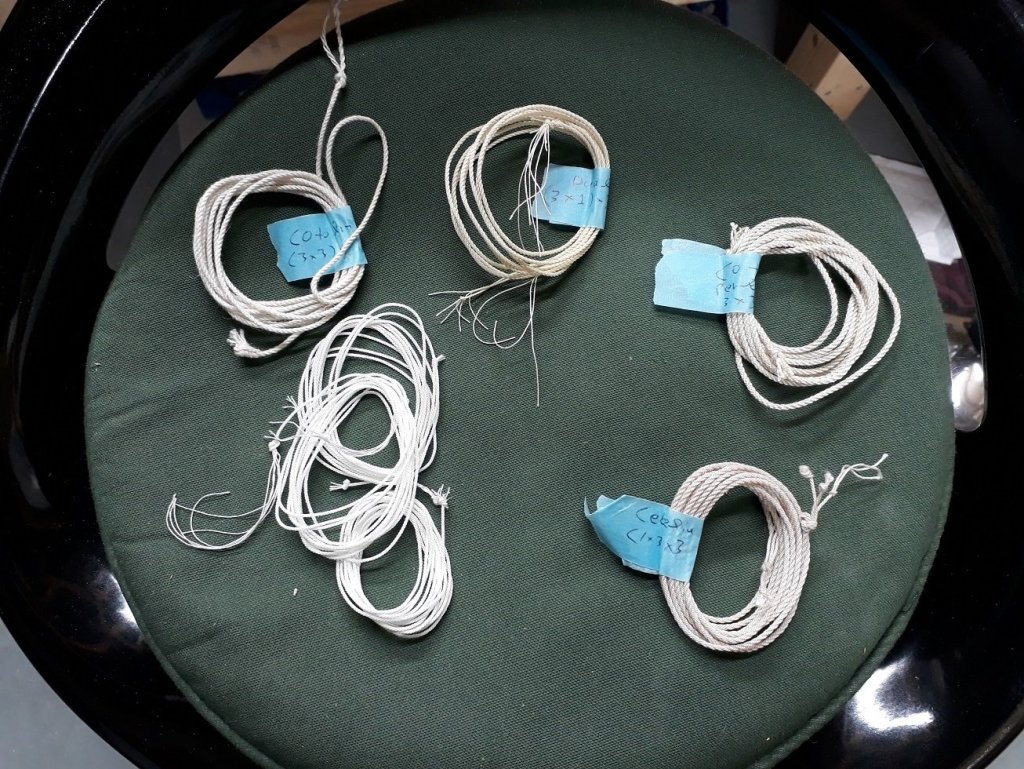
Dear all It is rope making time! I decided to take a break from boat building and make some rope. I put together my rope walk and got to work. There were two weak points in my set up , one the plastic cog I was using for a cone, the other the bearing thingy that allows the rope to rotate. I cut and laminated discs from cheap lite plywood and with lots of sanding and milling I produced a passable cone. I have not found a good solution for the bearing thingy. The following photos show my set up, I can produce rope up to 2.5, maybe 3 meters long. I will also reveal my secret settings: for 3 yarn rope, I use just the plumber's tool as weight. For 3 strand rope, I add the hammer! I can produce pretty good rope, the problem is what thread to use. I ve searched the forum and the net and this seems to be a common query, not really answered well. I have tried all DMC varieties, Bockens linen and I ordered some more threads. I still have not found one that I really like. Cotton produces very nice rope but for the scale I work at, if produced by three strands it is very stiff. It can be more flexible if produced from multiple yarns. The biggest problem though is that it stretches, in my previous boat the shrouds were sagging a few days after all the lanyards were properly tightened. These are a few test ropes I made: The upper left is cottolin, a blend of cotton and linen fibers. It feels great and soft but is fuzzy. It may be less stretchy though. The upper one is a coats dual duty XP thread, polyester core with a cotton wrap. Nothing too exciting. The one in the upper right is DMC cotton perle, I think the best of them all but it does stretch. The bottom right is DMC Cebelia, pretty good, same as DMC Cordonet (not shown). The bottom left is Gutermann polyester extra strong thread. As a thread is very supple and nice, the more it twists though the more plastic it feels. Bellow are 2 mm ropes, 3 strand polyester and 3 yarn DMC Perle. The polyester rope is like cheap hardware store cord. There are many high tech synthetic or part-synthetic threads that are only available for industrial use and I suspect that one of these is the ultimate thread for scale rope that will have the properties of proper rope. It is impossible to find out which one though and even if known, prohibitively expensive to obtain. I got some DMC cotton and cotton/linen fibres (unspun) to try and I may experiment with dying rope as well.


-
Welcome Ab! Your background is most intriguing, great to have you on board. Regards Vaddoc
-
When to paint/stain?
vaddoc replied to Zack Soderquist's topic in Painting, finishing and weathering products and techniques
If you varnish, oil or paint the wood, it will be difficult to glue anything to it. In my current boat, the hull, deck and cabin roof are all painted so everything is nailed on. -
Airbrush vs Brush
vaddoc replied to Zack Soderquist's topic in Painting, finishing and weathering products and techniques
You can't go wrong either way. Only use Tamiya tape or frog tape. I use thinned Valejo with some retarder with good quality brushes. No brush strokes, even when painting very large surfaces. It does take a dozen coats, 15 min between coats for proper coverage. I have a garage turned into a shipyard but I mostly paint in the dining room table as there is no dust and it is always warm. I decided against an airbrush because of the need to buy the equipment, clean the airbrush, learn to set it up and use, mask the area and always paint in the garage. I thought of going airbrush but I got an 1 inch brush so painting large surfaces is now not an issue. For my use it does not worth the trouble. I also enjoy hand brushing! Hand brushing with the modern paints is entirely feasible. Airbrushing can have fantastic results. If you don't mind the chemicals, long waiting times to cure and generally bigger mess, enamels with a hand brush can be great. I am not using it any more though, acrylics are just too easy.


.png.53c1c650367426599dcd09c6b1ea5f39.png)
.png.48df6f10ea4547bb853c86494dcc0dd7.png)
.png.903eb545610c125677f90115706dd222.png)