.jpg.f26acc9a74319261612561bfa7da1303.jpg)
vaddoc
-
Posts
1,605 -
Joined
-
Last visited
Content Type
Profiles
Forums
Gallery
Events
Everything posted by vaddoc
-
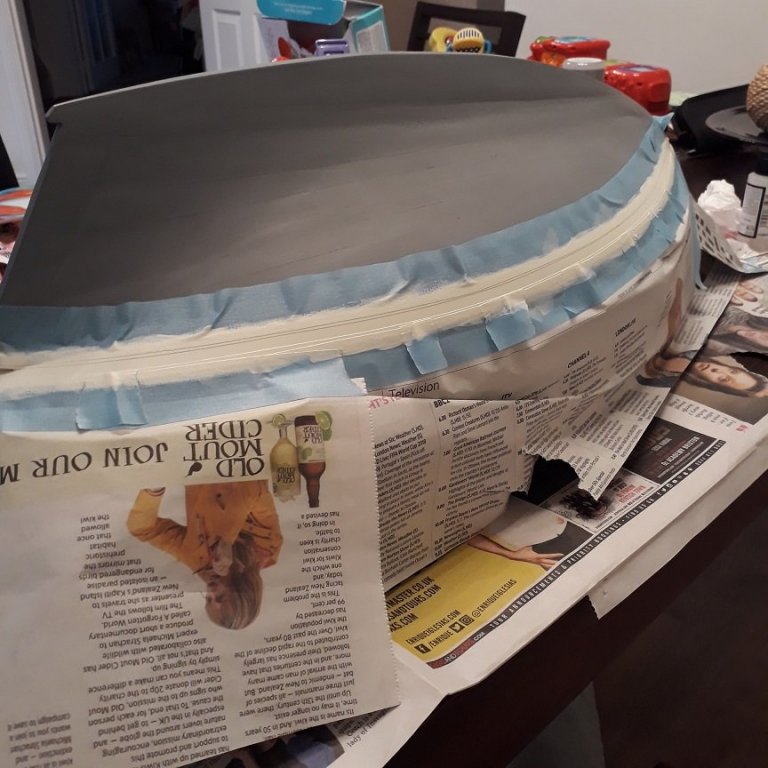
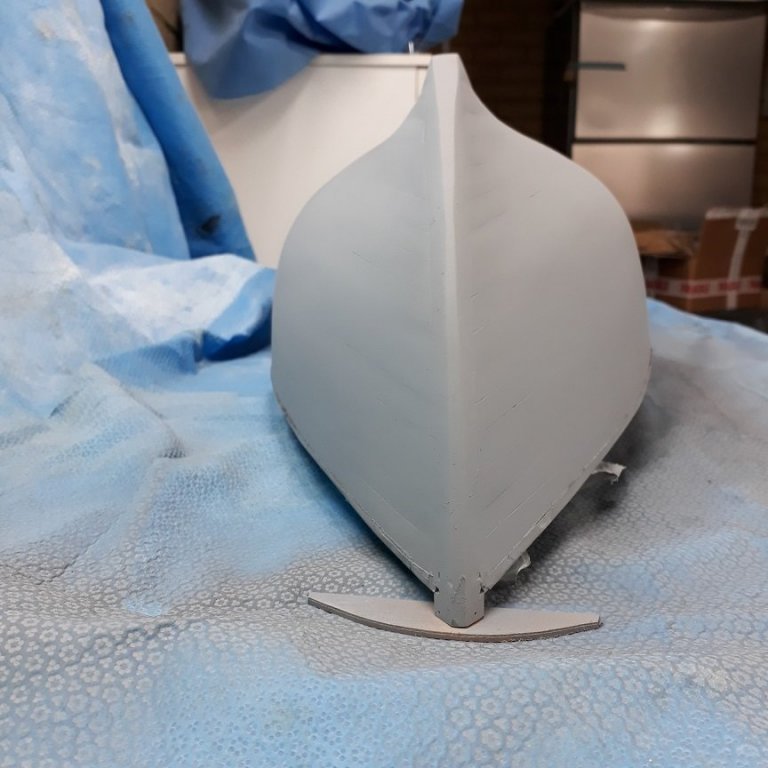
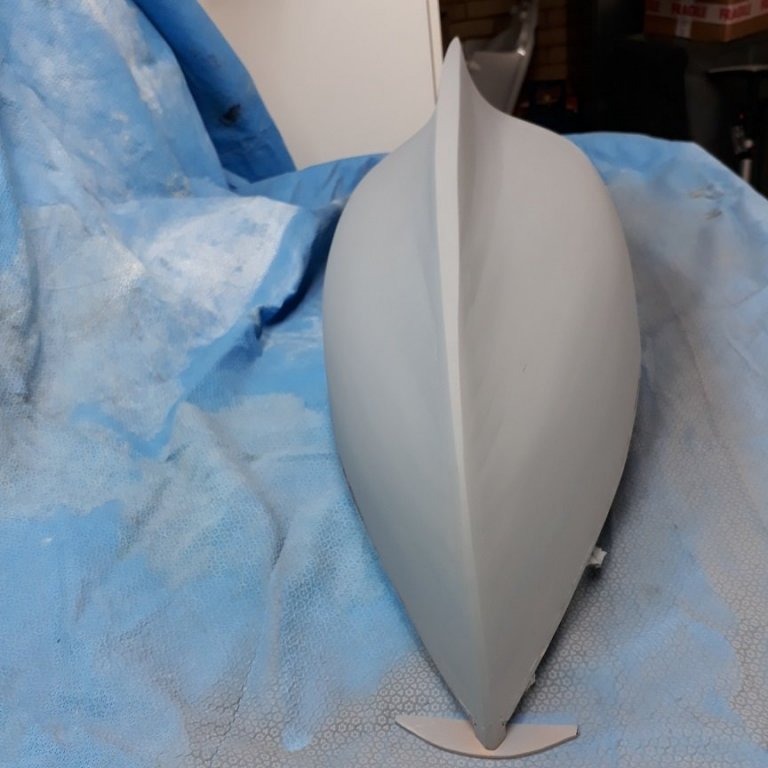
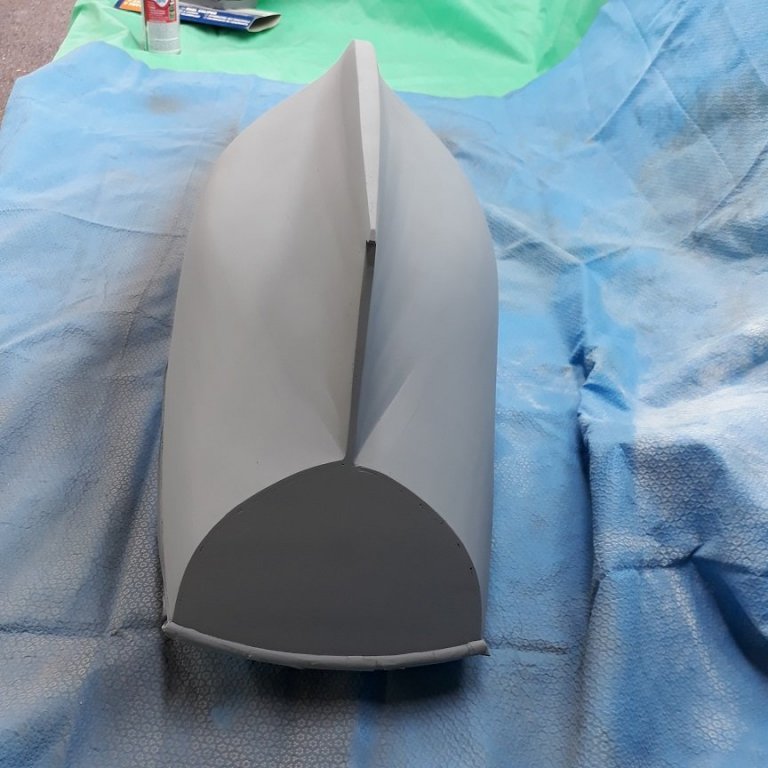
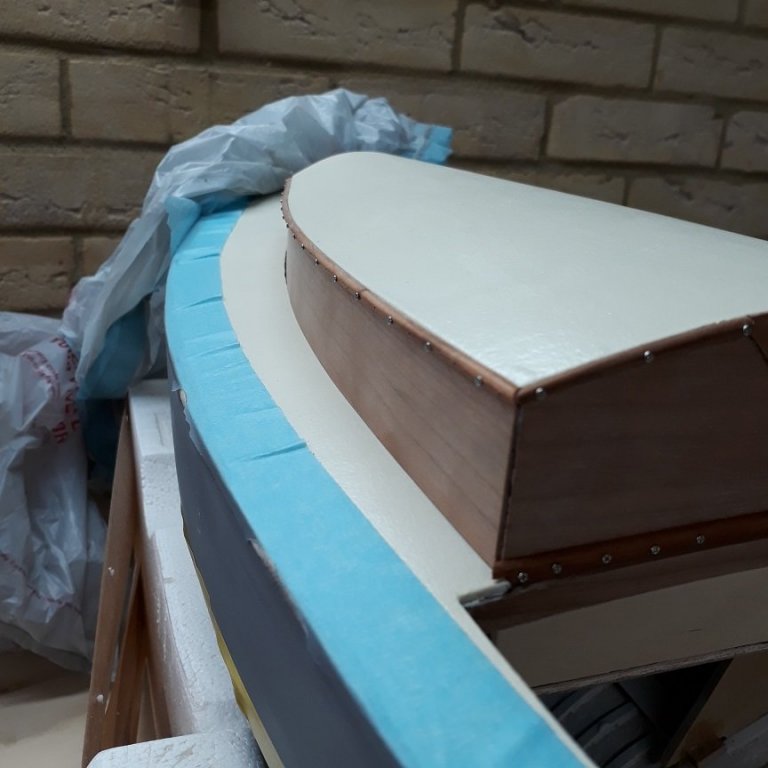
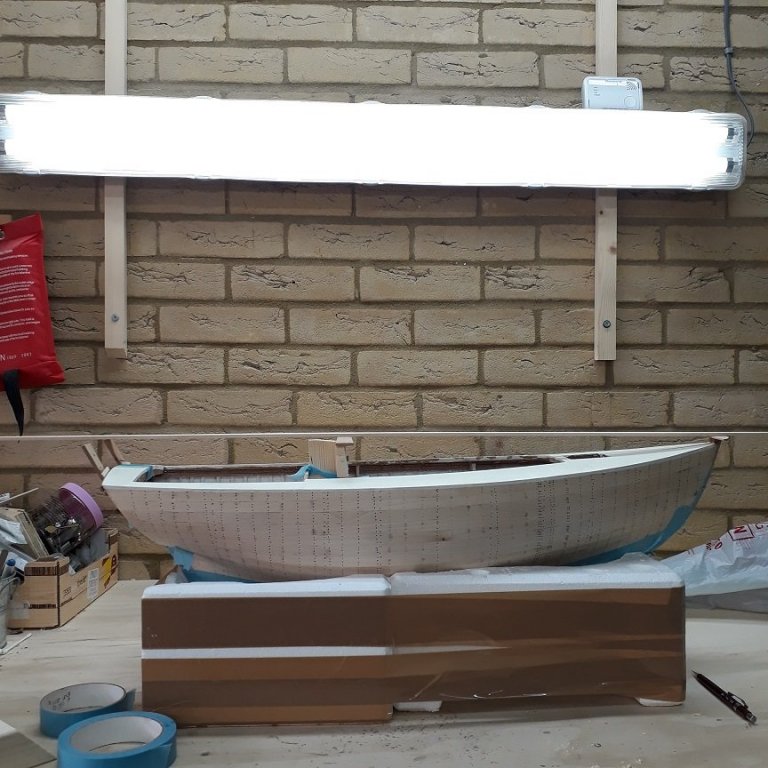
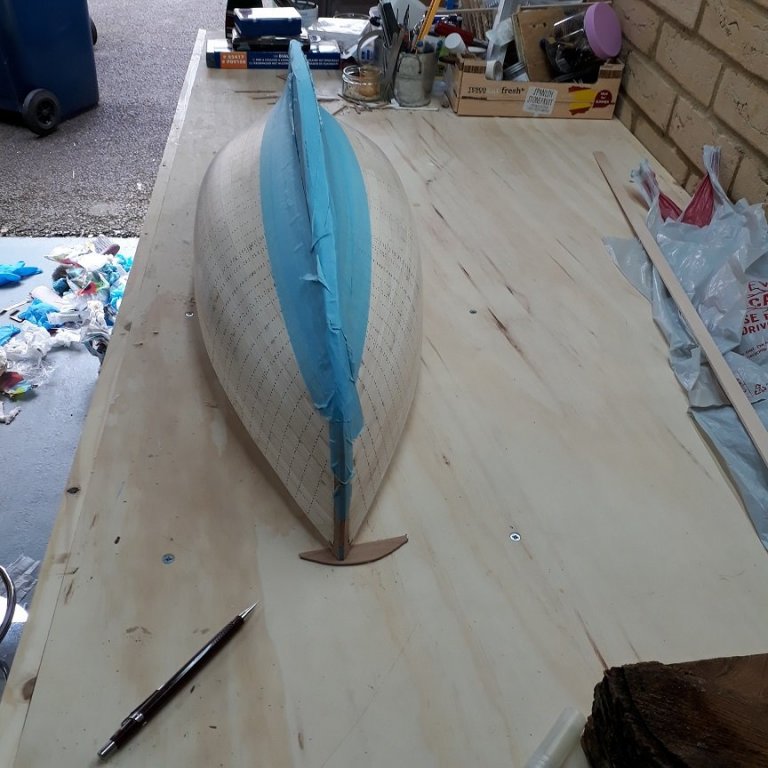
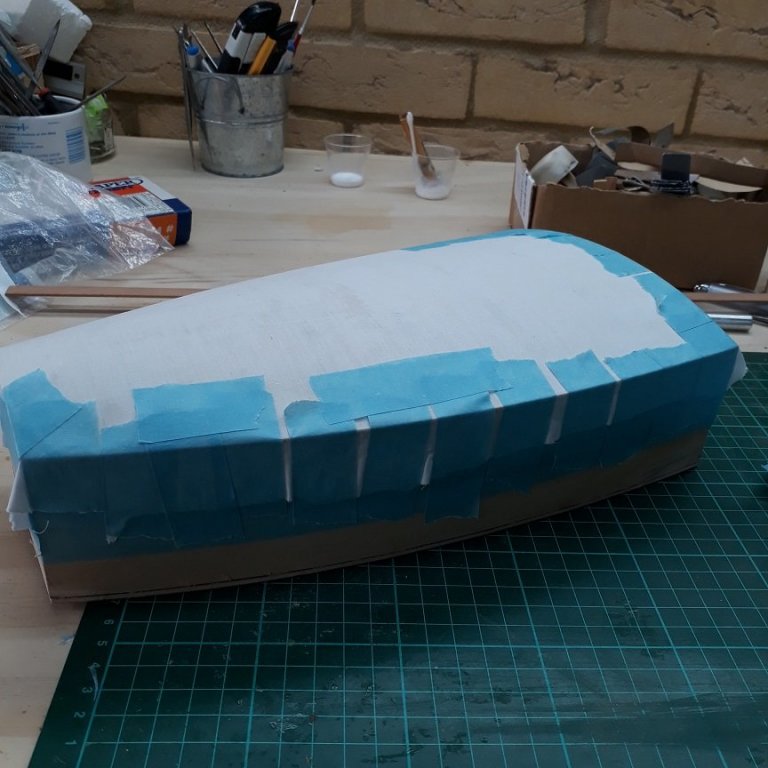
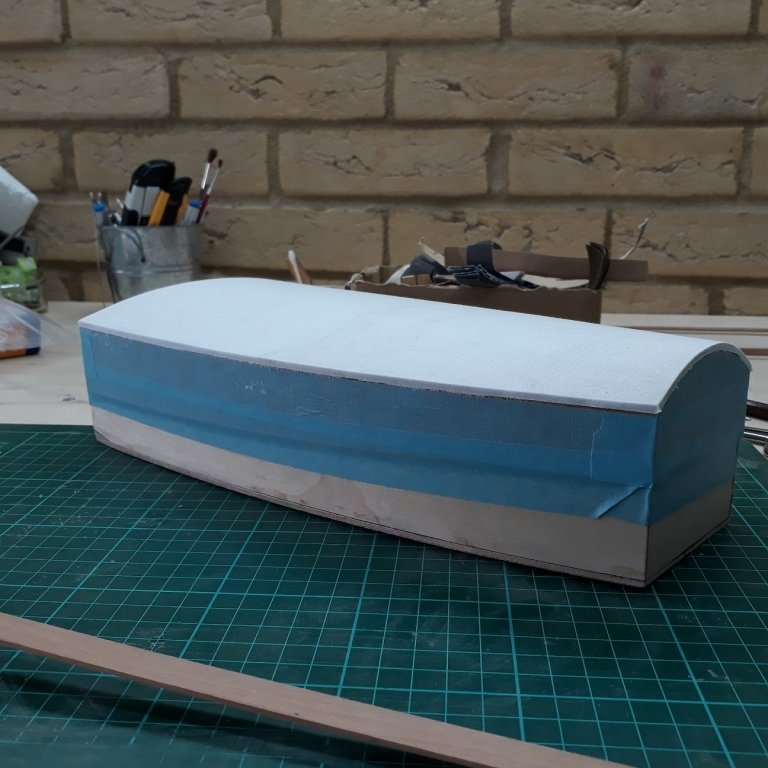
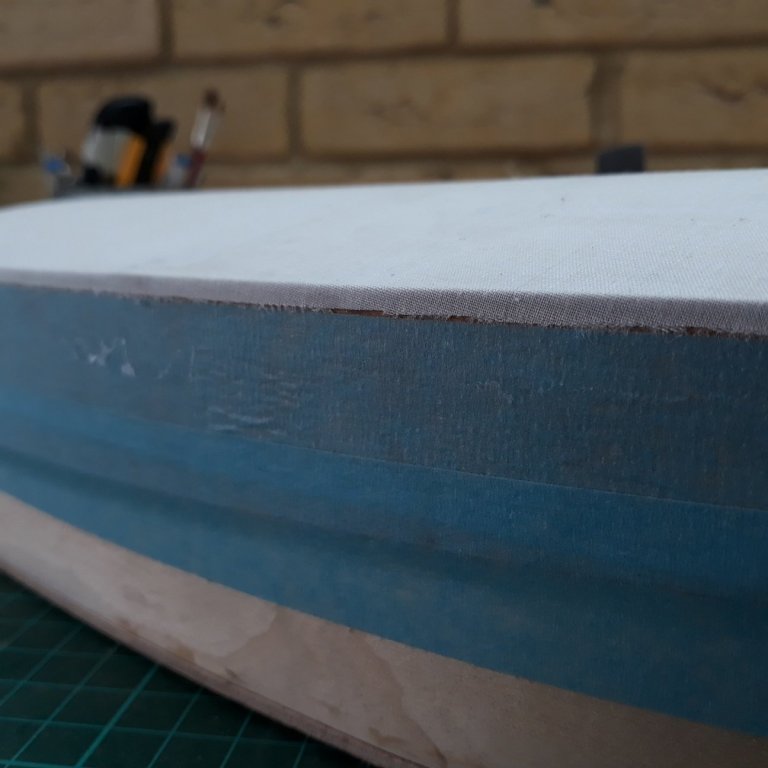
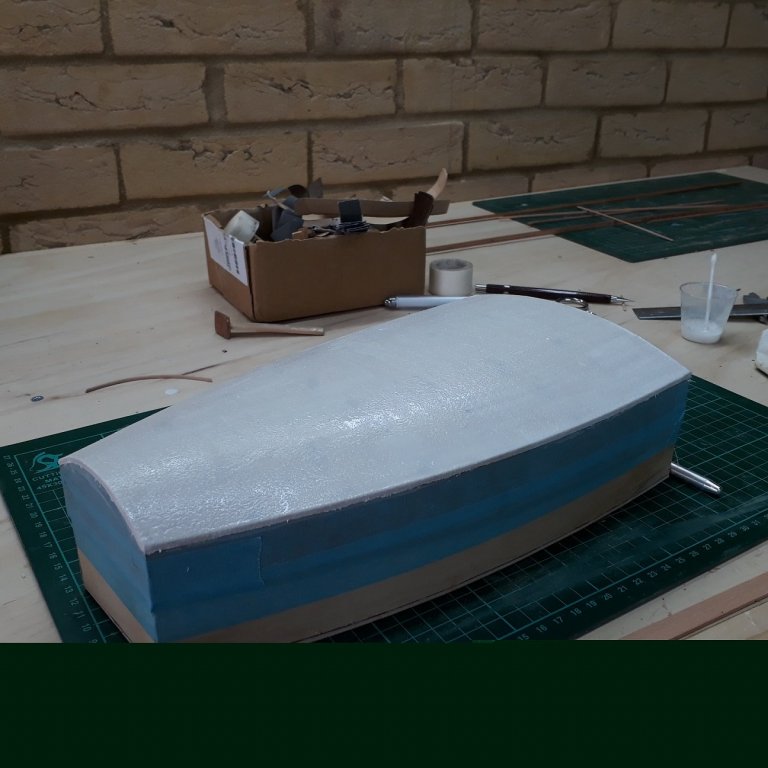
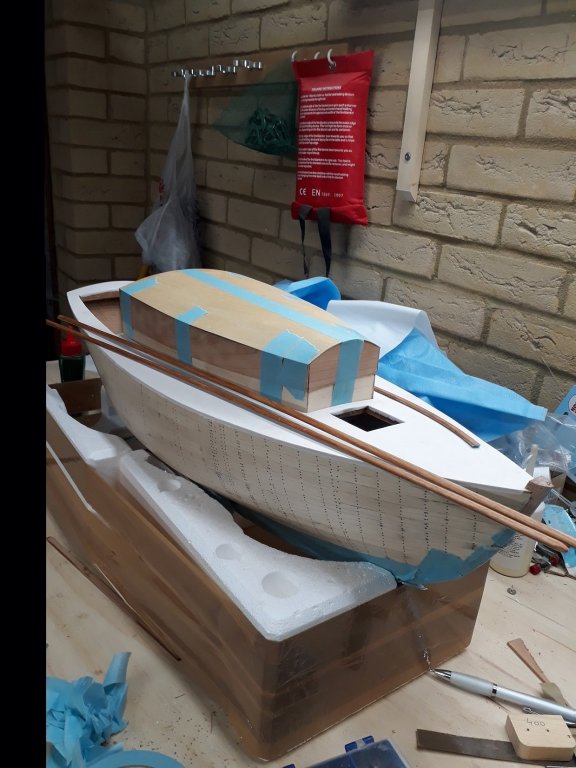
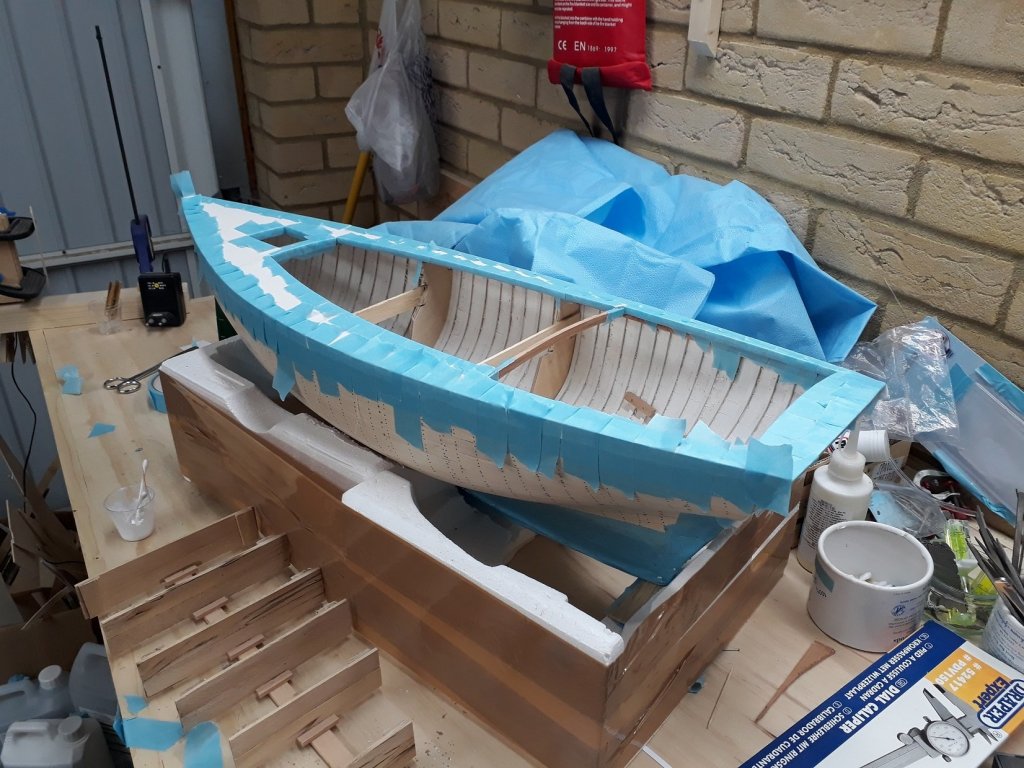
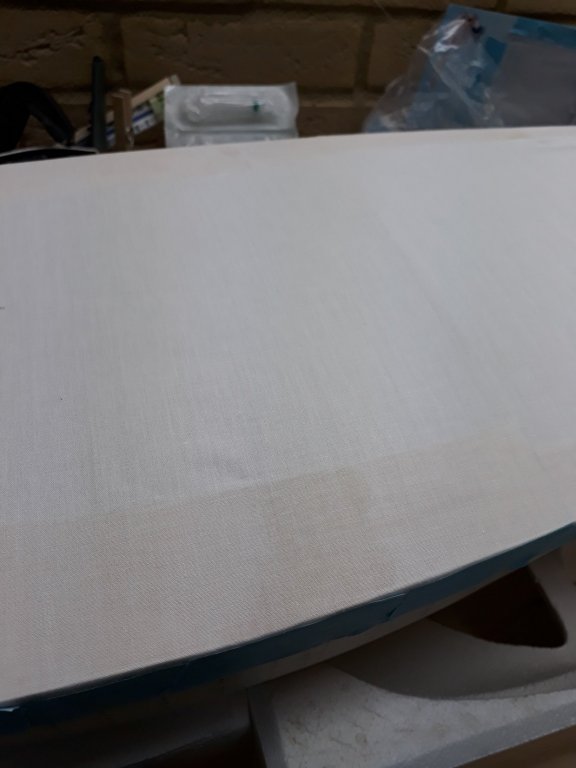
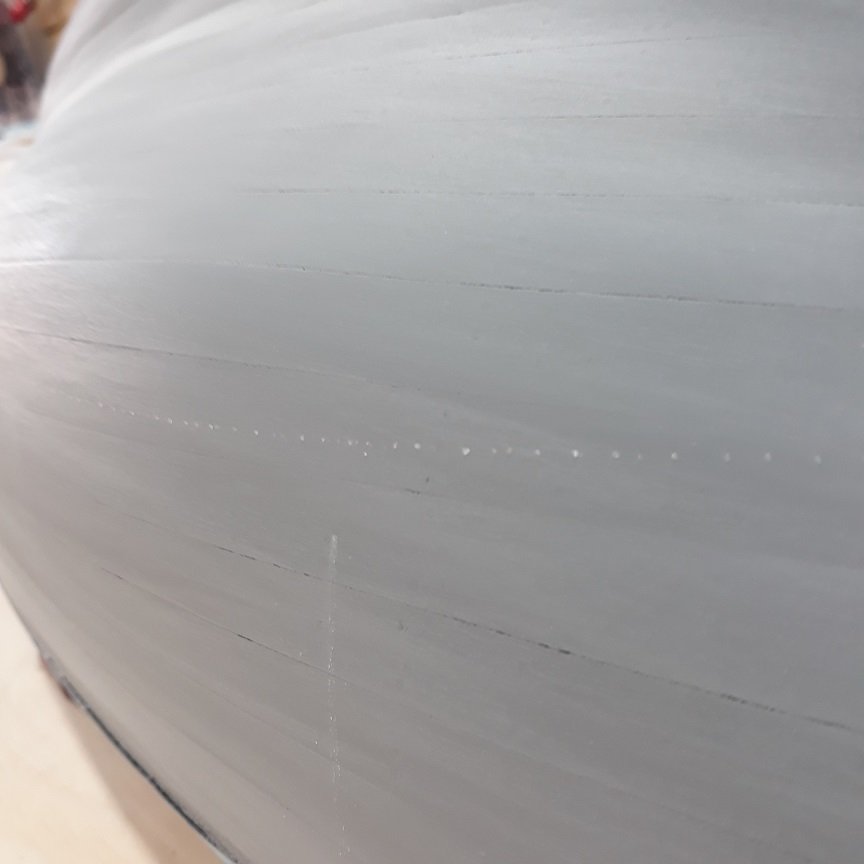
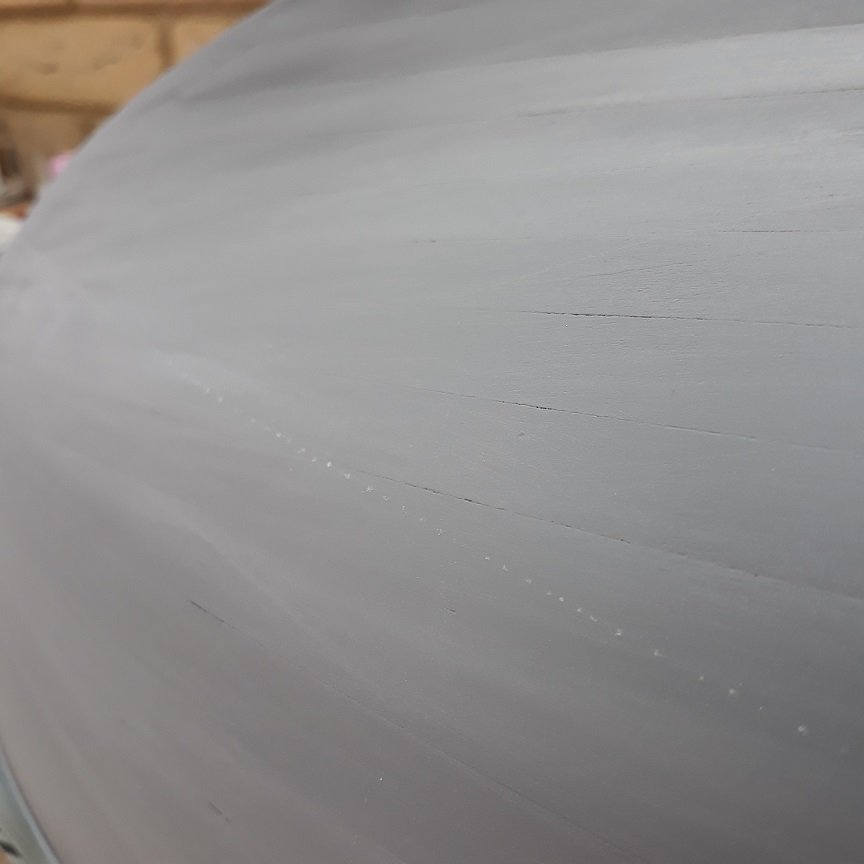
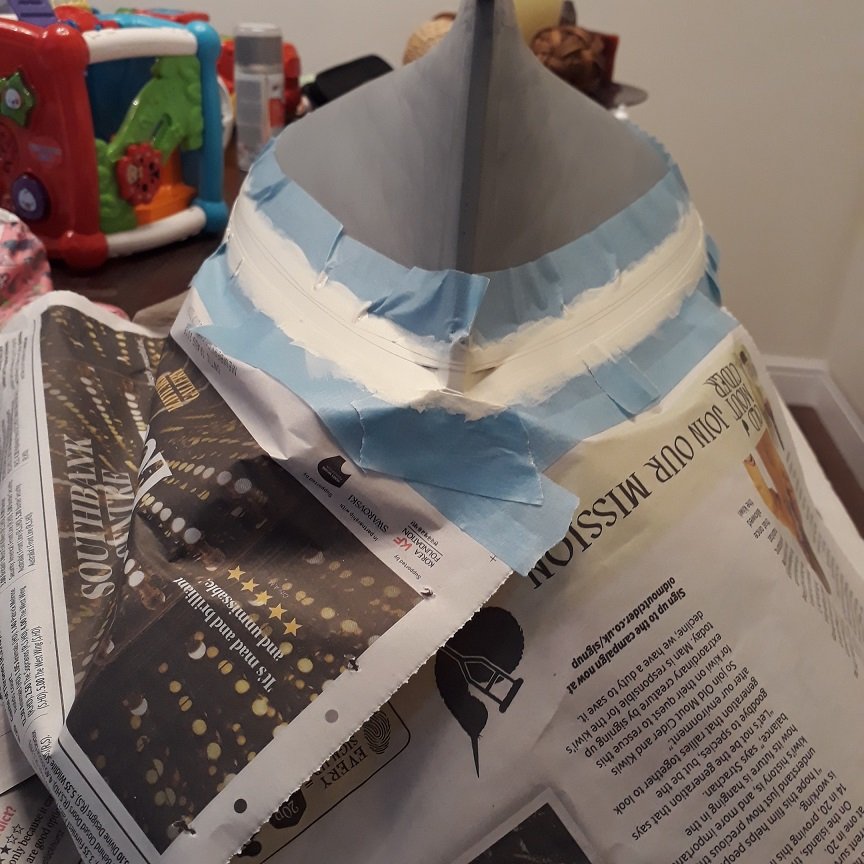
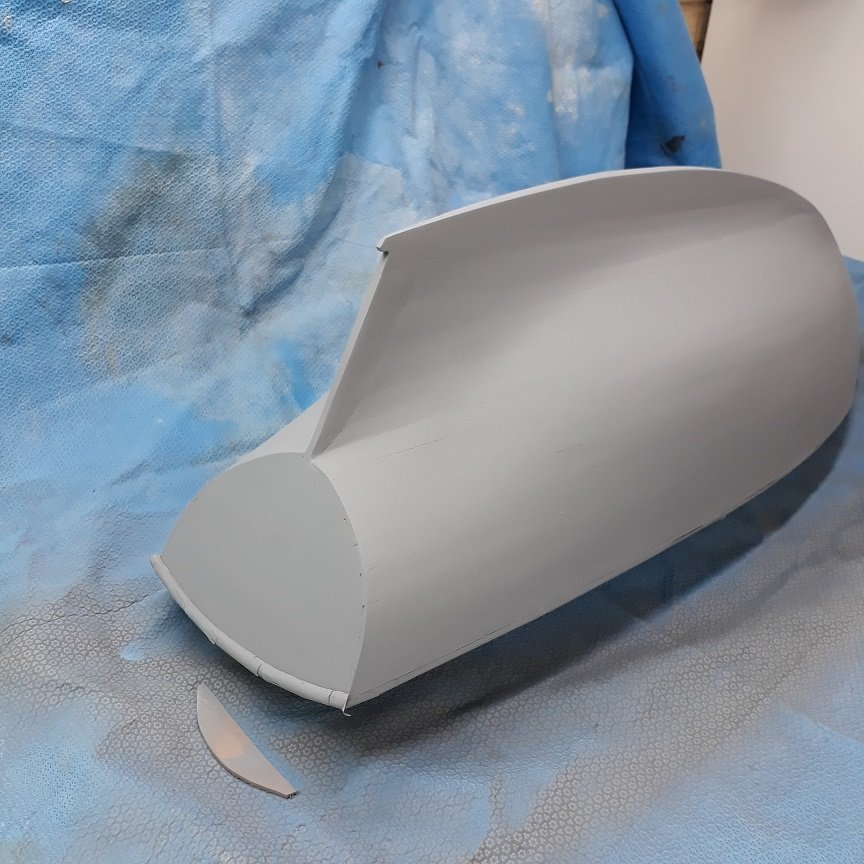
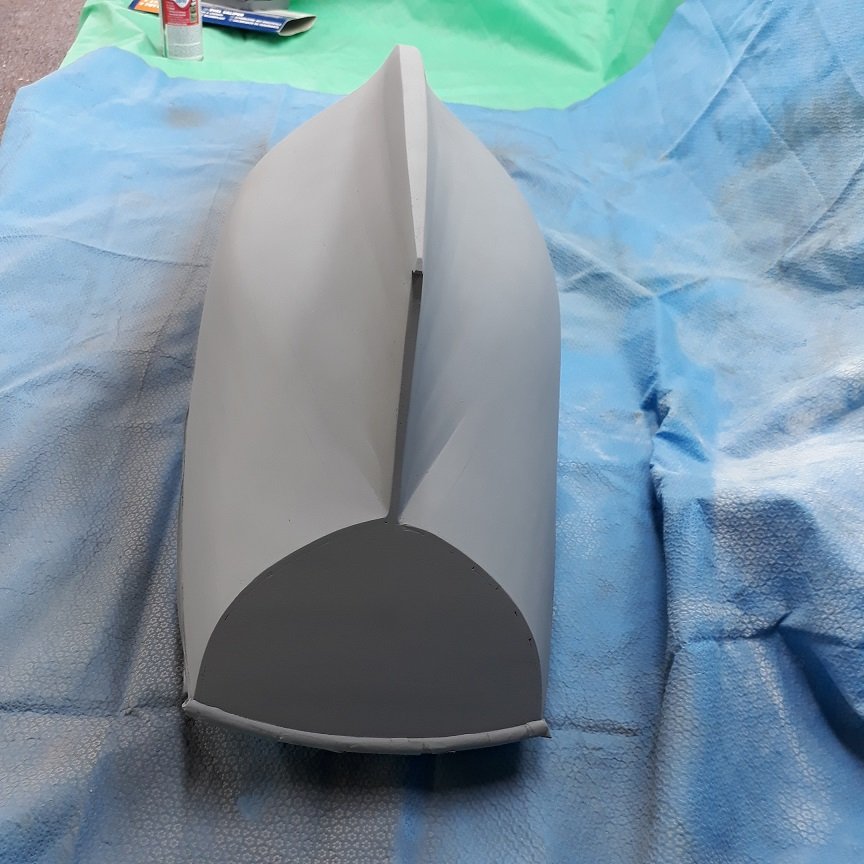
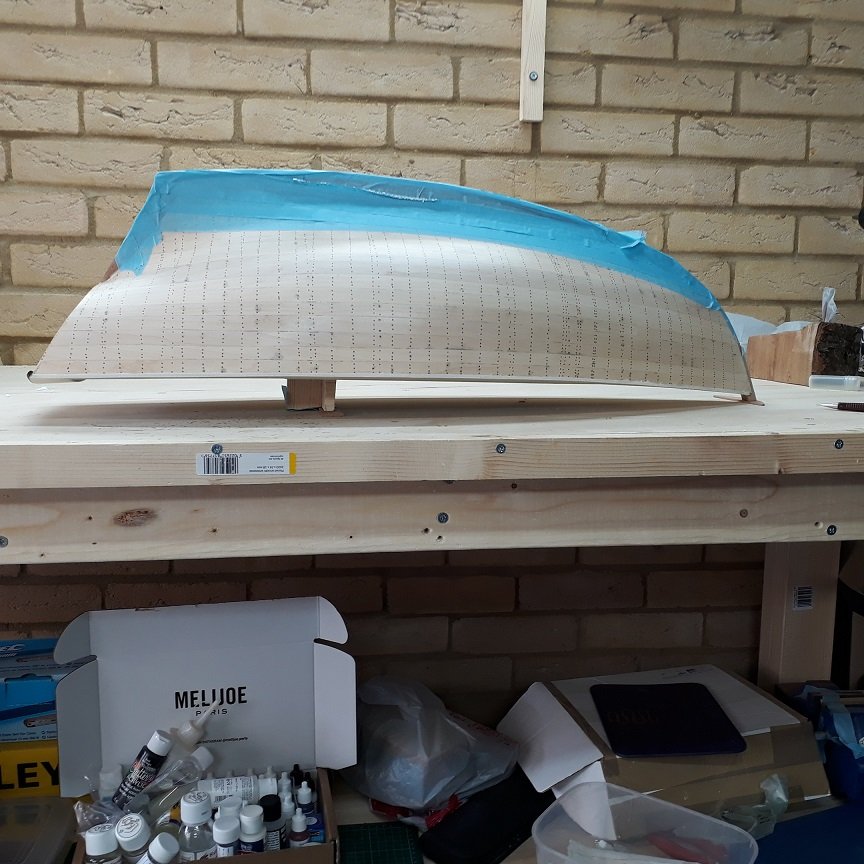
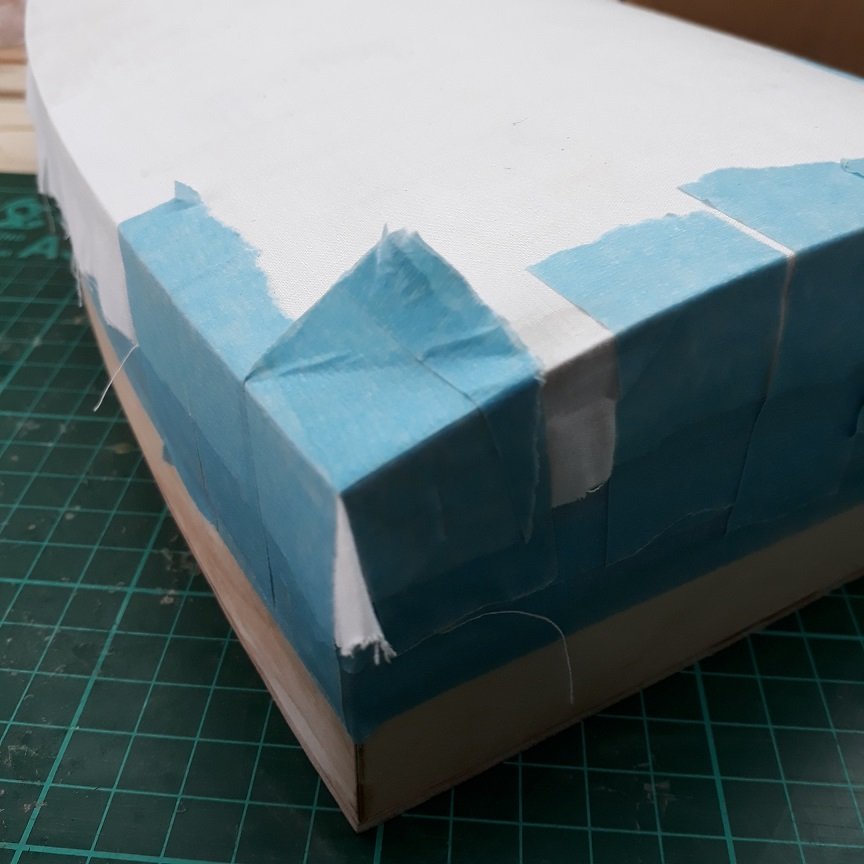
.thumb.jpg.6fd4c1b78768bb3efd745ab810936005.jpg) Thanks John! It is (very) slowly coming together. Now, the waterline gave me trouble. Initially I used a pencil fixed to a jig, but it did not perform well. I then used a ball pen which did better, but I was not happy with the ink line that I suspected would not easily be covered by paint. So I sanded everything and re-sprayed primer. It took pretty aggressive sanding to get the pen lines to disappear. Then I found the solution. I attached a bamboo skewer and dipped the tip in talk powder. As the tip touched the hull, a tiny white dot was left. Nothing permanent as the powder very easily wipes off. I then masked at the line, then added two more tape strips above and then removed the middle strip. I used Tamiya tape for the first time, it is indeed great. Then I painted the line with Valejo acrylic. What a wonderful paint! No brush marks, absolutely brilliant. I have put on about 20 coats but still some how I think the grey primer is coming through. I think it is enough though! I will wait for the paint to cure and then I will mask over it, remove the top and bottom tape strips and the paint the rest of the hull.
Thanks John! It is (very) slowly coming together. Now, the waterline gave me trouble. Initially I used a pencil fixed to a jig, but it did not perform well. I then used a ball pen which did better, but I was not happy with the ink line that I suspected would not easily be covered by paint. So I sanded everything and re-sprayed primer. It took pretty aggressive sanding to get the pen lines to disappear. Then I found the solution. I attached a bamboo skewer and dipped the tip in talk powder. As the tip touched the hull, a tiny white dot was left. Nothing permanent as the powder very easily wipes off. I then masked at the line, then added two more tape strips above and then removed the middle strip. I used Tamiya tape for the first time, it is indeed great. Then I painted the line with Valejo acrylic. What a wonderful paint! No brush marks, absolutely brilliant. I have put on about 20 coats but still some how I think the grey primer is coming through. I think it is enough though! I will wait for the paint to cure and then I will mask over it, remove the top and bottom tape strips and the paint the rest of the hull.


-
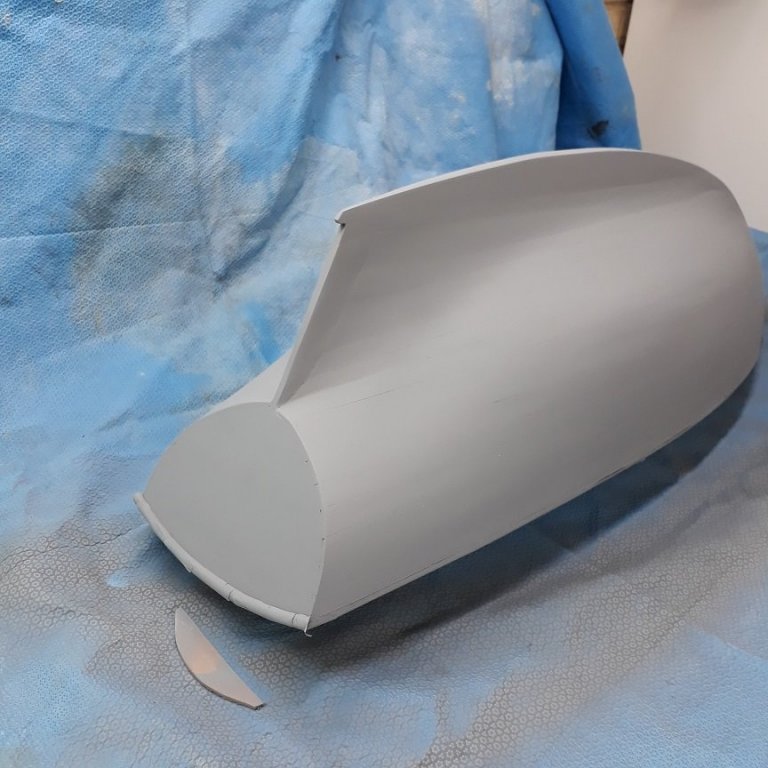
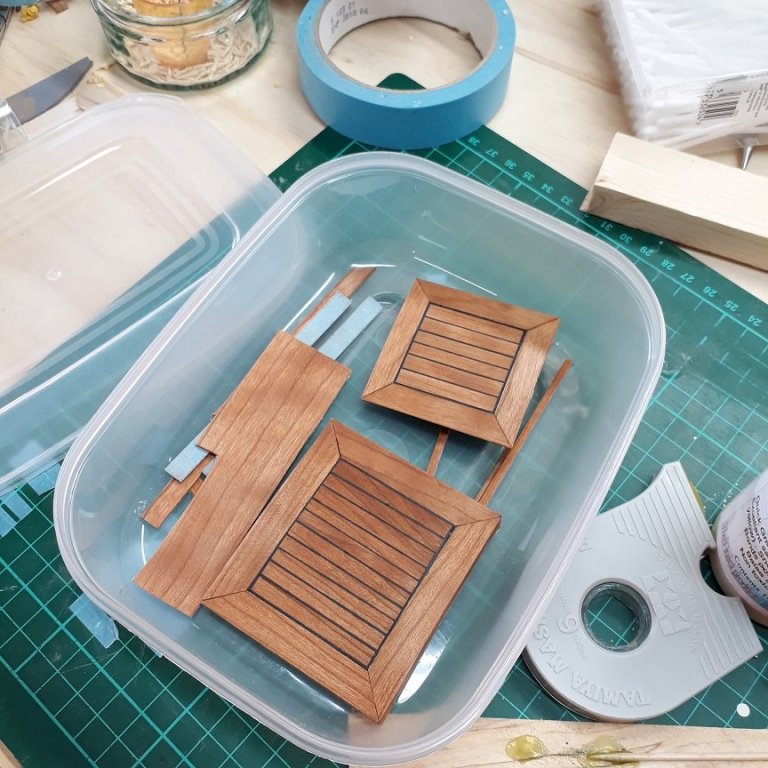
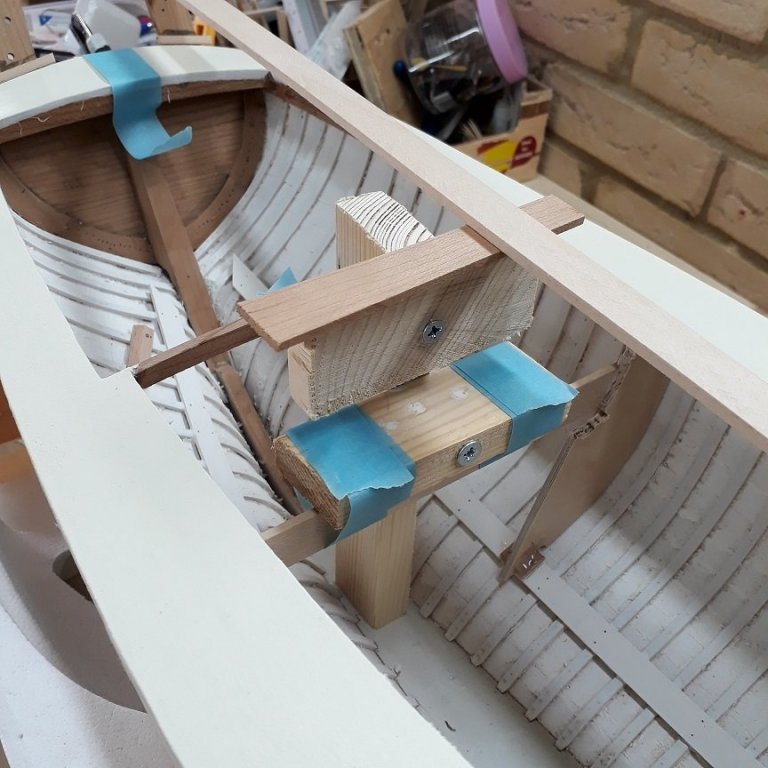
Work continues at the usual very slow pace but also things are getting pretty challenging. I need to think very carefully before I glue, cut or screw anything and an order needs to be followed, otherwise the next steps become very difficult. Also, the pieces with the Tung oil on are temperamental, they tend to discolour with even a brief contact with masking tape. Tape also raises the grain so need sanding and then more oil. I sprayed the hull with Humbrol grey primer which is great but very expensive and each can lasts for 2.5 thin coats. The hull is very smooth, only very few slightly rough areas due to the mistake with the methylated spirits. Also the areas which I filled with my previous filler are rough but these are on the underside of the keel so will not show. I then had a go at marking the water line. I am not happy at all, I ordered a selection of narrow Tamiya tapes. I continued work on the Cabin. It is crucial to get it right as it will be the only shiny luxurious part of this little boat. I started fitting the various wood trims and also started to shape the doors. The discolouration bellow is from low tack tape. The screws will be replaced by wood nails, unfortunately white as I have difficulties making tree nails from my cherry pieces. There will be very many wood pieces that will go on the cabin, these are the ones I have prepared so far, sanded to 600 grit and oiled. The oil appears to have polymerised, it takes about a week to 10 days for it to fully cure.


-
Hopefully all is going well with the health issues John. Your hull looks very good, especially considering you hand draw and cut the frames! Speedy recovery Vaddoc
-
Lovely boat Mark! Your metal work is truly inspiring. I think you are right, this beautiful design shows better without too many stuff on deck. Vaddoc
-
Another thing, the sheered waterline is probably similar to the "exaggerated sheer". At the bow, the sheer should rise more that a faired sheer would suggest. The reason is that otherwise, visually it would appear that at the bow the sheer is flat or dips down. This actually happened with my first model and it is very much noticeable.
-
Oh dear Mark, your comment about the sheered waterline created a whole lot of new problems! Have a look at this thread, I only had a quick glance myself but seems helpful https://www.boatdesign.net/threads/sheered-waterline.35840/ "Tad" is actually Tad Roberts, a well known boat designer. The other people are probably equally qualified. Regarding Tung oil, it is a fascinating product. It enhances the colour of the wood and when in contact with oxygen, it polymerises into a waterproof hard plastic like substance. It builds a very fine film, so it needs many coats to really finish wood. I read that in ancient China, they would put dozens of coats and as it takes anything from a week to 4 weeks for it to polymerise, it might take months or years to finish a piece. If you thin it with turpentine, it penetrates the wood much better. I just use it for the colour effect. However, if I varnish immediately, it will never polymerise due to lack of oxygen and the uncured oil might mess up the varnish. For the same reason I will not use water based products over it. It smells quite nice as well! I would expect that as the pieces we use are tiny, it would cure much faster. However, even 3 weeks after oil application, a very fine layer, the masking tape still refuses to stick. Regards EG
-
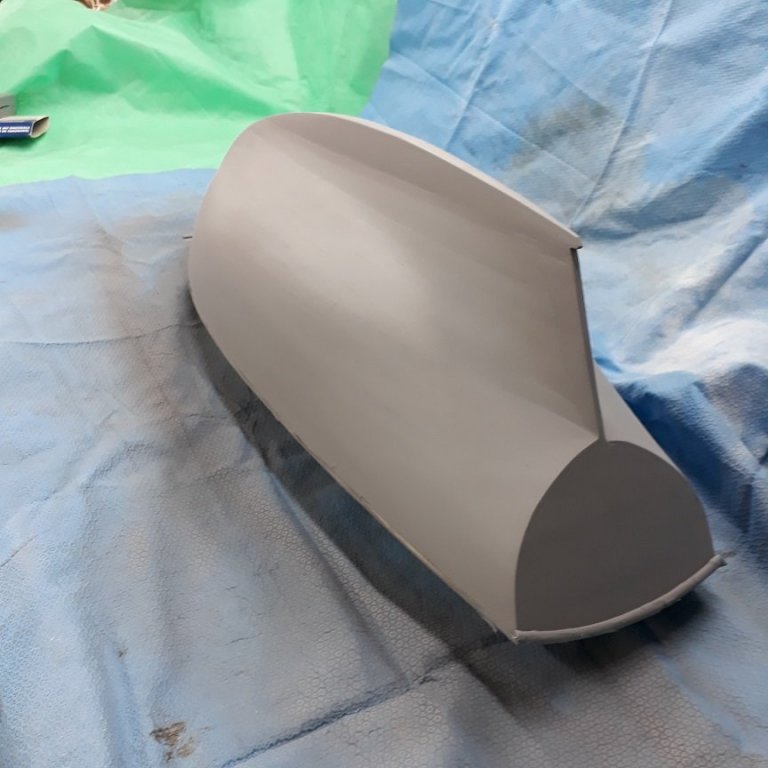
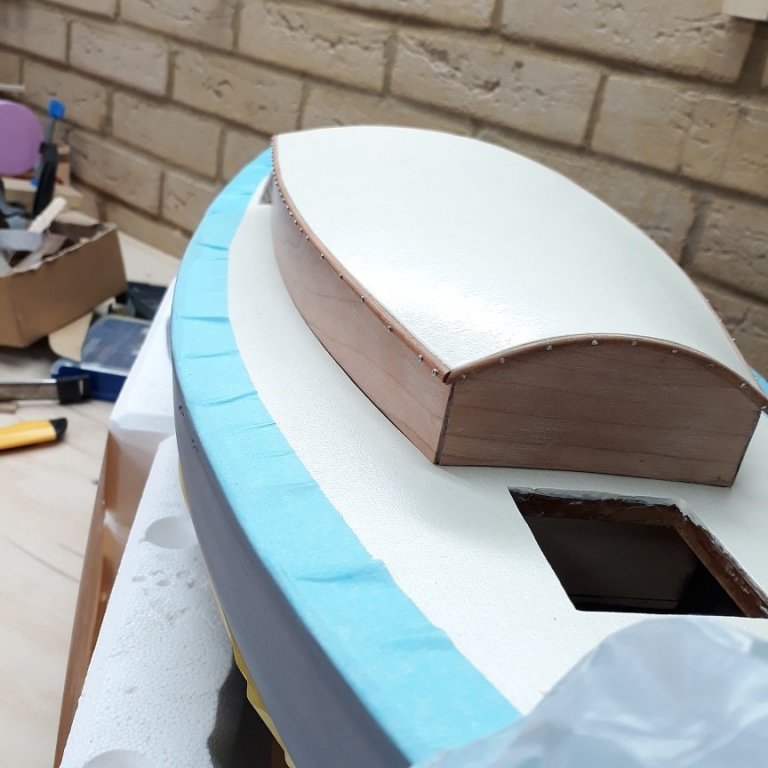
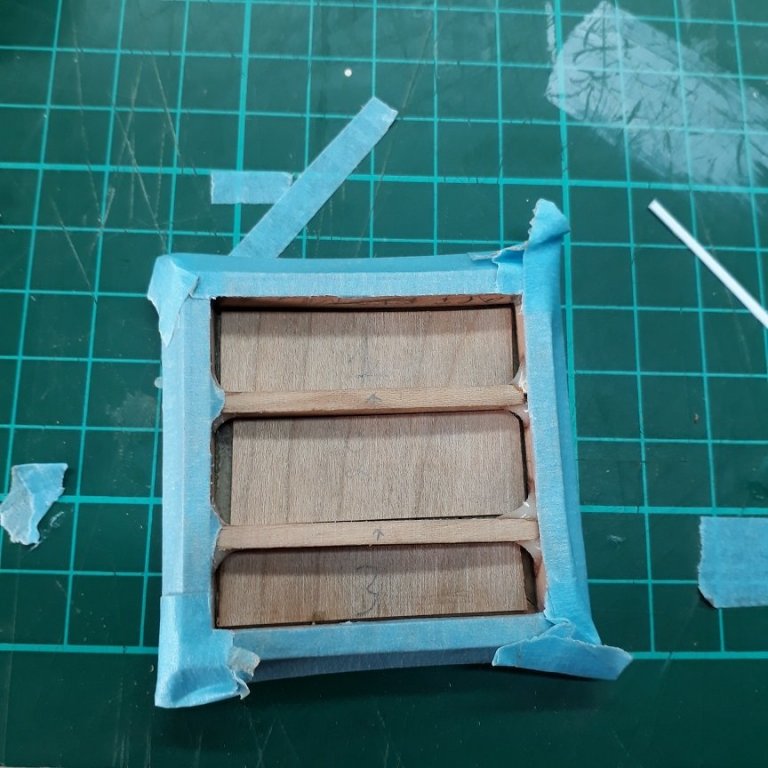
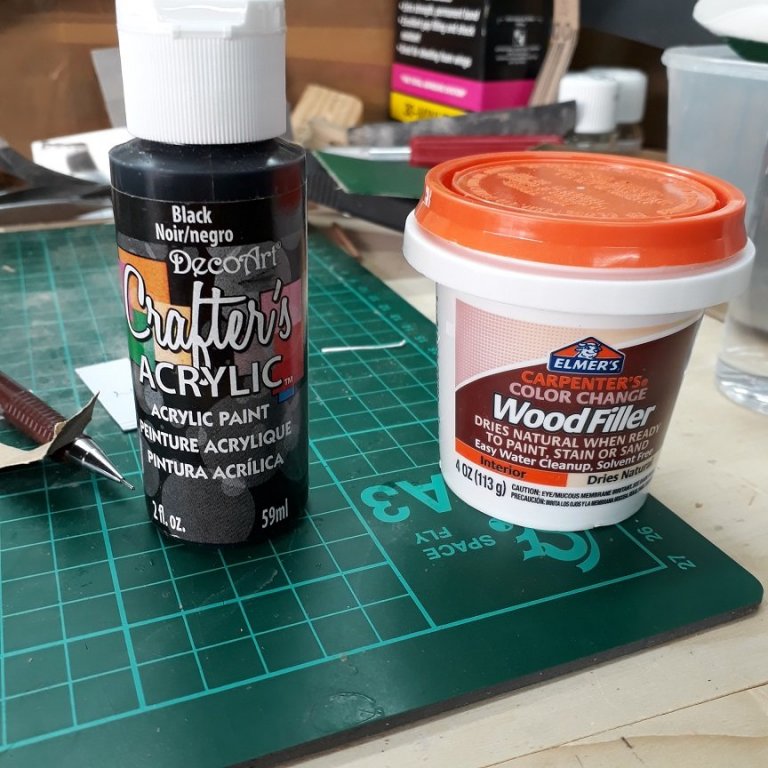
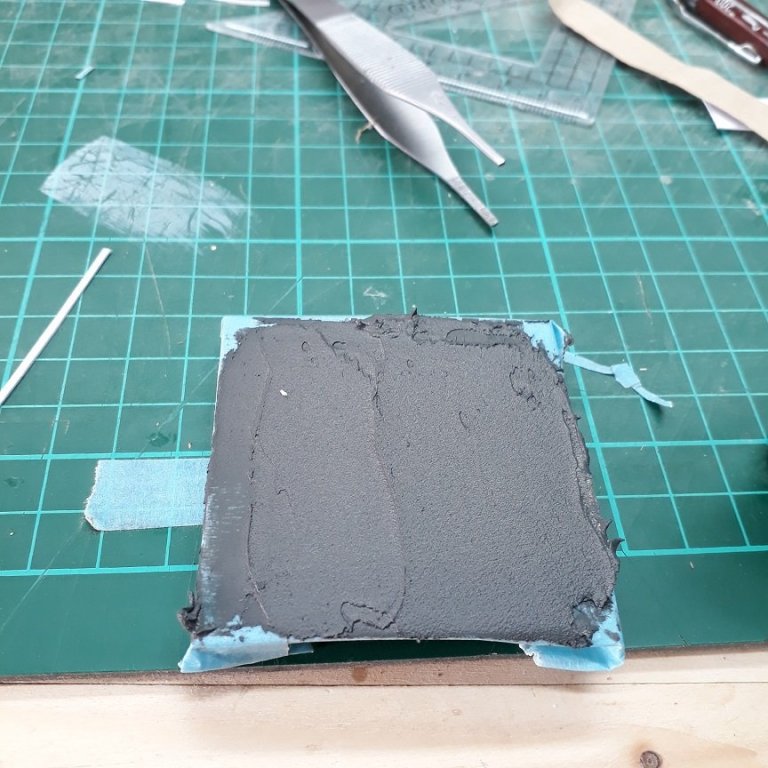
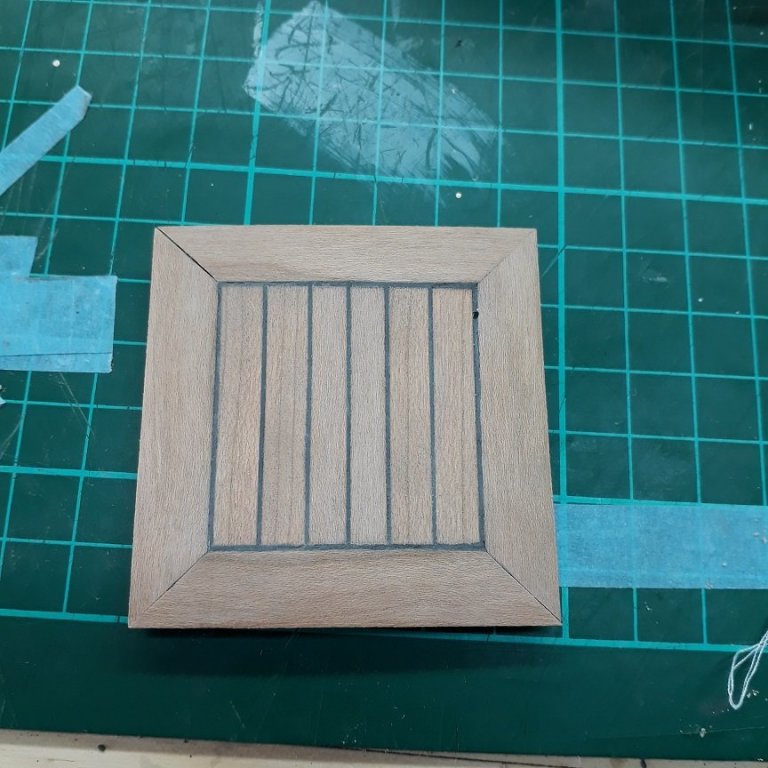
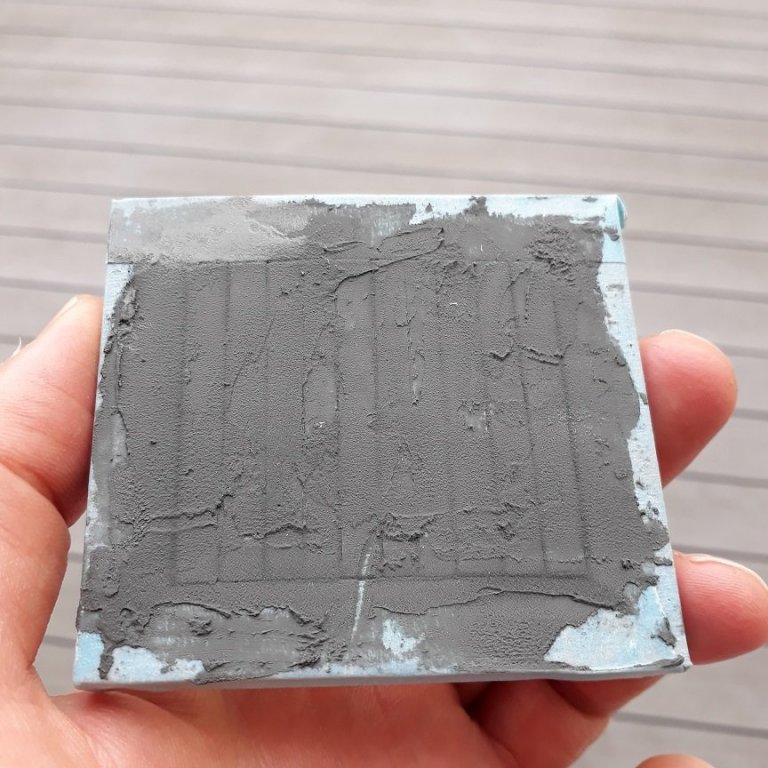
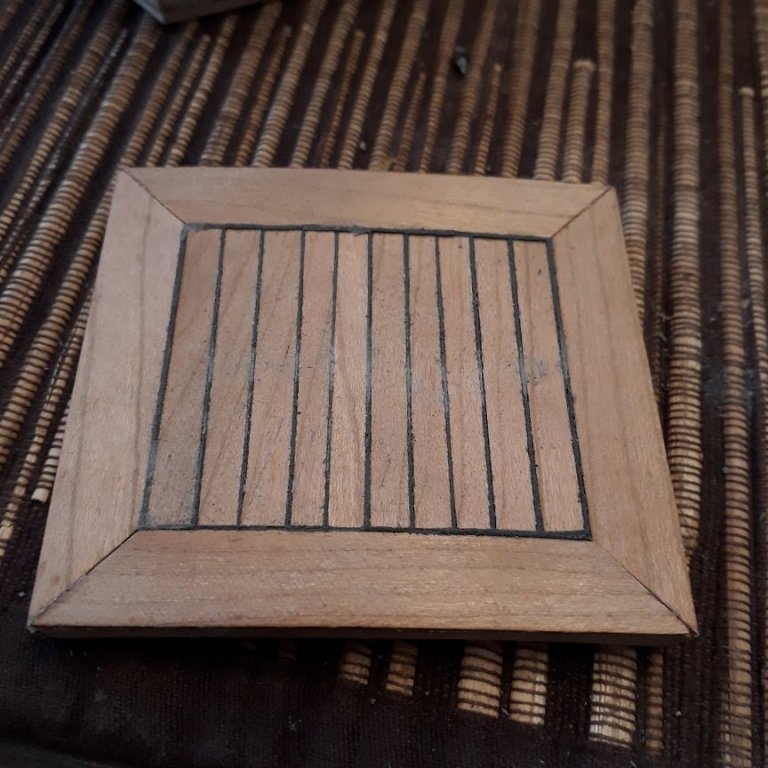
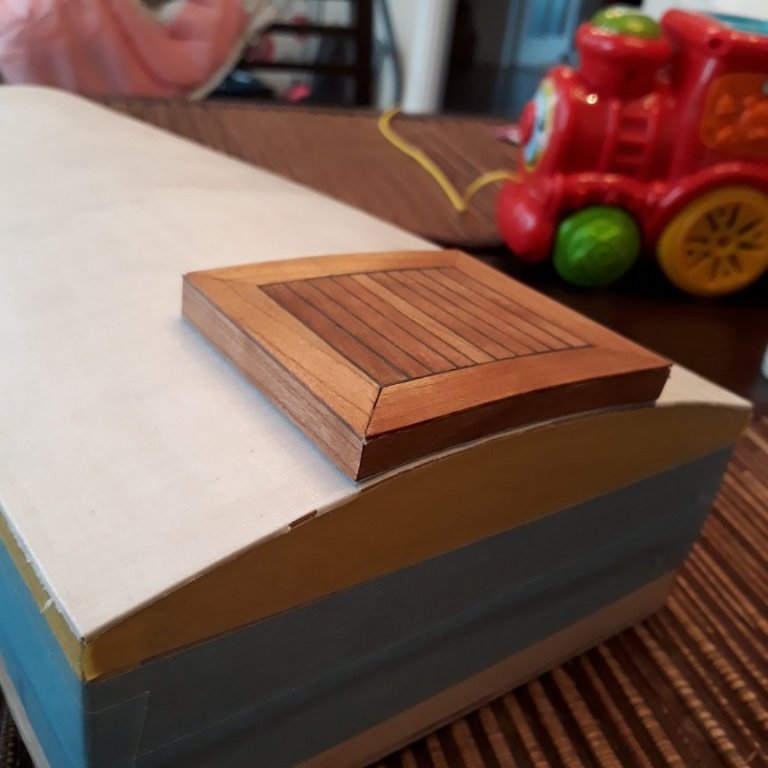
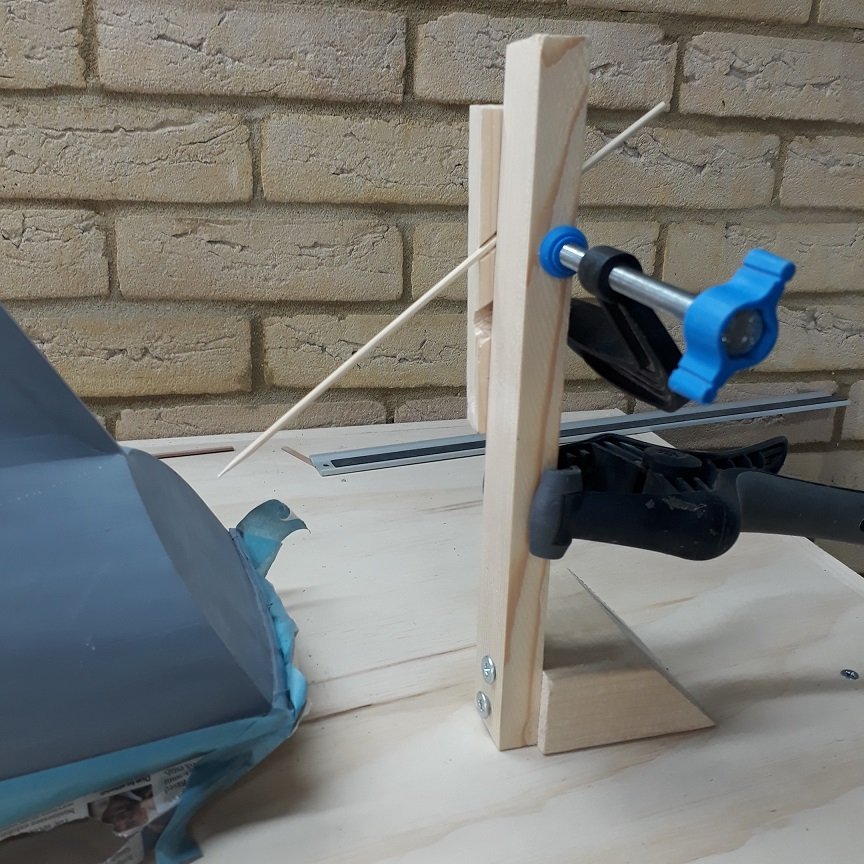
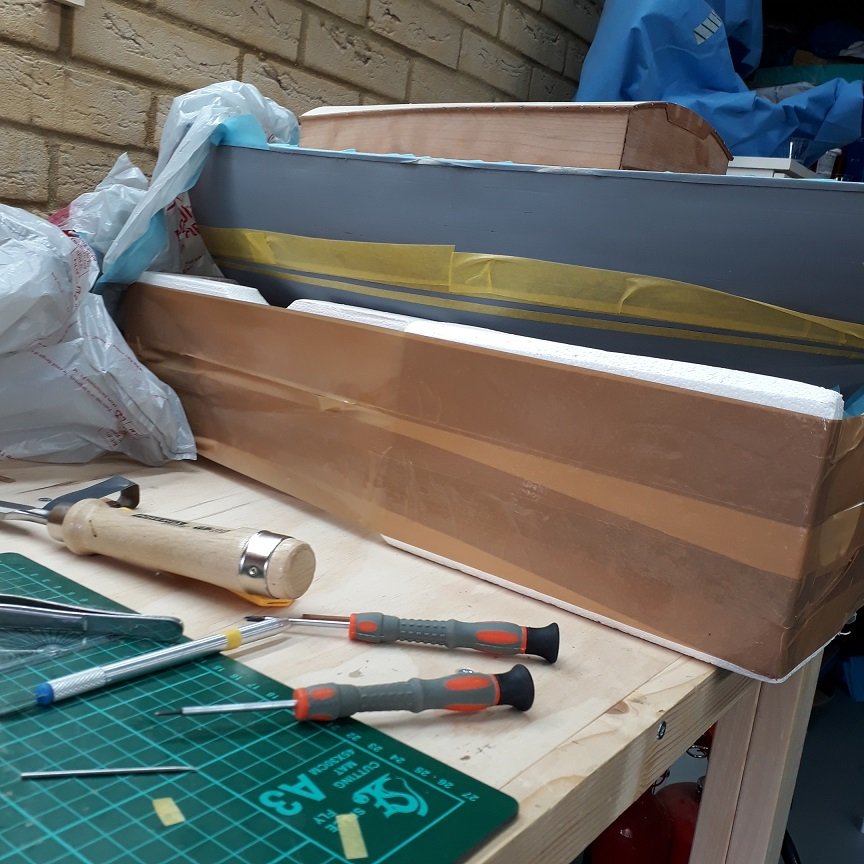
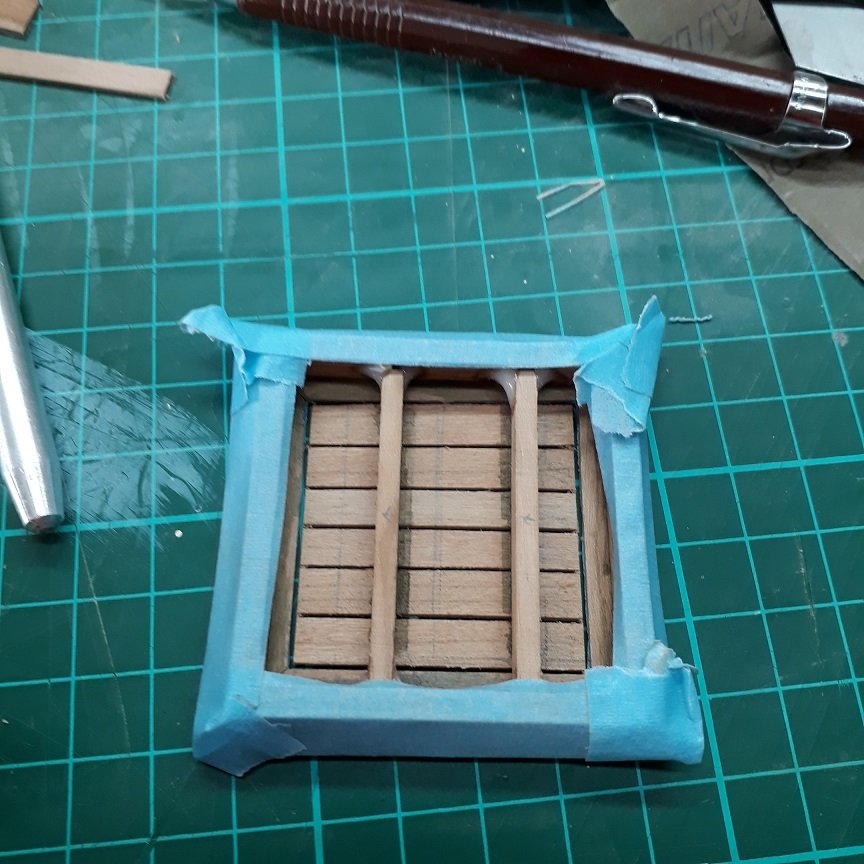
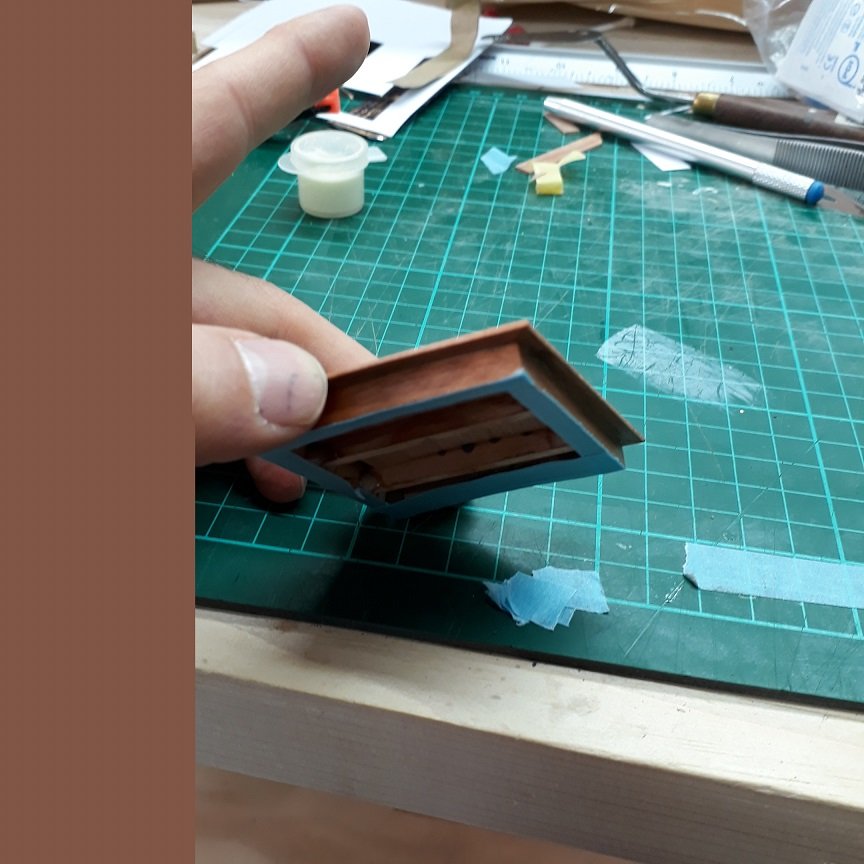
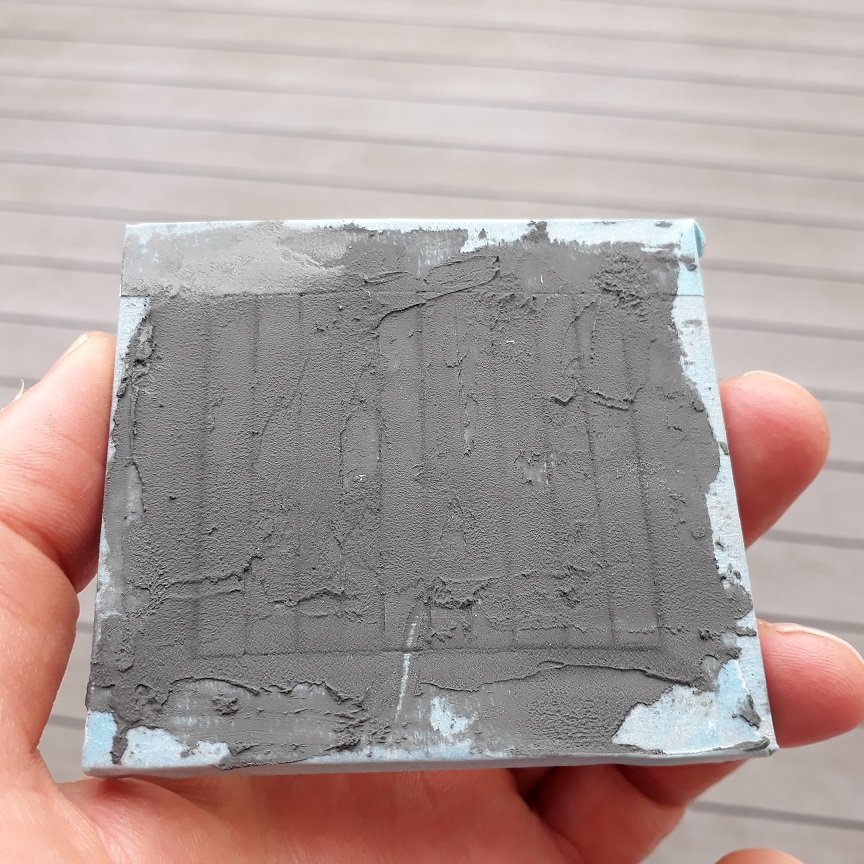
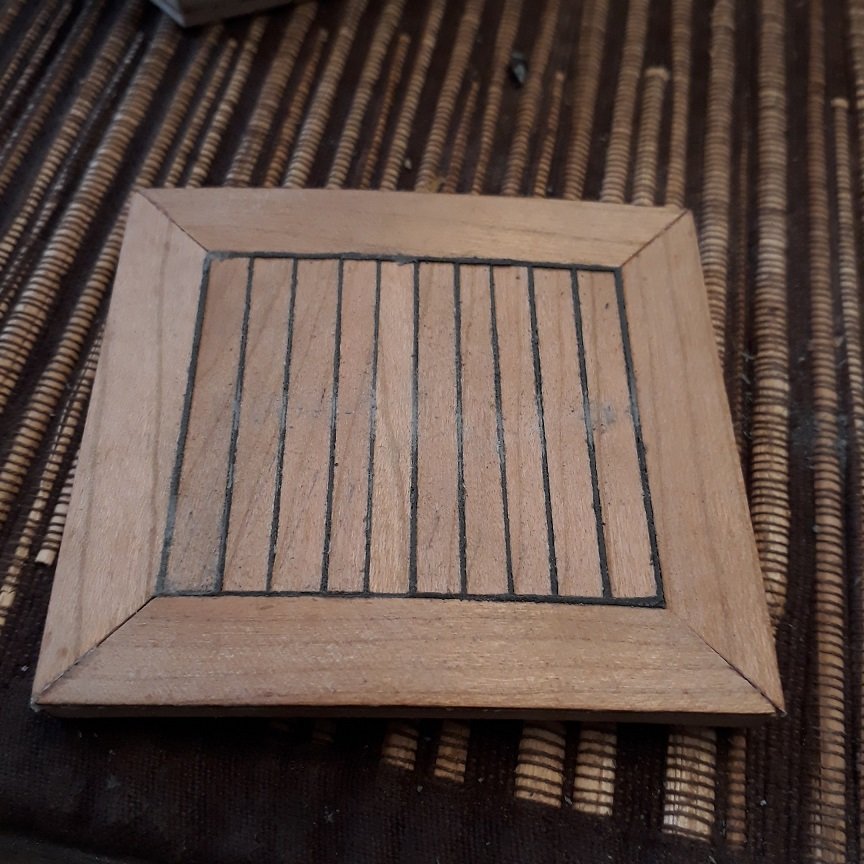
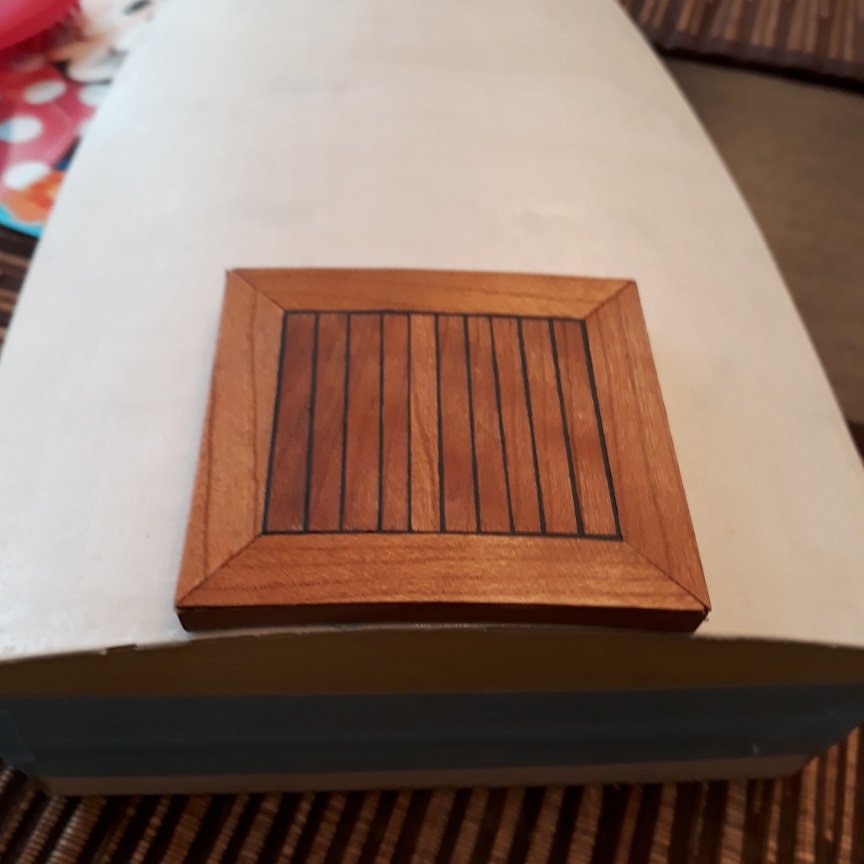
Some more progress so time for another post. I finished painting the deck and the cabin top. Valejo paint is wonderful, no brush marks at all! I did not want to use enamel varnish and I was never happy with the Valejo acrylic one. I decided to try the polyurethane Valejo varnish. This thing is amazing, odourless, dries fast, does not need any thinning. No brush marks at all! I did a bit of head to head with the decoart/americana polyurethane varnish, Valejo is better. I was planning to make the forward hatch and I had in mind to make it very simple. However, following your positive comments, I had to make it similar to the cabin hatch! This is actually a complex bit to make. The bottom frame is made of 4 strips, with 4 more thin ones over like veneers. Then the four top pieces went on and then two supporting pieces, matching the curvature of the hatch were added. Then the 6 strips were added. Then the underside of the hatch was covered with thin pieces of wood to allow the caulking to stay in place The caulking was made by mixing Elmers wood filler with a bit of black acrylic paint The caulking went on thickly Masking tape off, a bit of sanding and then tung oil This hatch is different than the cabin one as the top extends beyond the sidewalls. I decided I ll use enamel gloss varnish in all wood pieces. I sanded everything to 600 grid and added another coat of tung oil. I ll wait for a few weeks for the oil to polymerise before I varnish. However, now it was time to start painting the hull. And things got interesting! First of all, I had to mark the waterline. I had prepared a jig to allow the boat to stand hull up at a predetermined height with the waterline horizontal, but since I was hasty enough to glue the transom rub rail, this can no longer be used! I tried to take it out but it is glued very well. I had to improvise another jig which would kind of compensate. It actually worked quite well and I was surprised to see that the hull ended up vertical! And then I thought I should degrease the hull so I used methylated spirits. Almost a disaster! Immediately it started to dissolve the sanding sealer! I managed to quickly wipe the hull with isopropyl alcohol and then I lightly sanded with 400 grit. I will leave it to rest over night but hopefully no harm done.


-
I actually read a paper or some kind of study some time ago. It showed that in response to changes in moisture, there were minimal dimensional changes in wood along the grain but very significant across, sometimes with changes in width up to 20%. Different species behave differently, wood database report this as "movement in service". Where I live there are dramatic differences in ambient moisture between summer and winter. In my previous home, all the nails in the walls were coming loose and the doors would not close during some months! Interestingly modified woods like akoya will not shift. As we use pieces that have a huge surface to volume ratio, I would expect they easily adjust to ambient moisture. Really PVA glue should not take any measurable space.
-
Well, this has been a very satisfying thread, I got answers to questions I never new I had! Good luck with your boat Vinnie.
-
Many thanks to both! Patrick, no varnish on yet, just one coat of tung oil. I have some concerns about putting water based varnish or water based sanding sealer on, not sure what I will do. No tar Carl, I just improvised a bit. I have tried a few wood fillers and the best by far is Elmers wood filler, the one that changes colour. I mixed it with a very small amount of Americana (decoart) acrylic black paint. It turned grey. I masked all wood surfaces, applied the mix pretty thick. It dried dark grey/black-ish. Then unmasked and sanded-turned grey again. Tung oil on-became black again! Vaddoc
-
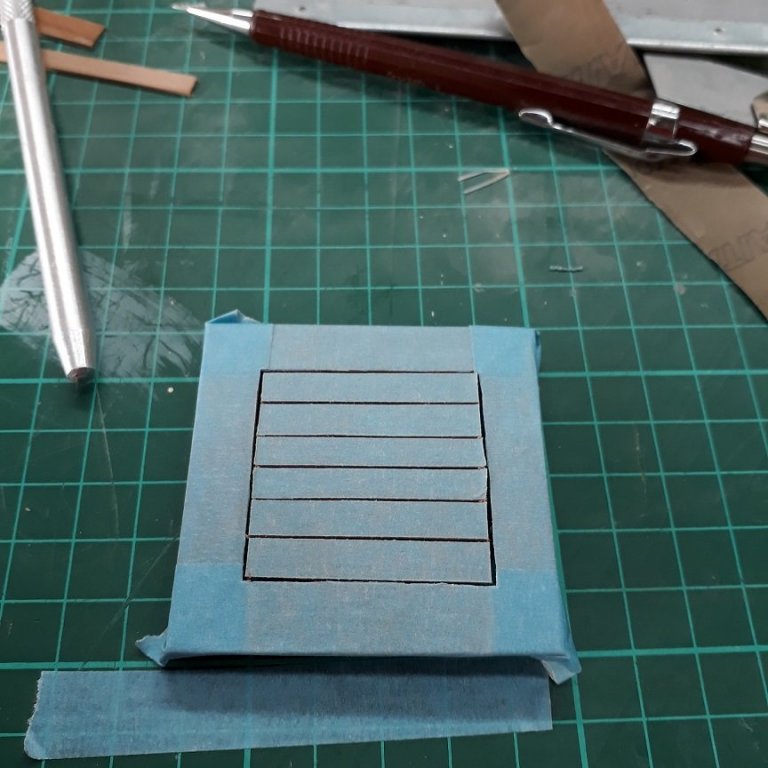
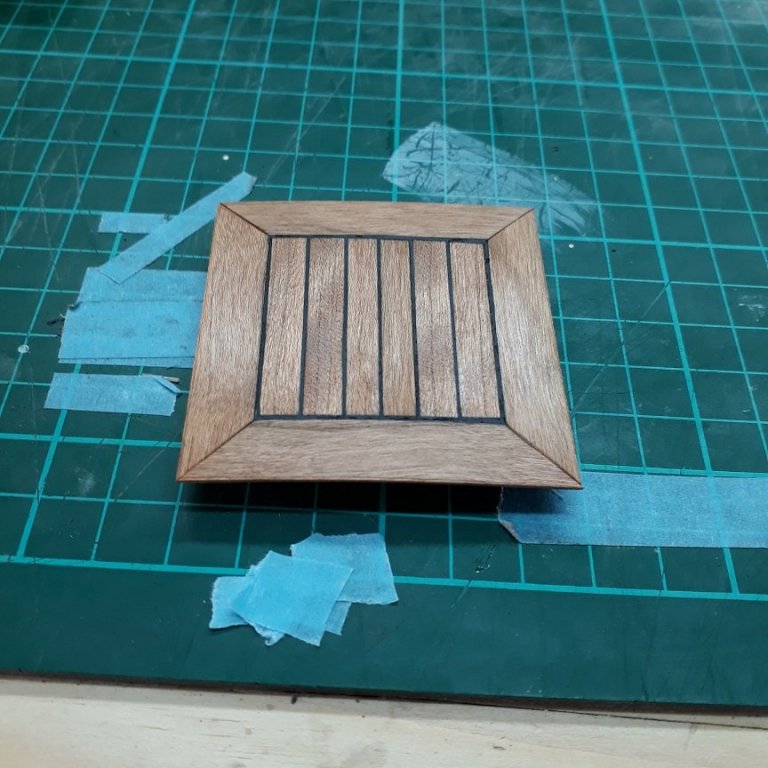
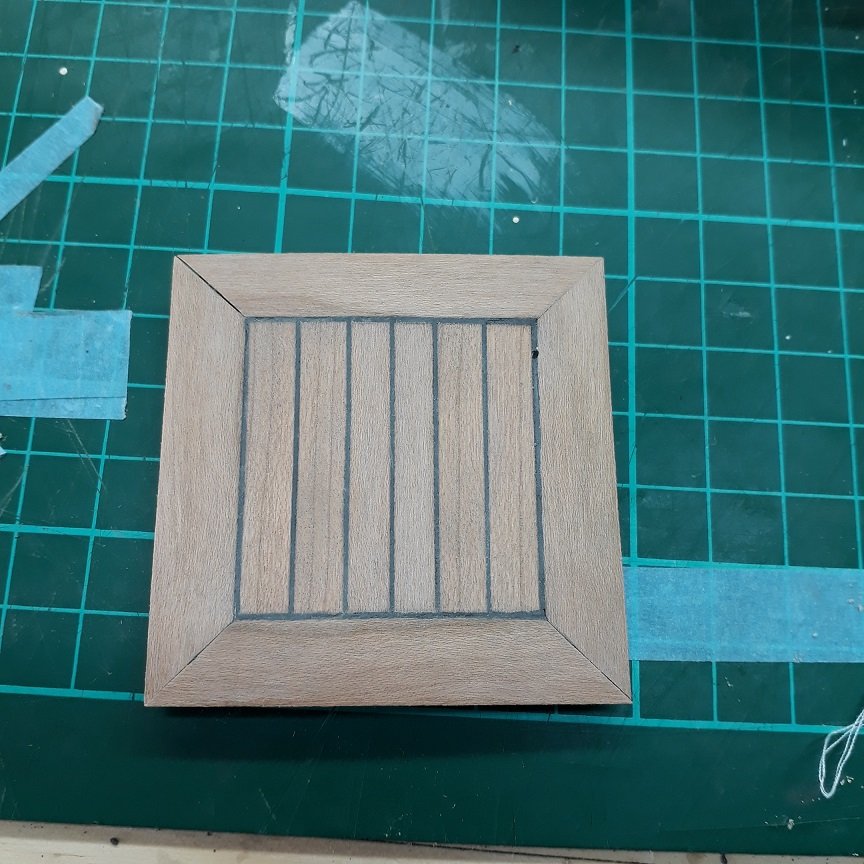
The journey continues and it is time for another update. John and Patrick, many thanks! This model indeed would be ideal for RC but no funds or time to invest in this at the time, maybe with the next boat. I managed to do a bit more work although finding time for the boat is becoming increasingly hard. I need to proceed slowly now as the different bits and pieces and the various sub-tasks need to follow a strict order so lots of thinking and planning ahead is in order to avoid disasters. A word on the Proxxon mini table saw: It is fantastic! Very accurate, plenty strong for what I need without being frightening. I have connected our old vacuum to it and I am using it constantly. I have been working on the cabin hatch for more than two weeks now. It turned out to be a massively complex component to make but I think it came out fine! It has a coat of tung oil on for now, I think I will add some sanding sealer and then varnish (in due course). Unfortunately I did not take many photos, these show the caulking going on and before and after tung oil. The hatch is not yet glued on. I added two coats of sanding sealer to the cabin roof and sanded lightly with 400 grit. It was then time to paint the cabin roof. I really love enamels, the coverage and self-levelling are much better than acrylics but they just are too difficult to use. So I will be using acrylics. I usually really struggle with painting but this time it went alright. I used a 3/4 inch good quality brush and Valejo paint which is fantastic. I kept the paint well diluted with a bit of retarder in and I am very happy with the result, no brush marks at all! I will look at it again tomorrow, and if it does not need more paint, I will probably add a couple of coats of acrylic varnish on. I also have been doing some thinking on the tabernacle, more in the next posts.

-
This is one crazy design Patrick but you nailed the shape I think. If there is a boat that looks awesome in gold it's this one! Looking good!
-
If you work in your living room or somewhere in the house, power tools probably should be avoided due to noise and huge amount of dust. My first ever model was a simple scratch built one, did it in the living room with absolutely no power tools. Then I moved and had a garage. Power tools made building more enjoyable and accurate but as Mark said it will always be a combination of both and imaginative thinking is always needed to effectively use tools. Most frequent tools are a home made disk sander, dremel moto saw and dremel rotary tool. I recently got a proxxon mini table saw which I seem to be using all the time. I would love to get more tools though!
-
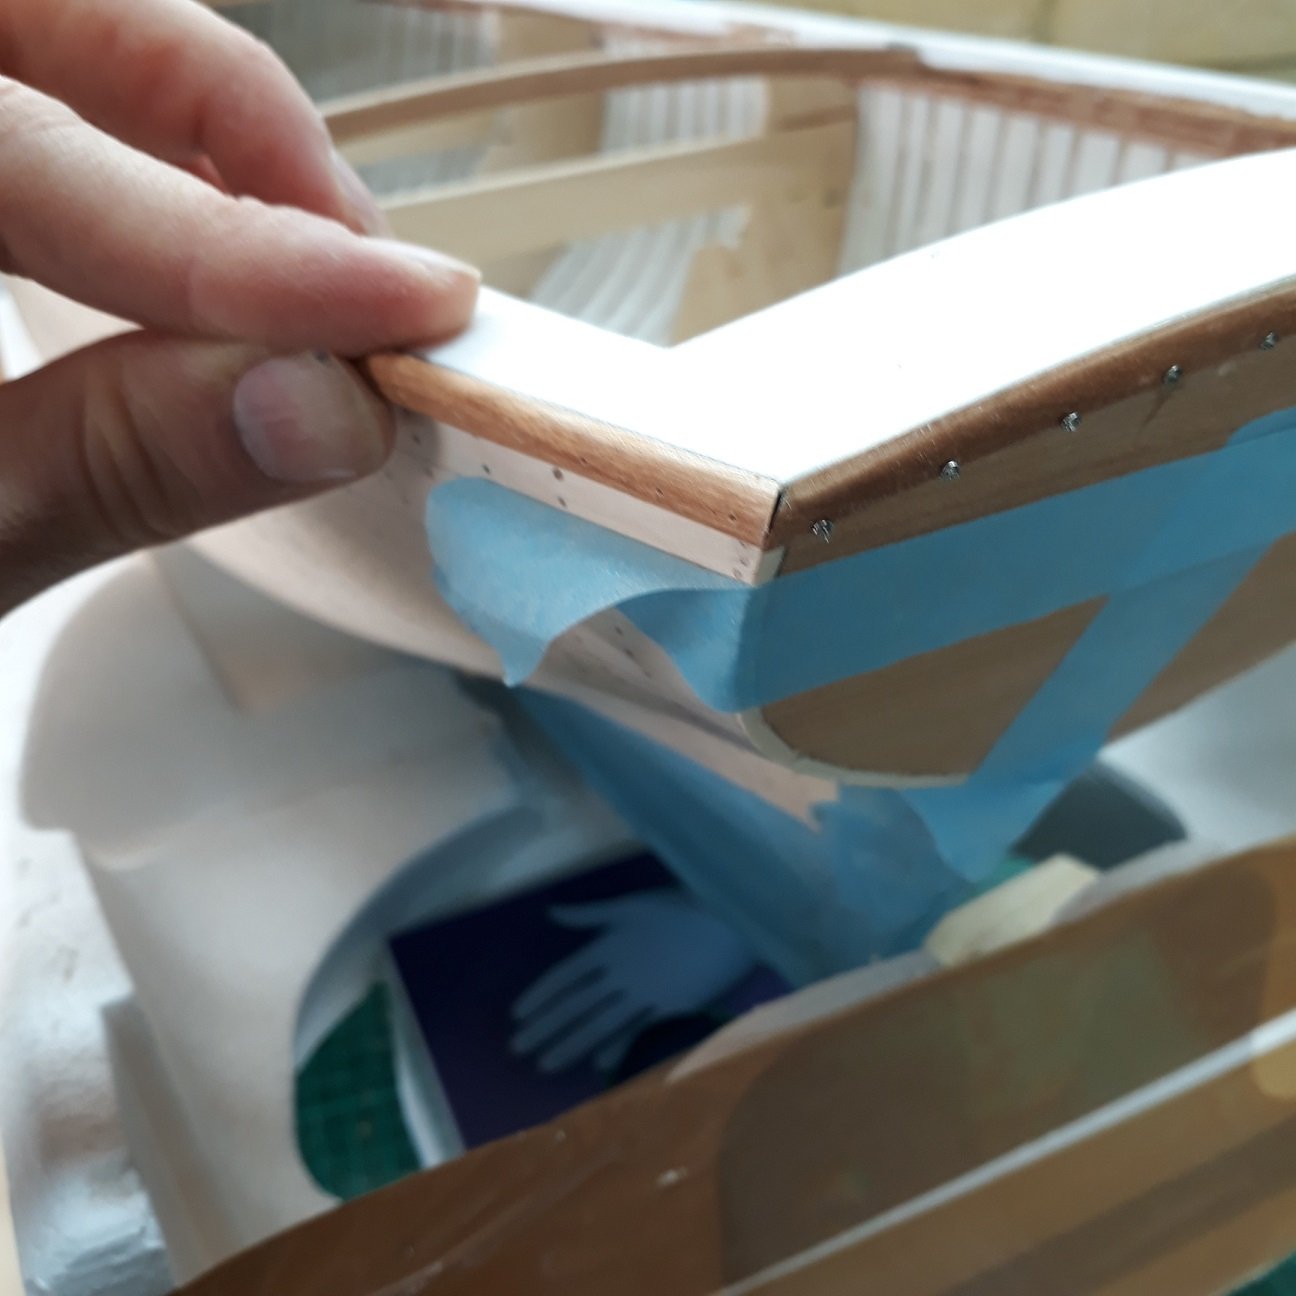
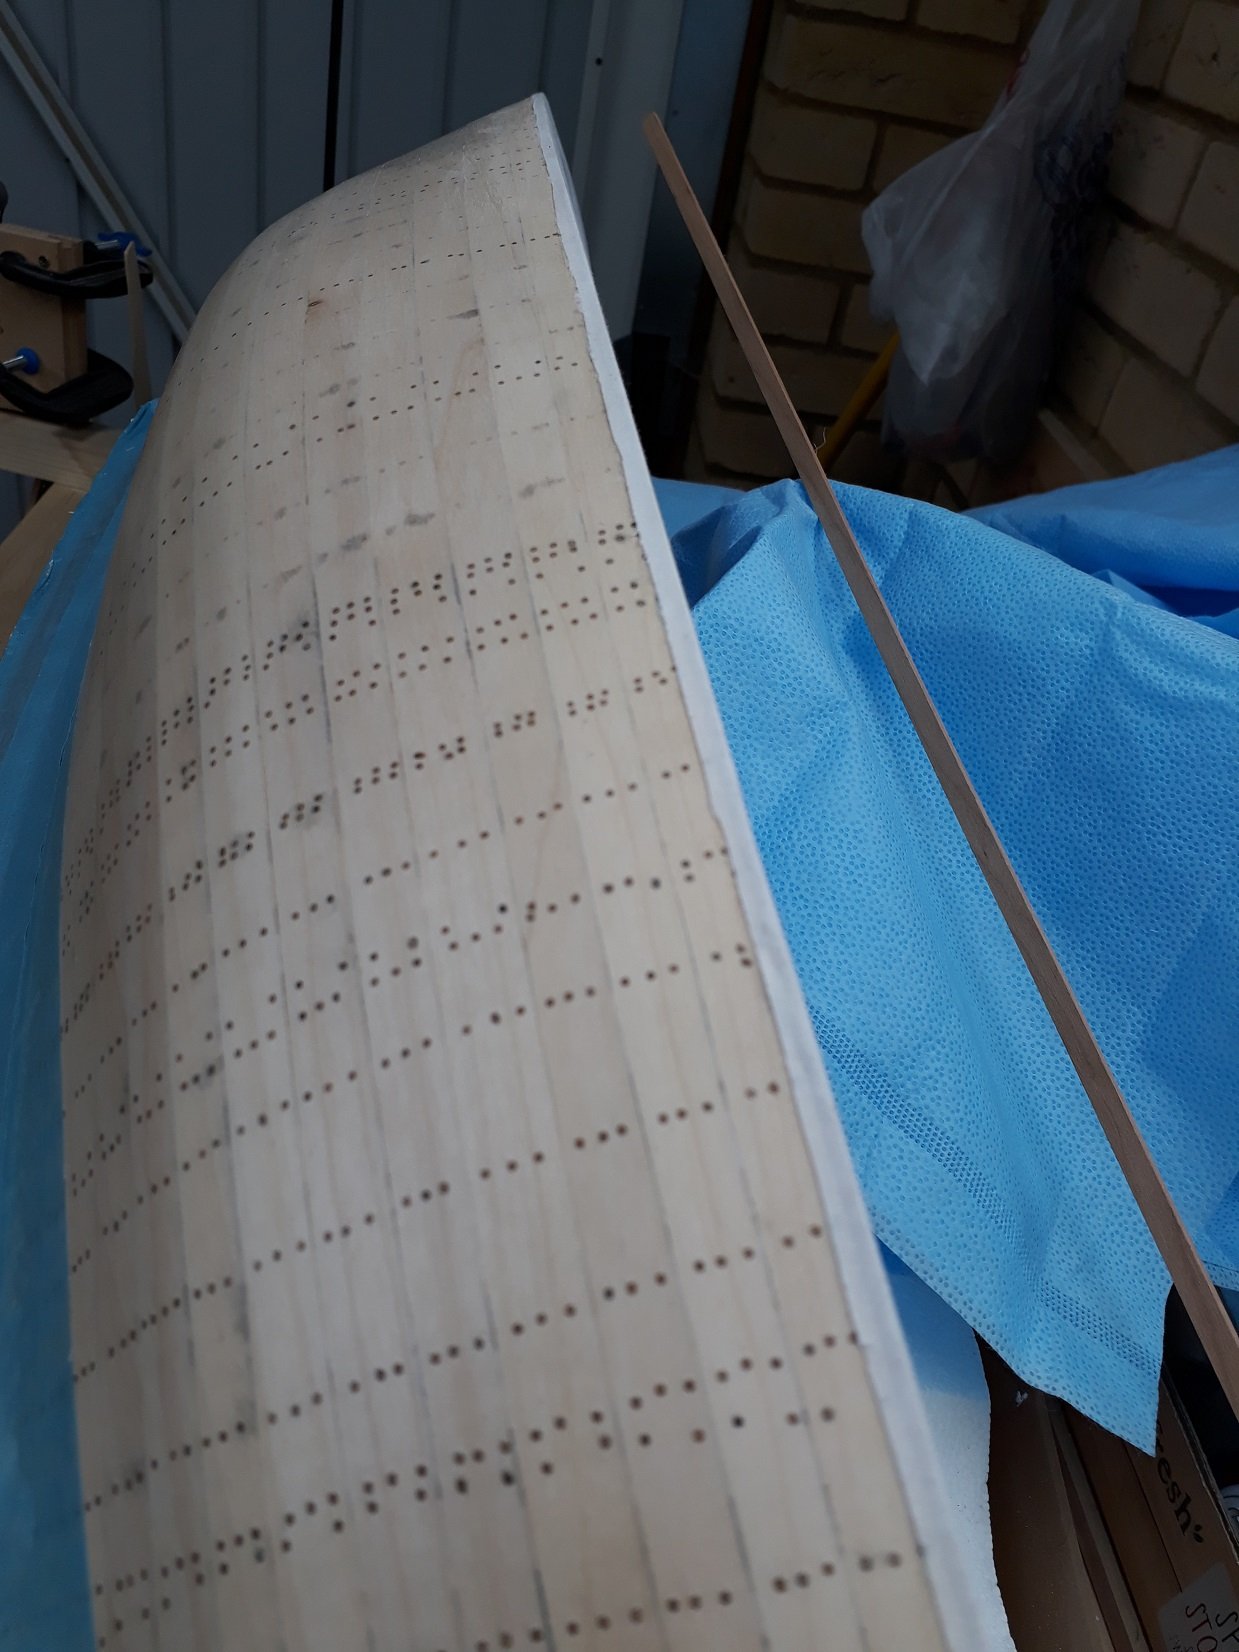
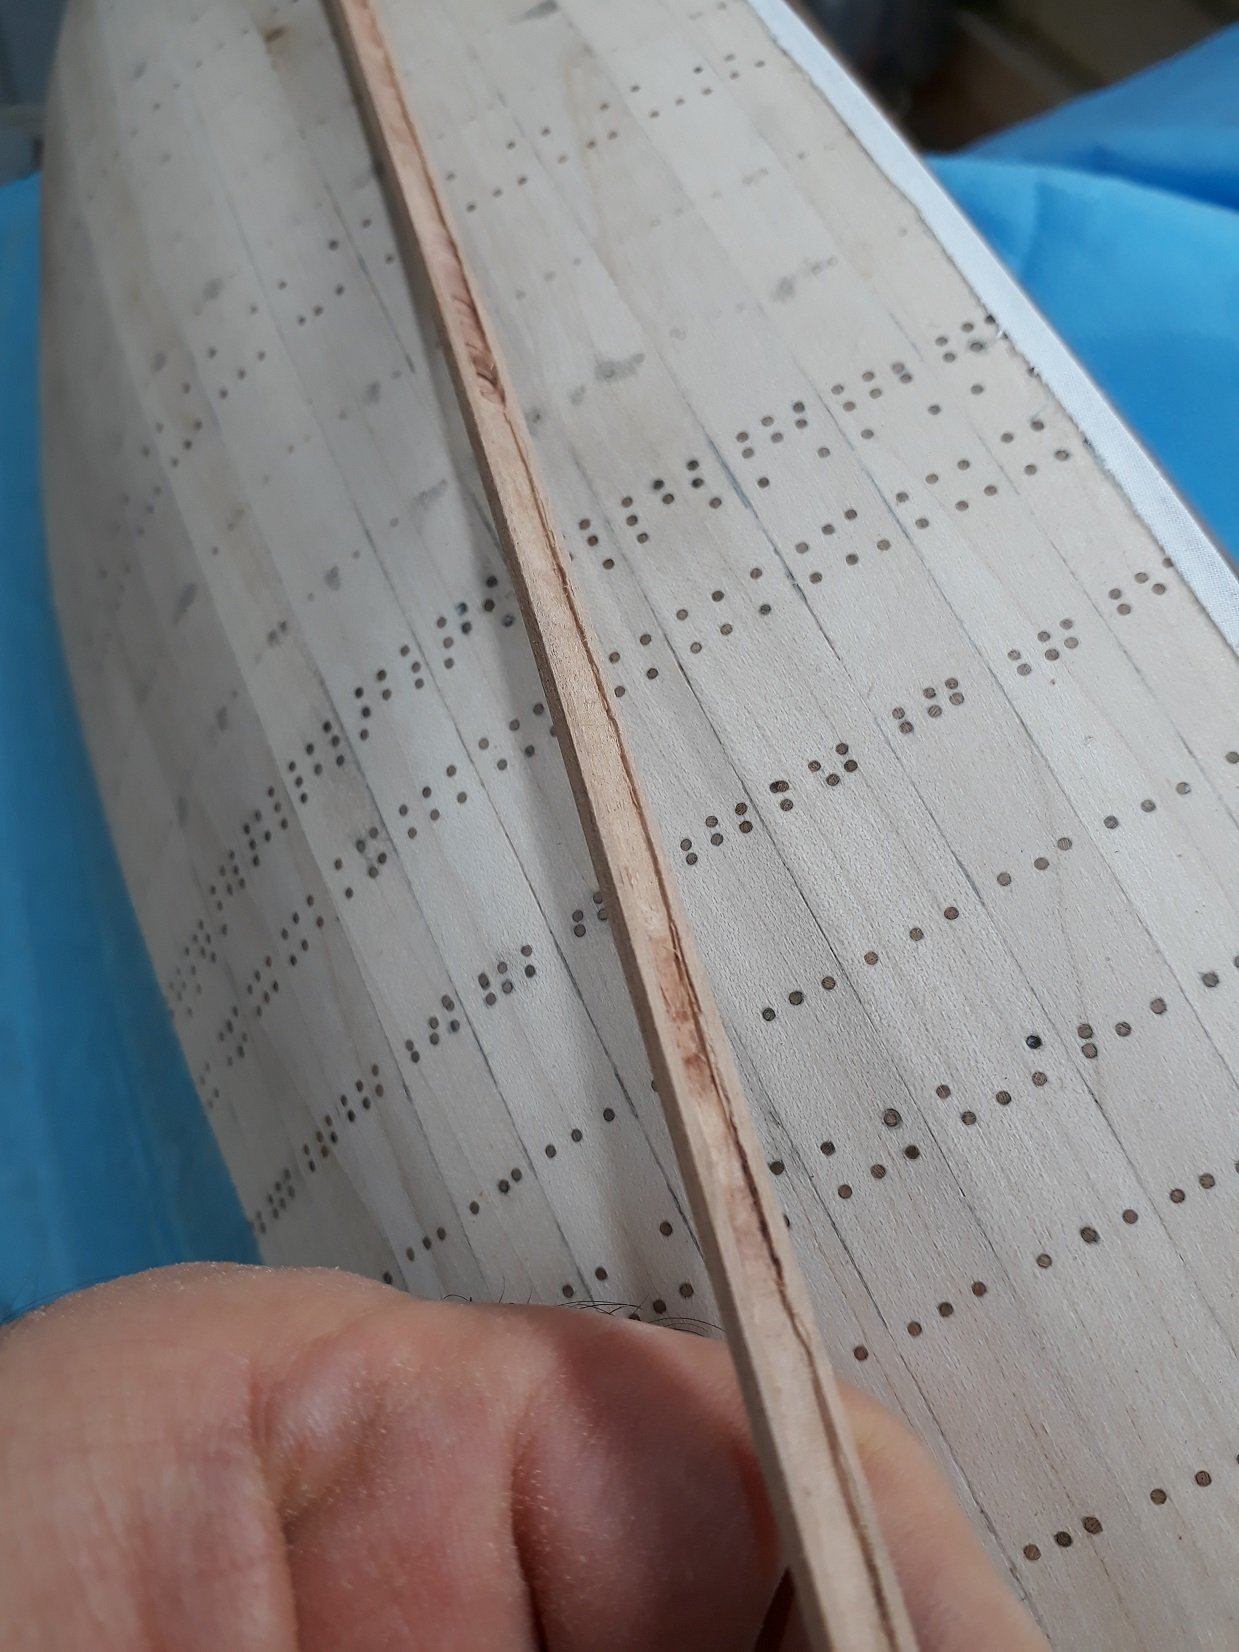
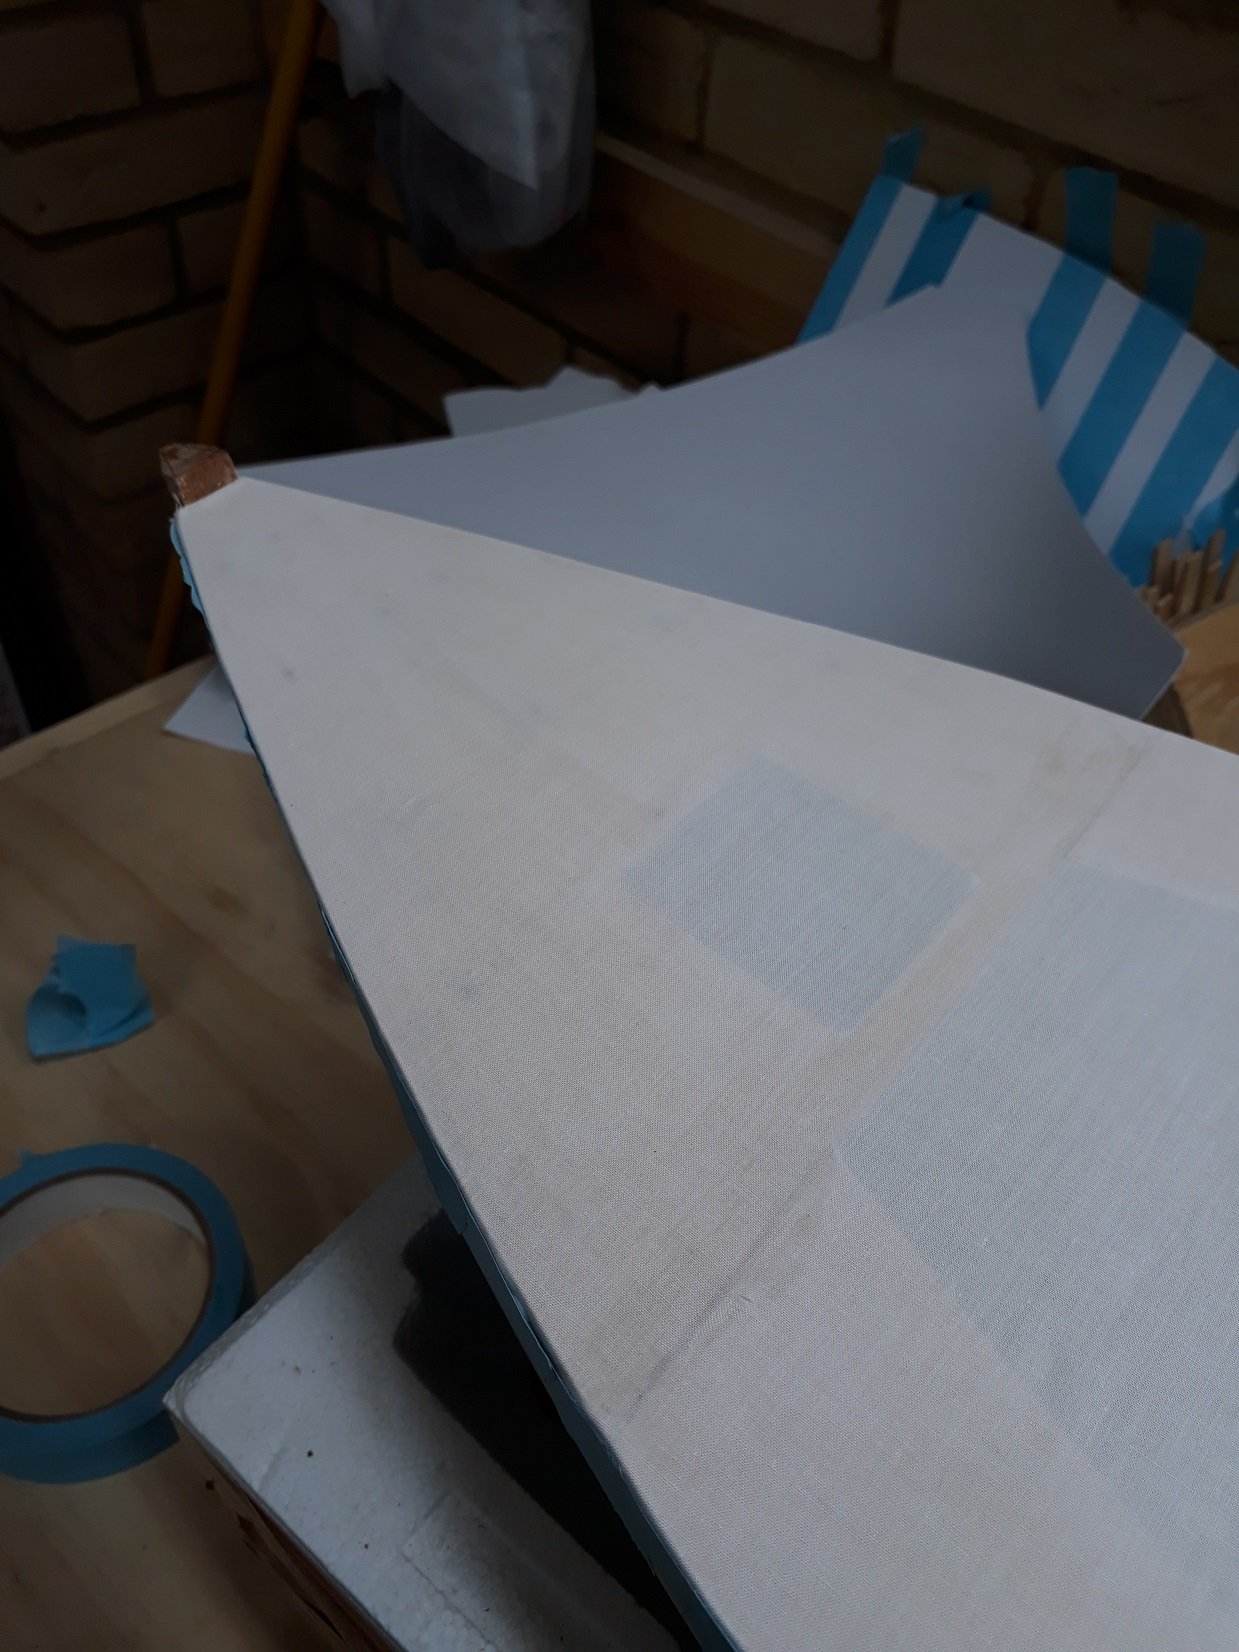
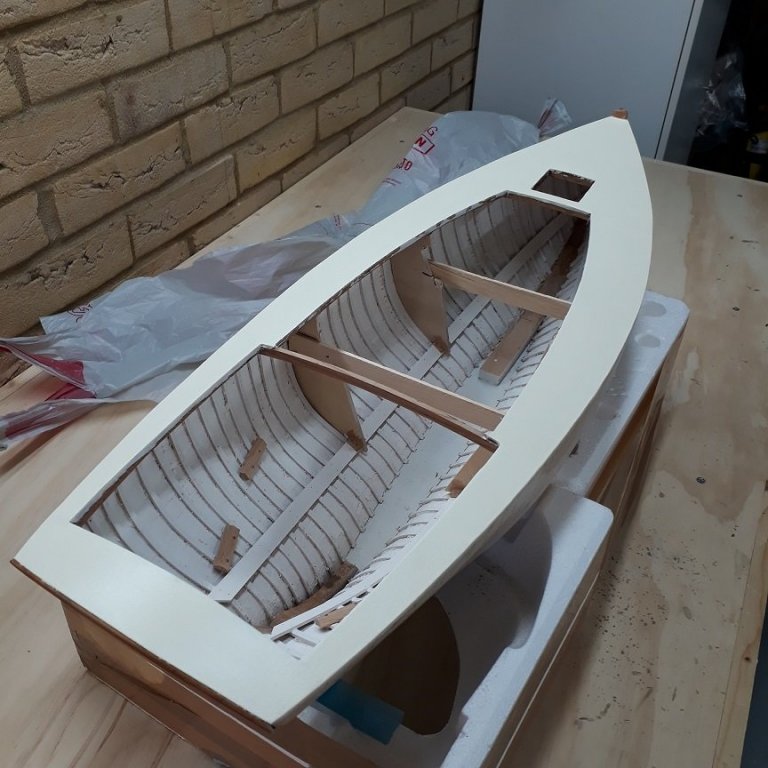
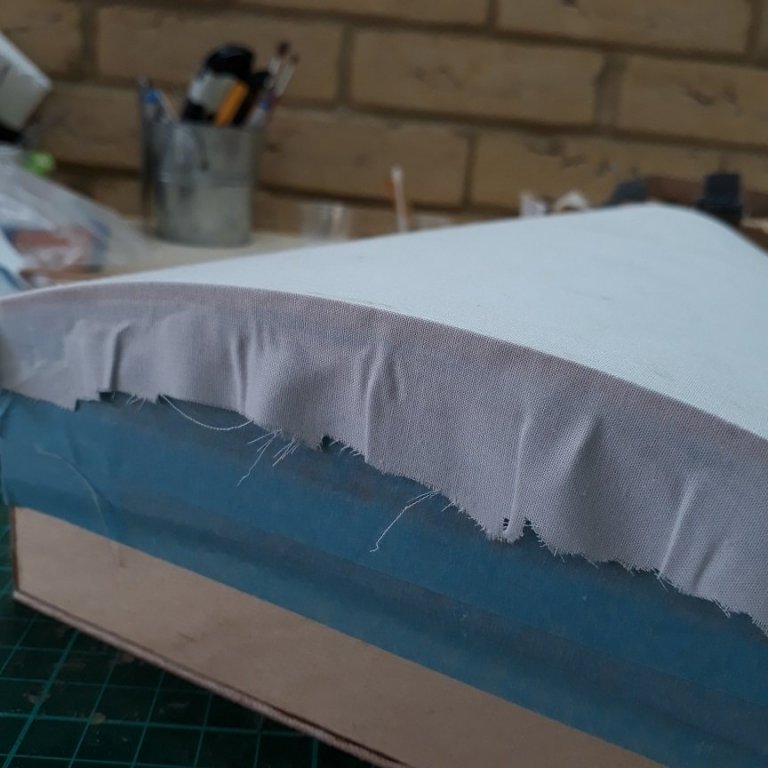
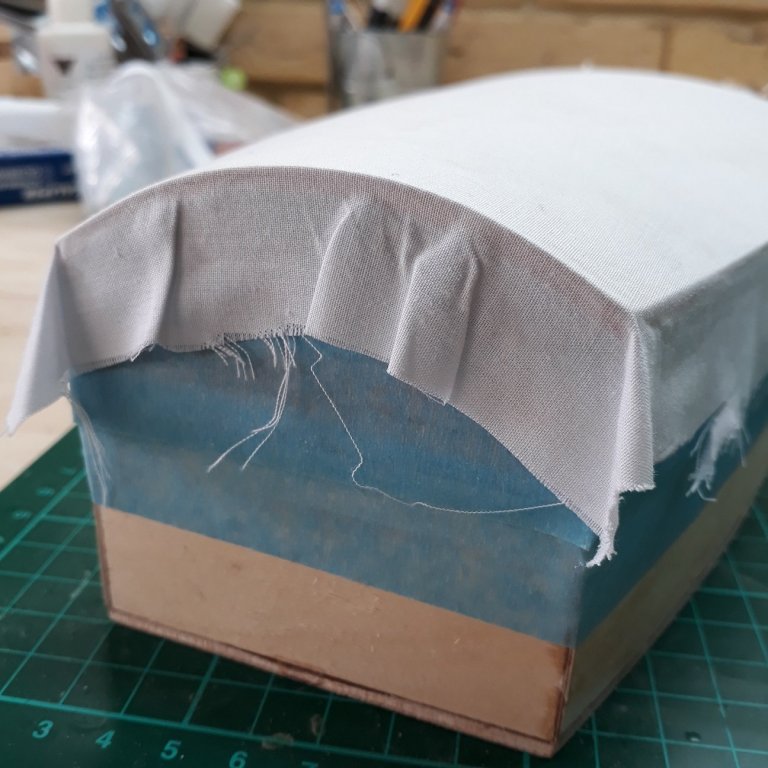
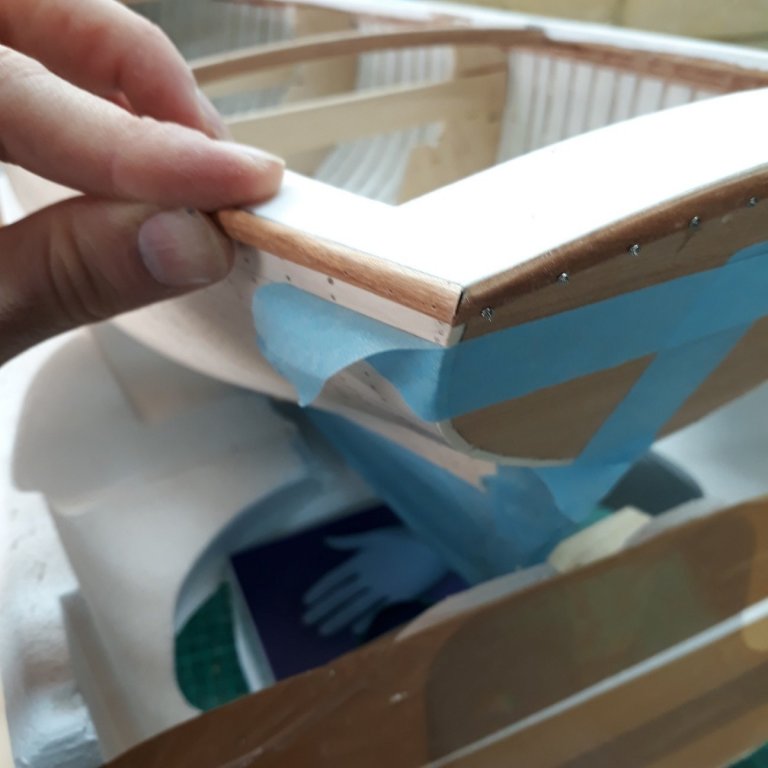
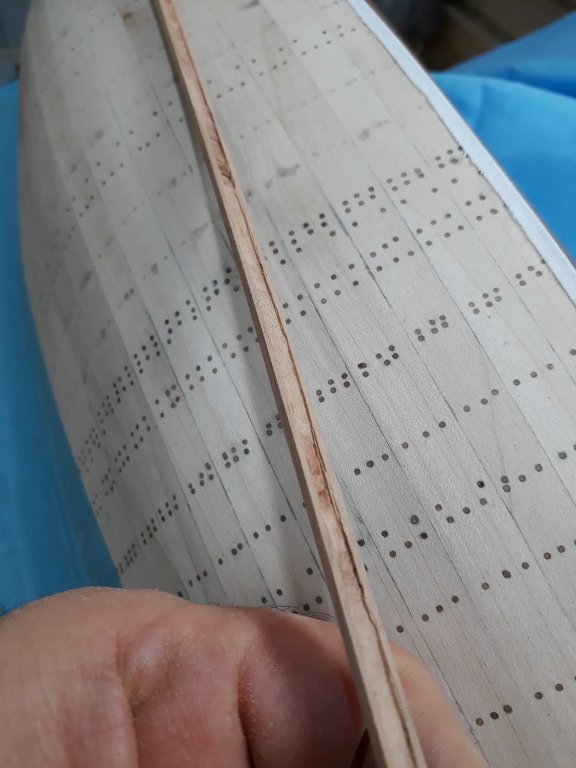
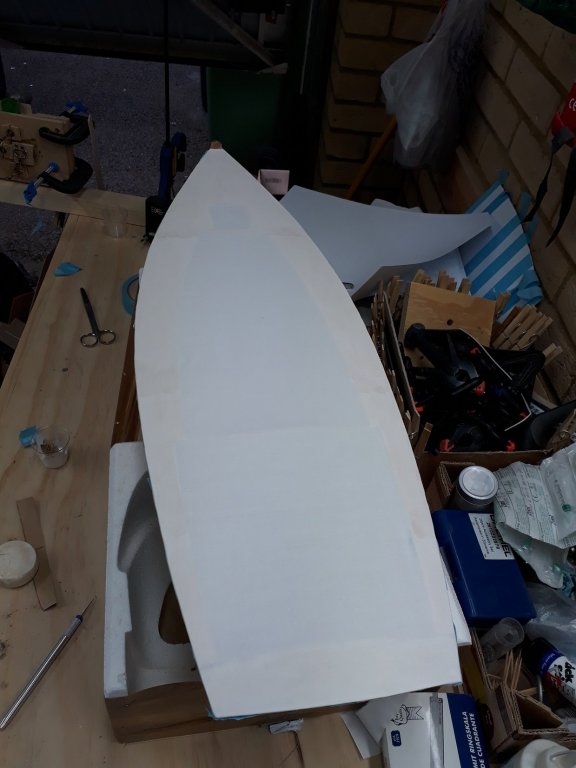
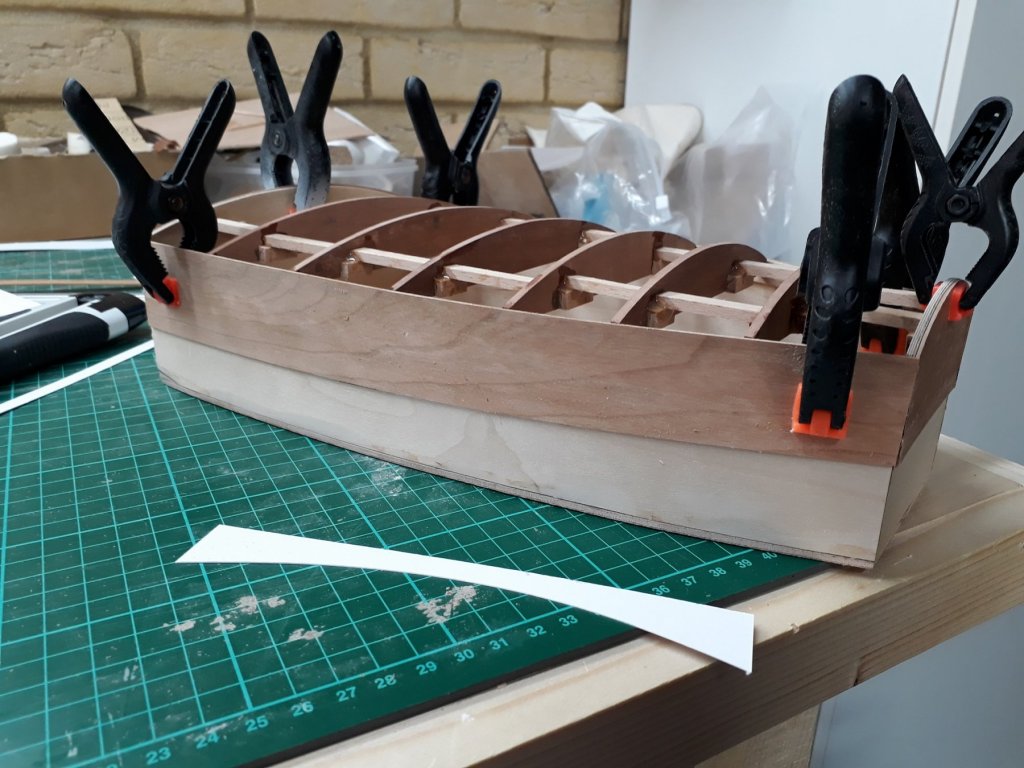
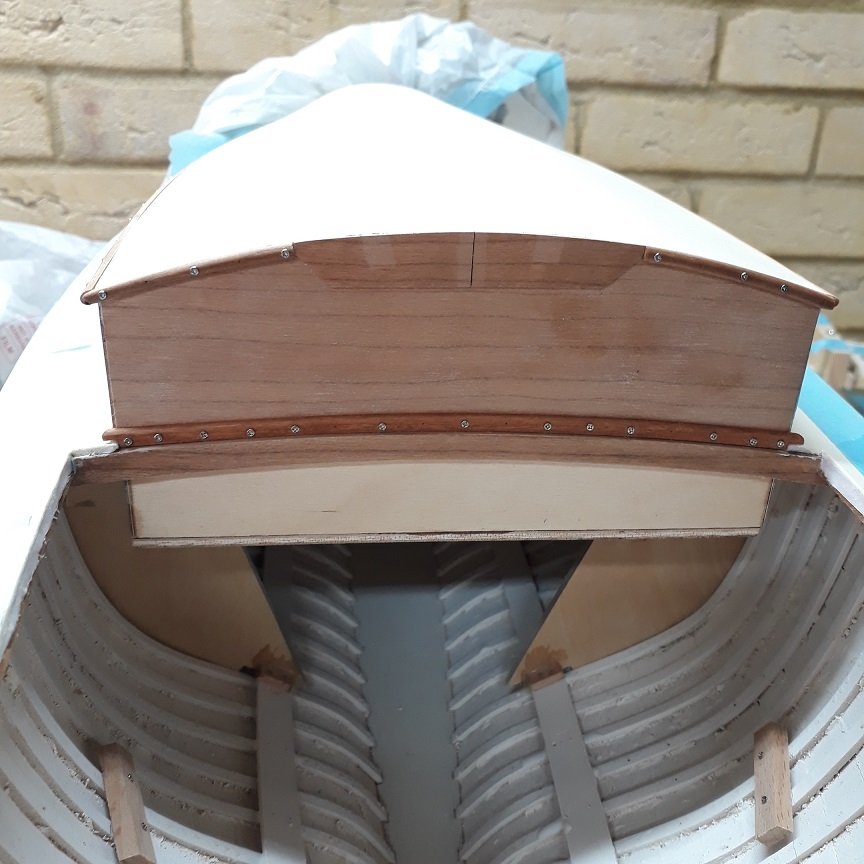
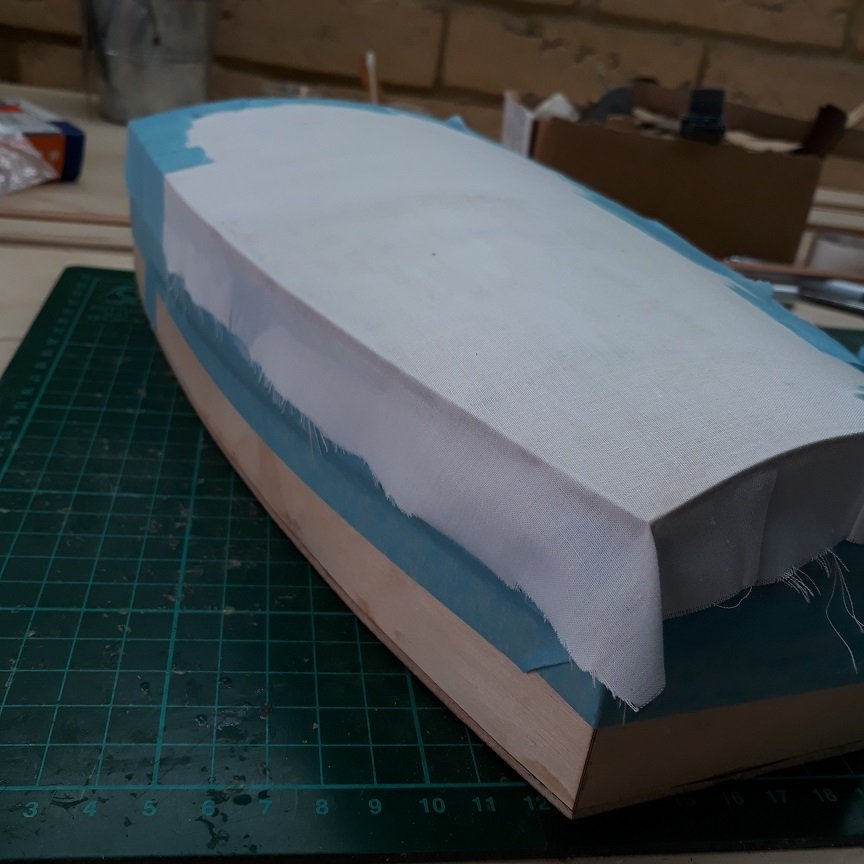
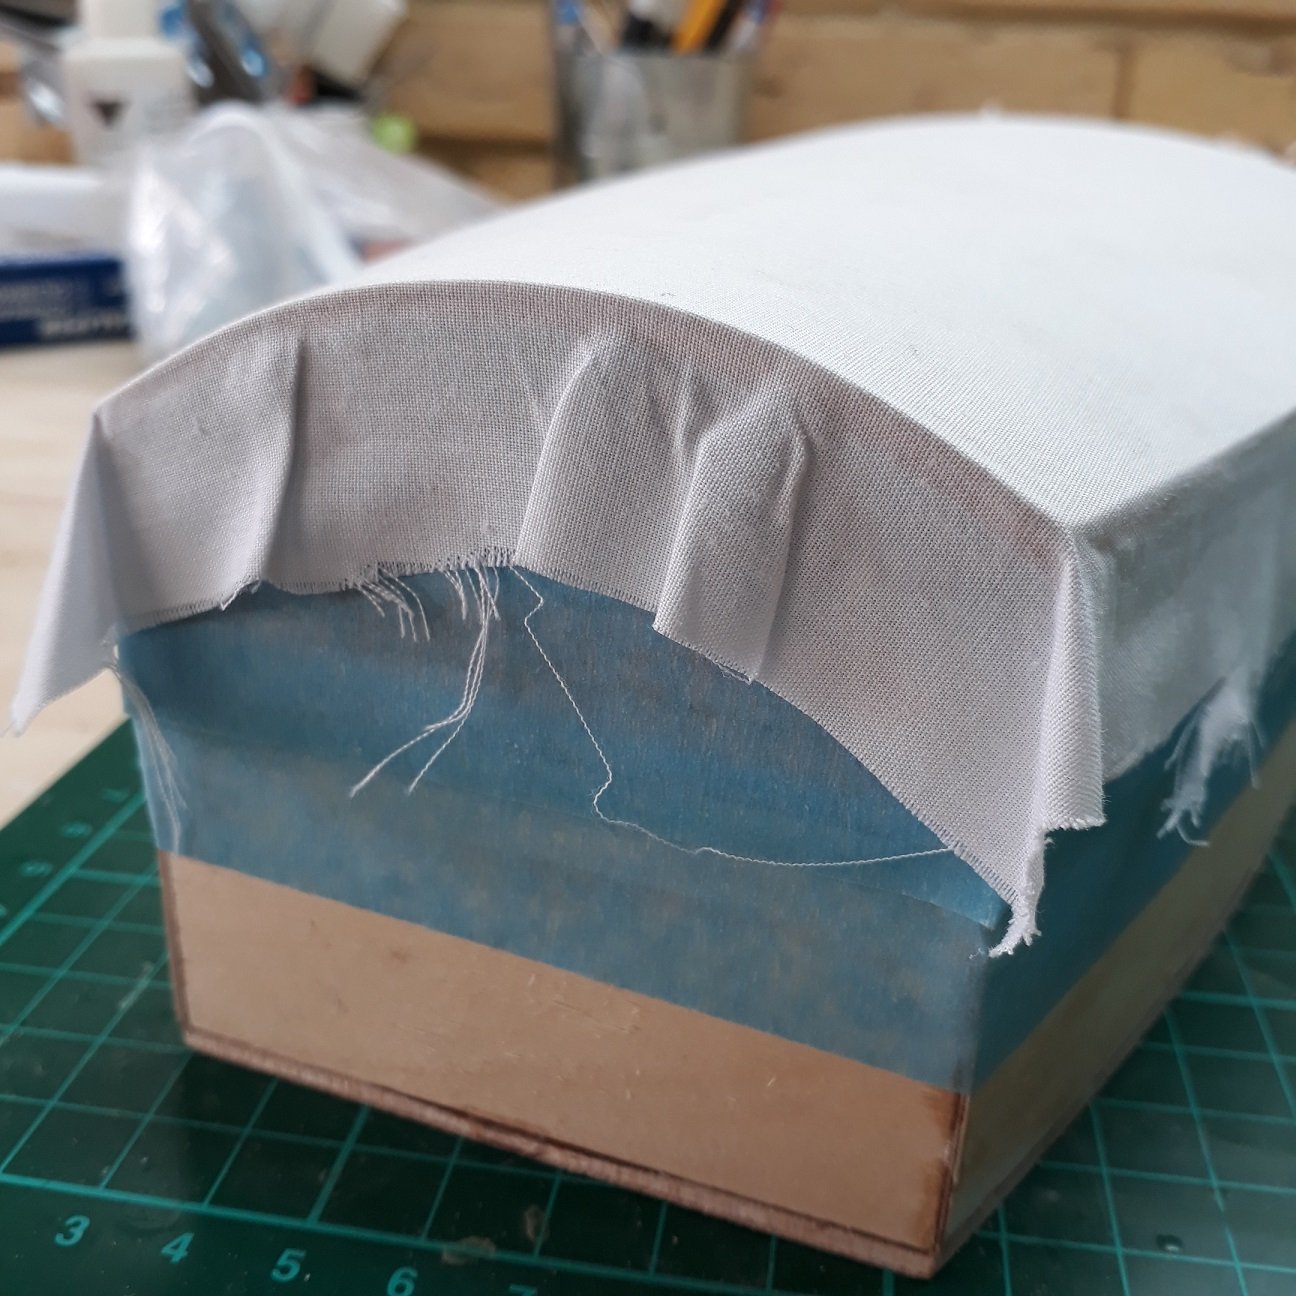
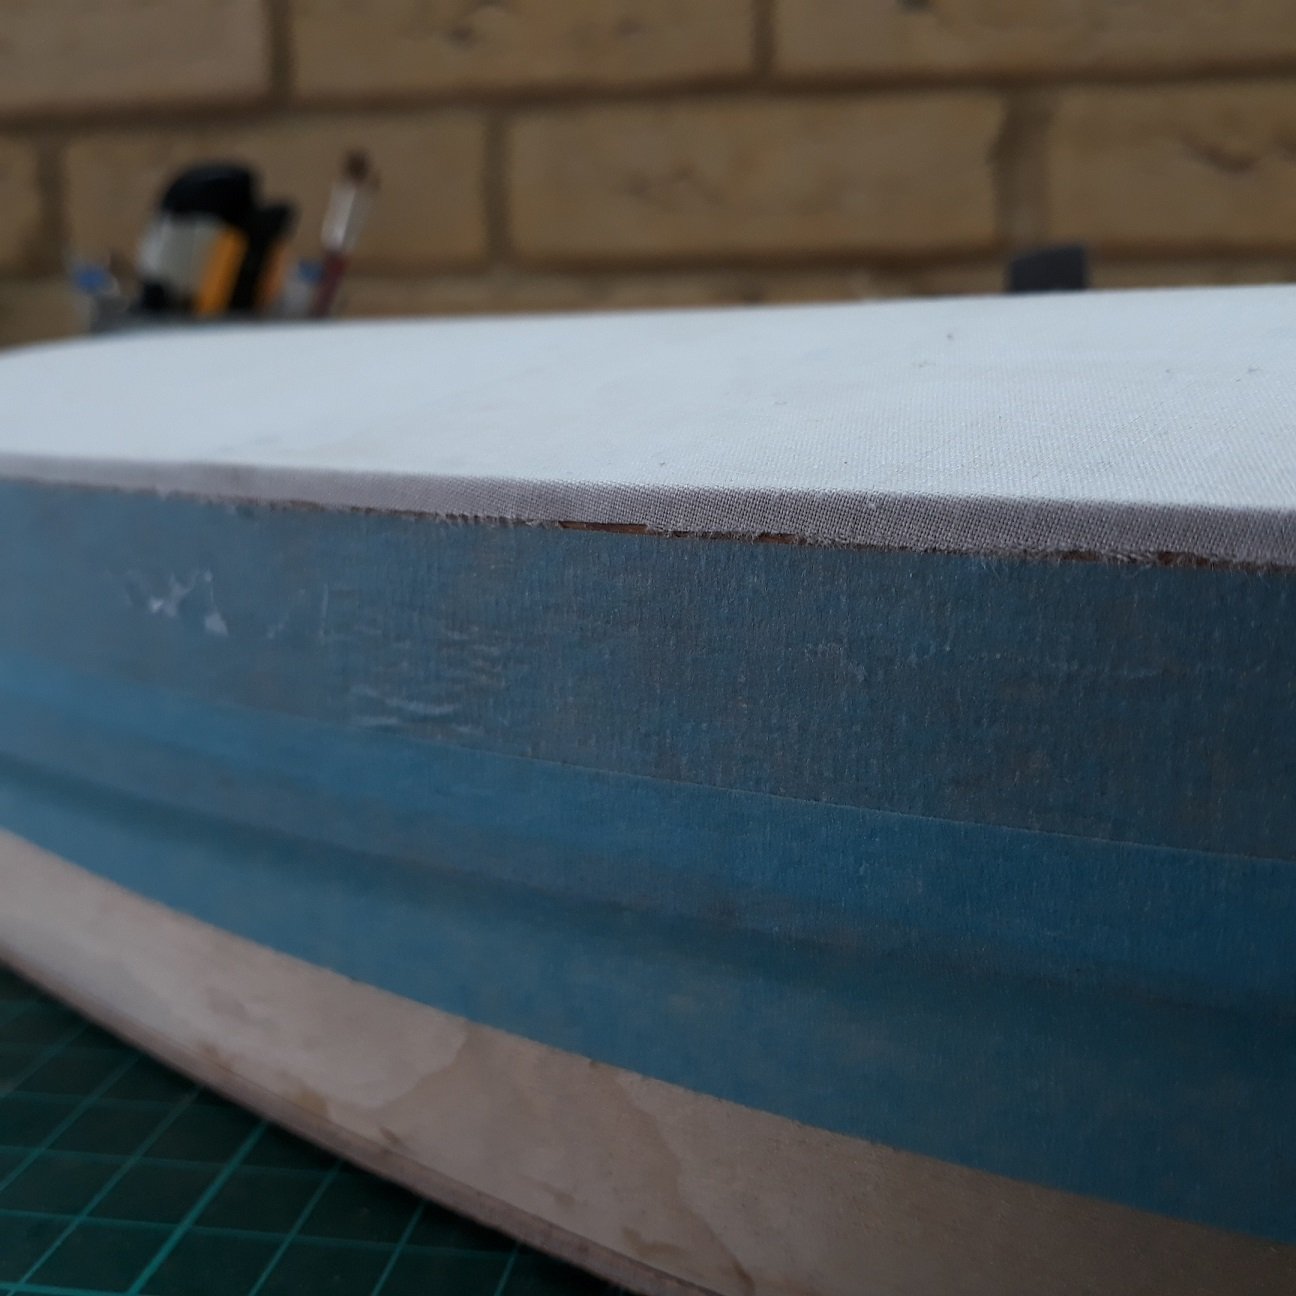
I got a bit more work done so time for an update. I glued the canvas onto the cabin roof, it came out fine. I am posting a few pics with the method I used. The cloth is high quality 400 count pure cotton and the glue I used is hardware store PVA, which dries more clear than the aliphatic varieties and also has a longer open time. The canvas needs to roll over the edge for 2-3 mm so I have taped the sides leaving just so much wood exposed. Then thick undiluted white PVA glue went on using a small foam sponge, not too thickly to avoid creating bumps. A cylindrical object was used to smooth the canvas and then the edges were taped. Particular attention is needed at the edges so they stick well, a dog ear will form but this can easily be trimmed off. Allowing overnight to cure, the outcome was good. Then, the excess cloth was carefully trimmed off. The surface is flat without any bumps but will be sanded smooth. A second coat of slightly diluted PVA went on. It should not need another coat. After much thought, I decided it was time for the rubrail to go on. I just used aliphatic PVA and 1 mm screws, which will later be replaced with wood nails. It should be enough to keep it in place. I installed the transom rub rail, went on ok-ish but not perfect. I think it will be fine though. I also started work on the forward hatch. A word on my new Proxxon KS 230 table saw, it is a very nice piece of kit and already proved very useful! For the things I cut it is definitely not underpowered!


.thumb.jpg.dd3d82f75c84ab14f3a07603fbe54467.jpg)
-
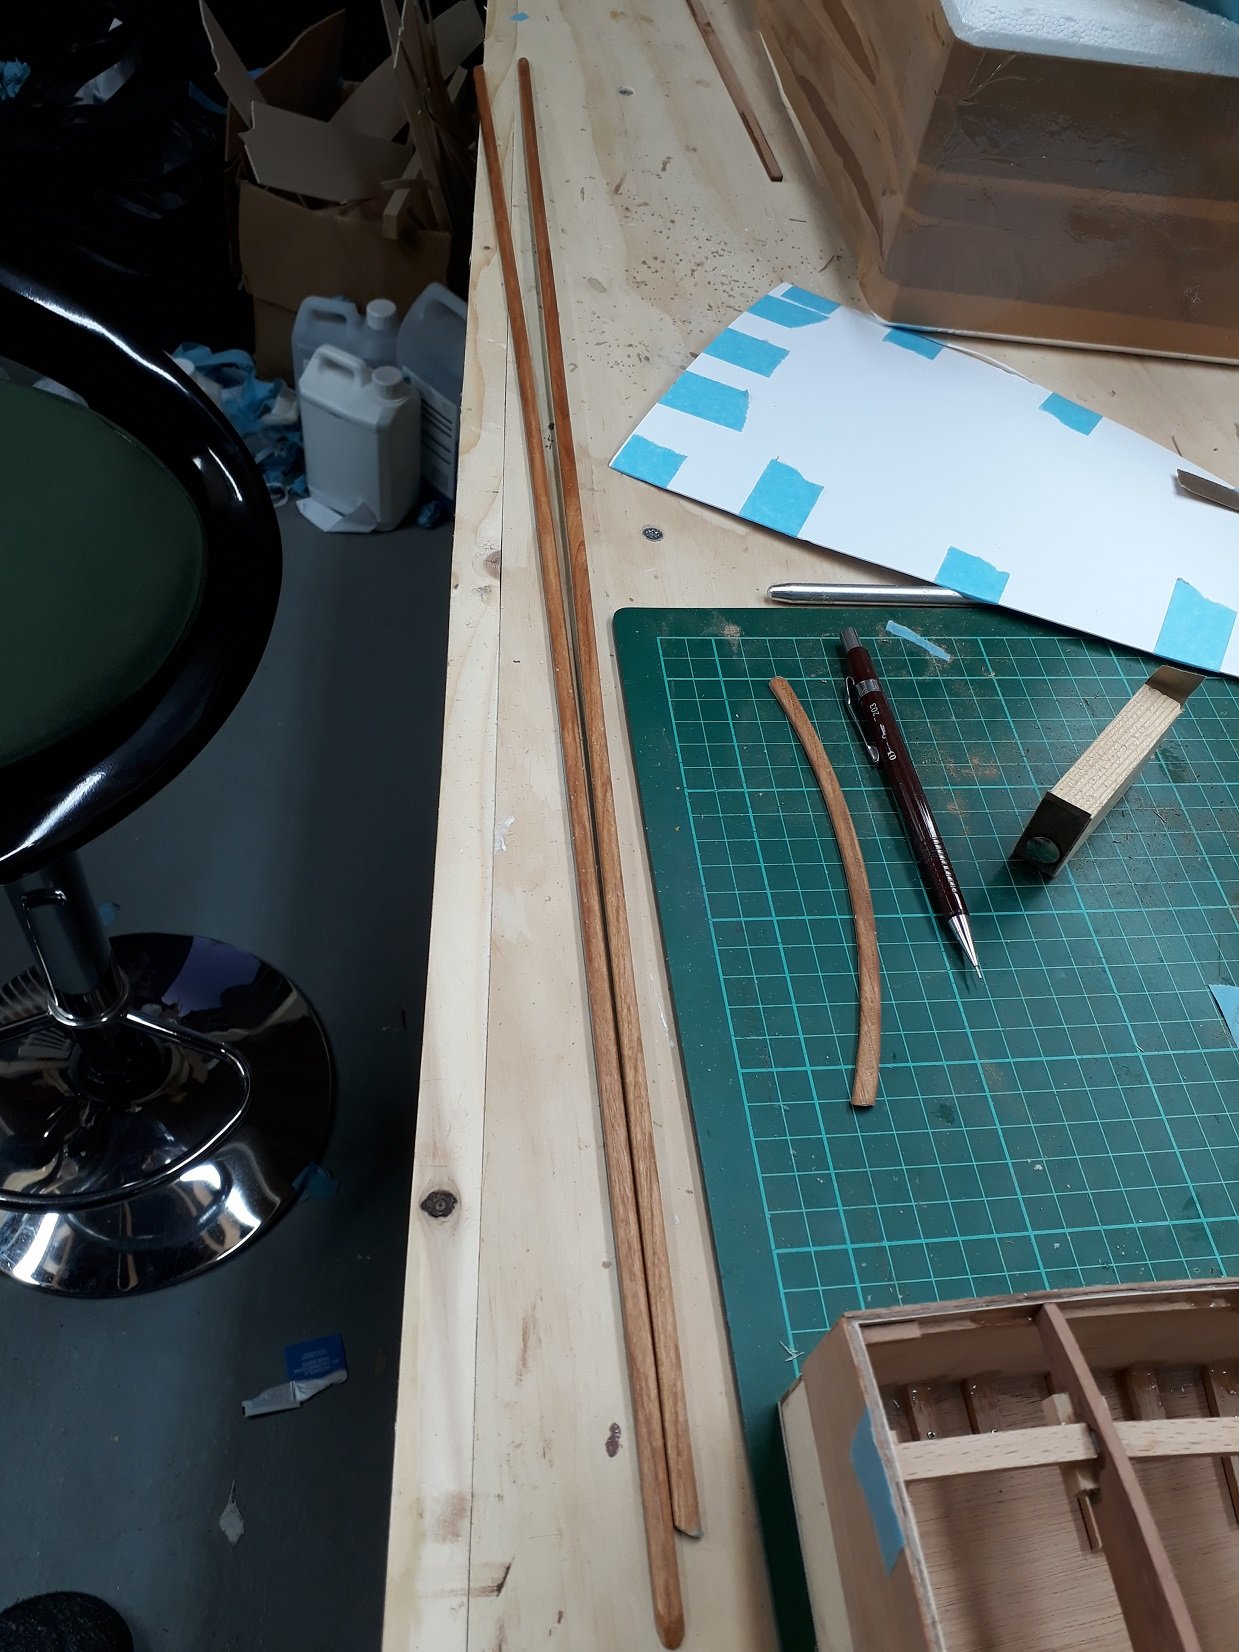
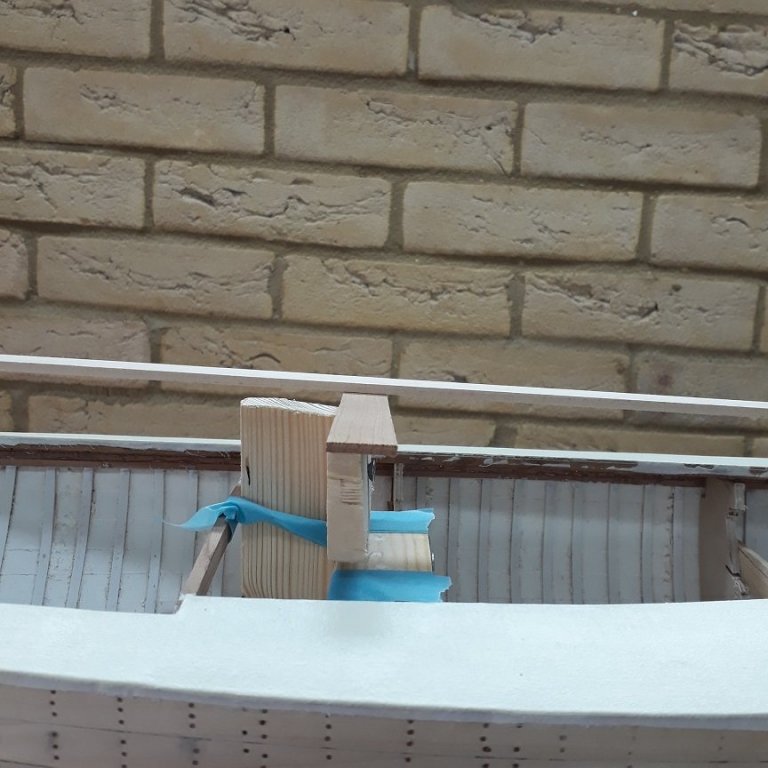
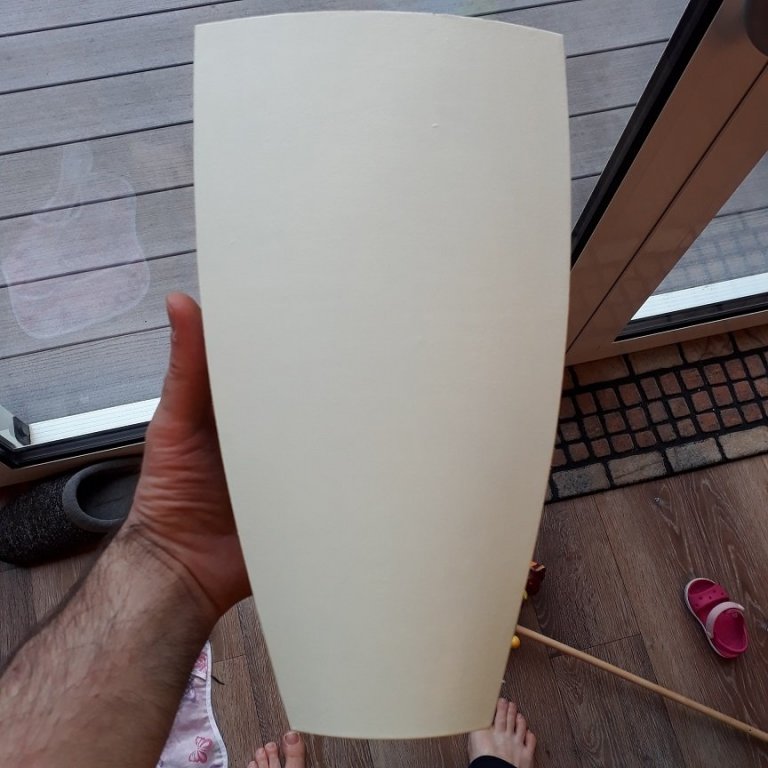
Thanks Andy! It was actually much easier than I thought. Still needs to be painted though. My long standing issues at work seem to have finally resolved (we ll see for how long), so the admiral agreed I could treat myself to a new toy. I bought a Proxxon KS230 table saw, I think it should give some solutions. I know it is very underpowered but then again so is my wallet! I did a bit of work on the boat. I added a solid piece of wood to the cabin roof beams to better support the tabernacle, when later fitted. I finished the rubrails and applied a coat of pure tung oil to enhance the colour. I will apply two coats of sanding sealer and then smooth the surface with 0000 steel wool. I also cut the plywood piece for the roof. Still needs to be glued on, trimmed and then get the canvas on. I also need to trim the canvas of the deck beams as the cabin does not fit anymore!
-
Fascinating boat Patrick and it feels you ve captured the hull. I absolutely love the gold and black/grey colours!
-
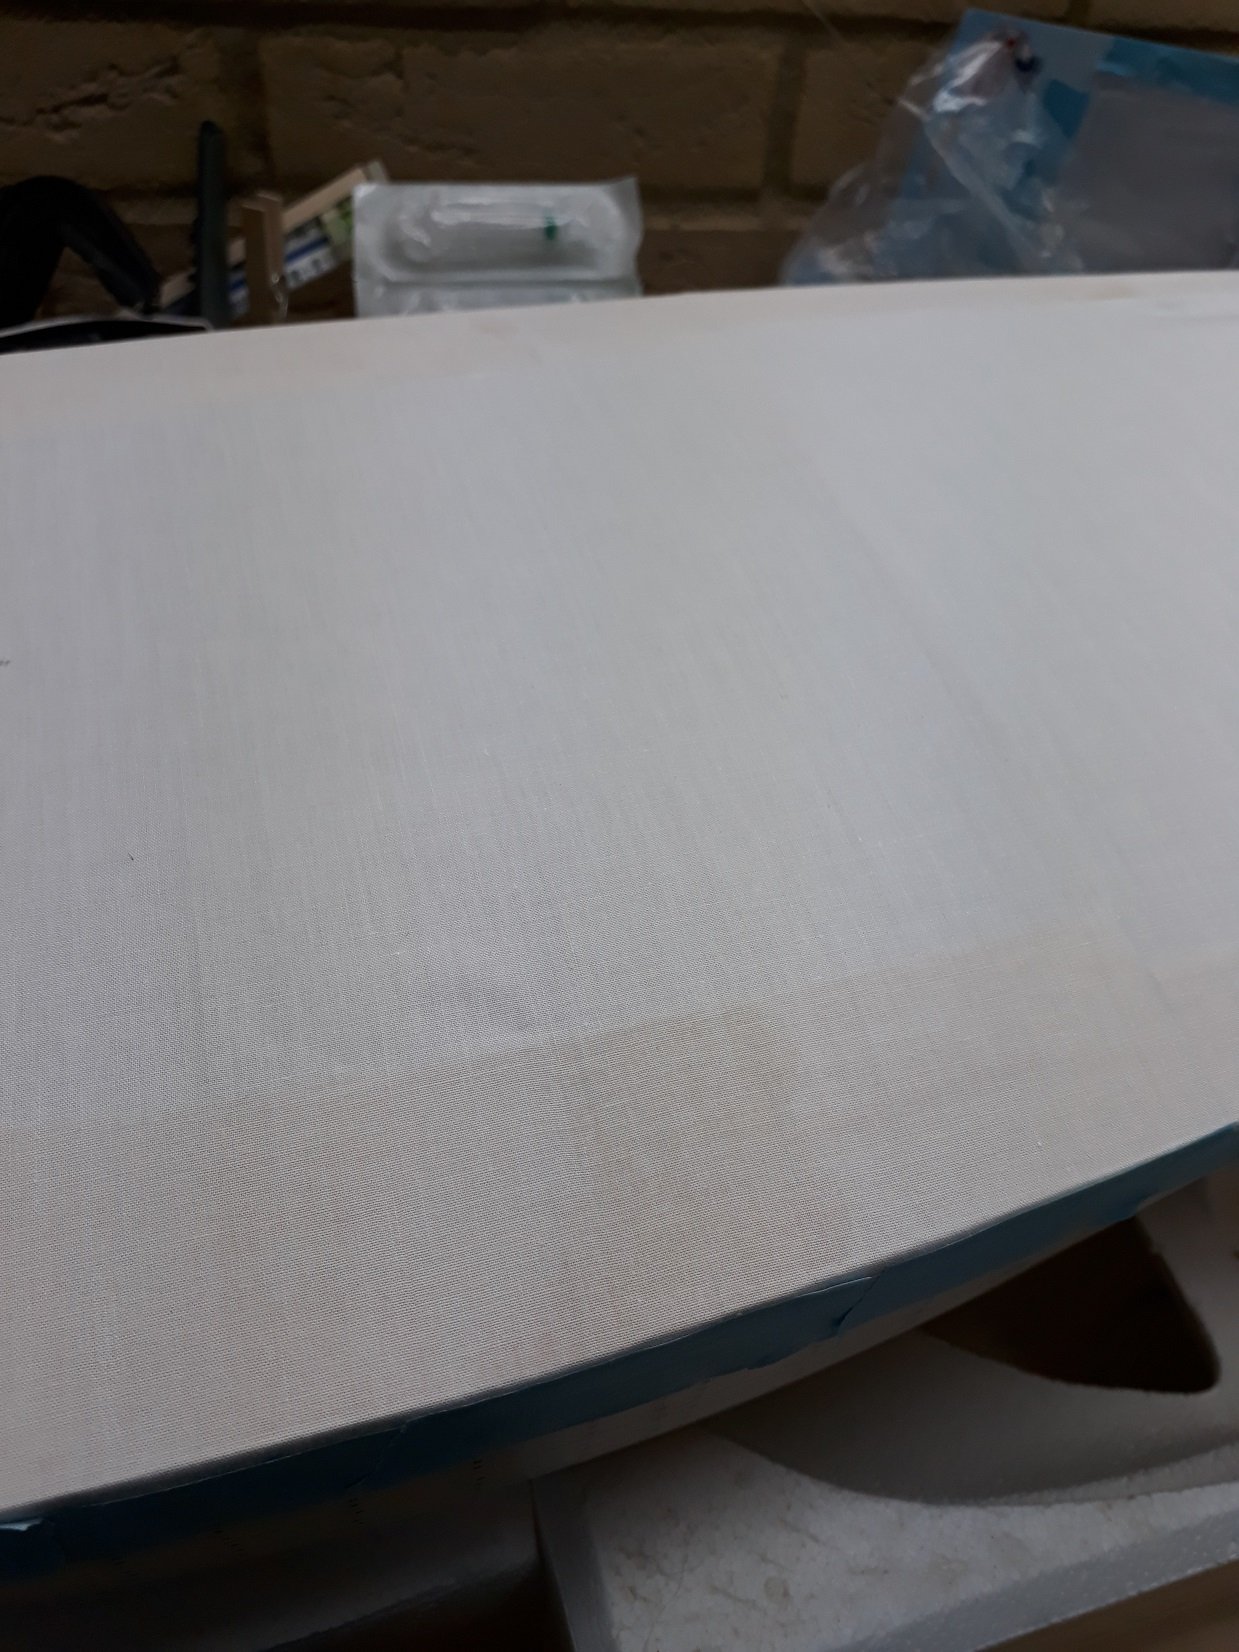
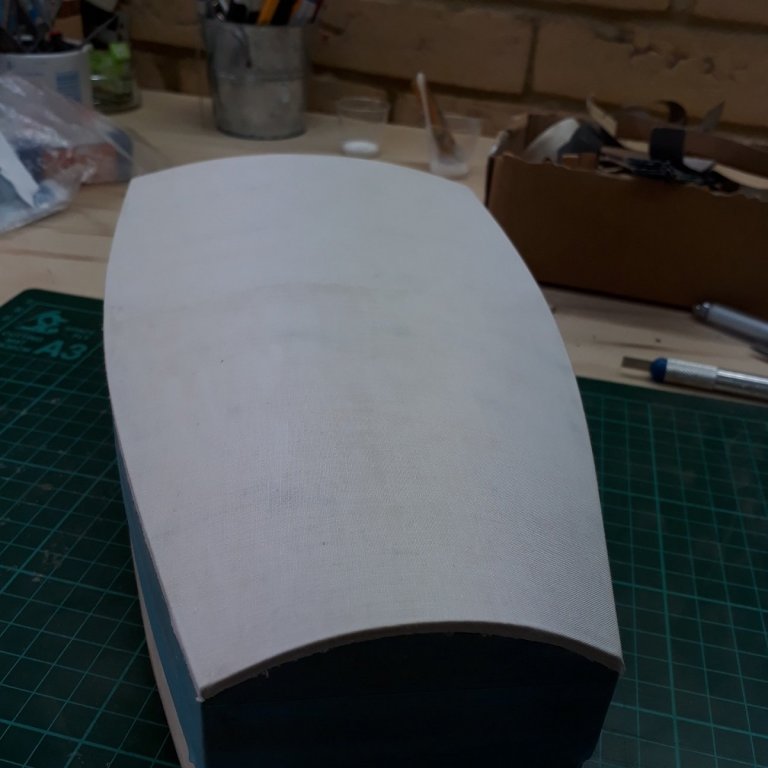
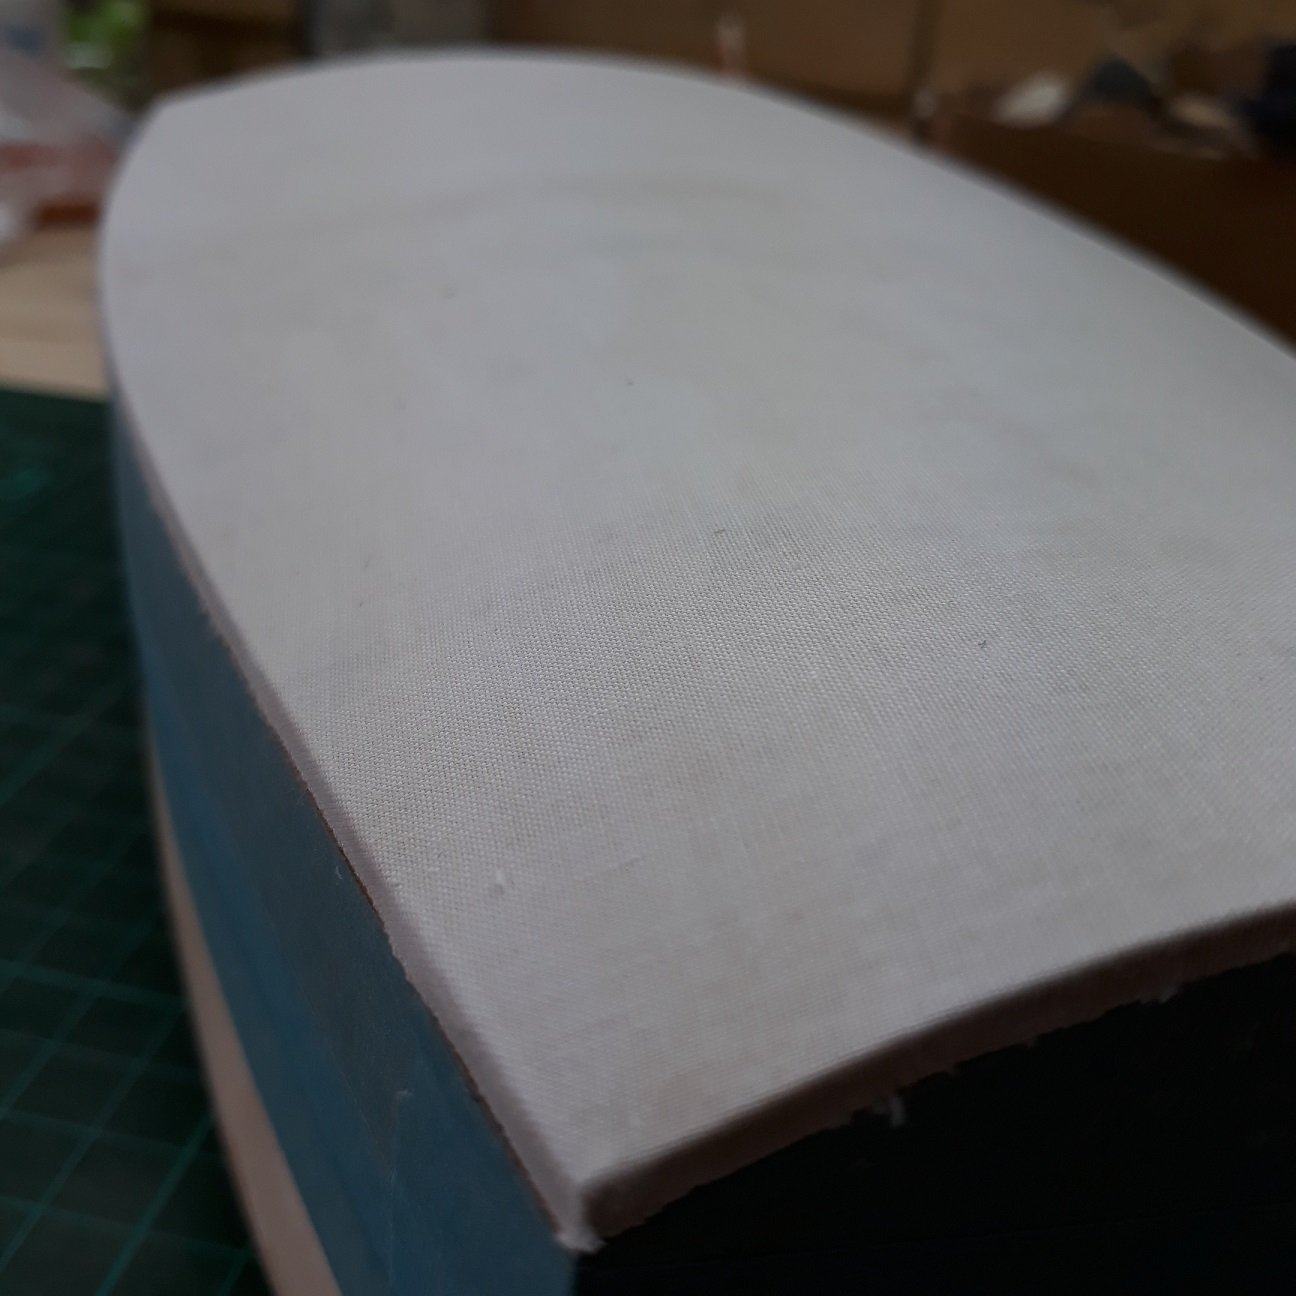
Many thanks for the advice Mark, good suggestions. A very quick update as I have had very little time to work on the boat. The canvas is ready. I only applied one coat of slightly diluted PVA, it does not need another. It is completely rigid and has become one with the plywood underneath and with the sides of the boat. It is rigid enough to support anything glued on it. Later on I will lightly sand it and it will become very smooth. I also almost finished the rub rails including the one for the Transom. Tons of work left as I slowly approach 2.5 years since I started work on this boat!

-
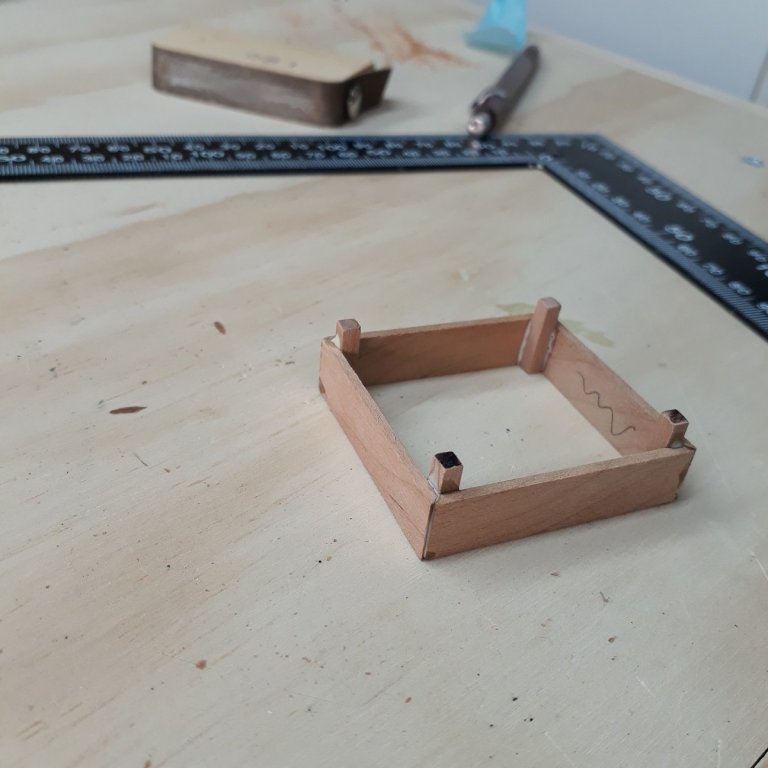
Many thanks both! Patrick, it will be just a few very simple shapes but it will be so much easier to cut this way, plus I can have 4 or 5 identical sets to experiment with. I must say that all the tabernaculums I saw on the net are simple, functional and rather ugly pieces of steel! Mark, what a brilliant suggestion. I googled it and ebay sells for cheap aluminum powder which when mixed with epoxy, should give a liquid weld look and also a strong joint. This will be a fall back plan. They also sell brass and copper powder.
-
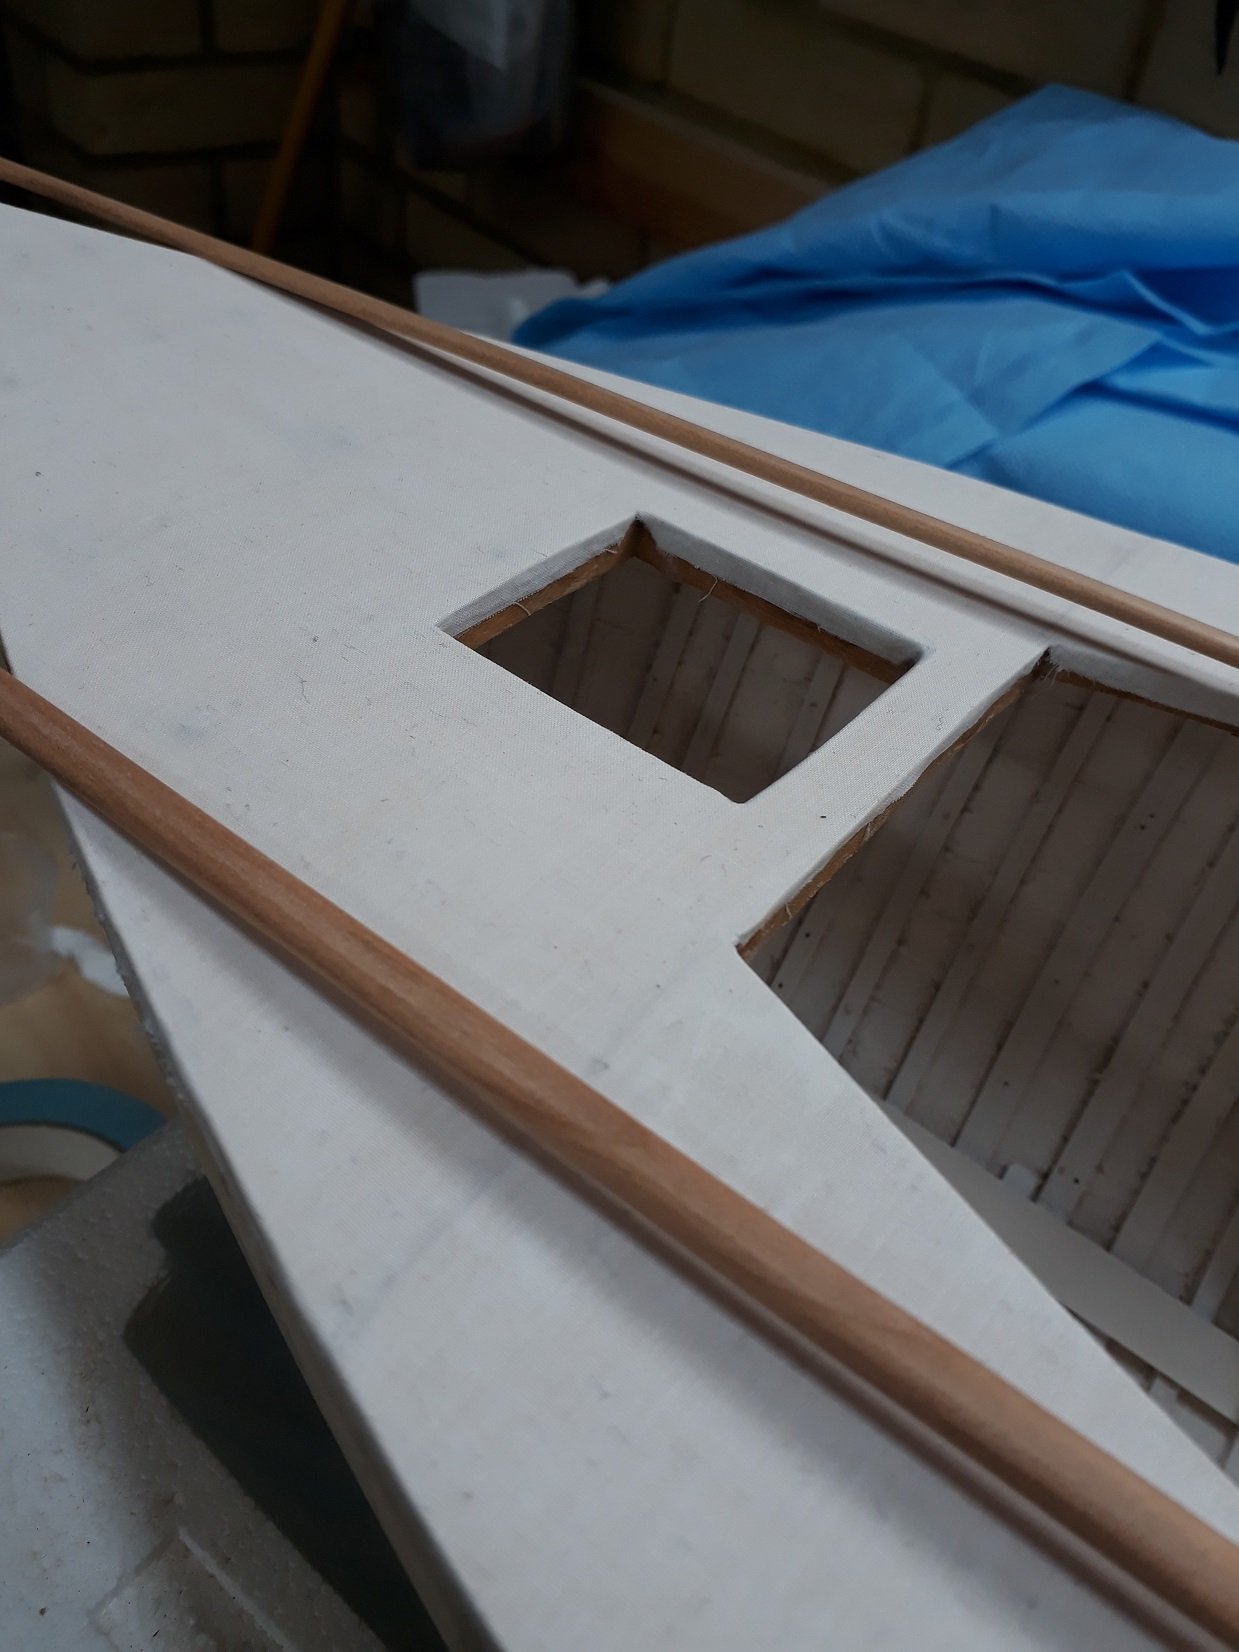
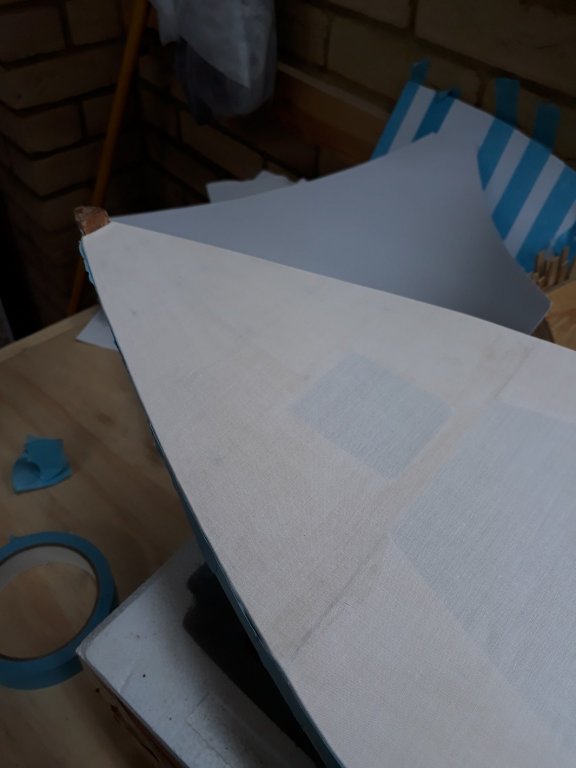
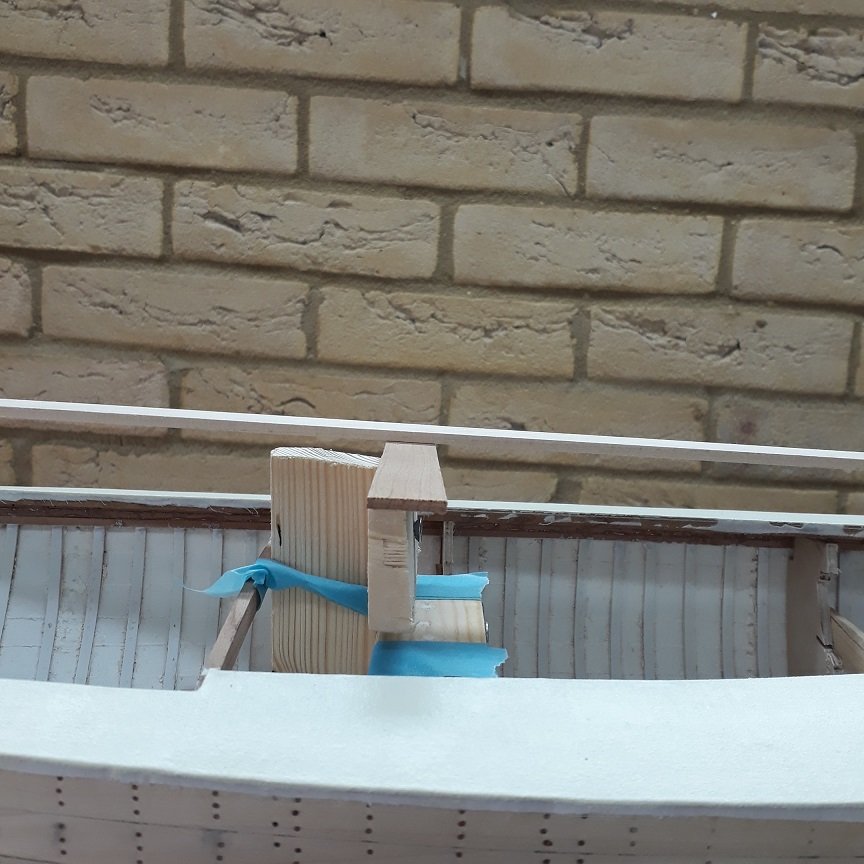
Life got again in the way of boat building so I only had time today to work. The good thing is that the glue had time to fully cure. I think that PVA needs at least a day to reach max strength. The fabric is now fixed to the deck. The discolorations are now much less visible. I cut the internal spaces and glued the edges of the fabric over the sides. Then I trimmed one side. The rubrail will be a long strip of cherry, with rounded edges. However, due to the fabric soaked in glue, now solid, it did not sit well and would leave gaps. I thought that milling the middle section of the strip would allow it to seat much better. It was not to difficult to do this with the dremel at low speed and a milling bit. Steady hand and slow progress was needed. The rubrail now sits much better. Maybe I will fill the milled out section with thickened epoxy when the time comes to glue the rub rail on. I decided to go for a tabernaculum for the mast. This however in the real boat would be made from stainless steel so I cannot use the familiar brass. I need to use either thin aluminum, which I suspect will not like soft or silver solder, or stainless steel, which will be too hard to cut with my saws. Also, I think my needle files and sand papers will not be too effective on stainless steel. I decided to cheat a bit. One thing I never mentioned is that I have a brother who has a full industrial grade CNC as well as (many) other toys in his factory. I will design the parts for the tabernaculum on CAD and I ll ask him to cut them for me in both aluminum and stainless steel so I can experiment with solders. In the meantime, I will not attach the cabin roof in case I need to go for a more conventional mast step at the keel.

-
bending planks
vaddoc replied to bluenose2's topic in Building, Framing, Planking and plating a ships hull and deck
I used 2 mm maple in my current build. 30 secs under hot tap water and I could get the wood to take extreme twists but mahogany does not like bending much. My experience is also that it can have interlocked grain, same as walnut which often suddenly breaks instead of bending. -
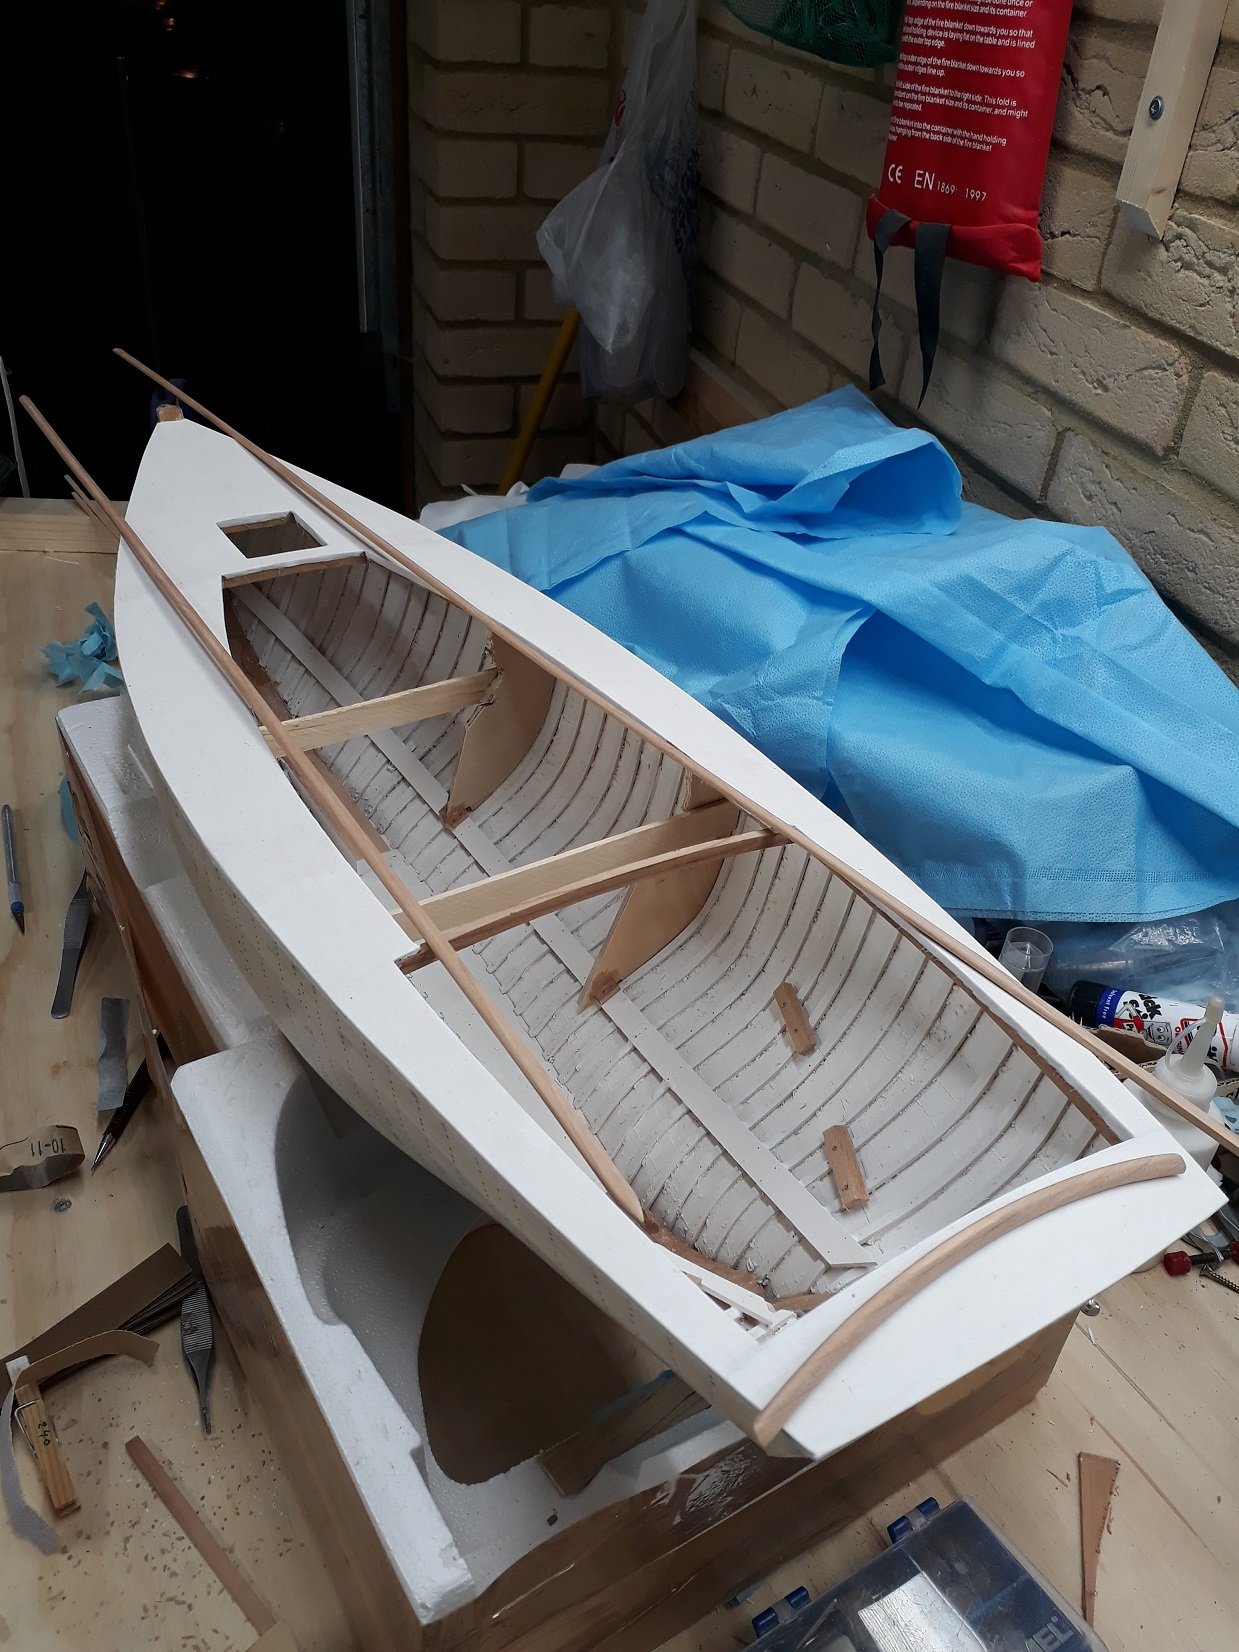
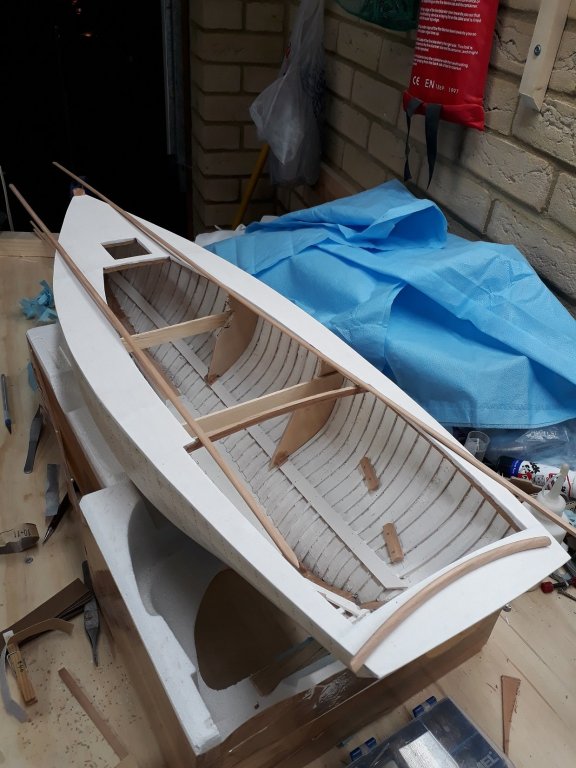
Many thanks Mark and Patrick! A bit more progress. I sanded the cherry veneers to 400 grit and glued them on the cabin with epoxy. I also lowered the cabin height a bit and now looks better. It came out fine, I think after everything is glued on I will finish it with Tang oil and gloss (probably enamel) varnish. I also glued the canvas on! it actually went on just fine. I used 400 count high quality cotton cloth and undiluted hardware white PVA glue. In a few areas the glue went on thicker and some stains appeared. I hope they will either disappear, or when the paint goes on they will not show. I ll wait 24 hours for the glue to cure, then I will cut the internal spaces. I will then glue the sides and add a coat of slightly diluted white PVA. I ll give it a few days and then add a second coat. Then, I will lightly sand the surface and trim the sides. Hopefully this will bring a good outcome. I think I will paint the surface before moving further.

-
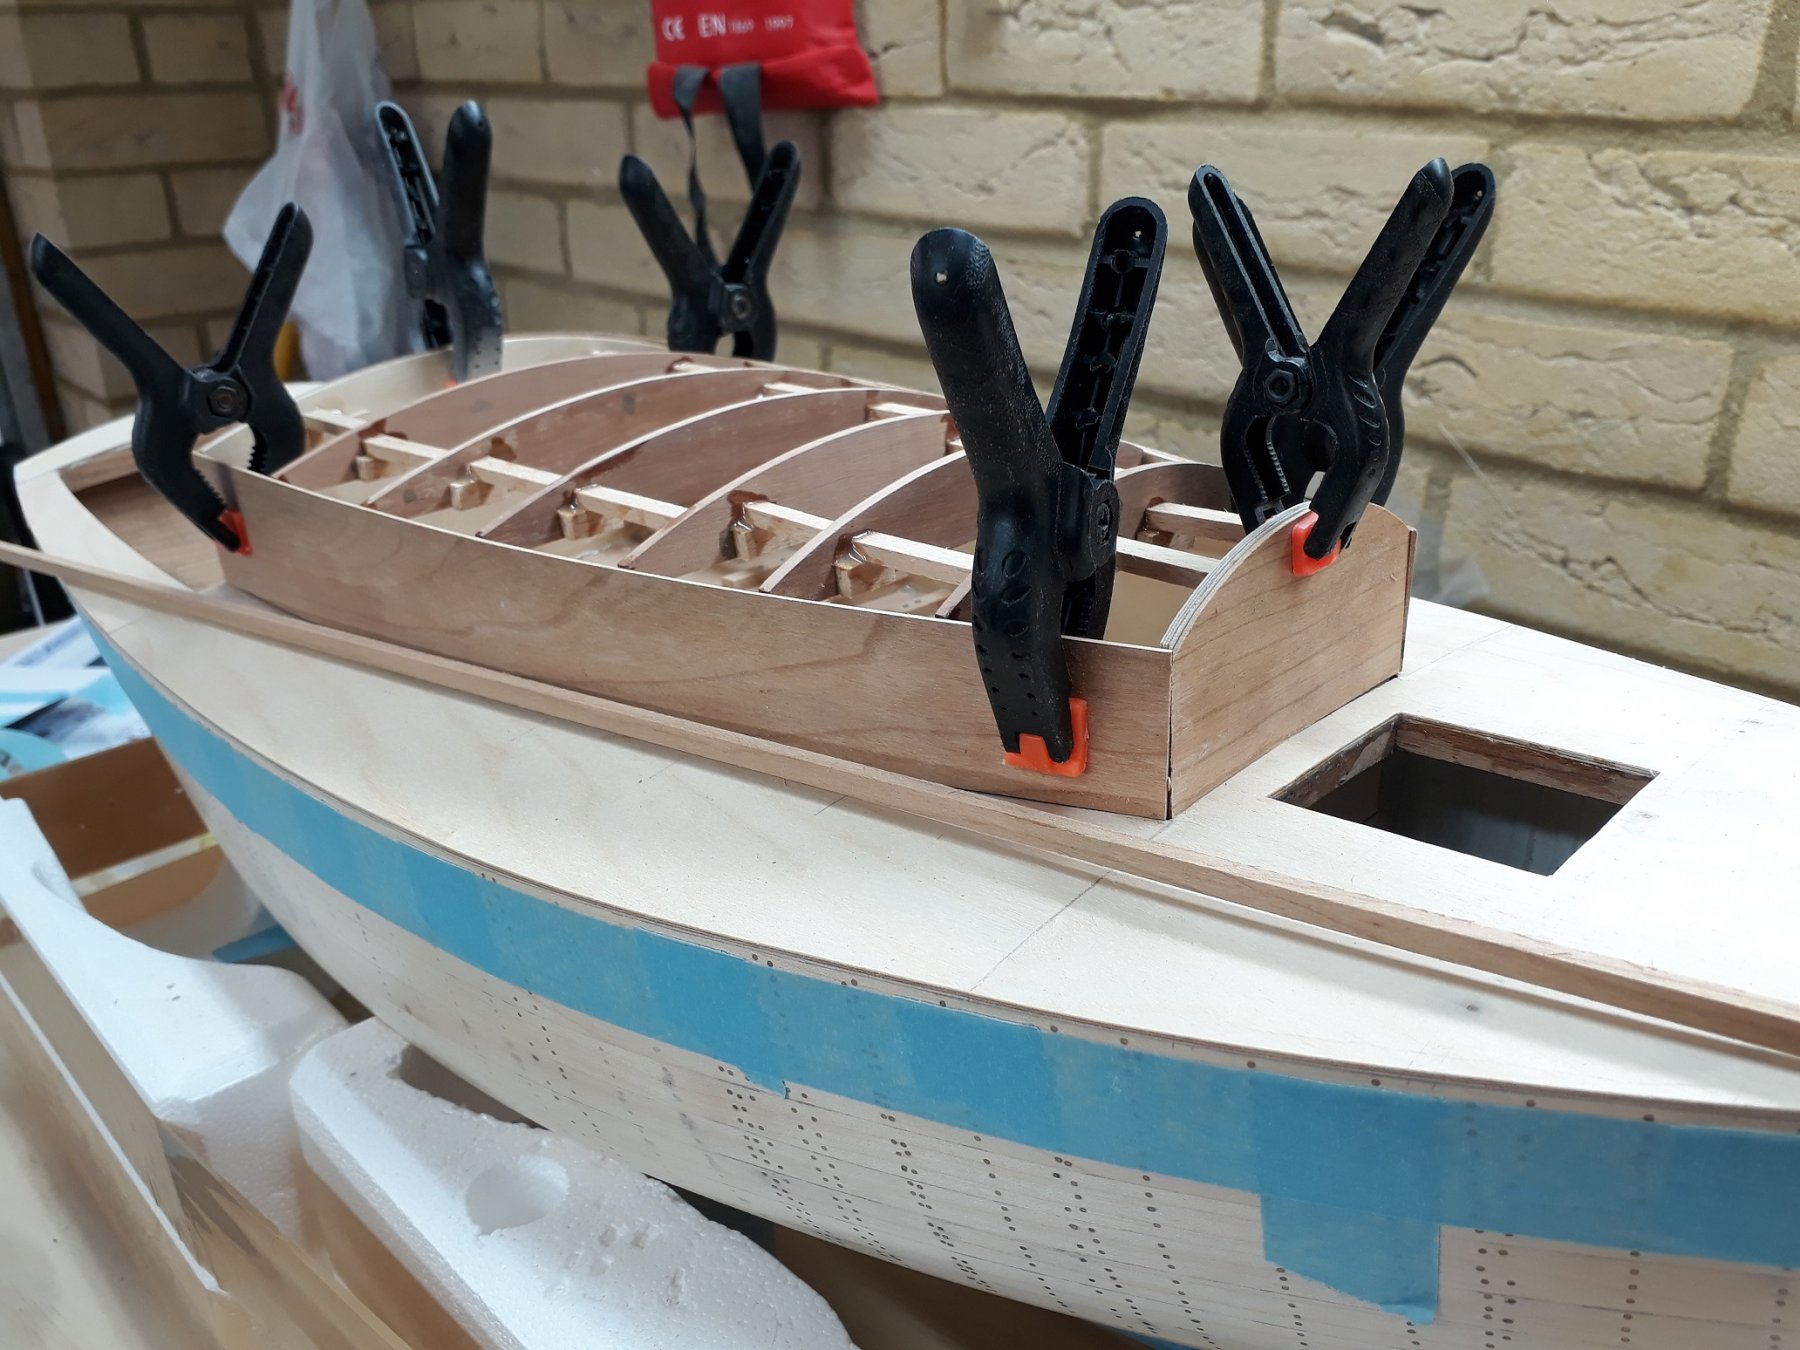
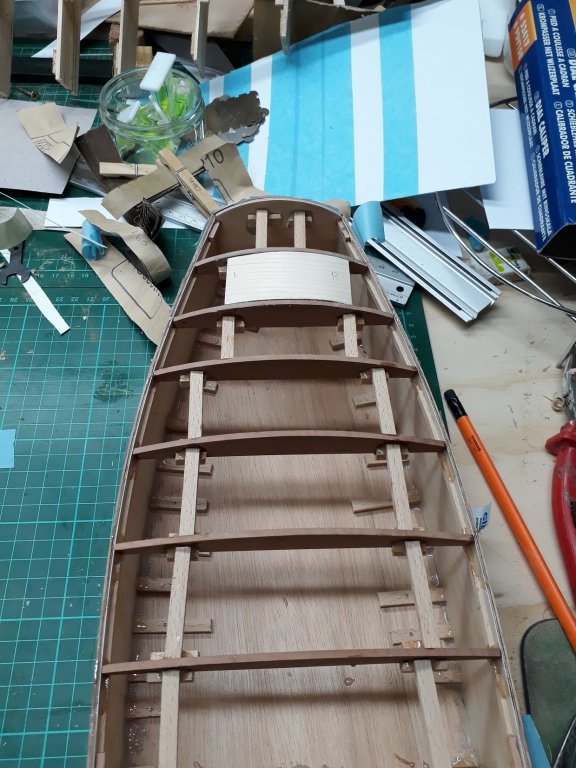
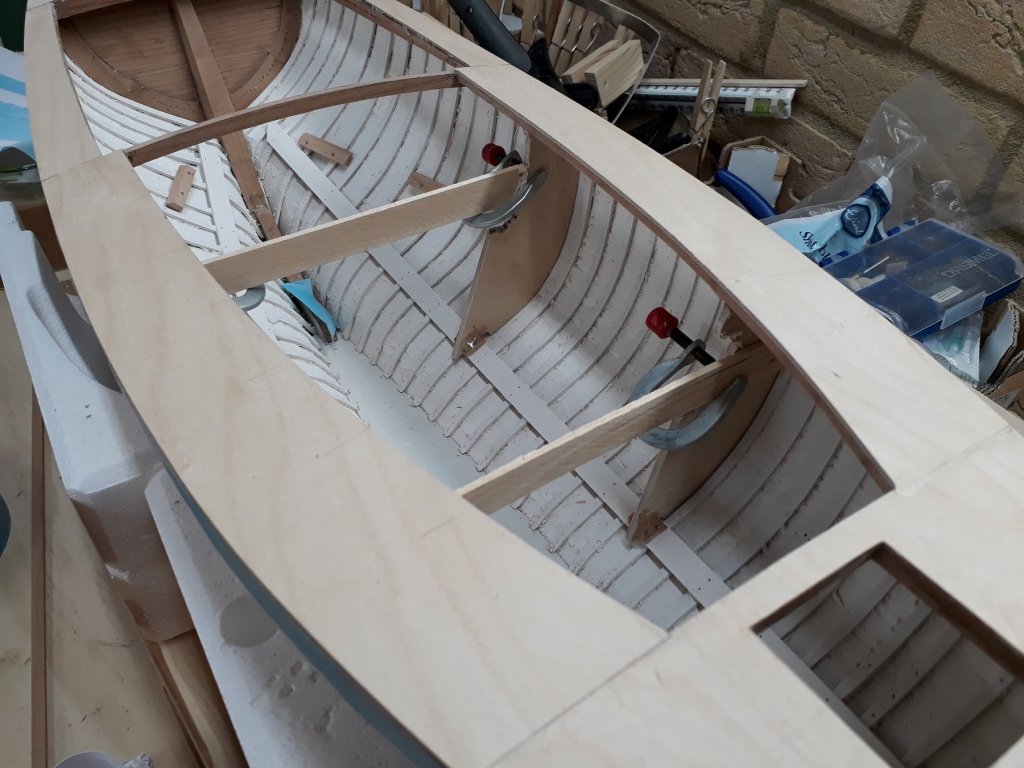
Another update is in order I think. After trial and error I think I now have established a cabin height that works well with the rest of the boat. I temporarily installed cross beams at the bulkheads and they do a good job at supporting the cabin. It took a bit of work to get the heights right so that the cabin roof would be parallel to the waterline. Due to the sheer curve of course, the cabin wall height reduces towards the bow. I found in my timber stash a forgotten cherry sheet 1 mm thick which is excellent to cover the plywood walls. Cutting the templates was much easier than I thought. I also cut the cardboard template for the plywood roof. I think next task will be to install the roof and then the canvas over the deck and roof.

-
Almost there it seems Patrick! I have been watching from the far end of the room and enjoying your journey, a very nice and unusual model. Thumbs up for the shoe polish!


.jpg.7a3231bbeae396bf939a7a54a883e773.jpg)