.jpg.f26acc9a74319261612561bfa7da1303.jpg)
vaddoc
-
Posts
1,605 -
Joined
-
Last visited
Content Type
Profiles
Forums
Gallery
Events
Everything posted by vaddoc
-
Welcome Bruce! I d say start building, far too much fun to miss out.
-
Regarding saw discs. Both the tungsten tip one and the steel wood disc are very good. Could not really tell a huge difference for the dimensions I cut. The metal cutting HSS I found completely useless. I could not cut 1 mm brass, it was even dangerous. Maybe it's me though. Another thing, I ve read that the bearings on the saw are not shielded and gather dust easily. I ve attached the admiral's decommissioned vacuum cleaner and it sucks all the dust away, the dust extraction port is excellent. Highly recommended set up. As Brian and Bill say, it can send pieces flying so wear glasses and count your fingers. I am ashamed to say though I took the guard immediately off...
-
Have fun with your new saw Nick! I found my KS very useful for cutting strips and long straight sides in panels. For accurate sizing of parts though I use the disc sander or multiple passes with a sharp knife. I think you ll find this little saw useful and personally I did not find it underpowered, considering it is intended fro small jobs. I sanded flat the end of the screw that tightens the fence, it comes out from factory slightly oblique and ruins the alignment of the fence. Took less than a second, used the disc sander, look into this.
-
.thumb.jpg.6fd4c1b78768bb3efd745ab810936005.jpg) Spot on Carl! Lawrence, I run the drill press at the highest speed. I have a pair of excellent (and expensive) Knipex side cutters. The raised surface easilt sands away, especially if the nails are made of softwood and the boat timber from something harder. You can very easily make 0.6 mm wide, probably smaller if you wish. I make a few hundreds each time I sit down to it. I now use them all the time as structural nails Regards
Spot on Carl! Lawrence, I run the drill press at the highest speed. I have a pair of excellent (and expensive) Knipex side cutters. The raised surface easilt sands away, especially if the nails are made of softwood and the boat timber from something harder. You can very easily make 0.6 mm wide, probably smaller if you wish. I make a few hundreds each time I sit down to it. I now use them all the time as structural nails Regards -
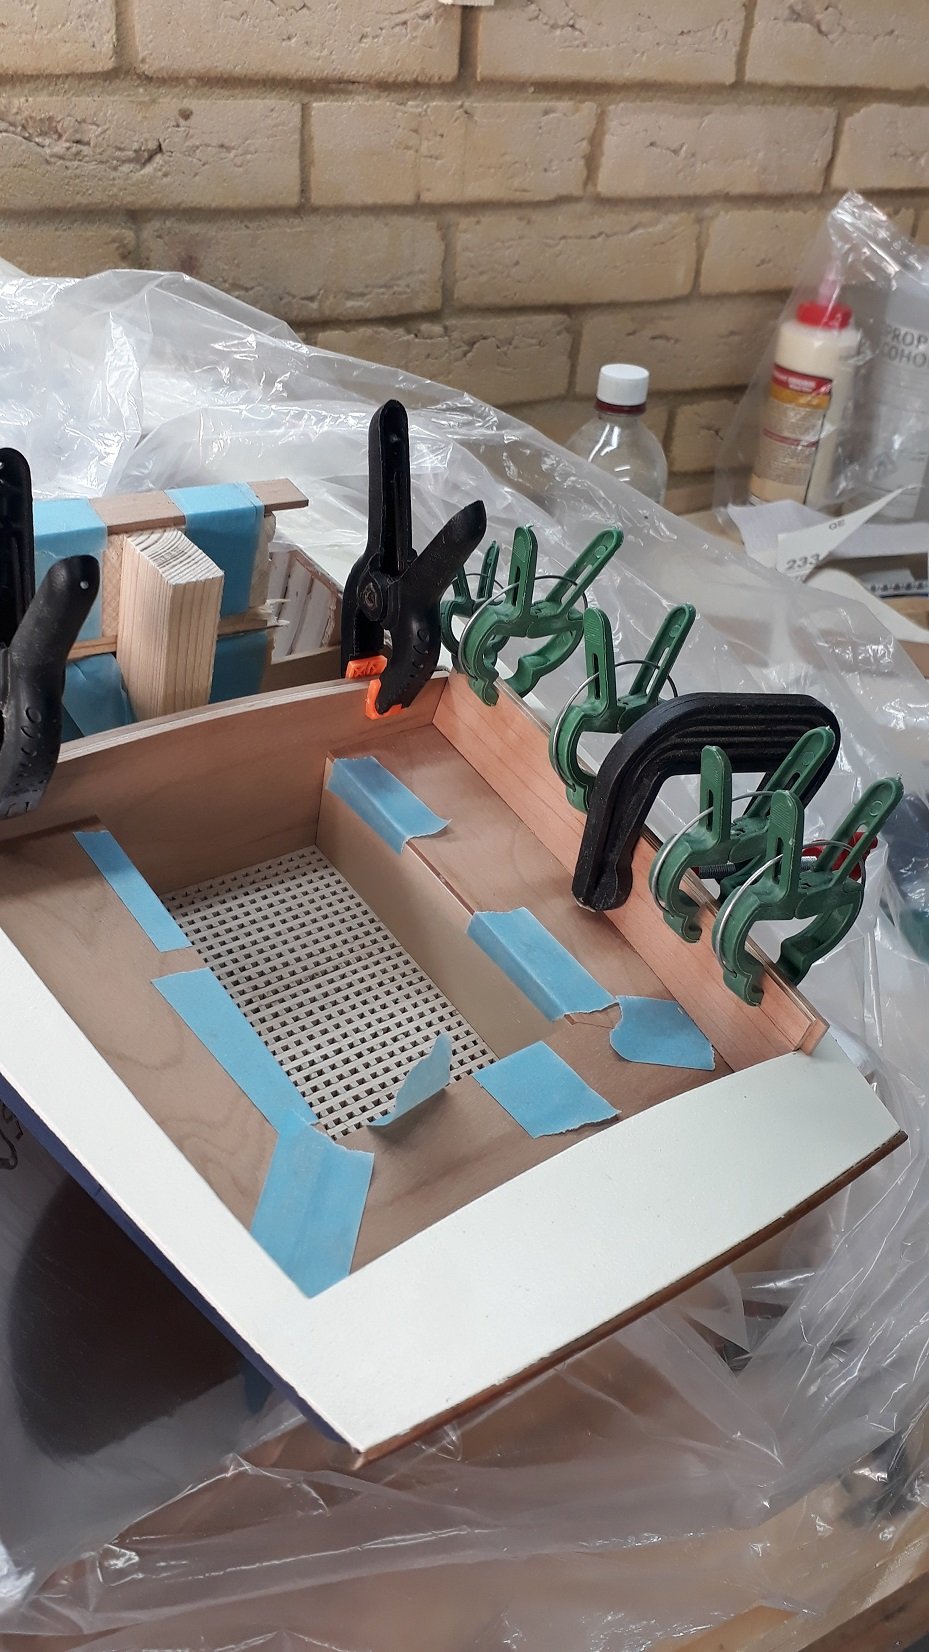
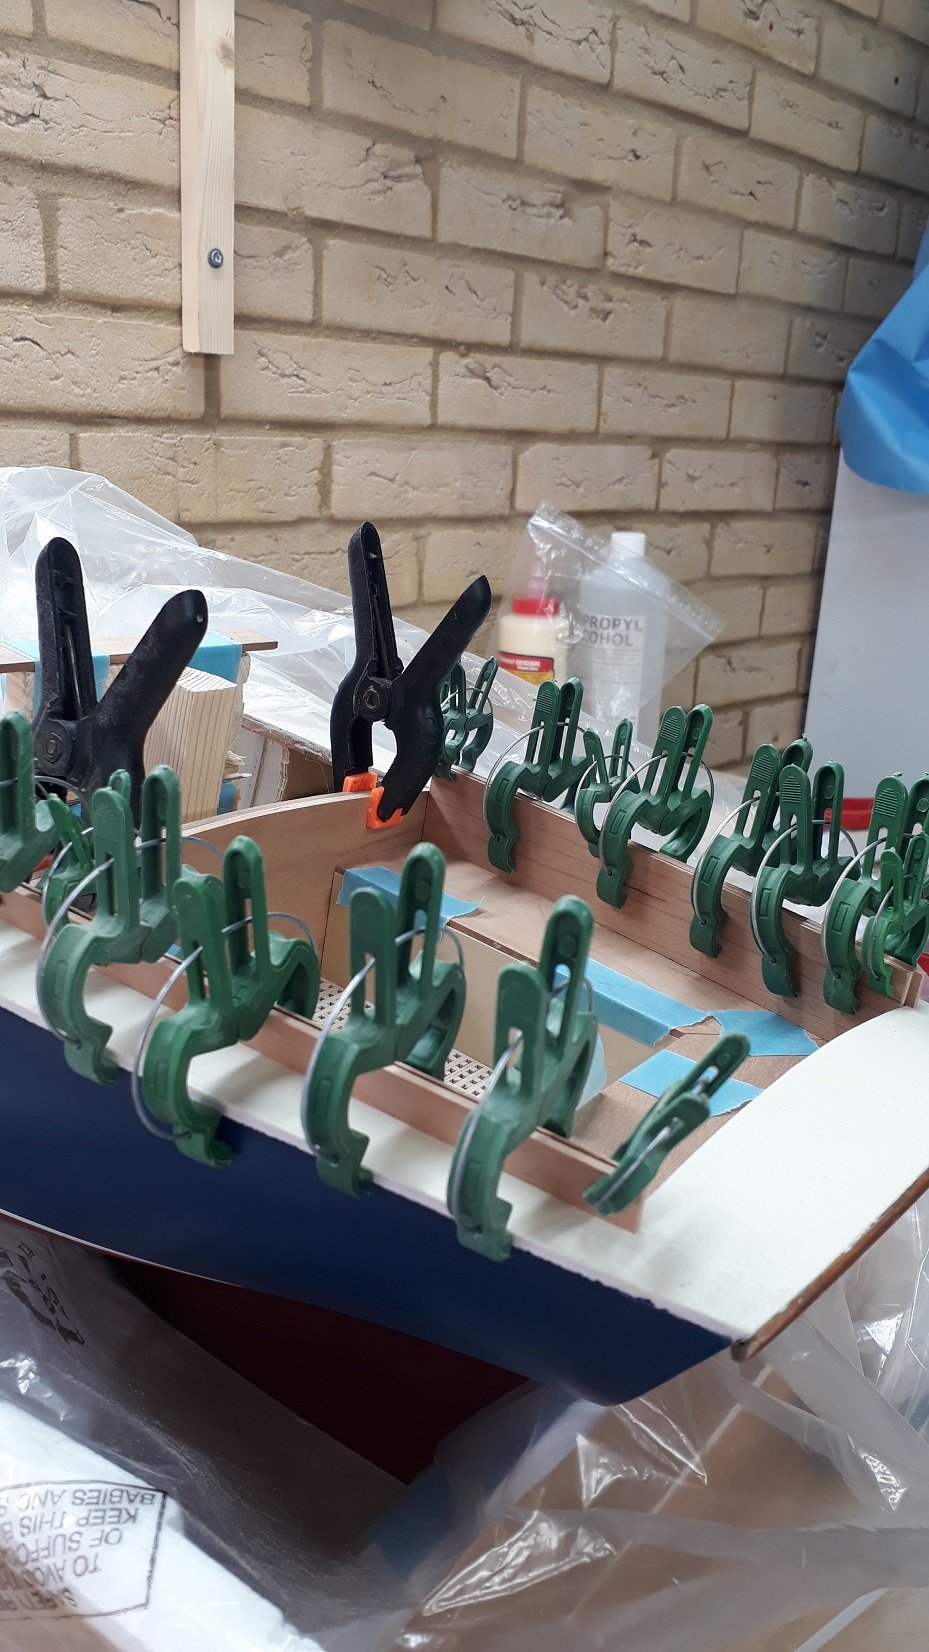
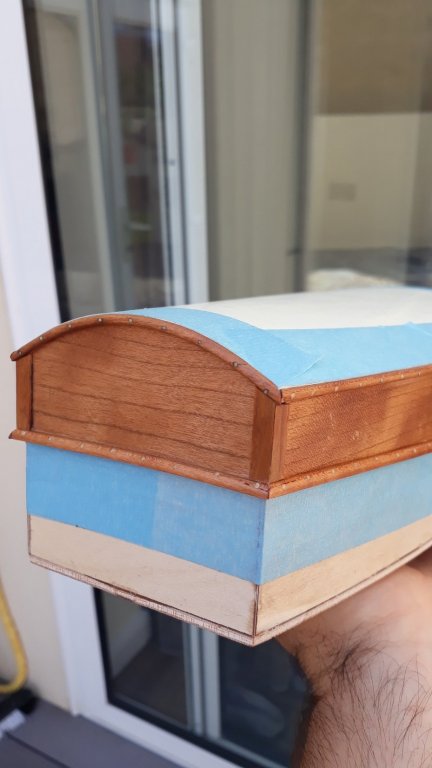
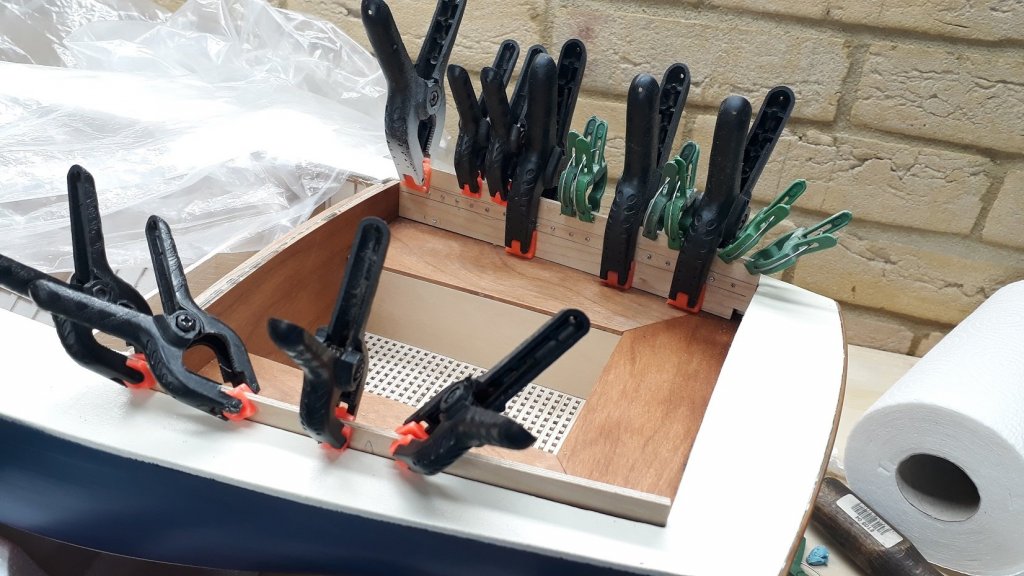
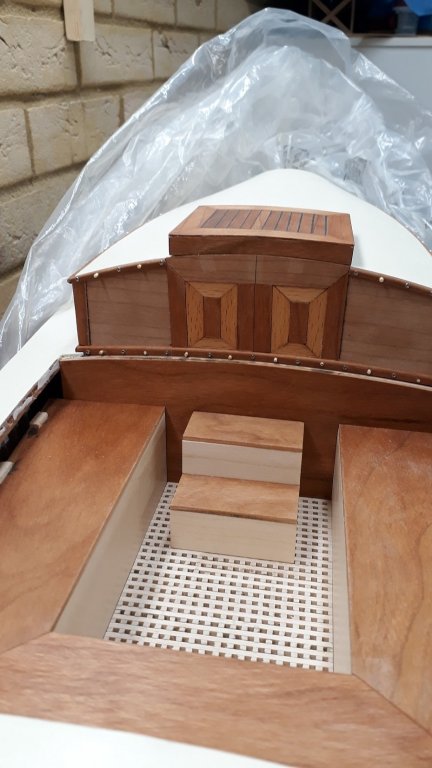
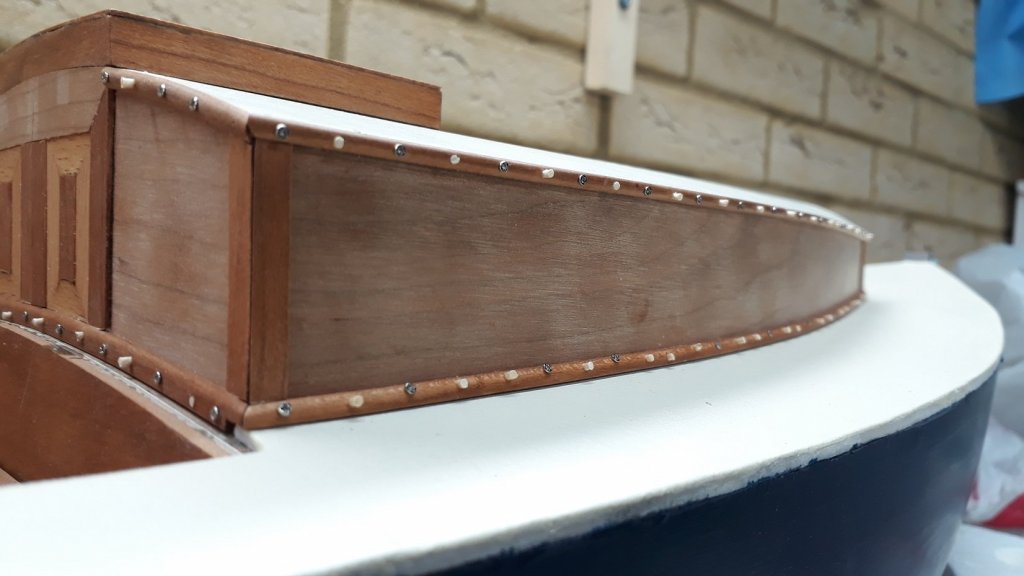
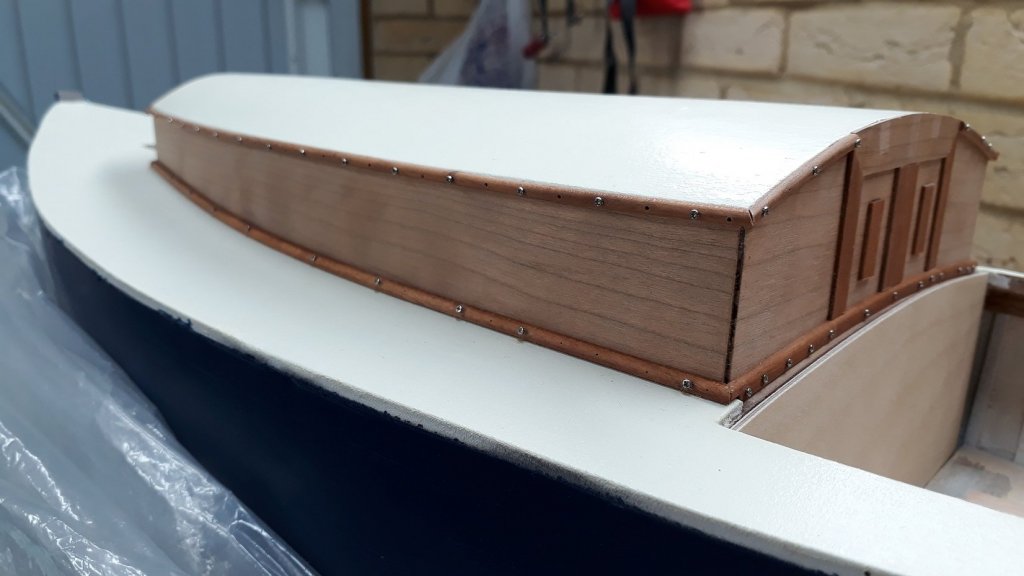
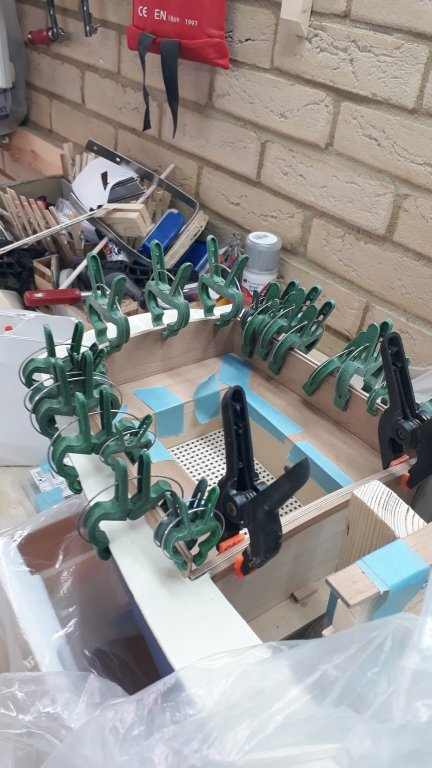
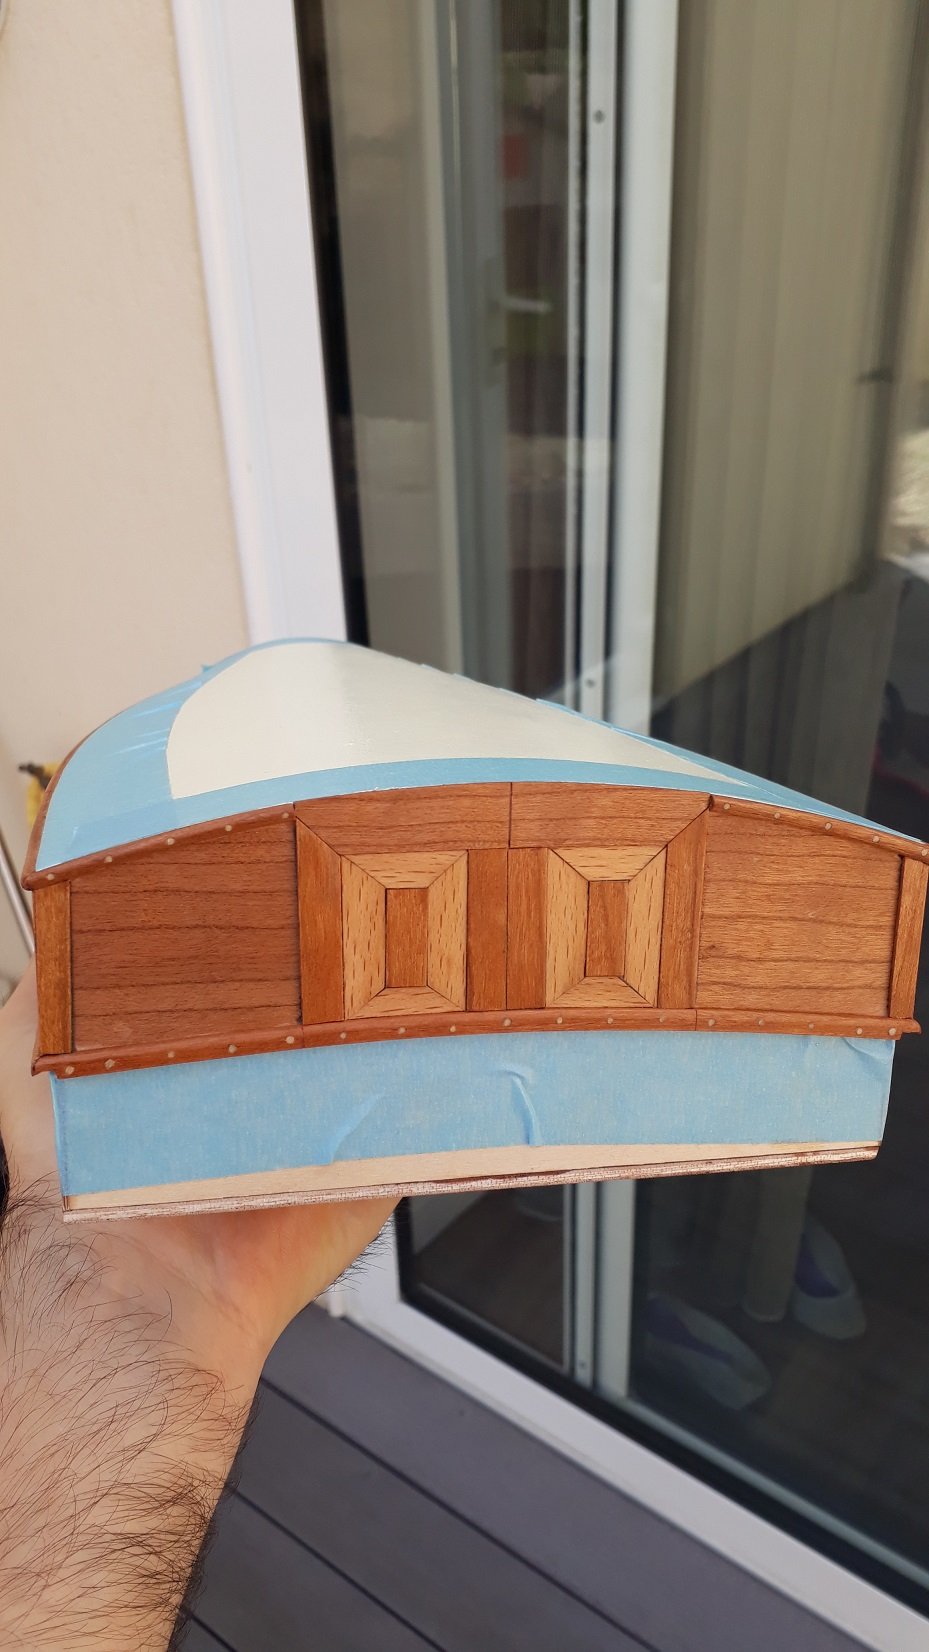
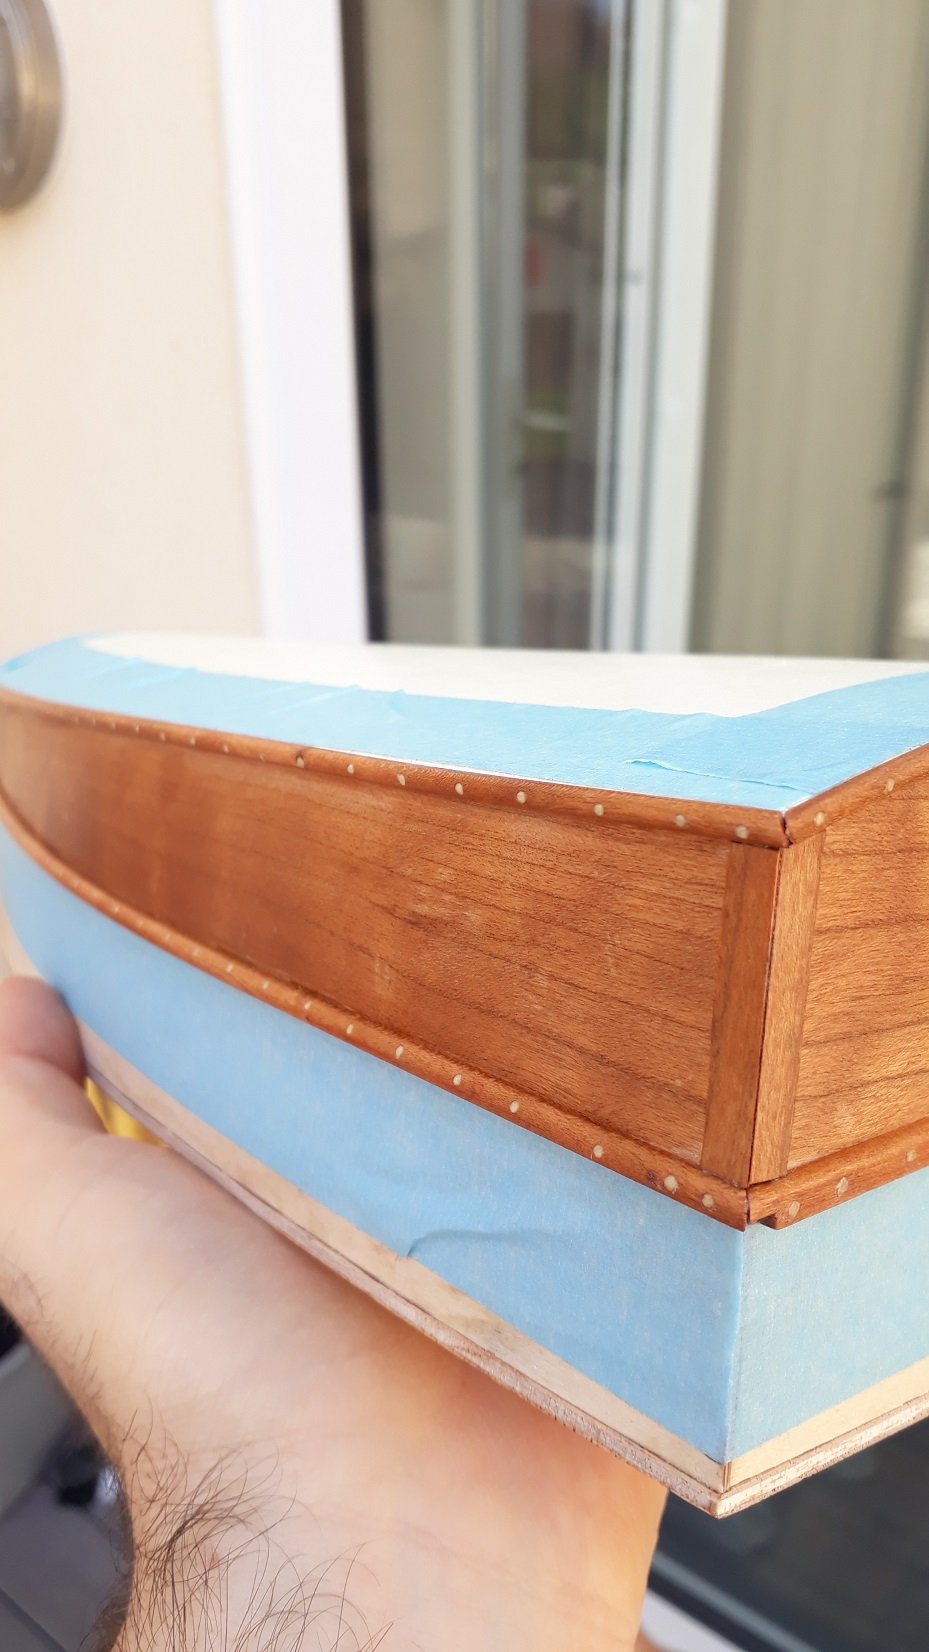
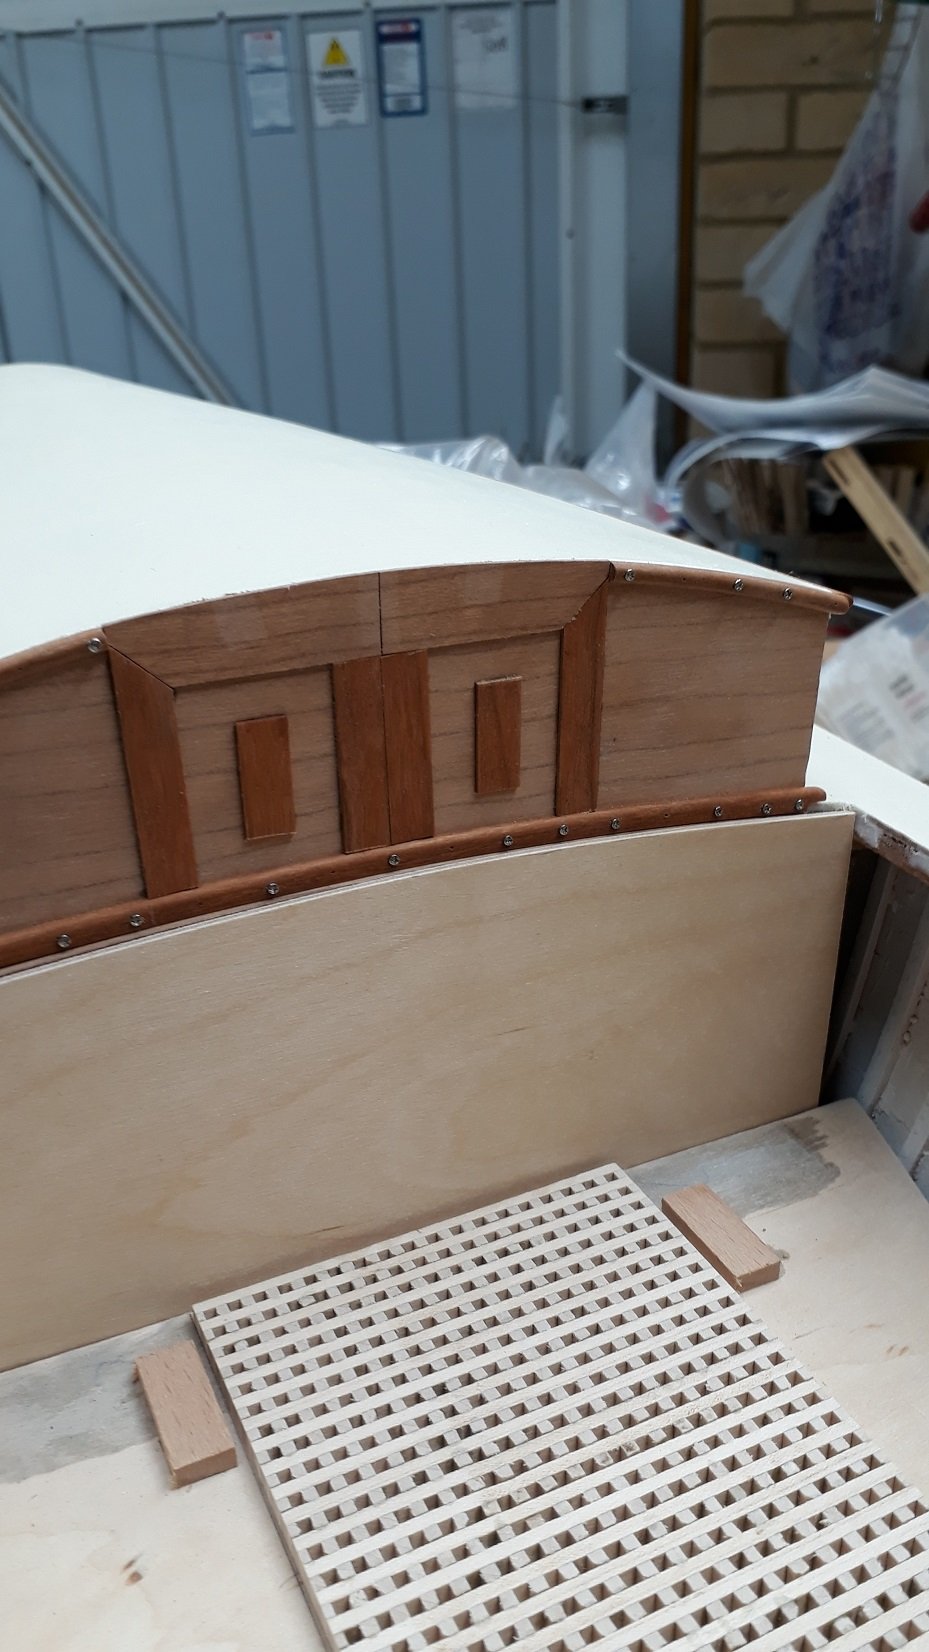
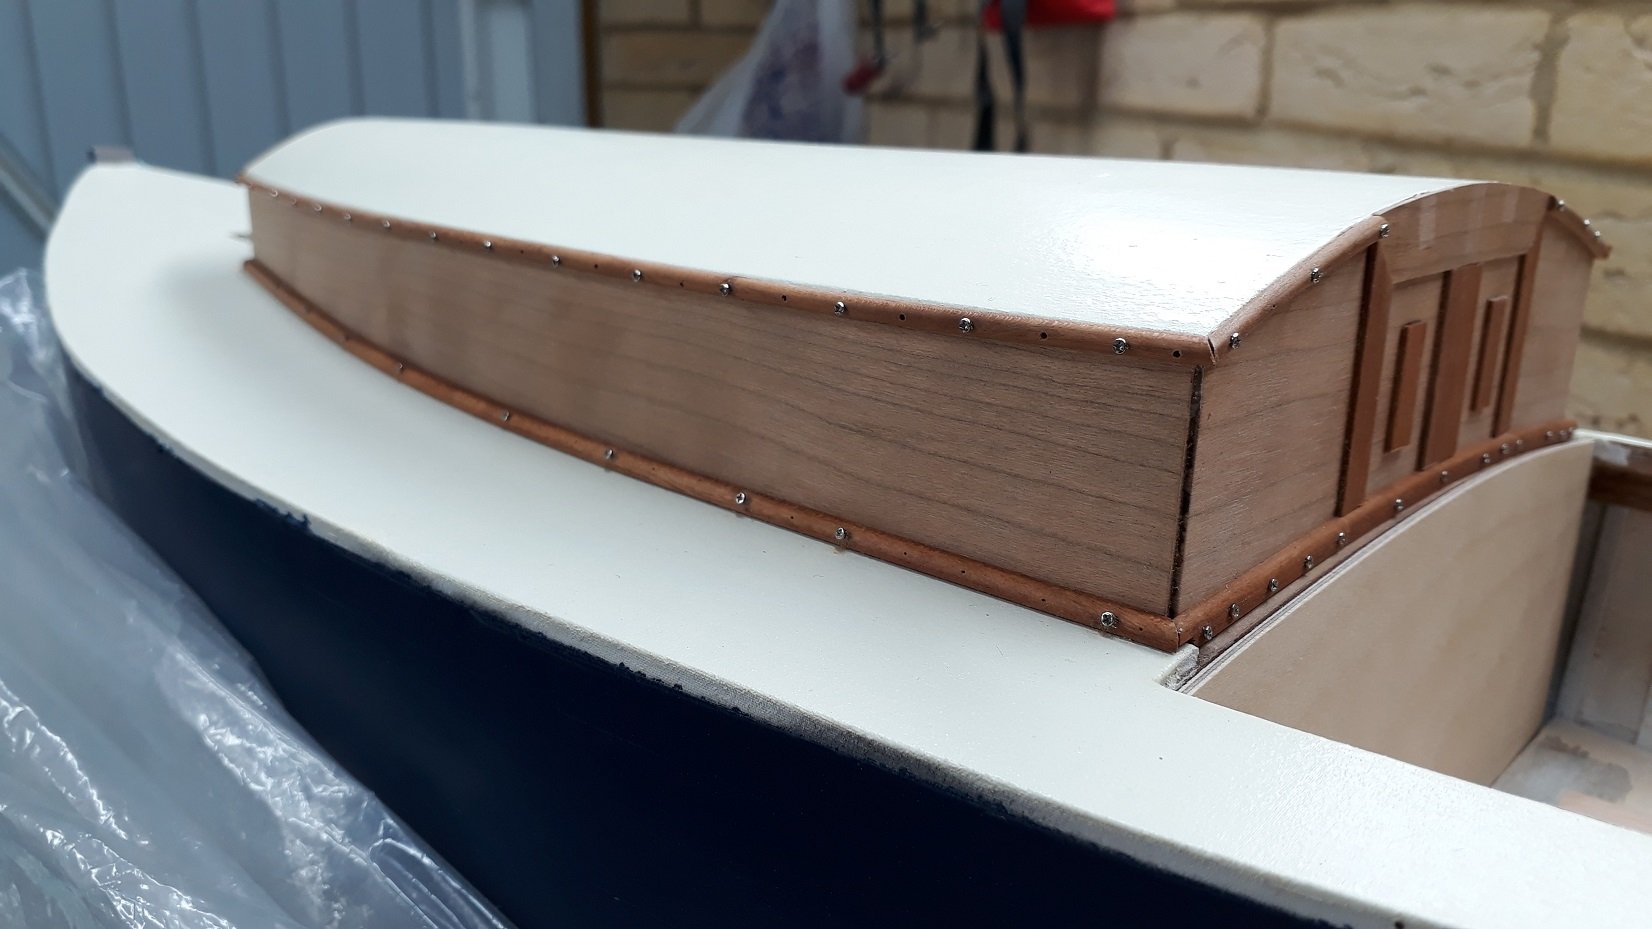
Good suggestion Mark, I thought about it but in the end I just sanded everything and applied Tung oil! It darkened the nails a bit, it stands out less. I think I ll leave it as is and carry on with the rest of the building... After the Tung oil went on, things look better. My 3 year old daughter saw the cabin and said "look daddy, this is a door!" so it probably looks like one! I ll put brass hinges and two knobs and then the top hatch and it should look ok I think. I continued work on the cockpit, I laminated and installed the side plywood panels. Cherry veneers will be added on both sides and then a top bit like a gunwale. I had also prepared the aft panels but following the installation of the sides they do not fit properly so I need to make them again. The screws will be removed and replaced with treenails. I realised that I do not have enough clamps! Not very original but I really need to get some more. Also, at some point I need to start thinking about the rudder. Regards


-
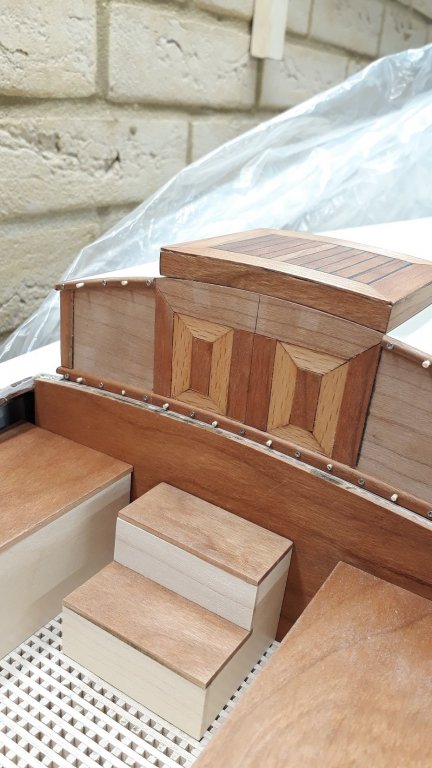
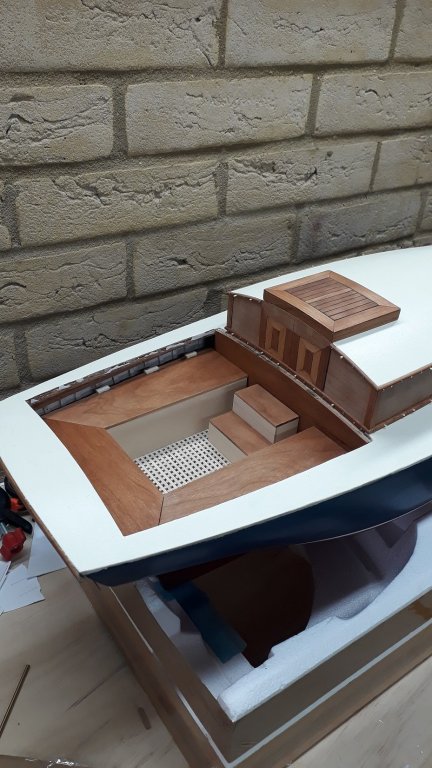
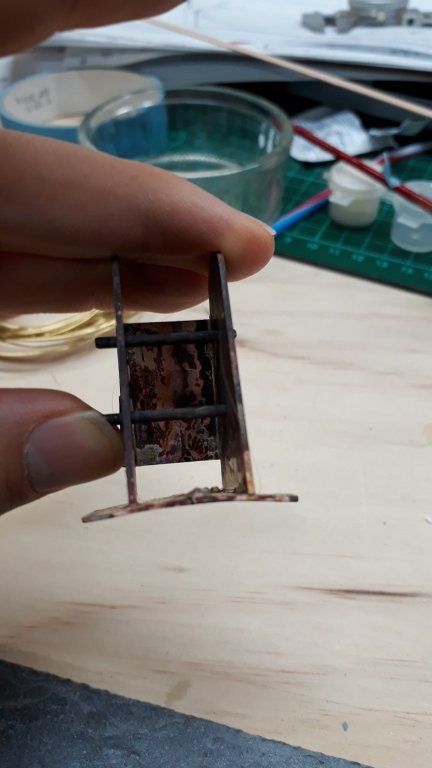
Thank you all for the good wards. Druxey, very useful tips! I did a bit more work, I made again one of the benches as it was not a good fit. I also added more panels to the doors, I think it looks better and there are still pieces that have not had Tung oil on. I also installed more bits to the cabin and started replacing the screws with treenails. Regarding the treenails, things did not go as planned. For some reason my cherry piece stopped producing treenails like before. The needle drills constantly burn and clog. I had to use pine so the treenails are white. Also, for some reason I can no longer produce 0.6 mm diameter but only 1 mm. they are a bit out of scale but I do not think it matters a lot. Either way, I have accepted that due to current life circumstances some compromises will need to be made to allow me to keep on building. At some point I will fix this issue but I do not rely want to invest time in this so I ll use the treenails I already have. I also finished the steps, I am not sure if it is really a good idea but I invested time making it and in the end of the day something is needed as the companionway doors are quite high. A few pictures, really difficult to get good ones due to the size of the boat. The hatches are not glued on yet.
-
According to Wood Database, it does not look a very good alternative. "With its low density and interlocked grain, willow has very poor machining characteristics, frequently resulting in fuzzy surfaces or tearout. Willow also tends to develop numerous drying defects and can be difficult to season. Glues and finishes well. Responds moderately well to steam bending."
-
Hull filler.
vaddoc replied to bluenose2's topic in Building, Framing, Planking and plating a ships hull and deck
Best filler I ve used is Elmers color change wood filler. The trade ones are very hard and the lightweight fillers from model shops do not sand well. I never liked the PVA/wood dust mix. Elmers is brilliant, applies well, dries quickly and sands very well. You can mix it with water based paint (and probably wood dust), it will still work. When it changes from purple to pale, it is ready for sanding. -
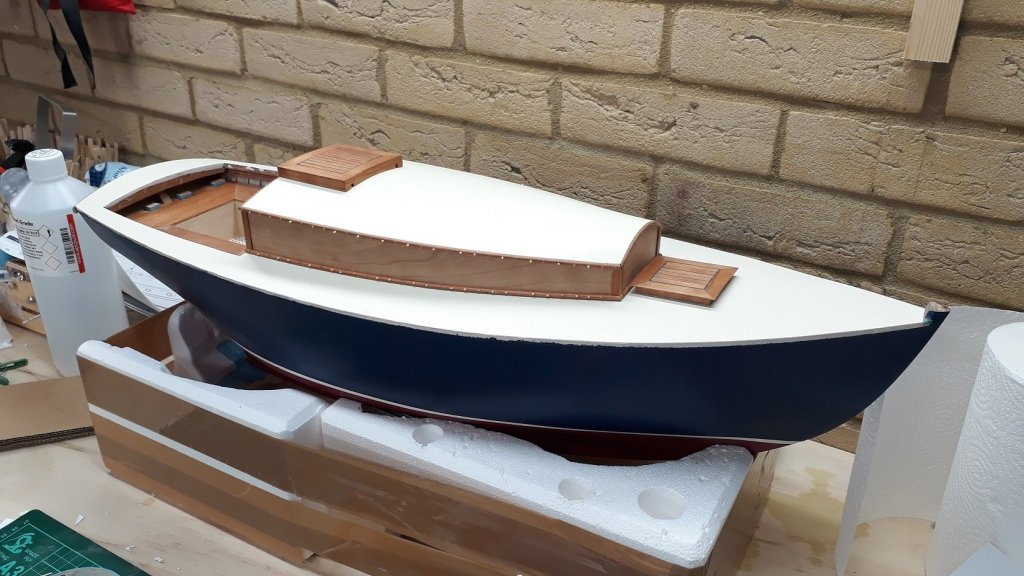
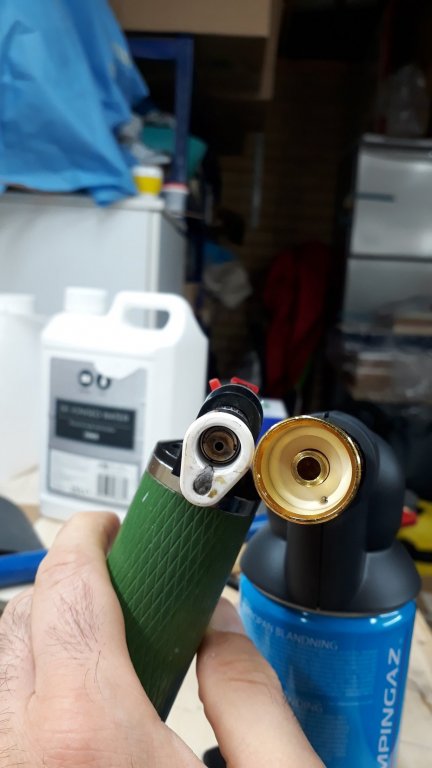
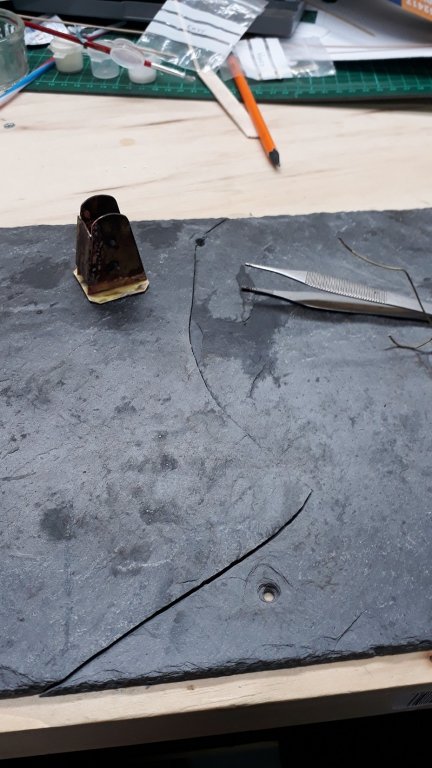
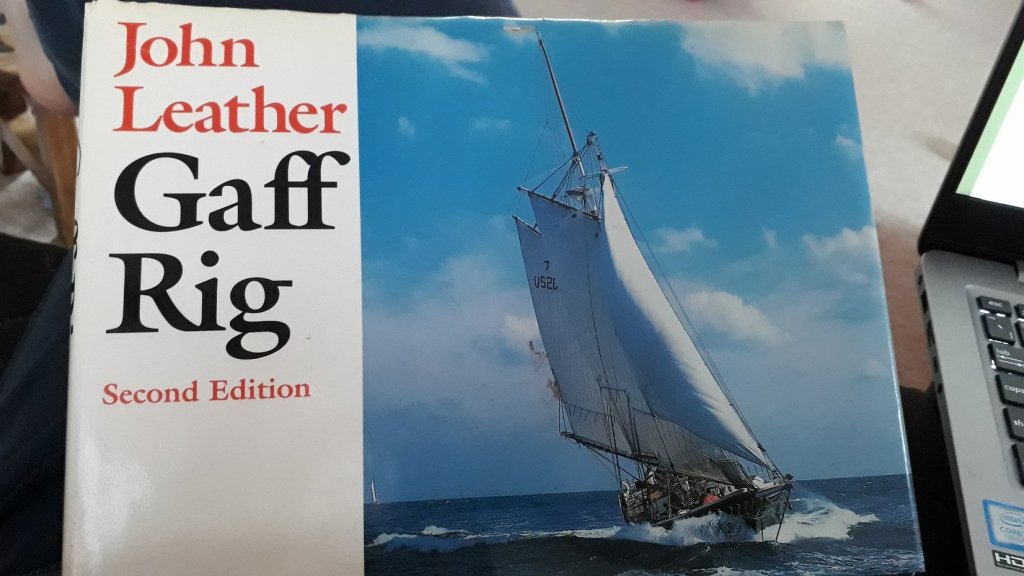
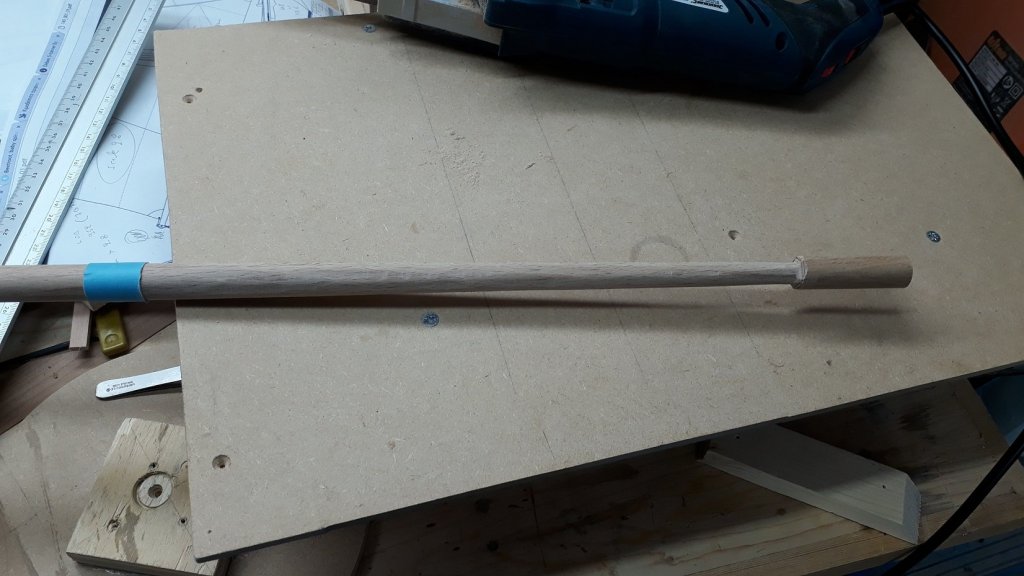
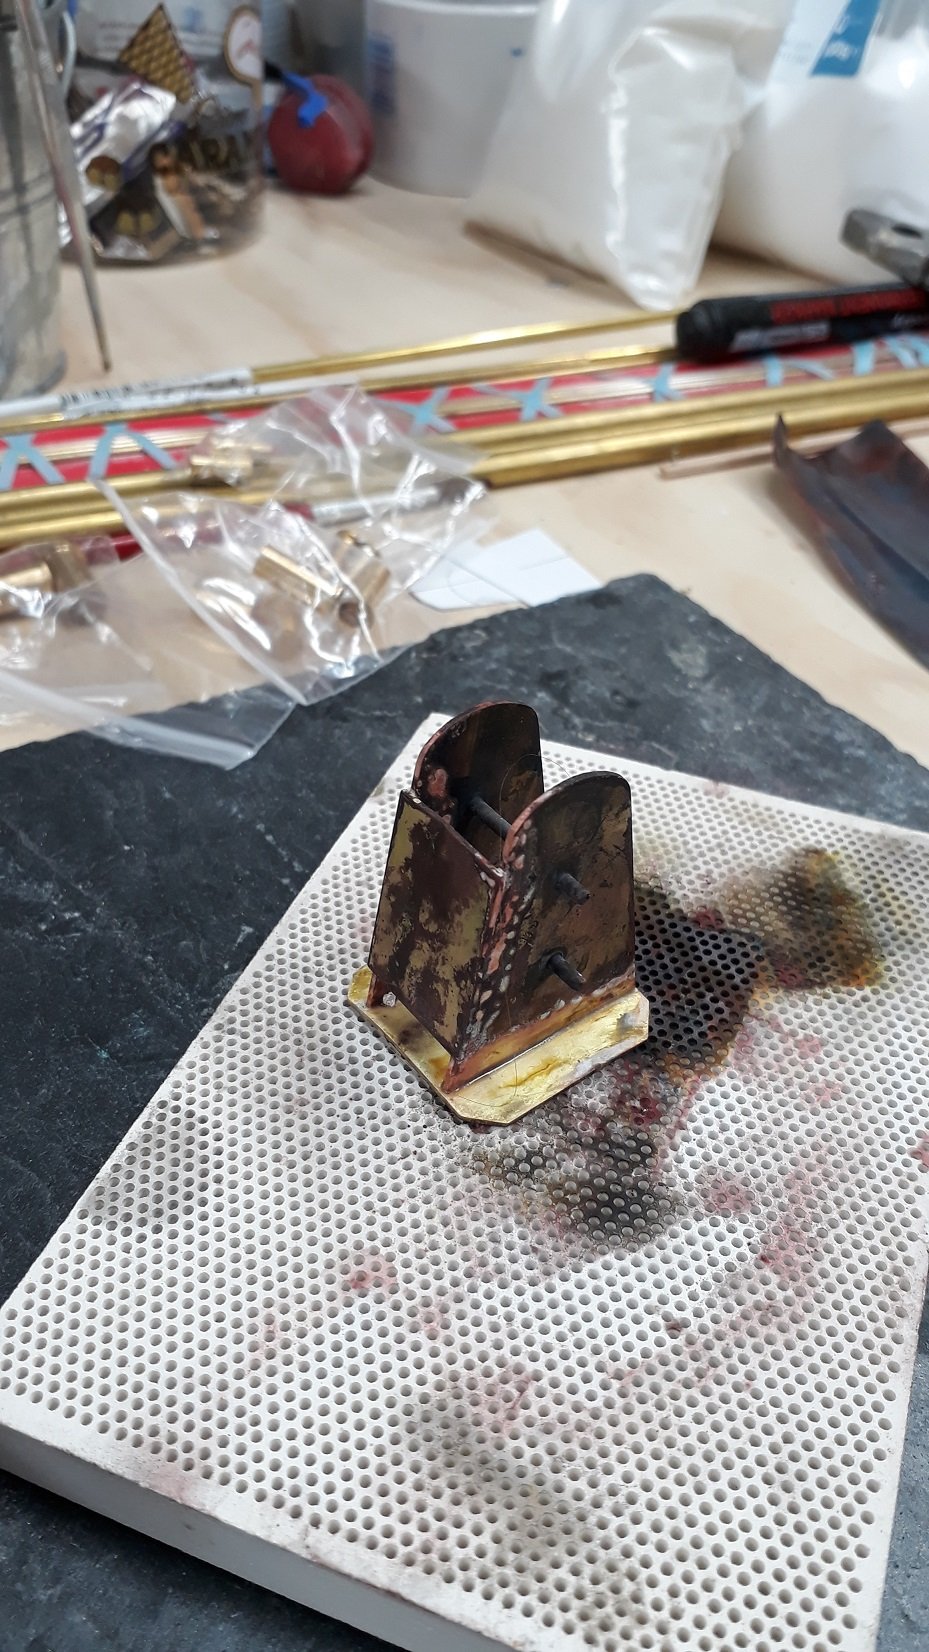
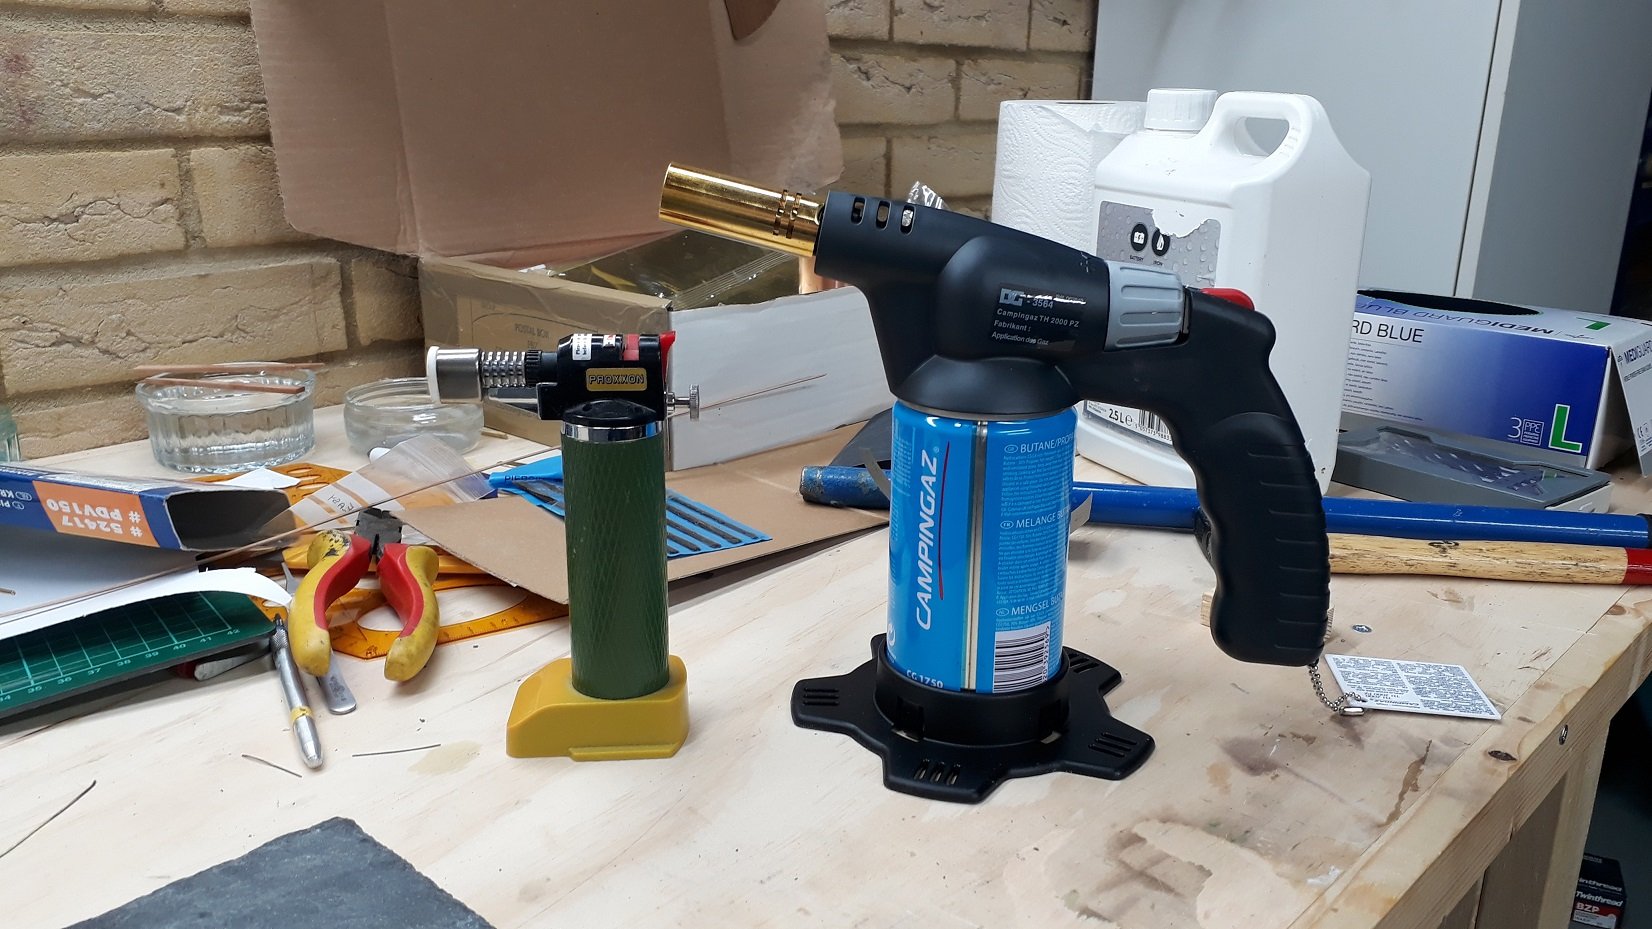
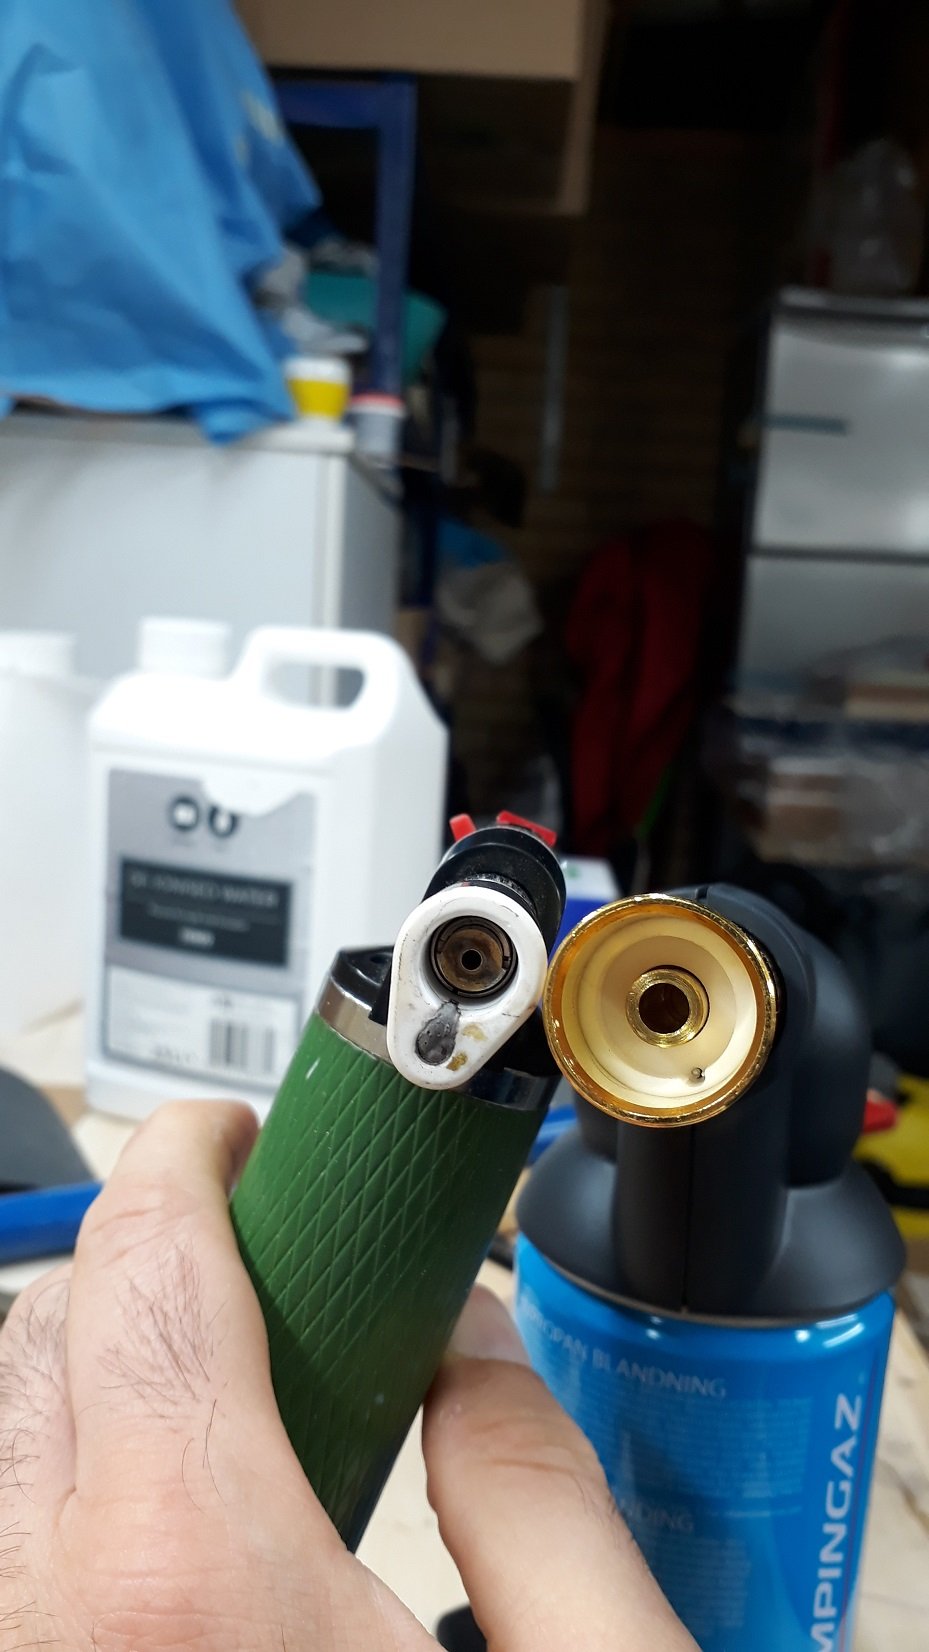
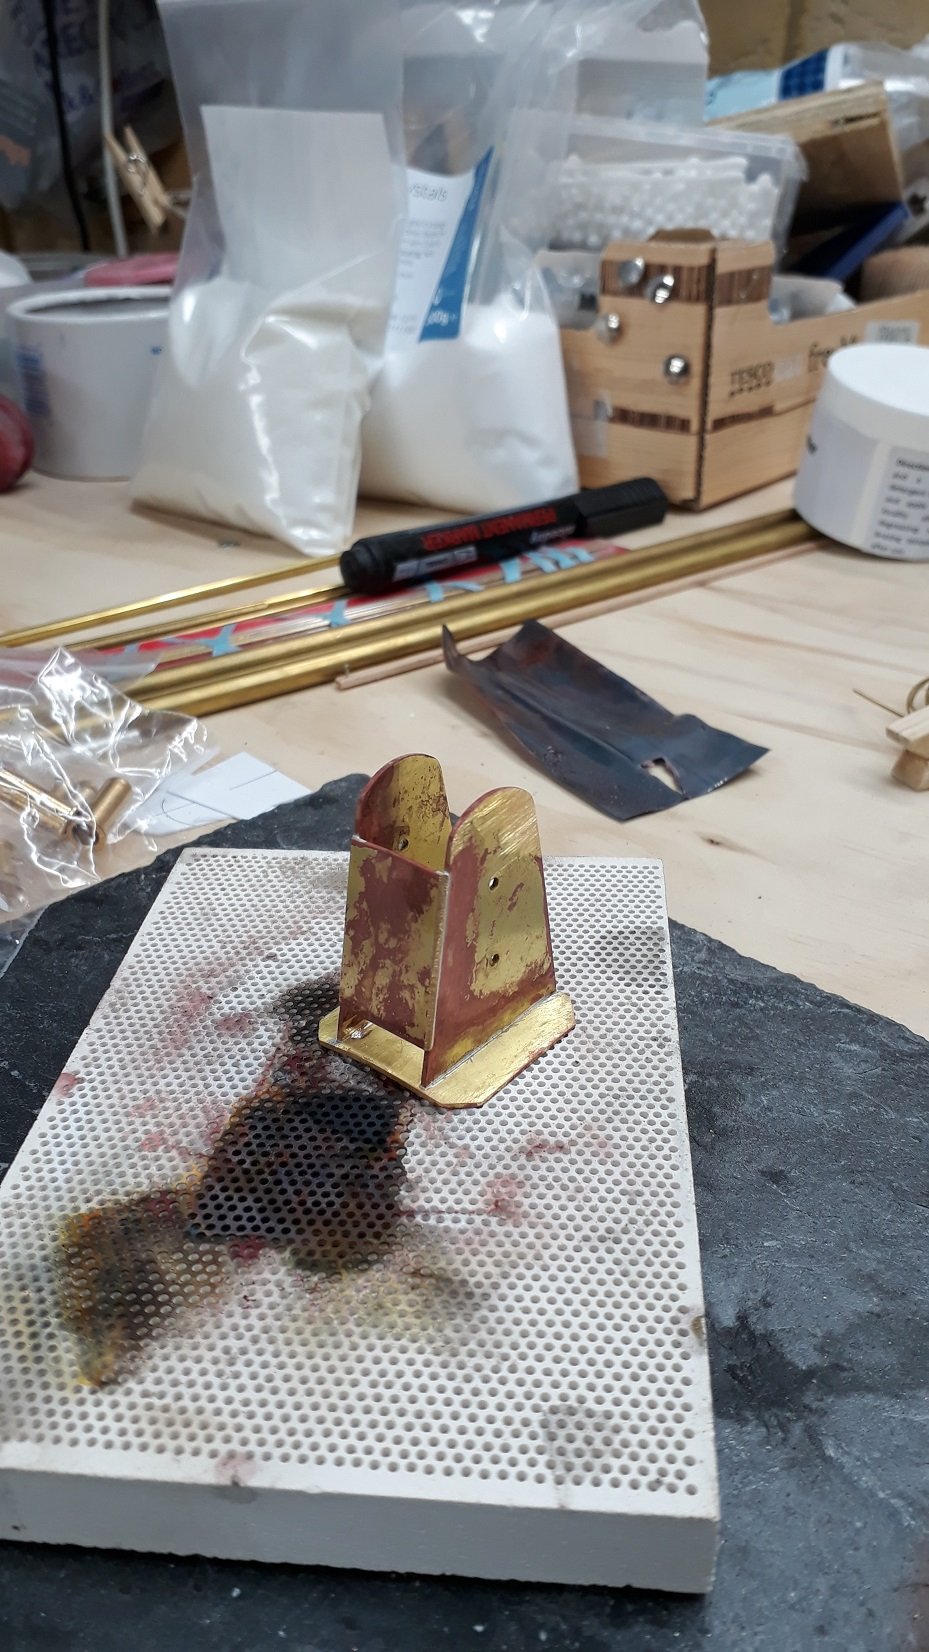
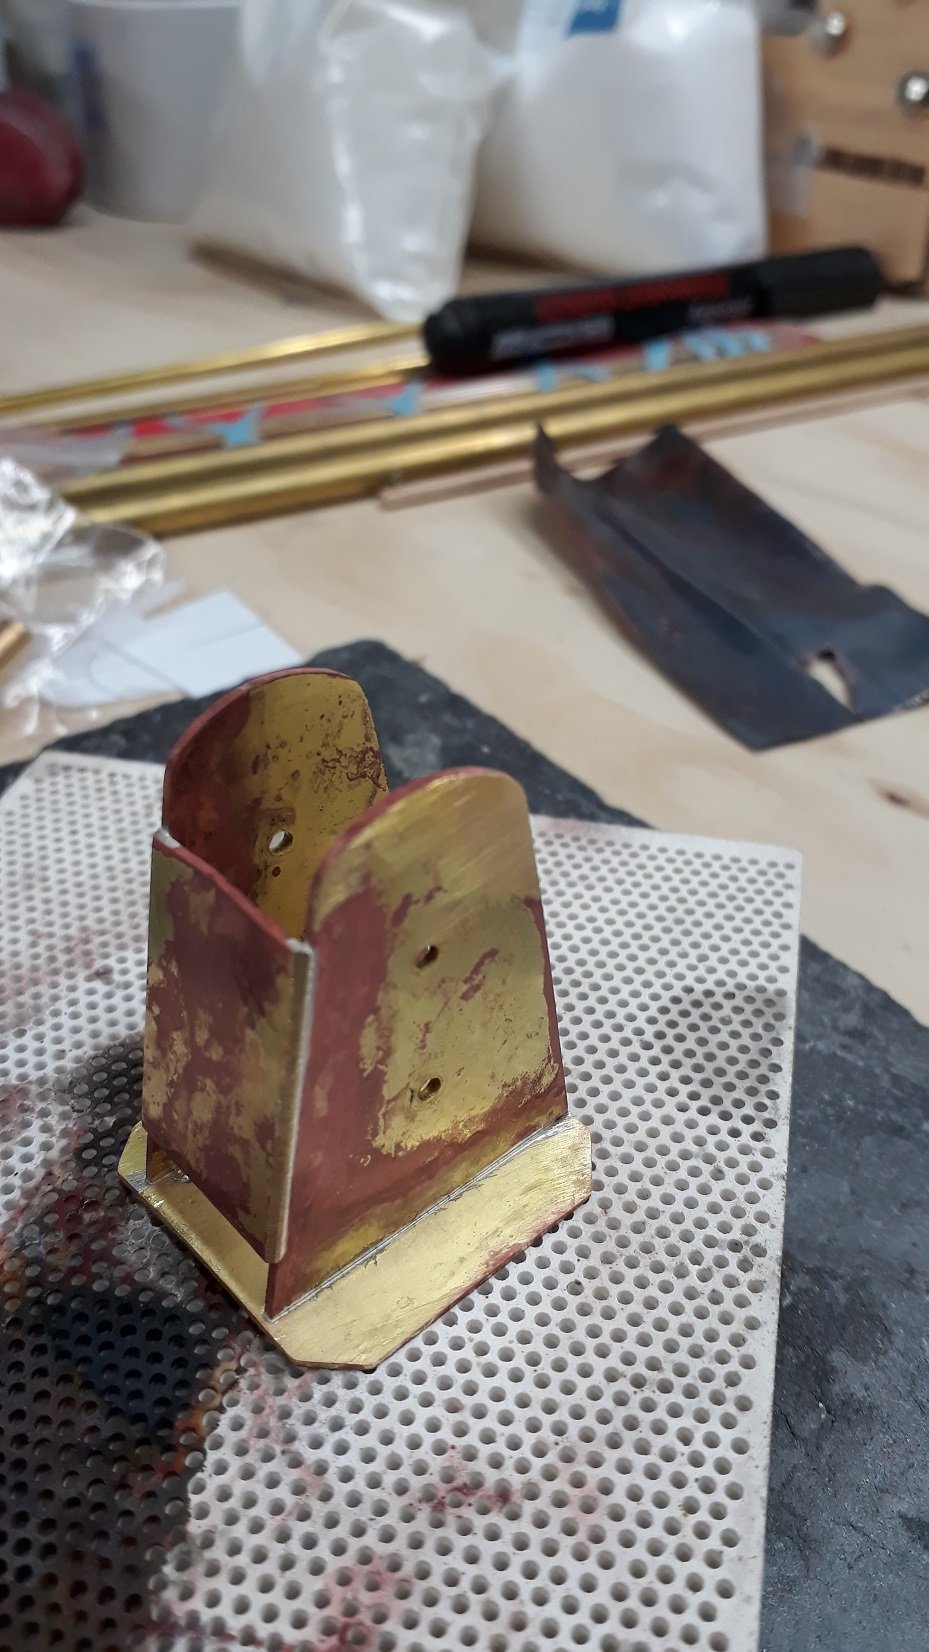
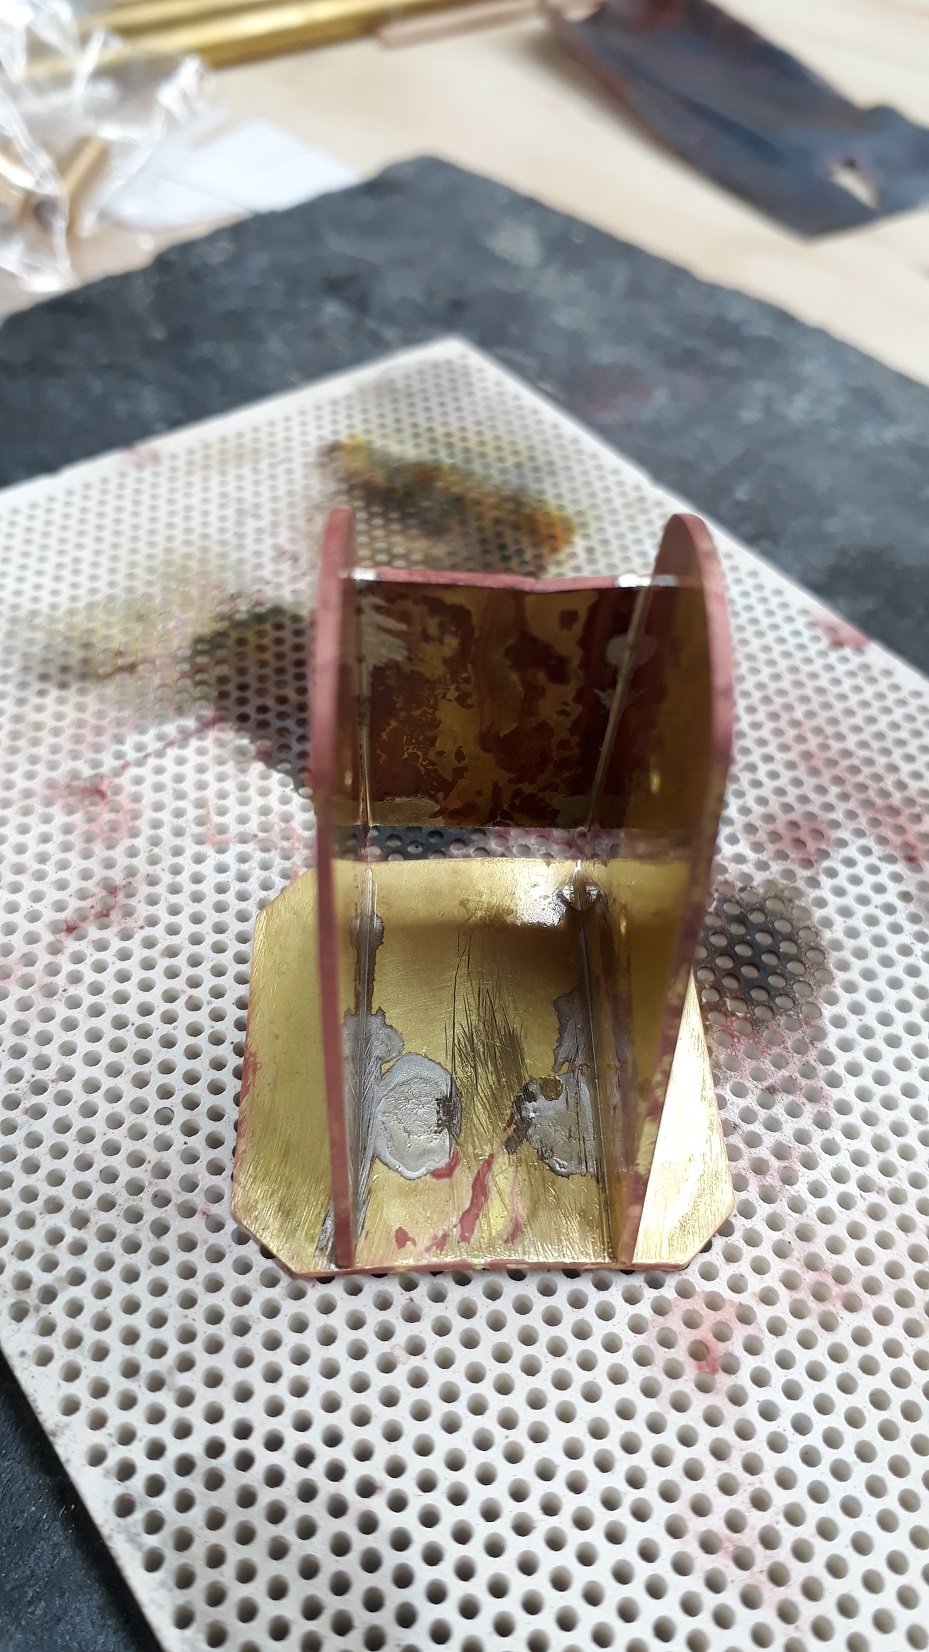
Dear all thank you for your excellent advice, I do not however own a hand plane. I would very much like a Veritas set and a proper sharpening jig but these things are expensive. In any case, I managed to secure the base of the dowel on my hand drill and span the mast on 80 grit sand paper. Despite being close to a meter in length, it worked well. It is now smooth, with a progressive taper and perfectly straight. I would have liked to taper even more and take off another mm or two from the tip but it will be too hard work so I ll probably leave it. I 've been reading a lot about gaff rigging and bought a book which already has been very helpful, I would like to try and properly rig the boat. Now, I have been experimenting with silver soldering but could not really make it work. I realised that the problem was the torch. At the scale I work at, the metal pieces are large and my proxxon torch just cannot get the metal hot enough. So I bought a much larger one which does not have the precision and refinement of the proxxon, but is hugely powerful. The pieces got properly hot under the massive flame and the results were excellent. I made the tabernacle from 1 mm brass sheet, the base is concave to fit to the cabin roof. The stone slate I use actually cracked form the intense heat! It also melted the thick brass wire I used to hold things in place. Pickling in a mixture of acid and hydrogen peroxide removed the scale. It was supposed to restore the brass colour by removing the surface copper deposits but it didn't. It does not matter though as it will be painted to resemble stainless steel. The solder really flowed very well. I use hard and then easy solder and all went well. Too much solder though! I decided to take a break and return to the woodwork. I glued the pieces for the cabin door, it does not really give the impression of a door but maybe when it is complete it will look better. I then started to attach the rest of the cabin trim. It actually went on much easier than I expected. A lot more to do but so far so good. Regards Vaddoc


-
Anyone using electric plank bender?
vaddoc replied to MESSIS's topic in Modeling tools and Workshop Equipment
I ve found that soaking wood in very hot water for 30 secs, allows extreme bends on most woods, even at 2 mm thickness, equally well to steaming the wood. I also have an old hair iron similar to this one which works well on wet thin strips that need to take extreme bends. I ve made laminated mast hoops with this iron very easily.
-
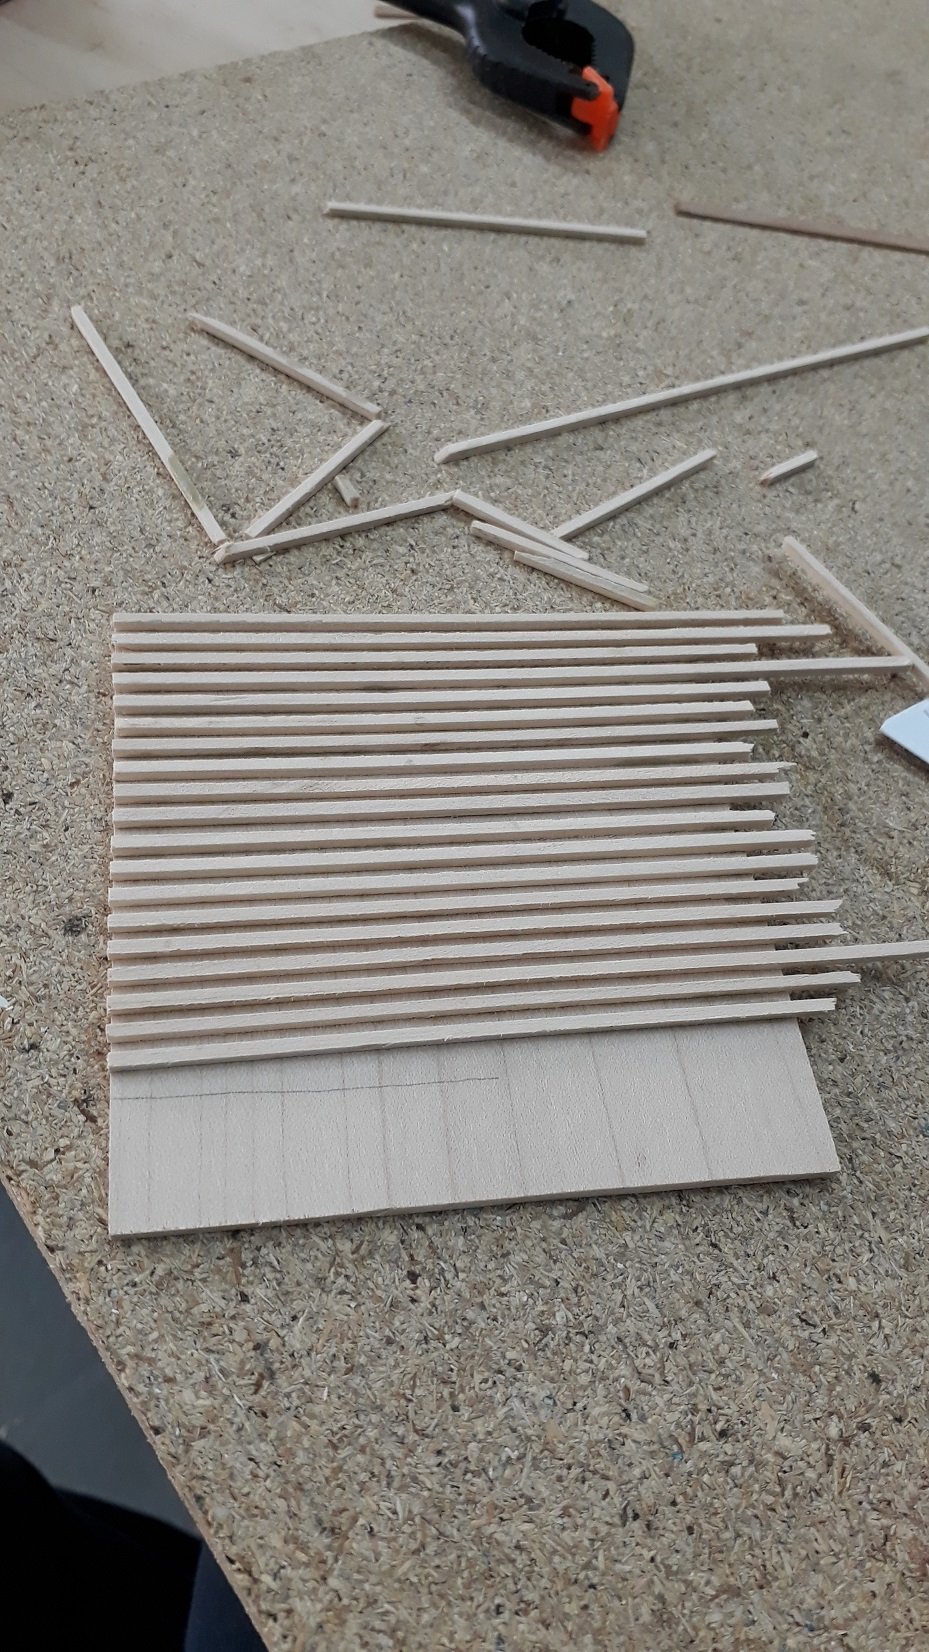
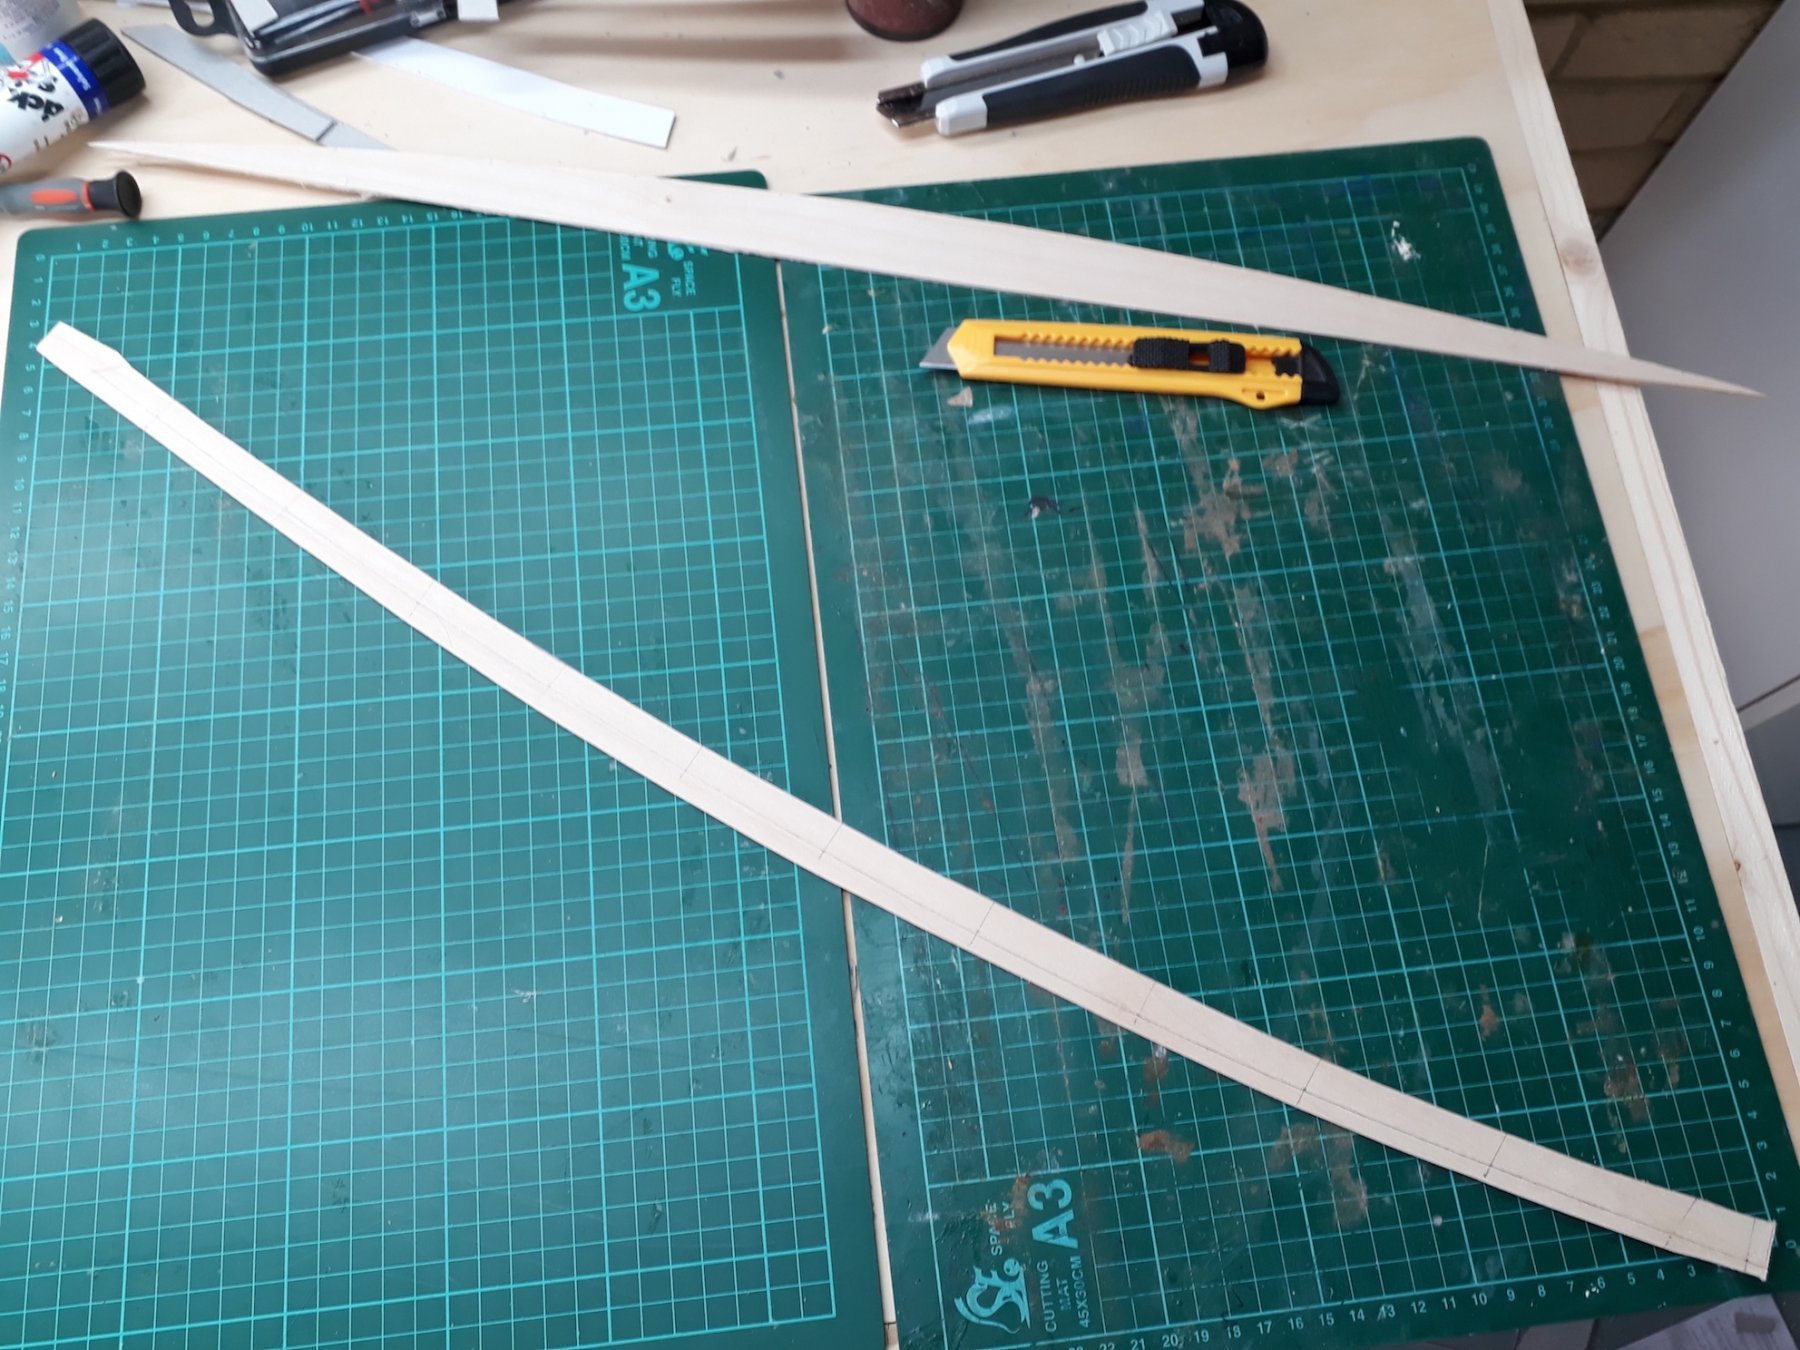
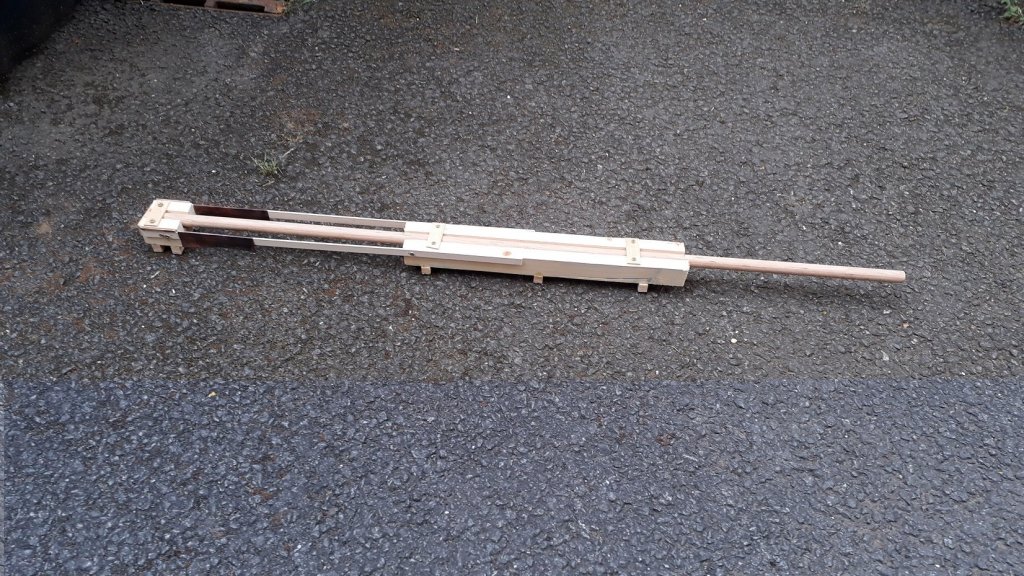
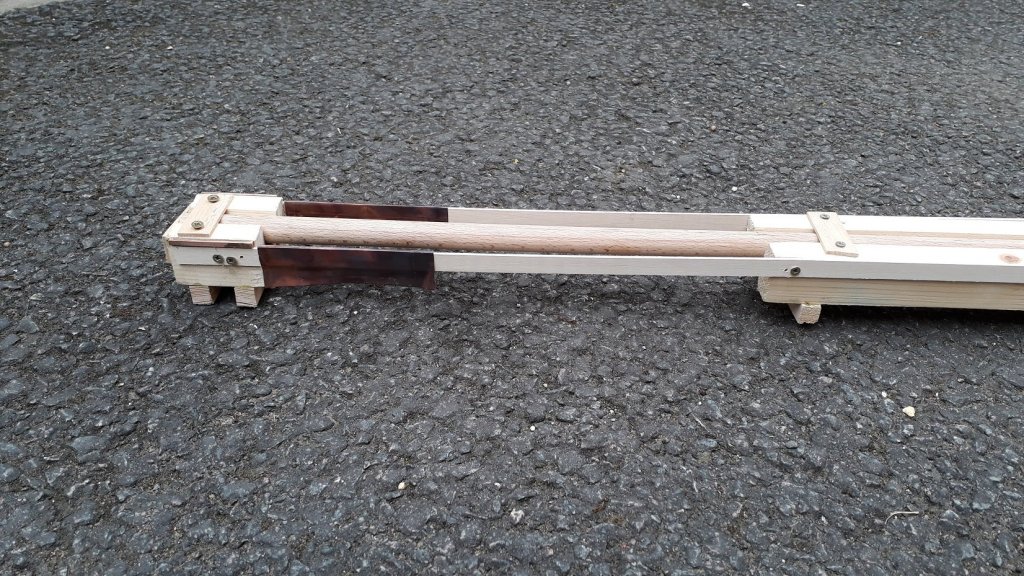
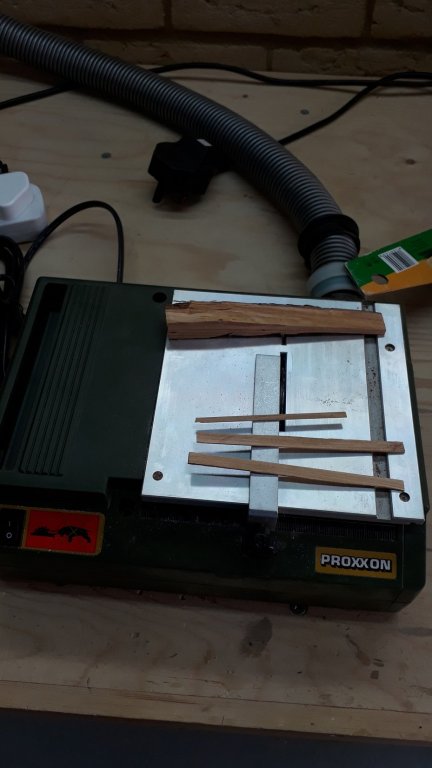
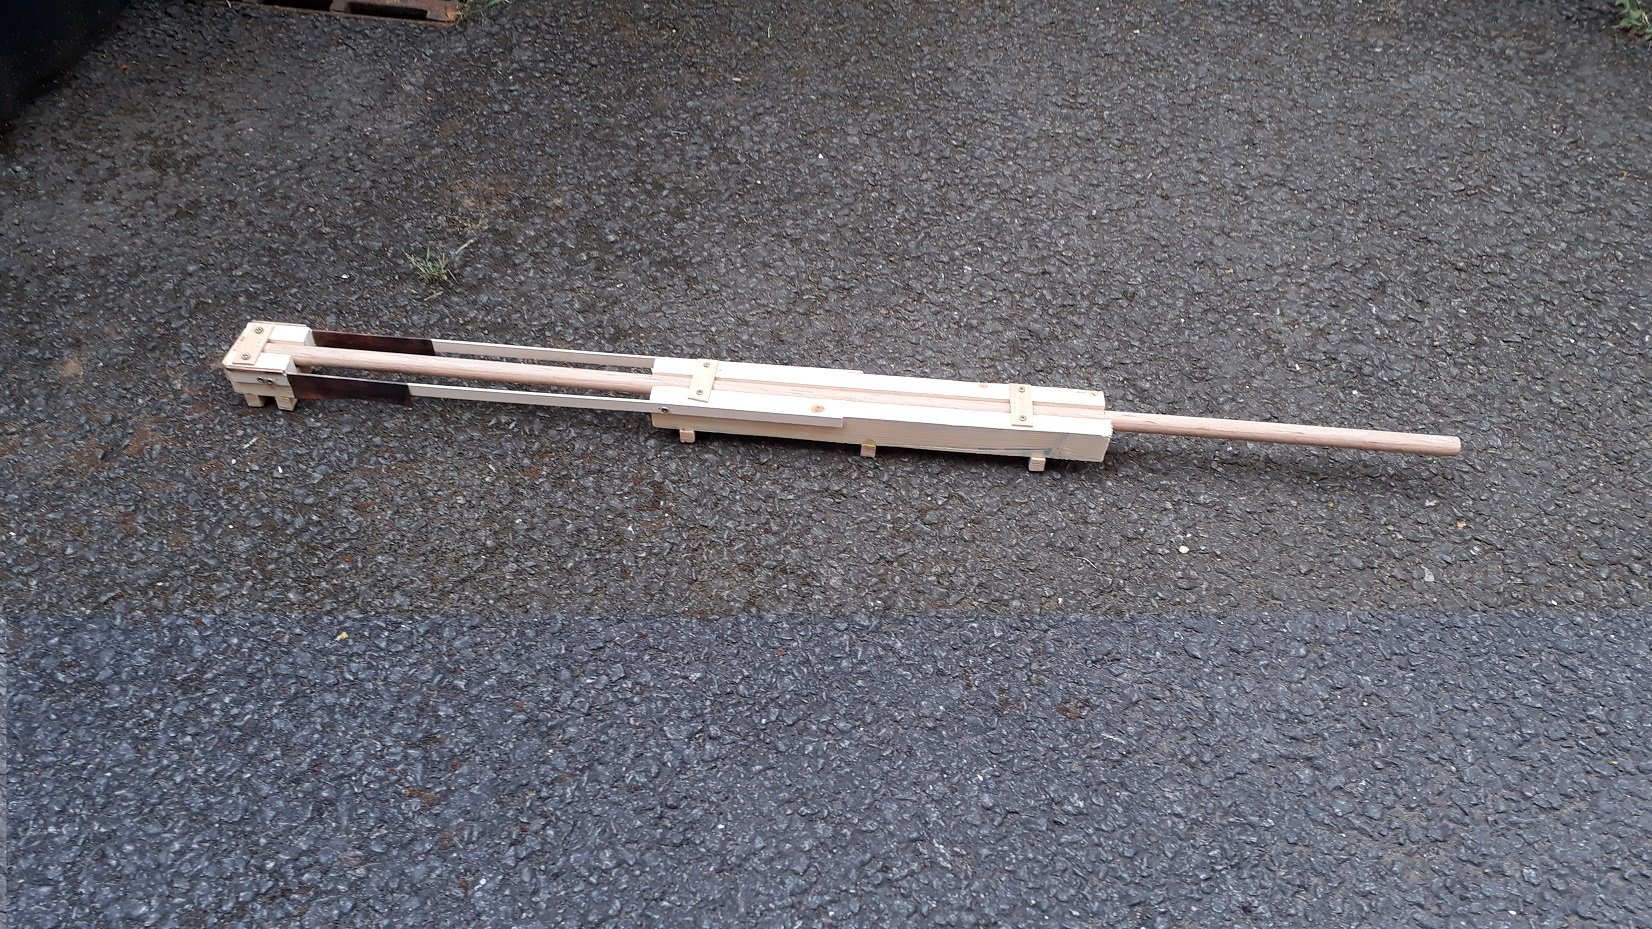
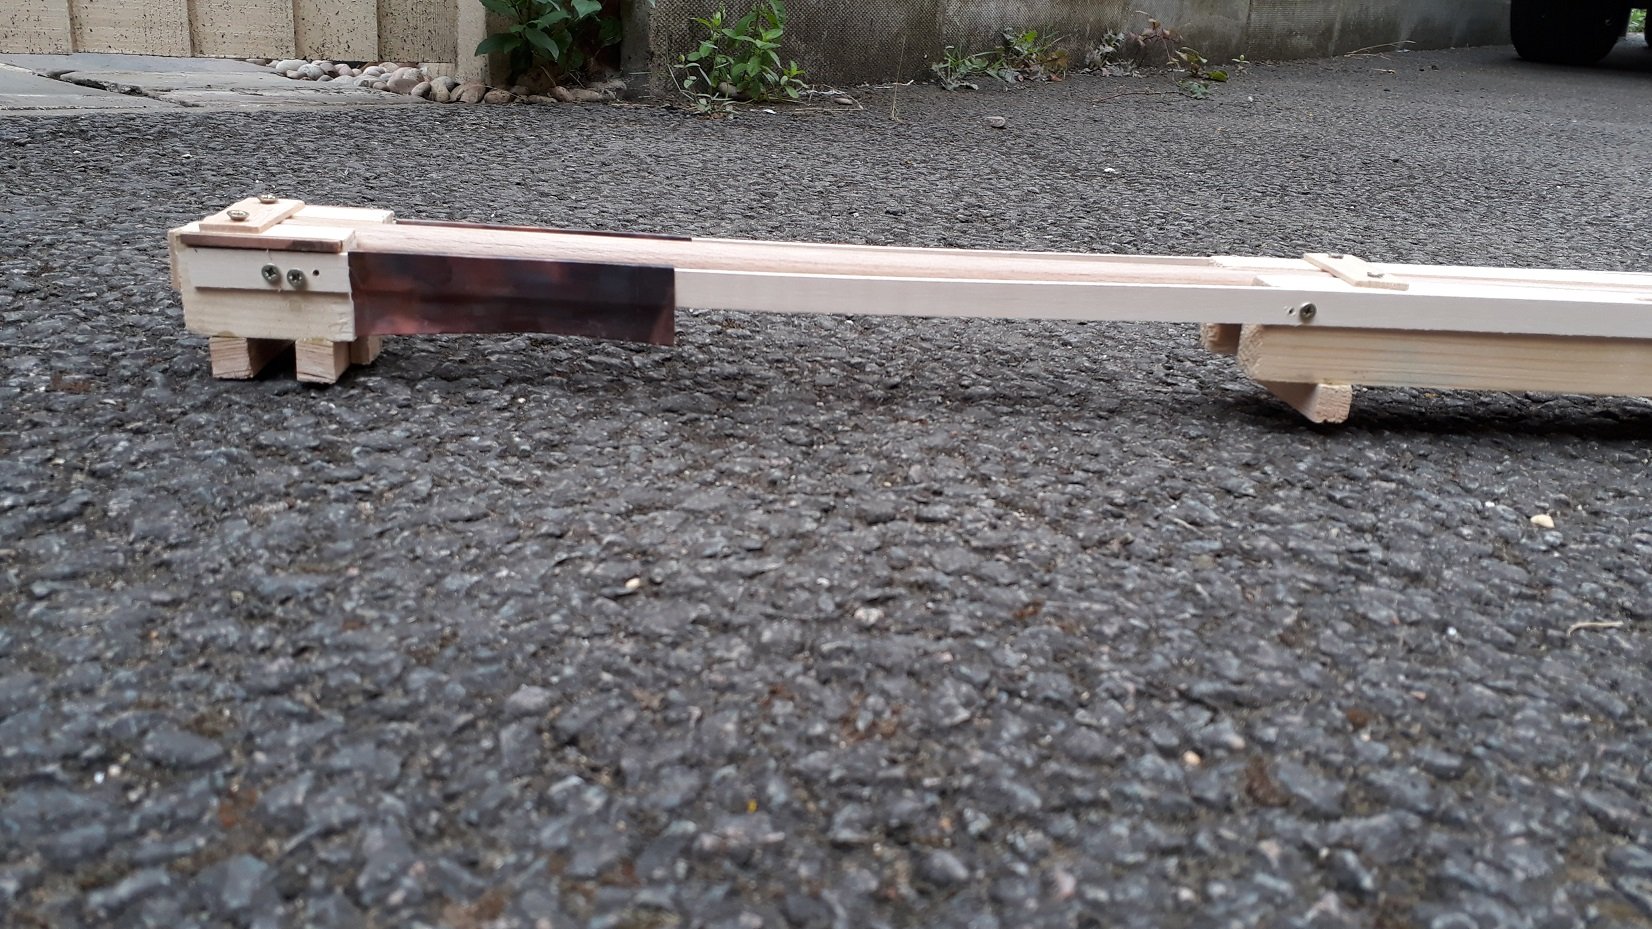
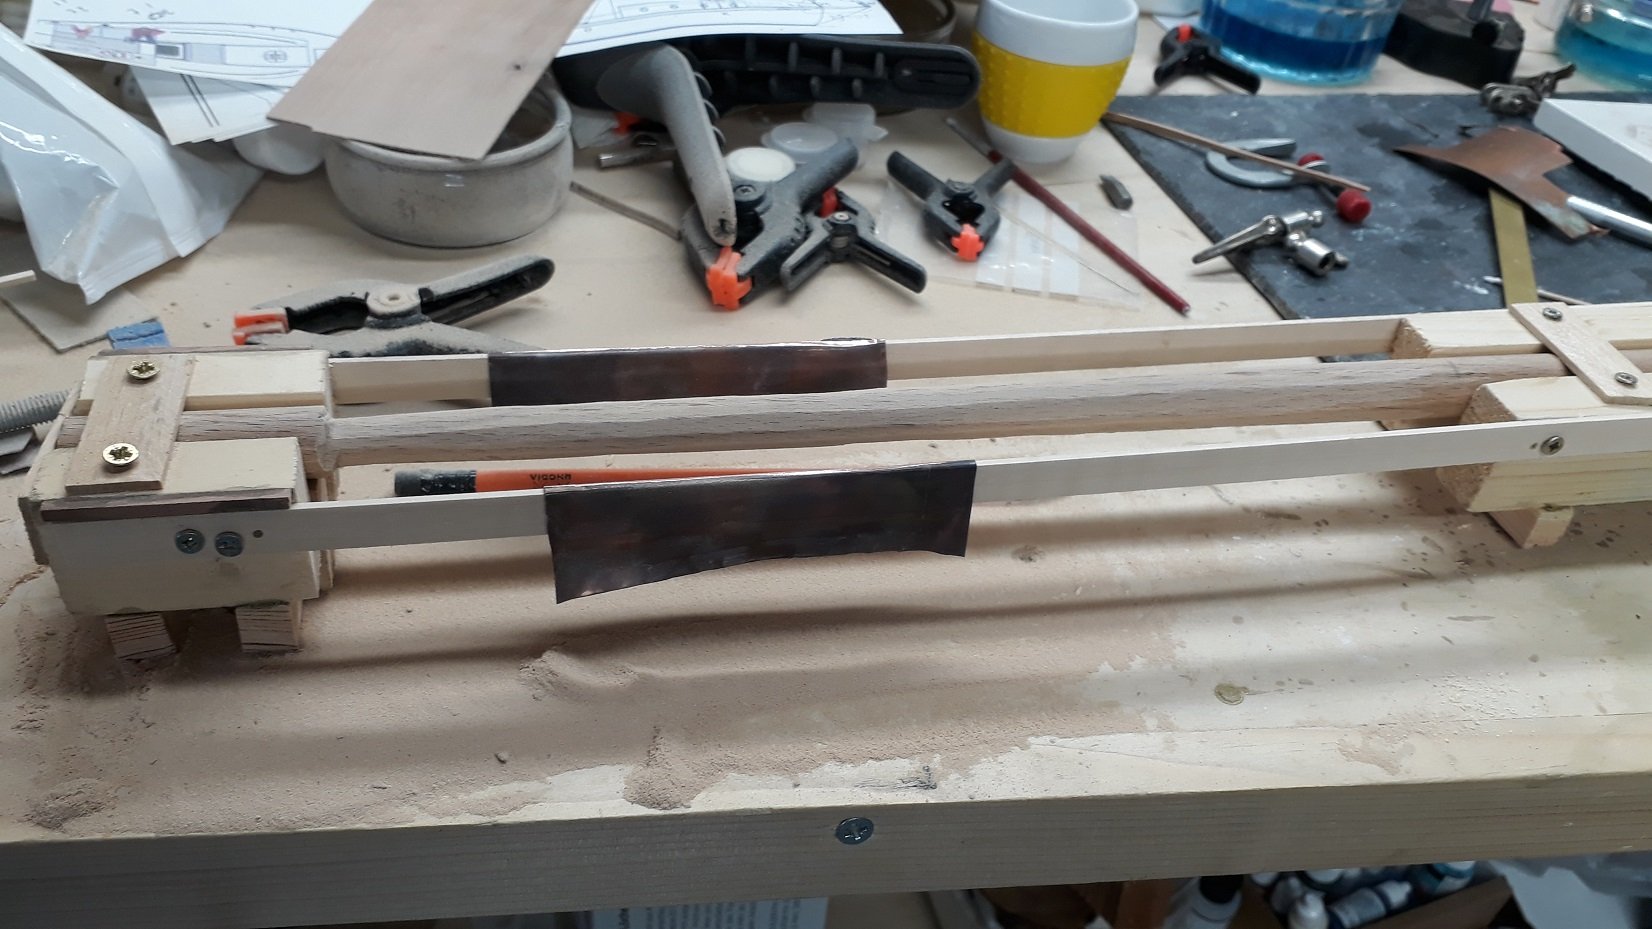
Thanks Michael and Druxey! Little progress to show, but I have been doing a lot of work in the background. I ve been experimenting with soldering, pickling etc. I read a lot and had some success with my initial tries with silver soldering. I think however that quite a lot of metalwork could be done with soft soldering. I also have been researching the gaff rigging, ended up buying a book. I find the gaff topsail particularly confusing and Deben has a very high mast with a substantial topsail. The mast will be 75 cm from the cabin roof and will taper for the last 29 cm, from 16 mm to a diameter of 10 mm. This is a lot of wood to take off and the Beech dowel I ll use is too hard and too big to attach to a drill. It took me a couple of days but I made a jig to allow me to taper the mast, keeping it straight. It actually worked beautifully! The two strips at the side dive to leave 3 mm of dowel exposed. The dark bits is copper sheet to protect the wooden strips from the aggressive sander. The next photo show how the dowel was progressively shaped. Still needs a lot of hand sanding but I am happy with the result.

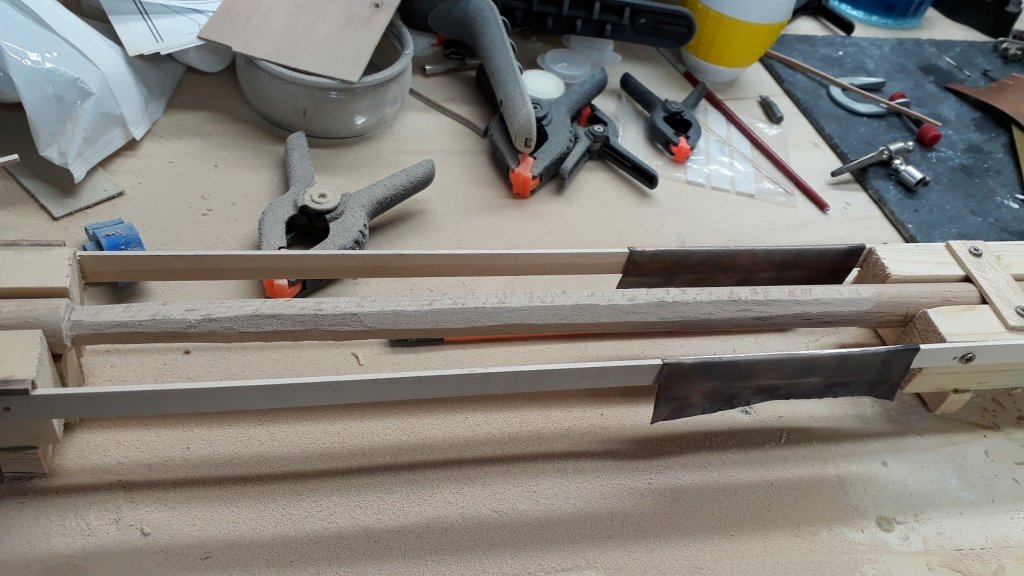

.thumb.jpg.3e452ff308224b74075d30eff2b9a076.jpg)
-
Brass - Shining Small Parts
vaddoc replied to Koa4225's topic in Metal Work, Soldering and Metal Fittings
To keep the shine, I ve found Renaissance wax is brilliant. I think museums use it to keep metal things shiny. I ve used it 3 years ago on my previous boat, all brass components are still as shiny. -
Brass - Shining Small Parts
vaddoc replied to Koa4225's topic in Metal Work, Soldering and Metal Fittings
I am experimenting with silver soldering and done a bit of reading and had a couple of attempts. Apparently, to restore the shine, dip the brass pieces in a solution of hydrogen peroxide+ sodium bisulphate (not tried this yet). I tried acid pickling with vinegar for copper, works brilliantly, removes fire scale and restores the shine very quickly, especially if heated. -
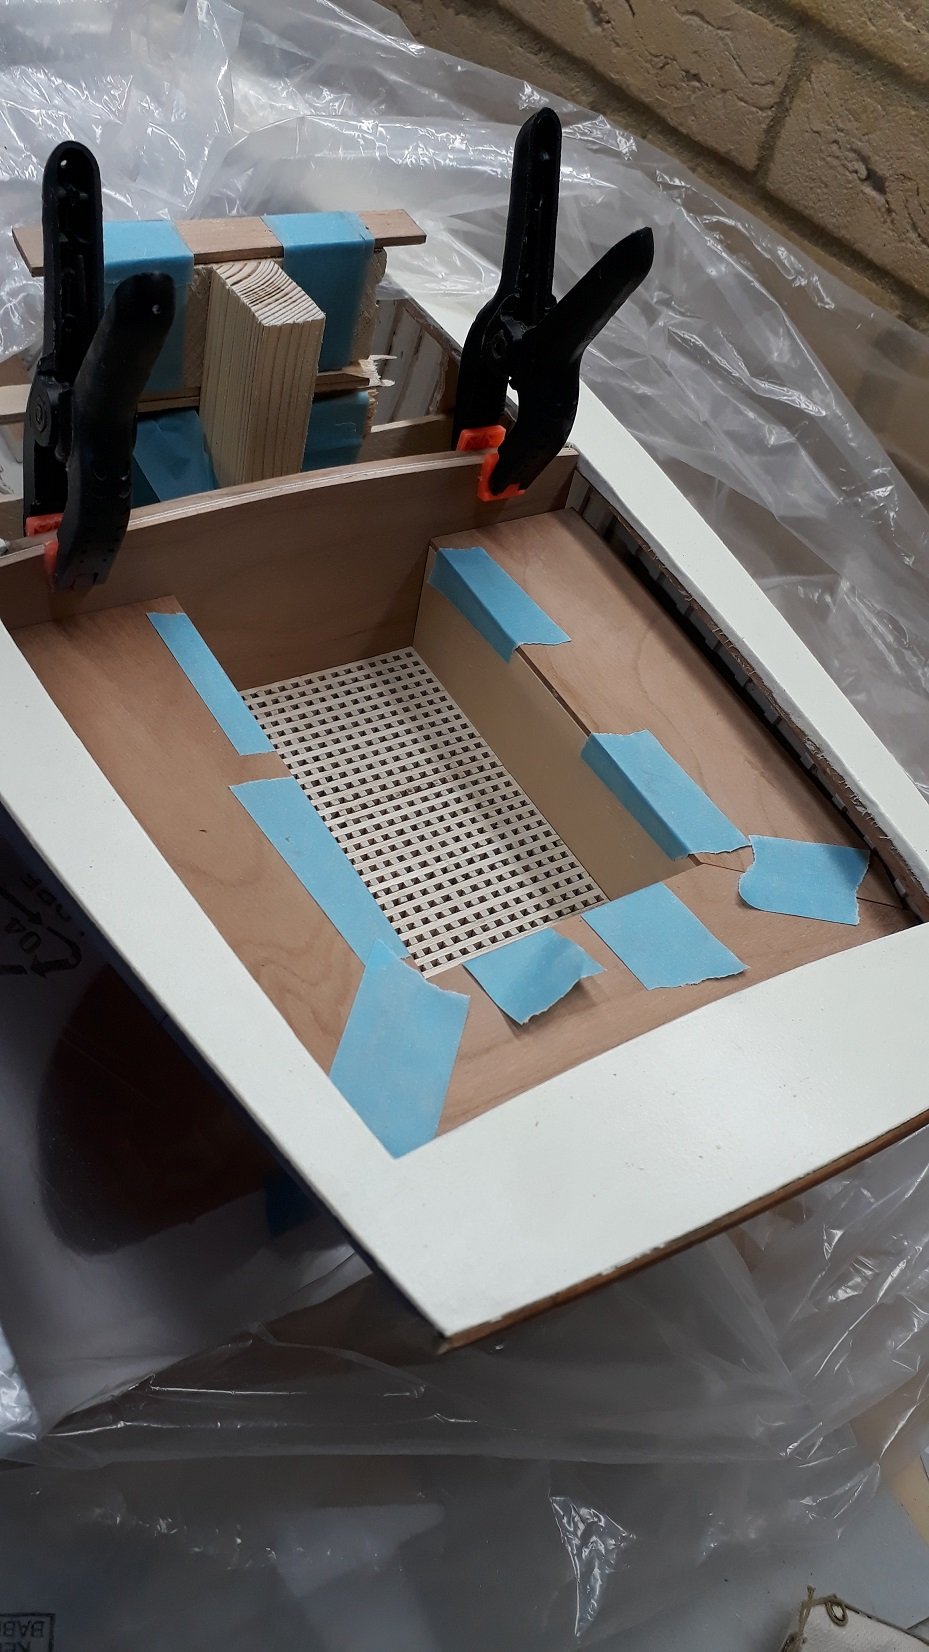
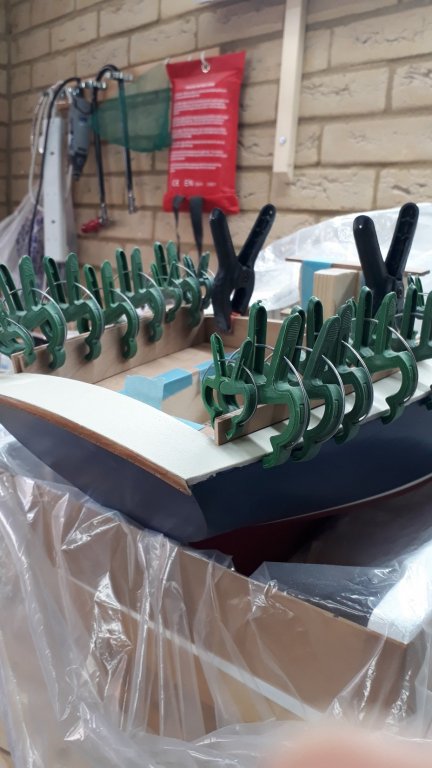
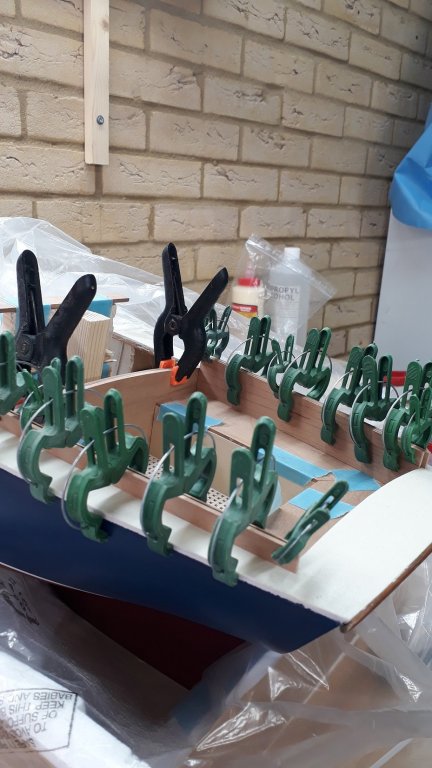
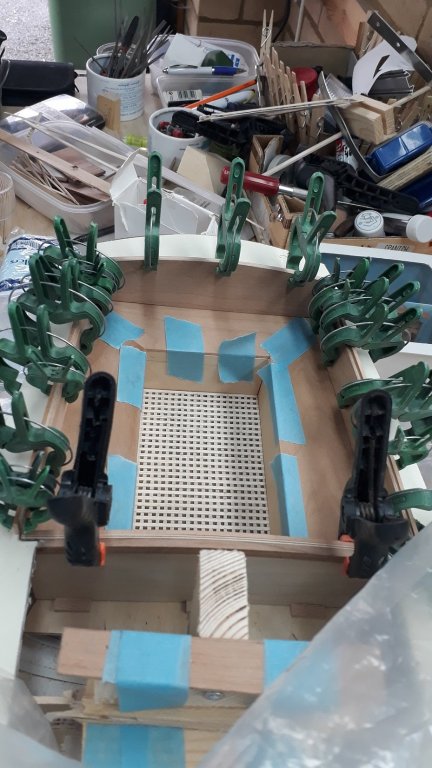
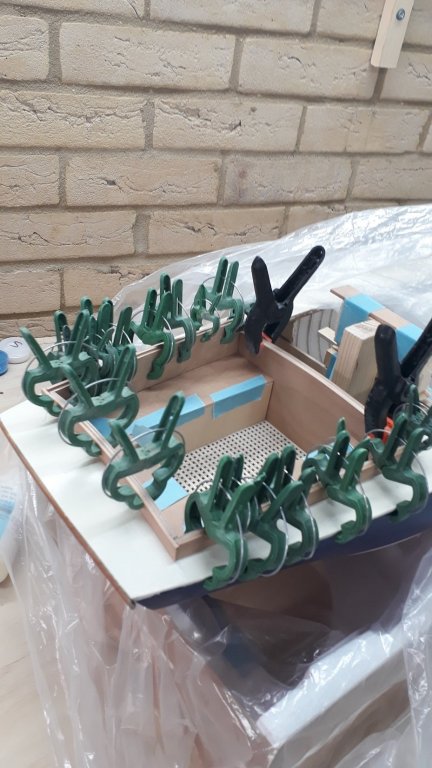
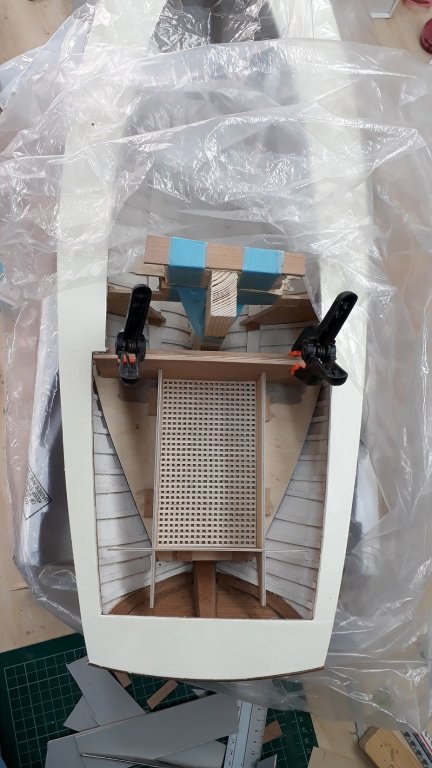
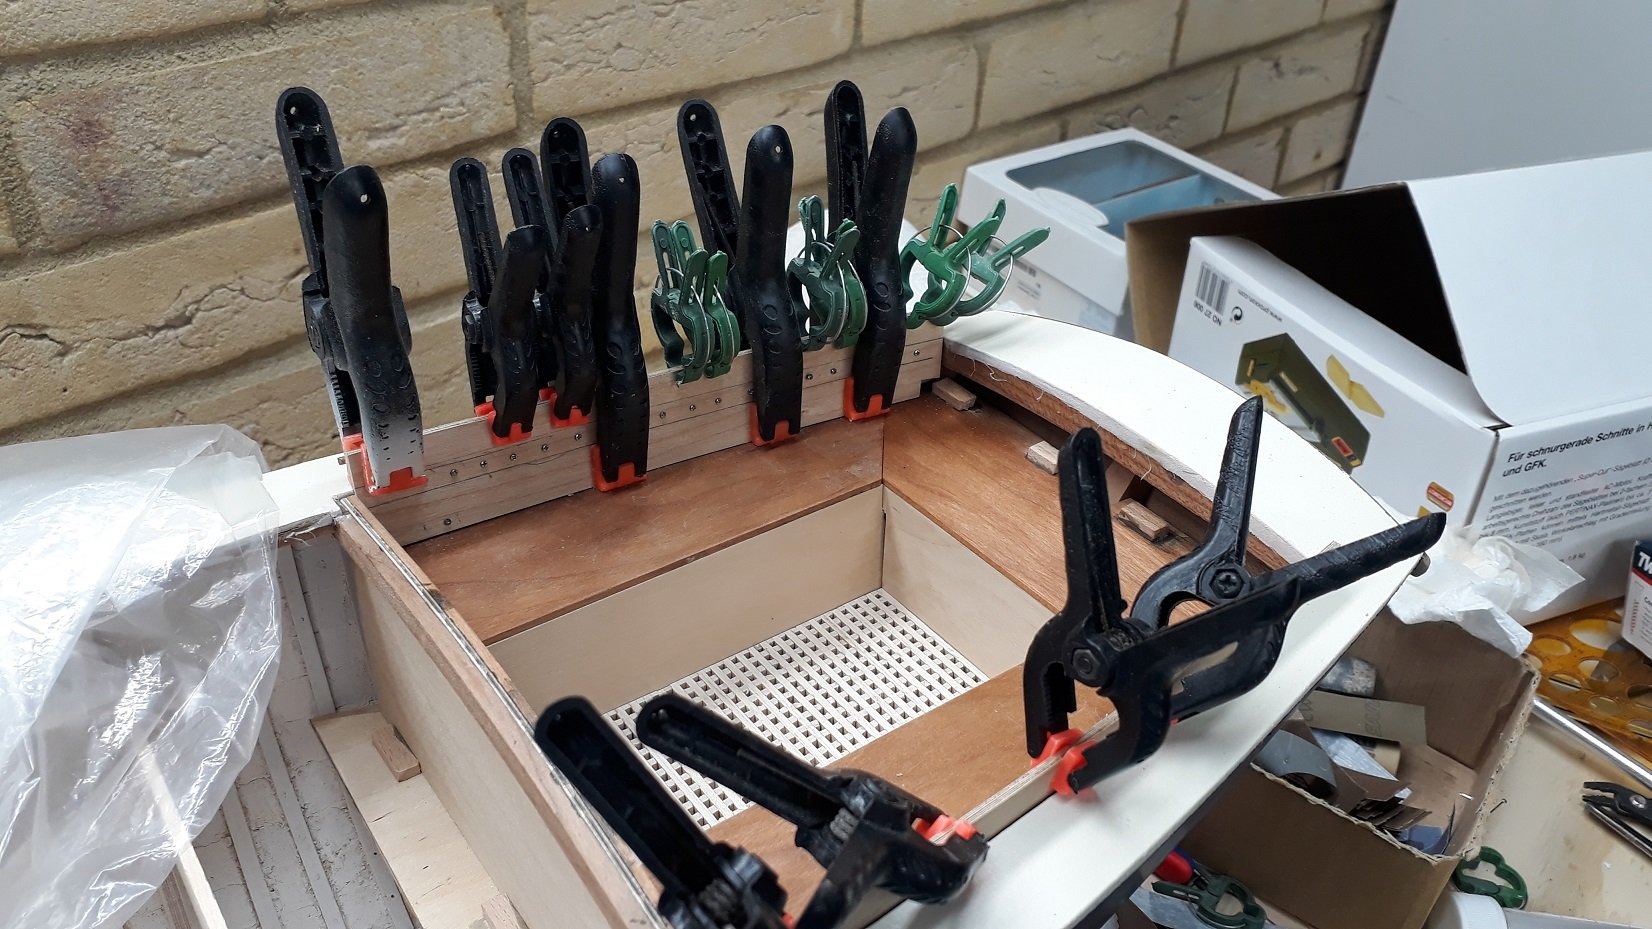
Thanks John! I did a bit more work, the cockpit is coming along fine but its structure is becoming really complex. The sides are not straight but slightly curved so every bench back/coaming will be laminated from 2 plywood sheets and a cherry sheet on each side. There will be other pieces covering the top and some more at the ends towards the cabin, then strips where the coammings meet the deck. More L shaped supports must be glued, the surfaces to be sanded, tung oil applied, glued in place...days and weeks but in the meantime, some more photos.

-
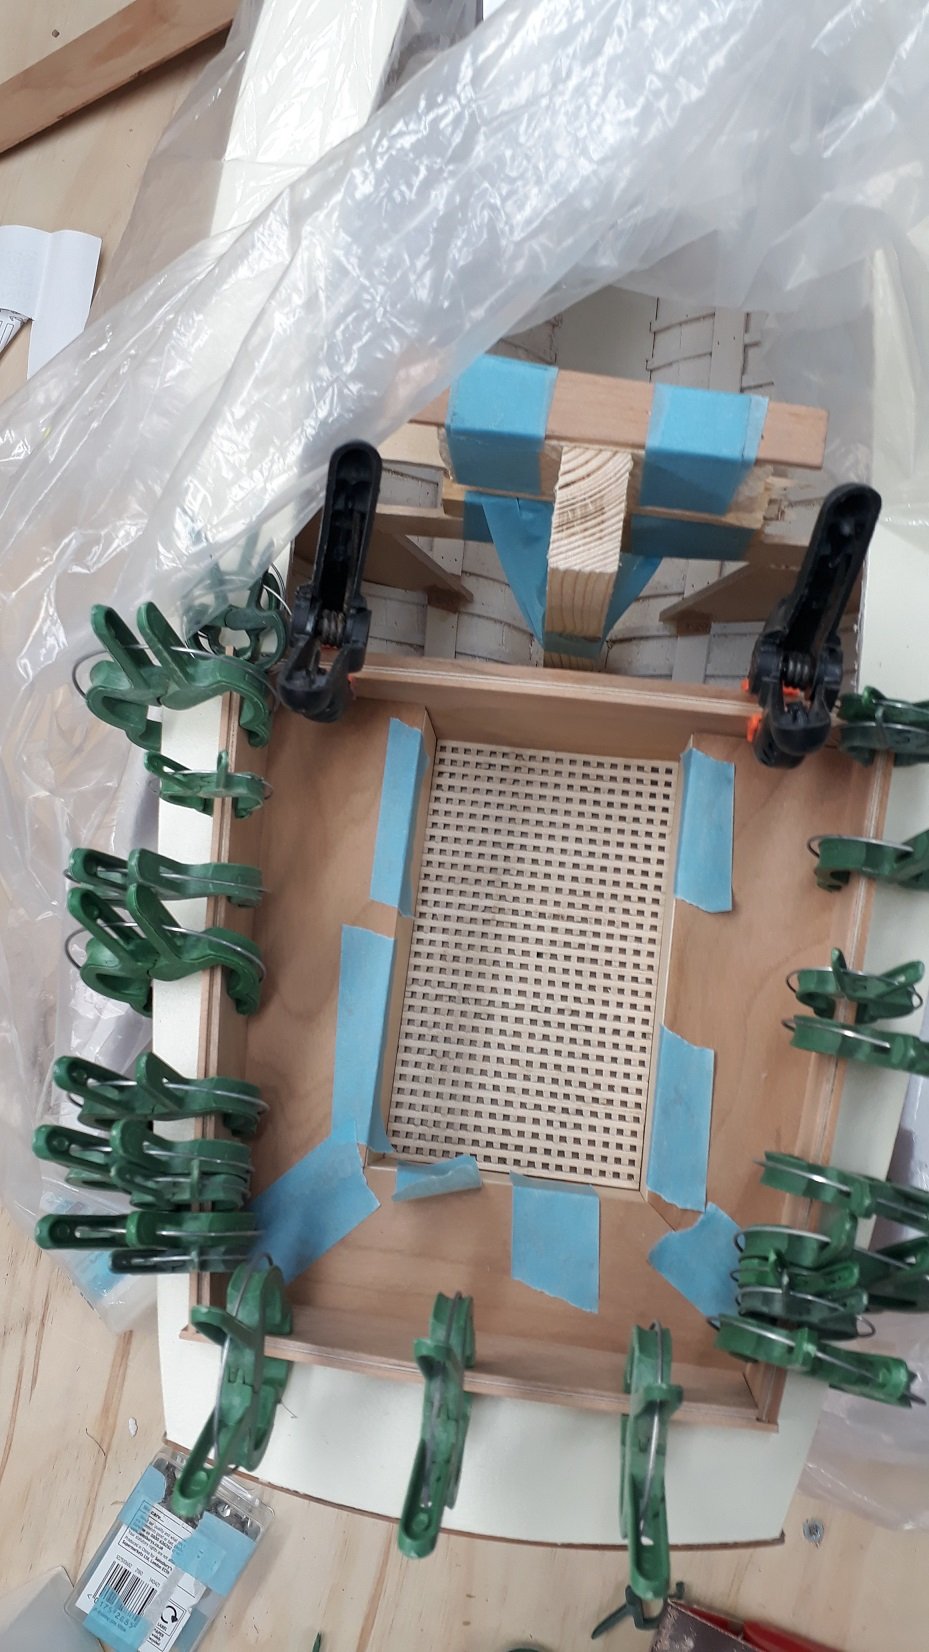
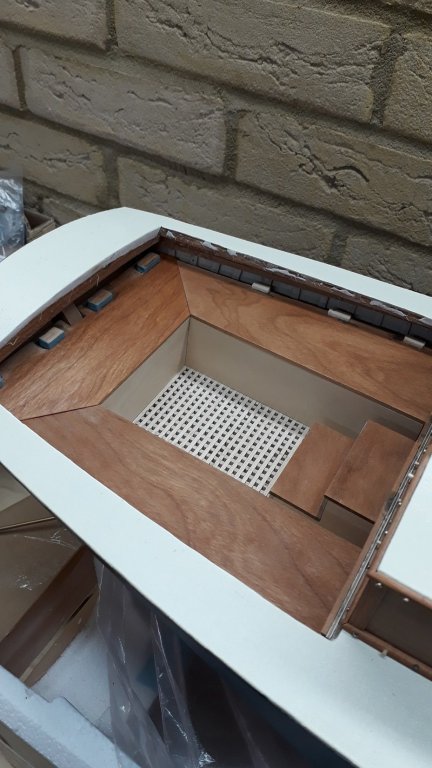
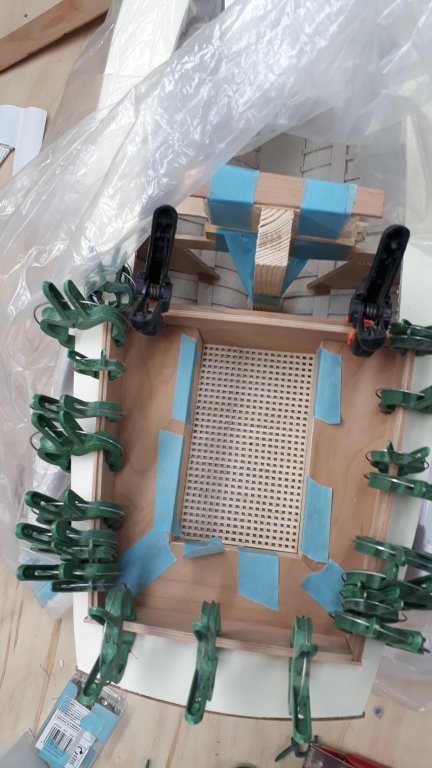
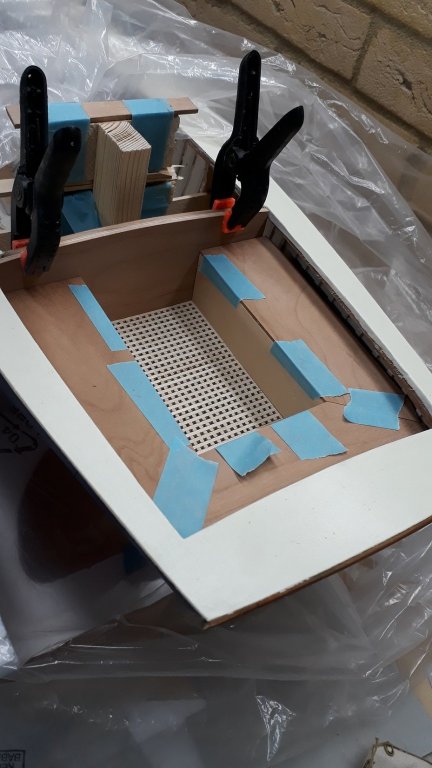
Just another quick update, I did some more work on the cockpit, it slowly starts to shape. The bench tops are a single piece of cherry, I am thinking of lightly scoring them with a knife to give the impression of being made by several planks. I ll test this to see how it looks. The plywood subframe loosely fitted Small wood pieces glued to fix in place Then cardboard patterns are made Cherry tops ready, seem to fit well.

-
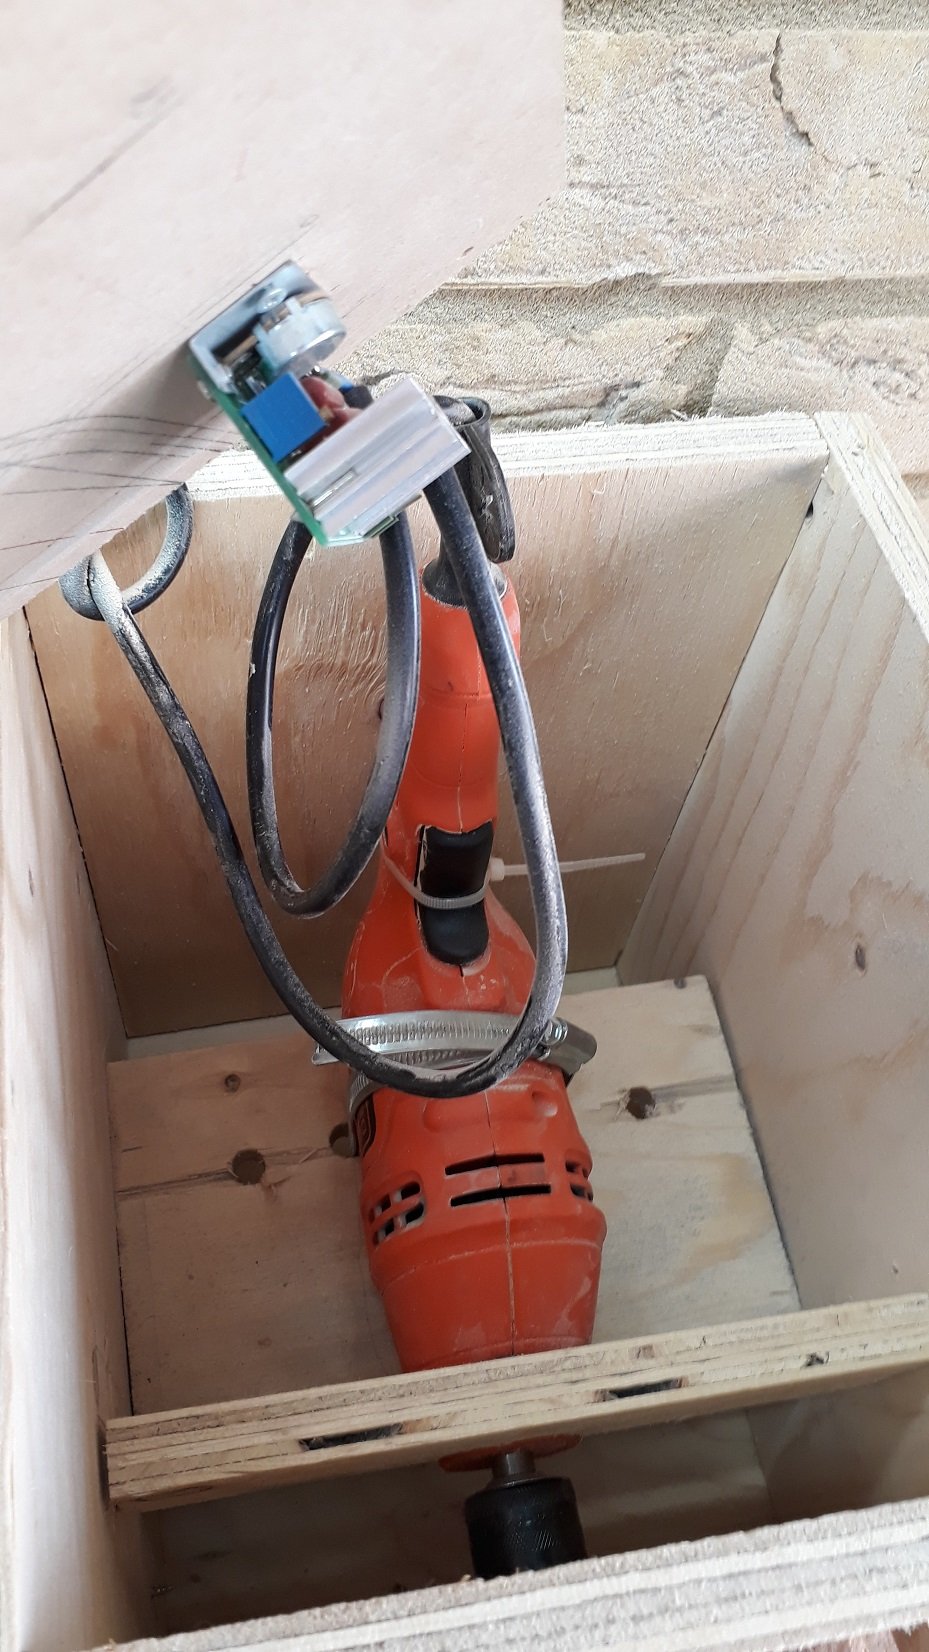
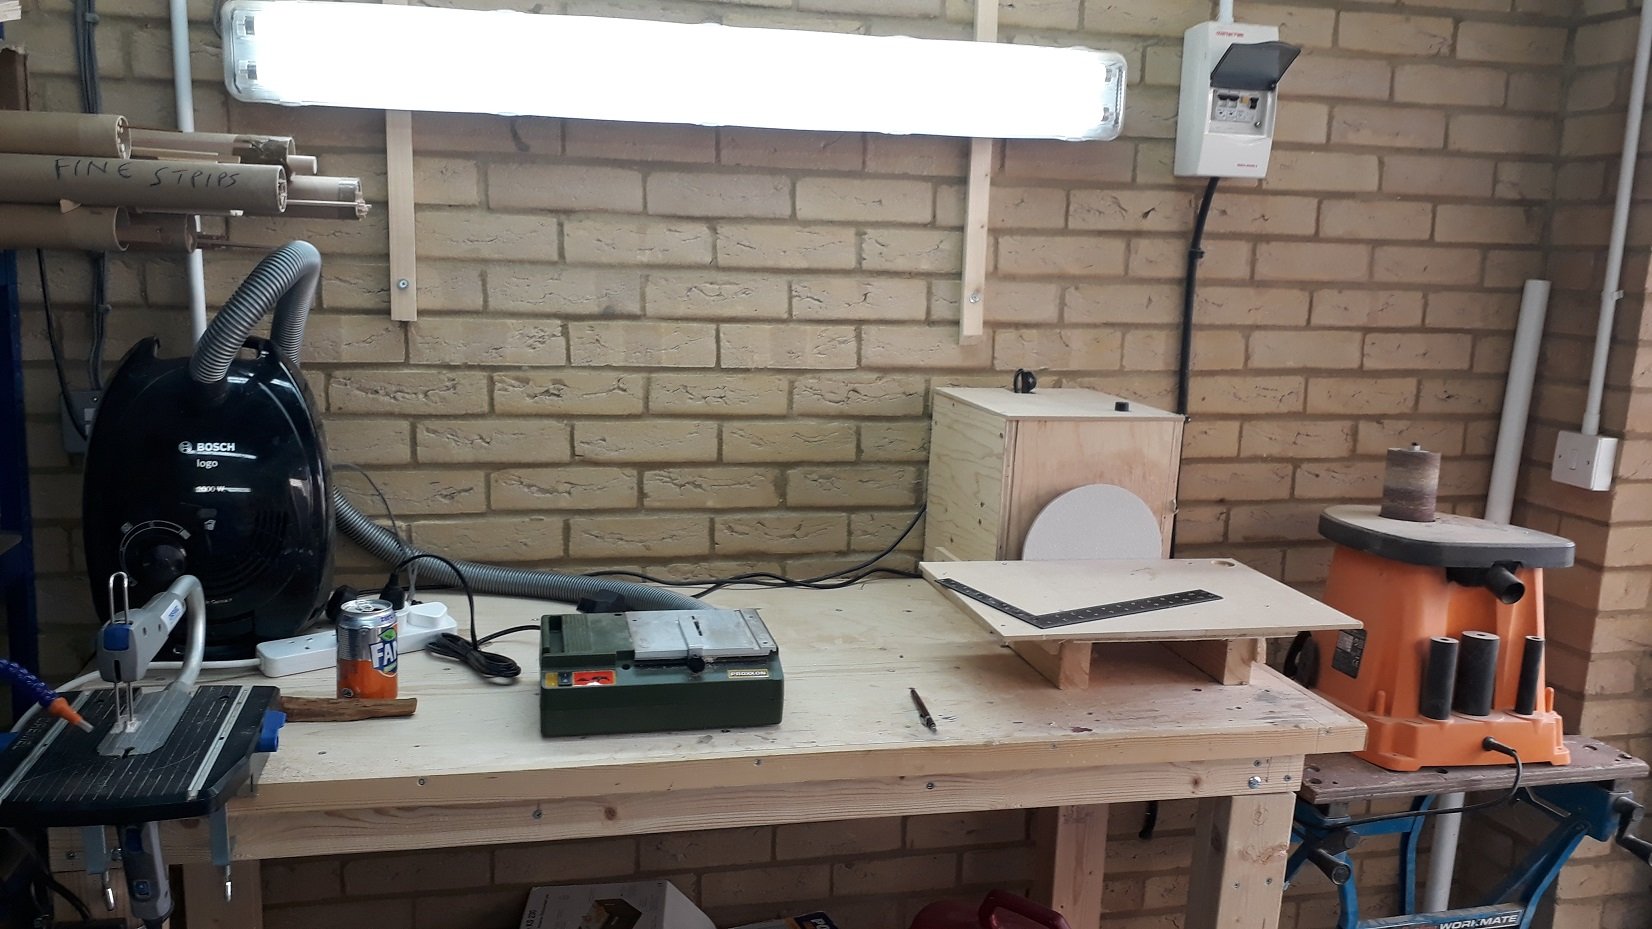
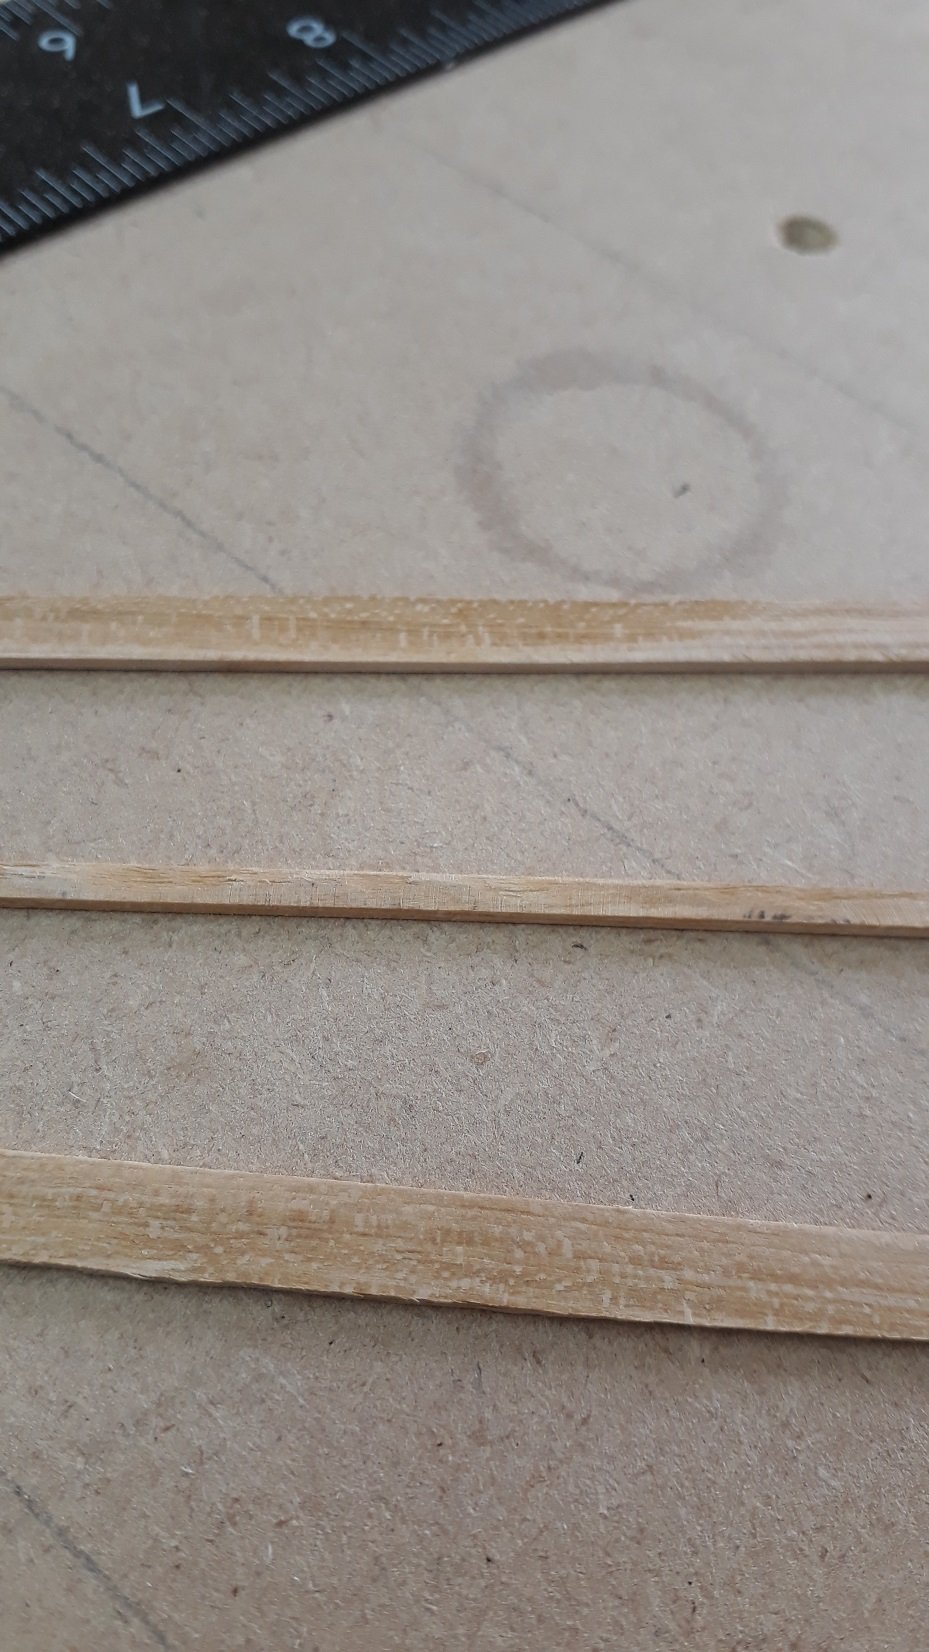
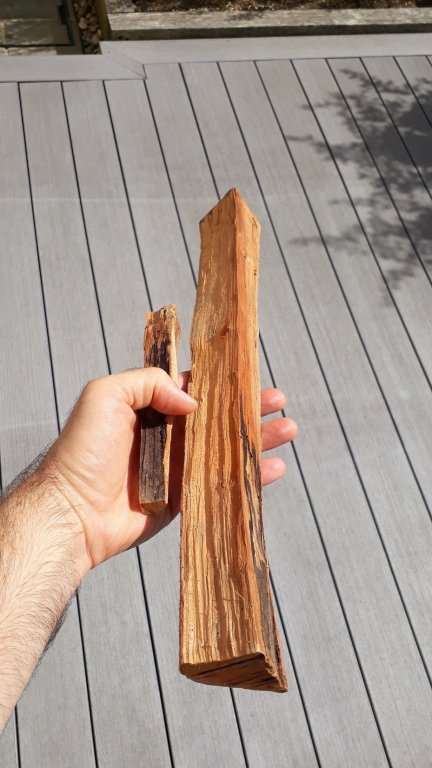
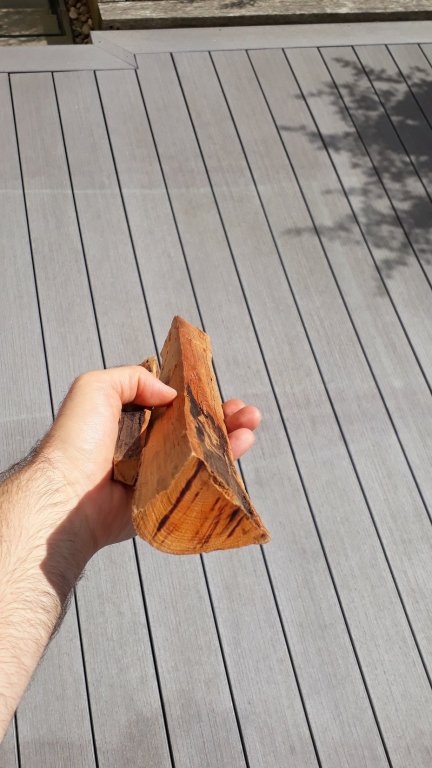
Back from summer vacations, with a bit of tan and two now very wild children that need to be tamed. Took a week before I could find a scrap of time to open the garage. I did a bit of cleaning and a bit of maintenance. My home made disk sander needed some attention so I repositioned the drill, squared everything off and changed the sandpaper. Works much better now. I have two large work benches, this is the one with my power tools. A drill press joins in from time to time. I also brought back a couple of pieces from an apricot tree my father had cut down. It was badly damaged by bugs and I could salvage only a little. It seems a lovely wood and I would love to use it. I have no tools to mill it with though. I tried using what I had, very hard wood, gave out a very nice fruity smell when sanded. I managed to produce 3 strips with much effort! I would like to make the blocks and dead eyes out of this but I cannot mill it, I may keep it for use in future years. My dad has some other fruit trees (lemon, plum, peach, orange etc) and occasionally they get damaged so I may be able to get some more rare fruit timber in the future,. There is also a large cedar that looks like it is failing. Back to the boat, progress is very slow. I need to do some metal work before I continue (tabernacle, chain plates etc) so I need to learn silver soldering first. The cockpit is giving me lots of trouble as to make the benches and coamings needs some skill. I also am not at all sure how the rigging will be set up and how the lines will course towards the cockpit. I bought some more stuff and I ve been educating myself, this journey has a long way to go!


-
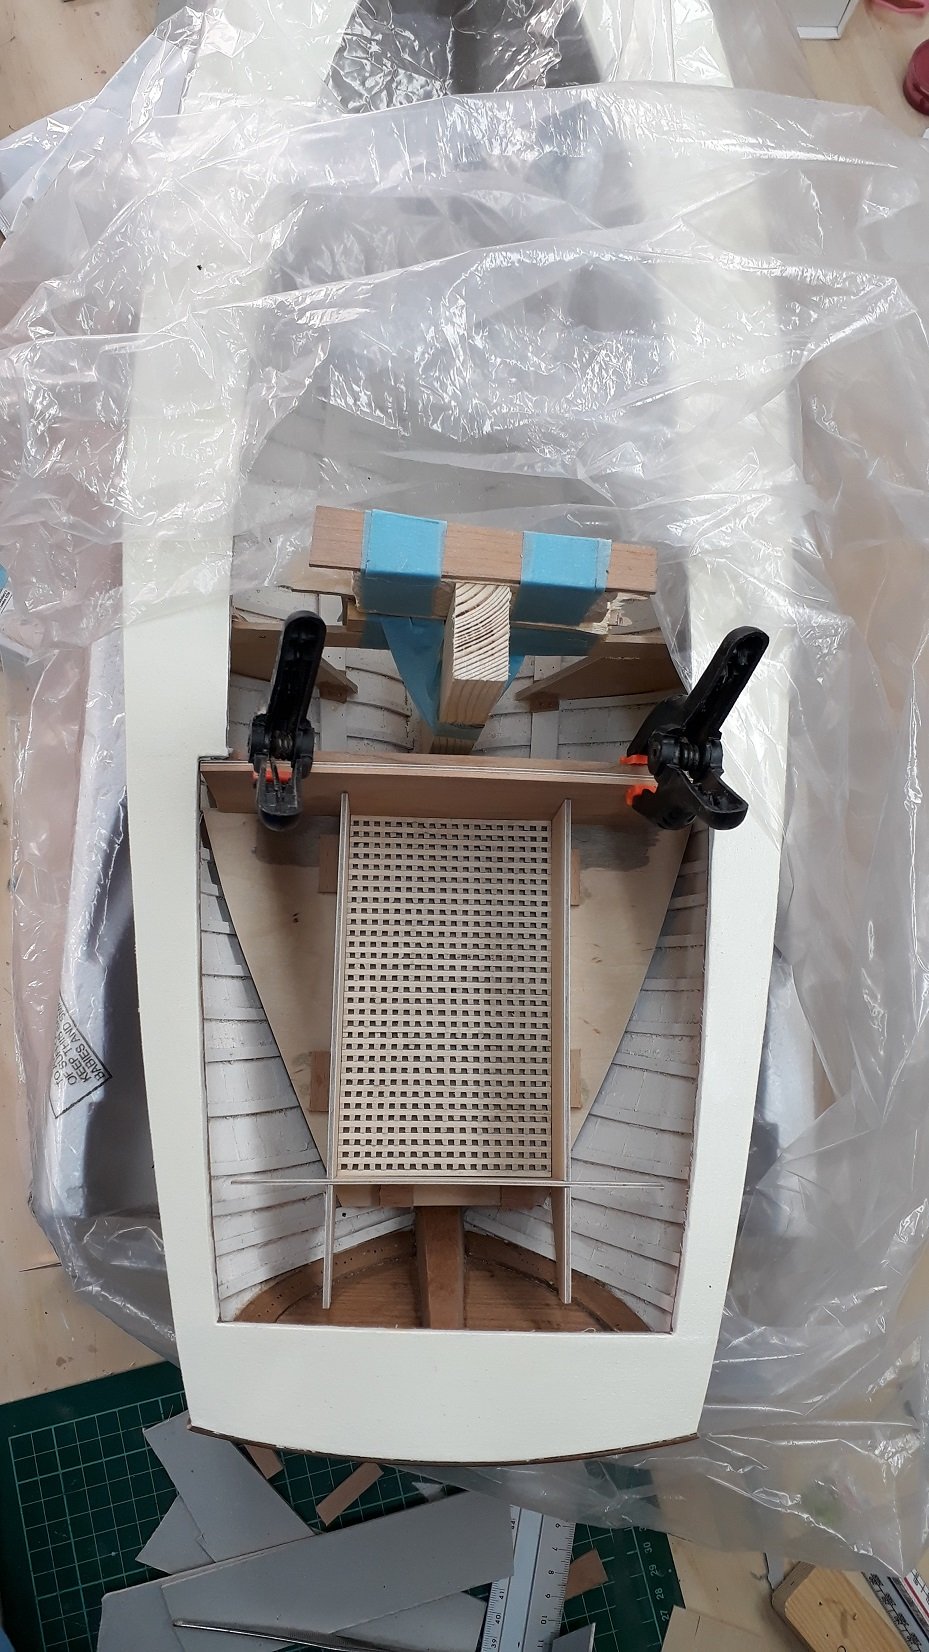
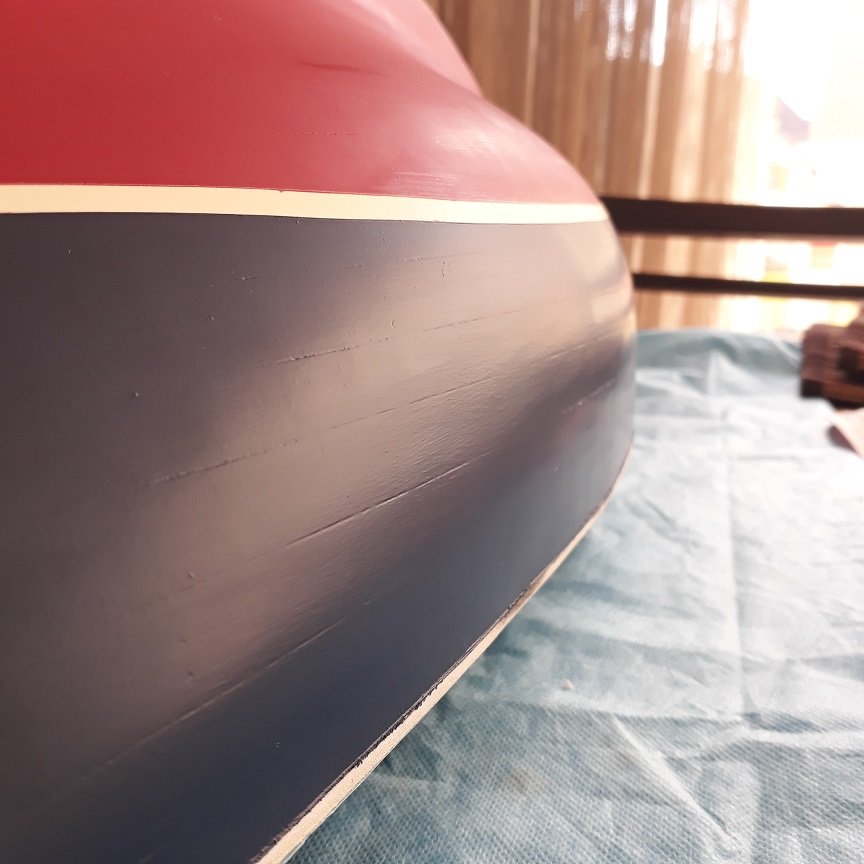
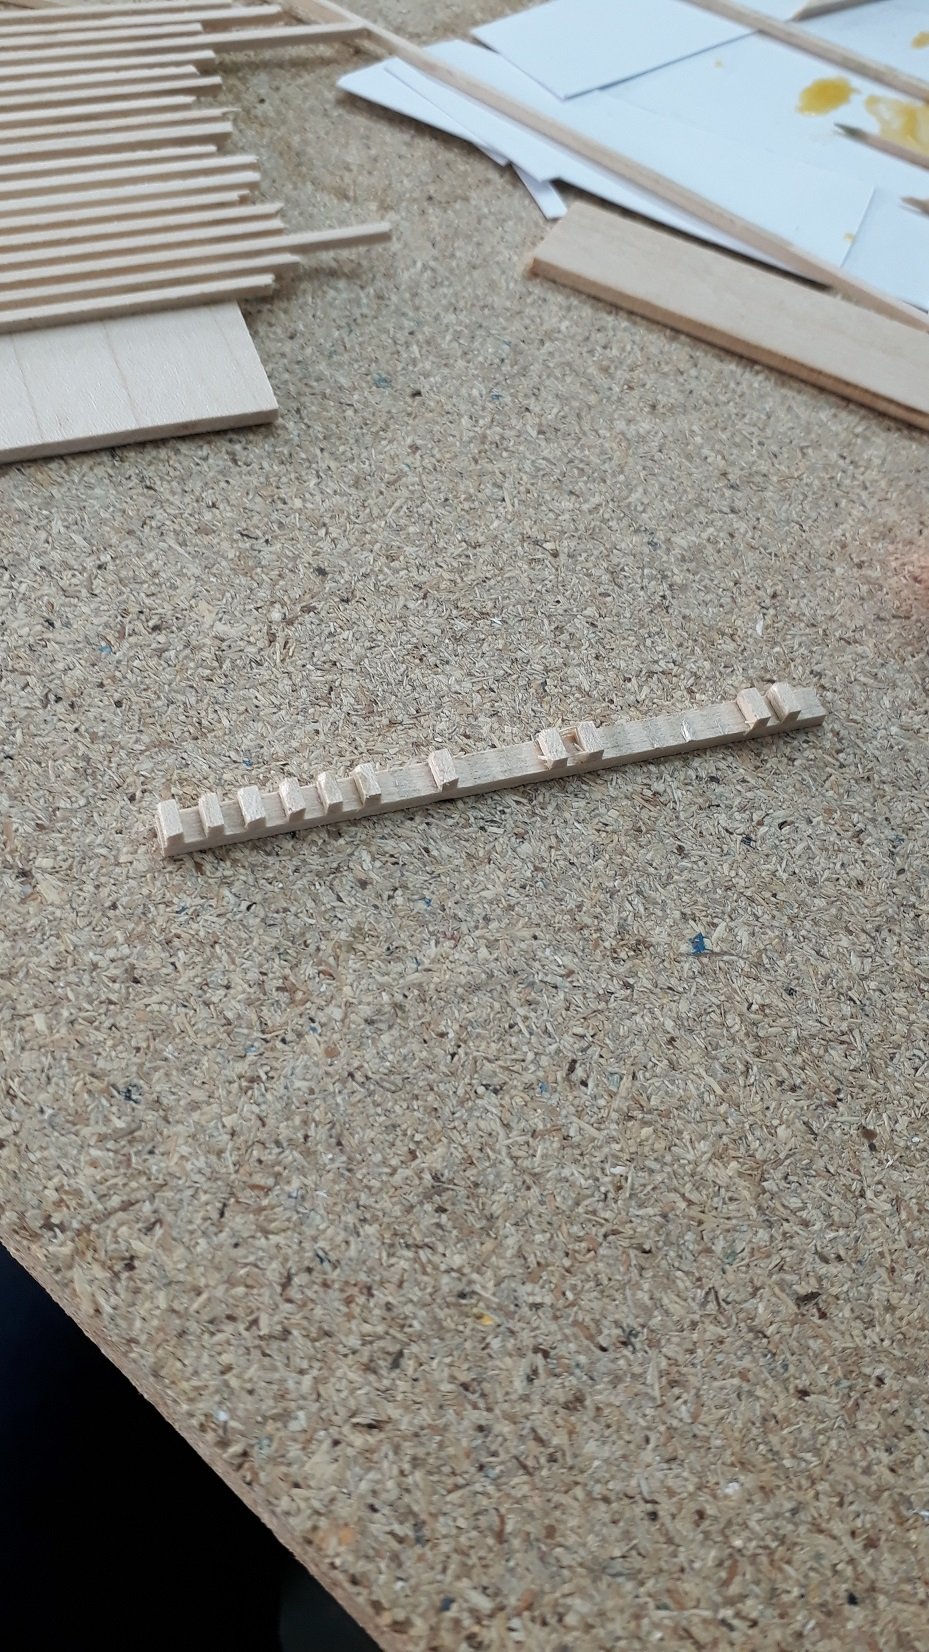
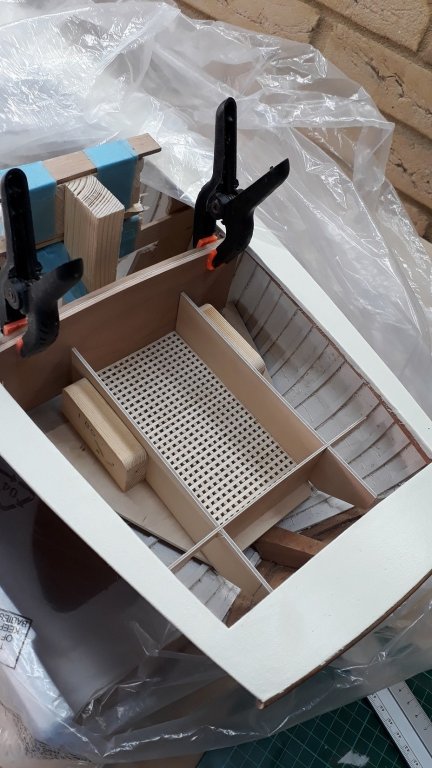
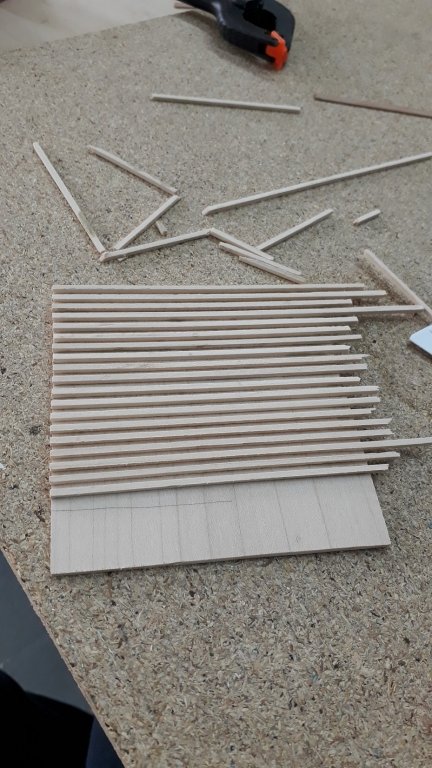
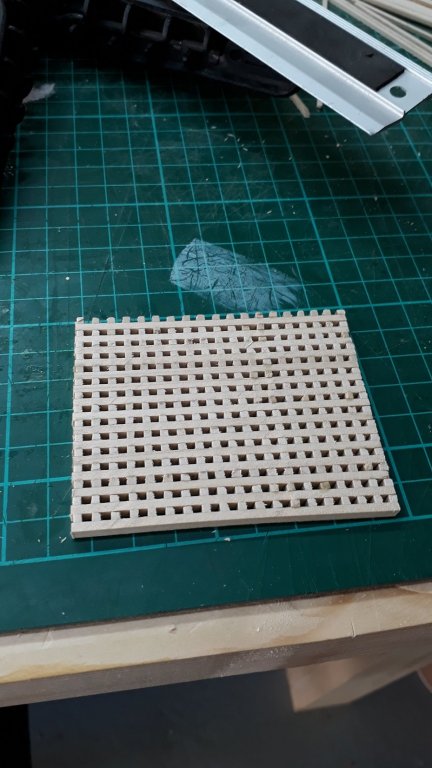
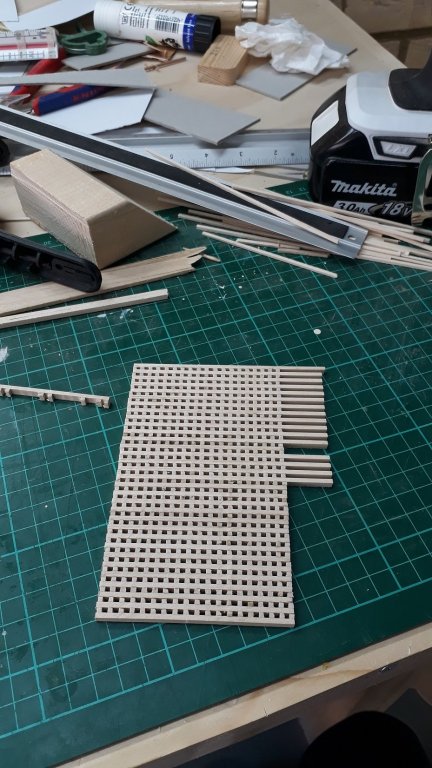
Thanks Michael, I am following silently your restoration project and keeping an eye for when you ll pick up that skipjack! Carl, the Valejo polyurethane varnishes are great. Being able to leave the very dusty garage and work in the house is a big advantage and they should be much cheaper than rattle cans. I finished varnishing the hull, the polyurethane varnish needs to be treated like paint, thinned heavily and trusting the varnish, not trying to repair any problem areas. I used gloss above the waterline, I am very happy with the result. There are a couple of problems and one more coat bellow the waterline would sort it out but I will leave it as is. Considering how unforgiving close up photos are and the size of the hull, I am happy. The next photo does not do justice to the colour, it is really much nicer. With this completed, I started work on the cockpit. I played around with card templates and I made a very sturdy laminated floor. I realised that the first thing to make would be the actual floor, as the rest would be built around it. Well, any serious boat needs to have gratings so here it goes! I tried to make it the proper way but failed miserably. I then tried another way, cheating a bit, and this worked better. I have a ton of maple so I decided to go with it, not sure if it will combine well with cherry but I don't want to use any of my diminishing cherry and pear stock. This piece was actually discarded but shows how the pieces look when sliced Then added one on top of the other And the grating is ready for sanding and final shaping and finishing I think it is acceptable for a first try! It only took a week to make... A word about the little proxxon table saw, I think it is fantastic and I have been using it heavily. i should have bought it ages ago. Off now for summer vacation, best wishes to everyone!


-
Ropewalk (and serving machine)
vaddoc replied to Charter33's topic in Modeling tools and Workshop Equipment
Very cool looking ropewalk Graham! I ve found that the most critical bits in a ropewalk are the shape of the spindle and the bearing thingy that allows the rope to spin freely as it is being made. It is extremely satisfying making rope and almost all settings will actually work. Another key element is the yarn, I have used quite a few but still have not found the ideal one to make a rope that will not stretch and that will be supple as a rope should be. Looking at your two ropes in the photo, maybe it needs more twist, more weight pull and more acute angle at the spindle, the base of it maybe needs to be more wide Regards Vaddoc -
What an amazing diorama! Great fun for all, for the kids, for you and for us reading this. Many thanks for the good vibes Sam, I enjoyed this so very much. Vaddoc
-
In the boat I currently build, I spilled all 35 planks, some very heavily. The 2 mm maple refused to bend sideways but very happily bent any other way. Some planks were 80 cm long and after the first 2-3 planks I standardised a method. Best to spill, very satisfying too. You will not convince a 2 mm strip to take this bend!

-
Yes, don't be too concerned with spilling. After a while it becomes routine
-
My experience has been a bit different Jeff. I ve never used or even seen holly. I ve used swiss pear a lot though. I ve found that it does not like bending much. It can but it needs a lot of force to keep it in shape, it can fracture suddenly and does not respond well to steam/hot water bending. Also, it resists sanding as it is hard. At 1 mm any wood will bend. At 2 mm, you might struggle with pear. Maybe I am wrong though. Of all the timbers I have, pear strips are the only ones that even after many years they are still dead straight, everything else has warped with moisture changes and time. My 2 cents
-
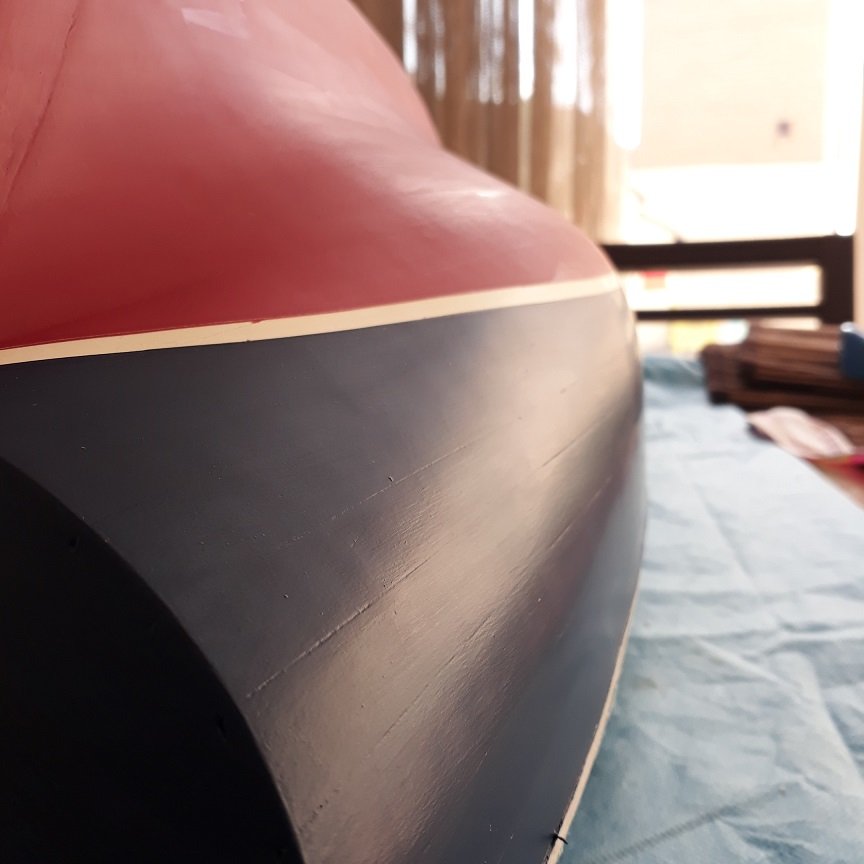
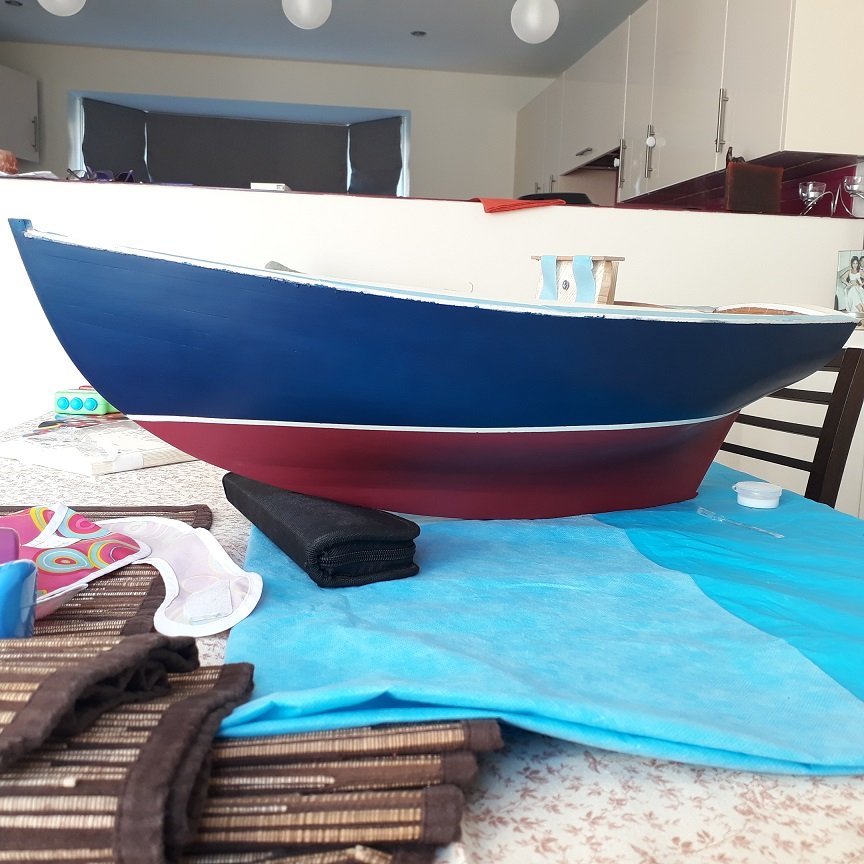
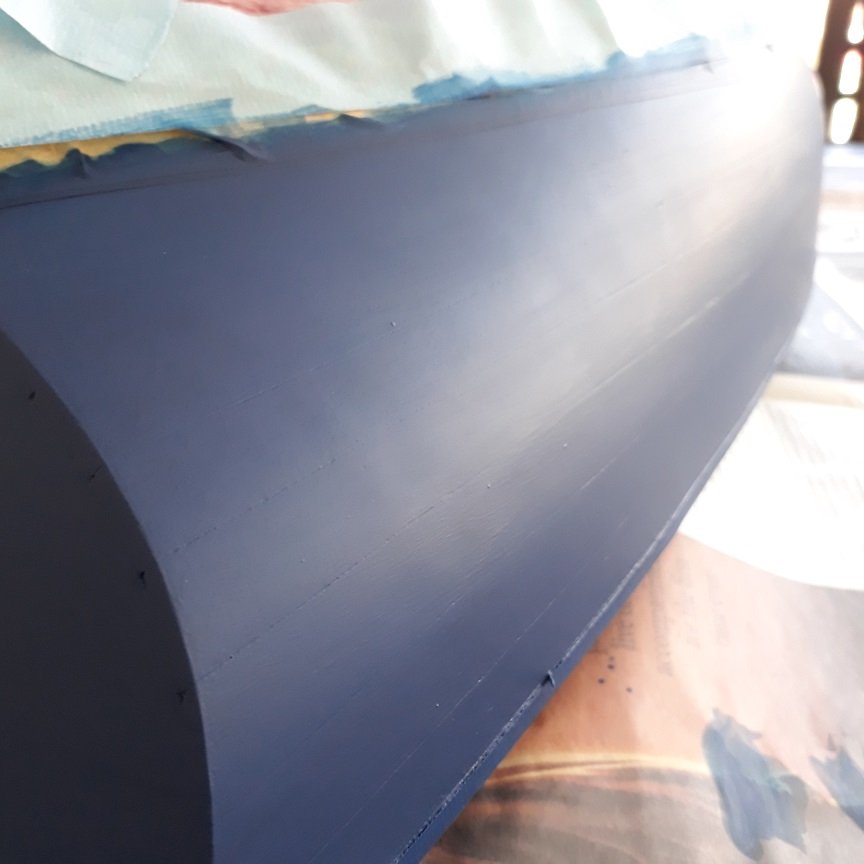
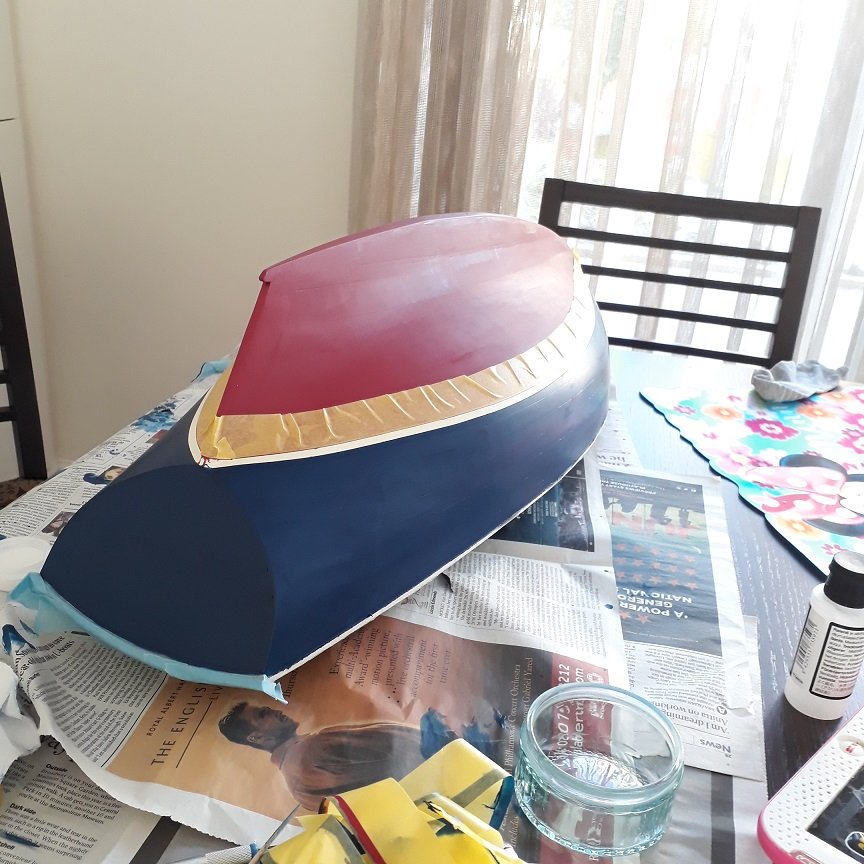
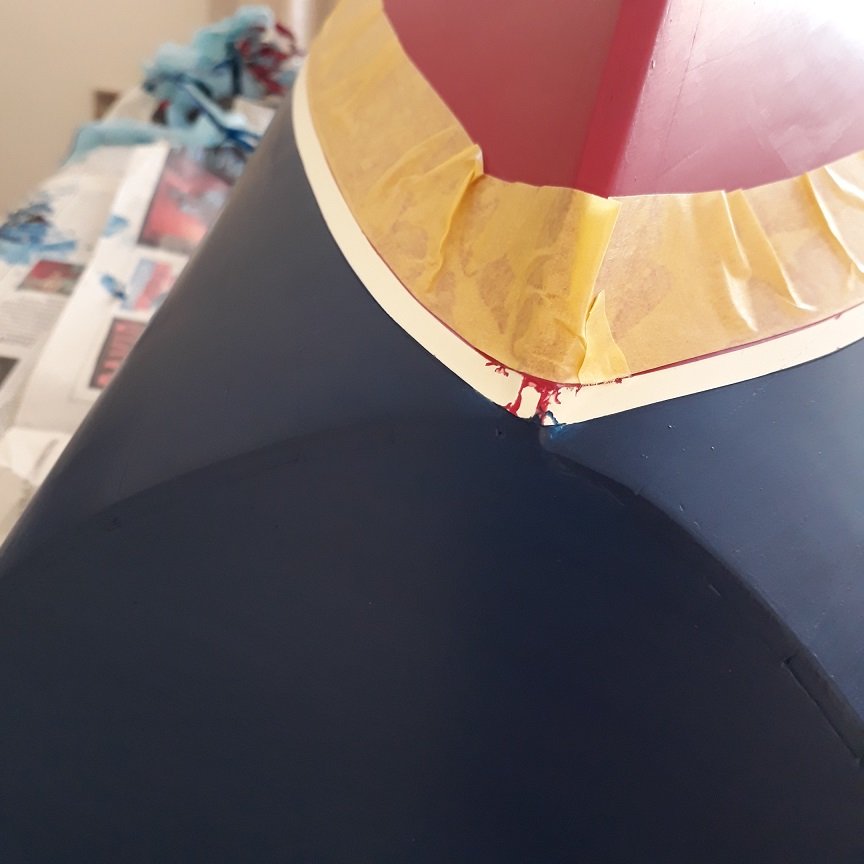
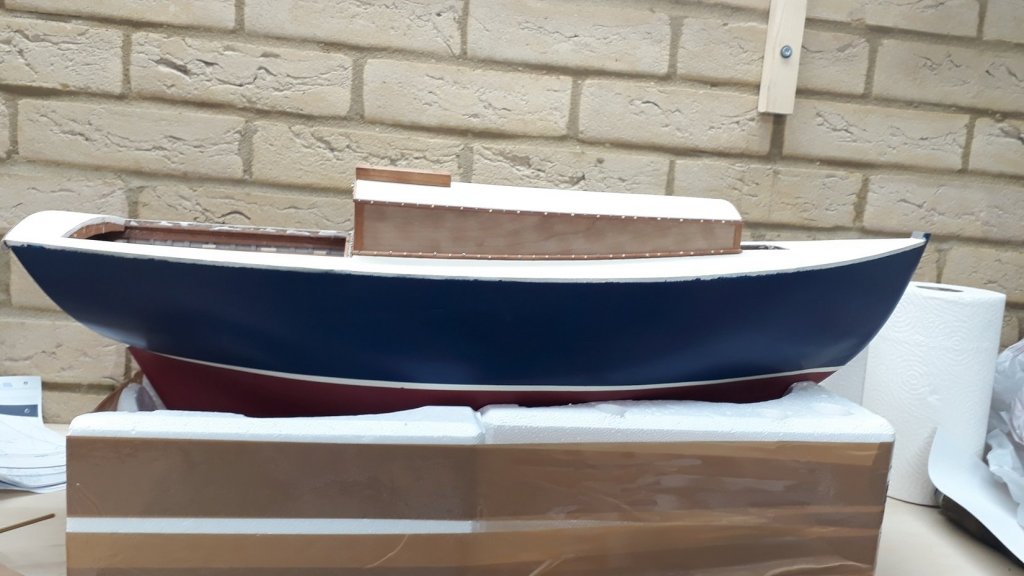
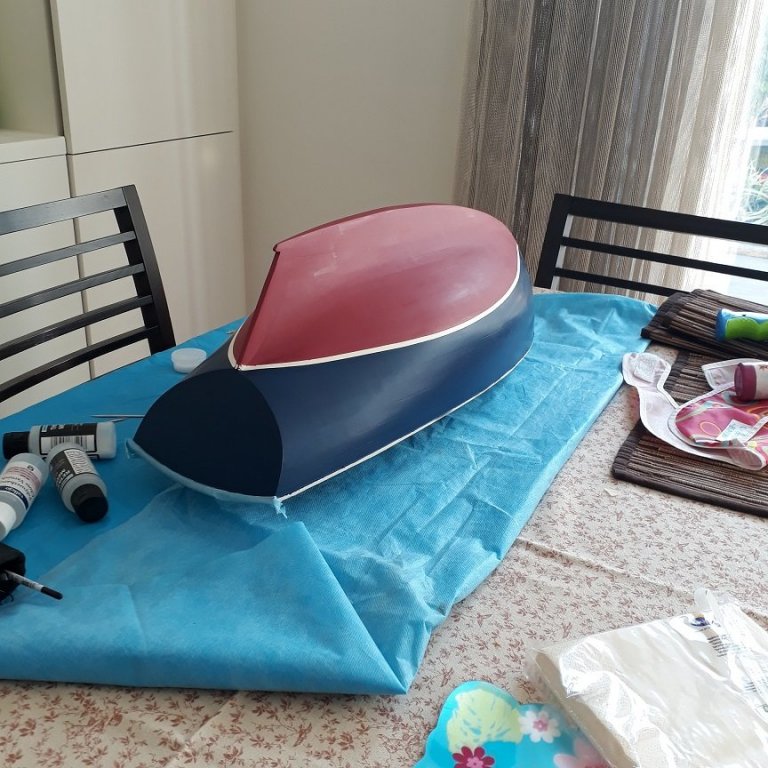
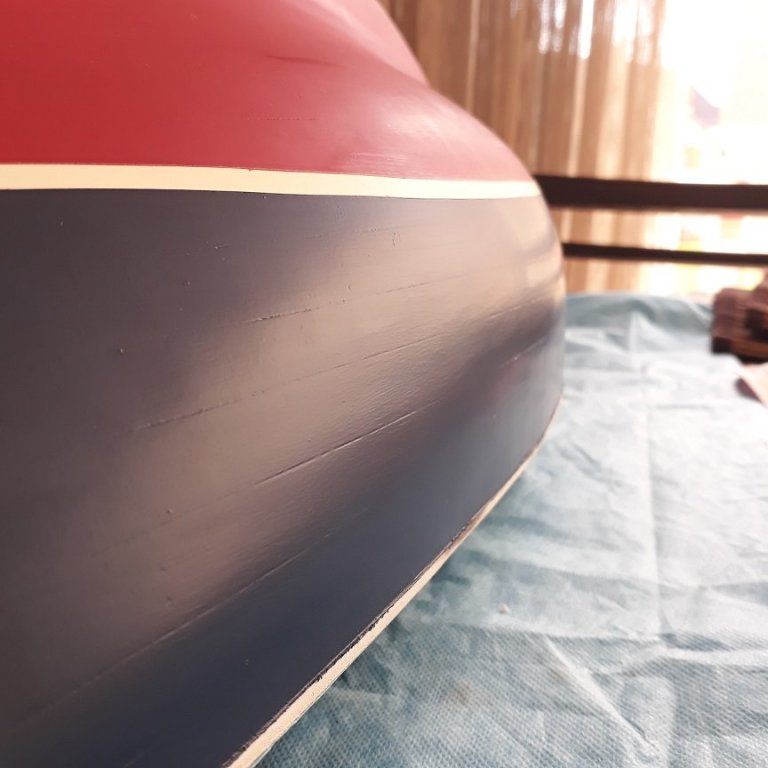
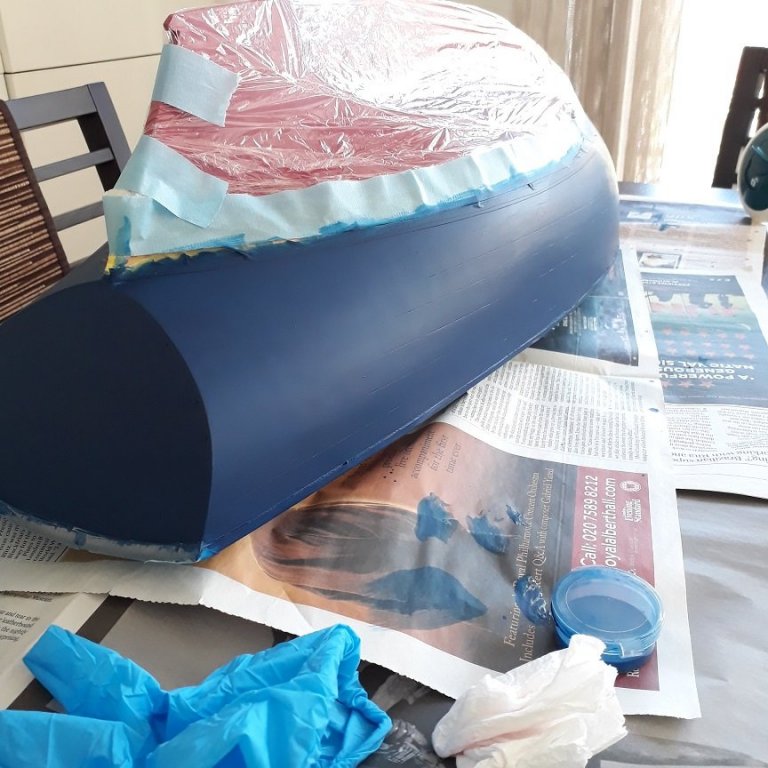
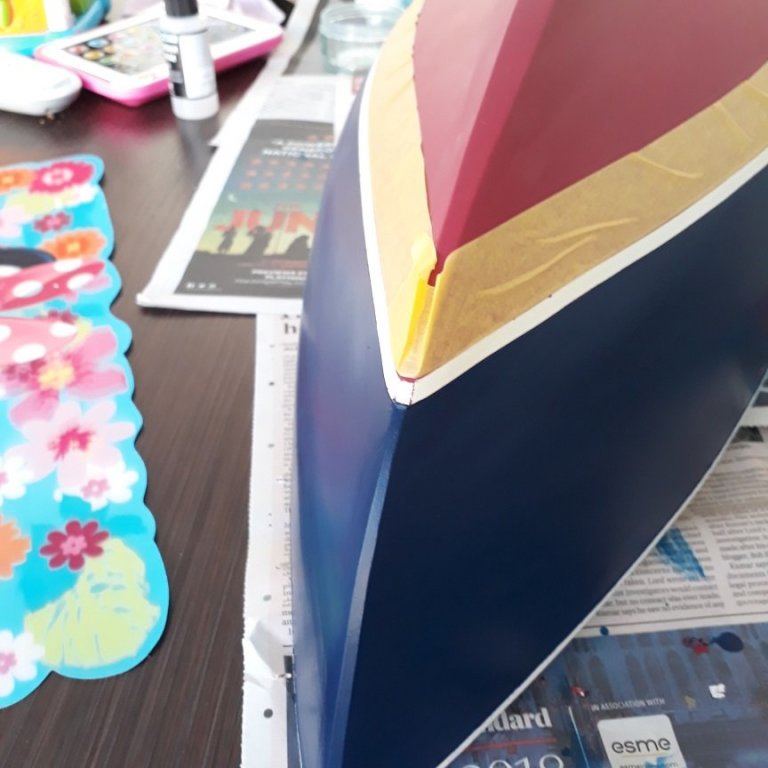
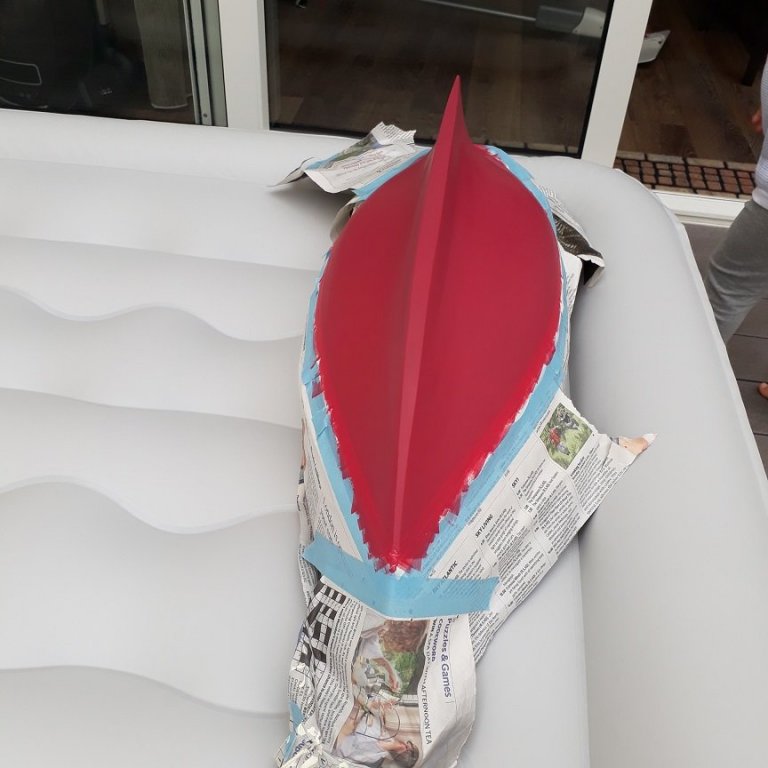
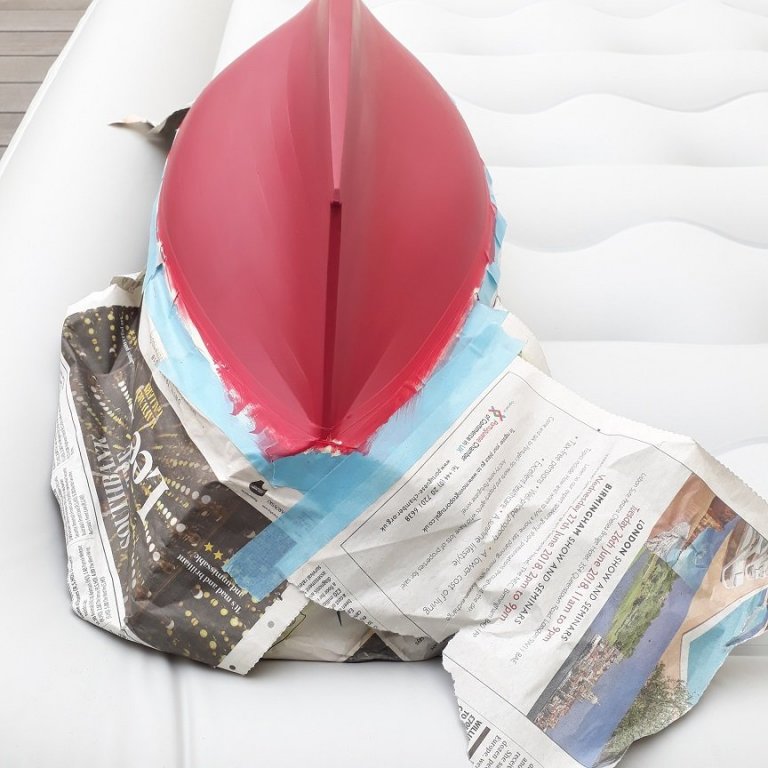
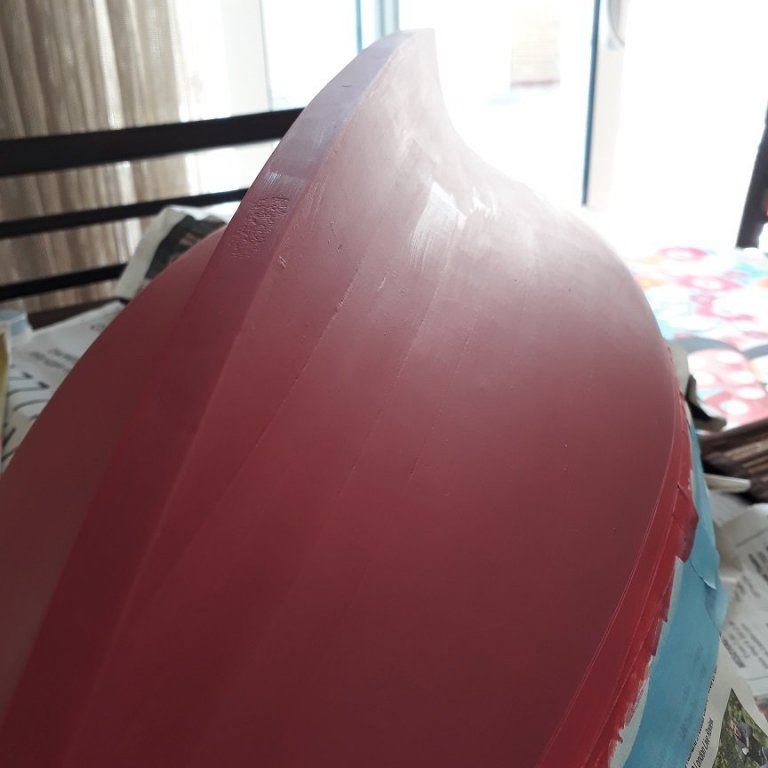
Dear all, a quick update. I finished painting the hull. The whole job was done on the kitchen table, no way this could be done with enamels. The upper part of the hull came out great. It did take more than a dozen coats though. This is impressive considering its brushed! I then unmasked the hull and remasked to start applying Varnish. I used the Vallejo polyurethane gloss varnish heavily thinned. It went on reasonably ok but it looks it will need 2 more coats. There is some bleeding under the tape but this is my fault, not tacking the tape down well. I decided to leave it, I will not try to correct it. I like the colour combination very much, not surprising as it was chosen and approved by the admiral...


-
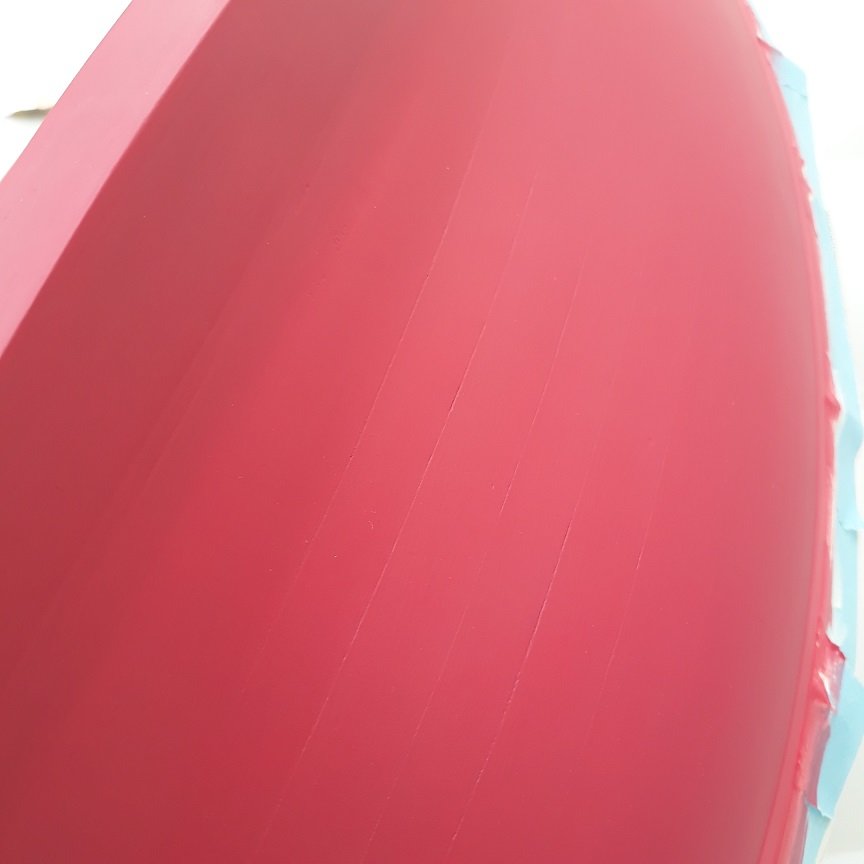
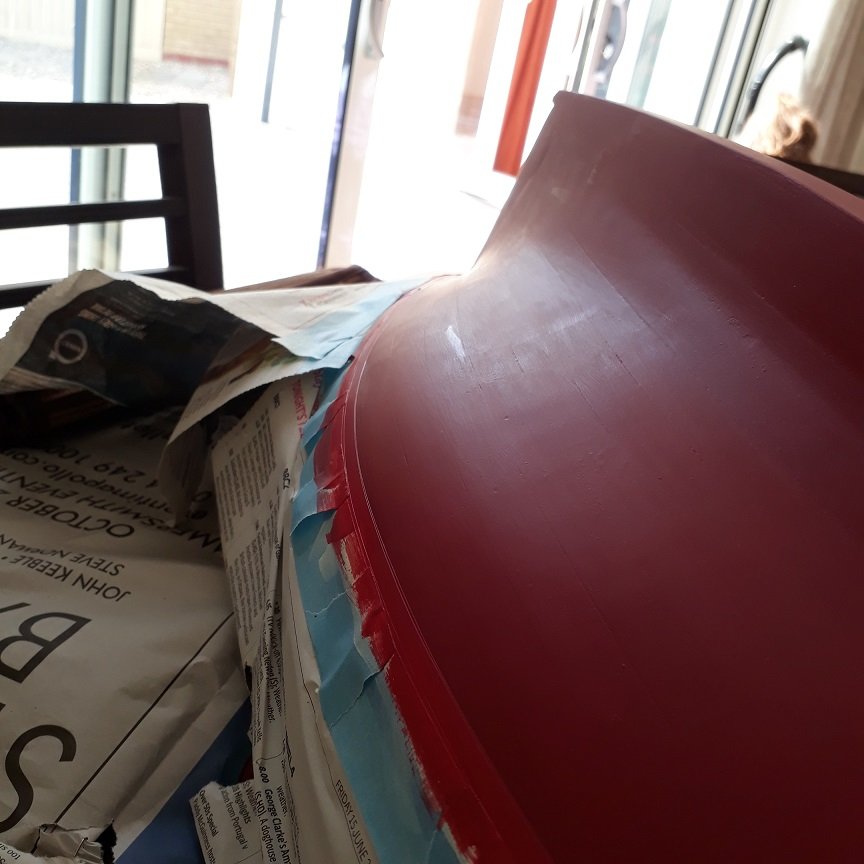
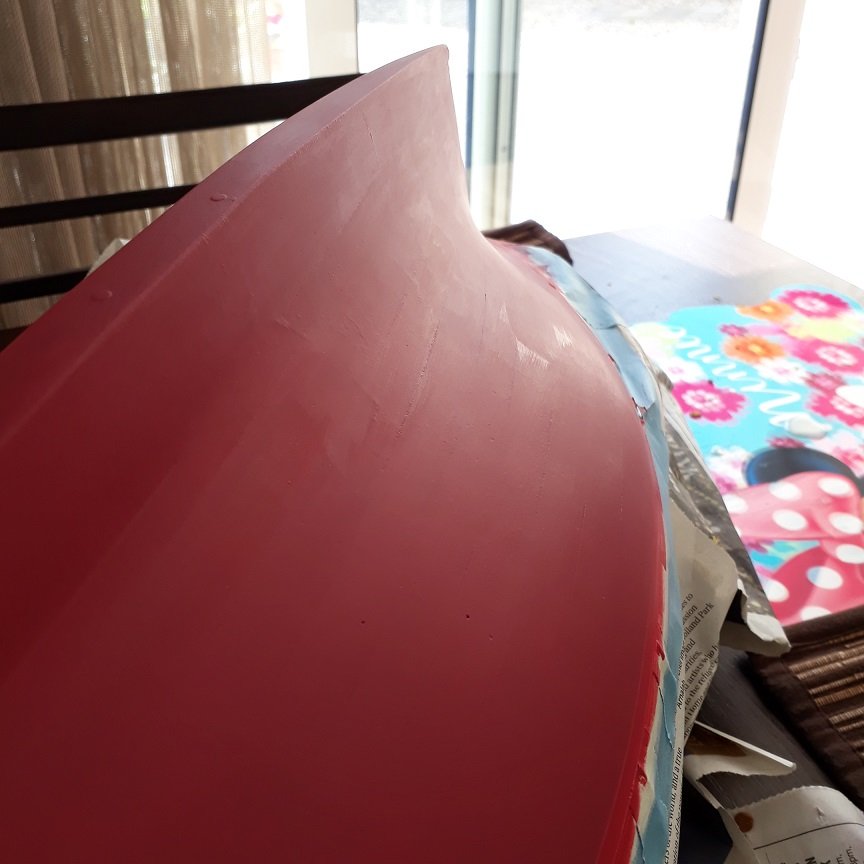
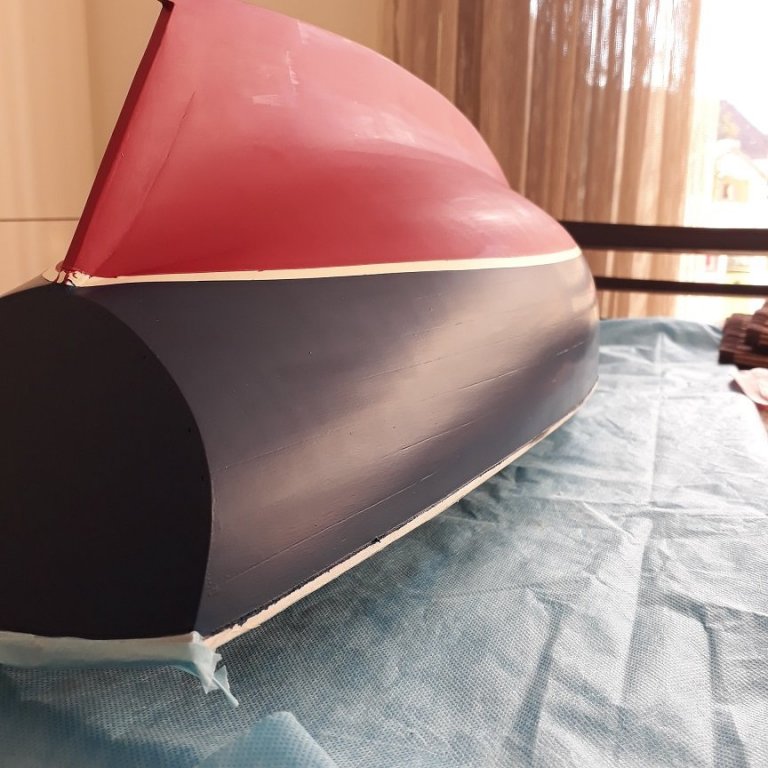
Thanks John and Mark! Now, some more progress has been achieved and interesting things happened. First I painted the waterline, in the same ivory colour as the deck and cabin top. I will be praising Vallejo acrylics later on but one thing that enamels do some much better is coverage. I put on 20 coats and I still felt the grey primer was somehow coming through. Overall it looked ok though. I then masked the painted waterline and removed the masking from the bottom half of the hull which would be painted red. There was a bit of bleeding near the stern but this was my mistake as I had not masked properly. The Tamiya masking tape was faultless. So now it was time to paint in red the bottom half of the boat and this is a huge continuous surface. I was certain the result would be a celebration of brush strokes but I did not want to use enamels. It came out great! No brush strokes at all, just a few blemishes due to very pour technique. It took a dozen or more coats using an 1" brush (!) but I could not be happier. Vallejo model colour line is simply amazing. Interestingly, I spilled my tea (with milk and sugar) over the hull in between coats but this did not affect the outcome. Maybe I accidentally stumbled over their secret thinner recipe? Then I used the Vallejo polyurethane varnish. Disaster... I brushed unthinned satin varnish, and it just would not spread. It would leave lots of bubbles and also seemed to react with the colour, creating lumps. I had to use the brush to scrape these off, just a huge mess. In the end after I had kind of patched things up, I left it to dry. Miraculously, it healed it self leaving only some unevenness. Then I applied a second coat but I heavily thinned the varnish, stupidly using water. It went on much better but the varnish separated, so after it dried, there were large gloss areas and large matt ones. A third coat went on, matt varnish this time but thinned with proper acrylic thinner. This worked extremely well. Easy to apply, no brushmarks, all wet edges blending together and becoming invisible. This is what I should have done from the start. This is how the hull looks now. A few small shiny areas, some brush marks and a few uneven areas. It probably needs another coat but these problems will never go after the abuse the hull suffered during the first two coats and in any case they are not visible due to the scale and the size of the hull. Overall I am happy with the outcome.
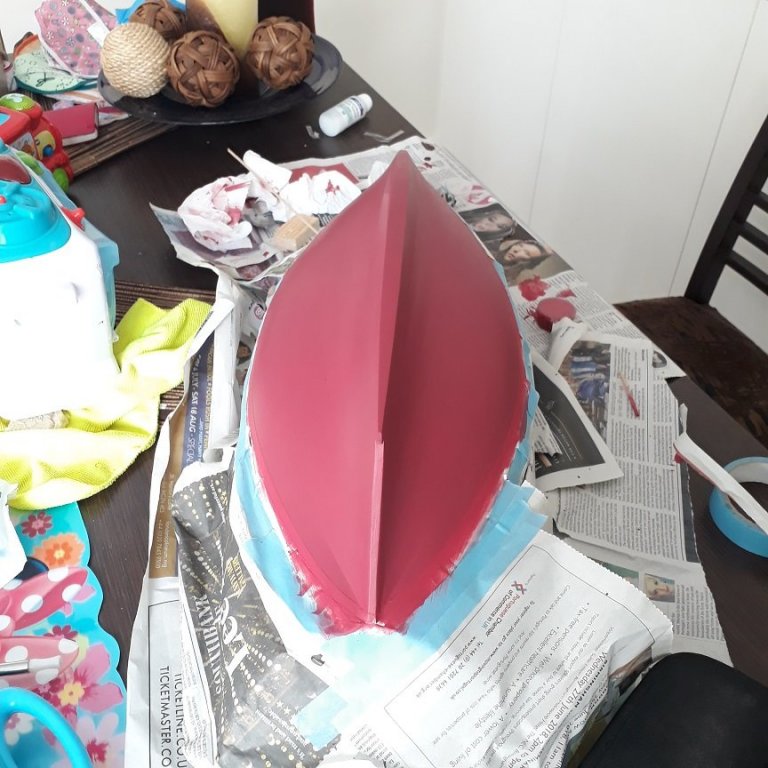

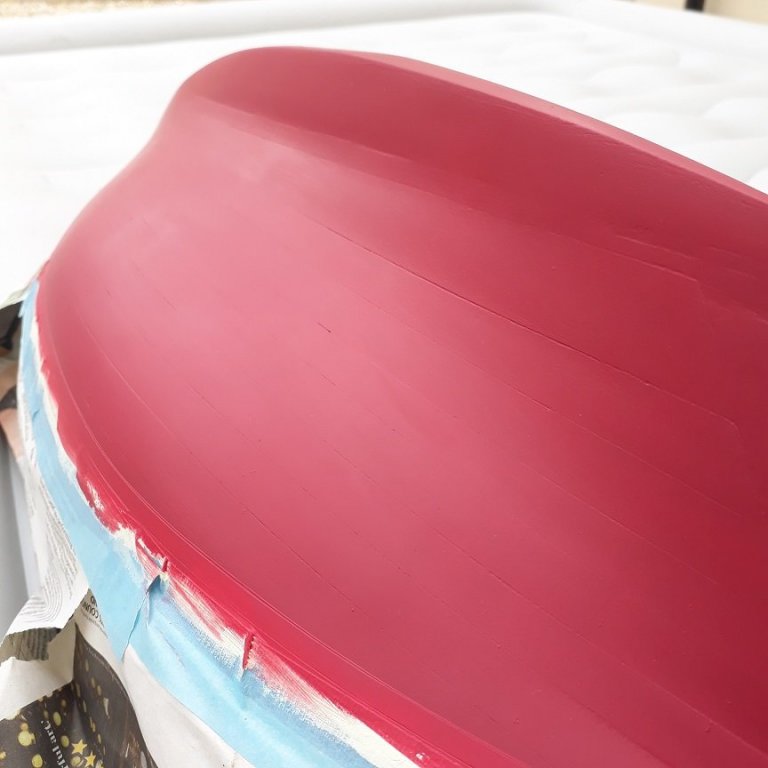
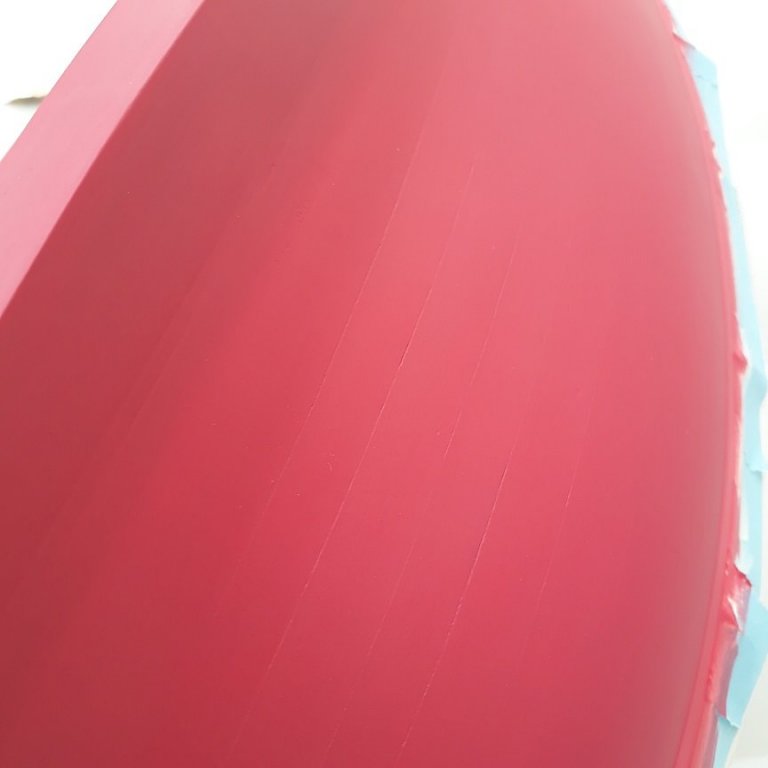


.jpg.382eabca5383287e94acb956a709e349.jpg)