.jpg.f26acc9a74319261612561bfa7da1303.jpg)
vaddoc
-
Posts
1,605 -
Joined
-
Last visited
Content Type
Profiles
Forums
Gallery
Events
Everything posted by vaddoc
-
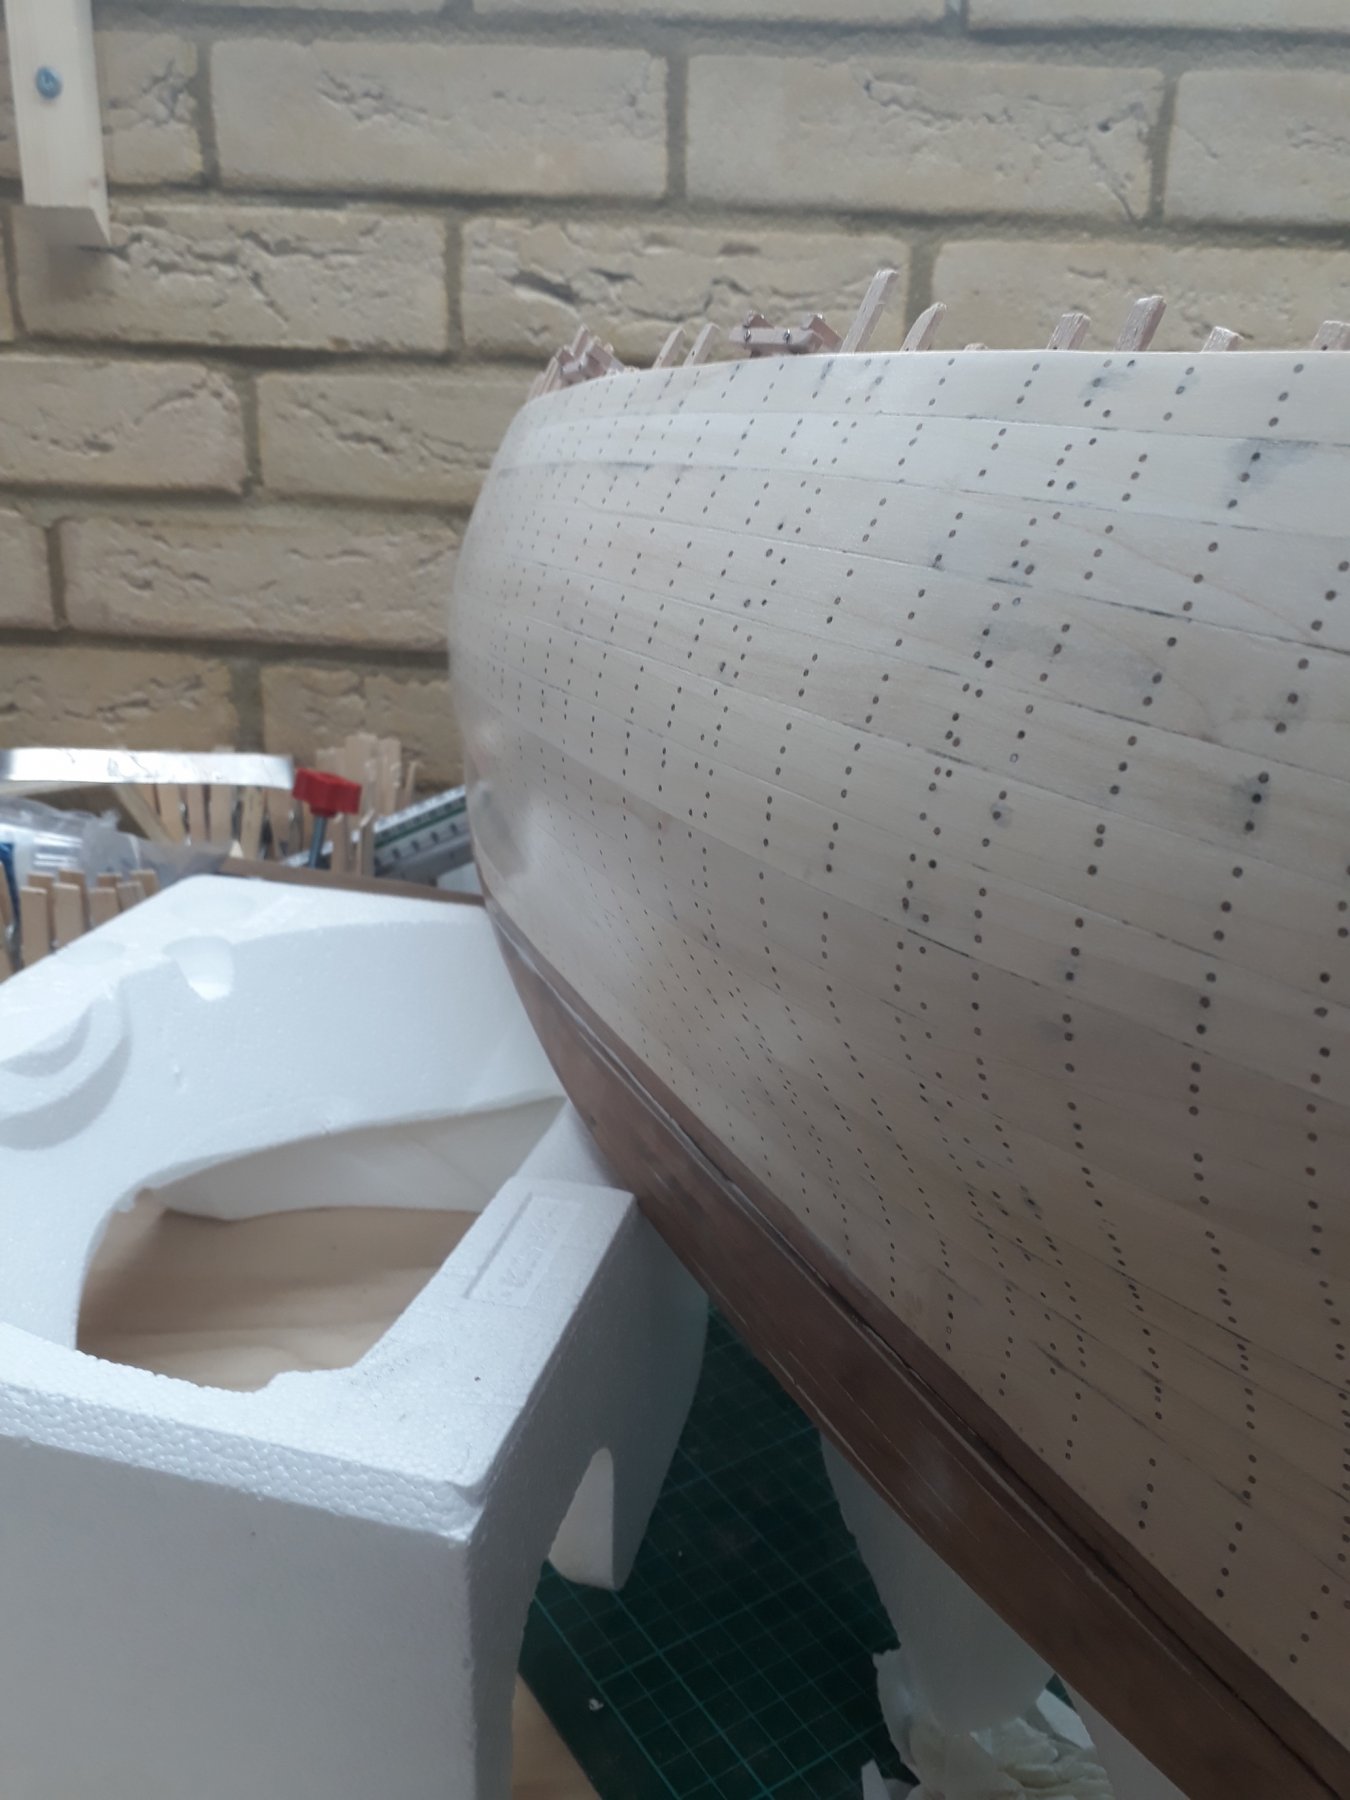
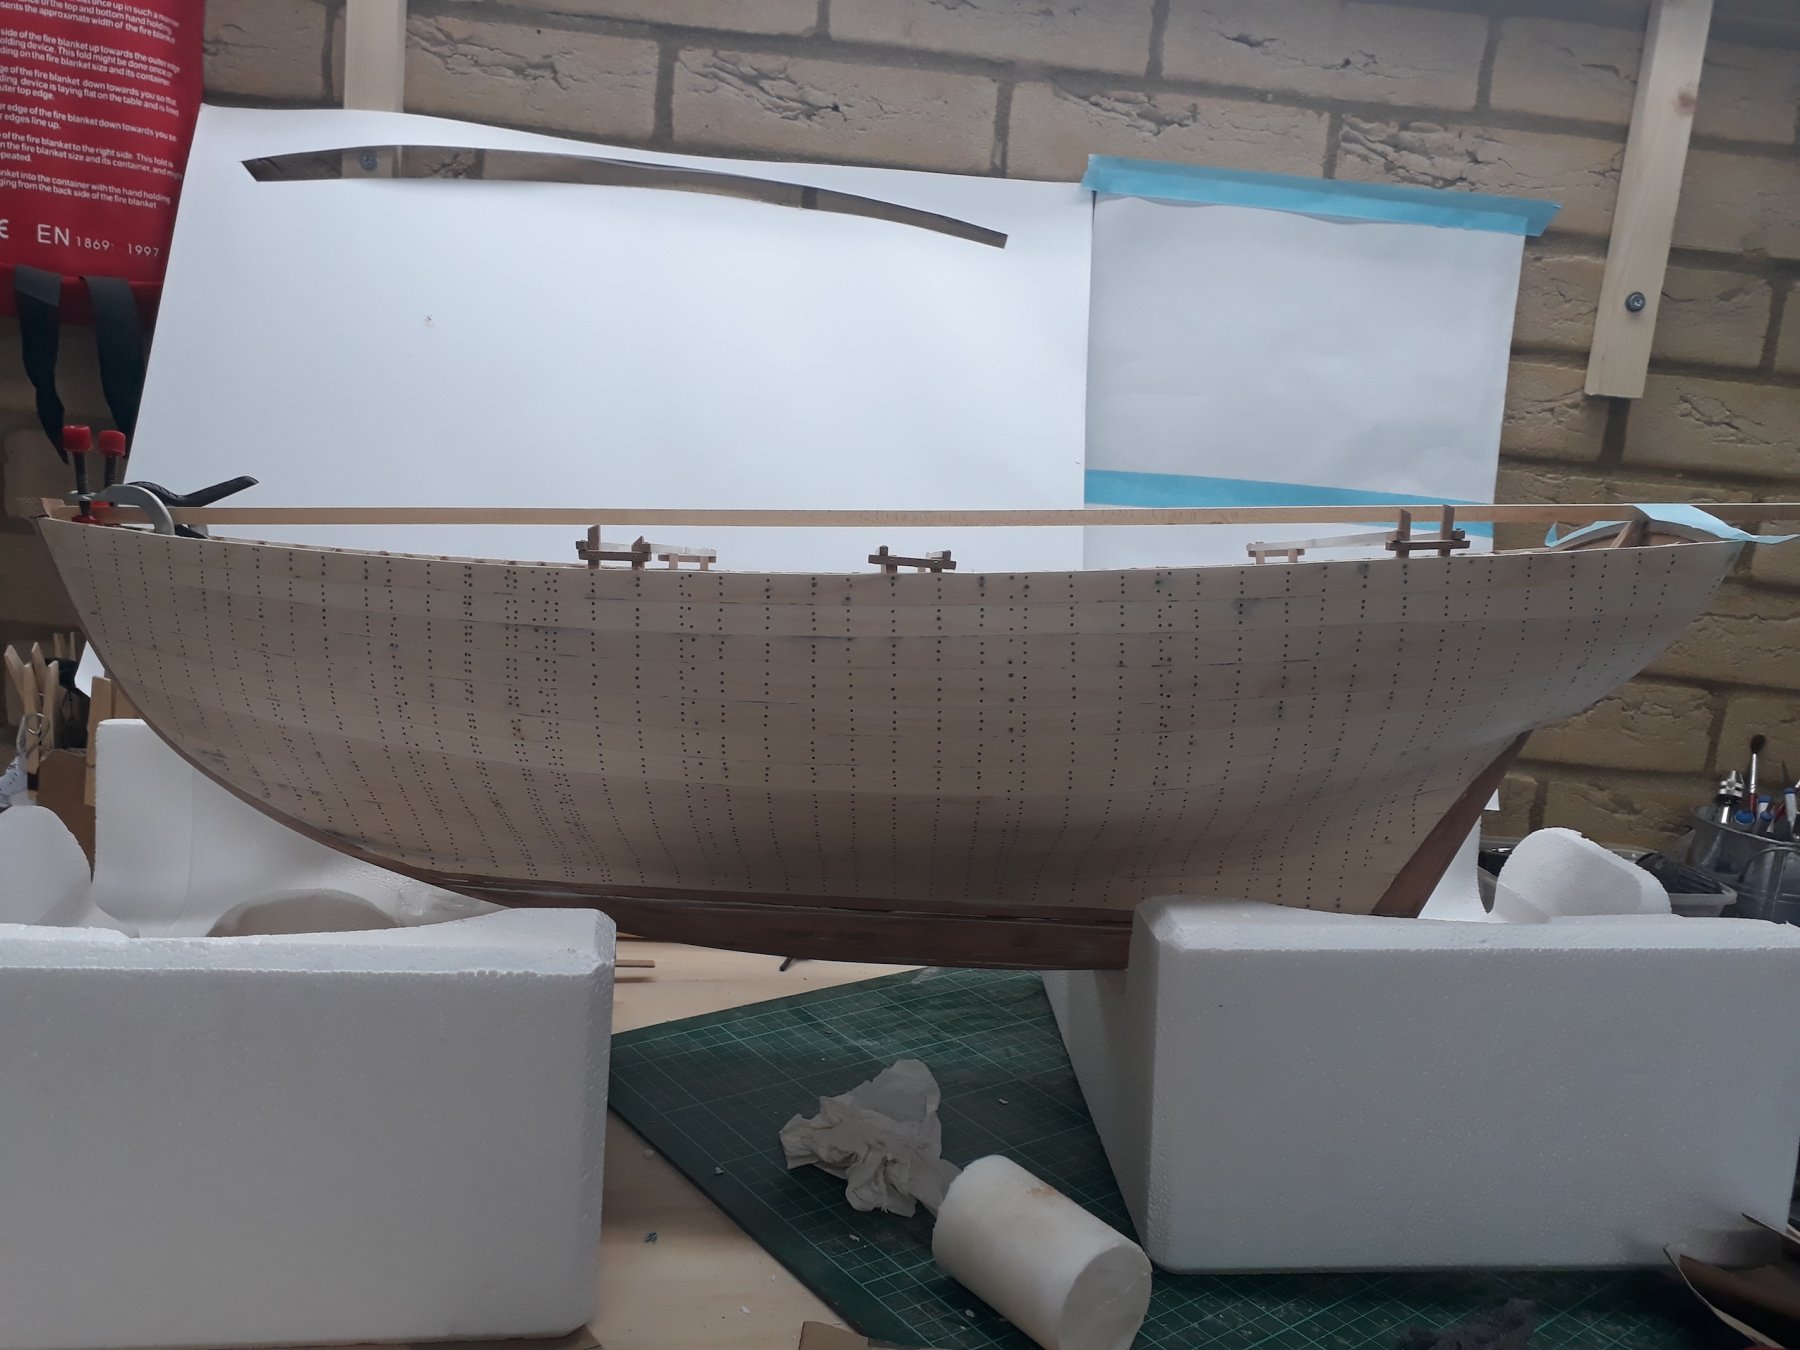
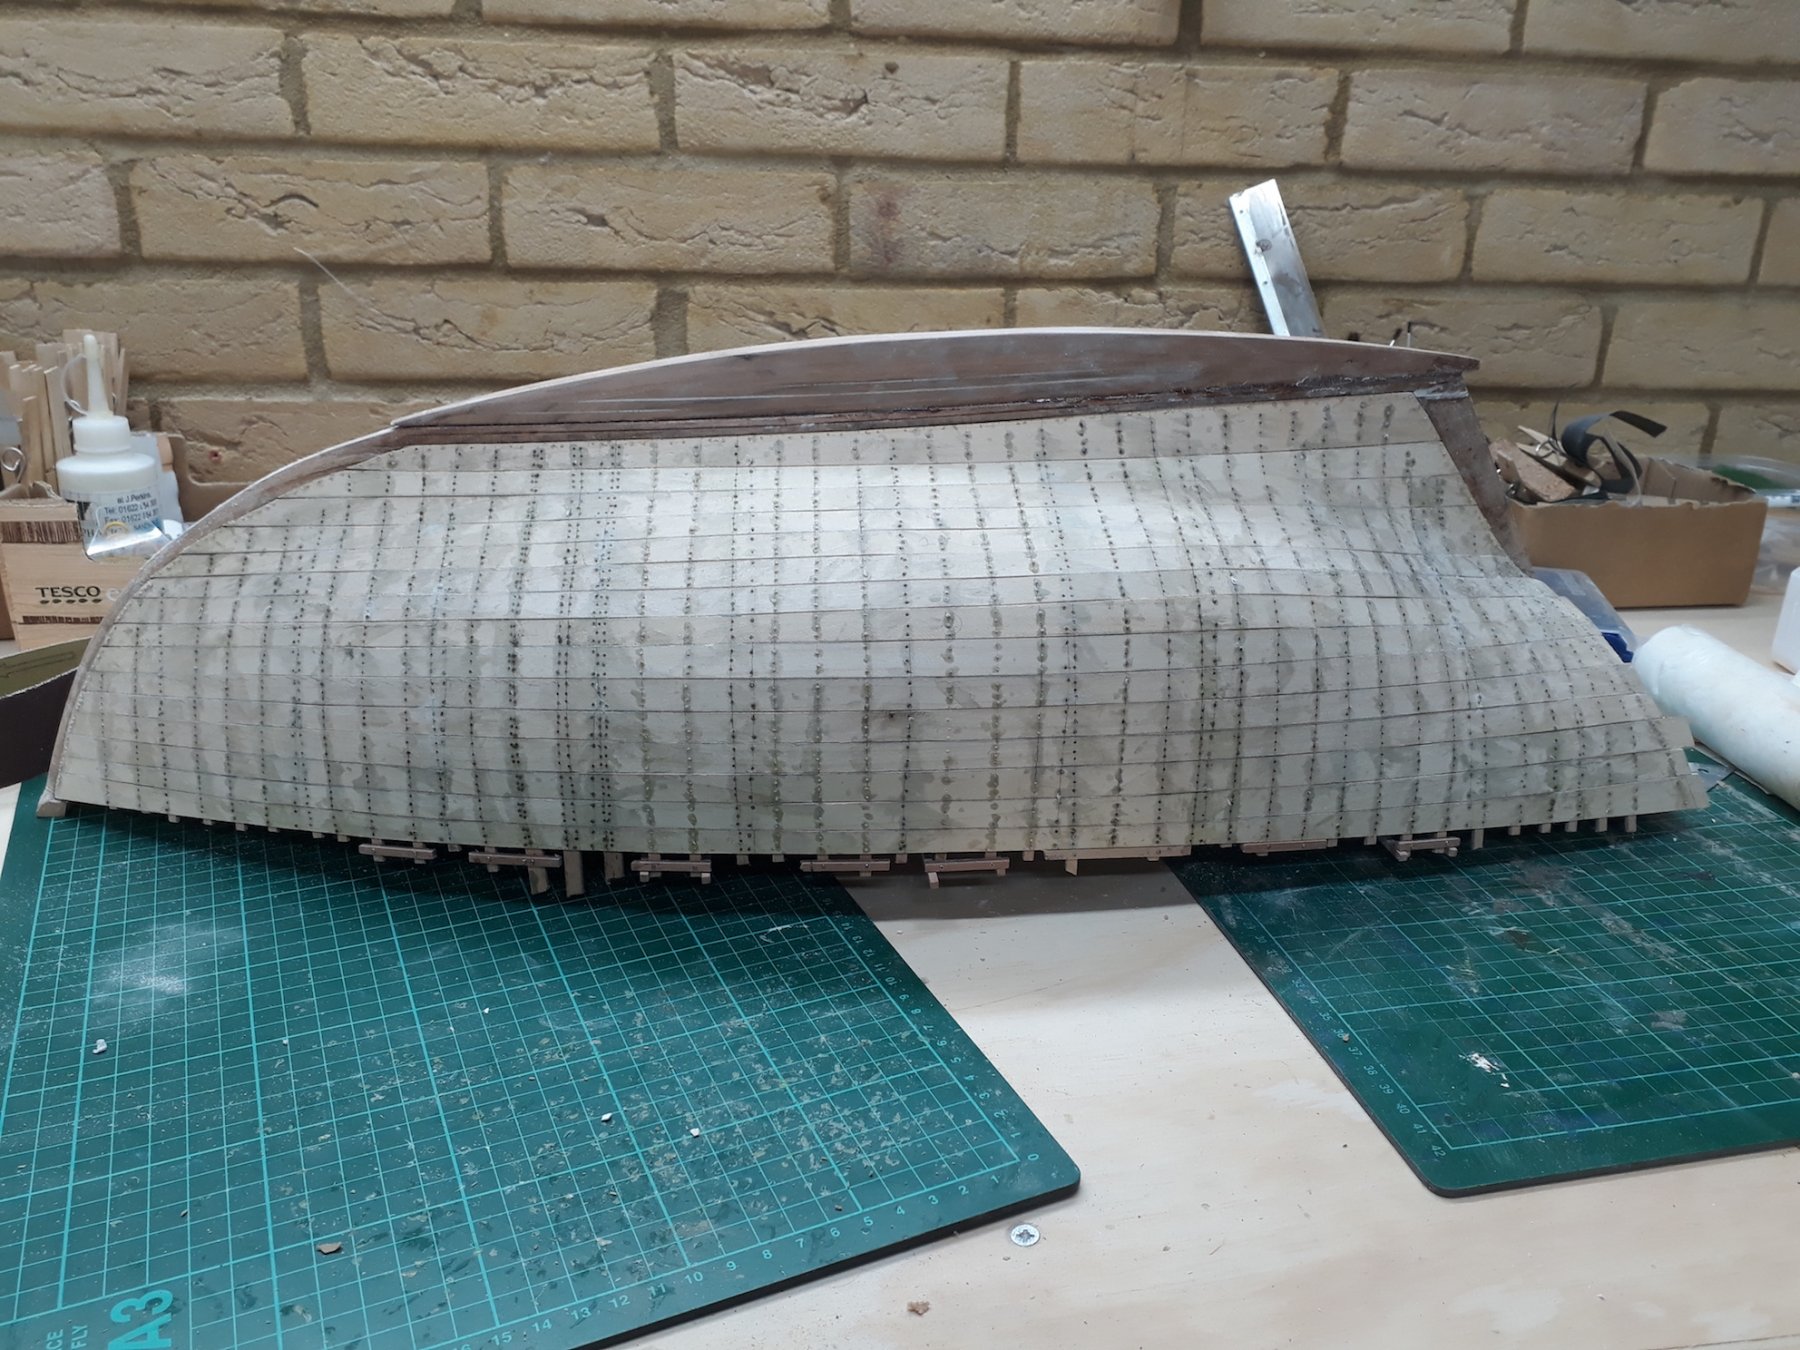
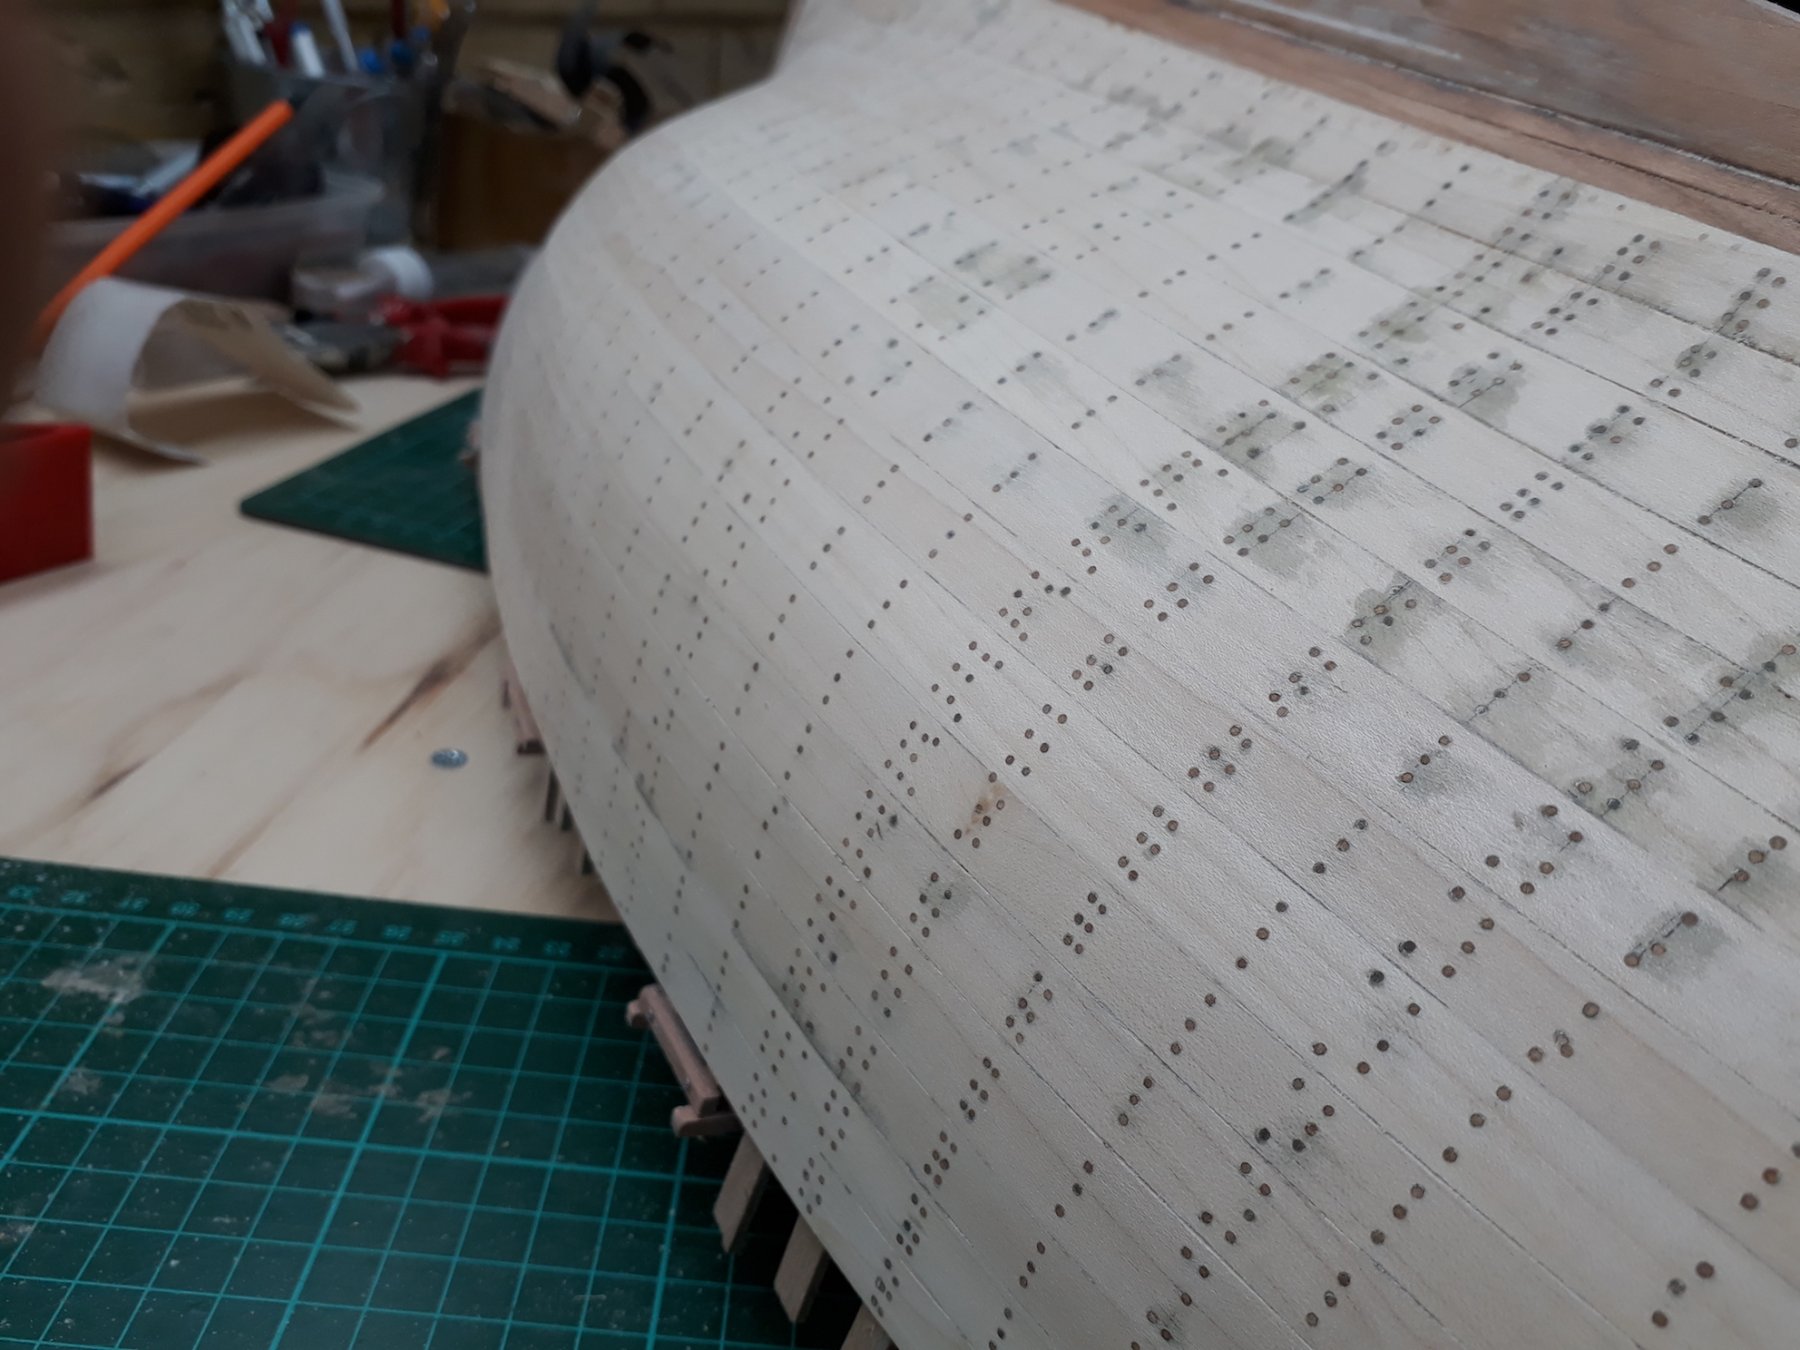
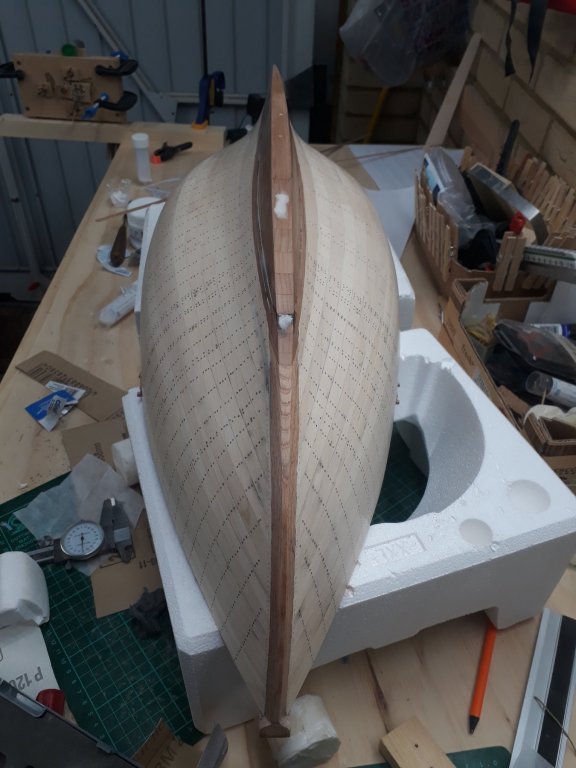
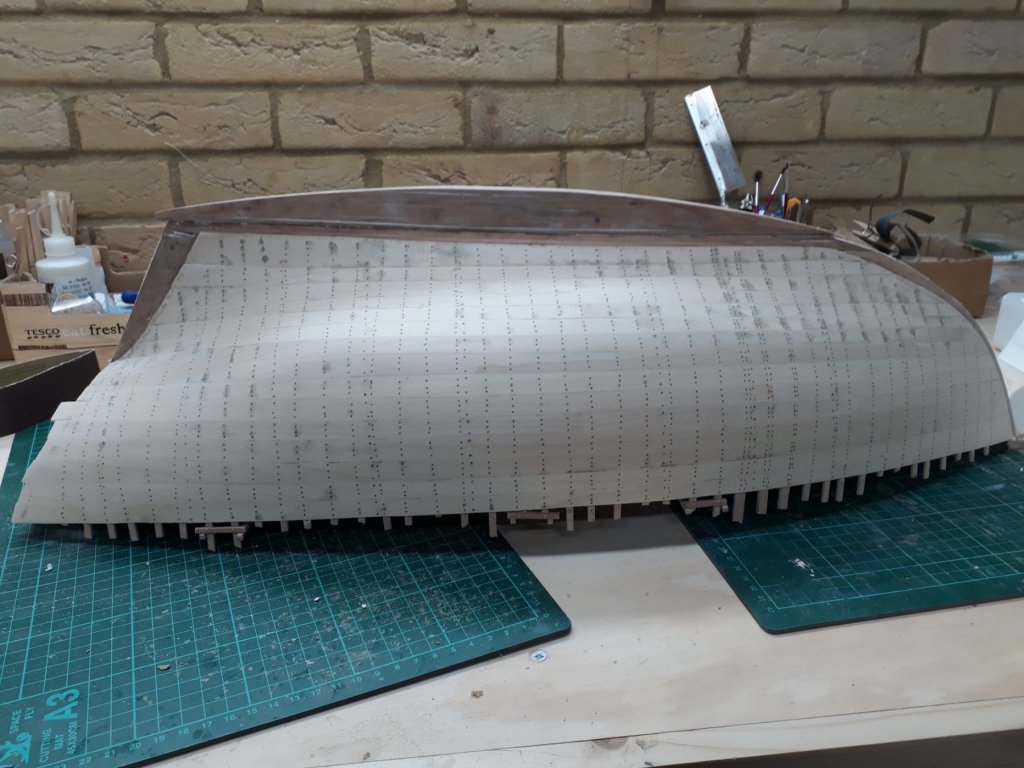
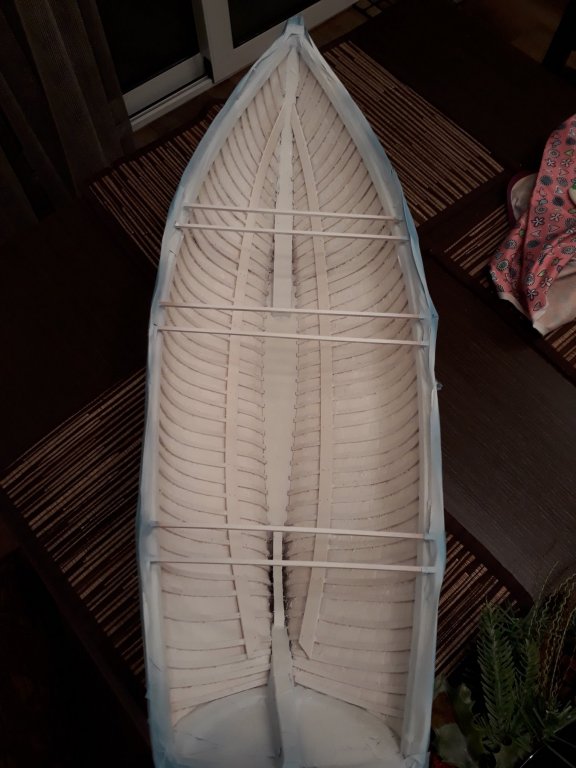
.thumb.jpg.6fd4c1b78768bb3efd745ab810936005.jpg) Another milestone reached, the hull is finished! It took a massive amount of filler to do the job. Then I applied two coats of sanding sealer, sanding after its coat. Finally, I sanded to 240 grit and then used some 0000 steel wool. The hull is now very smooth, sealed and the imperfections are all filled. Notice that the light reflects off the surface of the hull! I then cut the ribs flush with the sheer. I left the ones that secure the braces though. I now need to figure out how the deck will work and then start making the beams .
Another milestone reached, the hull is finished! It took a massive amount of filler to do the job. Then I applied two coats of sanding sealer, sanding after its coat. Finally, I sanded to 240 grit and then used some 0000 steel wool. The hull is now very smooth, sealed and the imperfections are all filled. Notice that the light reflects off the surface of the hull! I then cut the ribs flush with the sheer. I left the ones that secure the braces though. I now need to figure out how the deck will work and then start making the beams .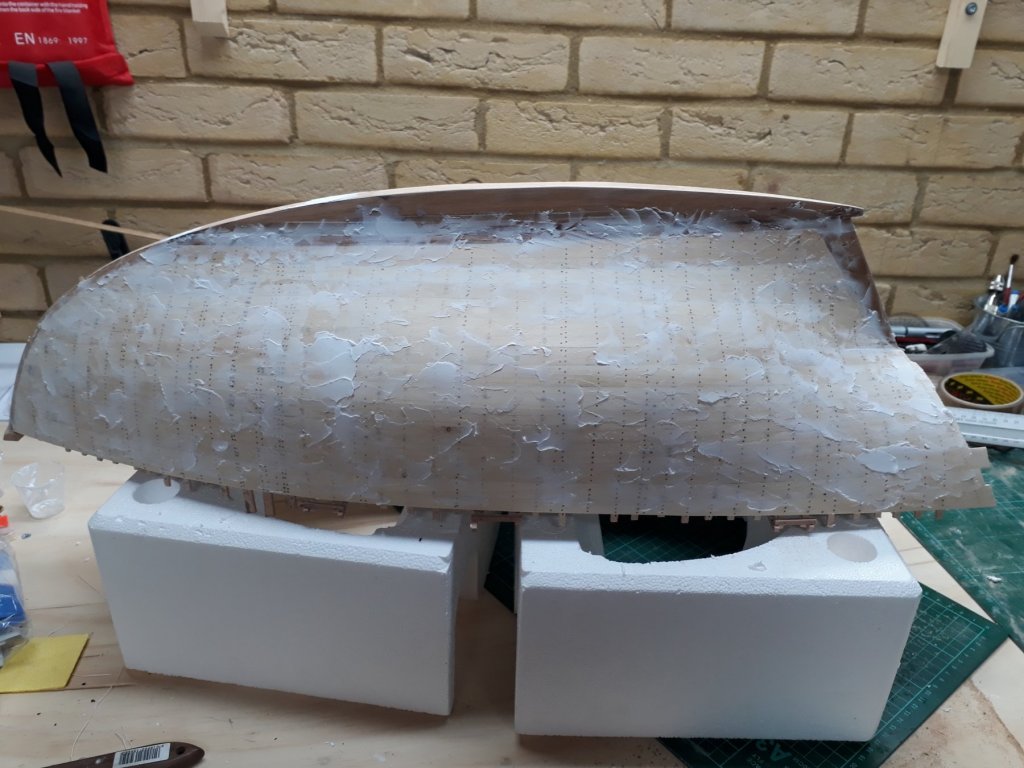


-
I think I get it know The way to do it is to decide on the crown height at max beam and decide on a method to draw the camber. Then you apply the same camber along the boat and different cron heights are produced. As long as your seer is fair, the deck centreline that will be produced will be also a fair curve and the deck planks should sit nicely.
-
Jud This makes a lot of sense, I understand what you say. This will work brilliantly if the deck centreline is a straight line. Will it be the same if the centreline has a slight curve to follow the sheer (not fully, to a degree)? Vaddoc
-
Thanks John I have a full set of plans which were (I think) a bit inaccurate so I had to do quite a lot of lofting. However, in the plans there is very little info regarding the deck. It seems that all naval architects assume that this is a very easy part and do not elaborate! I have tried to find some info on the subject but there is very little on the net. I think I ll need to get Chapelle's book. Still, The deck centreline does not seem to always follow the sheer, some times it can be actually almost a horizontal line. Others go for a variable crown towards one or both ends. But even if we suppose it follows the sheer, the crown will need to get more shallow as it reaches the bow and stern otherwise the deck will rise unnatural high. In my boat, the crown should be around 19 mm but the top of the beam selves is 3 mm down from the sheer Then there is the king plan that is pretty long and needs to be straight, but that section of the deck curves upwards. I think I need to study...
-
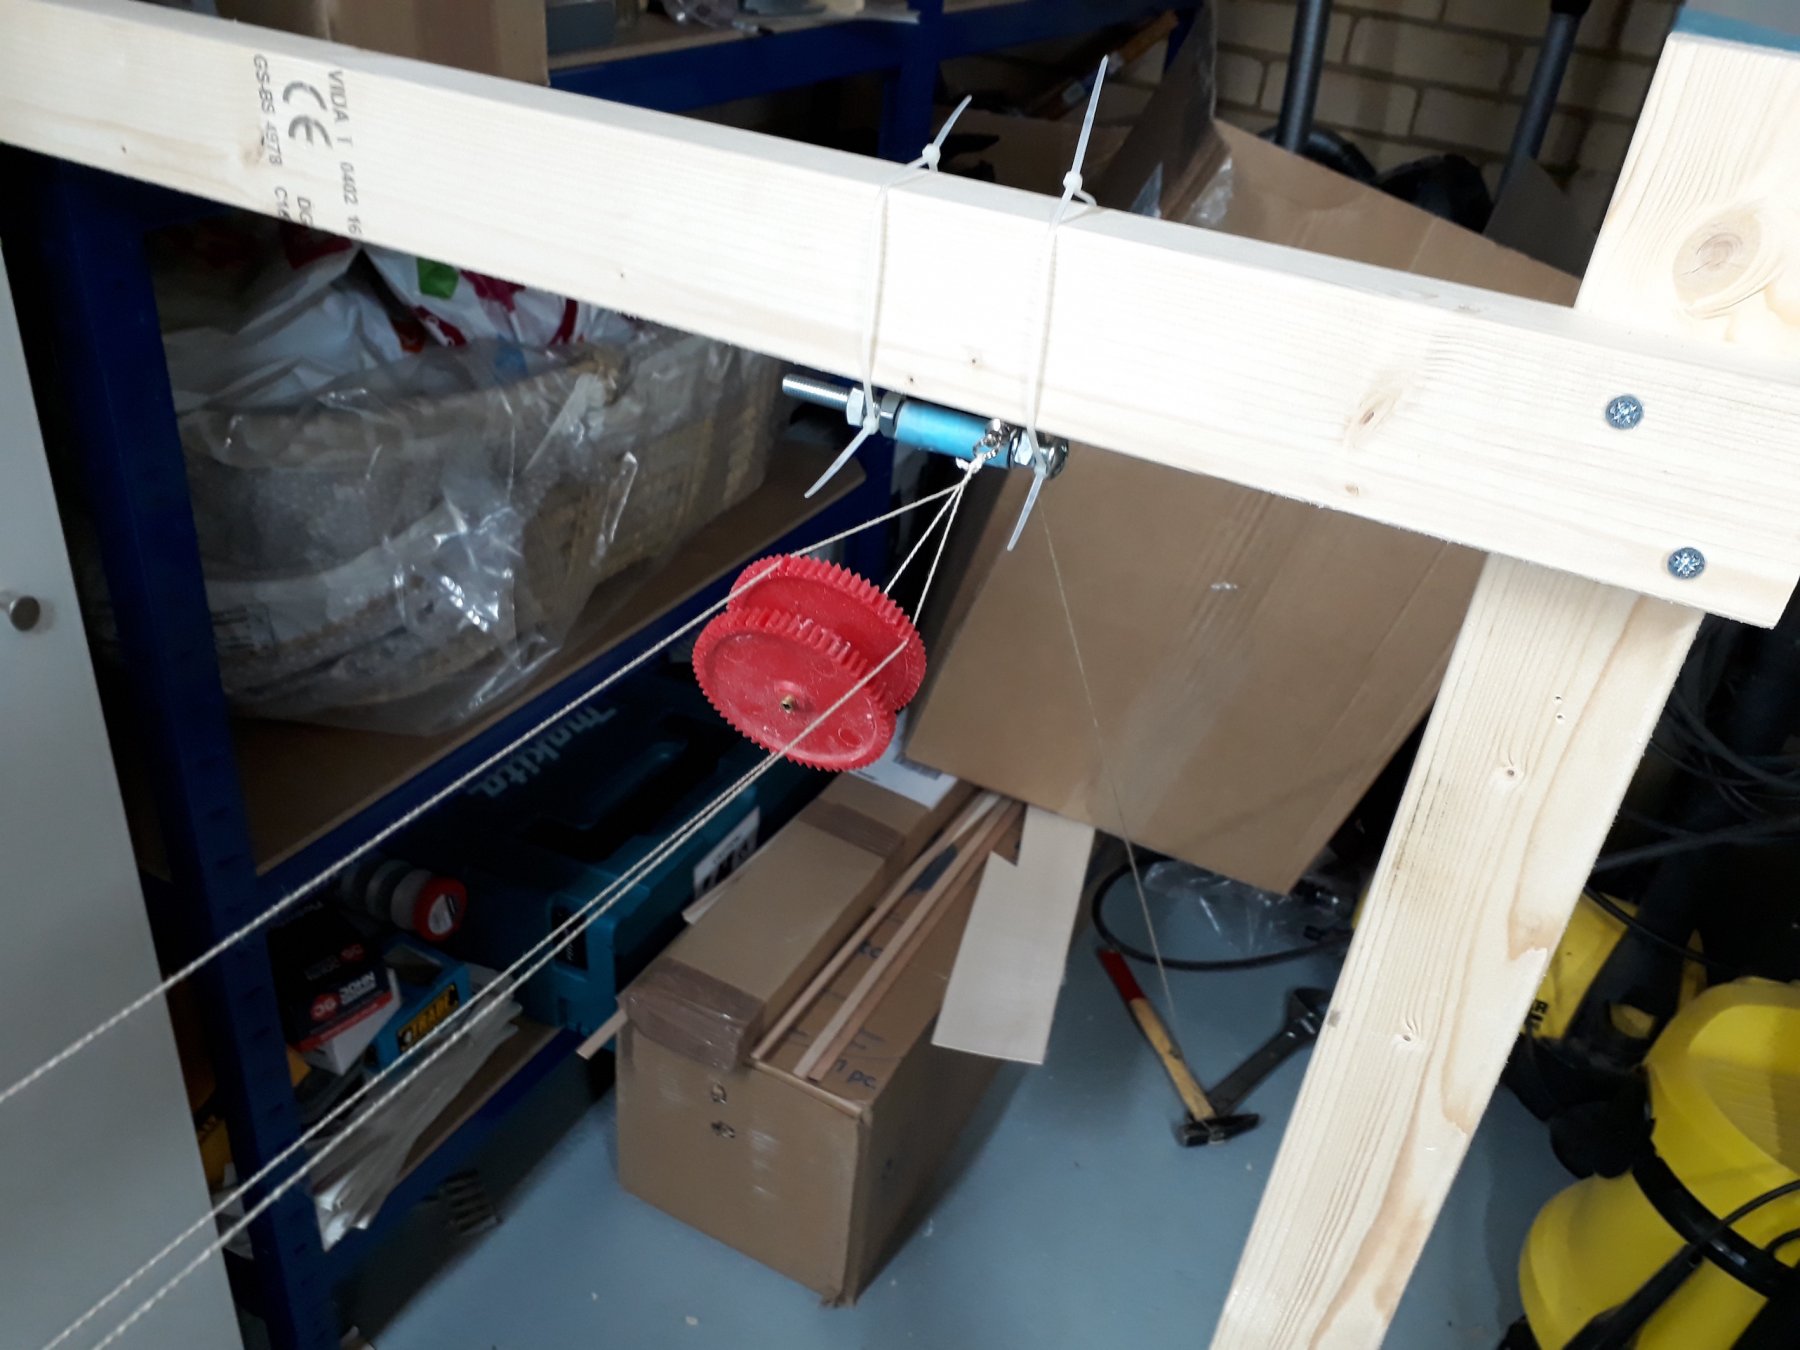
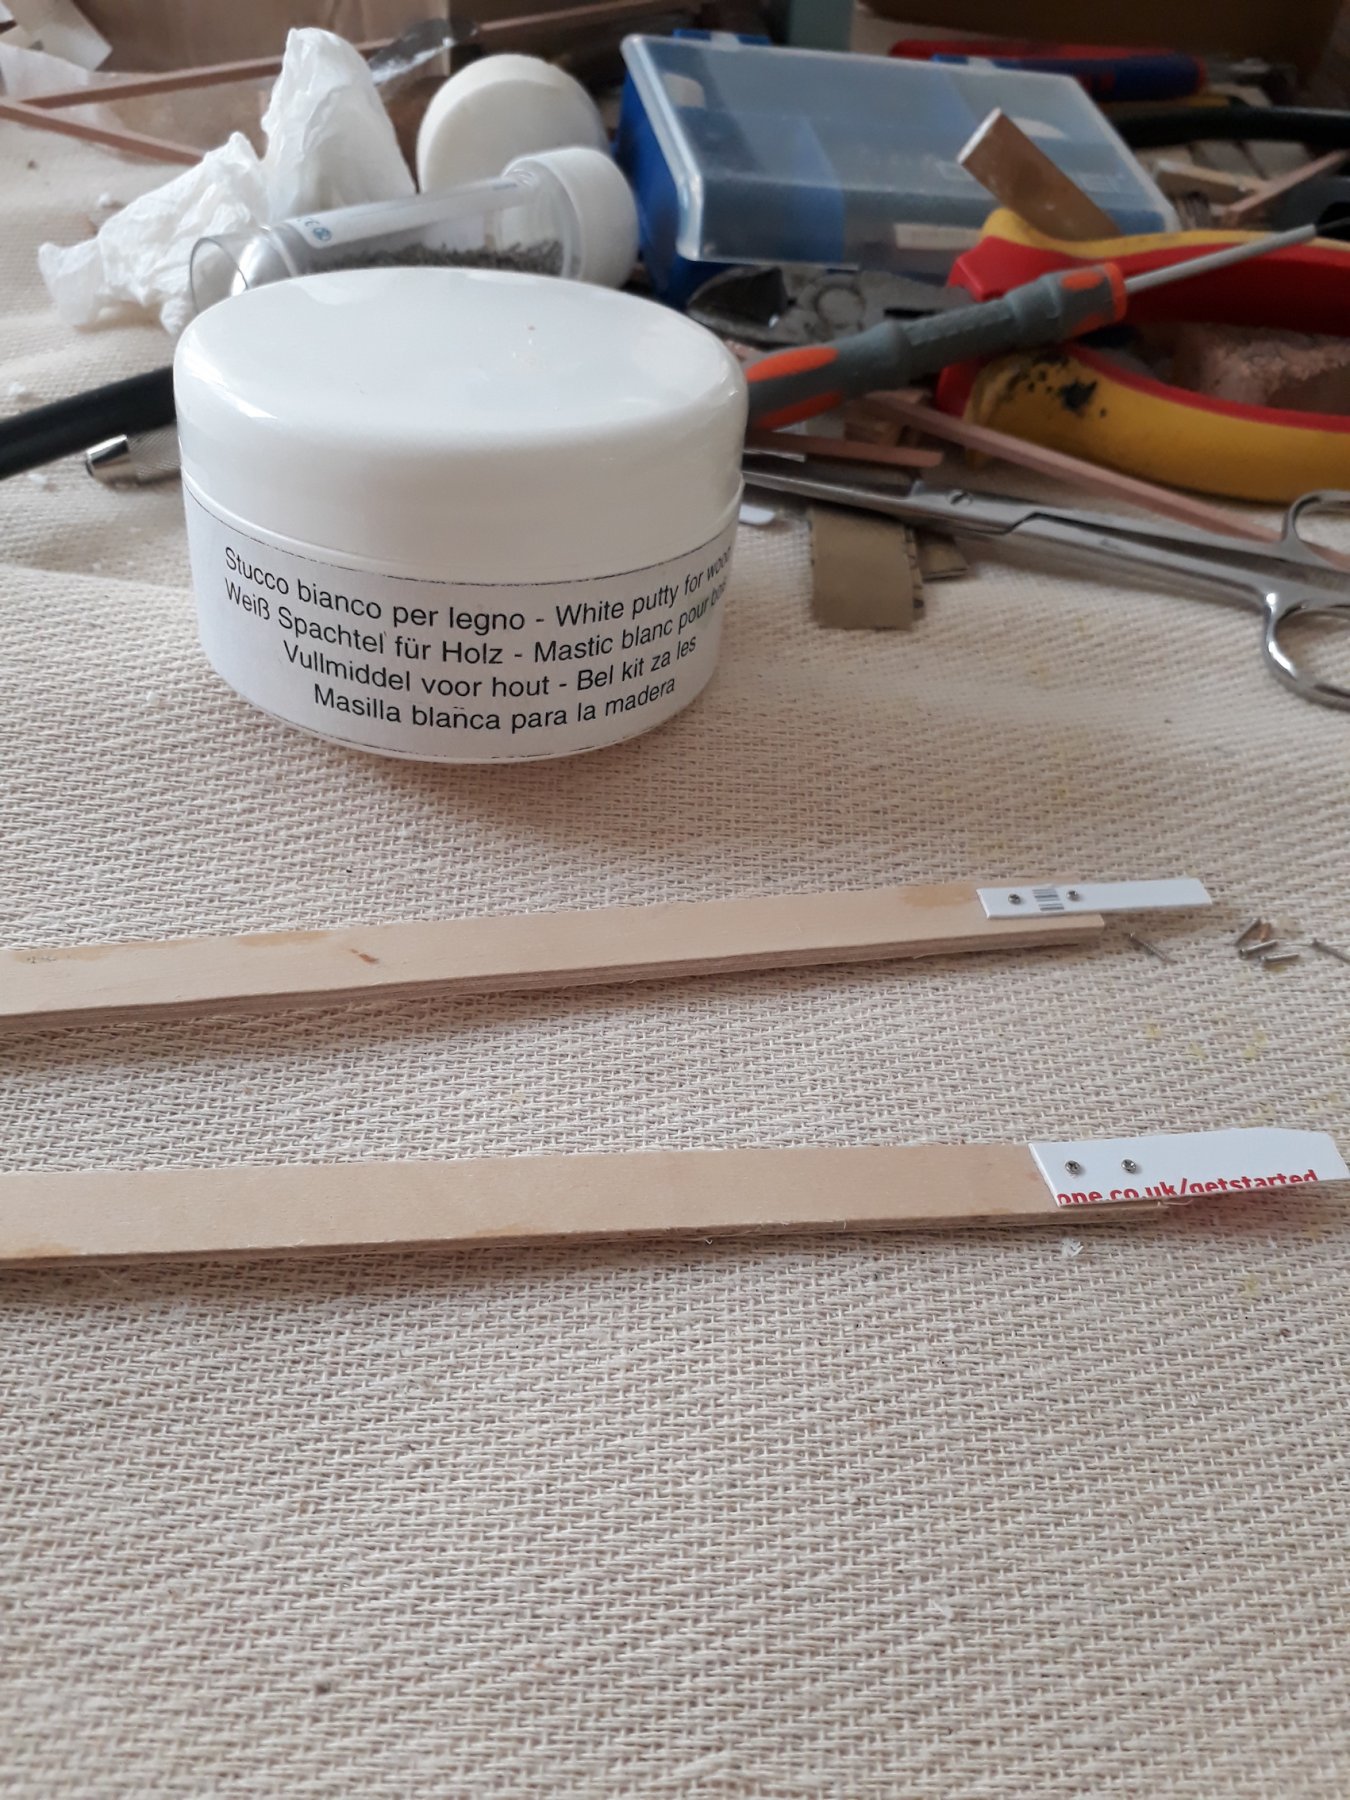
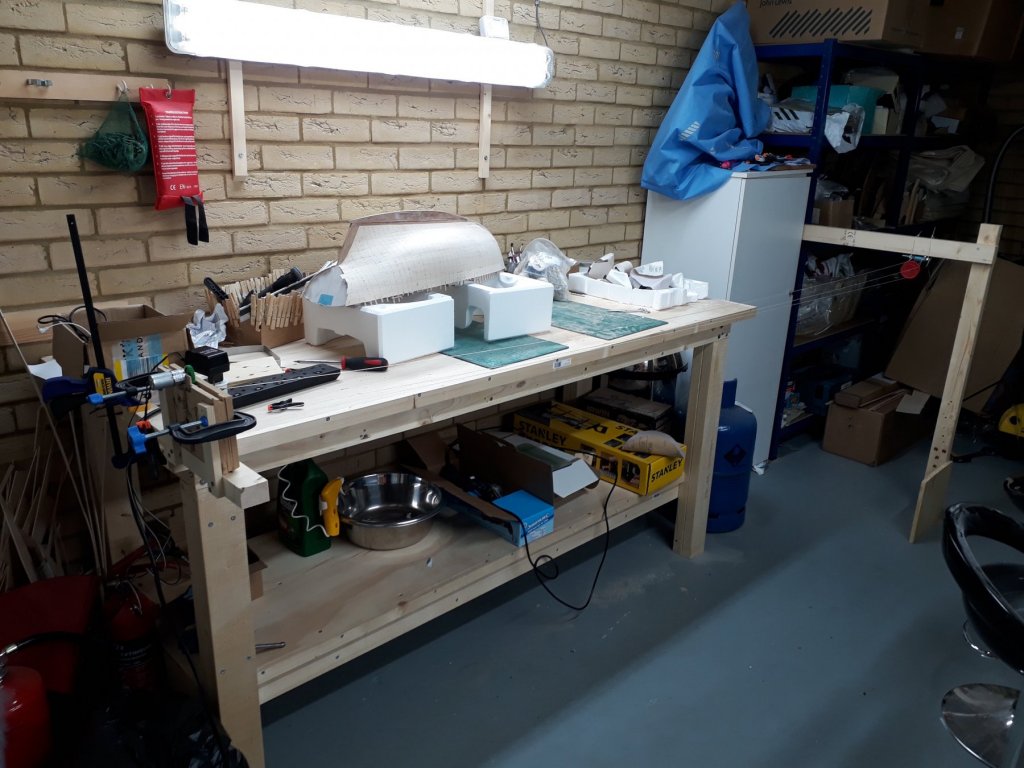
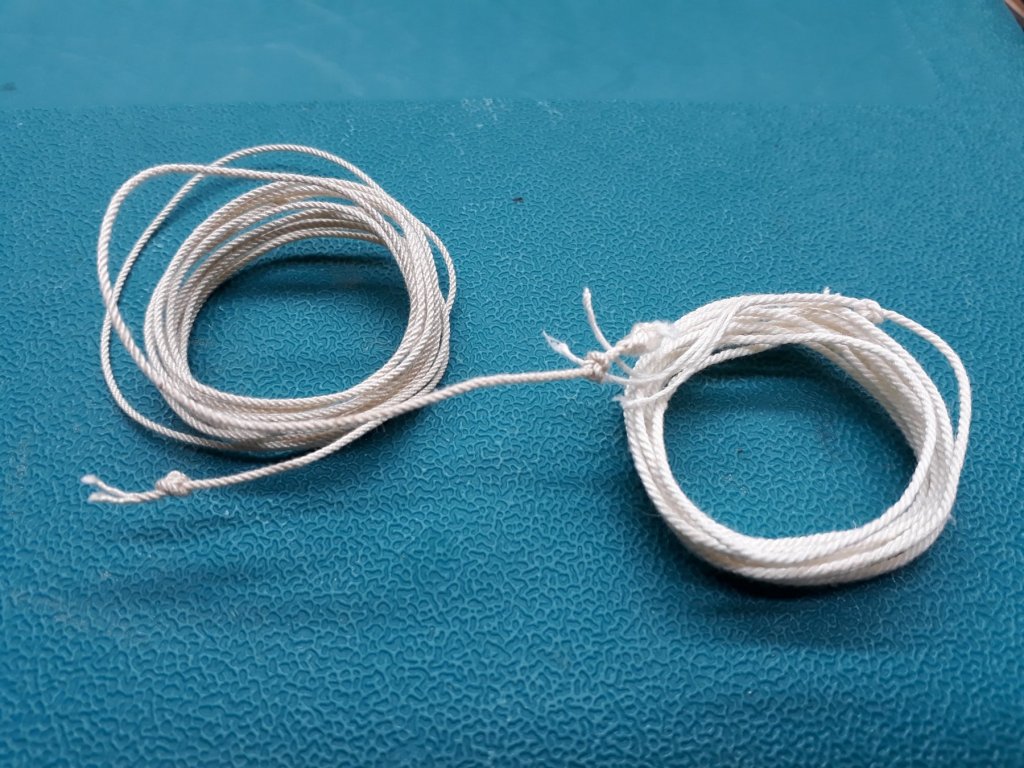
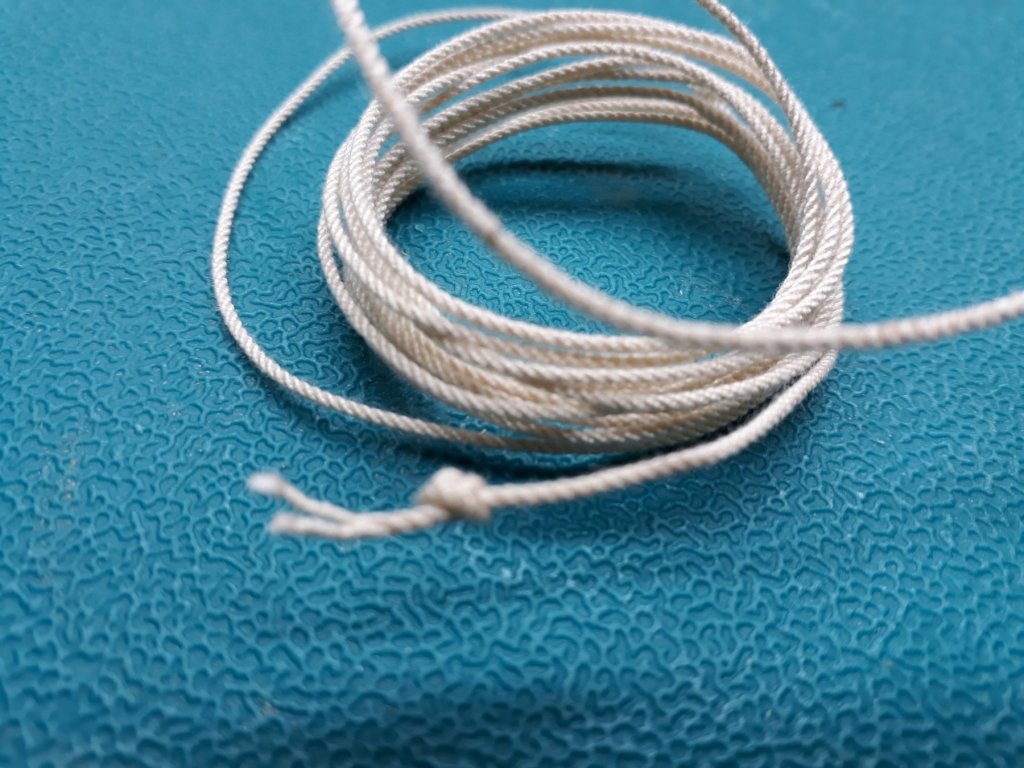
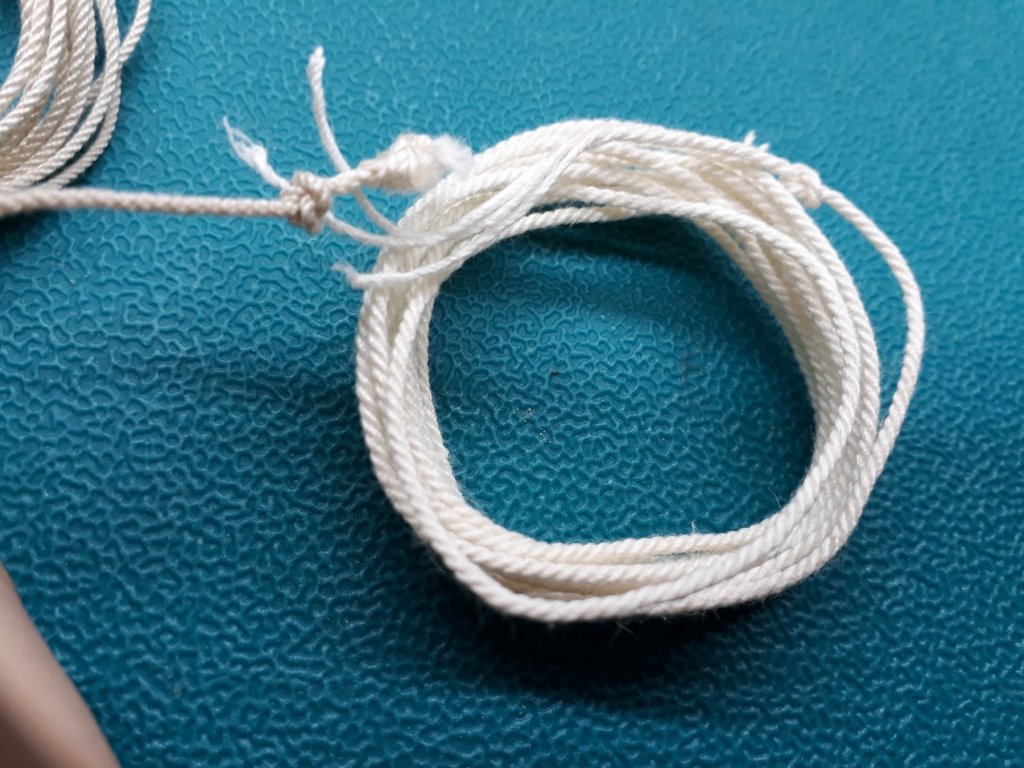
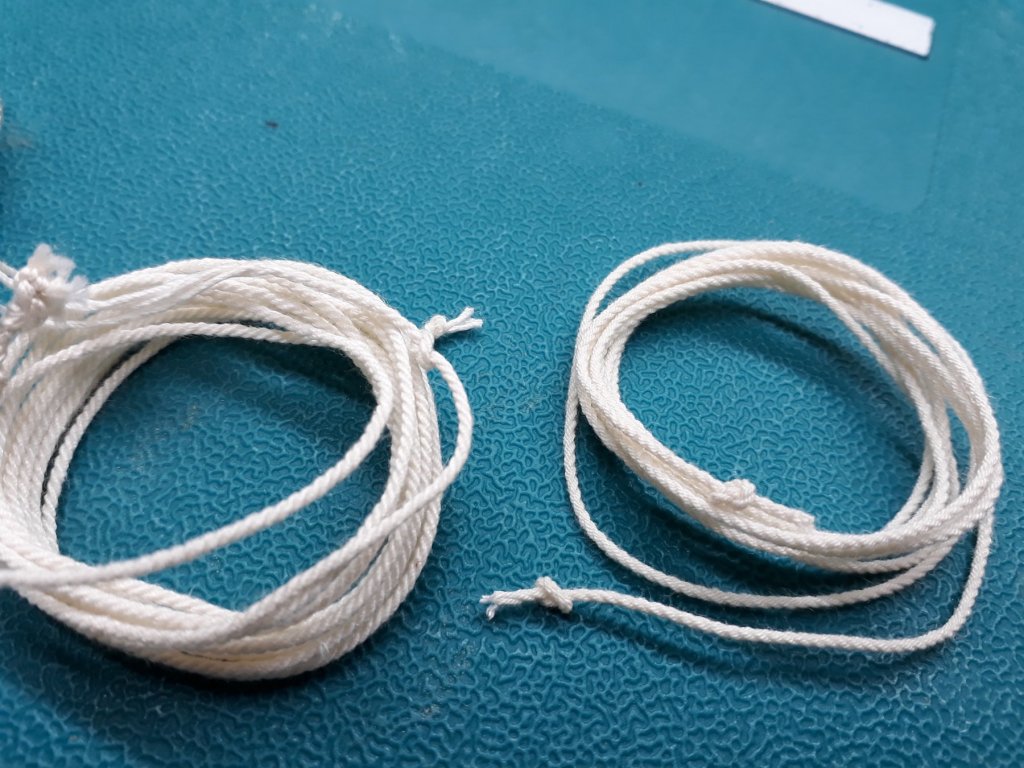
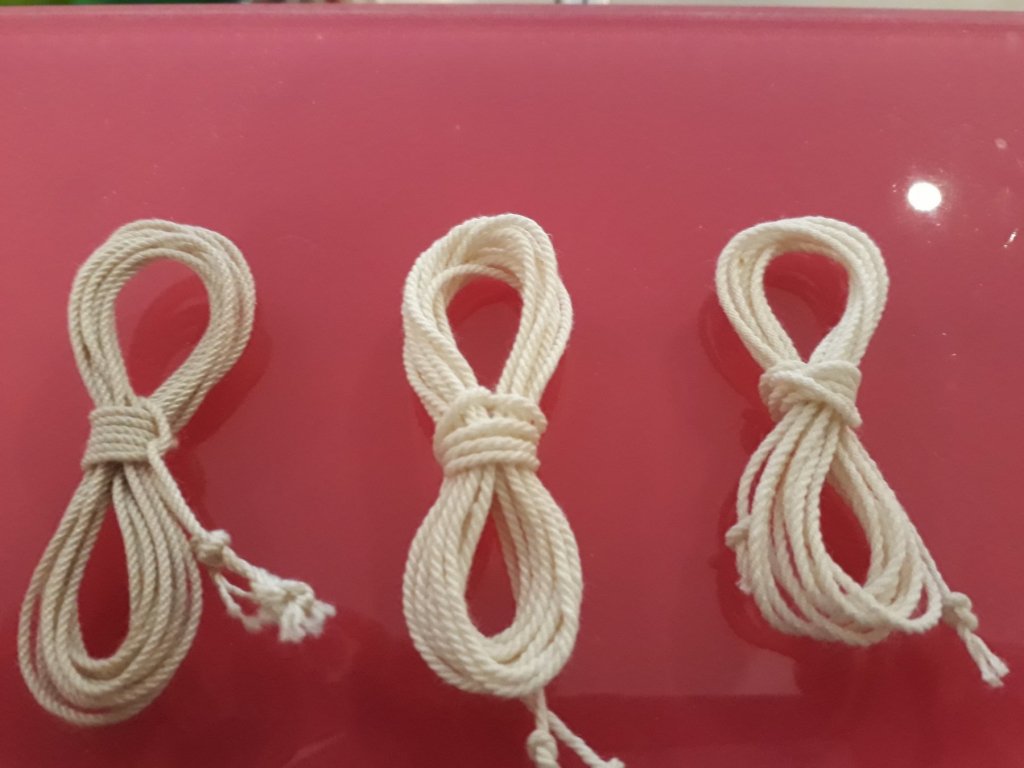
Happy New Year to all! I could have done some work on the boat during holidays but I accidentally threw away the filler putty I had just received. So waiting for the replacement work on the hull could not proceed. Strangely, there are still some glue stains around the tree nails that refuse to disappear despite aggressive sanding. It is very tiring to sand this huge hull so I gave up. Maybe I ll give it another try later on. As I had a lot of free time, I decided to set up a ropewalk and make some rope. In my new garage I have more space and also I got some linen thread I was keen to try. Again I used whatever I could find lying around in the garage that could do the job and the motorised spinning thingy I had put together building my previous boat. I can easily make ropes 2 to 3 meters length. I still need to improve a few things though. A short video making some rope I did 2 ropes, left is cotton, right is linen This is rope made from cotton and this is made from linen Not really a huge difference. Cotton is a bit more rigid and less fluffy. I then did some thick linen rope 2 ways, either with just twisting 4 threads per strand producing 3 strand left hand rope, or by properly twisting 3 left hand ropes and then using them to twist a 3 strand right hand rope. Despite needing much more work, it looks pretty much the same. Maybe the RH one is a bit more tight. All ropes side by side I can produce pretty much any size rope in any twist in long lengths but I do not really like how rigid cotton and linen ropes are, I feel they are a bit wrong materials. I have ordered some cotton/linen thread, cotton/synthetic and some monofilament thread to experiment. I would like to get some cotton covered synthetic thread as well but it comes in large industrial lengths and is a bit expensive. Also, I think I need to make a new motorised twisting thingy with 4 strands instead of my current 3, this should give me more flexibility. As I work in 1:10 scale I think I will need some really large ropes for the rigging.


-
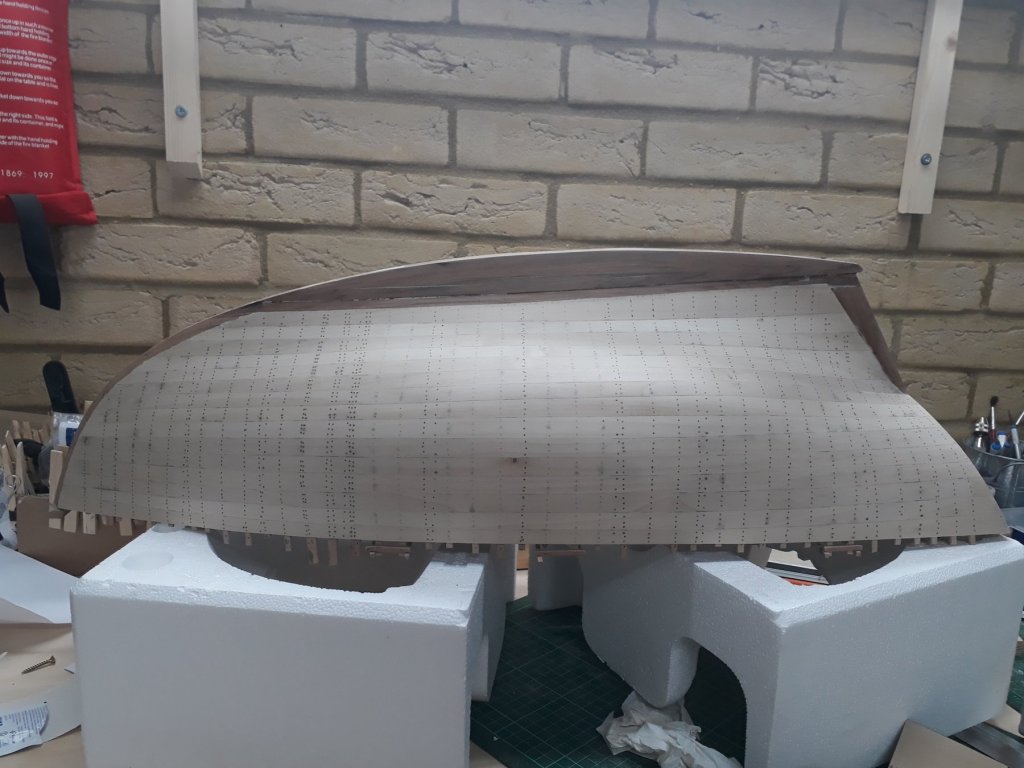
Some more progress made today. I finally got my gas heater sorted and now the garage is cosy and warm. I also spent 2 days cleaning and tidying up. I started sanding the hull and another difficulty in working in large scale presented. It is actually a physically demanding task! I initially used 120 grit sandpaper but then I used a blade to scrape the high areas. I continued with the 120 and it is starting to look better. There is still a massive amount of sanding but this hull has potential!

-
Gluing Planks When Wet
vaddoc replied to mikiek's topic in Building, Framing, Planking and plating a ships hull and deck
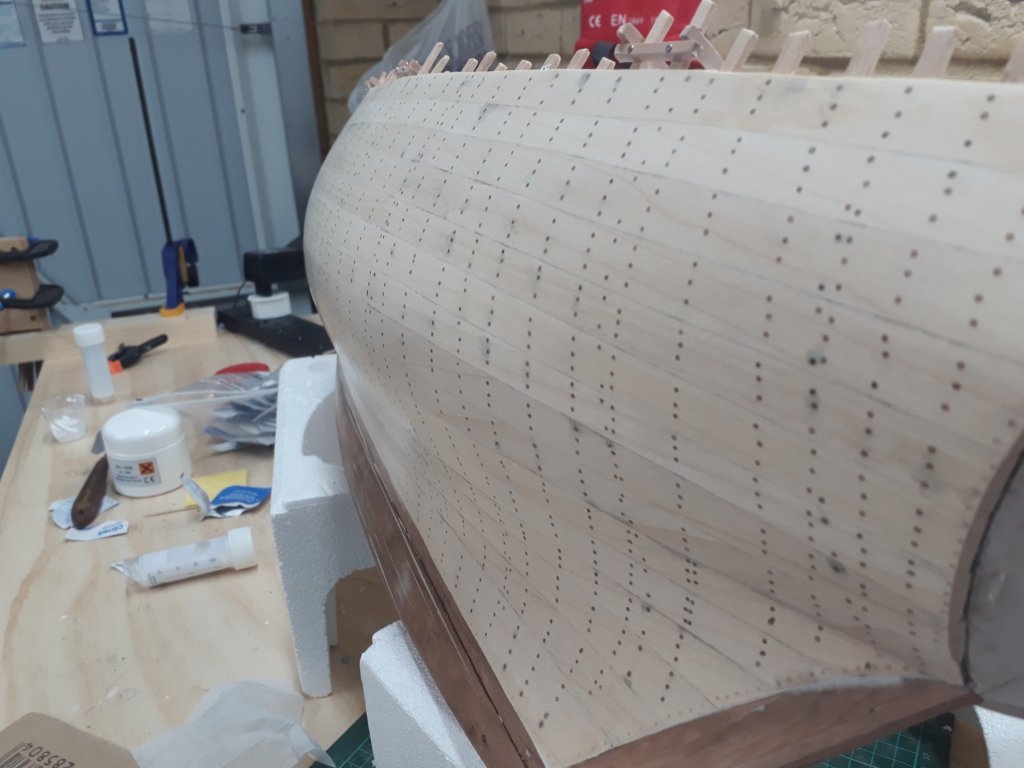
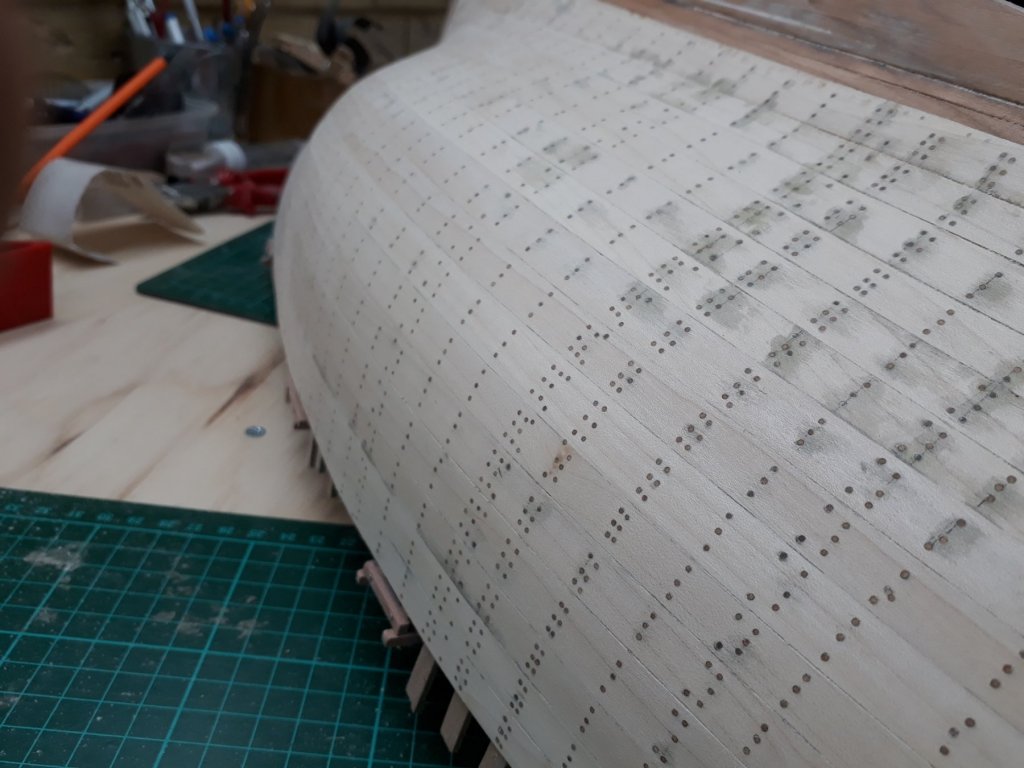
I recently finished planking my hull. I used 1 mm micro screws to temporarily secure the planks. These when then removed and the holes filled with tree nails that I make in bulk. It worked beautifully but I built in scale 1:10, I ll paint the hull and my planks were 70 cm long. But maybe it can work for you -
My dear Patrick "I’m still chasing that elusive perfectly smooth and unblemished paint job" Easy, you just need to apply coat after coat, sand gradually to 250,000 grit or thereabouts and in a few years you ll get it. (my painful experience with brush painting) Or you can compromise for a really good paint job! It must be summer time down under, I envy the good weather in your photos, here everything is frozen. Looking forward to seeing this glorious golden paint fully buffed and shining Regards
-
Gluing Planks When Wet
vaddoc replied to mikiek's topic in Building, Framing, Planking and plating a ships hull and deck
When I started boat building the first woods I used were lime, mahogany and walnut. I gave up on all. The problem with walnut is the interlocking grain. I found it difficult to cut and have a clean edge and when bend could suddenly break diagonally along the cross grain fibres. Shaping a strip, it could follow the stray fibres. There are much nicer woods. It finishes superbly though! -
Gluing Planks When Wet
vaddoc replied to mikiek's topic in Building, Framing, Planking and plating a ships hull and deck
Even after heating and bending, a strip should not really brake if pushed further. It might have to do with the wood you use. Maple and beech for example are very flexible and do not become brittle. This is a mahogany strip 0.5 mm that I bent to make hoops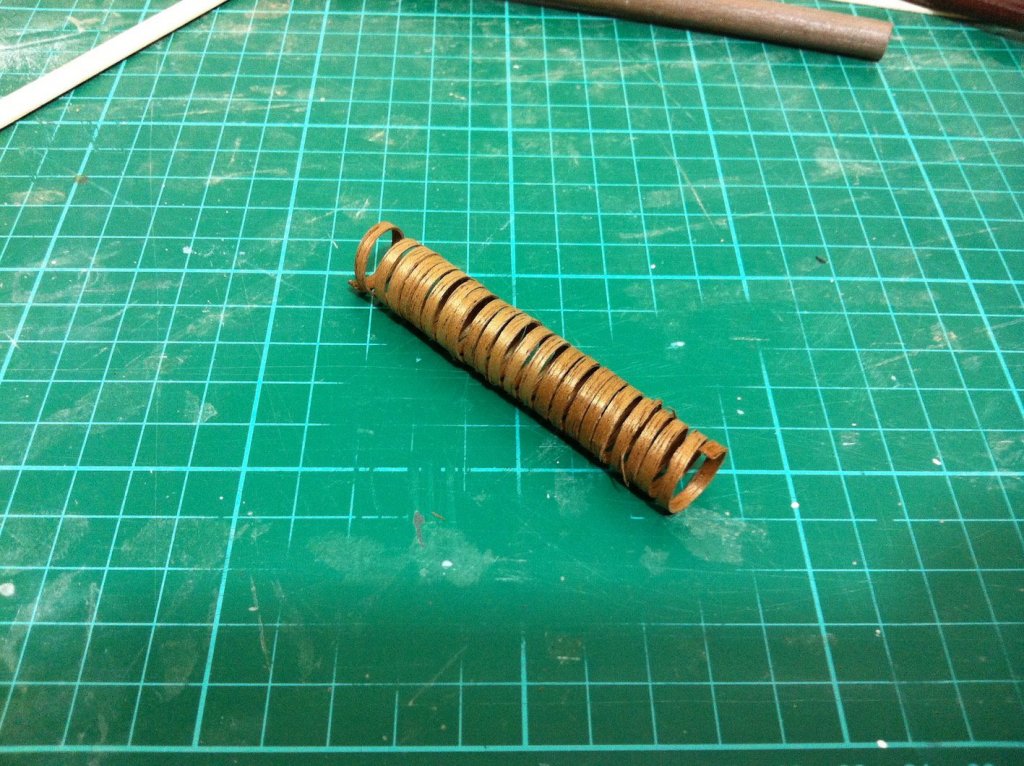
-
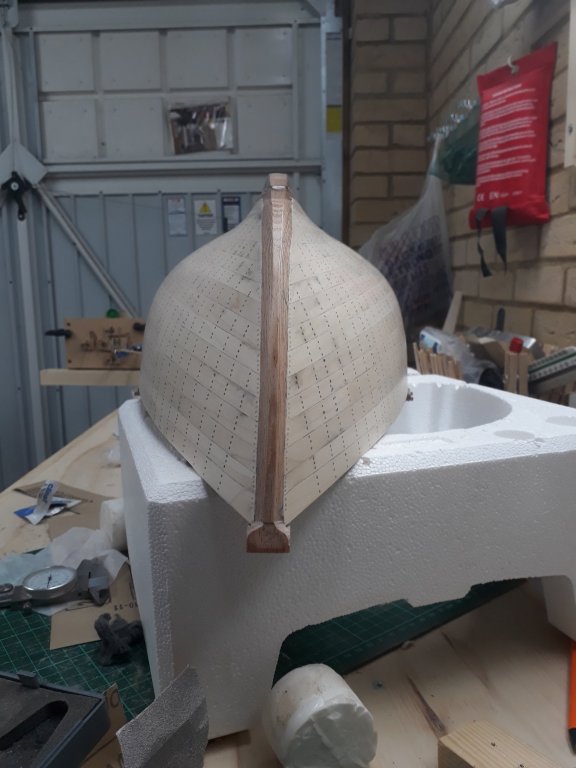
A milestone reached today. I glued the keel on! The hull is now complete. Next step lots of sanding, filling and sealing!
-
Dear all Could I ask for your help in understanding how the deck is drawn in small sailboats. I am not exactly sure what or how to ask as my knowledge and understanding of this is very shallow but I ll try. I think I have understood that the camber of the beams is a parabola and that there are many ways that this can be drawn. My main problem though is the deck centreline. The way I understand it, it is essentially a straight line form the stem to the transom, having chosen a crown height at max beam. Due to the deck furniture and the very visible sheer, this straight deck centreline is hidden from view. However, it seems that most decks are truly curved. 1. Is there a rule of how curved the deck centreline can be? 2. If the centreline is curved, what happens to the king plank that needs to be straight? 3. Suppose I draw a slightly curved centreline that pleases the eye and then arrange the beams using the same way to figure out the camber. Is it likely that the deck planks will sit nicely or will a lot of fairing be needed? 4. Is the crown height measured perpendicular to the horizontal level or to the sheer? In the first case the beams will meet the deck planks at an angle and will need fairing but in the second will sit flat. Or is this not an issue to the relatively small rise of the sheer? 5. Is it better to go for a straight centreline or is it better to have a bit of curve? Apologies if I don't make much sense! Vaddoc
-
Welcome Scipios!
-
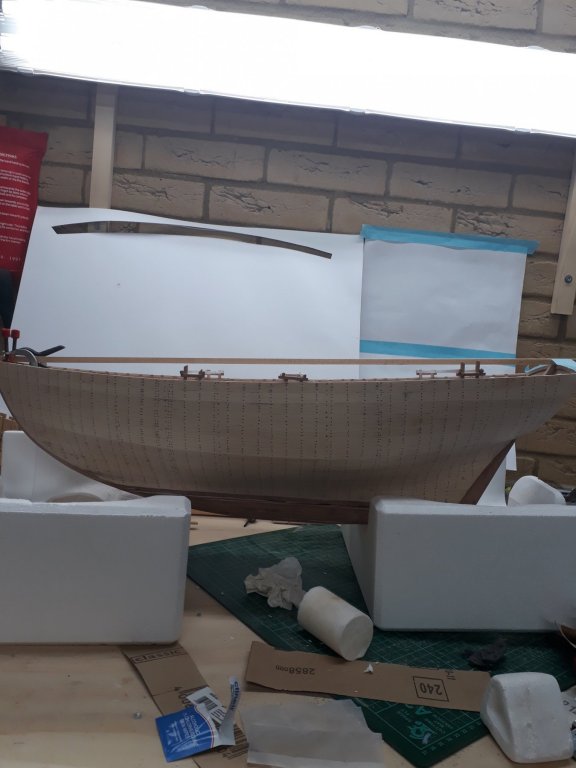
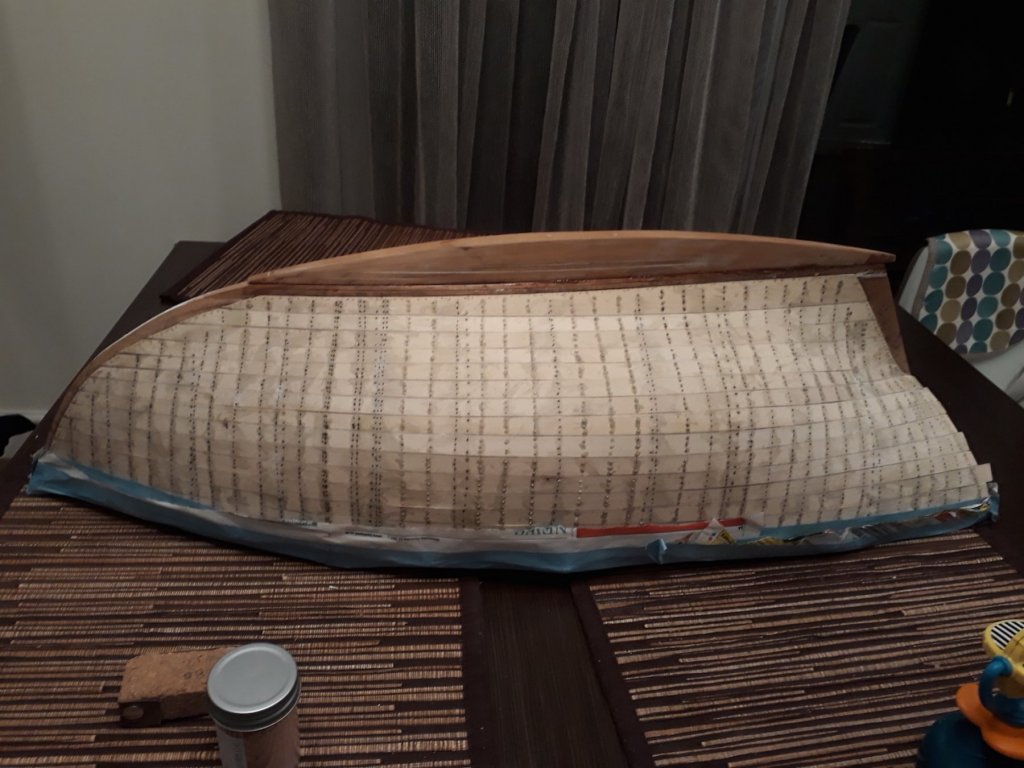
Another quick update The interior of the hull has had filler applied, then a coat of sealer, then a thick coat of Halfords white primer and then a coat of pledge floor polish. I think it is now reasonably sealed! I should have waited 24 hours for the primer to fully dry before applying Pledge but it did not cross my mind. The deck will hopefully cover all sins. I still need to remove the masking tape from the transom and stem but at least the appearance has improved a bit.
-
Dear all You might find this helpful I have some 2 part epoxy resin that I bought maybe 5 years ago. It is still perfectly fine and I have lots left. However, the resin had become very thick to the point I could not draw with a syringe. I popped it in the microwave with the lid off for 25 secs in increments (for a half full 12 oz bottle). It liquified again beautifully. It seems that the resin can crystallise in cold or with time and that microwaving it or letting it sit in warm water brings it back. Visually, there does not seem to be any difference in its qualities. Previously I had thrown away epoxy or had trouble matching the volumes because of this problem so this seems a good fix. No health and safety guarantees though, I did it when the admiral was out. Regards
-
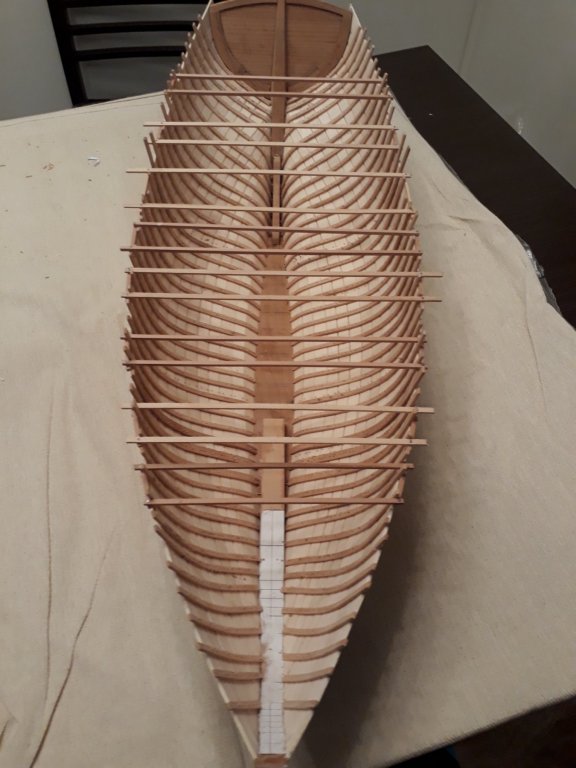
Dear all A very quick update. I finished the beam selves, maybe I should have added another 3x3 strip on each side but it is super strong and I think it would be a waste of time and of expensive timber. I also added the stringer in one side and this task proved a very challenging one. It was difficult to find the position and persuade the 11 x 2 mm strip to stay in place. I had to use epoxy and the whole job was very messy. I do not look forward at all to doing the other side. Planking the inside of a ship must be much more difficult than planking the outside. I also started applying sanding sealer to the inner surfaces of the hull. White primer will be sprayed on top when all is finished. I am very happy I chose this boat, so far it has been great fun and I am learning a lot in the process. Still, it is far more difficult (and expensive) than I initially thought. Regards
-
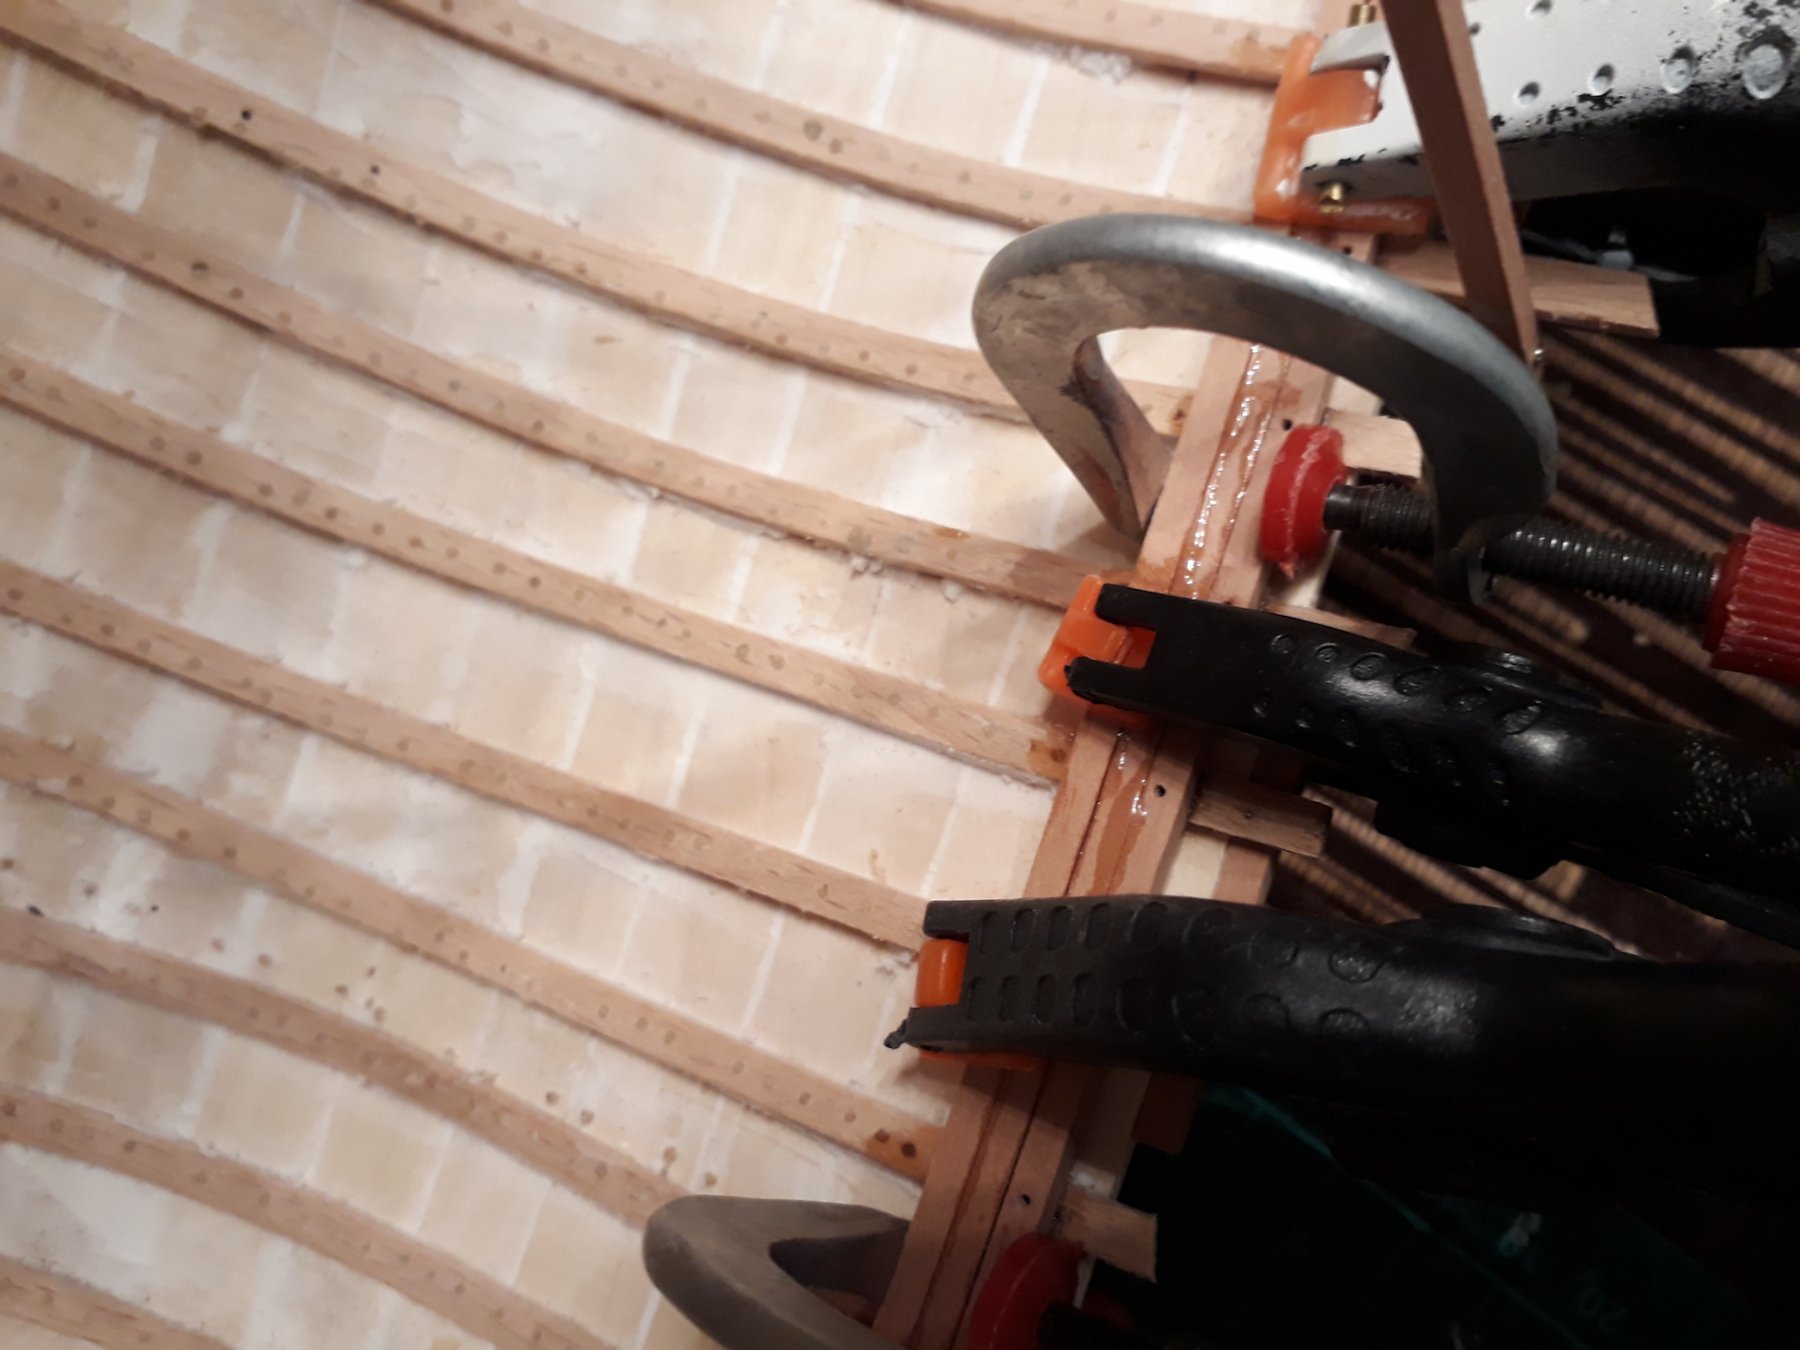
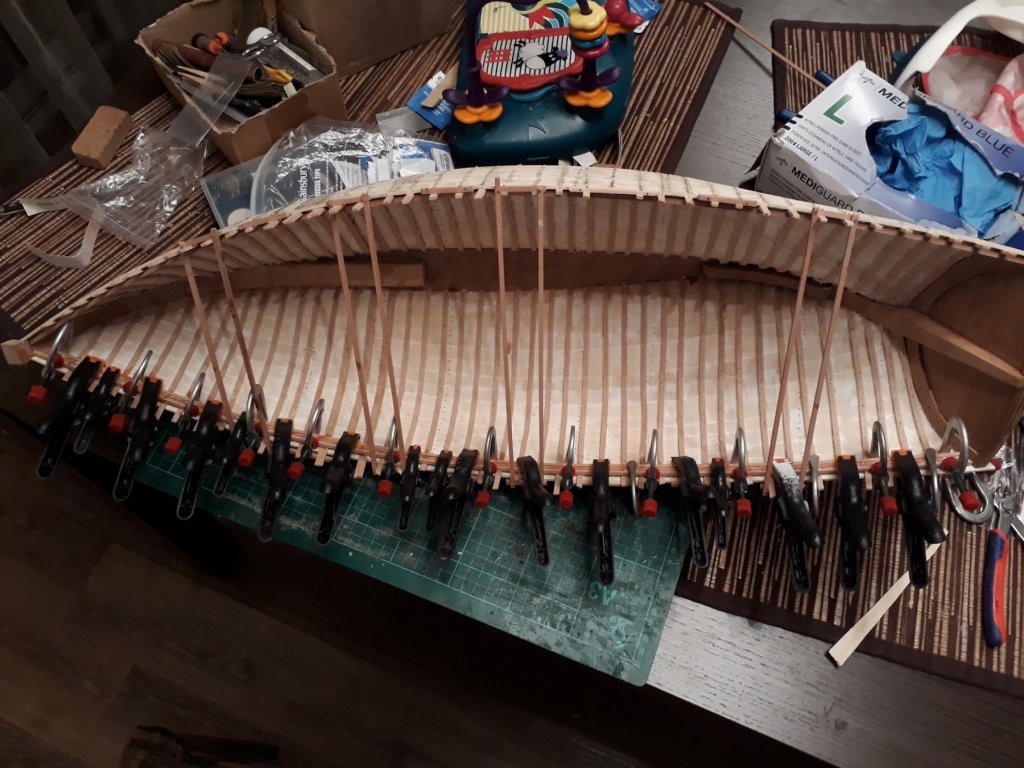
I think you are right Mark. So the plan now is to finish with the stringers and beam selves and then to seal the inside of the hull and spray white primer all over. Then, to glue the keel on, fill, sand and seal the hull but leave the paint for (much) later on. The beam selves should be 11 x 3 mm. I think it was a good idea to essentially laminate 3 strips 3x3mm each as I was able to very easily follow the curve of the sheer in both dimensions. I decided to use epoxy for its gap filling abilities. Still it is messy and unforgiving and I had to work really fast as with the high temperature in the house it cured very fast. The port side is curing and tomorrow I ll probably do the other side. I think I won't bother sanding the excess epoxy as the deck will cover everything. Indeed, you can never have enough clamps!

-
Dear all thank you very much for your comments Druxey, indeed humidity is what causes the problem but with the cold and the constant heating in the house everything is pretty dry and it will be months before temperatures in Britain pick up! Mark, what do you mean by undercoat? The inside of the planks is well covered with filler but I guess I could spray some white primer on, this should seal it even better as well as cover the ribs and keel. As for the outside of the boat, after filling and sanding I was thinking of actually using a sanding sealer, then primer and then paint the hull. I have used sanding sealer on MDF which is very water absorbent and waterproofs it nicely. This should seal the wood, I just don't know if I can do this before spring time. I was thinking of getting the beams and deck on before sanding the hull but maybe I need to finish the hull first, at least getting the sealer and primer on and the paint bellow the waterline as primer is soft and will mark easily. Regards Vaddoc
-
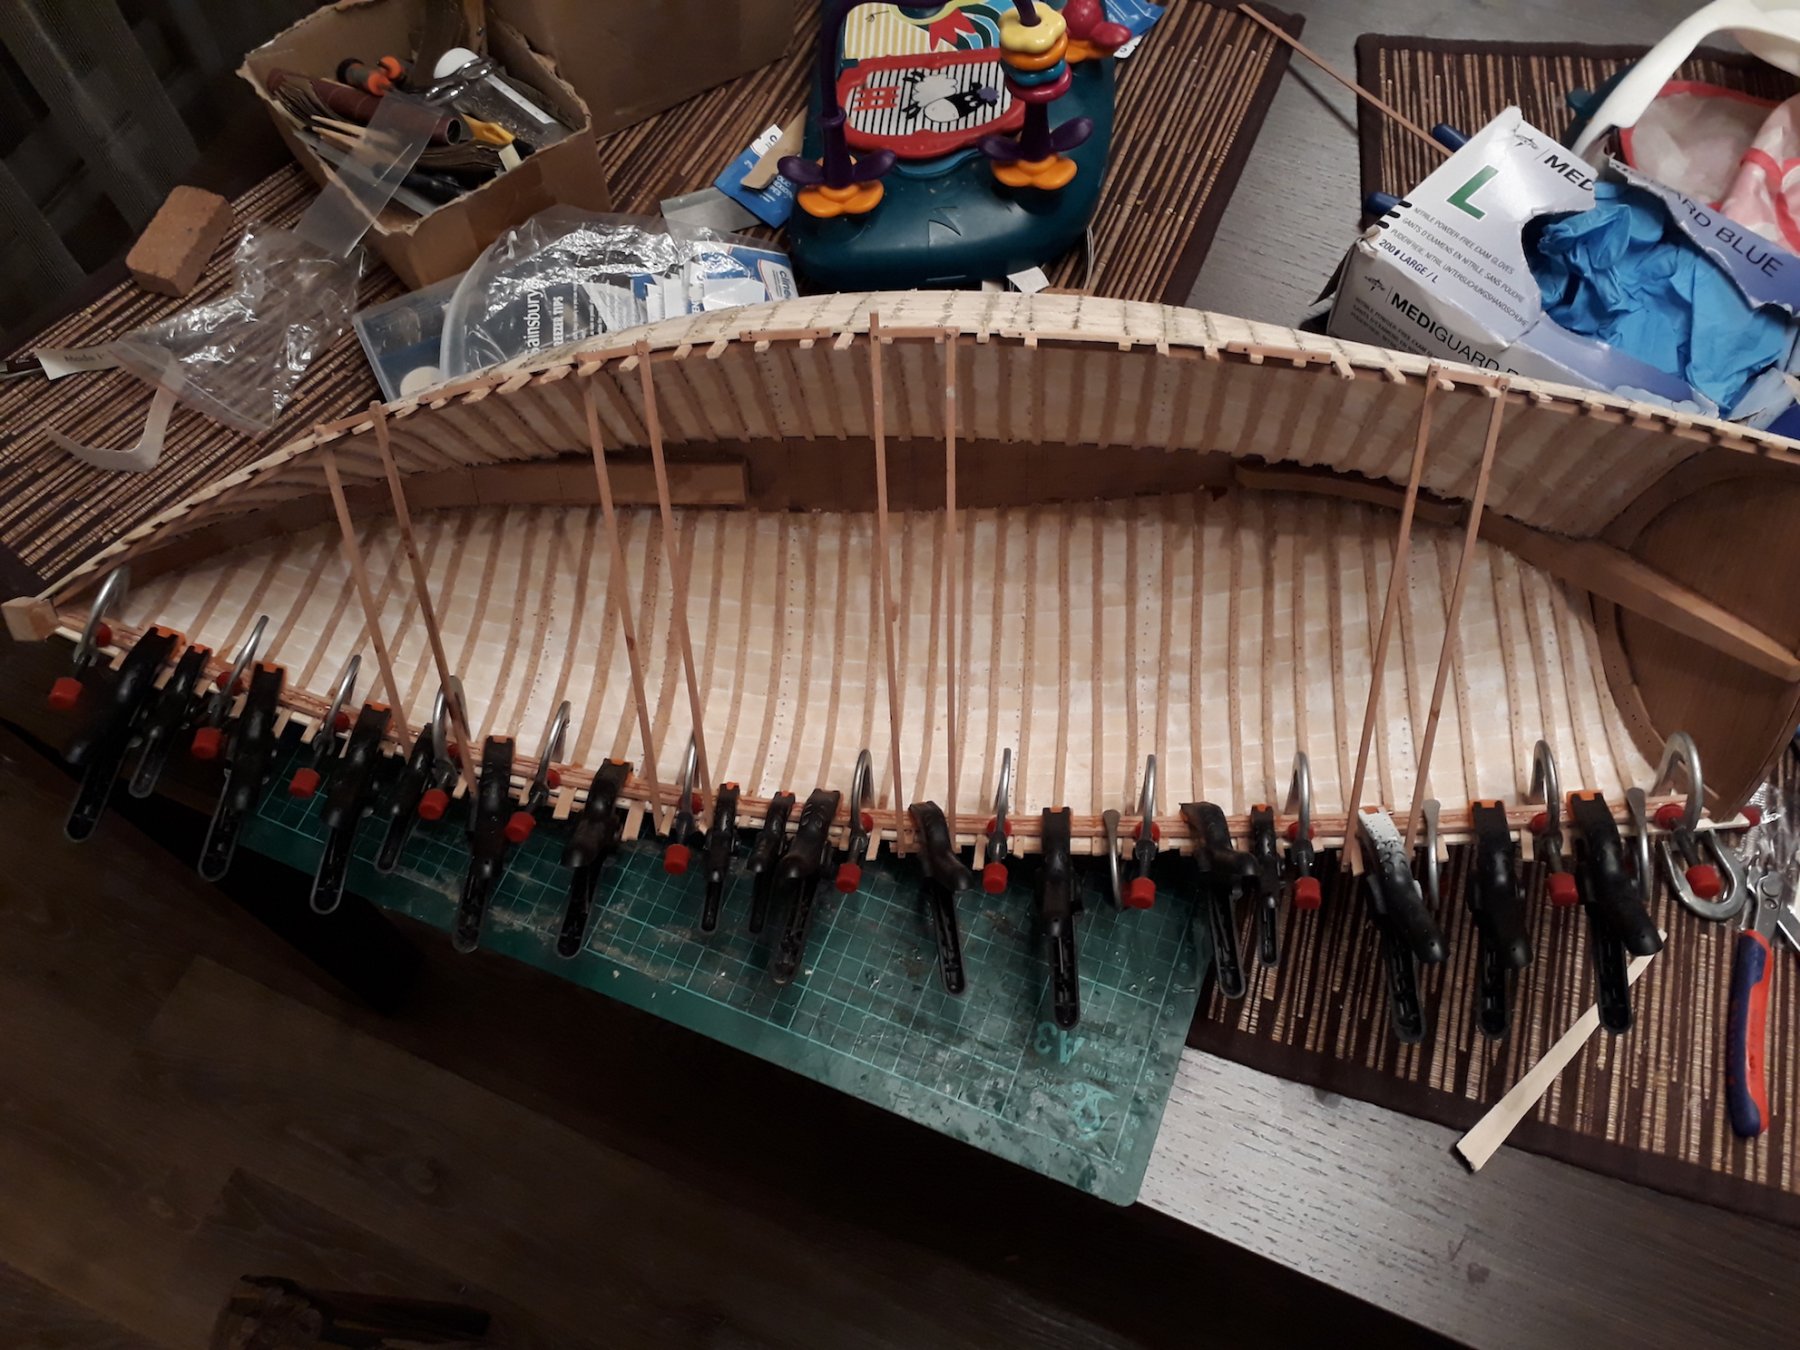
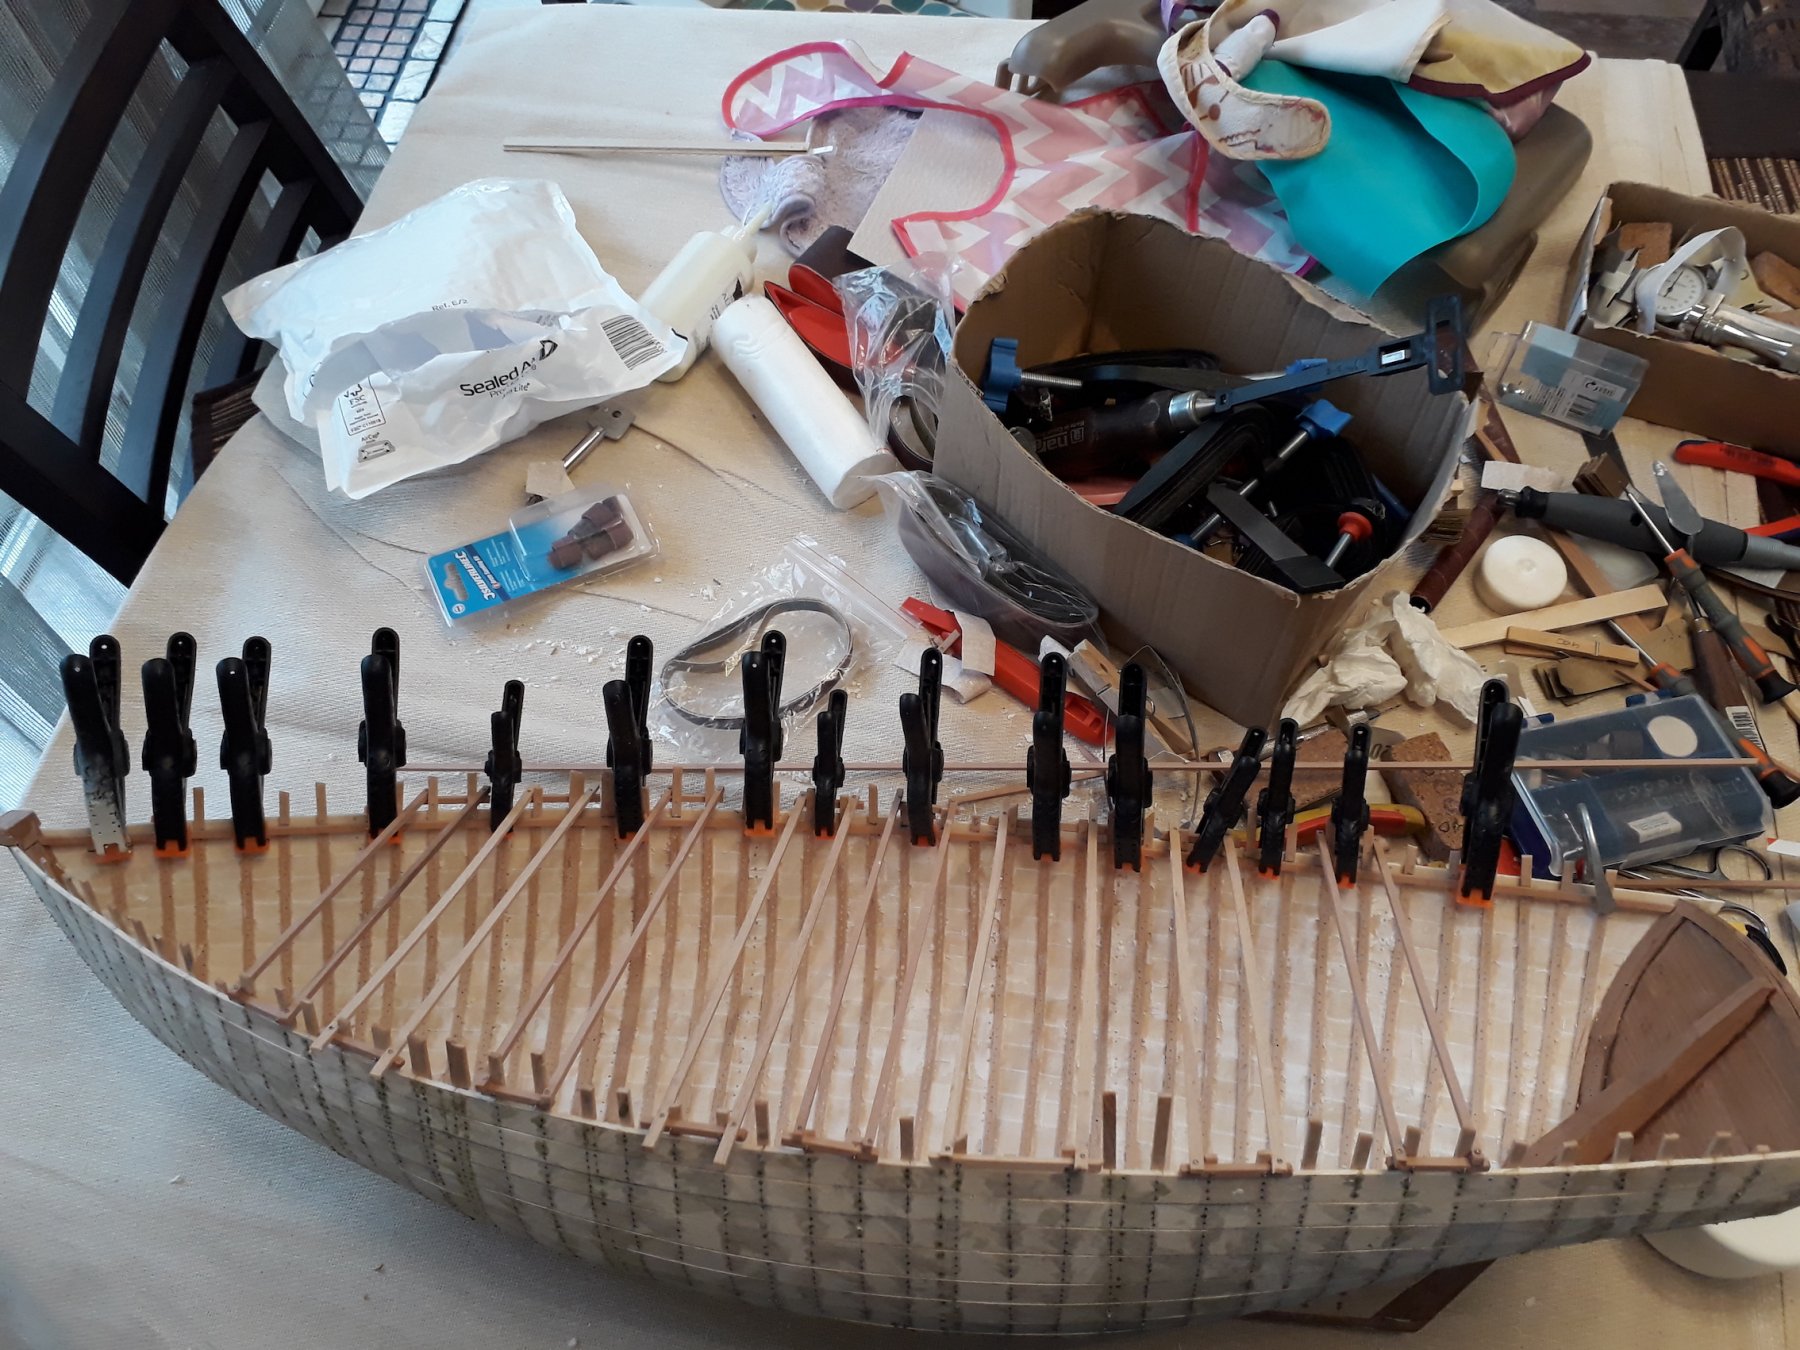
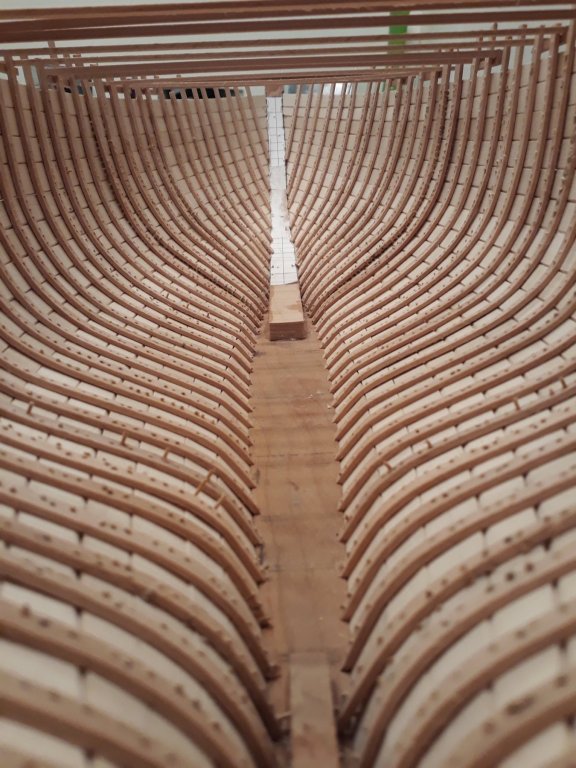
I ve made some progress in the last couple of days. Due to the malfunction of my gas heater I had to work in the dining room table. My 2.5 year old daughter was very interested in the boat and she "helped" me a lot this past two days, sitting in my lap and constantly moving while I was trying to drill 1 mm pilot holes or helping me with the screwdriver leading to a few stripped screws... Would not change this for the world! First thing, I decided not to build the interior of the boat. I am not really interested enough and would much rather carry on with the hull, deck, rigging etc. This decision simplified things a lot. The boat has been in the house for 3 days and I can't say I ve seen a huge improvement in the gaps in the planking. I have a feeling that these gaps will not fill well from the outside as I have sanded the inner edges of the planks far too aggressively. I decided to fill al gaps from the inside. The result is unsightly but it does not matter as I have already decided not to do the interior. I used a light filling putty and improvised a few tools. As the boat is so huge I could actually squeeze my arm in! The result was pretty good.I think that later on filling and sanding of the hull will now be much easier. Next I started work on the beam selves. It needs to be 11 mm wide and 3.5 mm thick. I decided to make each self out of 4 strips 3 x 3 mm. I have a few pear wood strips which I can use. Par is super strong, excellent for this task. The upper most strip will be screwed onto the frames and the lower three will kind of laminate with epoxy and may be reinforced with screws. The upper strips went in fine. I felt that the hull stiffened up considerably. Regards


-
Dear all I think the problem is solved. I decided against building the interior so no huge access needed. Still, the boat is so large that I can squeeze my arm in the hull! Most importantly though, I added the first strip that will make the beam selves (It will be laminated from 3 strips 3 x 3 mm each. I feel that the hull immediately stiffened up a lot. I ll add the rest of the strips for the selves and also the stringers and I will report back when I take the braces off. Many thanks for your advices. Regards
- 8 replies
-
- 2
-

-
- deformation
- ribs
- (and 1 more)
-
Druxey, the boat now lives in the house and will only go to the garage when I ll be working on it. Yes, we do suffer winters with the dry air! Thank you Mark, it is about 1 mm in many areas, too wide to paint. The whole boat is about 70 cm in length, 1:10 scale. Another problem is that I sanded the bottom inner edges of the planks but much more than I should. After sanding the hull, these gaps should open up even more. It seems that maple that I used for the planks (well seasoned) has high movement in service. I think I ll wait for a few days for the boat to soak up moisture and then I ll fill the cracks from the inside, sand the ribs, install the beam selves and stringers and take it from there. Vaddoc
-
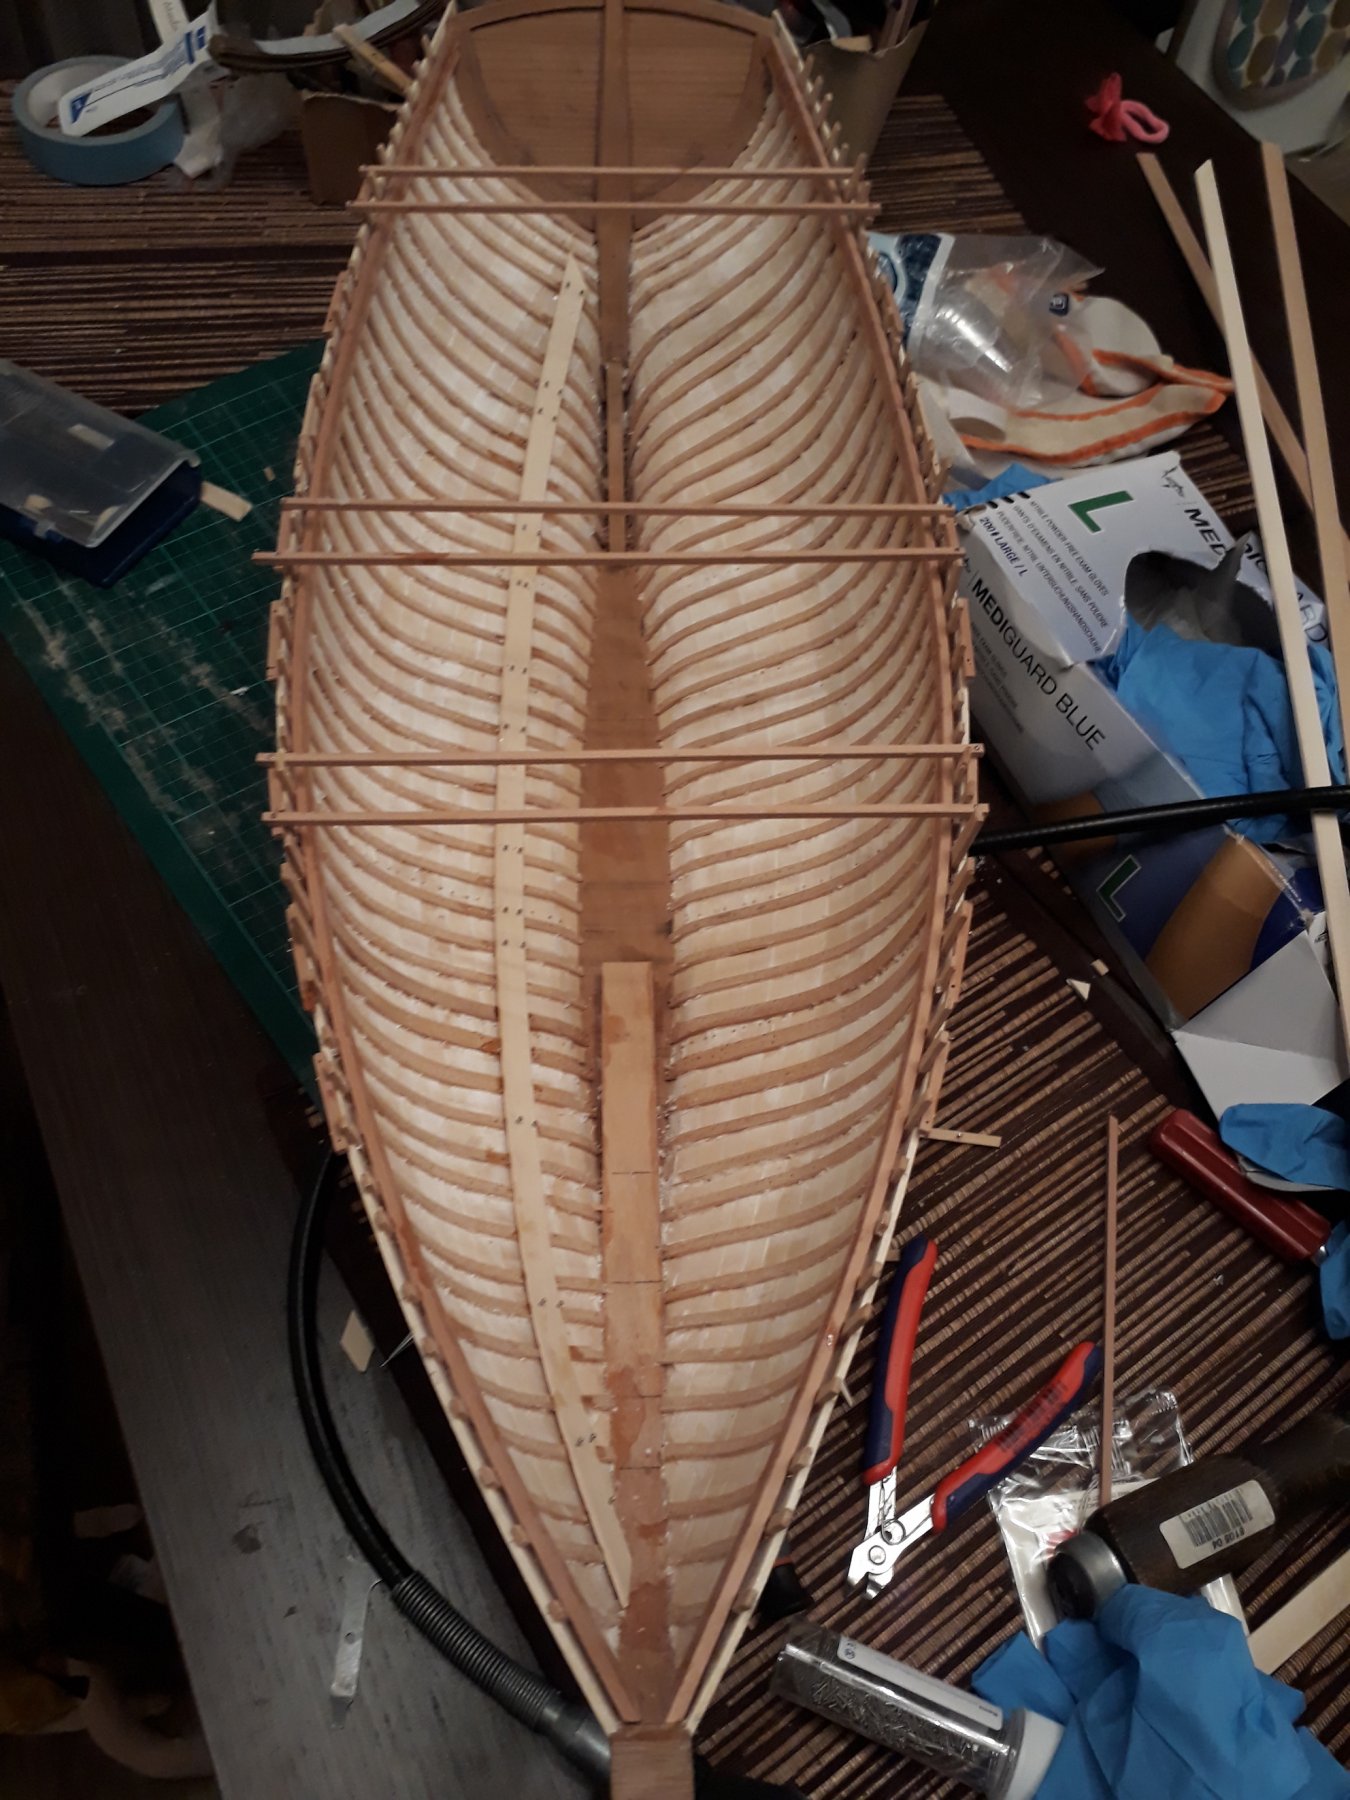
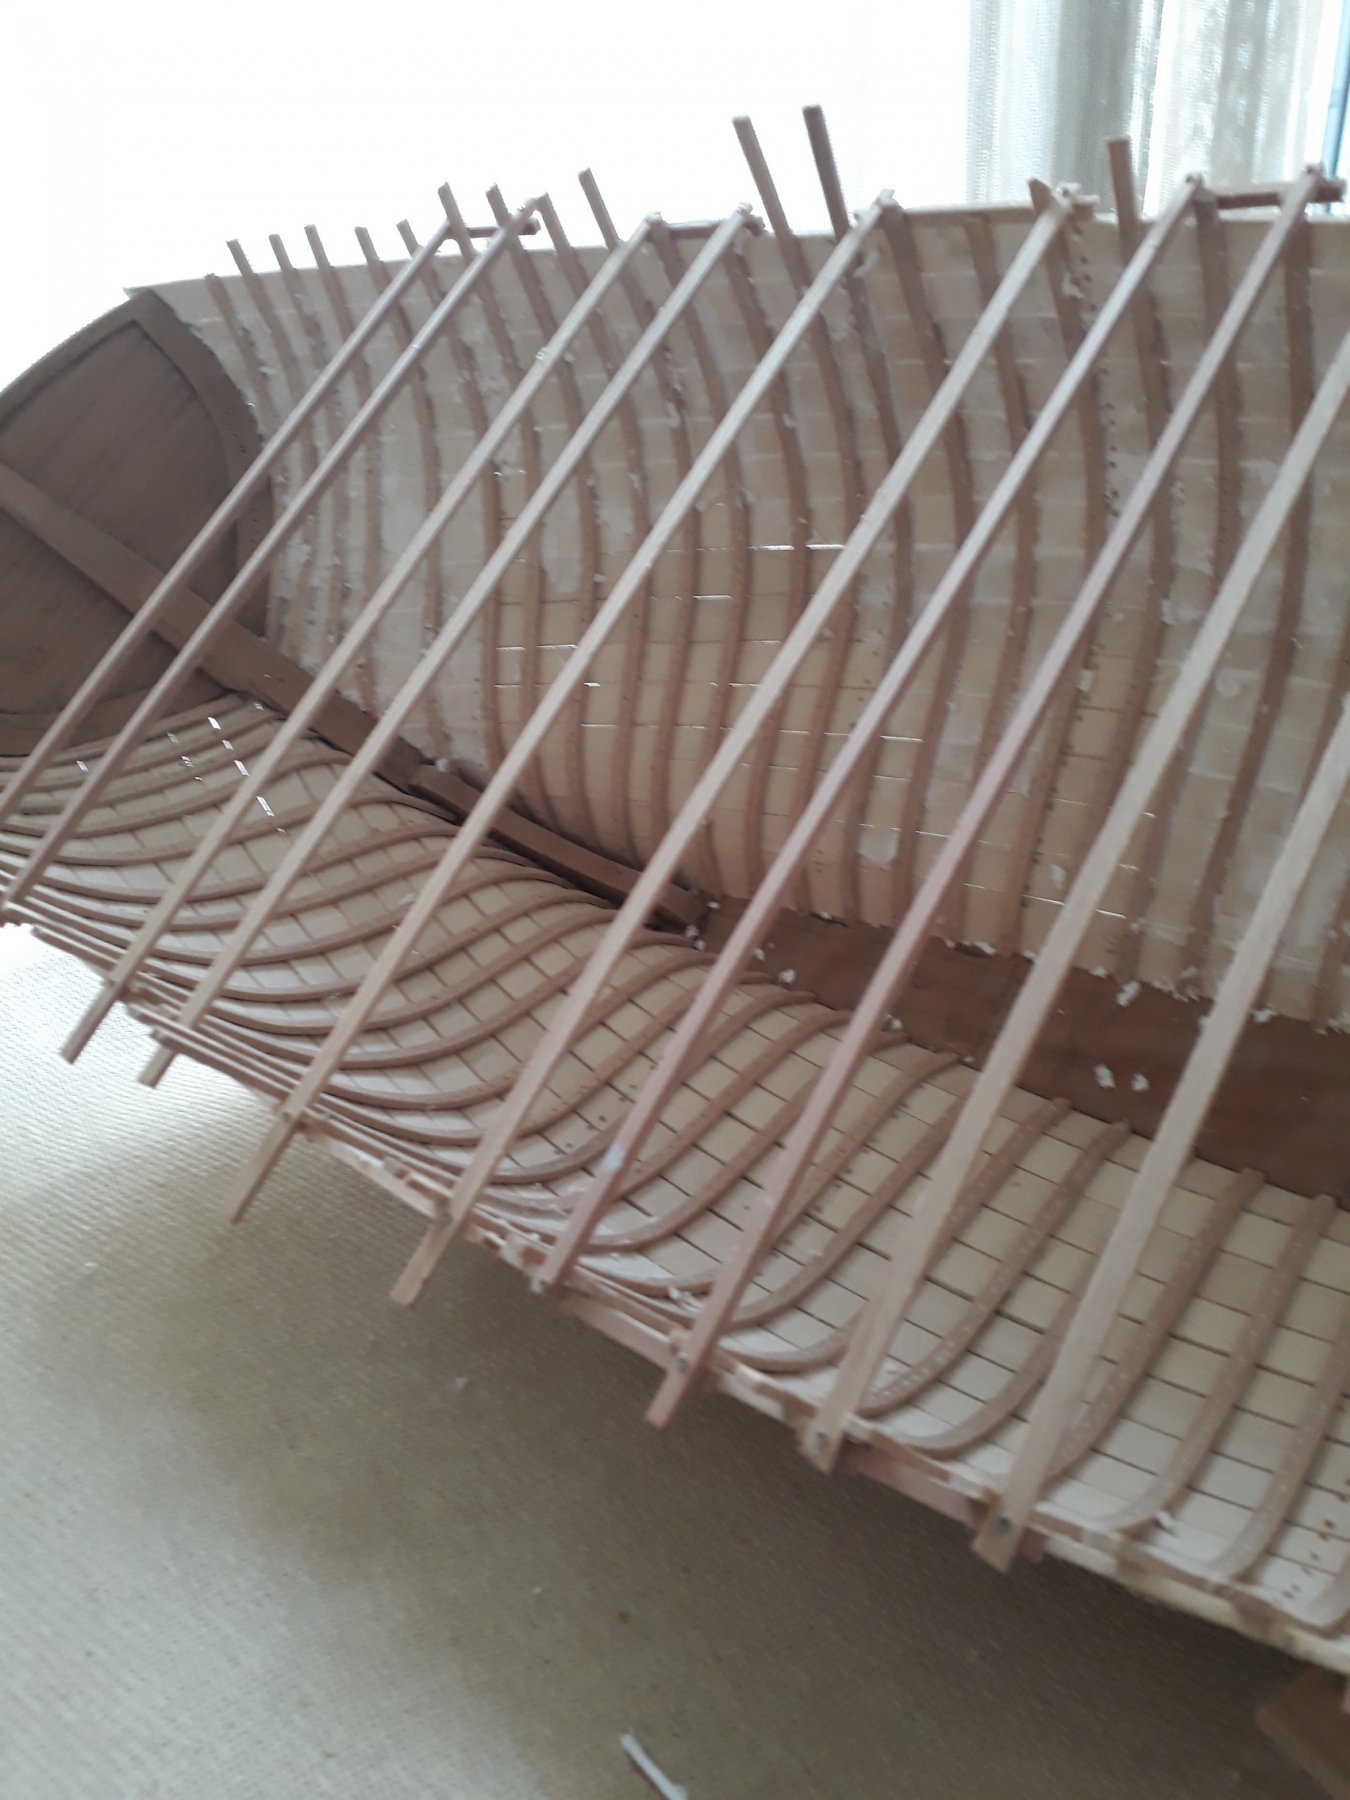
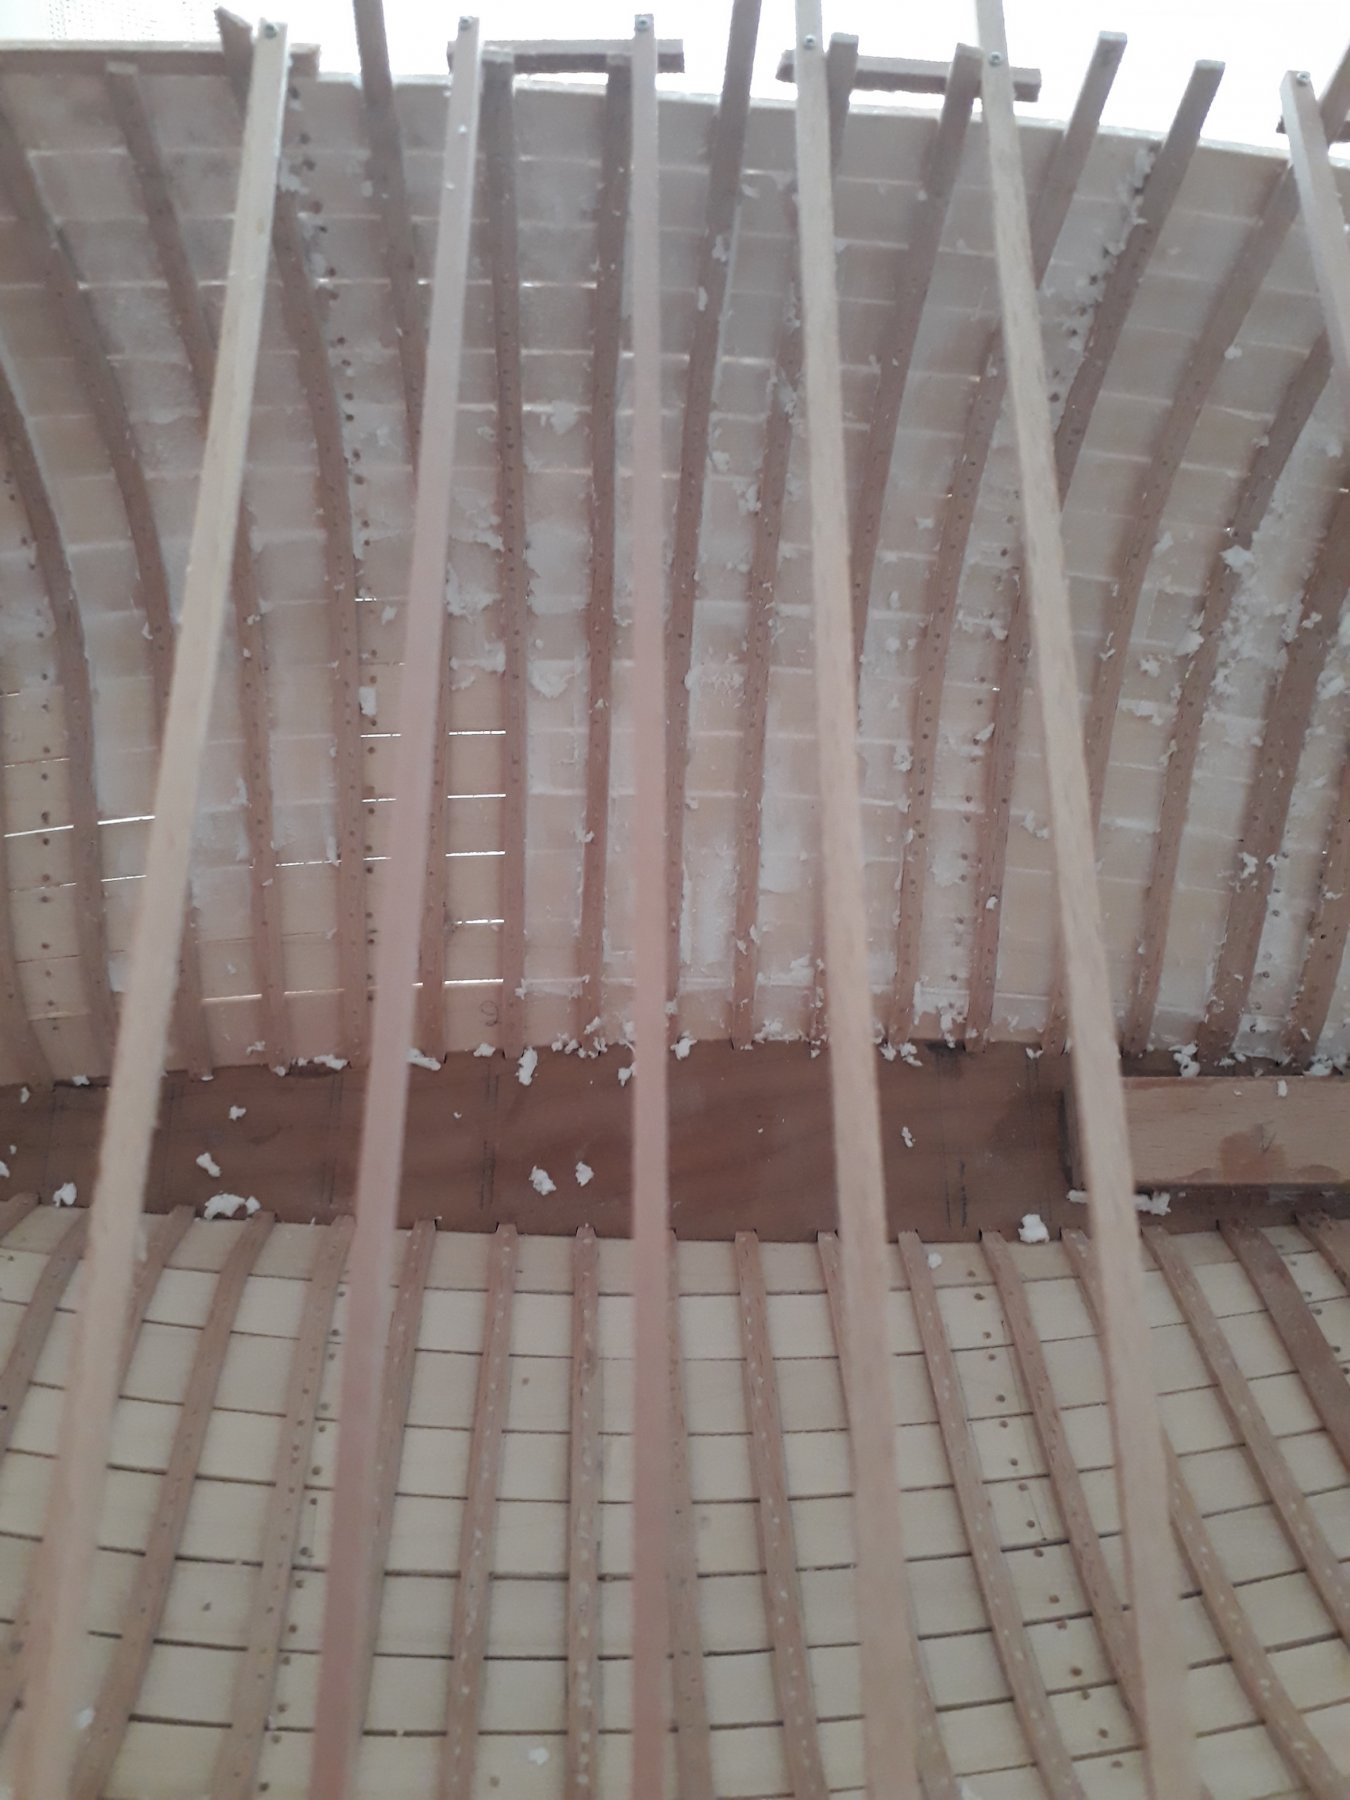
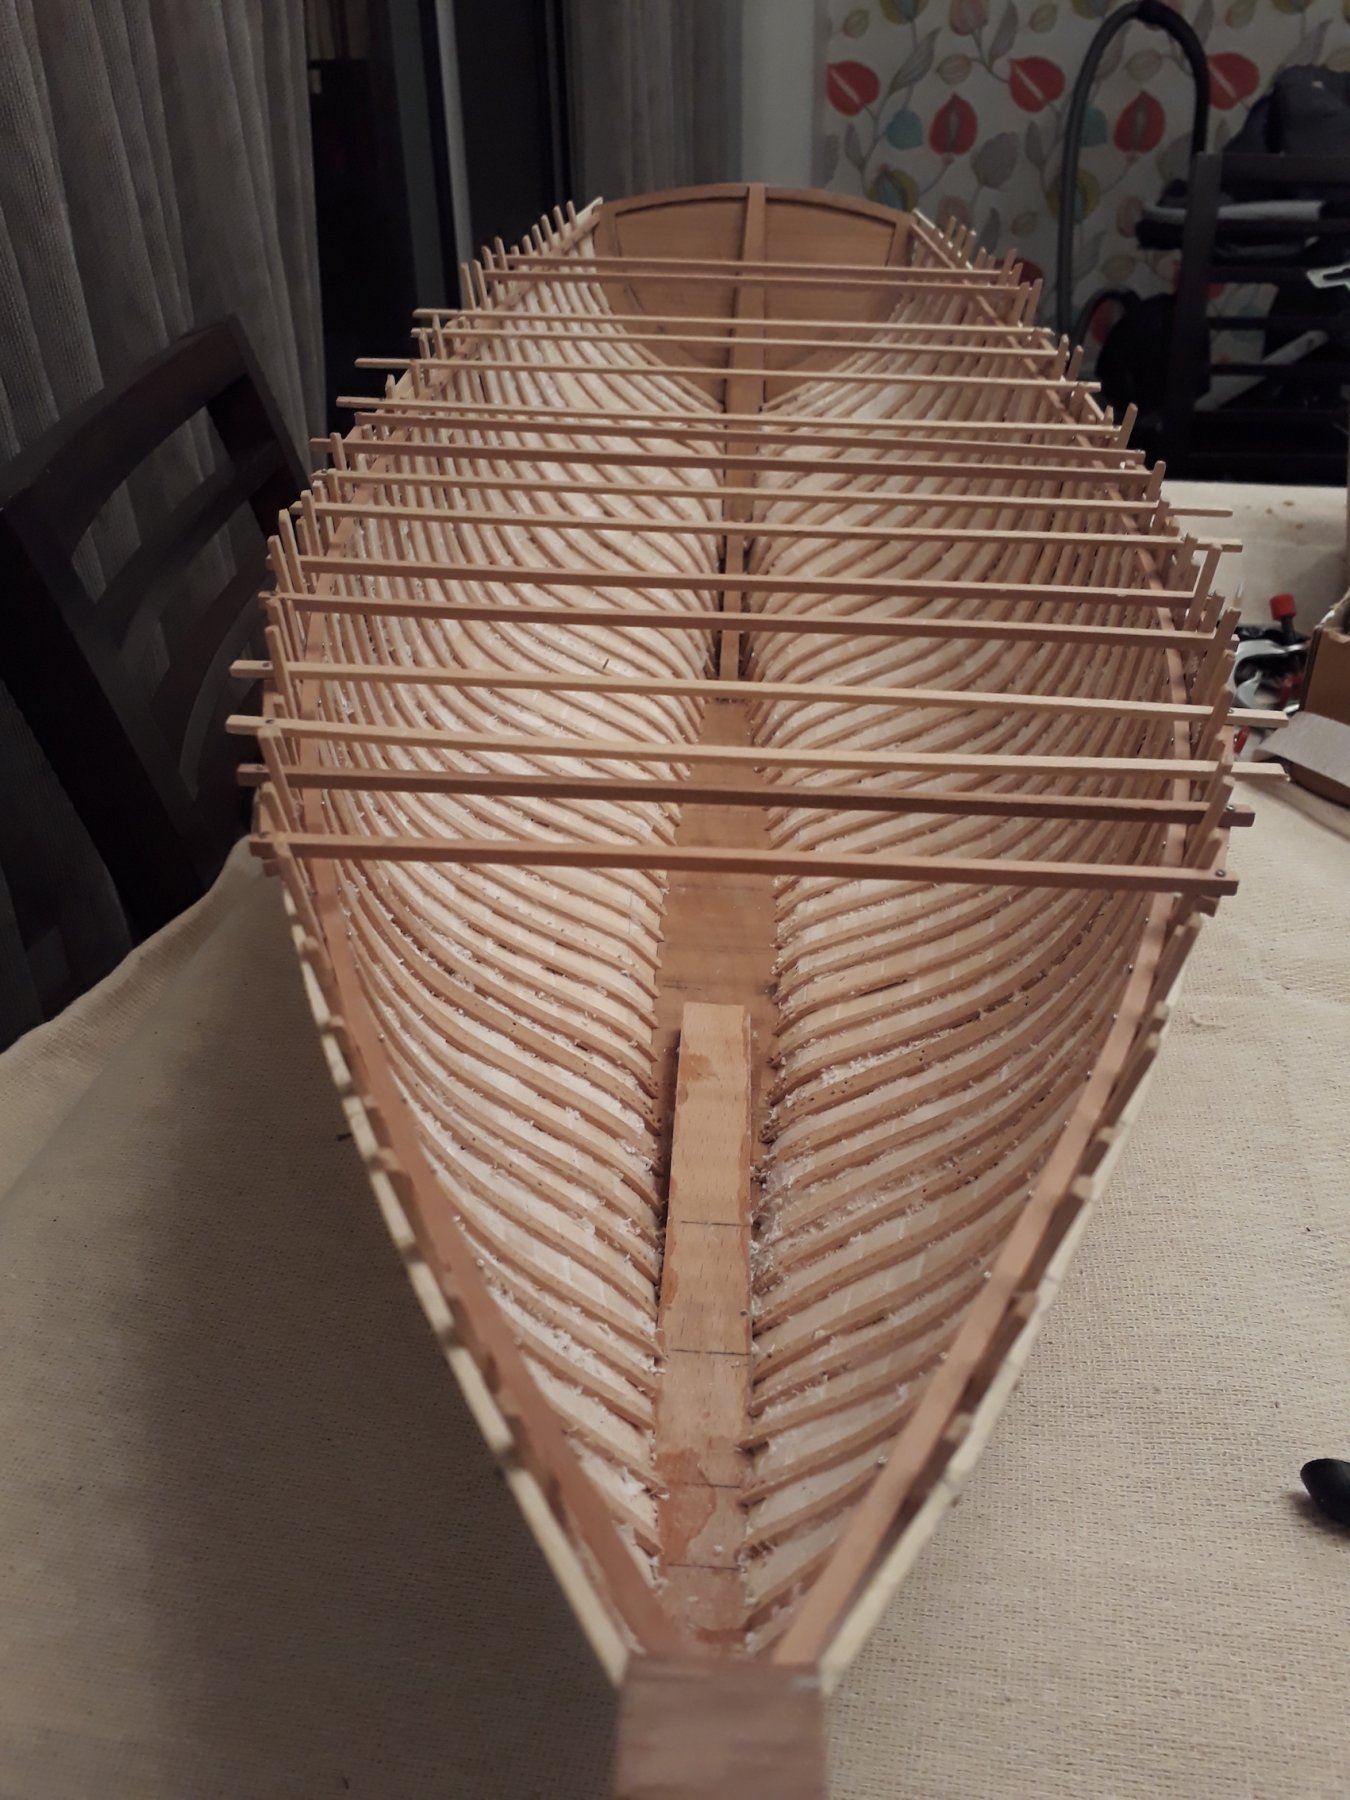
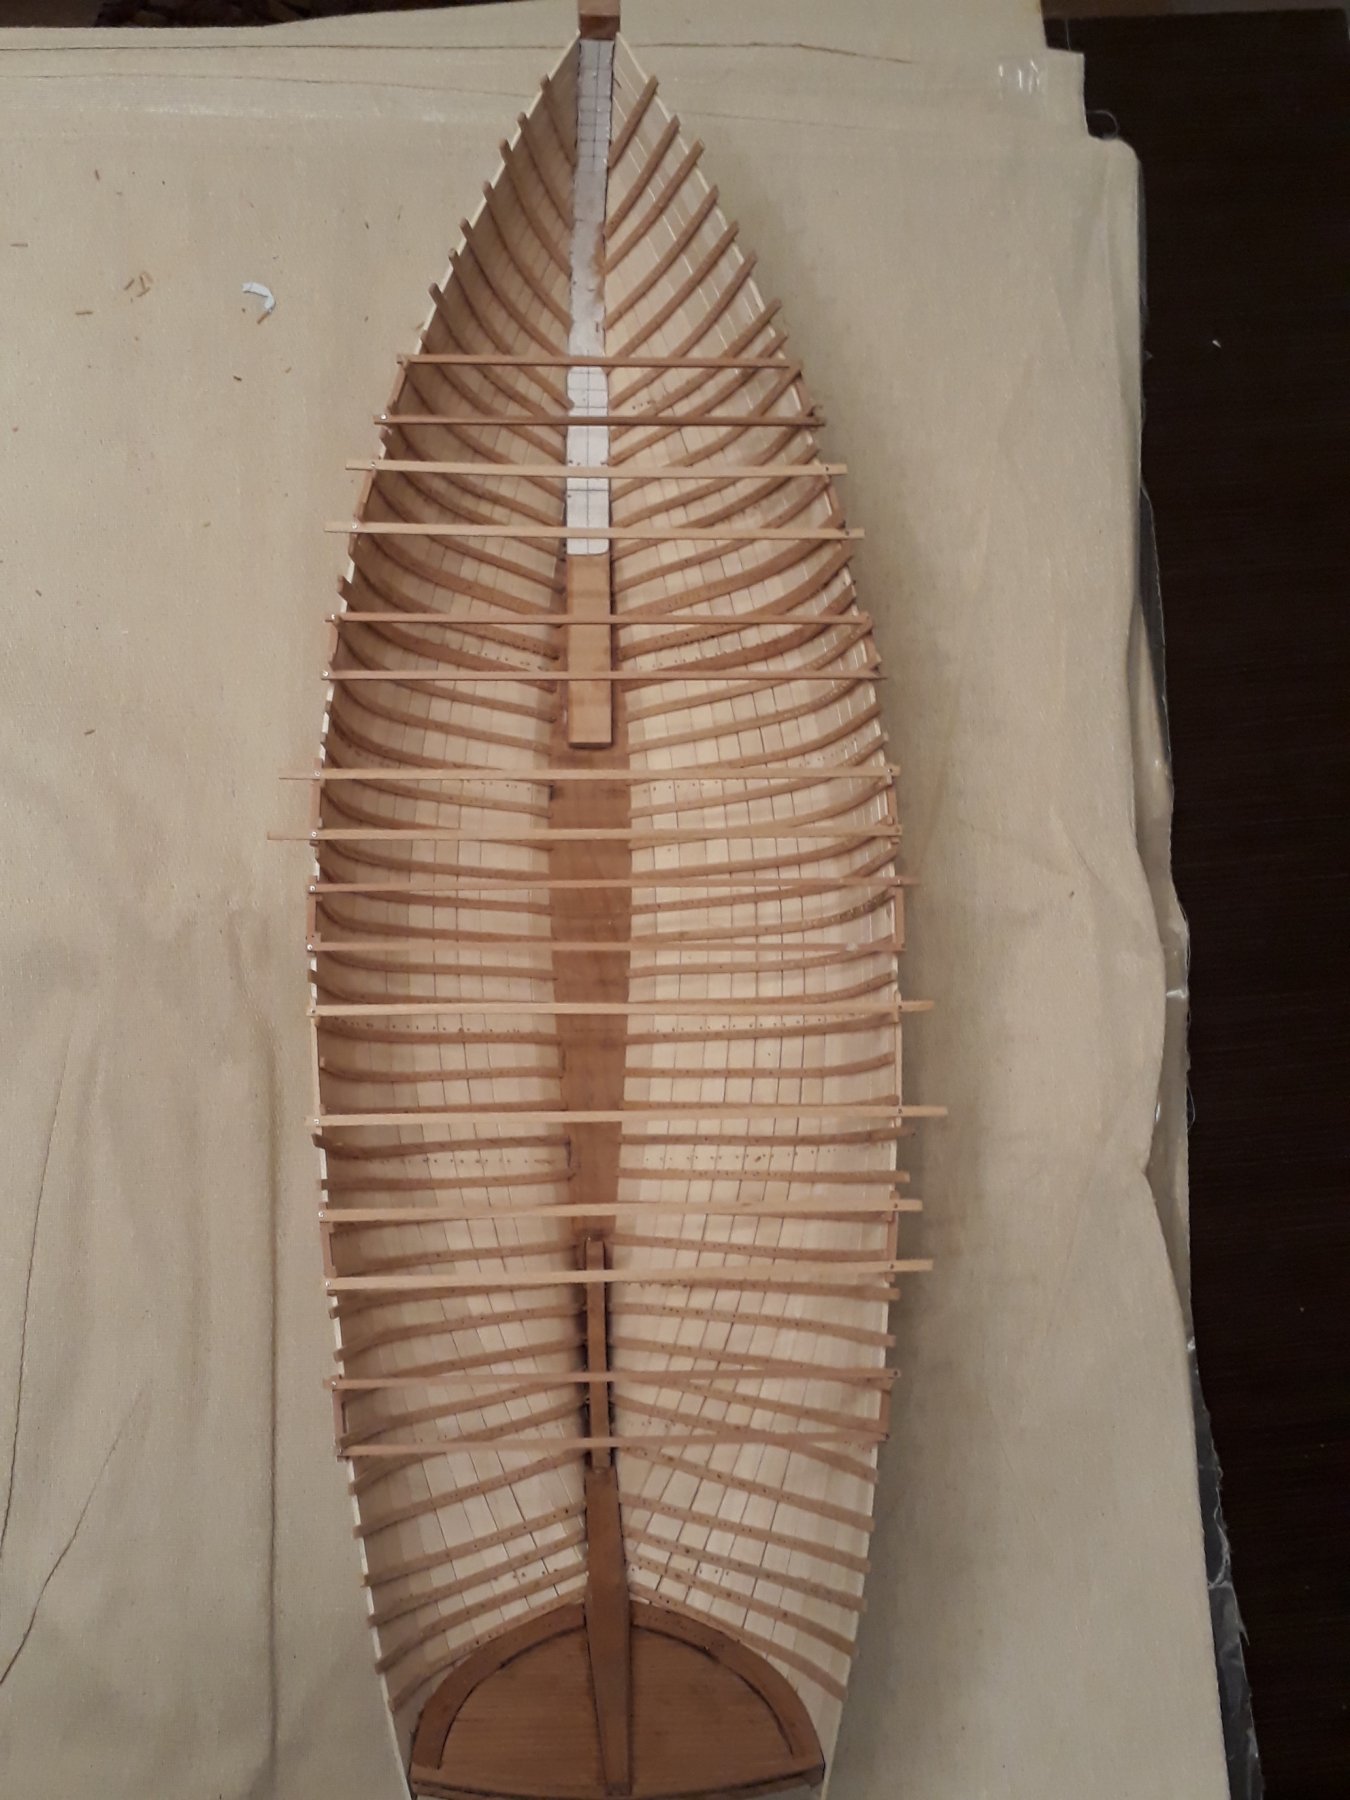
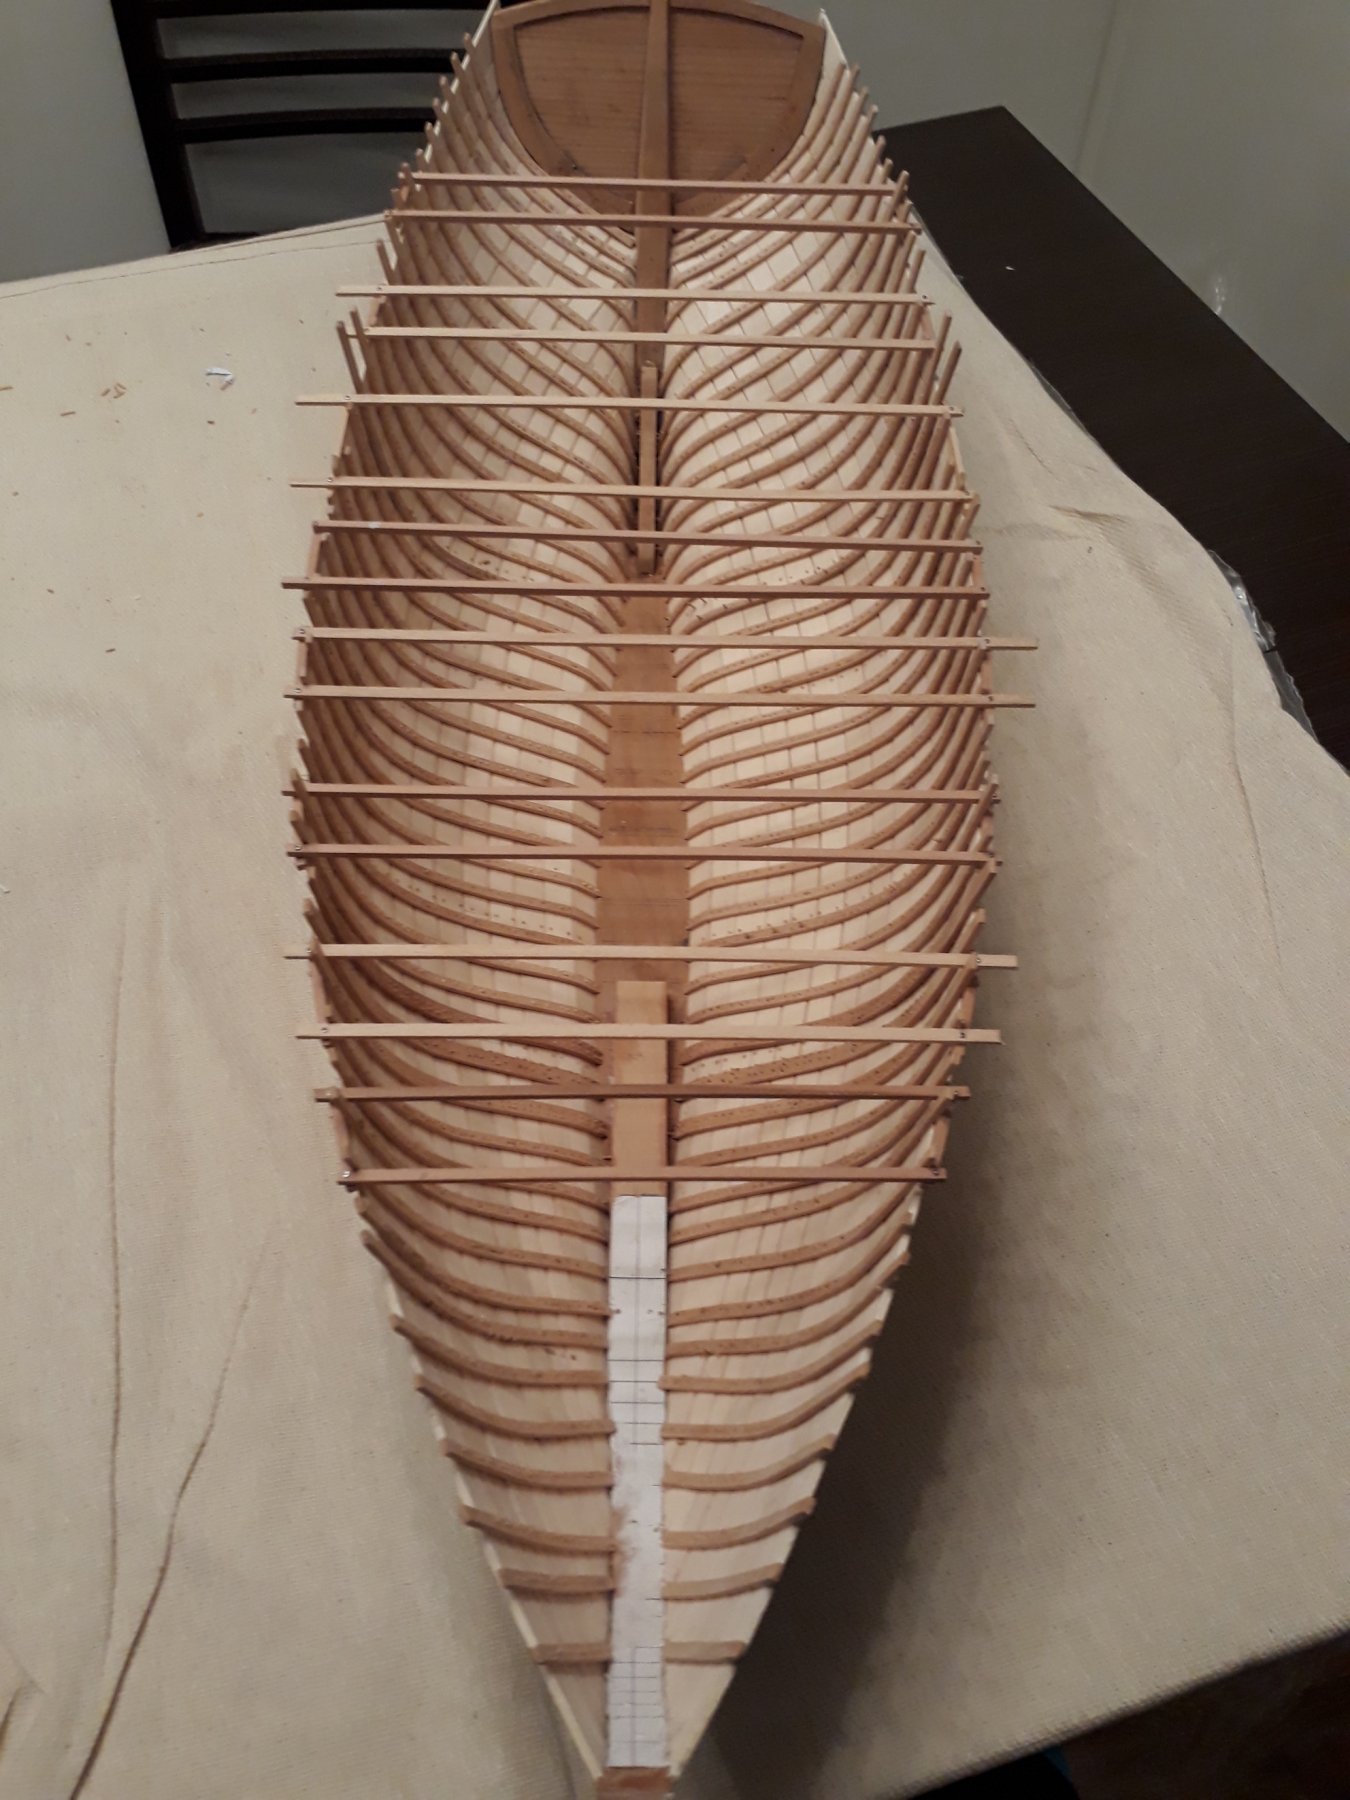
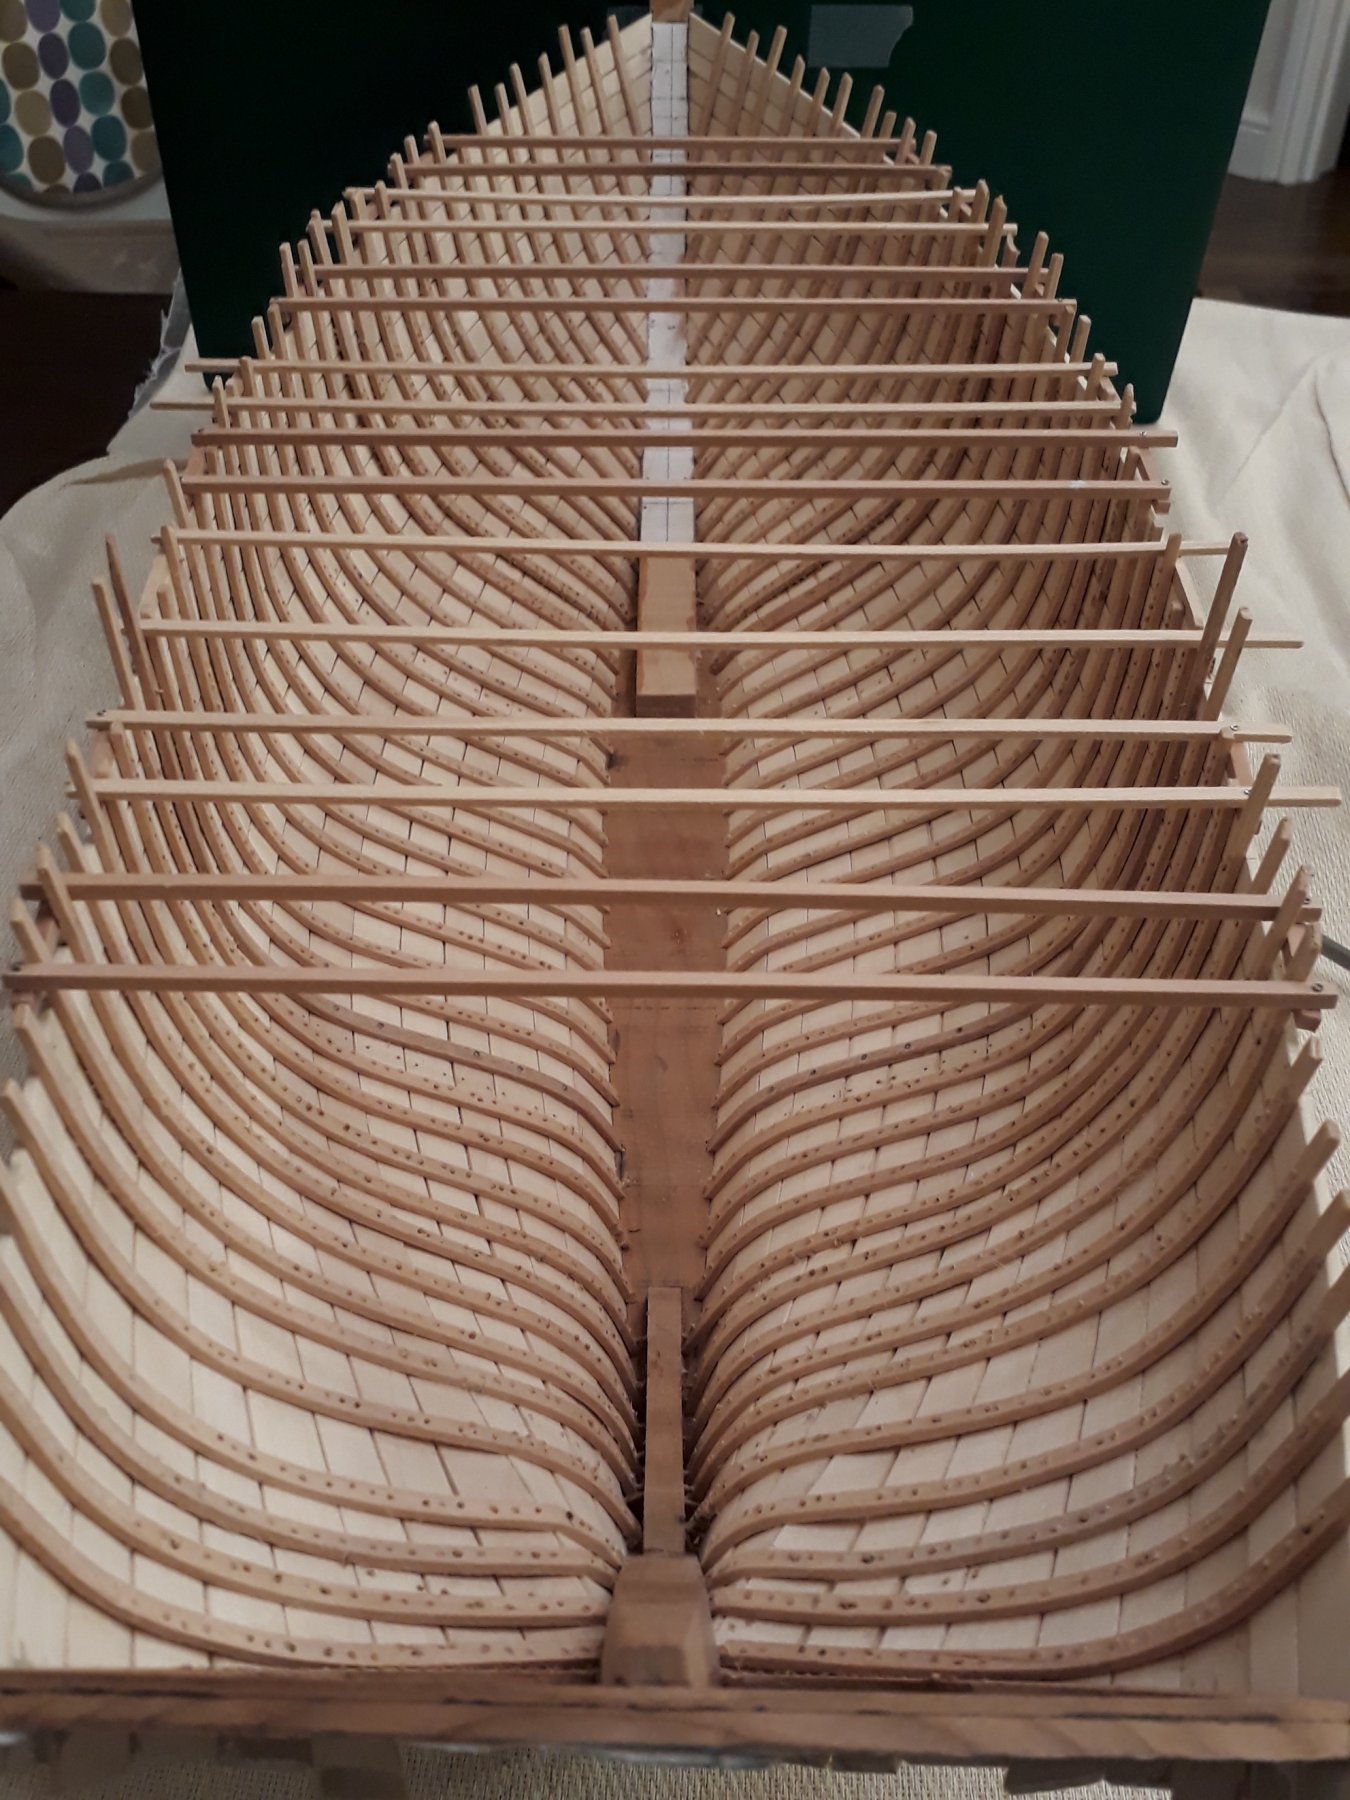
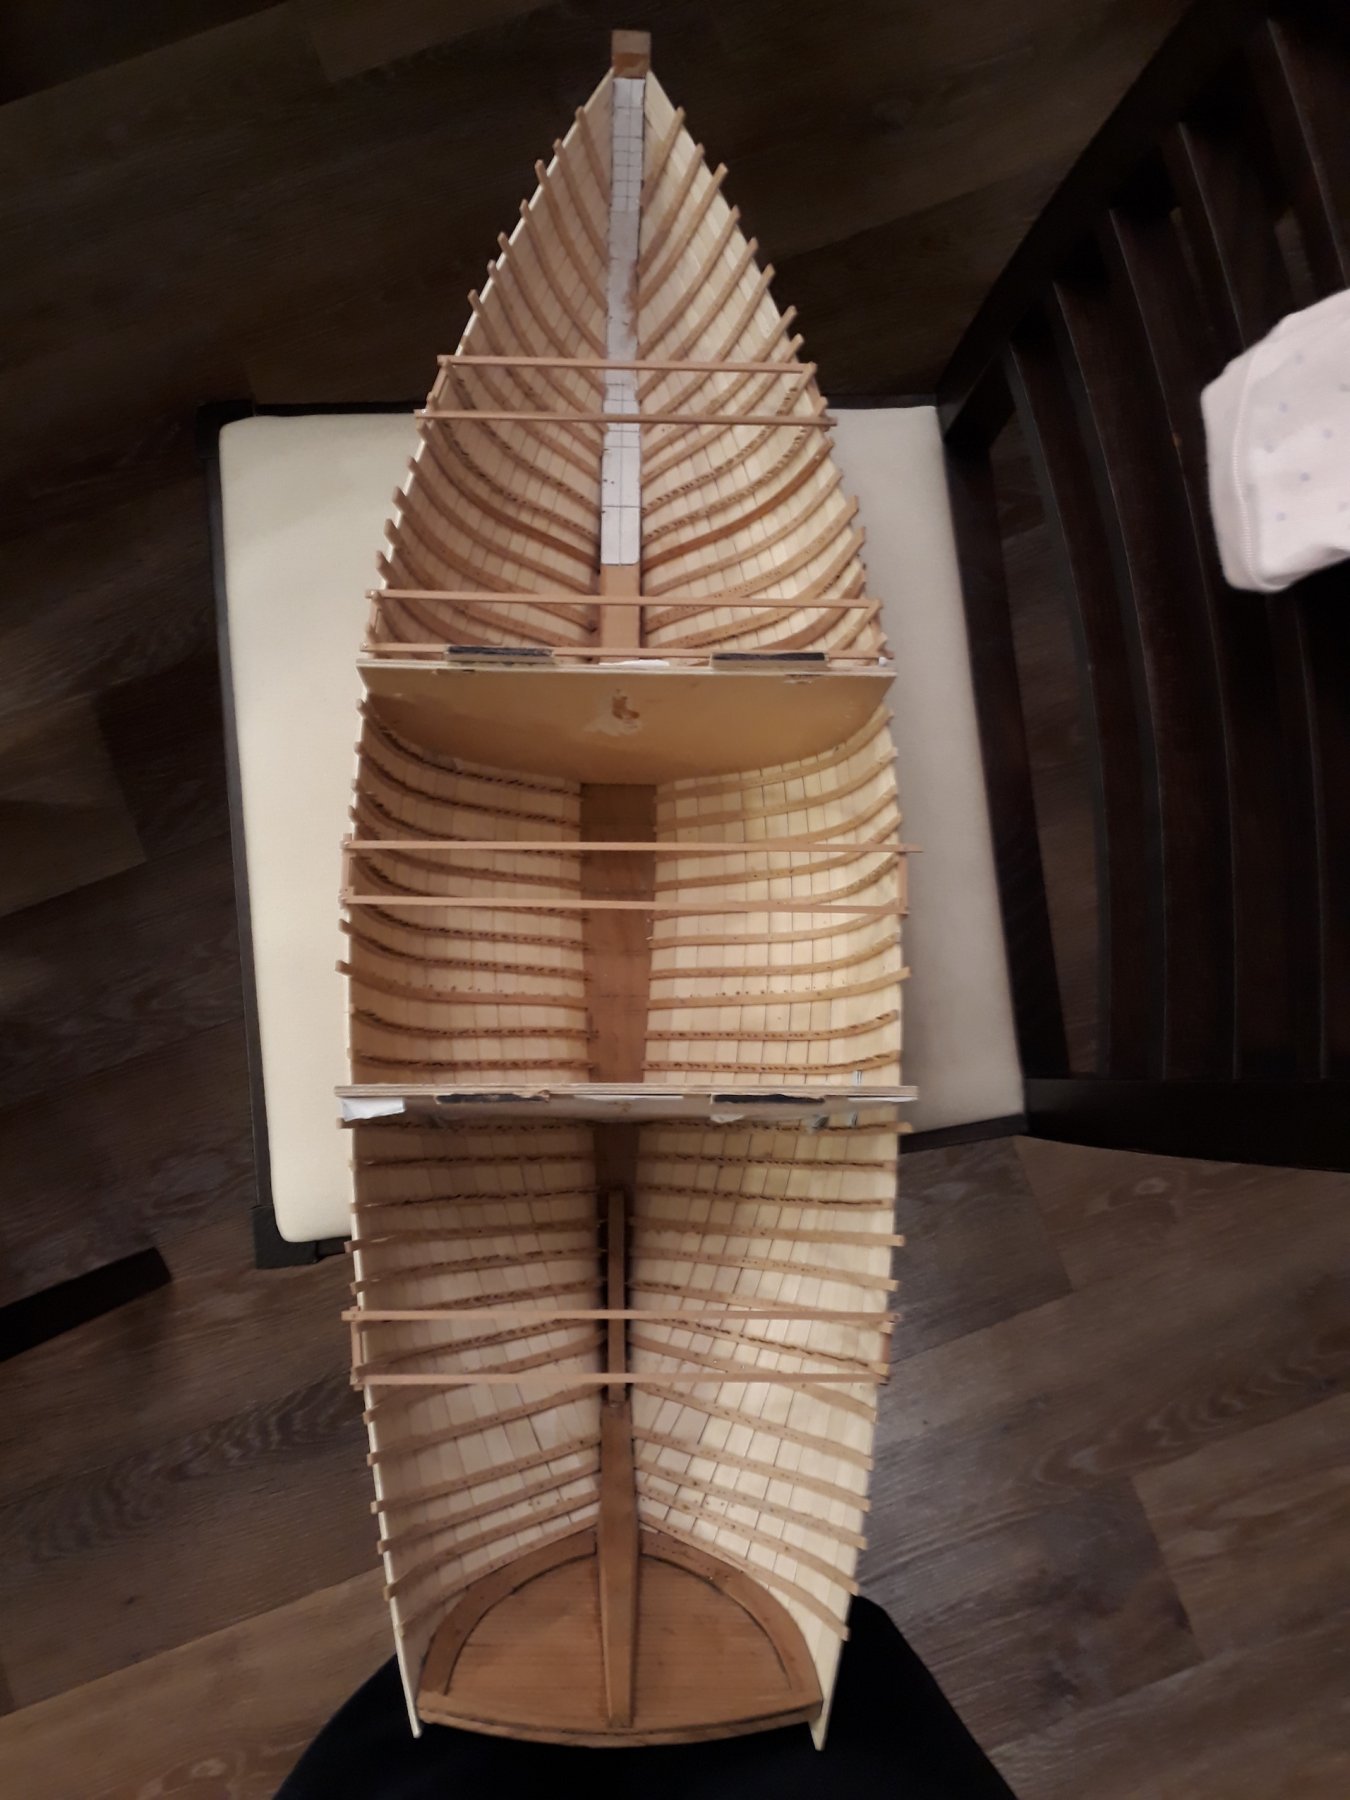
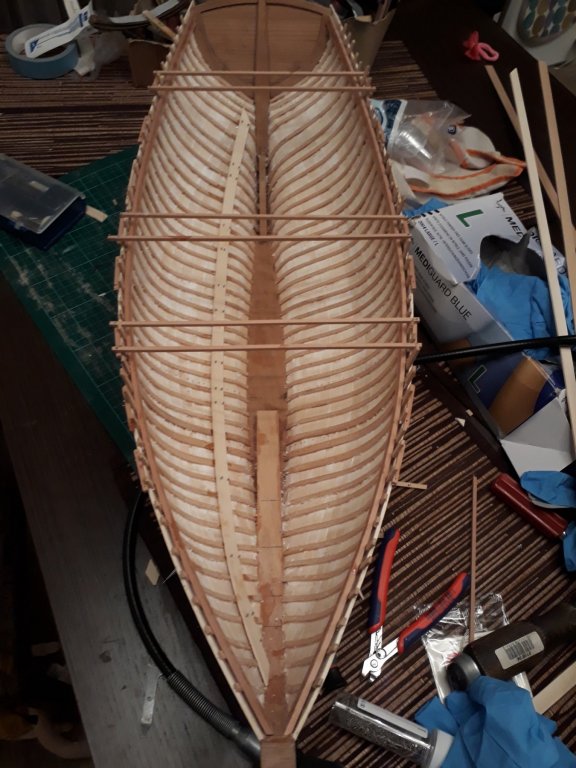
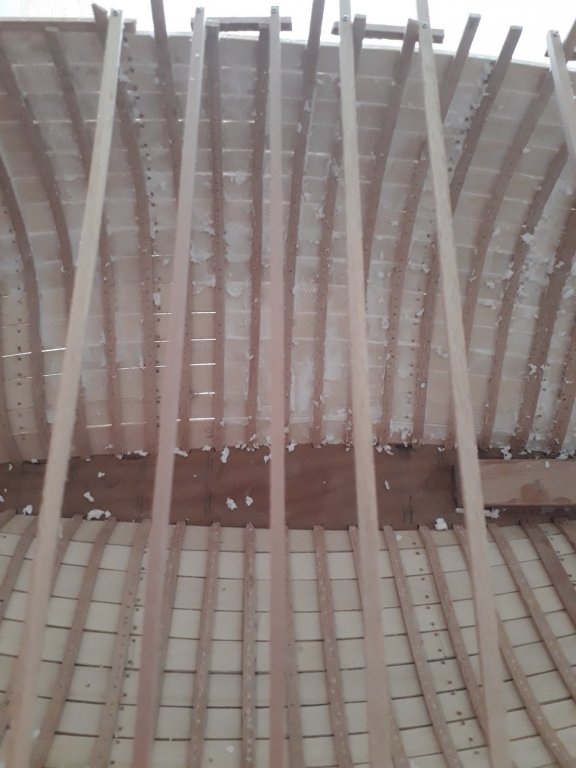
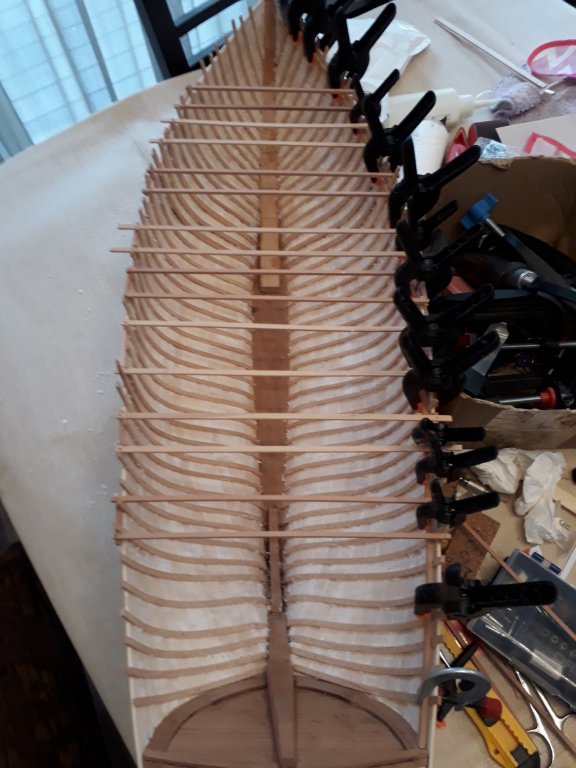
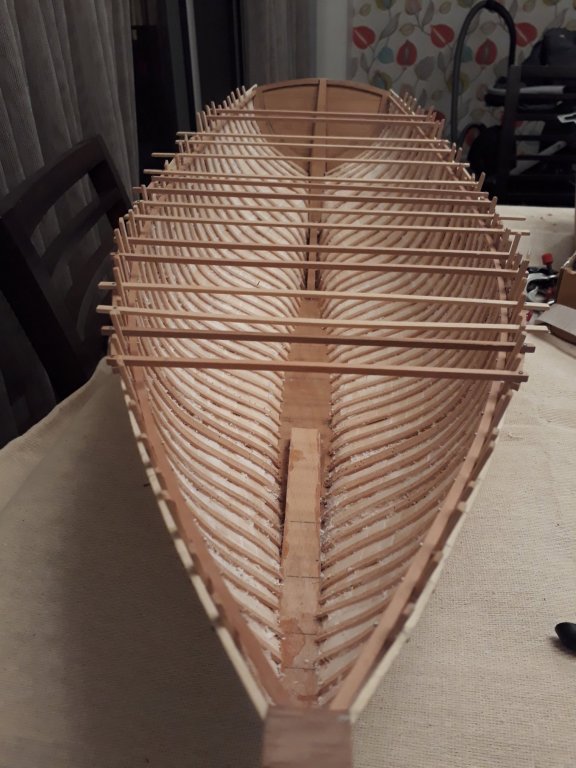
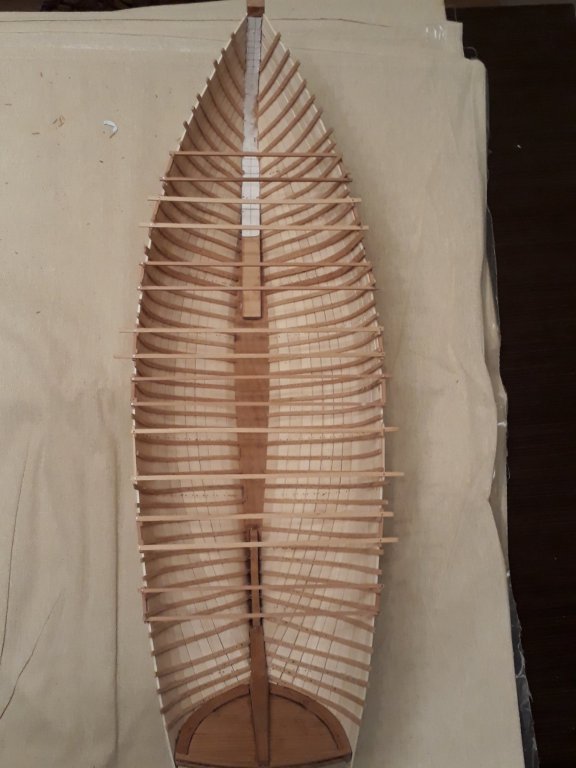
Dear all Work continues slowly with its ups and downs. John many thanks! I continued taking frames out but then a problem developed. The hull started deforming. I have started a separate thread on this. (https://modelshipworld.com/index.php?/topic/17360-hull-deforming-advice-needed/&tab=comments#comment-536582) I have now taken all the temporary frames out and installed all the permanent frames. I have installed more braces to preserve the shape of the hull. Now, this indeed looks impressive, very rewarding photos! I am not sure now how to proceed and I need to think. Many thanks to everyone that have offered their advice on the thread. However, there are two more new problems. One, my gas heater broke down and the replacement I was sent does not work either. With freezing temperatures I can no longer work. Secondly, there are now gaps in between all of the planks!. I think the reason is the change in moisture. When I installed the planks it was summer and humidity was high. Now the boat and wood is constantly in just above freezing temperatures and I think humidity has reduced a lot and the wood has shrunk. Not really sure how to deal with this. I think a lot of filling will be needed but in the next season cycle it will probably fall off. Who said boat building is easy... Hopefully my gas heater will be fixed and if life allows me I may do a bit of work in the next few weeks. Mary christmas and a happy new year to all! Vaddoc


-
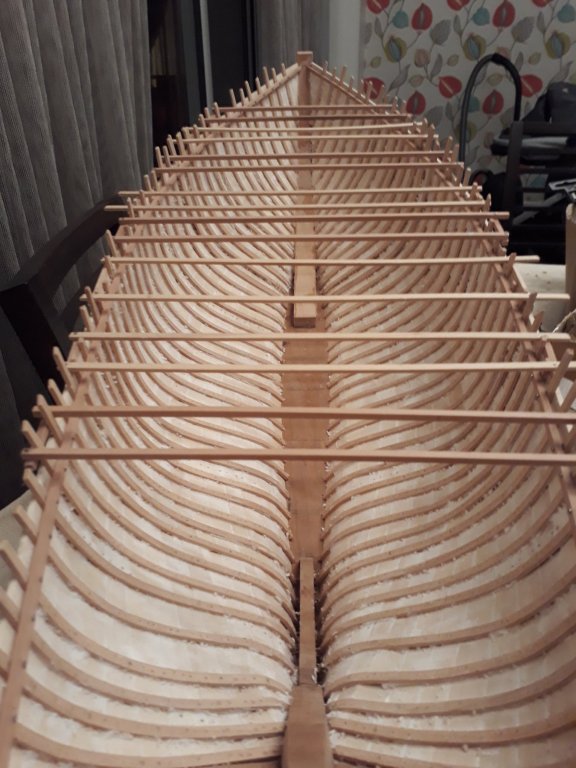
Dear Druxey, Jim, Steven and Bruce Thank you for your suggestions. I have now installed more braces and removed the last two temporary frames. Steven, your boat is very nice. 132 frames though! And I though my 84 were a lot. Still, your boat even without stringers held its shape. My frames are 4 x 2 mm beech and despite they bent nicely after heated through, they are stiff and they seem to push hard against the planks. I am really not sure what I should do. Building a scaffold externally to support the hull seems to be the more comprehensive way but means an awful lot of work. I find that I can squeeze my hand enough to do some work and possibly I will be able to sand the frames and install the stingers and beam selves. I think that I may have overcorrected a couple of areas when installing the new braces as I had to push rather hard to install them. I ll have another look. Certainly though the hull will need to be supported. This was a useful lesson. I think that hulls with steam bend frames are lighter but probably not as strong as hulls with proper solid frames. I ll post updates in this thread when I find theme to do some more work. Regards Vaddoc


- 8 replies
-
- 3
-
-
- deformation
- ribs
- (and 1 more)
-
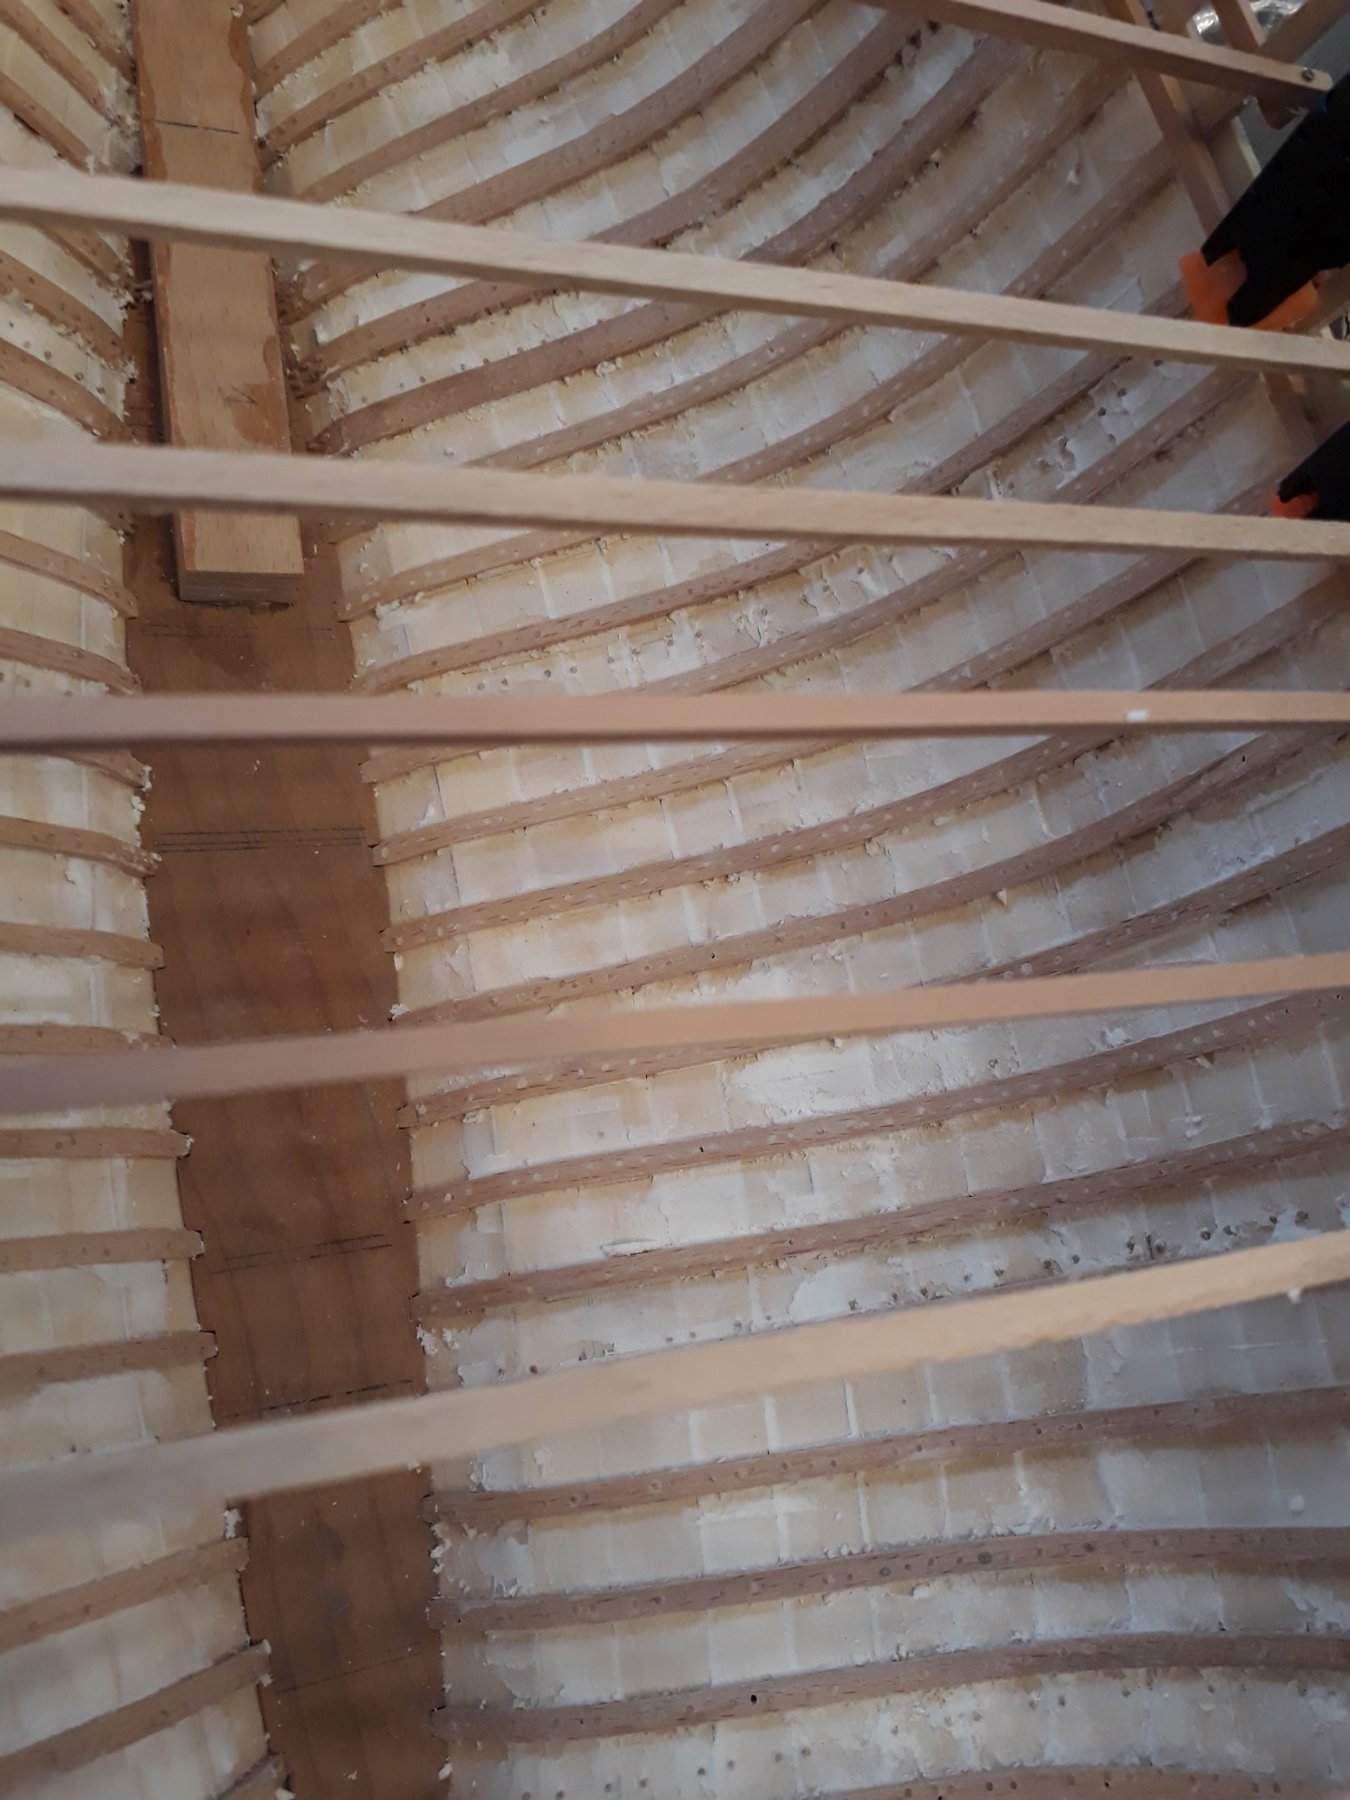
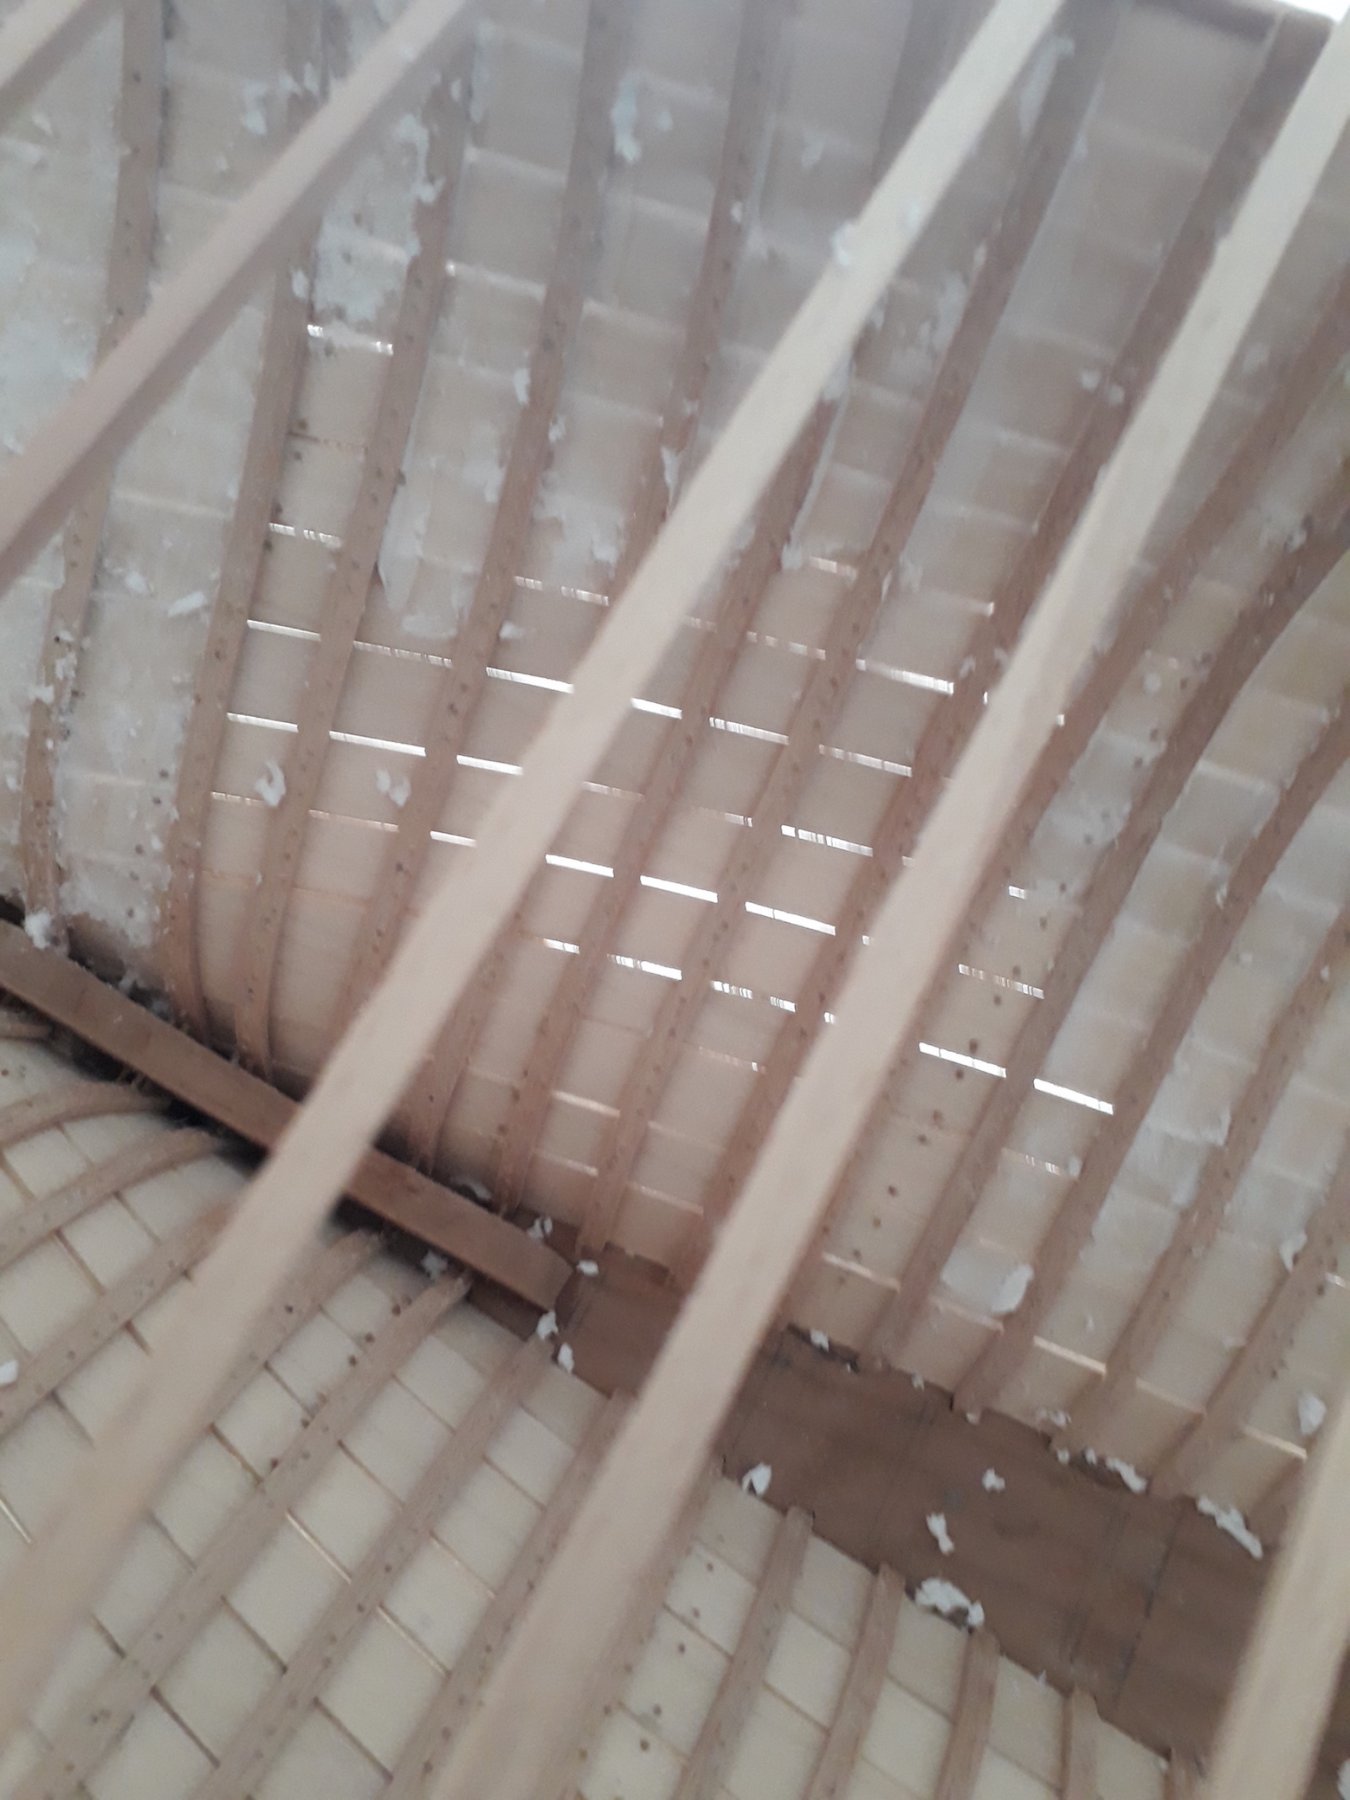
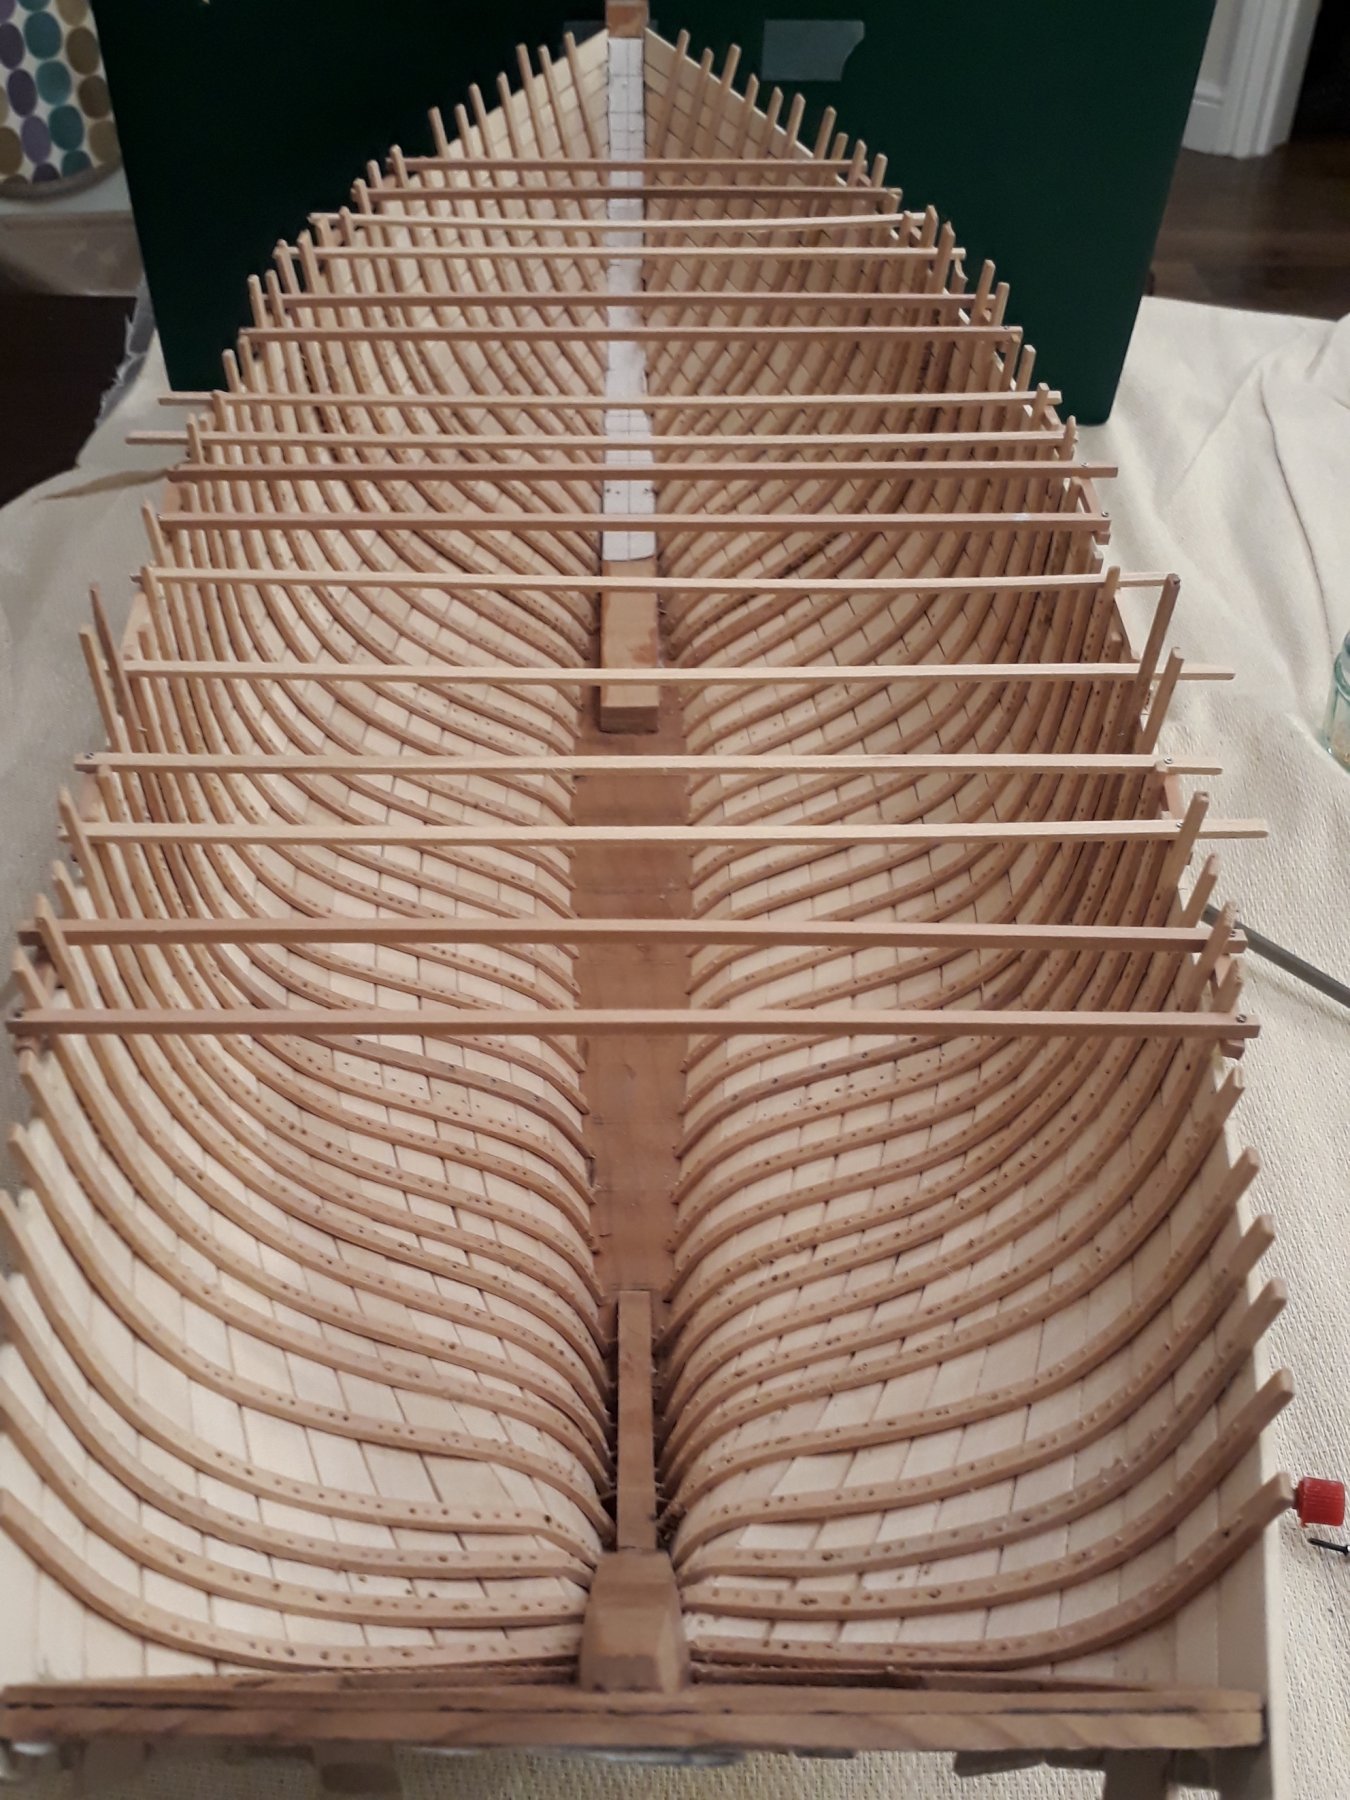
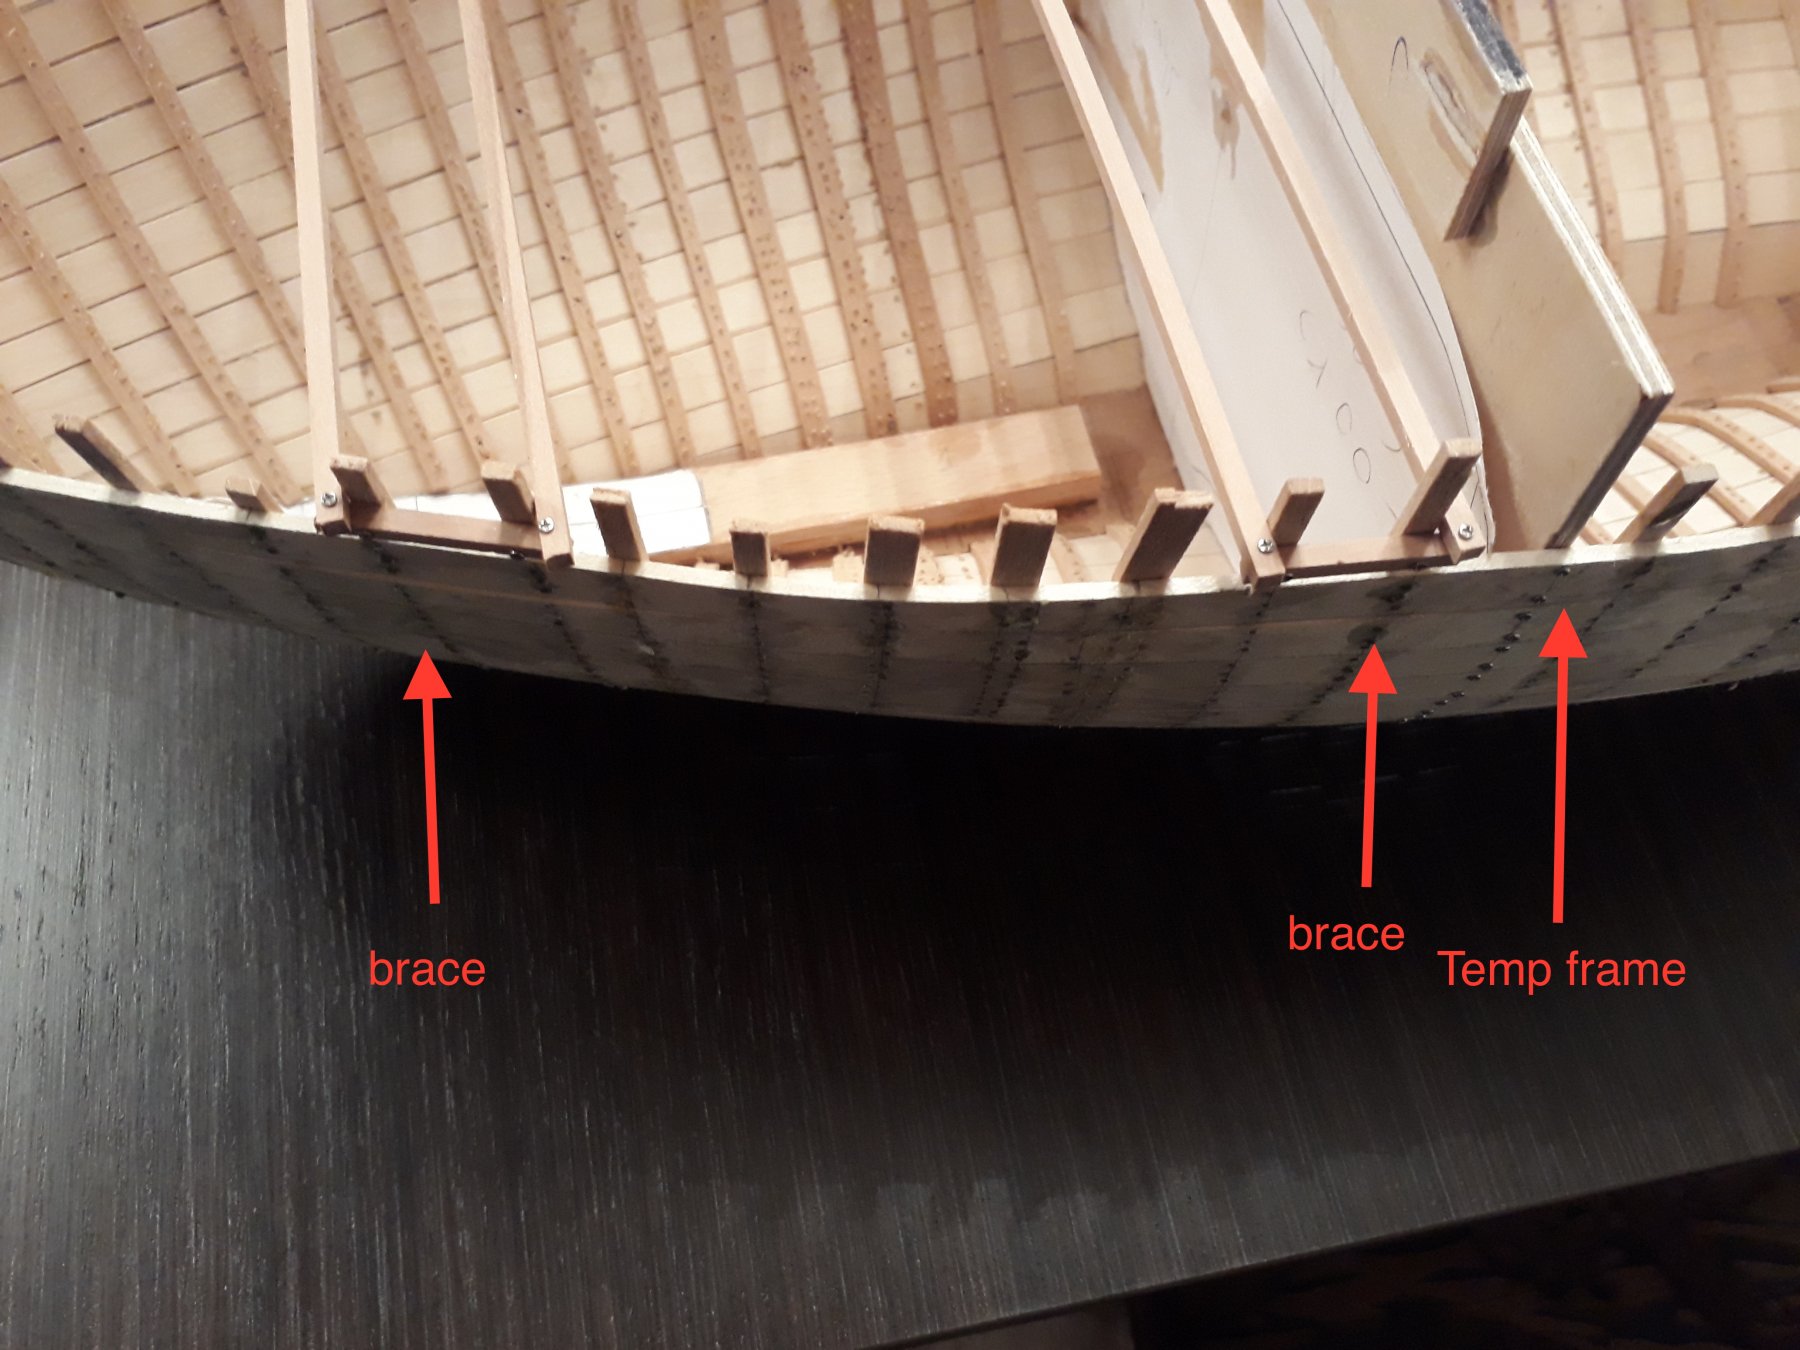
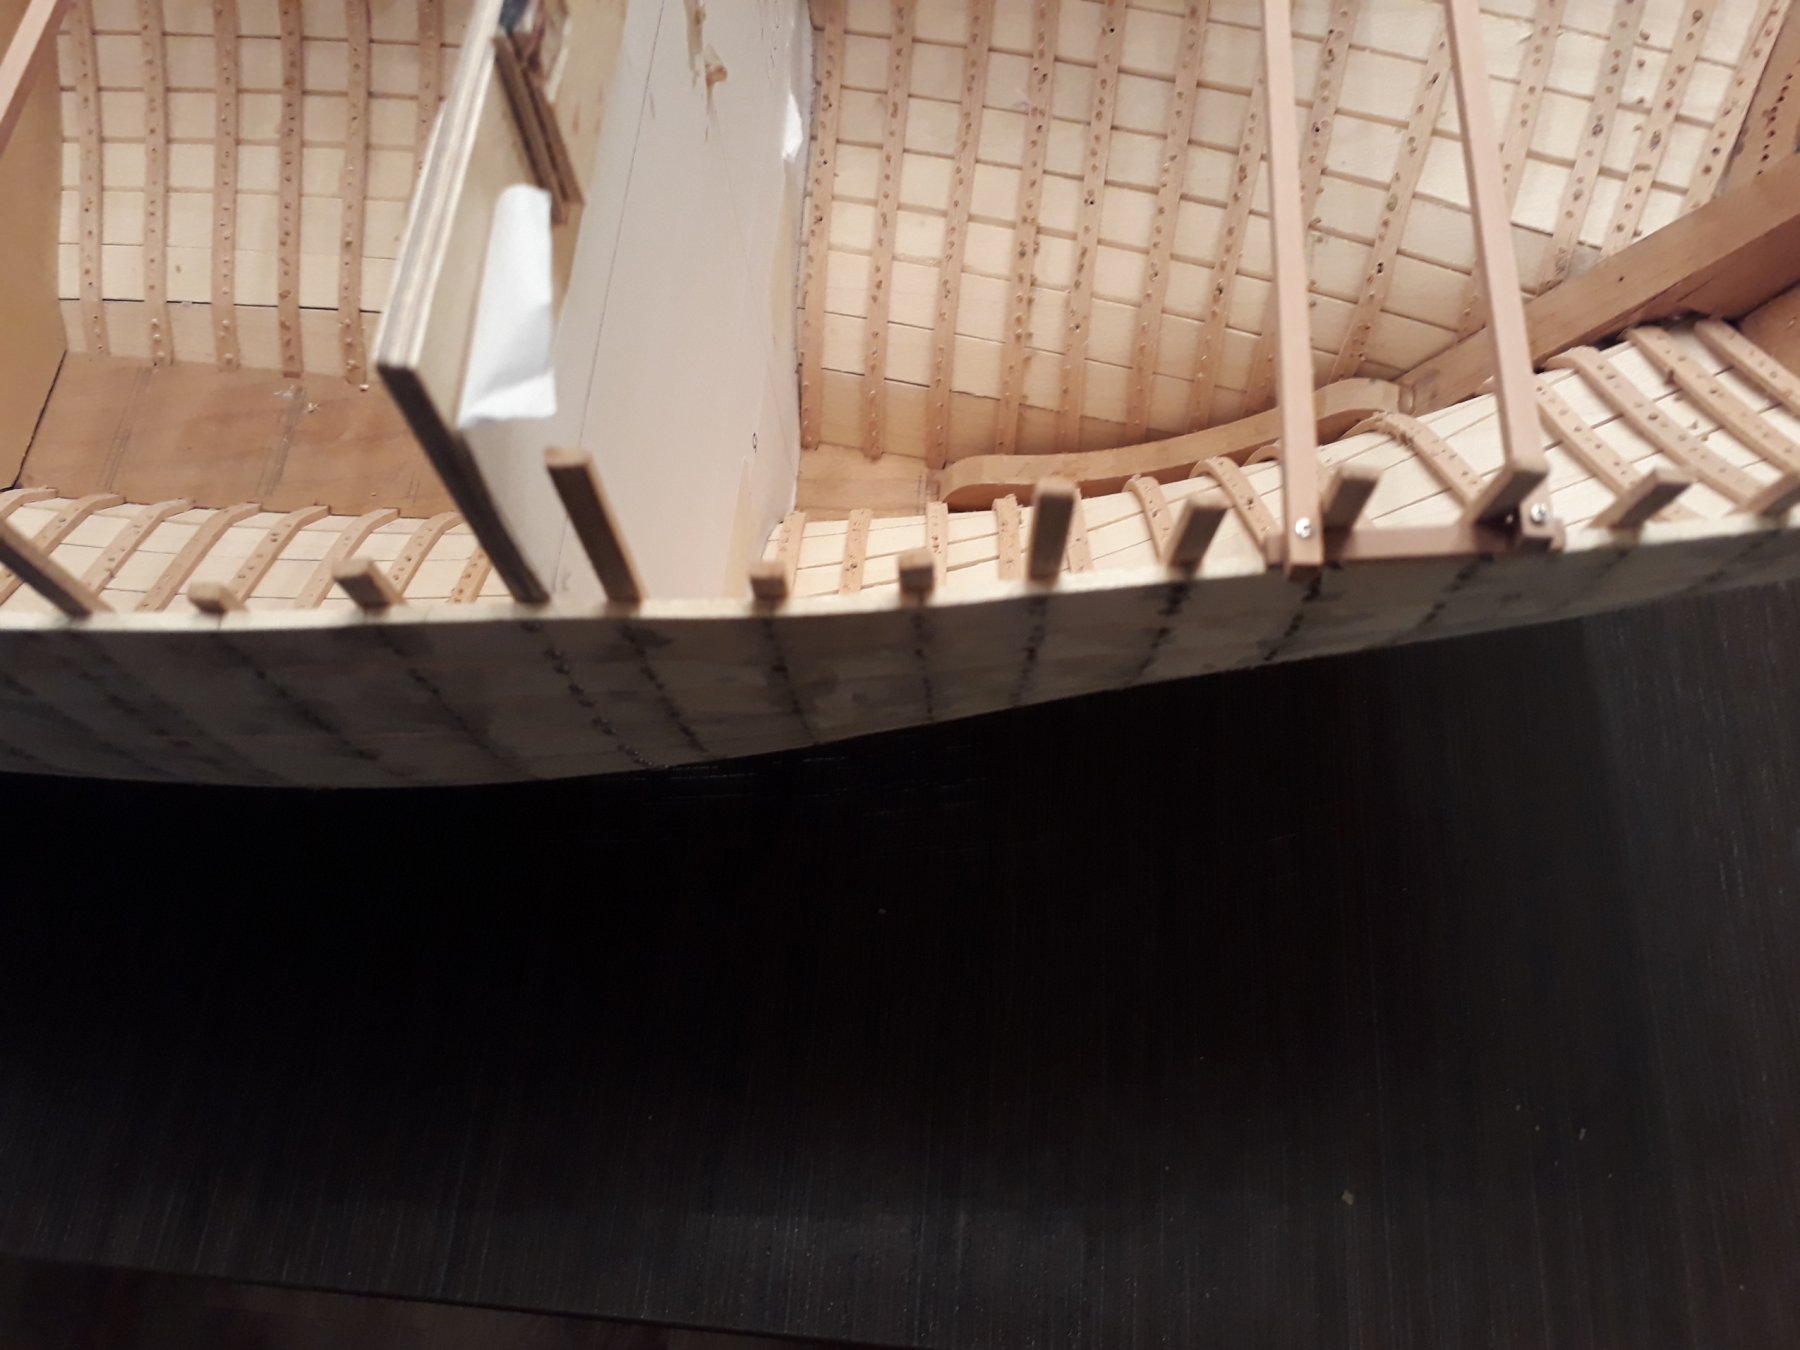
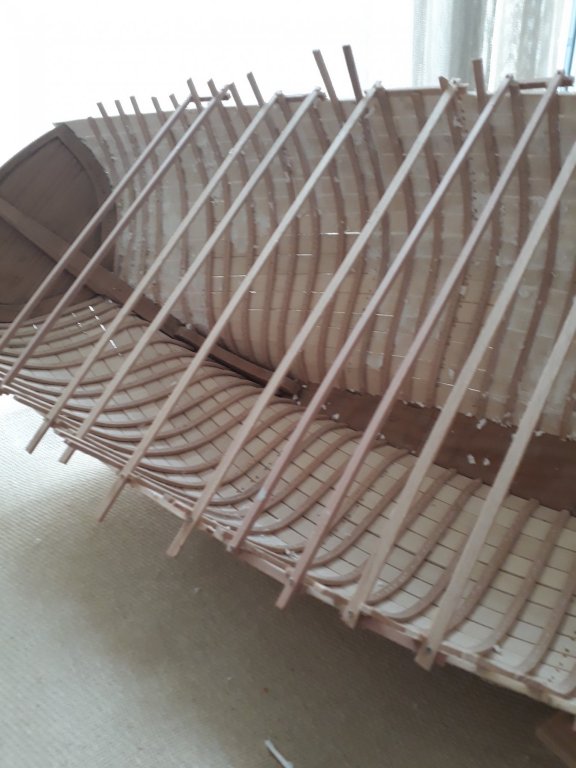
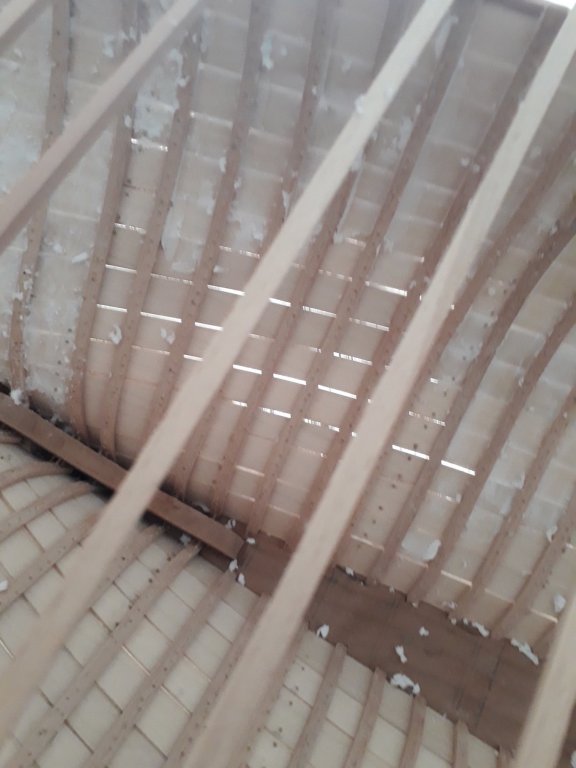
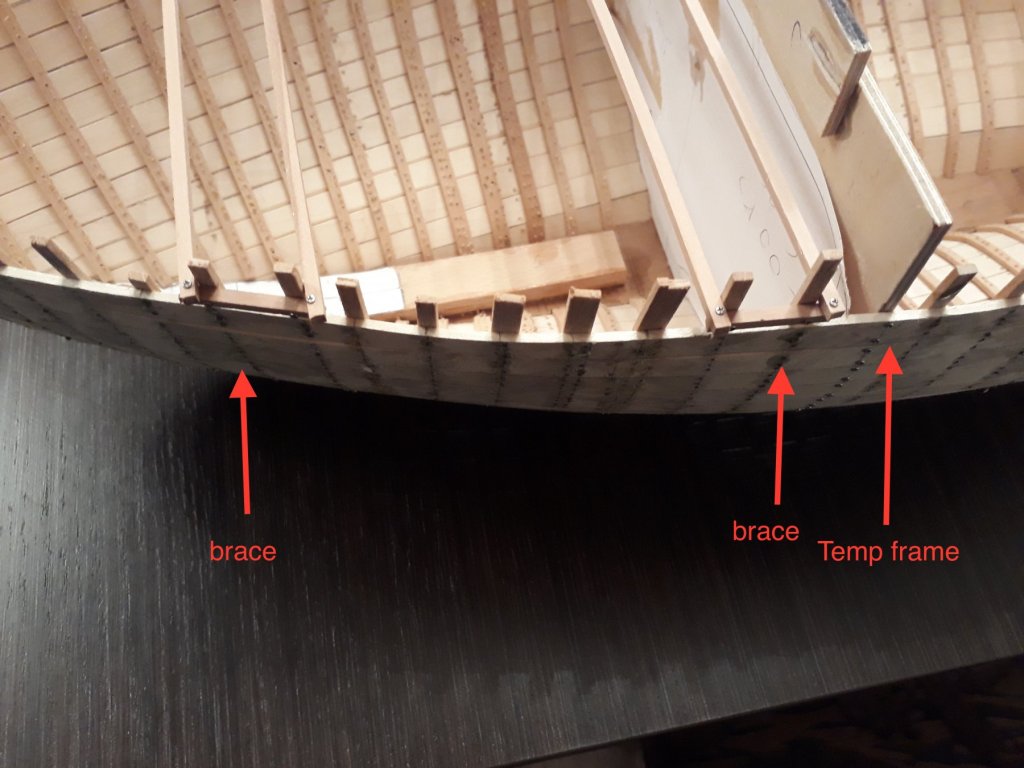
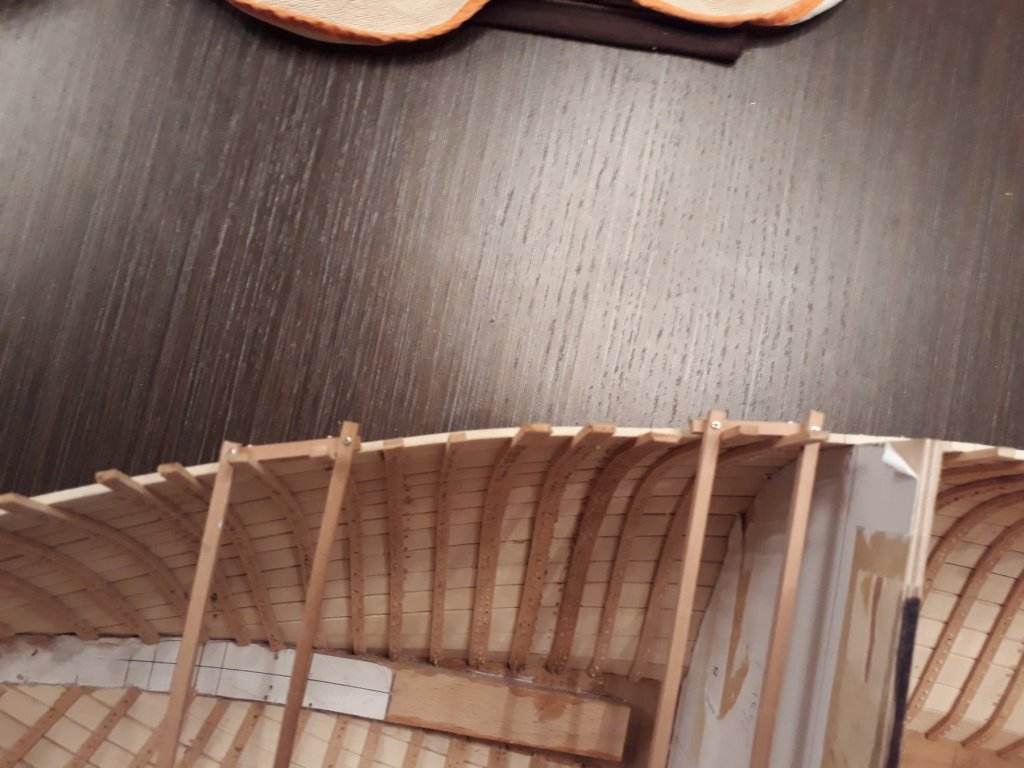
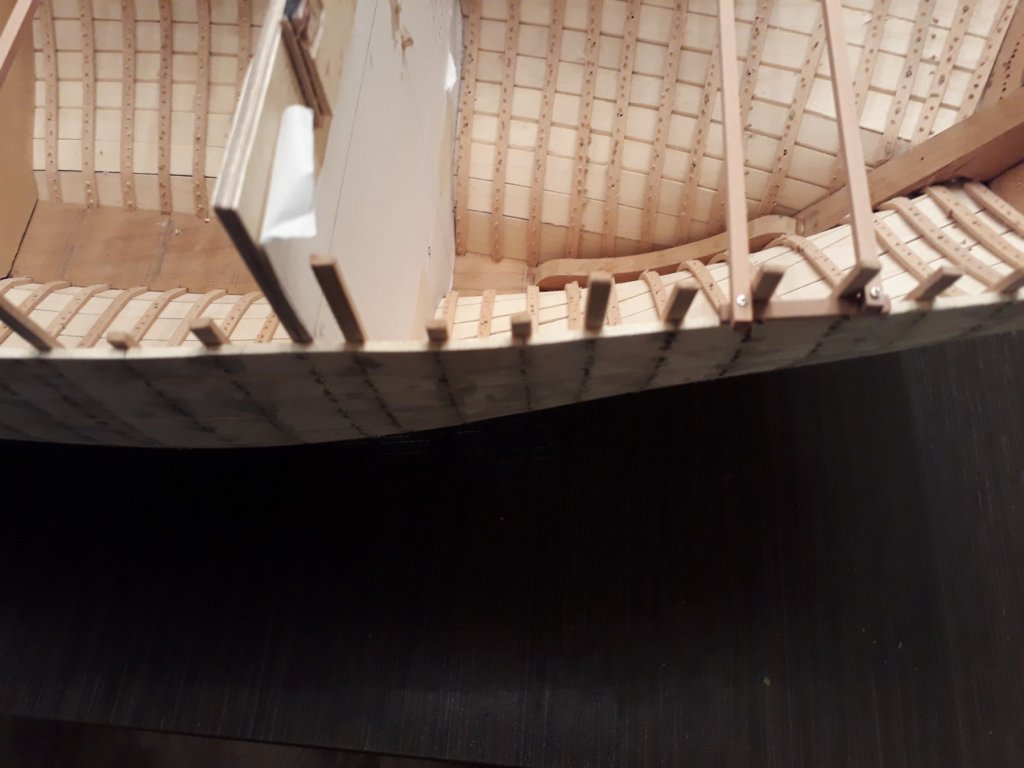
Dear all I would be very grateful for a bit of advice. I am building a boat that has carvel planking with 42 steam bend ribs each side. Initially during building there are some plywood frames that hold the shape until they are replaced by the ribs. I have installed almost all the ribs and only 2 temp frames remain in place. I was advised as a precaution to have some cross-spalls to avoid hull deformity and I installed a few. However, I noticed today that the sheer plank has deformed and is now a bit wavy. The photos show that in the gaps between the cross spalls and frames, the ribs are pushing the sheer plank outwards. The photos exaggerate the deformity due to lence and distance issues but it is there.It took a few days for this deformity to develop. In the plans, the next step would be to install a stringer low in the bilge and a beam self. However, I still need to do some work in the interior (sanding, floors, mast step etc). Also I need to first remove the remaining two frames which will probably lead to more deformity. 1. What will happen if I remove all frames and braces? Will the sheer plank short it self out with minimal overall deformity or will it massively deform? 2. Should I put even more braces and pul the sheer back into shape and then install the stringer and beam self? But then I will loose all access to interior. Still the beam self should add a lot of rigidity to the sheer. 3. I this what happens with all steam bend ribbed hulls? Any advice would be greatly appreciated as these are uncharted waters for me Regards Vaddoc

- 8 replies
-
- 2
-
-
- deformation
- ribs
- (and 1 more)
-
Just a quick update My parents have been with us for a month so lately I was able to work on the boat. They are now leaving so back to my usual snail pace! I ve taken all but two of the frames off and only 4 ribs are left to be installed. It looks alright! Bags of work left...