DONATION DRIVE - SUPPORT MSW - DO YOUR PART TO KEEP THIS GREAT FORUM GOING!
×

catopower
-
Posts
1,898 -
Joined
-
Last visited
Content Type
Profiles
Forums
Gallery
Events
Everything posted by catopower
-
 Chris, I'm counting on your excellent V108 tutorial to lift me up to the challenge of the USS Bagley kit! 😁 Jan, thanks for pointing that out. As you can see, I haven't even dealt with that girder edge. I will probably do as you suggested and simply cut and glue.
- 106 replies
-
- 1
-

-
- digital navy
- v108
- (and 3 more)
-
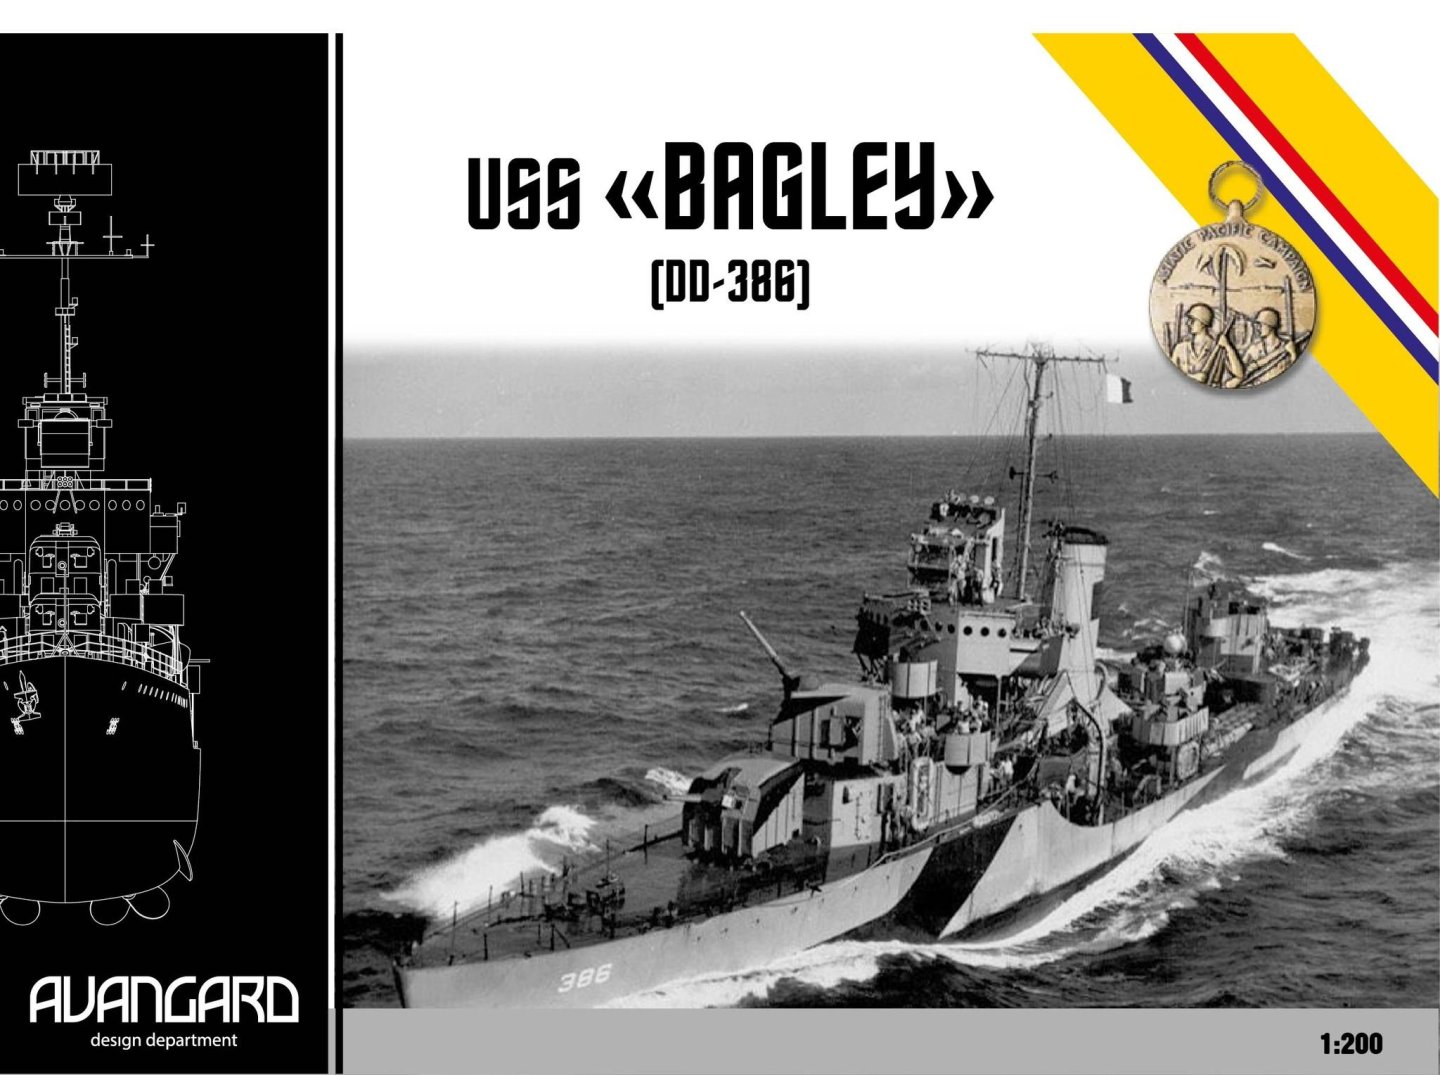
Chris, thanks for the info. As my first steel navy paper ship model kit nears completion, I'm thinking about the next one. I'm using paint to color the white paper edges now. While that works fine for paper models I'm painting, for the steel navy ships, I expect that markers will be a cleaner way to go. Thinking about this because my USS Bagley from Avangard in the Ukraine made it through the "customs blockade". I was surprised that I actually received the kit, especially after my order with Seahorse got cancelled last week. But, this looks to be a one-off solution. I'll post about the Avangard kit separately, later. But, it will be a major step up in challenge, by the looks of it.
- 106 replies
-
- 2
-
-
- digital navy
- v108
- (and 3 more)
-
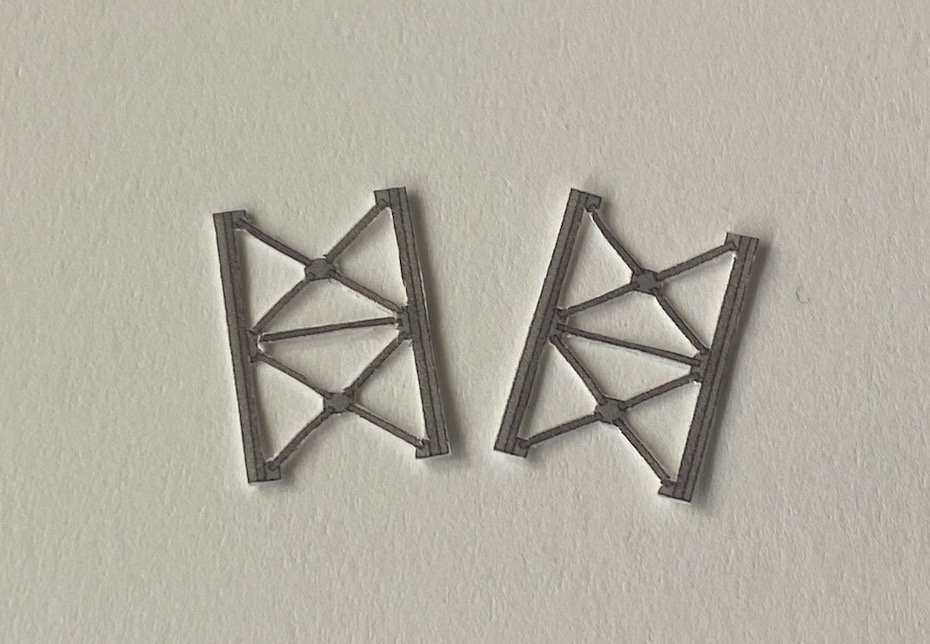
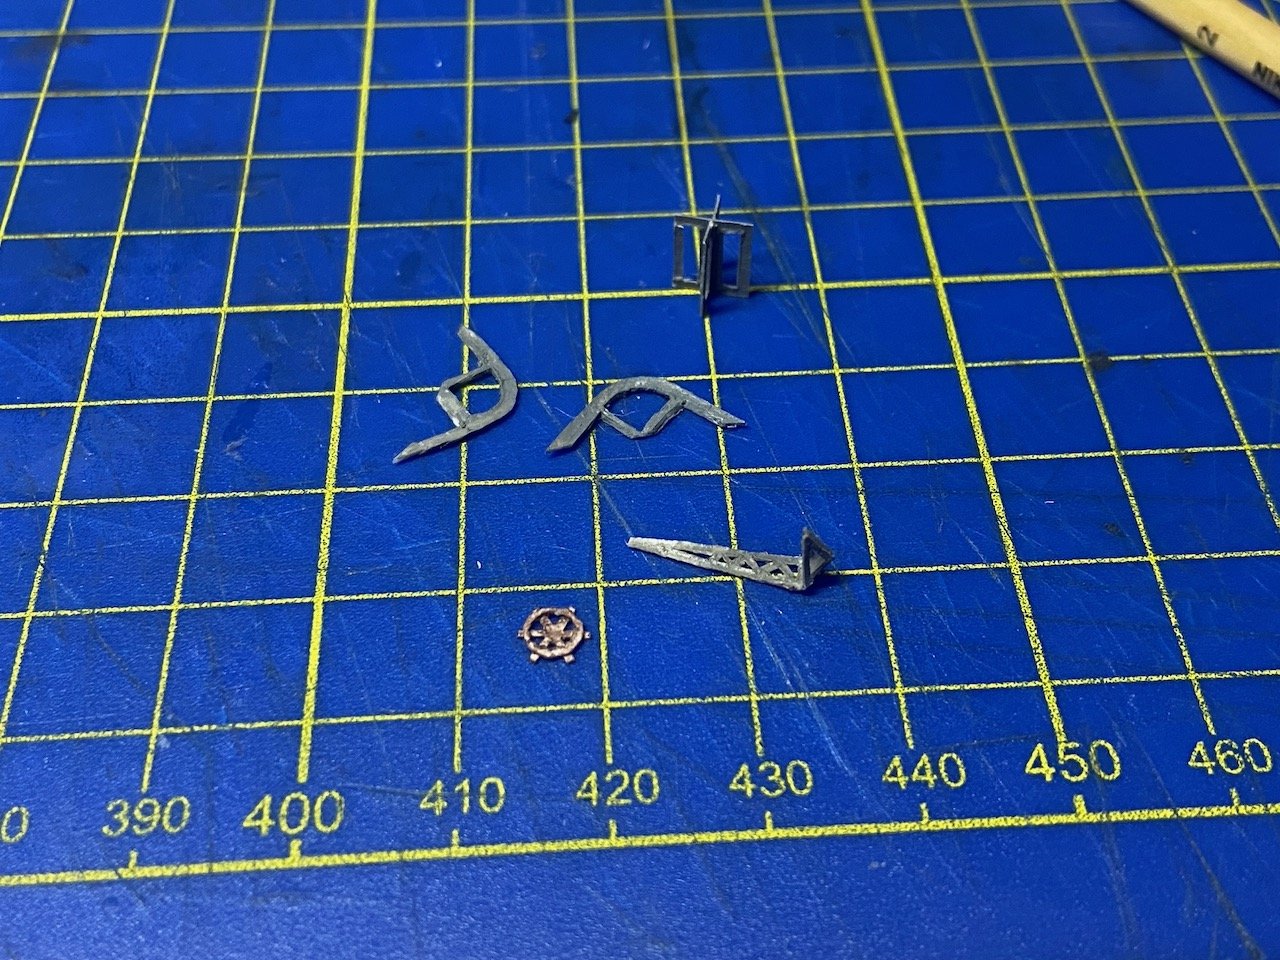
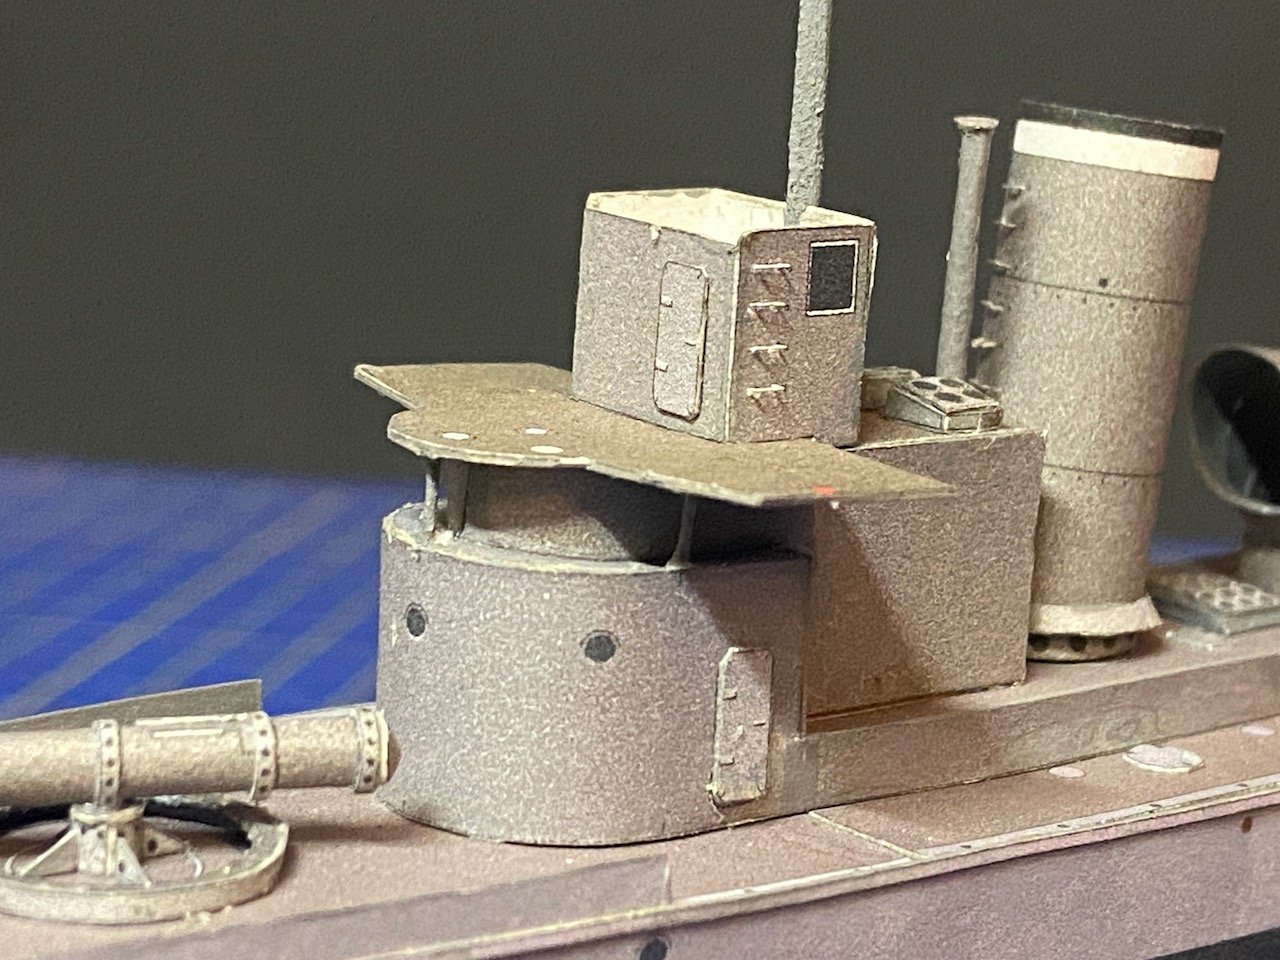
Progress is very slow this last week. Only small windows of time available. However, I made use of a window of opportunity last night and overcame what I've found to be the hardest task yet... Thinking I may just reinforce these with some wire on the back sides, particularly some of those thin trusses. Still have to clean up the white edges. Chris, what markers did you say you use? I should try them out. Oh, and one more photo. Decided to finish up that stern reel. The handles are a bit large, but I had a hard time bending them at all without destroying the whole assembly. So, this is how it will be... I think.
- 106 replies
-
- 6
-
-
- digital navy
- v108
- (and 3 more)
-
The kit looks like something that many people will love to see. I look forward to seeing some builds of this and the other recent kit releases. Also, I feel it necessary to apologize for some of the comments on our forum that are rude and disrespectful to one of the valued sponsors of this forum. It aggravates me that some members here make such careless comments. Why would they feel the need to do this? I saw comments last night that I was considering responding to today, but I see they are now gone. Just as well. Anyway, thanks for being a sponsor of MSW and please keep up the great work. I think your work makes ship modeling more accessible to more people. I personally prefer to use printed plans and hate watching construction videos, as I find them boring. But, these days, more and more people are accustomed to learning from instruction videos. Also, these video presentations show how beautiful a ship model can be, and create some nice anticipation for potential modelers. Love the availability of figures for the kits!
- 104 replies
-
- 11
-
-

-
If you're looking for a particular Shipyard kit that's out of stock at Ages of Sail, be sure to ask about it. Sometimes knowing there is demand is a motivator to gets things done, like reordering stock!
-
Hi grsjax, On the surface, the instructions look really nice, photos are clear, and are nicely labeled and all. I have their Navio Rayo "battle station" kit and their Frigate l'Hermione kit. I've heard from people who started the Navio Rayo kit and gave up on it. I haven't looked closely enough at those instructions yet. However, the Hermione instructions for constructing the transom are extremely vague, and the parts they provide don't fit as shown. There are no plans sheets and no instruction videos. I also found that a template they provide for marking the gun ports is far too large for the hull and would result in the construction of a hull that hangs way too far beyond the rudder. The template also results in an incorrect gun port arrangement. The kit instructions show both a model being build with the correct gun port arrangement as well as photos of a model with incorrect gun port layout. Now, overall, I'm happy with the model kit because I think I can build it into a really nice, relatively large scale model, and the bulkheads seem to be okay. But, it took me weeks to try to figure out how to make the stern look correct. I added parts and removed them twice. On the third attempt, I chose to ignore the instructions and got past the hold up. Don't know about the Marieville. Instructions may be fine, but just be very careful as you step forward through the build. Check and recheck that everything makes sense!
-
Chapman, I'm doing something similar and noticed the same thing you did. My own plan is to adapt the kit as best I can, short of redesigning the kit hull.
- 12 replies
-
- 1
-
-
- Le Coureur
- Shipyard
- (and 1 more)
-
Anyone out there working on a card model?
catopower replied to gagliano1770's topic in Card and Paper Models
Michael, that Carrack looks beautiful! Do you have a build log for it? I'm going to have to go check now... -
Anyone out there working on a card model?
catopower replied to gagliano1770's topic in Card and Paper Models
Thought I'd do a card model update here. While I shelved the Schwarzer Rabe build years ago, I finished an "admiralty style" HMS Wolf from Shipyard's 1/72-scale laser-cut kit early this Summer. Late in the Summer, I got the itch to restart my V108 build and I'm working to try to get it completed. It's my first ever "steel navy" paper model. Build log is here. Being happy with this build led me to take my Armed Virginia Sloop off the shelf and I've been tinkering with it again. It doesn't look very different from the last photos I posted... how many years ago? It's 1/100 scale, and while I've built other models of similar scale, I guess never one that carried guns as small as these. Maybe they're 3pdrs? Because, I'm having trouble rigging breech ropes around the cascabels. The smallest diameter rope is too fat! Trying to figure out something now. In the meantime, I still have the card model bug it seems. The V108, and watching the film Greyhound a few times, got me interested in building a WWII destroyer. I spotted some kits from an interesting looking Ukrainian brand called Avangard, but it took me a while to find a shop that would sell it to me. Finally have their USS Bagley kit and accessories on its way here. Hope I actually receive it! Also, since I was shopping anyway(!), I spotted the newest kit from Seahorse, having recently seen its photo posted on papermodelers.com. Yes, I know I've gone card model crazy, but this was too awesome looking to pass up. I'll post more about that when the kit arrives.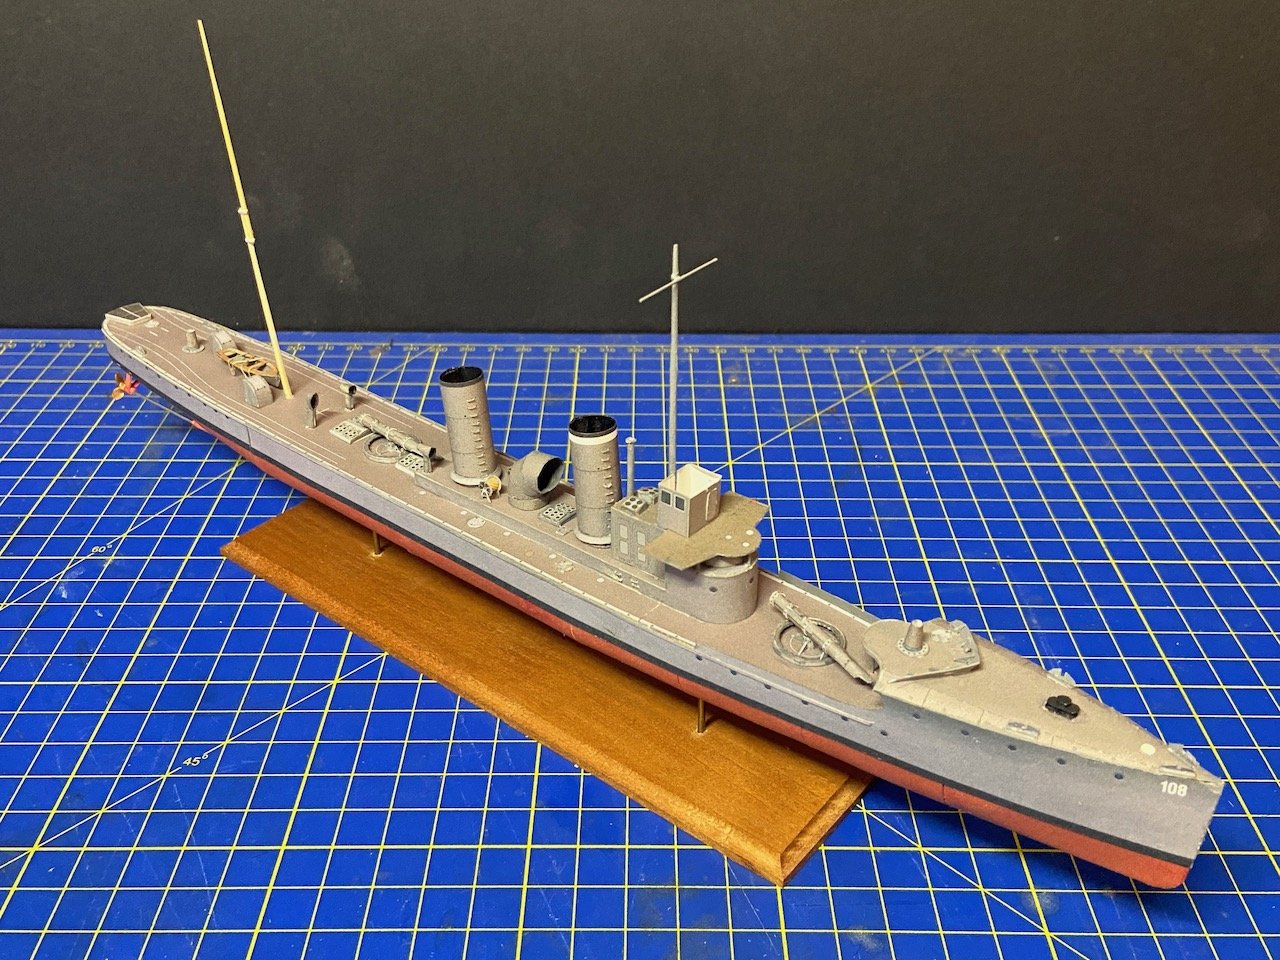
-
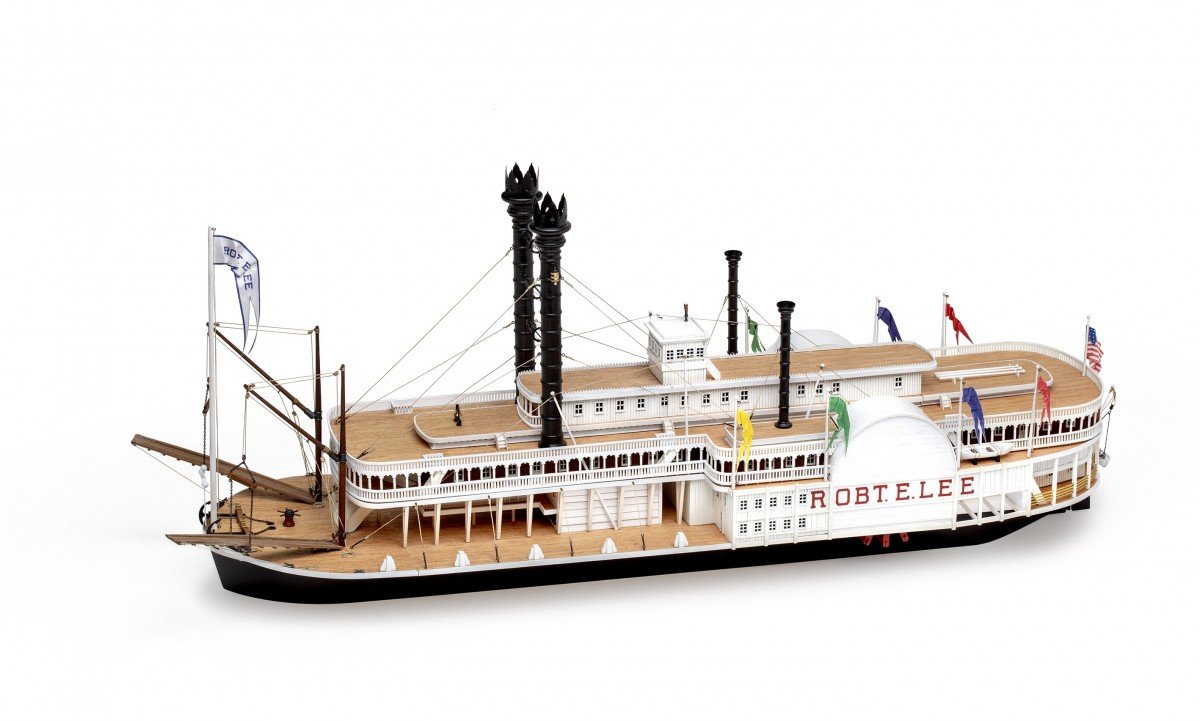
Hello elguzanoq, Good luck with your build! When you get done, if you're still considering another paddlewheel boat, you might also consider Amati's recently revised kit of the Robert E. Lee. It was just revised and. upgraded by Amati last year, and is a well known subject. Just a thought. Ages of Sail carries it (MSW supporter), as does WoodenModelShipKit, and others.
-
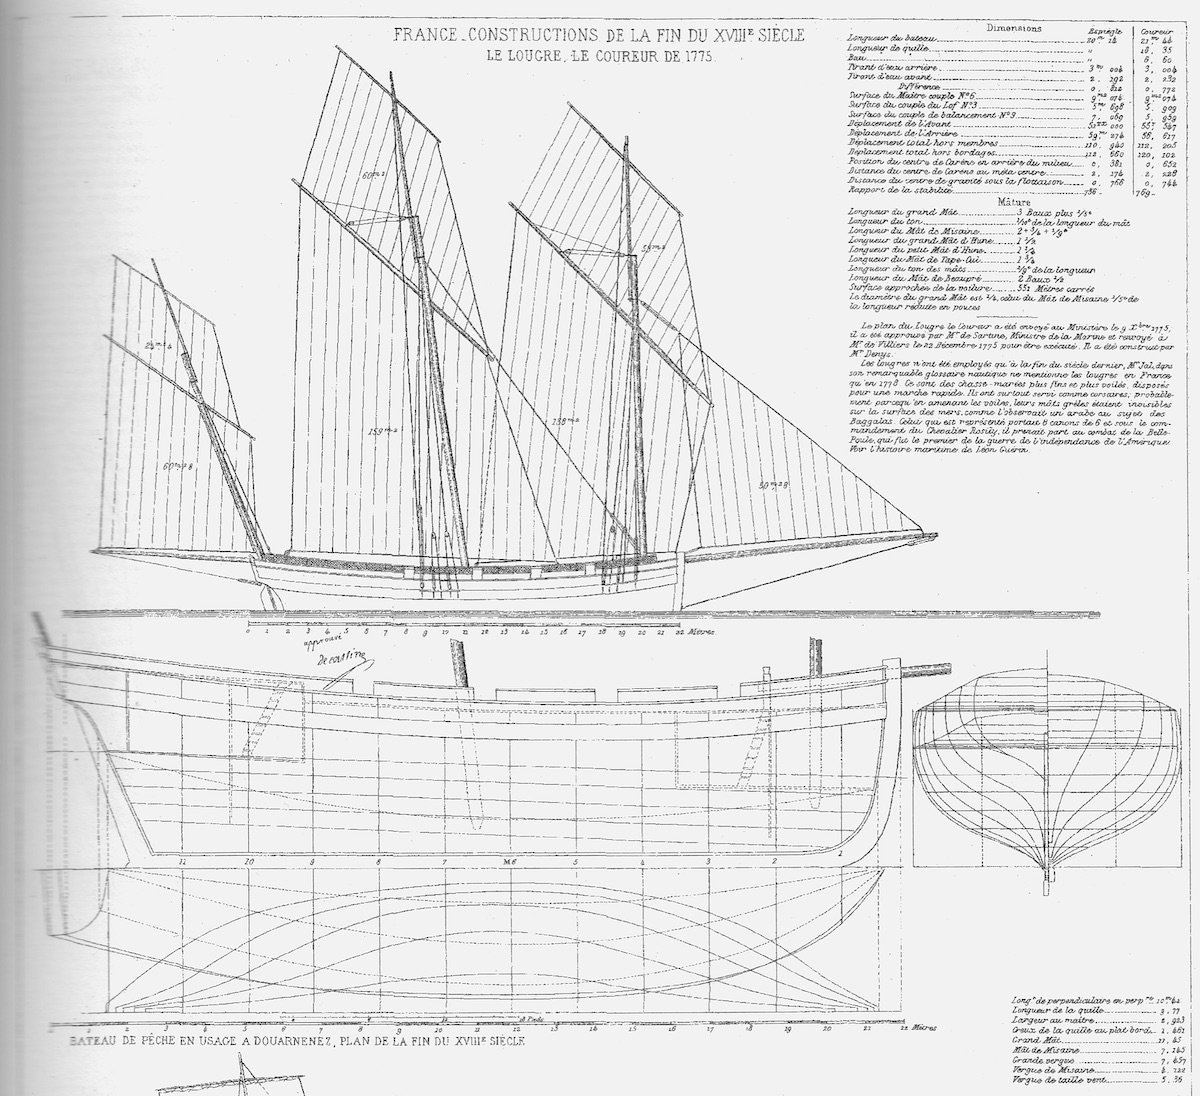
Only Shipyard can answer this, but the Paris drawings were pretty commonly available since the late 1800s. If you examine other older kits of Le Coureur, like Mamoli's and others, they all tend to be based on Paris, even down to the point of being seemingly based on the related AAMM model plans. Shipyard seems to have simply followed suit. But, I'm glad you mentioned those drawings. My own interest is to take the Shpyard kit and make the modifications to make it closer to these, using the Boudriot/Berti monograph. It should make for an interesting project.

- 12 replies
-
- 3
-
-
- Le Coureur
- Shipyard
- (and 1 more)
-
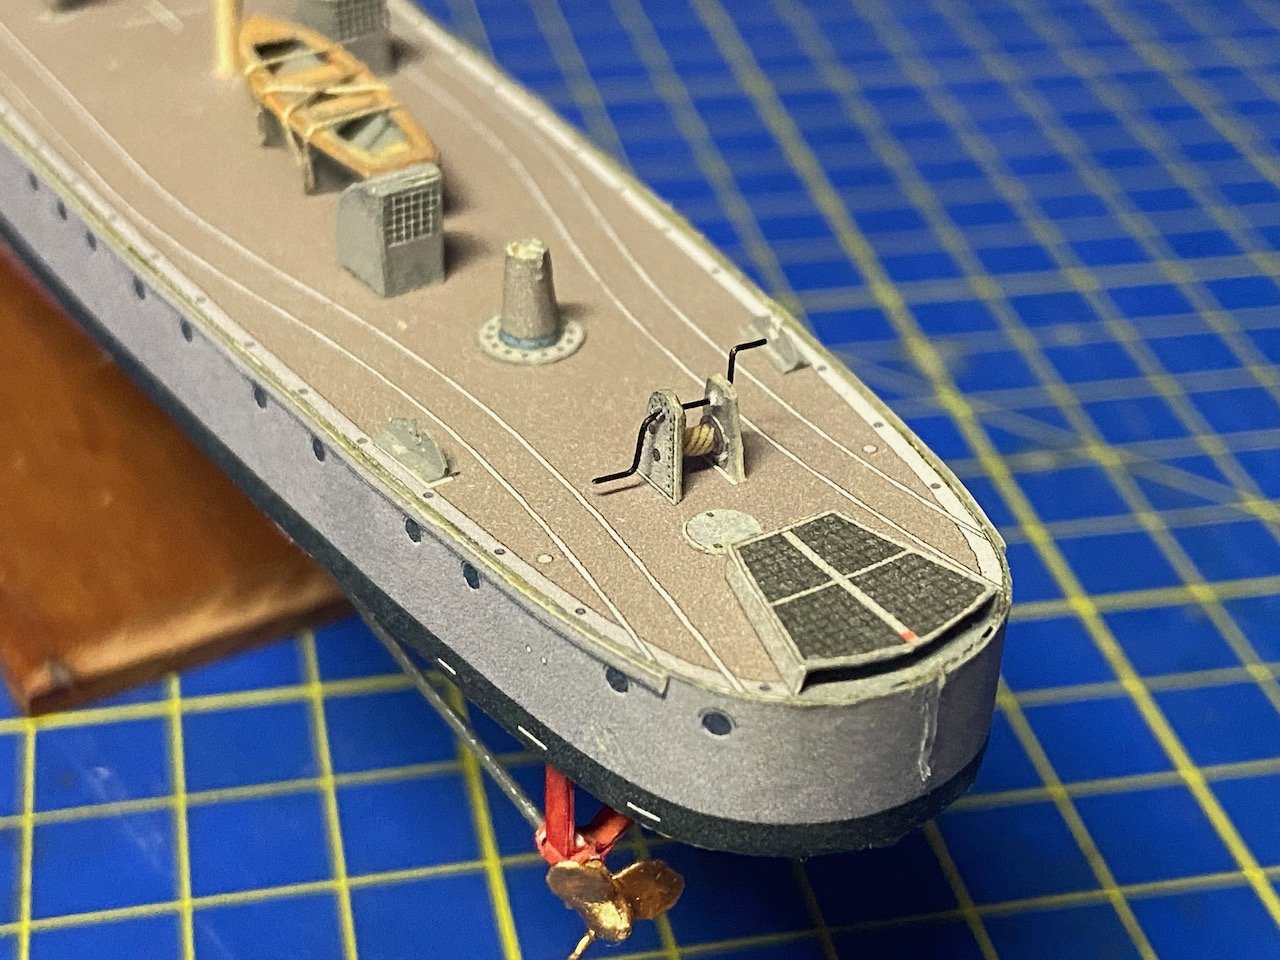
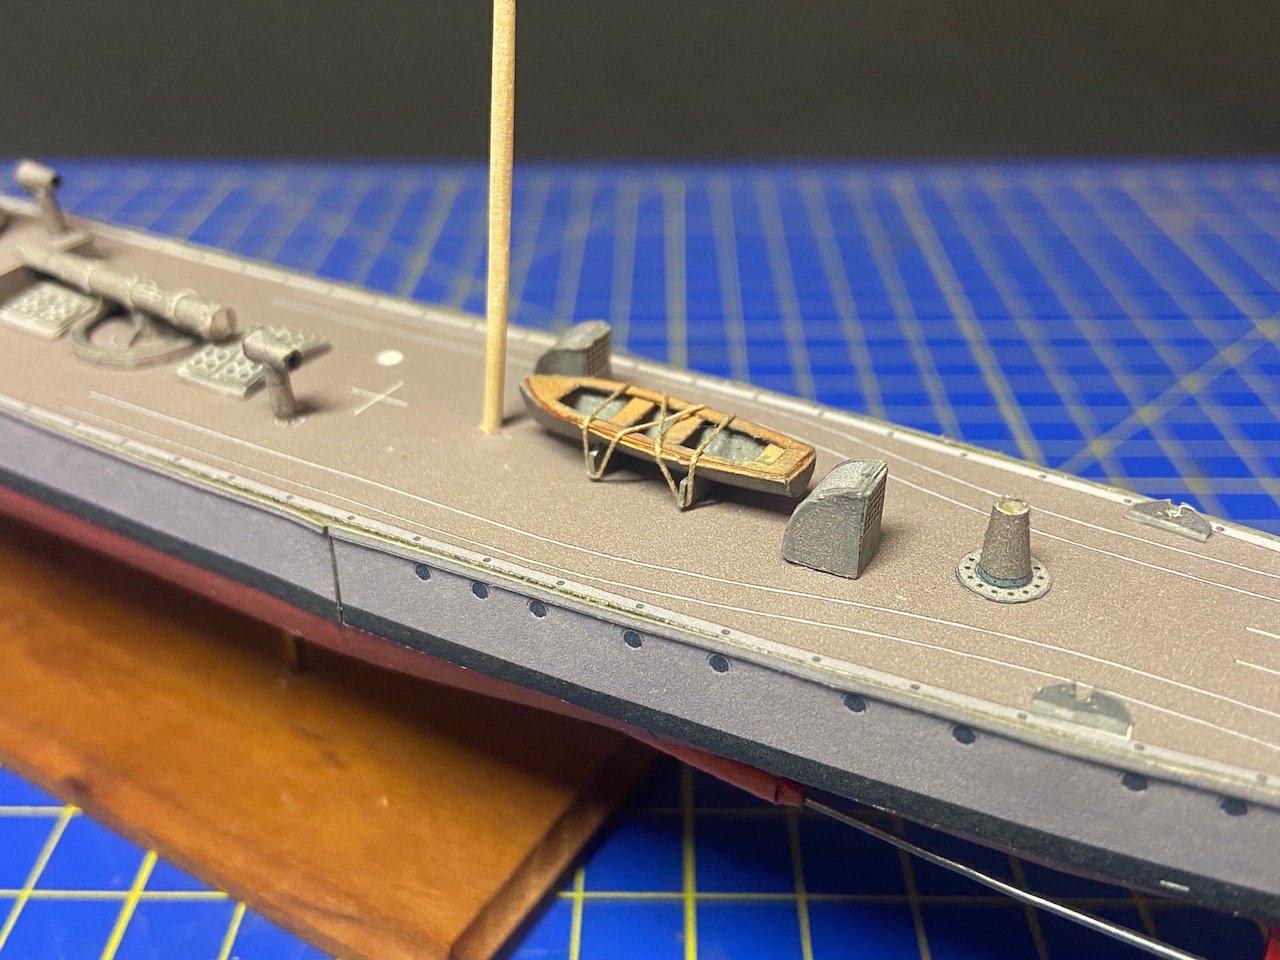
No admiral here to worry about, but I will probably try one more time, cutting the bridge wing supports, and if that doesn't work, I'll try the grilled ziplock bag sandwich method. But, for now, I decided that I'd deal with the issue of the bridge wing supports by NOT dealing with them for now. Taking a break from it, while I get a few other things done that need to be done anyway. Finished making the remaining ventilators, and adding the launch. Seems odd that the kit didn't include a cradle for the boat. I fashioned something simple out of card scraps. I attached them to the boat and cut small notches in each of their corners. Then, I could use the smallest rigging line I have to tie the boat down. My only concern with the ropes on the launch is that it's going to look really heavy compared to the rest of the 'rigging' on the model. But, this is the only rope on the ship, the others are going to represent wire guys and radio antenna wires, so maybe the thick rope on the launch is okay. Next, I didn't cut those bridge wing supports, but I did manage to cut these parts that required a lot of careful little tiny chops, like what Chris was describing as the Woodpecker technique. I had to use thin CA on the parts first, though. Also, I didn't laminate any of these parts. These all went pretty much without a hitch. I was amazed at how well the crane structure turned out.

- 106 replies
-
- 7
-
-

-
- digital navy
- v108
- (and 3 more)
-
Jeff, I'd say these laser-cut kits are easier than the regular paper models, since the scale is a bit larger and all the parts are cut out for you. Also, you're not expected to roll your own cannon barrels, and figureheads are cast resin, and some of the scroll work is usually laser-etched card stock, so you don't just have 2D images of scroll work. Same with gratings. But, you can do a lot with the paper models, and they don't take much room to work on or to display.
- 12 replies
-
- 2
-
-
- Le Coureur
- Shipyard
- (and 1 more)
-
GradpaPhil, thanks for the explanation on the primer coating. Haven't tried that yet. With CA, I've been using thin CA to plasticize my paper parts since my first paper model 10 years ago. I've just never cut anything this thin before. I tried using the CA before I cut the part, and that seemed to work for a while, until it didn't... Next, I tried laminating the part, thinking the extra layer would make the part stronger. The problem there is that the parts are so thin, when there is delaminaion, there's some tearing and some slipping of the paper that happens, leaving not much to glue back together. I'm going to try going back to a single layer card stock for this. Beautiful French sailing warship, by the way! Hi Chris, I'd never heard the name for the technique, but it makes sense, thanks. That's what I'm basically doing with the chopped single-edge razor blades. Did the same thing really when I was using a scalpel blade, but the thickness of the blade pushes parts sideways as I push the blade down on the part. I'm hoping the razor blades, being so much thinner, will reduce the sideways pressure as I chop into the part. I gave up on it last night, but printed out yet another parts sheet so I can try again. Maybe a combination of the up and down strokes, using single layer card stock, and luck will lead to success this time?
- 106 replies
-
- 5
-
-
-
- digital navy
- v108
- (and 3 more)
-
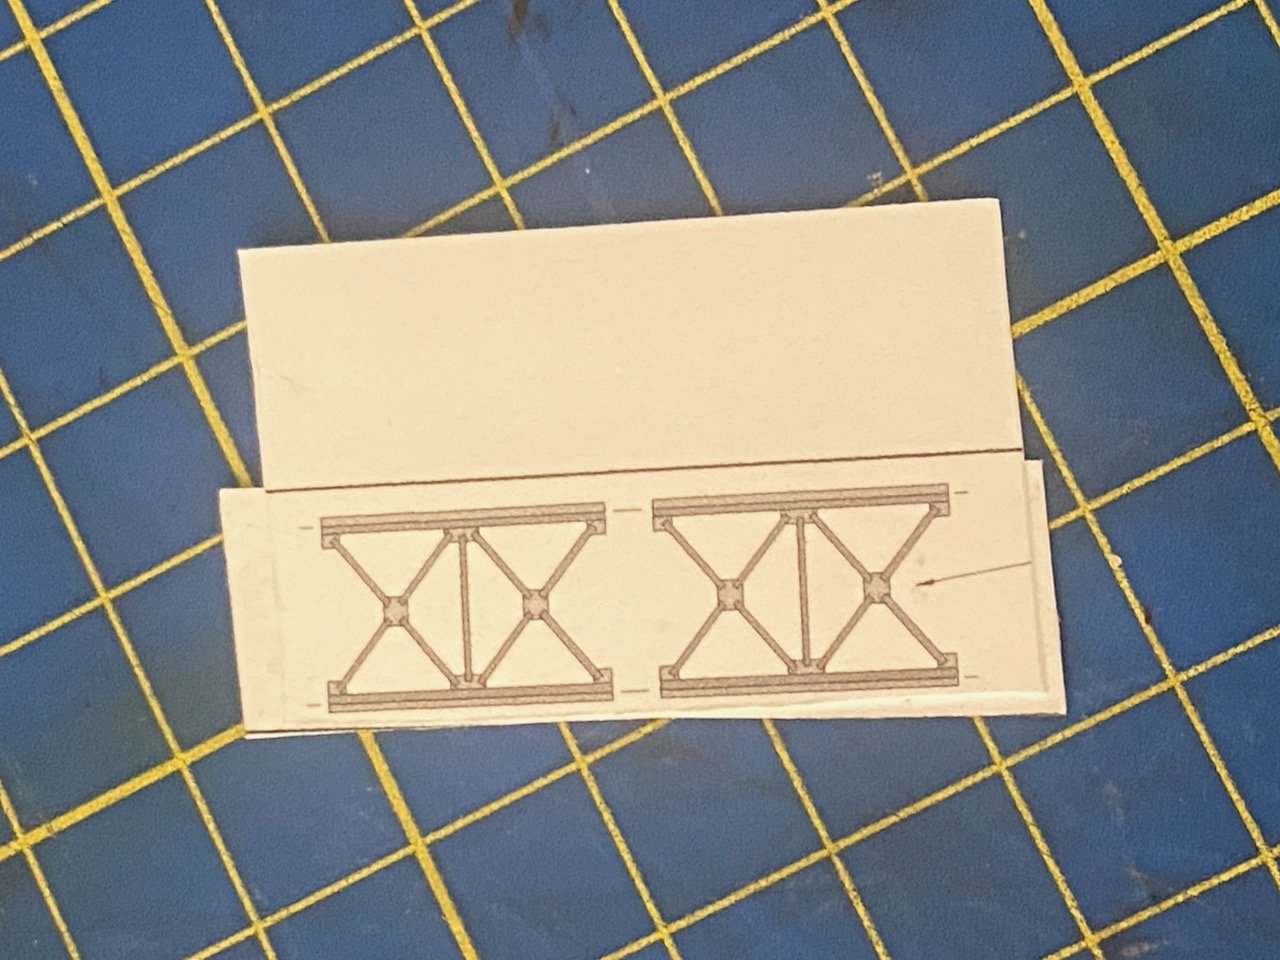
Hi GrandpaPhil, I appreciate the suggestions. What do you mean by pre-sealing both sides? Sealing with what? I already spray my card stock with matte lacquer to protect the print. I've tried using CA to stiffen up the parts before doing the cutting. But, I'm wondering if perhaps it's better to wait until after the cutting. I'm just not sure. This is first assembly that is really so delicate that my work falls apart. I tried laminating the printed card stock onto another piece, but where the girder parts are really thin, the laminated card moves around and starts to come apart.
- 106 replies
-
- 2
-
-
- digital navy
- v108
- (and 3 more)
-
We'll see what happens after my kit arrives, IF it arrives. If nothing else, perhaps getting AOS to carry a selection of kits, with their accessories, which is just their laser cut frames set, and their laser-cut detail set. Meanwhile, the V108 build continues. Here's a minor update – Do any paper model updates seem to be anything but minor? Managed to add the supports posts under the center part of the bridge. Unfortunately, I got things a bit out of order here, and added the bridge deck before I added these supports, which are fine brass rod. Also, forgot that there are ladder rungs going up the side of the radio shack, so I added those as well. These rungs seem to be the easiest detail for me to add to the model. I probably should have waited to add the bridge deck after completing the whole assembly, but I got kind of anxious, as I hadn't done much on the model at the time and wanted to get something on it. Next thing I want to do is to get those big support girders into place that hold up the wings of the bridge deck. The details on this are so fine, though, that I'm having trouble cutting them out. I'd better go back and look at other builds to see how they managed. I almost had one all cut out. I'd soaked it with thin CA, then cut using a scalpel. But, after about 10 minutes of work, ended up mucking it up, right at the end (! 😫) . I'm thinking I need to reprint the parts on thicker card stock and just carefully do it again, maybe using a razor blade as instead, since that's thinner and doesn't put so much sideway pressure on the delicate parts when cutting straight into the paper, like chopping. Here's the culprit... I did start on chocks for the ship's launch, and did a little work on the last of the ventilators. Those should be going on the model shortly.
- 106 replies
-
- 5
-
-
- digital navy
- v108
- (and 3 more)
-
No update on the V108 just yet. But, I do have some news on Avangard kit. I messaged the company on Facebook, and they agreed to sell me one and ship it to me direct. They don't normally do direct sales, but they said they'd make an exception. I also talked to Roger at Ages of Sail about the possibility of carrying the line, since US customers can't purchase these kits otherwise. He was open to the idea, and I got dealer info from Avangard. Now, the question is, will people in the US buy them? Nothing will happen until I get the kit in my hot little hands and evaluate it to the best of my mediocre paper modeling abilities. If people are interested, I'd suggest speaking up, because if I don't think there will be enough sales, it won't happen.
- 106 replies
-
- 2
-
-
- digital navy
- v108
- (and 3 more)
-
Hi GrandpaPhil, I'm probably going to need to finish my V108 torpedo boat, and a couple other projects floating near completion before I start a blog for this. I've always had an interest in building a model of Le Coureur. I have the 1/96-scale kit too, but I'm mostly using it to test out ideas for this 1/72-scale build. Hope you start a build log for your 1/96-scale kit!
- 12 replies
-
- 2
-
-
- Le Coureur
- Shipyard
- (and 1 more)
-
This is a review of Shipyard’s 1/72-scale French lugger Le Coureur laser-cut card model kit. Shipyard is a Polish company that produces many very high quality paper/card model kits of sailing ships, lighthouses, and a few related structures. Regarding their sailing ship kits, they divide their products into three lines: Paper Kits (1:96 scale), Laser Cut Kits (1:72 scale), and Wooden Kits (1:72 scale) Paper Kits First are paper kits, which include color-printed parts on large sheets that the builder must cut out to assemble. This can involve cutting out hundreds of small, often delicate parts, to be glued together to build up the model. The builder is generally expected to use wooden dowels for masts and spars, and most of their kits provide laser-cut hull framework parts to simplify construction. All Shipyard’s paper kits are in 1:96 scale. Laser-Cut Kits Shipyard also makes a line of laser-cut kits (formerly referred to as “Laser Cardboard” kits), which are very complete and come in a boxed set. The kit includes sheets of laser-cut parts, paints, brushes, dowels for the masts and spars, pre-cut and printed sails, 3D printed or cast resin cannon barrels and decorative fittings, cardboard blocks and deadeyes the you assemble, rigging line, illustrated instruction book, and several large plan sheets. All Shipyard laser-cut kits are in 1:72 scale. Wooden Kits This is a relatively new line of products from Shipyard. Essentially, these are the same as the laser-cut kits, but the parts are laser-cut wood rather than card, and they're not intended to be painted, so no paint or brushes are included in the kit. There are currently only 4 wooden kits available, with a 5th kit soon to be released. All Shipyard wooden kits are in 1:72 scale. The Le Coureur Kit Shipyard’s laser-cut card kits come packaged in plain cardboard boxes, about 20″ x 14″ x 2″ thick. These folded boxes are very sturdy, and have printed paper covers glued to the front, back and sides. This seems to be more than adequate, and seems flexible and cost-effective for the manufacturer. The whole thing is protected by a clear plastic sleeve that encloses the box. Upon opening the box, you’re faced with a very well packaged kit. As you can see, the components are very well protected, being in separate cardboard box inserts that serve to keep things from moving around during shipment and storage. While these separate boxes are mostly air, they do a good job protecting the contents of the main box, and keep the components well organized. These component boxes are well labeled. In some cases, these are the only detailed descriptions of the accessory parts and their quantities. For those that don’t know, the Ø symbol is pretty universal, indicating diameter. Early Shipyard laser-cut kits used to include wooden blocks and deadeyes, but now provide laser-cut cardboard blocks that you assemble. Wooden dowels are provided for the masts and yards. Three sizes of rigging line are provided. This is unbleached cotton that looks like good quality, but you will need to dye the line the appropriate colors. As stated earlier, the kit includes a set of Acrylic paints. These are very high quality artists colors, manufactured by a Polish brand called Renesans. I’ve seen comments by other ship modelers that they just throw out the included paints, but I have a hard time understanding why. These are nice quality paints that are provided very thick, so they must be thinned down with a small amount of water. But, these paints cover well, and dry to a nice matte finish. Because these paints can be difficult for individuals to source, especially in the U.S., I try to keep a supply of them from past kits I’ve done. I’ve even gone so far as to find a European online art shop that carried the brand and would ship to the USA, but that was in pre-tariff days. The paints are subject to drying out, though they now come in plastic jars that contain a rubber seal in the cap. But, it’s a good idea to check them periodically and to add a little water to keep they from drying out. Also, the rubber seals of the jar lids tend to come loose, so it might be a good idea to transfer the paints to containers that seal well if storing for long term. Four colors are need for this build, and more than enough paint is provided to complete it. Instructions are provided for mixing the paints to get the appropriate shades to simulate wood to a very good effect. And, since the paint comes very thick, with thinning, the paint goes a long way. The brushes included are very nice quality artists brushes in wide/flat and small/round. The rings, eyebolts, and deadeye strops come in the form of coils of copper wire, from with you need to make these components. The accessories also include a piece of clear acetate for stern gallery windows, color printed stern decoration, and the French white naval ensign. Cannon Barrels In early kits, Shipyard provided turned brass cannon barrels, which is what you see in most of their product photos, even in the current kit’s instruction booklet. They have since switched to 3D-printed resin cannon barrels, swivel guns, and belaying pins. In the older kits, I believe they only included one size of cannon barrel. I was pleasantly surprised to see that they now correctly include two different sizes to represent the 2pdr and 3pdr cannons carried by the actual ship, and I believe the new barrels are more scale accurate. Laser-Cut Parts All the laser-cut parts come on eight A3-sized cardboard sheets of varying thicknesses. These come enclosed in a clear plastic folder to protect them during shipping. Unlike with their paper kits, the parts come pre-cut, but the plain cardboard requires the builder to paint all the parts, which is why paint and brushes are provided. Many structural parts have a part number etched in them, and in some cases, registration marks for properly aligning the parts. Parts that will be visible, often have details etched into them, such as plank outlines, part locator markings, and treenail details. Card stock is much easier to laser cut than wood, requiring less power and can be cut more more quickly, so there is very little char, though there is still some. Since some of these parts much be painted, I think it may be a good idea to take a large soft brush to clear out any loose char, as it may otherwise stain any paint that’s applied. Sails The kit includes six cloth sails that are nicely marked with seam lines, reefing bands, and tablings. These lines are very clear without being overly dark and don’t stand out too much. The builder will need to glue on bolt ropes, and to add reefing points, and such. The remaining components of the kit include the 20-page, color illustrated instruction booklet, a set of three double-sided, A3-sized (11.7″ x 16.5″) plan/instruction sheets, one single-sided, A3-sized plan sheet, and a set of printed cloth sails. The large plan/instruction sheets include one page of history of the ship, given in English, German, and Polish. The diagrams are very clear, but provide very little text. What little there is, is printed again in English, German, and Polish. Some of the pages are printed in scale. Those that are not, are clearly indicated. For the dowels shown on the plans, the shape and size of their cross-sections are indicated clearly. Length can be measured directly off the plans sheet. On the diagrams that show rigging, the numbers in triangles indicate the size of the appropriate rigging line. Numbers inside a circle indicate part numbers, while number with no circle identify individual rigging lines for matching them to their appropriate belaying points. The color instruction booklet is 20 pages long, containing mostly color or black & white photos. Short text descriptions label some of the photos, and are given in English, German, and Polish. The instructions show how to get a finish that nicely simulates wood, if followed carefully. For the most part, there are no paint color guides, except for reviewing the provided color photos. While builders may choose to make their own modifications to the paint scheme, following the kit photos, everything is either light-colored wood color for the deck and hatches, or a medium wood color, or black. Overall, this is a very nice looking kit, but it is also one of Shipyard's earlier laser-cut kits. Having worked on Shipyard's paper model kit of the same subject, I've read ahead through the bigger kit's instructions, and I can see that there are some parts that the instruction skip over. In particular, there are platforms underneath the open hatches, representing the deck below. The parts are included for these platforms, but I haven't been able to find any indication of them in the instructions. So, clearly, the builder will want to proceed very carefully with this build. However, this is a fairly simple looking ship to build. It is about the least expensive of this line of kits. The rig is about as simple as it can get, so this should be a good kit for beginning paper modelers, if caution is observed. This kit was purchased from Ages of Sail, but is also available for about $150 direct from Shipyard. There are several other similarly designed laser-cut kits made by Shipyard, including HMS Alert, the Santa Maria, the schooner Berbice, and their biggest kit of all, the British 28-gun frigate HMS Mercury. For a review of a similar, but more complicated Shipyard kit, please see my review of Shipyard's HMS Wolf Laser-Cut Kit here. Or my review of Shipyard's Hanse Kogge Laser-Cut Kit here.


- 12 replies
-
- 6
-
-
- Le Coureur
- Shipyard
- (and 1 more)
-
Jan, funny you posted that today! After recently watching the film The Cruel Sea, I came to the conclusion that those were most likely companionways. I was planning to mention that on my next post, but you beat me to it. Thanks for the post!
- 106 replies
-
- 2
-
-
- digital navy
- v108
- (and 3 more)
-
I swear I worked on the V108 for hours this week, but it just doesn't look any different, really. ... and, I still have a lot of parts still to go! Added brass rods to the ventilator bases, to secure them to the deck. Made the masts from very thin wood dowels and sized them down about as much as I could. The cross yards need to be even finer, so I used very fine brass rod. I added the yard on the forward mast, but waiting on the aft mast, until I get the booms installed. Or, do you still call them foremast and mainmast? Seems weird. Masts aren't permanently installed yet. Need to finish adding details to the aft mast. The provided parts for the mast bands at the doubling wouldn't fit, my yards are too thick. So, I scavenged some other parts off of one of my spare printed parts sheets. For the antenna wiring, guy wires, etc., I thought I'd try out EZ Line, so I bought both available sizes in black. EZ Line is elastic, but it's flat, not round. The Fine stuff is so thin, you don't really notice it's flat. The Heavy line's flatness is really noticeable. Anyway, it looks too thick for the model, so I'll just use the Fine line for everything. Well, assuming I have the skills to make the stuff work for me. I'm planning on starting with the funnel guy wires, but not until I get the remaining paper parts on the model. Still have all the bridge and gun details to go, plus a few other items.


- 106 replies
-
- 6
-
-
- digital navy
- v108
- (and 3 more)
-
Hi GrandpaPhil, I believe those kits are being sold by importers, which can deal with customs on large scale shipments from Europe. But, even these, if you look at customer ratings, seem to be showing signs of shipping problems/delays. If that Amazon store Plastic Models Store, which appears Ukraine based, would only carry he Ukrainian brand Avangard, I'd be set!
- 106 replies
-
- 3
-
-
- digital navy
- v108
- (and 3 more)
-
Beautiful work Chris! I wish we could still get the Master Korabel kits at Ages of Sail. The shop is down to just the Morel Secret Vessel and the Double Boat, though the Double Boat does look like a nice kit. Anyway, I really love seeing your progress on this one!
-
Not much news on the V108 build, as I've been trying to make some progress on other model fronts. But, the V108, being a paper model, is so easy to sit down and work on. So, I did get a couple of the ventilators made and started working on the masts. Biggest news is that Orlik just refunded my order of the USS Bagley kit. So, that's no Orlik, no GPM, and no Fenton's. I think that's the last hope I have of getting it, unless something changes regarding the tariff situation. ☹️
- 106 replies
-
- 2
-

-
- digital navy
- v108
- (and 3 more)
-
Hello stevenba21, thank you for sharing your find! I'm sure many members of this forum will find this information interesting and of value. What size/scale is the cannon?