
HOLIDAY DONATION DRIVE - SUPPORT MSW - DO YOUR PART TO KEEP THIS GREAT FORUM GOING! (89 donations so far out of 49,000 members - C'mon guys!)
×


Bedford
-
Posts
1,297 -
Joined
-
Last visited
Content Type
Profiles
Forums
Gallery
Events
Everything posted by Bedford
-
 She's really looking the goods John
 -
Ah, but this is how we learn. Especially useful for those wise enough to learn from the mistakes of others.
-
I was talking to someone just the other day who's doing that, can't remember who though. It will be a great trip, enjoy the sailing!
-
Thanks, she looks quite "salty" doesn't she. It is truly written that "A fair line supersedes any given measurement"
-
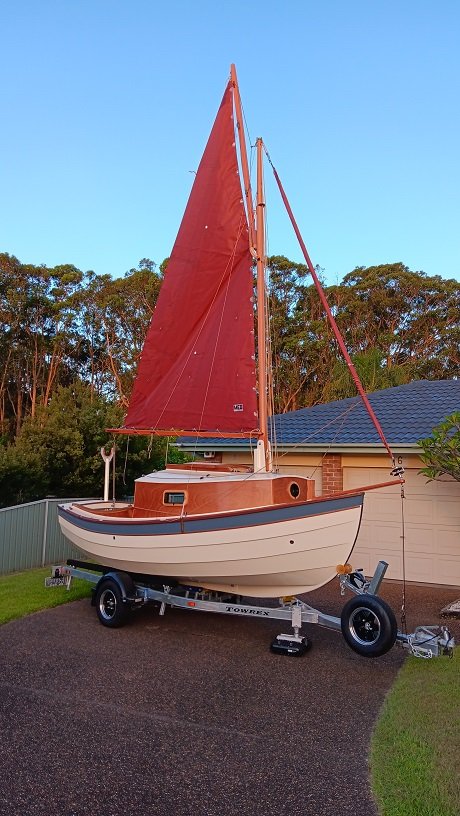
Vaddoc, you know I admire your work so please don't take this as negative criticism, it isn't! I think we can make life hard for ourselves sometimes, like all the trouble you went to in order to get the deck profile printed. All I do is plot out the relevant points and draw it. You can use pins at all the mold stations and run a fairing batten (a length of thin section flexible wood strip) around them. This not only shows you any station points that are wrong but gives a guaranteed fair curve to the hull. I've just built a full sized sail boat this way and it's very accurate and symmetrical.
-
She's looking the goods John! If memory serves, when I sailed on Bark Endeavour in 2015 the manual showed 100 lines in the running rigging. She's an older style rig with fewer sails and hands aloft to do everything so I can imagine in this rig with more sails and lines to do most of it from deck level she's going to keep you quite busy!
-
Keith, he got it from an RC sailing supplier here in Aus. There will be similar shops in your neck of the woods. It's a hard film kind of like a very thin x-ray film and the stuff he gave me is somewhat translucent, it's more for function than scale appearance but I think it'll do the job.
-
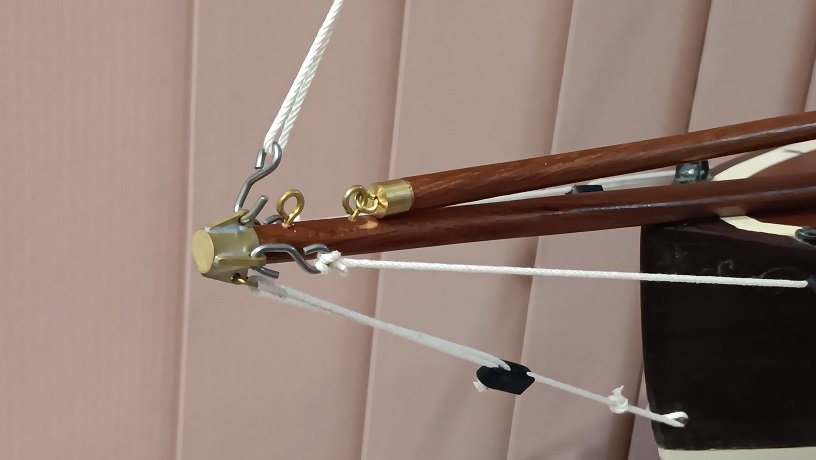
I've made some good progress on the pond yacht, thanks to Mark Pearse for sending me the rigging cord! I've made two travellers for the sheet horses from hard brass wire, now to try and work out how the sheets were originally set up, I'm trying to make sense of the pre-existing holes in the spars. There is a bloke I know through dinghy sailing that has mylar sail fabric suitable for pond yachts, he's coming through in the next couple of days and will drop it in for me. I think it'll be a whole lot easier than me trying to sew normal fabric nicely.
-
Thanks Keith, the existing mast and boom appear to be original and a second boat we've been given of similar age and size confirms that, she was most likely built as a Bermudan sloop. These are very simply rigged so it won't take much work in that regard but I think I'll need to build a nice display stand for it.
-
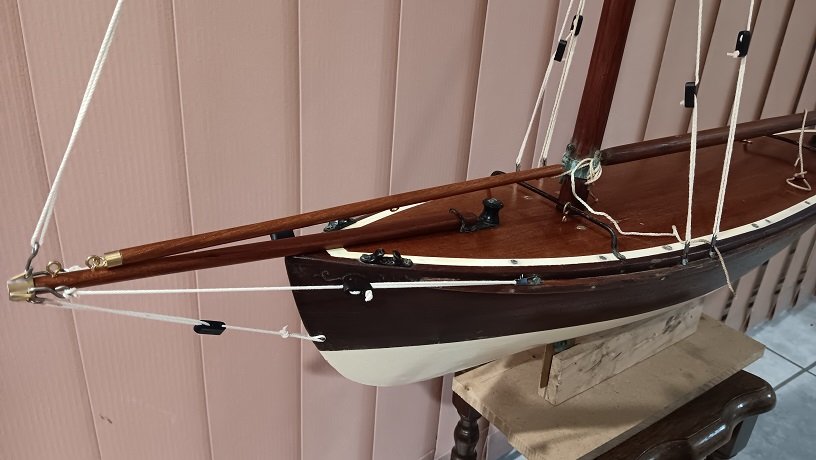
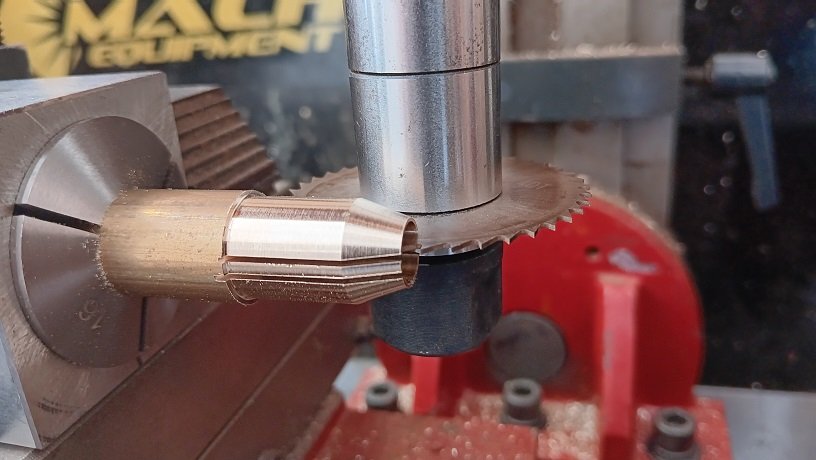
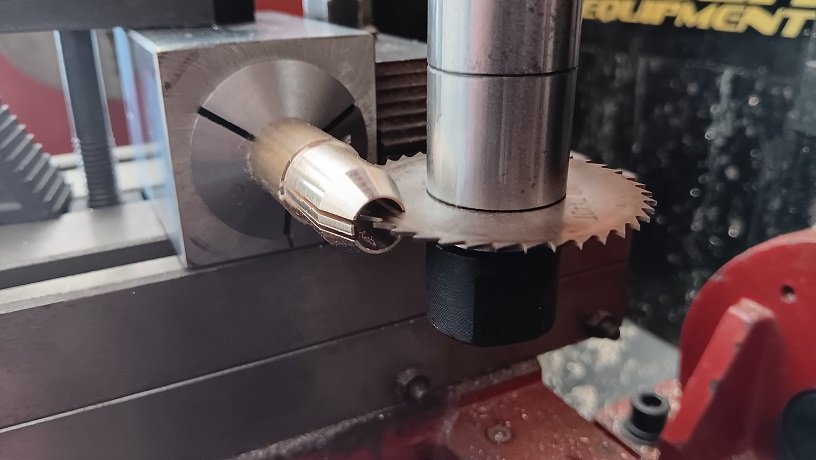
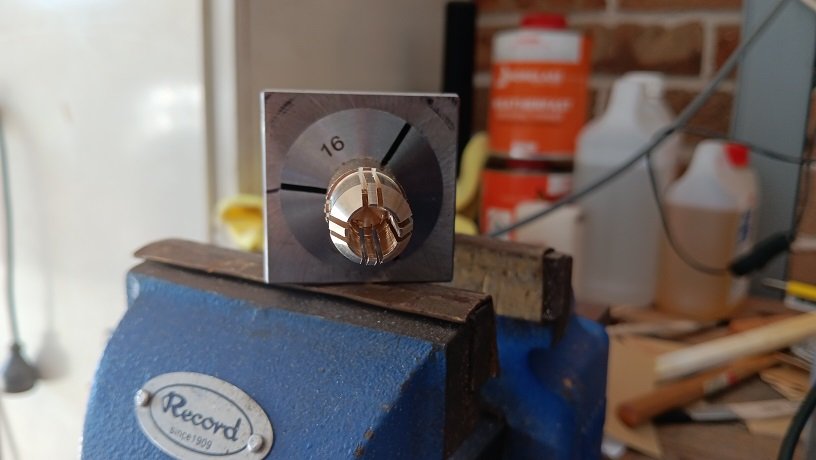
I'm starting to make progress on the pond yacht, I've ordered some rigging fittings suitable to the period and created a new cranse iron.
-
Hi John Thanks for the input, I'm pretty well convinced she had a Bermudan mains'l due to the height of the mast and the lack of wear or any other indication of a gaff on the mast. The rudder turns quite freely so that's still a bit of a mystery. I'm not too worried about it as it'll be fine for display purposes as is.
-
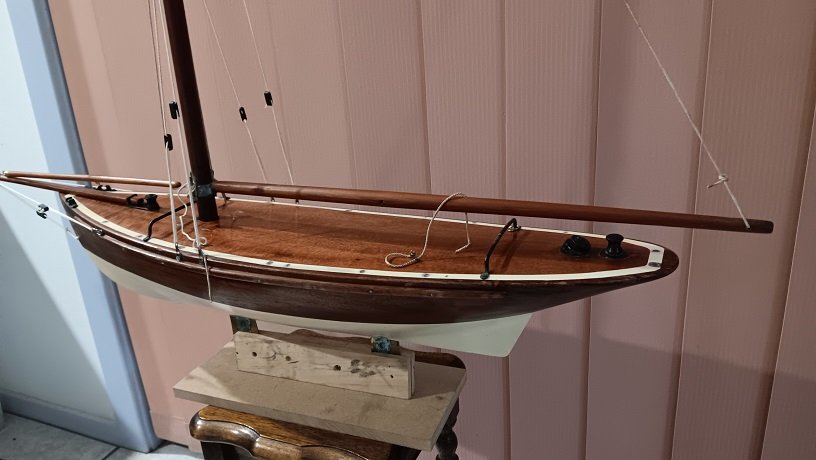
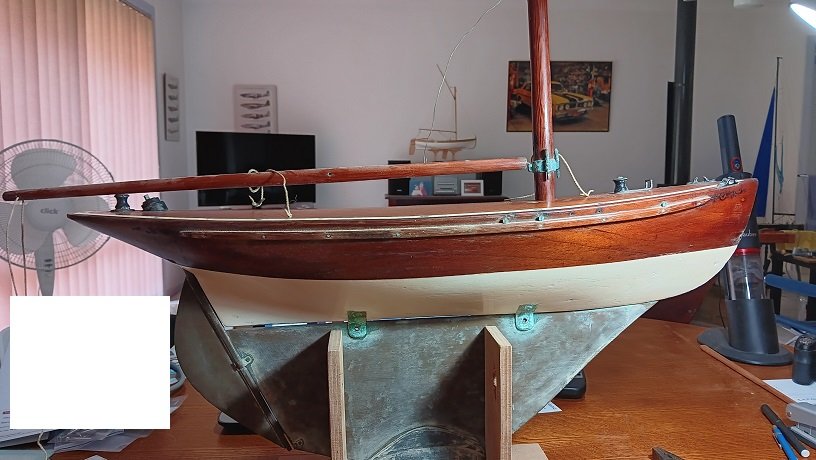
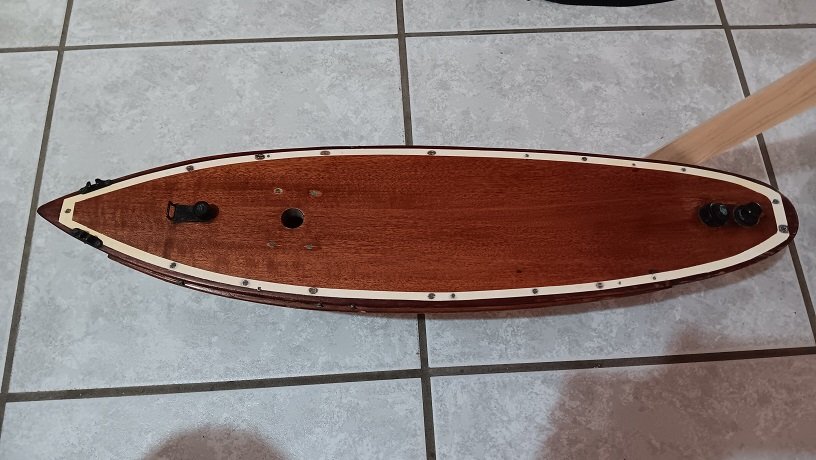
Mate, it's exquisite. In the second pic you can make out scroll work at the bow, it's duplicated at the stern and it has been suggested it could be 100 years old but I don't know about that as the finish is in beautiful condition. There appears to be no shrinkage in the deck either as there is absolutely no gap anywhere around the margin. Master craftsman built from excellent quality timber. It's a real pleasure/honour to be working on it.
-
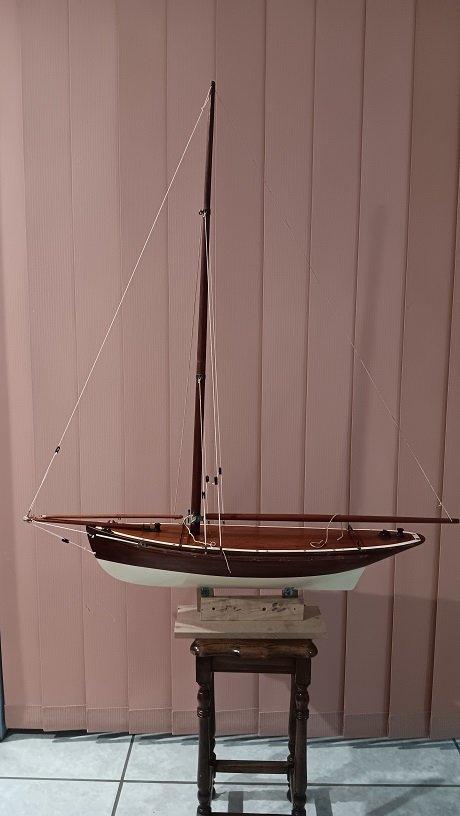
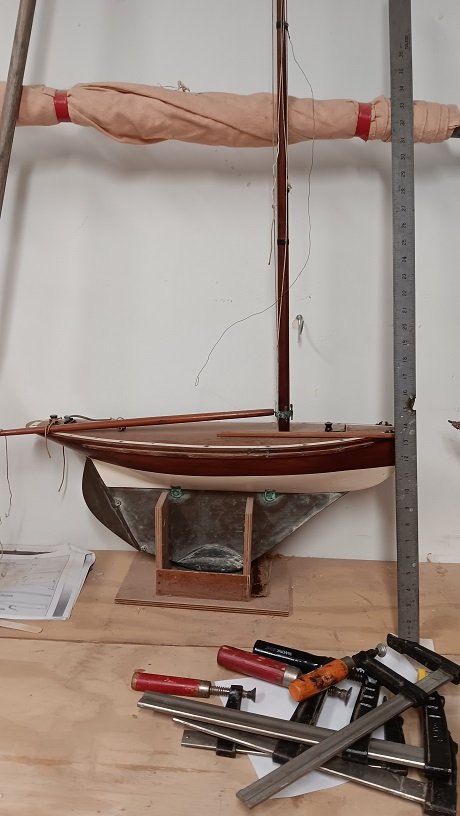
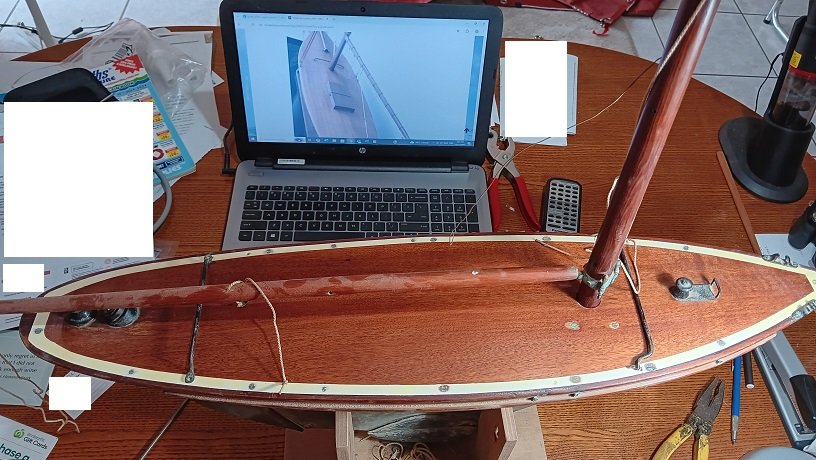
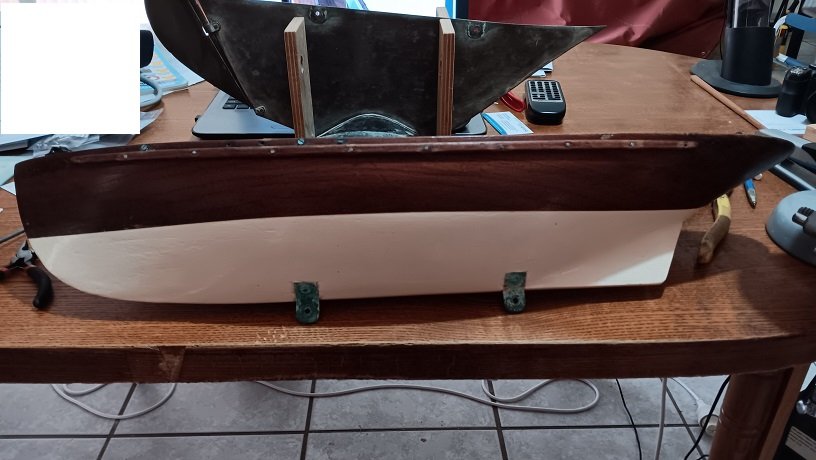
I've been asked to restore a lovely old pond yacht for display in a local yacht club. It's beautifully made, the hull is carved from a solid piece of mahogany hollowed out and the deck is another piece of mahogany. Perfectly fitted and screwed down around the margins. I have no experience with pond yachts so I'm looking for some help with the details. Specs are:- L.O.D. 668mm - 26 1/4" Beam 160mm - 6 1/4" Mast 843mm - 33 3/16" with lower shroud mast band at 315mm - 12 3/8" high and upper shroud/stay mast band at 618mm - 24 5/16" high Boom 493mm - 19 3/8" Bowsprit is missing So the questions so far:- The rigging left in the mast suggests she was a fractional sloop but I'm not sure if she would have been gaff or Bermudan rigged. There are still two haly'ds at the top of the mast but it looks like there could have been three. How long should the bowsprit be, its heel, for want of a better word, is 114mm - 4.5" aft of the bow. There are two sheet horses, each running the width of the deck. 1 for the jib and one for the main. Might she have a club footed jib. There is no "comb" for setting the tiller and it has no holes in it or any indication it had things connected to it. How did it steer. I don't need to get her back to true sailing condition but I'd like her to look as close as possible to original and I'm hoping they don't want her stripped back and refinished because she's in gorgeous aged condition.
-
She look great and the fittings are beautifully made, well done!
-
She's looking beautiful Mark I prefer the glue first paint later approach as it's easier to get them positioned properly as you said and easier to glue them on. Masking tape works well and can even be placed on the later painted surface to protect it from fine detail sanding of any paint that bleeds under the tape onto the sponson
-
Looking beautiful Mark
-
More ingenious metalwork and even more to come!
-
Yeah, that'll be it. I can see them wanting to keep tenders etc away from the hull, the boom would let them swing the tender in when they wish to use it
-
I'm hopping aboard again too, that's a very pretty and interesting subject for a model.
-
As you know, I'm no expert in the field of quadrireme design or use so take this however you chose. I own a 15 foot Tammie Norrie, a beautiful rowing/sailing dinghy with a bit much freeboard for rowing in windy conditions so I deploy the rudder in such instances. My oars are 8 feet long so the motive force is at two points 16 feet apart in the water. That's a lot of leverage applied by each oar. To overcome that leverage with a rudder is not easy. I can tell you from experience that the boat can not follow the arc set by the rudder while being rowed. It goes straight and then when oars are lifted for the back sweep it takes the rudder a second or so to overcome the straight line momentum before imparting its influence on the direction of the boat. The boat traces an almost porpoising action but on the horizontal plane. This is with a full scale rudder in full scale conditions. Another way to look at it is as a drag car. Imagine a locked differential driving two tyres 4 feet wide and trying to steer with 4 inch front wheels. It ain't going to happen. The only way I can steer my boat in an arc is by altering the power I apply to the inboard oar and shortening the stroke. So as I see it you either reprogram to achieve this or make MUCH BIGGER rudders.
- 536 replies
-
- 4
-

-

-
- Quadrireme
- radio
- (and 1 more)
-
Beautiful work Mark You're right about shaping ply, the good marine ply I've used for rudders and keel on my full size builds and the Miss Caroline model were very easy to get right because of the perfect contour lines created by the ply layers
-
Keith, I don't think you'll have too much trouble making the ply conform as long as the curves aren't too great. We are building a 16 foot sailboat at the boatshed and it's got 6mm ply sheeting that has to bend two ways to meet the curve of the chine. The big thing is being able to pull it in and clamp it effectively and using the right glue. I suppose you've already considered the joint between the two lengths of ply but in case you haven't I'd be using a scarf joint rather than a butt joint to make the joint easier to hide.
-
What he said! Well done, the tedium of planking is behind you, now we look forward to the fancy stuff
-
Congratulations, a very long project with incredible attention to detail. A masterpiece! What's next I wonder...
-
Chair pulled up, coffee brewing. I'm in for the whole show and looking forward to it

