


Foultide
-
Posts
81 -
Joined
-
Last visited
Content Type
Profiles
Forums
Gallery
Events
Posts posted by Foultide
-
-
On a side note I was given a Artesania Latina kit of the HMB Endeavour which had been started but sadly the builder past away while it was still under construction.
It sat for 15 years waiting to be completed.
The first planking had been finished but I needed to redo some of it as really needed redoing. I have already built this ship but it will nice to work it along side the Washington as a change of pace.
Some of the kit has gone missing so I'll probably be creative with it and build it as I like.
Thanks for stopping in.
Bye for now,
Dan
- paulsutcliffe, Canute and mtaylor
-
 3
3
-
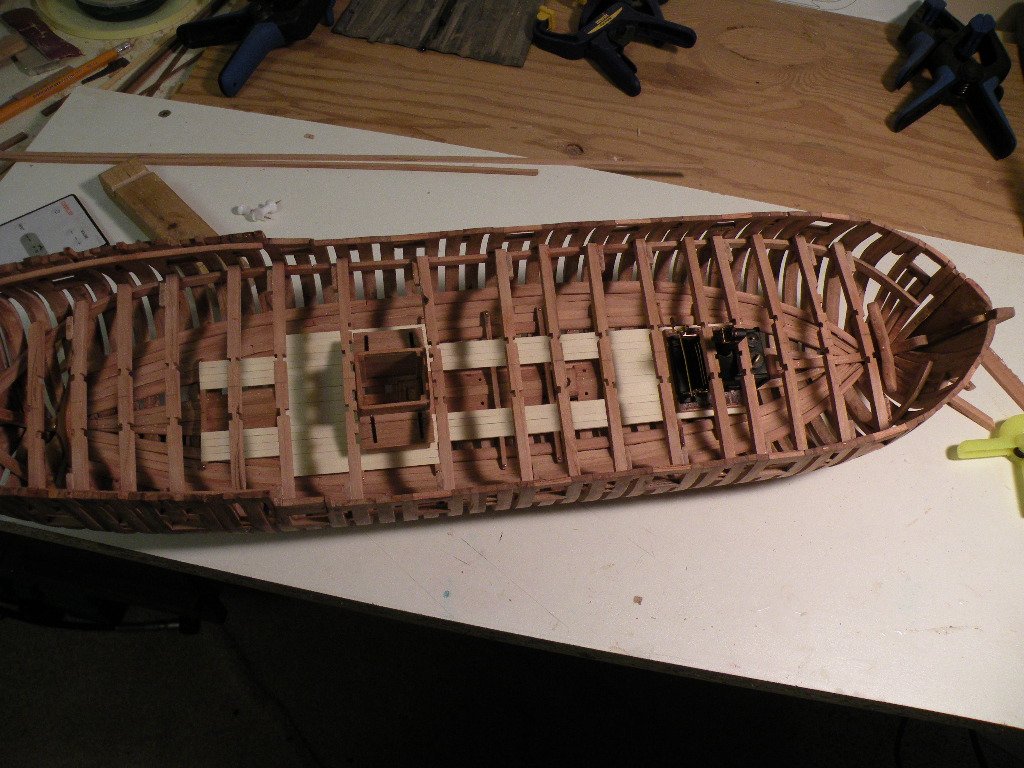
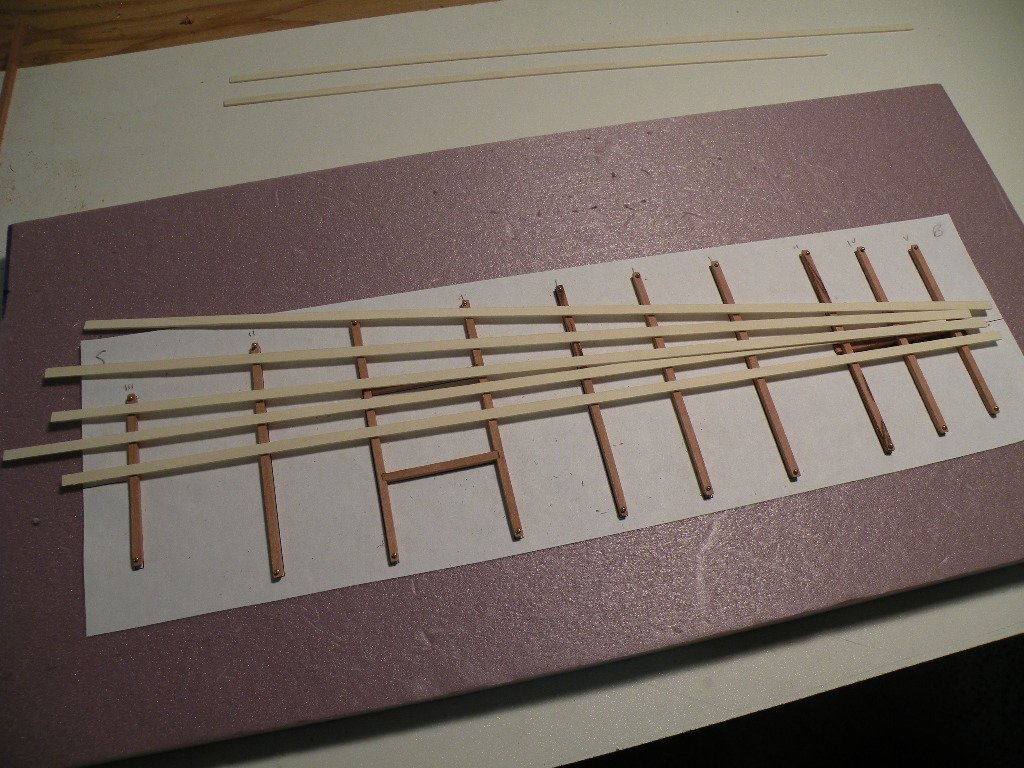
Finished....... the deck framing. Better than a jigsaw puzzle.
- Tigersteve, Mike Y, shipmodel and 6 others
-
9
-
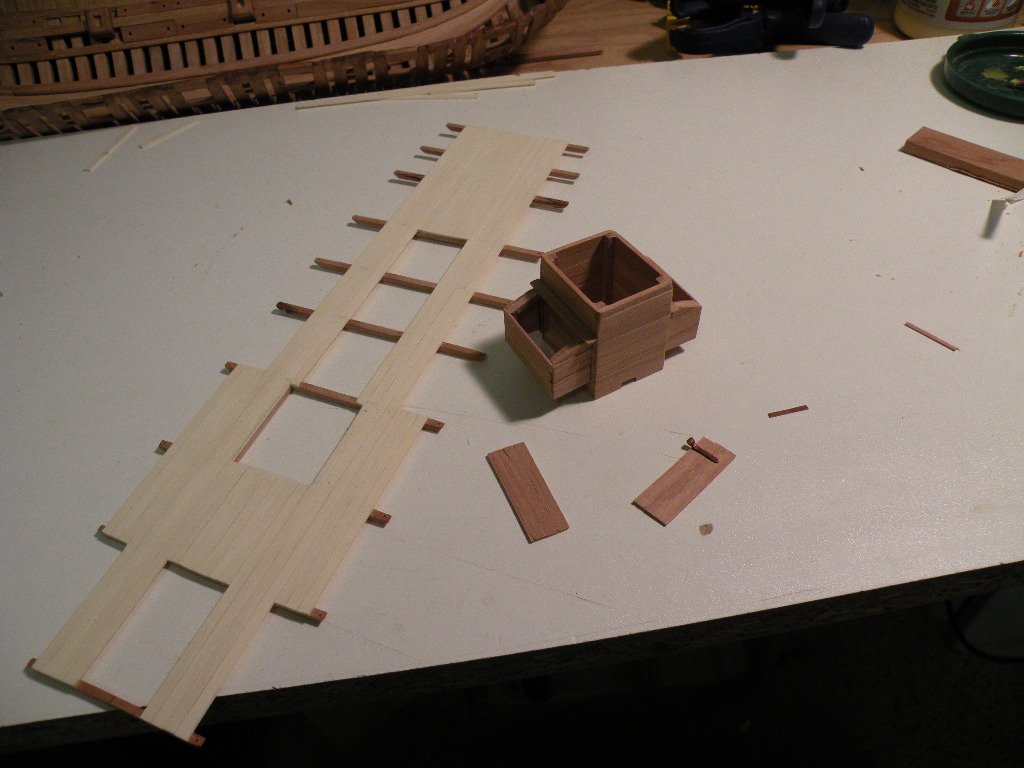
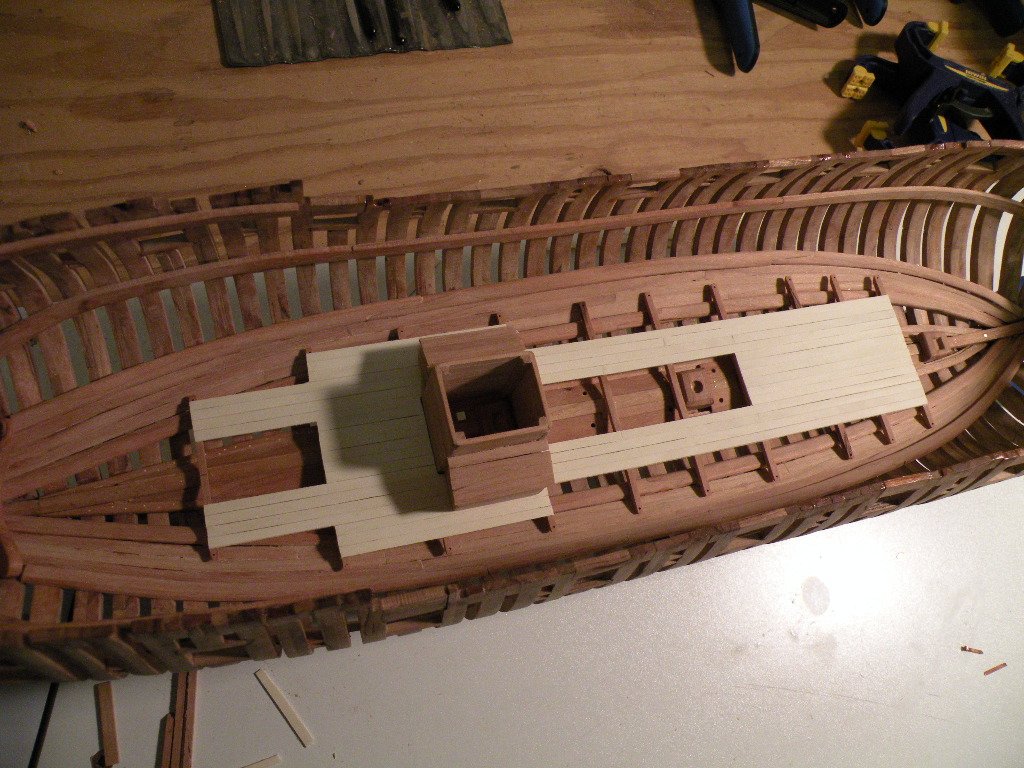
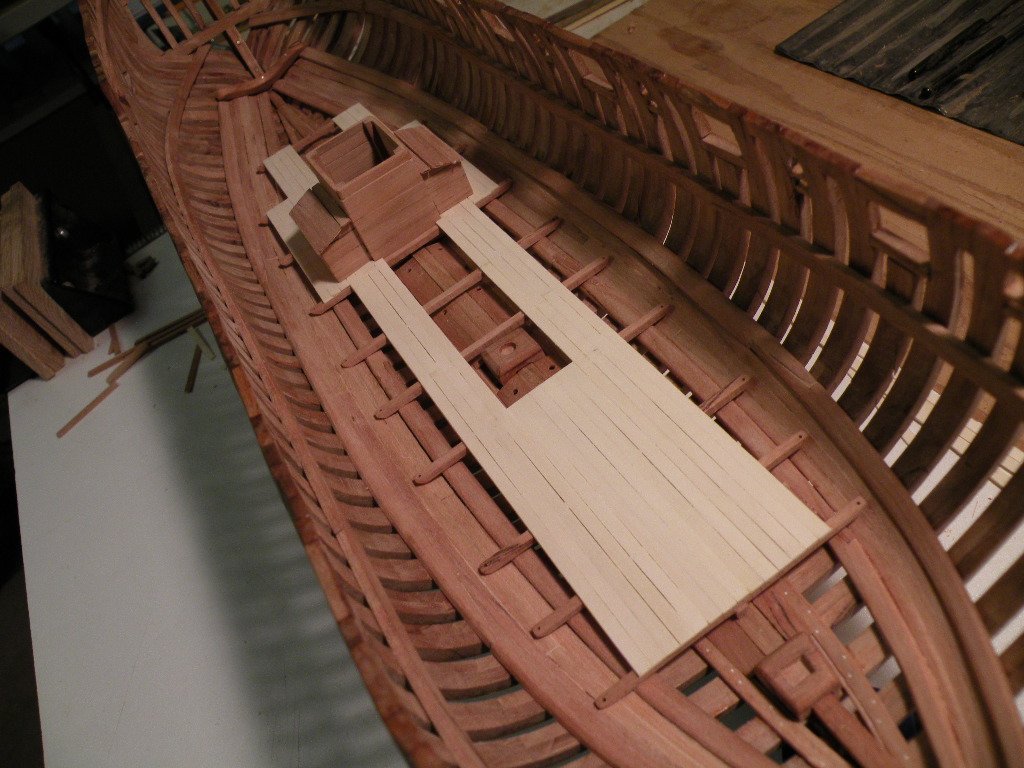
A little more progress.
- egkb, Tigersteve, shipmodel and 8 others
-
11
-
-
-
-
-
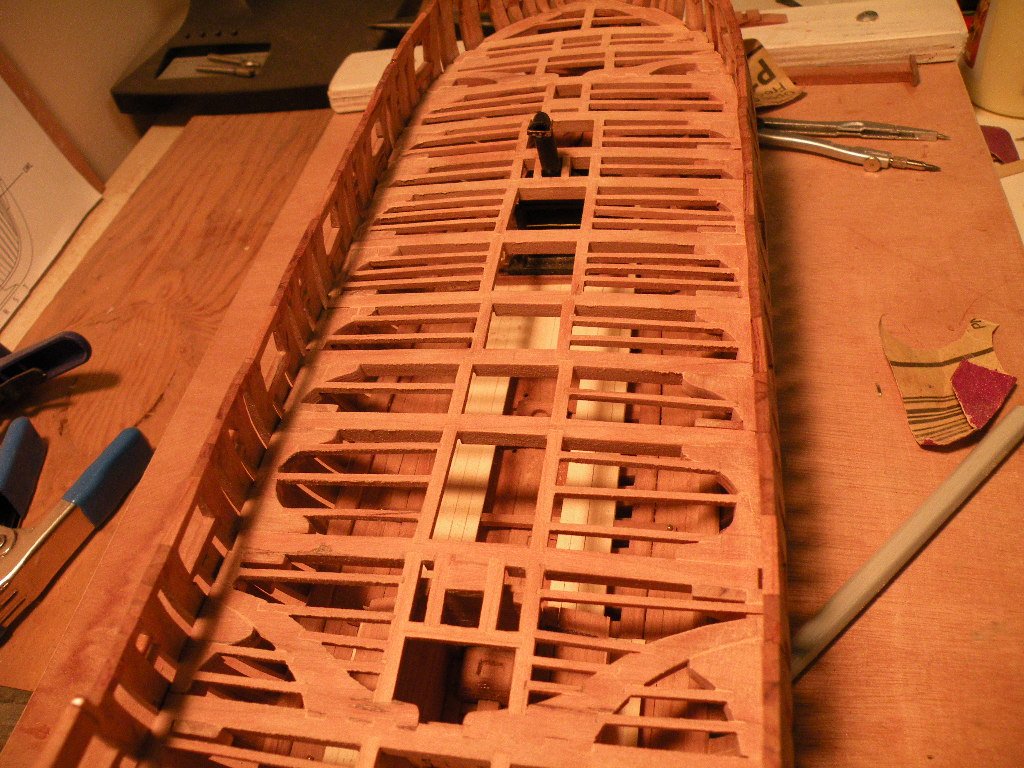
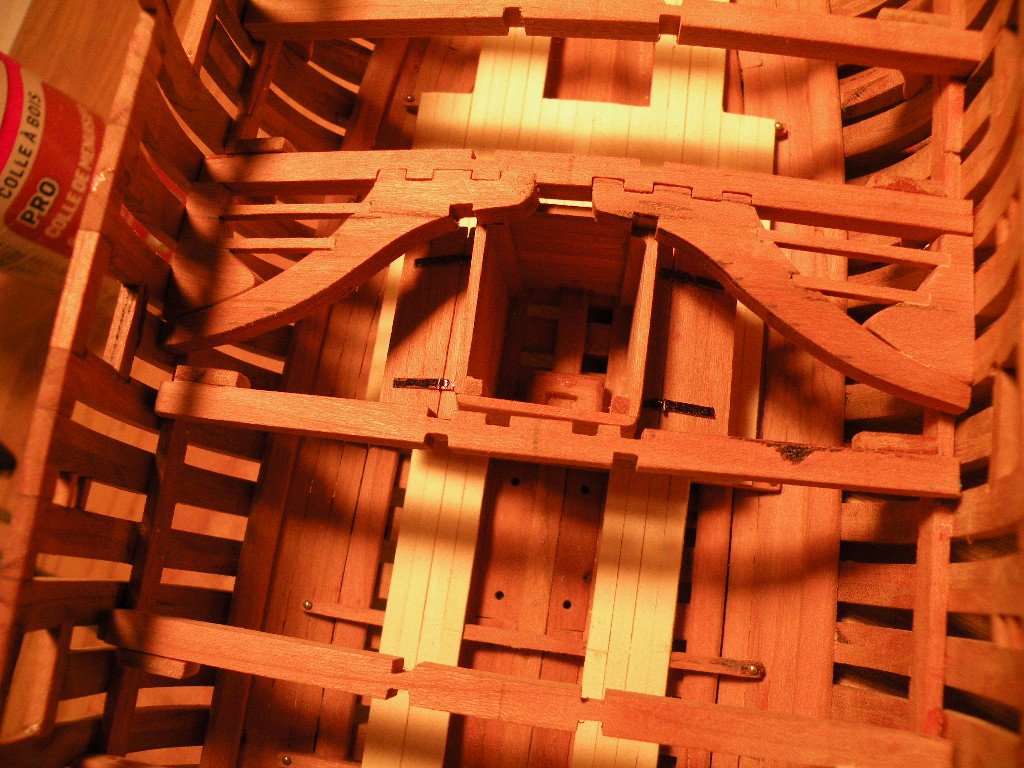
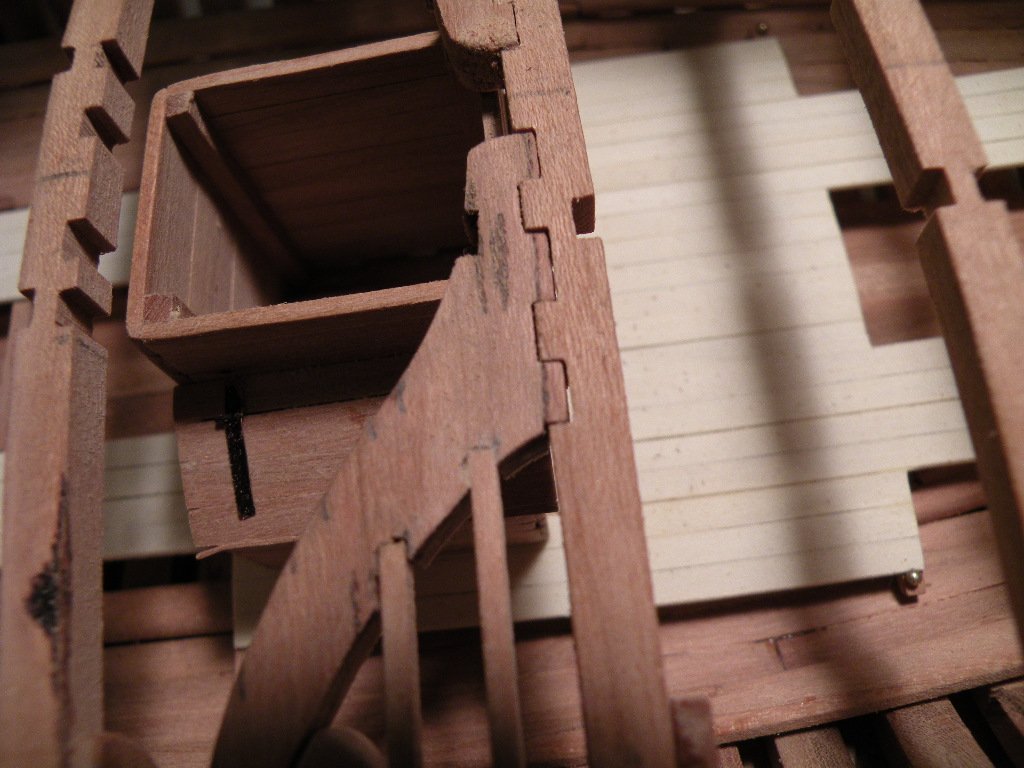
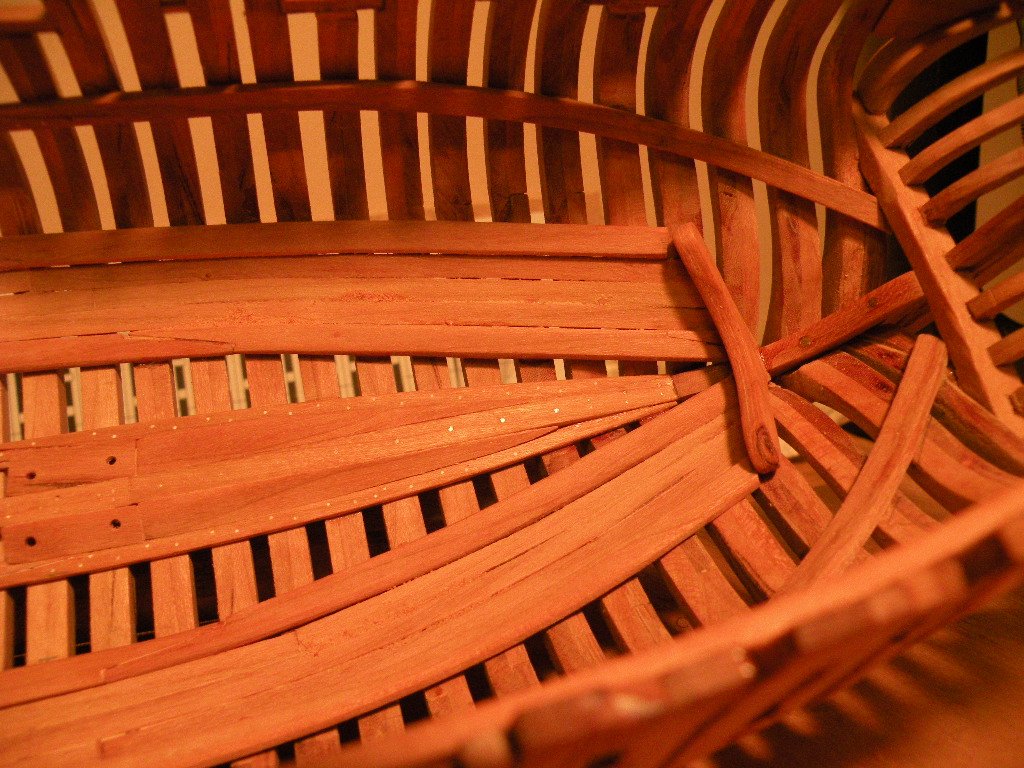
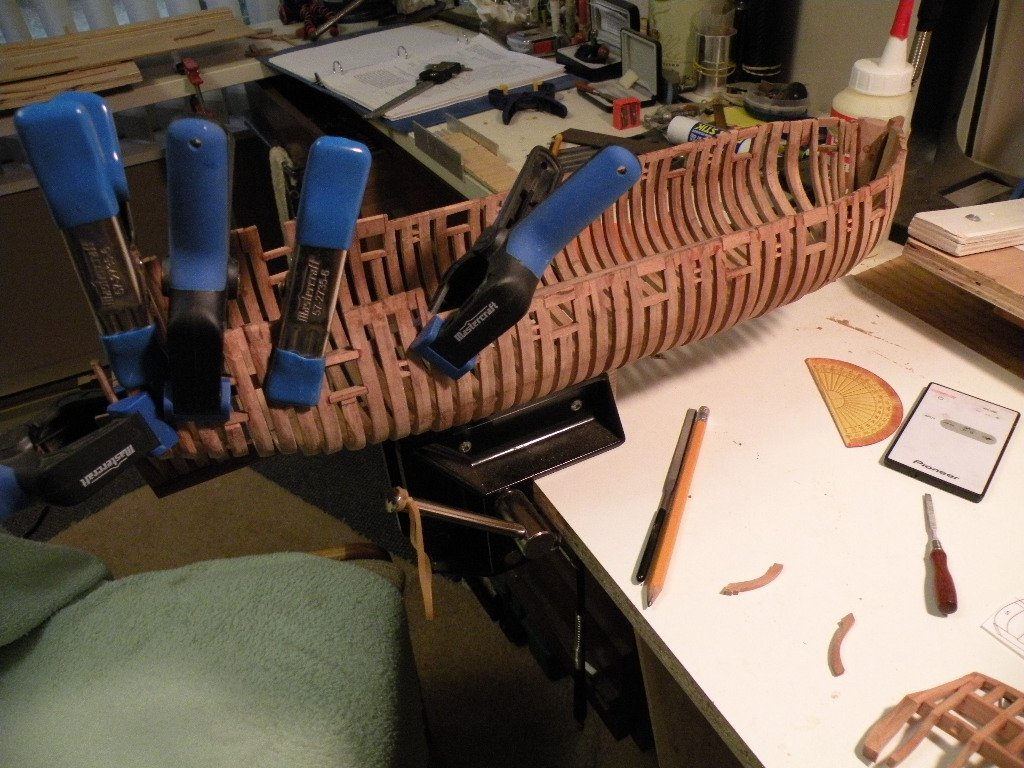
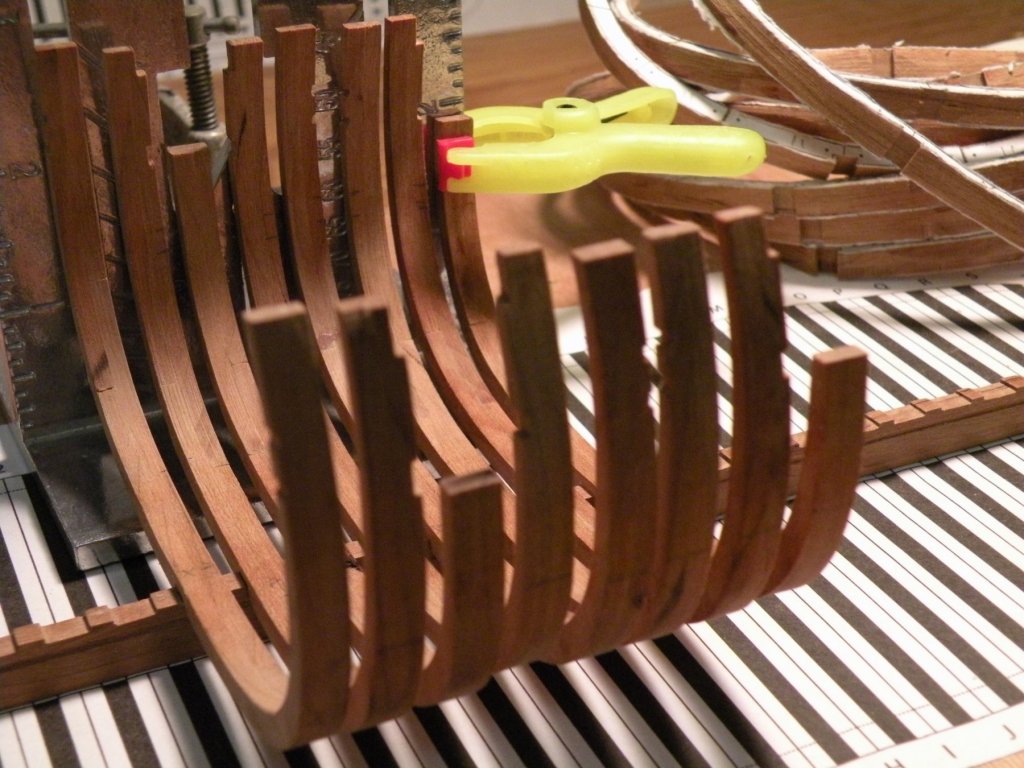
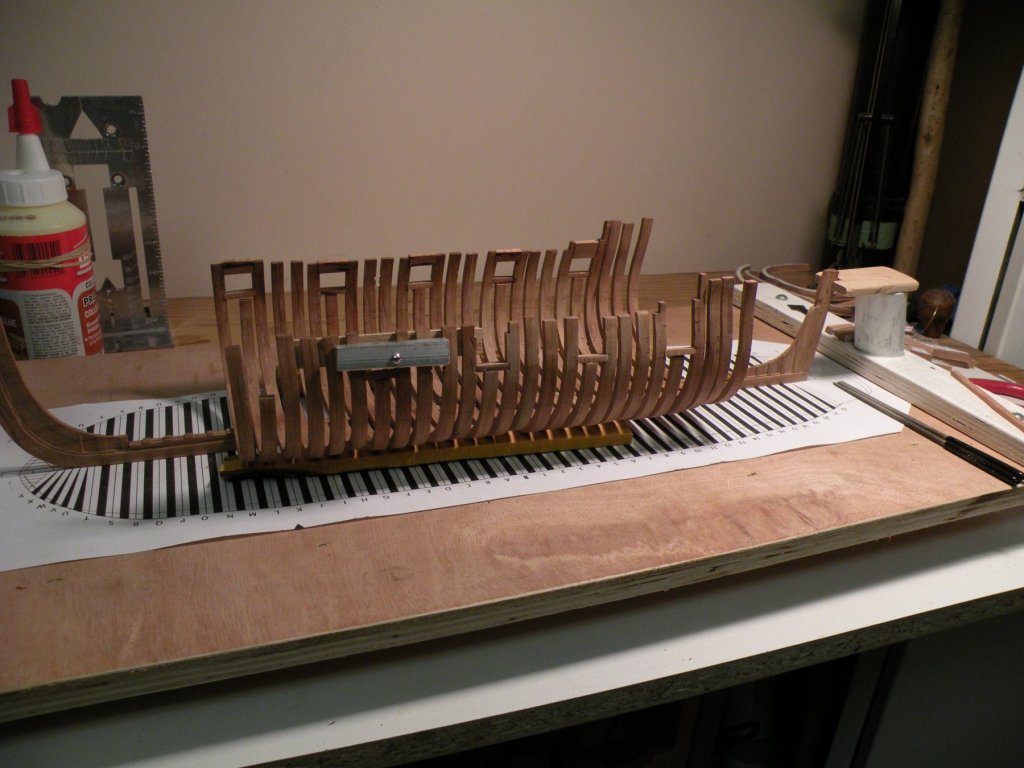
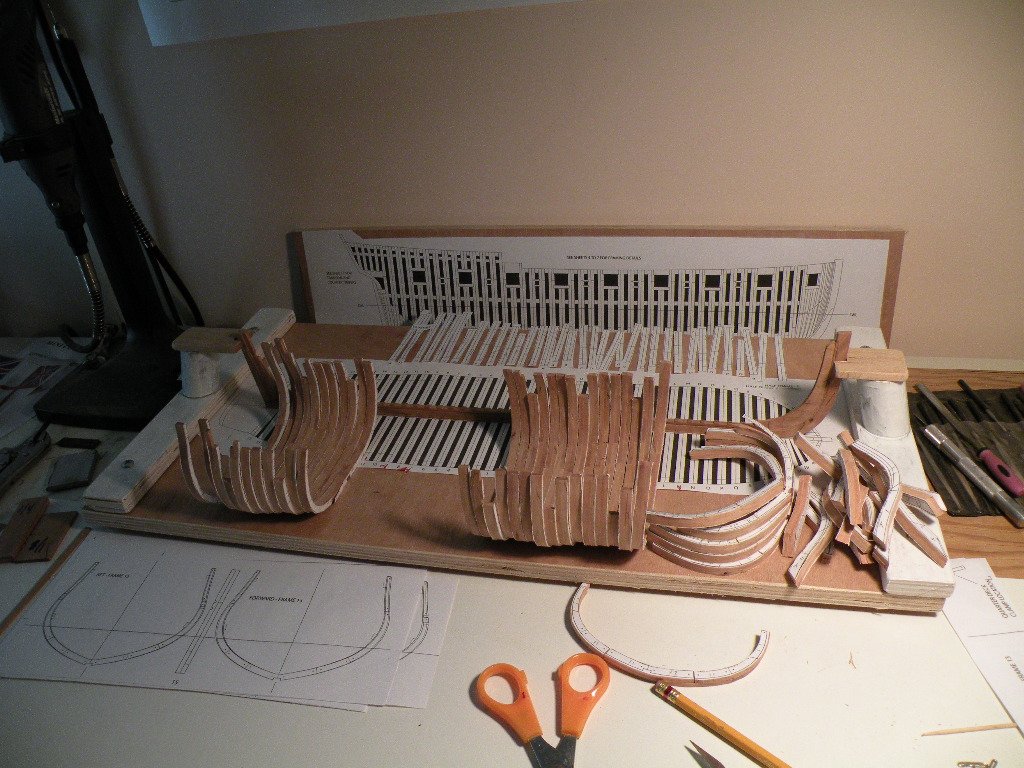
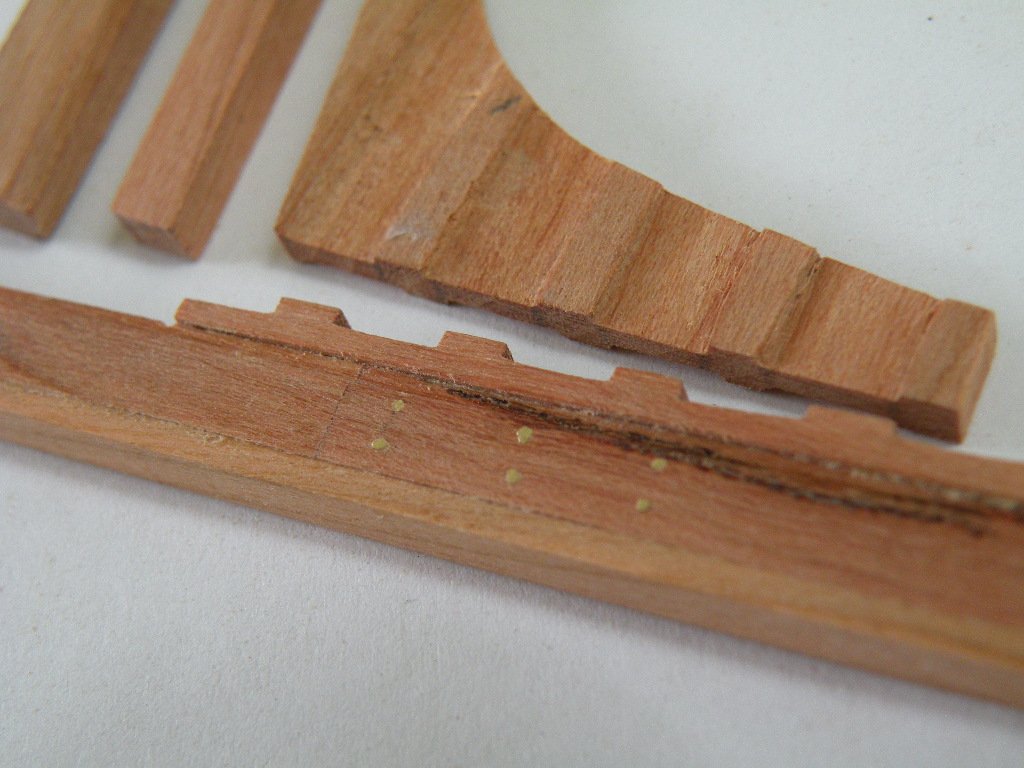
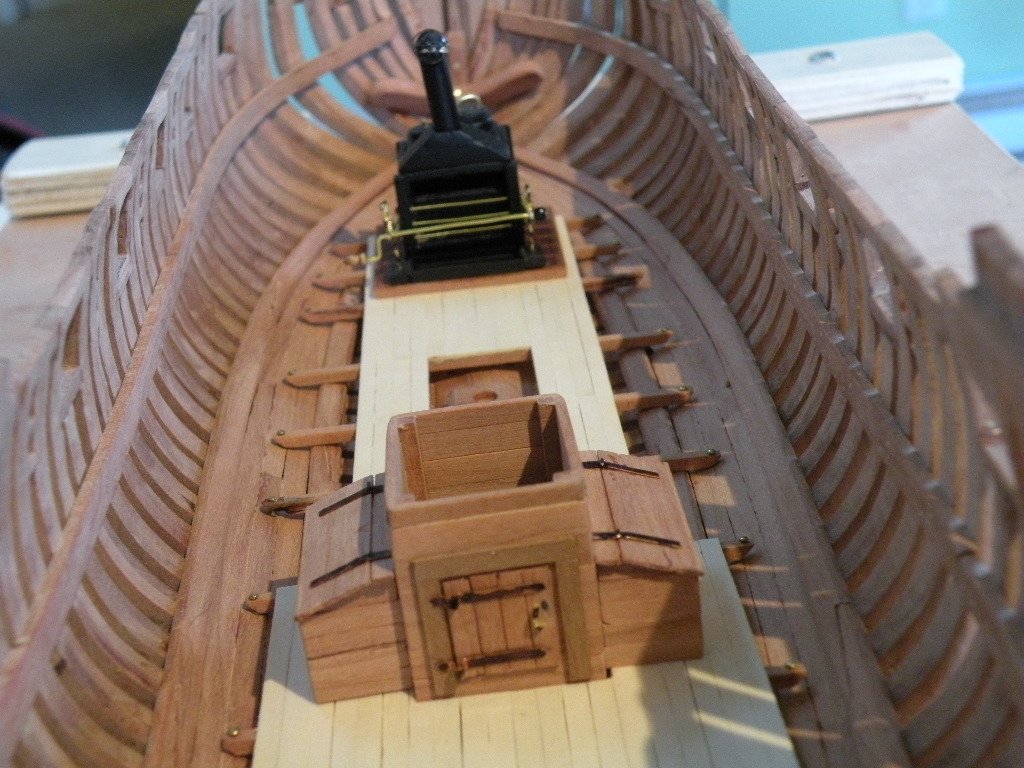
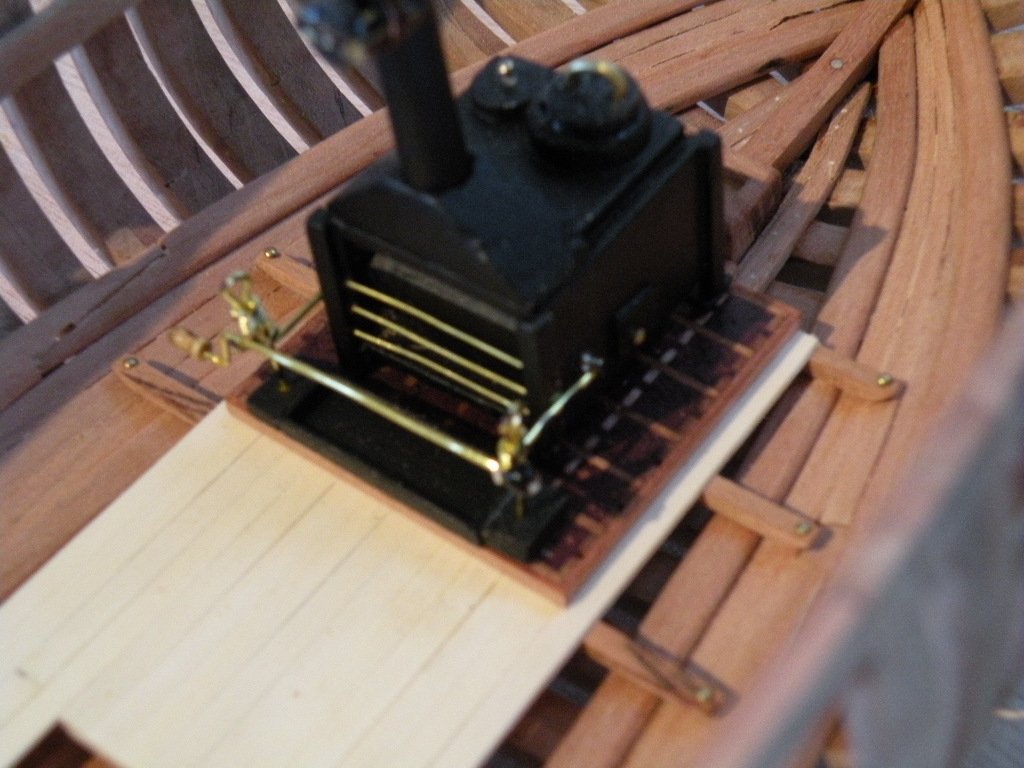
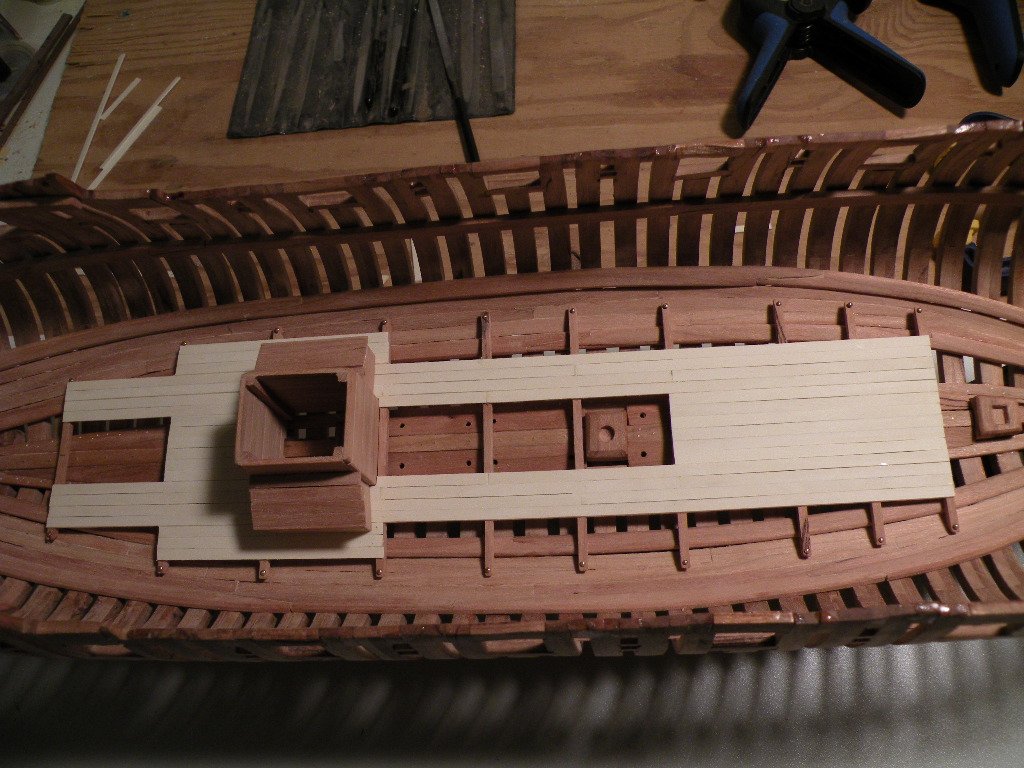
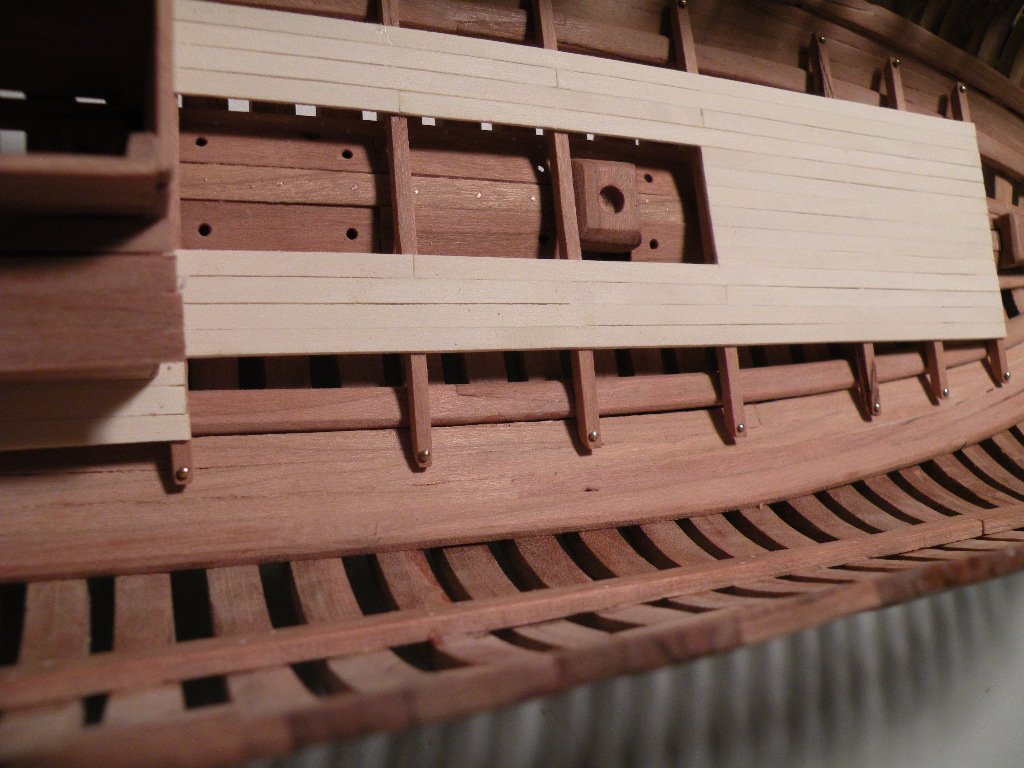
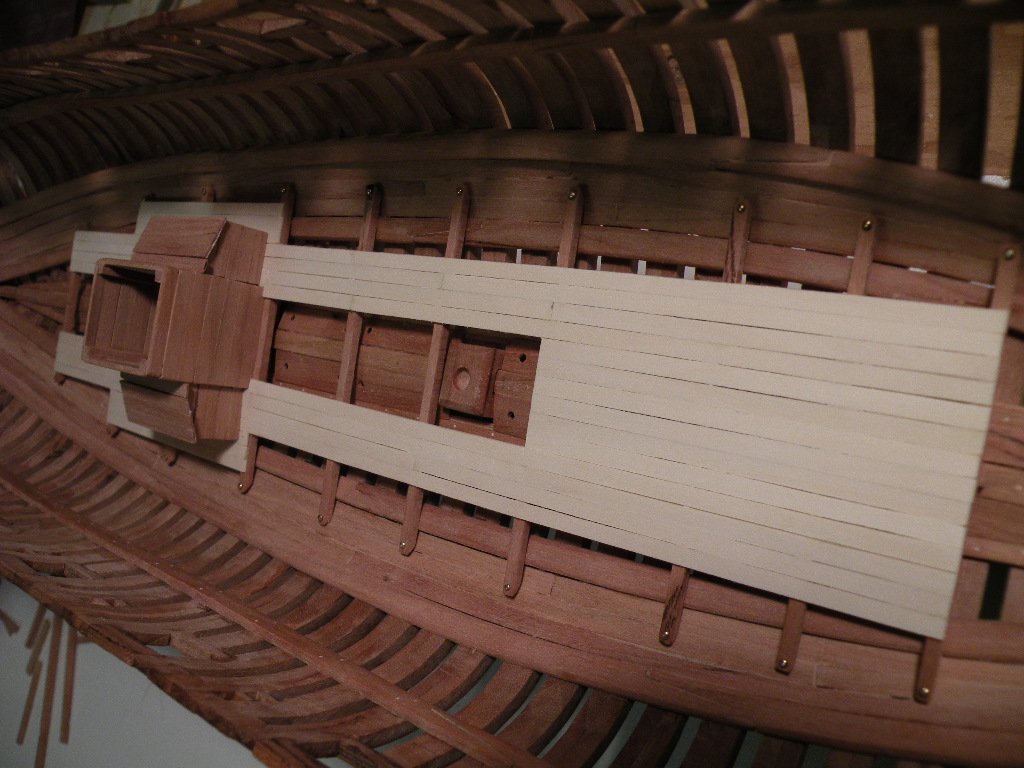
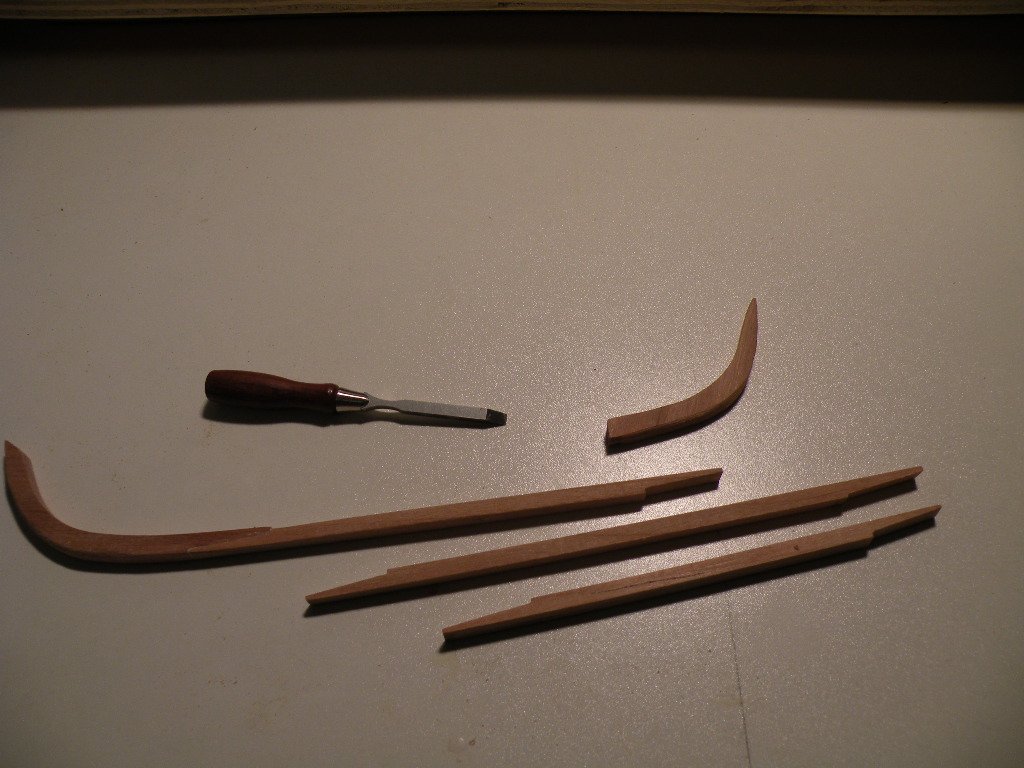
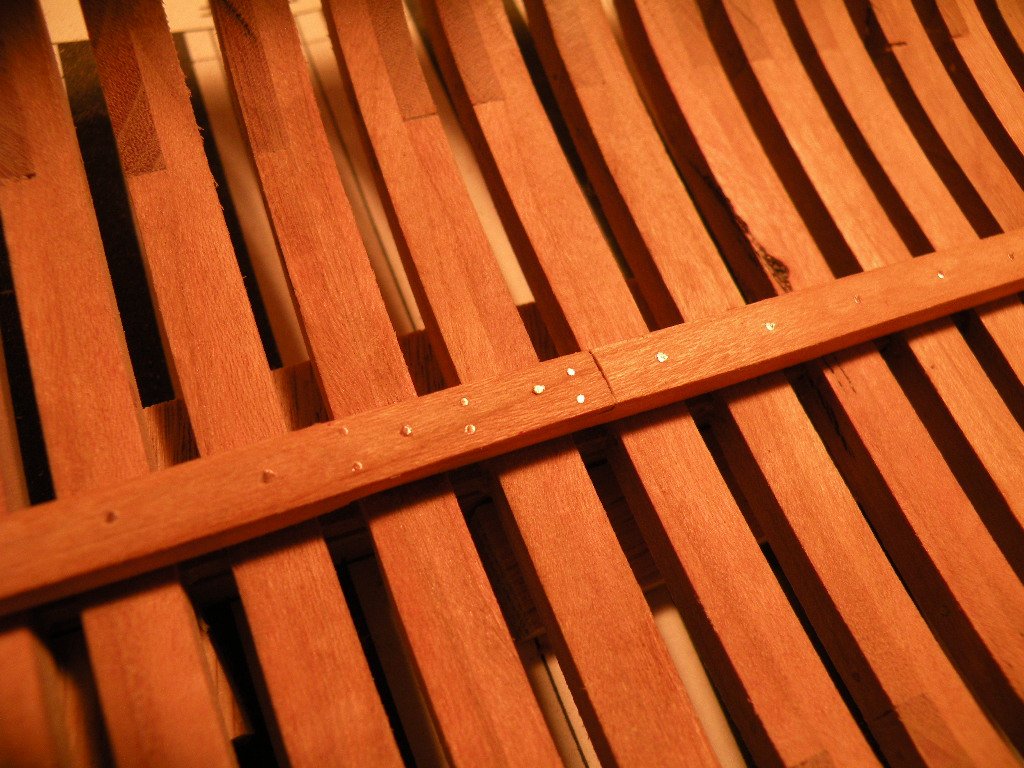
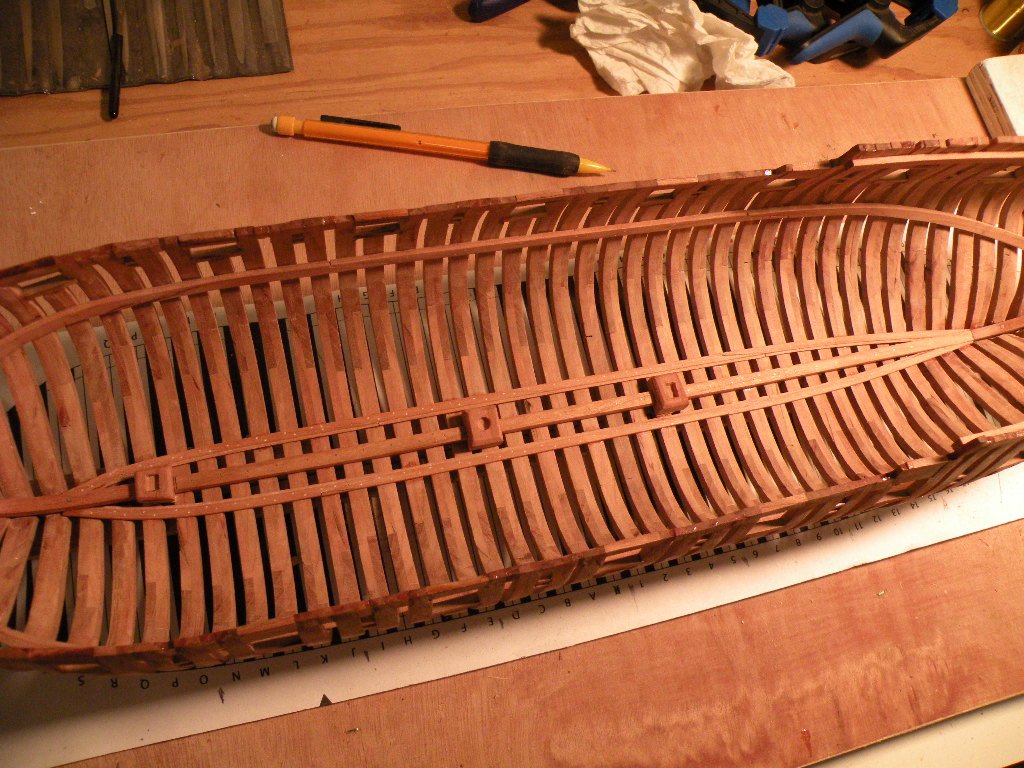
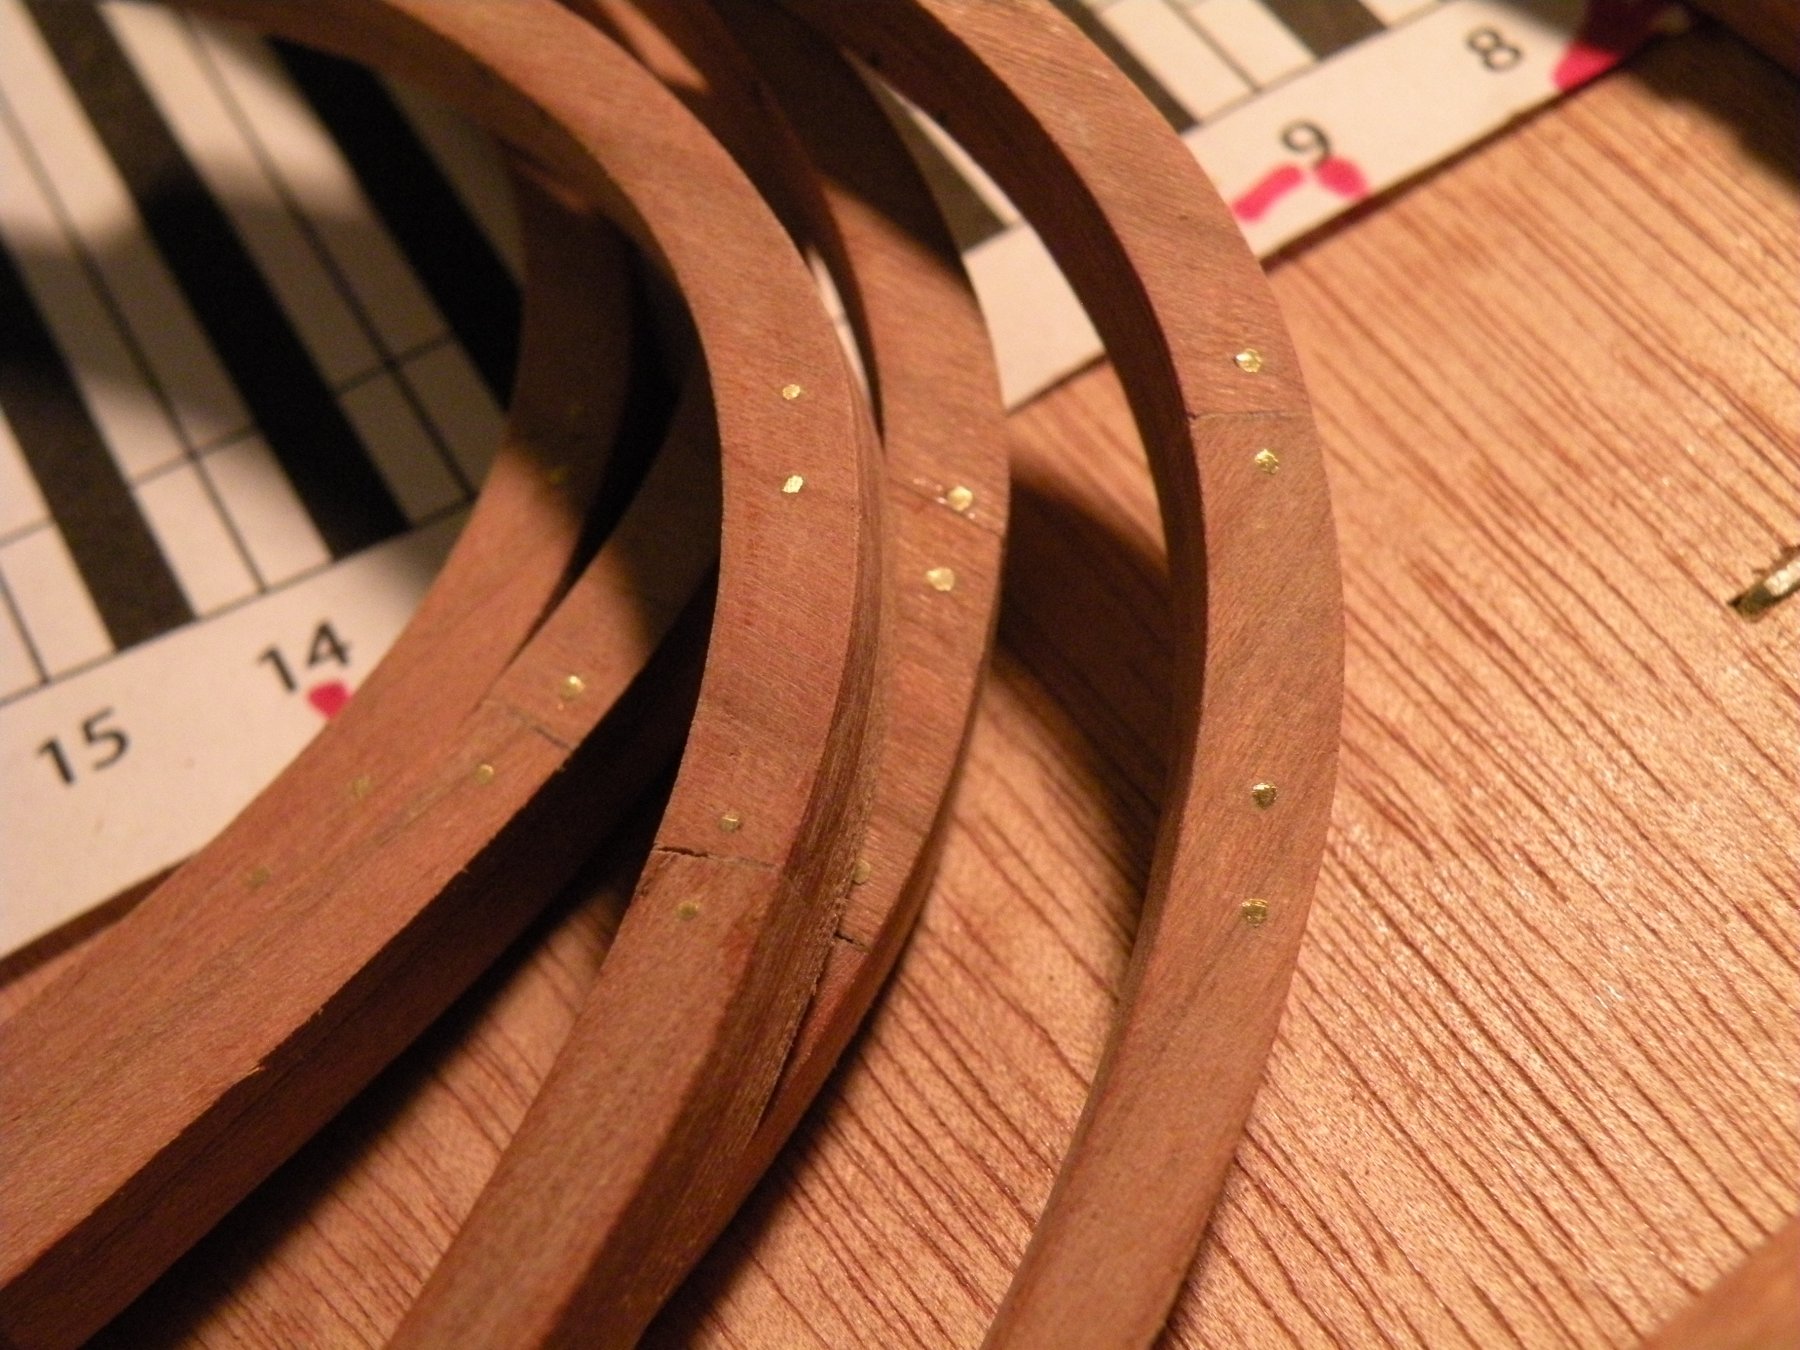
Some more progress. My bending technology is being put to the test. Bending sideways is a challenge but I found if I soak the piece in hot water,then press it into a form of the shape and hit it with the heat gun I can get pretty close to what I need.
So here's where we are now.
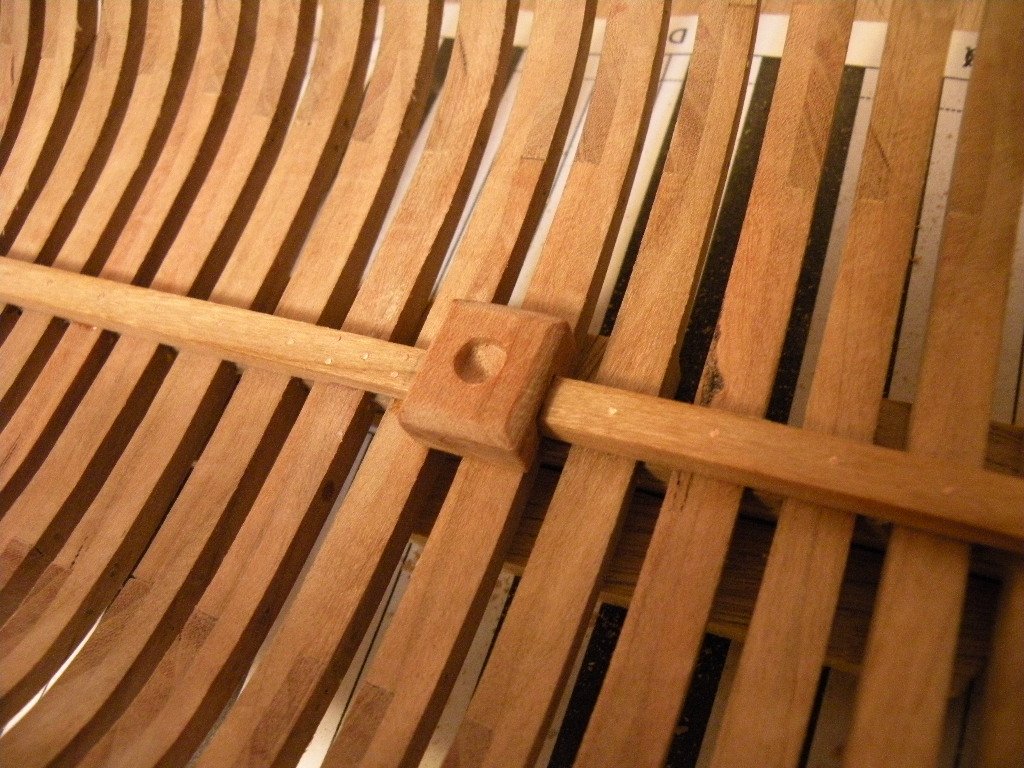
The thick and thin boards are in and so are the crutches. Made a modification to correct an error but I think we are good.
Cheers Mates.
-
Thanks for the nice Mike and all the likes..
On 1/5/2018 at 10:47 AM, Osmosis said:I am always amazed when I see one of these coming together. So far beyond my skill level and a real treat to watch. I am most definitely on board for the rest of the voyage.
This is definitely stretching my skill level. Having to get creative along the way.
-
-
-
-
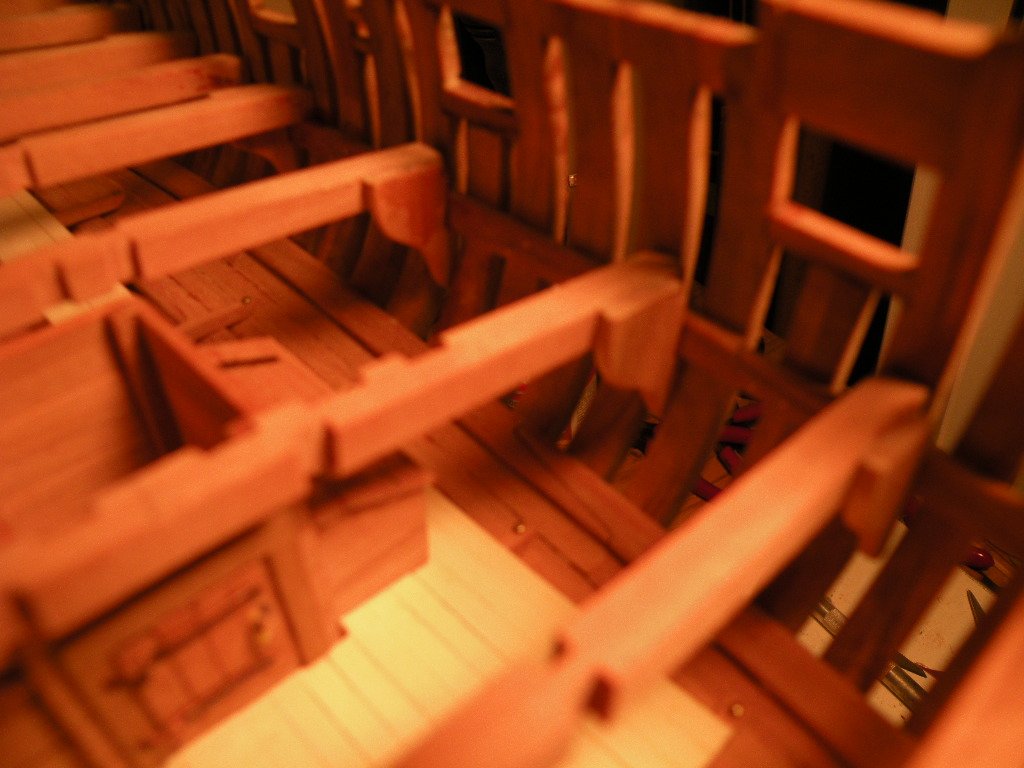
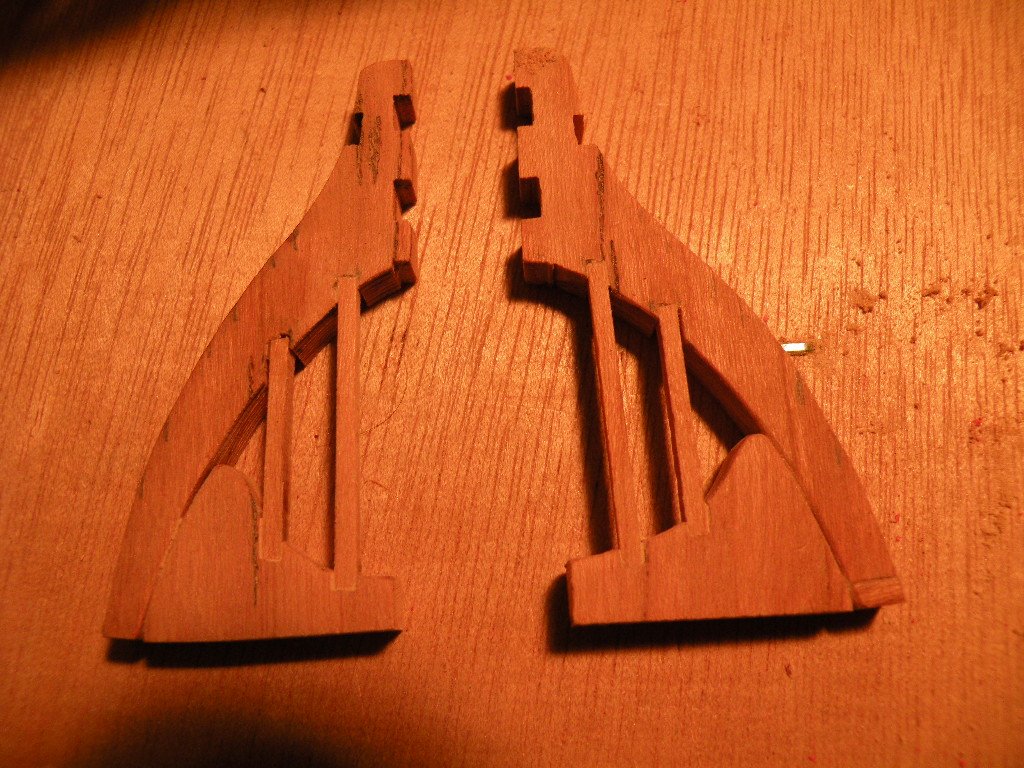
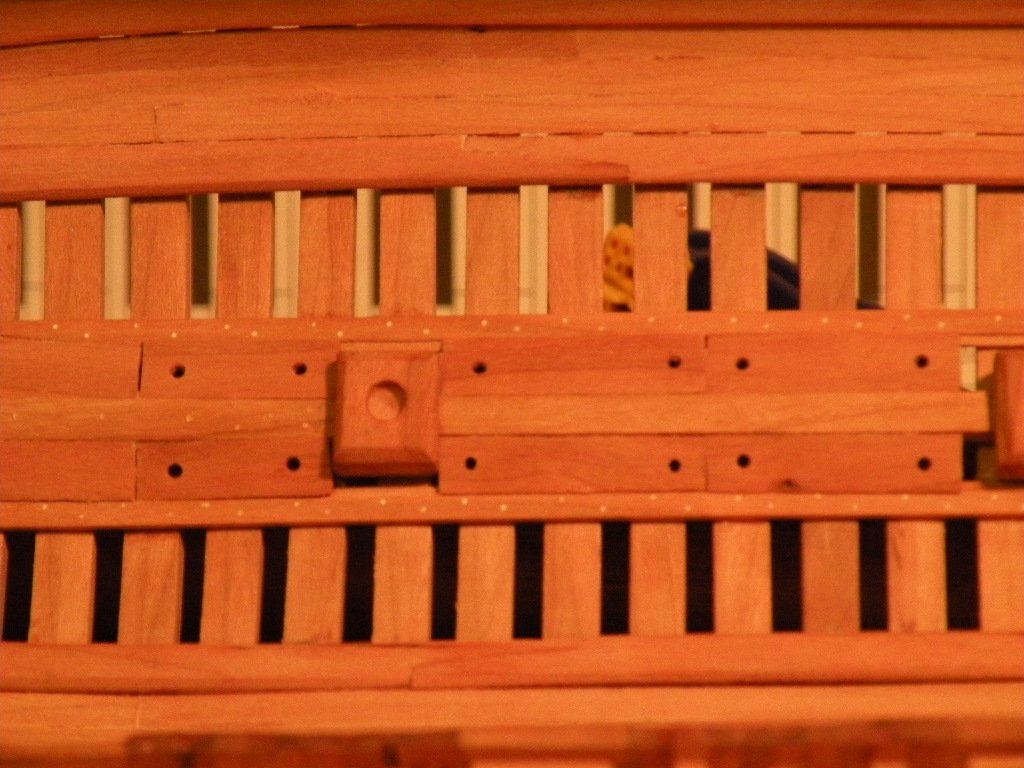
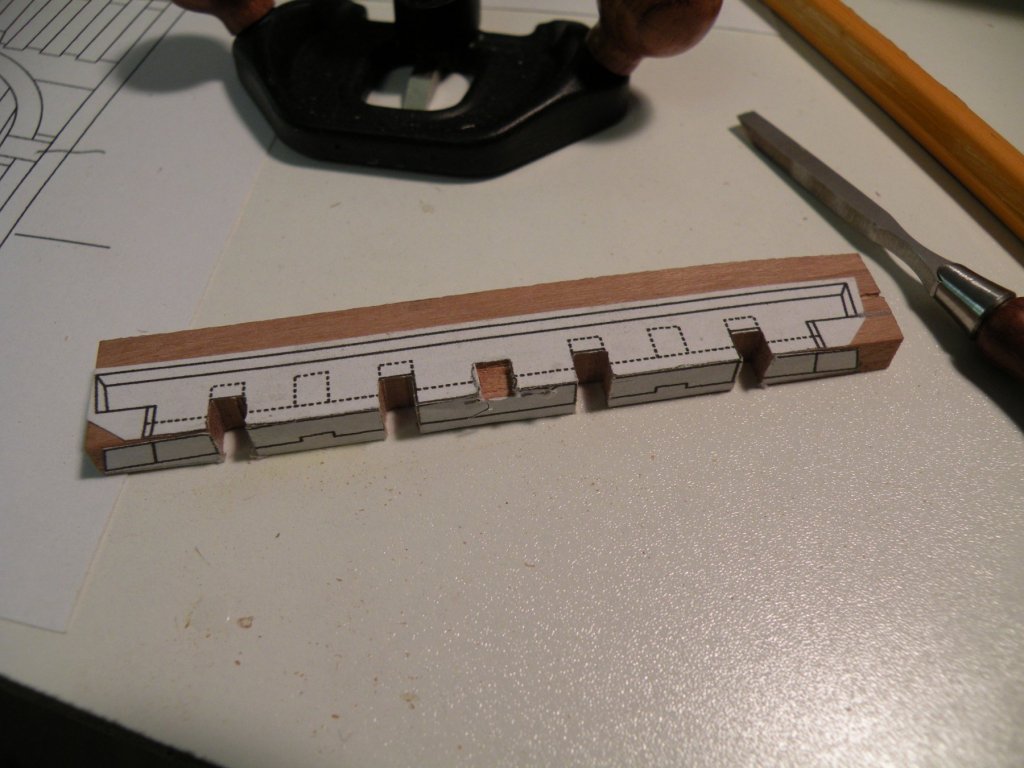
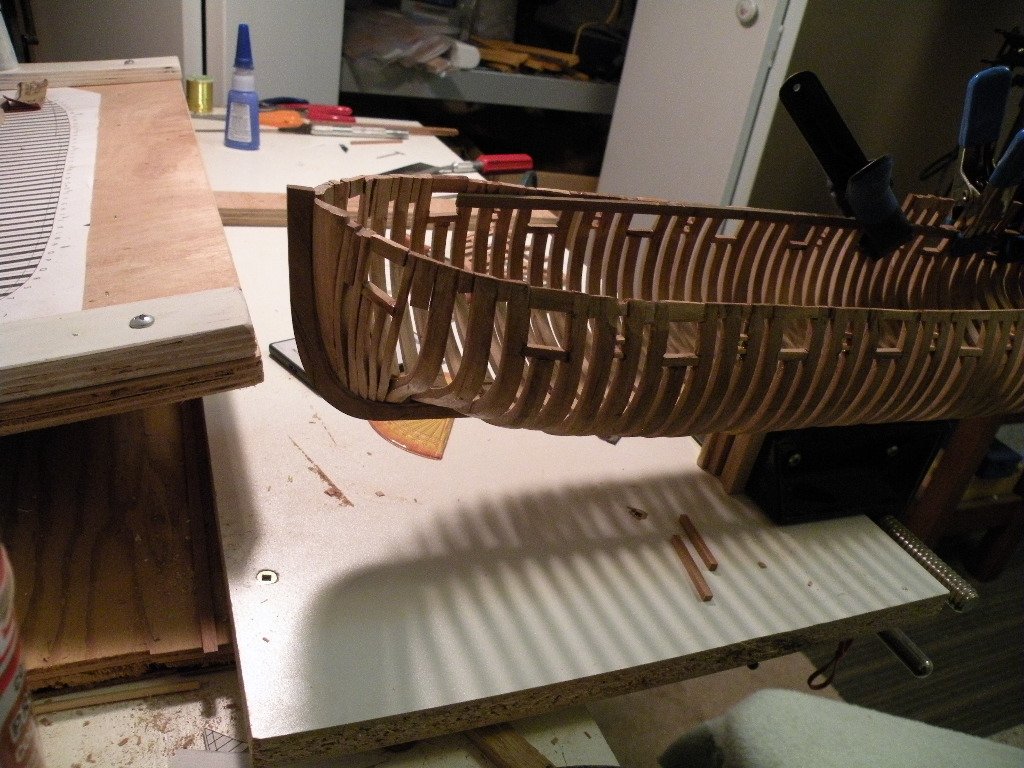
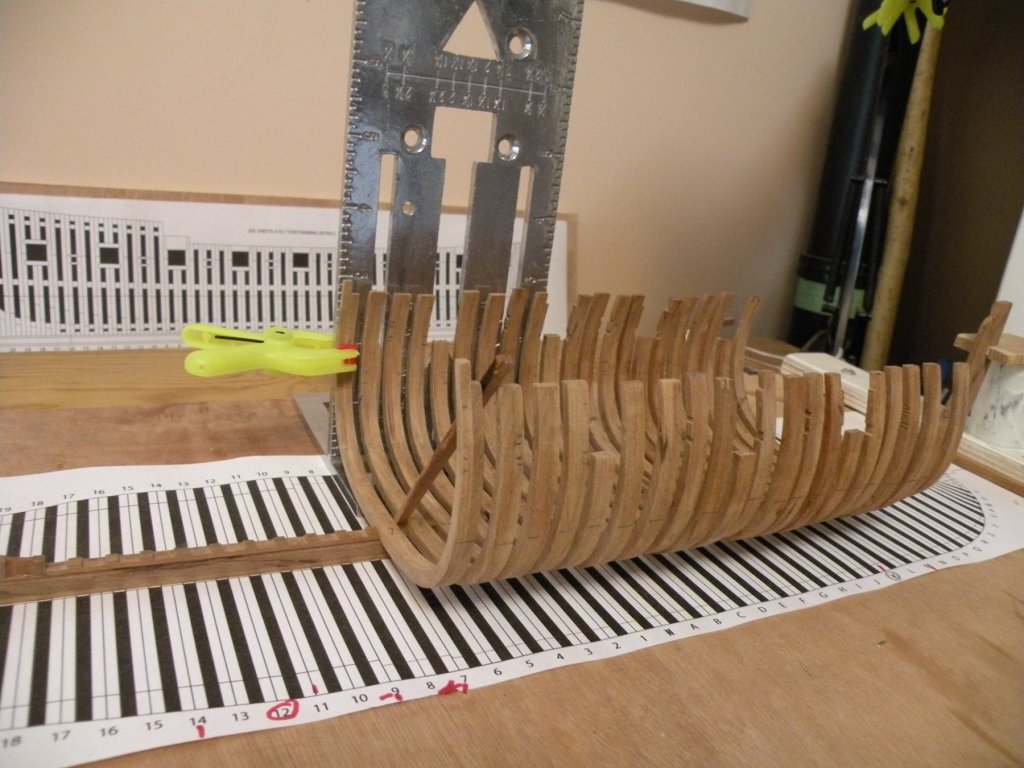
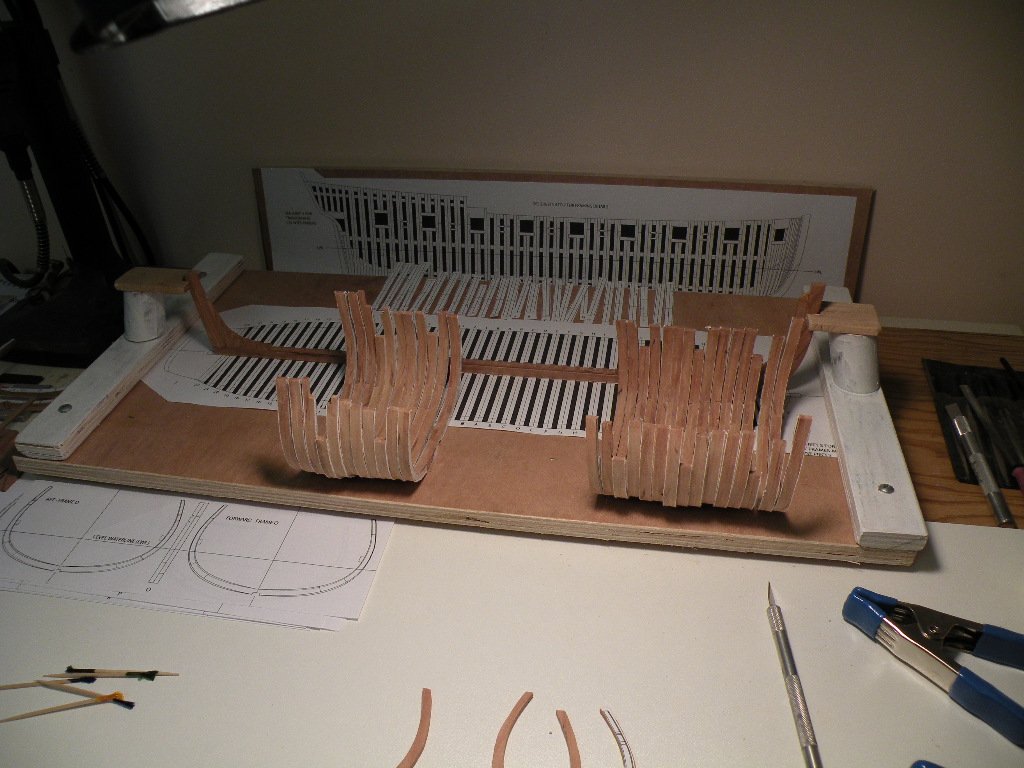
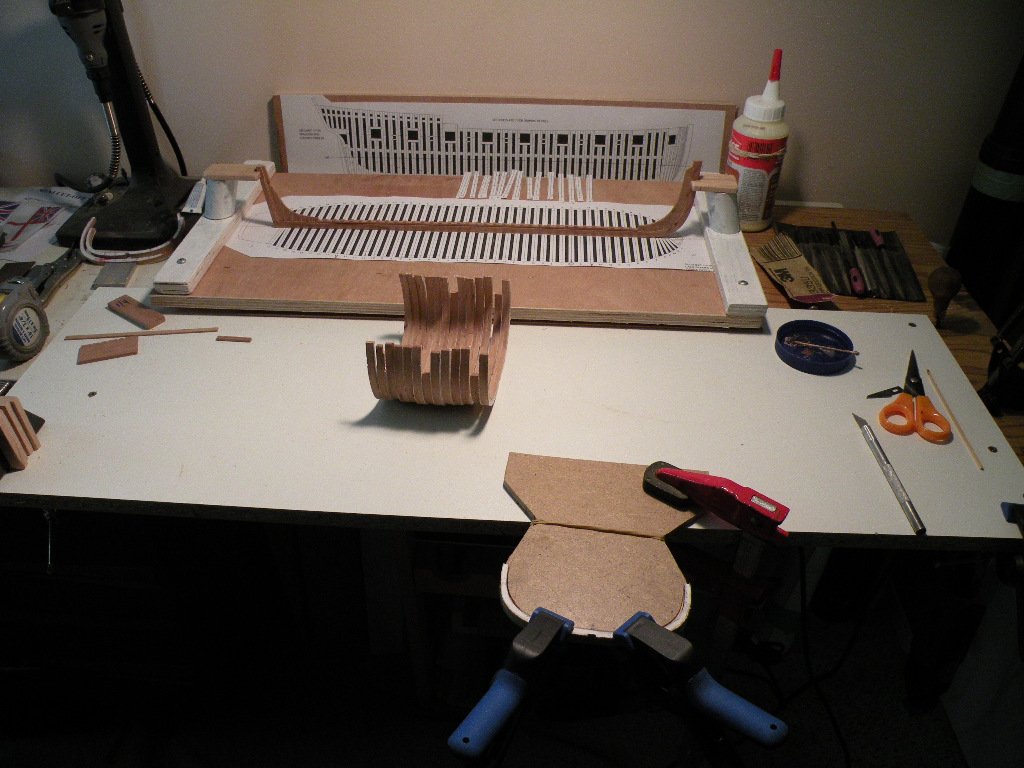
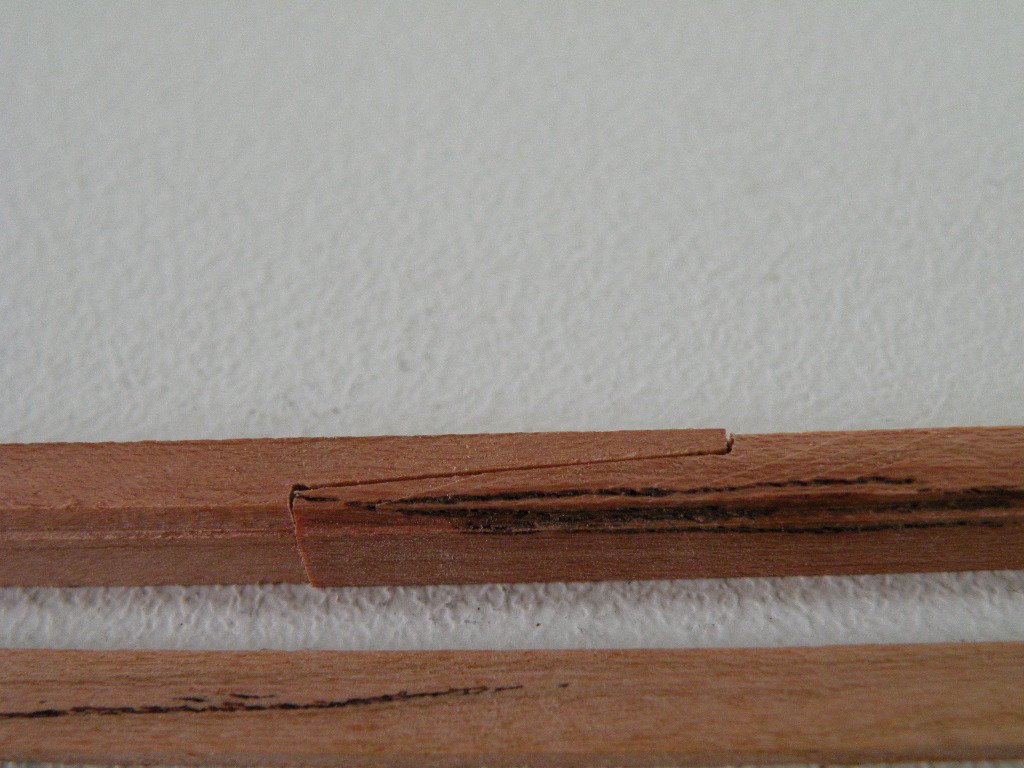
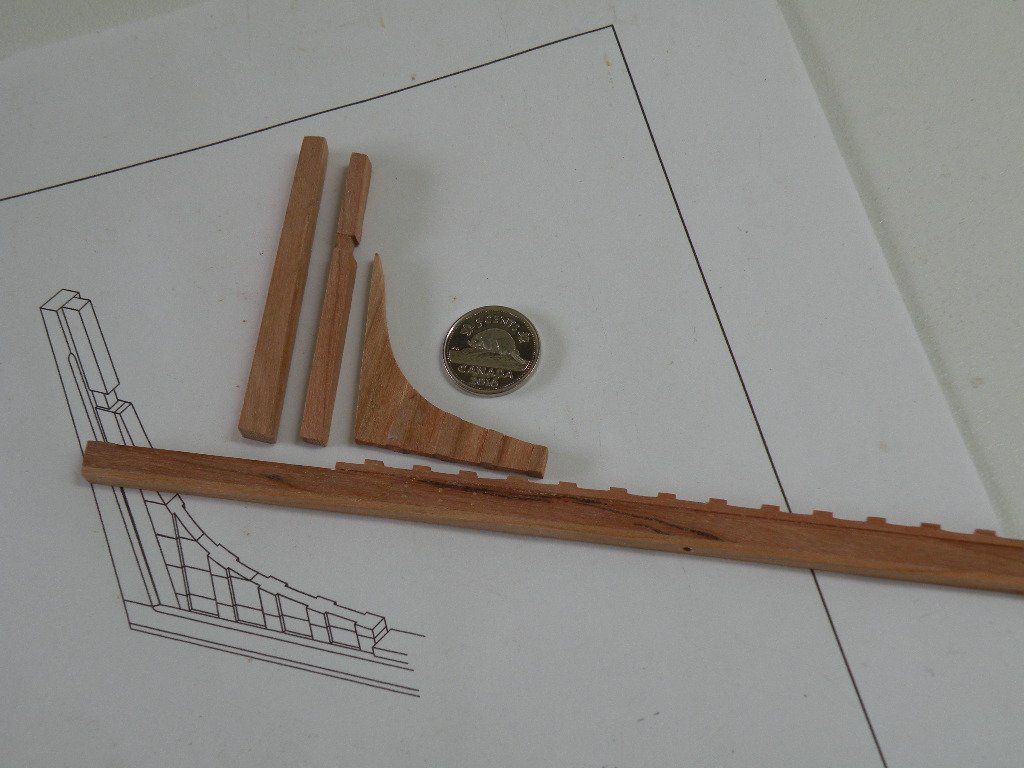
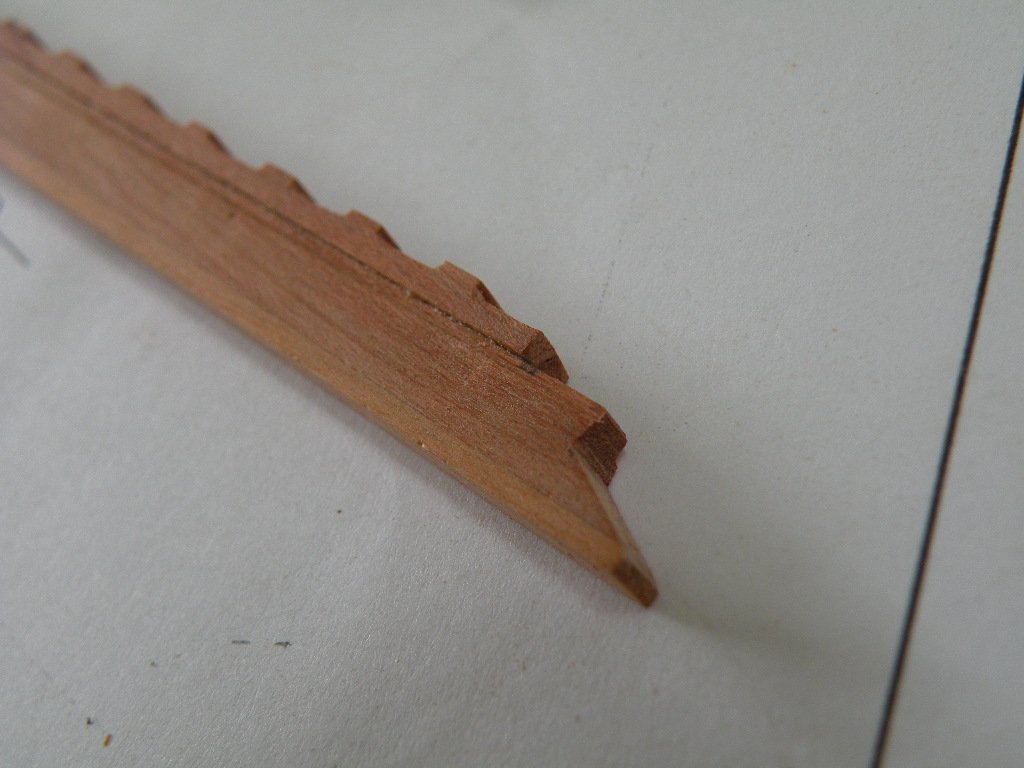
Well things are rolling along some days it's two steps forward and one back. Found I had a bit of a twist near the bow managed to work most of it out.
The front Canti ribs are one rib and not doubled up so had to redo those. The bow filler pieces were a hand full and I think I made three stern tops # 8.
Sadly I forgot to reduce the size of some of the pics I took here are a few that made it.
Merry Christmas to all.
-
-
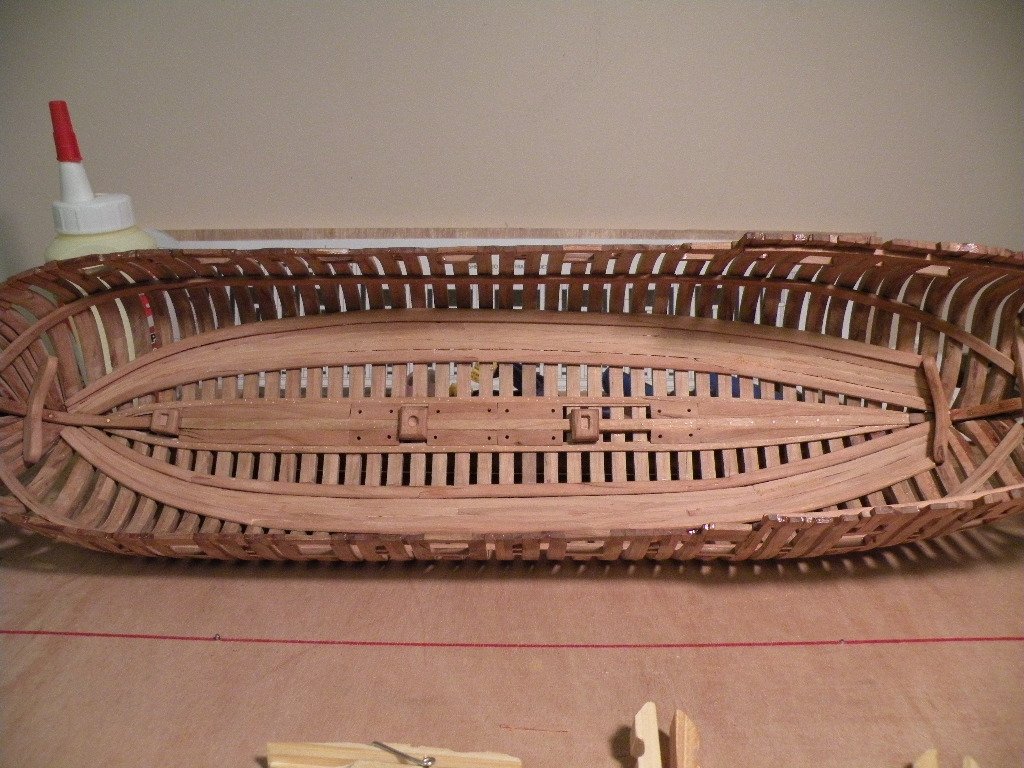
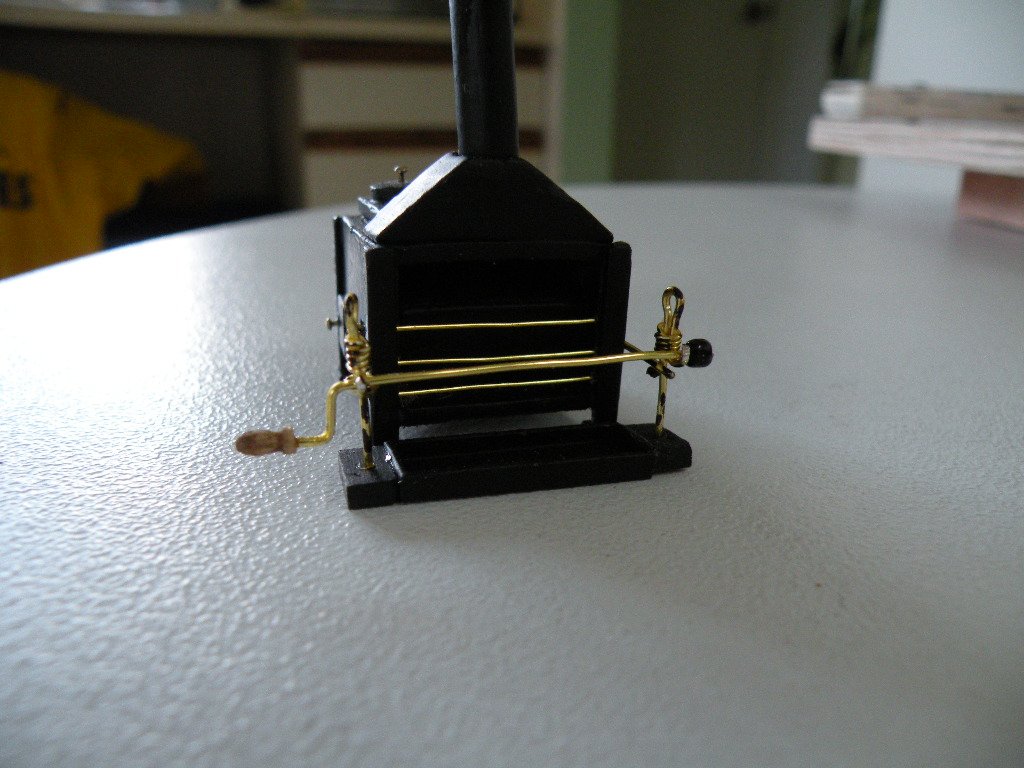
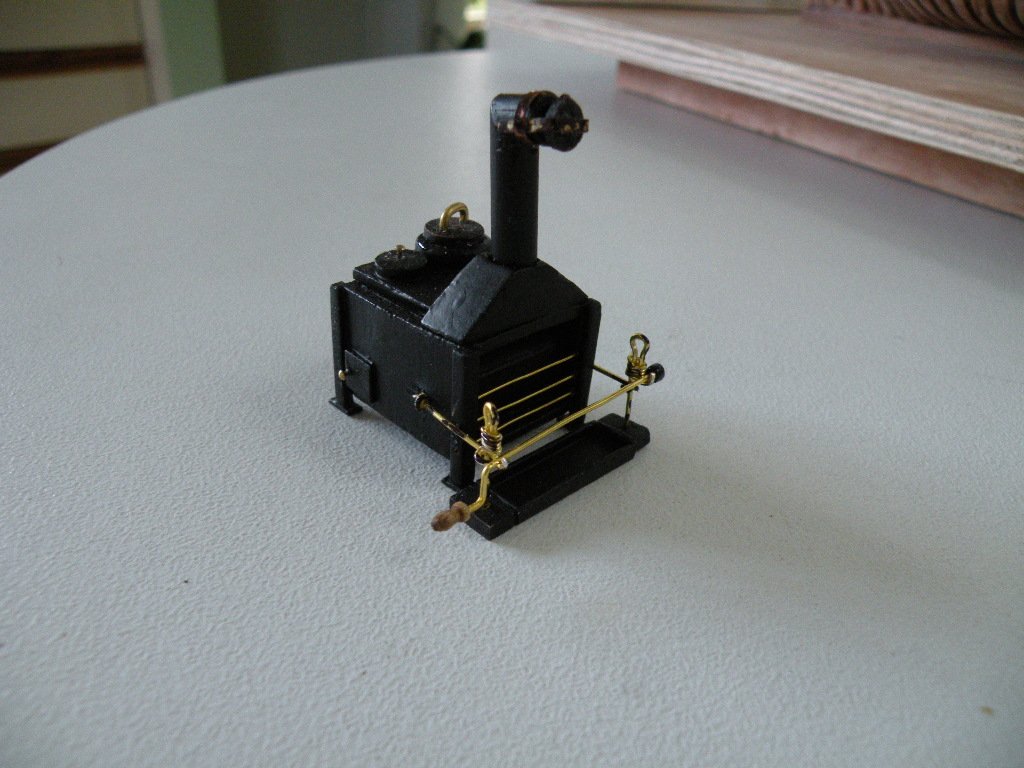
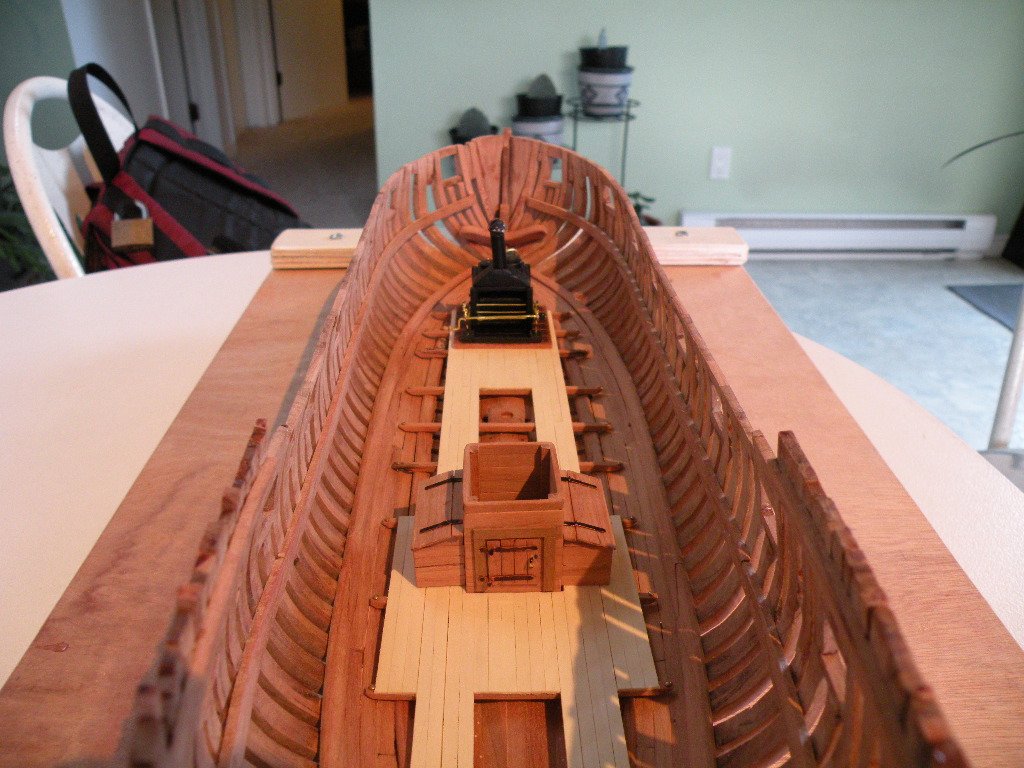
The time for summer activities is over here and I'm back to working on the Washington. Here are some progress pictures.
I started cutting the gun port mortises off the ship but decided to do them after mounting on the keel. I could get better alignment this way.
It seemed to be getting a little helter skelter cutting them solo.
Dan


-
On 6/4/2017 at 9:42 AM, robnbill said:
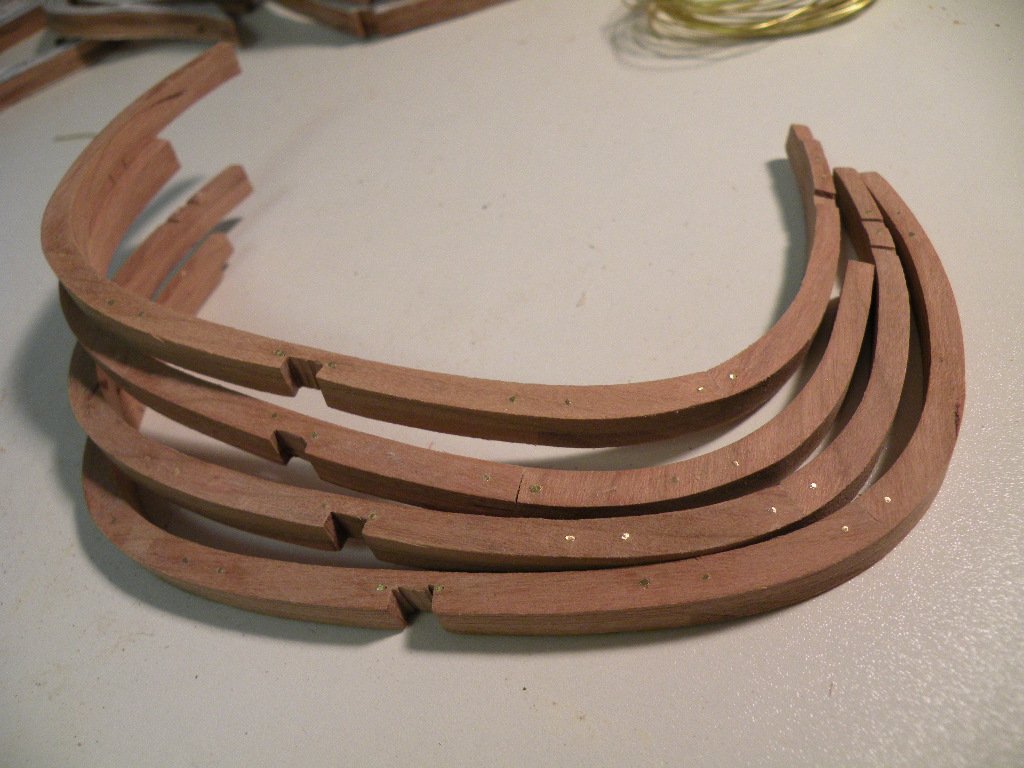
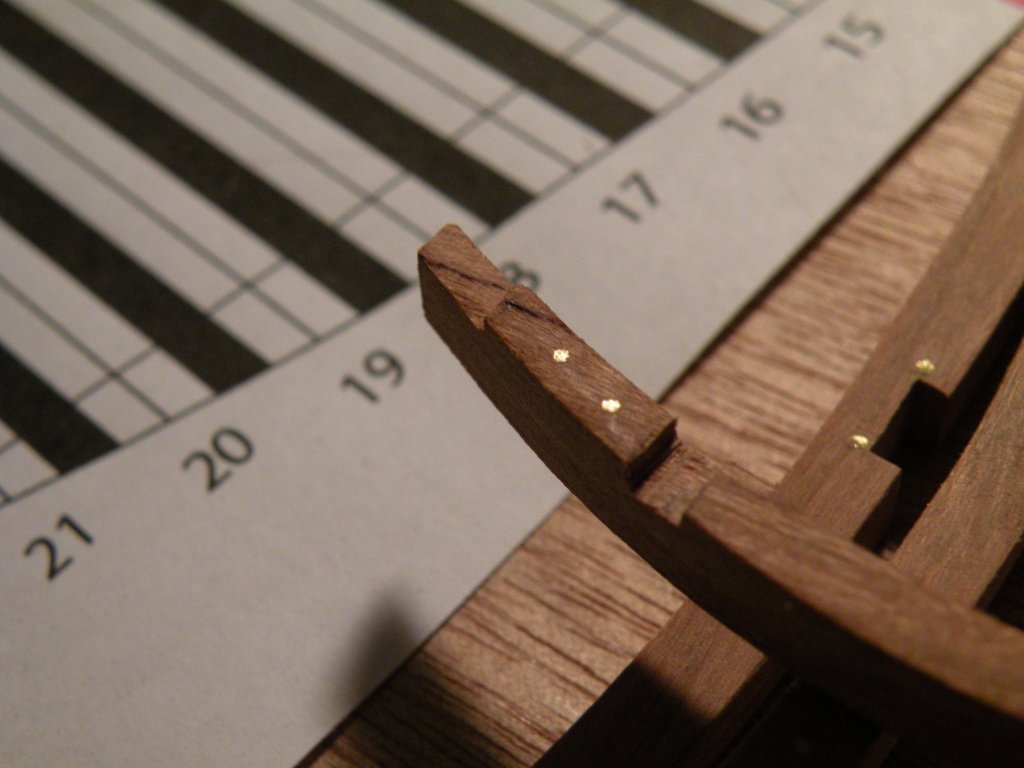
You are doing a great job with the joinery. I have a couple of suggestions you might want to look at. First is to try to align your frame sections with the wood grain. This makes the strongest frame. This minimizes the grain running across the short section of the frame (as shown in the second frame from the top in your last photo). This is never perfect, but was the technique used by the builders.
Second, I found it good insurance to glue the frames up on top of the template. This insures the frames do not get sprung one way or the other during glue up.
Thanks for the advice Rob, I did the odd grain matching so when people come to admire the ship the change of grain direction would be more obvious and they could see where the joints are. This way they can see it isn't just one piece of wood. I havn't had problems with the ribs springing but some of the shapes weren't completely true.
Cheers
Dan
-
-
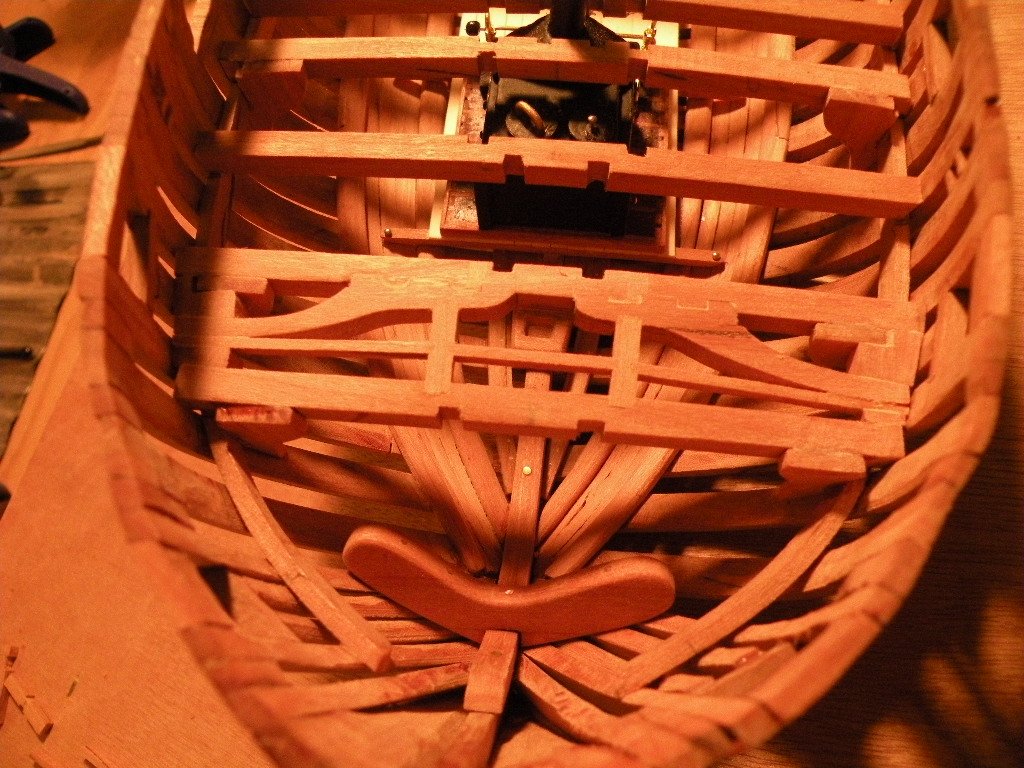
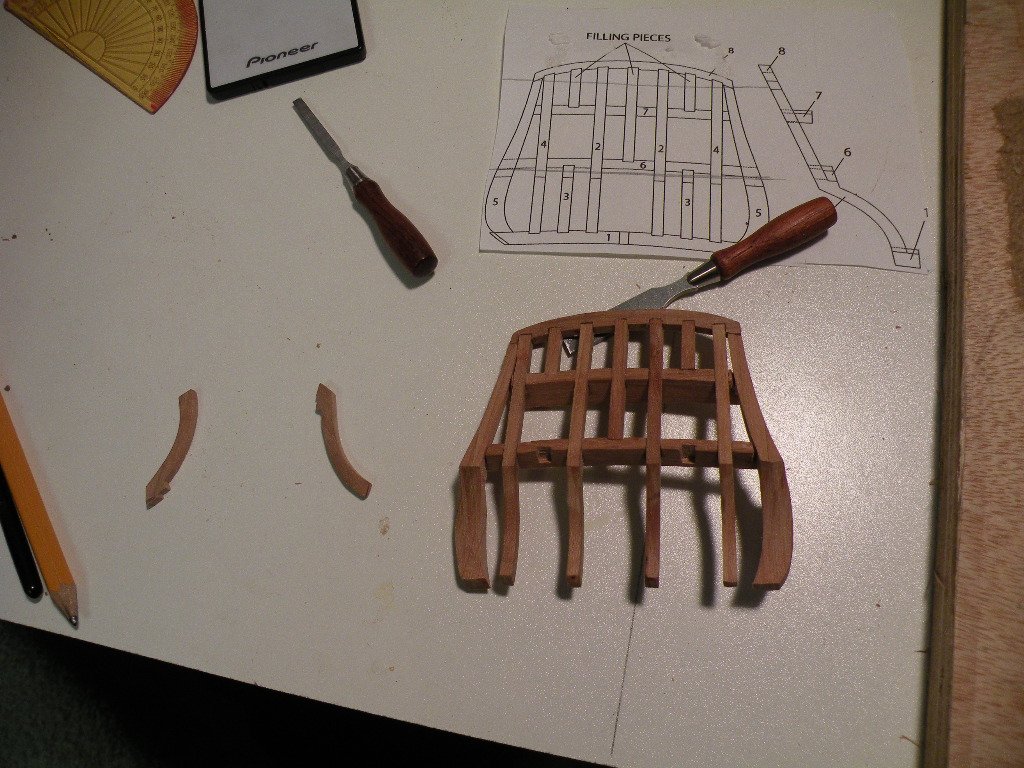
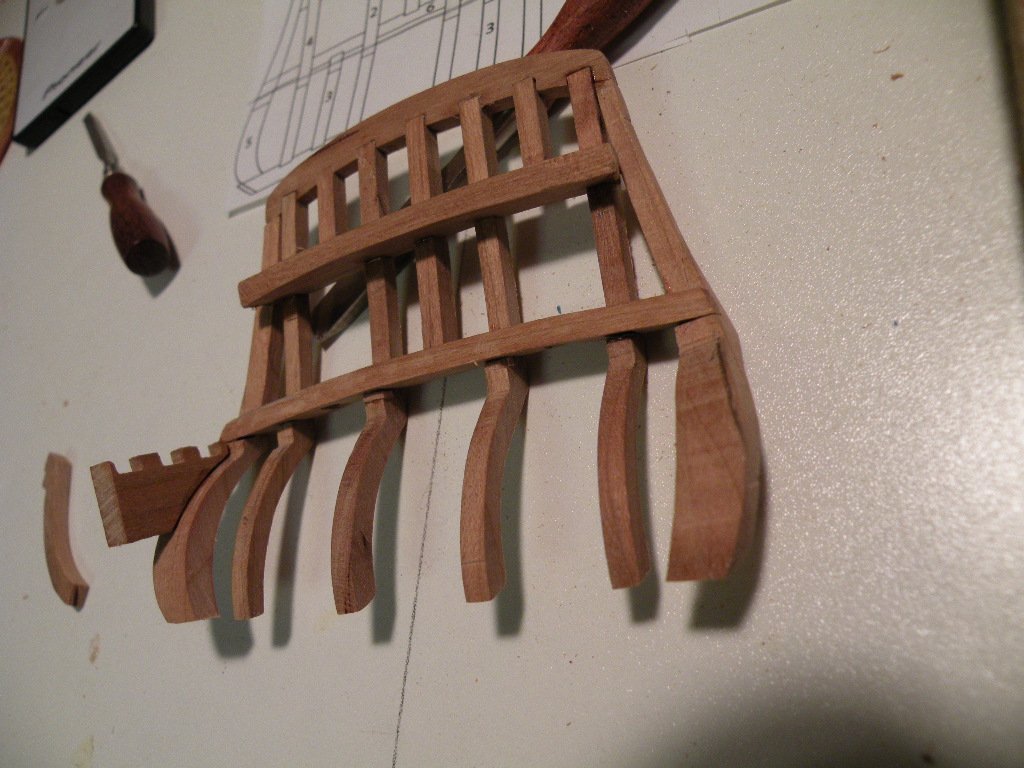
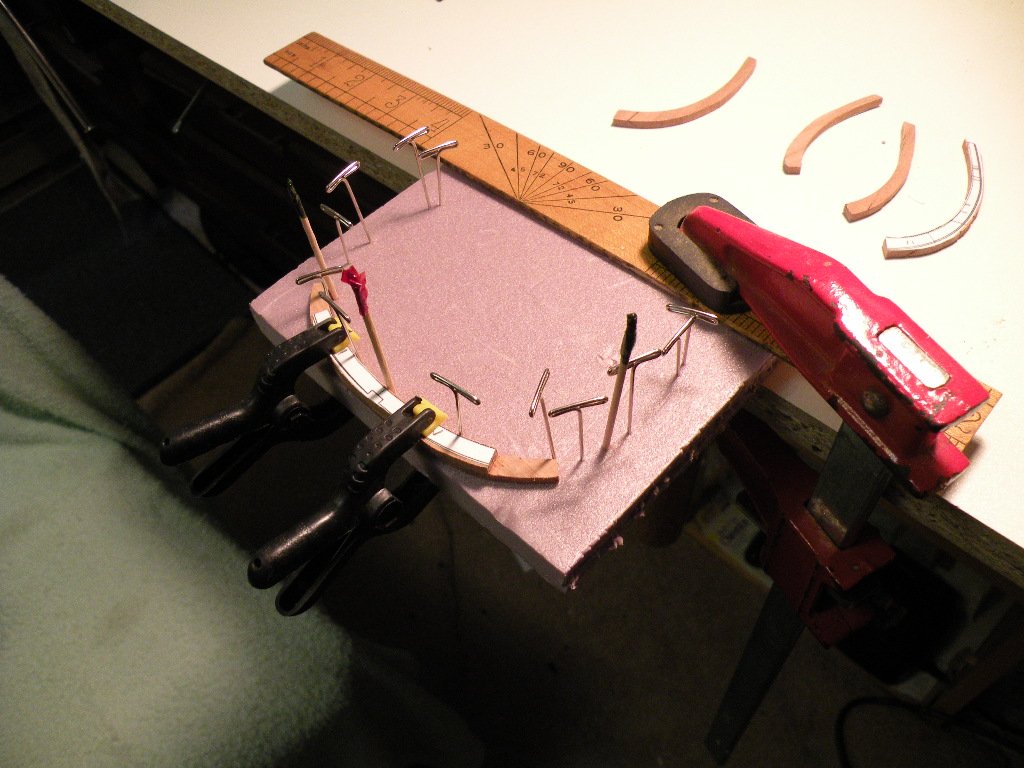
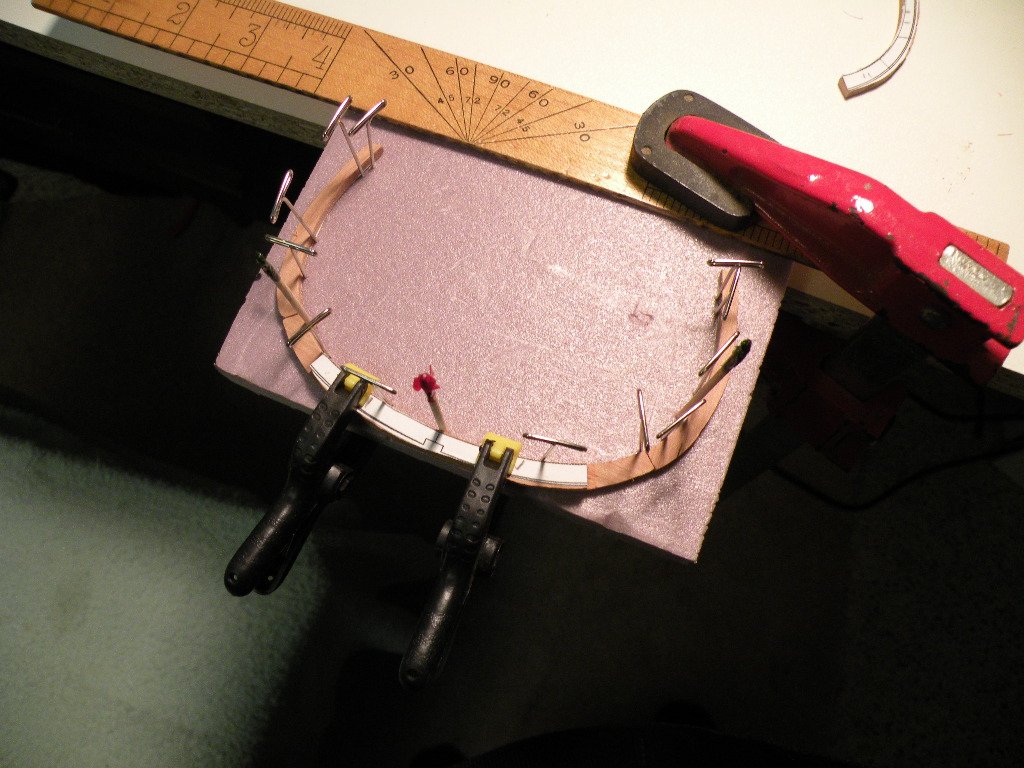
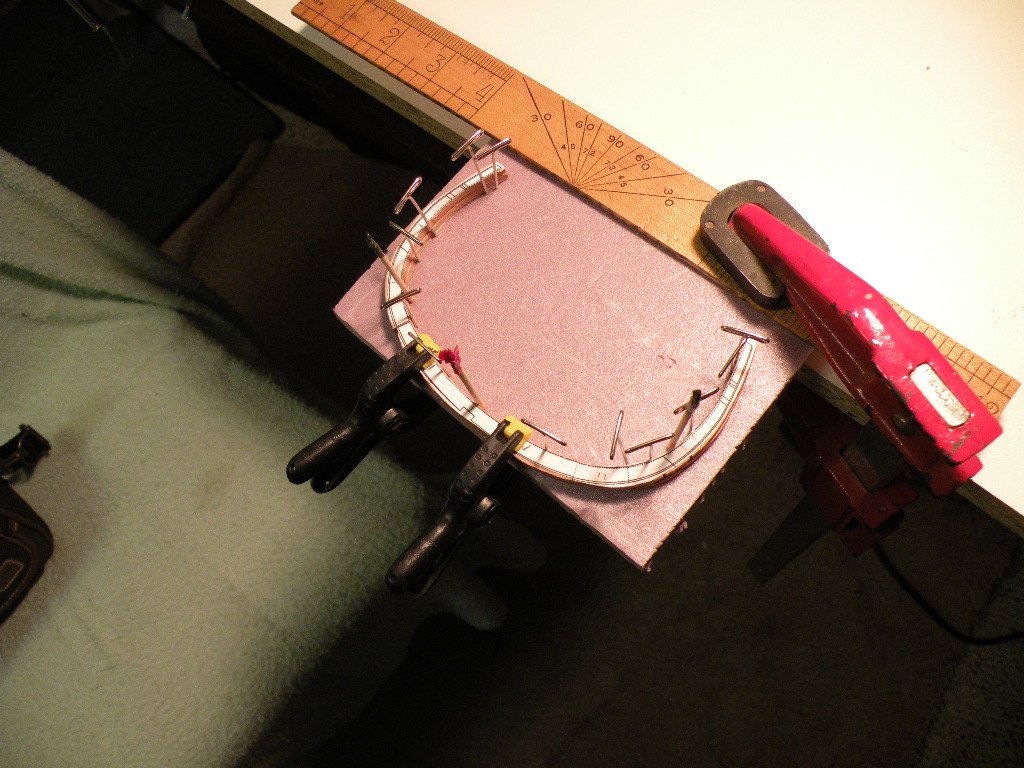
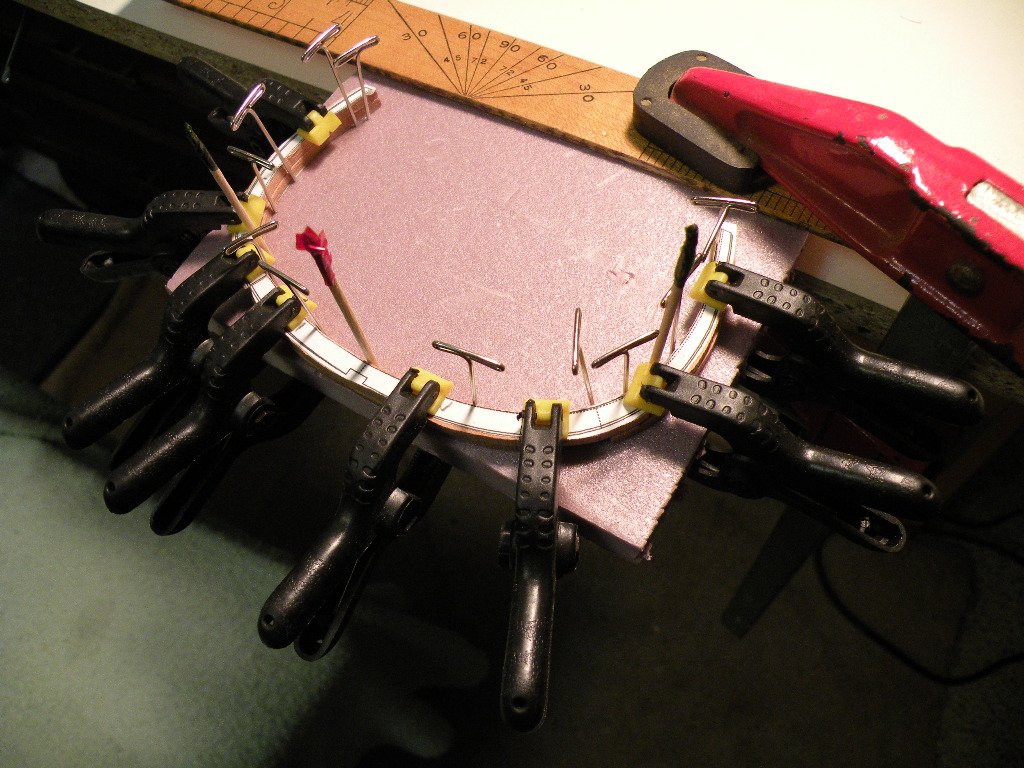
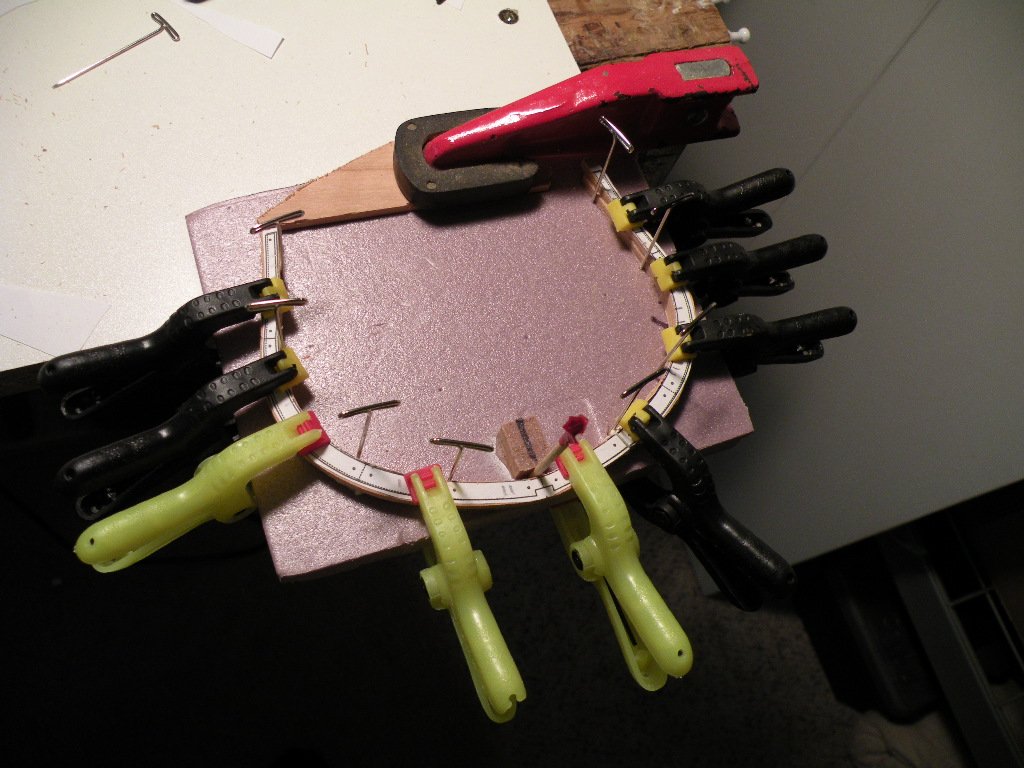
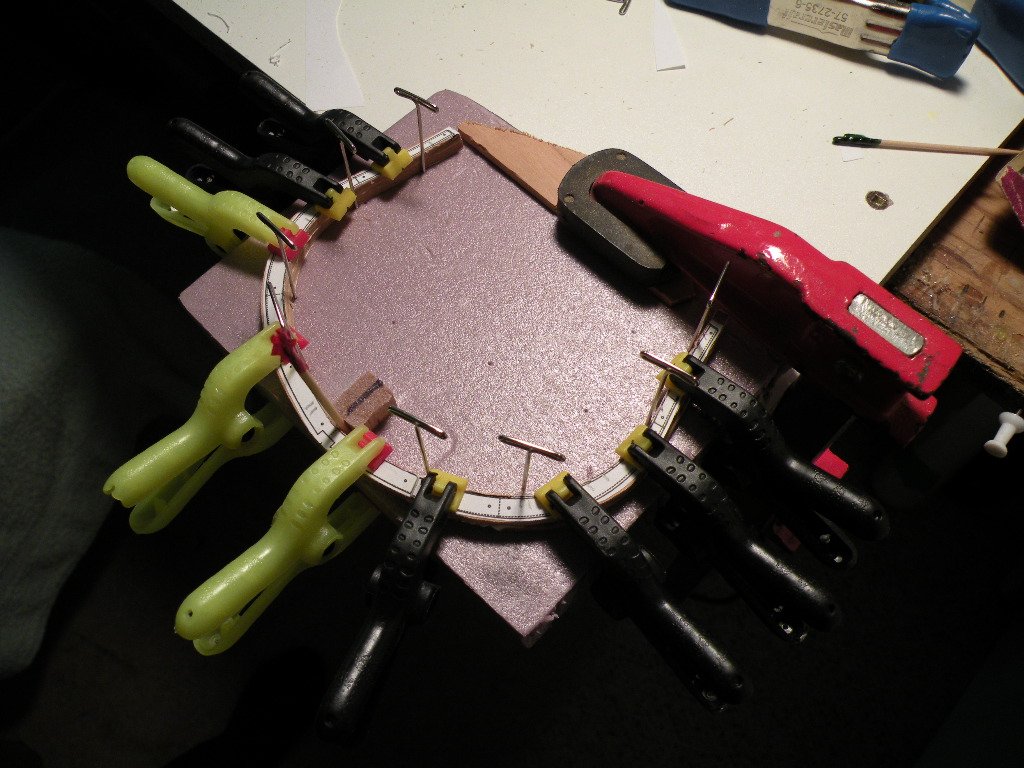
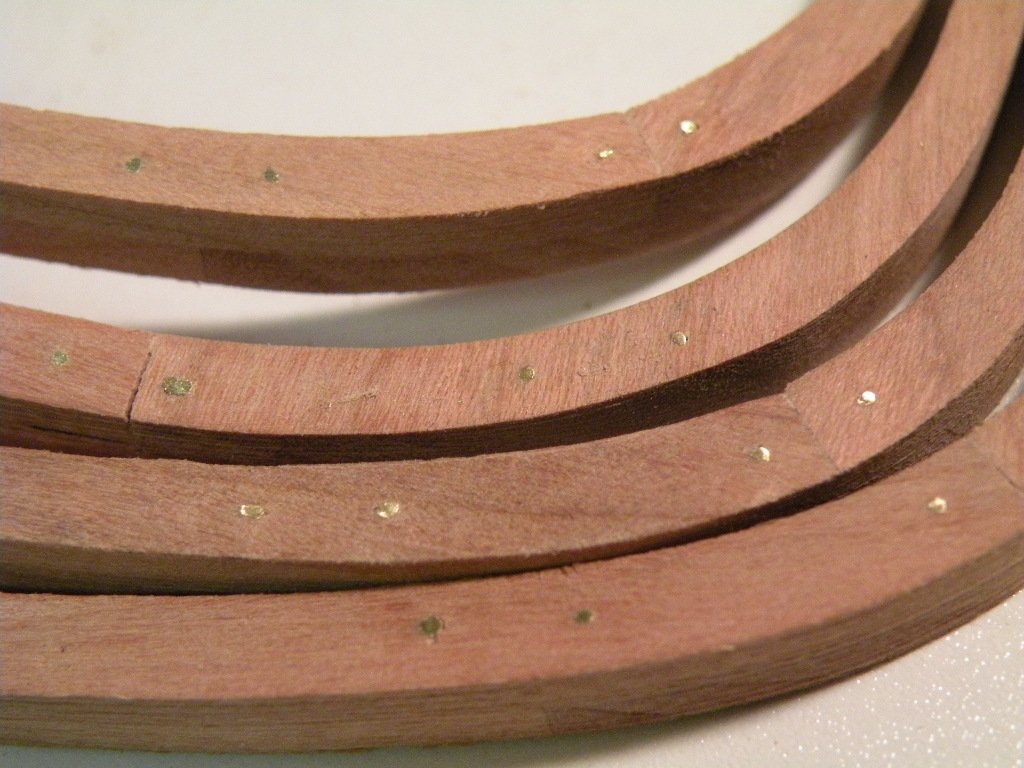
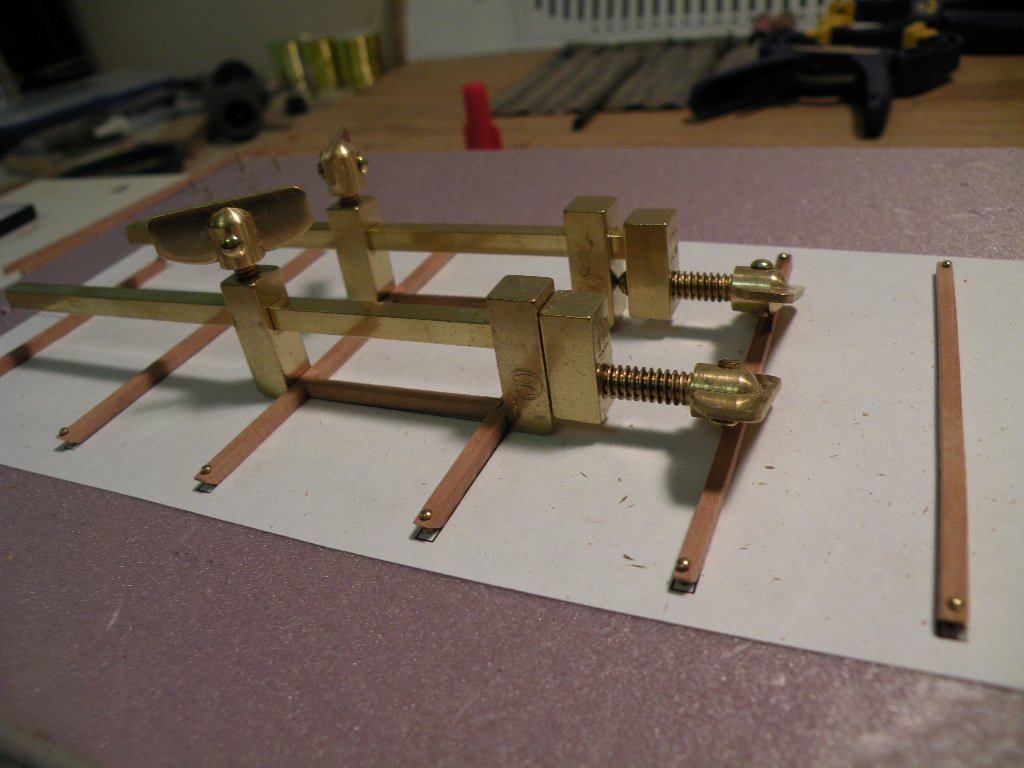
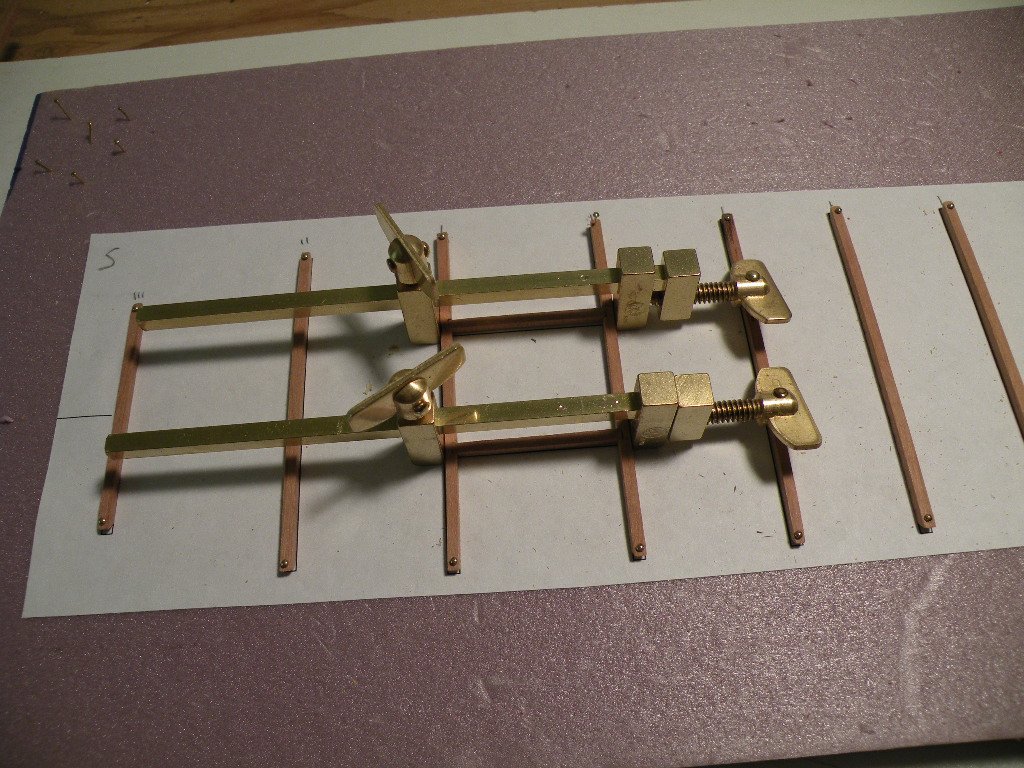
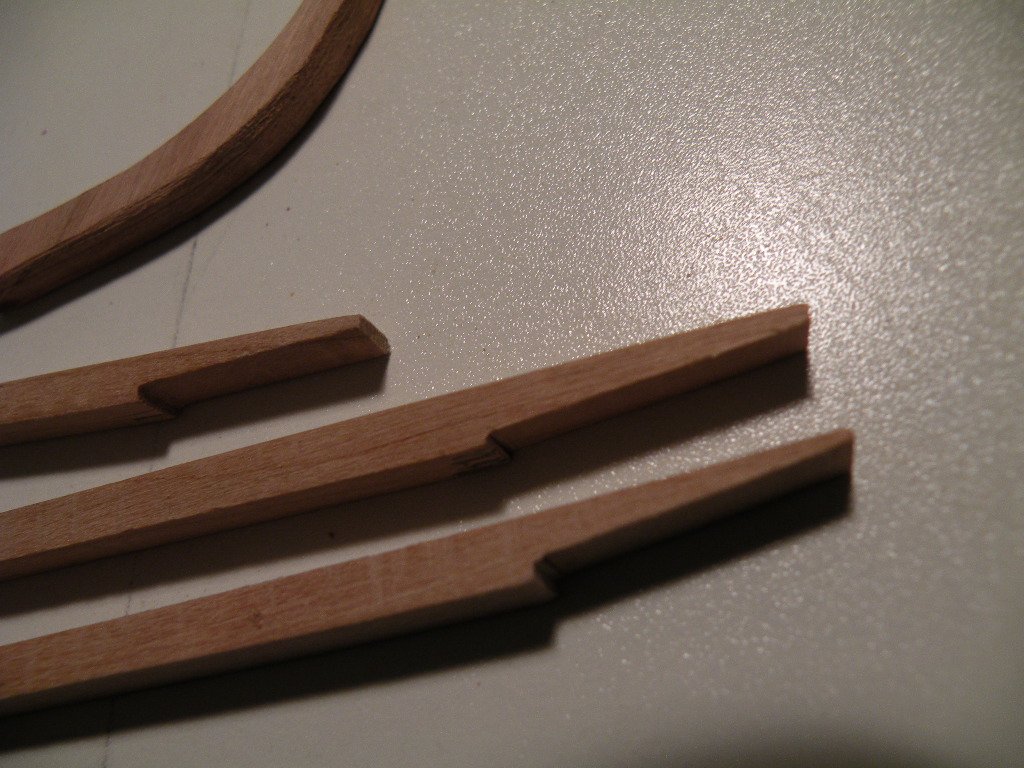
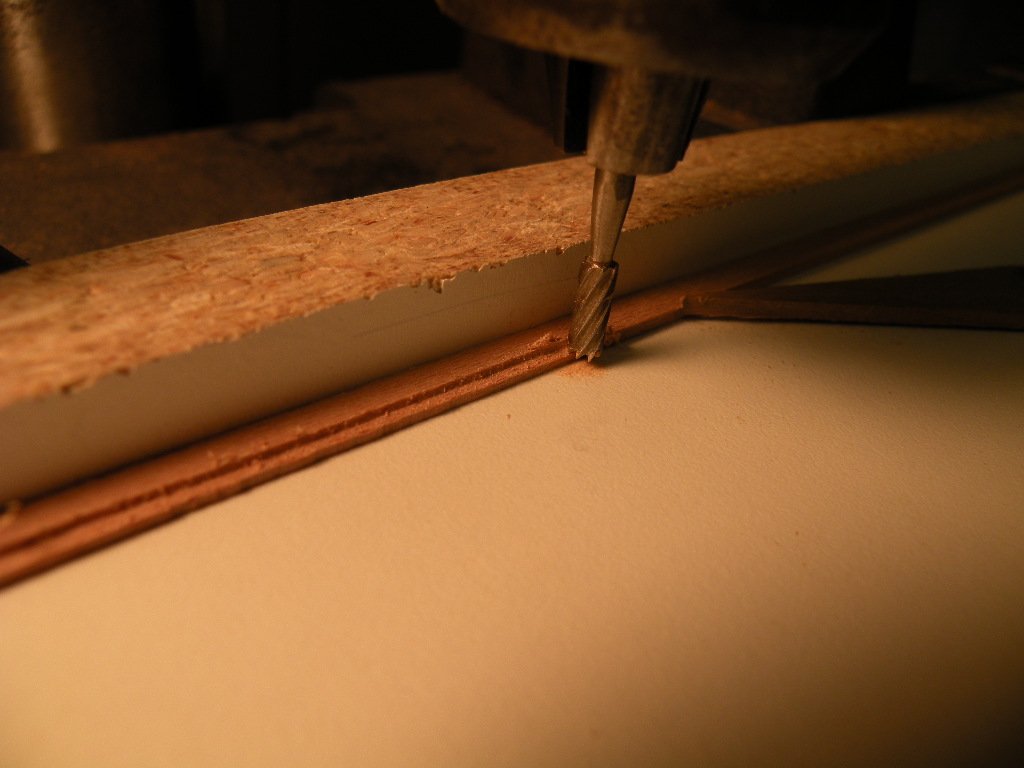
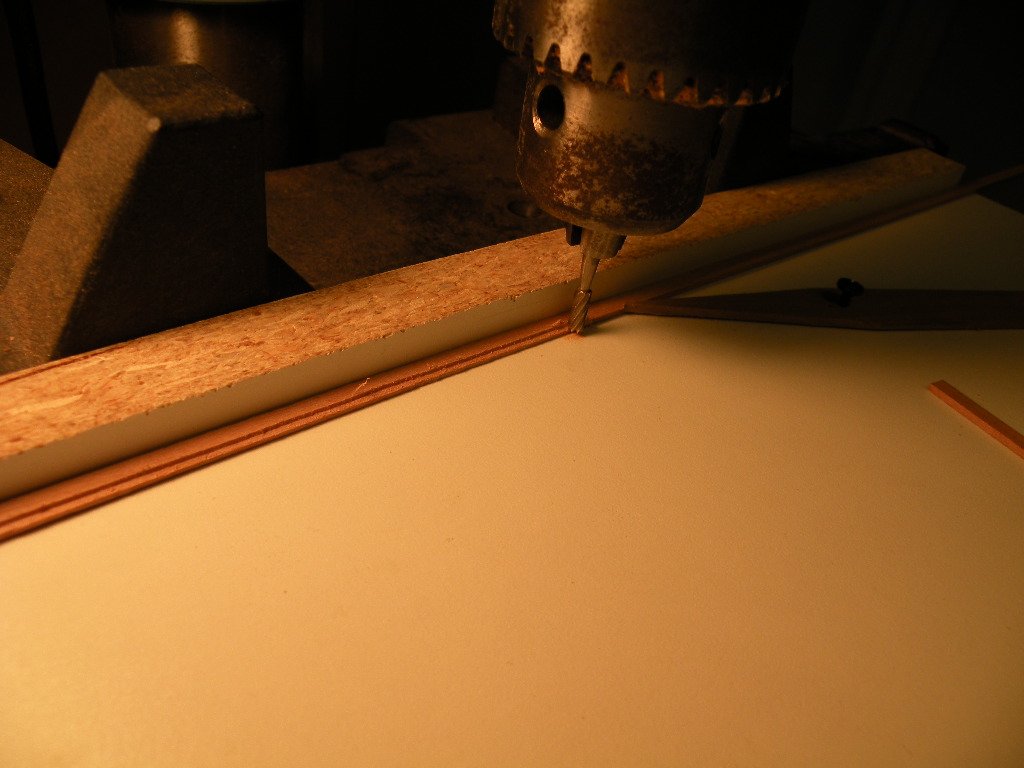
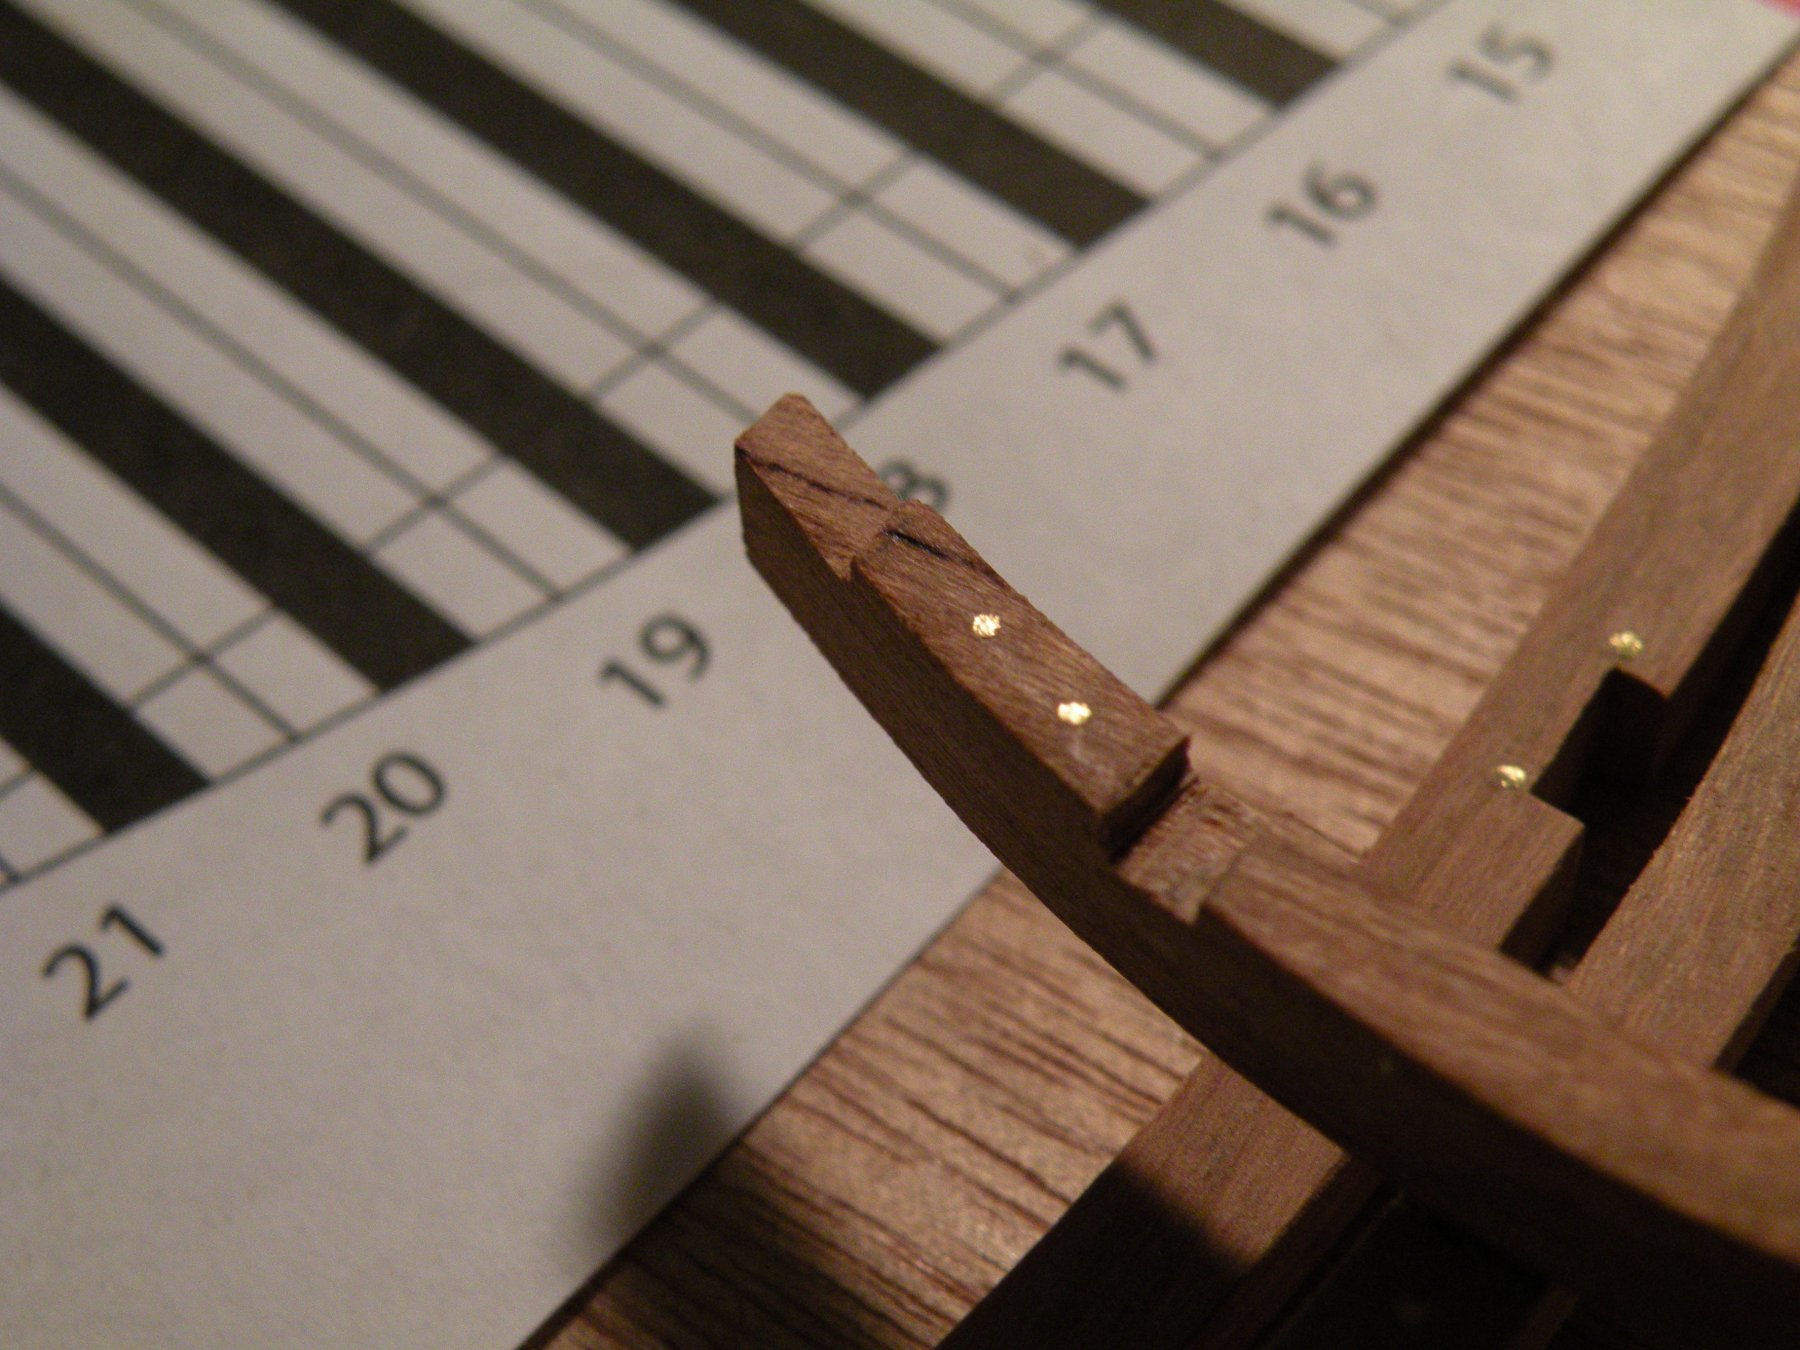
Here is a little more progress. I used some hard pink styro and some long pins to create a adjustable jig for the ever changing rib shapes.
Worked out very well, keeping the top of the Keelson rabbet as the common point.
Started to fair some and got a few copper bolts in.
Cheers

-
On 5/27/2017 at 9:13 AM, Mike Y said:
Pulling up a chair, looks interesting!
What scale are you building?
Also, as usual, you might want to cut the frames a bit outside of the lines, to have a bigger margin when fairing the hull.
H i Mike scale is 1:48.
-
On 5/21/2017 at 5:12 AM, JosephHuntley said:
Hey Dan have a couple questions if you dont mind as my plans when i bring into cad lost some quality.
I am on the keel and from what I can tell the keel and false keel come to abt .21" wide.
I got the Rabbet at like 1/16" wide but I cant seem to tell what the proper thickness of the deadwood is and how deep the notches for the cants are.
could you help me out with them. and are the forward aprons the same thickness as the deadwood.
these are great plans just wished had a few dimensions on them
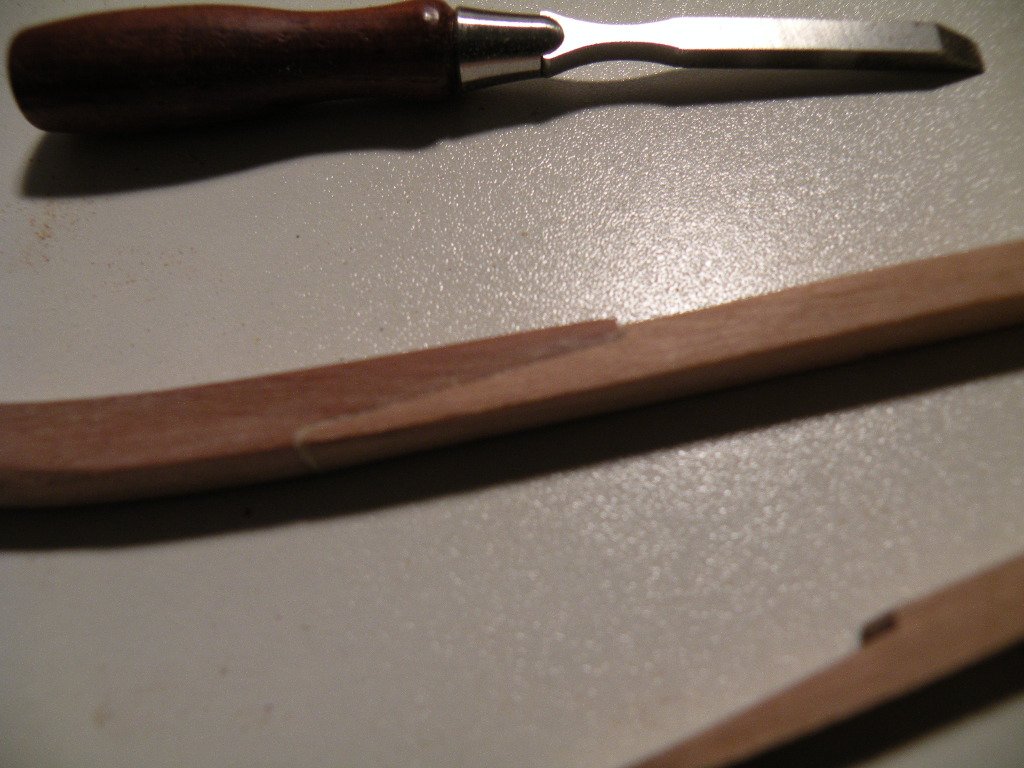
Hi Joseph, sorry to keep you waiting. 1\16 on the rabbet might be a bit deep but only just so your probably O.K. there. I get .015 in for cant depth and I used the 1\8 in stock that came in the wood package. Yes aprons are the same as the dead wood. I'd be lost with out my digital micrometer and magnifying glass.
Hope this helps.
-
-
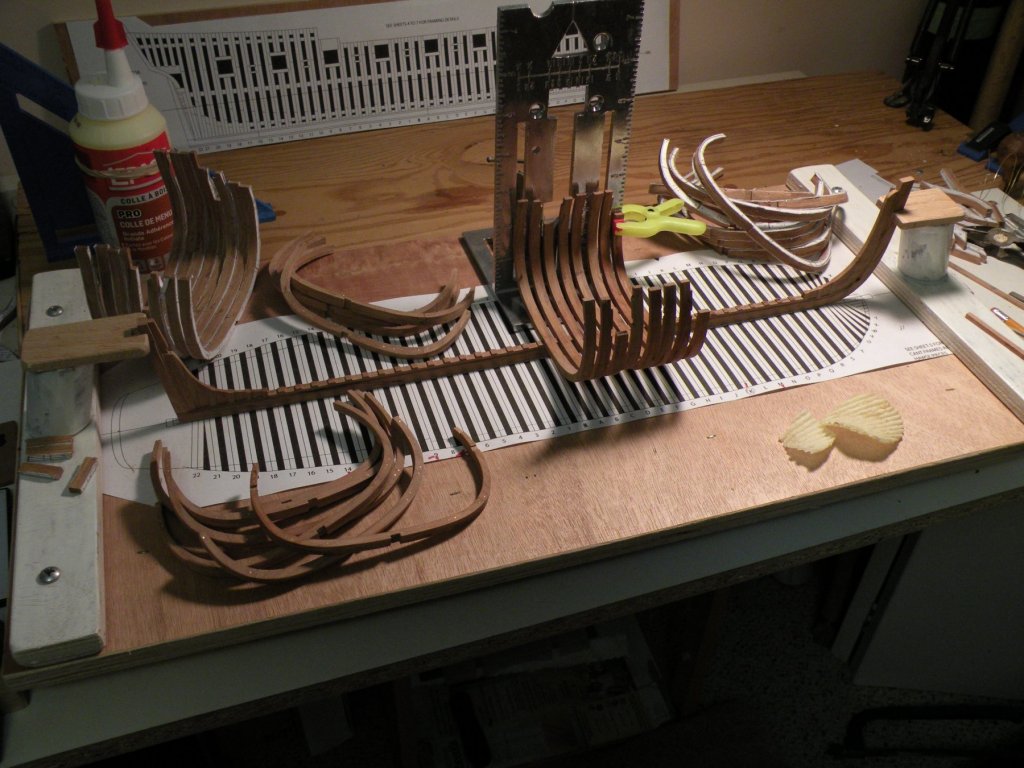
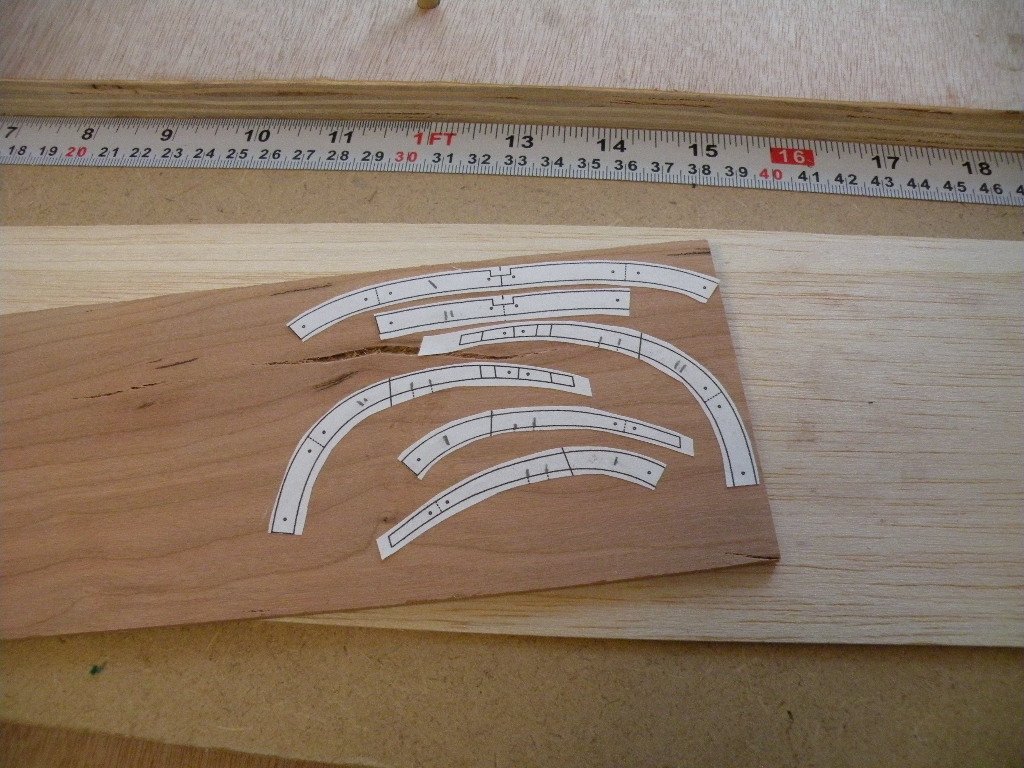
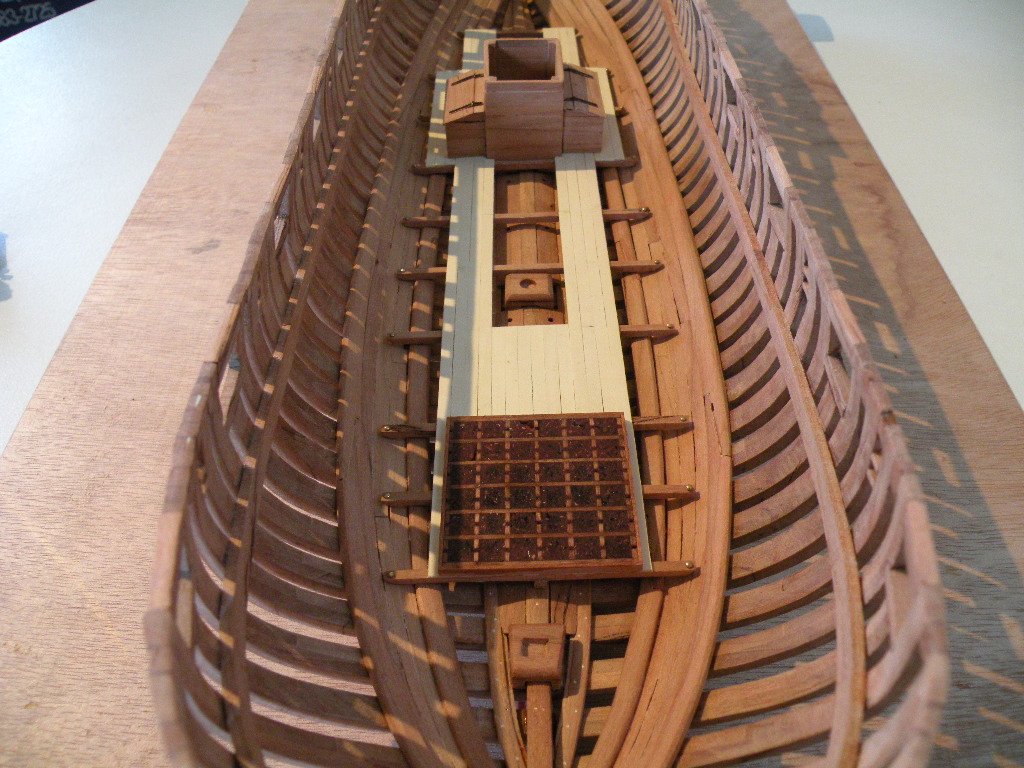
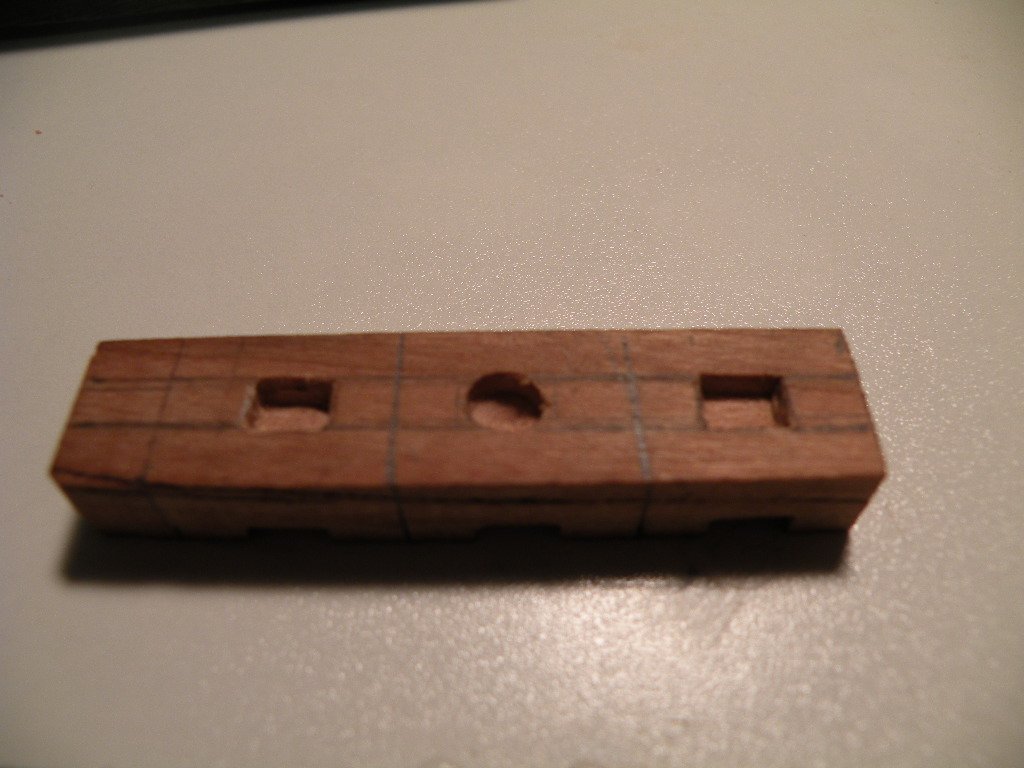
Moving forward with a little progress.
I assembled 4 ribs free form and found there was too many parts to get consistent shape. 2 were O.K. but the other 2 needed remaking.
I made a form to build them on as these first 20 or so are mostly the same....
Ribs A through M are formed but not 100% complete as they still need bolting and the frame work for the ports and sweeps.
Undecided at this time to cut them now or wait and cut them later.
Thanks to all who showed up for the meeting.


-
Inspiring work!
Dan
-
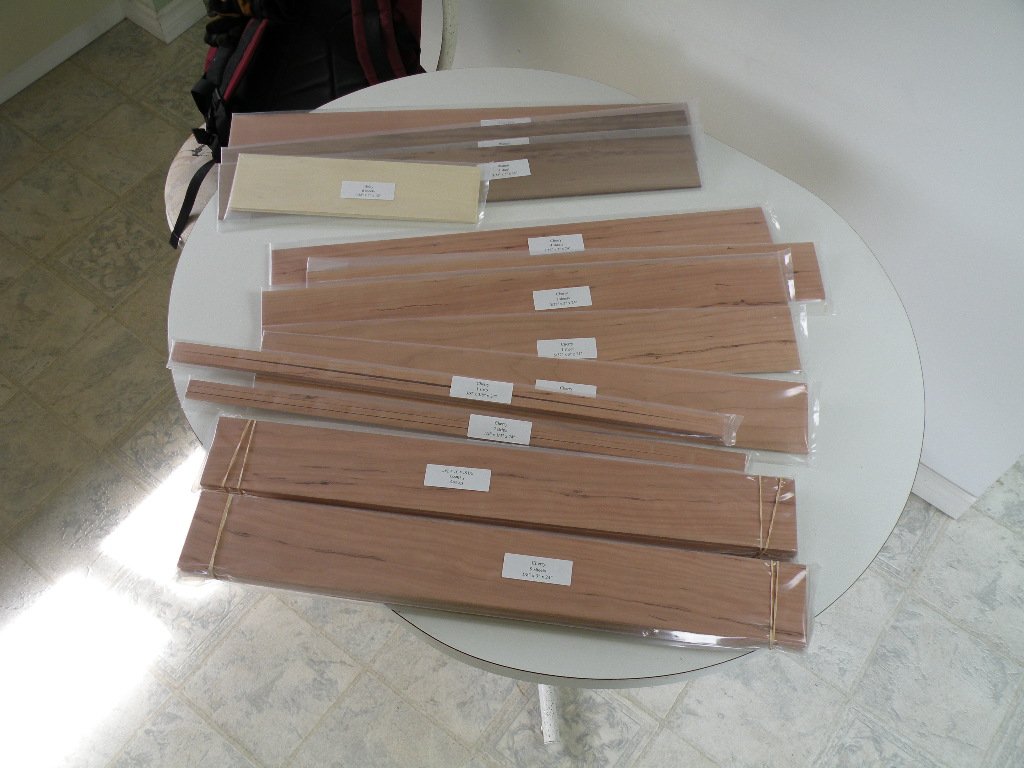
Hi all, welcome to my build.
This will mostly be a pictorial rendition of the Washington. Every body likes pictures.
I'm not going to tell this crowd how to build ships.
There are other excellent build logs of this ship in progress and I'm pretty sure this will not be better than those but I will do my best.
This is my first scratch build so I'm riding the learning curve.
Feel free to over suggestions,criticisms ect.. or ask questions.
The main structure of the vessel is going to be Cherry. I'll use Holly for the deck planking, Swiss Pear for the hull planking and some Walnut for the Wales and
deck bits. This should give some nice color contrast.
I did the keel in three sections as "Yamsterman" suggested did make the rabbit much easier to work.
So without any farther Adieu here are some pics.


- zoly99sask, WackoWolf, Eddie and 14 others
-
17


Washington by Foultide (Dan) - Continental Galley
in - Build logs for subjects built 1751 - 1800
Posted
Time for a few more update photos,