Bob Cleek
-
Posts
3,374 -
Joined
-
Last visited
Content Type
Profiles
Forums
Gallery
Events
Everything posted by Bob Cleek
-
Byrne's saw advice needed.....
Bob Cleek replied to CPDDET's topic in Modeling tools and Workshop Equipment
I'll check and see! Thanks! -
Byrnes Sliding Table -Input Requested
Bob Cleek replied to glbarlow's topic in Modeling tools and Workshop Equipment
The advantages of the cross-cut sled on the Byrnes saw are the same as for a sled on a full-size table saw. When making cross cuts, the sled provides greater safety and accuracy, particularly when making mitered cuts and cutting multiple pieces to exactly the same length. A cross-cut sled makes perfect, repeatable crosscuts on a table saw without tear-out, which is something the modeler needs to do on a fairly regular basis. Because both the workpiece and the offcut move with the sled and are backed by a fence perpendicular to the blade, there's much less chance of kickback and blowout as the blade exits the cut. The Byrnes sled has a metal box which covers the blade as the cut is completed. This is a very good "automatic" safety feature that prevents ever getting cut by the blade as the sled is pushed forward. The Byrnes saw sled is machined to the same .001" tolerances as the saw itself, so, while building your own sled is conceptually easy, incorporating the highly accurate miter gauge of the Byrnes sled in one you build yourself is going to take some doing. Building a sled for your full-size table saw doesn't require the tolerances that making one that will give you what your Byrnes saw is capable of would demand in terms of accuracy. While anything done on a sled can also be done without the sled, the sled saves set-up time, especially with repetitive cuts. It also keeps your fingers away from the blade, which is particularly important when cutting small pieces. Check out this video. It's for full-size table saws, but if you turn your volume down, you can pretend he's talking about a Byrnes saw. -
Byrne's saw advice needed.....
Bob Cleek replied to CPDDET's topic in Modeling tools and Workshop Equipment
I don't believe the extended table top is any longer an option. It hasn't been listed on the website in a long time. -
Byrne's saw advice needed.....
Bob Cleek replied to CPDDET's topic in Modeling tools and Workshop Equipment
It's probably the case with most that making beveled rip cuts is a rather rare occasion. If necessary, it is a relatively simple thing to tape or temporarily glue a strip of wood beneath the edge of the piece opposite the side to be cut such that the strip raises the piece to be cut enough to angle the cut. Few will need the tilting table. Do get the fence extension. The fence is only 1/8" high. It's nice to have a bit more height in some ripping applications. Definitely get the sliding table. It's easy enough to make one yourself, but not to get it with the miter gauge and all CNC cut to tolerances tighter than a gnat's *** like Jim does. The "sled" really almost doubles the usefulness of the saw and there isn't a lot of sense to building your own with most likely sloppy tolerances compared to the factory-made one, which is as accurate as the rest of the saw. The micrometer fence adjustment can be done without, but for the money, why would anyone want to It's handy when you want to make minute adjustments. It's a machine that's really made to provide 001" accuracy and that isn't likely to be easily achieved with any certainty without the micrometer fence adjustment. I'd suggest spending the few bucks to get the bag of spare screws, etc. They are really tiny and even though I've not yet lost one (knock on wood) it's bound to happen at some point. They aren't hardware store items and you'll pay twice the cost if you have to order them afterwards once you factor in the shipping costs. The same goes for blades. Get a selection when you get the saw. It can all ship together and save you a few bucks in shipping over buying them piecemeal. You can make your own zero clearance plates, but for eight bucks a piece, I don't see how it's worth anybody's time to do so, and certainly not to the perfect fit you'll get from the factory-made ones. Making your own rip taper gauge is a piece of cake, but for only $40, Jim's machined one is just so "cute," I couldn't resist it. Chalk it up to a "pride of ownership" thing, I guess. I've yet to use it, but I'm considering trying it for mast tapering the next time I have occasion to get out some spars. I don't know if that will work, but my thought is that if I can accurately taper four sides of the stick, getting out a very accurately tapered spar by rounding off the corners in my drill press vertical spar-turning lathe set-up would be a lot easier and faster. In short, aside from the tilting table, one might as well buy all the optional stuff! Seriously. Just down three or four shots of the good stuff and go all "drunken sailor" on it. SWMBO ("She Who Must Be Obeyed") will never notice the difference anyway. -
I've always found the case to be larger than I imagined before it was built. Perhaps it's spending the time building a model in miniature that "shrinks" one's perception. I'm quite comfortable with the size of a model, but it's always a surprise to me that the case always makes the whole thing so much larger. Sounds like you found a good solution!
- 1,208 replies
-
- 2
-

-
- great republic
- clipper
- (and 1 more)
-
Definitely! Staying out of the "line of fire" is good advice for any lathe or table saw operation. I would also add that any filing done on a running lathe should be done with the handle of the file in the operator's left hand with their right hand controlling the tip of the file. This practice, for a right-handed mechanic, is the opposite of other filing operations when the workpiece is held still, as in a vise. The reason for this practice when filing on a piece held in a spinning lathe is that the mechanic's left hand, forearm, or elbow, is not adjacent to the spinning chuck when filing. It can't be mentioned too often that the lathe, while the most useful and versatile of all machine tools, is also the most dangerous of all machine tools. Some might believe the table saw to hold this dubious distinction, but that is not so. The table saw may account for the greater number of injuries, but that is only so because there are more table saws and they are more accessible to the unwary and untrained. The lathe, however, is a vicious and merciless adversary which, when it grabs, does not let go. The danger is perhaps less with the tiny mini-lathes than with the large industrial machines, but the capacity to maim is present with all of them. In many shops, operating a lathe alone is prohibited. Someone else should be present in case something goes wrong. About ten years ago, a young woman undergraduate at Yale, operating a lathe alone in the chemistry department machine shop, was killed when the lathe caught her long hair and pulled her head into the spinning chuck. https://www.nytimes.com/2011/04/14/nyregion/yale-student-dies-in-machine-shop-accident.html She failed to heed the basic safety rules for lathe operation: no jewelry, no long hair hanging loose, no loose clothing or long sleeves, no gloves when operating a lathe. Stay safe out there!
-
Question on line size for lacing for small craft
Bob Cleek replied to DonInAZ's topic in Masting, rigging and sails
Indeed it does. You'll be glad you used it. -
Question on line size for lacing for small craft
Bob Cleek replied to DonInAZ's topic in Masting, rigging and sails
Yes, you should probably be using something around 1/2"D to 3/8"D for halyards, sheets, and your bow painter. You probably should use somewhere around 1/4"D line for your luff lacing and centerboard pendant. (Scale size, that is.) That would be for modern synthetic line. For period hemp line, go up a little, 1/2"D for halyards and sheets and perhaps 3/8"D for the rest. I'd also urge you to toss all the line pictured in your build log, particularly that "nylon" stuff. You've done a nice job building your model. Many don't realize it, but the simplicity and larger scale of small craft models demands exacting precision and attention to detail. Large, smaller-scale square-rigged models have so much detail that small imperfections are more easily overlooked. Not so with a small craft model. It's got to be perfect to create the impression of realism in miniature. The viewer's eye will be drawn to the finest details on your model and particularly to the line. Get yourself some line from Chuck at Syren Ship Models and pay close attention to your rigging. Whip the ends of your lines and details like that. Those details really make a model like yours. -
Question on line size for lacing for small craft
Bob Cleek replied to DonInAZ's topic in Masting, rigging and sails
It depends upon the way it was done on the full-size prototype. Generally, the size of the line used is that appropriate to the job. Generally, a luff lacing line will be smaller stuff than a sheet or a halyard, -
Jack London's Snark is quite well documented. There are many photos of her posted on line. https://www.google.com/search?q=jack+london+%2B+snark&source=lnms&tbm=isch&sa=X&ved=2ahUKEwjHjZjS5NbnAhUHrZ4KHVD1C8AQ_AUoAXoECBYQAw&biw=1440&bih=749#imgrc=pKcBFiiXa67niM&imgdii=LvoBgGAxqOHmqM There is a model of her on display at the Jack London State Historic Park (His former home) in Glen Ellen, California, USA, north of Sonoma, California. (pictured below) http://www.parks.ca.gov/?page_id=478 Details of the vessel are in London's book, The Cruise of the Snark: Jack London's South Sea Adventure, which is still in print. I don't know if the book provides lines drawings, though. As famous as London was in his day, there was much recorded about Snark. The primary places I'd suggest beginning primary source research would be the Jack London State Historic Park, the J.Porter Shaw Library at the San Francisco National Maritime Museum, Fort Mason, San Francisco, CA, USA, and the Oakland Museum, Oakland, California, USA.
-
I have their drill press which I acquired used. It's much better than the Dremel drill press rig. It's a quality-built item of CNC'd aluminum. That said, it suffers from all things Dremel, which is to say a lack of power. Dremel moto-tools trade speed for torque and their chucks and collets aren't high-tolerance machine tools. I find occasional uses for my Vanda-Lay Dremel drill press and I'd consider it a worthwhile entry-level power tool if price were a consideration and one already had a decent Dremel tool to put in it, but not as good an investment as would be putting the additional few bucks into a dedicated mini-mill.
-
Paint for Models
Bob Cleek replied to silbchris's topic in Building, Framing, Planking and plating a ships hull and deck
I'm not a doctor, but I play one on the internet! Your headaches could have any of a large number of causes, so we're just guessing here. Diagnosis is an exercise in a process of elimination. It could be paint solvent fumes, but, frankly, you'd have to be doing a lot of painting to be getting a lot of headaches from that. Are these headaches always happening during or shortly after painting? Are you using solvent-based paints? Solvent inhalation can cause headaches, but allergic reactions to acrylic (water-based) paints are almost always the result of physical contact with the paint and symptoms are runny noses, itching, rashes, and skin irritation. Acrylics aren't generally recognized as having anything to do with headaches. Many people are very sensitive to cyanoacrylate glue fumes. Exposure to "Super Glue" fumes frequently causes headaches for many. The solution is, as with any sort of fumes, to "only use in a well ventilated space." Exposure to sawdust from various wood species will also cause allergic reactions in many people. These vary in frequency and intensity depending on the species of wood and include headaches and respiratory symptoms. Sawdust allergic reactions are a "gift that keeps on giving," because you're exposed not only while actually sawing the wood, but also from the ambient dust contaminating your work area thereafter for as long as it remains. Common "respiratory masks" only filter out particulates like sawdust, but not fumes. There are specialty masks for "fumes," but they are questionably effective, depending on the type of fumes involved and failure to properly replace costly filter cartridges renders them worse than useless. Complete protection from fumes requires an isolated air supply pumped into the mask and that equipment is expensive and cumbersome to wear. Frankly, for modeling purposes, adequate ventilation of the work area should resolve any adverse effects of any solvent fumes produced by the relatively small amount of exposure generally experienced by modelers. Opening a window to provide a ventilation flow, and, if necessary placing a fan in front of the window to exhaust the air in the room, or even to just blow a light current of air across the work area should do the trick without requiring you to "suit up" with hazmat gear. If that doesn't do the trick for you, you should also consider other causes of headaches. If I had to hazard a guess, I'd say that eye strain from doing protracted fine work and lighting issues are a more frequent cause of headaches associated with modeling than inhaled allergens. Posture is another frequent cause of headaches. Hunched immobile over a bench top for long periods can stress spine and neck muscles and cause headaches. There is, as many know, another very common cause of headaches around the house, but you'll need a divorce attorney to cure that problem! -
Good thinking! I bet you're right.
-
It's a beautifully figured piece of maple. It's going to add a lot to the presentation of the model ! Be sure to post a photo of the model in the case on the table when it's all done.
- 1,208 replies
-
- 1
-
-
- great republic
- clipper
- (and 1 more)
-
Byrnes responsiveness
Bob Cleek replied to Gerarddm's topic in Modeling tools and Workshop Equipment
Nope. Not hardly. Odds are he'll respond to this post in short order. As I understand it, they are pretty much immediately available by telephone during business hours, Florida time. It's a small family owned business. It's not like they "have operators standing by to take your call." We all go on vacation now and then, an so on. I've never heard of anybody having a problem with getting through to them. They are known for excellent personalized customer service. -
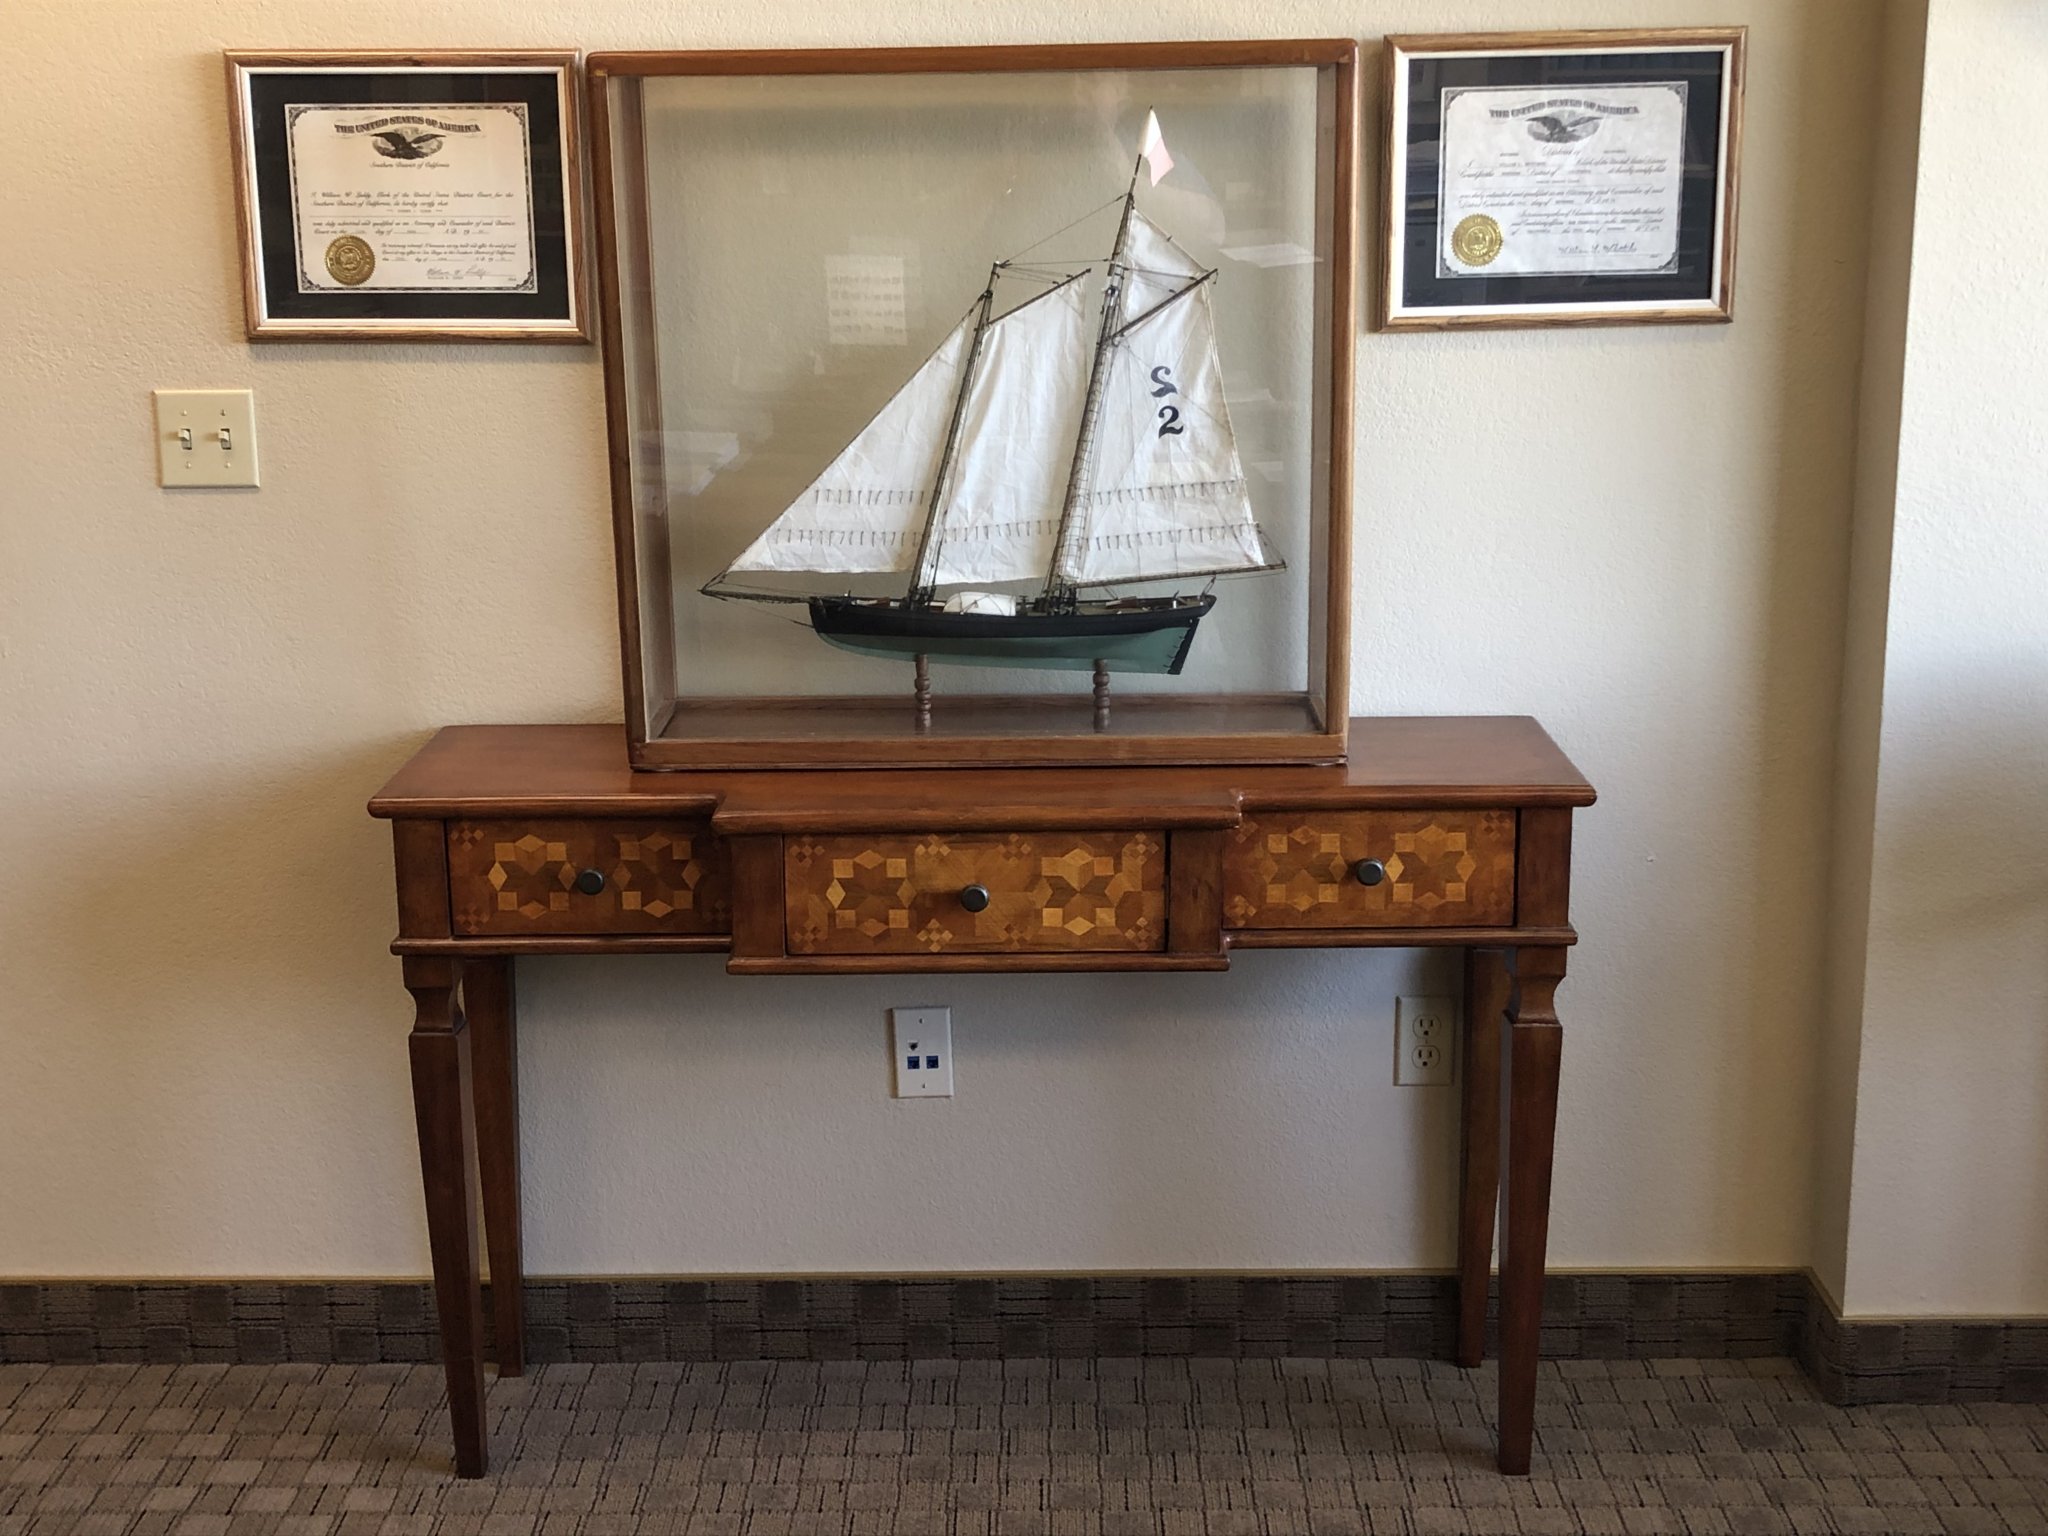
It took me forever to figure out how to rotate a photo and get it posted here. The below case isn't representative of my "later period." I think I must have done this one sometime around 1980 or so. The case pictured had tenons at the ends of the posts which let into the corners. Way too much work! The table gives it a touch of class. I found the table at a used furniture store. It's a modern piece and didn't cost much. I built this case in the manner described in my previous post. It's of oak and the base plinth is walnut, IIRC. (It was just some scrap I had in the shop.)


- 1,208 replies
-
- 4
-
-
- great republic
- clipper
- (and 1 more)
-
It looks great, Rob! I know how hard it is to get the frame as perfect as it must be for it to all come together like that, especially while keeping the frame pieces narrow enough not to distract from the appearance of the model. Well done! I have a similarly sized cased model on a similar narrow topped "hall table," although it has four legs. Living here in the SF Bay Area all my life, I screwed a bracket beneath the back of the table through which I placed a screw through the drywall and into a stud to keep it from toppling in an earthquake. Here, it's not a matter of whether, but rather of when. The experienced "locals" do that around here, along with fastening all our bookcases, china cabinets and the like in similar fashion. (In fact, all the local building codes actually require all water heaters to be secured to the studs with metal strapping and there's a big fine if they catch you without it.) I don't live in fear of "the Big One" so much. It's the little ones that are sometimes just enough to rattle a breakable treasure off a shelf that can make you cry.
- 1,208 replies
-
- 1
-
-
- great republic
- clipper
- (and 1 more)
-
It looks beautiful! From the angles in the photos above, I can see that it isn't as long as I thought it was. I recall your asking for input on case construction and I'm only now finding time to respond, for what it's worth. You've probably got a lot more experience building cases than I do. I've had good results building my cases as solid boxes with the glass set "dry" into grooves cut in the frame pieces, including the top "rectangle." I've never used anything to glue the glass in place. I just cut the grooves so the glass is a slip fit into them with a bit of extra depth to account for any movement in the wood frame. That bit of "fudge factor" in the fit of the glass serves to prevent the glass cracking if there is movement in the frame structure from humidity changes or a "bump" at some point. (I once encountered a case which had the glass so tightly fitted that it cracked for those reasons.) I make the bottom "rectangle" a bit taller in side elevation than the rest of the frame pieces for strength, as well as appearance. The mitered corners (but not the glass!) are glued with epoxy adhesive and allowed to thoroughly cure. The top "rectangle" has the glass set into the grooves and its corner miters are joined with epoxy, as with the bottom "rectangle," and allowed to thoroughly cure. The sides are then assembled into a rectangular box with the glass panes slid into the grooves in the posts in identical fashion, a slip fit with a small bit of extra depth. The top and bottom ends of the posts are cut perfectly square. The rectangular box created by the side and end panes and the posts is then positioned on top of the base with the bottom edges of the side and end panes slid into the grooves in the base "rectangle." The bottoms of the posts are glued with epoxy adhesive to the tops of the four corners of base "rectangle." (At this point, the edges of the side and end glass panes slid into the grooves in the base "rectangle" will define the square shape of the case and hold it all together quite securely.) The top "rectangle" with the top pane in it is then placed on top of the box created by the side and end panes and the vertical posts, letting the top edges of the side and end panes of glass into the grooves in the frame pieces of the top "rectangle" and the corners of the top rectangle are epoxied to the top of the vertical posts and allowed to thoroughly cure. After the epoxy has cured well, I drill a small hole diagonally across each mitered joint in the top and bottom "rectangles," entering from the sides of the case, not the face of the case, and two small holes down through the top of each piece of the frames of the top and bottom "rectangles," one on each side of their mitered joints. (It goes without saying that great care must be exercised in not drilling into the glass in the grooves when doing this.) I then epoxy a nail with the head removed in each hole. (These nails aren't "nailed" into the holes, I just use nails as they are convenient pieces of metal. The epoxy holds them in place.) The nails are sunk into the holes below the face of the wood and the holes plugged with a small wooden plug, or, if appearances permit, the hole can be plugged with a touch of furniture restorer's wax colored to match the wood's appearance. As the holes through the miter joints are drilled from the sides of the case, there will be no hole visible on the front or back of the case joints, but only on the sides, if at all. These metal pins serve to provide mechanical strength to the case "box" in addition to the epoxy. This is perhaps a "belt and suspenders" approach, but I never trust any adhesive in such an application, even epoxy. The one catch in this method, as with any case-building method, I suppose, is that the fabrication of the pieces must be precisely accurate. All mitered joints must fit perfectly. I procure the glass panes before setting out to make the frame and build to the size of the panes. The panes must be cut accurately as well. That is not always done by glaziers, who may be off by a 32nd or even a 16th or an inch sometimes if they are used to cutting glass to fit in window frames. (I get my UV resistant case glass from picture framers, not window glaziers' shops.) It's more important that the dimensions of the panes match than anything else. Cutting the depth of the grooves in the frame pieces a bit deep allows for some margin of error in the glass and frame dimensions, should they occur, as well as allowing for the differing coefficients of expansion of wood and glass. I've found this method, particularly with the glass pane on the top of the case set into grooves in the top "rectangle" frame, produces a very rigid box structure. There is no "wobble" or weakness because the top "rectangle" is quite rigid with its epoxied corners and glass set in the grooves ties the sides together well. The wider frame pieces of the bottom "rectangle," having a greater faying surface at their epoxied mitered joints, hold the "square" of the open bottom of the case box securely. Fitting the edges of the panes into the grooves in the top and bottom "rectangles" makes the structure self-aligning and capable of being assembled single-handedly with relative ease. I found trying to assemble a case with glass panes "glazed" into rabets, as with a window, becomes an exercise requiring at least three arms, as the frame structure wants to wrack this way and that and collapse in three different directions at once during assembly! When the glass case box is complete, the base of the case is made with a plinth or "step" such that the glass case box may be placed over the base and fit around the raised plinth or step and so held in place without sliding around. This is made to be a bit of a loose fit around the plinth or raised part of the base and I place some sort of unobtrusive "spacers" on the bottom edge of the glass case box so that there will be a small bit of air space between the outside and inside of the case. (For this purpose, I've used those small silicone adhesive-backed "bump cushion dots" sold to attach to the back edge of kitchen cabinets to good effect, one at each corner.) A really large case would require more ventilation, but for this size, I suppose a tiny bit at the bottom is better than none at all. Ventilation in the micro-environment of cased ship models is significant for preservation of a model, according to the curators of the US Navy's extensive ship model collection. This is particularly so not only with respect to lead corrosion, as most probably know, but also with respect to "out-gassing" of acidic fumes from some other materials routinely used in the construction of models. See: https://www.navsea.navy.mil/Home/Warfare-Centers/NSWC-Carderock/Resources/Curator-of-Navy-Ship-Models/Lead-Corrosion-in-Exhibition-Ship-Models/ I figured here was as good a place as any to share my experience with case-building, for what it's worth. Others' mileage may vary, of course. However you end up doing this one, it's going to be a spectacular treasure!
- 1,208 replies
-
- 2
-
-
- great republic
- clipper
- (and 1 more)
-
Funny you should ask. This posted today on the SF Maritime and Coastal History Club Facebook page: USS Pompanito "weathered." She's a museum ship at the San Francisco Maritime Historical Park. Date and circumsances unknown. The background is apparently the Reserve ("Mothball") Fleet in Suisun Bay north of San Francisco. That Reserve Fleet has been pretty much entirely removed for scrapping by now. This may have been decades ago when she was undergoing preparation for museum display. There wasn't any further information on the photograph. It doesn't look like she's been maintained in a long time. There was reference to her "awaiting her close up," so it may have been weathering applied for a movie shoot. I wish the poster had been more specific!
-
Beautiful figuring on that wood! It really comes up nice with a bit of oil on it. It's a great match for the table. It's going to be a very elegant presentation. Those will be pretty good sized panes of glass. I expect moving the case will be a two-person job for sure. I hope there's no stability problems with the weight on the table. It would be a disaster if it came to pass that somebody decided to lay a heavy book on one end of the top of the case and the whole shebang tipped over sideways! (Don't ask me what caused me to think about this... fortunately, I caught it. Living in "earthquake country" makes me think crazy things like that.)
- 1,208 replies
-
- 3
-
-
- great republic
- clipper
- (and 1 more)
-
Coffee stir sticks
Bob Cleek replied to Daliab's topic in Building, Framing, Planking and plating a ships hull and deck
Birch tongue depressors and popsicle sticks are sold in bulk at craft stores and are often handy. Bamboo skewers are a supermarket item. I keep a stash on hand always. -
priming hull
Bob Cleek replied to helge's topic in Painting, finishing and weathering products and techniques
Next time, try adding a bit of "retarder" to your paint. I expect Vallejo makes a proprietary one. "Retarder" is a type of paint conditioner that slows drying time. A slower drying time will give you more time to keep a "wet edge" when brushing and will give the paint more time to "lay down" and eliminate the brush strokes and overlaps. This is one of the things to look for when you are making your tests before final painting. If it's "drying" ("curing" with acrylics, actually,) too fast, you can condition your paint to suit the immediate environmental conditions. Ambient temperature, humidity, and things like that affect how paint behaves. The components of any paint are relative to each other. Thinning may, depending on the type of paint, affect gloss, drying time, and so on. Sometimes, when paint is thinned a lot, some of the other components, "retarder" or "accelerator" ("dryers") have to be added to compensate. -
priming hull
Bob Cleek replied to helge's topic in Painting, finishing and weathering products and techniques
Painting and varnishing is a highly skilled craft, if it is to be done well. It takes practice and knowing how it's supposed to be done. There's no substitute for experience. Sometimes it's tricky to get a perfect finish, as is needed for models which are viewed "under a microscope," as it were. I can't stress enough the usefulness of experimenting with "test patches" before doing the final job. Not only will going through the process on a spare hunk of wood let you know if there's a problem that doesn't have to be corrected on your model, but it will give you confidence when doing it "for real." Don't forget the painter's maxim: "A good finish is 90% surface preparation." While we're at it, I should mention that several thin coats are always preferred over fewer thick coats. This avoids runs, drips, and brush strokes. The thinner the coating, the less detail is lost on a model. I don't know if you are committed enough to the hobby to make the investment (which isn't all that much,) but I'd suggest you consider getting and learning to use an airbrush. Brushes can produce great finishes, but, IMHO, one can learn to get a great finish from an airbrush more easily than from a brush. There's always a need for brushes for fine details, but there's nothing like an airbrush for "wide open spaces." Good luck with your project! -
priming hull
Bob Cleek replied to helge's topic in Painting, finishing and weathering products and techniques
I don't use sanding sealers. I use shellac as a sealer and sanding base coat for covering imperfections, although those should be rare on a model. Many people apply a sanding sealer, thinking they are sealing the wood, and then sand it off, to bare wood in places, trying to get a fair surface. Sealer should go on thin and penetrate the wood. I use sanding base coat to fill imperfections after that. IMHO, wipe-on will not do as good as a sealer, but something is better than nothing. Wipe-on is wiped on and pretty much forms a film over the surface of the wood. It's just a thin surface coat of polyurethane varnish. It sells well because any idiot can wipe it on and won't make a dog's breakfast of it. Shellac is alcohol based and has the consistency of water. You brush it on generously. It soaks deep into the wood, particularly the end grain. When it dries, it's one of the best moisture barrier coatings known to man. You can sand it very smooth. Anything else sticks to it fine. It's compatible with everything. It can be easily sanded to a very fine degree of smoothness. It's easy to clean up. It washes off with alcohol. It's relatively inexpensive. I use Zinsser "Bulls Eye" clear shellac. Fifteen bucks a quart. (It doesn't skin over in the can like paint and varnish do, so you won't have to buy it too often. https://www.lowes.com/pd/Zinsser-Bulls-Eye-Clear-Shellac-Actual-Net-Contents-32-fl-oz/3449840?cm_mmc=shp-_-c-_-prd-_-pnt-_-google-_-lia-_-219-_-interiorstains-_-3449840-_-0&store_code=1901&placeholder=null&gclid=EAIaIQobChMIzqOgn6vD5wIVFq5kCh3ZawjTEAQYASABEgKoDfD_BwE&gclsrc=aw.ds On models, I don't ever really have a need to fill grain, but if I want to use a sanding base coat, I use Interlux Pre-Kote or whatever other sanding primer is on my paint locker shelf at the time. Pre-Kote runs around $35 a quart, which is way more than anybody'd ever need for a model. It's sold in chandleries and on line. Any sanding base coat (sometimes called "primer") compatible with whatever finish coat you are using should be fine. The products sold at professional auto body and paint supply outfits are quite good and more reasonably priced than the stuff "with a boat on the can." You just want one that will give you a uniform colored base and is easily sanded. It can be applied in multiple coats to fill grain and minor imperfections and then sanded smooth. https://www.jamestowndistributors.com/userportal/show_product.do?pid=120&engine=adwords&keyword=interlux_pre_kote&gclid=EAIaIQobChMIk5uU8bTD5wIVC8JkCh1jRAm7EAAYASAAEgIYM_D_BwE If I have serious nicks and dings, or for puttying generally, I use Interlux surfacing putty. It's $30 a pint, which is outrageous, in my opinion, but I guess it's all about the environmental regulations. It's thinned with acetone. It will last a long time after opening if you keep the lid edges clean and turn it upside down when you put it back on the shelf. If it starts to harden, adding a bit of acetone to the can and letting it sit over night will restore it. The stuff absorbs the acetone on its own over time. It drys very fast and sands very easily and will give a very smooth surface. https://www.jamestowndistributors.com/userportal/show_product.do?pid=4154 Any other surfacing putty or "fairing compound," as it's sometimes called, will work pretty much the same. I do not favor Bondo for any application on wood. It's for metal. Epoxy resin mixed with micro-balloons works well, too, but it's expensive and very messy to work with. Racing yachts do indeed have high gloss topside finishes. For a model, though, a high gloss finish would not be to scale. If you look at a high gloss finish up close, it's glossy, but at "scale viewing distance," a model would look like a shiny toy if painted with a high gloss finish. It needs to be toned down. If you look at a glossy example in real life and then back away from it until you can view the entire boat (or car) in your eye's "frame," you'll see that from thirty or fifty feet away, it doesn't appear super-glossy. A semi-gloss, "eggshell," or "satin" finish would be more appropriate. You can, of course, paint a model hull with high gloss paint and then, when the paint is well dried, hand-rub the finish with pumice and rottenstone to the degree of gloss you want. This is the best way to go about it, really. A hand-rubbed finish is "finestkind," but will take additional time and effort. -
Shellac, applied to the back of the paper, should cause the paper to adhere well to just about any surface.