md1400cs
-
Posts
2,870 -
Joined
-
Last visited
Content Type
Profiles
Forums
Gallery
Events
Everything posted by md1400cs
-
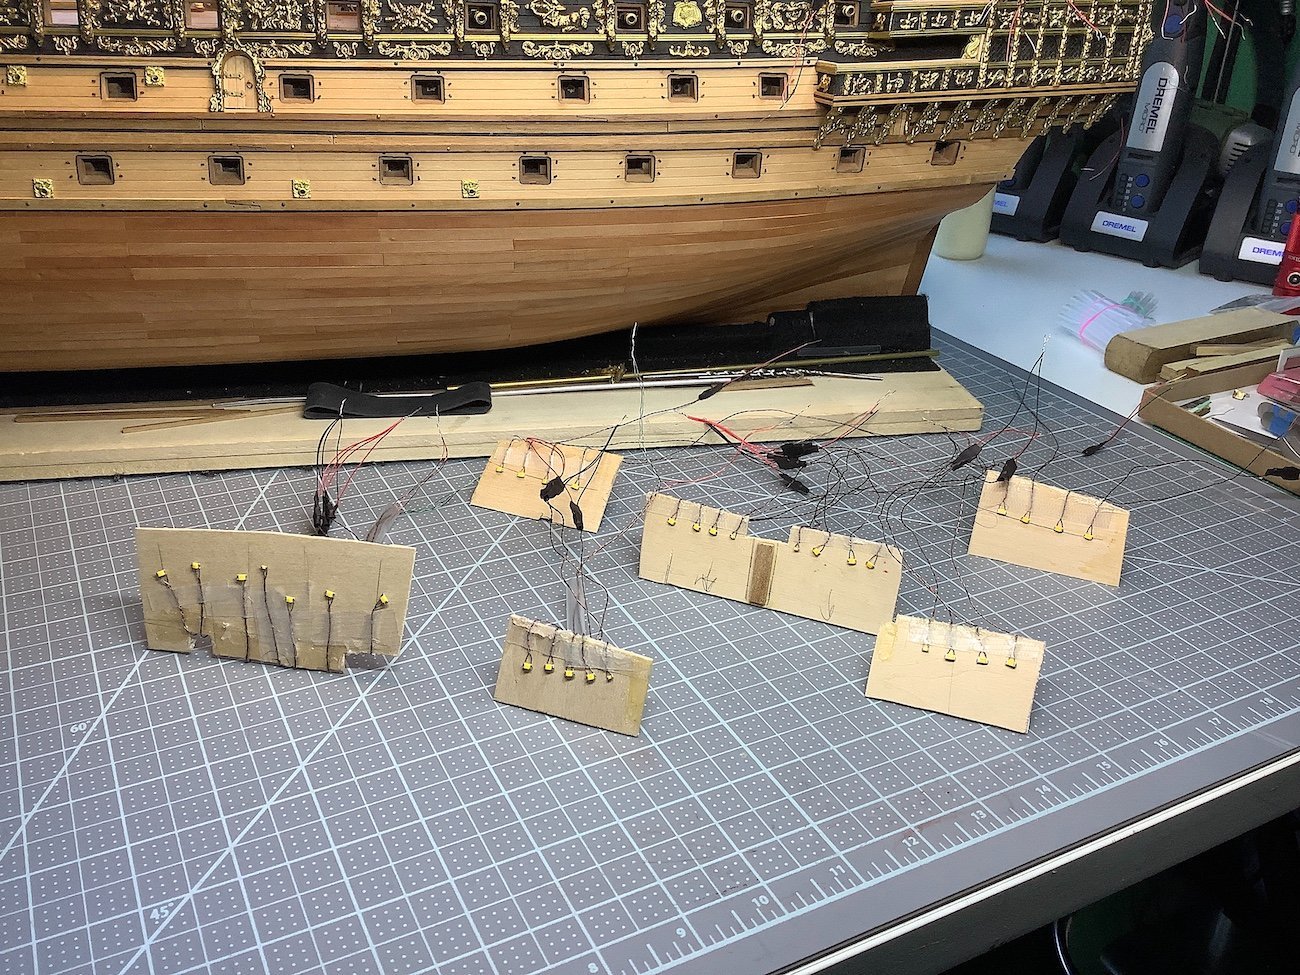
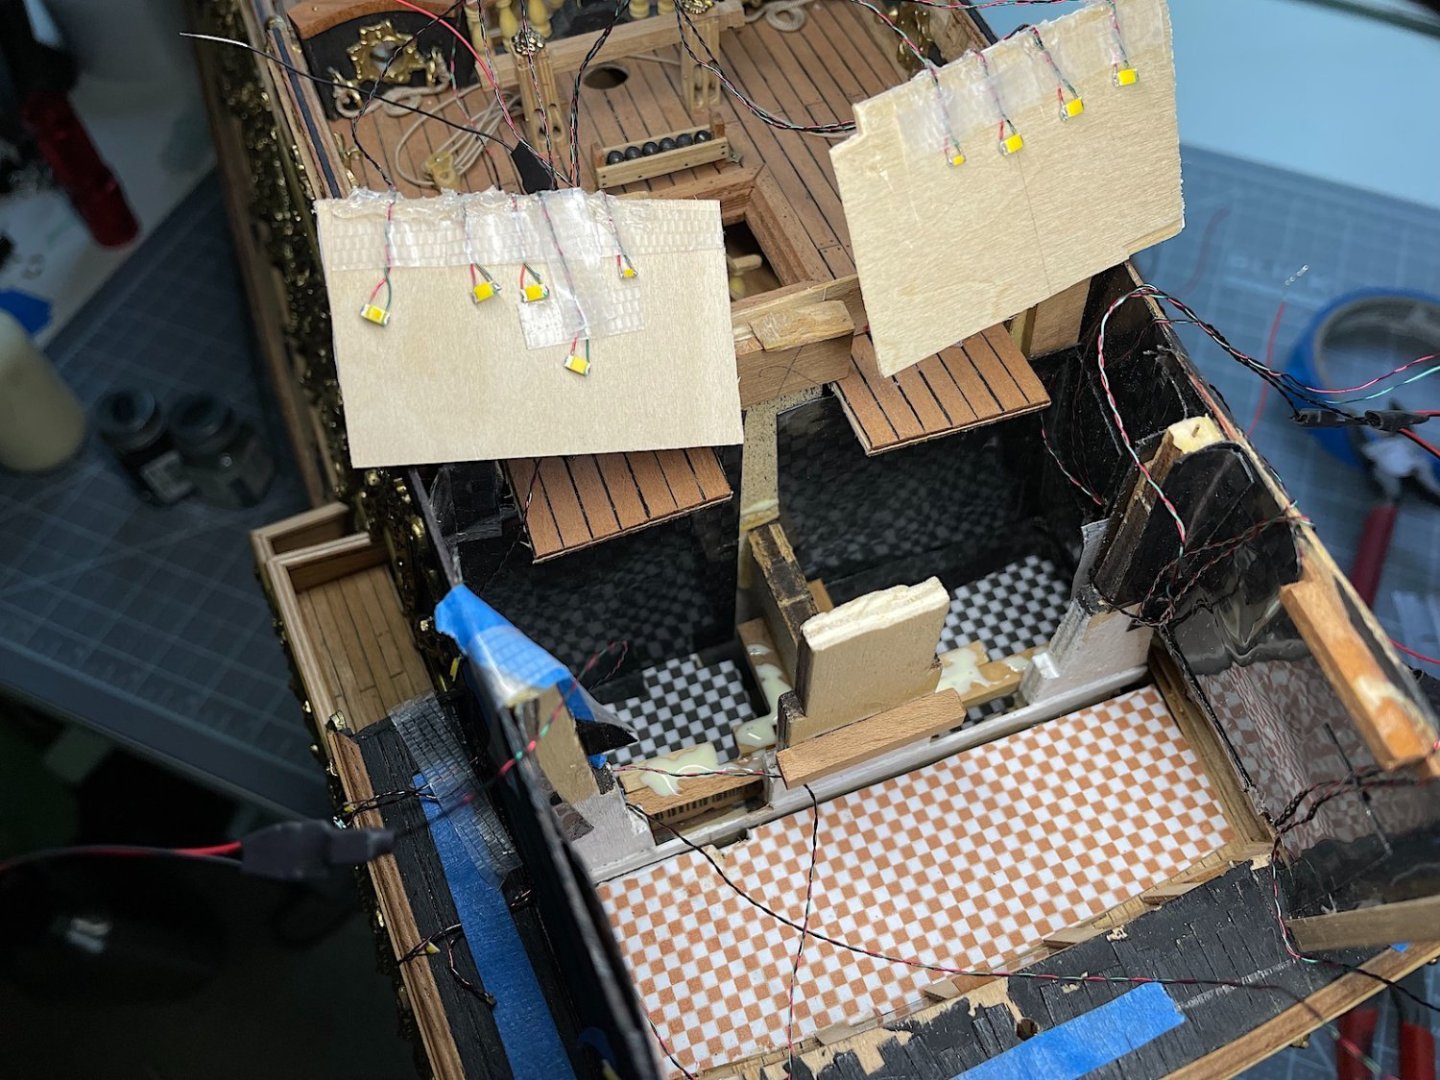
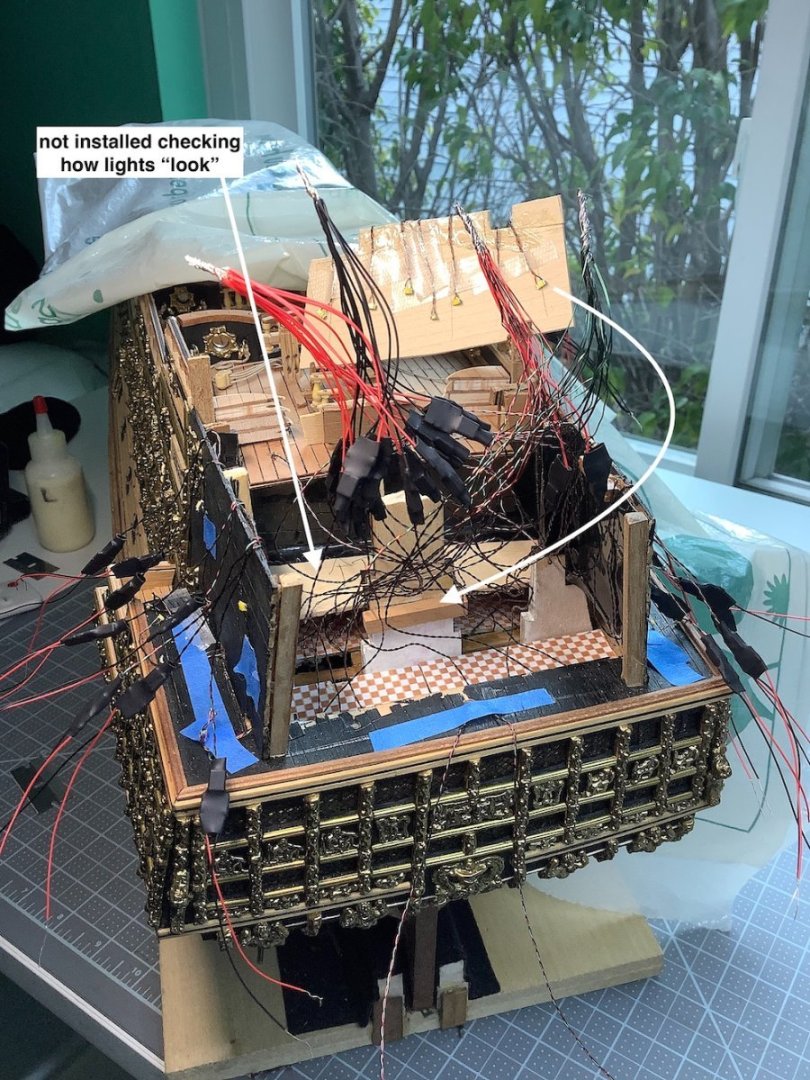
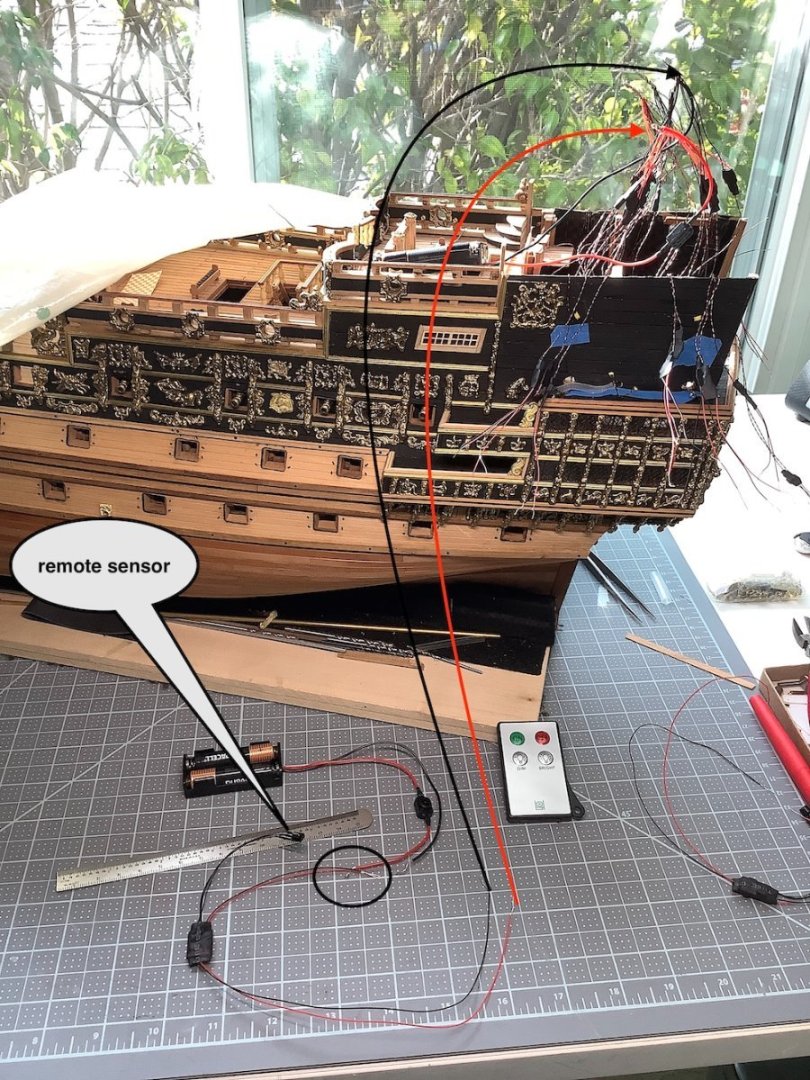
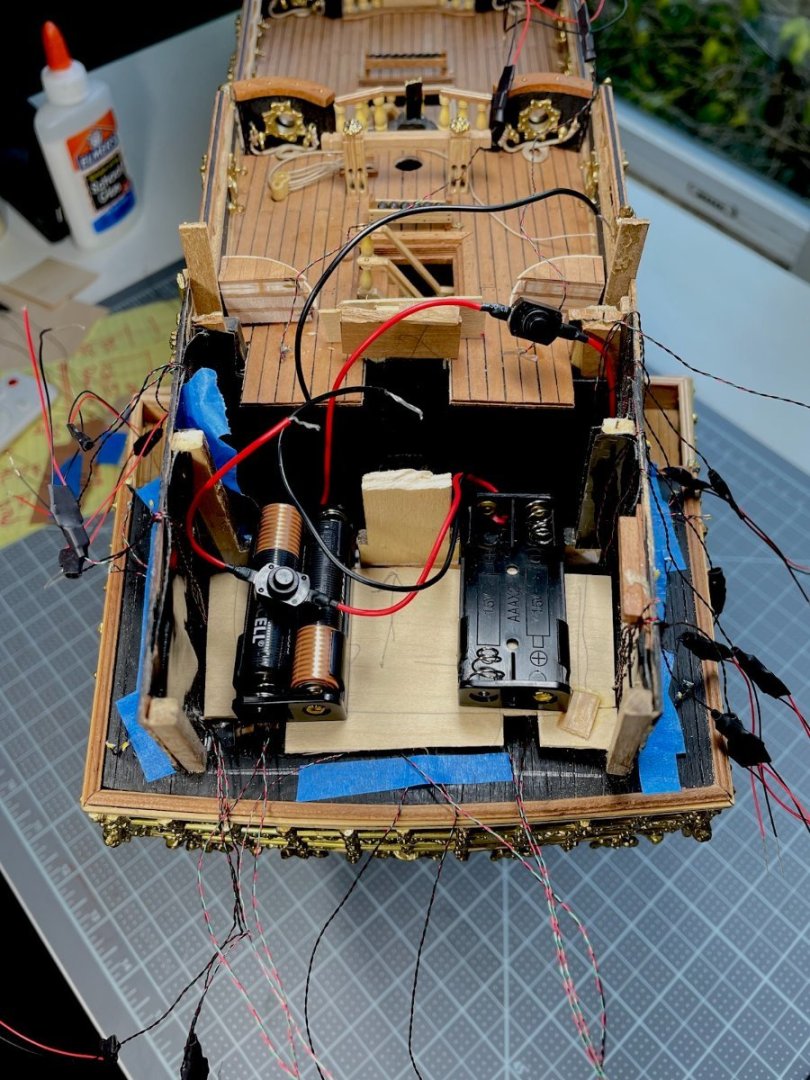
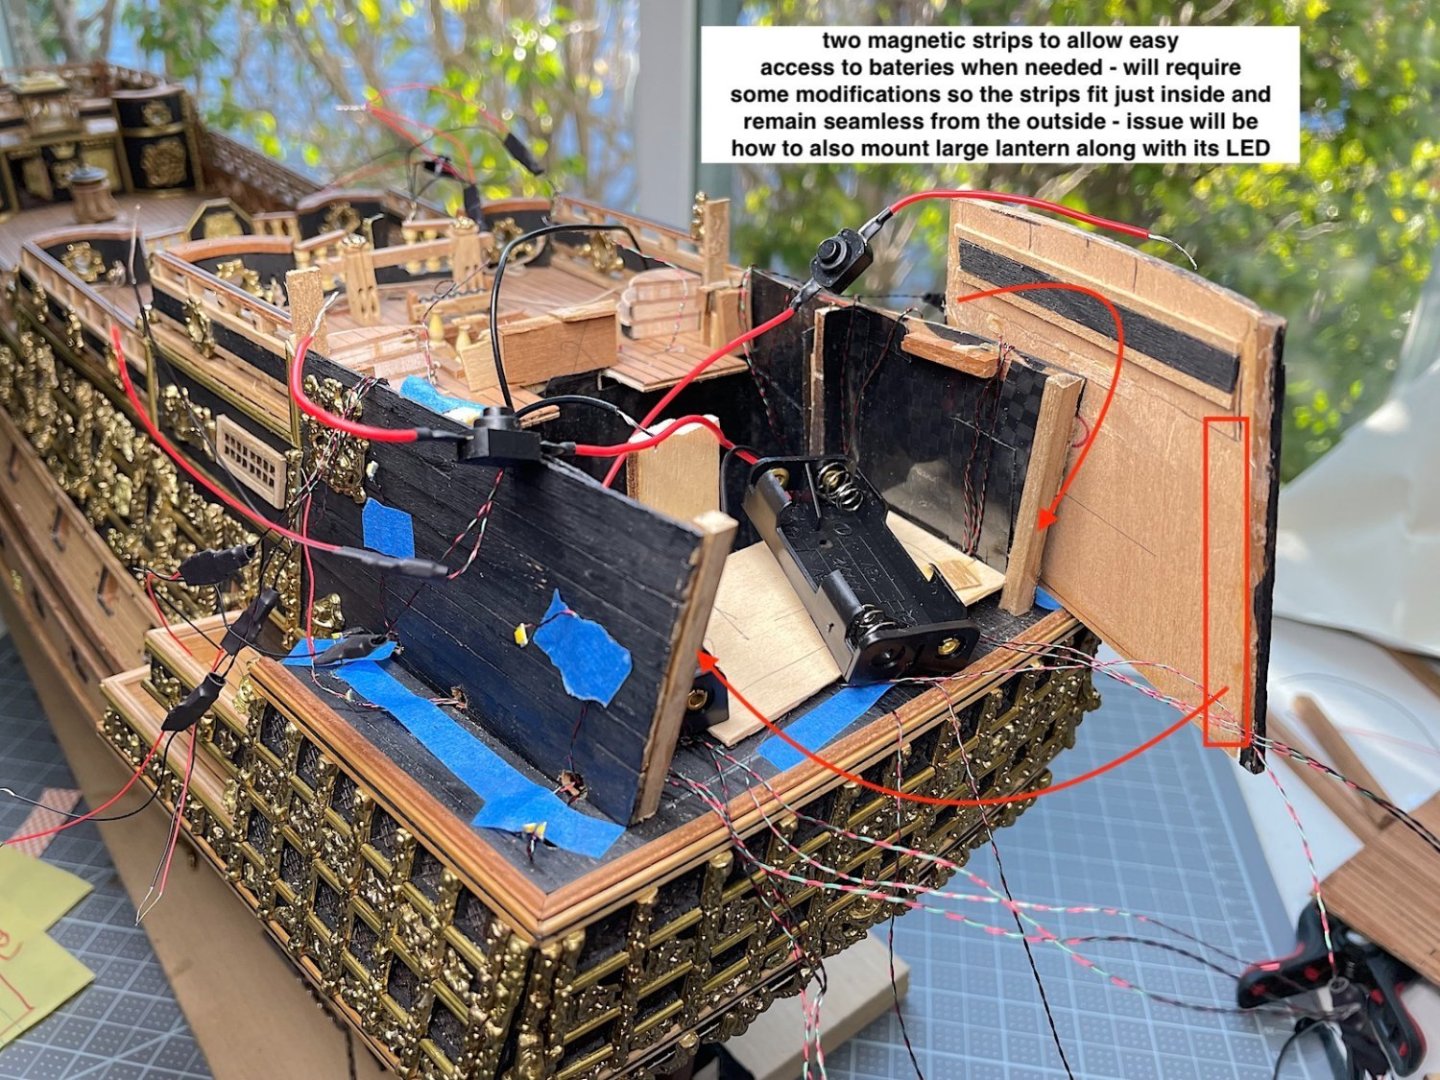
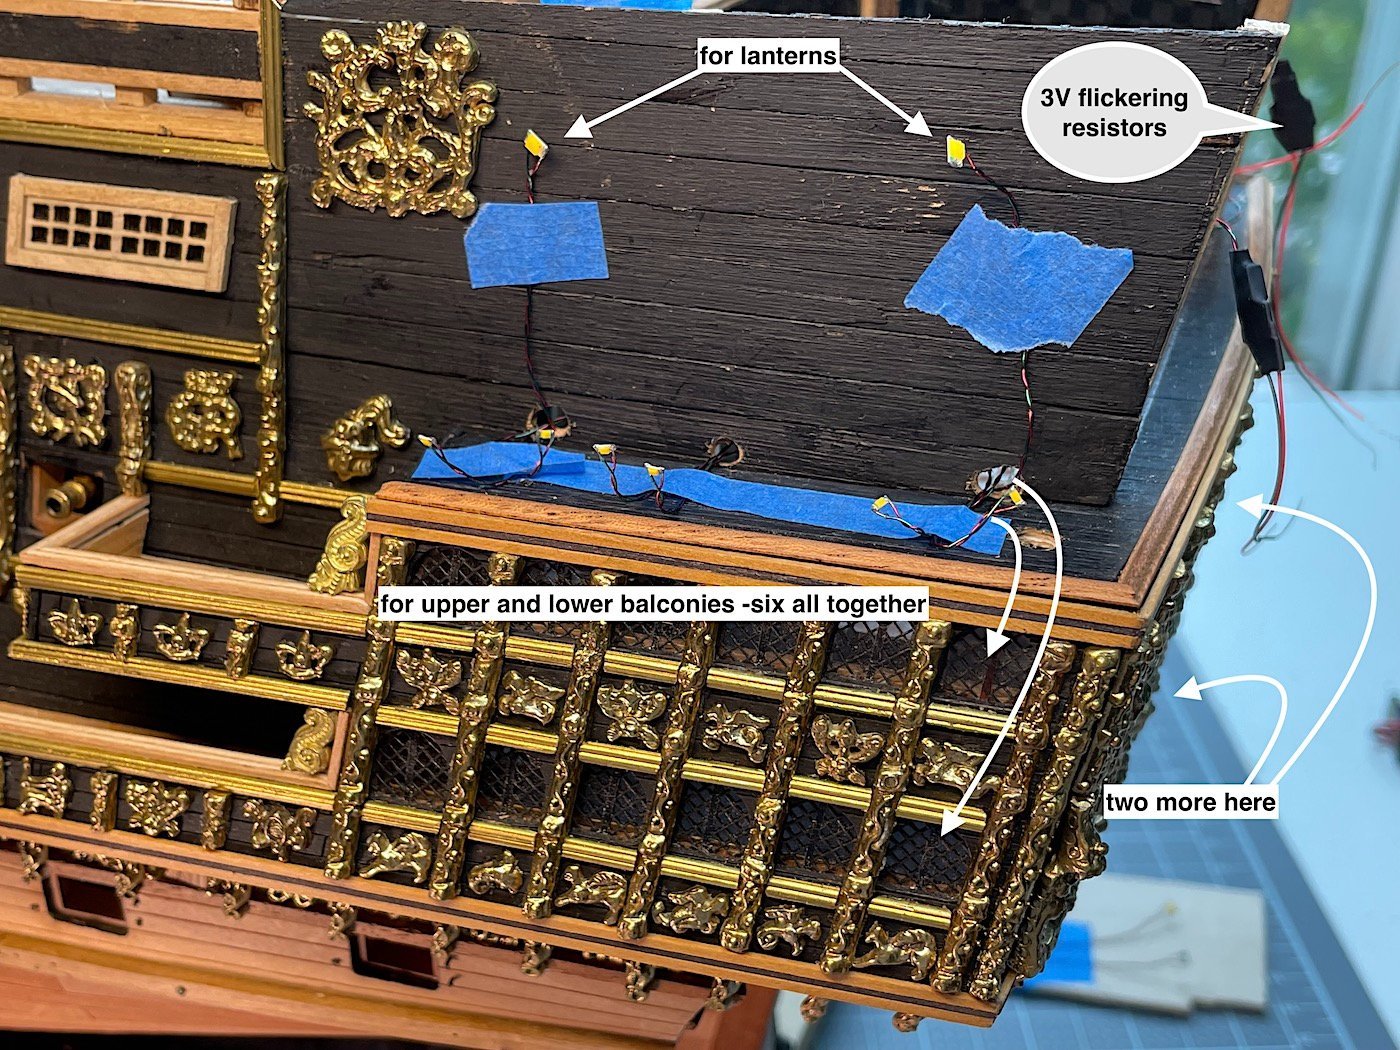
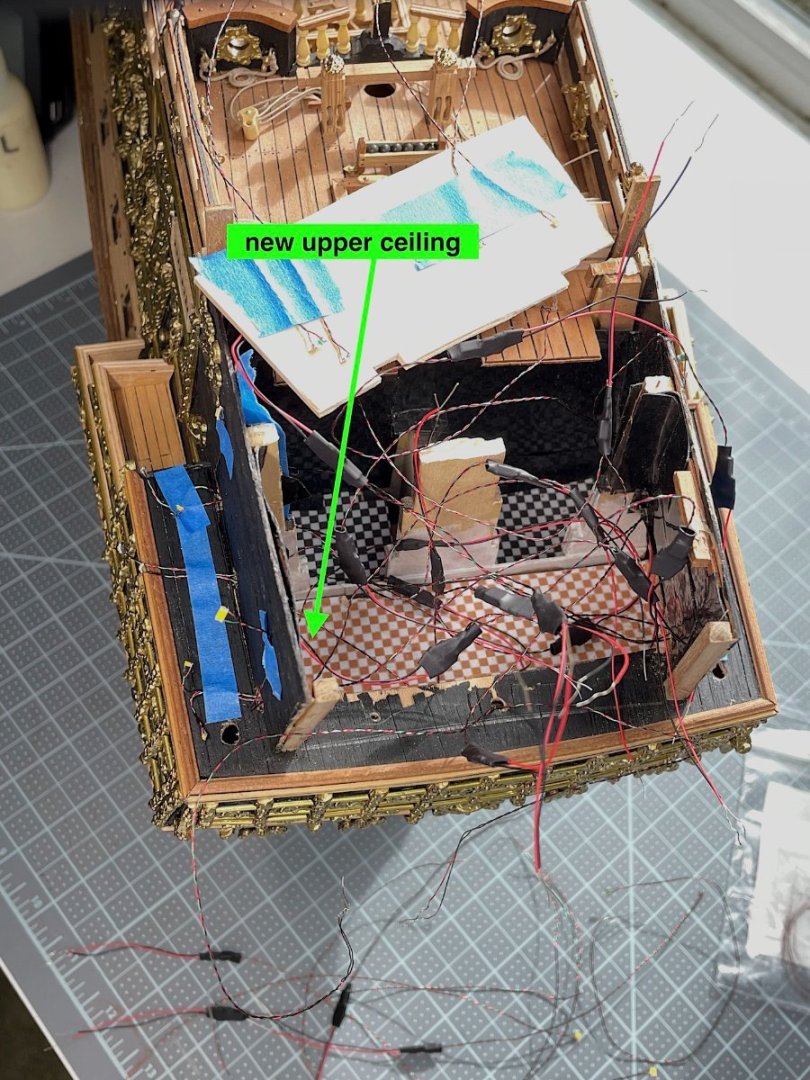
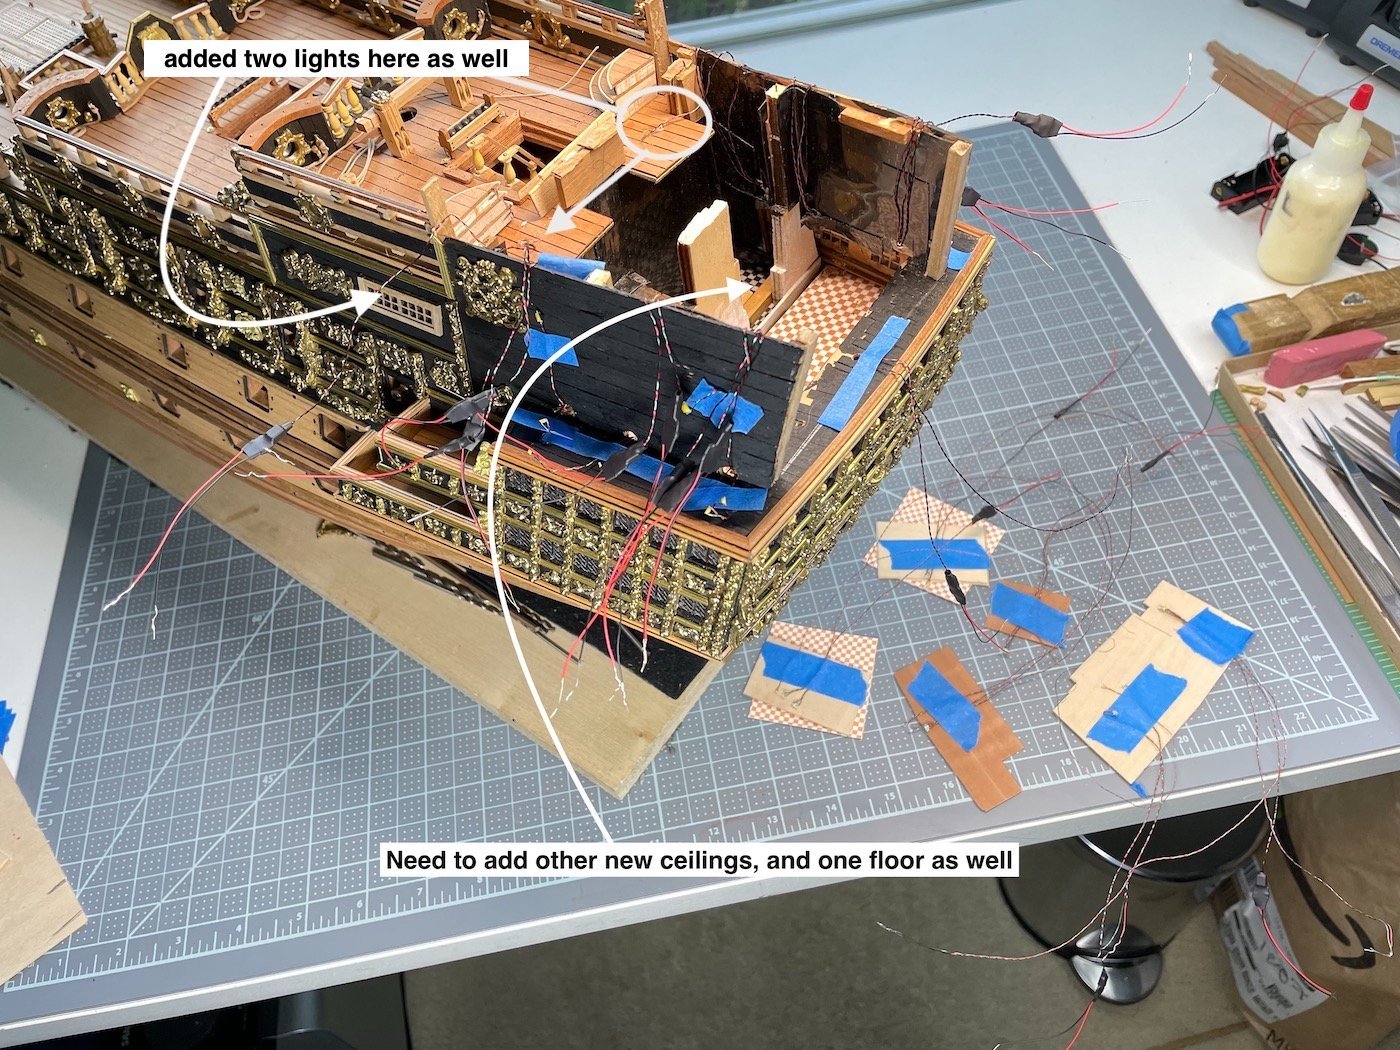
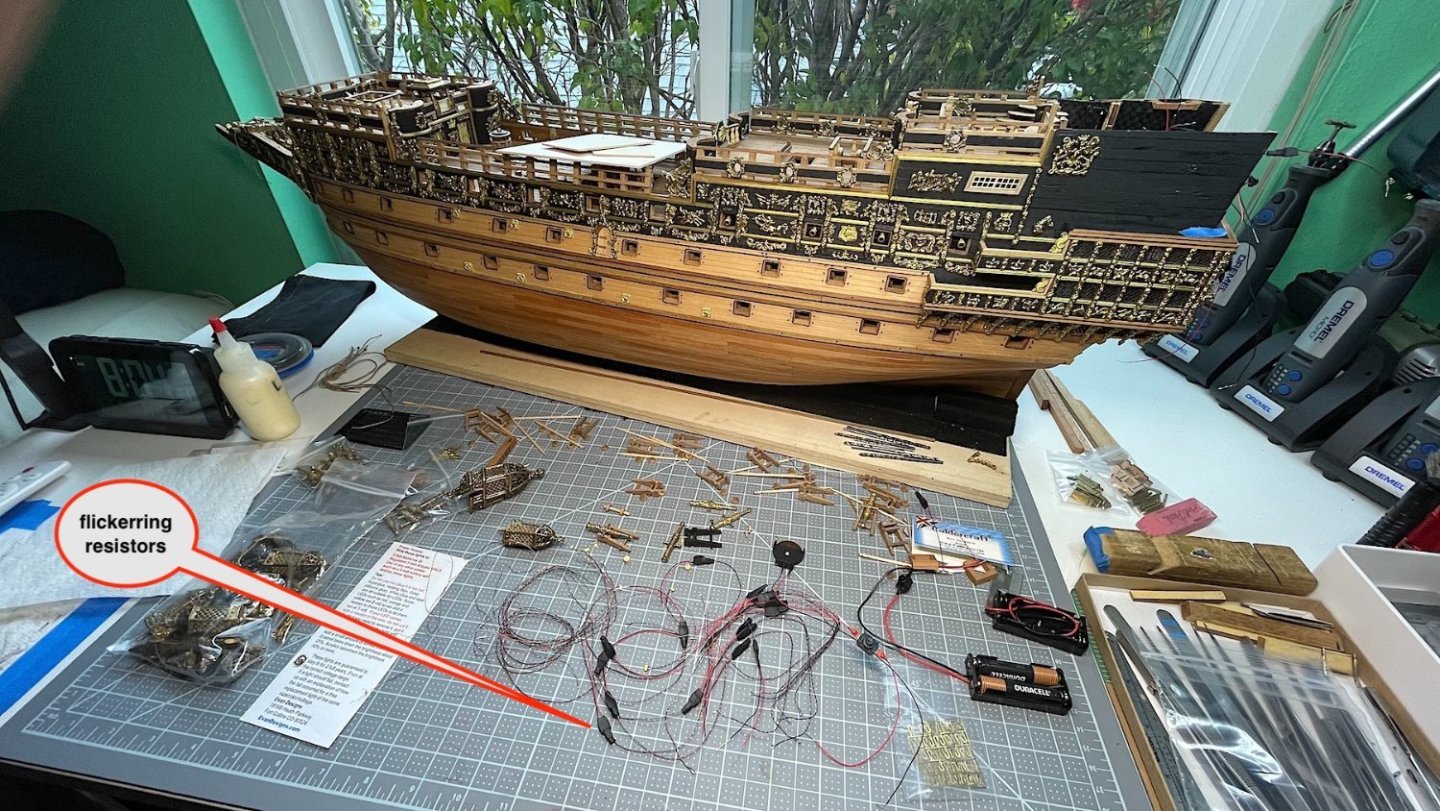
 Hi Mates, LEDs update Lots of hours installing, so far, 29 LEDs some with flickering as well as some static (all warm white) Eighteen others have been added to needed locations (balcony walkways, and for lanterns) but all need to be secured and positioned into their proper places. It’s also important to aim the LEDs for best visual effect. PS: Evan Designs ROCKS!! Still to do…. •install upper rear quarters ceiling into place (that’s next) •attach its wiring looms for the seven lights, •clean up the wiring jungle to make room for both AAA battery packs •connect remote sensors to all lights and battery packs, •attach two battery packs, to their permanent locations. •make “candle looking” cylinders for the five stern lanterns, •seal any light leaks to the outside, •re-attach poop deck, •cut two very small openings in rear facing stern upper panel for the remote sensors, •make a magnetic connector to that rear panel as well (for easy access to batteries) Thanks for dropping by, likes and comments all much appreciated.
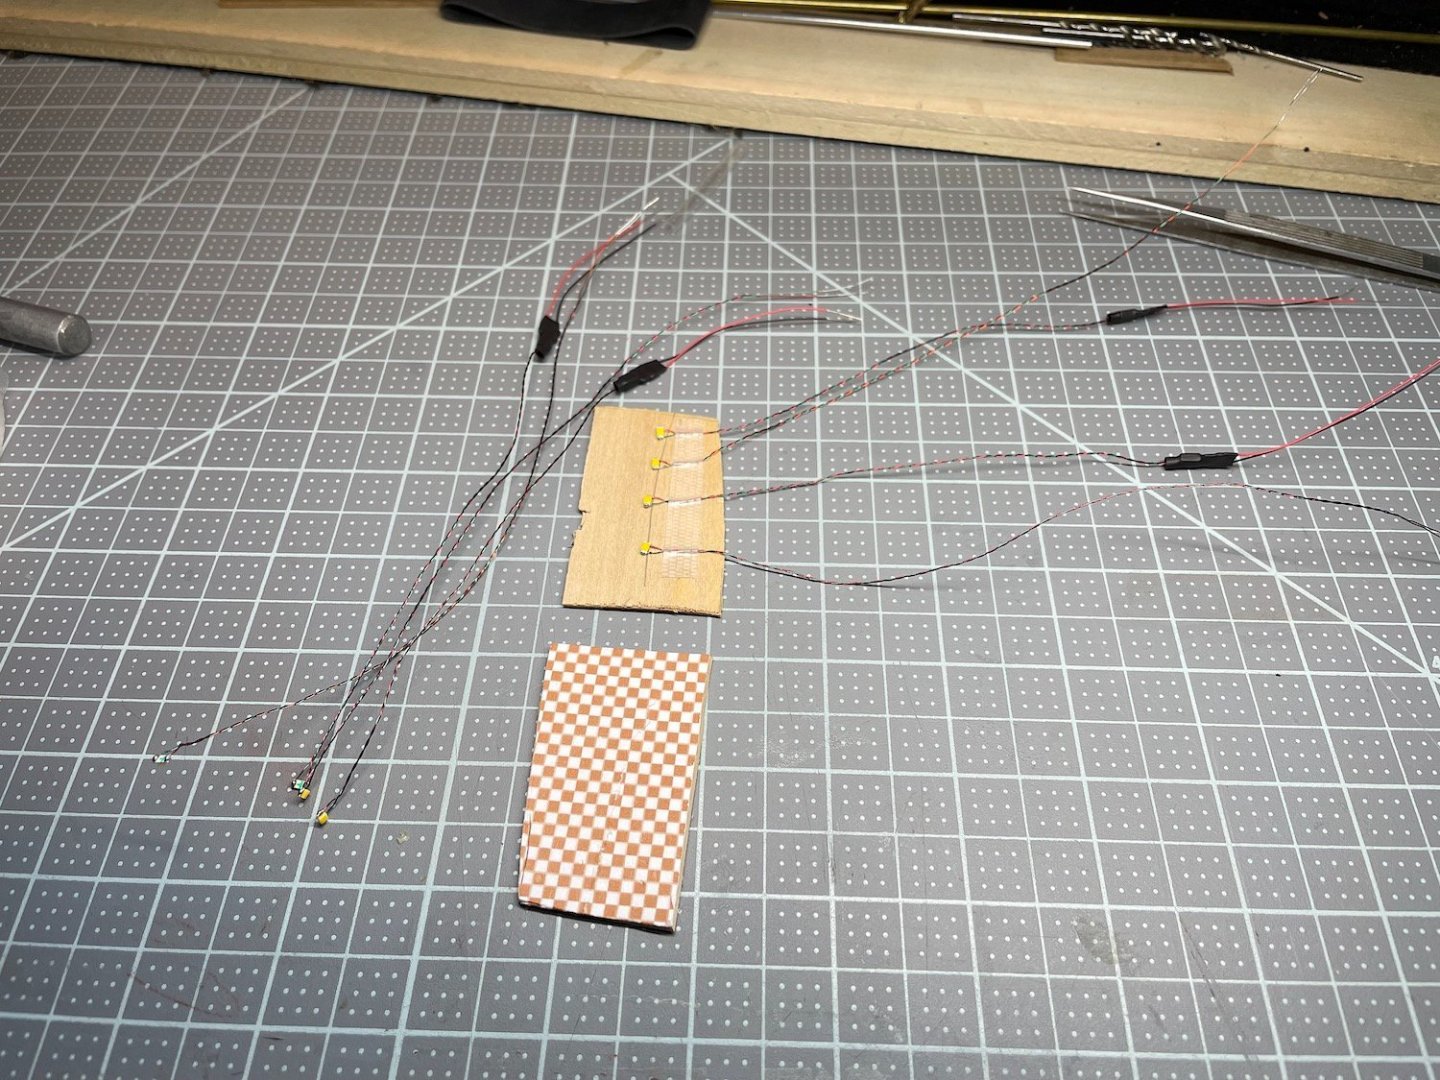


-
Jason, Just found your log - Excellent work !!- great start - a Viking ship will be my next project - I will follow along as well. Regards
- 75 replies
-
- 2
-

-
- Oseberg
- Billing Boats
- (and 1 more)
-
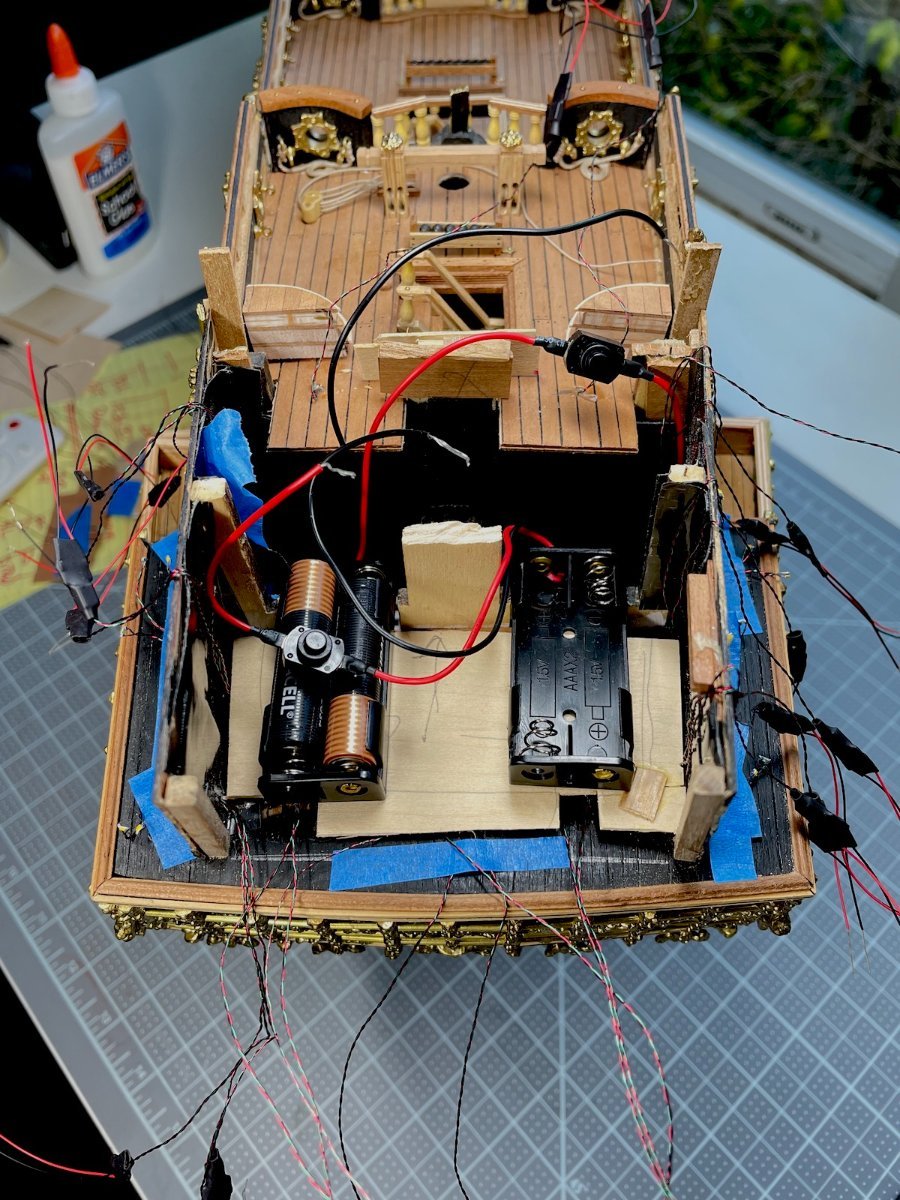
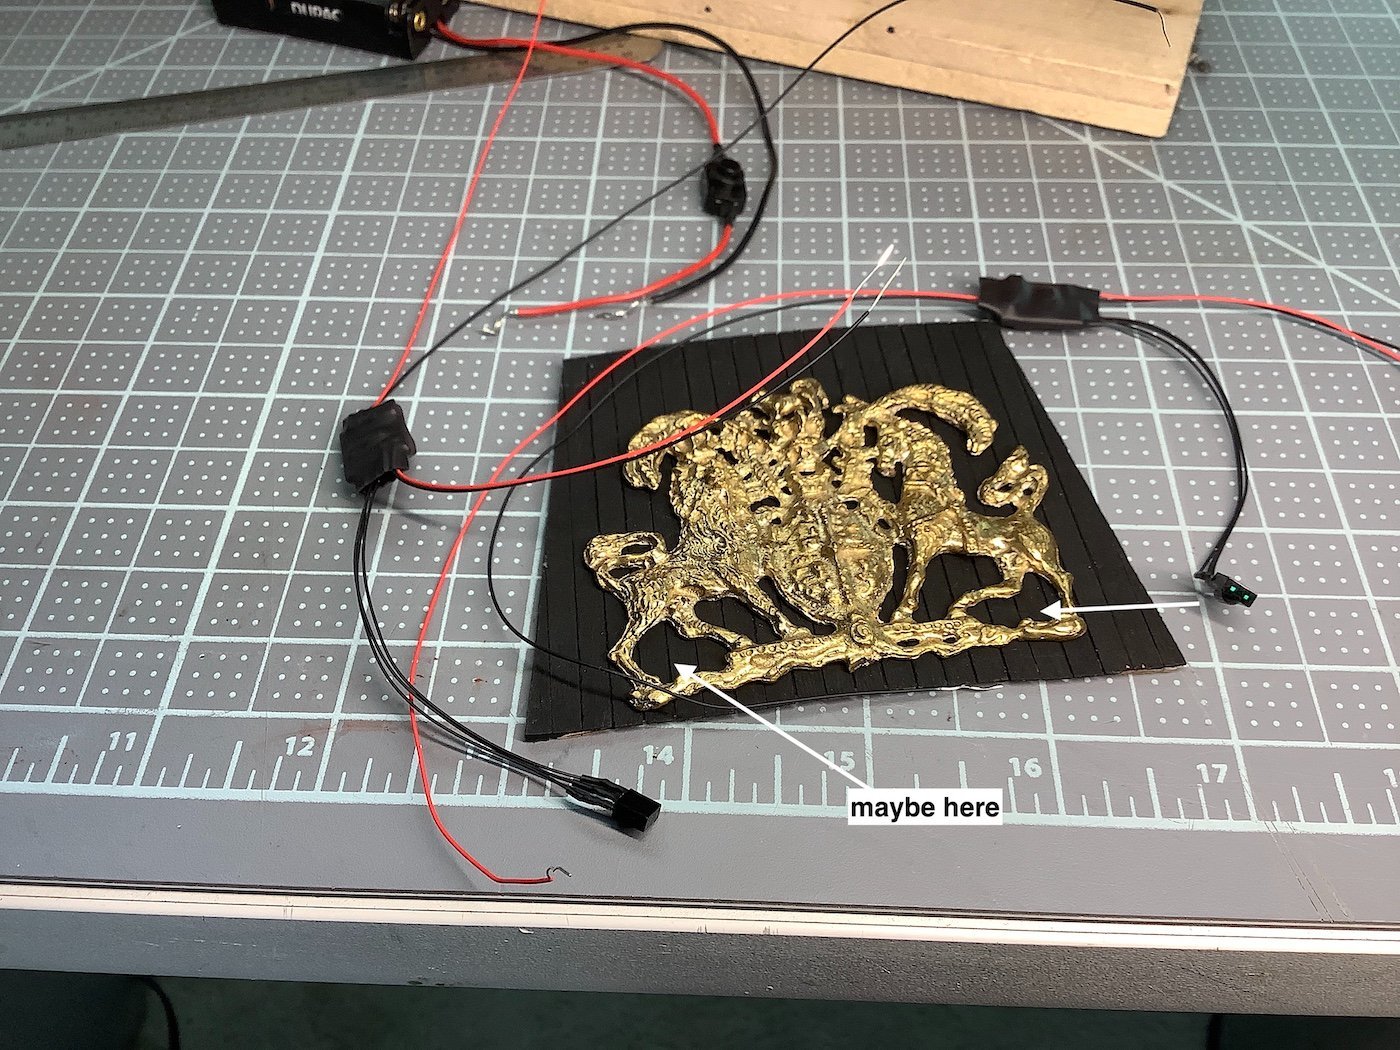
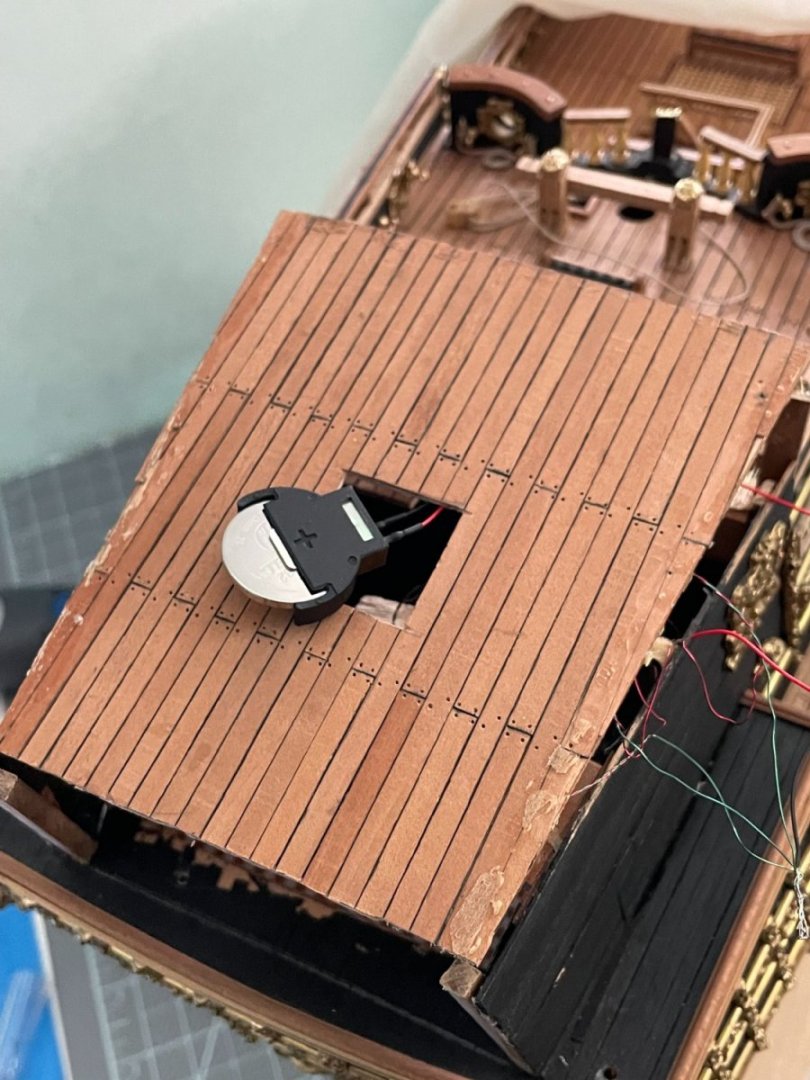
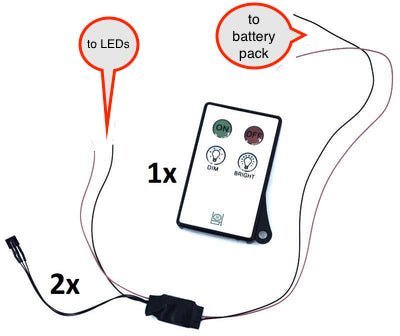
Snug Harbor Johnny, Thanks, for your nice post as well as your comment/suggestions. Indeed, you are right I (we’ve) probably had issues with leaking Lithium AA/AAA batteries especially in remotes and in electronics that sit idle for extended periods of time. I had originally wanted to add two CR2032 button cells – to be located just under the poop hatch grating cover for easy access, but those button cells only allow a maximum of 10 - 3V LEDs to work with a single CR2032. Had bought two, but decided that I needed more than 20 lights both steady and flickering ones as well. So -so long button cells. Now it will be up to the two AAA holders as power sources; also going one step further – The lights being an afterthought, it would have been a mess removing the (to be constructed) case each time to turn the lights on/off. And I’m not prepared to go deep into the ship to drill holes for the on/off switches through the keel – or thereabouts then somehow add the on/off buttons and wires outside of the case. Logged into Evan Designs, they have a remote control with sensors that will turn 3V lights on/off as well for dimming if I so desire (had no idea). Perfect solution for when model will be housed in a Plexiglas case. This was suggested to me by a member of another forum – had no inkling of how this technique is so very popular with model railroad enthusiast. Yes, to your well noted point, I will indeed “keep an eye” on potential leaks. Thanks for dropping by and your post – appreciated…. Kind Regards,
-
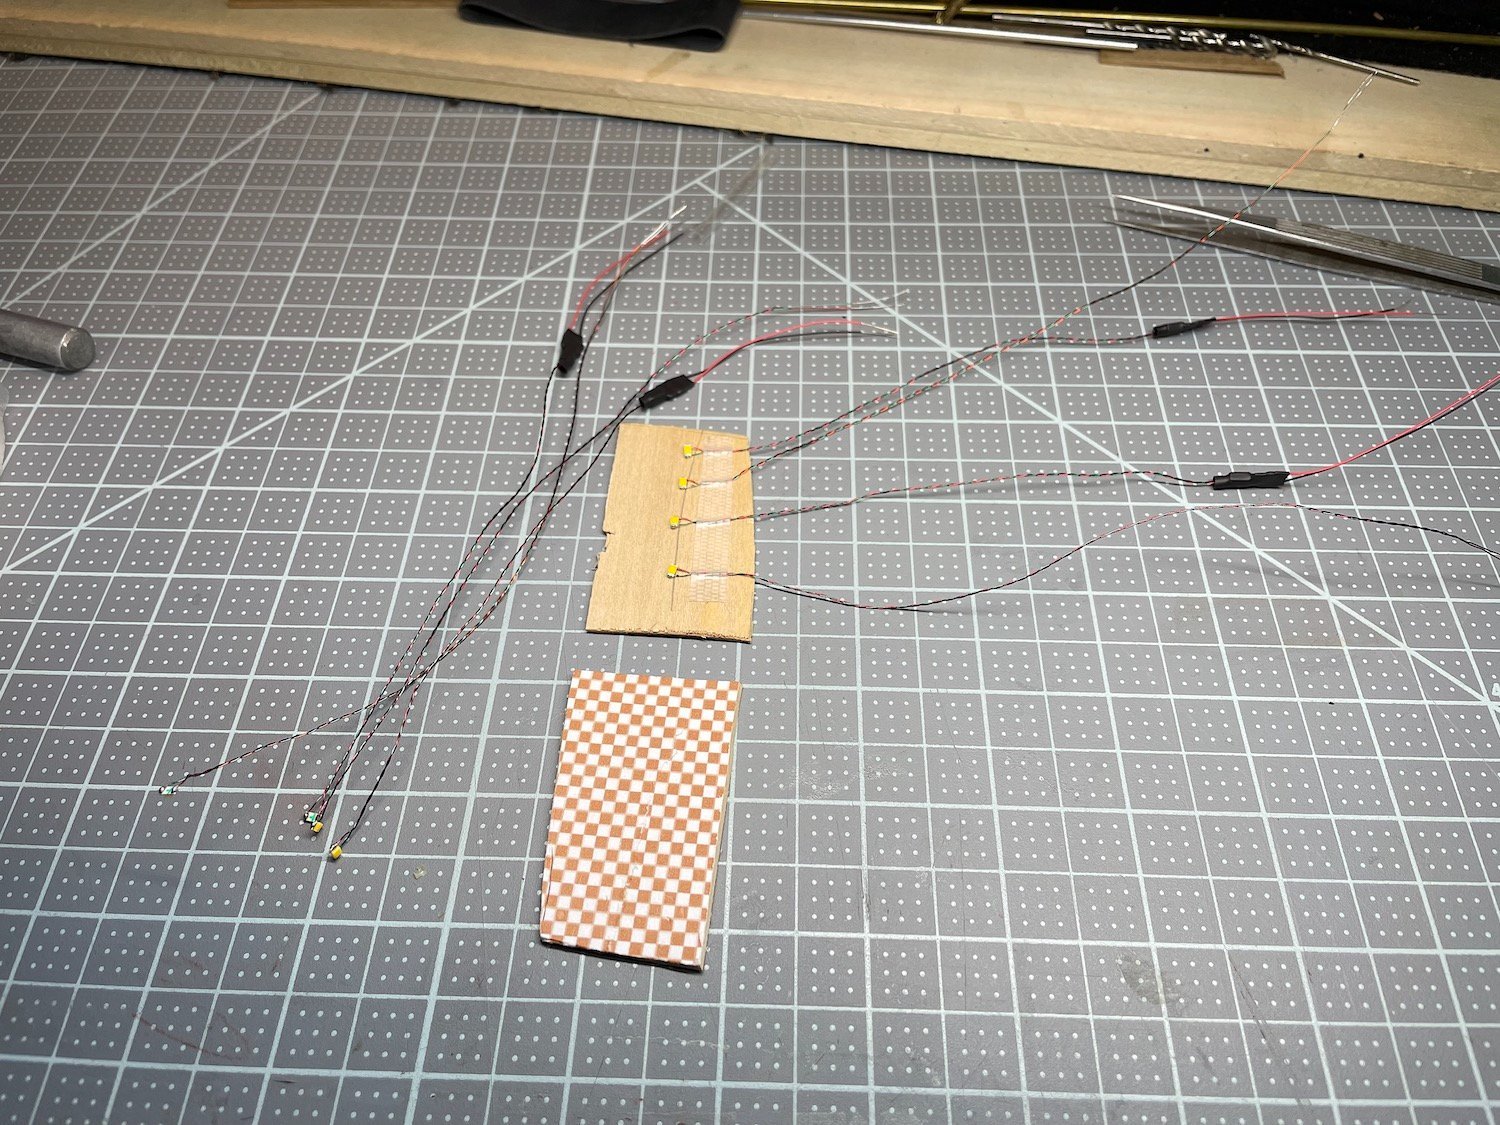
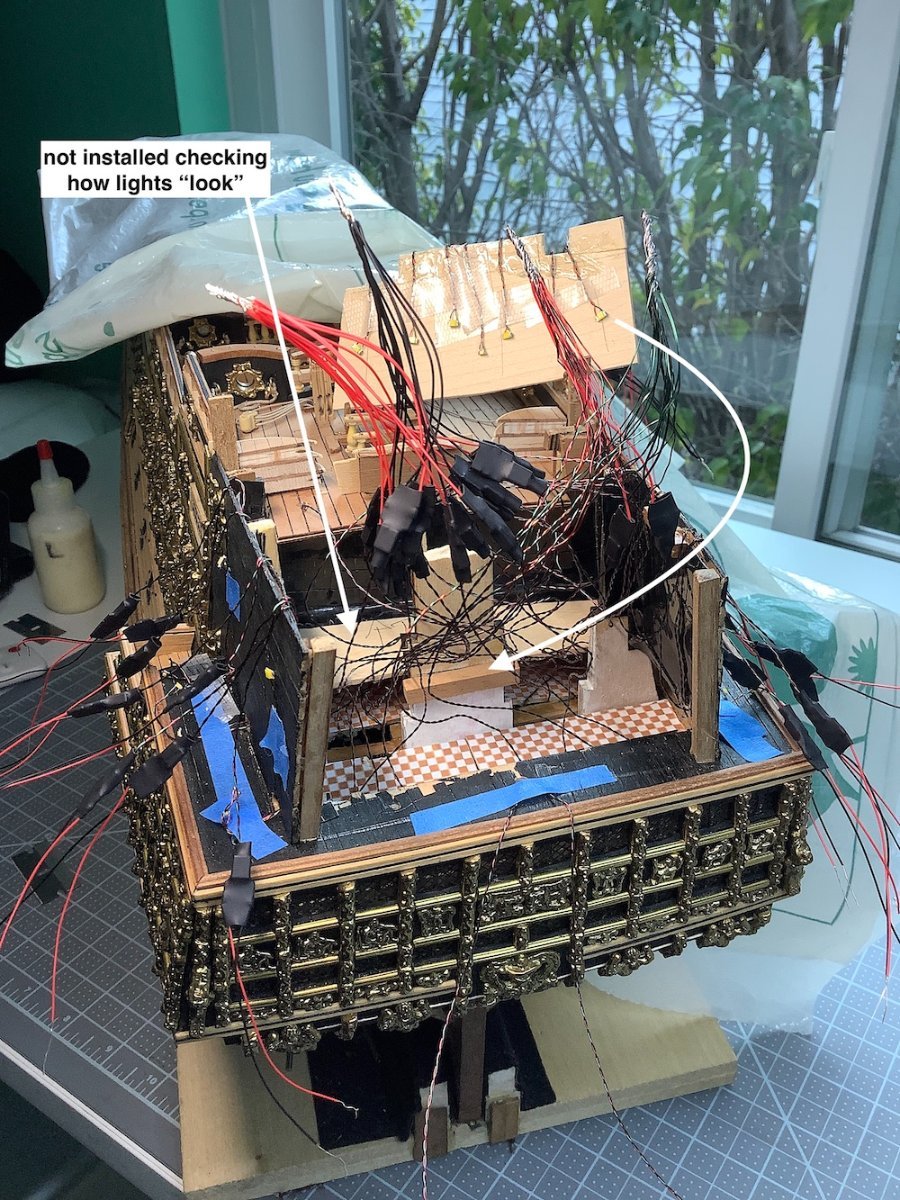
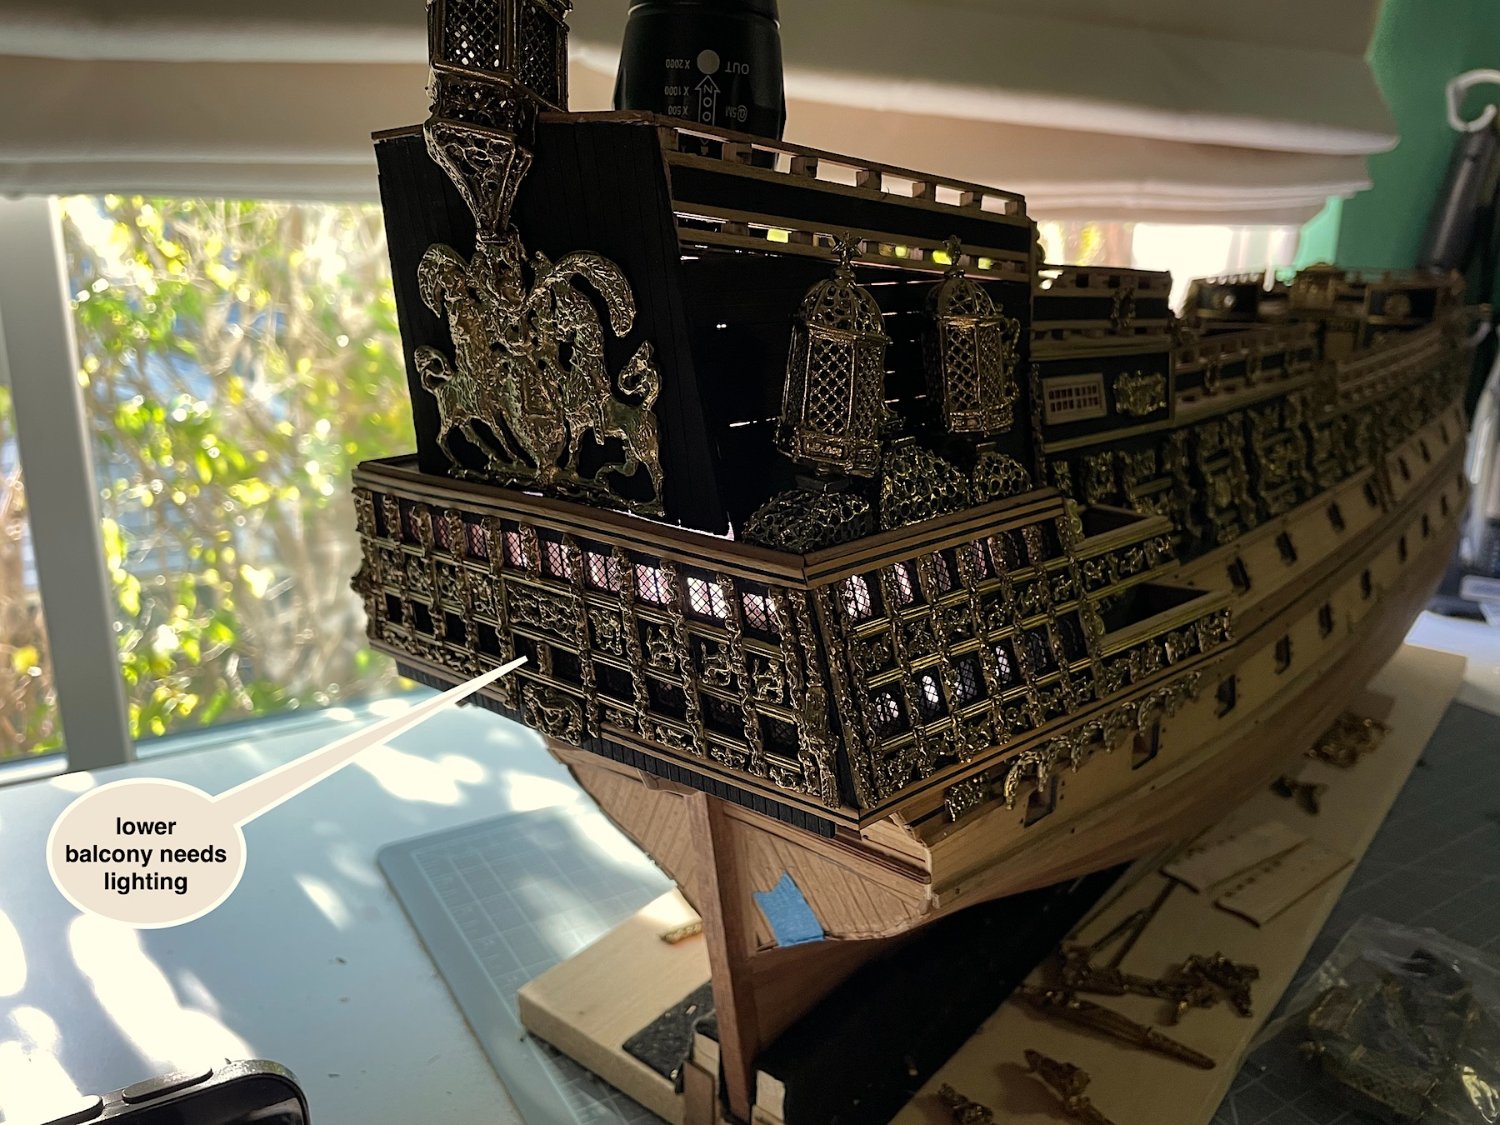
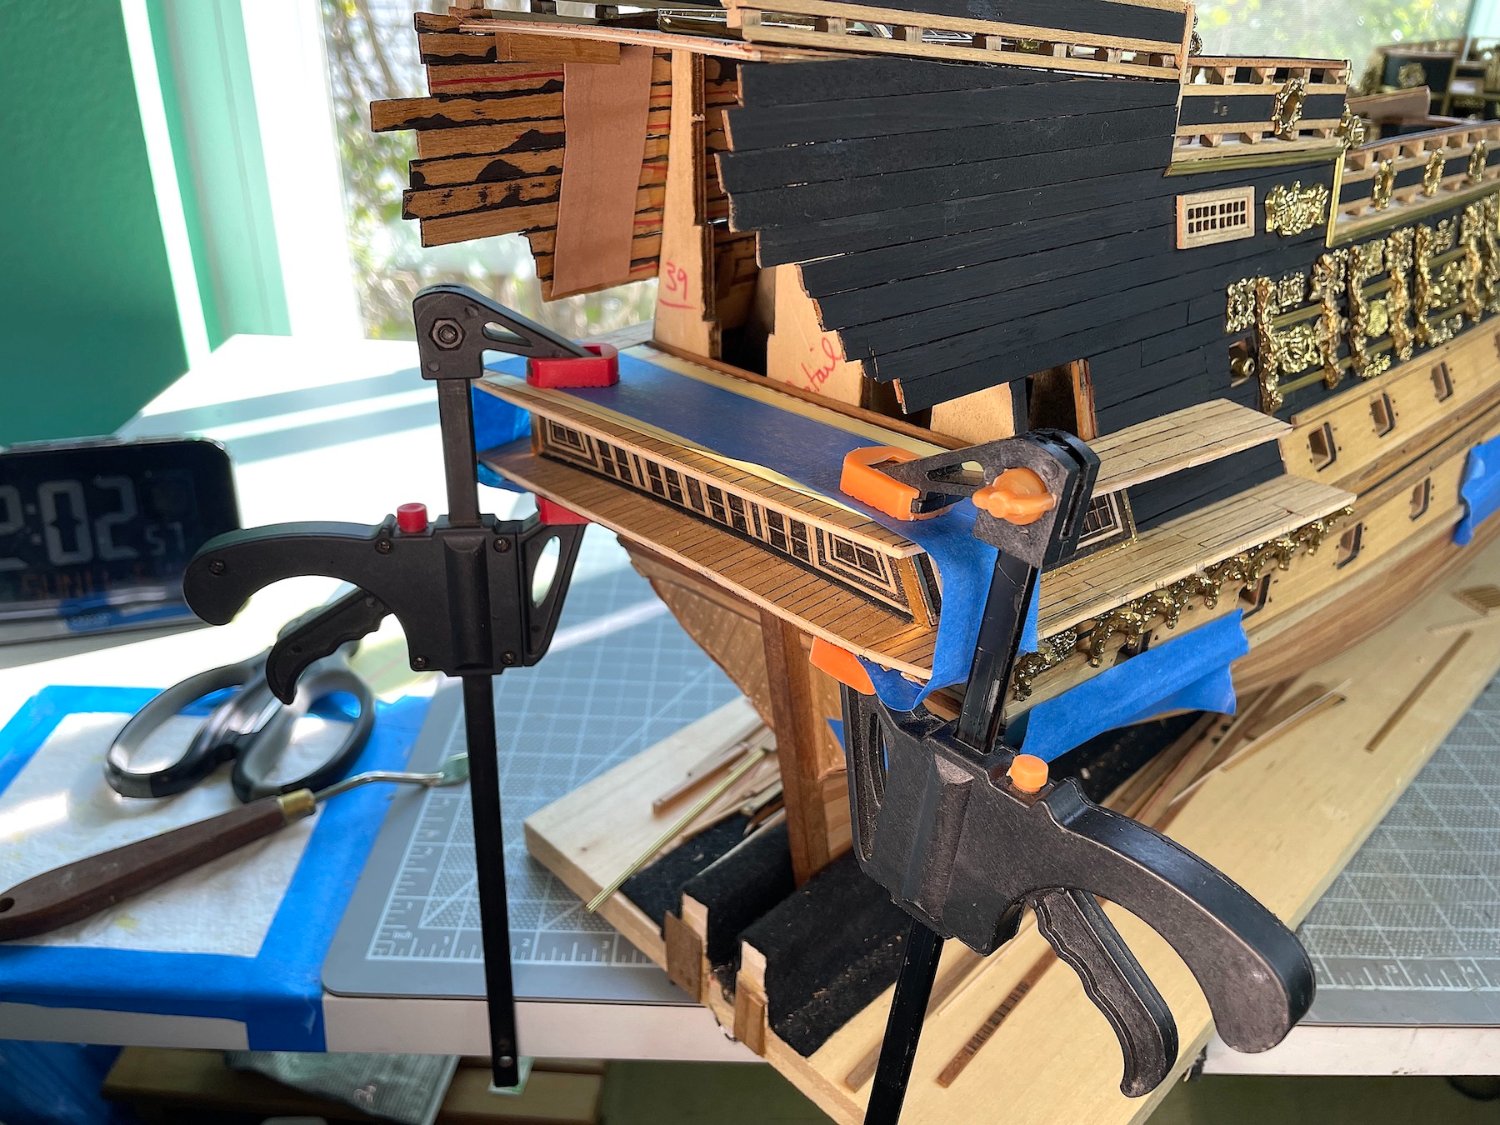
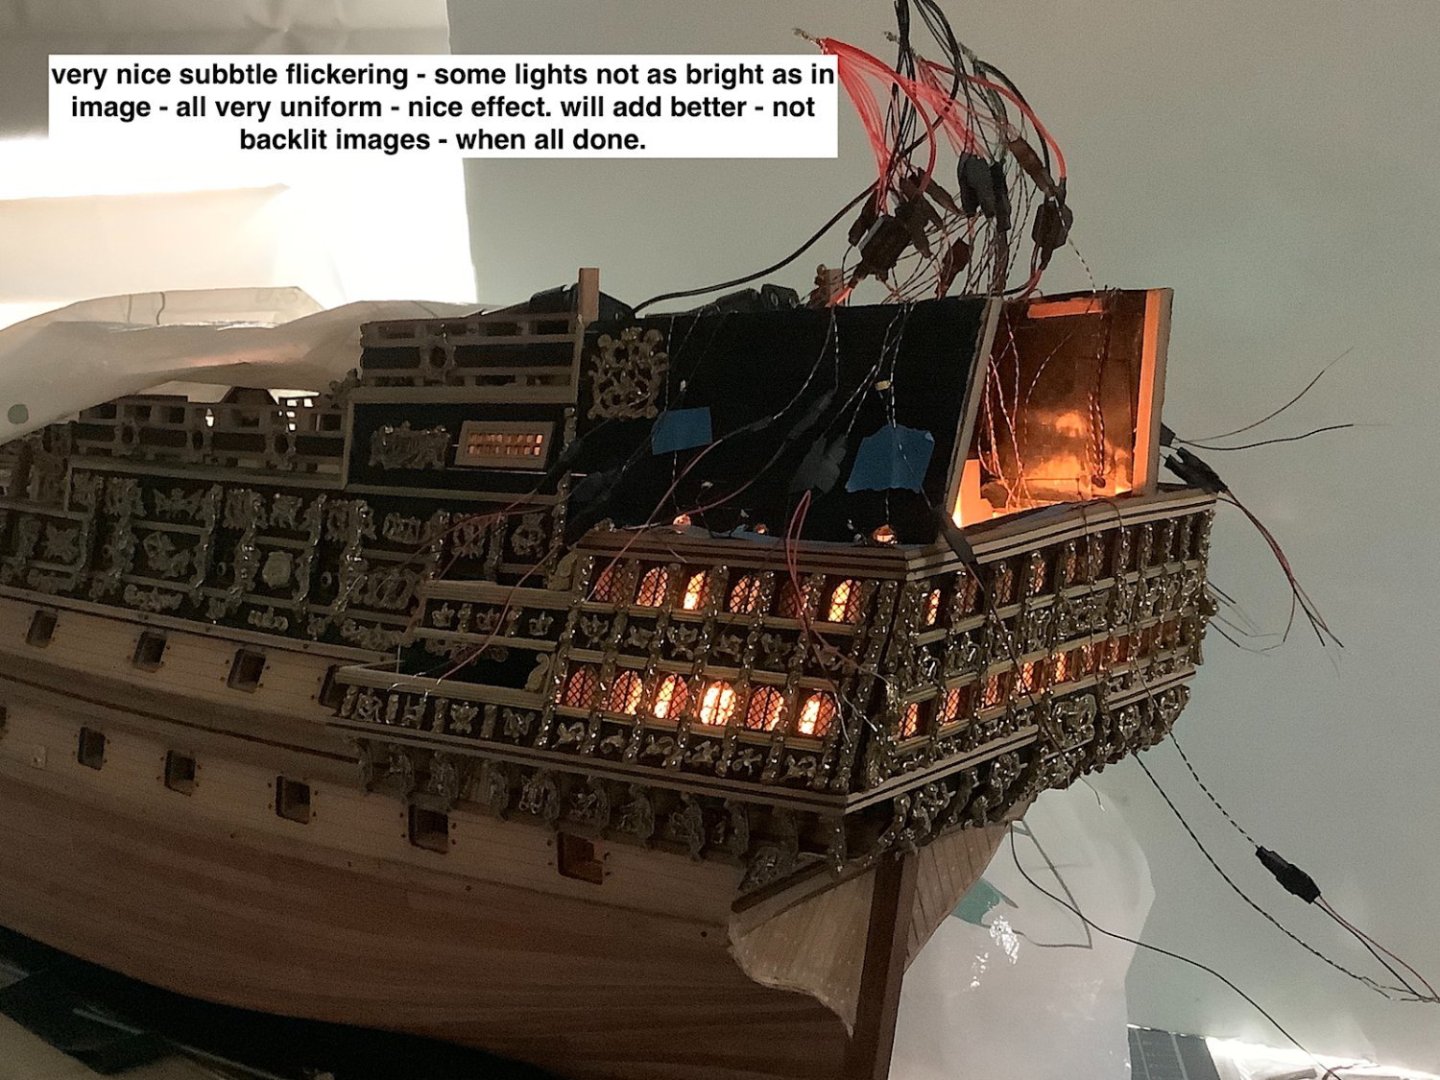
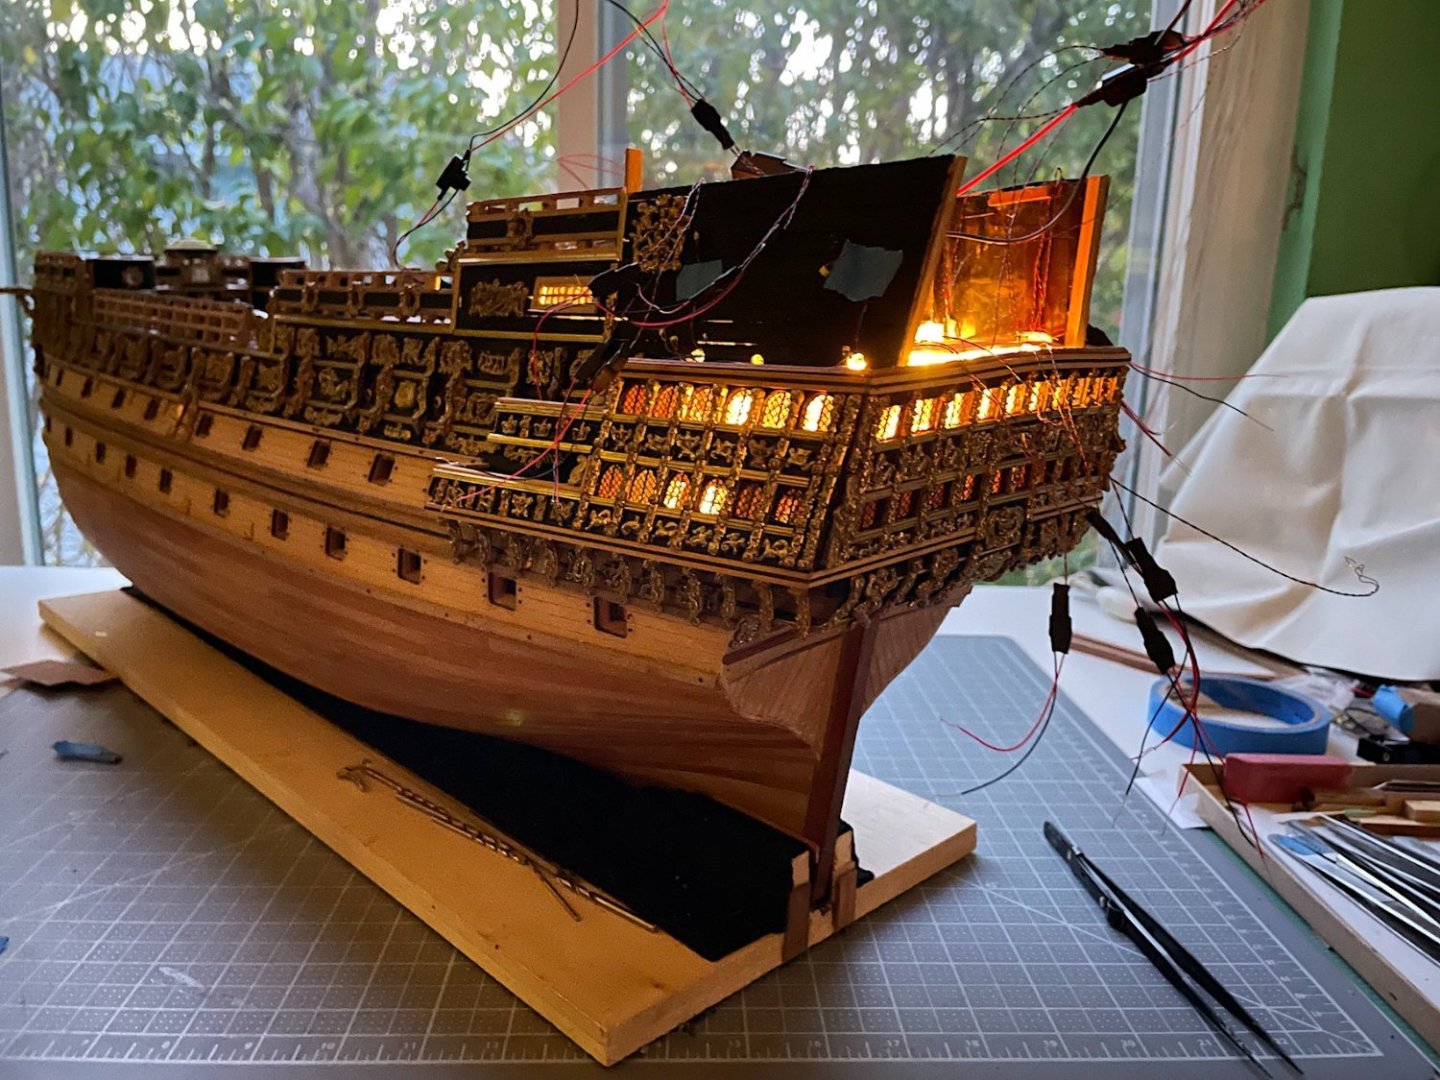
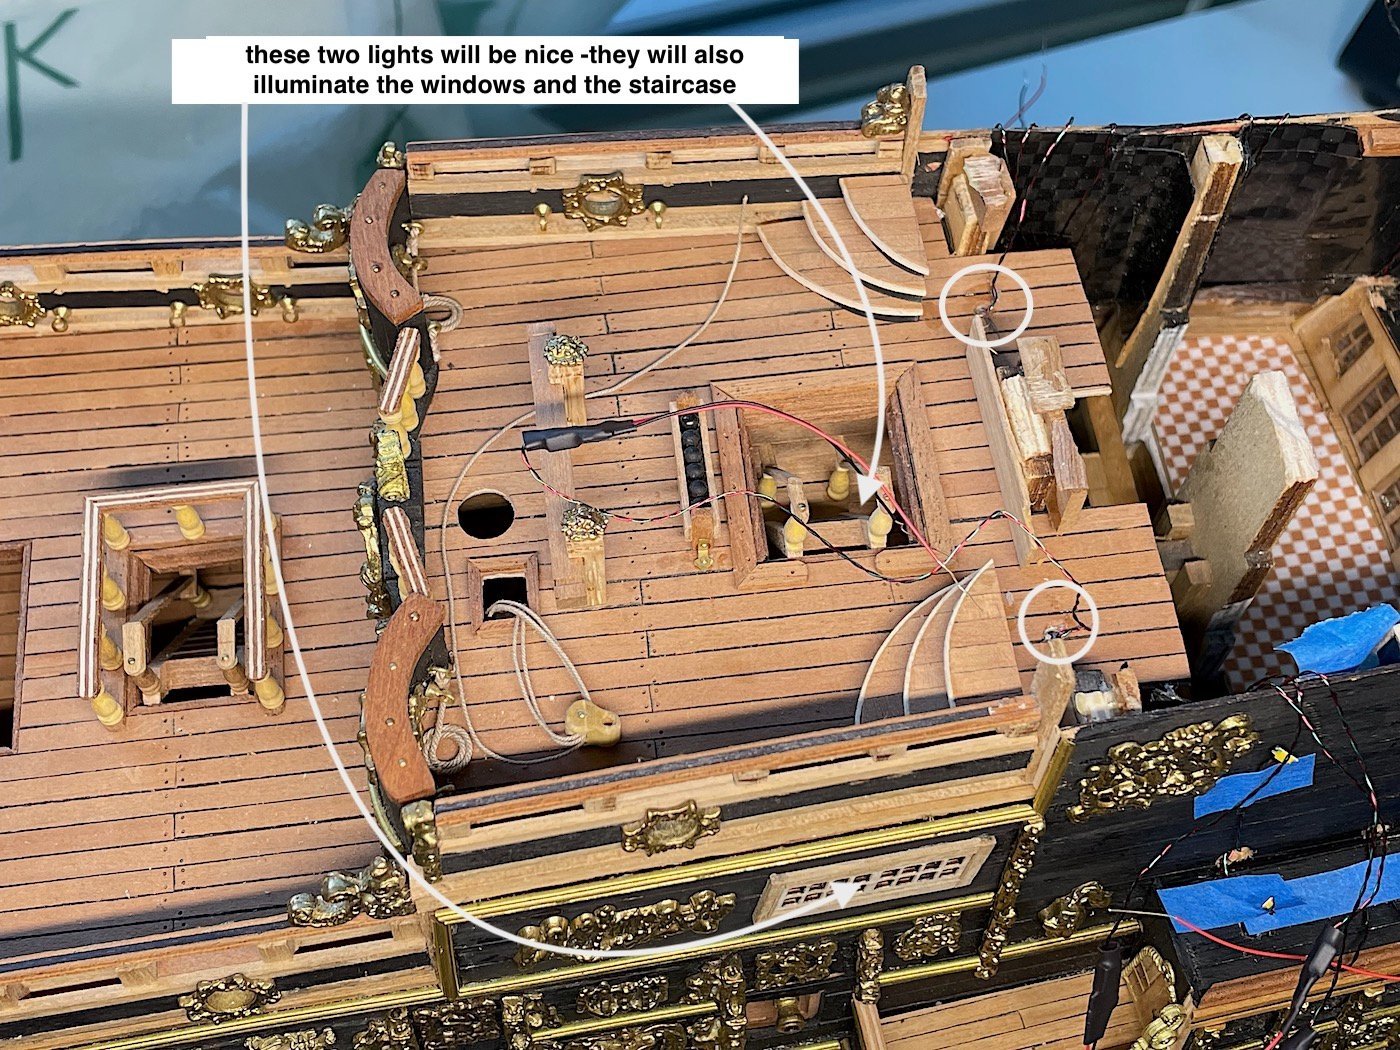
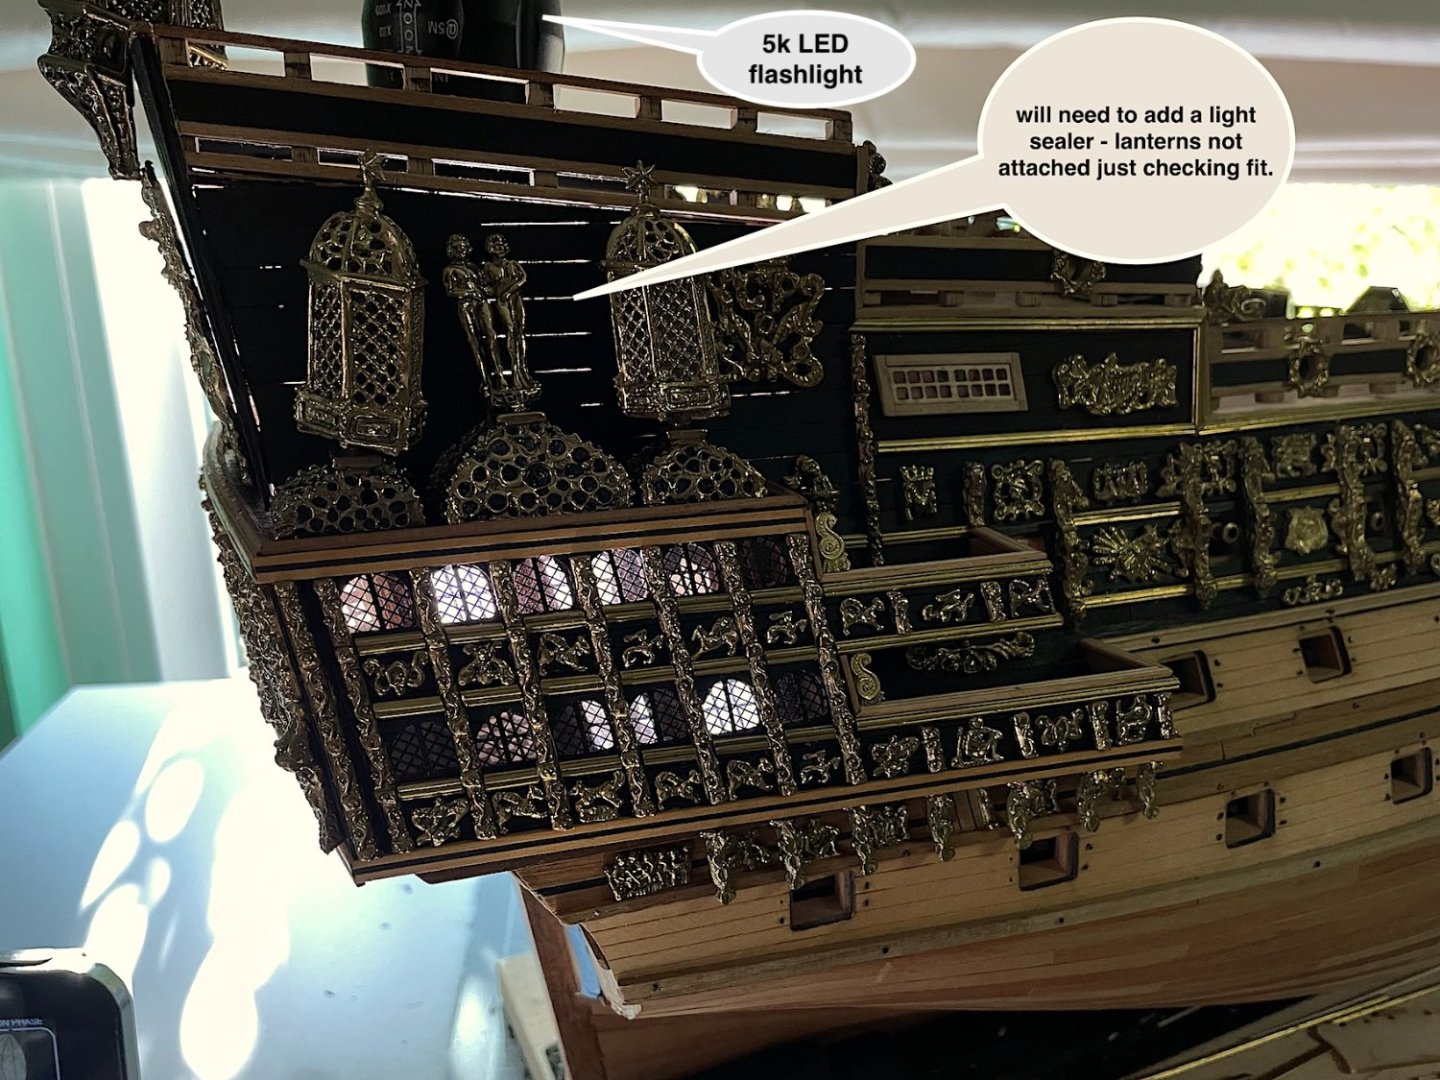
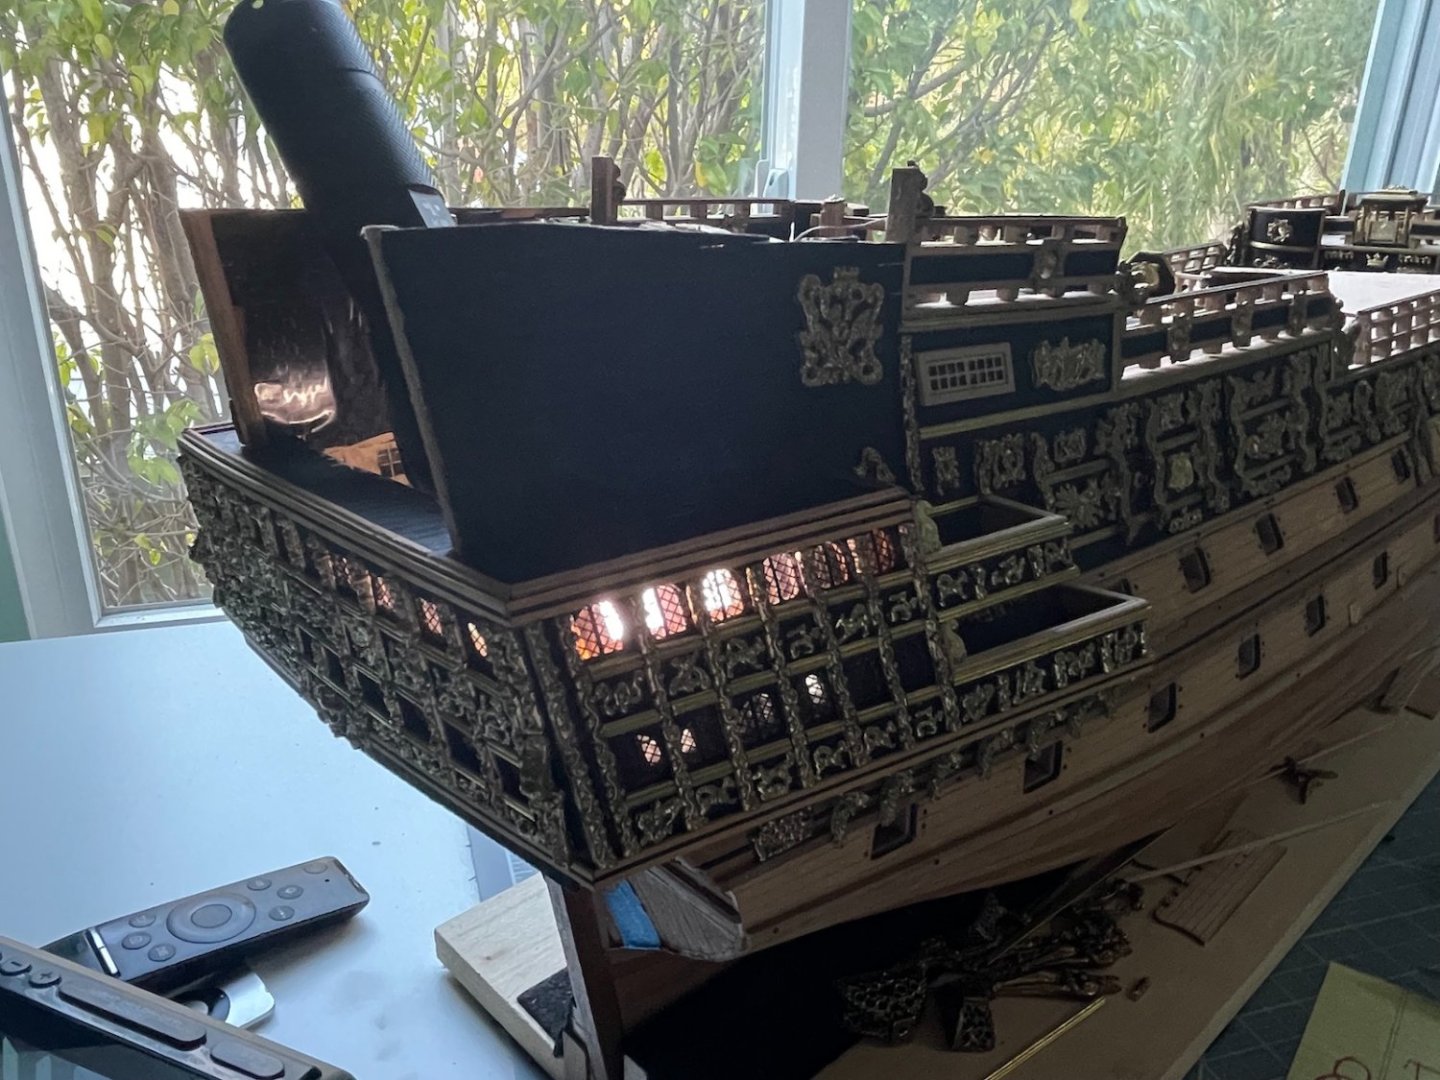
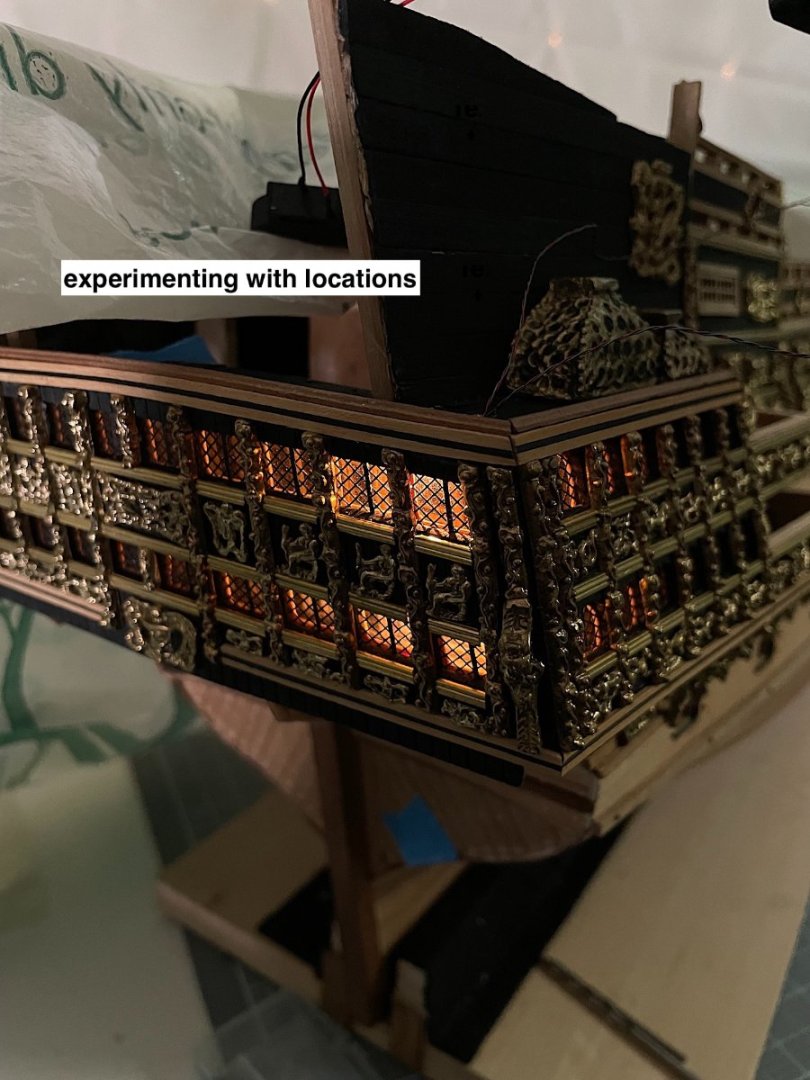
Thanks Frank - always a pleasure when you drop by. Experimenting with locations of the three size lights; Nano, Pico, and Chip blending with some non-flickering as well – This image iPhone was not up to the task (did not pre-set for correct image quality) – lights are not as intense as some depicted in images, but lights harmoniously blend nicely through those windows where I’ve temporarily placed some LEDs. Also, another dozen or so need to be inserted into proper locations. I did determine that I will have to segregate the wiring. All flickering lights will be connected to a specific 3V AAA power source. Non flickering will have their own AAA battery pack. Evan Designs indicate that all 3V flickering and non-flickering can be sourced from the same power source. Yes, that’s right, they do all work - but I noted that as such, the flickering effect (of those LEDs) becomes much more muted, as to be almost “missing” when blended with non-flickering types. Segregating all flickering onto one power source returned those light to their proper flickering “look”. Having also removed the poop deck will allow me to “fix” an issue that I feel is not quite right – the sloping angle of that deck seems a bit too high at the stern. Other images detail my thoughts Regards,

-
Allen, Thanks for the very nice comment. Regarding your search for Spanish ordinance this link might be of help to you. http://www.shipmodels.com.ua/catalog/Cannon
-
bc_63, Found the answer looking back through my Vasa log. scroll down for links to tools as well

-
Glad that it was helpful. I need to go back (ringlets) to remember - will post ASAP.
-
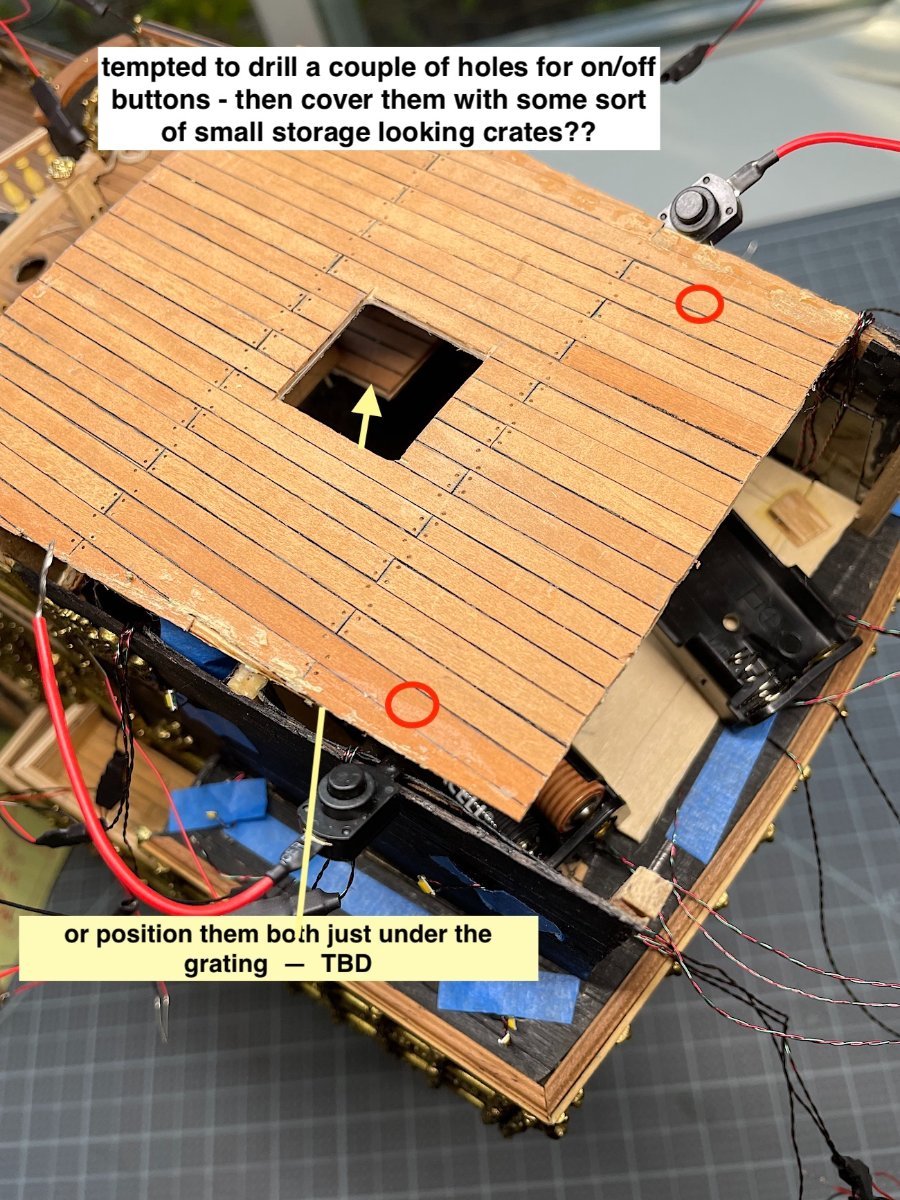
Hi, Work in progress update. Got all of the LED’s needed from Evan Designs (excellent source!!!). So started the installs – Yikes this would have obviously been SO much easier had I decided to add lights earlier in this project. But enjoying the current challenge this is creating for me. Where to locate the batteries and two needed on/off buttons to be determined. Battery packs will, of course, fit inside – on/off button locations TBD. Will also make some kind of candle looking housings for the lantern LEDs Thanks for dropping by….
-
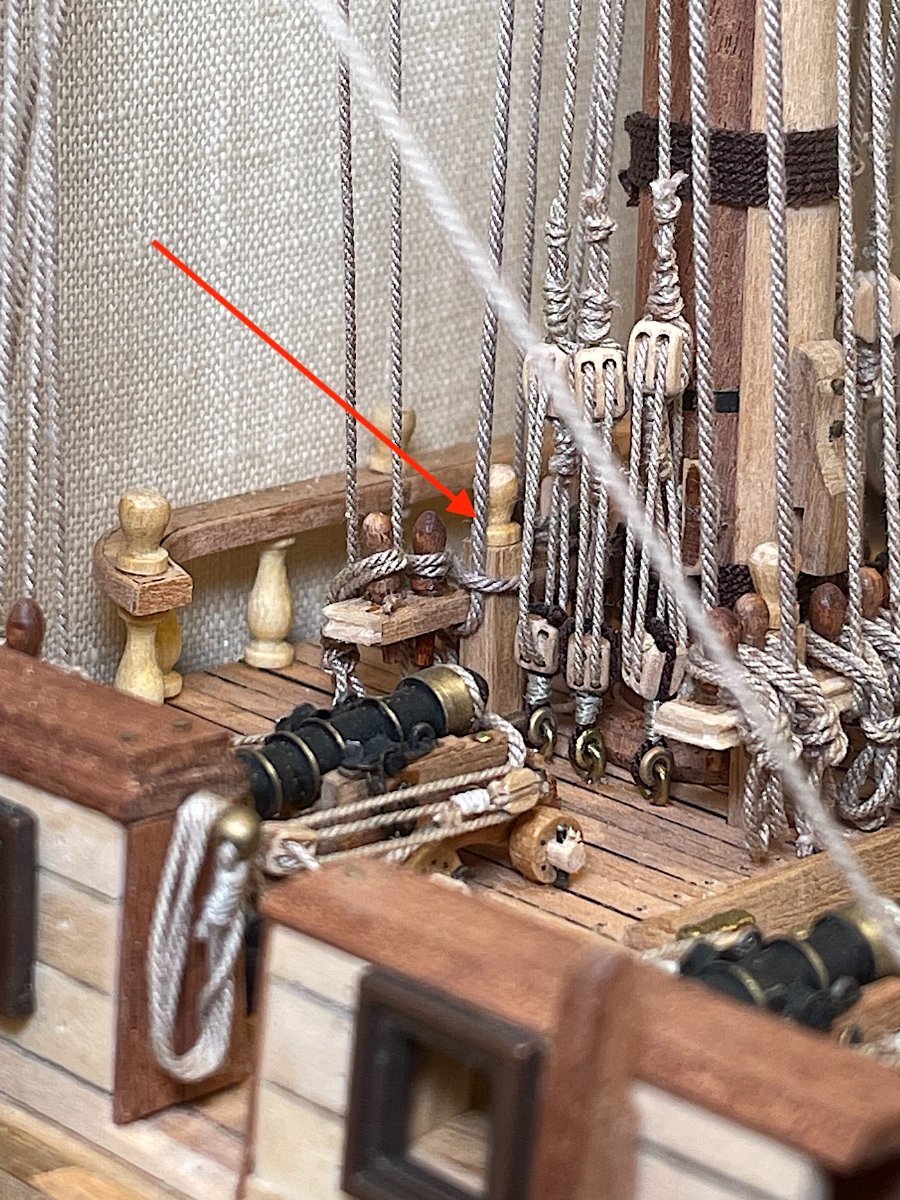
Bc_63, I looked at the rigging – don’t quite remember. That said – at the rear – since my model would not be seen from the back – did some creative rope pin attachments with certain clew, bunt and leach lines placing them at other non-specified (kit) locations. Then other four left over ropes were attached as in image below bellow (Ithink) – just made sure that lines did not cross over each other, but just visually disappeared along with the other lines. That also avoided having to attach two lines into single pin holes. Good luck..

-
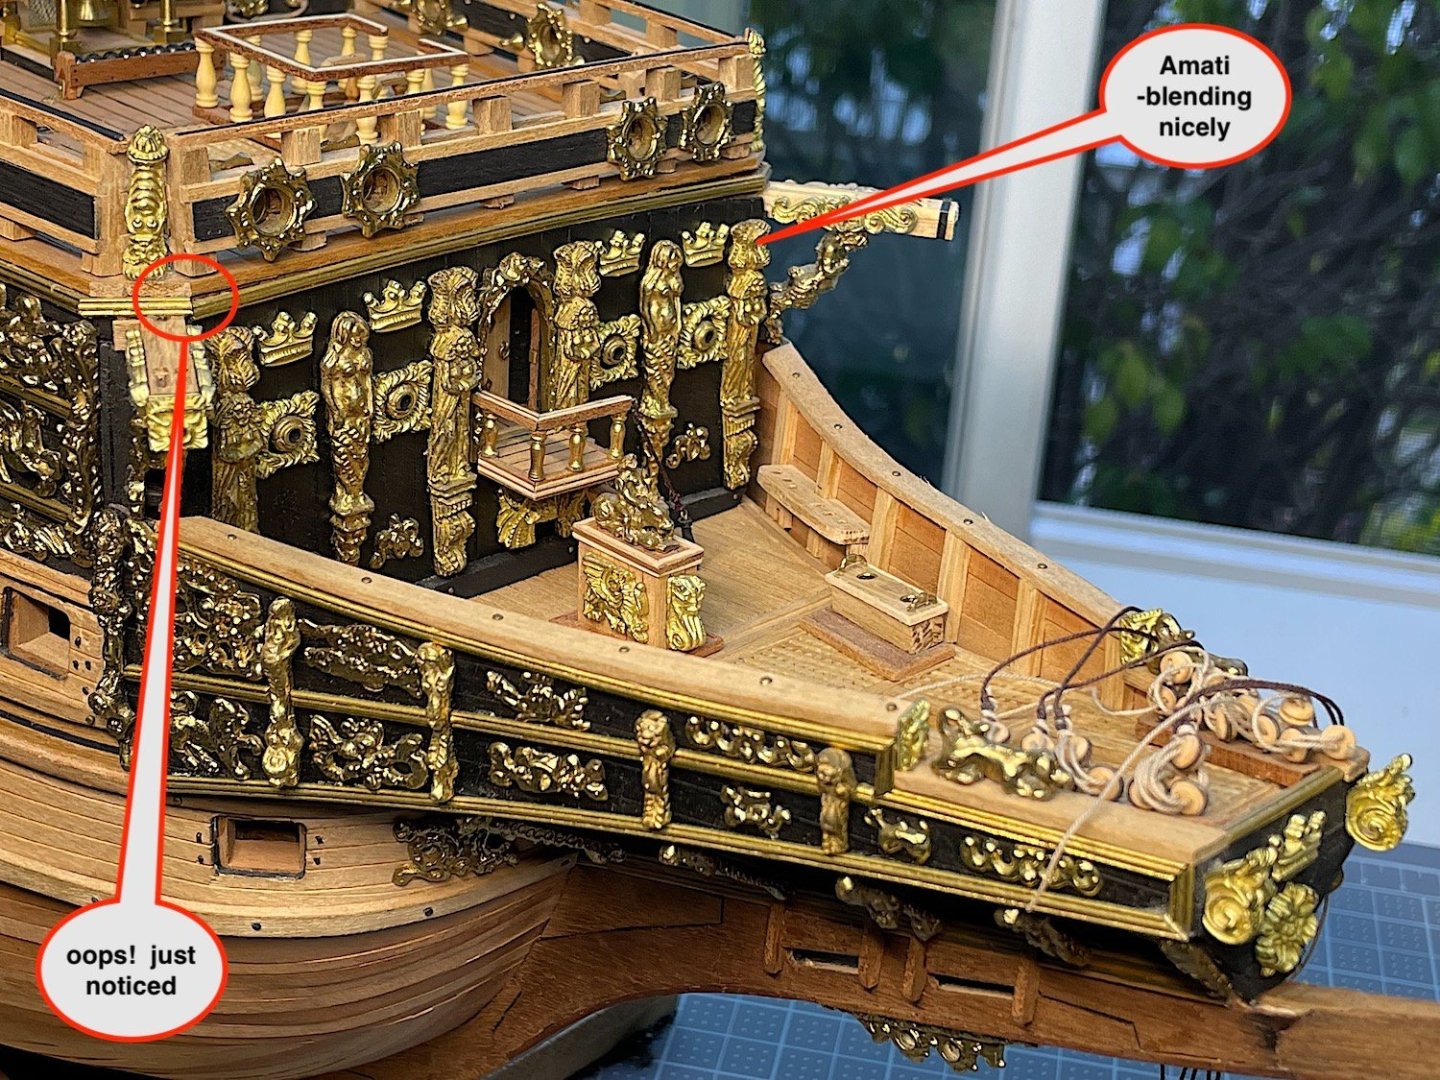
Hi, Been away from the yard for a bit of time - so no real updates.. Peter (@Katsumoto) Thanks for your very kind post. Yes, you are right the Amati decorations tend to be a little more yellow. I think that over time that they will hopefully fade. Judging from the Amati bits that I added to the forward bulkhead, the others may also “fade” a bit more as well. Good luck with your current project, as well a possibly later starting a sovereign as well. Wade13, Wow – so touched by your thoughts – that, BTW, go way beyond my perceptions of what I am capable of. You are overly kind – So appreciate that this project is of great interest for you. You also have a great gift for the written prose….also loved your exaggerations of my skills (;-))) Again, so touched by your words…. I have finally ordered from Evan Designs as many LED’s of different sizes (took three orders) – both flickering and solid, and of different sizes as well that now can move forward installing lights were they may be the most useful. The power source locations are still a work in progress - given that the lights were an afterthought.... Regards,
-
Jeff, Wow!! indeed a beautifully built ship along with your super creative setting for placing this great work. 🏆
-
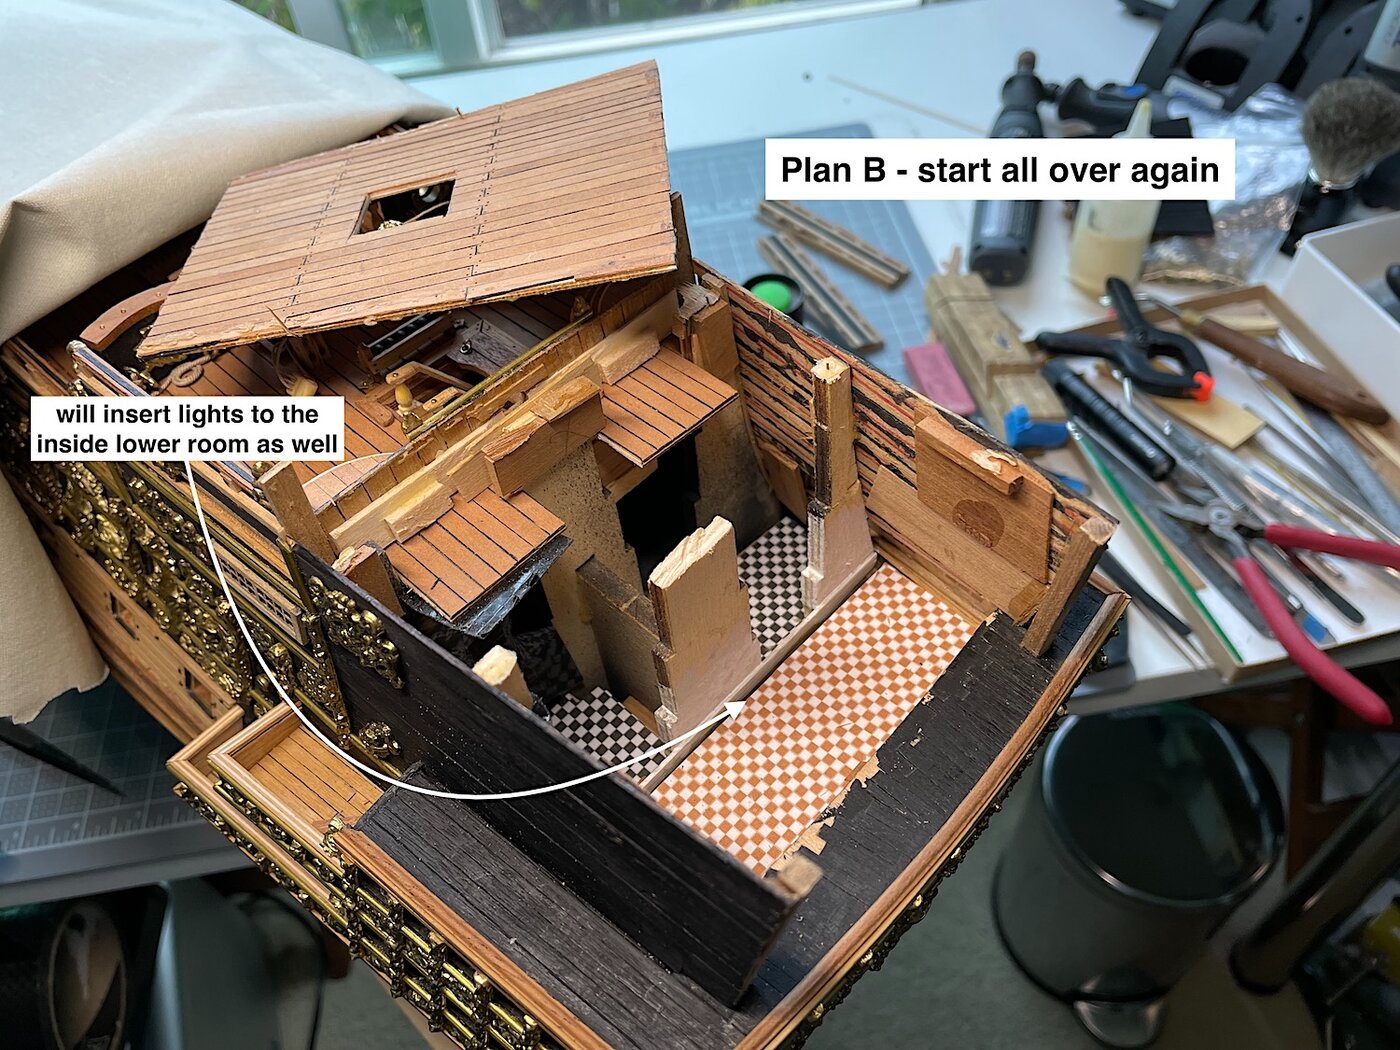
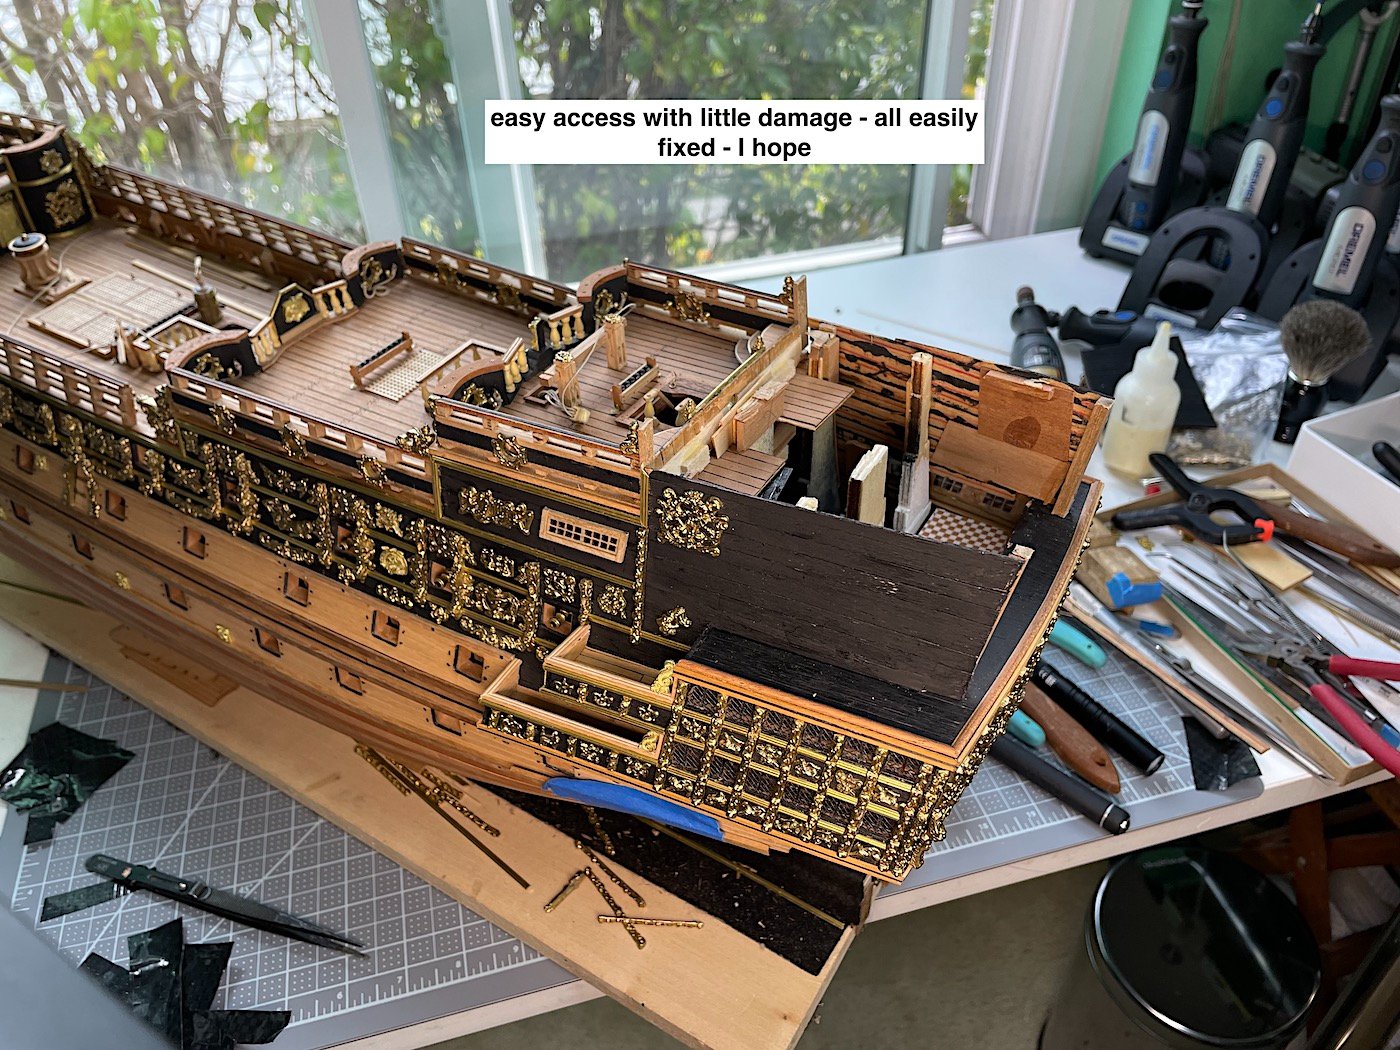
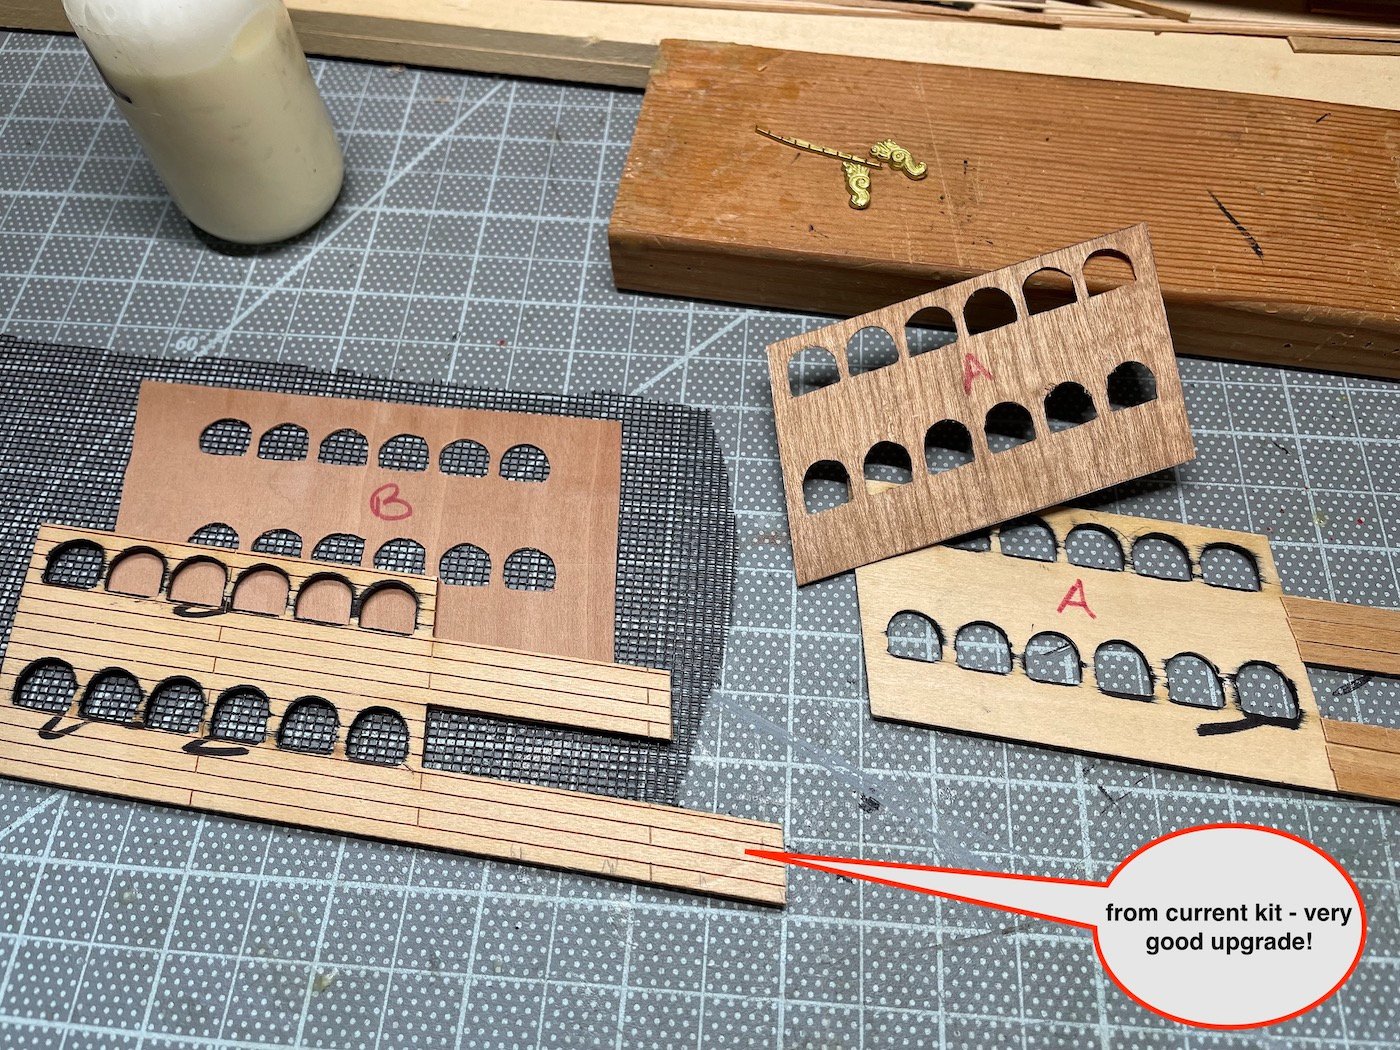
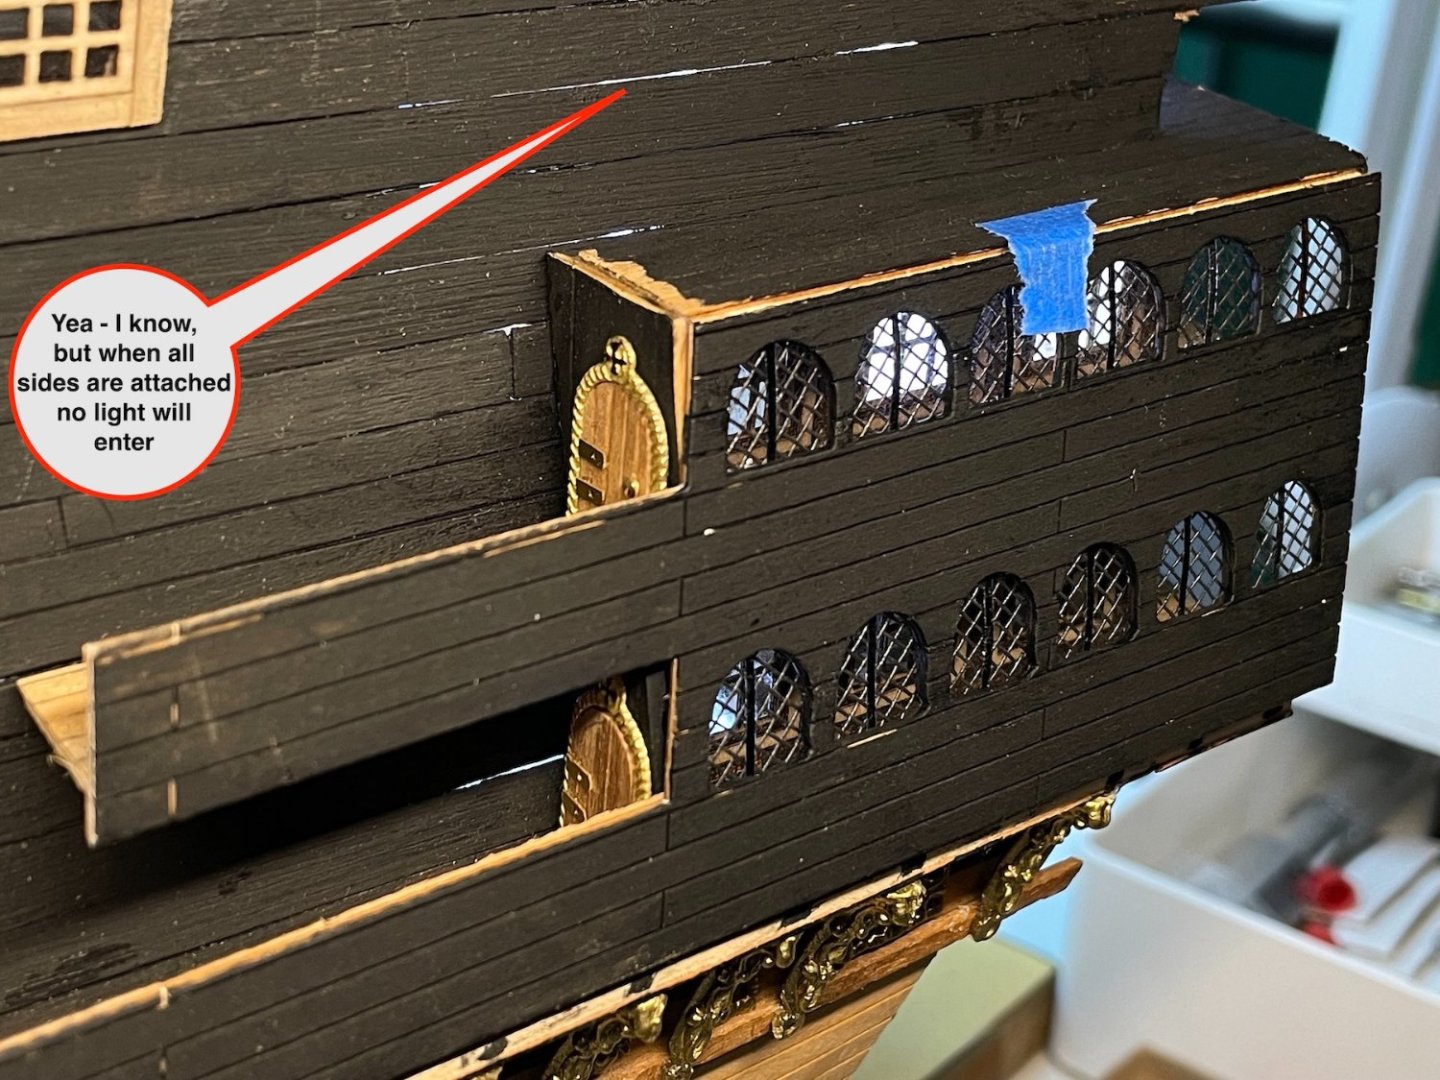
Frank: Yes big quality difference indeed – just starting work with lantern housings will post comparisons between vintage and current kit's product as well. Patrick: Thanks – PS: your new log looks to be another great build! Peter: Thanks as well for your much appreciated comment. – welcome aboard – so nice of you. I have, in fact, blended some of the Amati decorative pieces into this build. Have you started your Sovereign? ---------------------------- I did not think that they (all the outer gallery windows) would SO “blacken out” all interior details. SO have decided add LED’s – needed to remove the poop deck as well as the upper stern facing cover for better inside access. Just purchased LED’s from Evan Designs (a vendor here at MSW) as I did for my Santisima cross section. His lights require a small flat coin battery 2032 holder - as well as incorporating a small on/off switch, or I could use his AAA battery holder, but how to place that inside as well as needing later access – have not figured that out yet. Work in progress….with the coin battery holder could just leave it under the poop deck grating. Tiny on/off switch will need a hidden spot as well. Adding lights should have been thought of - a long time ago - not at this stage of this build so far. Yikes 😁 Regards,


-
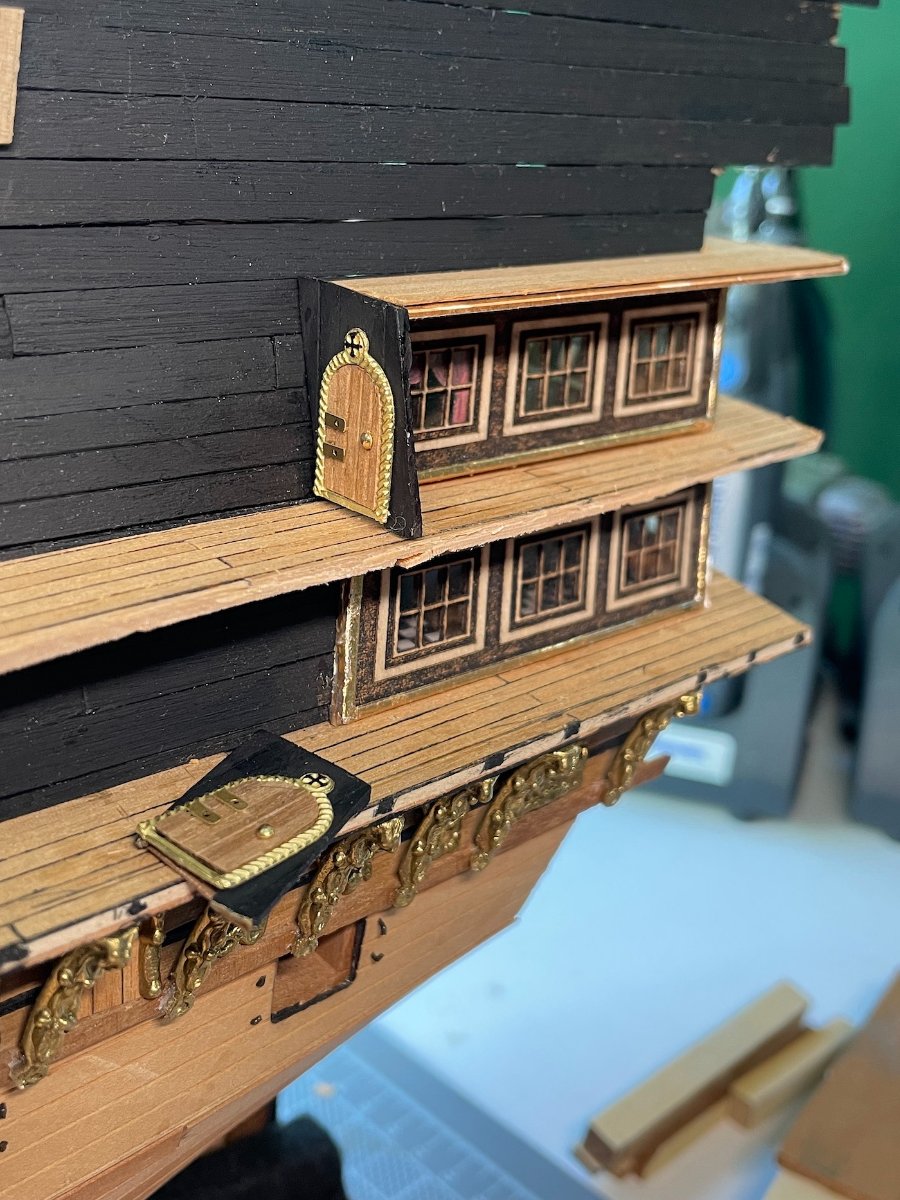
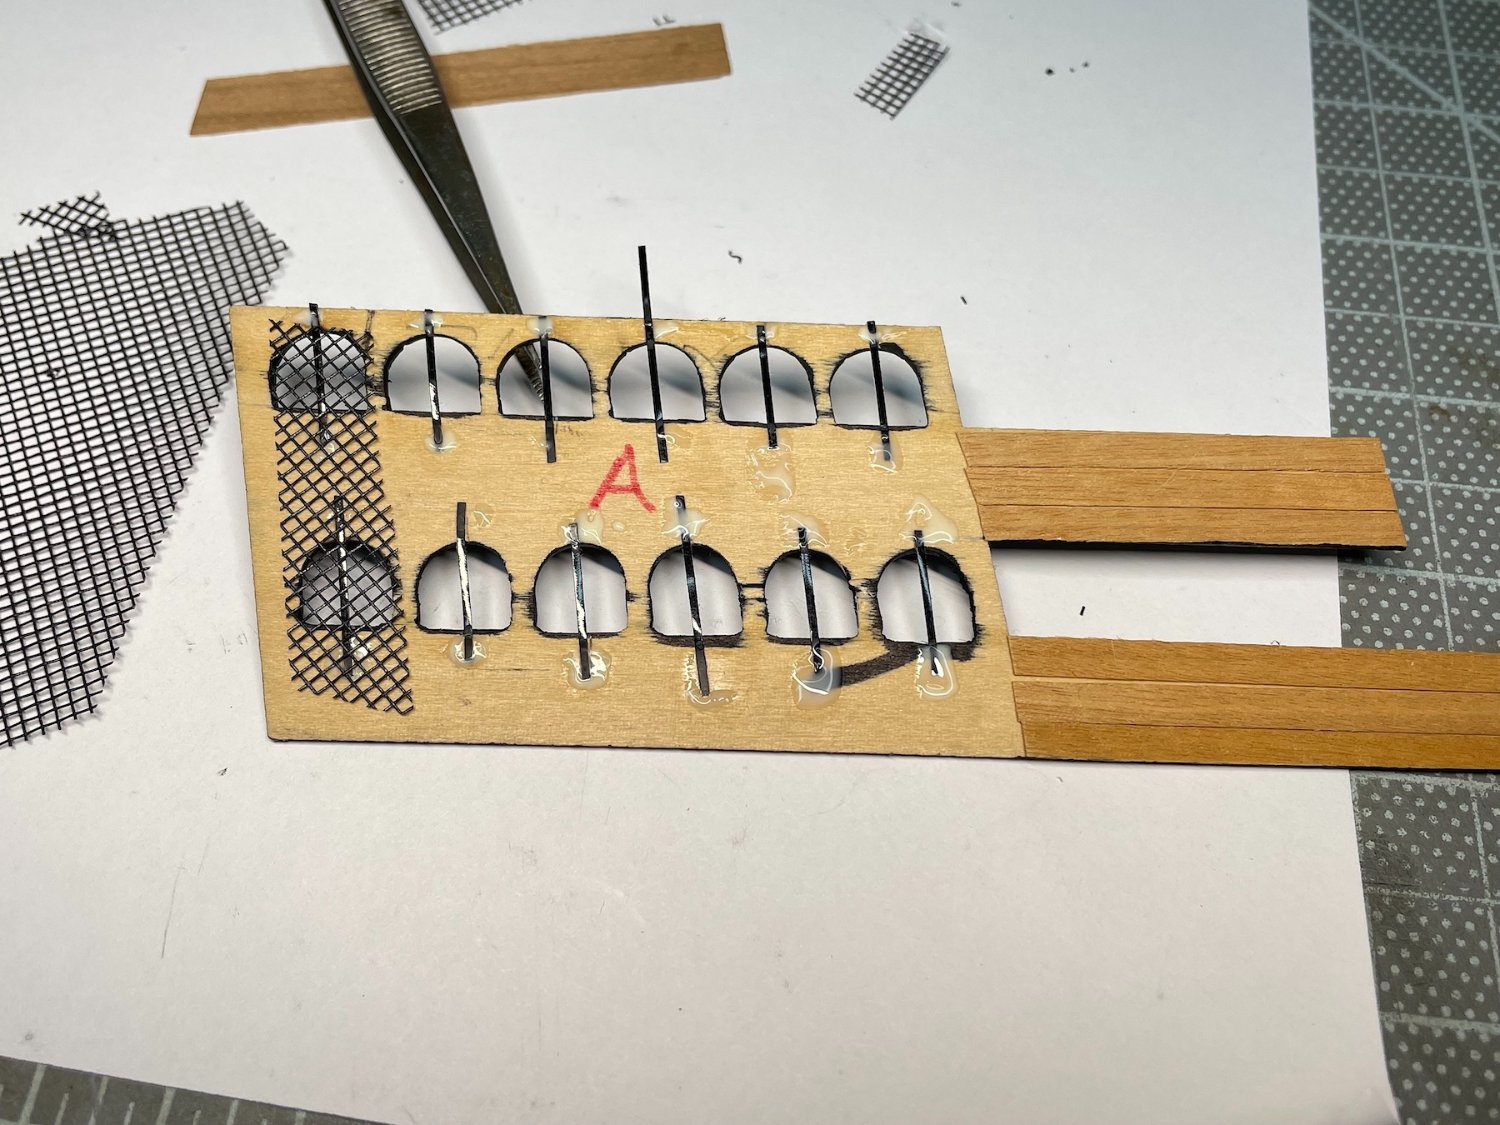
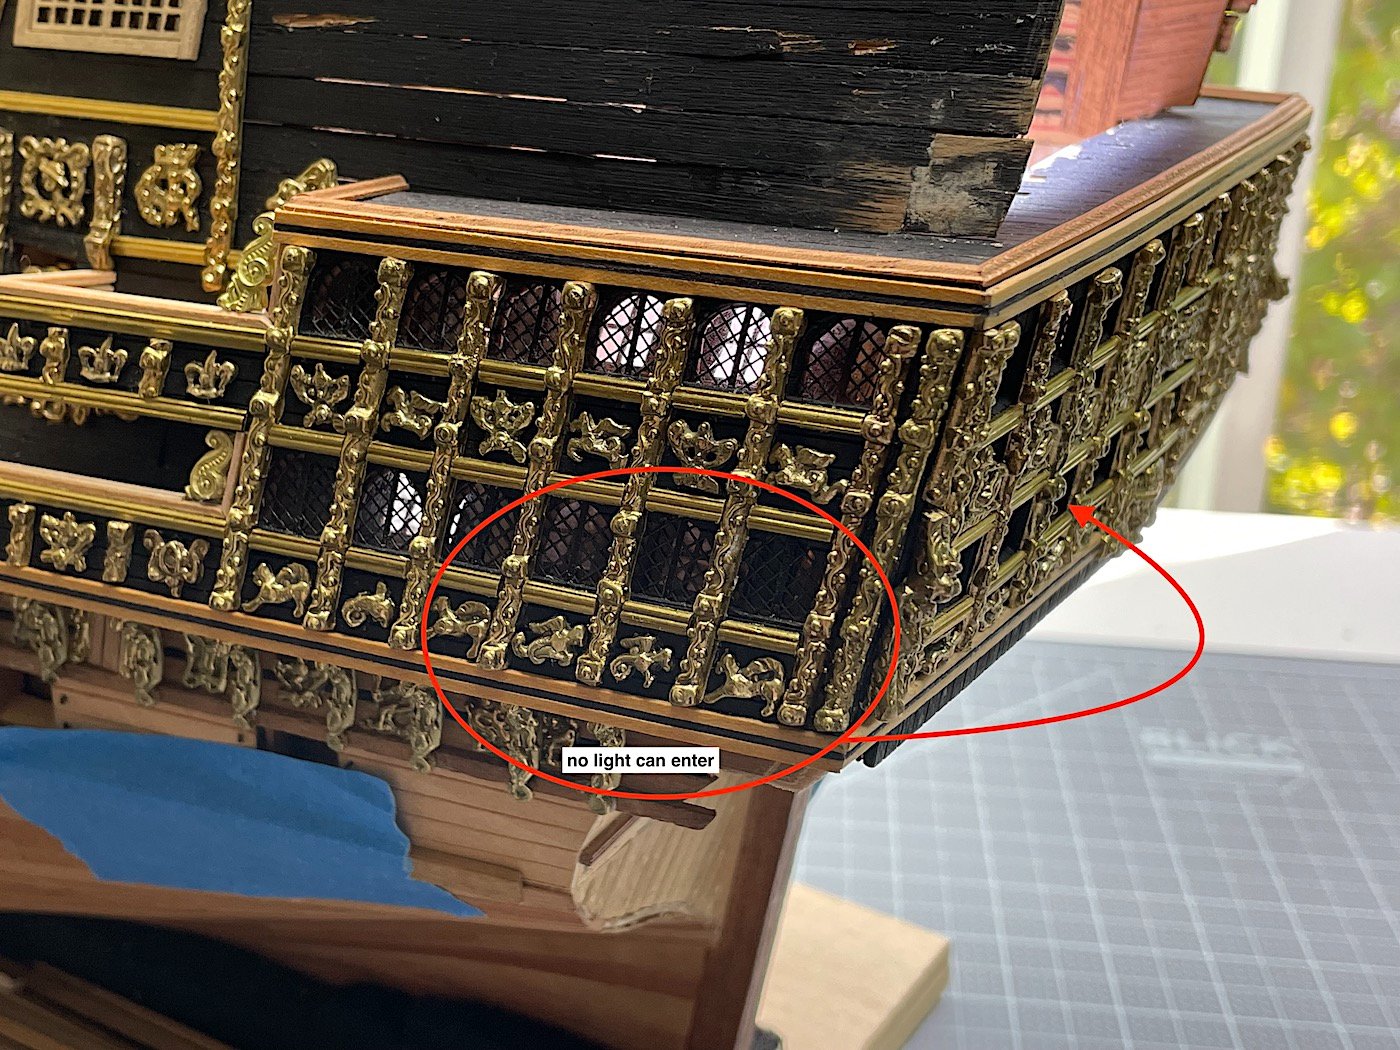
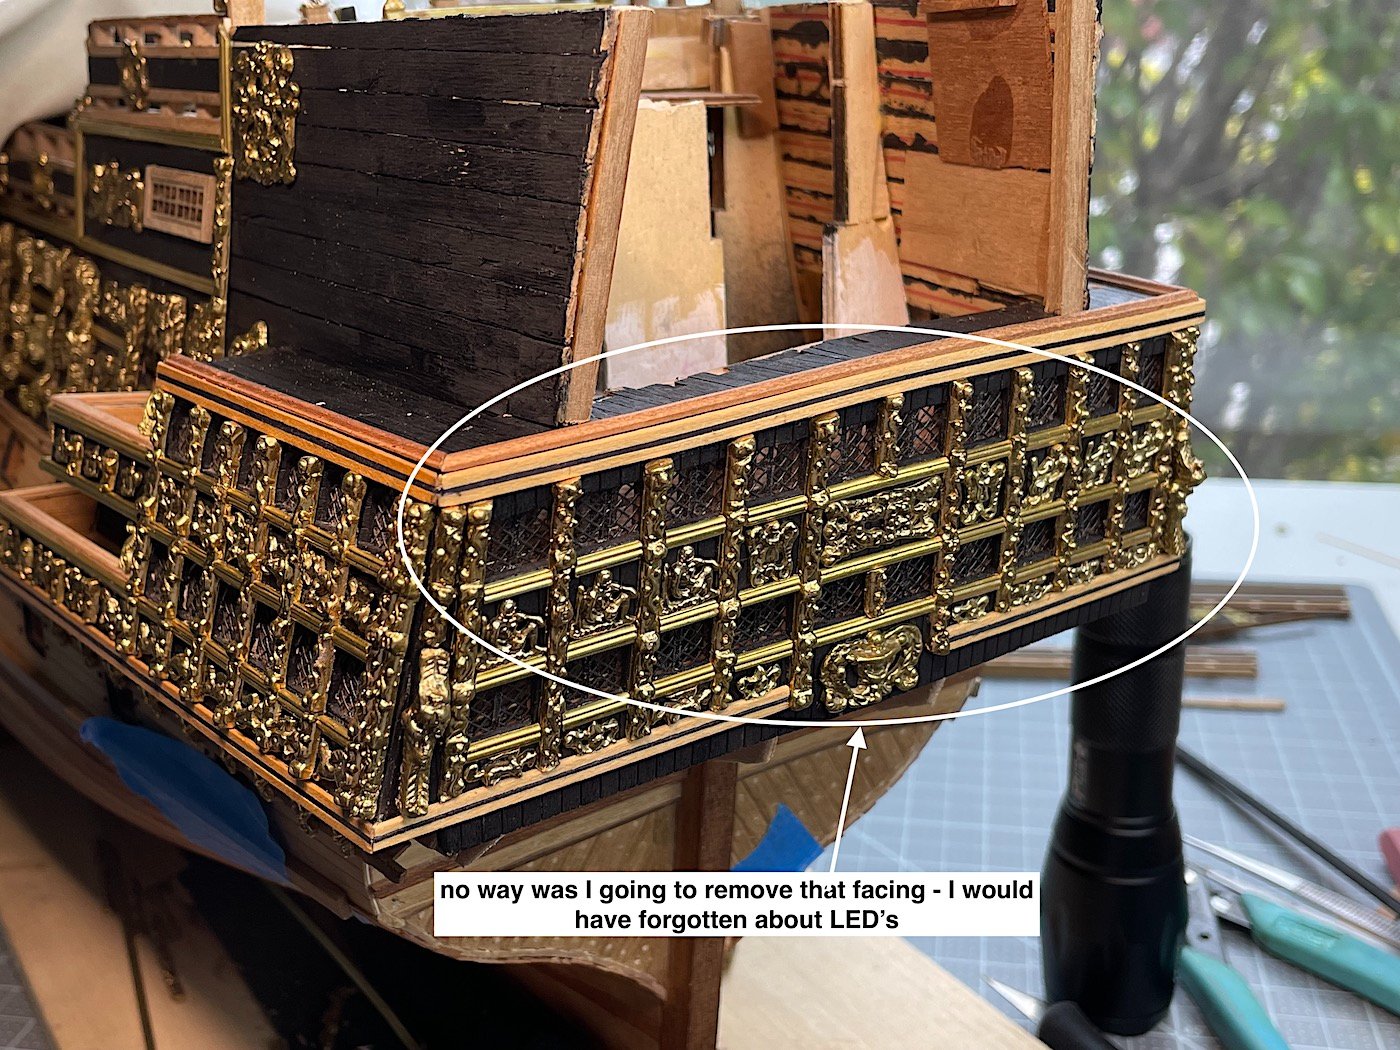
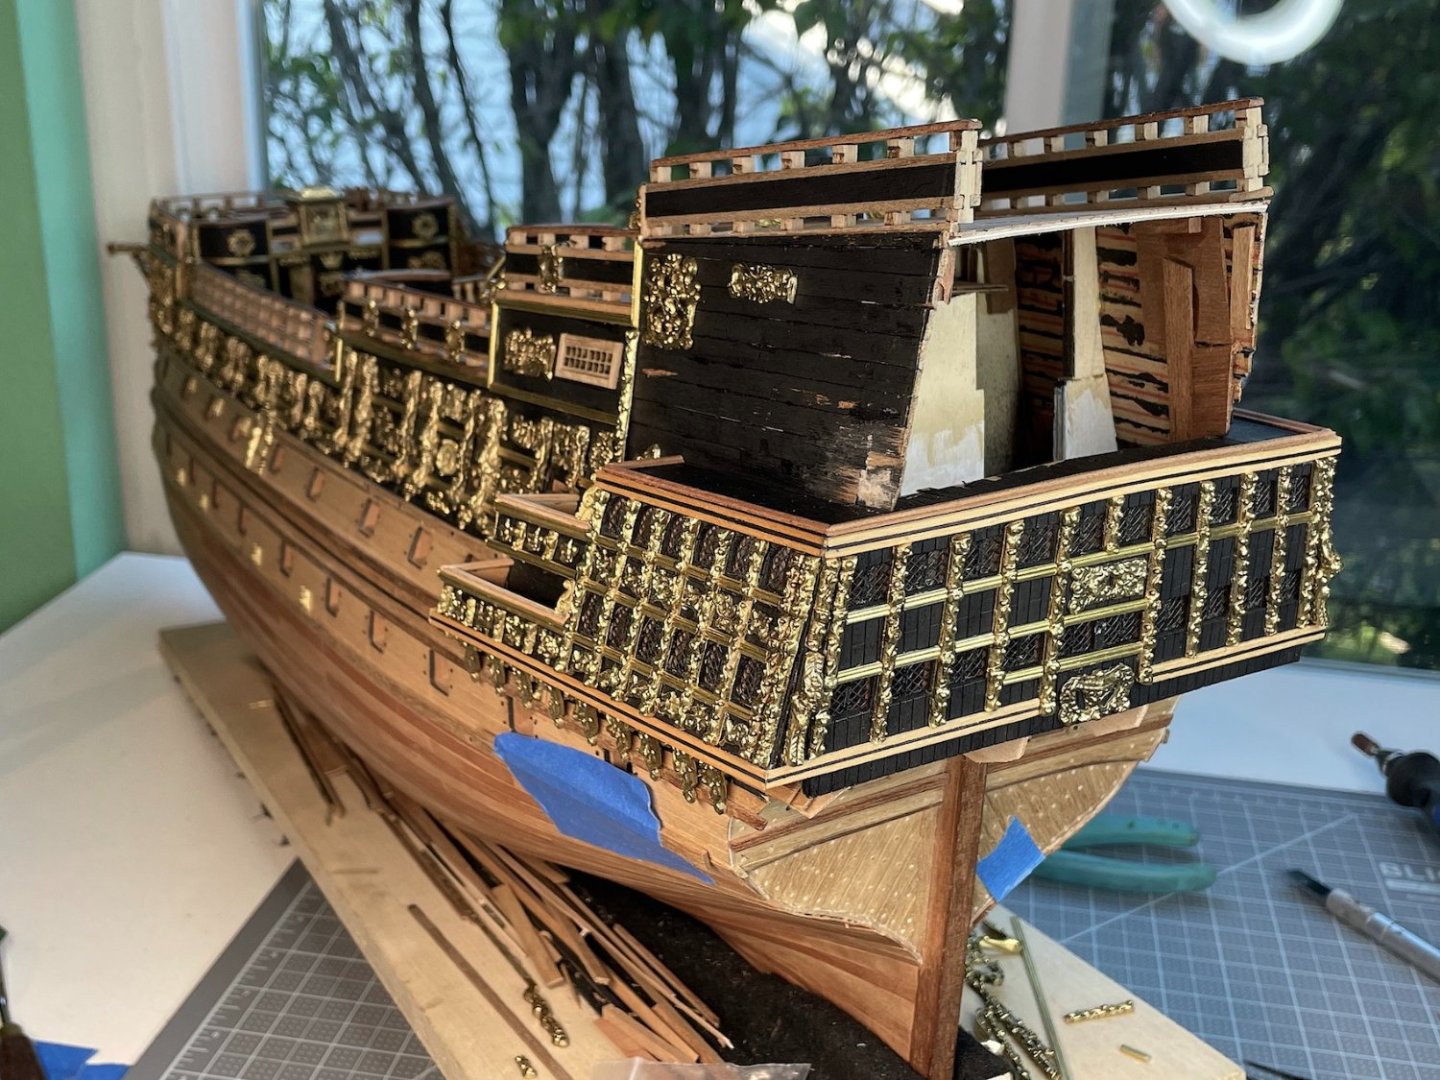
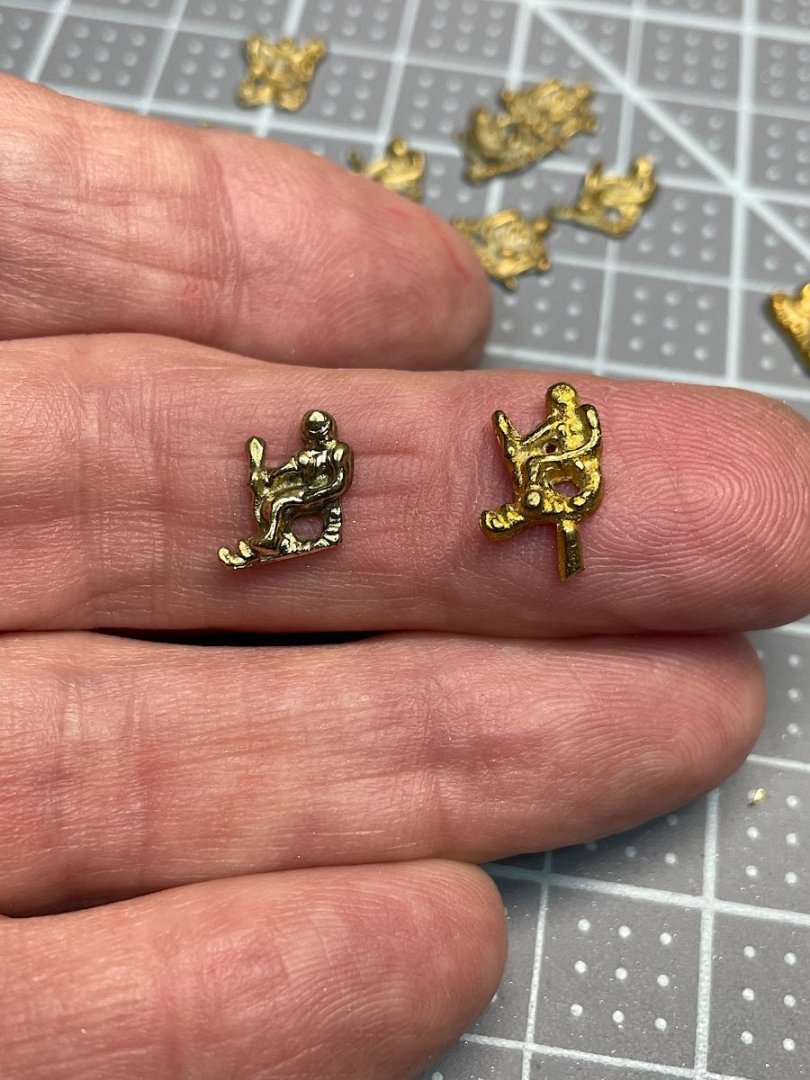
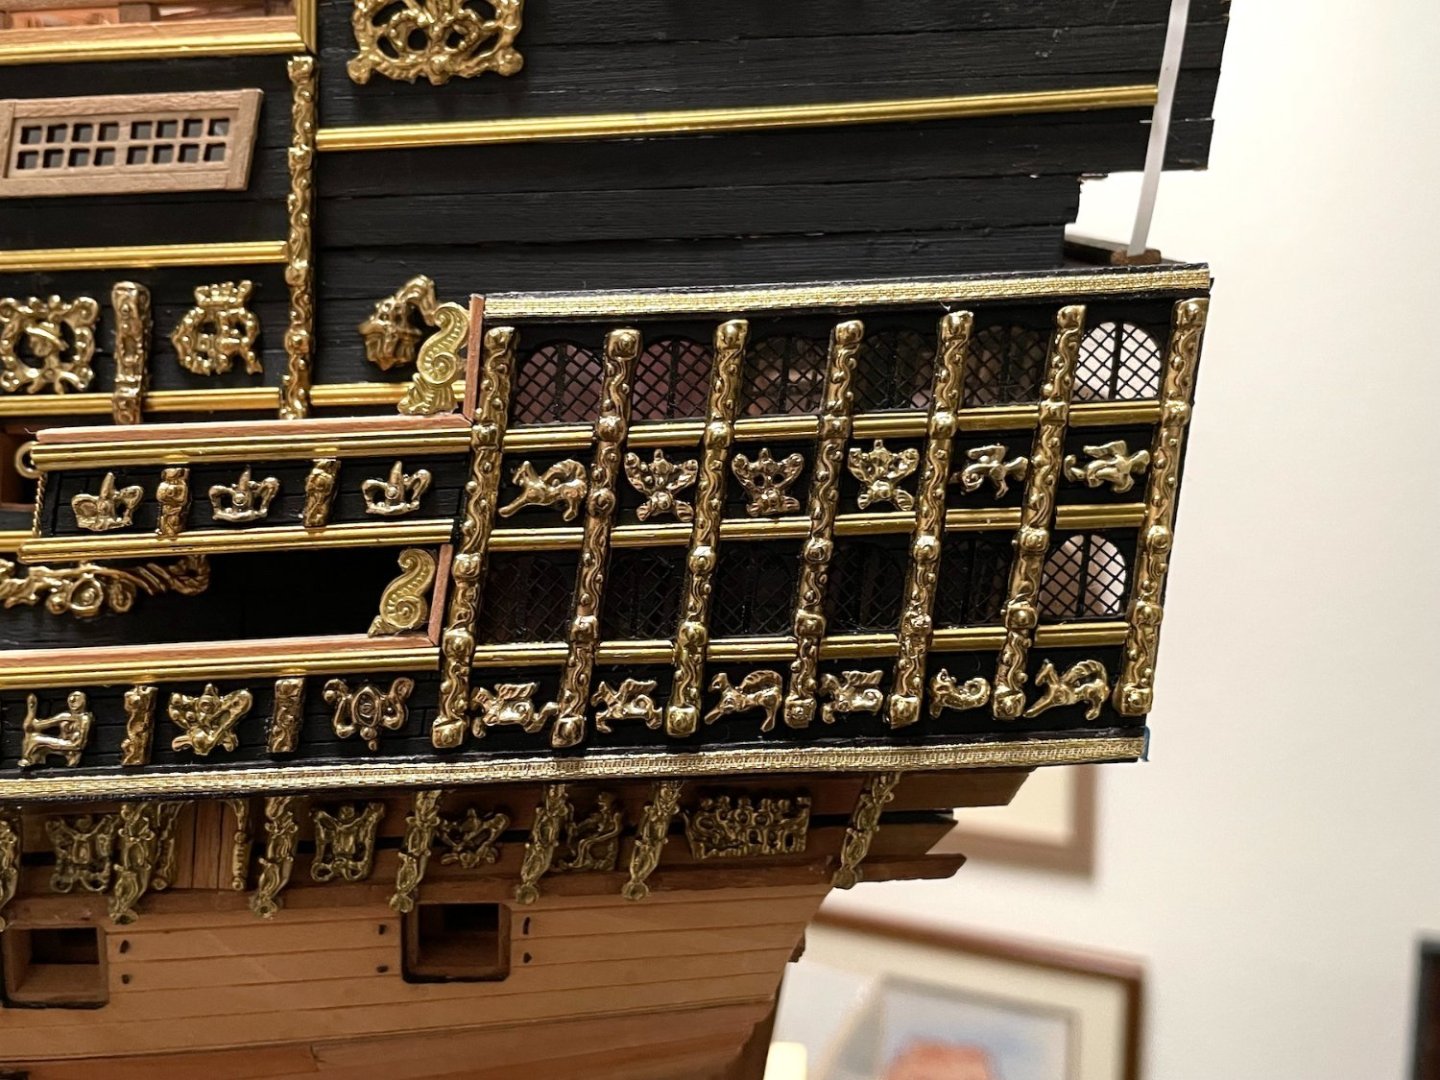
Hello, Alex-Ks1 -- big thanks Here are some updated images of the continuing work with the stern gallery outer faces. I like how the outer windows turned out. Certainly more historically accurate (haha – this kit has nothing to do with historical accuracy).. though I am a bit regretful, in that all of the previous work (interior floorings, gold trimming on upper and lower inner window frames, and gallery planking are now totally hidden from view - oh well. FYI: Last image offers a comparison of current kit's metal bit compared to vintage kit's solid bronze bits. Regards,


-
Frank, superb build log - with arguably a super difficult kit to look as yours came out. Regards as always….oh tassels- brilliant indeed!
- 510 replies
-
- 2
-
-
- reale de france
- corel
- (and 1 more)
-
Patrick - adding your new log as well. in the mid-90s I visited the Mary Rose (well after seeing that other one - right next door) haha — Very interesting. This was before they of course totally rebuilt the Mary Rose museum, which apparently today is astonishing. Looking forward to your new build, which are always a delight to follow. Cheers, my friend.
-
Patrick, SO enjoyed and I learned following this log. Big congratulations indeed. Cheers,
- 756 replies
-
- 4
-
-

-
- galleon
- golden hind
- (and 2 more)
-
Patrick your work is always so inspiring 😊 Cheers as always
- 756 replies
-
- 3
-
-
-
- galleon
- golden hind
- (and 2 more)
-
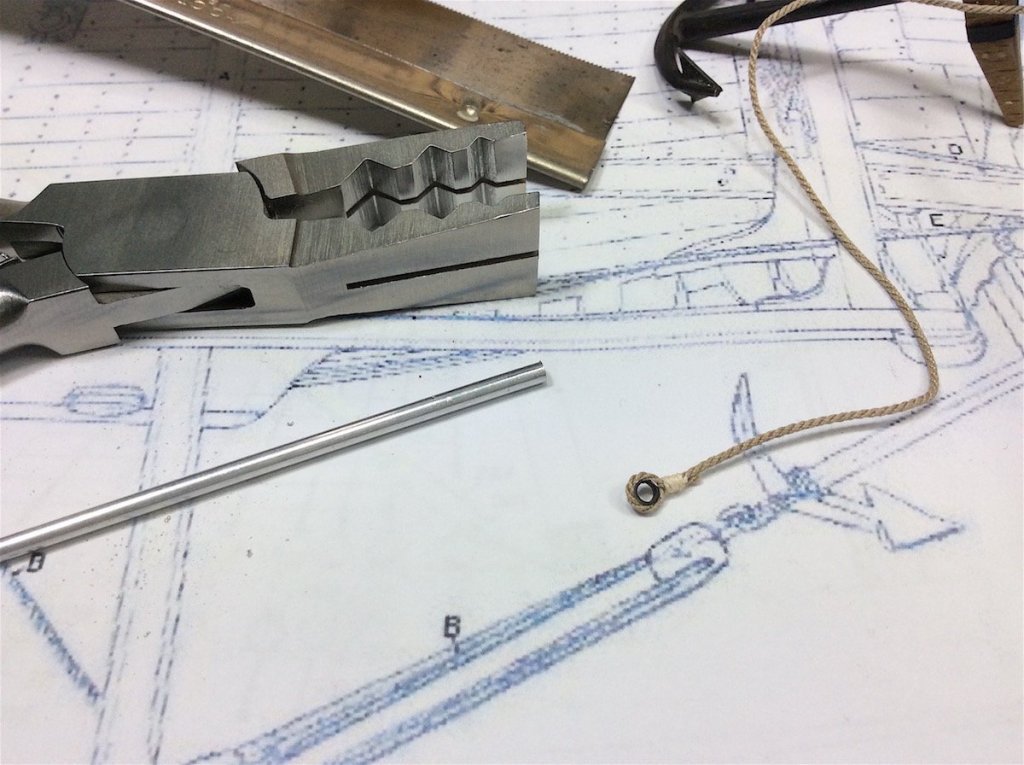
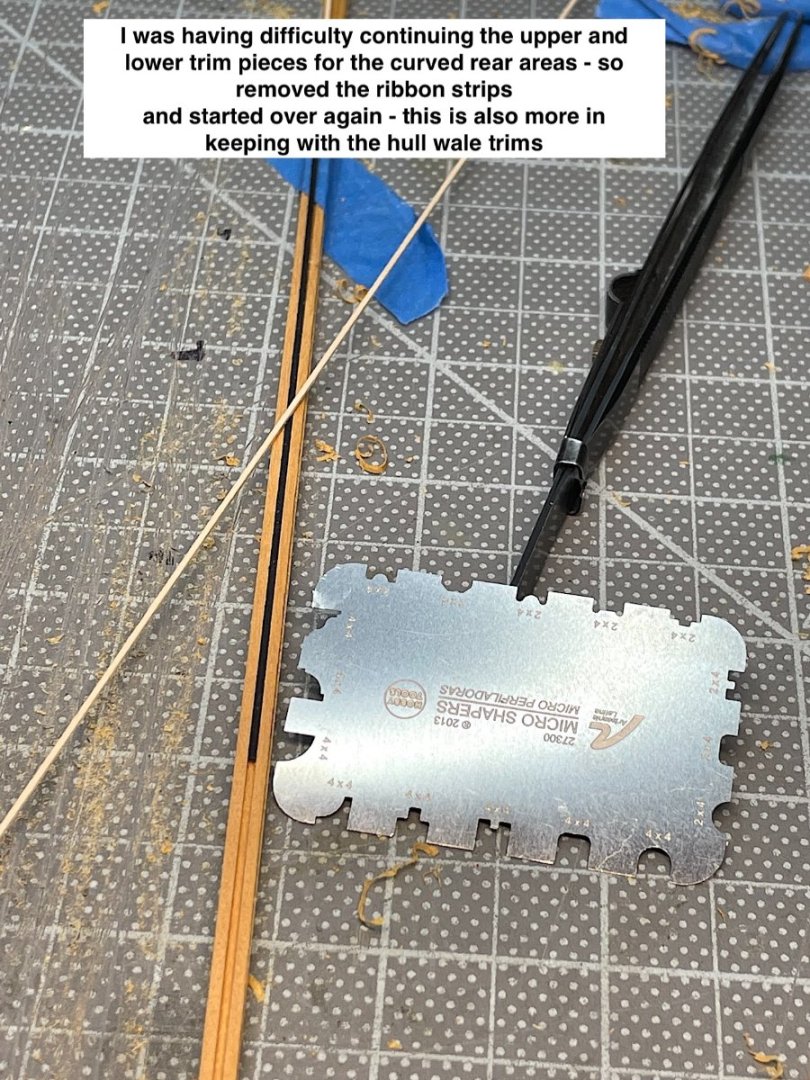
Richard, always appreciate your kind thoughts. Yes, those shapers are excellent. Given the absolute amount of such perfectly small details that your include in your builds - these shapers will be awesome for you. Other suppliers are available -- https://artesanialatina.net/en/micro-tools/1295-micro-shapers-a-wooden-plastic-models-miniatures-8421426273007.html Marc, Thanks - yes indeed looks much nicer - We are each our own worst critics, but glad that I went back for the "fix". Just caught up to your log - Wow -- sculpturing is an area that I will never attempt - I know my limitations hahaha. Regards,
-
Patrick and Frank - thanks for your nice words....
-
Frank, Just catching up. Great build!! As you note with oars out this will require a very large footprint.....
- 510 replies
-
- 1
-
-
- reale de france
- corel
- (and 1 more)
-
Patrick, Just catching up - great work - your swivel guns are brilliant indeed.....
- 756 replies
-
- 2
-
-
-
- galleon
- golden hind
- (and 2 more)
-
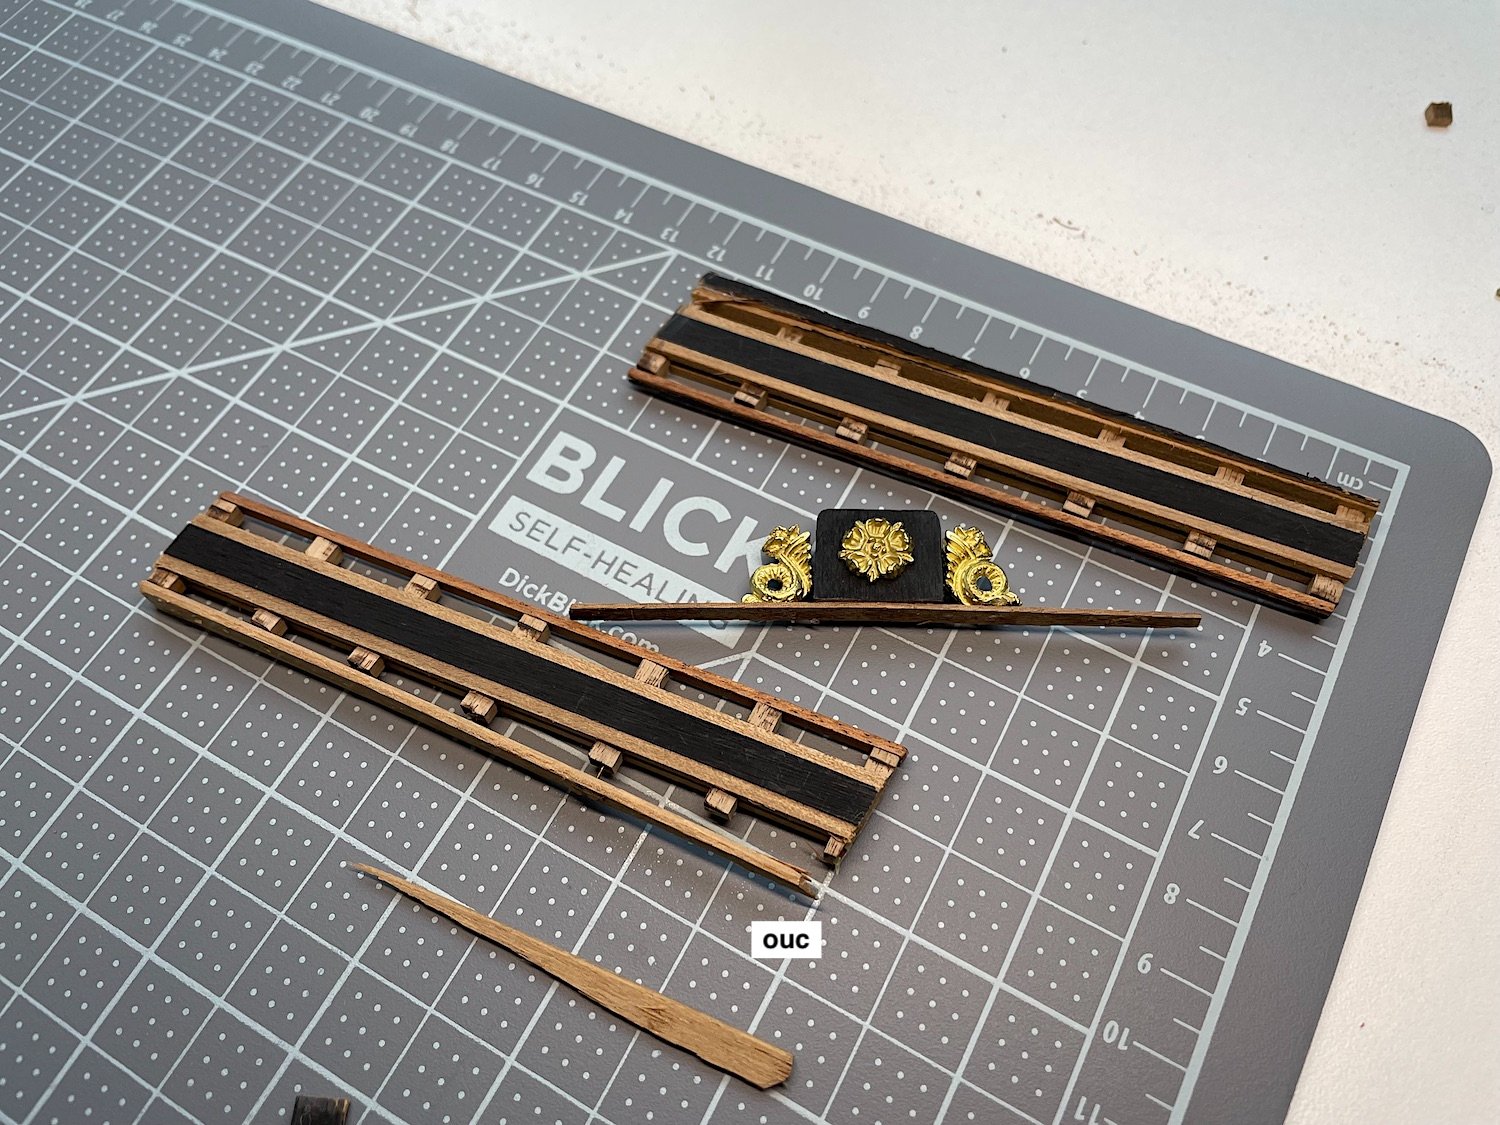
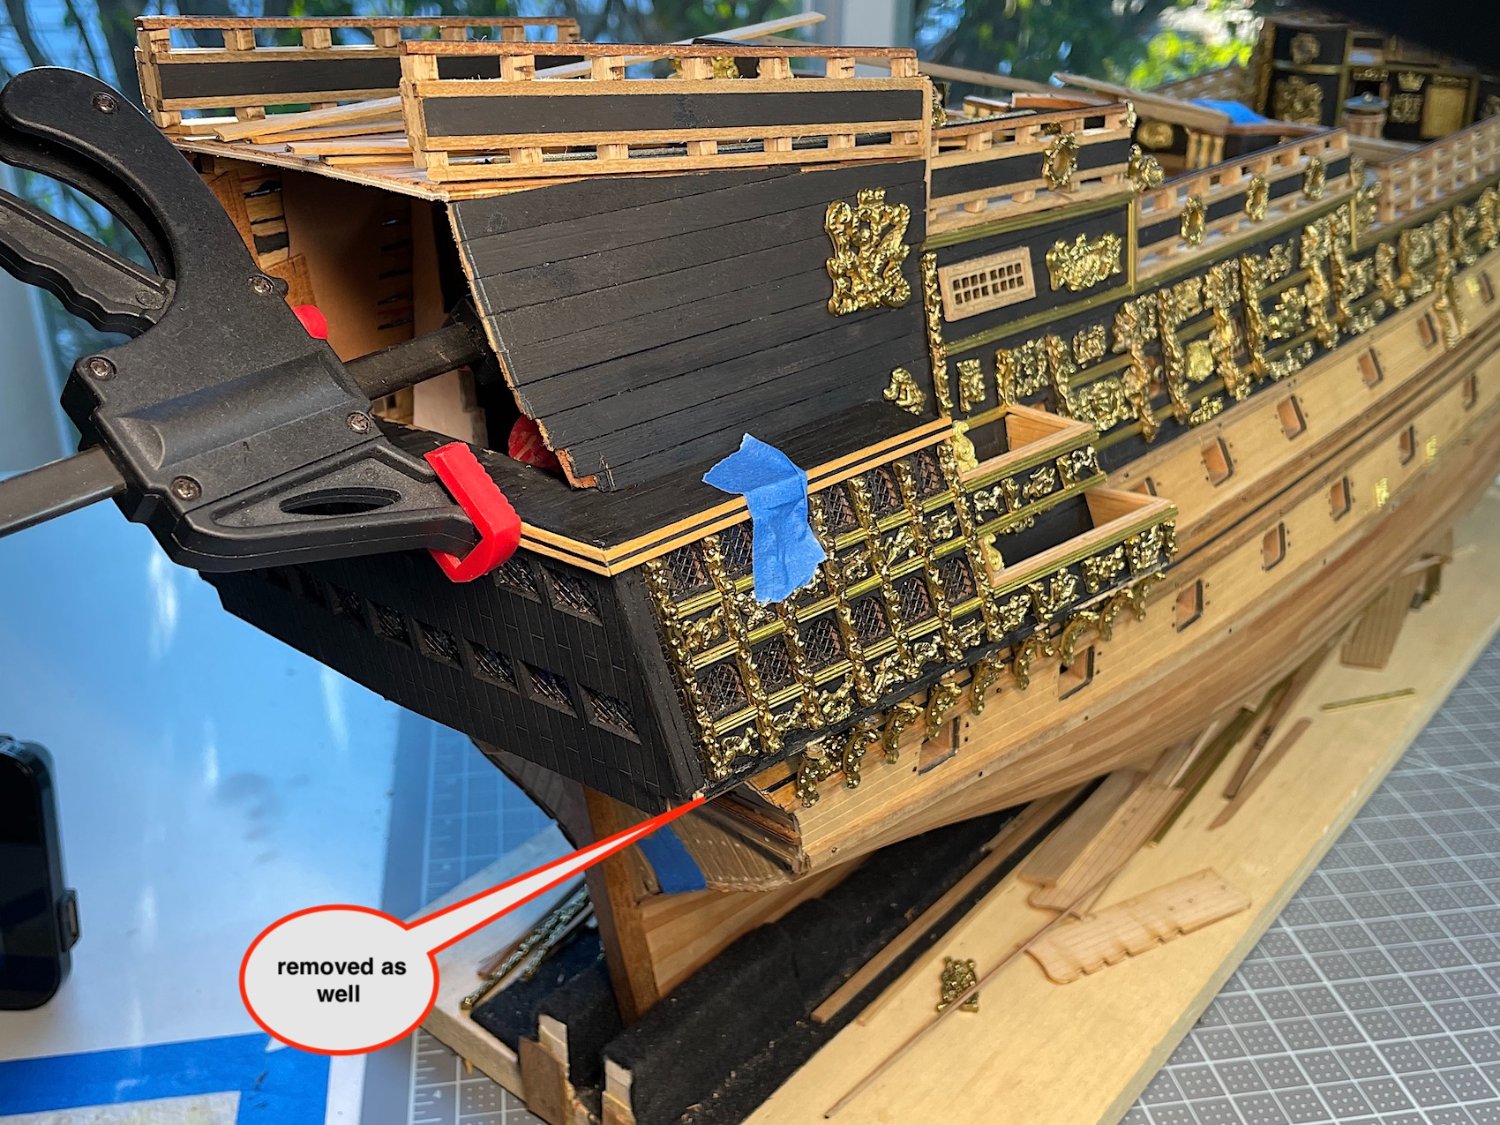
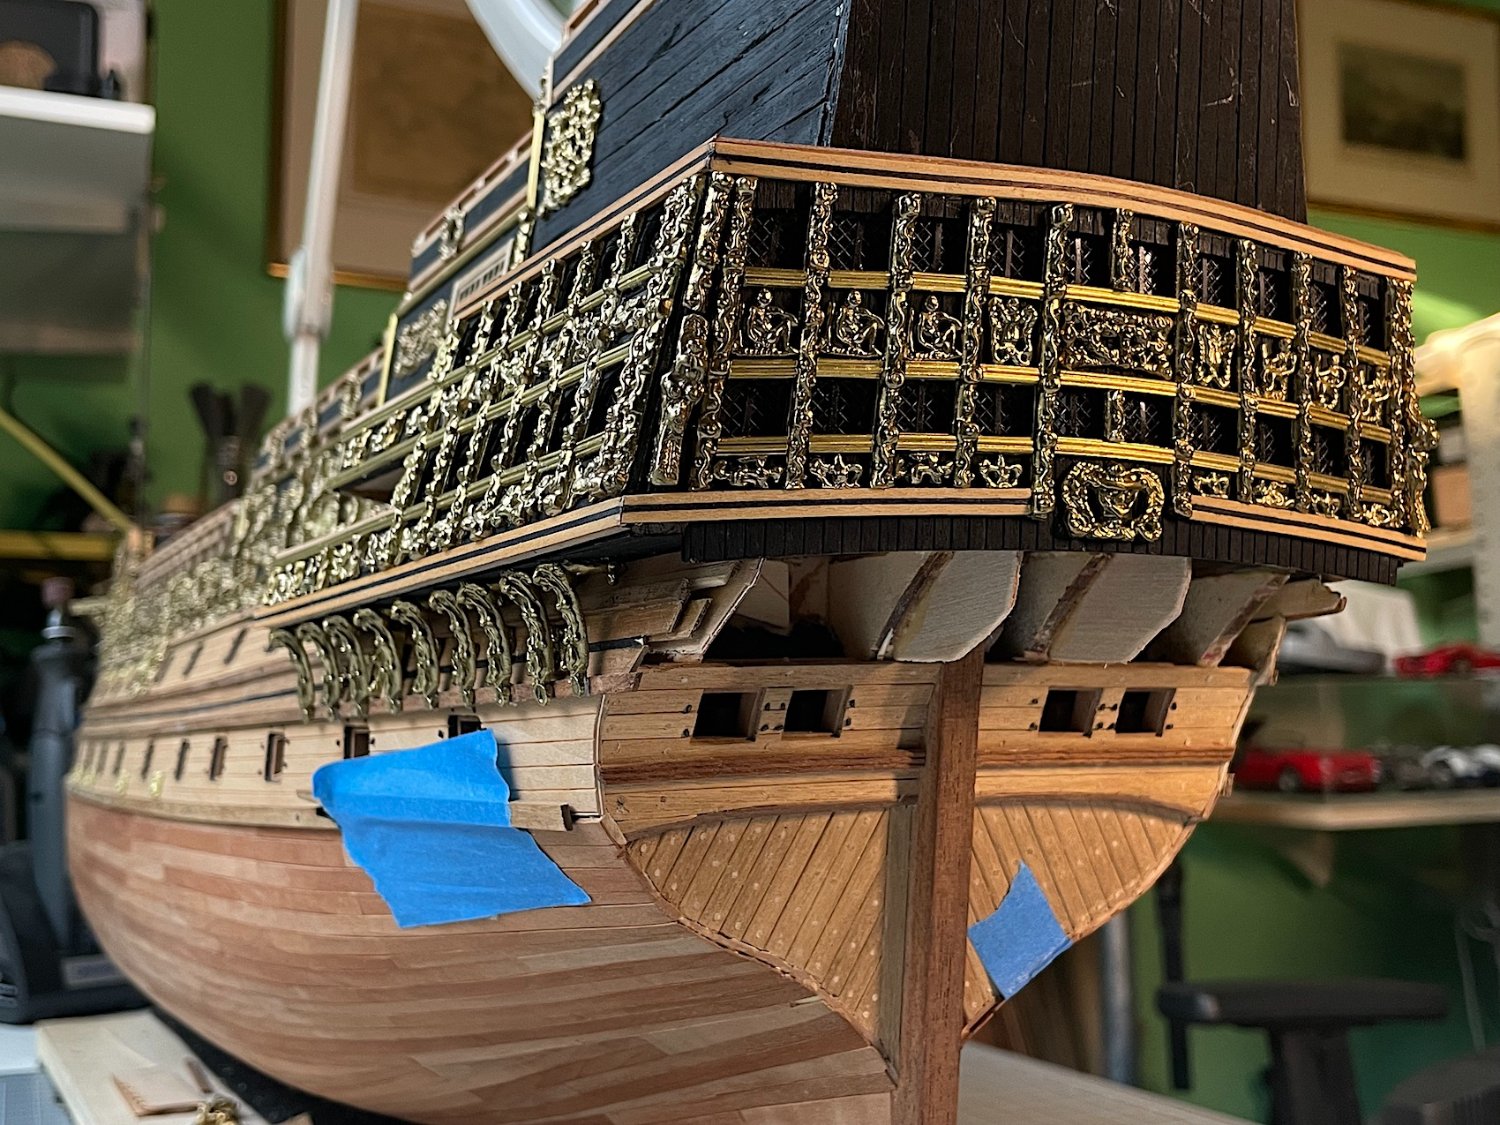
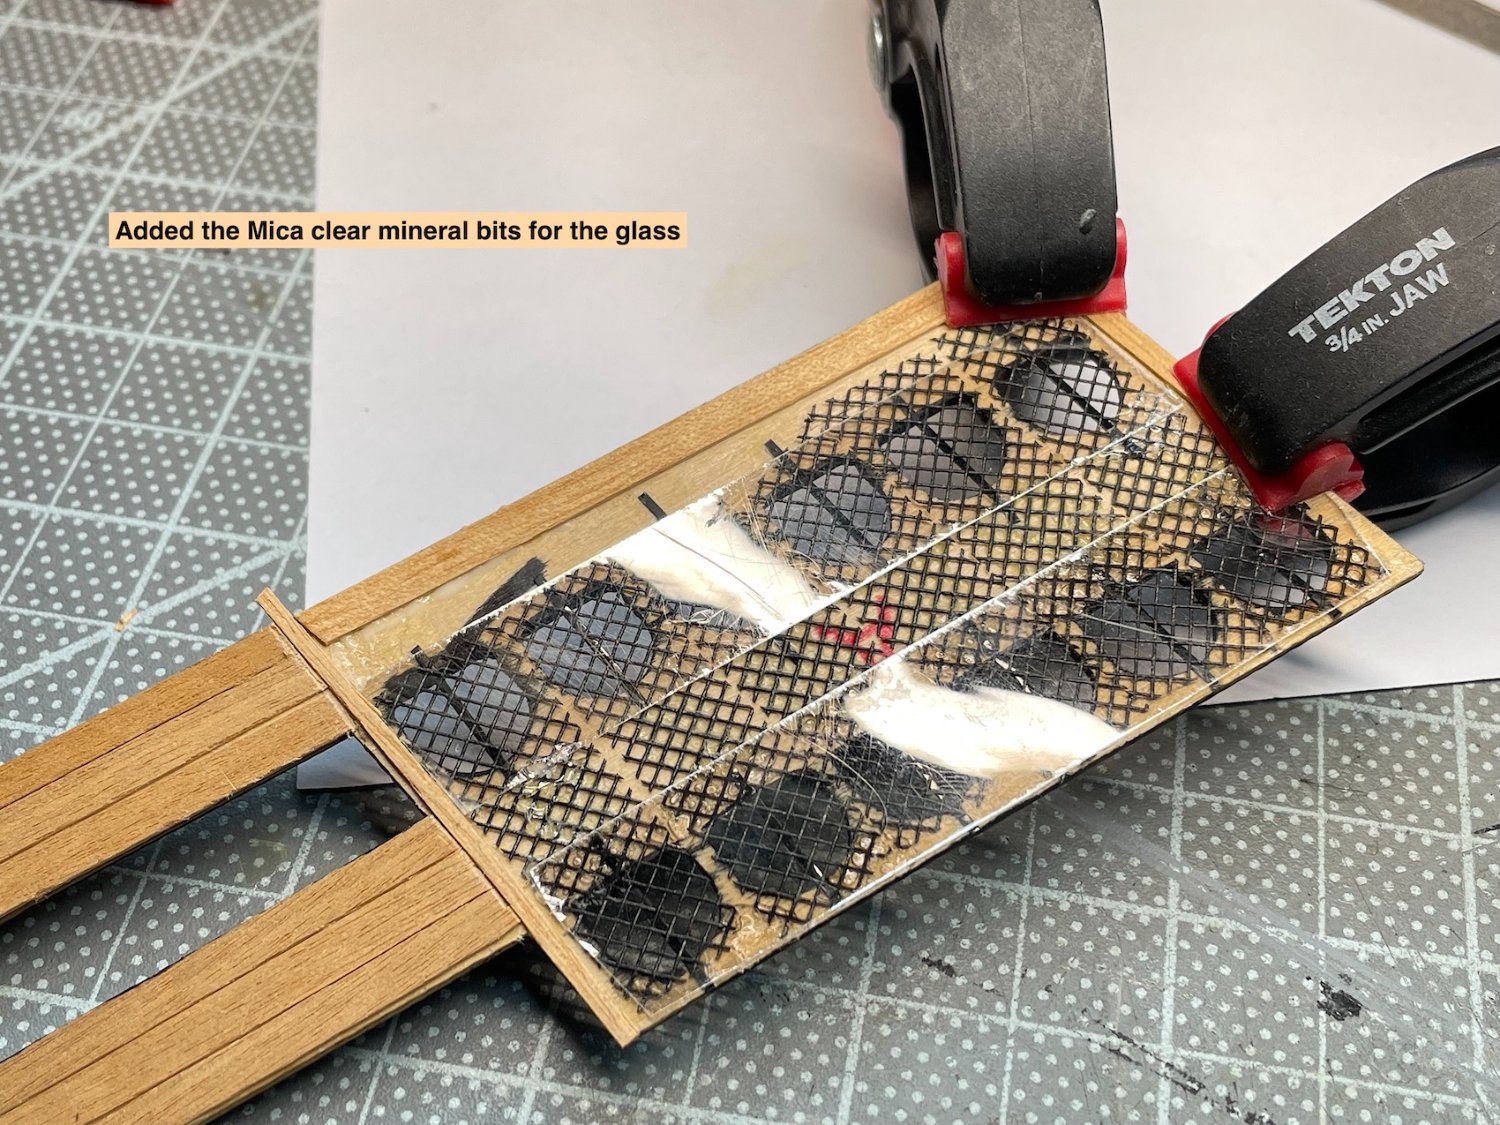
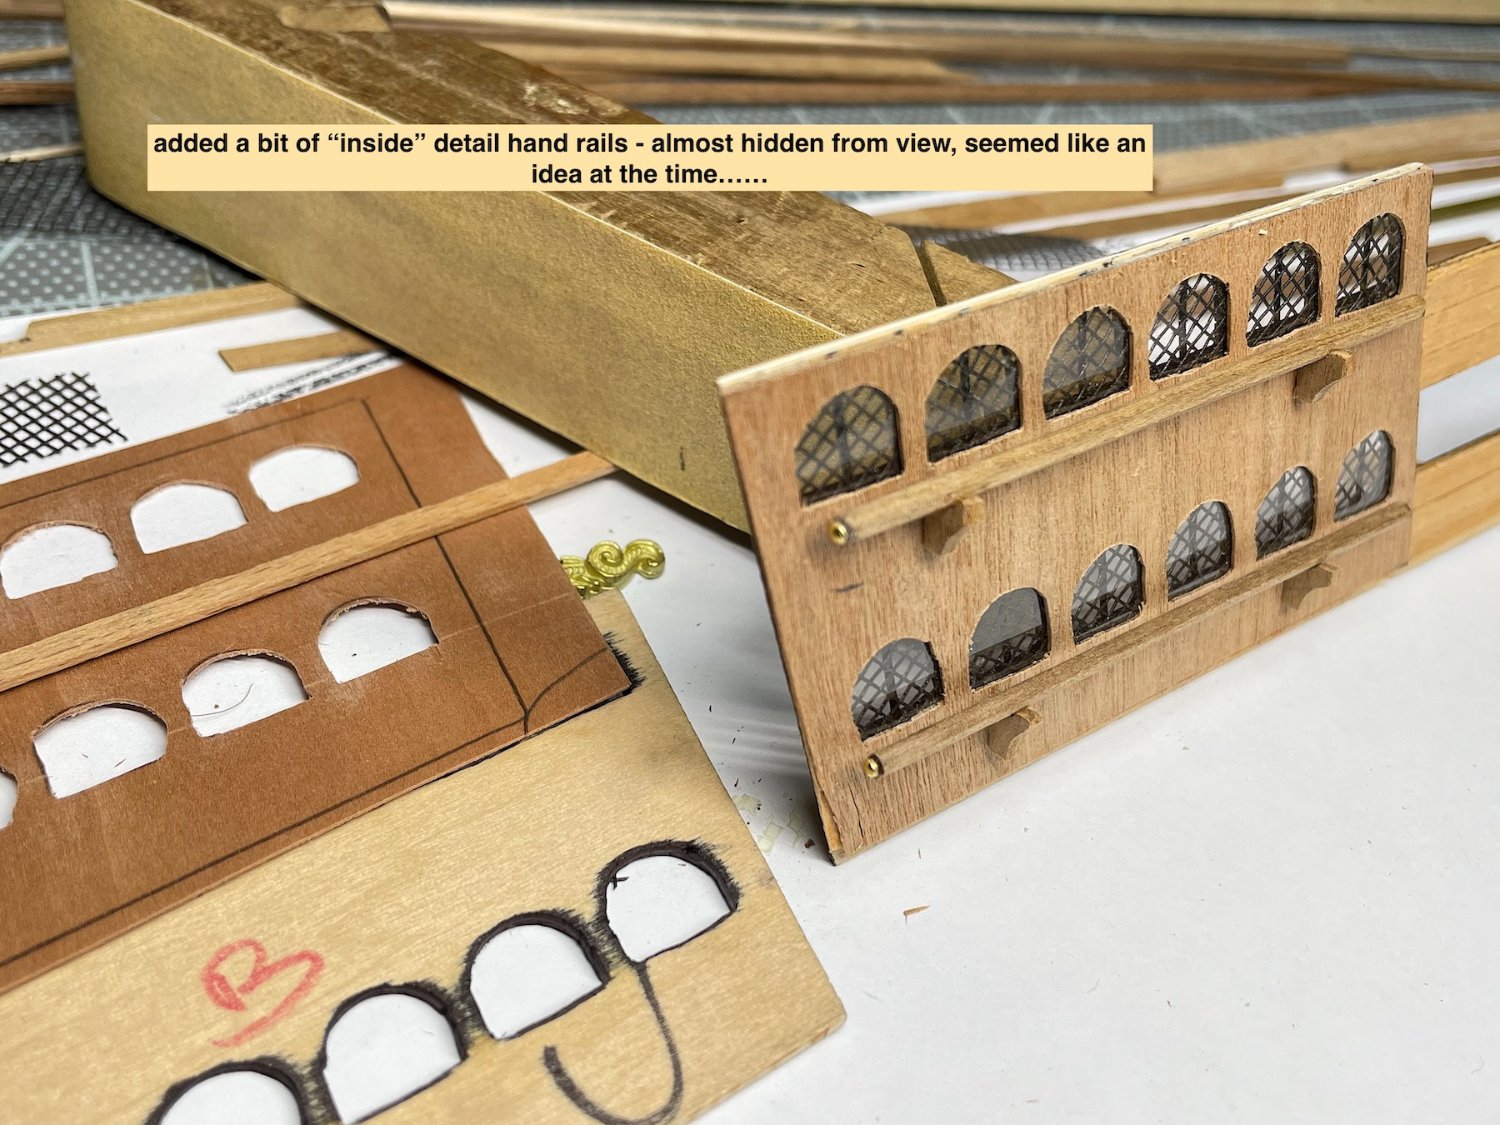
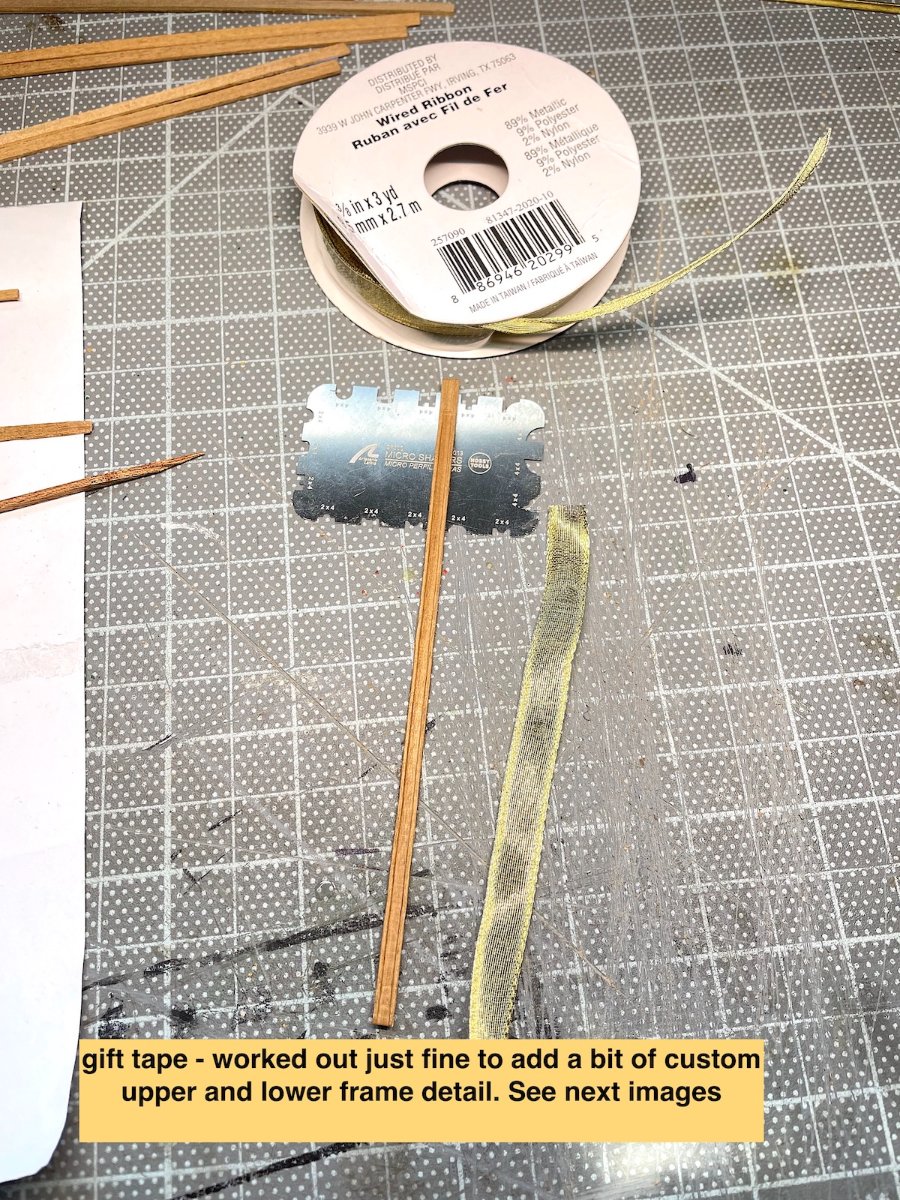
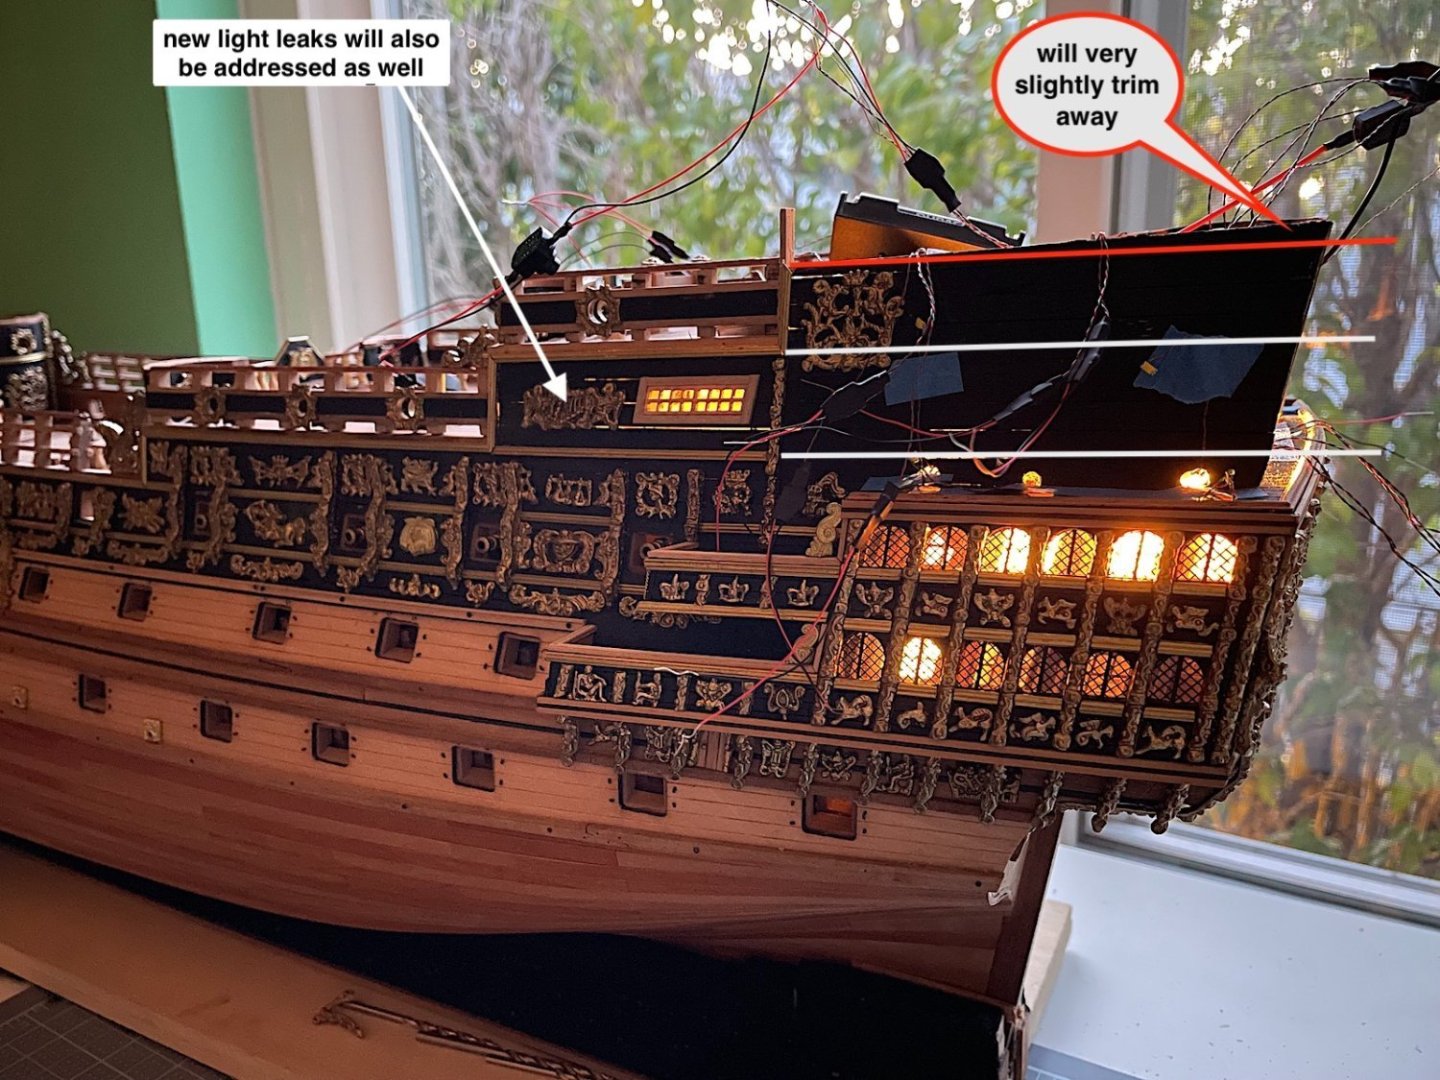
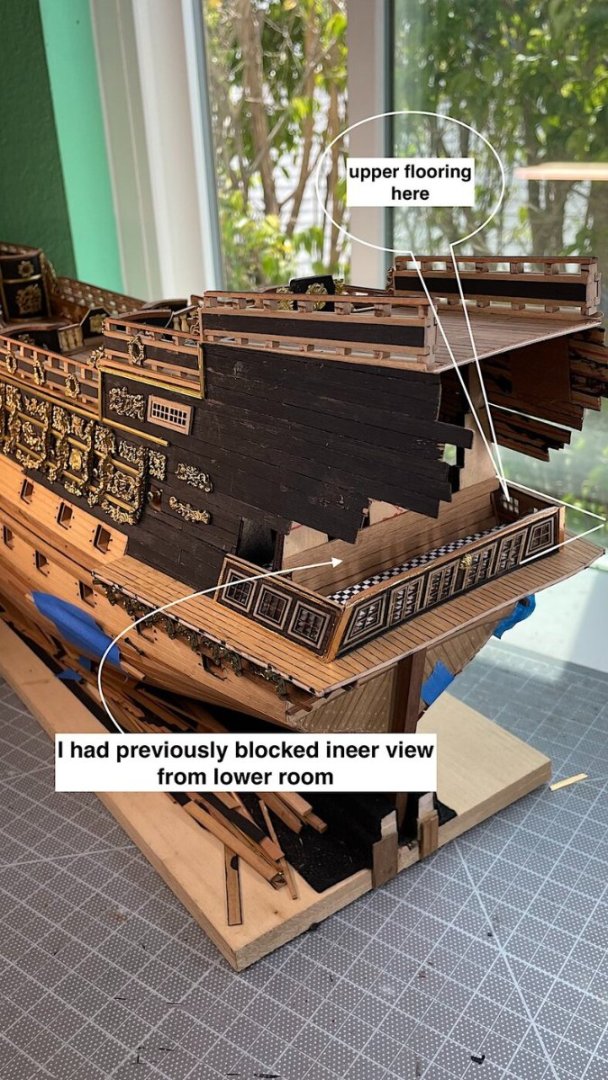
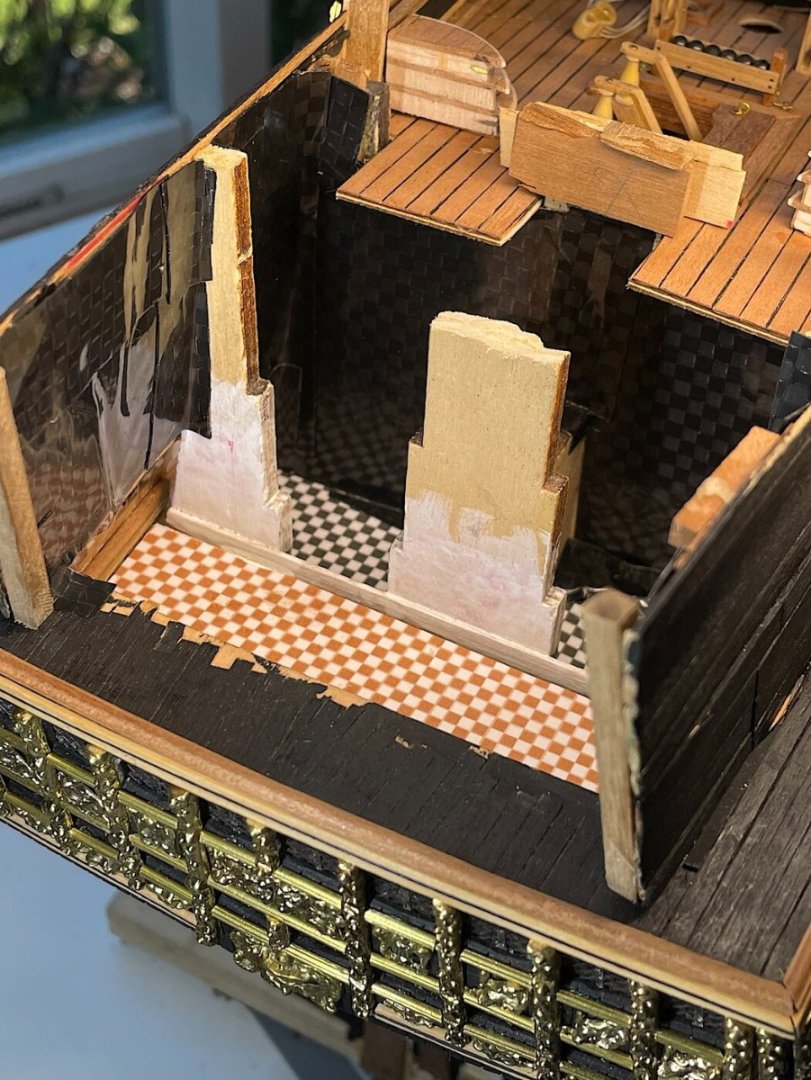
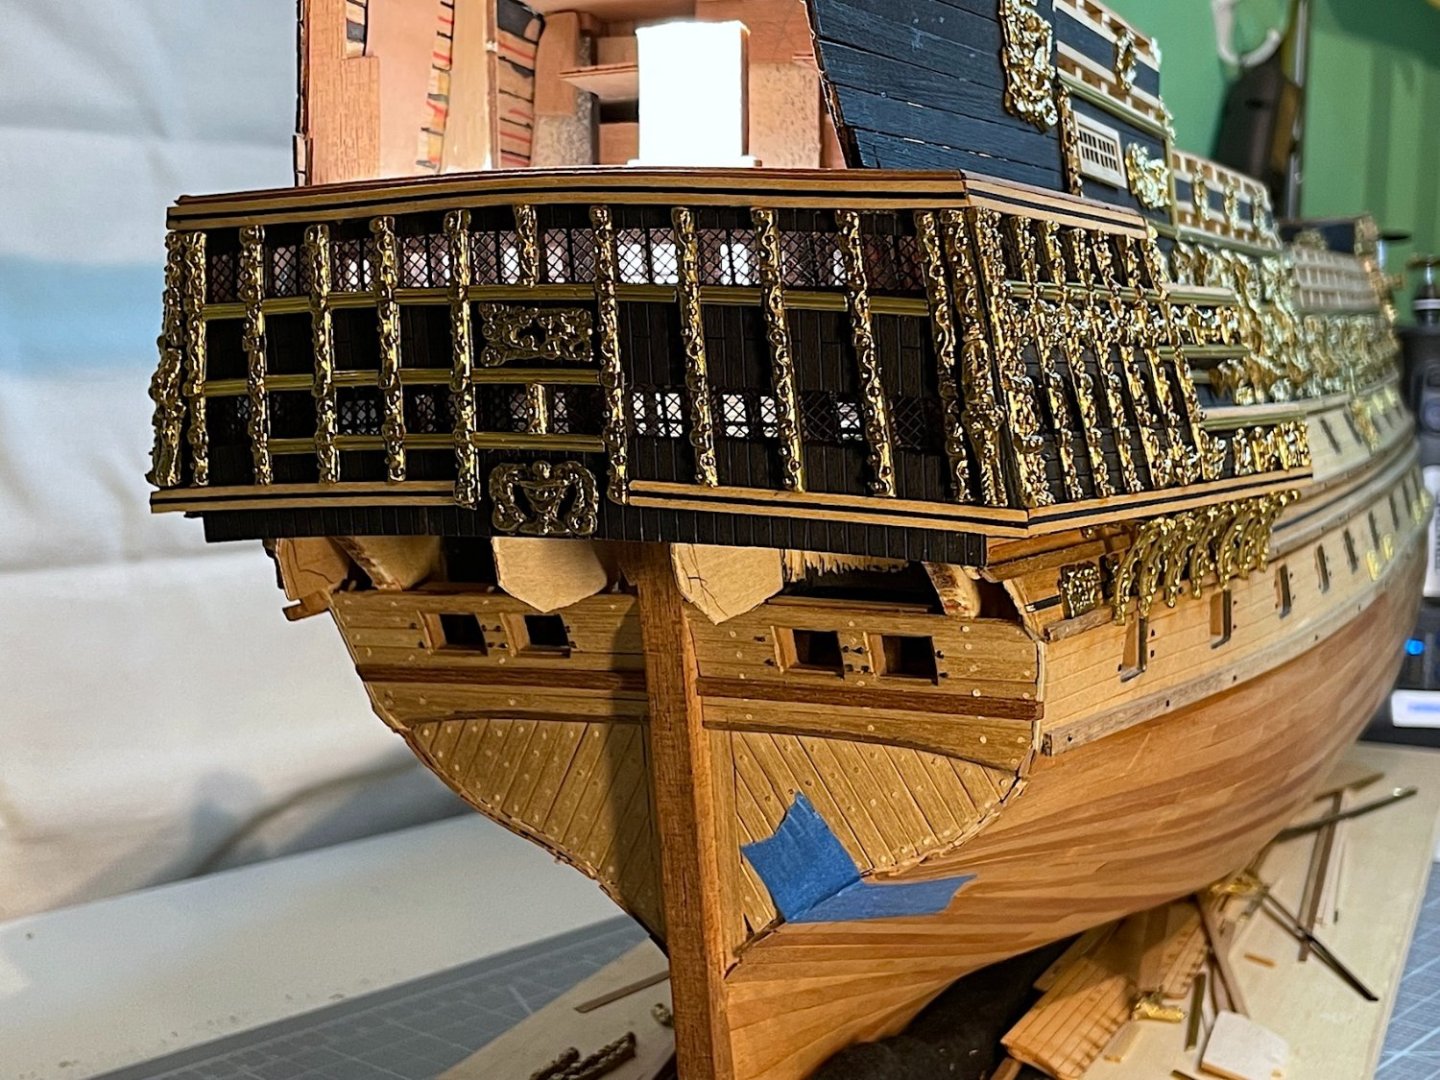
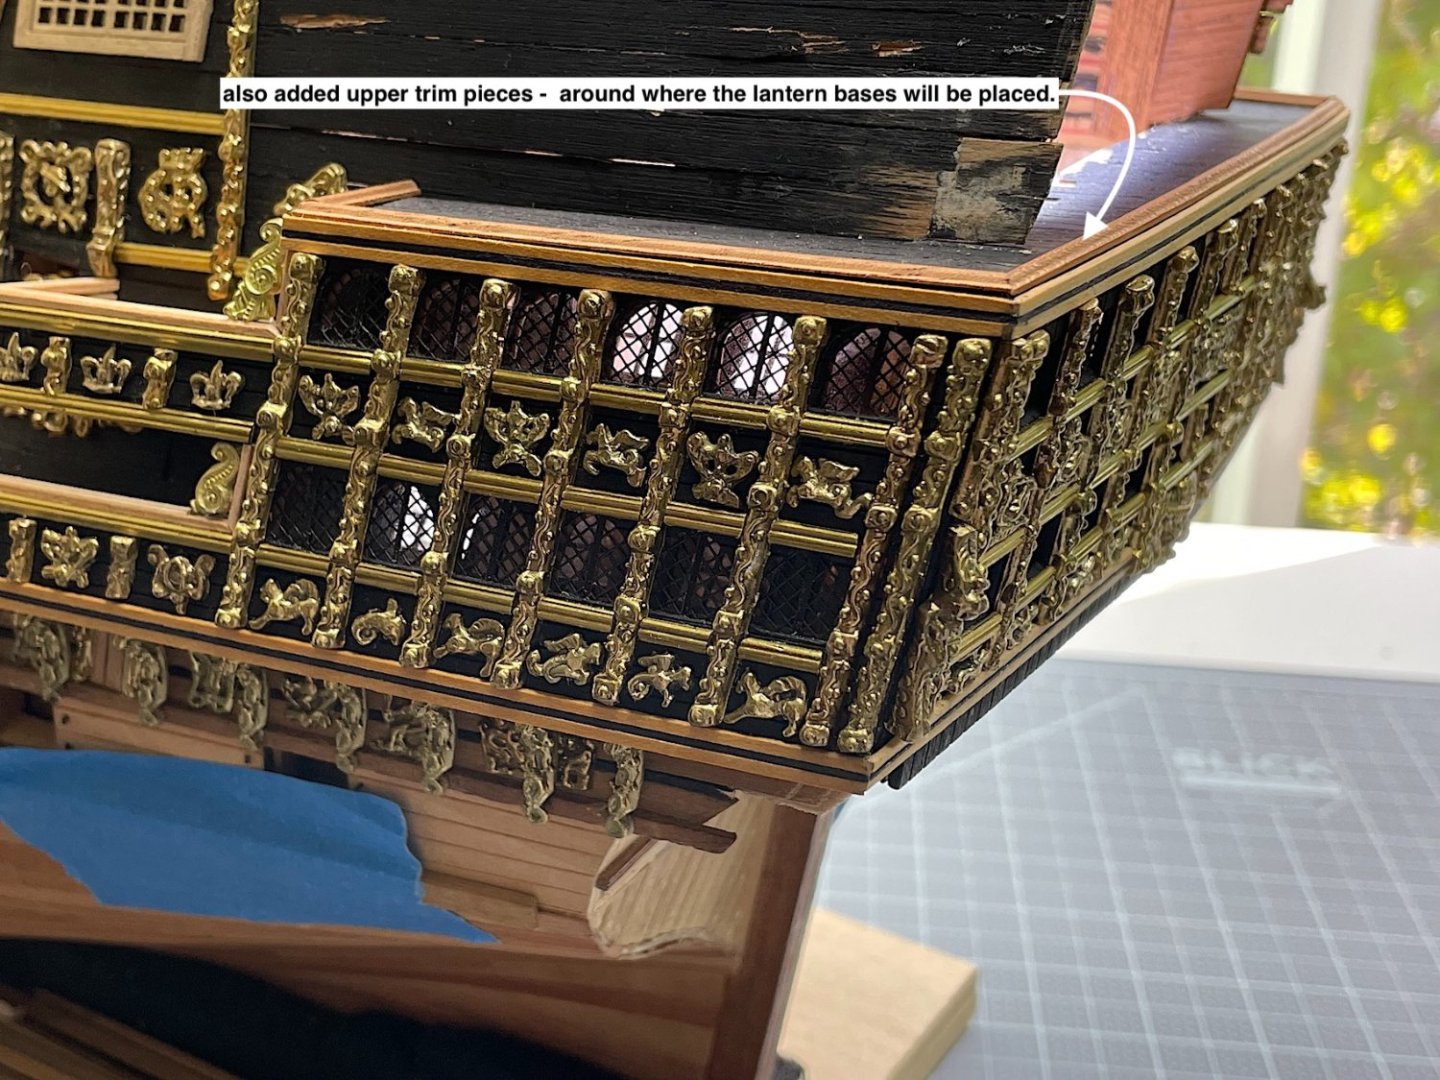
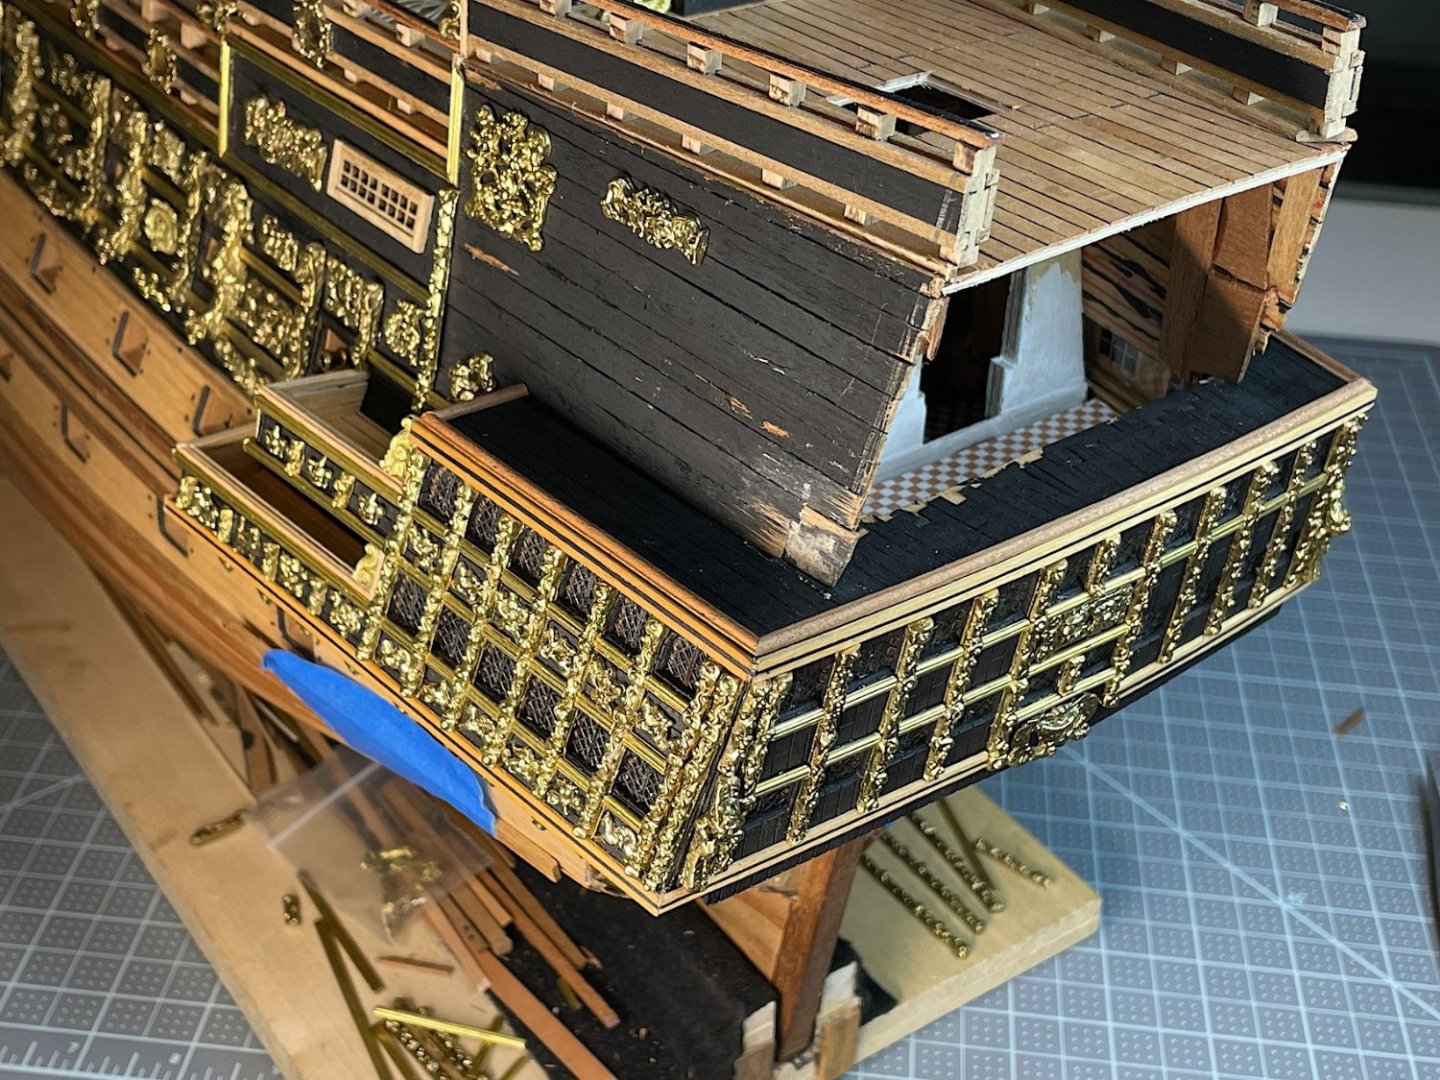
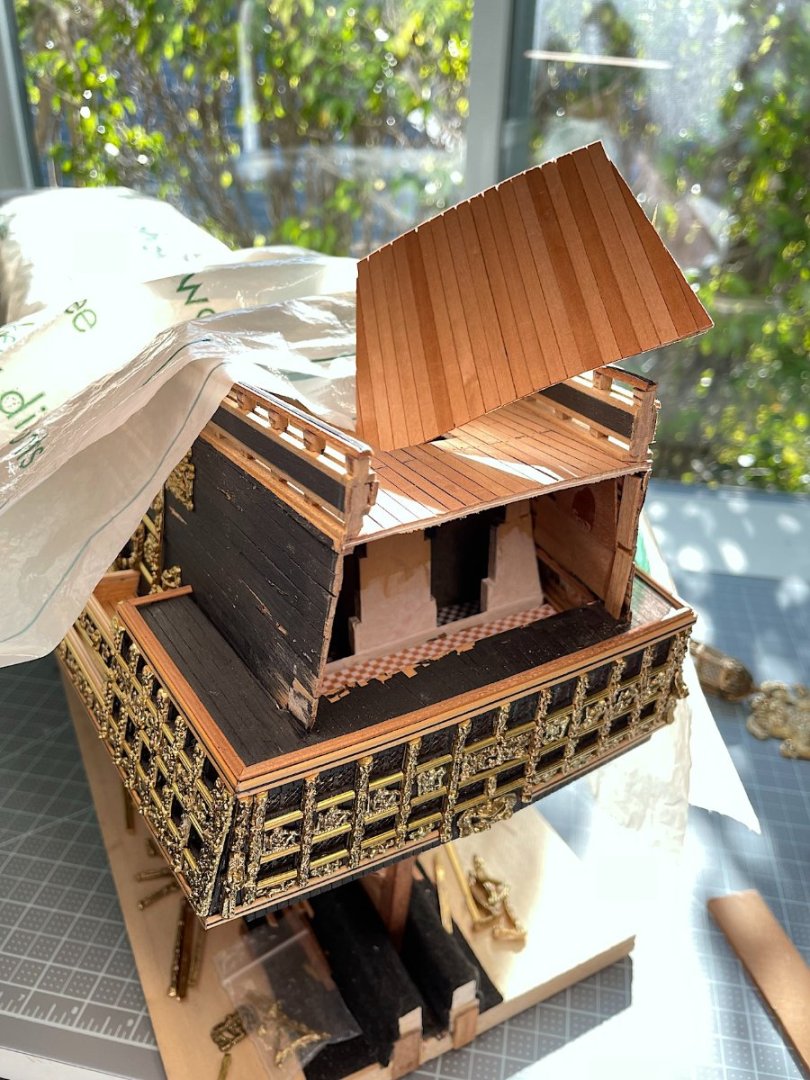
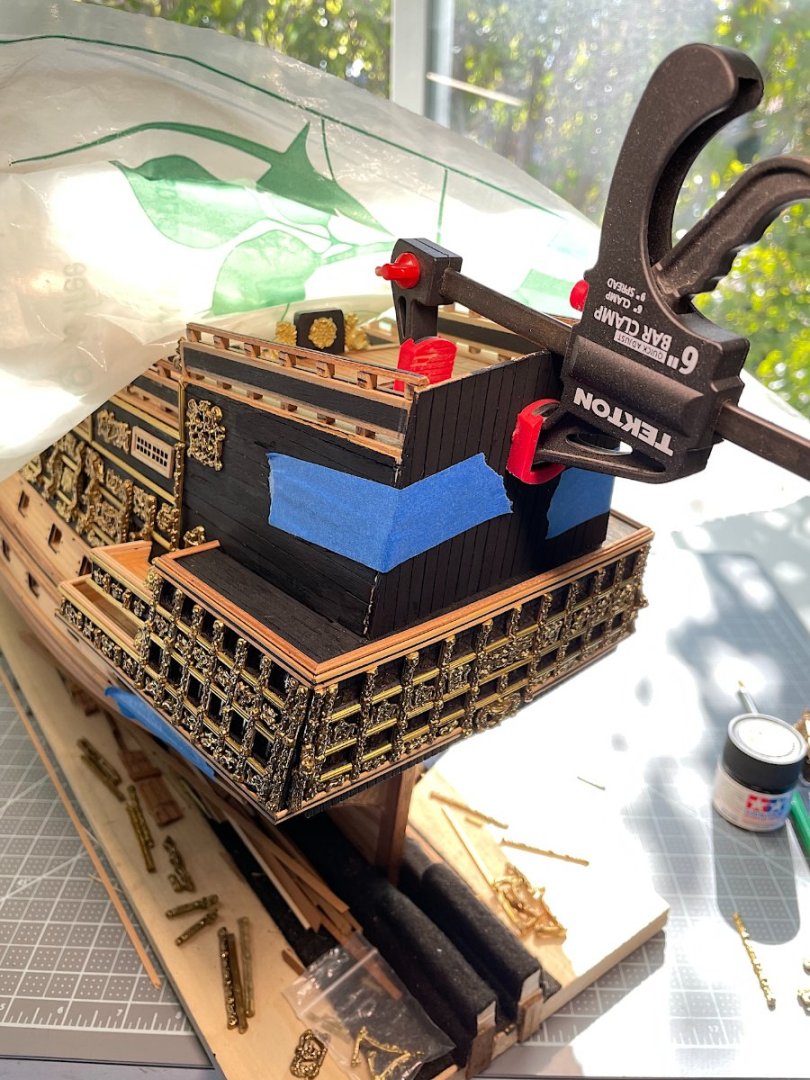
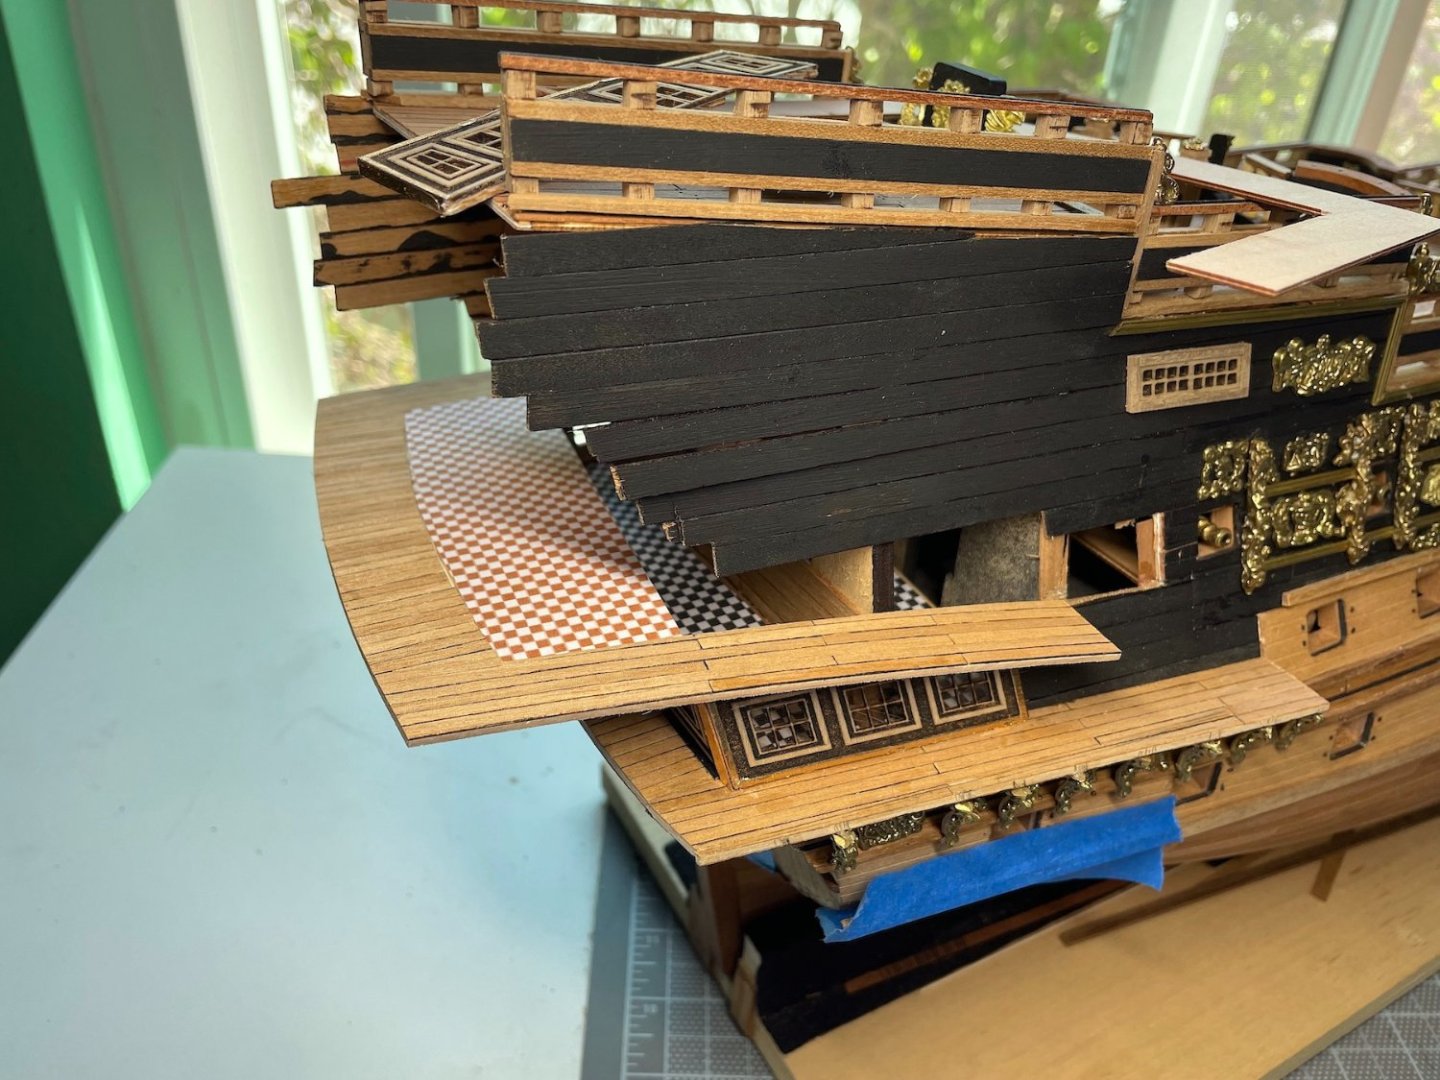
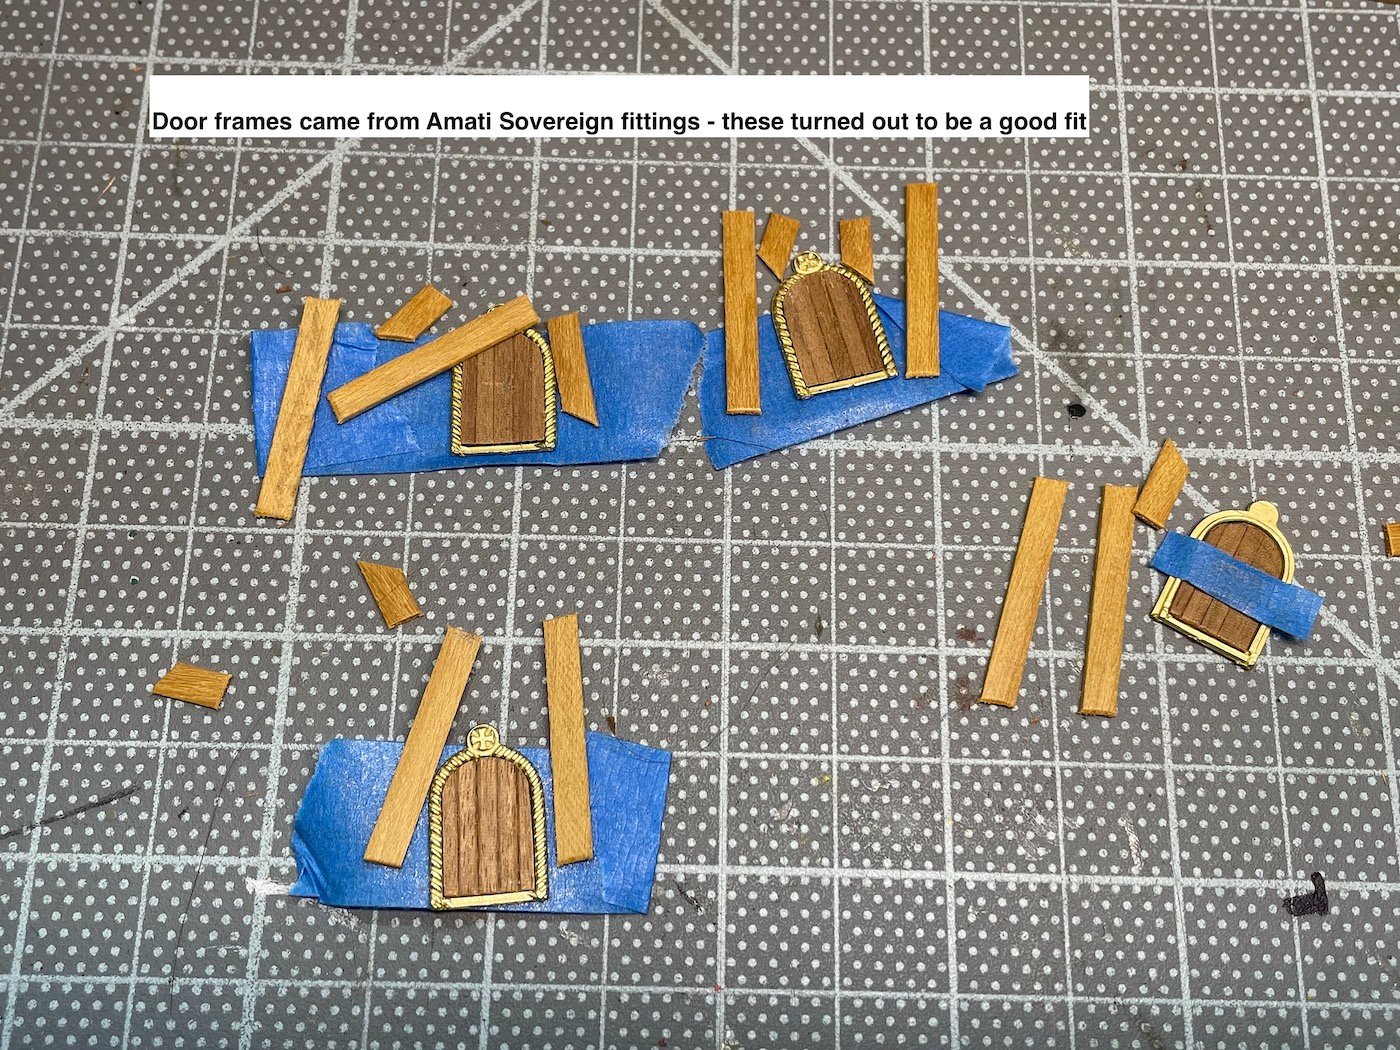
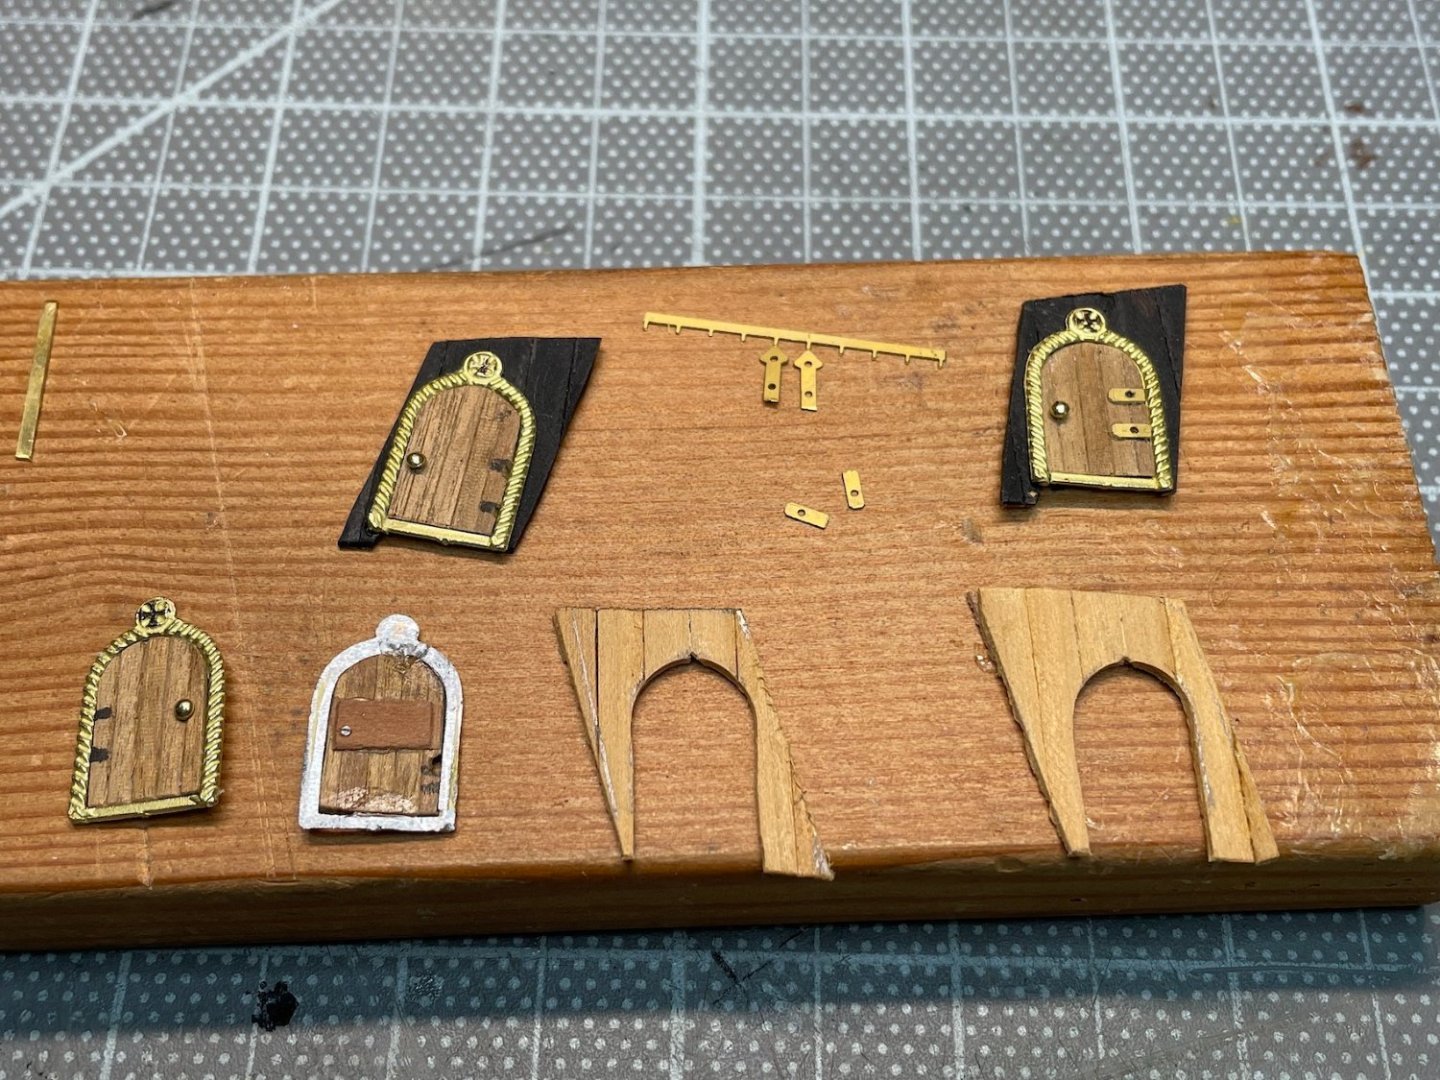
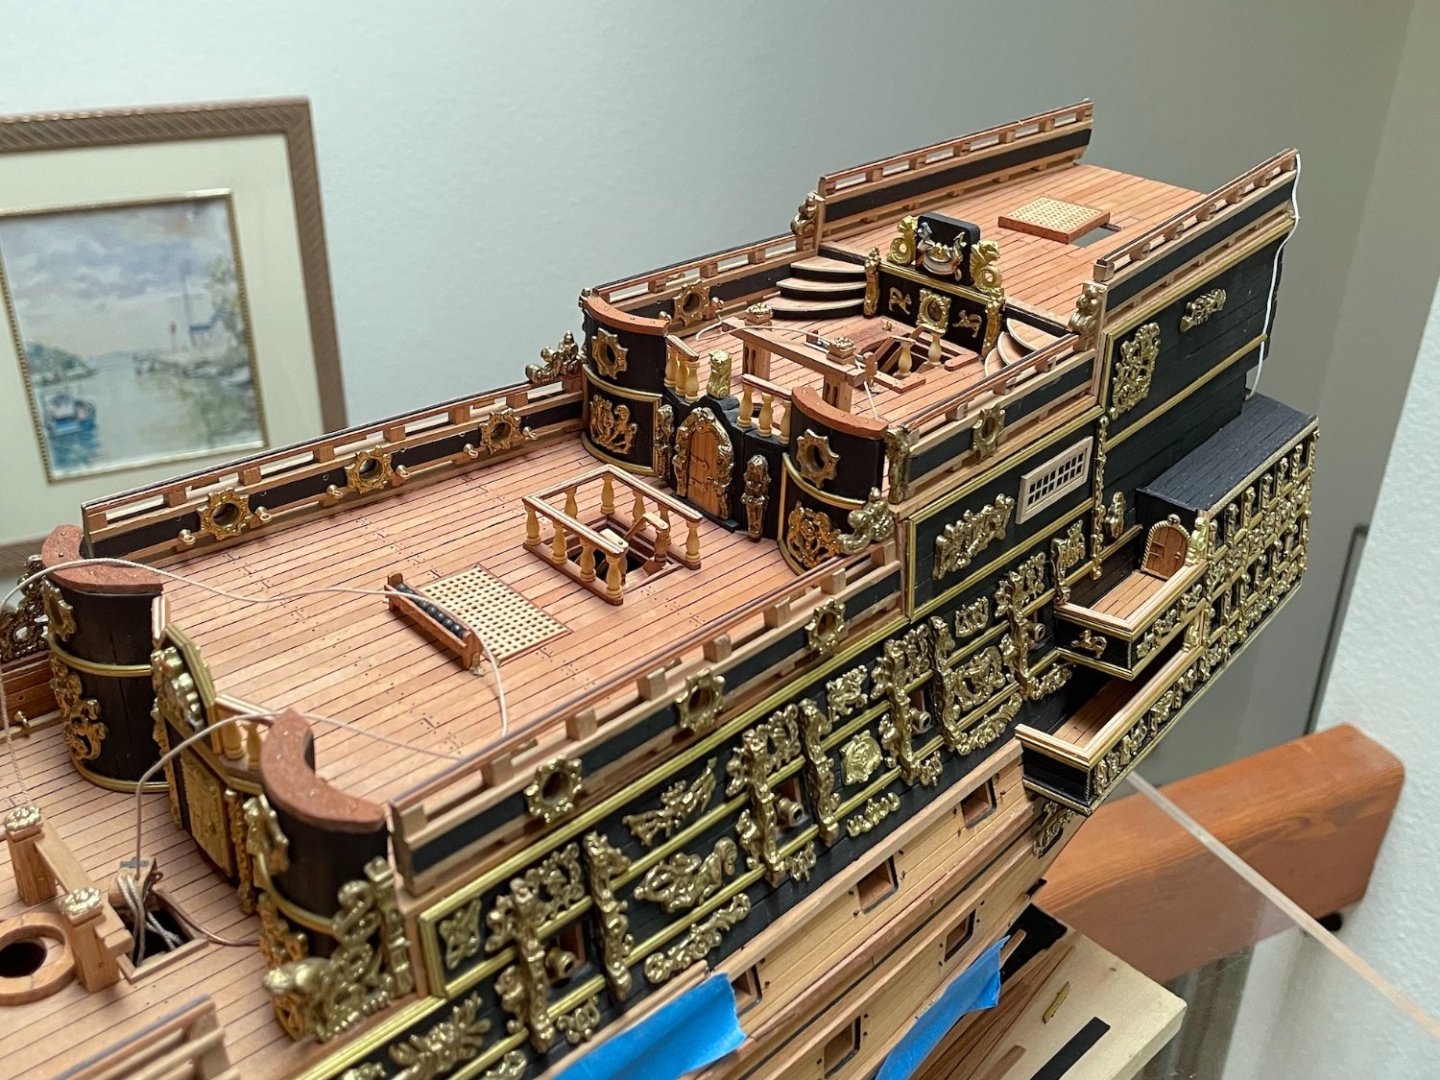
Hi, I have been away from this hobby for more than two months and, it was now time to continue the stern portion of this project. Here are some images of my continued work at the stern area. For those of you who are kind enough to still follow or just drop in for a look (big thanks) – You may remember that I also intended to mostly scratch build the stern, as well as lowering the poop deck angle from what Sergal suggests in their instructions. Here are some images, and inserted notes of the work so far. Cheers to all – enjoy your year-end holidays.


-
Richard, Thanks, Need to get back to her - she's been in idle drydock for over a month. Life has gotten in the way 😎. And also spent time in Europe for a 1st trip in about three years - given that the planet has been shut down for almost as long. Regards,
-
As always - just wonderful work!!