md1400cs
-
Posts
2,870 -
Joined
-
Last visited
Content Type
Profiles
Forums
Gallery
Events
Everything posted by md1400cs
-
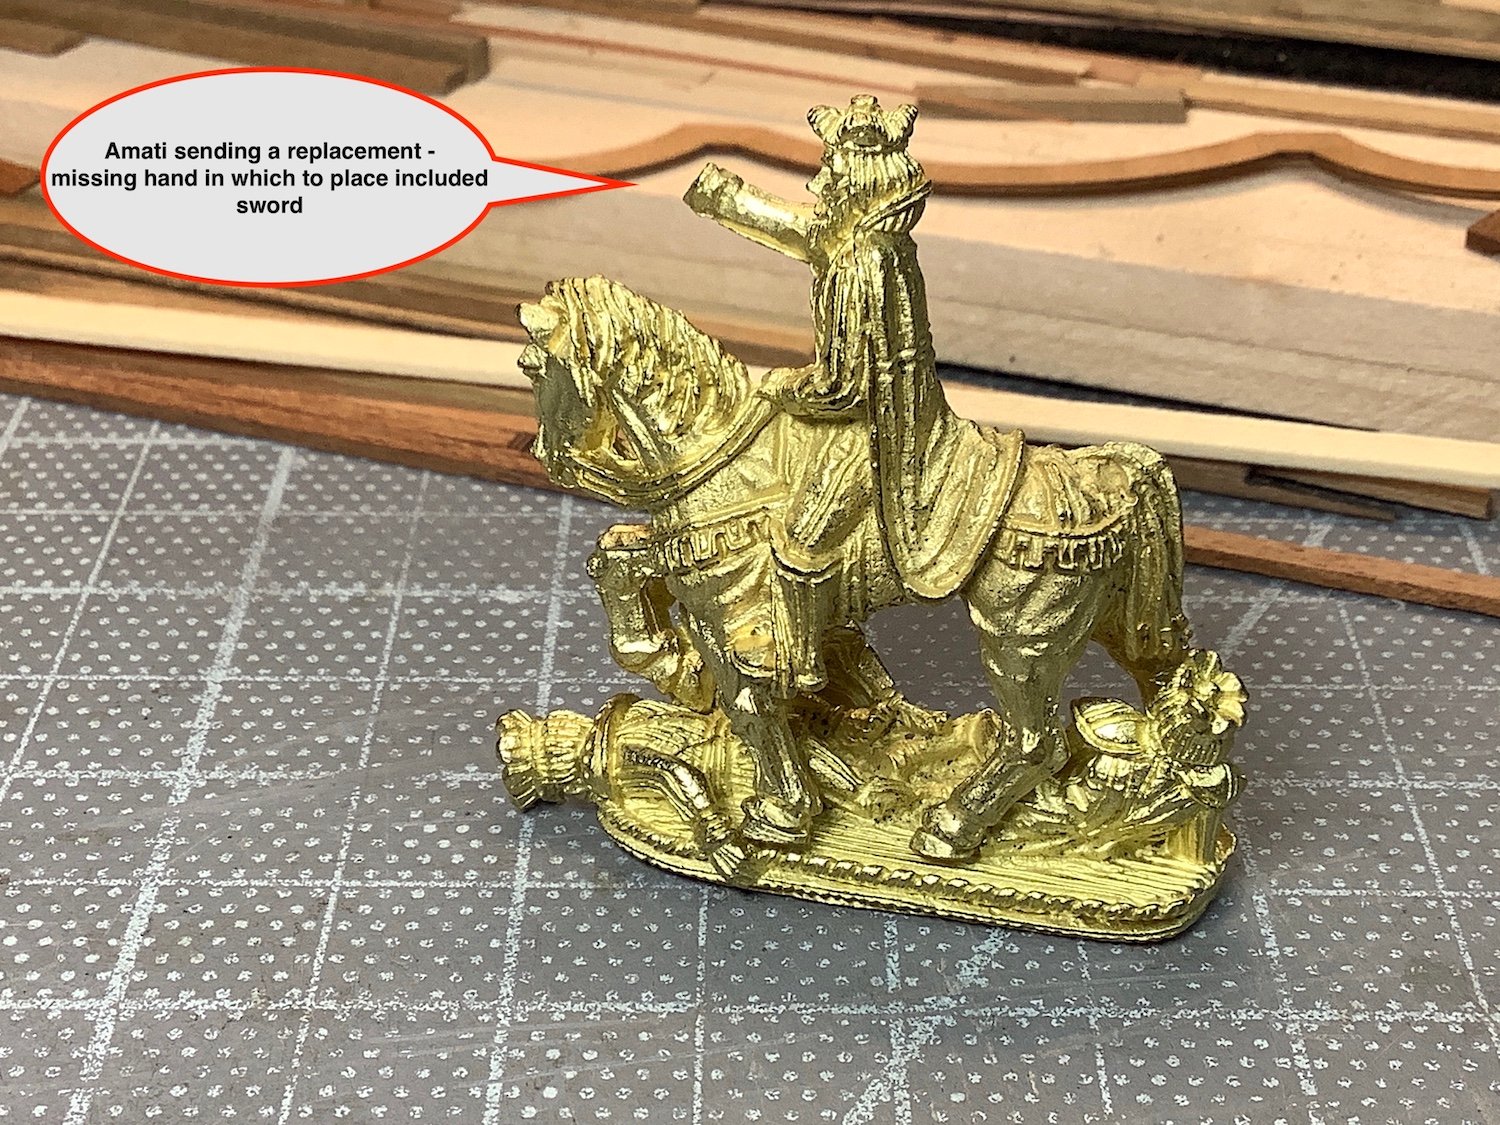
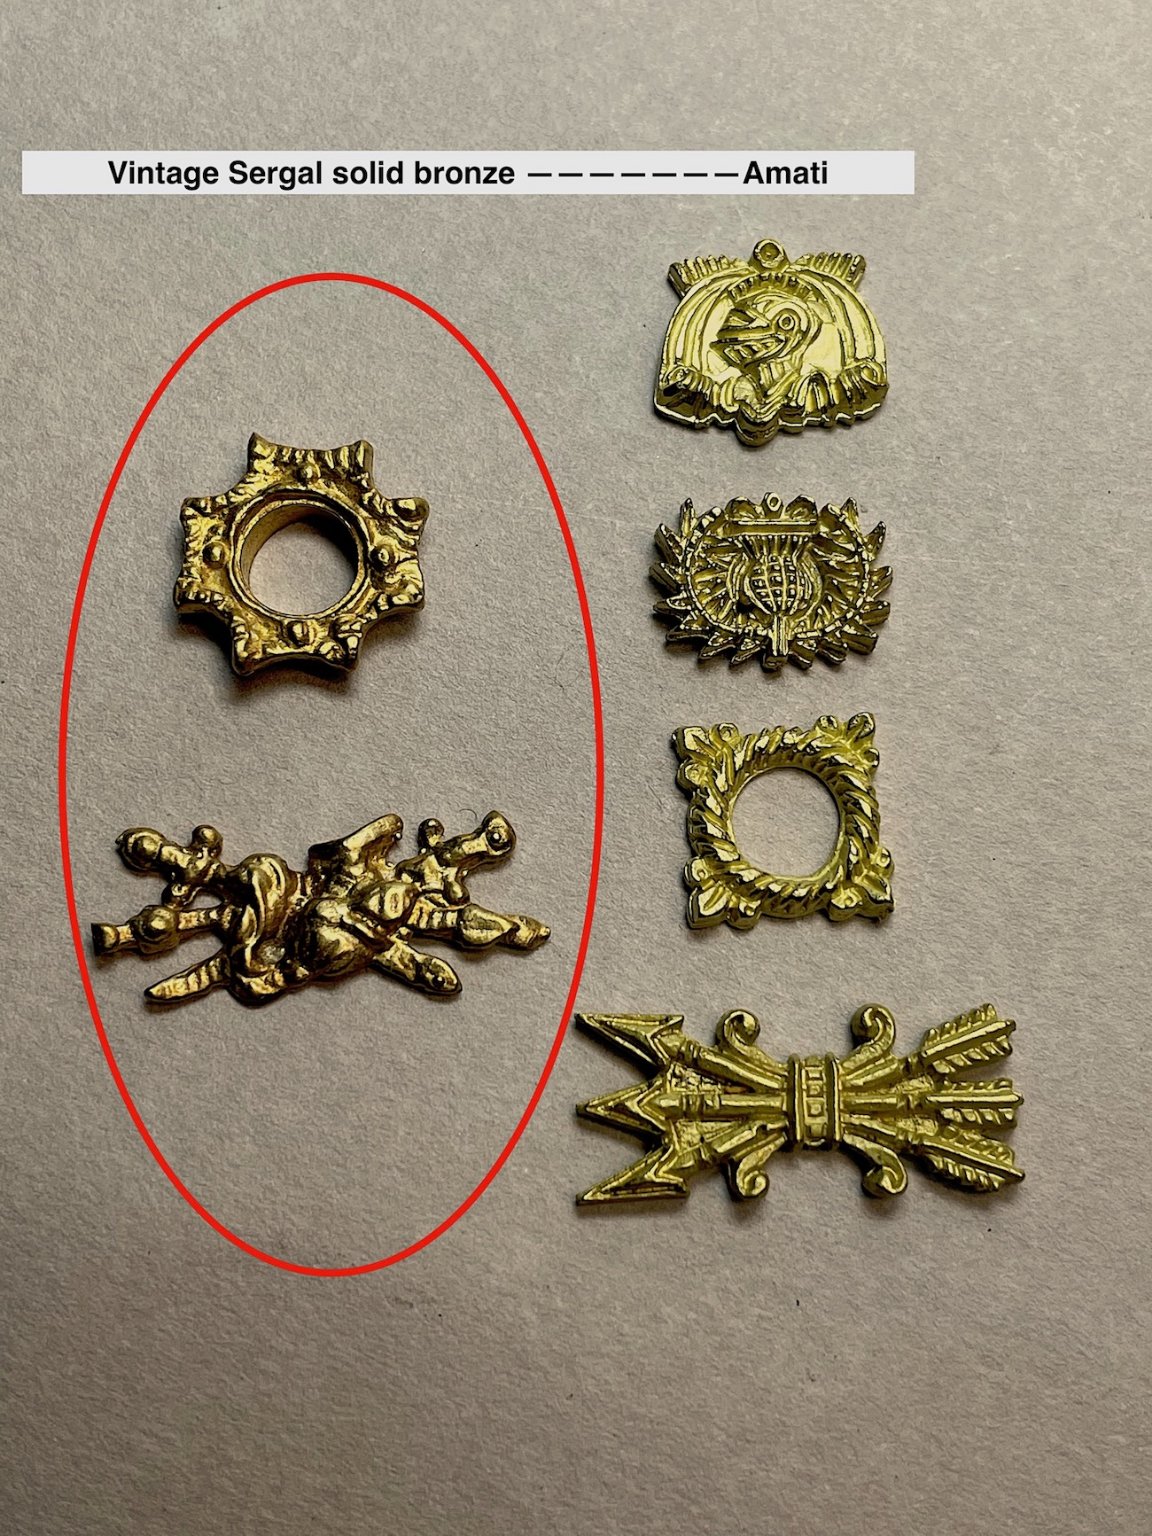
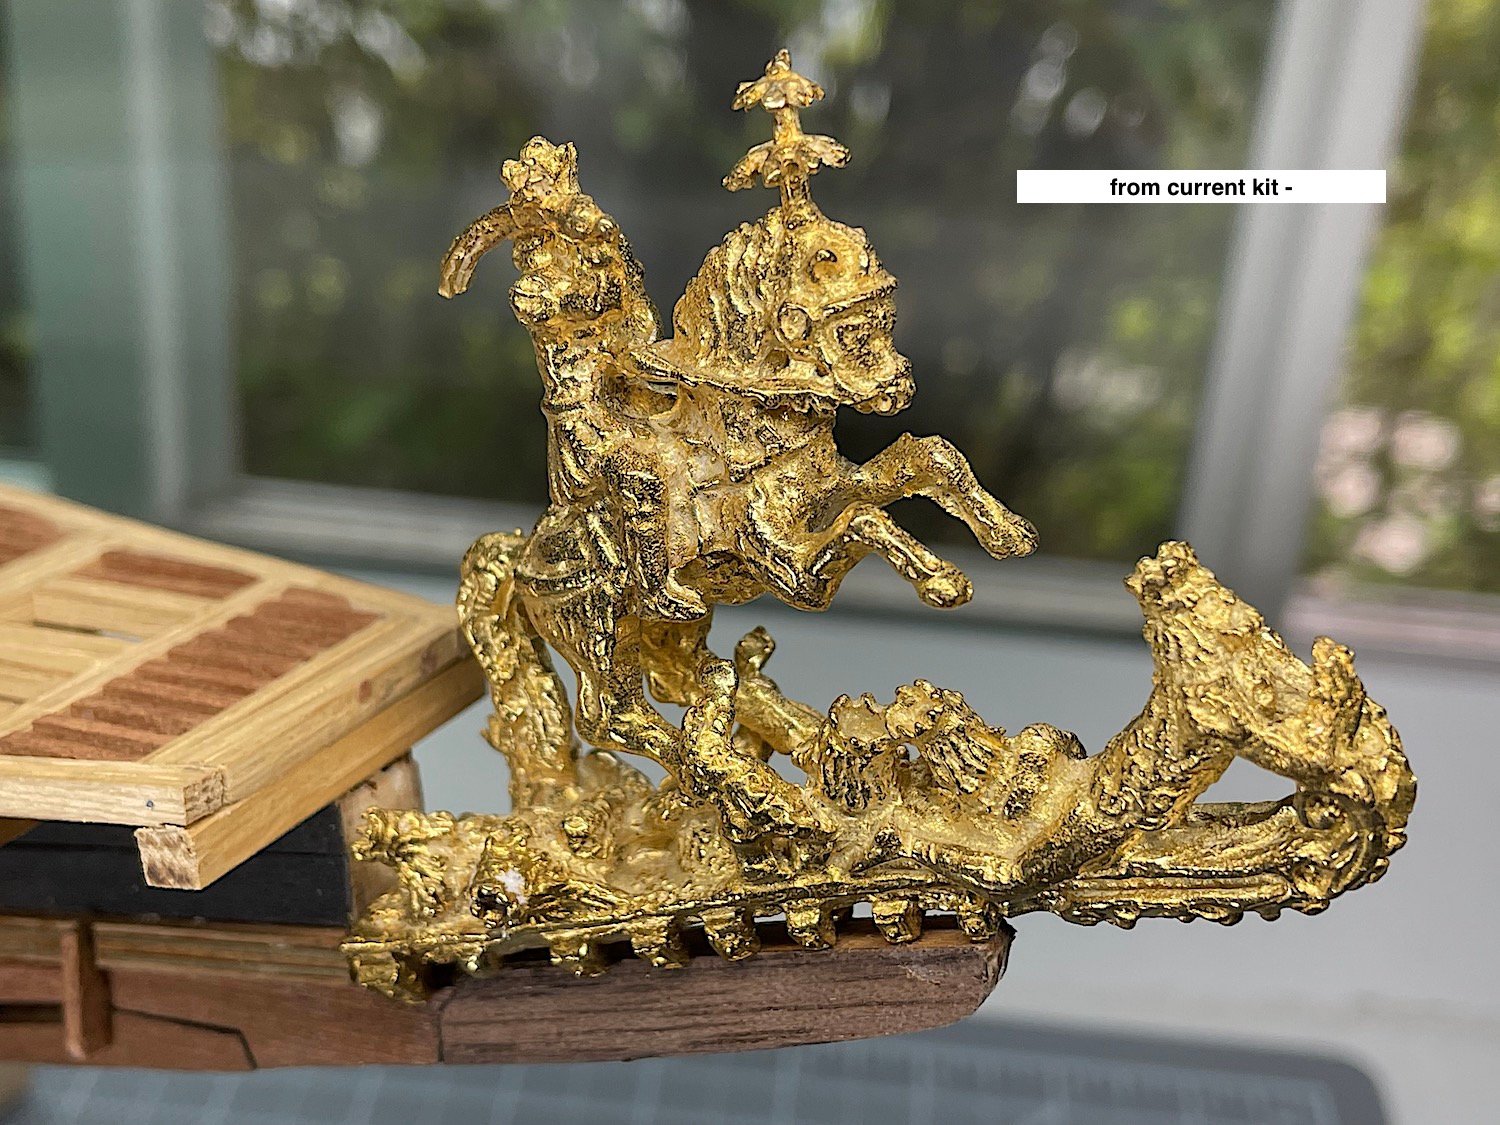
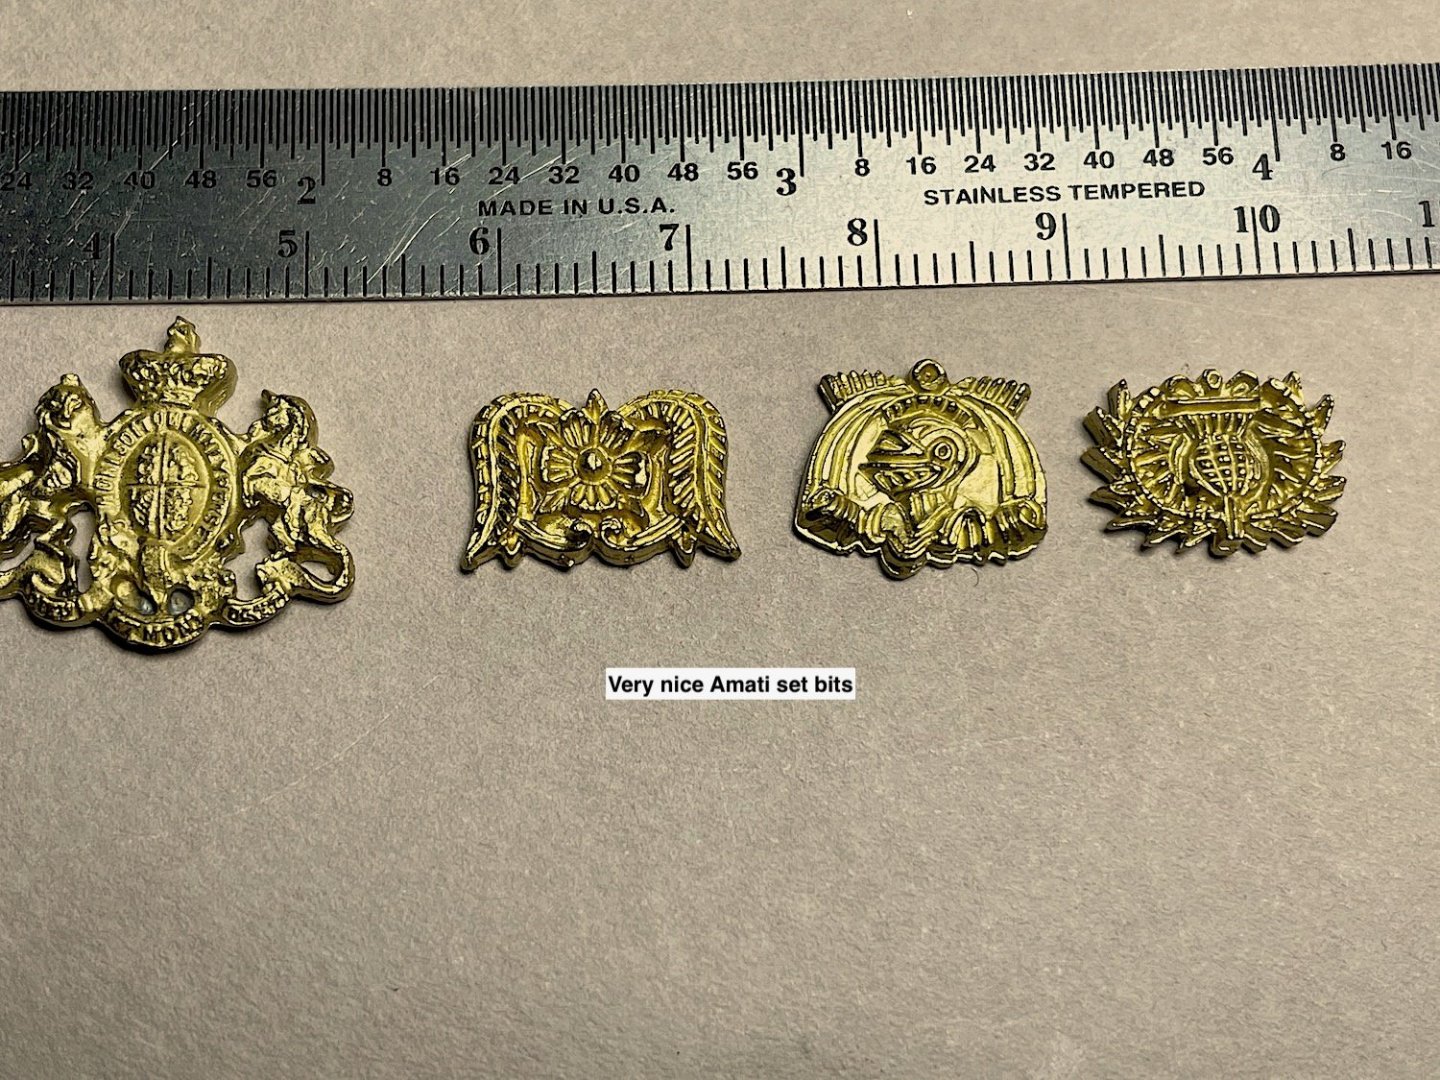
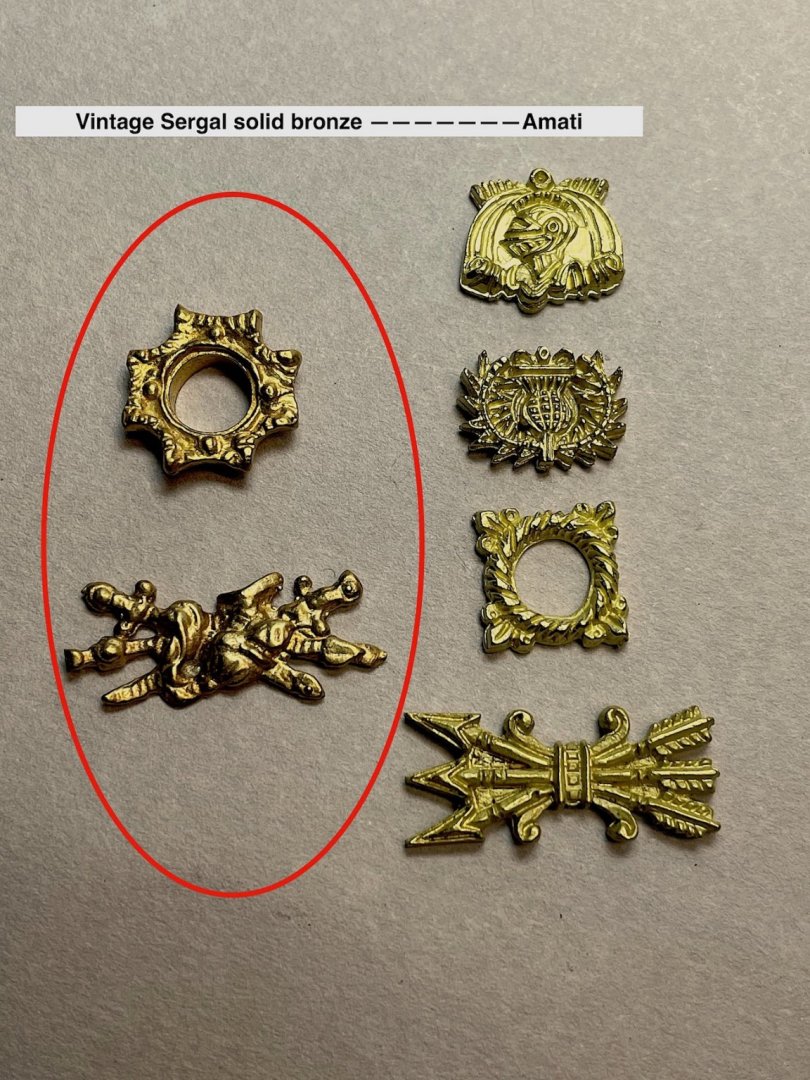
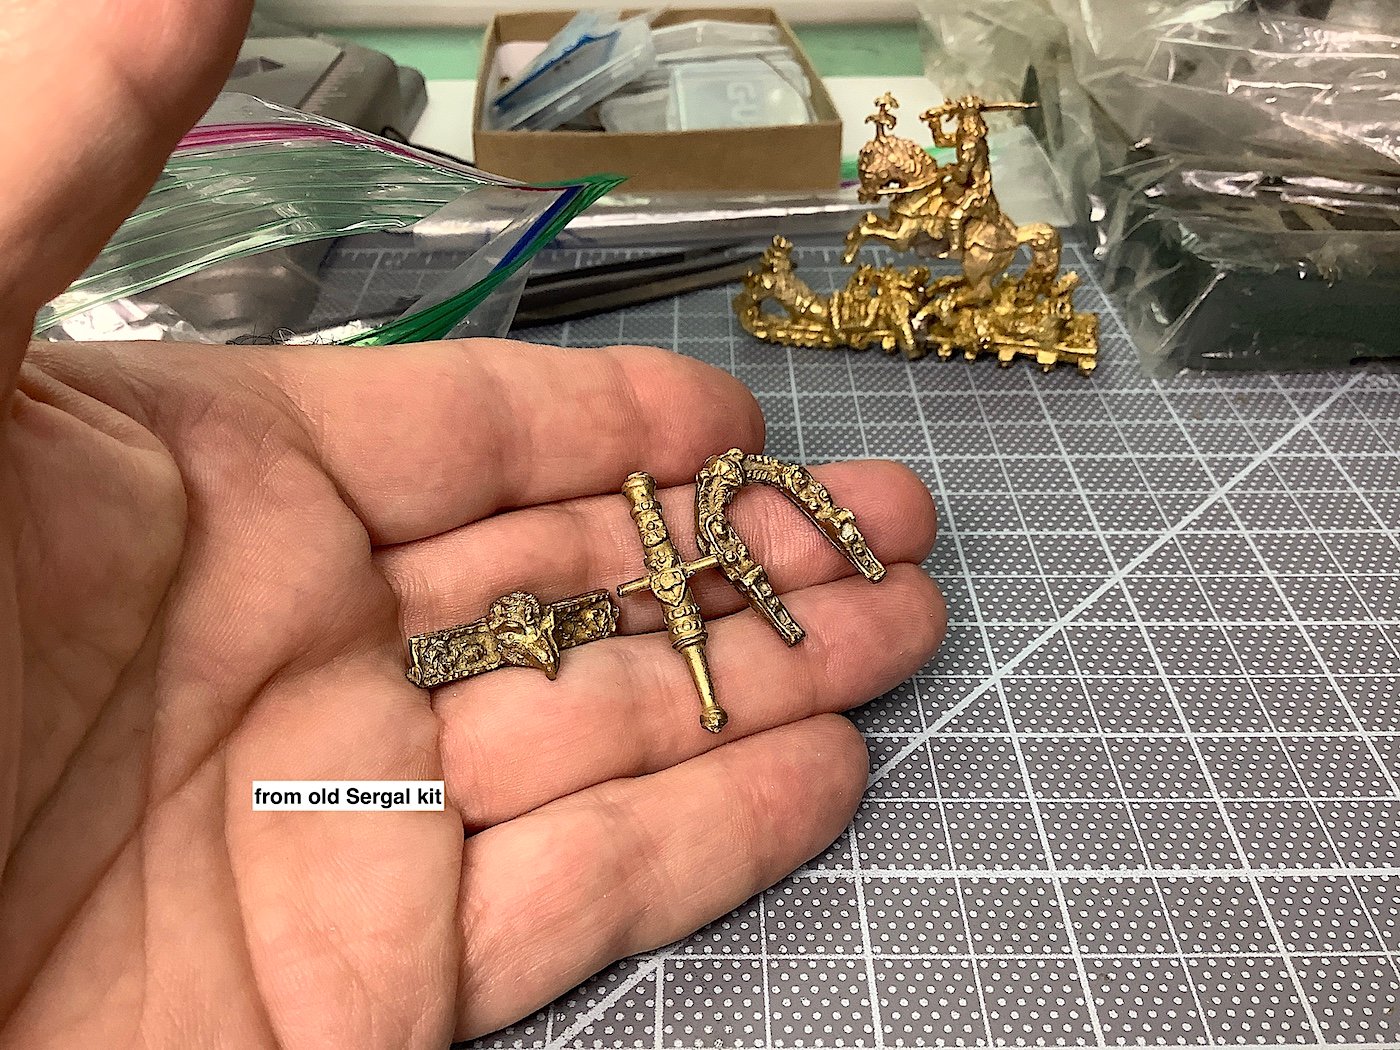
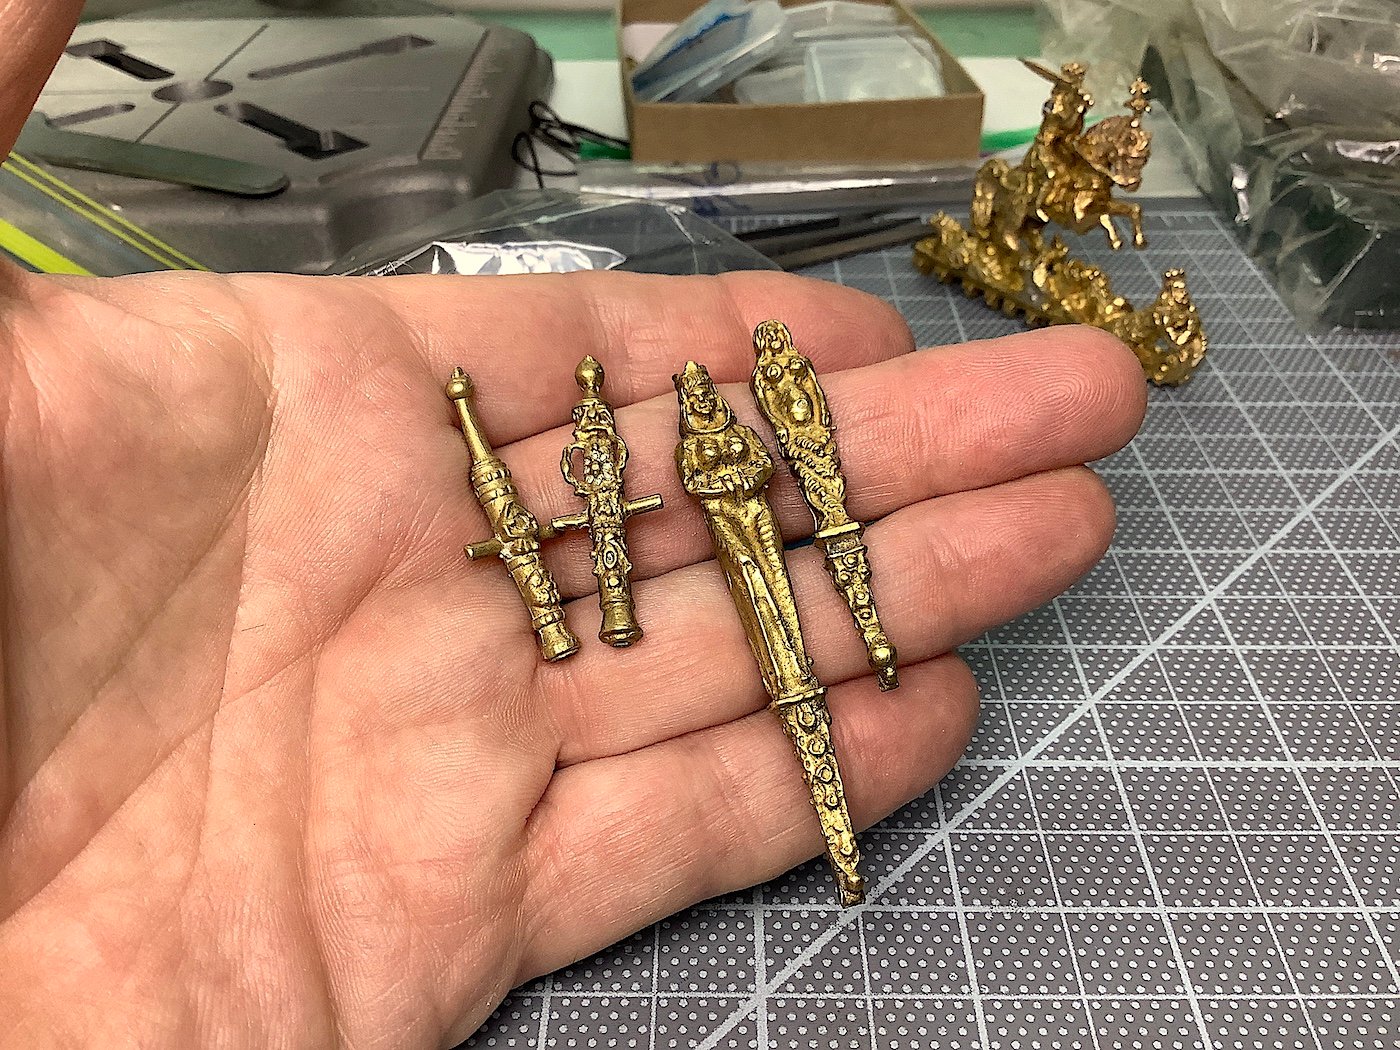
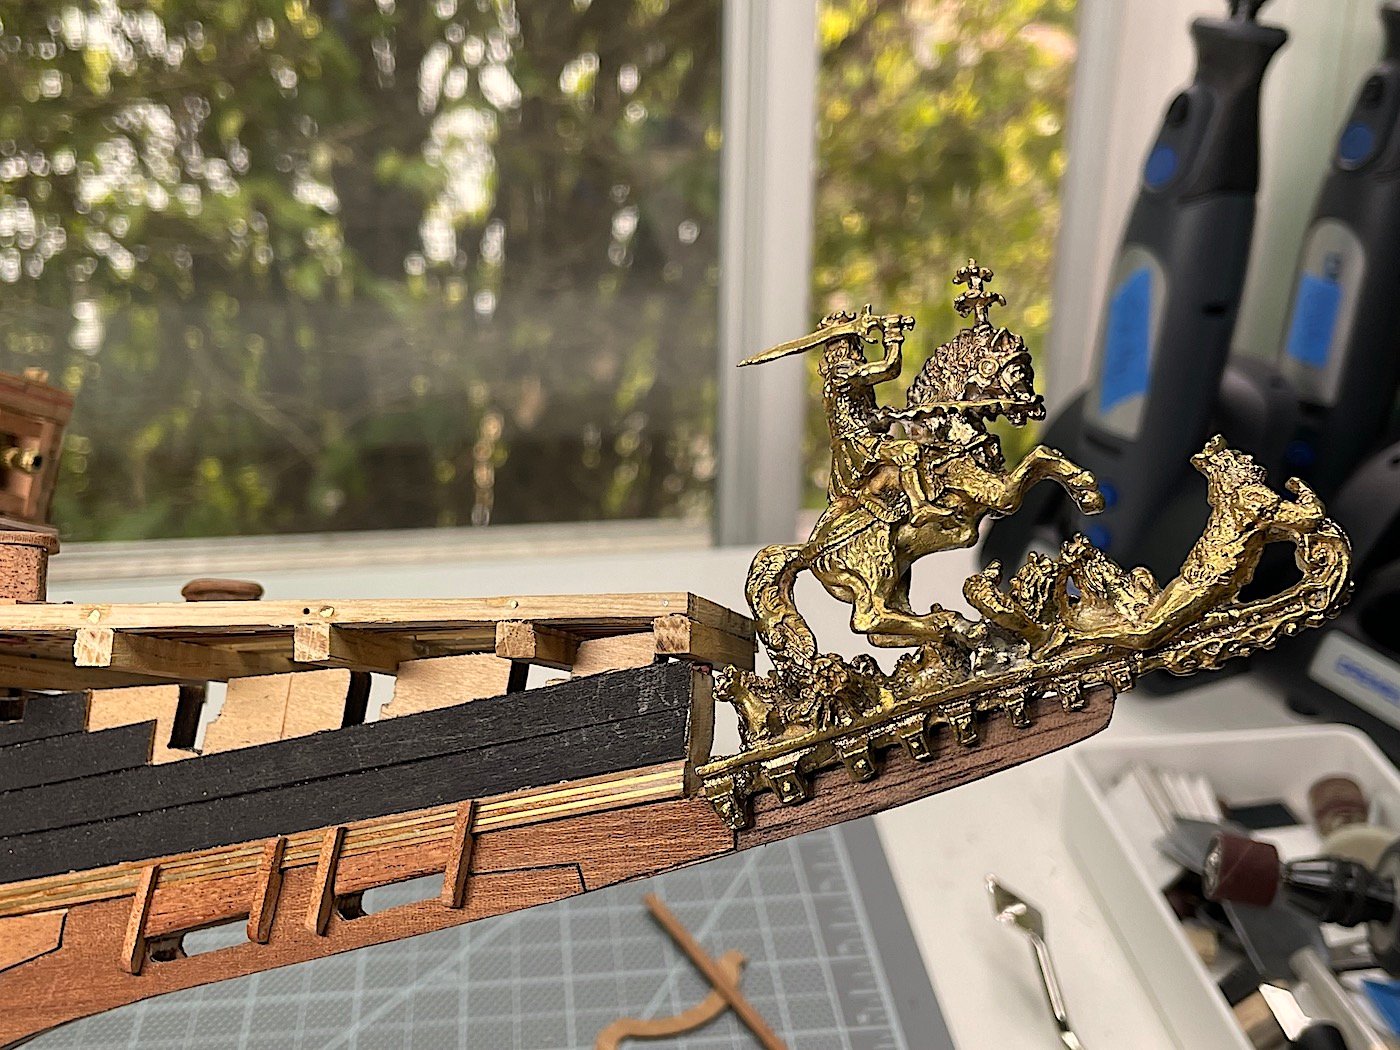
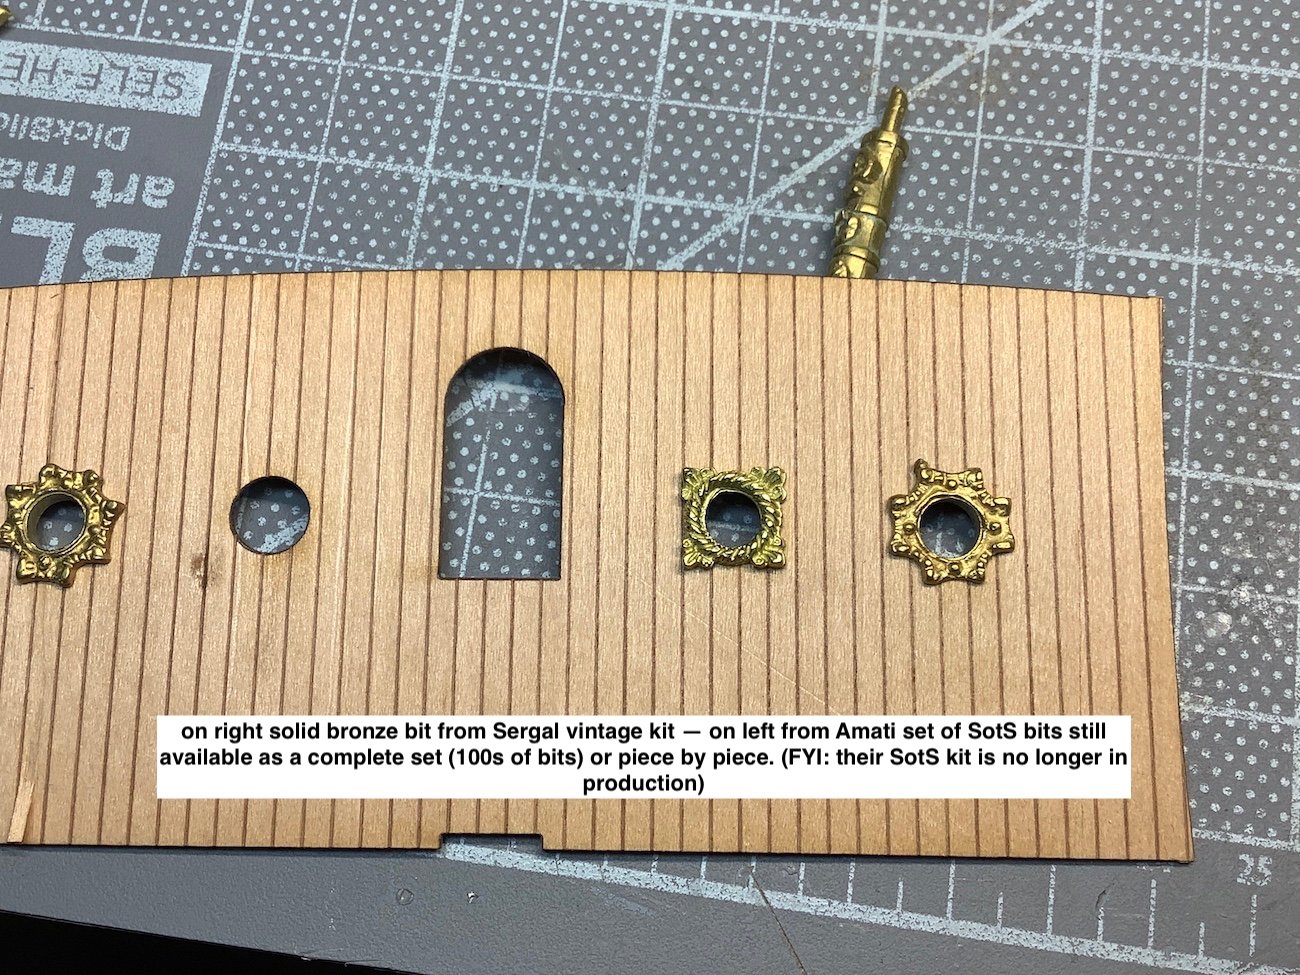
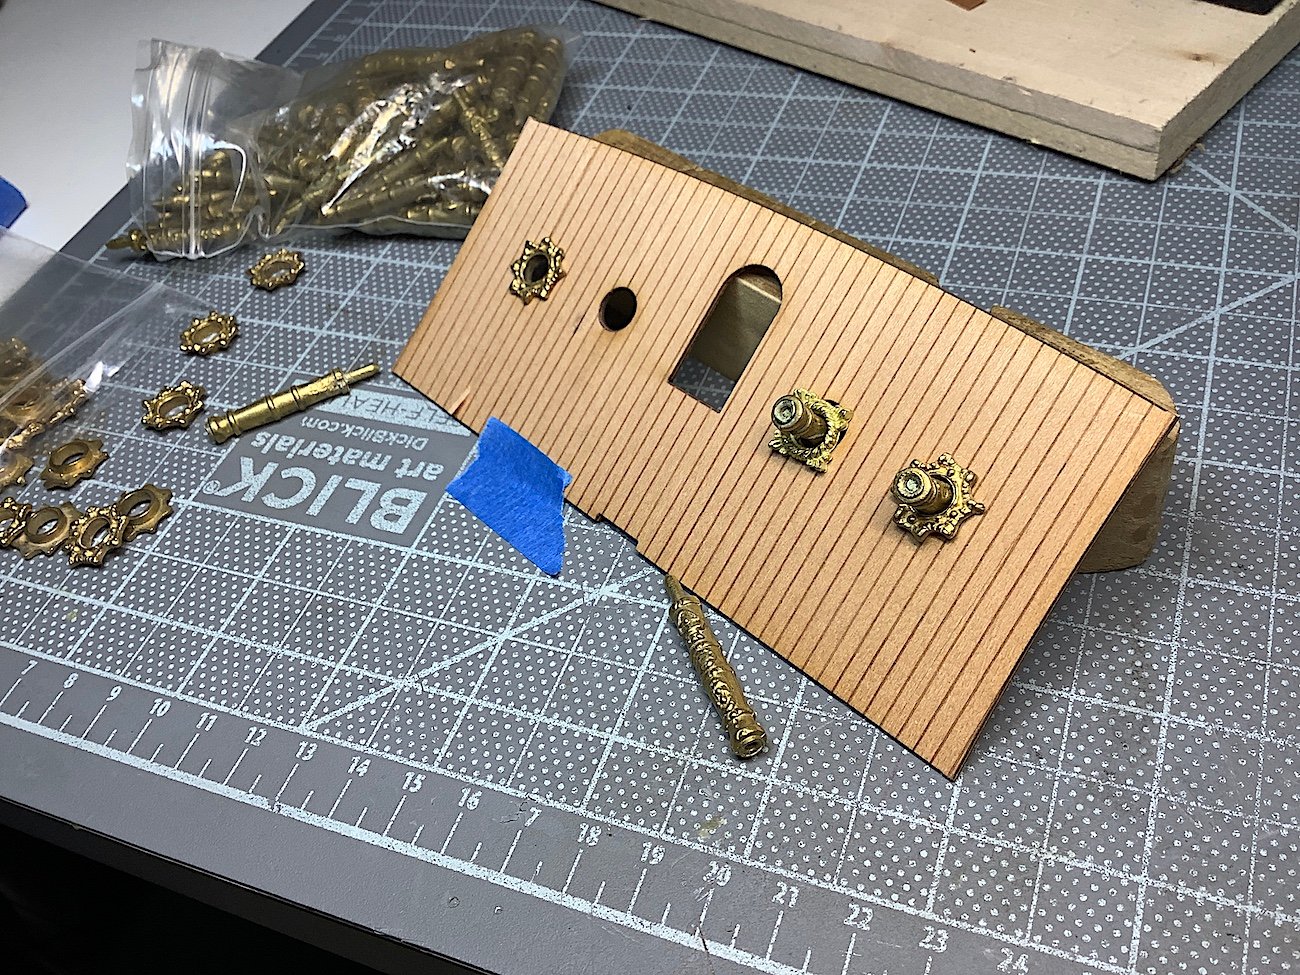
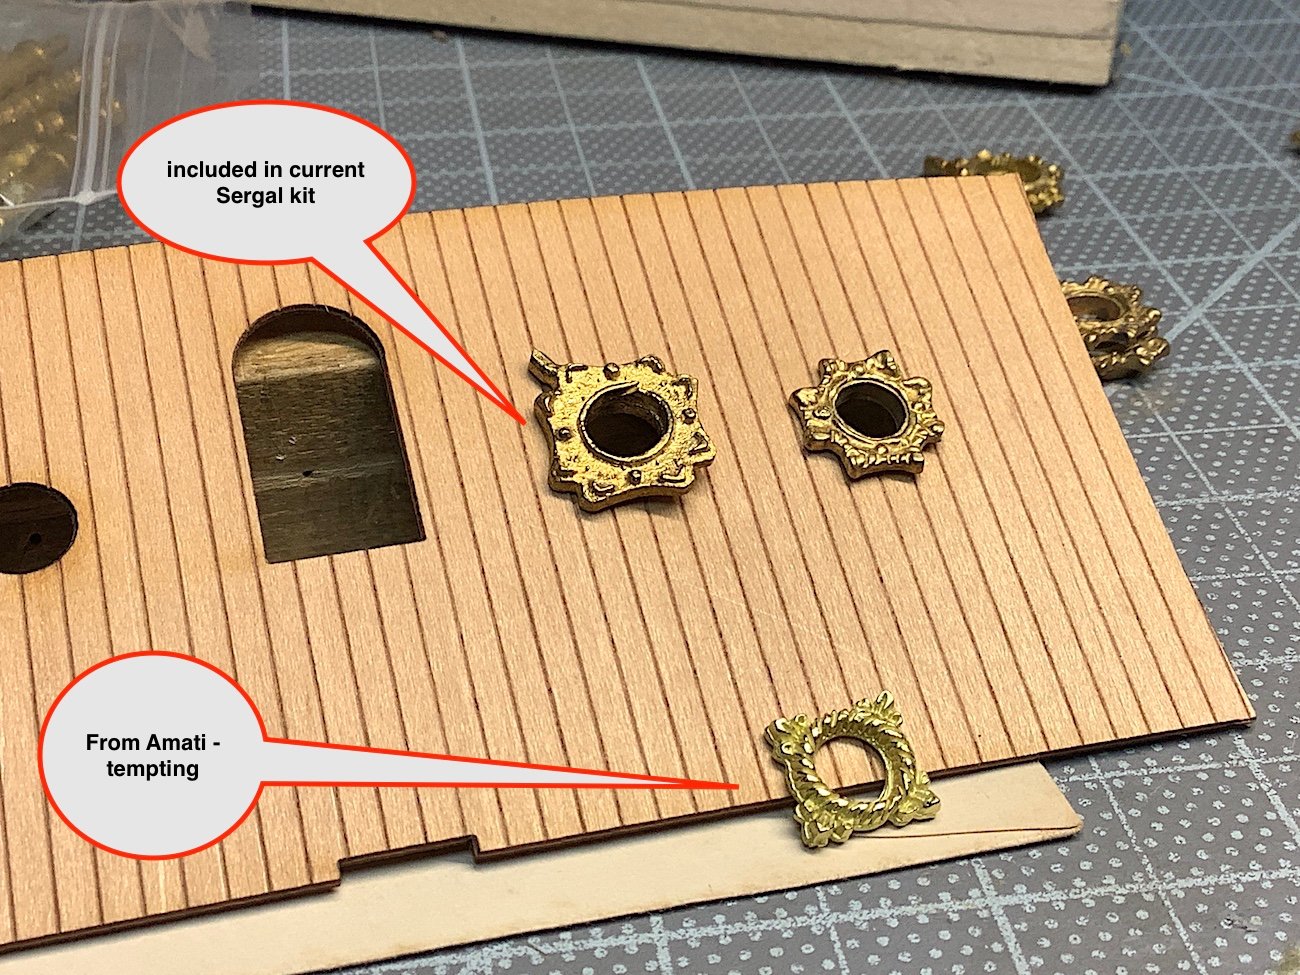
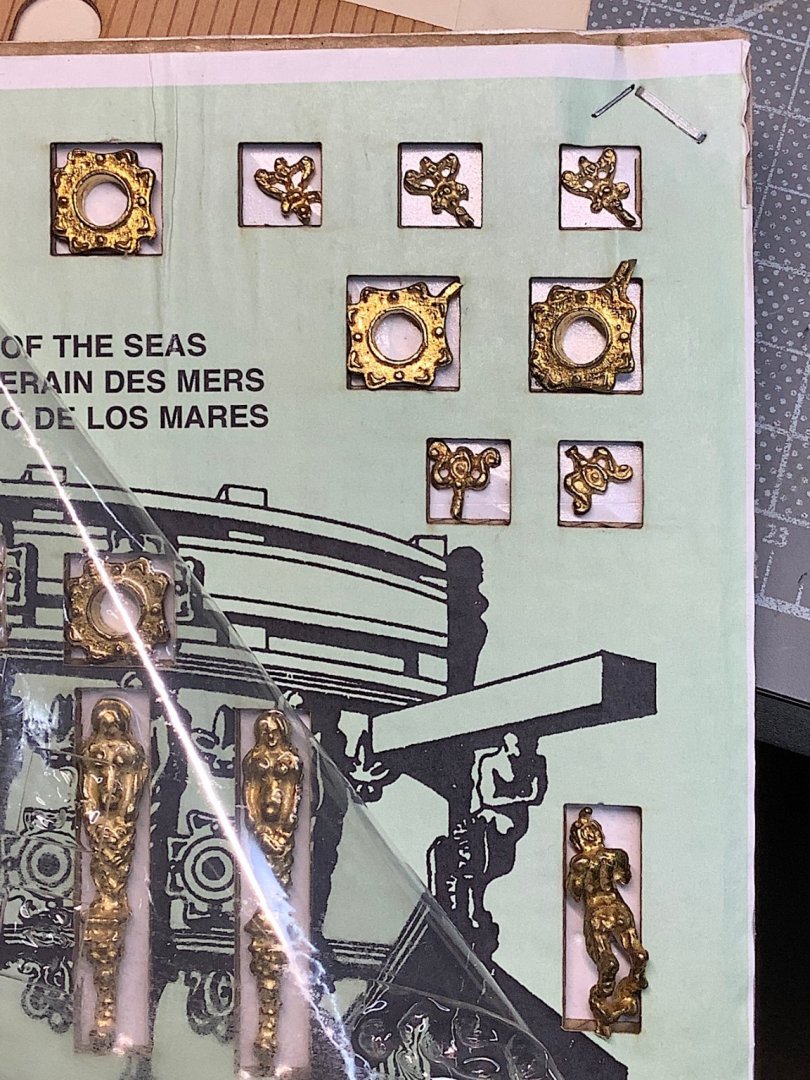
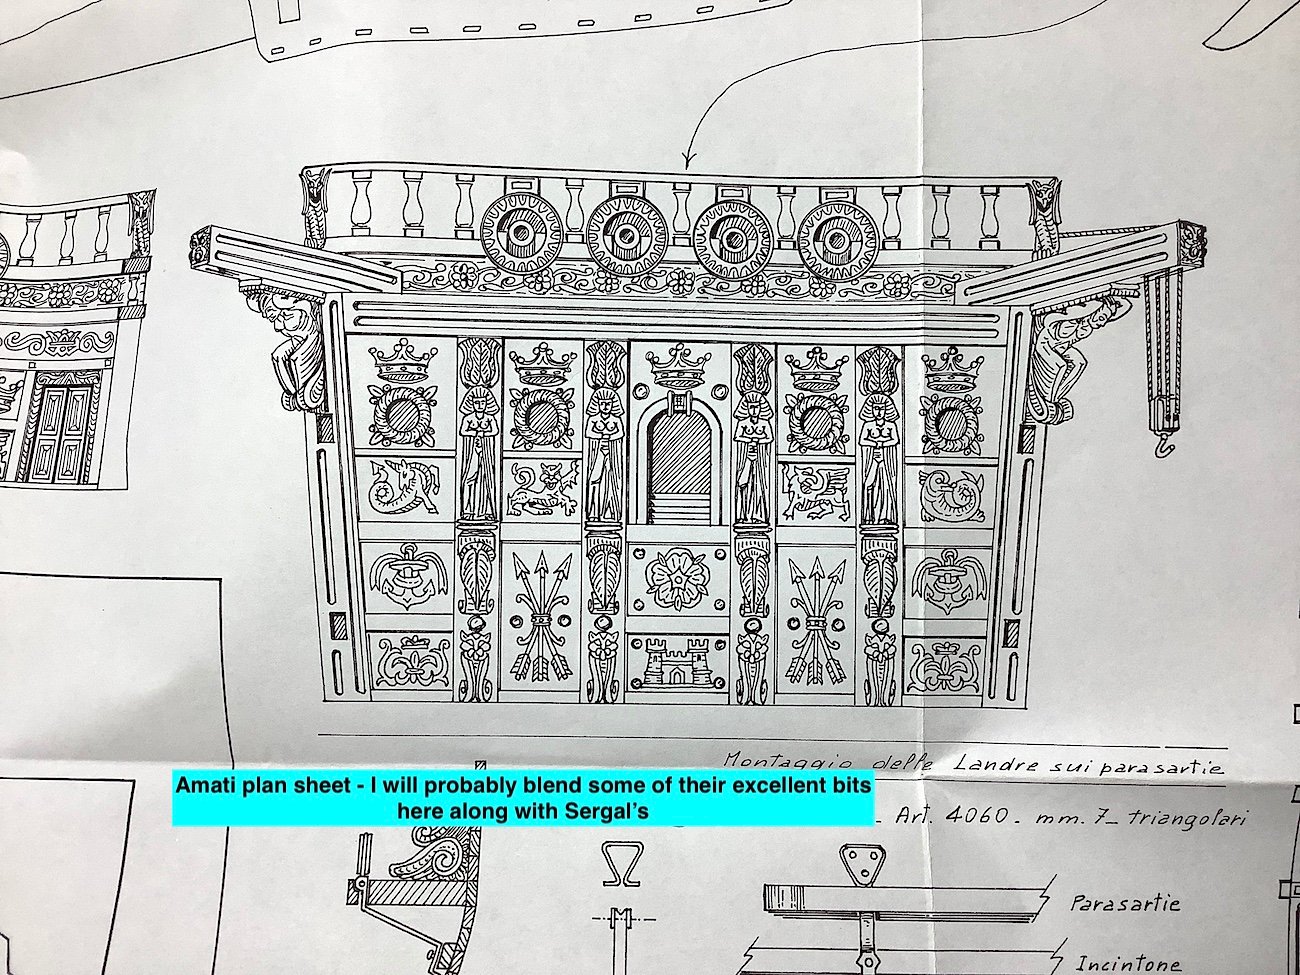
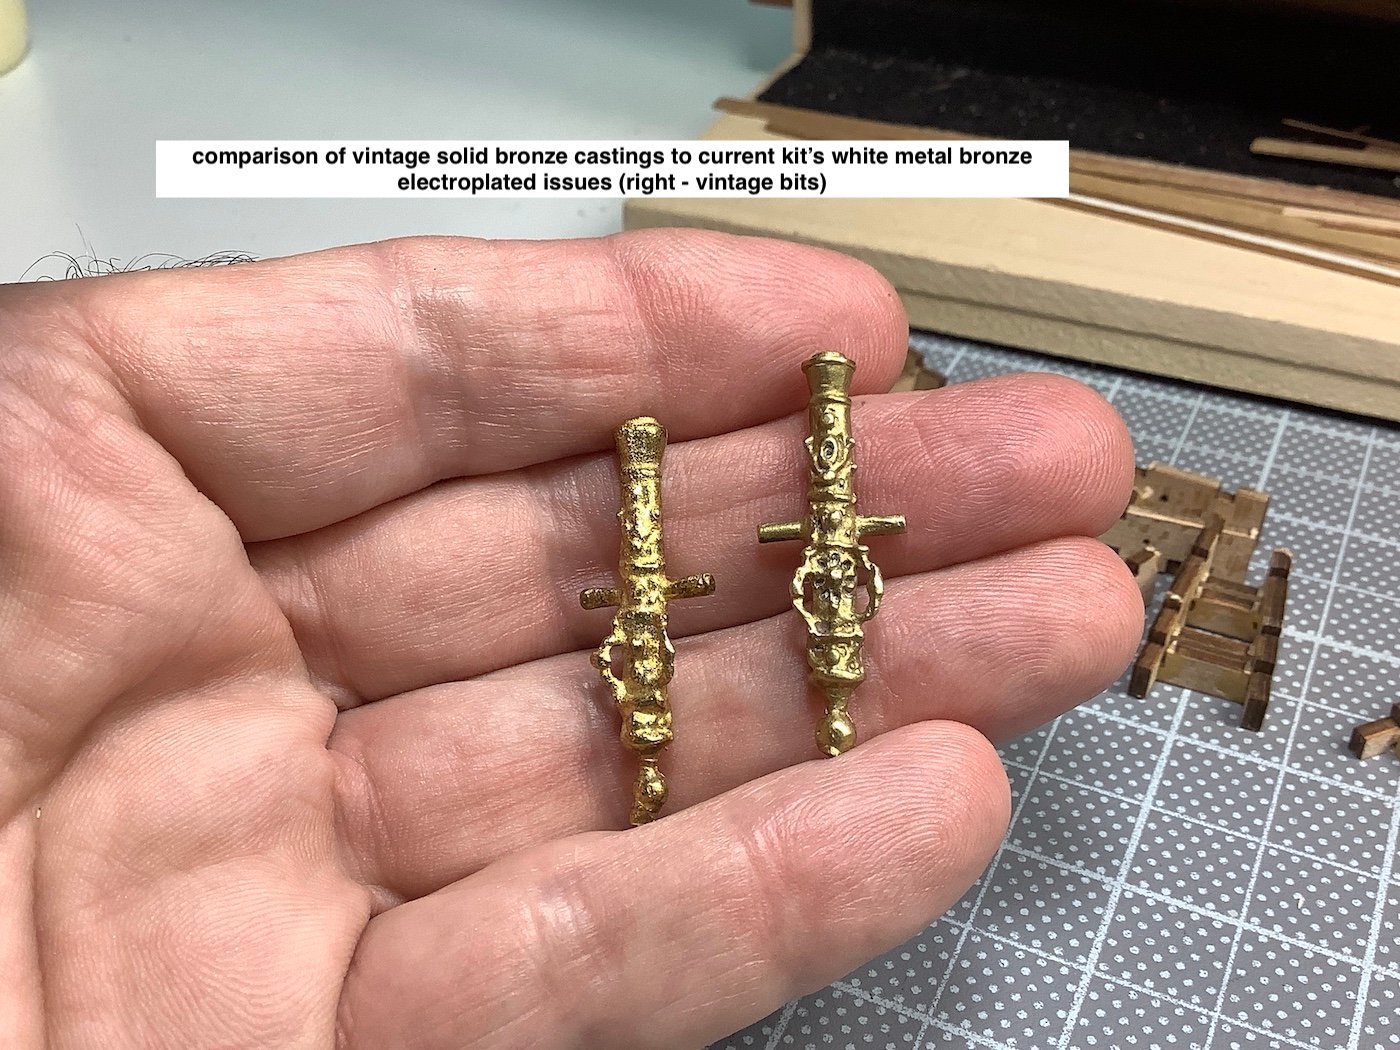
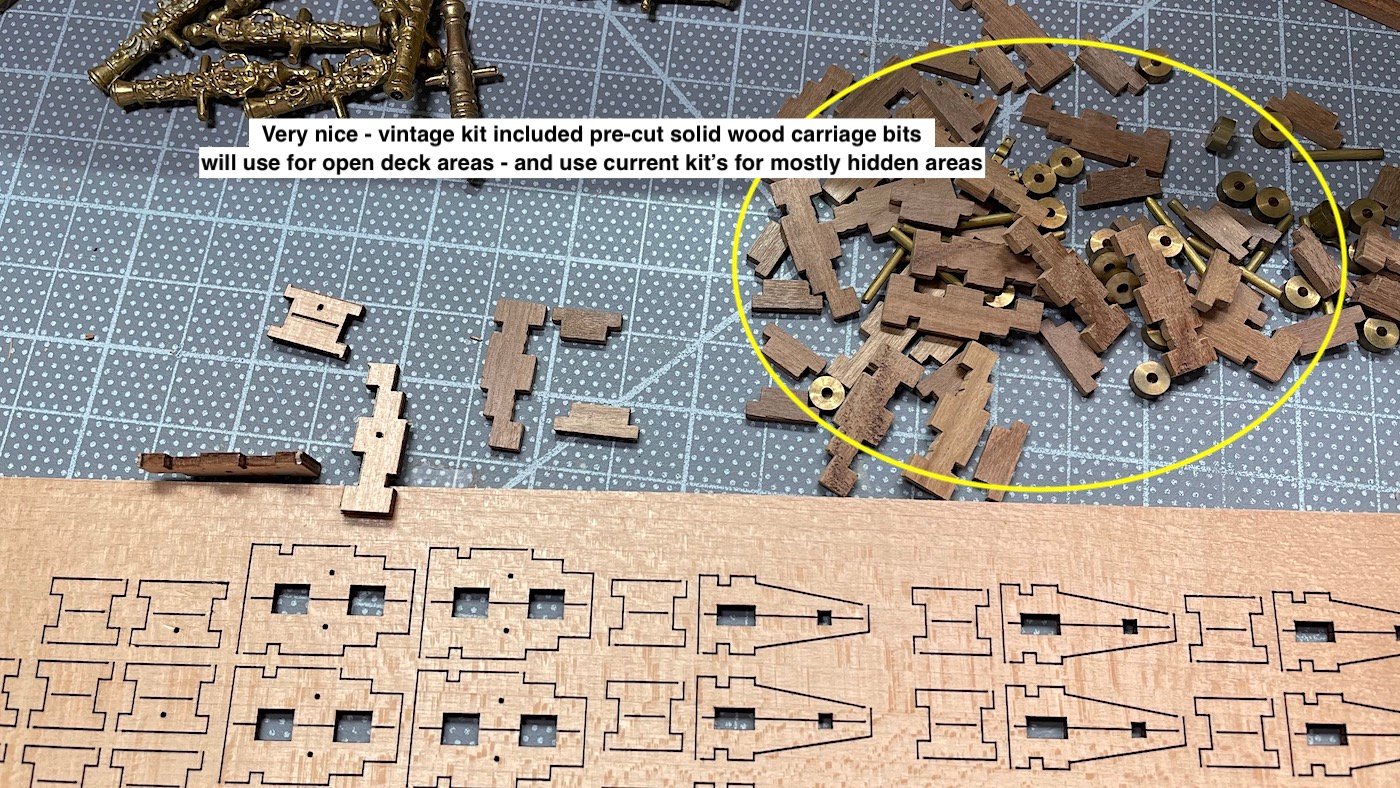
 Thanks for your interest in this ironic dilemma. From what I had read, Sergal some years back was sold, or went to new management for cost cutting measures. They then revised some of their products; one of which was their SotS. They “improved” the new release by including pre-scored decks, laser cut gratings, a build booklet as well as other pre-ready bits. Then, it was also decided to delete the expensive solid bronze castings with cheaper white metal electroplated substitutions. The resulting castings lost some details. I have no information regarding casting molds. That said the blister packs showing the exact location of the many 100s of castings is indeed excellent. Also solid wood pre-cut bits (carriages, deck vertical railings, etc), were replaced with laser cut non solid wood sheets. When I chose to build this one – having wanted to for many years – I hesitated after learning about the loss of casting details given, as well, the price point for this expensive kit. I then queried here at MSW and, as I had mentioned in my first post, found a seller who had a vintage kit available. I subsequently also received the current kit for Father’s Day in 020….. I am very satisfied with the solid bronze castings. Then adding to this silliness also purchased the still available Amati complete SotS castings set – those are really something. I will blend Amati and Sergal bronze decorative castings onto this project. PS: Amati diff. scale but for decorative bits not important.... Thanks for following along – bit too much text this time around lol Finishing this thread topic - a few more images, then back to build log....
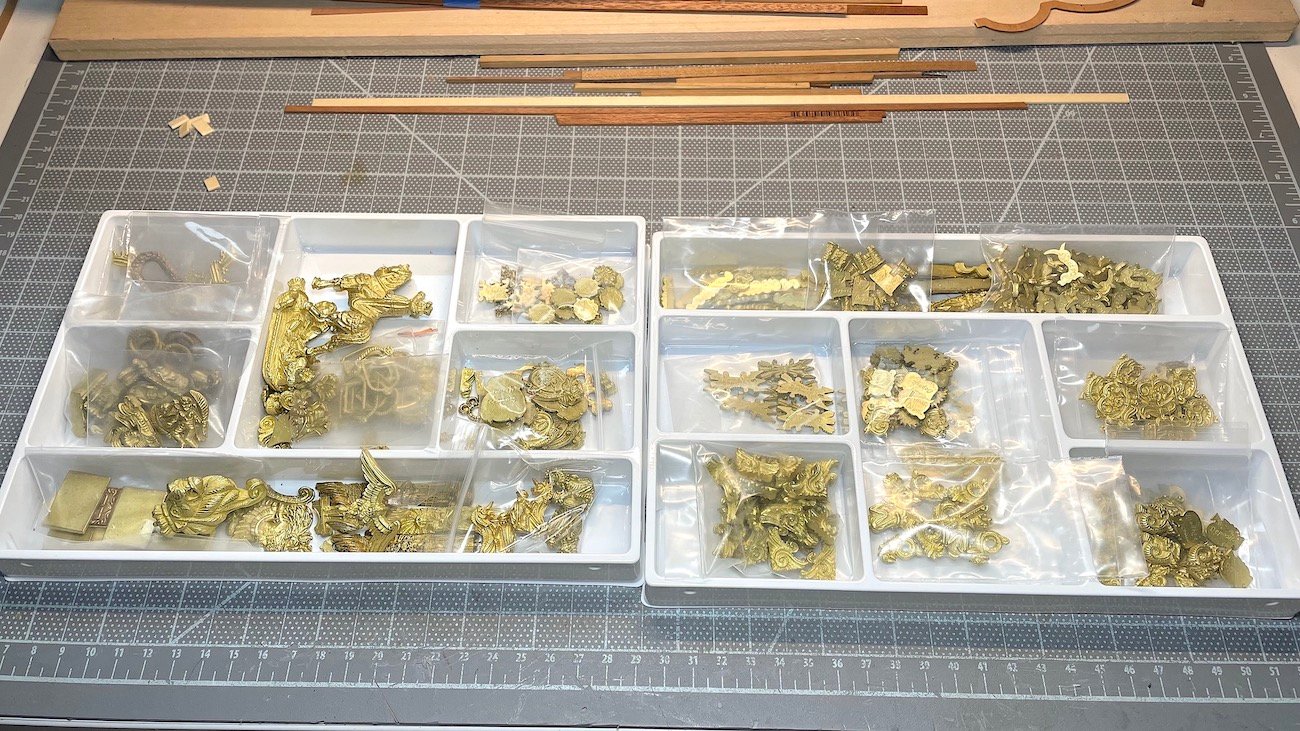

-
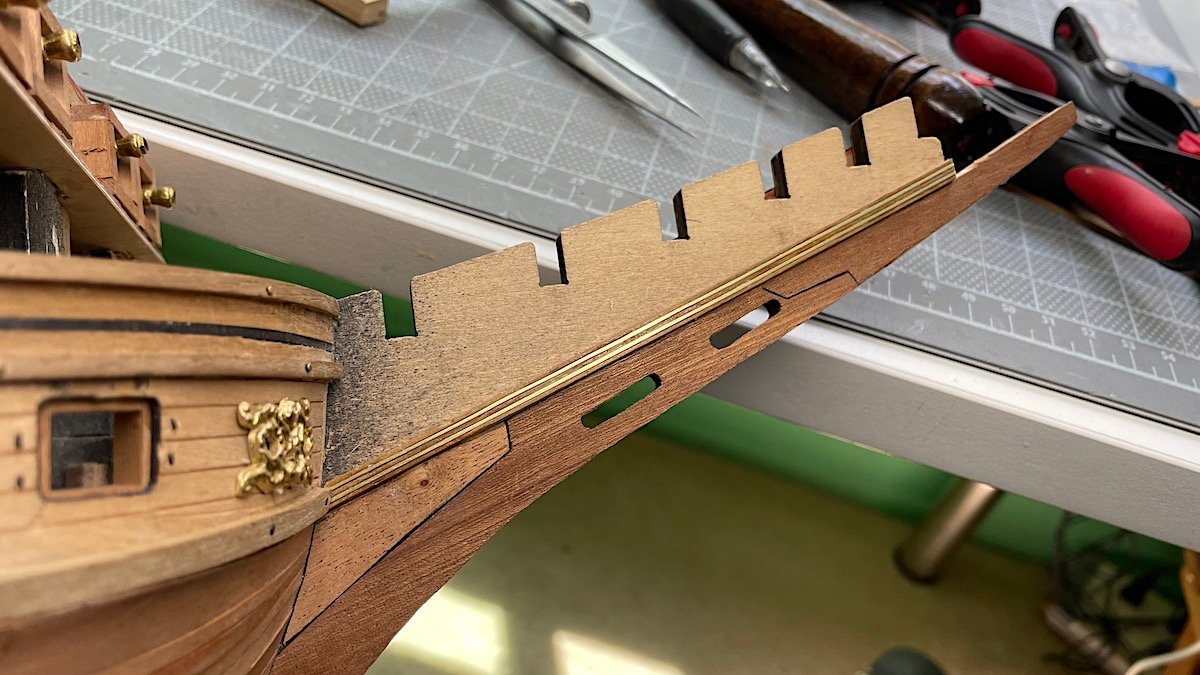
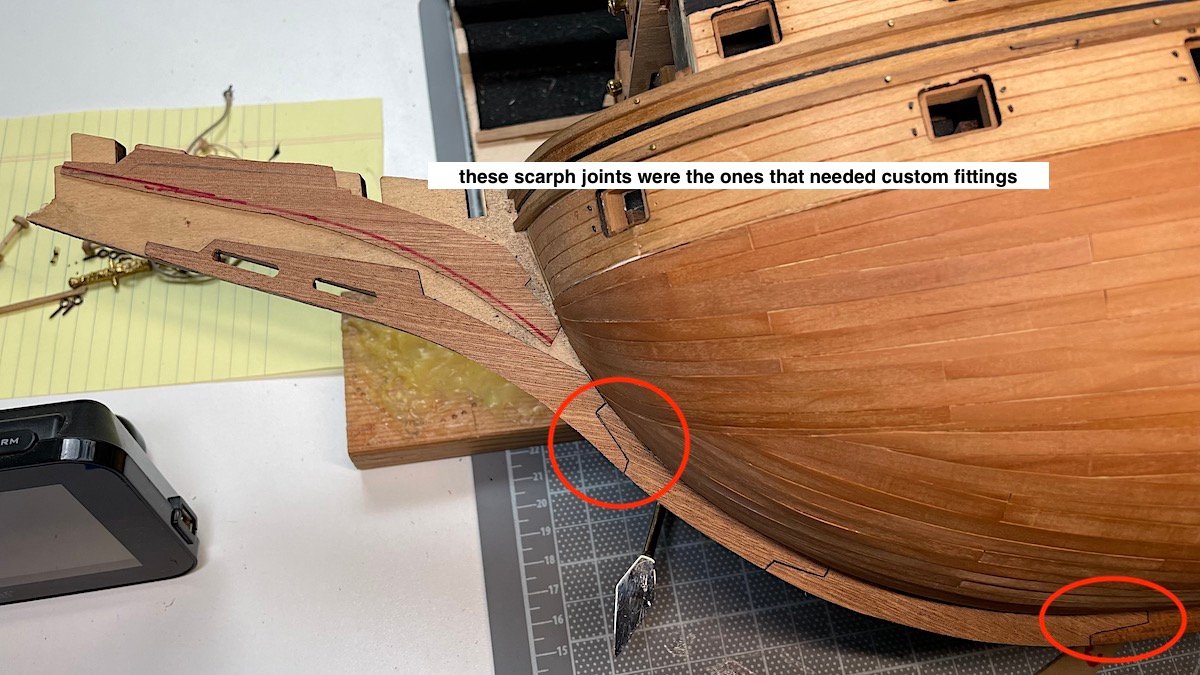
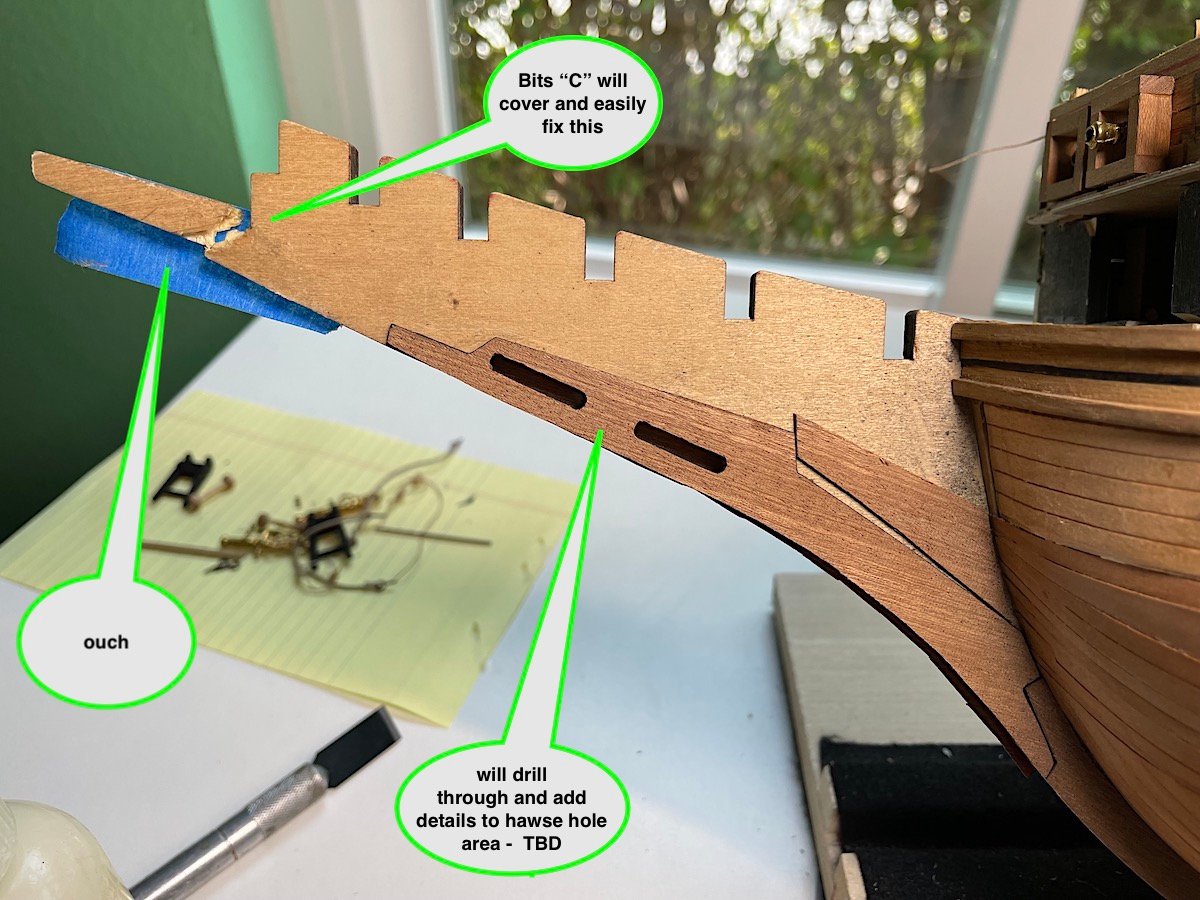
Hi, Minor update – still working on forward keel, beakshead and stem areas; adding details that have taken some time, and of course some areas don’t come out right on first attempt, or areas also have to be redone 😬 --- Thanks for dropping by, likes and any comments or suggestions…


-
Ulises: big thanks so kind of you - you are a master builder it will be fun following your log. PS: the kit has "fit" issues with initial framing parts when locating pre-formed decks - also when adding the hull walles I did a lot of custom strengthening inside hull - did not post any of these issues in log - PM me at any time will be happy to assist E.J: as always thanks as well - Also when you get around to the SotS - any issues please don't be shy - We all learn and get better by sharing techniques with each other....
-
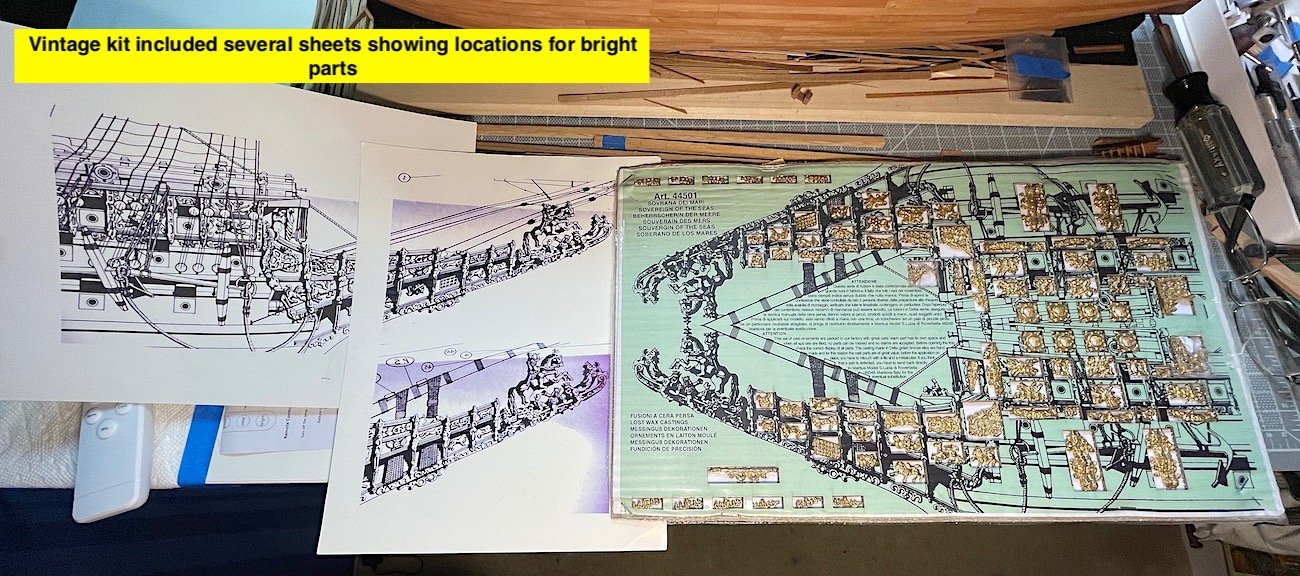
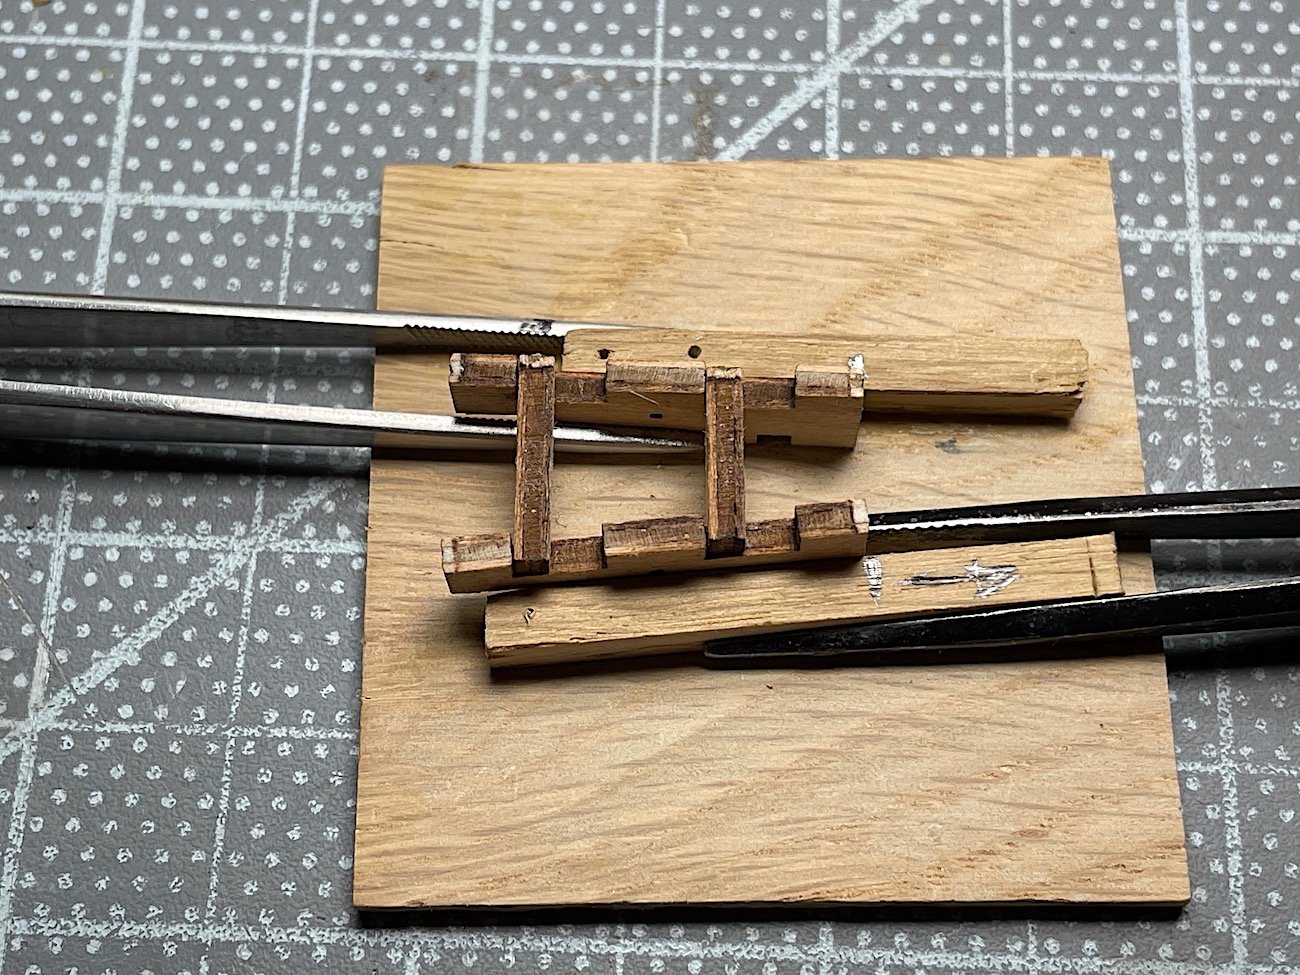
I have both kits - this one (green box) is current kit packaging - Vintage kit had a blue box, and all metal bits were in packet trays. Current kit includes eight blister packs - along with excellent part locations images within blisters for actual bit locations. Also all plan sheets were 1:1 with vintage kit - the image looks to be reduced size sheets from curent kit based on how sheets are folded.
- 35 replies
-
- 3
-

-
- Mantua
- Sovereign of the Seas
- (and 1 more)
-
Marc, Everytime I drop in I get even more amazed Wow! -hardly an in depth post - your write and get those lol
- 2,699 replies
-
- 3
-
-
- heller
- soleil royal
- (and 9 more)
-
Ulises, OK - glad you set up a log - I'm on board - Good luck. PS: The McKay book is excellent - though it has some critics that make good points, otherwise superb, and great plates within - very useful source. The Sergal instructions are IMO almost useless lol.......
- 35 replies
-
- 3
-

-
-
- Mantua
- Sovereign of the Seas
- (and 1 more)
-
Ulises, Yes it has been a while indeed - she came out just beautiful - You were always a master with rigging - years ago you helped with my Vasa - Your example Vasa came very Perfect - So your next build will be the Sovereign - nice choice. I started this same kit last year (a Father's Day gift from my family) So I'm a bit ahead of you this time. I'm making a lot of changes from the "out-of-the-box" kit - Please drop by and take a few looks. I will follow your new build when you get started. Te veo luego mi amigo
- 786 replies
-
- 3
-
-
- Royal Louis
- Finished
- (and 1 more)
-
Very nice indeed, Lot's of fun following your log. You are also exploring historical accuracy - certainly helps that the Vasa is "alive". 👌 PS: are you planning to also include the needed tools for cleaning, loading and so on. I don't remembers seeing those bits on display at the museum.
-
Ziggy, Just found your log on the right side-bar --- Very cool idea will follow along as well. Great start - boilers are great! PS: I'm sure that you know there are some awesome Titanic (super large) wrecked models on that site as well - This kind of work requires huge creativity - kudos to you....
-
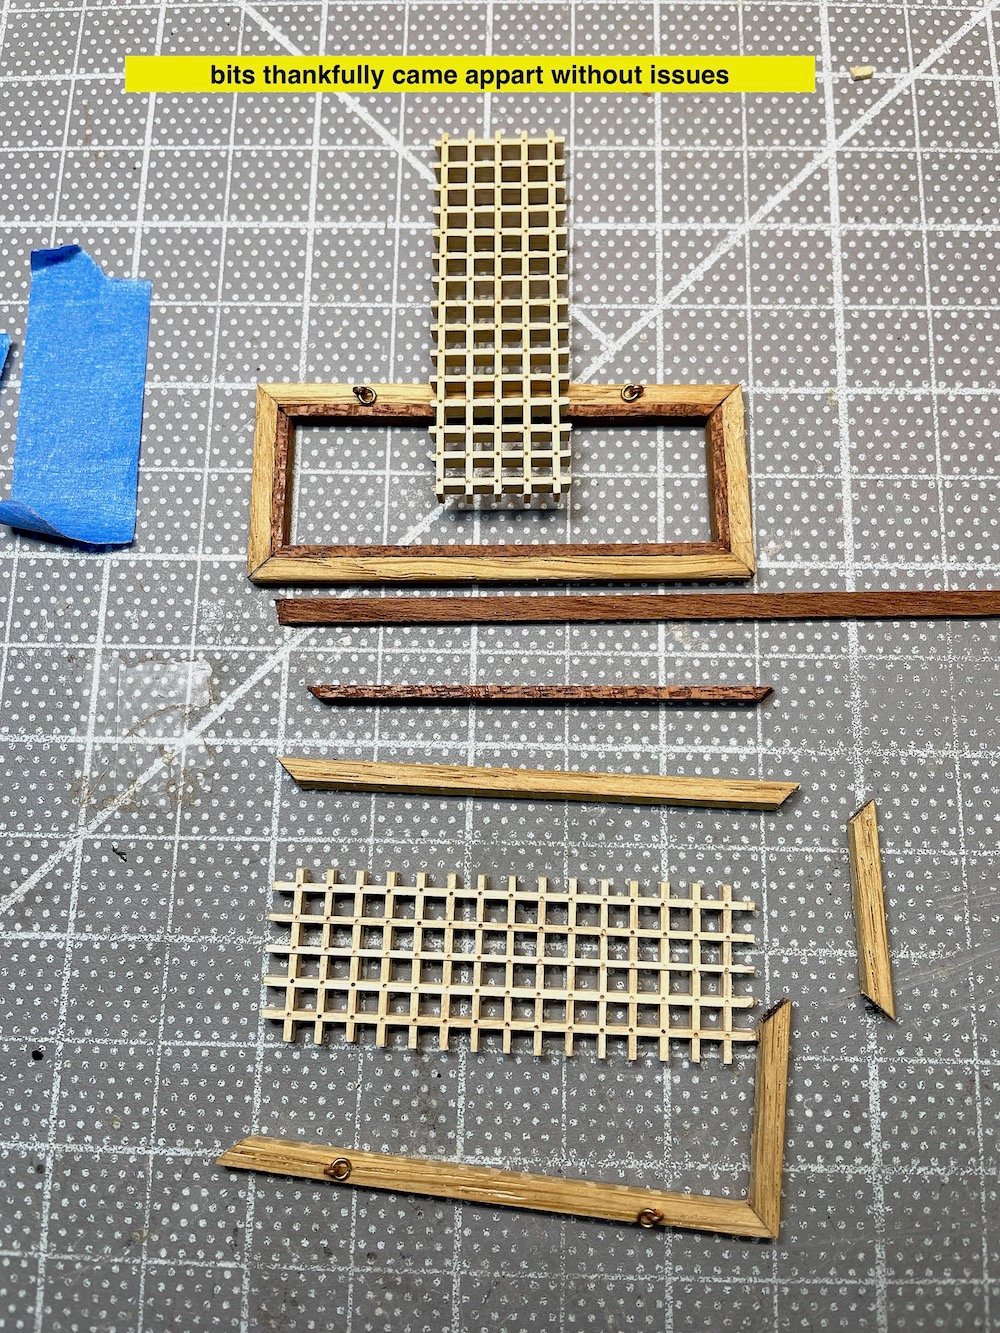
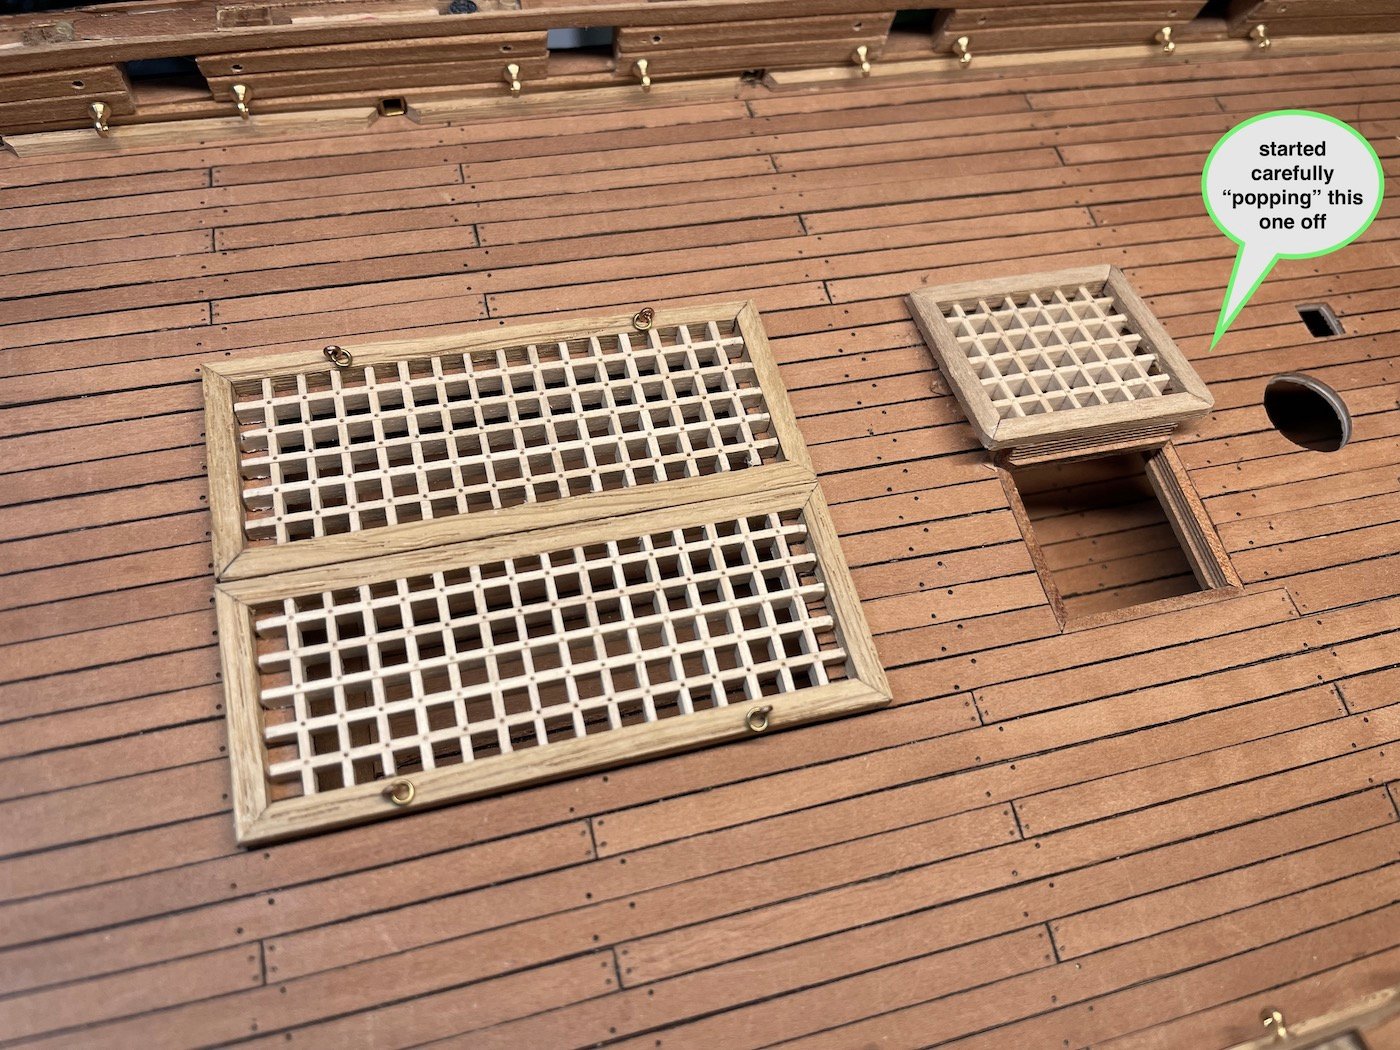
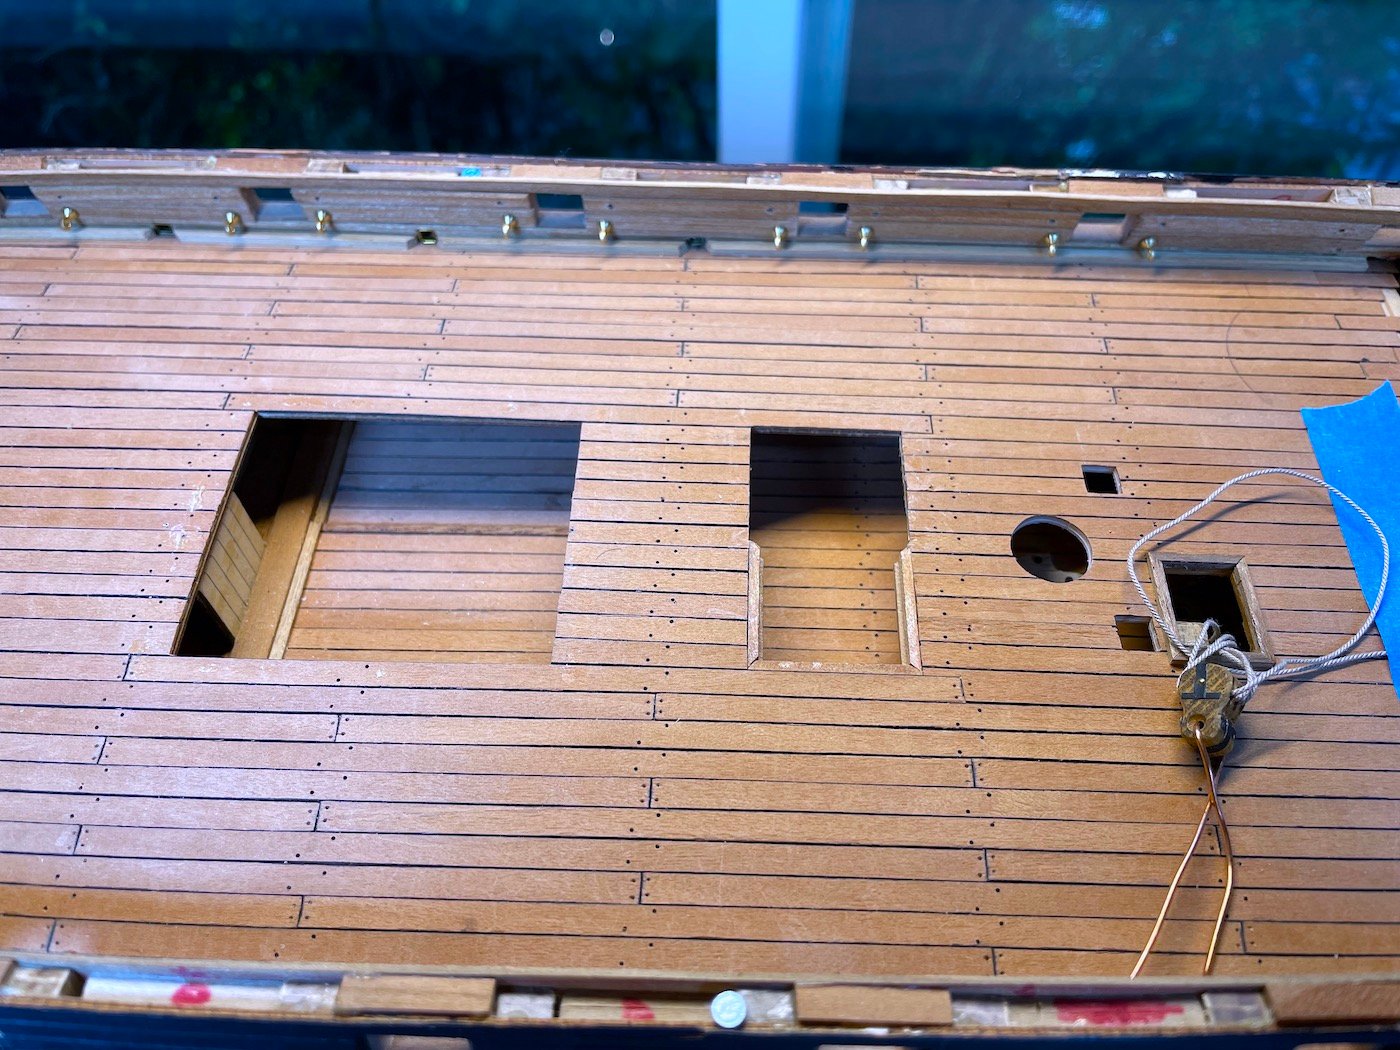
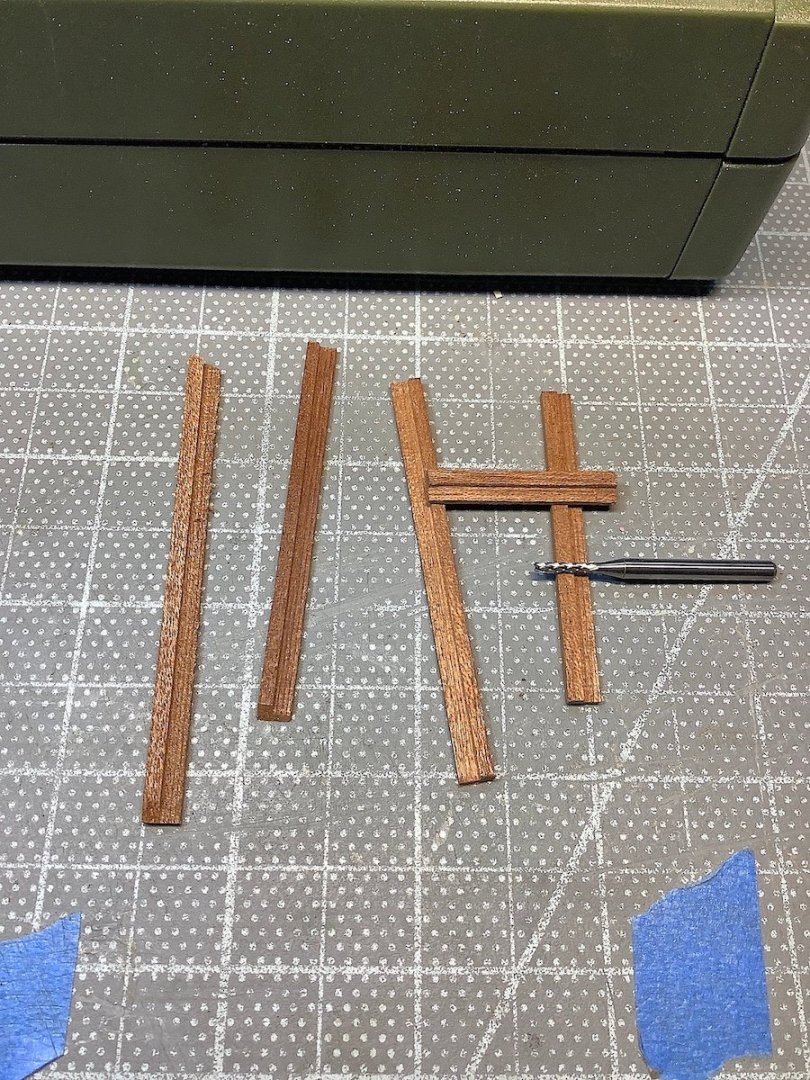
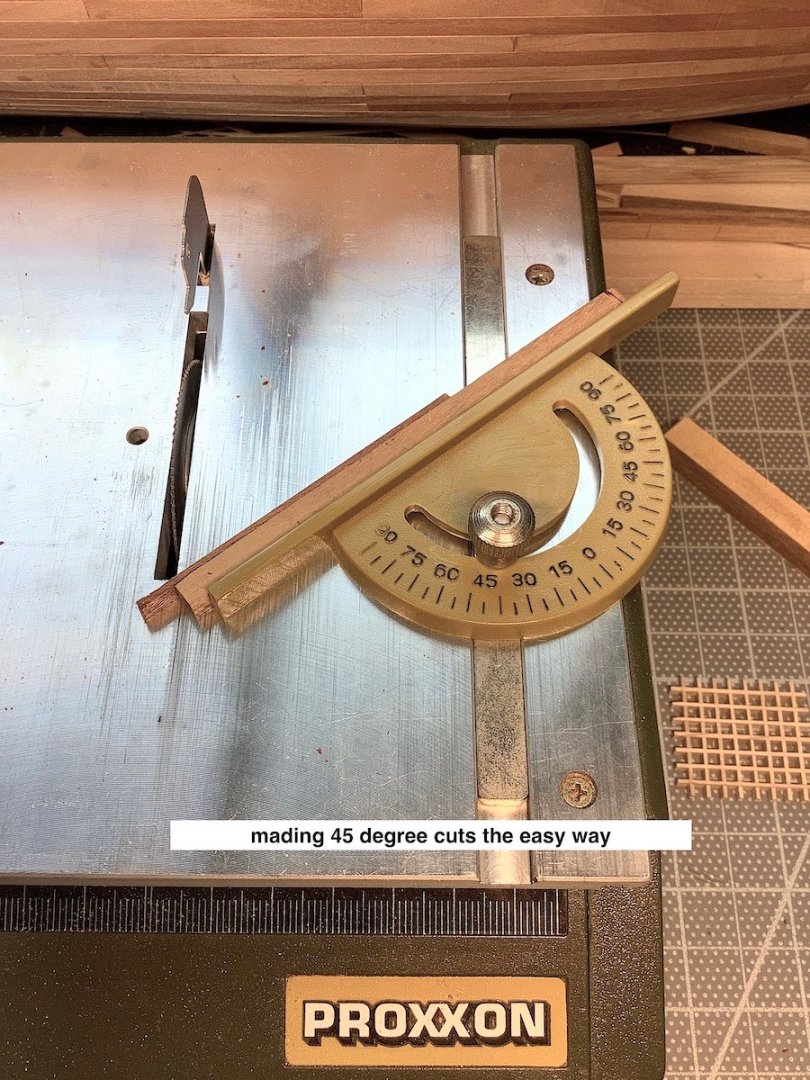
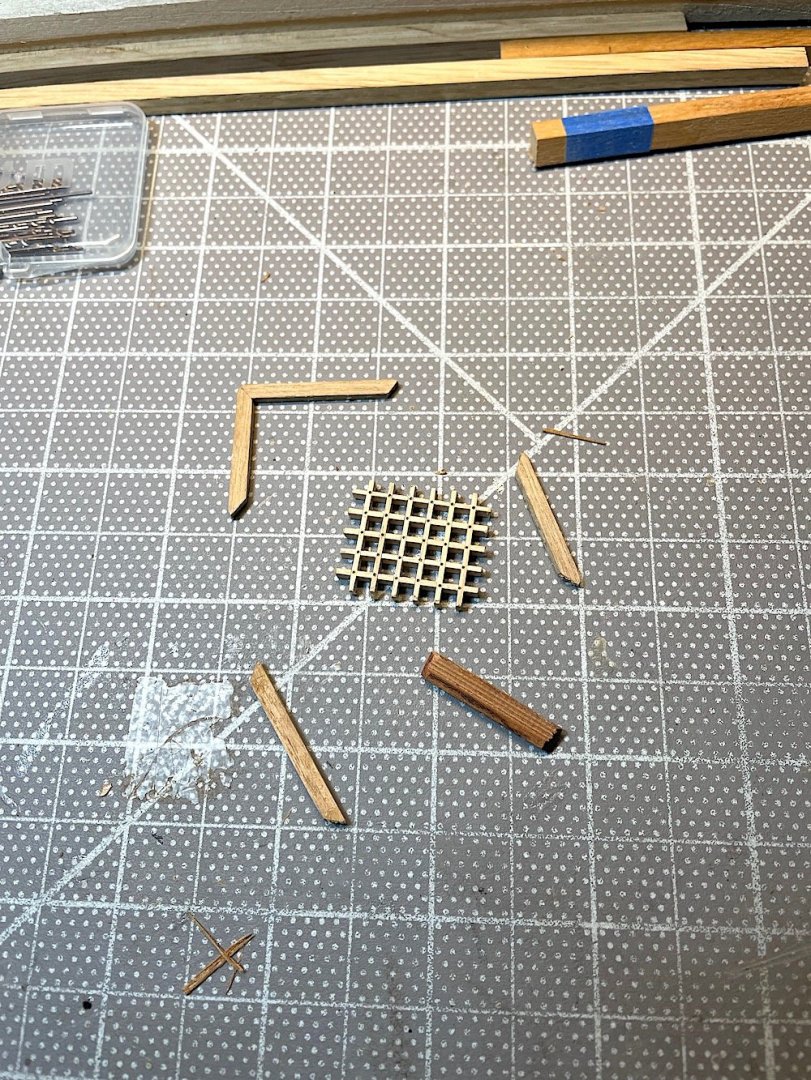
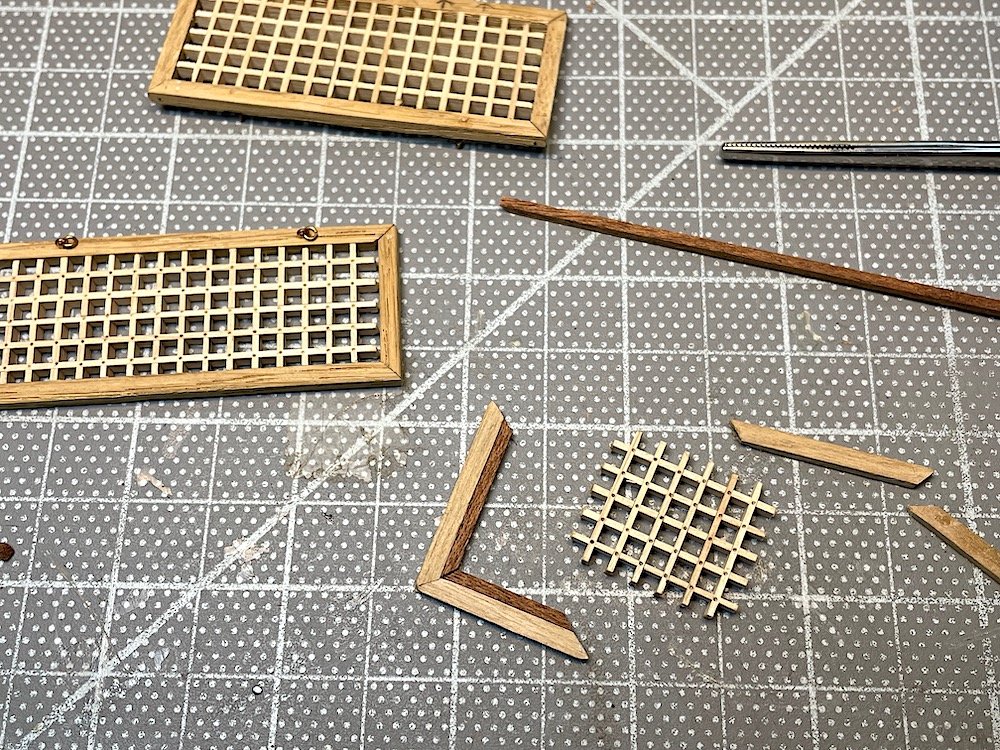
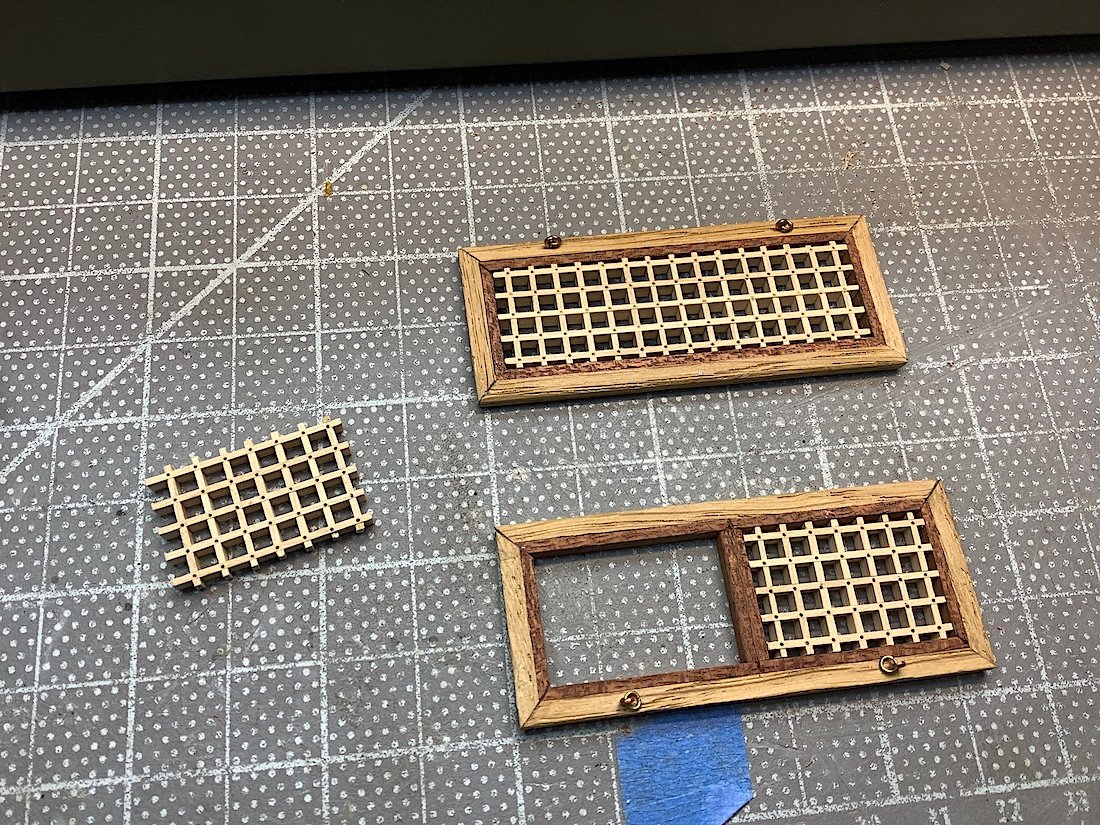
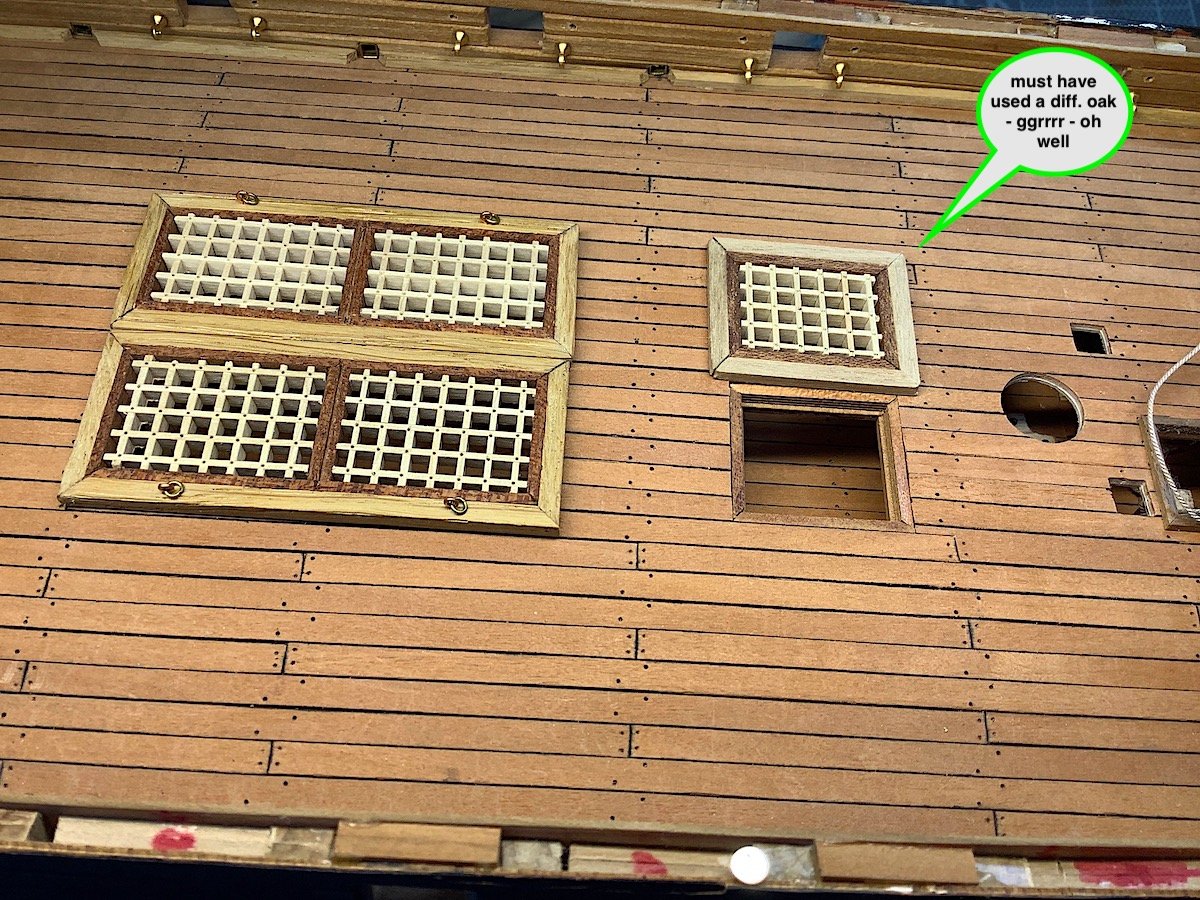
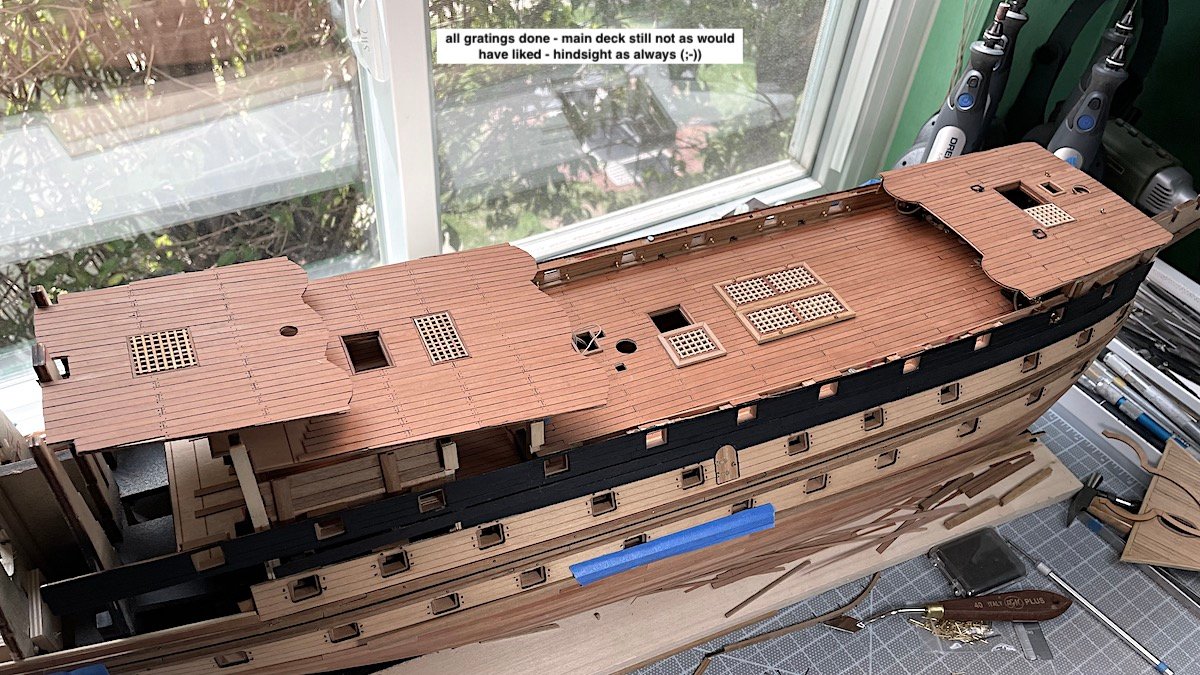
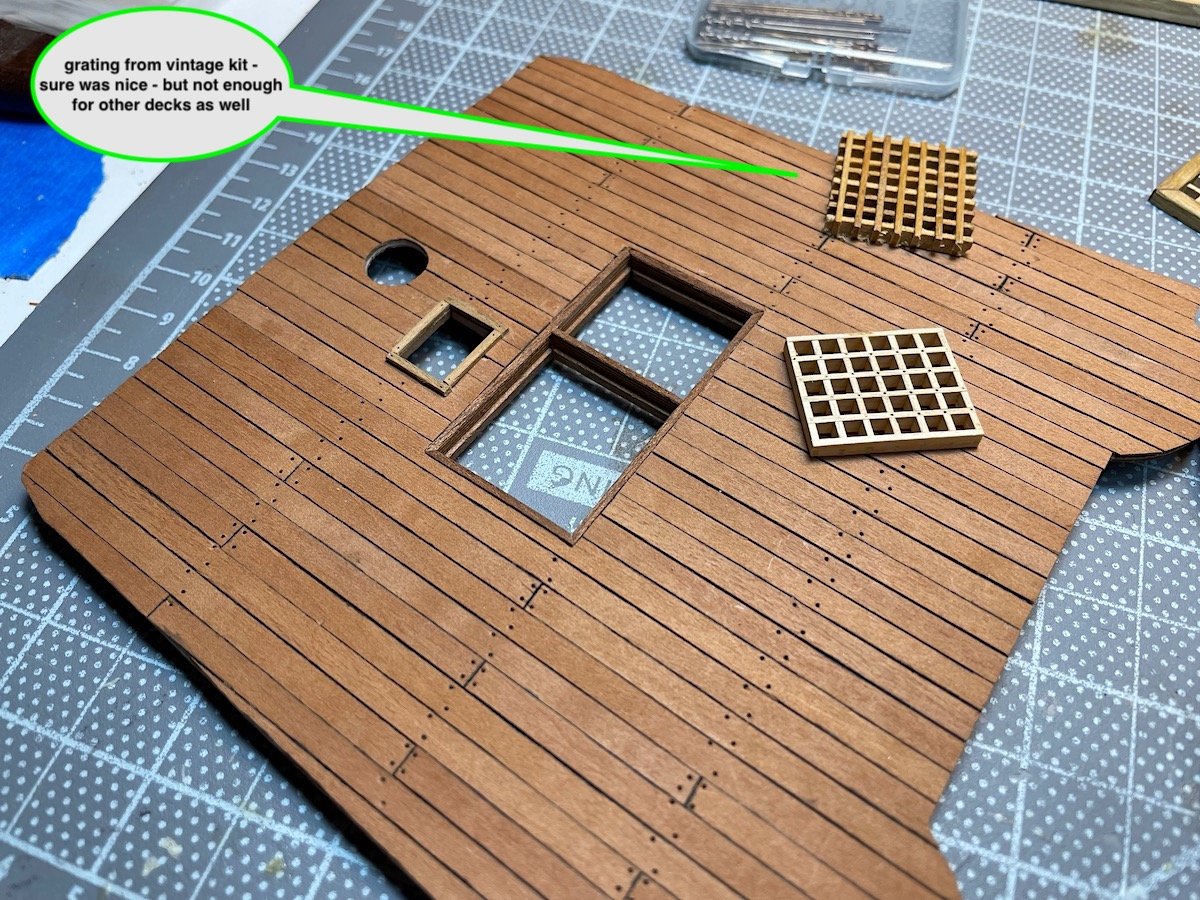
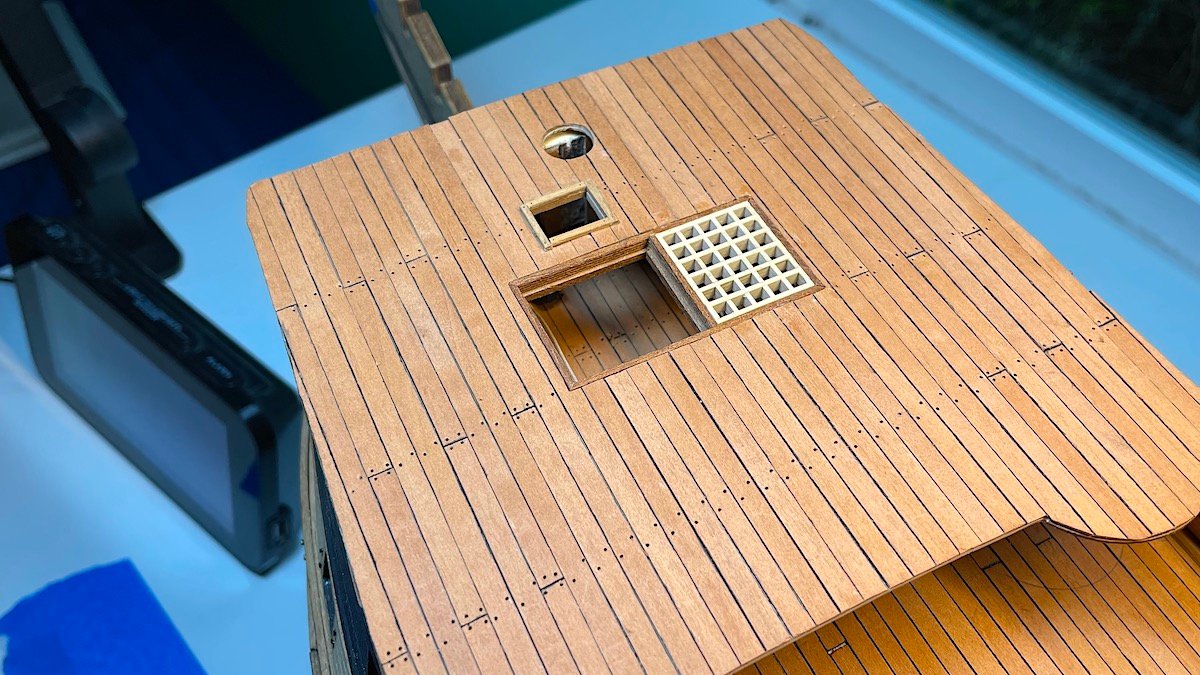
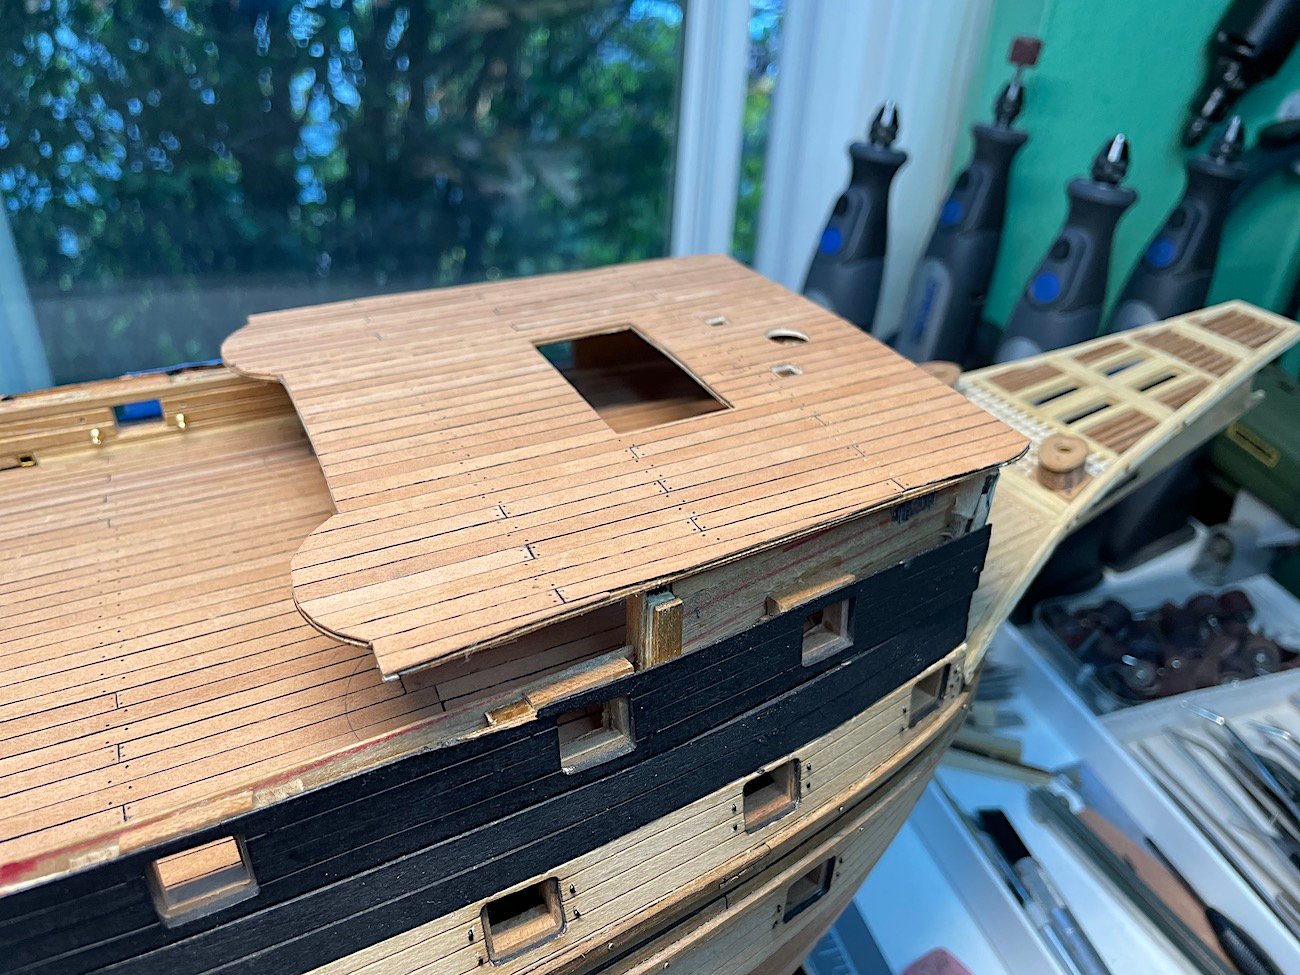
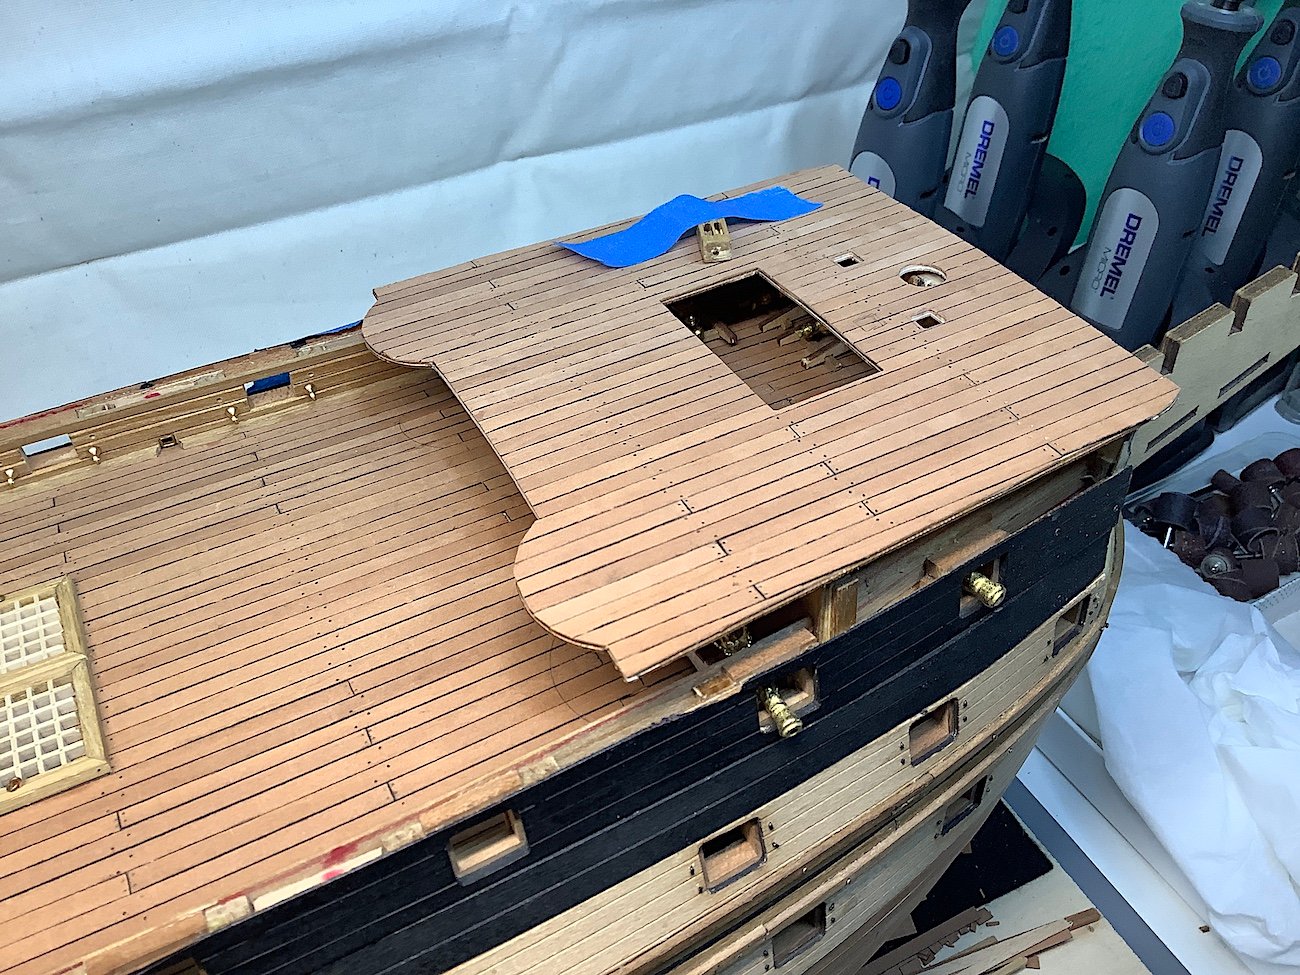
Hi all, Very minor -- almost back-to-back “fix” update As I was reworking the fix for the forecastle deck knightheads, grating and staircase framing, I came to the realization that my main deck gratings were so wrong – In retrospect I should have done the same type of framing as for the forecastle, and main deck near mainmast openings. Removed and attempted to “fix” main deck gratings - still not 100% but better.....here are some images. Thanks for looking in..... Cheers,

-
Johann, I (we most certainly all have) learned SO much from following your beyond superlative work - no! art really - as always thanks for also posting superb build logs - I have attempted to emulate - well sort-of attempted to copy some of your work details in part of my current build - (many images from your work are in my files - yet to be attempted) That said, It's also been a wonderful way of trying to improve my work in this hobby - A big thank you And the pleasure of admiring your work is such a pleasure to the eyes and senses. Regards,
-
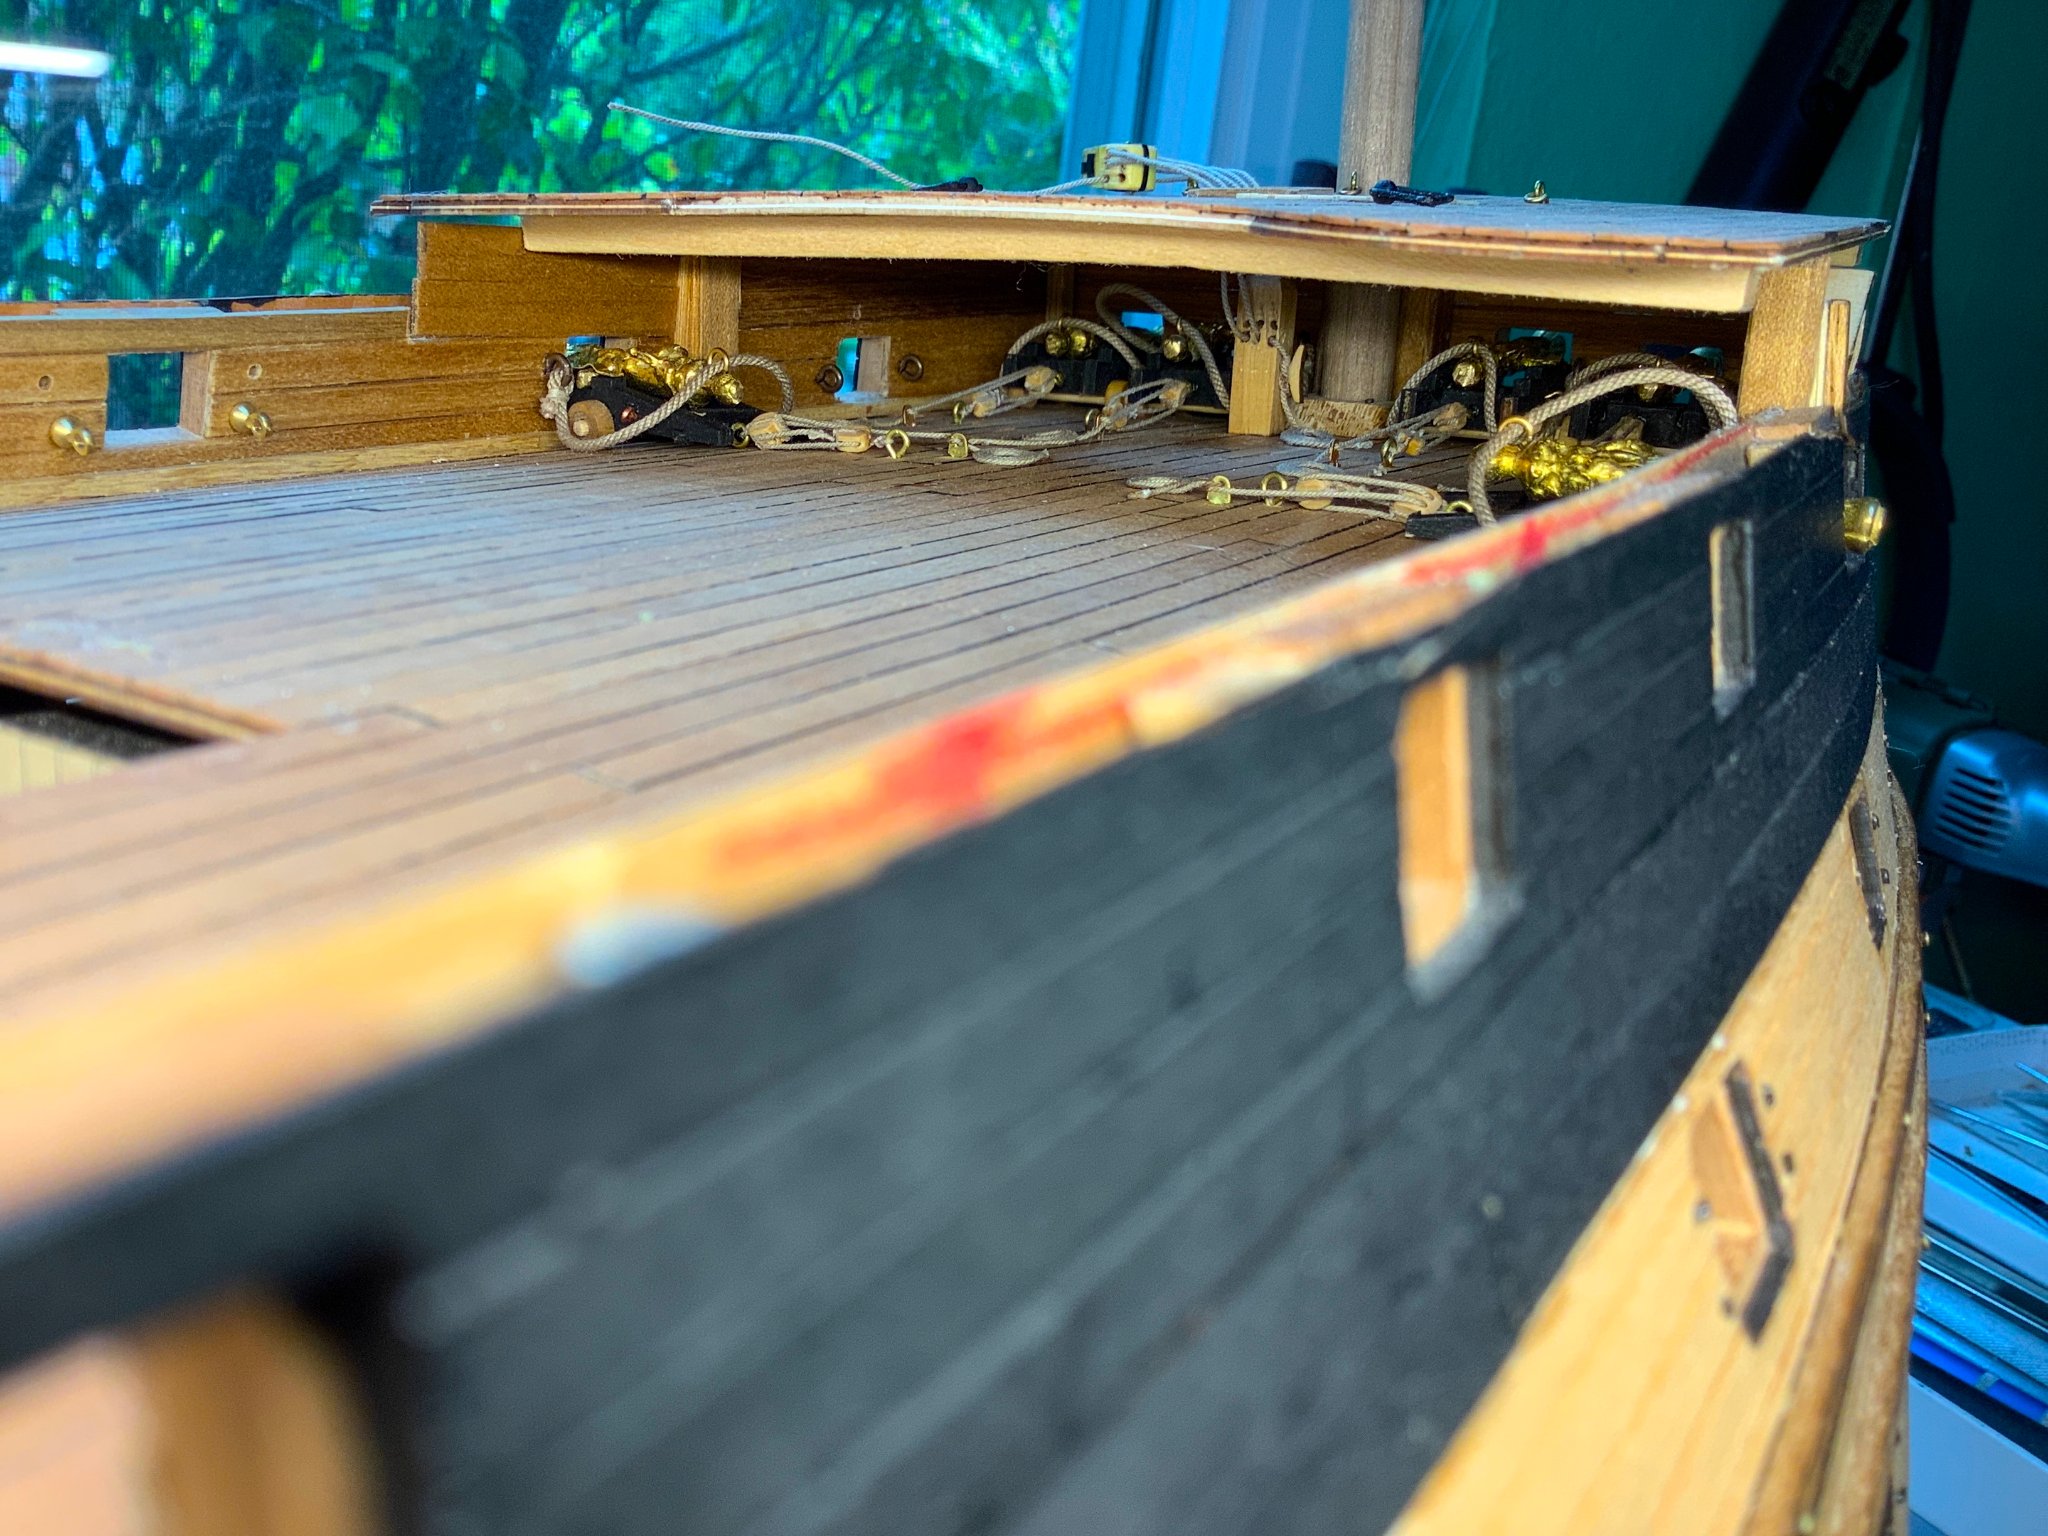
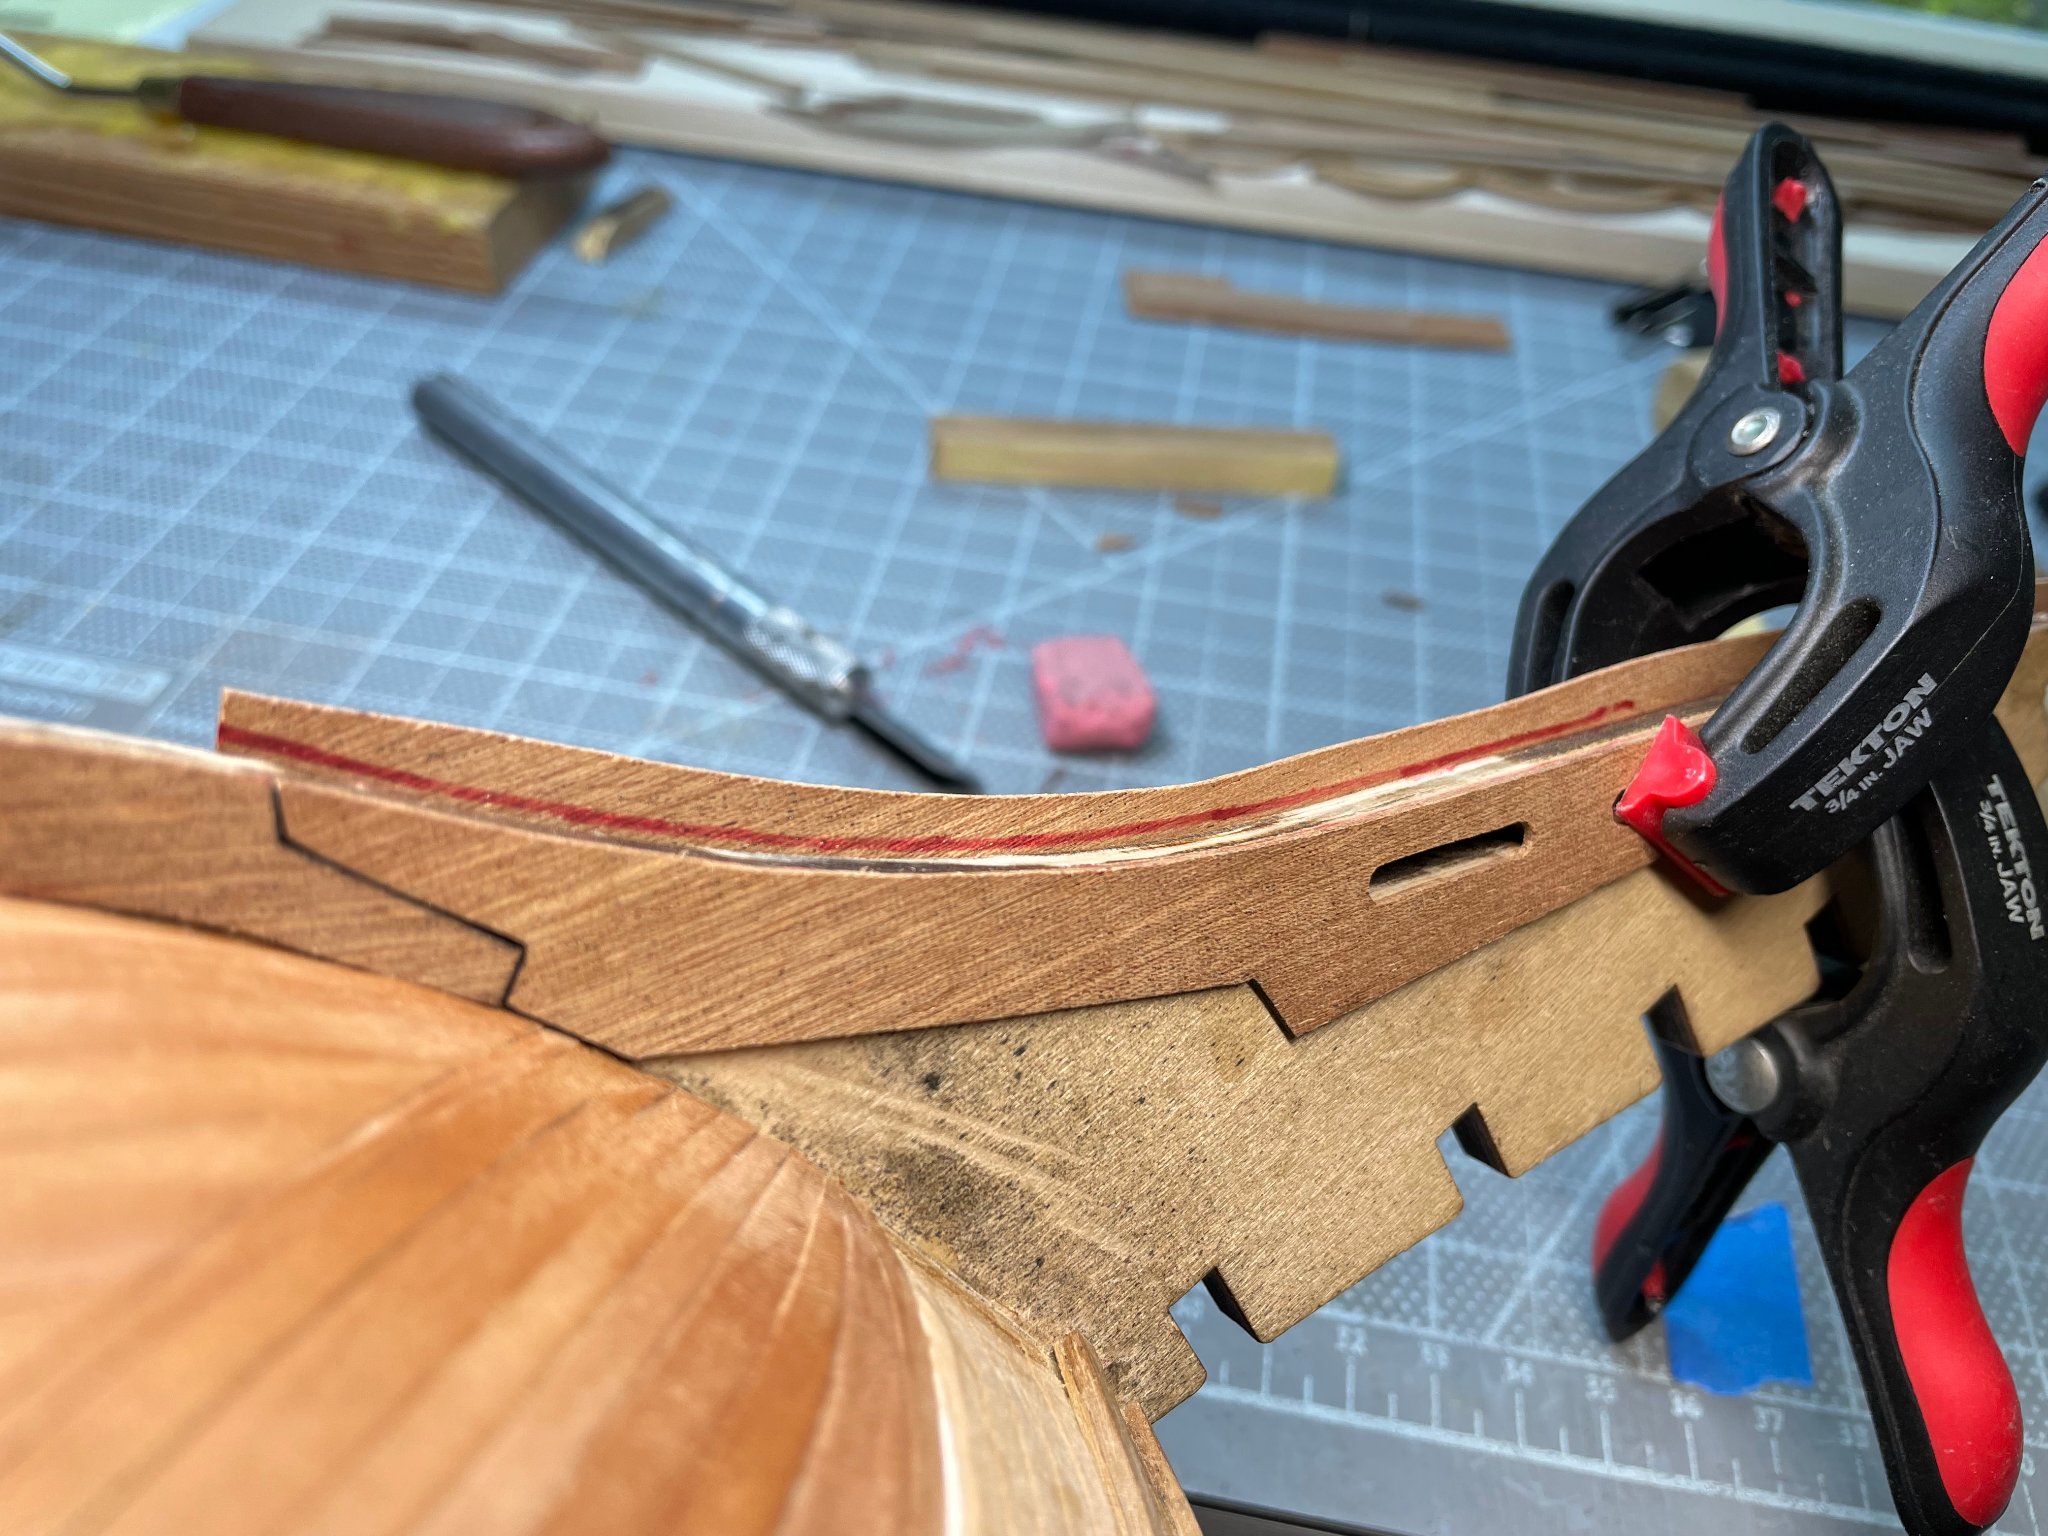
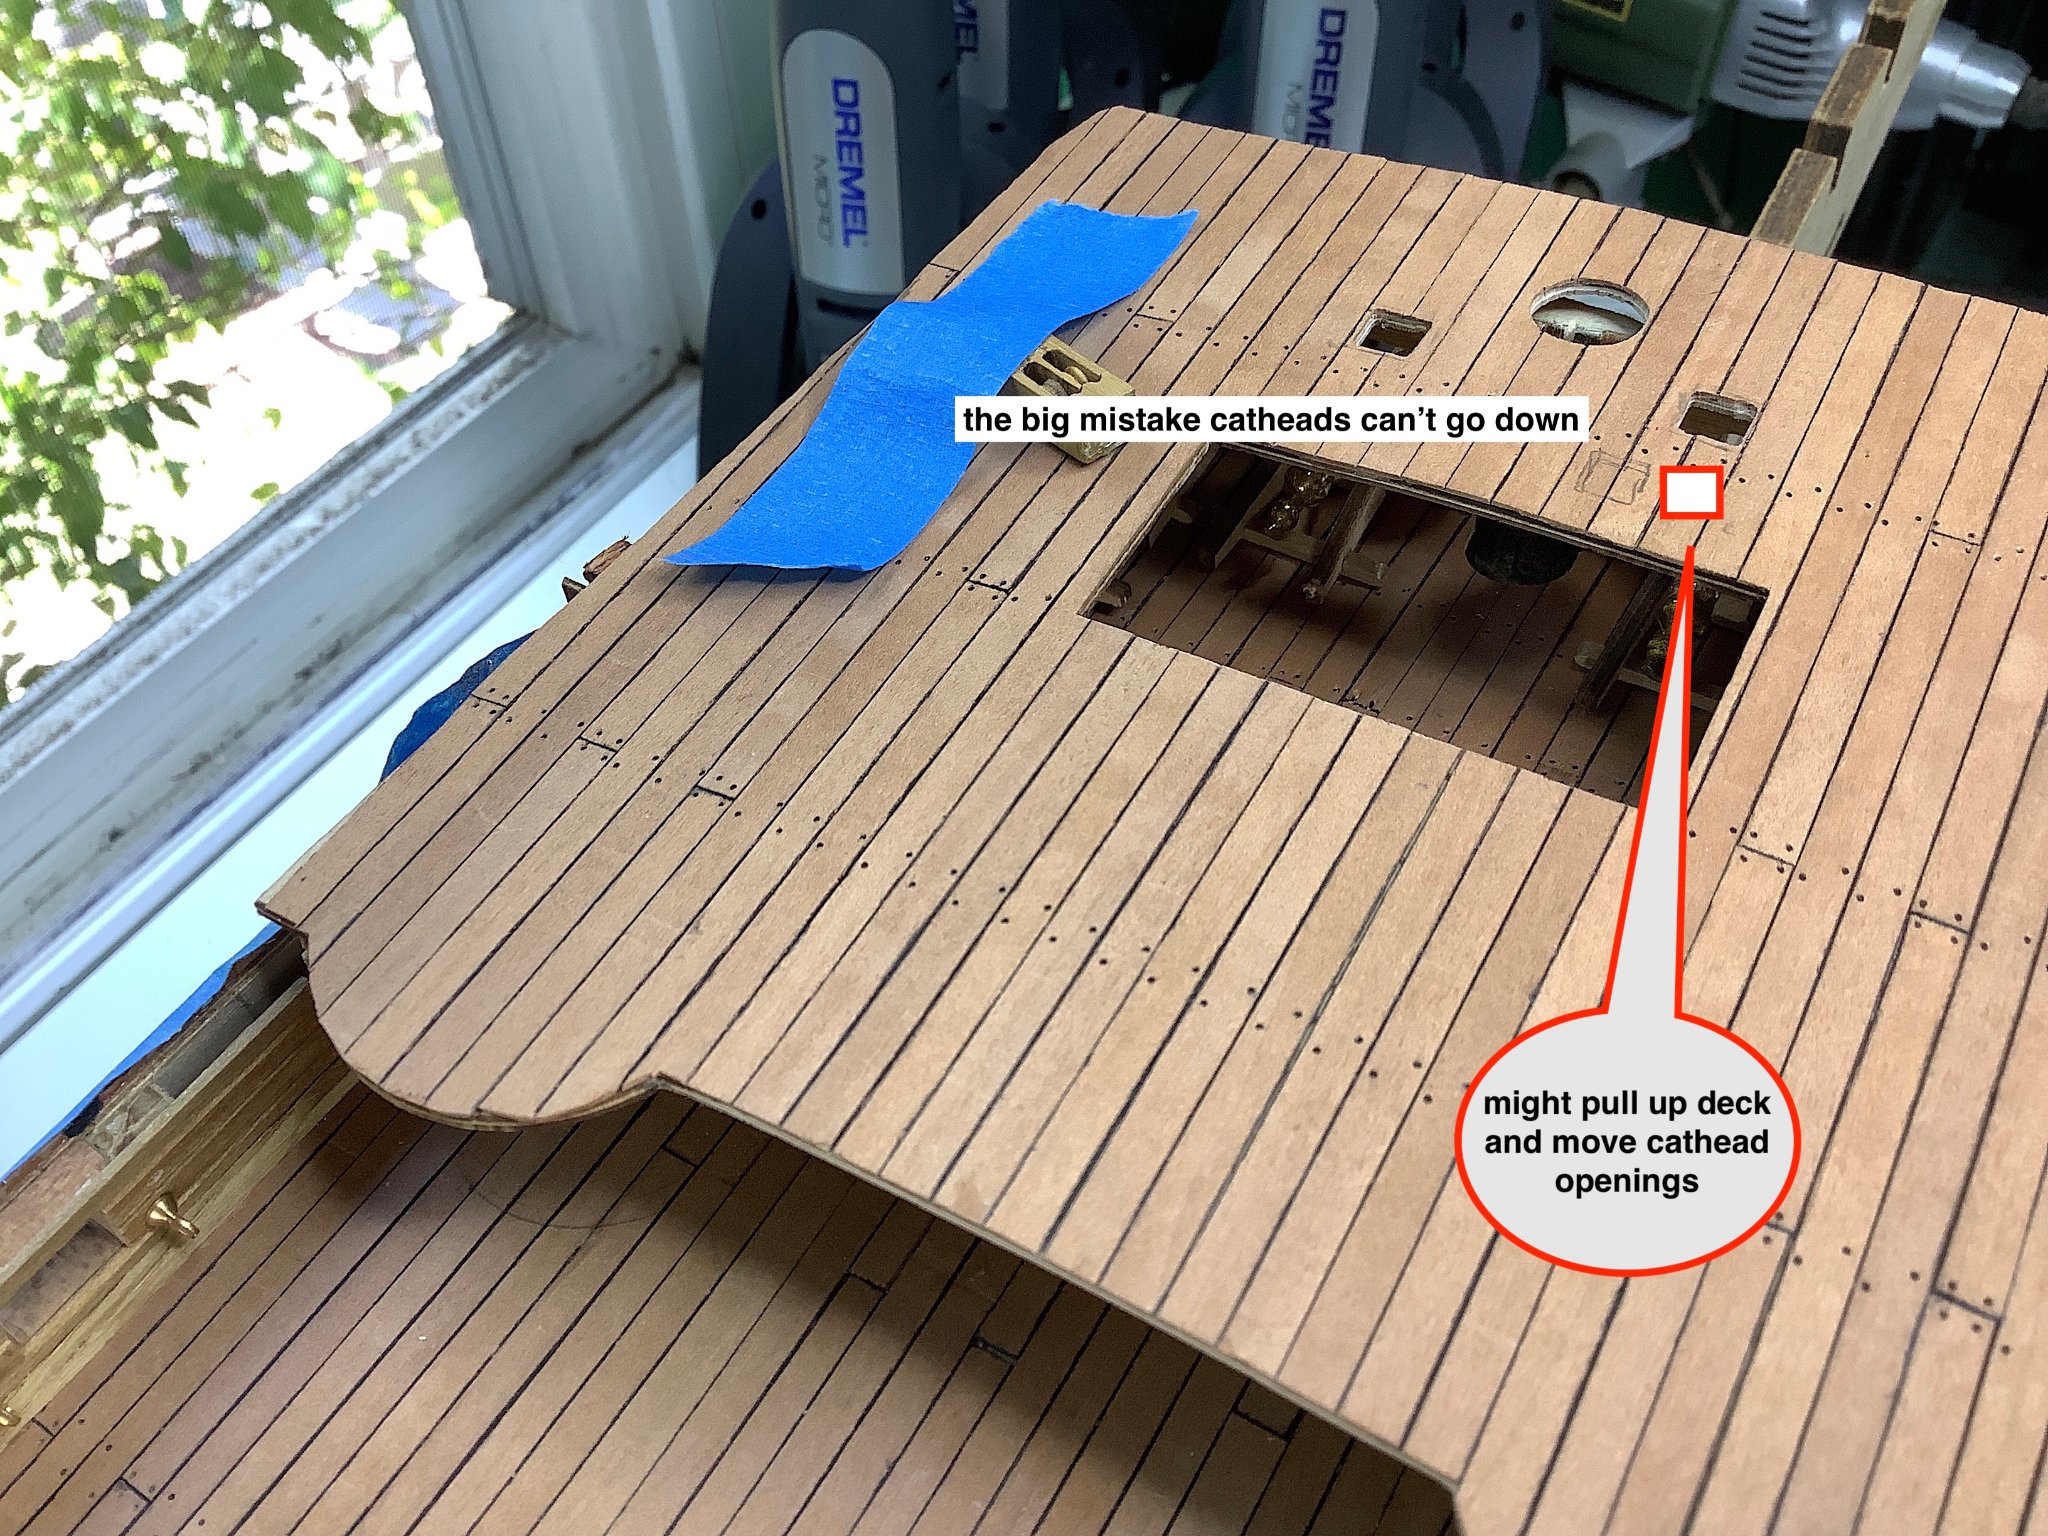
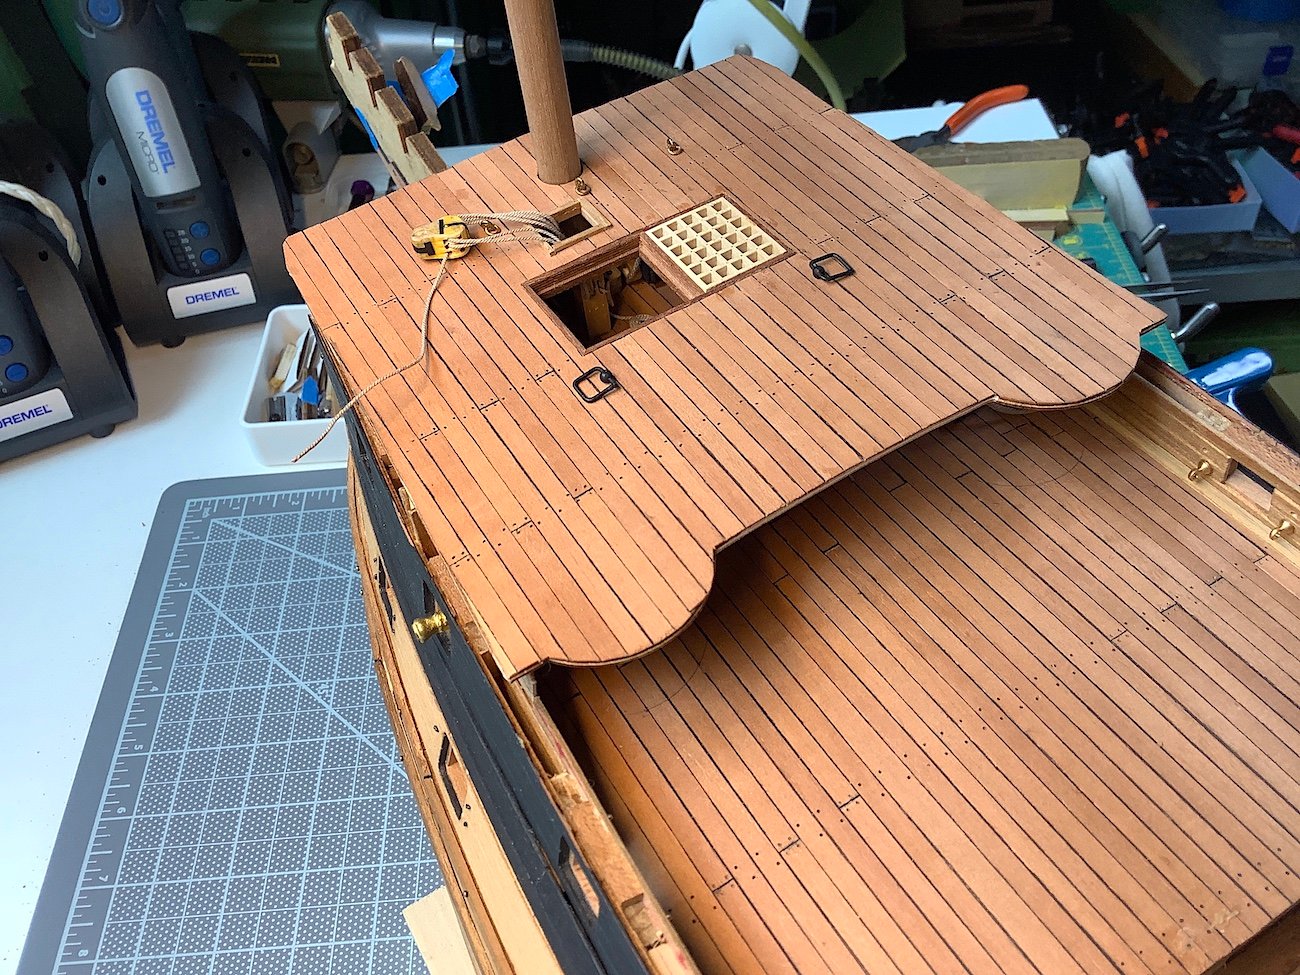
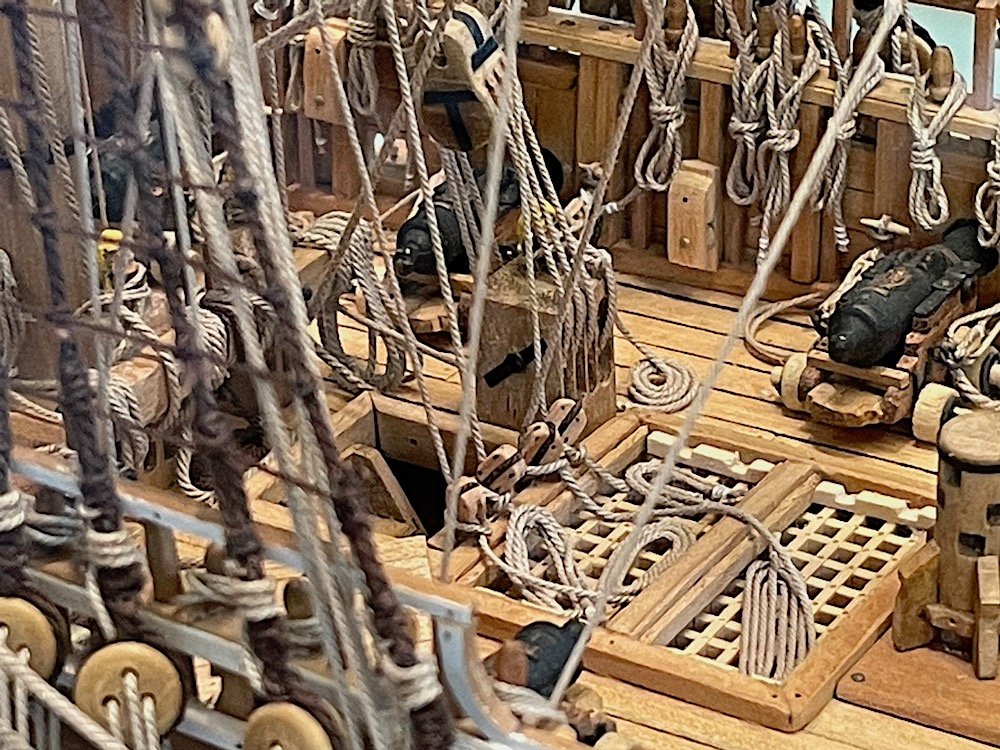
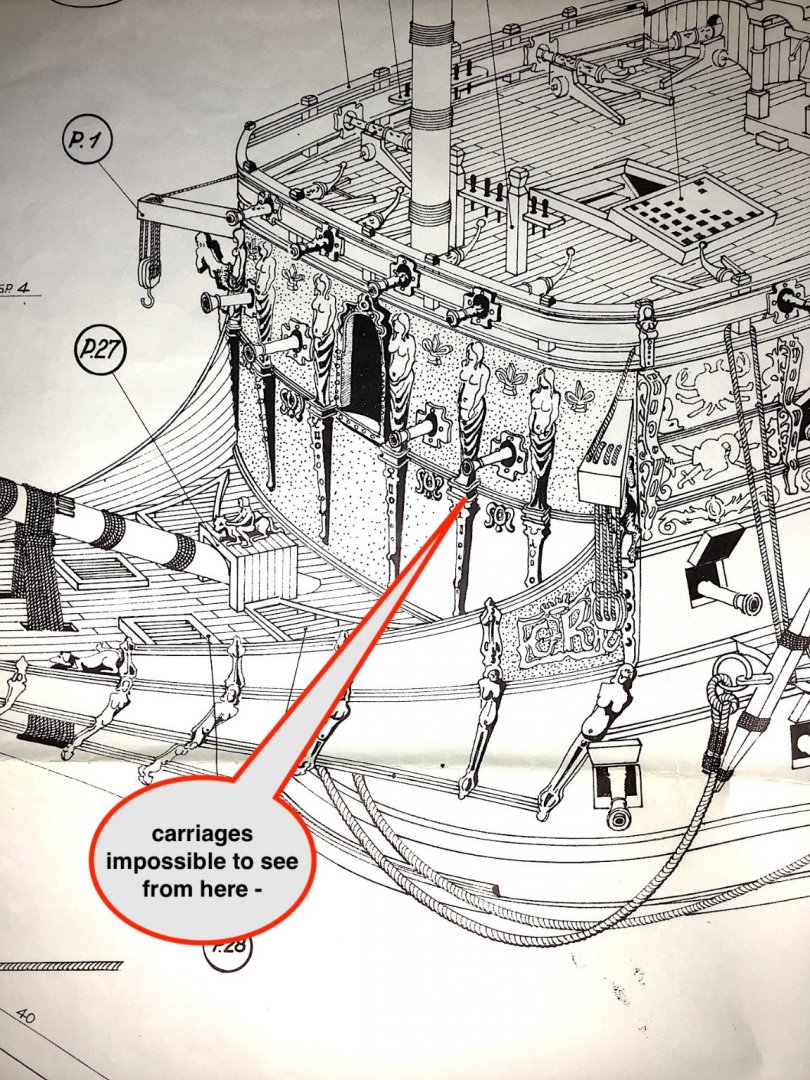
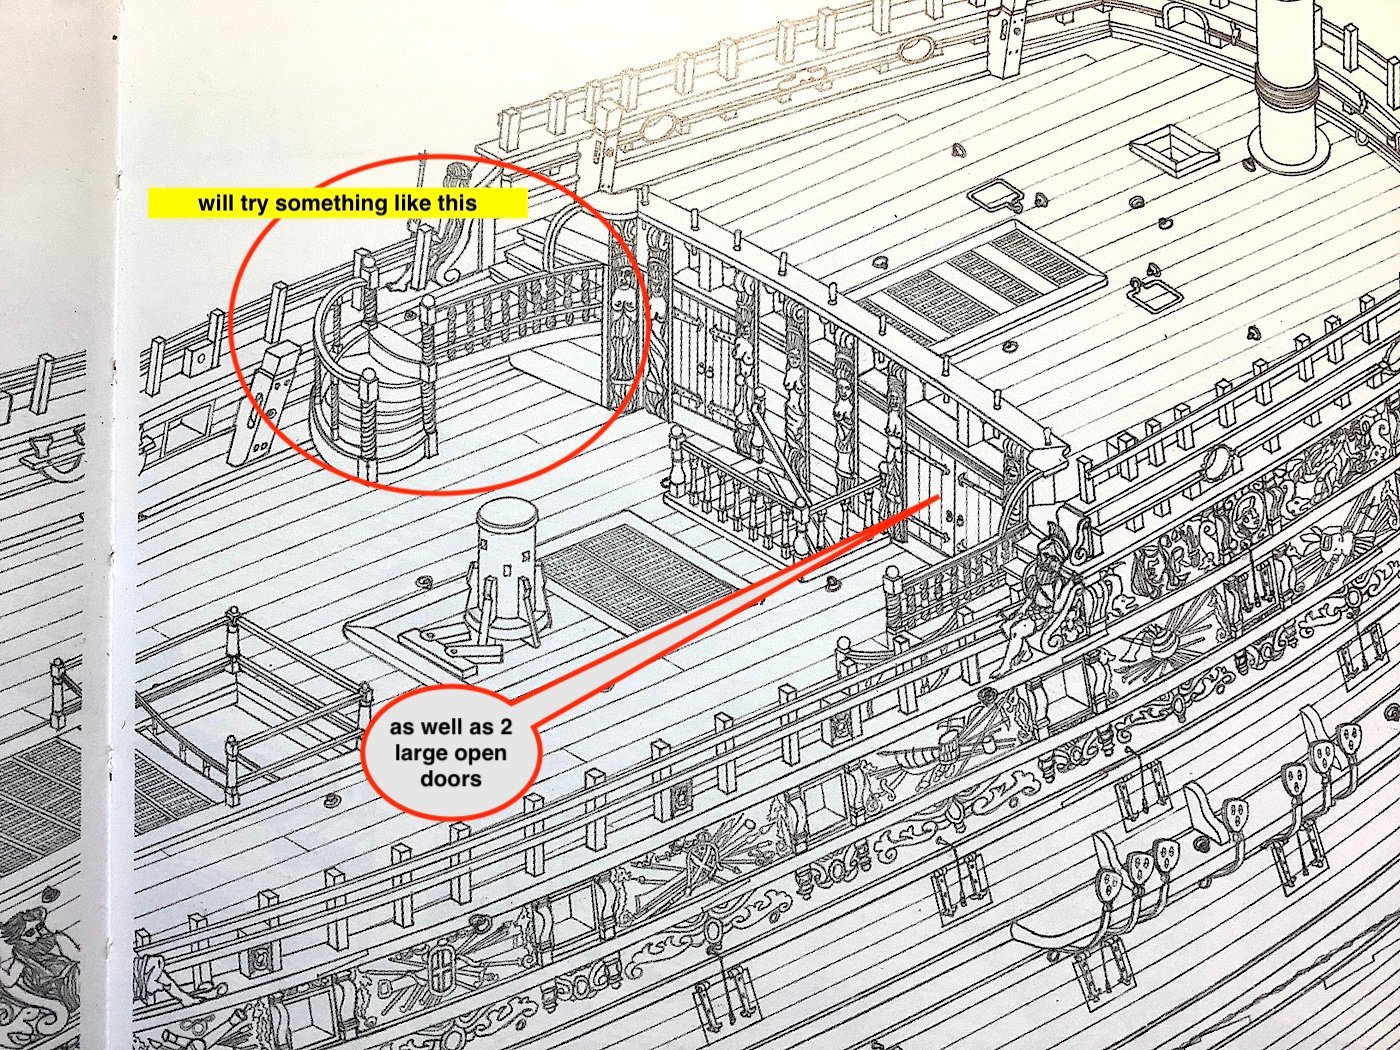
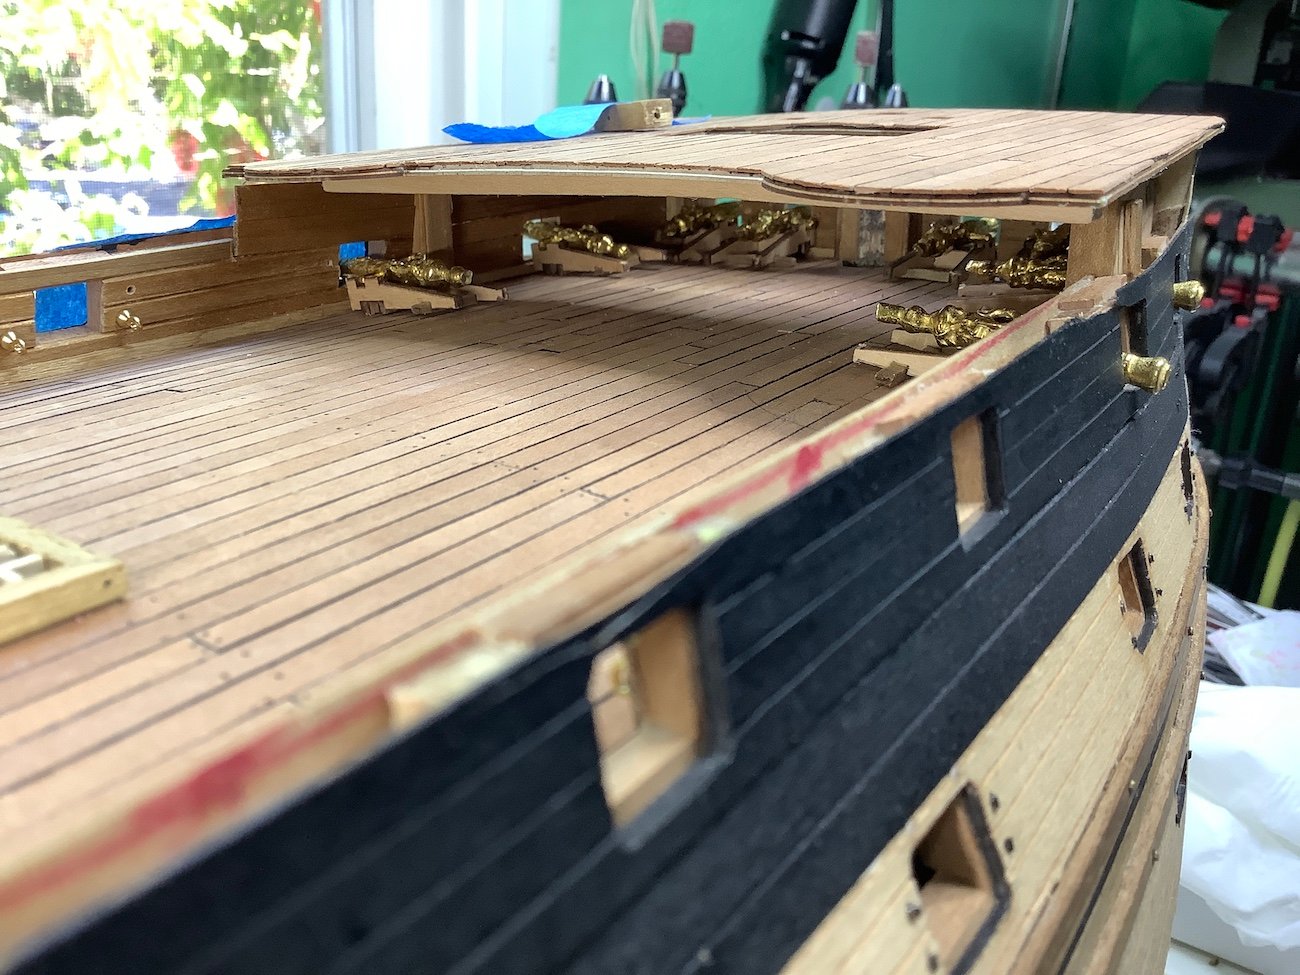
Hello, Thanks so much for your likes (;-)) After some very good advice from E.J. – made some changes. Left off, his suggested, two broadside cannons. Then made the needed changes to the forecastle deck removing cathead holes just aft of mast. Added a cut for the lower halliard. Those catheads as I noted in an earlier post would have had no space to anchor to main deck given the inner two forward carriages. Instead decided upon halliard block; same as for main mast. And finished deck inner framing for grating and open area for stairs leading down. Kirill4 – had offered that very good advice along with some contemporary images of SotS’s foremast fitted that way (see post #69 – if interested) --thanks Kirill! Finished up installing and adding partial carriage riggings as well. All of this work will mostly be totally hidden from view, but that’s ok. I used the guns from the current kit, not from the vintage edition – only adding recoil rings Next up; upper hull sides and forward bulkhead timbers to mostly complete this area. It will be tempting to also add the many bronze decorative bits as well….and keel/stem work need completing as well,,,,,,, Regards,


-
Kirill, Just found your log for this project WOW !!!!- -- will go back and visit - All the details are so perfect, sails, flags, fittings.............every part is so well thought out and executed. Beautiful indeed.
- 228 replies
-
- 3
-
-
- spanish galleon
- lee
- (and 1 more)
-
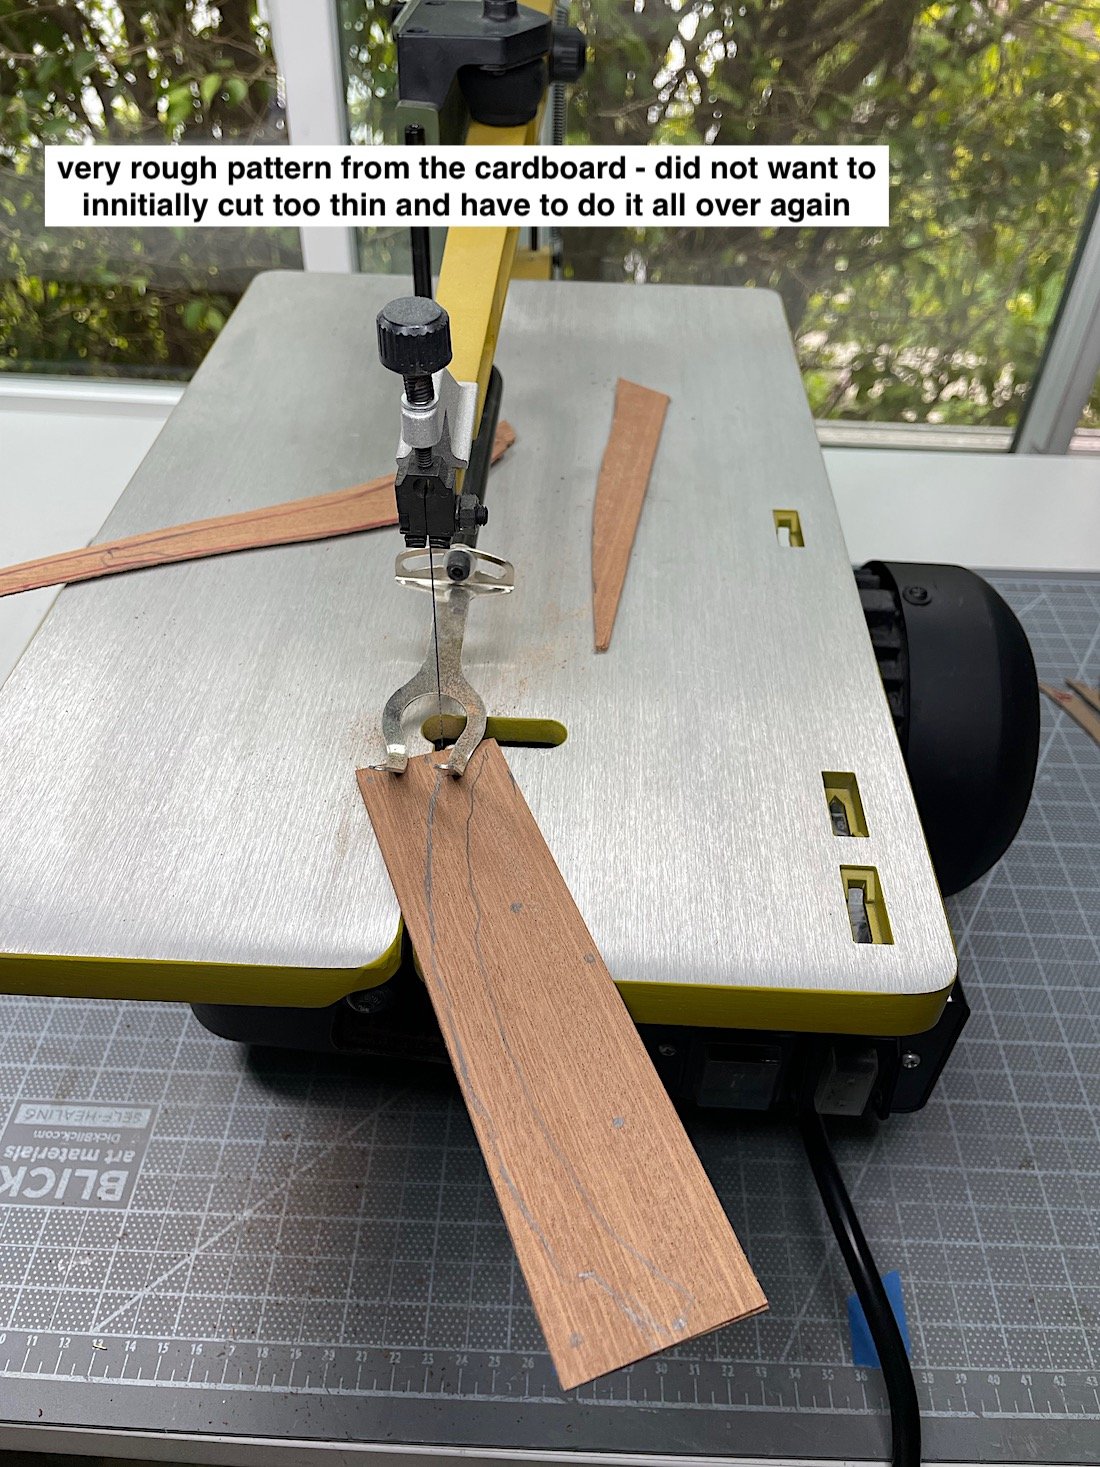
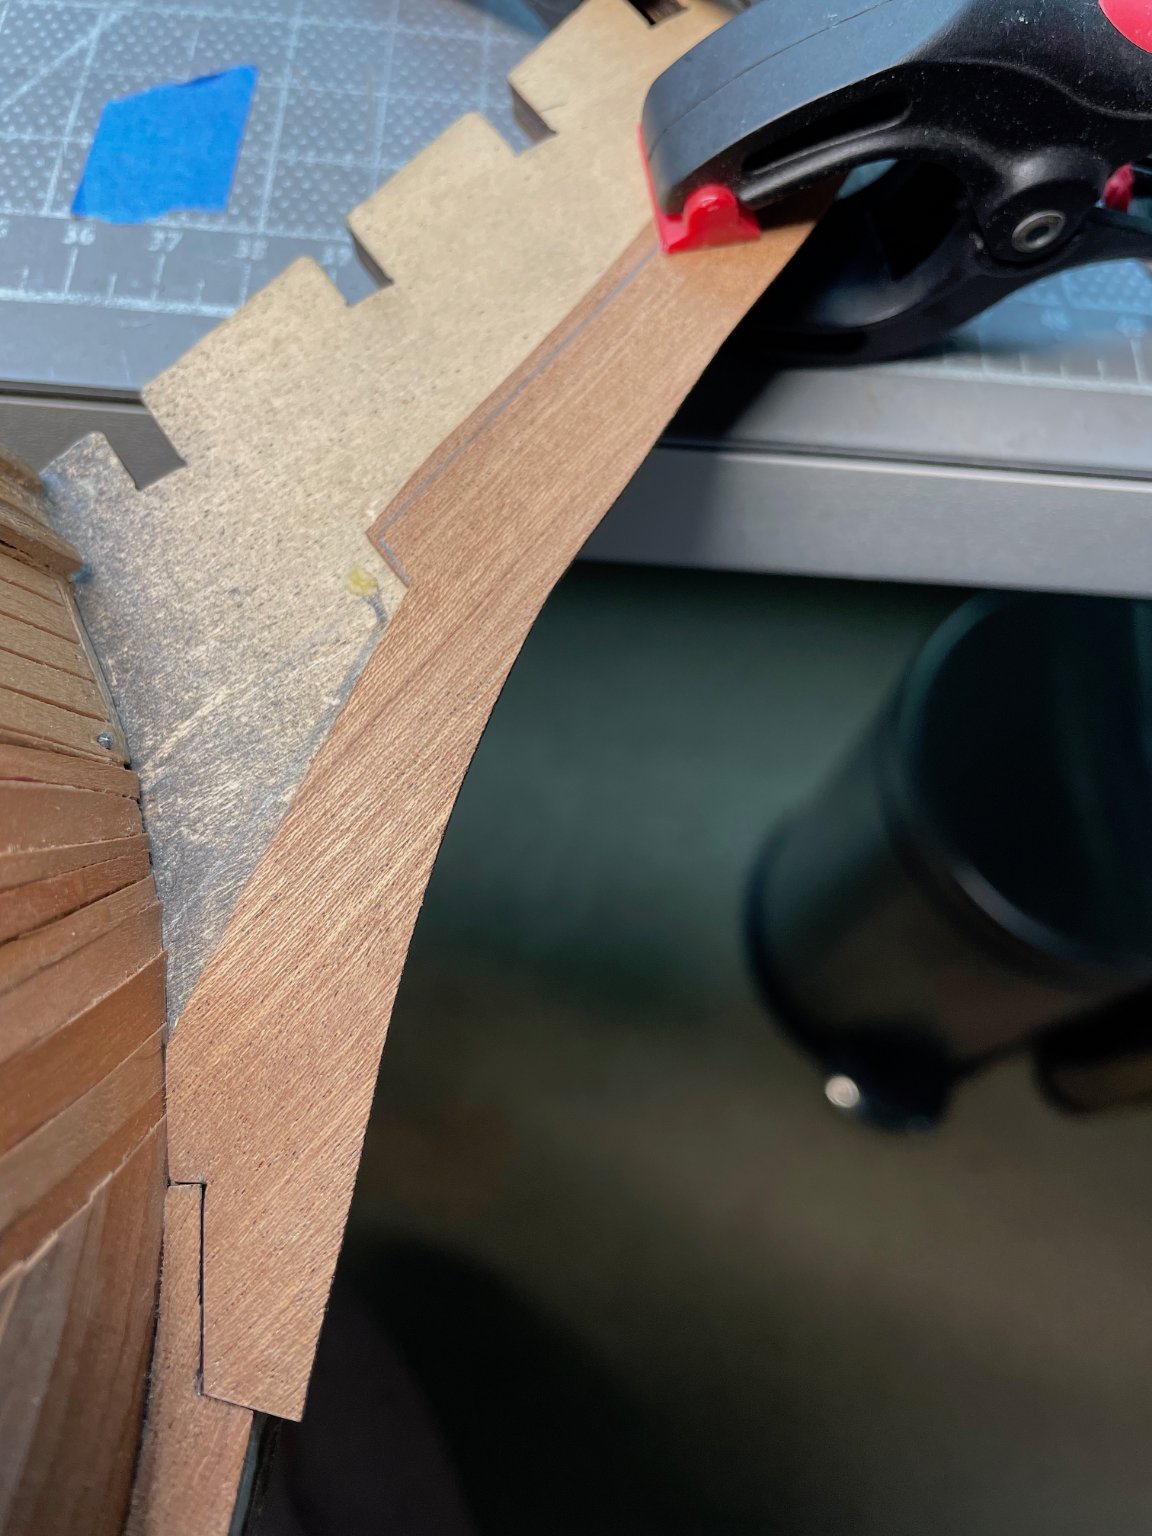
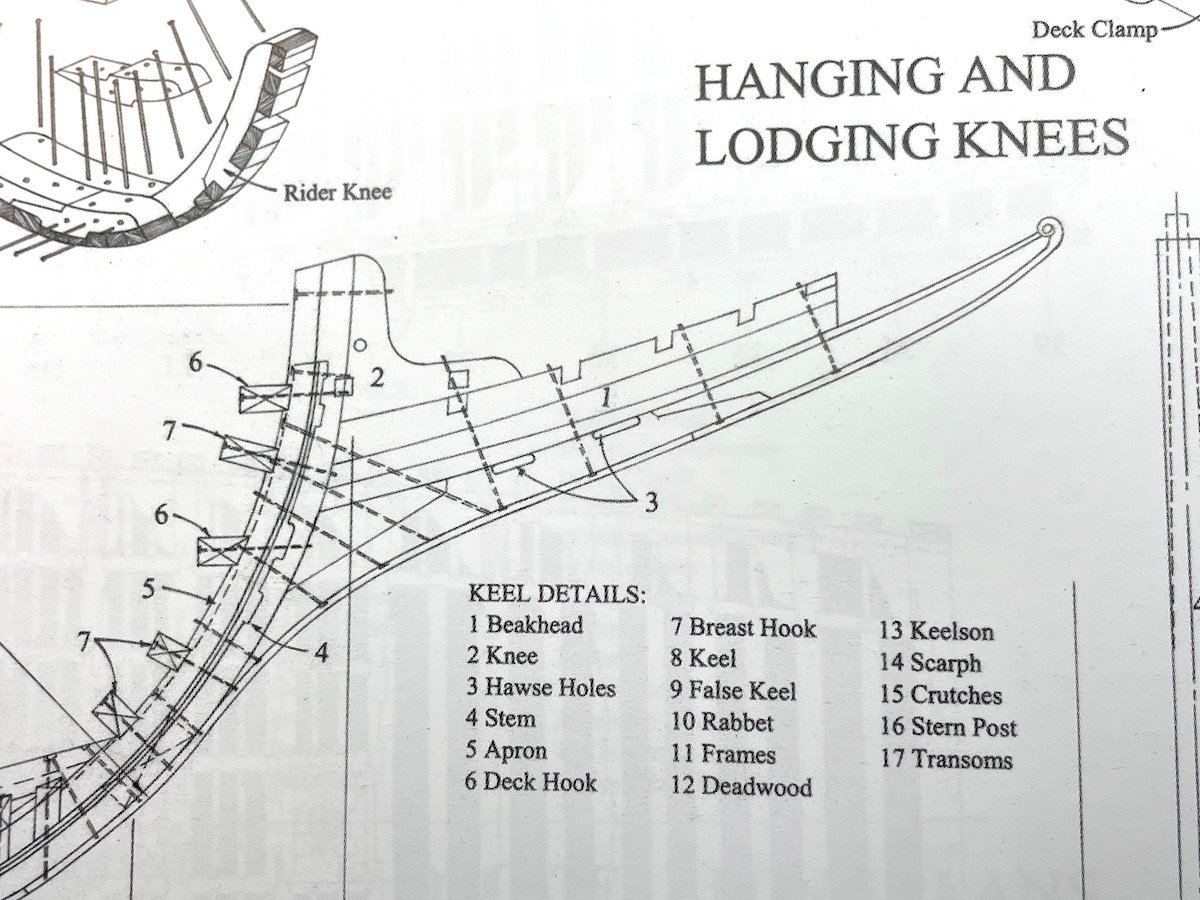
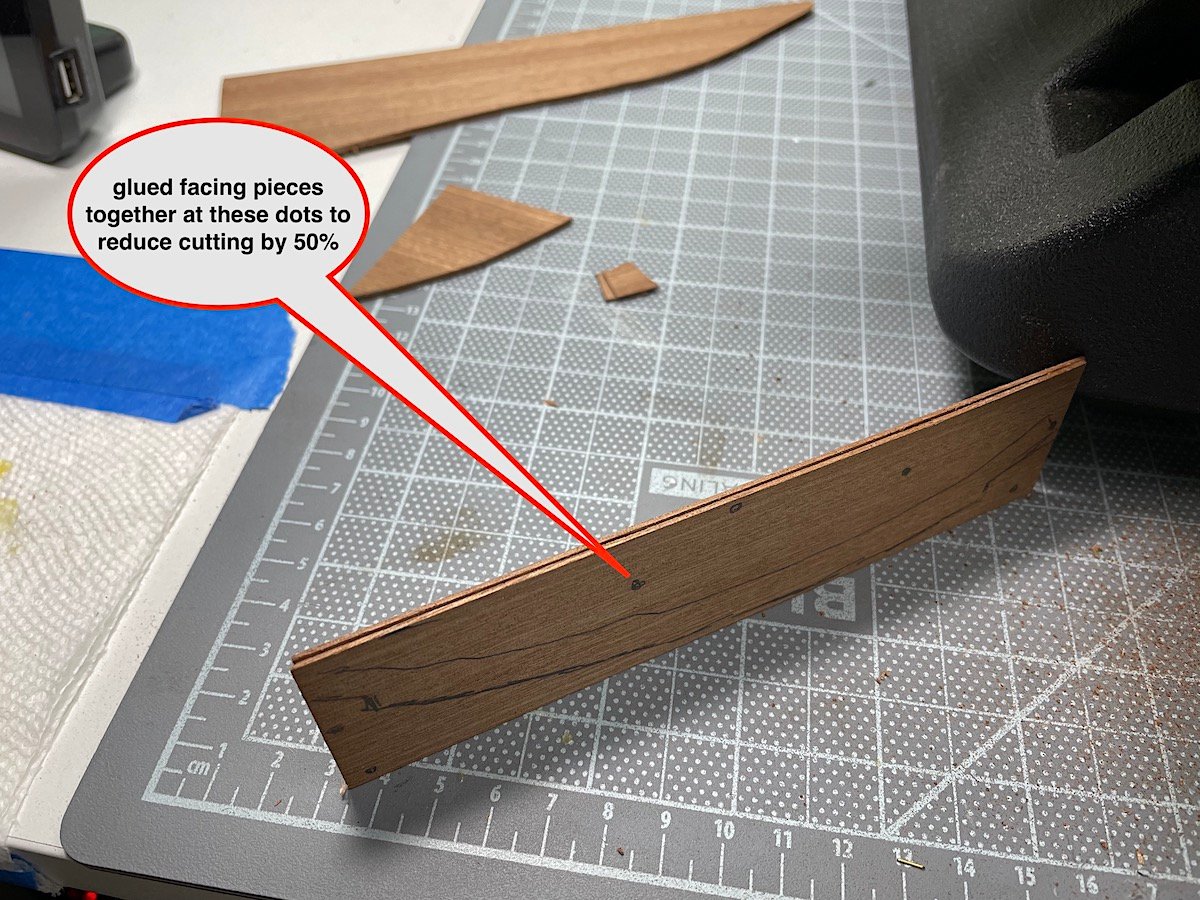
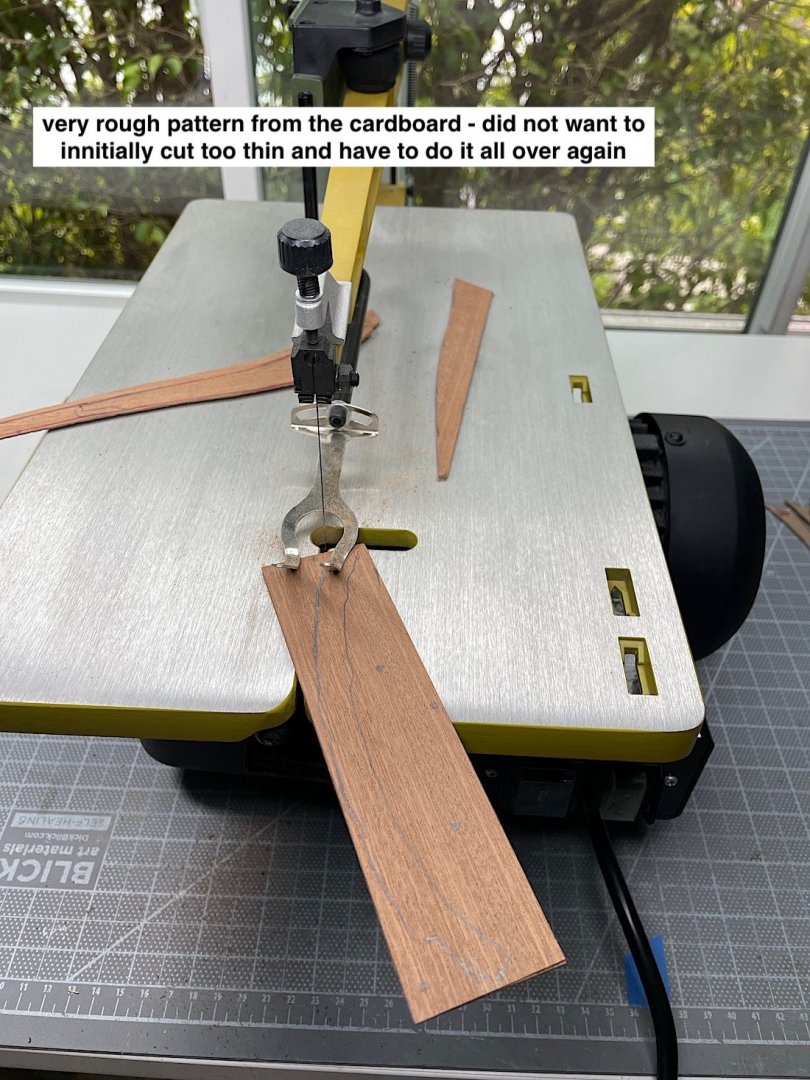
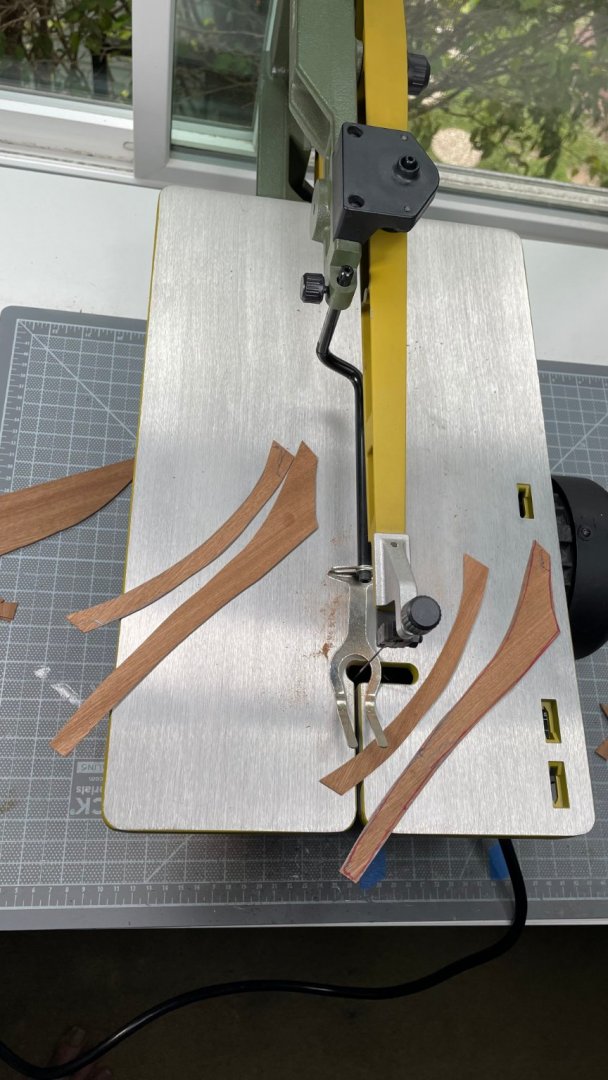
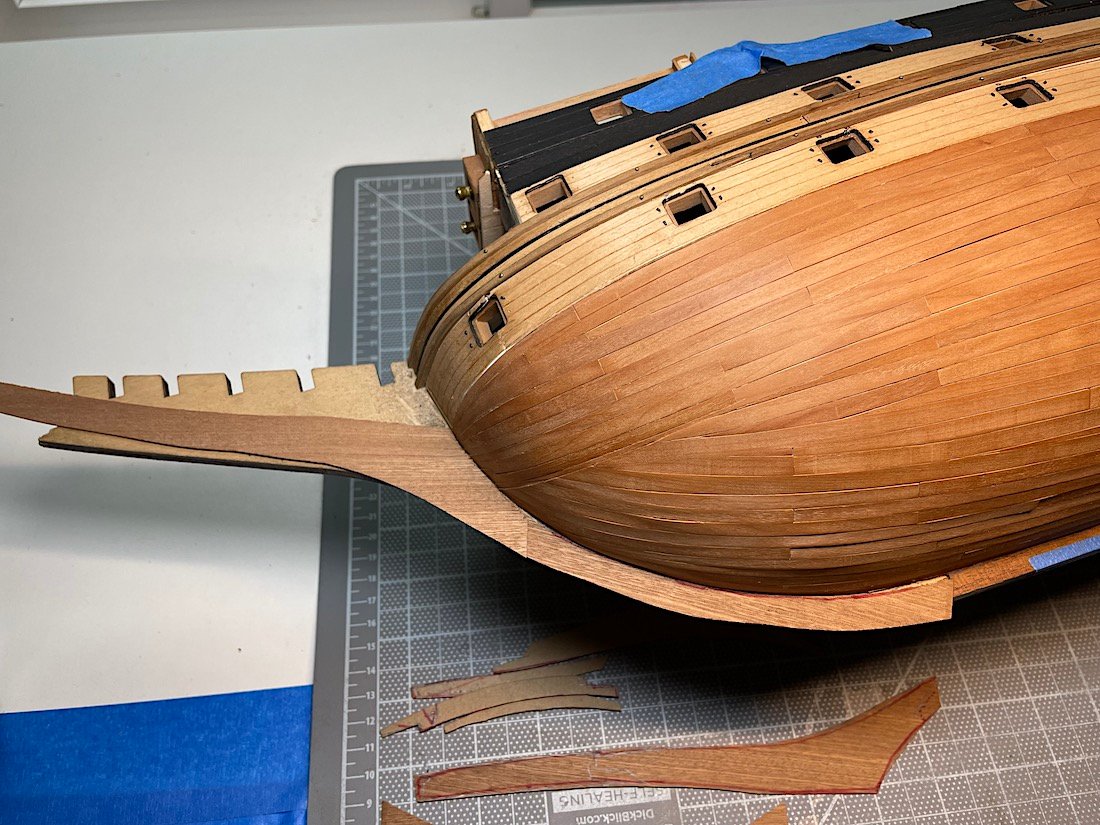
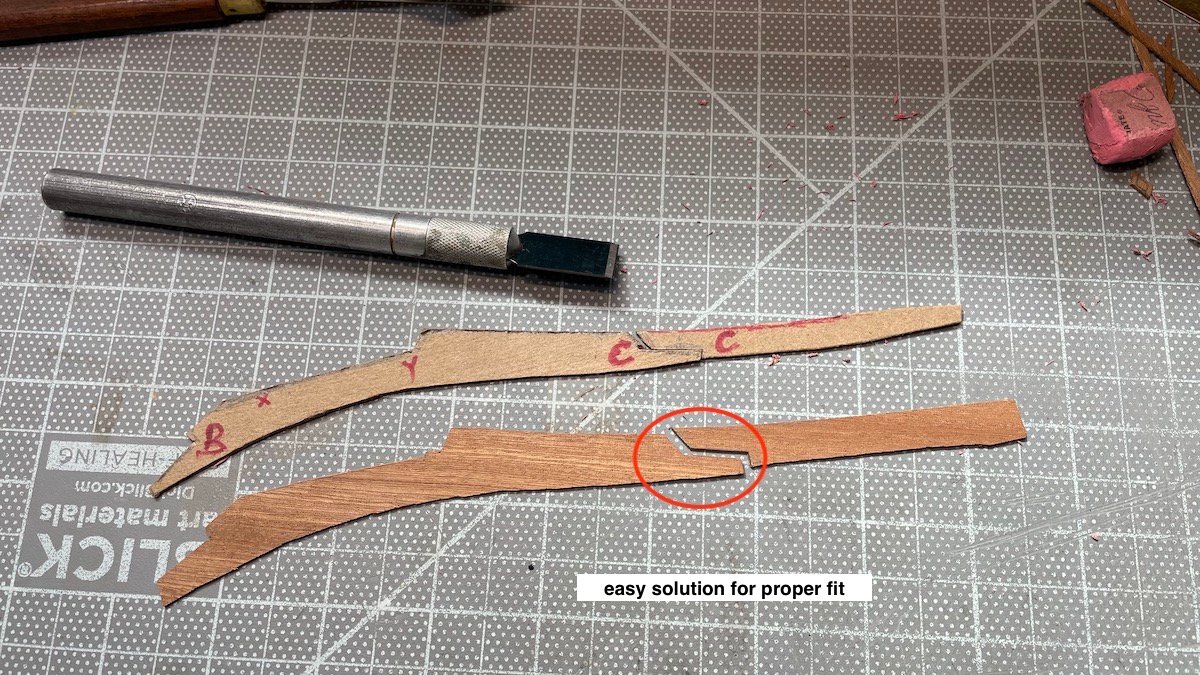
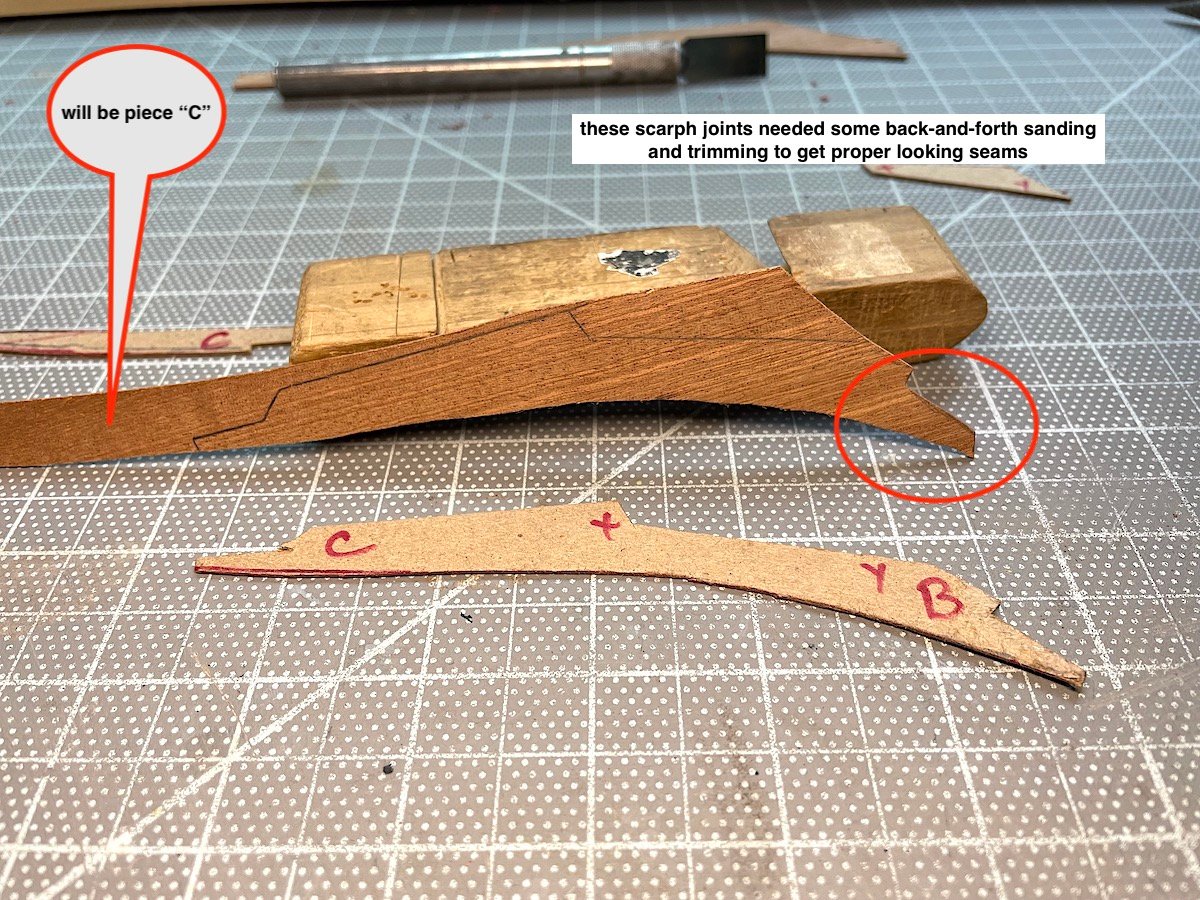
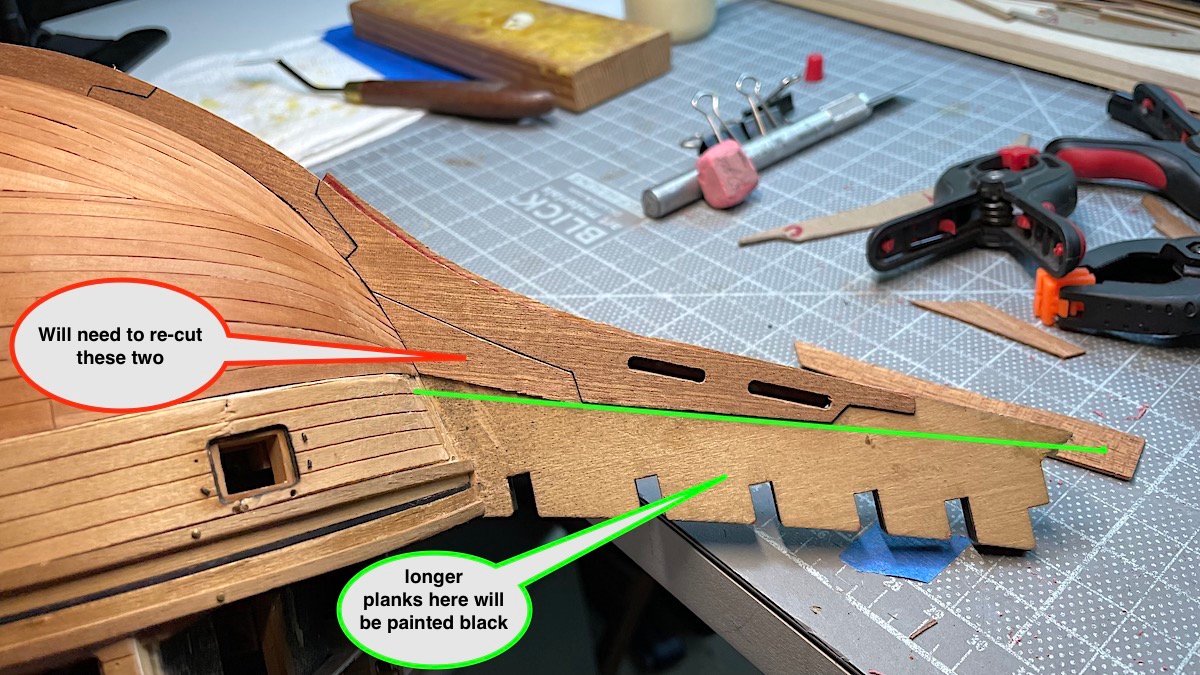
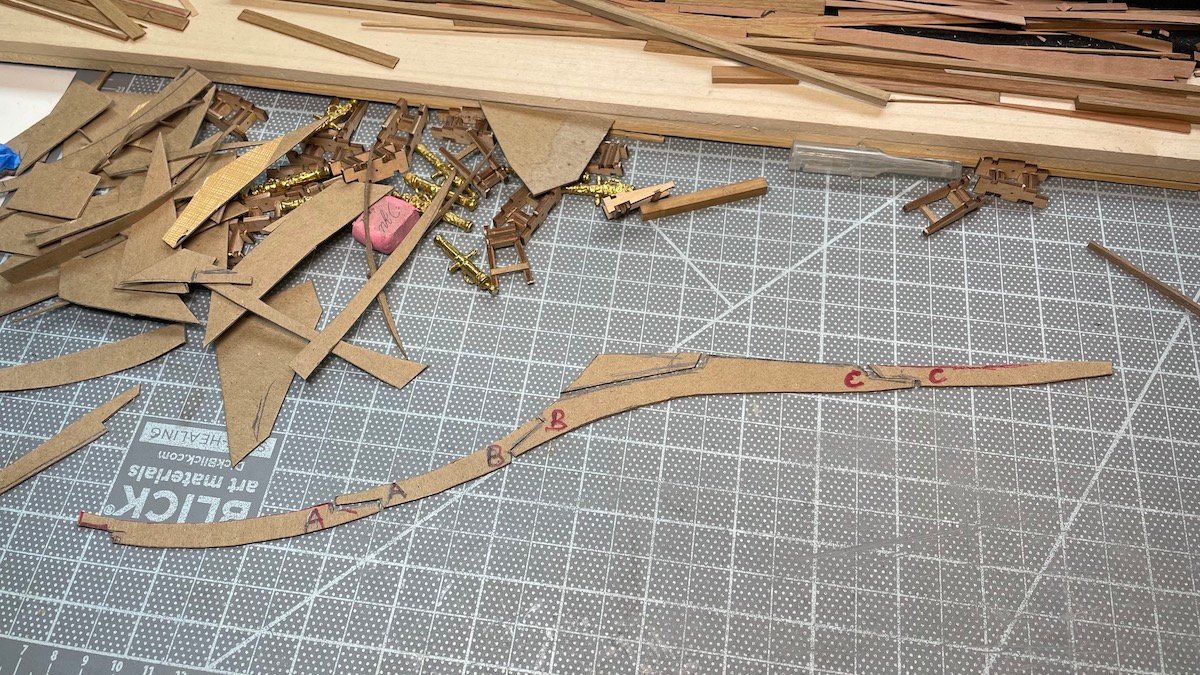
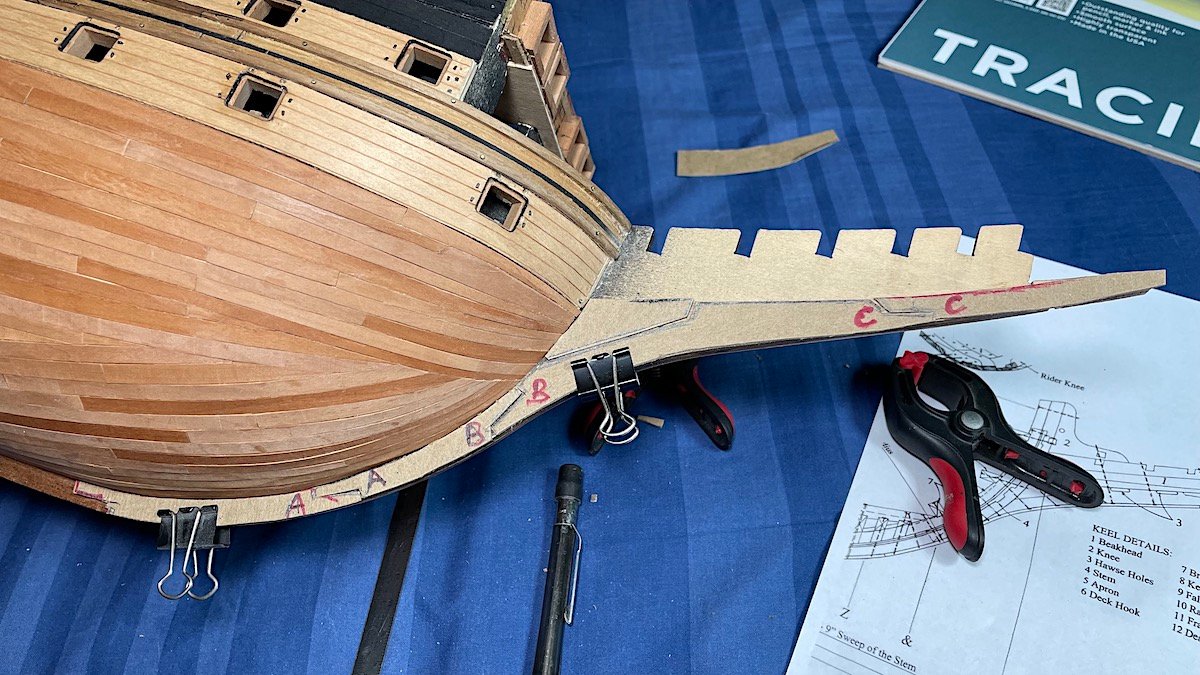
Hi Mates, Thanks so much for your continued interest, and likes - so encouraging indeed. Work in progress update; used McKay as a guide. Did look at several awesome logs in the Scratch Build Projects, and what I did notice was that the really great forward stems were cut, and caulked from large single bits of wood, then properly scarphed together. (PS: I’ll never be that good - lol) Working from a kit, and wanting to add better forward keel detail (first attempt at this) created some conundrums. I had to, obviously, use thin “cover” pieces on each side of the kit provided keel to get the right looking details. Here are some images of how I worked this out so far after having cut cardboard patterns of one side.


-
LFN, So glad that you have taken some inspiration from my cross-section of the same kit. And very, very kind of you to note as much in your log. I was also a member that very much enjoyed following your Santisima that was weathered to the point of being un-seaworthy haha You are also "aging" this project...I'm on-board and will follow along. Very good start indeed. Again thanks for mentioning my build. Cheers,
- 135 replies
-
- 1
-
-
- Occre
- Santisima Trinidad
- (and 2 more)
-
Siggi, Just discovered your brilliant log - Wow! superlative work. Spent an hour going through - thoroughly enjoying every post and image. I saved some of your images to inspire me to attempt to add some of your brilliant details to my current project - certainly not close to your level of work, but it will be a good challenge. Again amazing work - oh yes and your lion - as has been said - "over-the-top" amazing Respectfully,
-
One last thought - per you question how to fix lines that don't go to pins? cathead with rails and or blocks on deck - loop and knot the line leave extra per what would be needed for a specific line. Yes needle threader is also good - remember that line would double in width as you pull the threader out - then return to a single width - sometimes making the result too small and "out of scale" Didn't mean to take over this thread - but I learned all of this from other members (especially images) - helped me a lot with the Vasa. Regards,
-
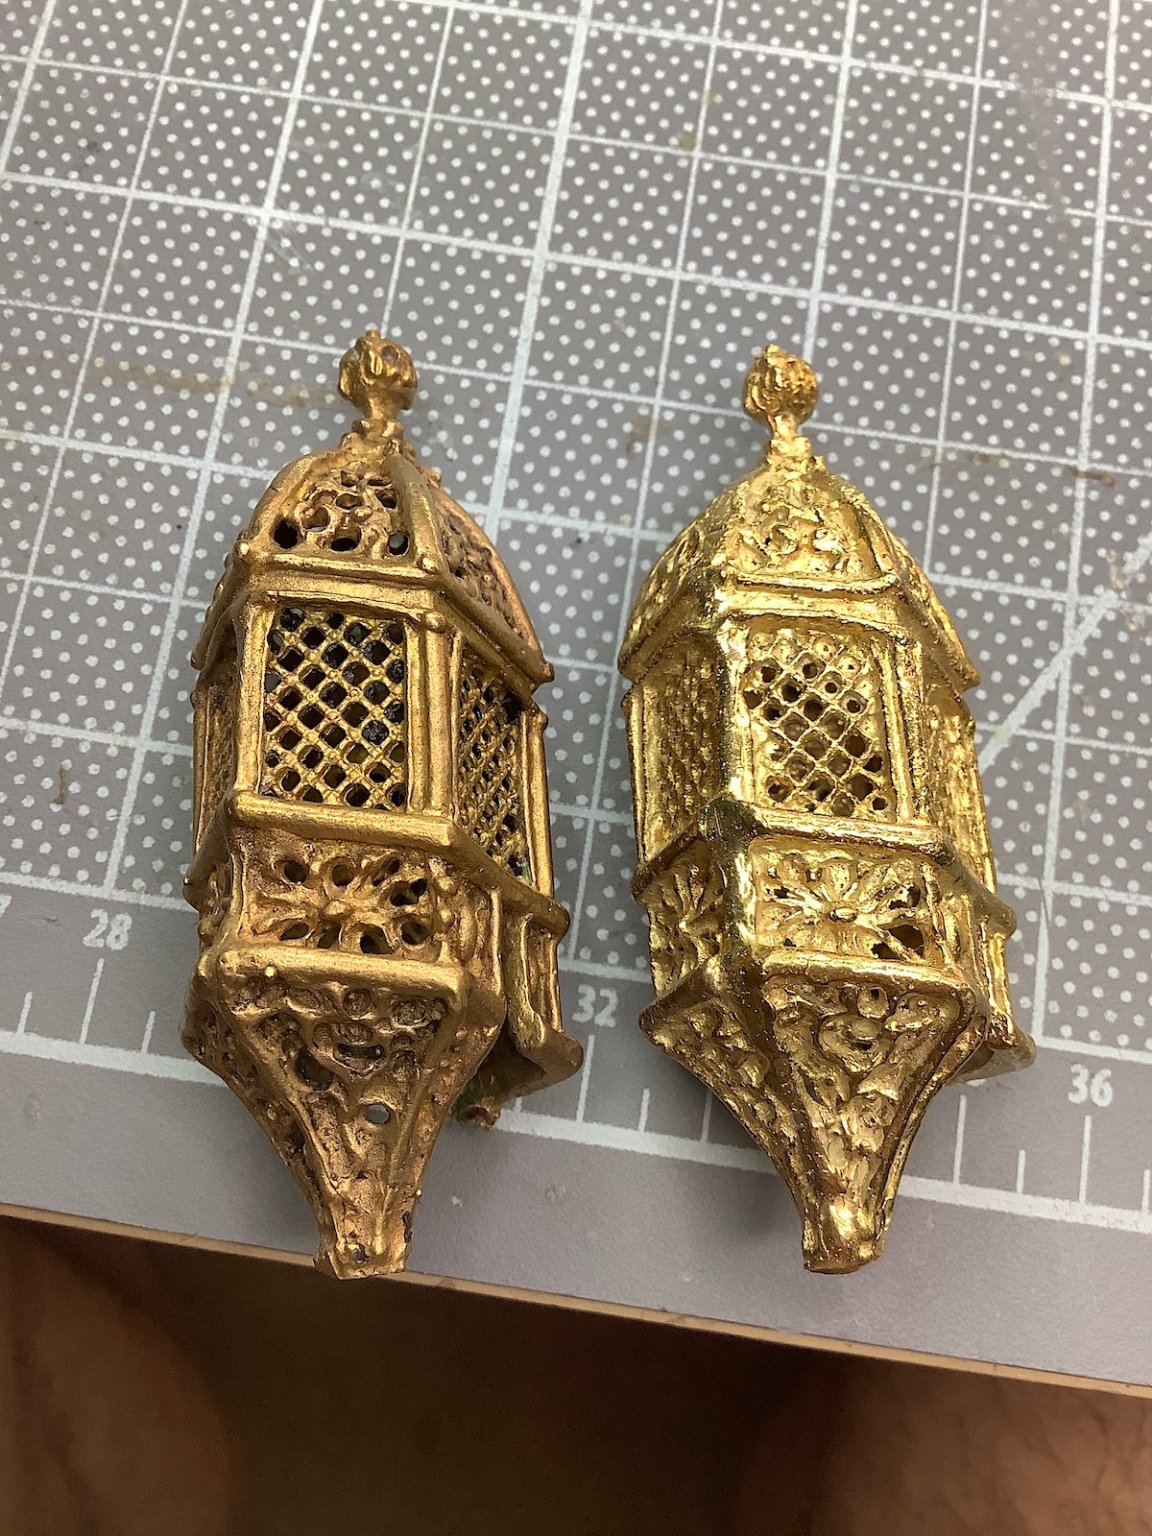
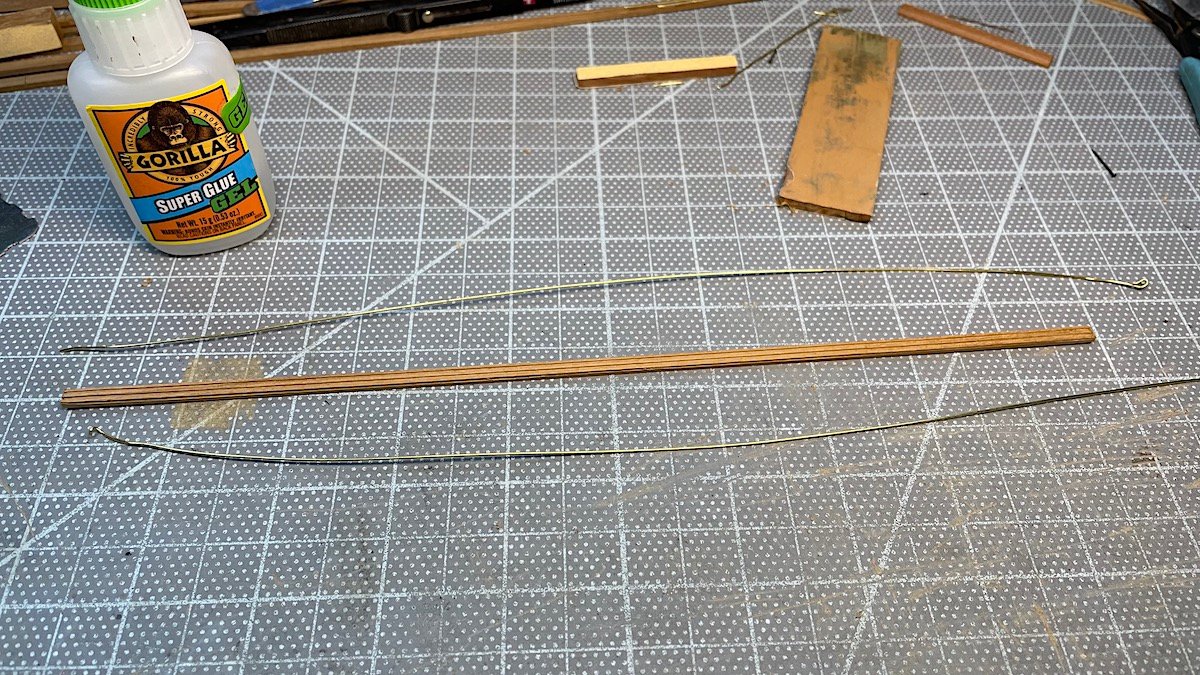
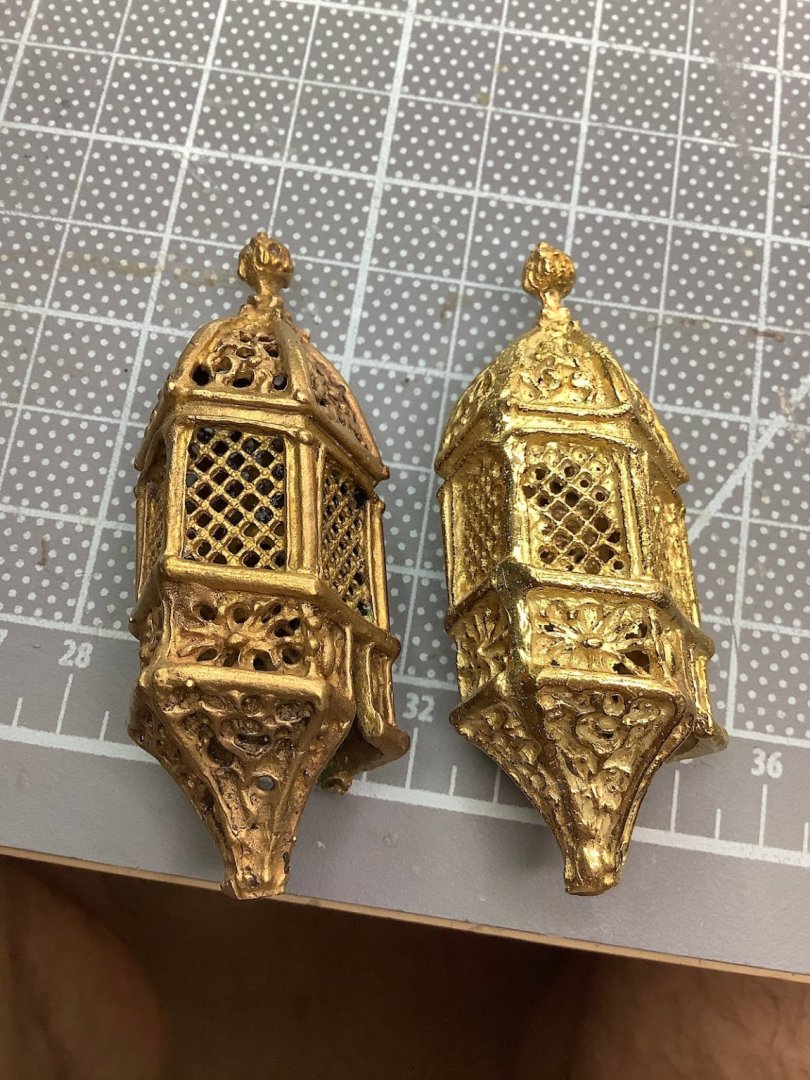
Patrick. Yes - very unfortunate indeed - Here are comparisons of one of the stern lanterns - this one being the large one that is attached to the poop deck Now working on patterns for keel - I can't believe that this took the entire morning - at least they are mirror images on each side. Will cut the wood bits this week...matching the bits perfectly will take time as well - enjoying this part of the project.
-
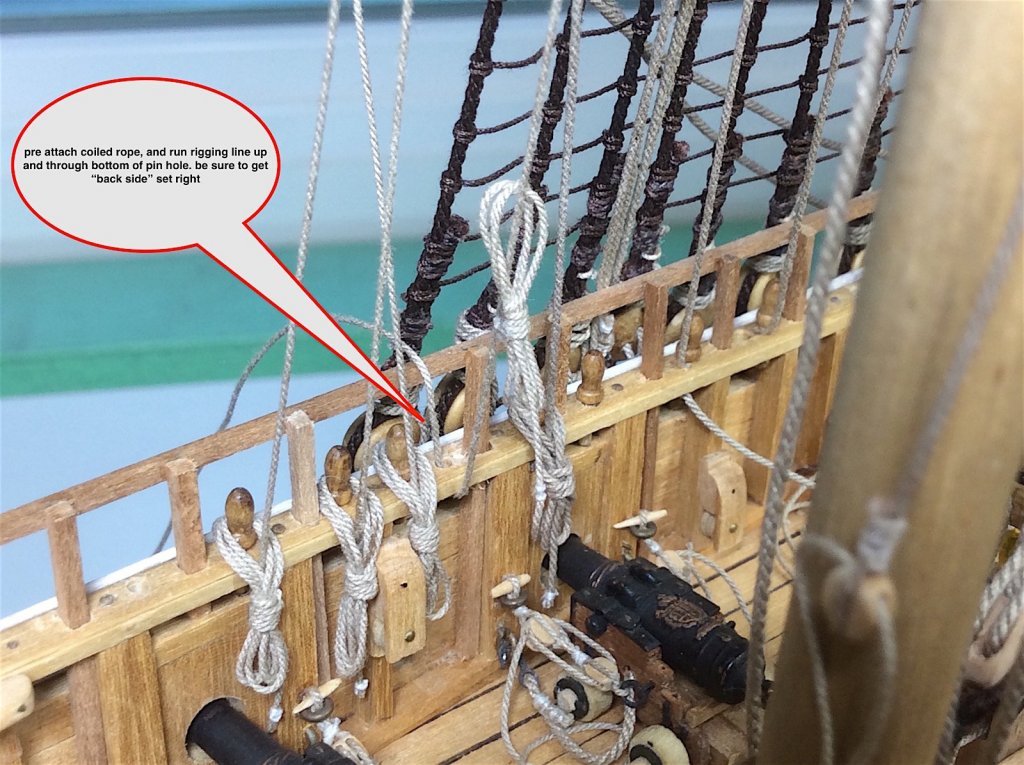
Yes and no - a technique I use; at the tip of any line for about 1/4" or so, wet the end of the rope with Gorilla Gel CA - then wipe away the excess with a cloth (thumb and index finger) the result will be a very hard straight tip - easily inserted through the bottom of a pin rail - or anywhere else for that matter.
-
Peter: As always thanks so much for your overly kind posts - thanks as well for following - PS: your current build is a jewel re: scuppers - no I have not drilled them through - I only painted the insides black - I will however add to the outside of the hull drains for those as well as drains for the gun decks, only as visual perspectives - On my list 👌 E.J., Brilliant suggestion!! Yes, I will do just as you suggest - yikes never occured to me - this way I can also install the four chase cannons - And you are also certainly right in regard to the overcrowding and recoil issues. Leaving two forward broadside ports empty is perfect!! big thanks Peter - thanks as well for your concurring thoughts regarding too many cannons - this will work out Just Fine!! Cheers Mates,
-
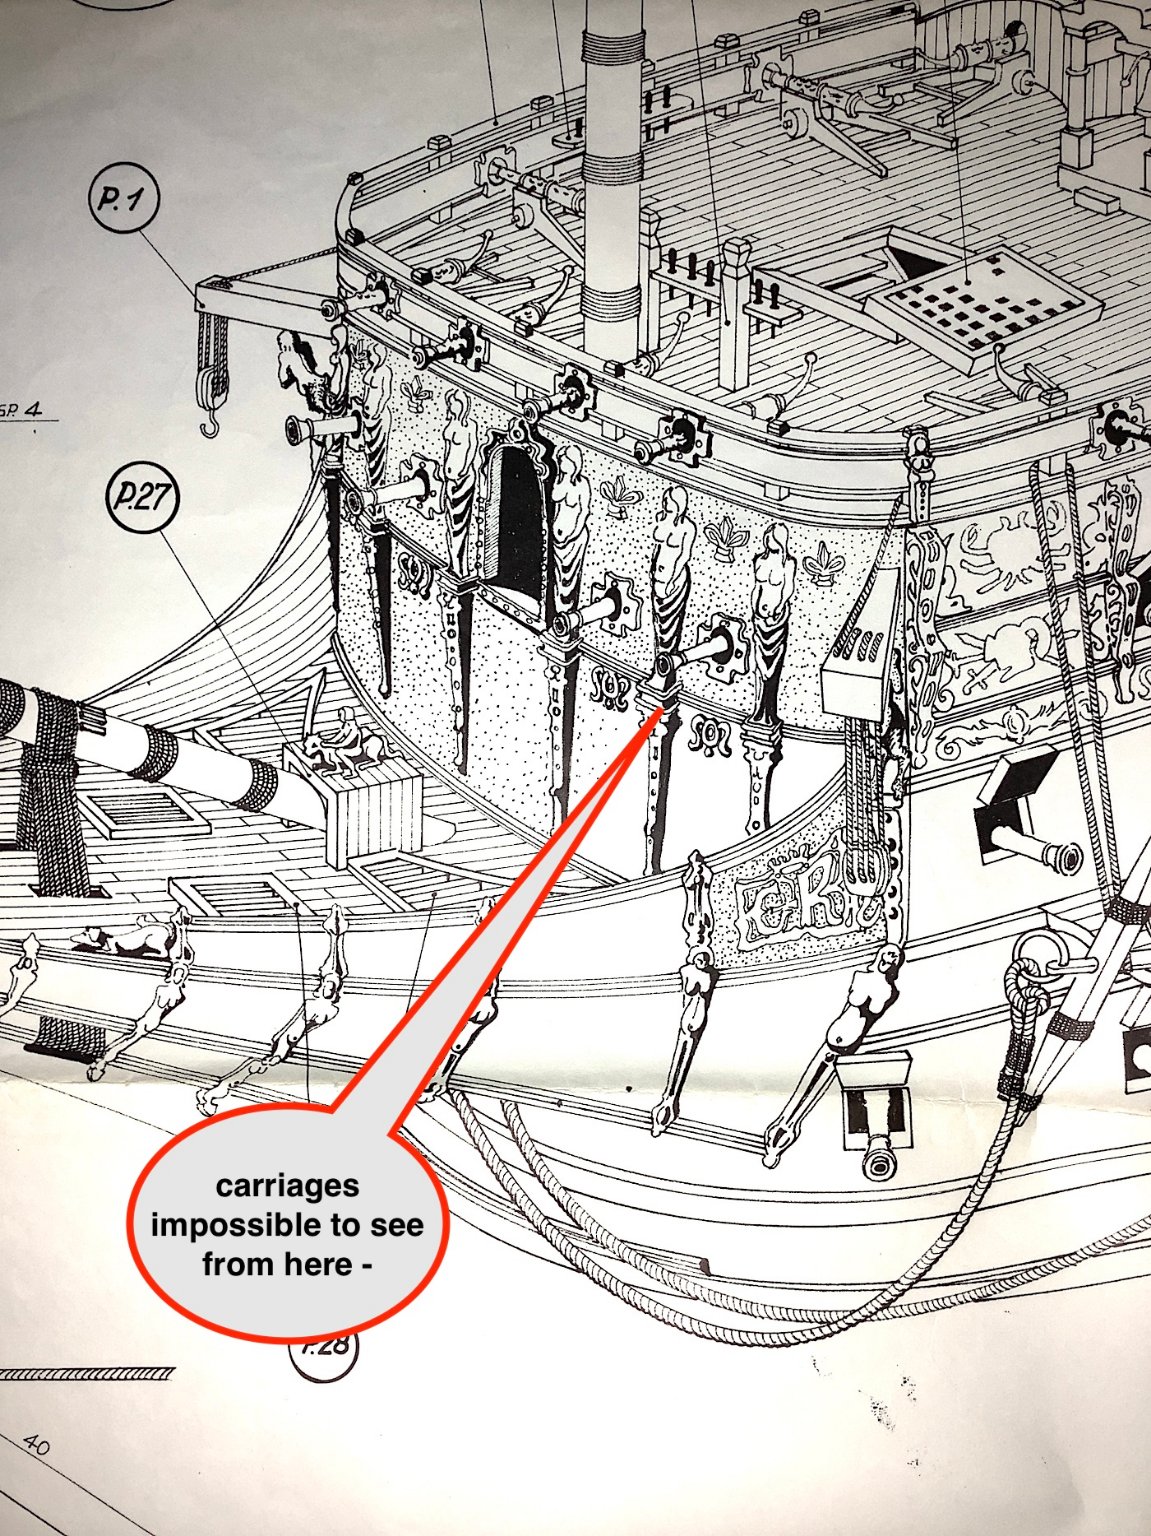
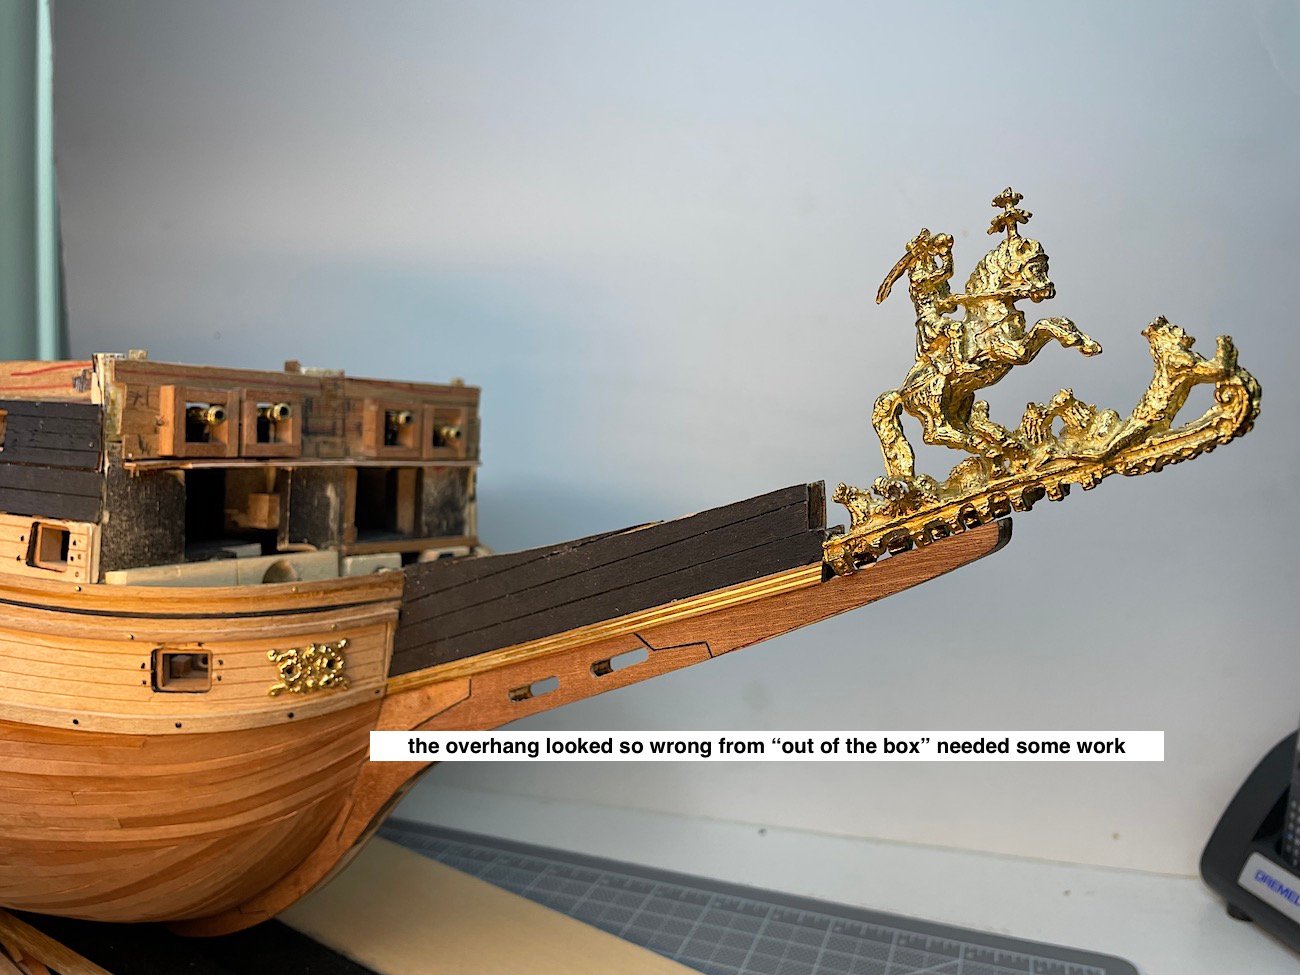
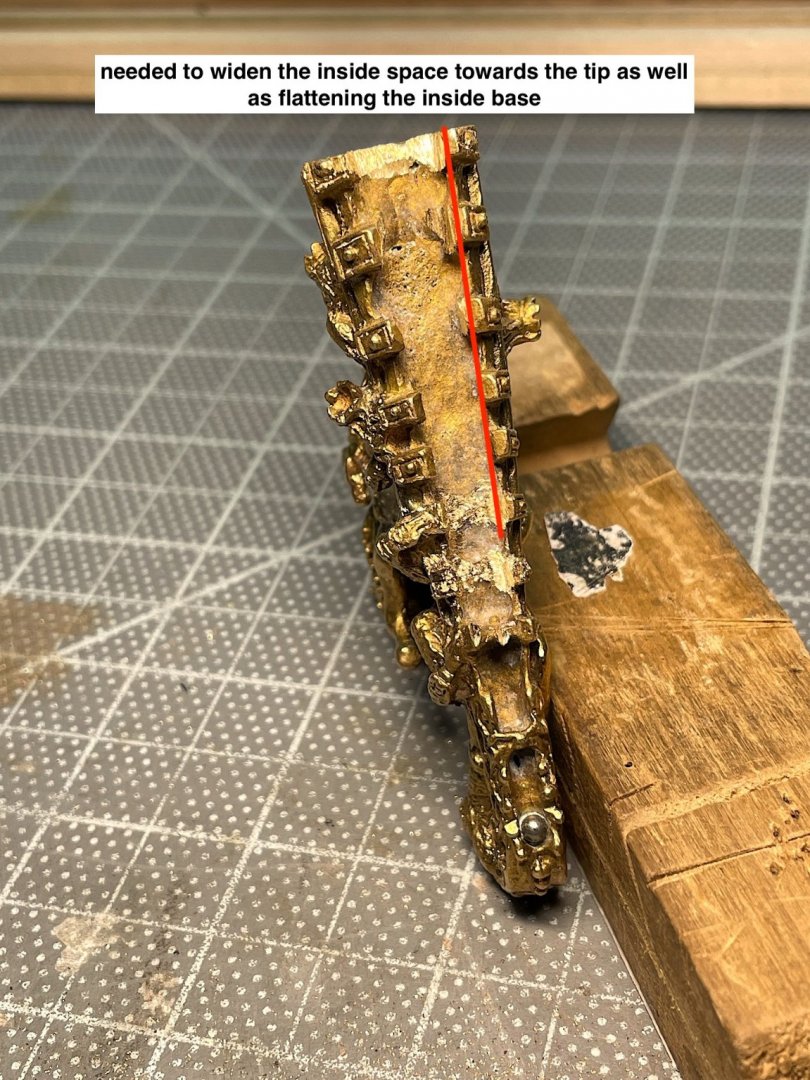
Patrick, Yes the cathead question is something that I thought of. Sergal shows a pinrail - Amati as McKay do not. All of the tie points are at the forward bulkhead upper railing in front of the foremast (hmmm?). I have not decided if I want to add sails, as I did with the Vasa - the extra work, and many needed extra pin locations is - well something to think about. McKay's rigging plates are really superb, that also include full sails. So regarding current situation - yes I have found a solution 😉 -bit of a less than good one - but it will be fine ...images speak for themselves Cheers, One last thought given the price point of this Sergal SotS - and that it has been available for decades - certainly R&D costs have been long ago paid for, even with their "improved" product (yes some parts are much better) One would think that the bright parts (for this ship THE buying incentive) would be at least as excellent as the vintage kit's solid bronze bits....the are poorer by comparison IMO.... hmmm??
-
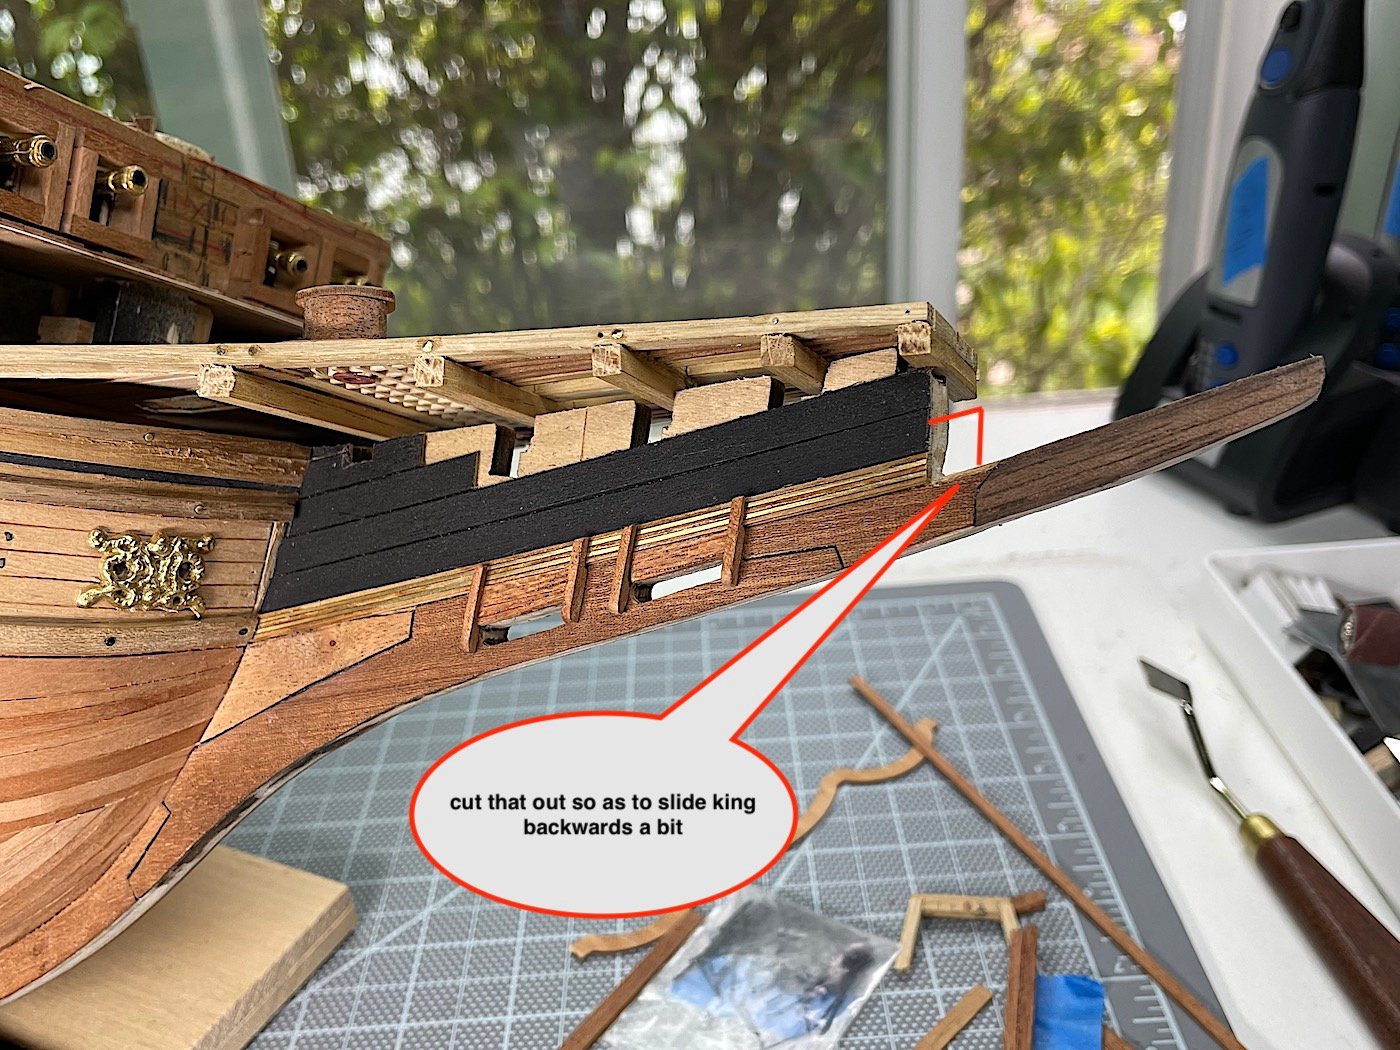
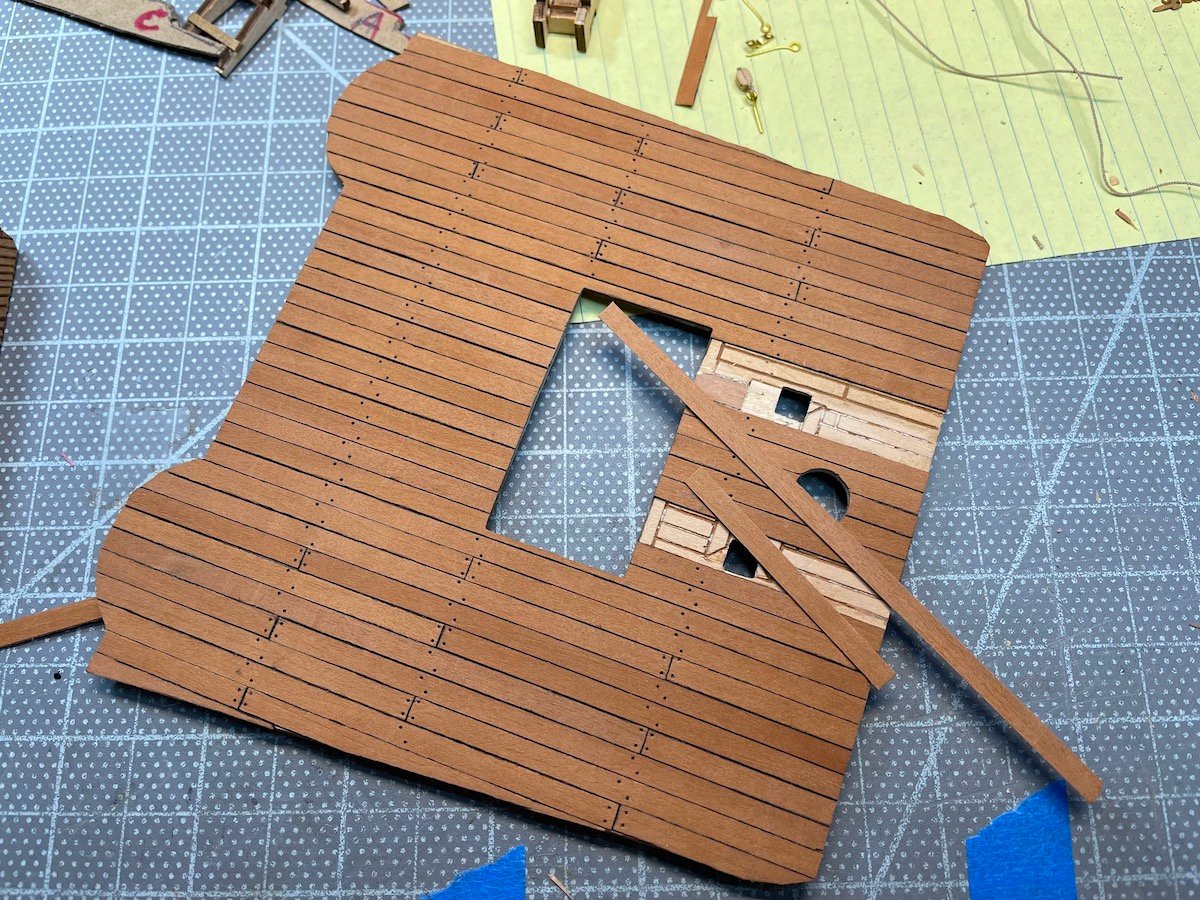
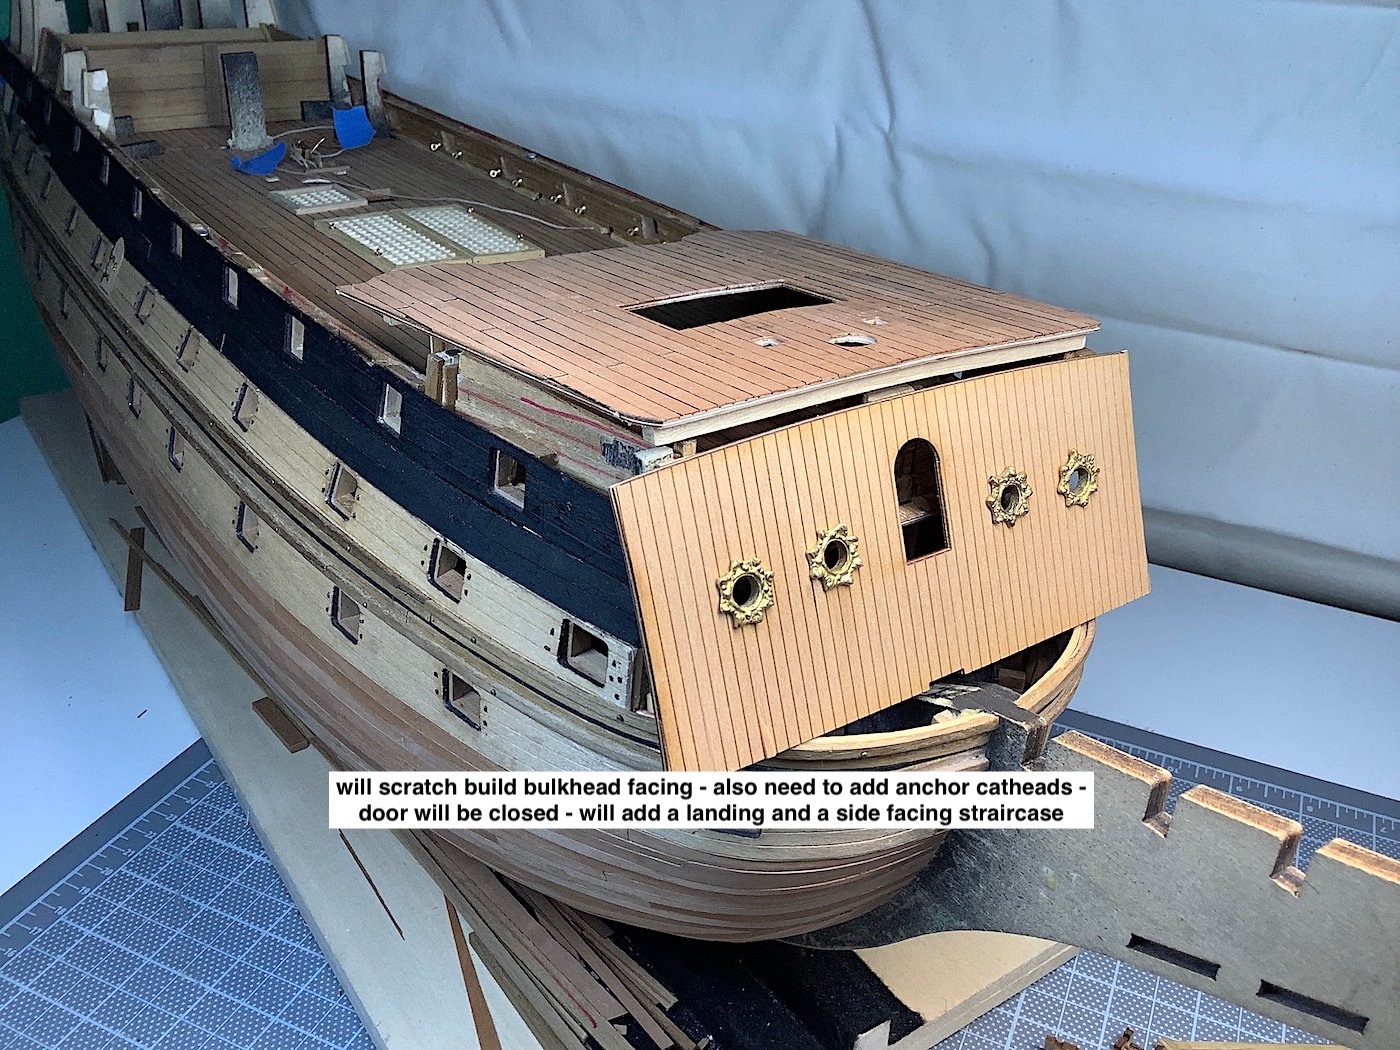
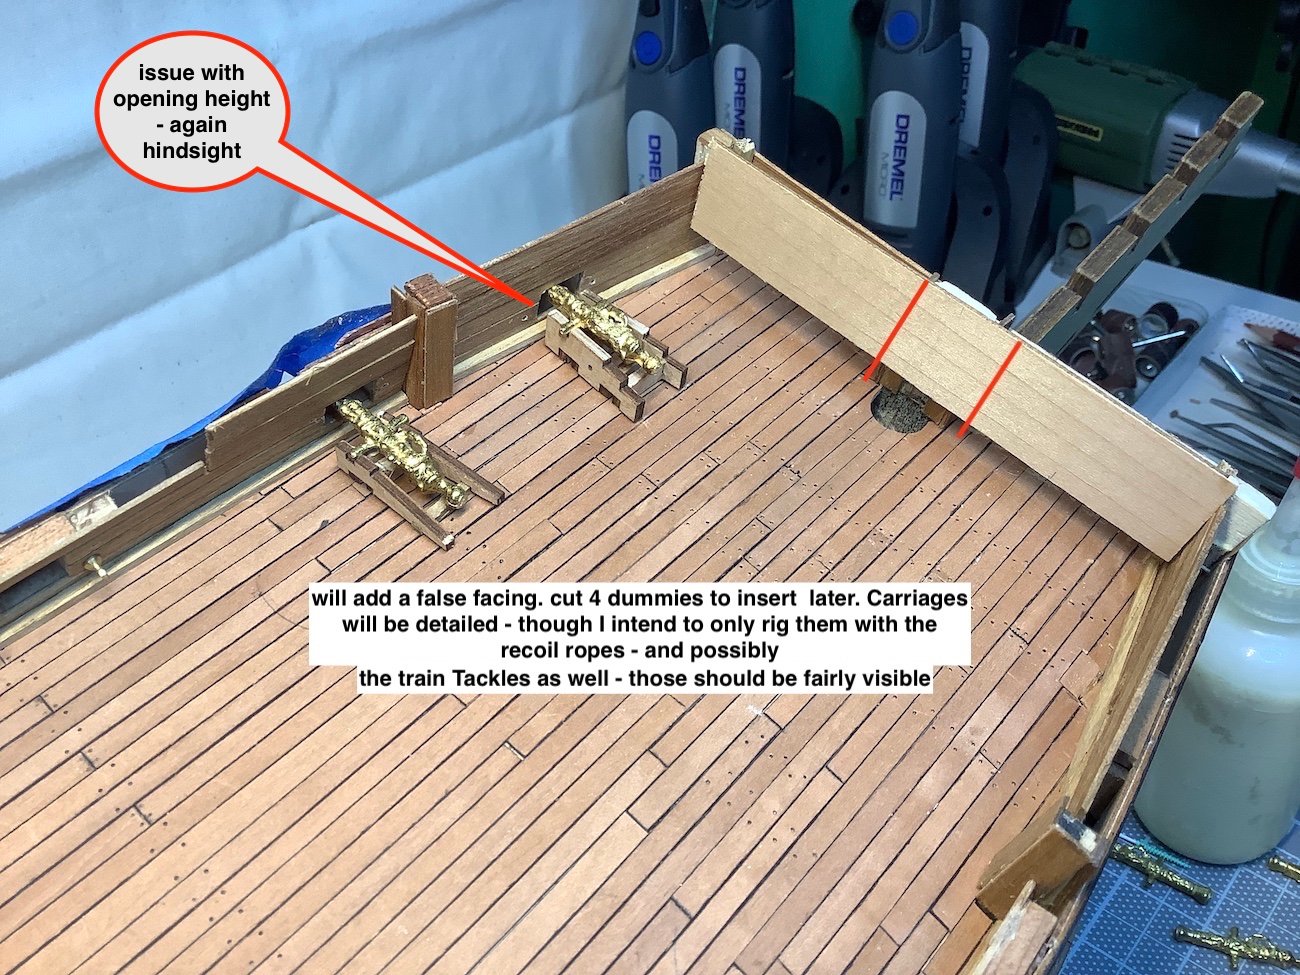
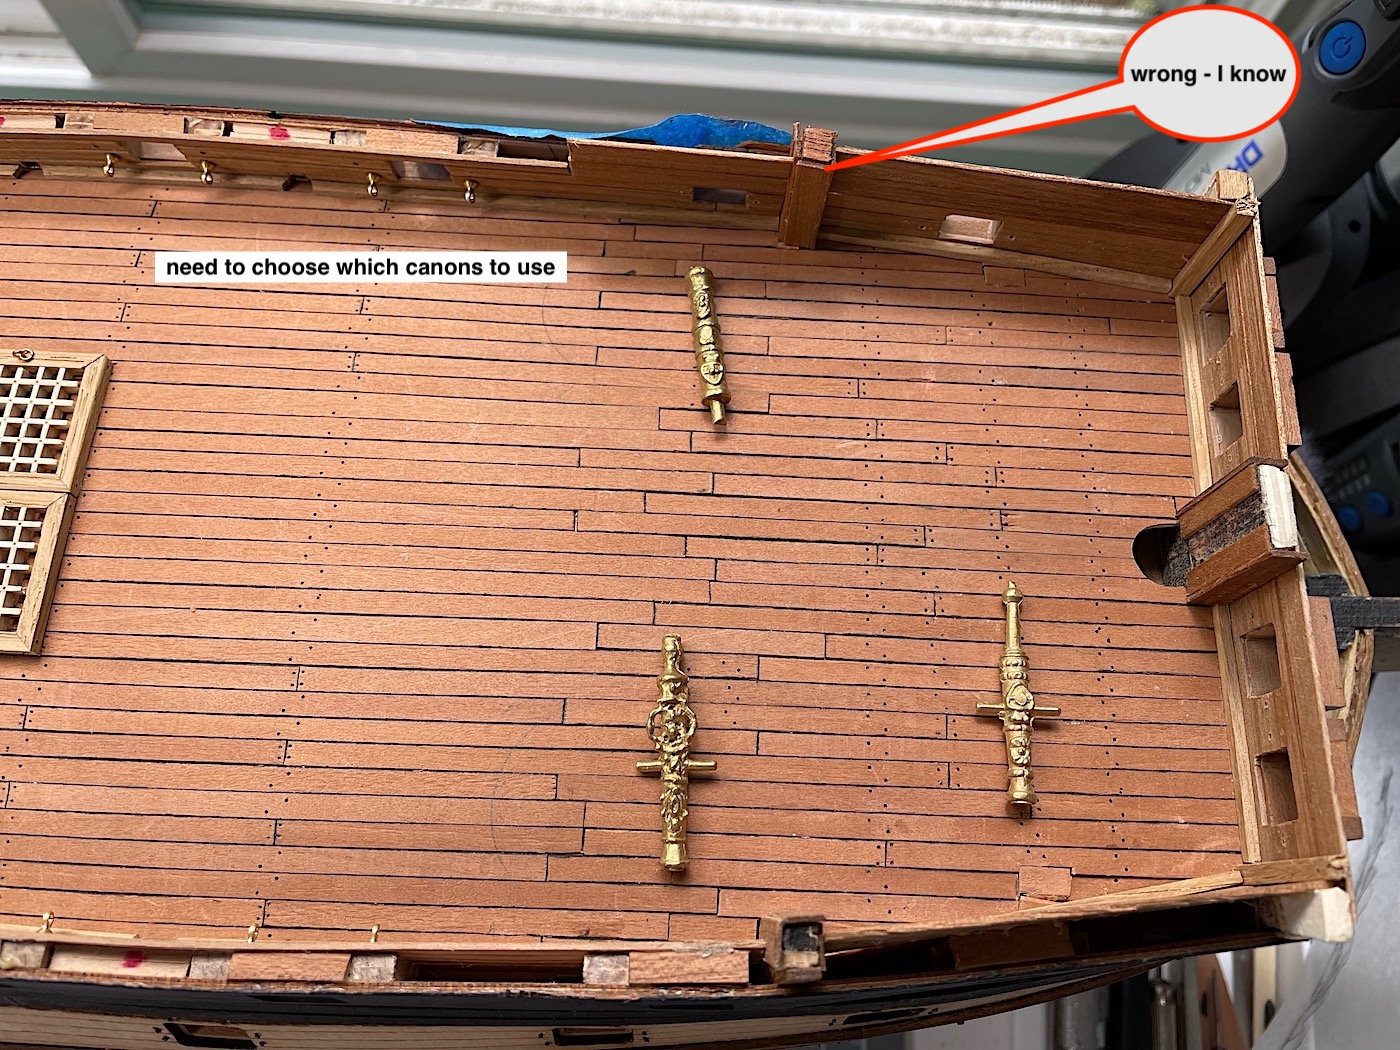
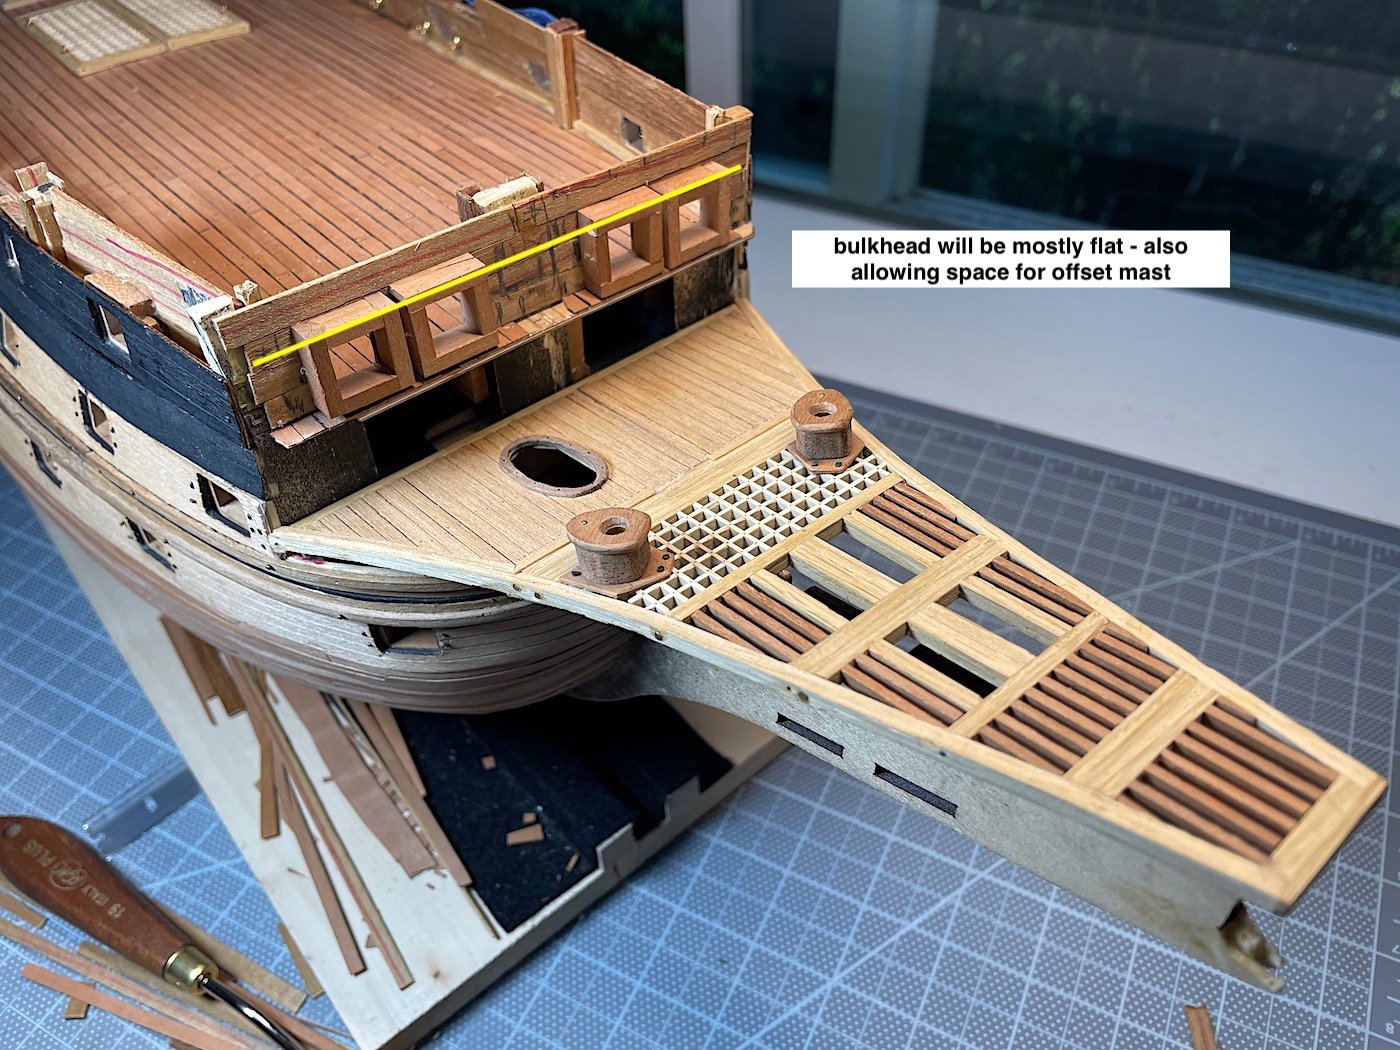
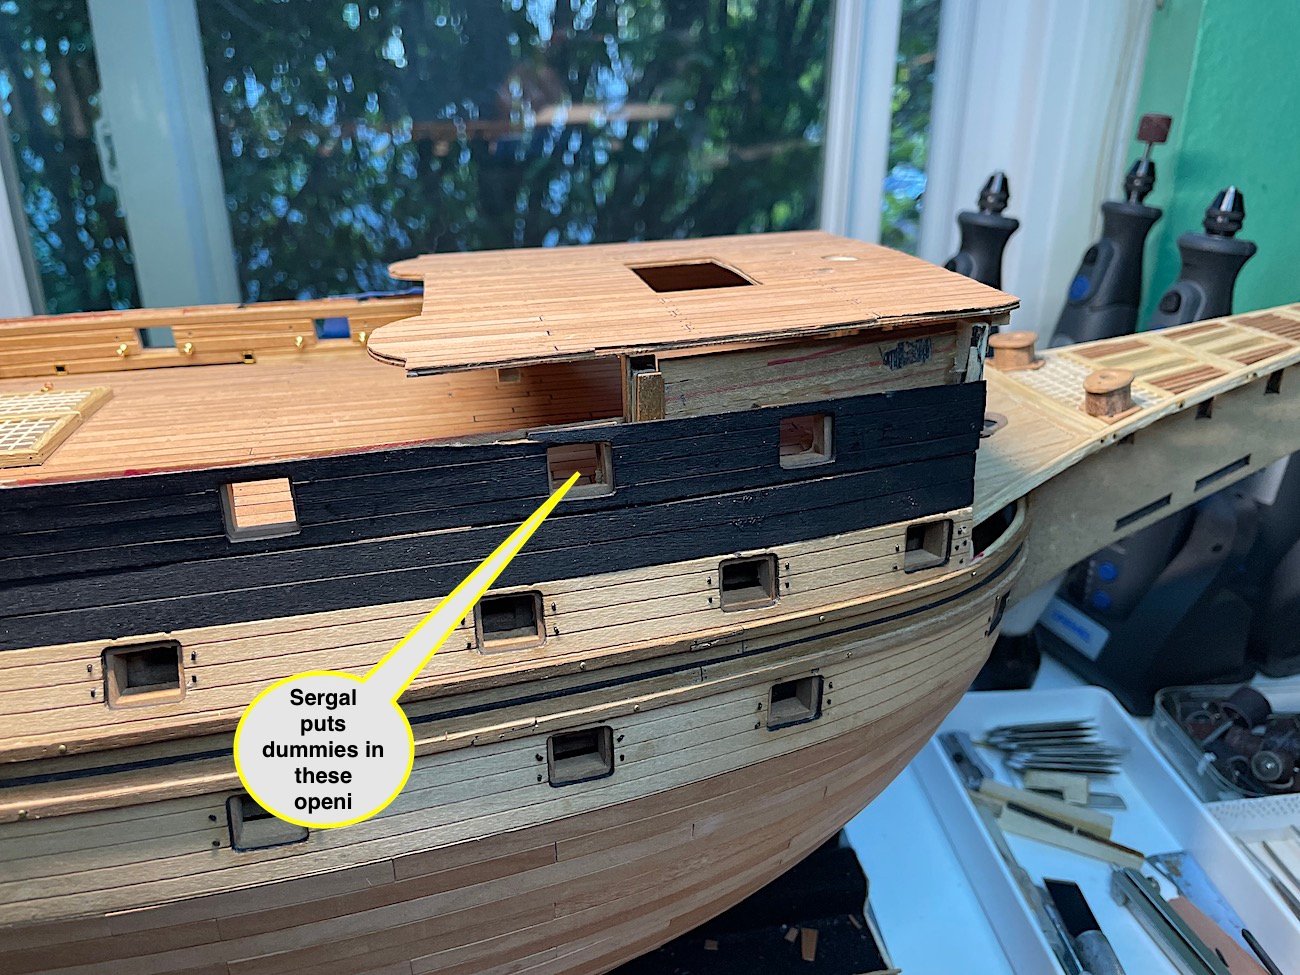
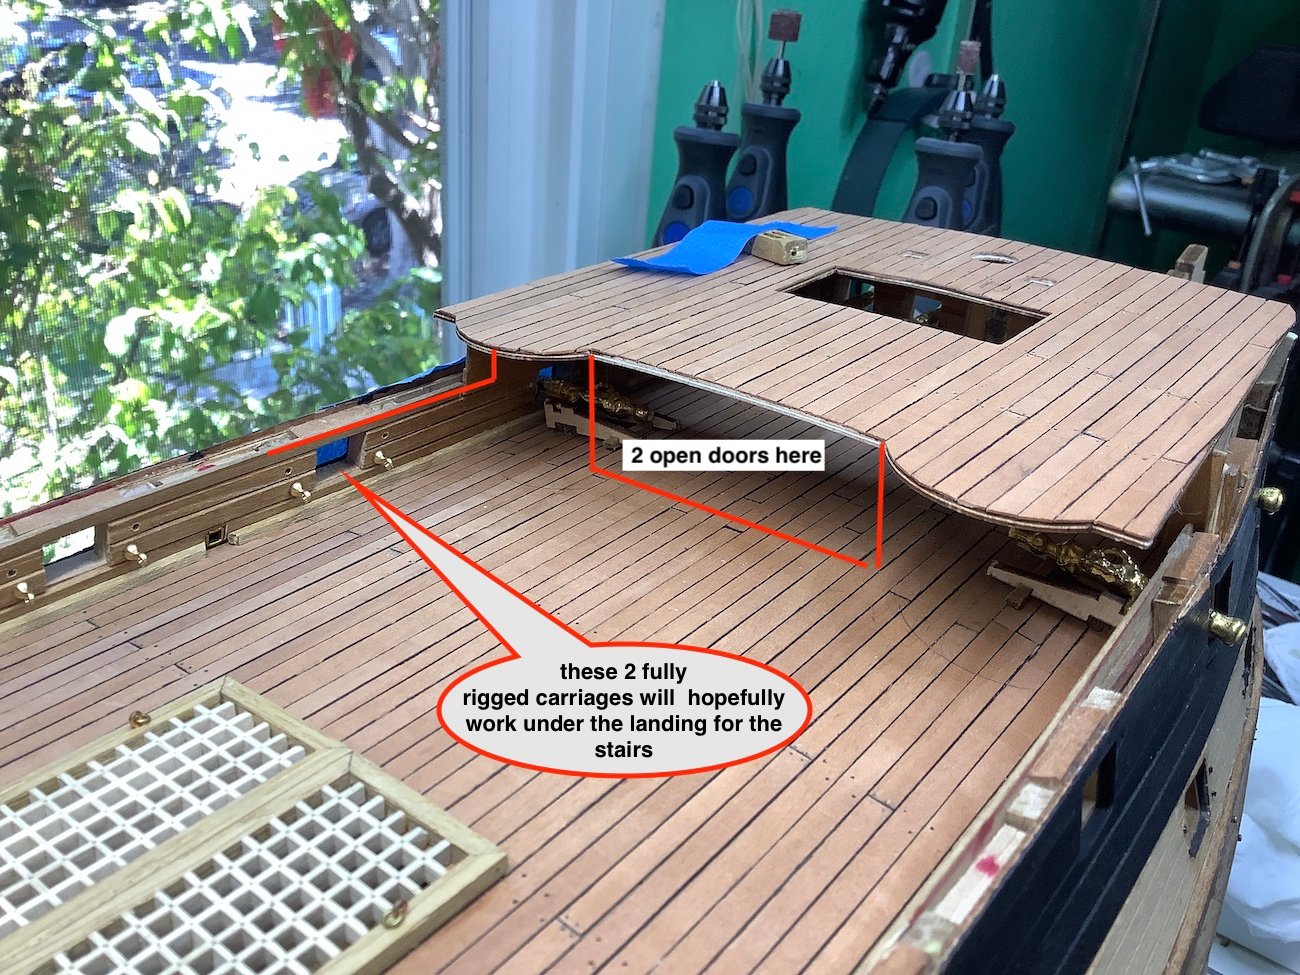
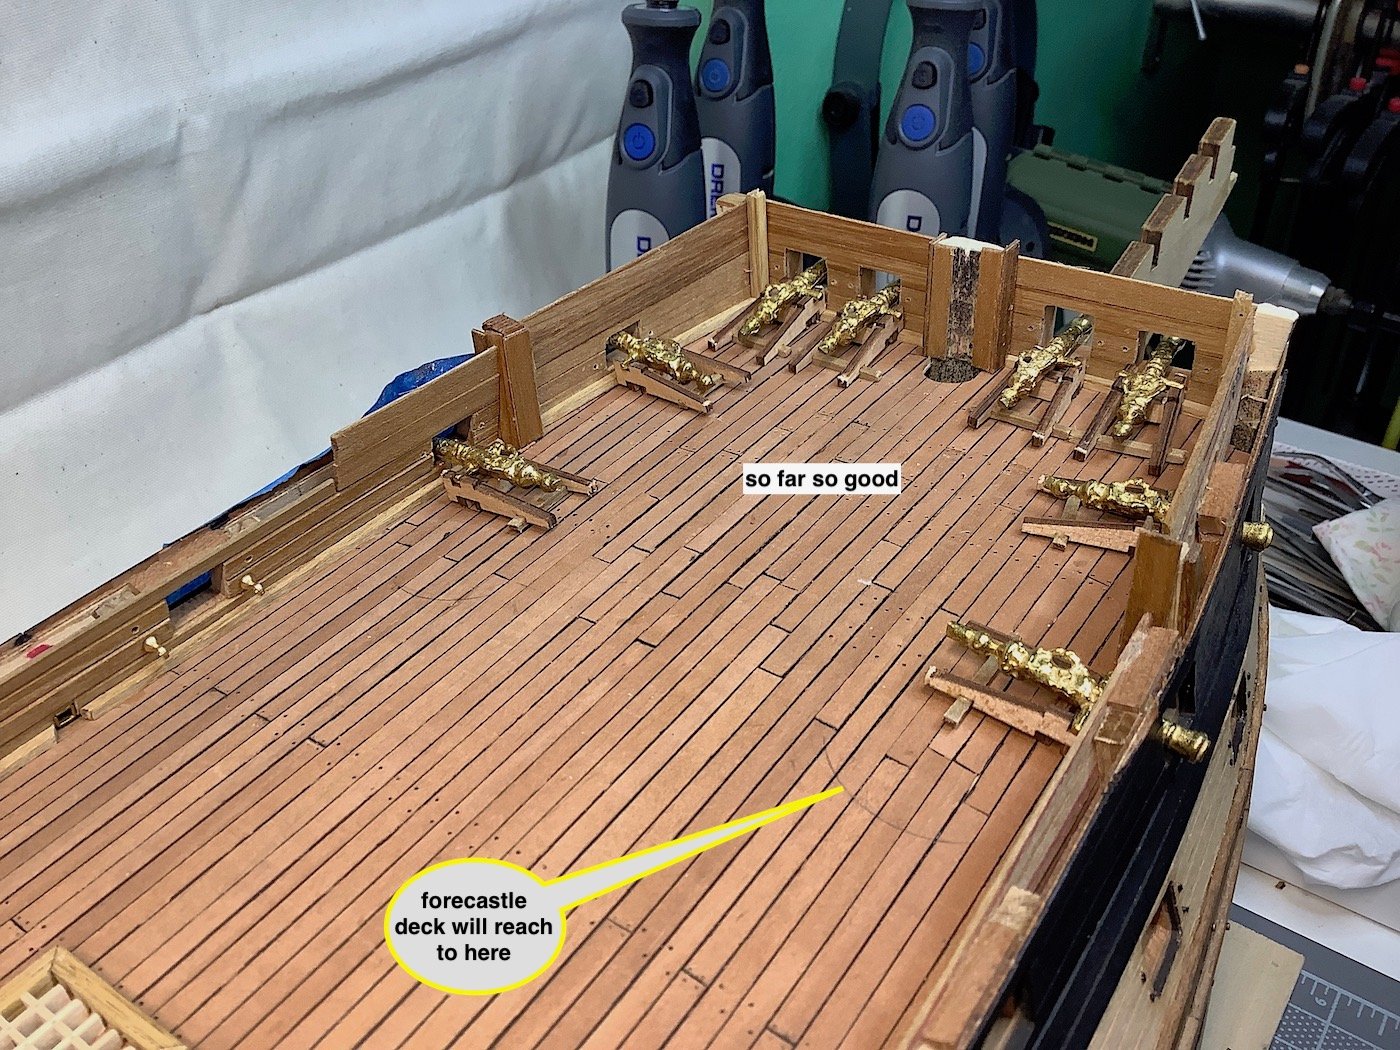
Hi Mates, A work in progress update that has caused some unforeseen issues (my fault); 1) Canons under the forecastle deck, and forward bulkhead – per the kit are eight dummies. Stubs to be inserted in kit provided balsa blocks. 2) Forecastle deck has large open area for stairs leading down to forward portion of main deck. So I planked that part of the main deck as well (was an afterthought) then wanted to add carriages and canons, instead of the eight dummies. – work is very average given the very minor view that it will provide – it will do 3) Needed to choose canons and carriages; will all be from current kit 4) Will use the McKay drawing and flatten the forecastle inside bulkhead and add two doors (to be open) hence added visual to those eight carriages. So far so good. THEN realized that the forward inner carriages sit in where I need to add the two knightheads that run through forecastle deck - Yikes!! Now need to re-think this entire section of work. Might just add a grating, use dummies for the four forward canons – need to think it out Hmmm?? TBD. As always thanks so much for your interest….


-
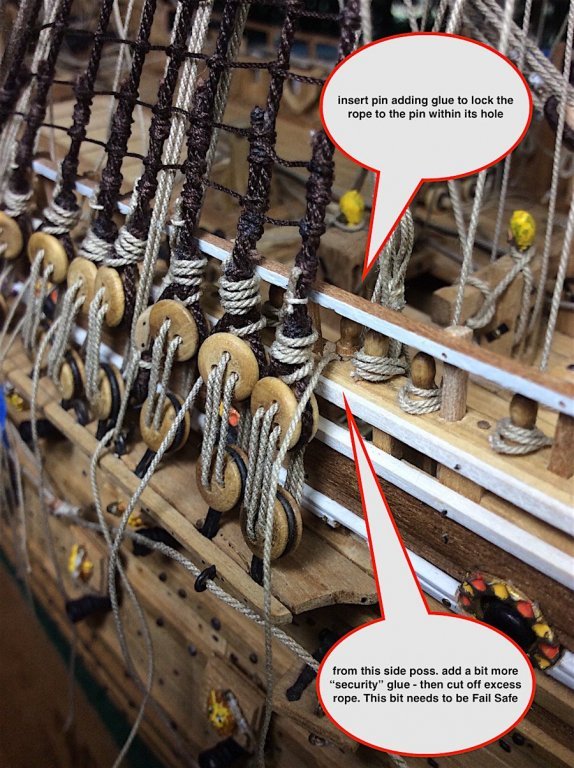
barkeater is right - don't pre-glue any lines. I have found the following method to be very practical. pre insert your coil. run the line under the pin rail. leave lots of extra rope. put in pin - don't glue. Then later you can remove the pin as needed to adjust lines, then add a bit of CA to pin. lock into position. cut excess rope. add coil over the top. Hope this helps