HOLIDAY DONATION DRIVE - SUPPORT MSW - DO YOUR PART TO KEEP THIS GREAT FORUM GOING! (83 donations so far out of 49,000 members - C'mon guys!)
×

md1400cs
-
Posts
2,847 -
Joined
-
Last visited
Content Type
Profiles
Forums
Gallery
Events
Everything posted by md1400cs
-
 Thanks for the nice posts - very kind of you.
 -
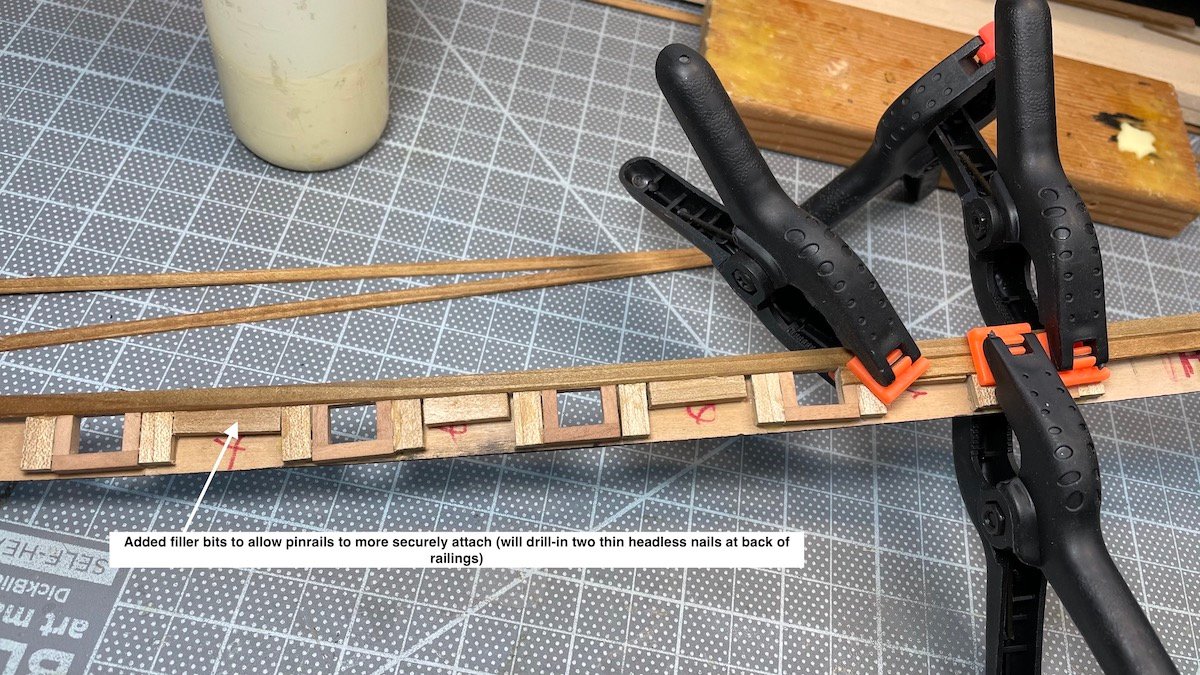
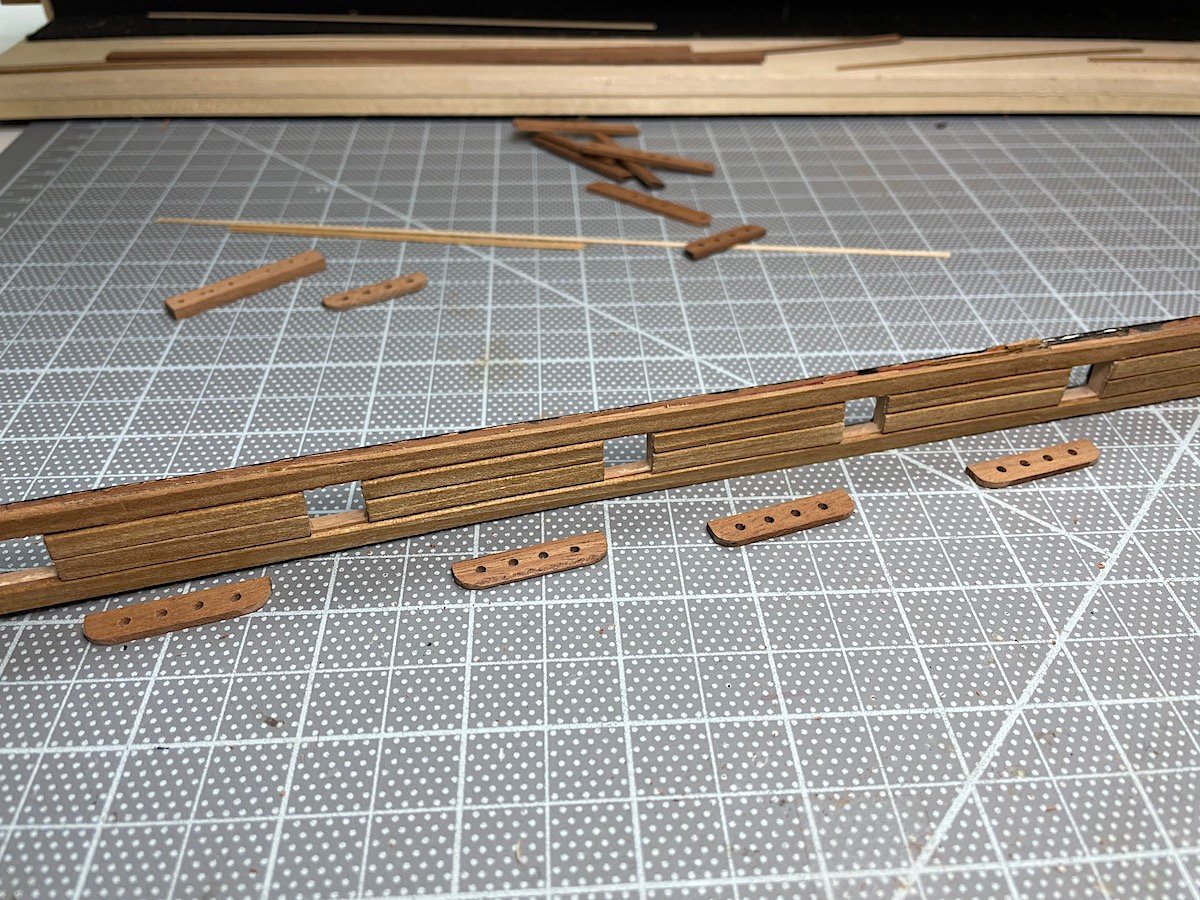
Hi Mates, Finishing up some needed details to main deck before installing. Also got my order from Cornwall so finished up the upper side railings as well. Thanks for the likes - much appreciated indeed.


-
Robert, No they only have that one size. I too was a bit concerned about their sizes; using for a 1/78th project. Here are a couple more images. That said, yours look perfectly in scaled. Good choice indeed!. I may decided to do your method - thanks for the idea and the company link. Regards,

- 527 replies
-
- 3
-

-
- caldercraft
- victory
- (and 1 more)
-
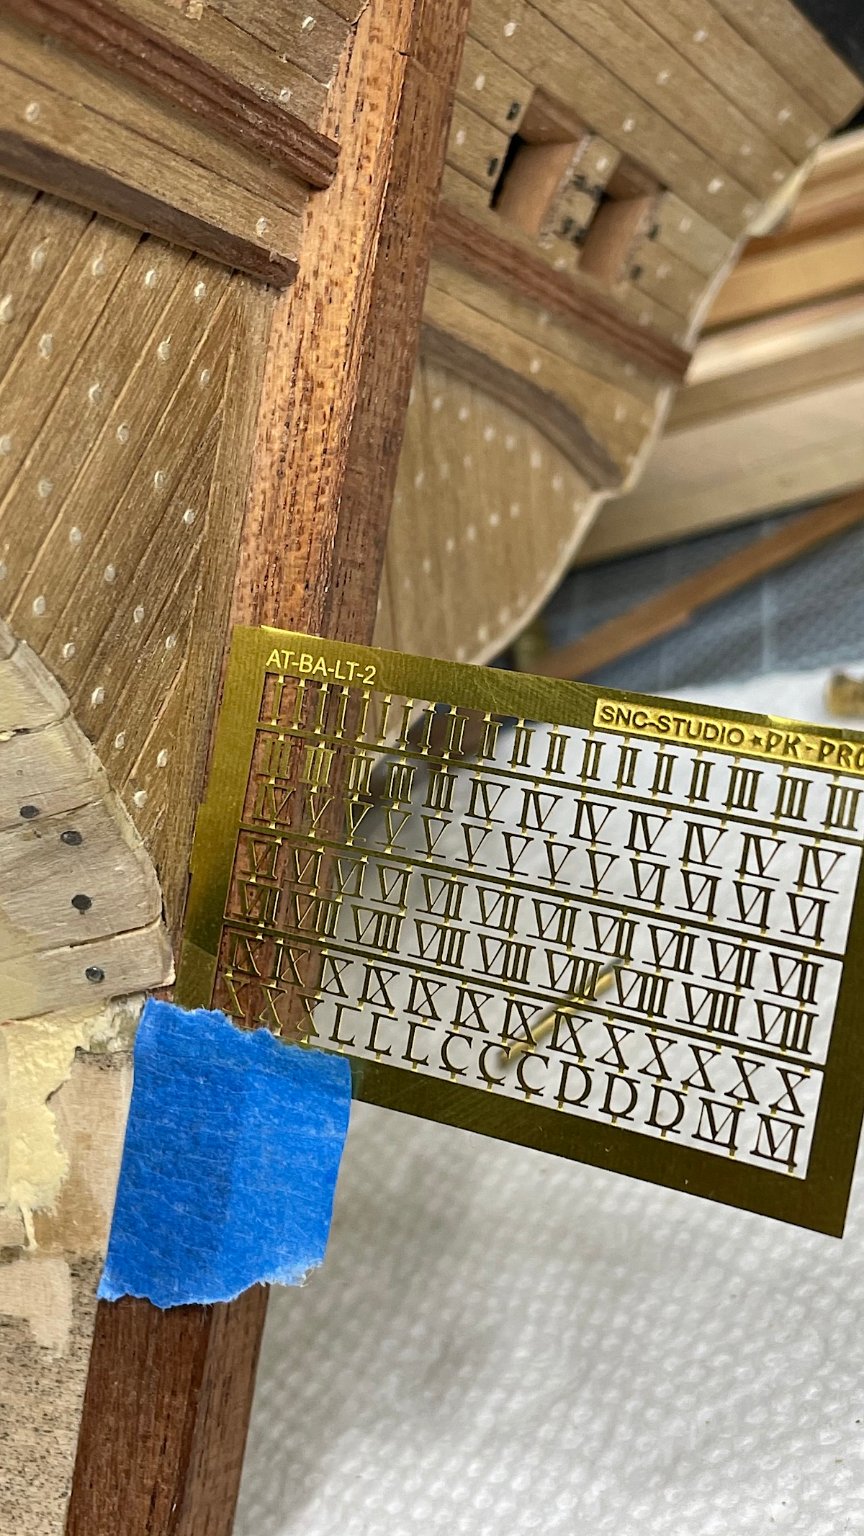
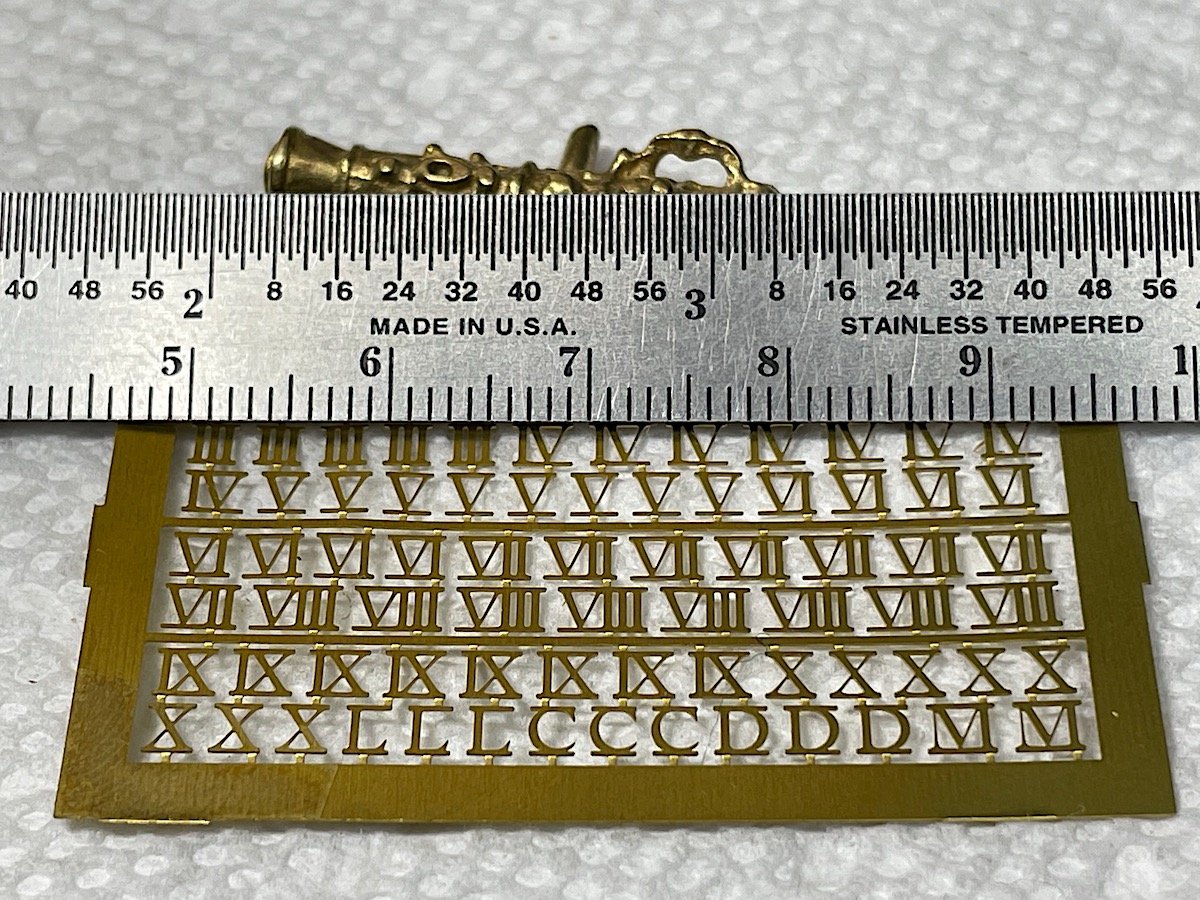
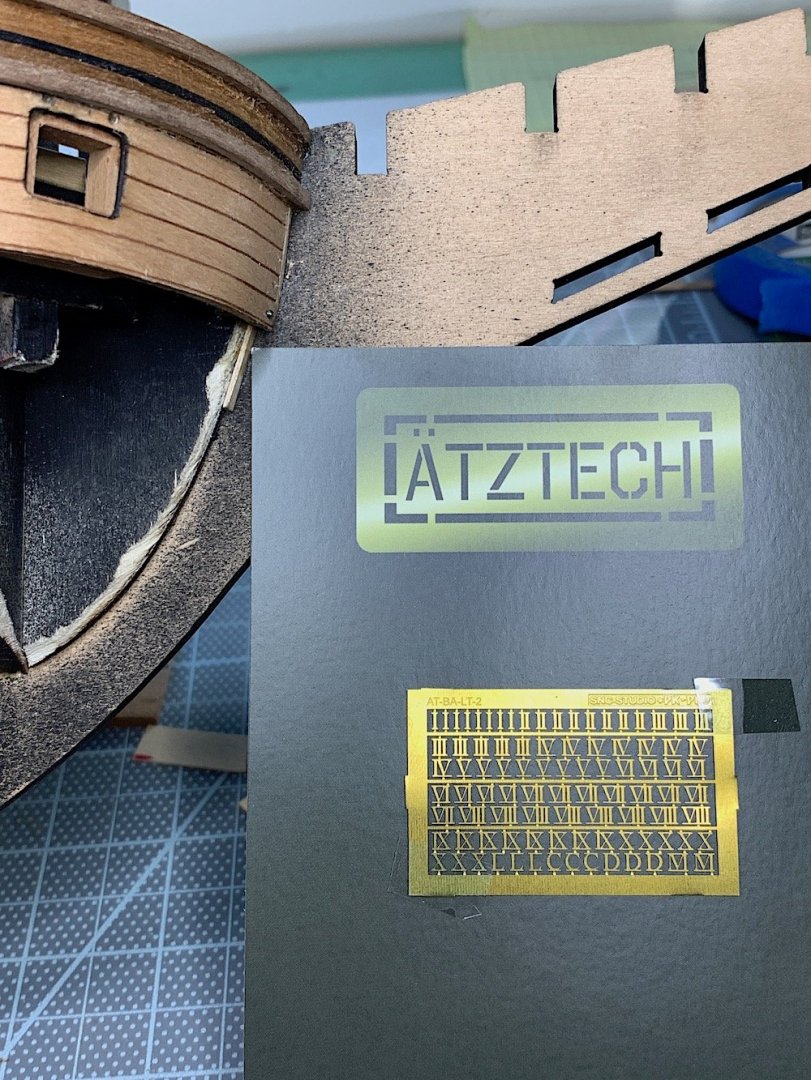
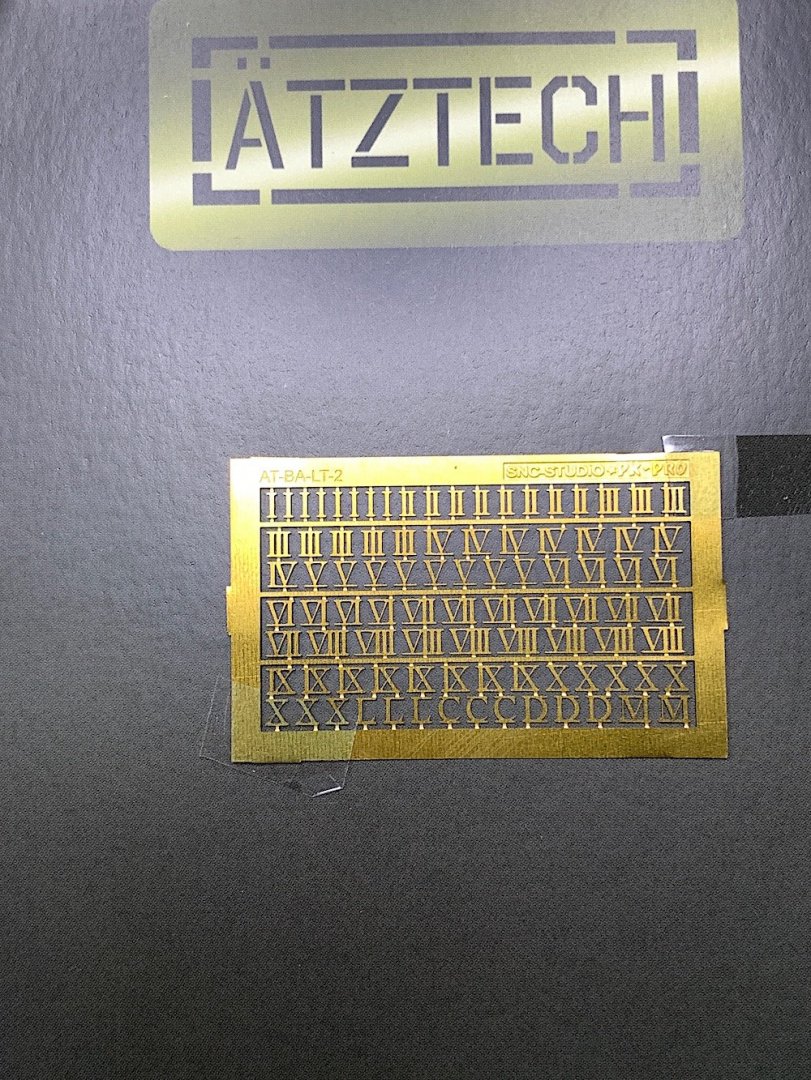
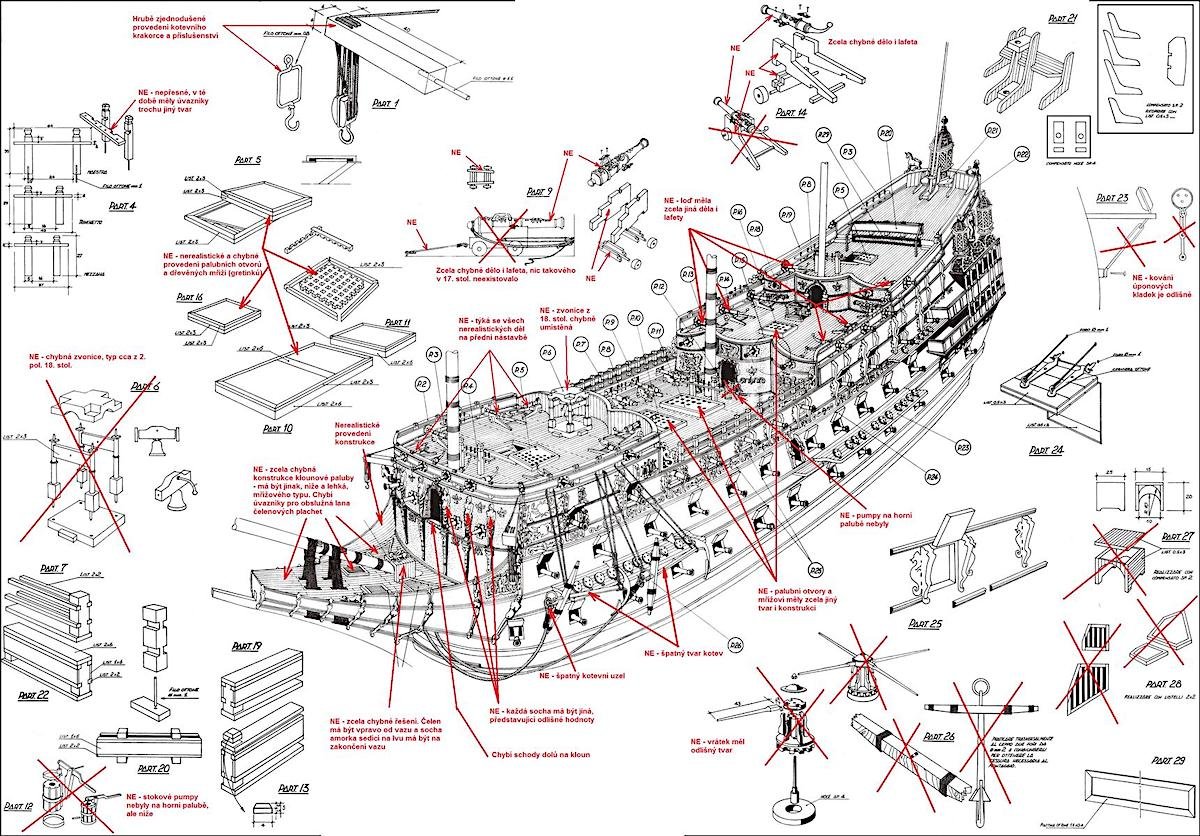
Robert, As always superb work; Fire buckets are beyond perfect - also depth markers look excellent. I plan on adding depth markers details for my current build. FYI found these brass etched examples https://www.hfminis.co.uk/shop?product=roman-numerals~hfpkpro05&category=accessories~etched-brass-%28architectural%29
- 527 replies
-
- 6
-
-
- caldercraft
- victory
- (and 1 more)
-
Martyn, Glad that you are back 🙂 She looks to be a very interesting project - really like the look and your details - well done Regards,
- 19 replies
-
- 2
-
-
- flying dutchman
- pirate
- (and 1 more)
-
Andre - much nicer indeed !!! - You saw that I also used a different stern lantern on my Vasa. Adds a big improvement indeed. The "wash" that I used helped the look. Your paint work added a nice look as well. The Vasa lantern was never recovered. They are still, today, finding many artifacts from around the wreck - interesting! When I went to the Vaset museum in 018 - I had a very nice meeting with Dr. Fred Hocker - he thought that the lantern, for the launch, had not yet been installed. So it's not know how it might have looked - specific to the Vasa,which was the flagship of the swedish navy.... Regards,
-
Jason, Concur with ALL all the superlatives posted above - and as a minor thought your flag also came out Fantastic!! Sincerely,
- 800 replies
-
- 2
-
-
- snake
- caldercraft
- (and 1 more)
-
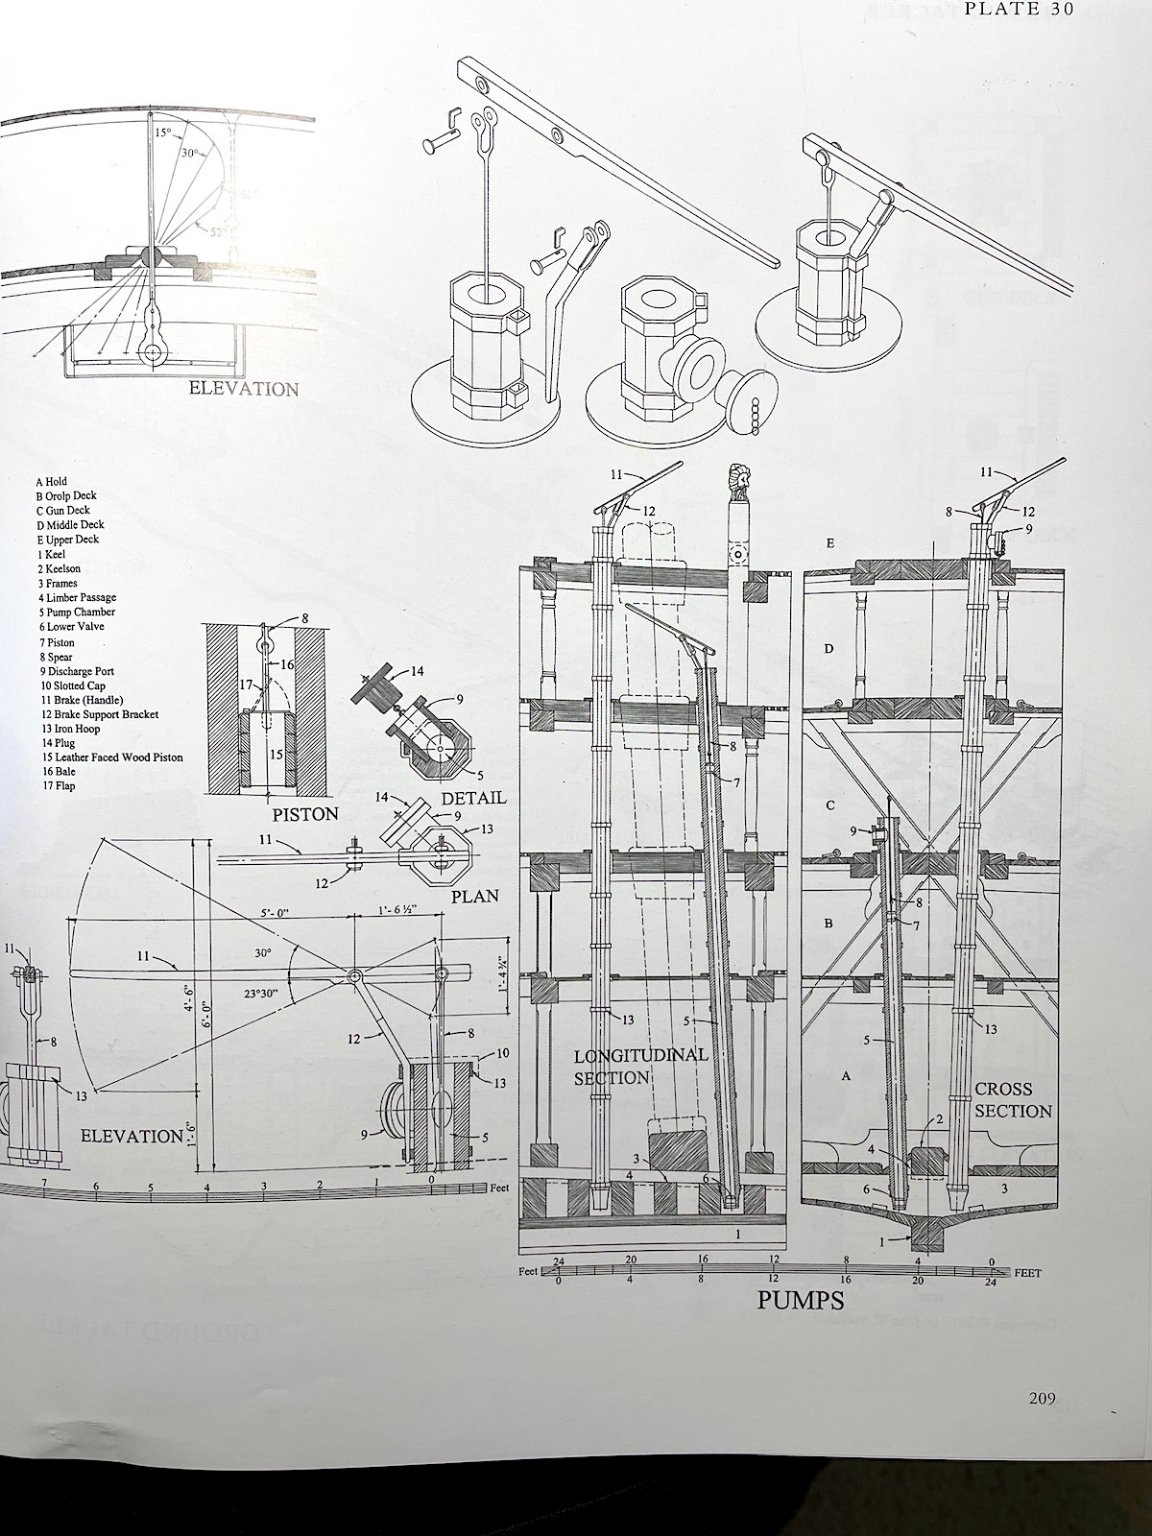
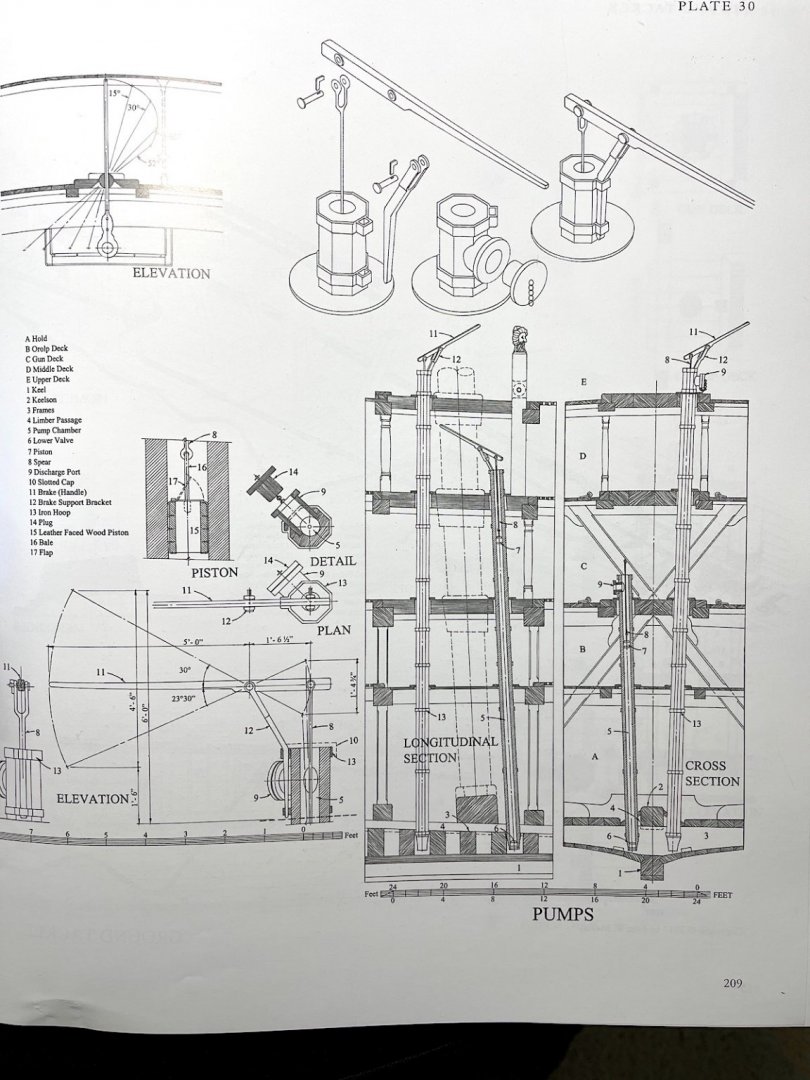
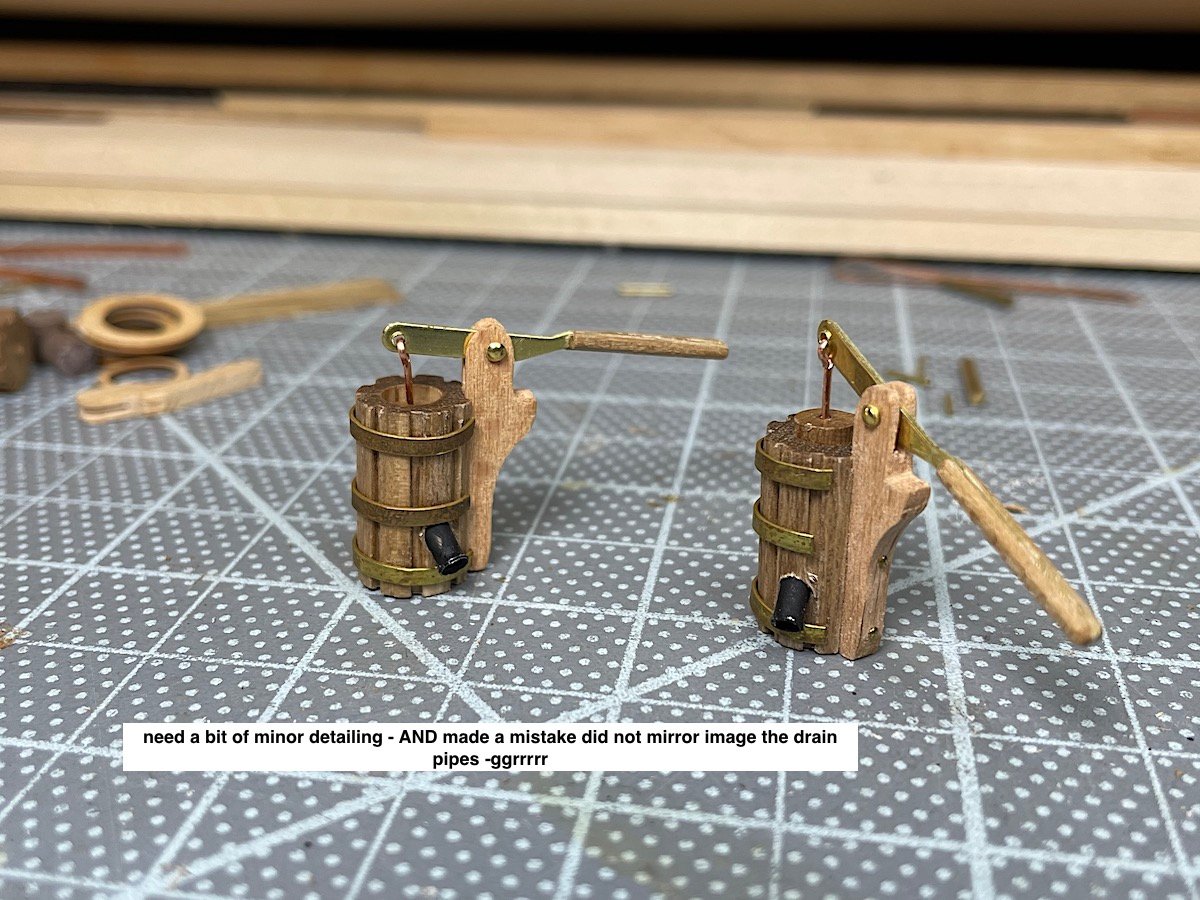
Frank: As always thanks appreciate your thoughts - Patrick: Noted thanks for the post - Hmm I might figure a way of filling the grooves then adding a stain - thanks for the information. Sergal was getting too creative - again haha - No drains? seems odd -where would the bilged pumped water go? - I was going to follow McKay's image but seemed a bit too much work...actually I was tempted to at least add the drains and caps from his images.🤔 but, this project will look "so busy" that these two pumps will be minor details - still always thanks for your information and advice.
-
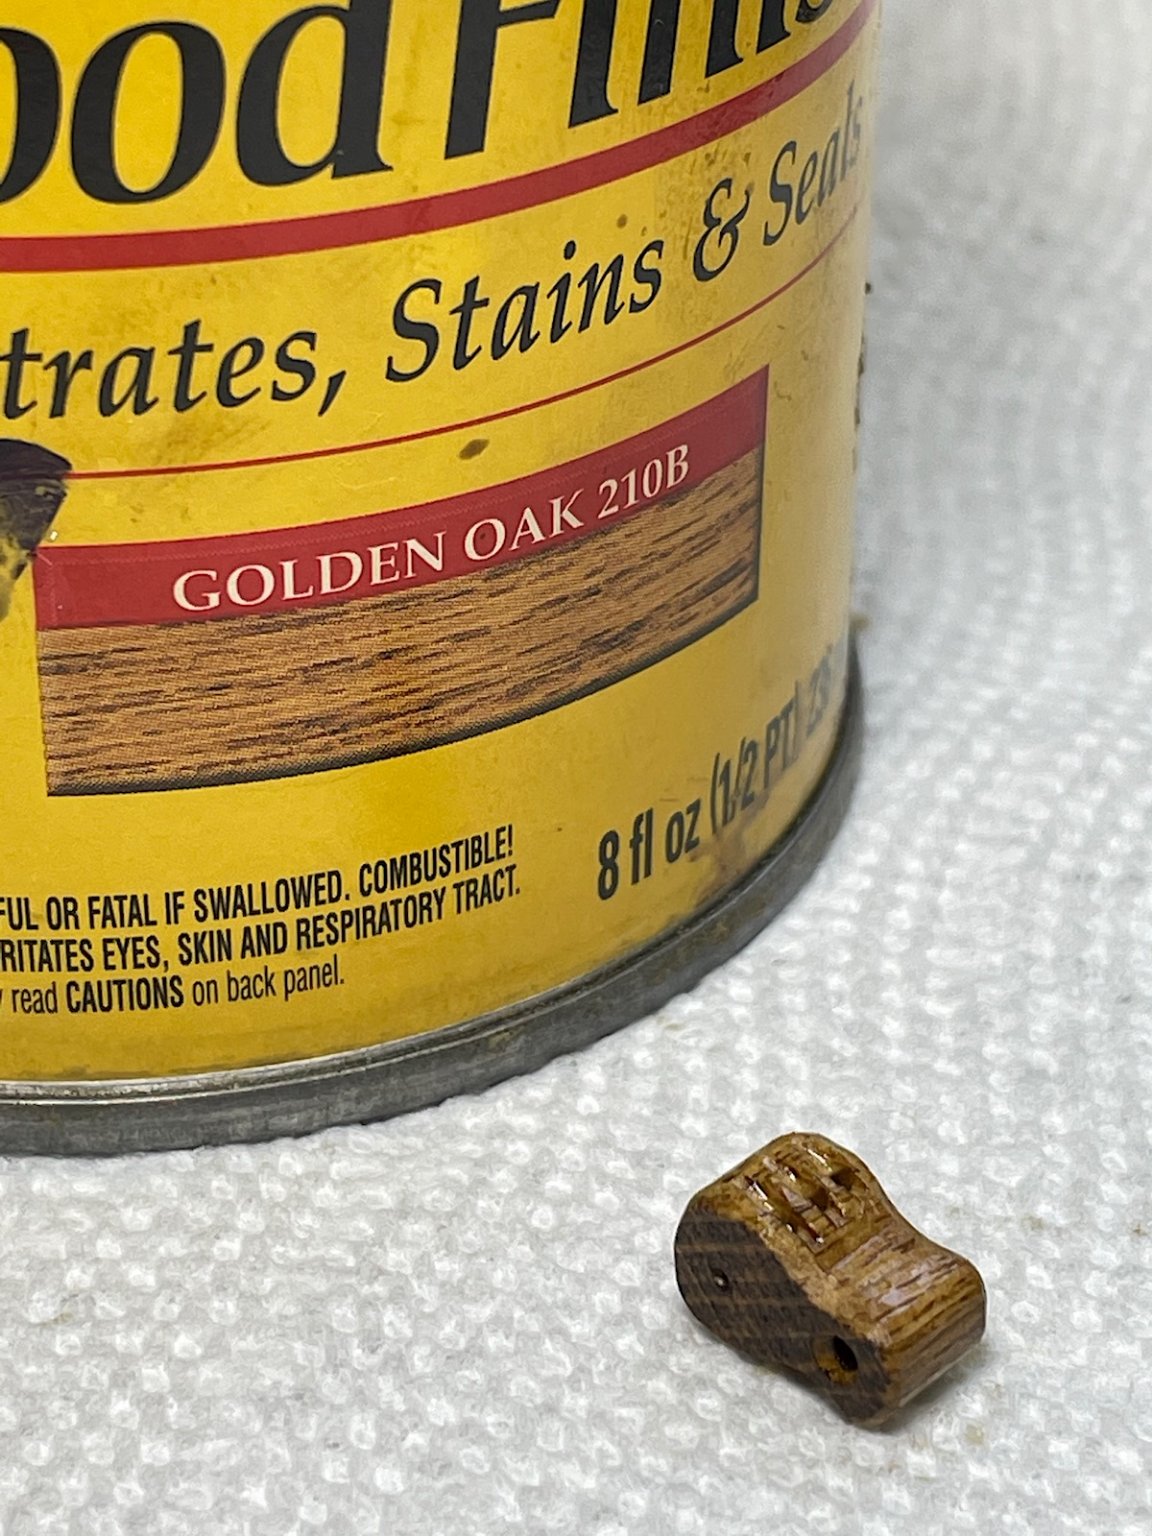
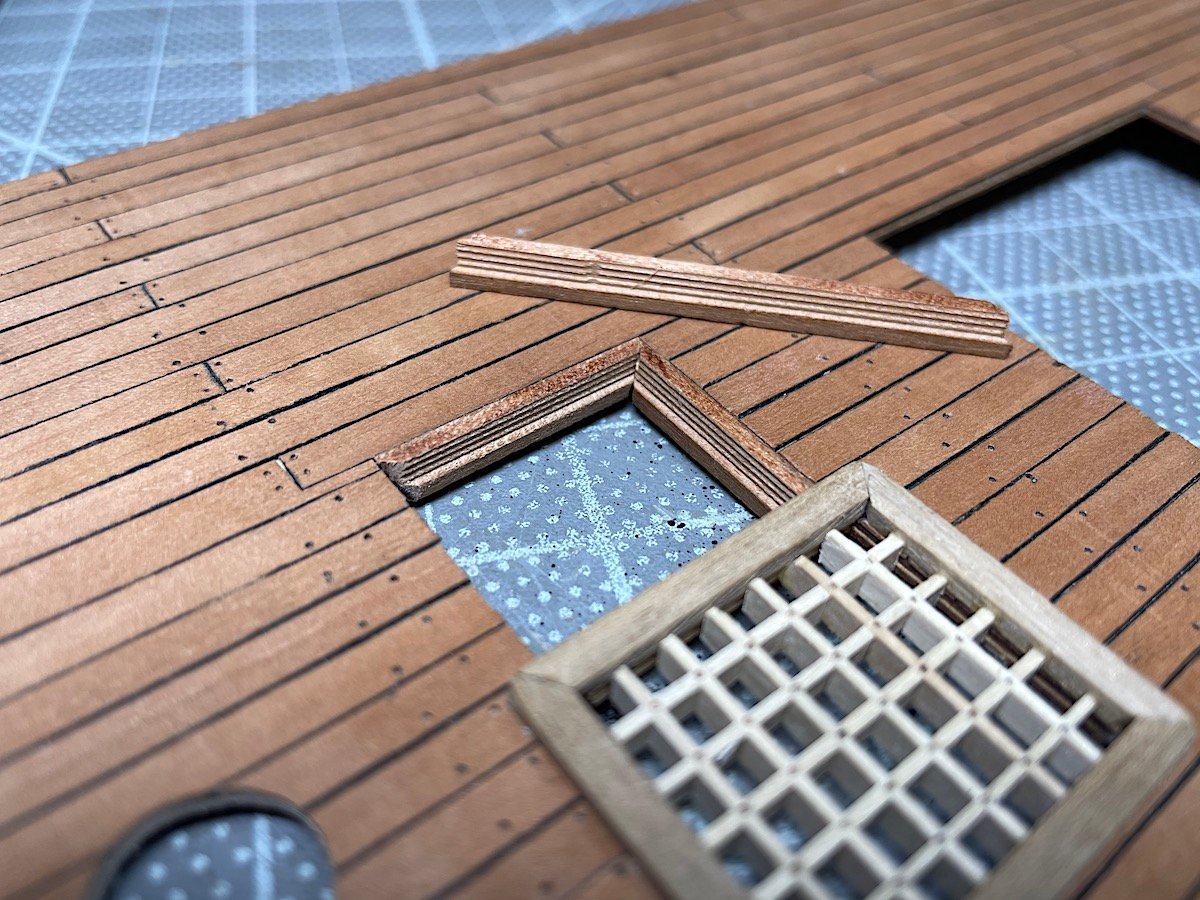
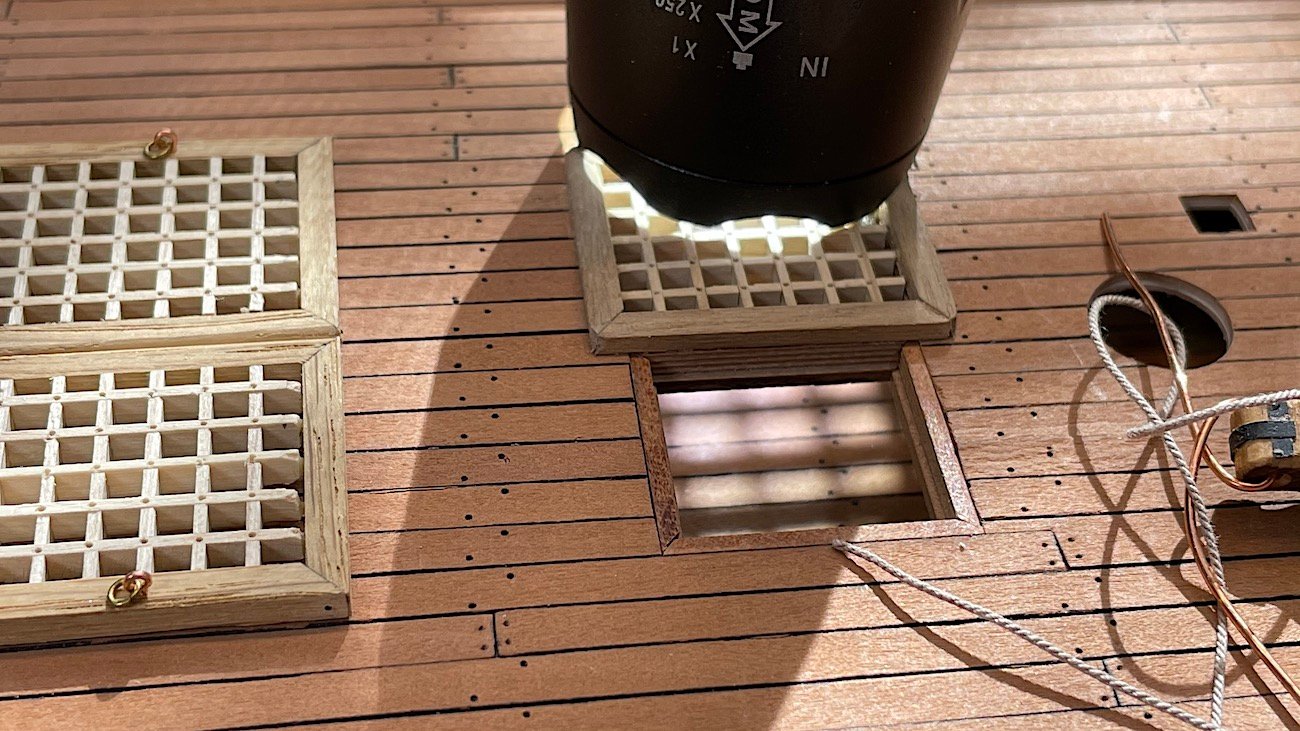
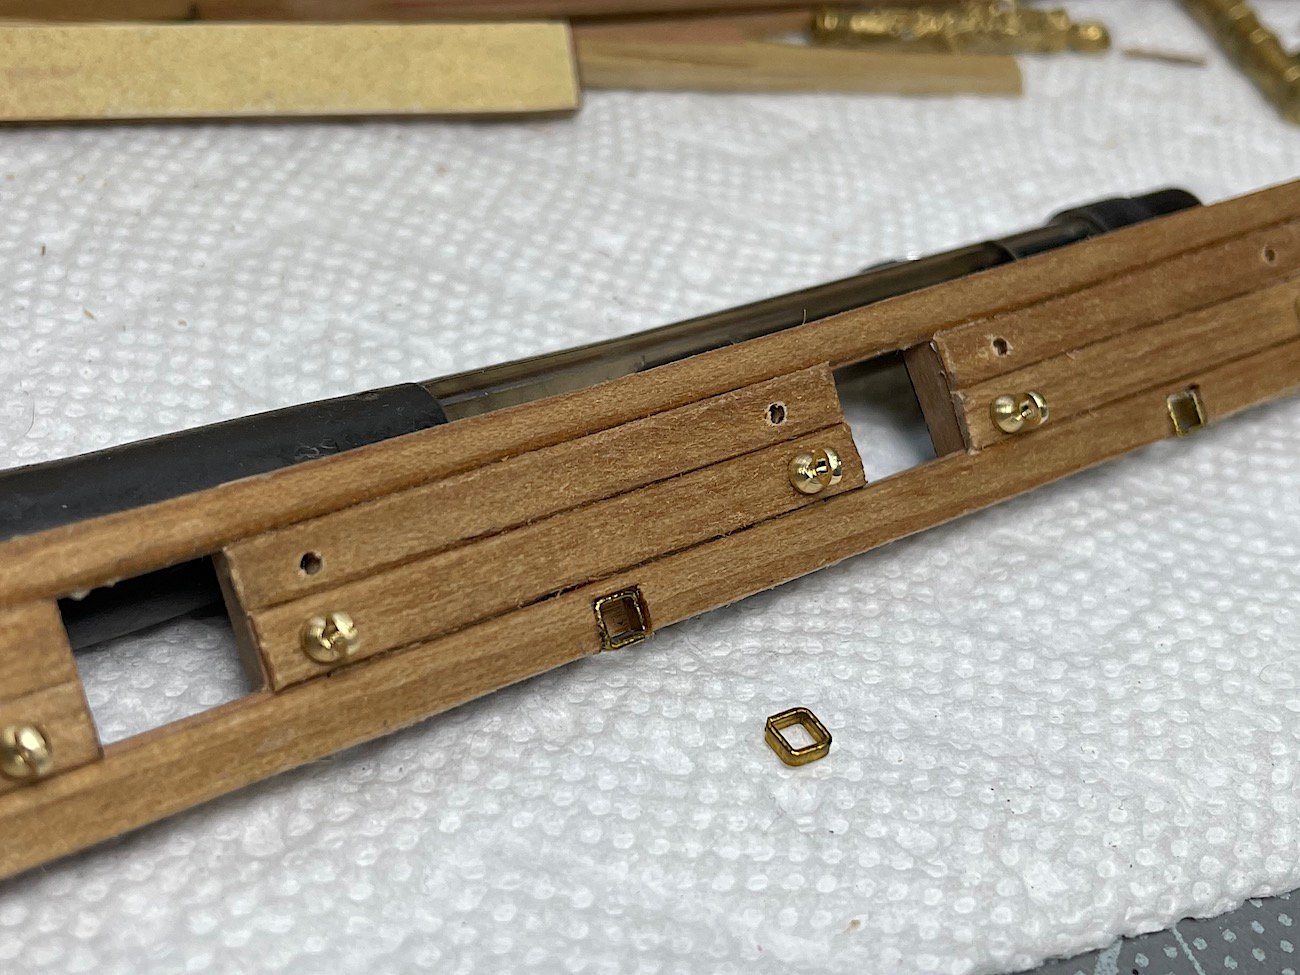
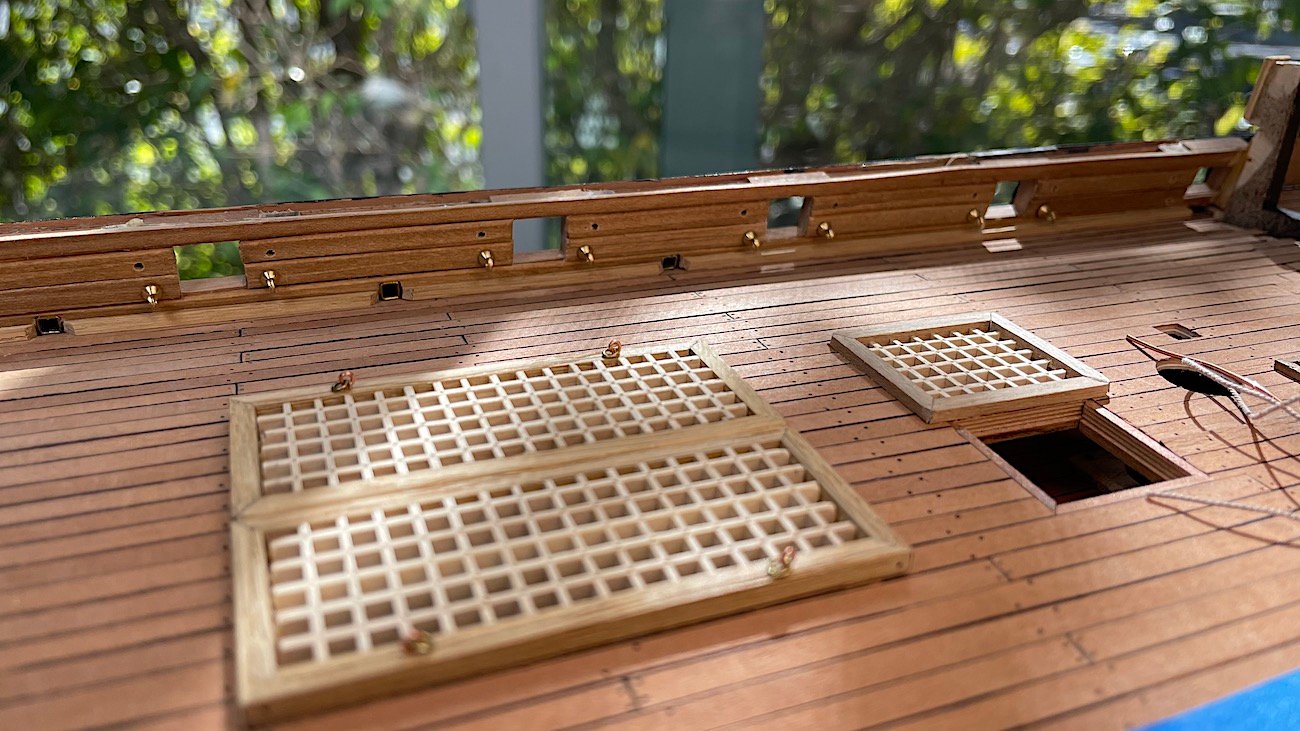
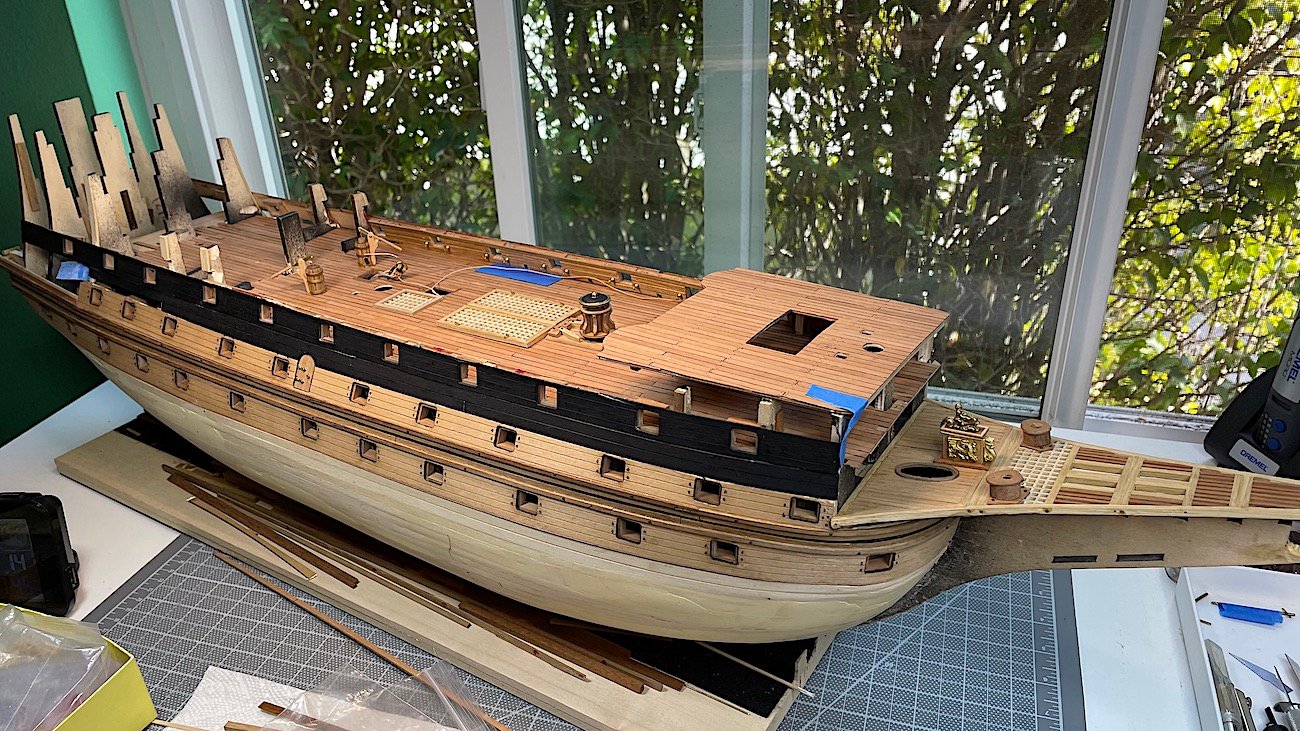
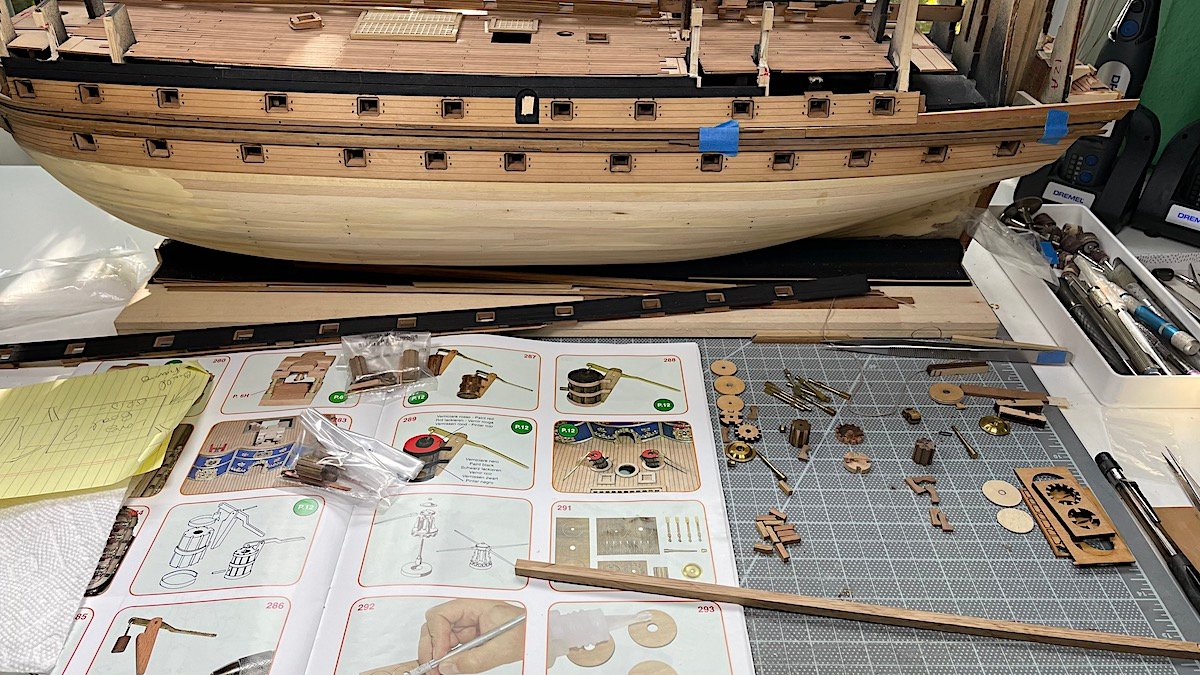
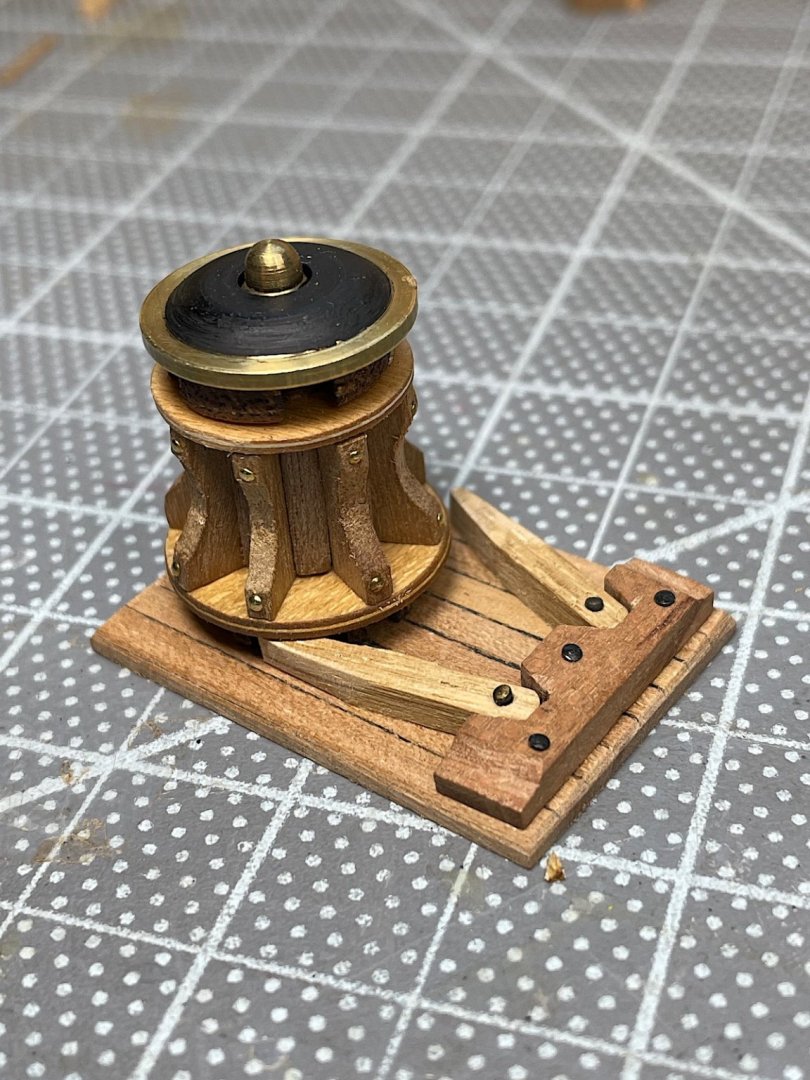
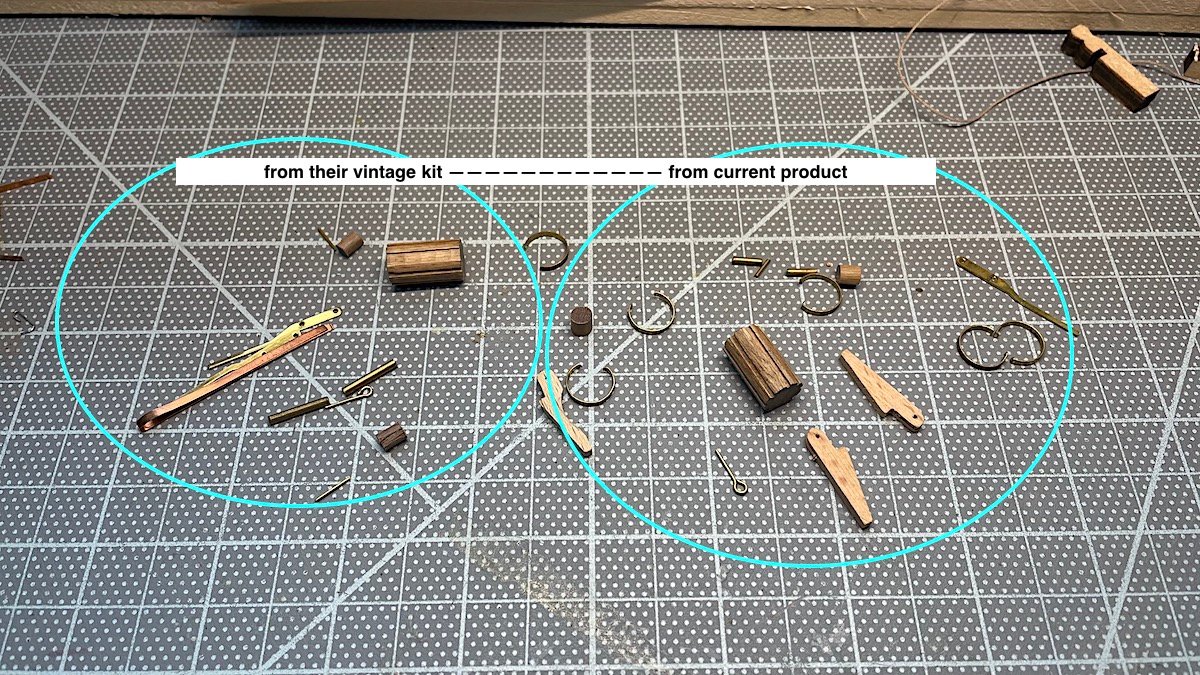
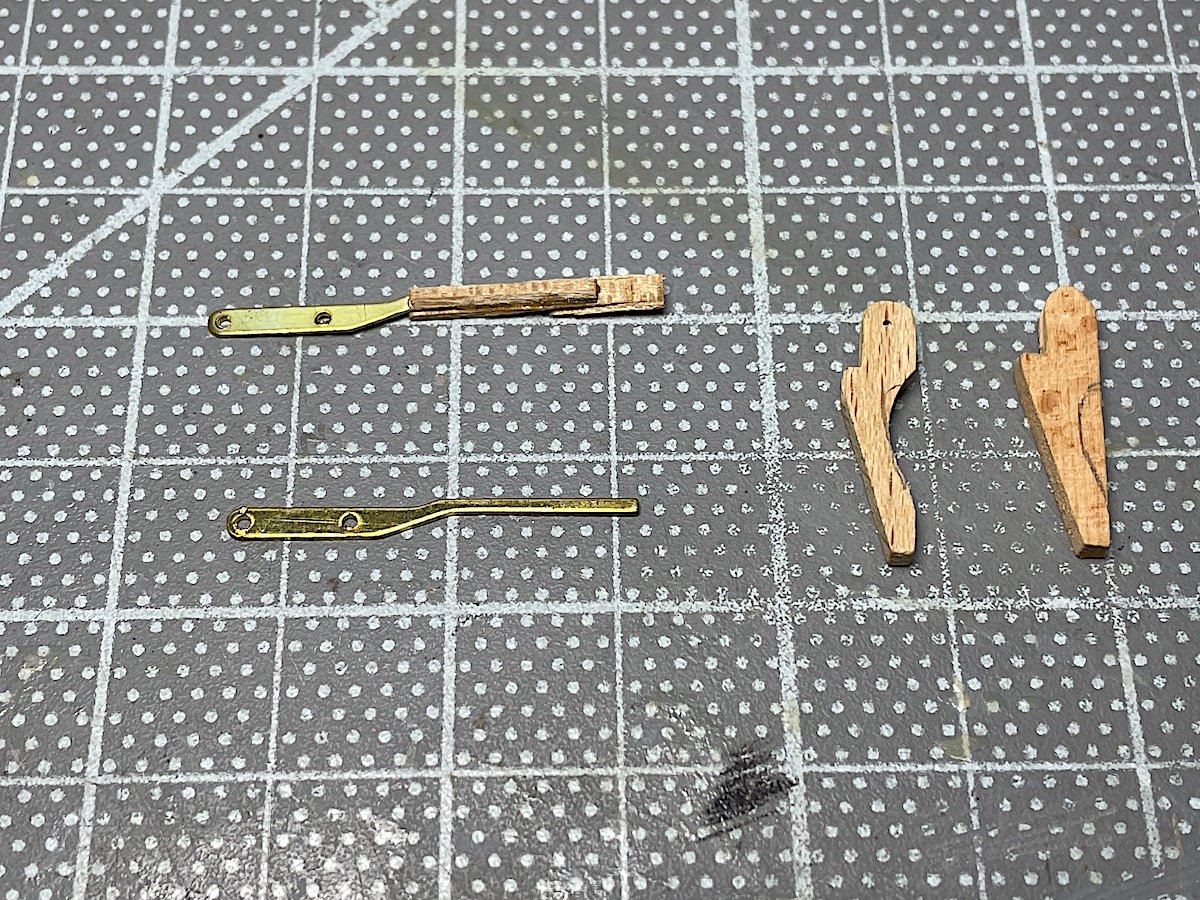
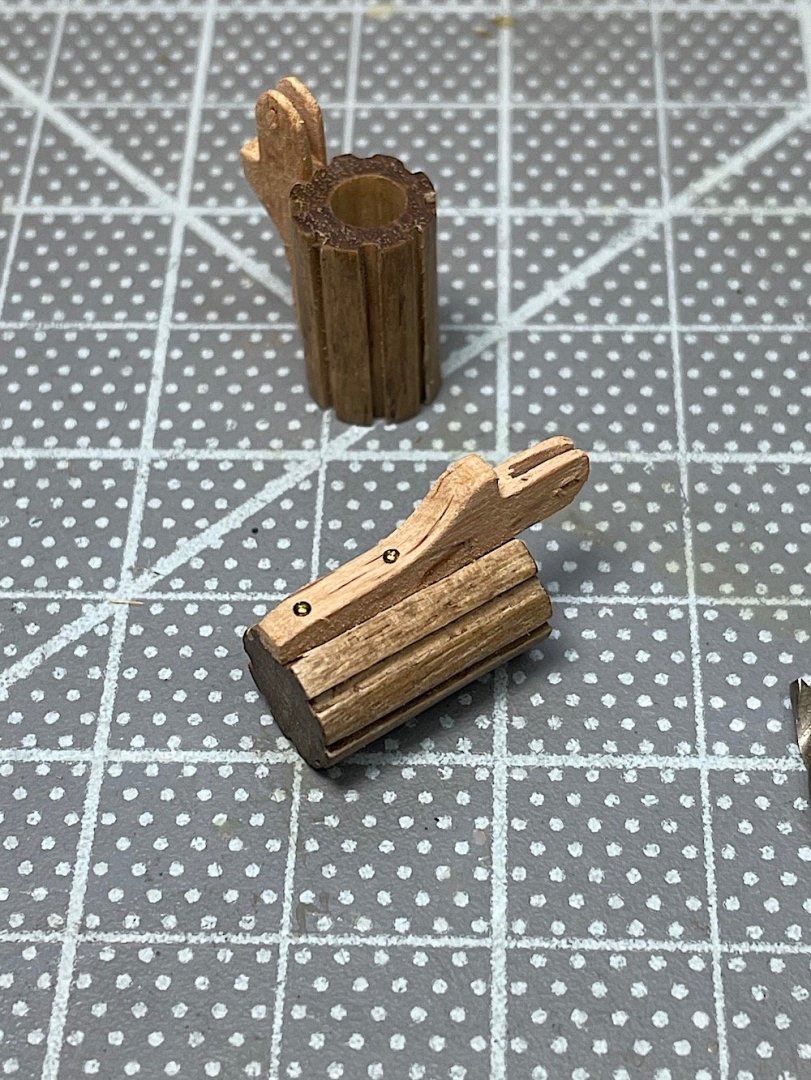
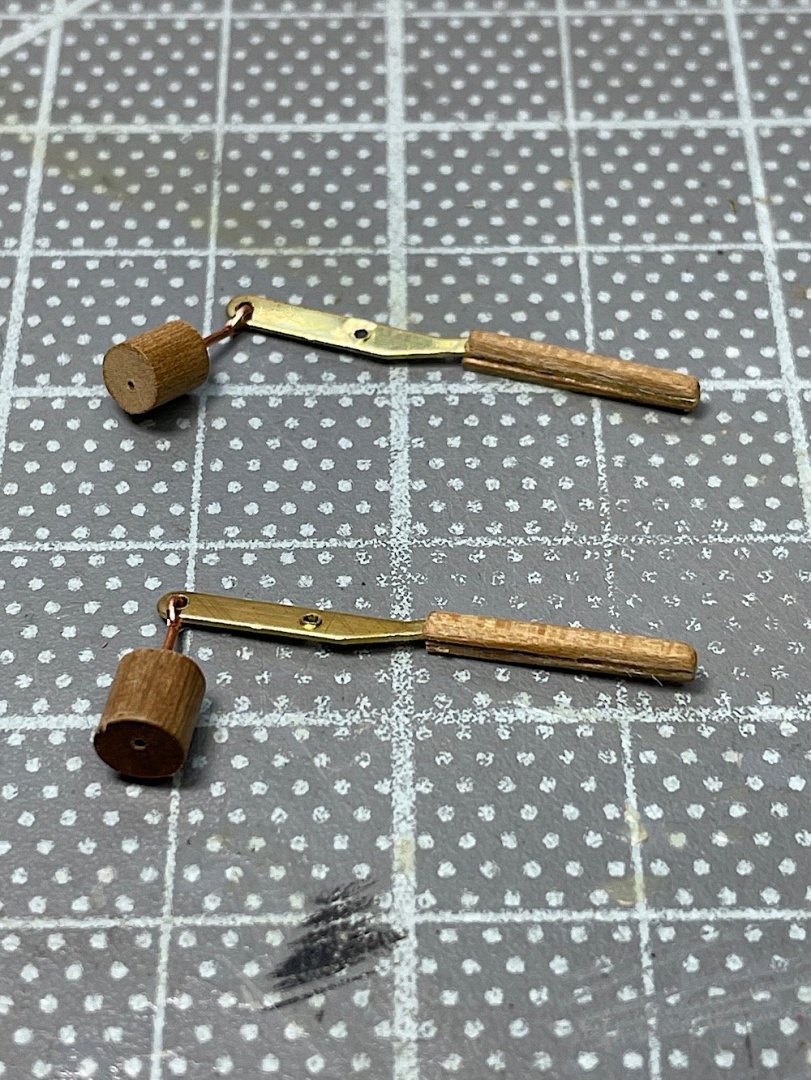
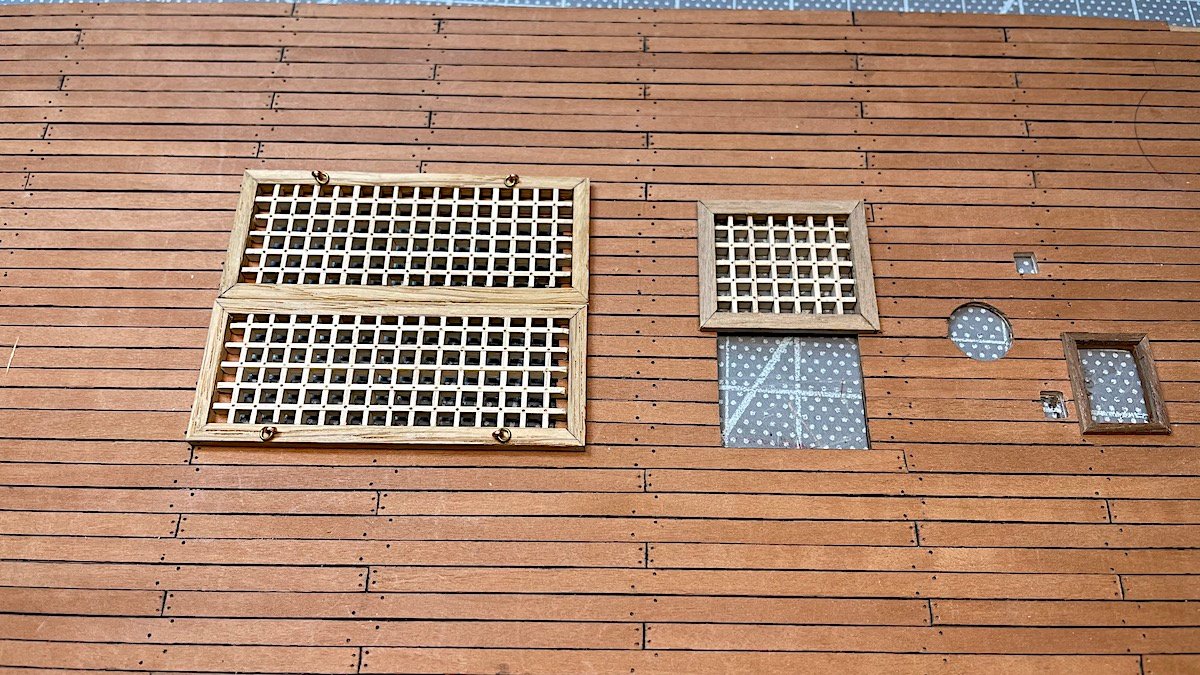
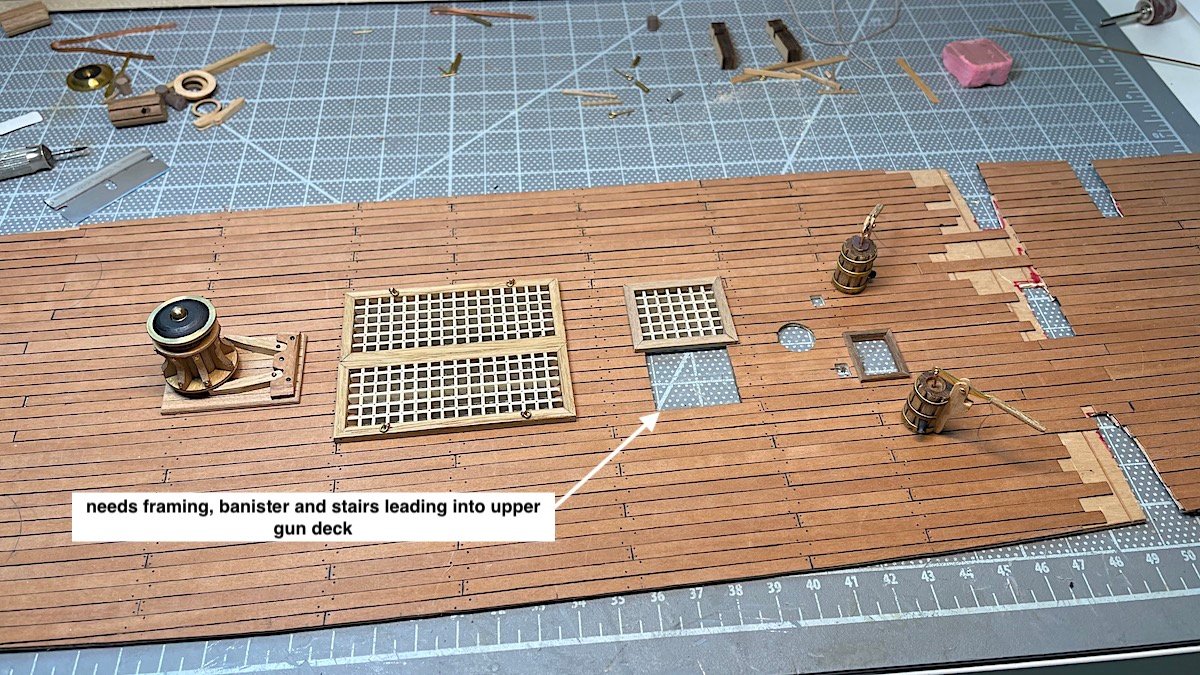
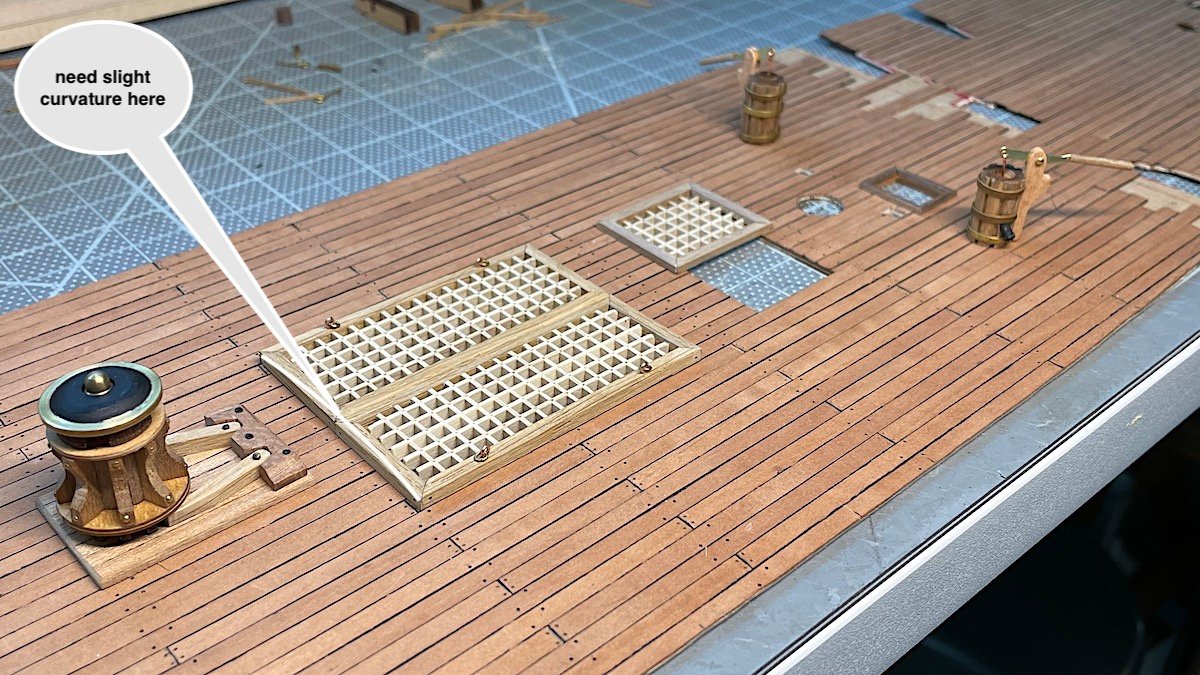
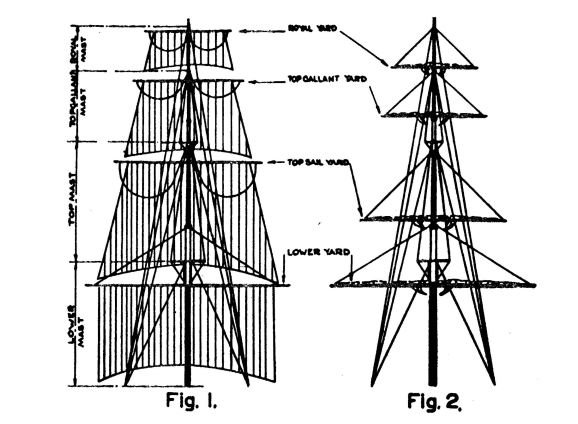
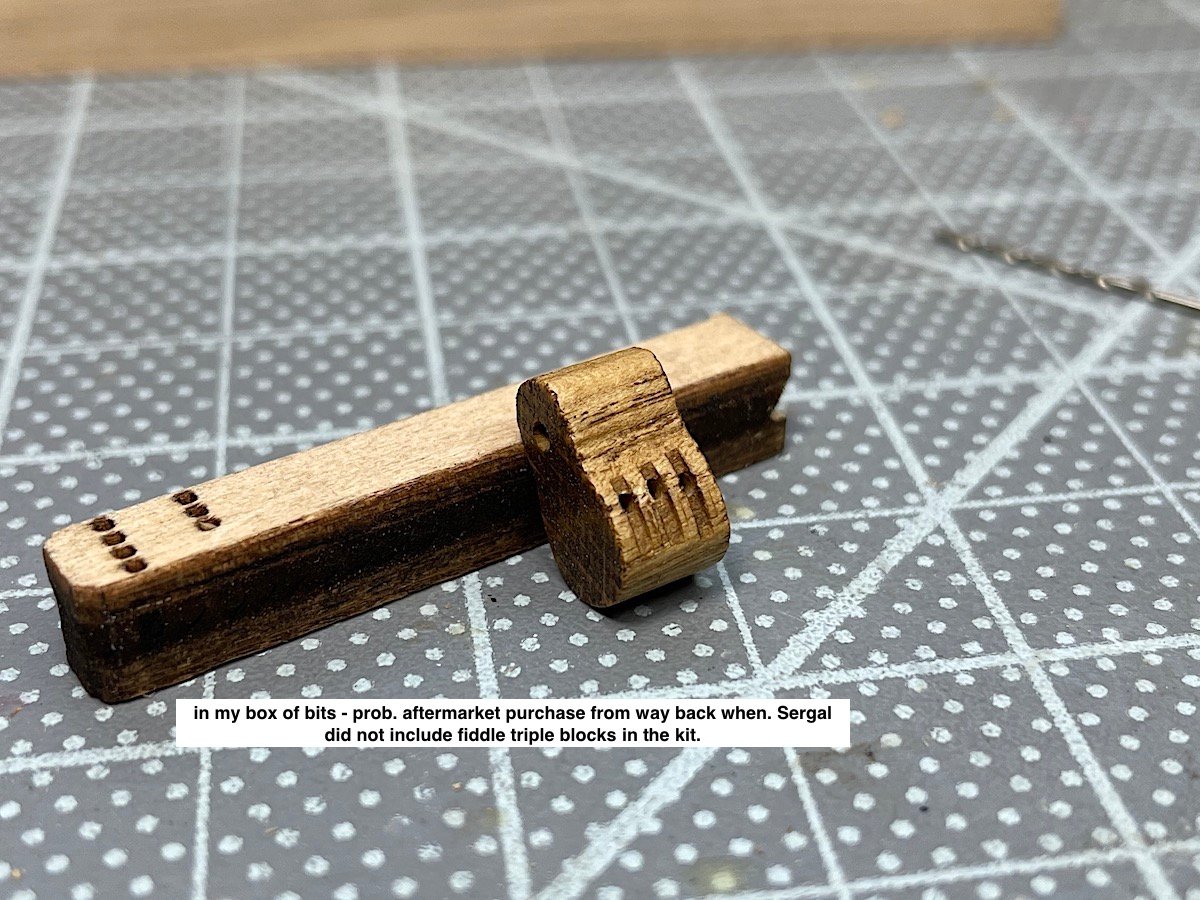
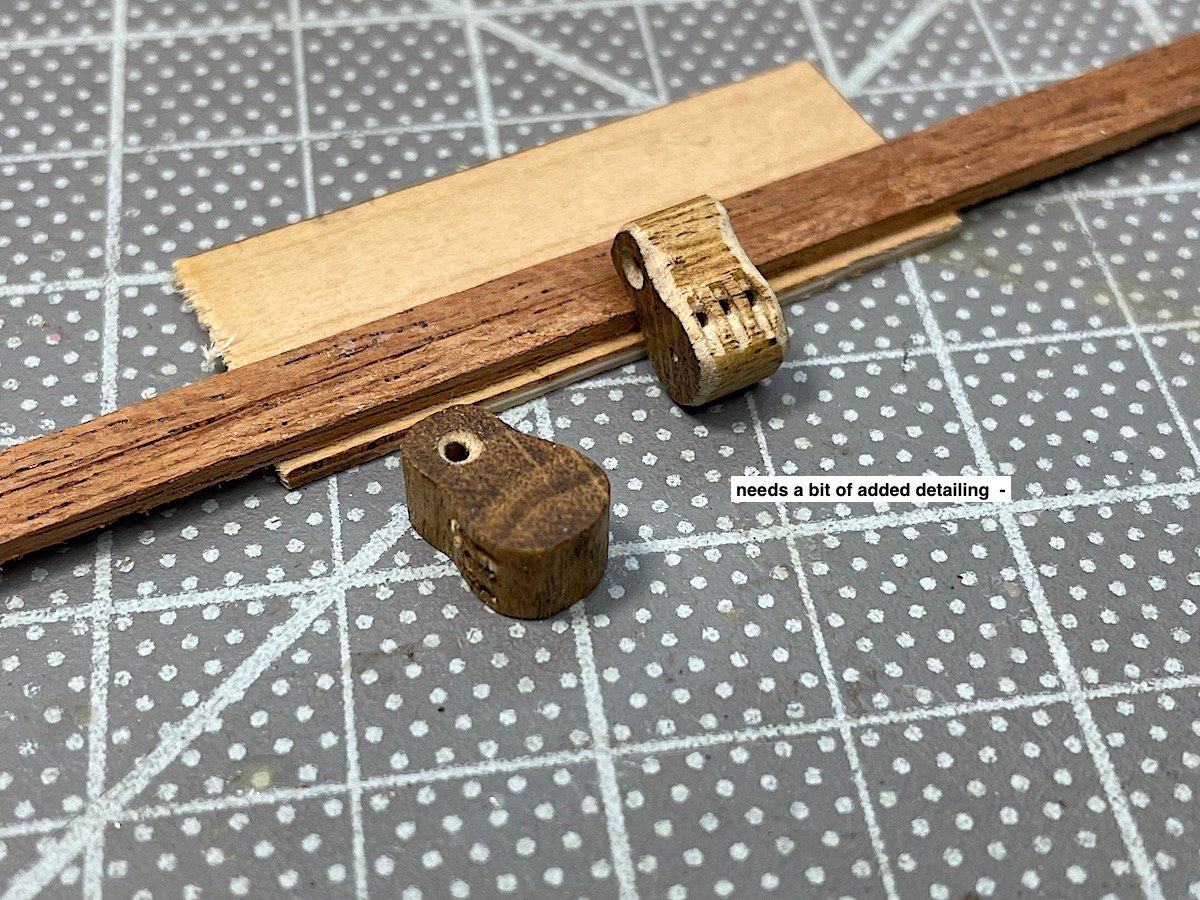
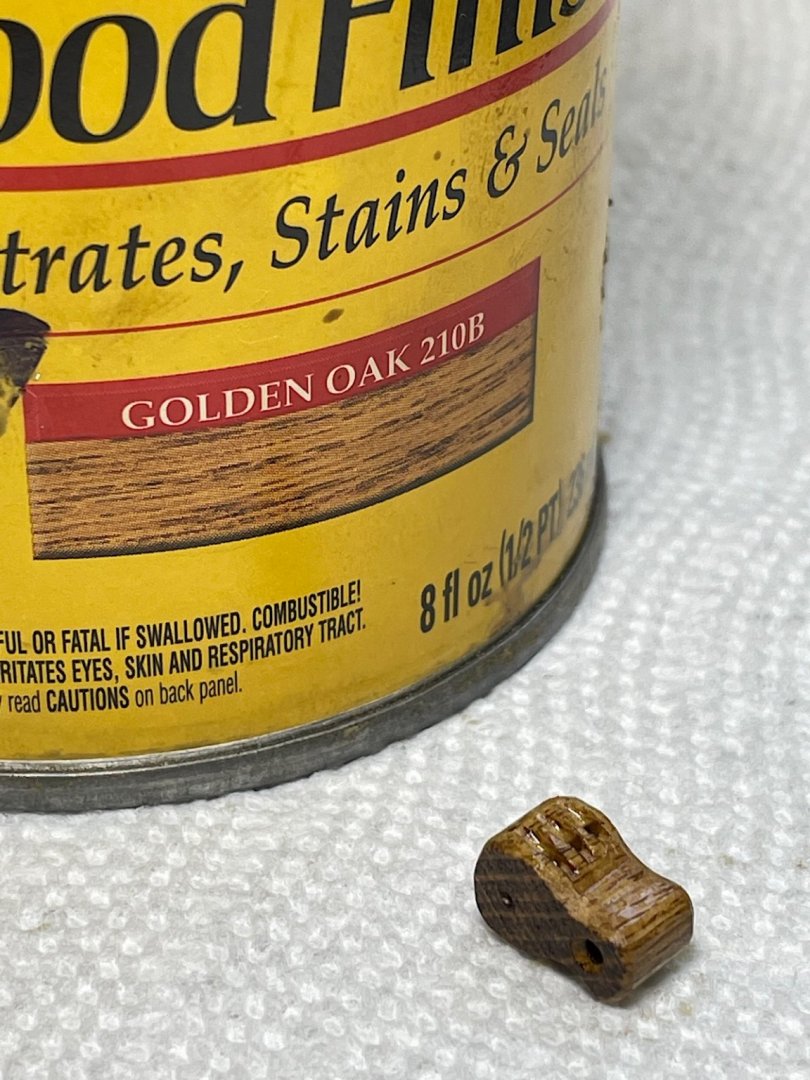
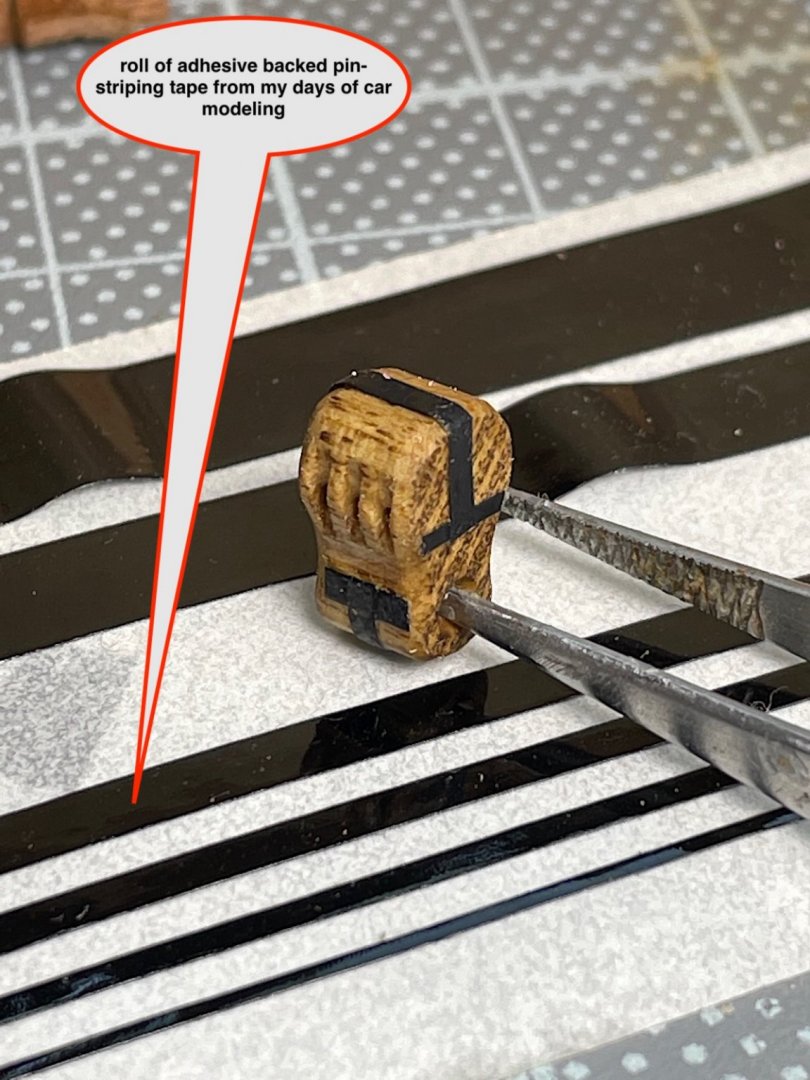
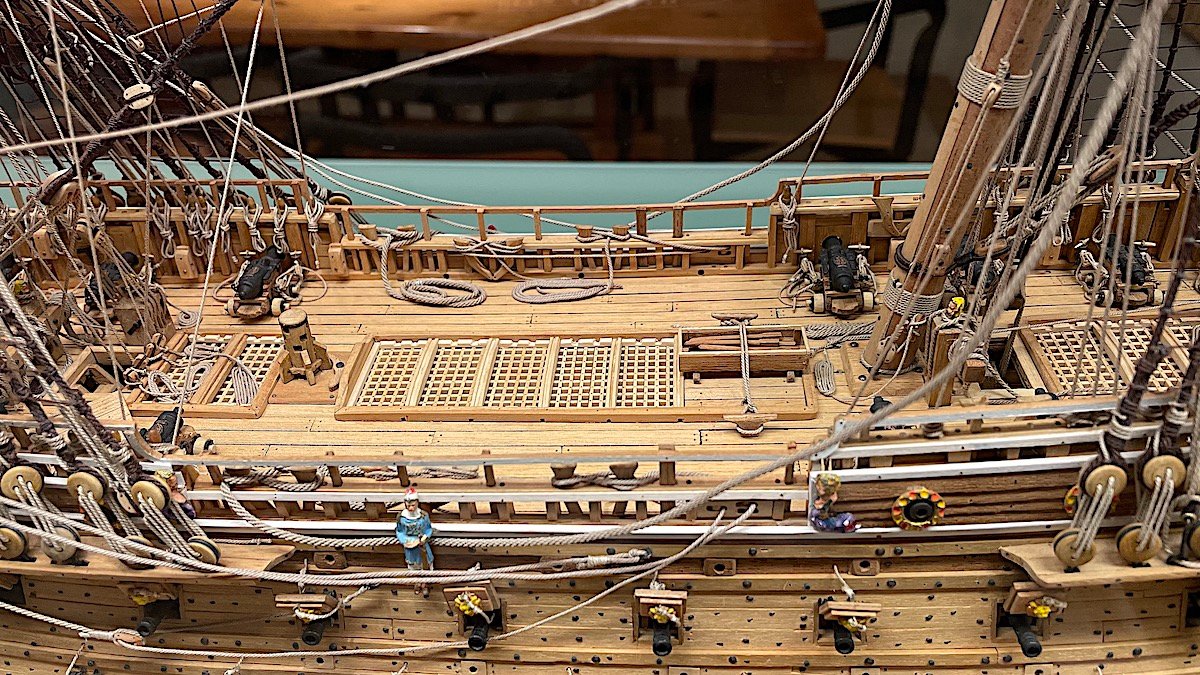
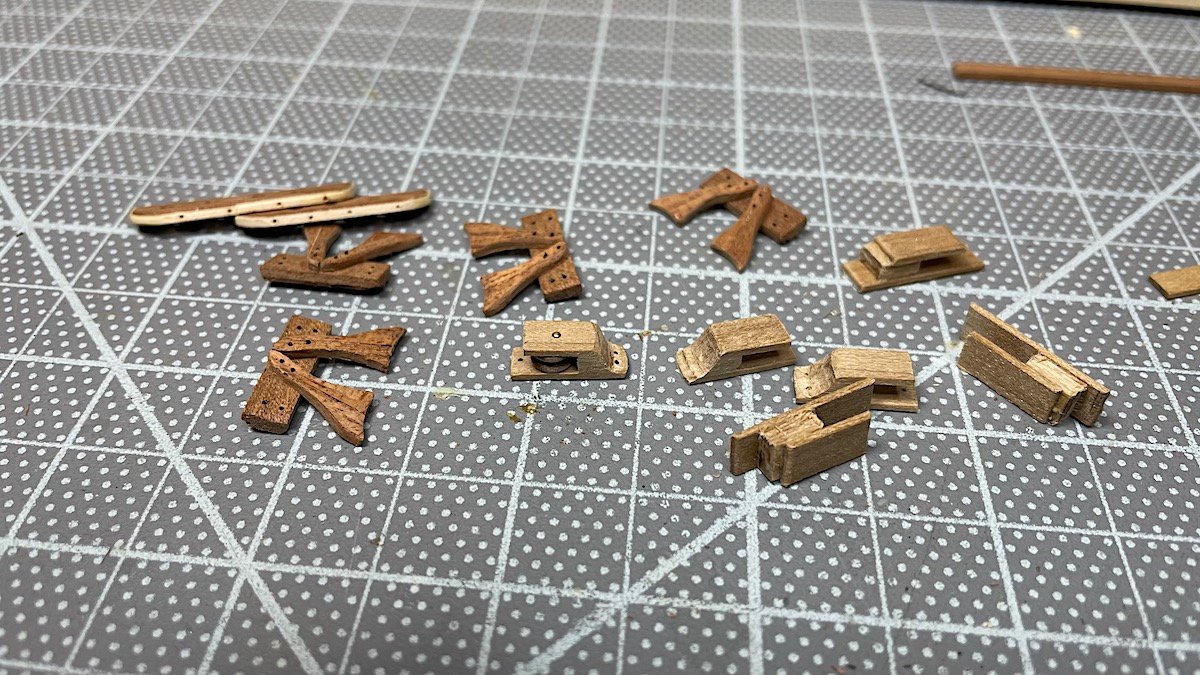
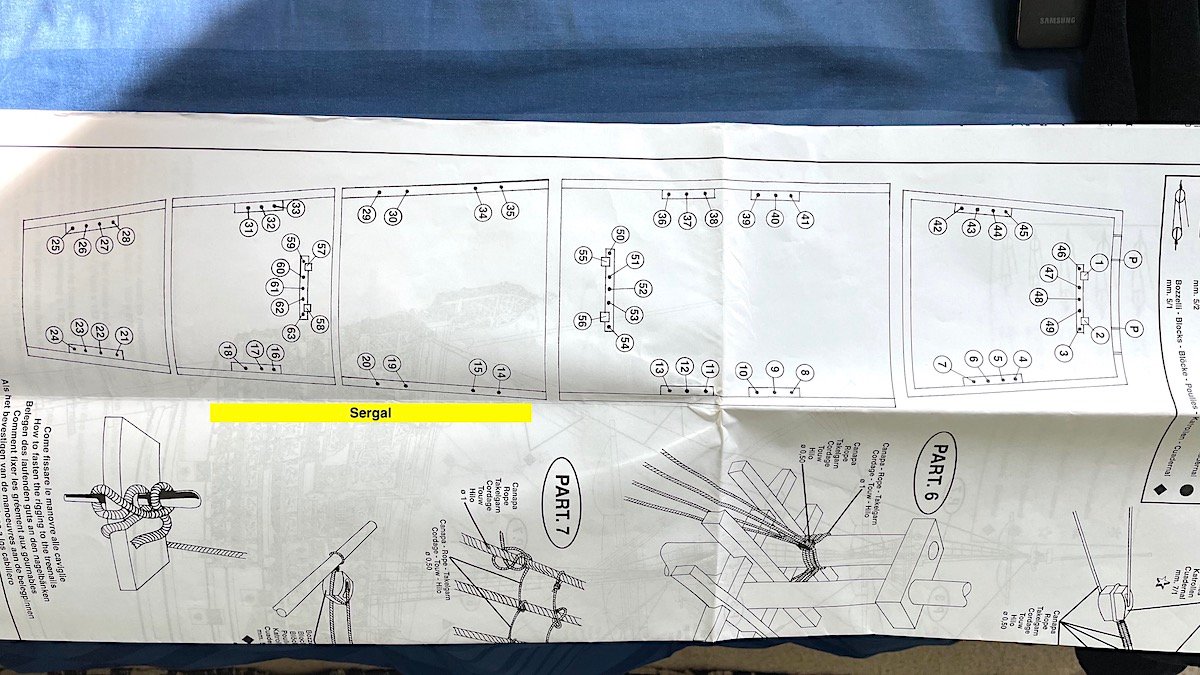
Kirill4: Thanks so much for your images, very informative and helpful – very kind. I do have the Anderson book, indeed excellent. Yes all mast yard hails will use the same methods. Thanks again for your excellent comments. Minor update – still waiting for bits from Cornwall – not their fault; international flights, USPS mail, both almost out of business…..🙁 So in the meantime worked on the capstan, bilge pumps, and main deck gratings; the Sergal provided pumps and capstan were actually quite good. Added some details but all in all fairly satisfied with these bits. The gratings Sergal provided (laser etched) I did not plan on using, much the same with all the decks. But for these bits the Sergal instructions were very useful. Here are some images. Regards,

-
Patrick, Nice -- I'm working on sump pumps as well. What is that around the bases? I'm not sure if I should directly glew them to the deck, or did sump pumps have some sort of "seal" at their bases --Hmmmm? Regards,
- 756 replies
-
- 1
-
-
- galleon
- golden hind
- (and 2 more)
-
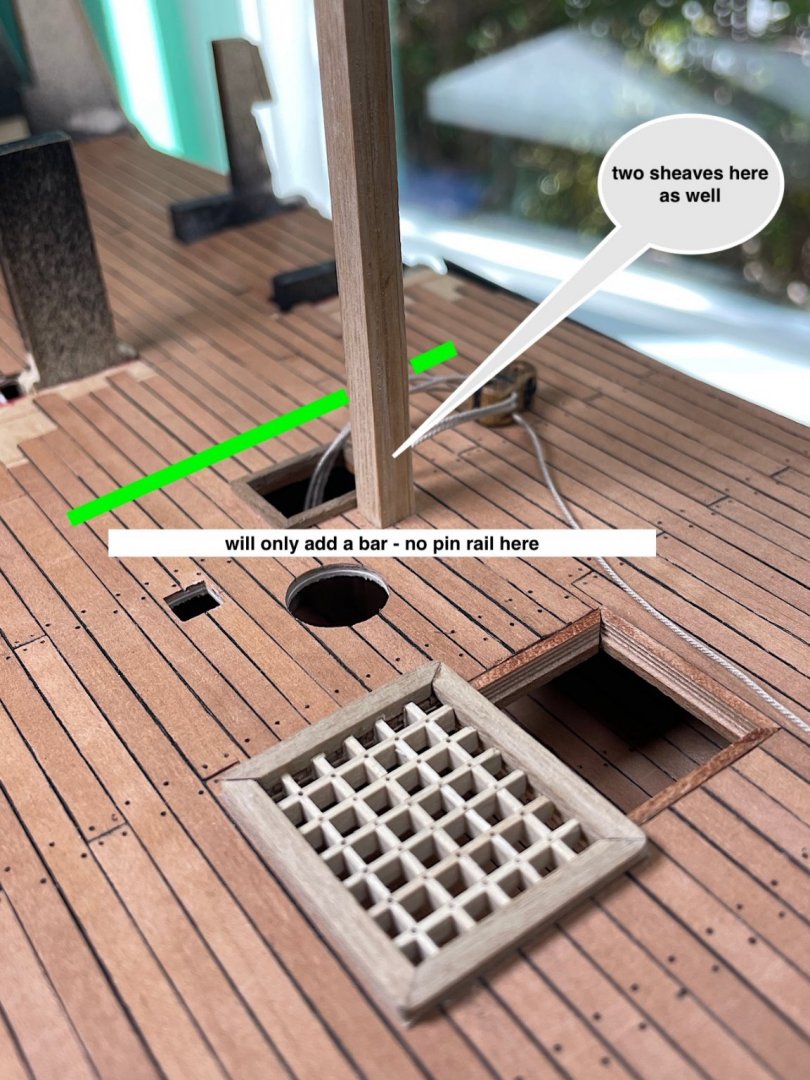
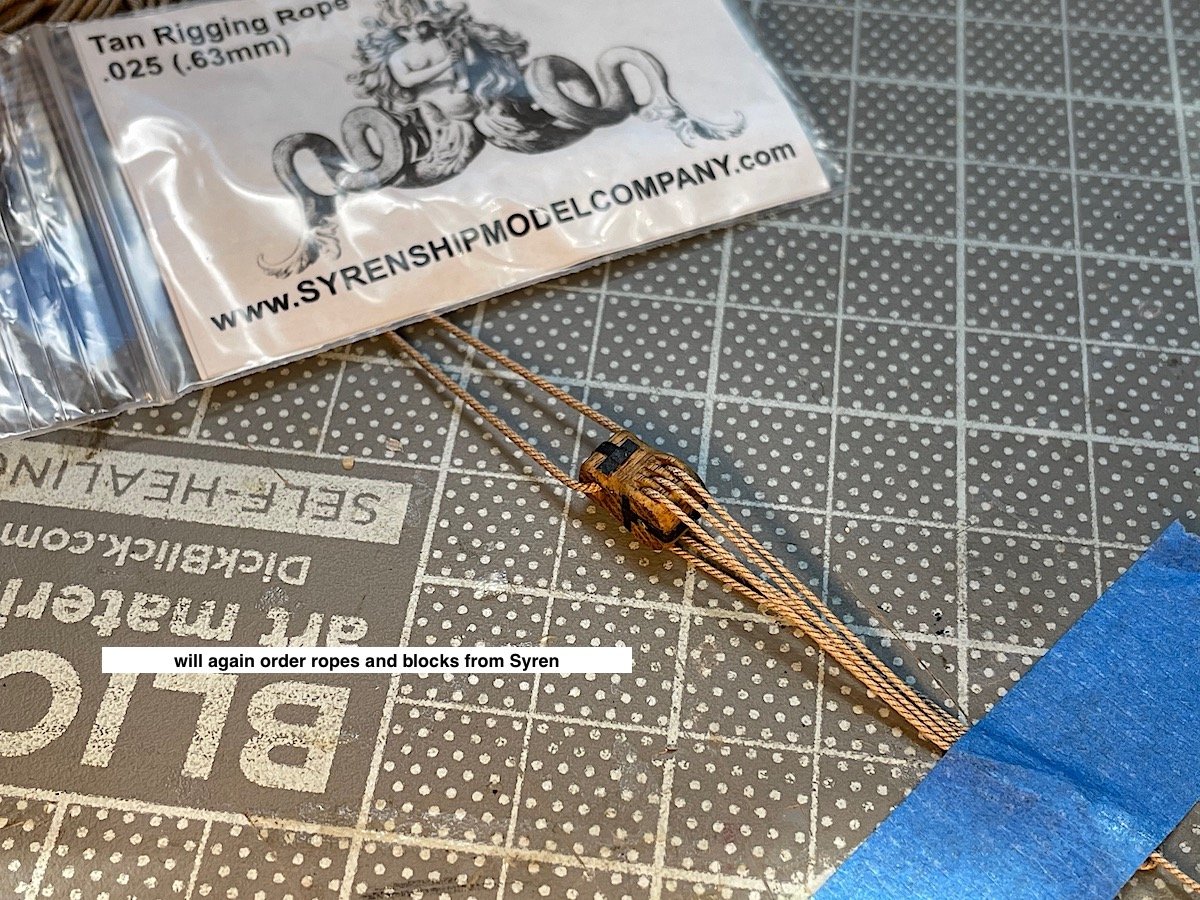
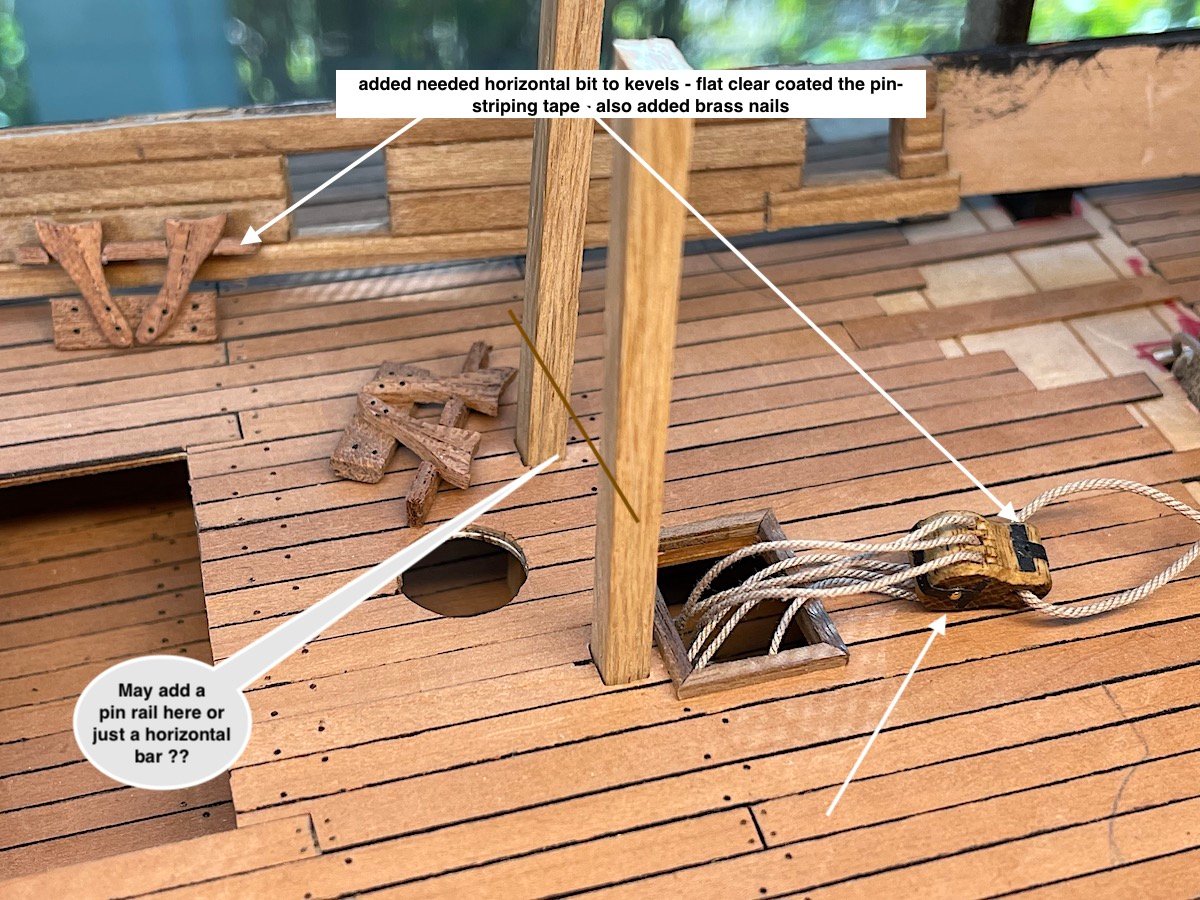
Kirill4, Thanks for your images and your comments much appreciated - I think that I will, at the base of the three masts, just install knighheads with sheaves within their bases - along with horizontal bars for the main and formast. Pins will be located at the several bulkhead railings and along the sides within upper railings. Think that I will also skip complete sails on this project - maybe just adding two furled examples to lower main and foremast. all upper yards will just be lowered without sails as in the image below. The main halyard block was a guess - some museum builders included them others did not - will add one to foremast as well Hmmm? Again thanks for your notes and images.
-
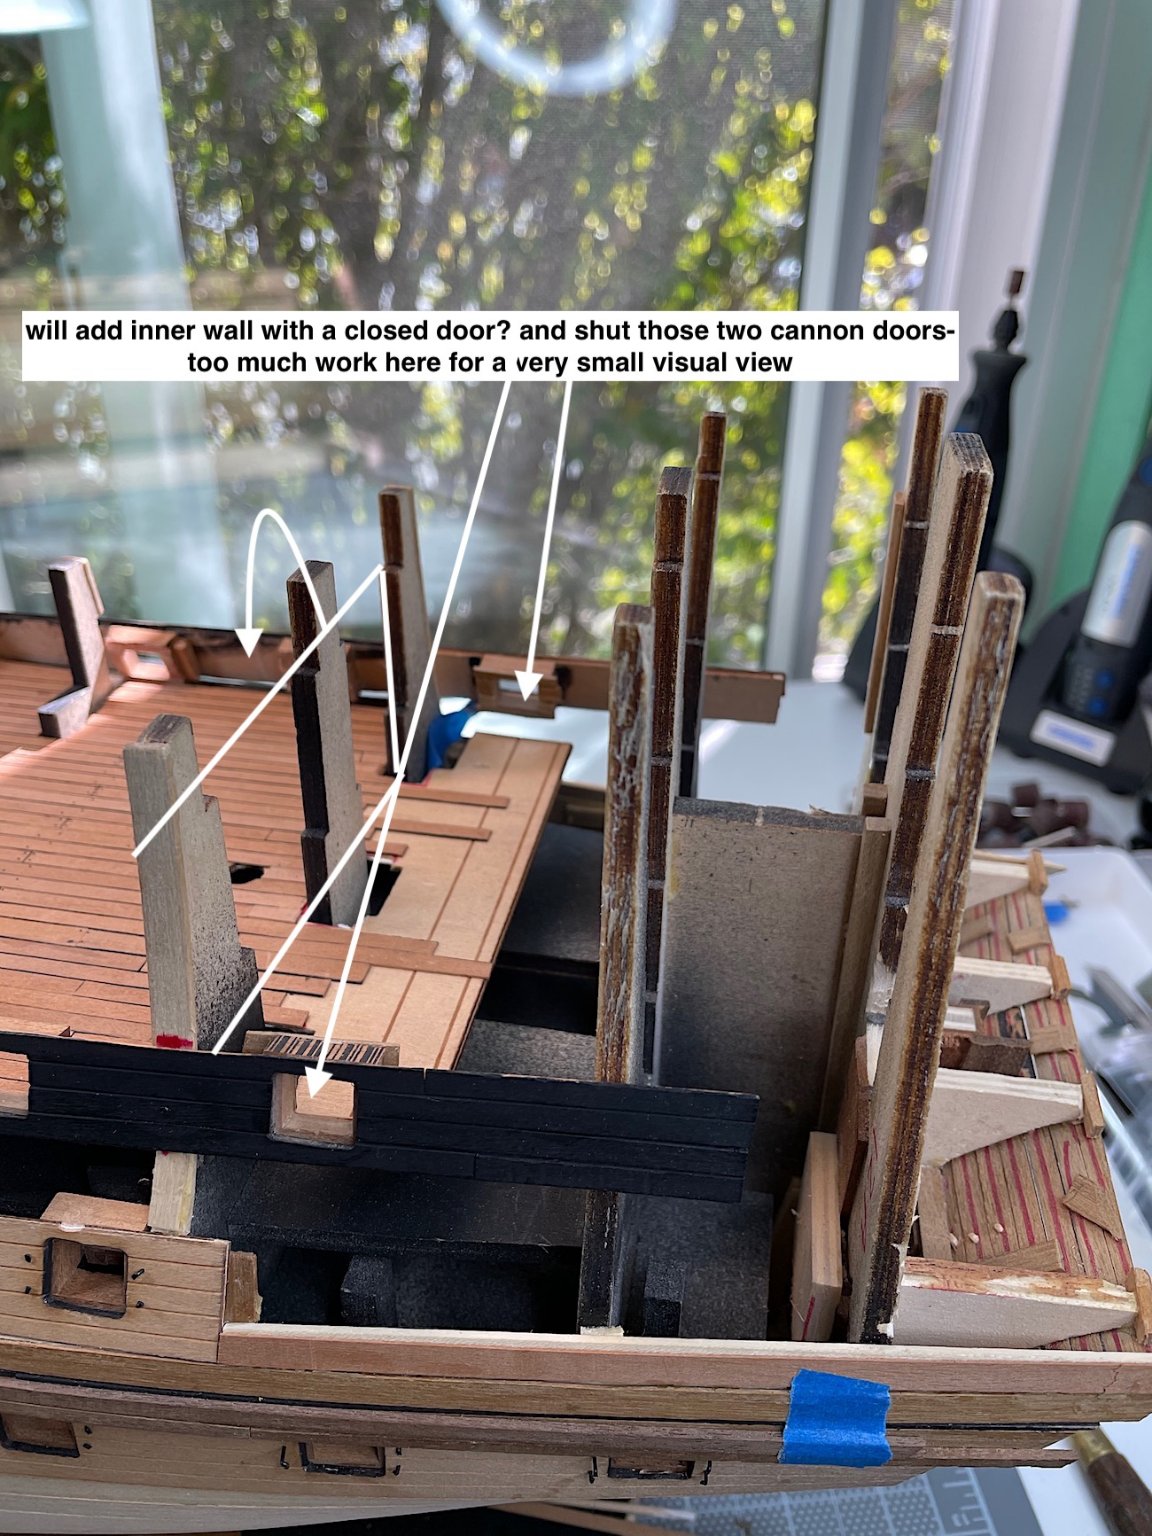
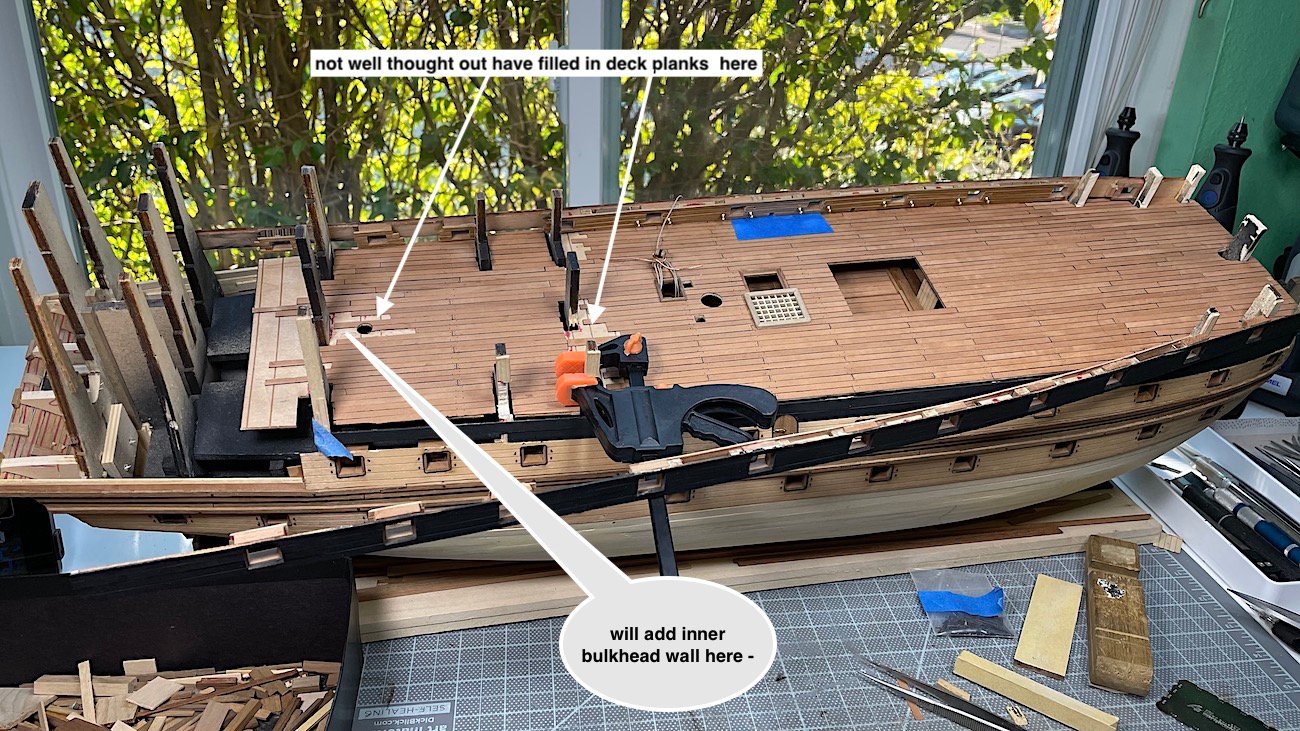
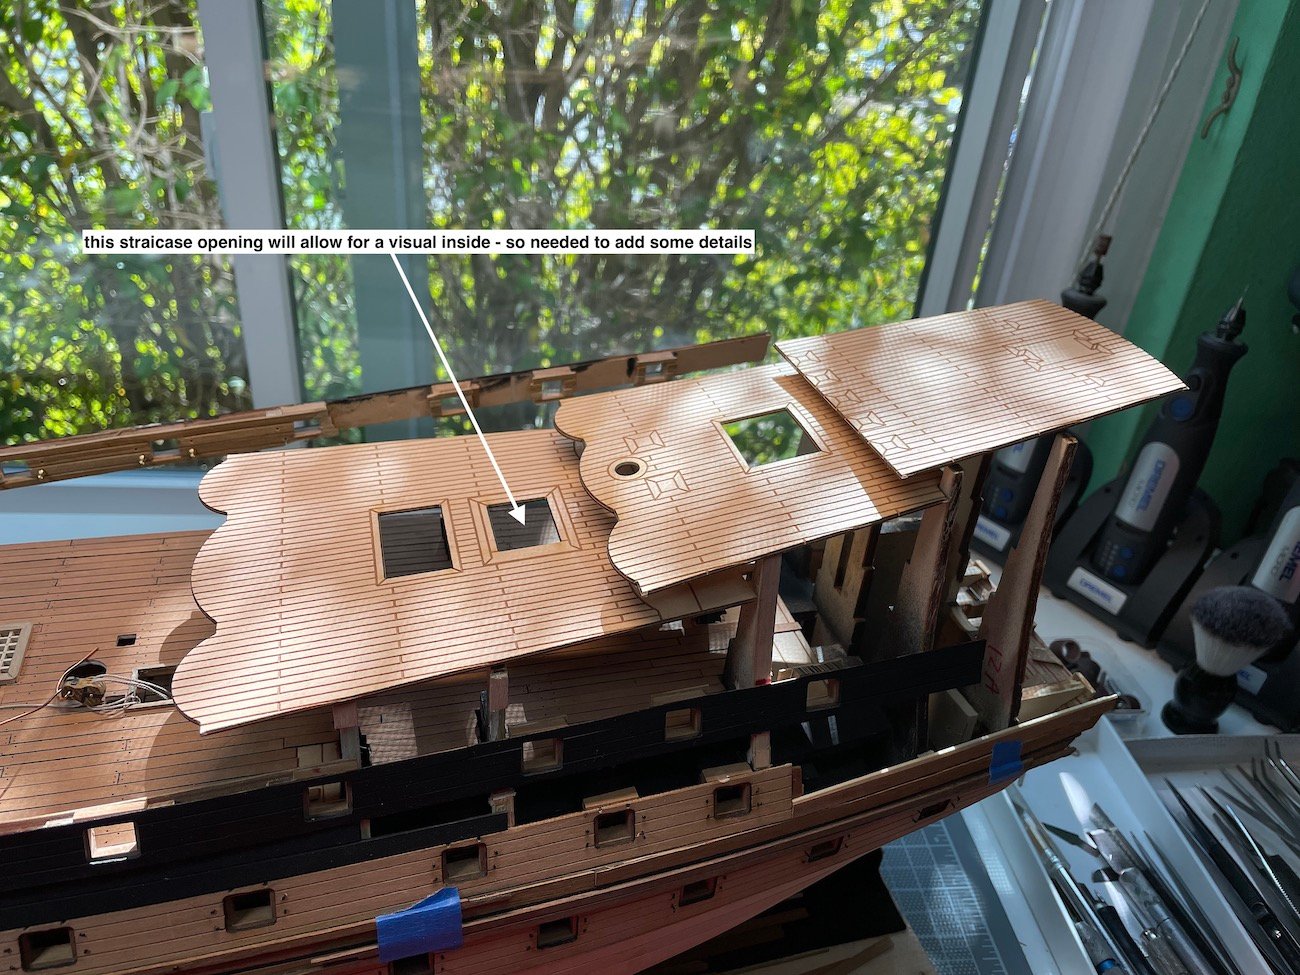
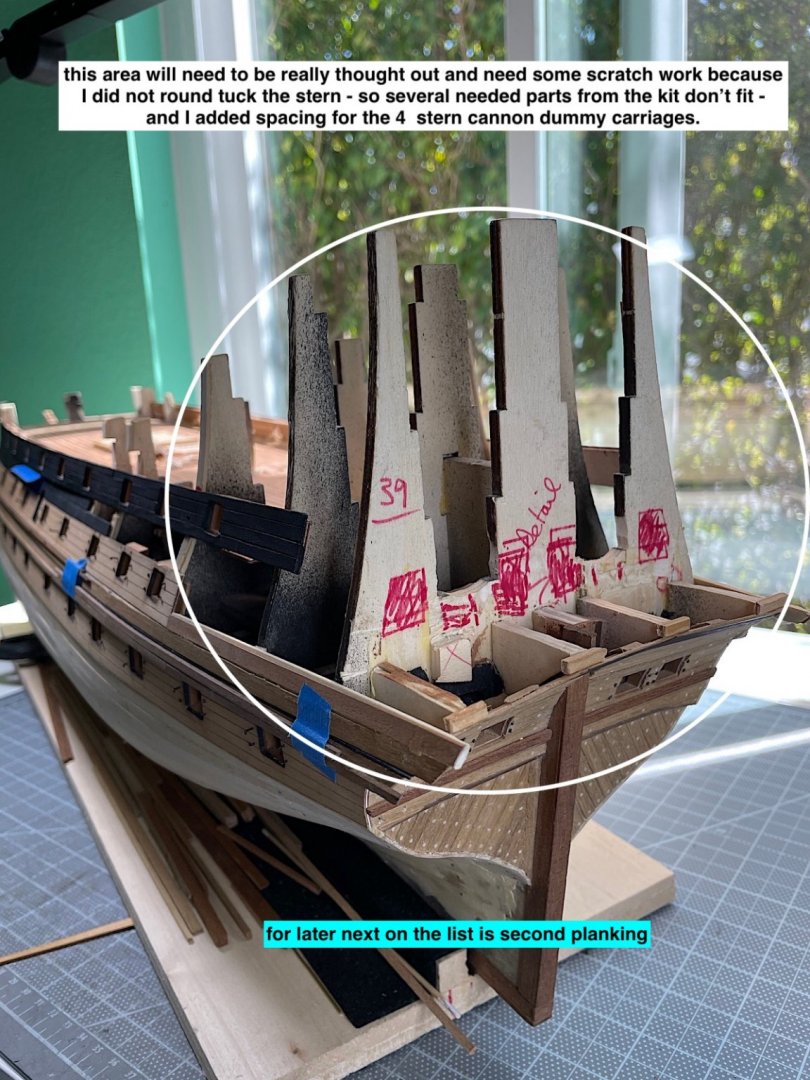
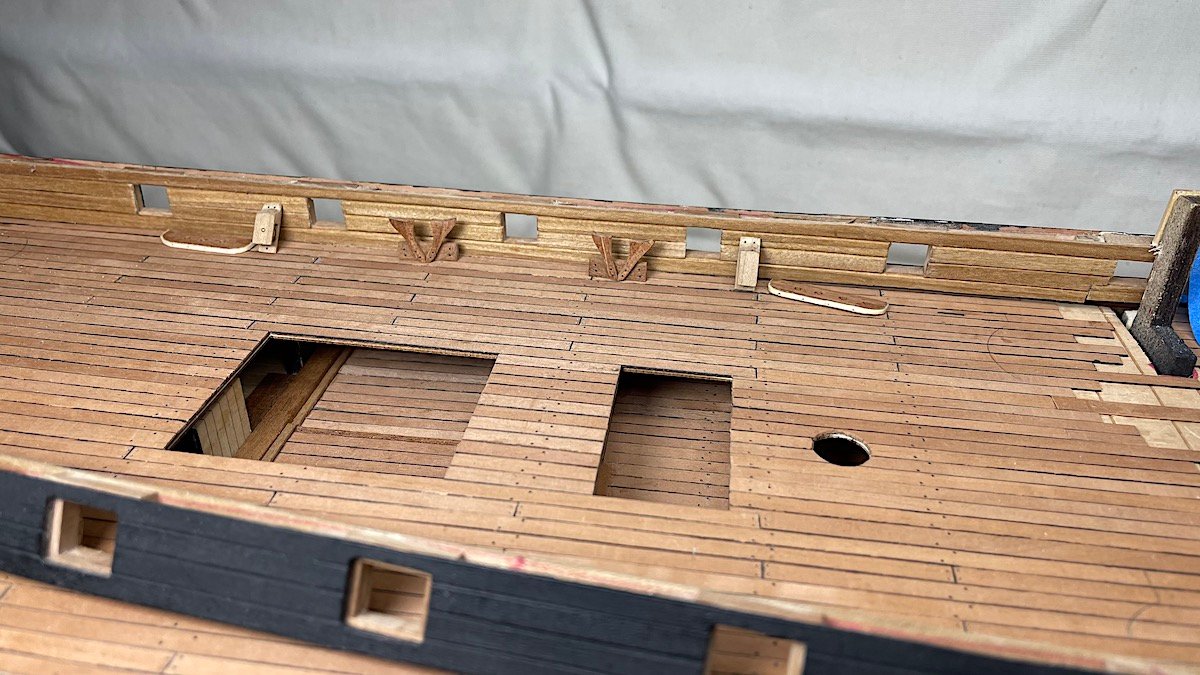
Hi Mates, As always thanks so much for dropping by, and the likes. AND thanks to members who are interested in following this project – so kind! Some minor busy work details; waiting for an order from Cornwall to finish up and finally install the main deck and attach side panels. In the meantime doing other bits that need to be done as well. see image notations.... Next on the list is cutting and framing the deck grids. Also doubled ordered some ladders – intend to attach two ladder frames together then trim and cut to allow for curved looking stair banisters – TBD need to figure out how to do that so that it looks “ok”, Then will finally second-plank hull - Not sure how to do that - so hesitating - Should planks be caulked? Should scarf joints also be included. Treenails will be a concern as well. Hmmmm?? Regards,
-
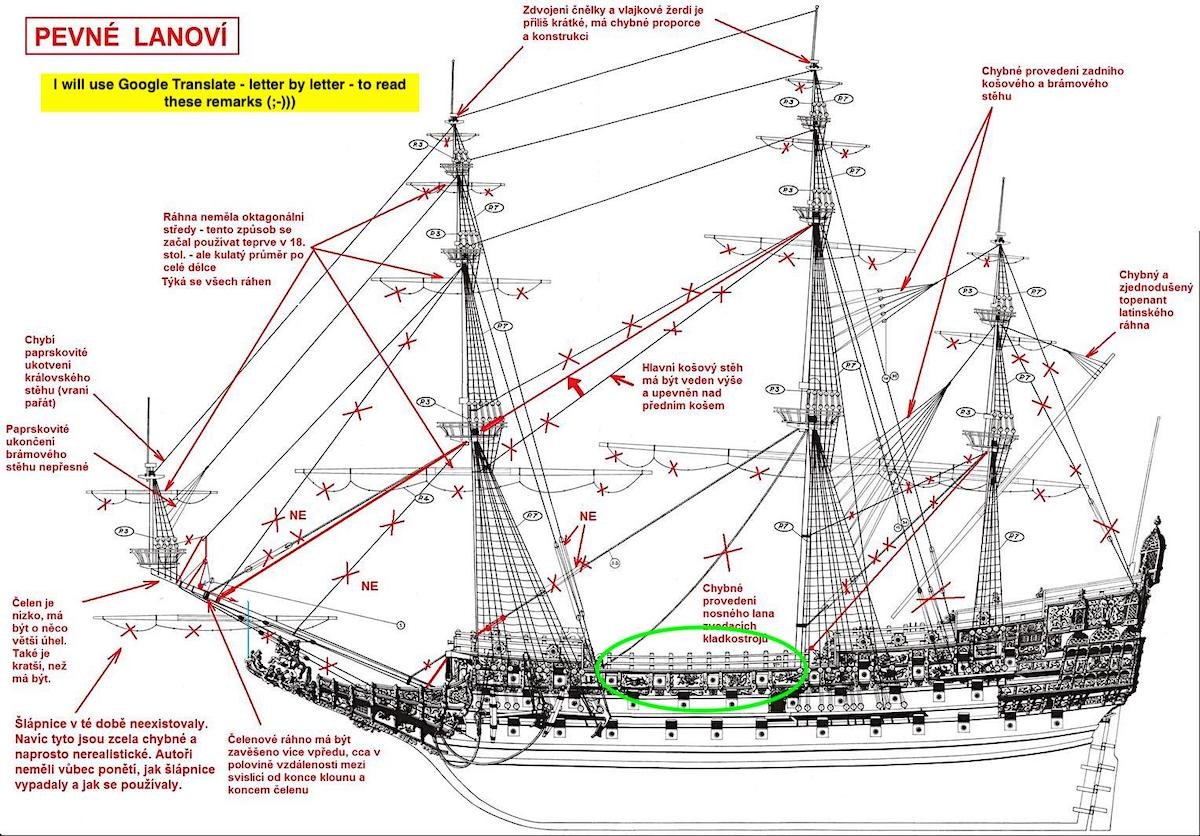
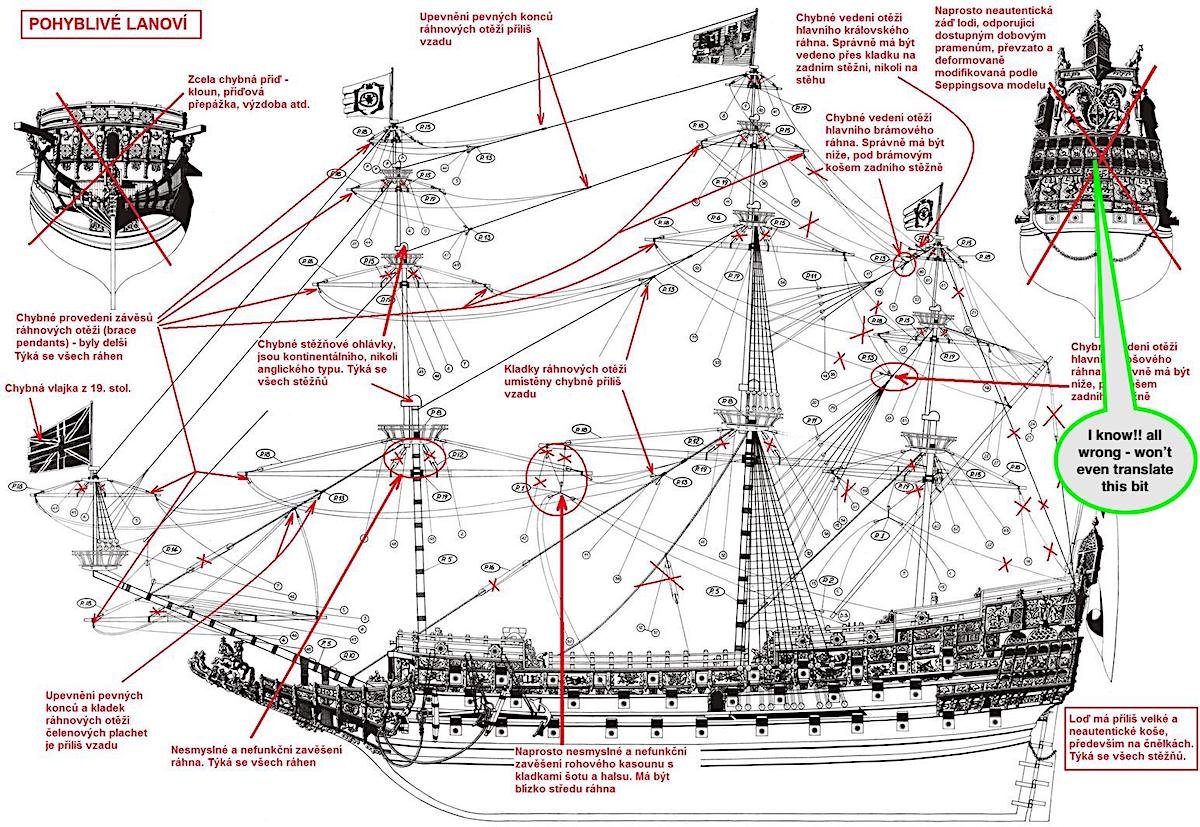
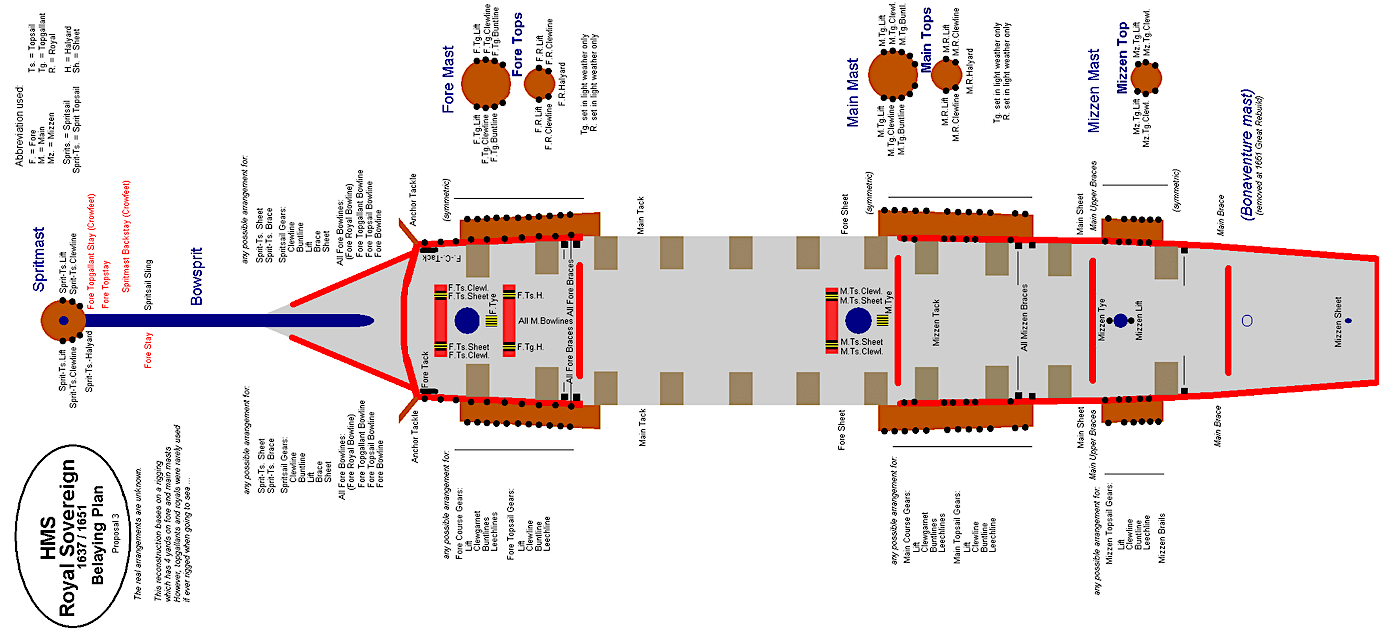
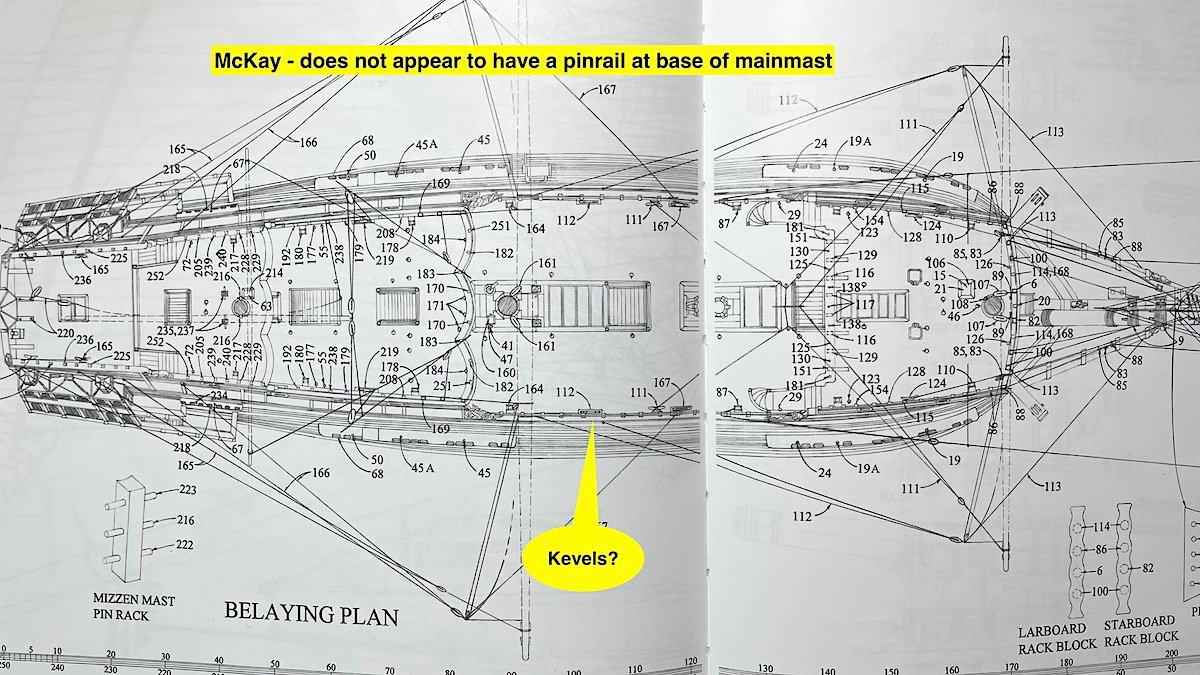
Darivs, Yes, conundrums indeed. And the two images below also add to the rigging “confusion”. So some (most) rigging will result in "appropriate" location estimates at best. Though it is apparent from these two excellent Czech site images that pin rails/ attached lines were not located at main deck. I will attach kevels -- McKay, and Amati follow in this as well. Though I may add a pin rail on those two sides as well TBD. I might also go back to one of my earlier builds –same vintage but Dutch – no rails mid deck either – I had used the Billings complete rigging sheets that were included in their Vasa kit. That kit includes excellent running rigging details – could be very useful as well? The Corel instruction were very basic and not much use IMO.. Current small bits that are in progress for this project; To add to the “confusion” won’t follow most of Sergal’s instructions regarding the deck entries or their architecture regarding the poop, Quarter or Forecastle decks lower entries or facings– will do lots of scratch work here (actually will try to emulate ideas from excellent museum examples in my files…….. And, of course the many 100s of gilded bits will also not be anything close to the 1637 stern in Pett’s painting. Regarding the 100’s of gilded bits I intend to blend what Sergal has included from the solid bronze pieces of their kit from decades ago, along with a recently purchased complete set from Amati’s now discontinued SotS gilded parts (still available today) AND It will be quite a while before work on masts and yards. Thanks for dropping by and posting.
-
Frank - thanks for dropping by, yes whatever rigging sheets I use this project's line locations will end up being mostly educated guess work - may also re-visit the Sergal complete rigging sheets (also include sail rope pin locations that I used for the Vasa. On the plus side this is a long way off at this point still at the beginnings of this project. Plan on first adding as many details as possible to decks and much extra work at the stern. fun ahead.... To add to the guesswork I also found this 🤔 Now four diff. choices. 😂
-
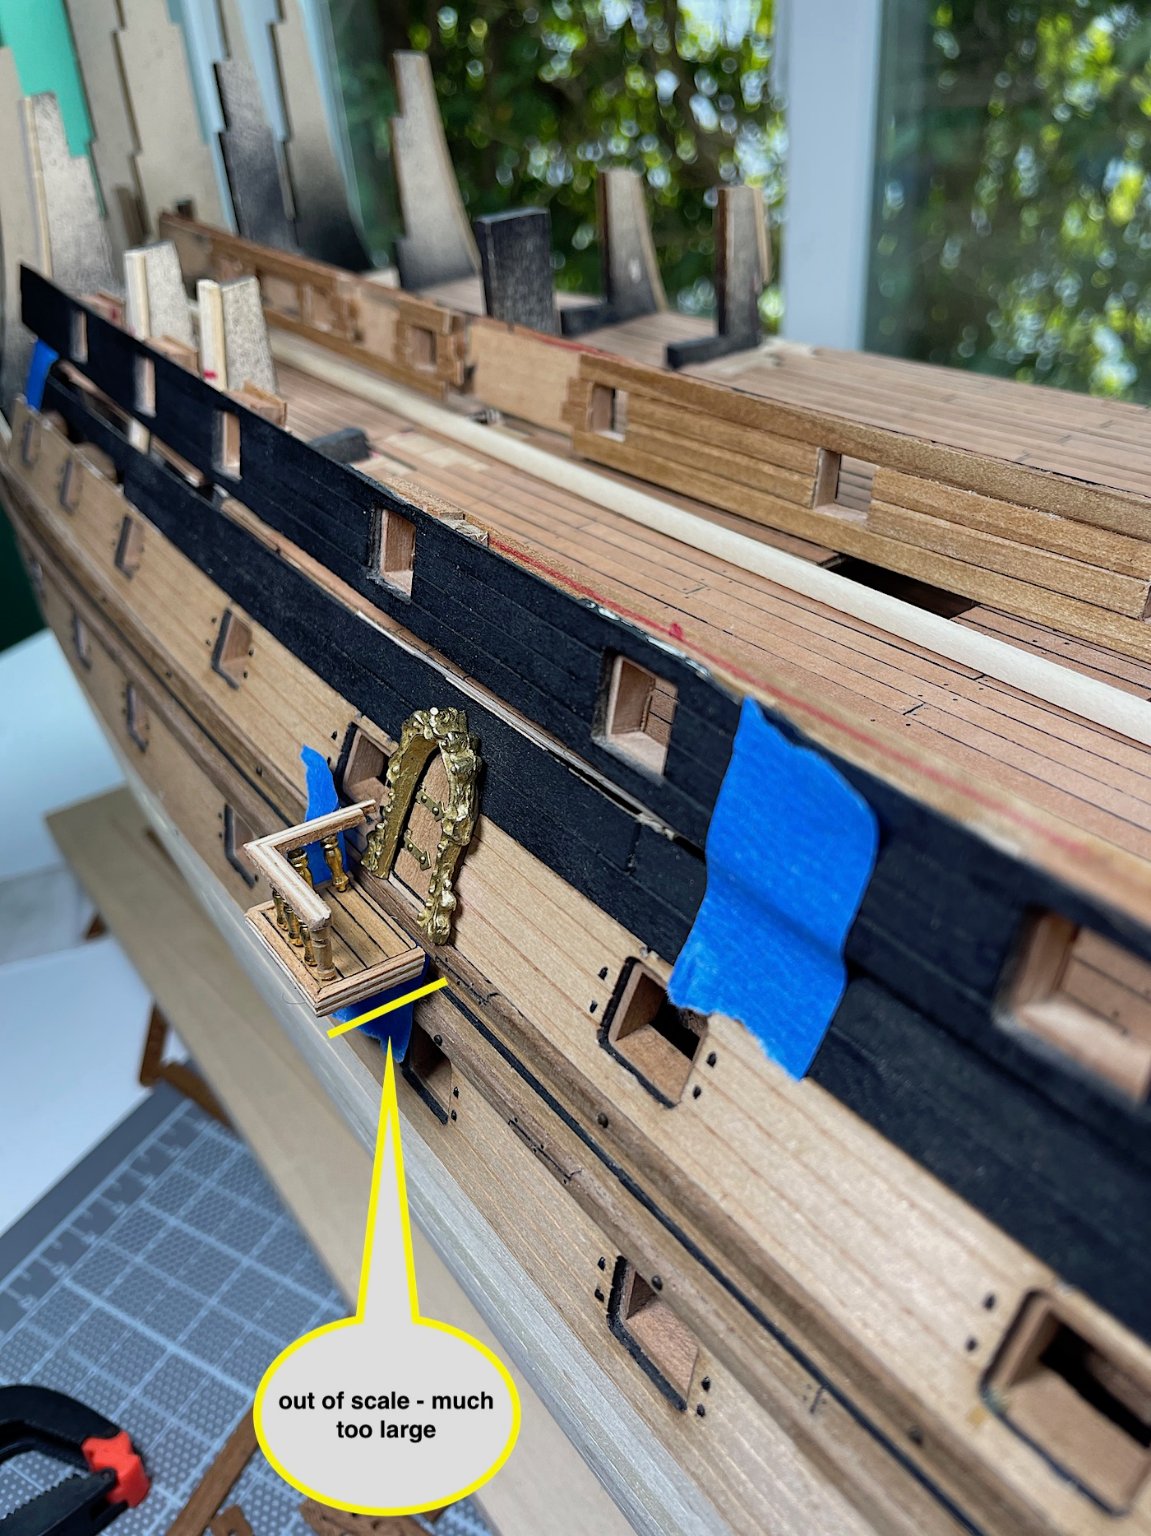
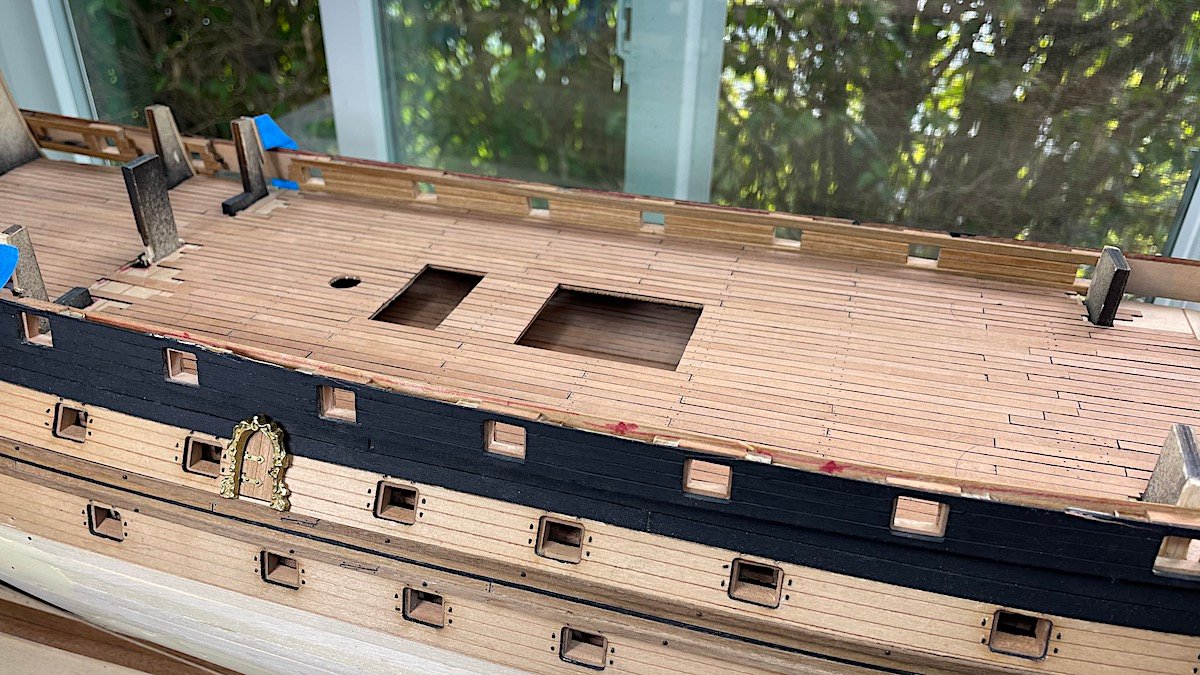
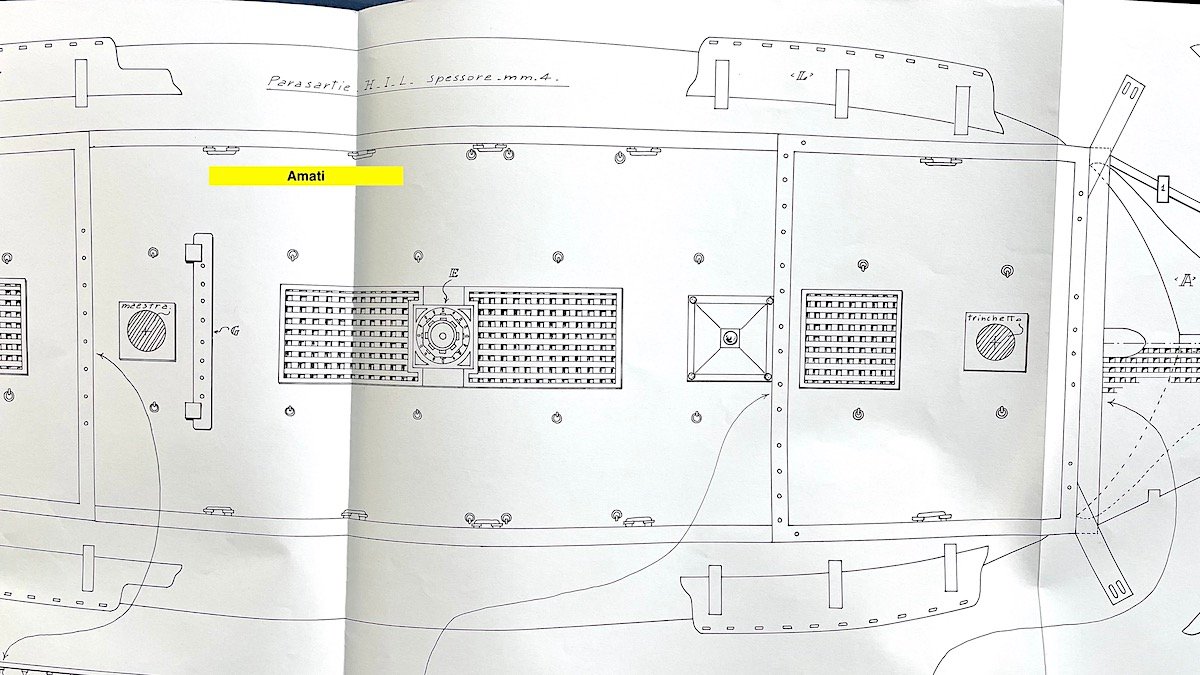
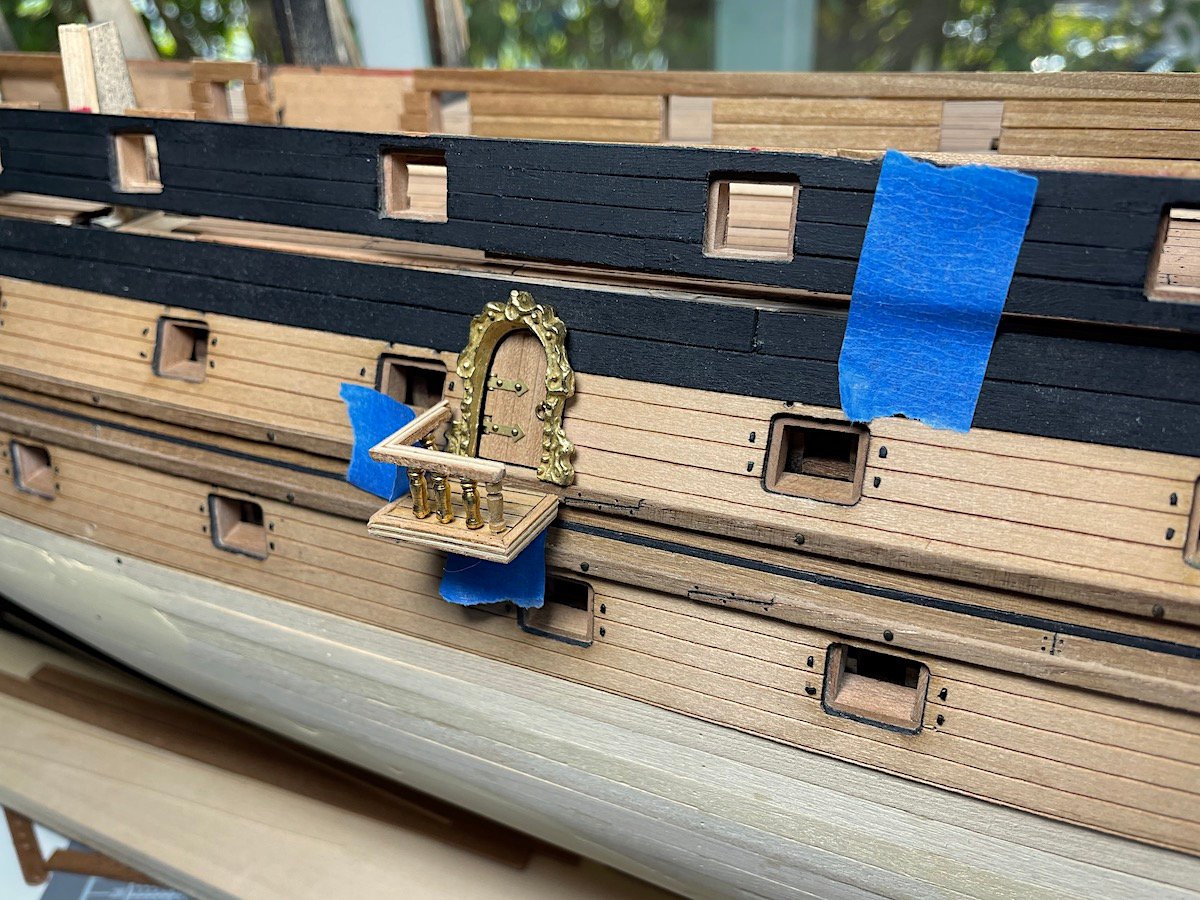
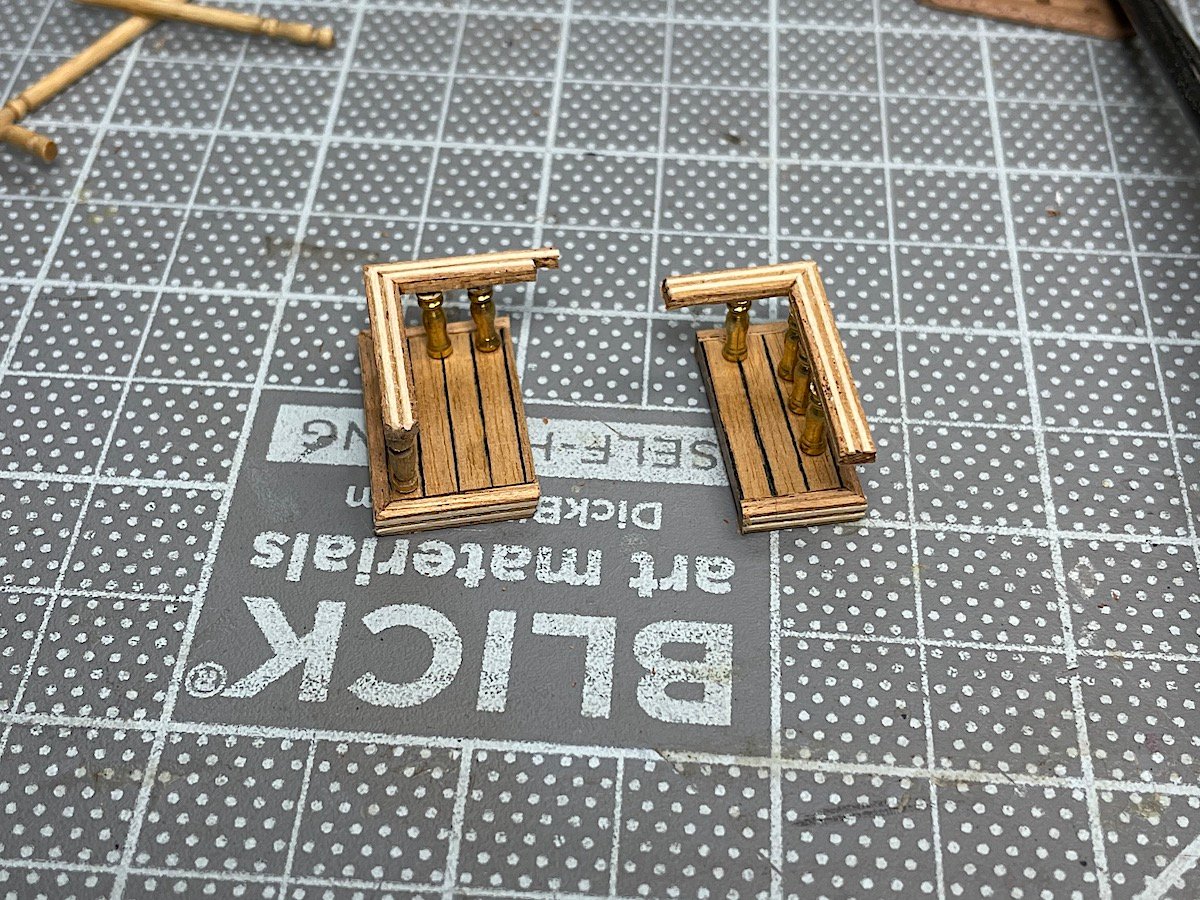
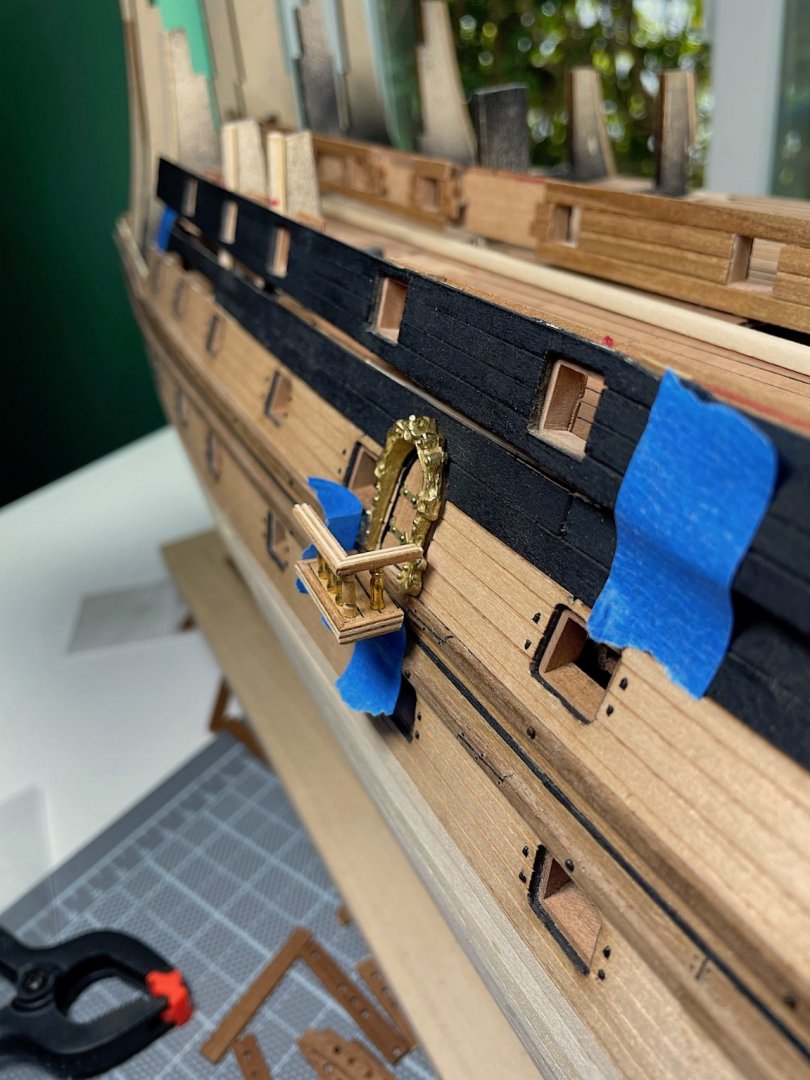
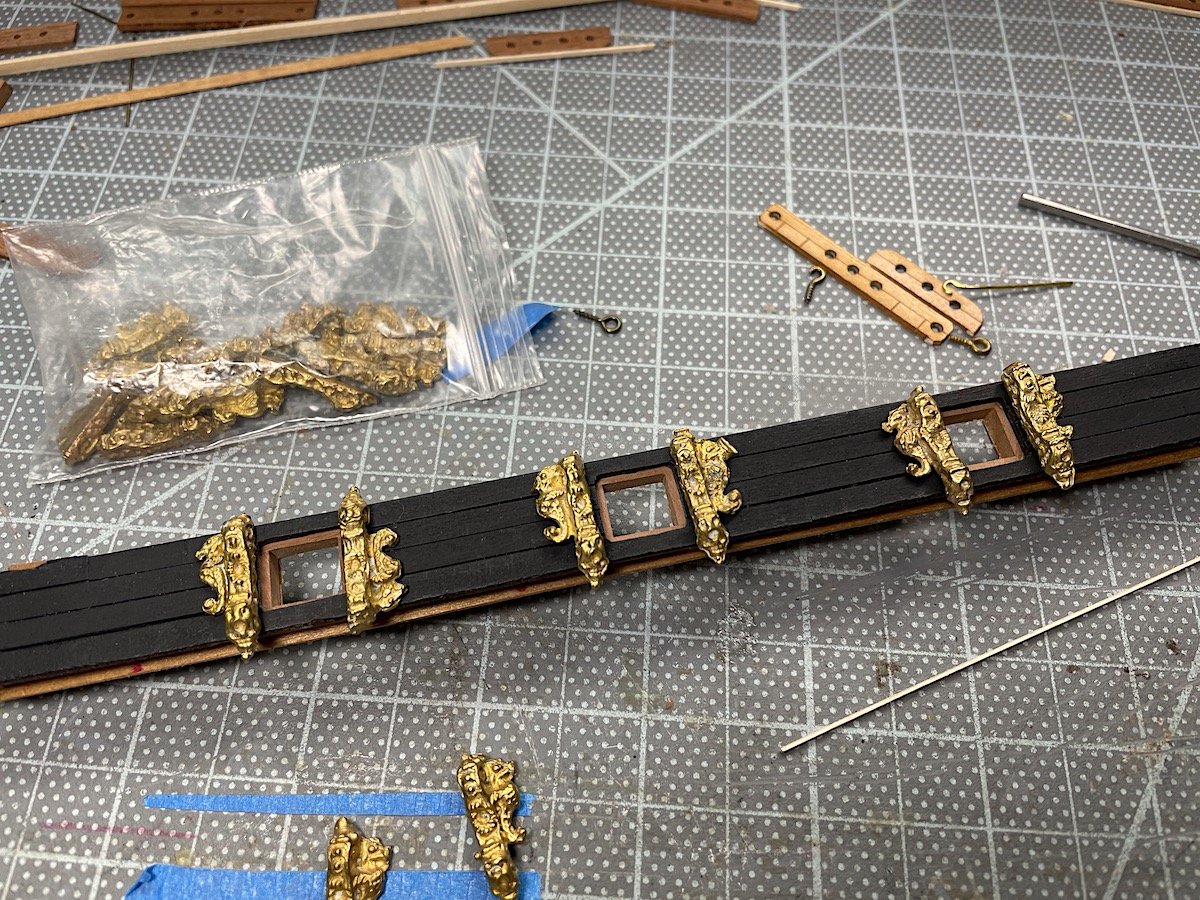
Hi Mates, Happy New Year - hopefully better than 020 “Busy work” update – as well as needing to fix an obvious mistake. First inside facings of main deck along with gun port openings and working on pin rails – this area is more complicated – not sure how many (if any) rails to add, or how many holes for the pins – I’m tempted to add sails – as you know this will require many more belaying pin locations than are shown in the Sergal rigging sheets. I also acquired the Amati rigging sheets (that kit included instructions for sails) and looking at my McKay book Each are different – so “all over the map” -- sorta speak. Both Amati and McKay indicate kevels for mid deck – no pin rails. Also Amati and McKay show pin locations mostly in railings running across the decks Forecastle and so on…. so just not sure how to proceed before installing these two mid-deck bits. (McKay's rigging details are also for added running rigging with sails) So who knows? - certainly McKAy is arguably the most correct In the meantime -- entry platforms were too large – needed to be fixed, Will clean and prob. attach some of these bright bits as well as installing carriage retaining rings to the inner deck timbers before securing to the deck. I need to think of when to start and complete hull second pearwood planking hmmm? As always thanks so much for dropping by and taking a look much appreciated. Cheers,


-
Jason, Have not commented too often -- should have -- awesome log along with brilliant work!! Regards,
- 800 replies
-
- 1
-
-
- snake
- caldercraft
- (and 1 more)
-
Patrick, Beakshead, offset mast all so well articulated !! as always a pleasure to drop in Regards,
- 756 replies
-
- 2
-
-
- galleon
- golden hind
- (and 2 more)
-
EJ, Just catching up - wow - your stern work is way up there !! arguably the most complicated and intricate area of a ship of this type to get looking right -- Superb work so well scaled and detailed - well done indeed. Cheers,
-
Your really captured the look of this ship - excellent work indeed
-
Mark, Just catching up - you have brought plastic to such an amazing form of life - beyond brilliant - and your sculturing in this format is also superlative indeed. Woa!!
- 2,697 replies
-
- 3
-
-
- heller
- soleil royal
- (and 9 more)
-
Frank, This current build of yours is really something !
- 510 replies
-
- 1
-
-
- reale de france
- corel
- (and 1 more)
-
As always -- a pleasure to follow your build
-
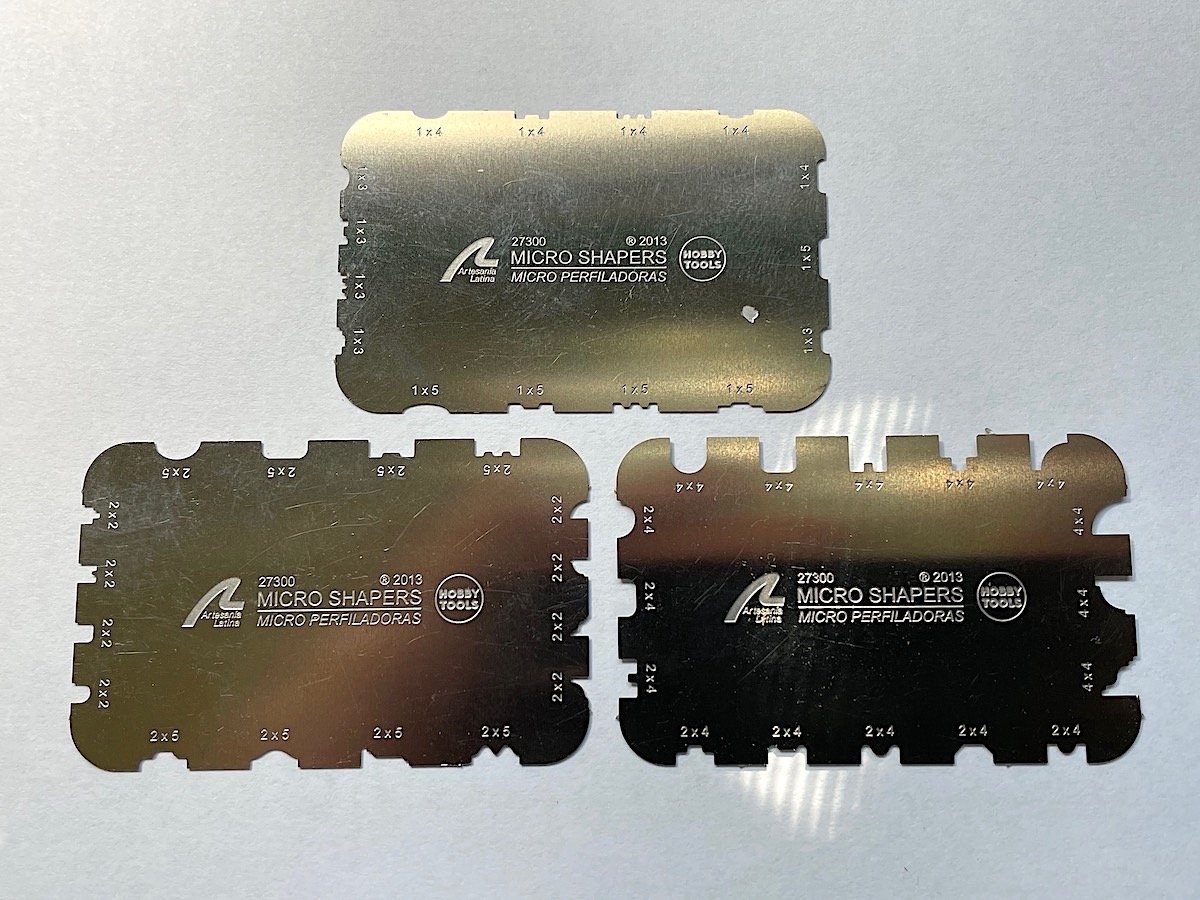
Frank, thanks for the kind words. FYI - they come in a set of three - width dimensions are in mm. At first I only used one for scoring soft basswood - thinking that the metal groovers would bend. No, these work just as well with harder woods. Will use them to add details to upper deck railings, and poss. larger lower wales. lot's of creative shape potentials. Great tool!
-
My understanding is that it has to do with each refurbishment throughout its active life. At one point she was burned to the waterline and again refurbished. Other much more knowledgeable members may have more detailed information.