md1400cs
-
Posts
2,866 -
Joined
-
Last visited
Content Type
Profiles
Forums
Gallery
Events
Everything posted by md1400cs
-
 Bob; Thanks for your nice comment - much appreciated. You are so right - paying a premium for any kit, one would expect a high quality product indeed. Sergal has had this kit on the market for more than 30 years - certainly their initial R&D has been returned al long. long time ago. It is disingenuous of Sergal "bean counters" to lower the quality of the metal parts - making them almost - an "eye sore" IMO of course. Possibly someone at Sergal has become aware of this issue. I looked at a retailer in CA - kit listed for $1,150. + 10% tax and probably $30.00 shipping? On the flipside there is a new kit that is a work in progress - not yet on the market that has Chris Watton as a lead designer with Amati - the images of this new HMS Victory kit look to be AMAZING!!!! - Now that is an example of a superb kit!! Yes, higher end ($$$) kits do have a more limited market appeal - though I would image that this new victory will be a monster sales hit - also the ship is arguably one of the most popular for builders? https://www.shipmodelersassociation.org/research/VictoryKitResearchWatton.pdf here is the link to James H - build log for this upcoming kit Regards,
 -
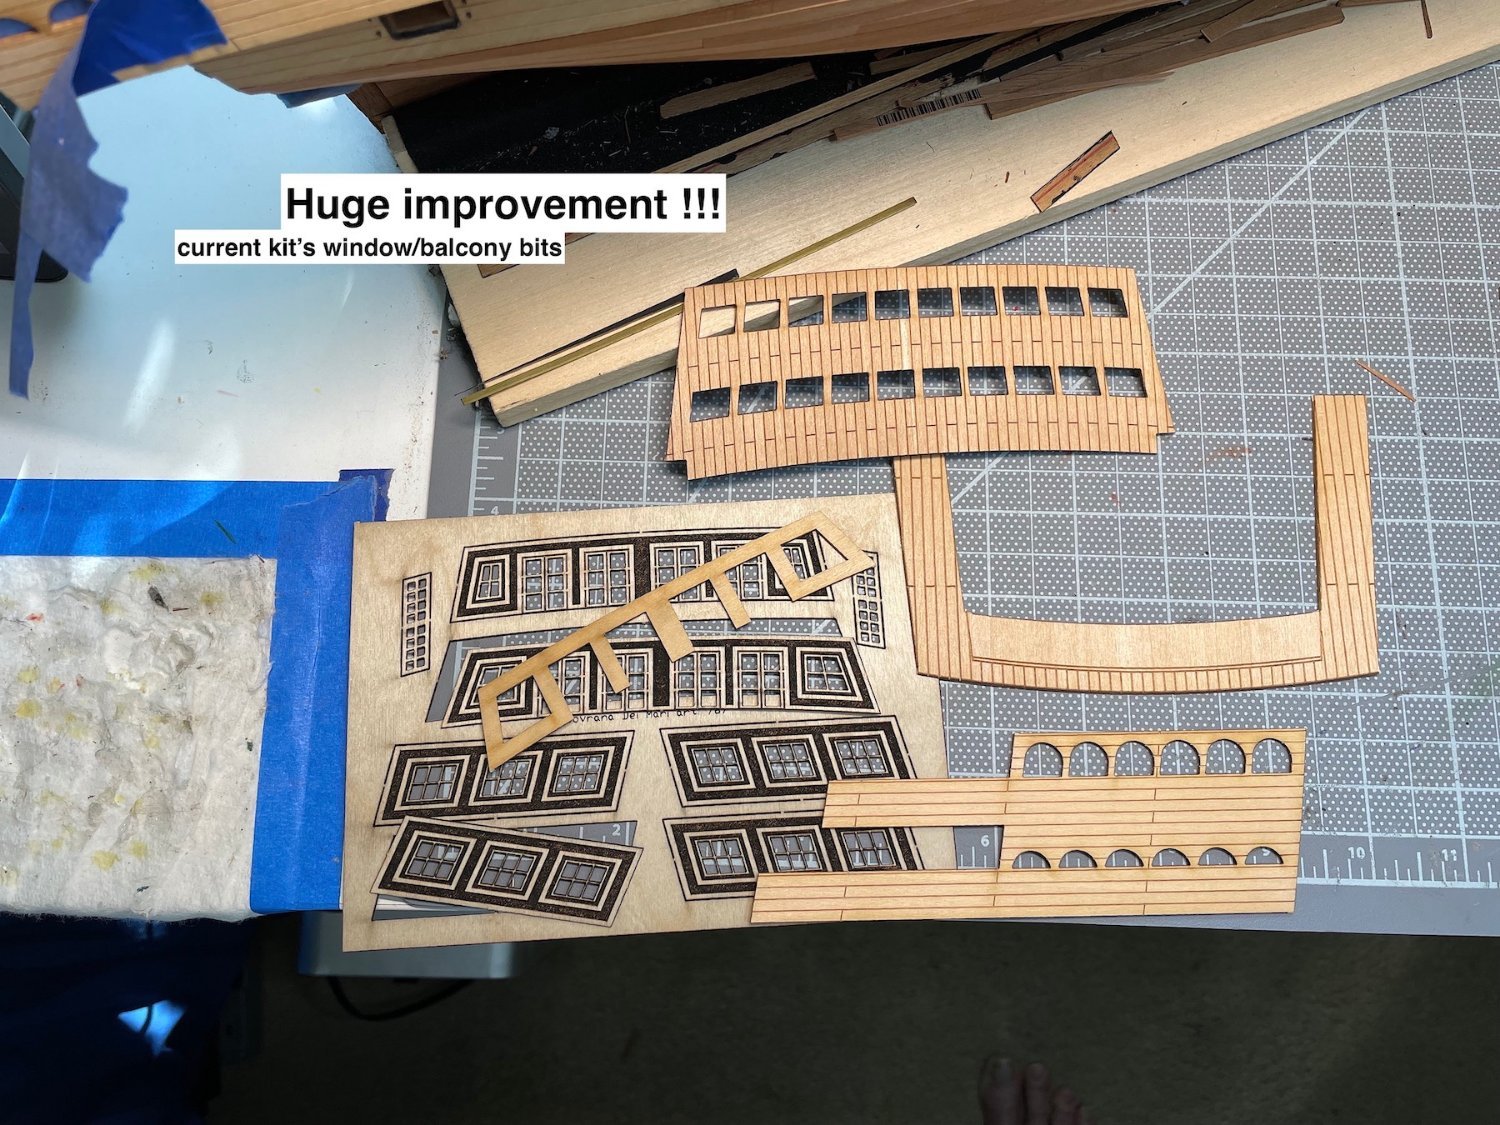
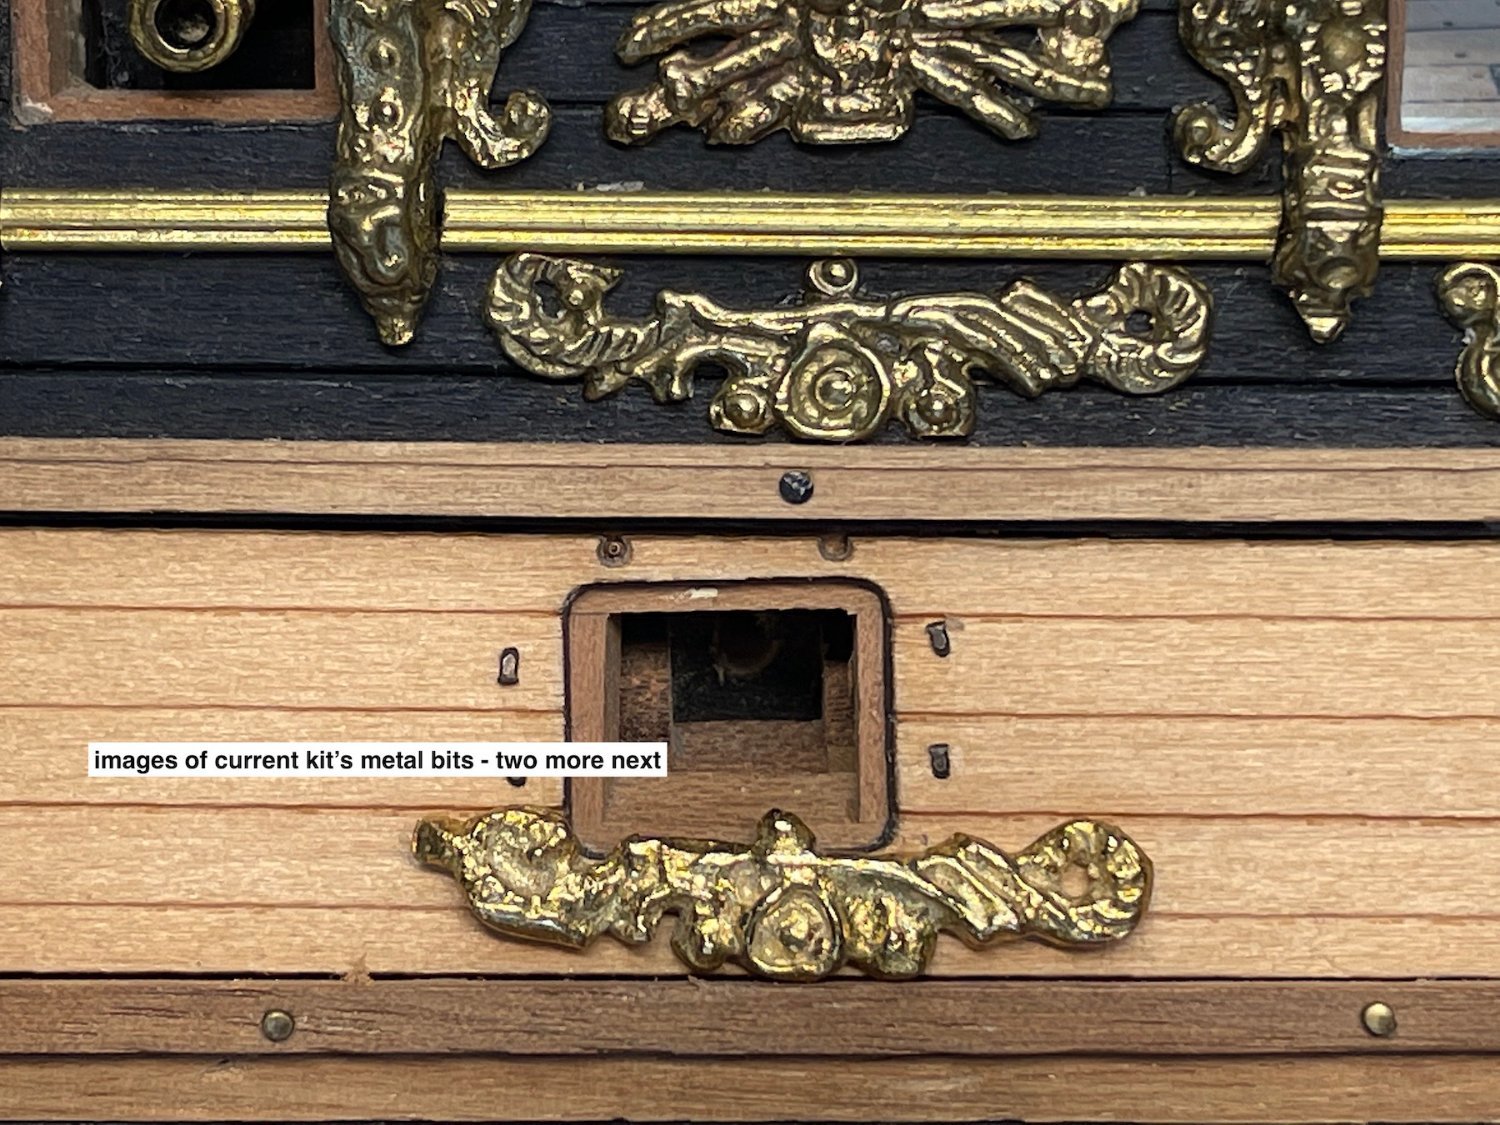
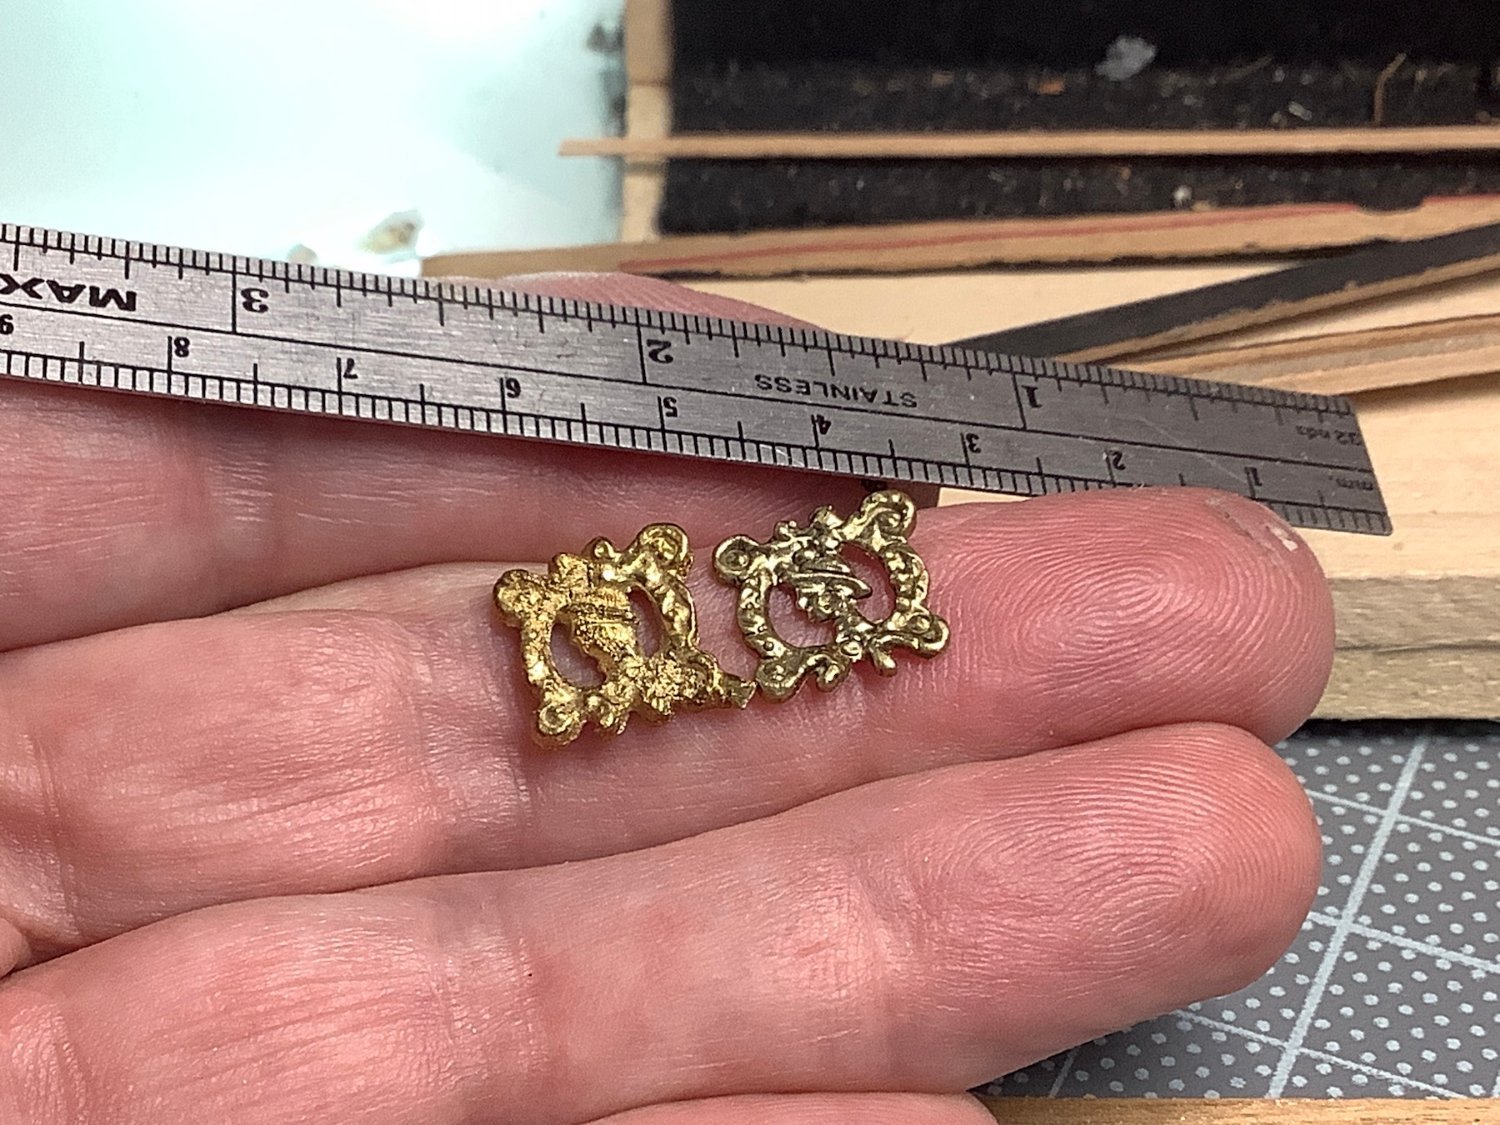
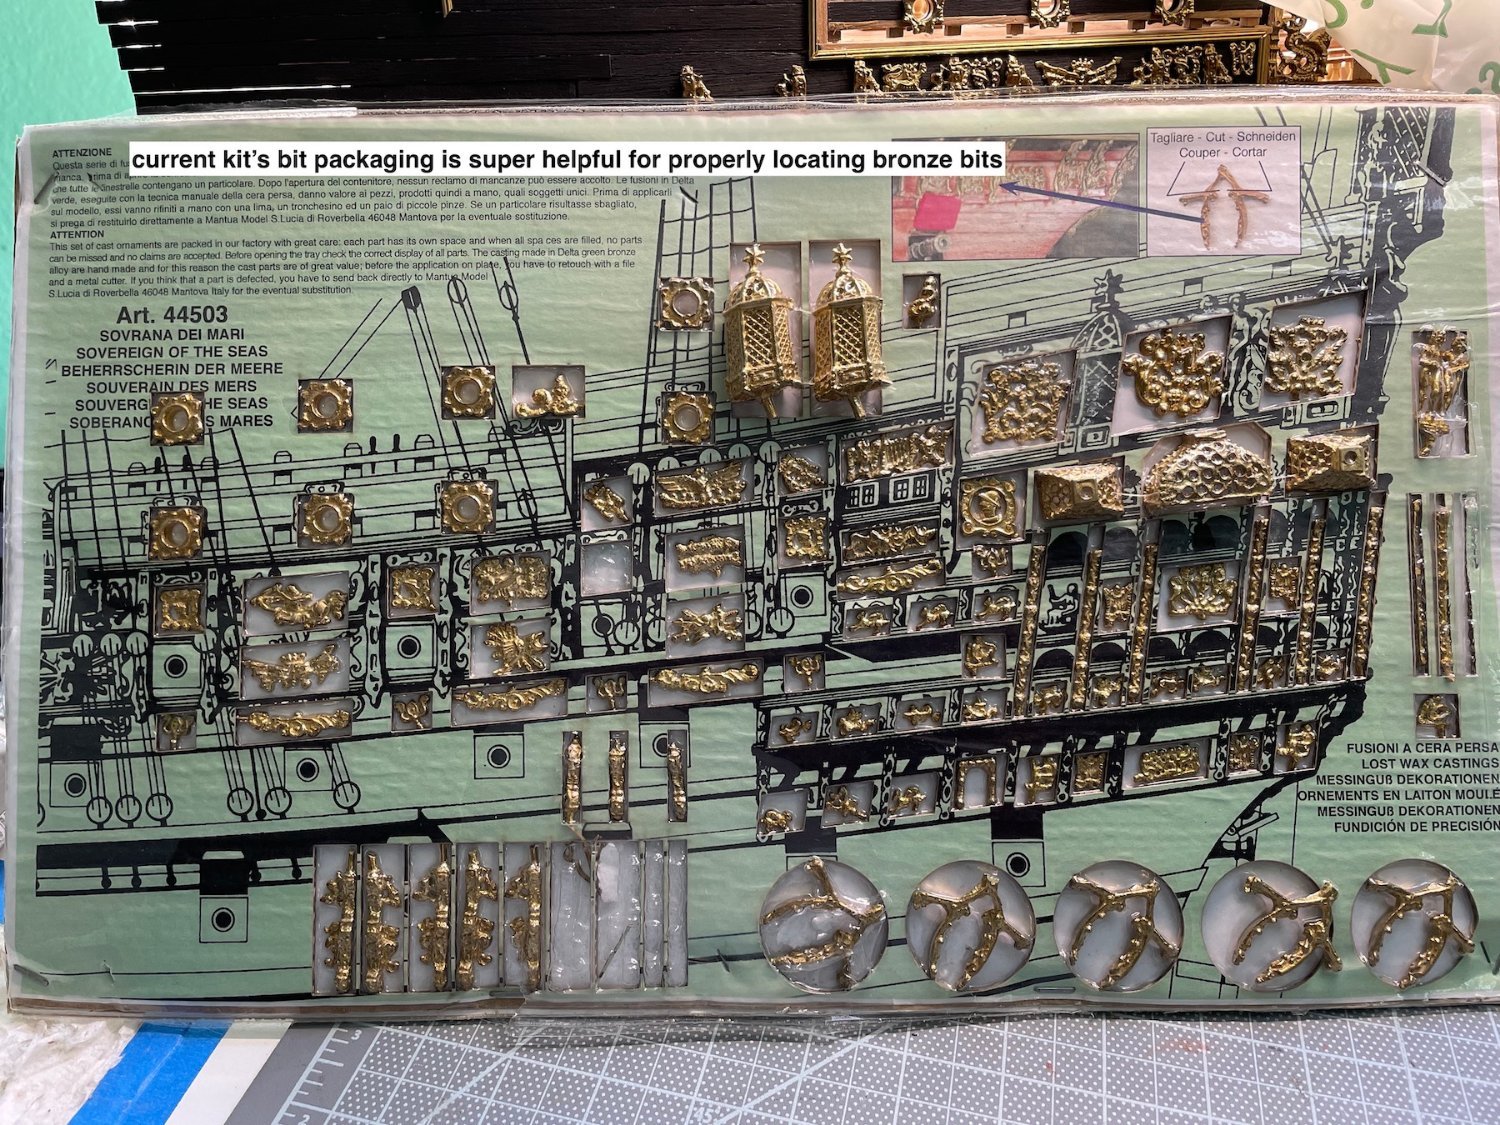
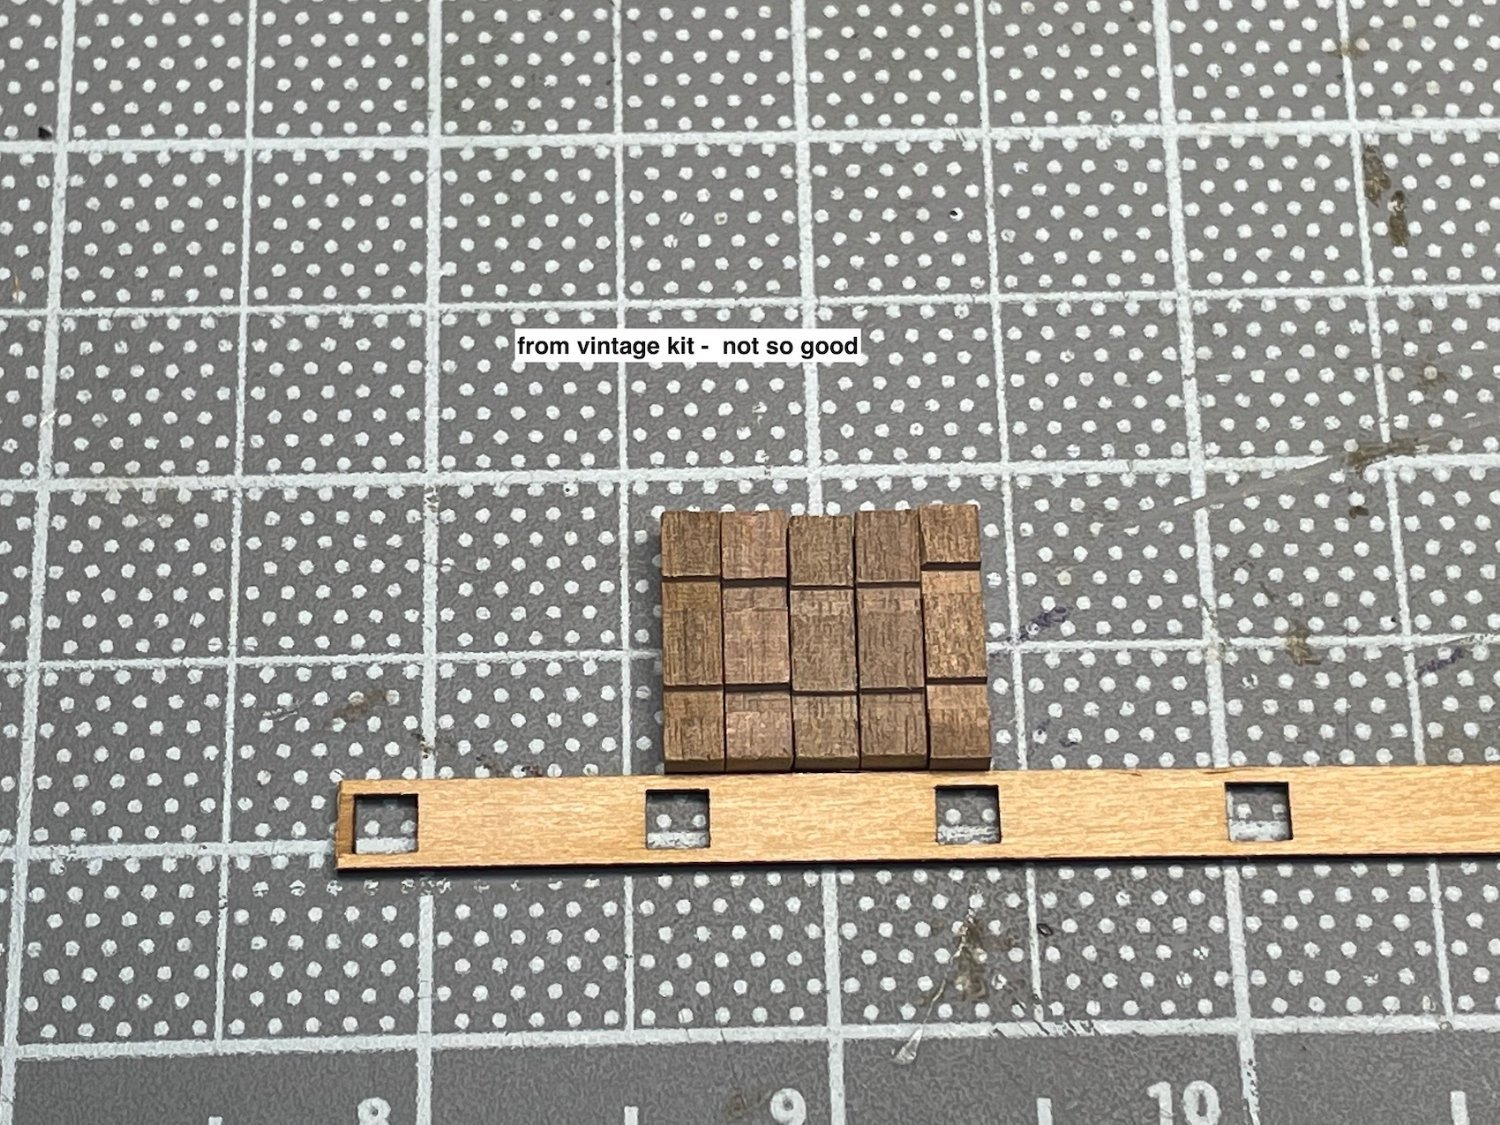
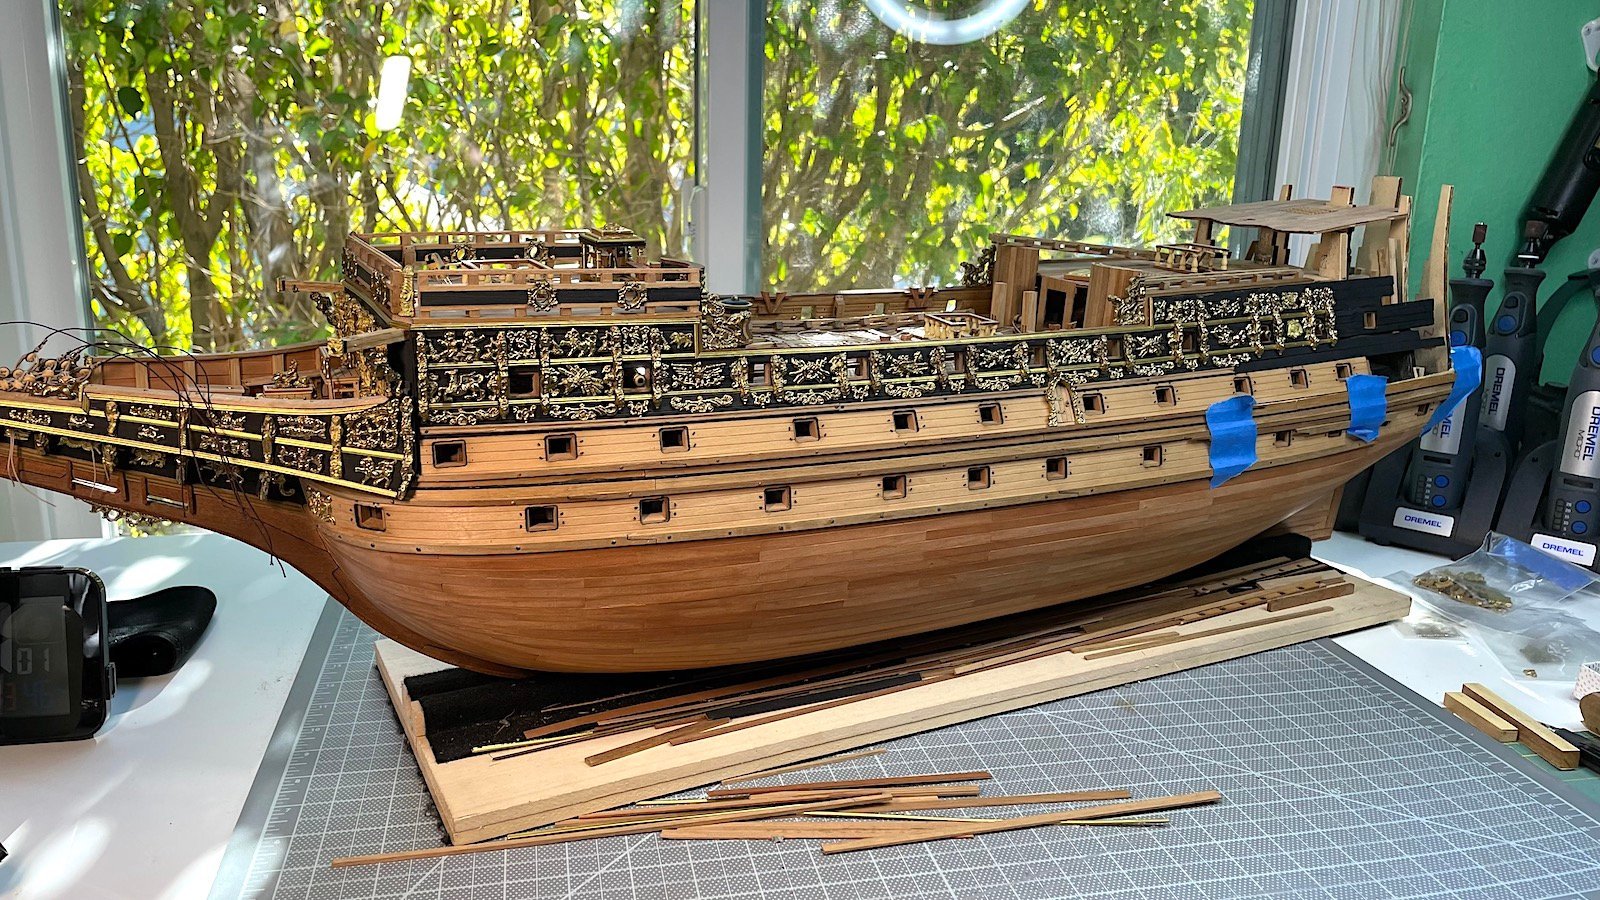
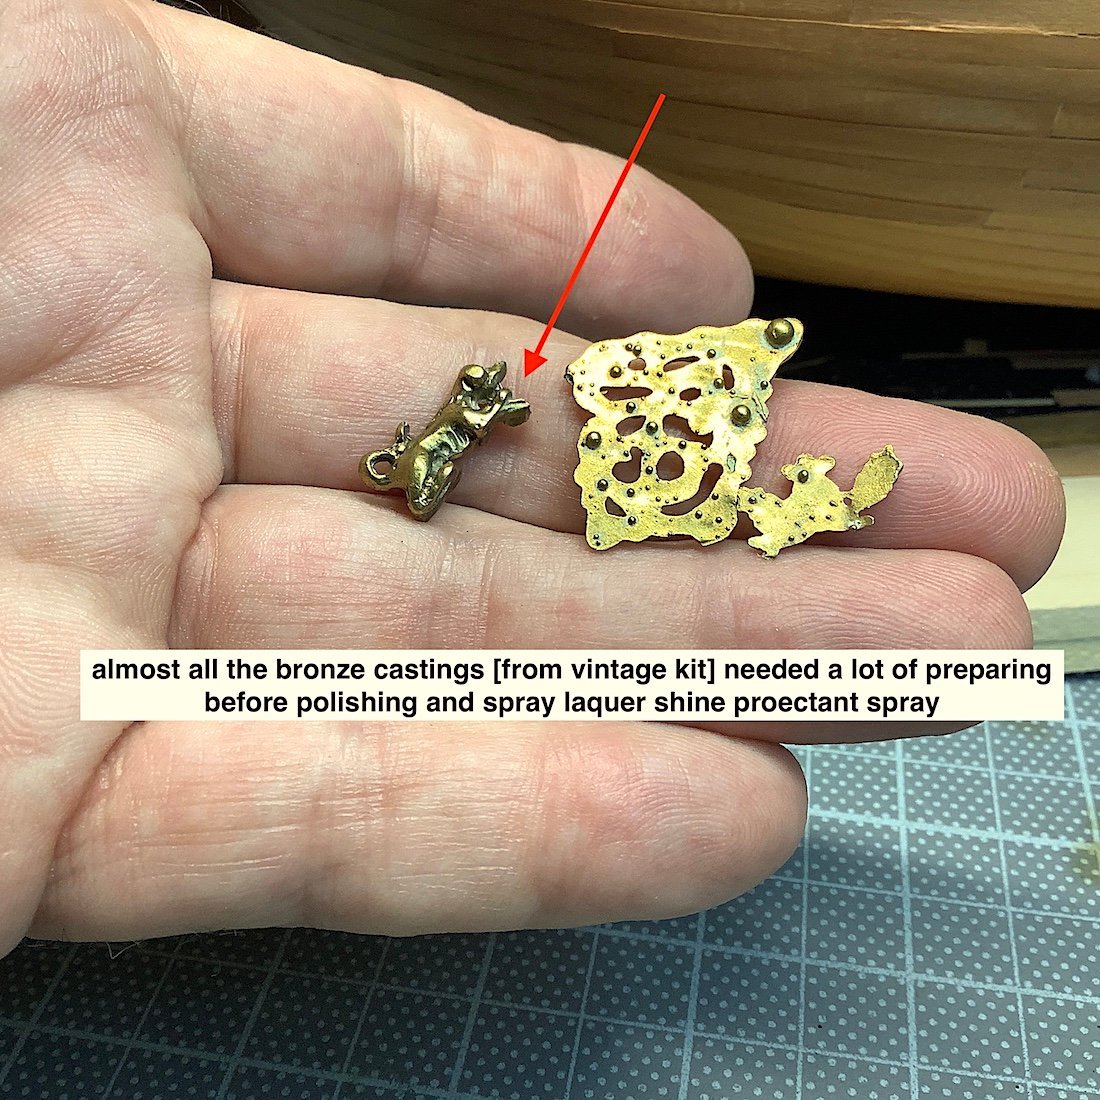
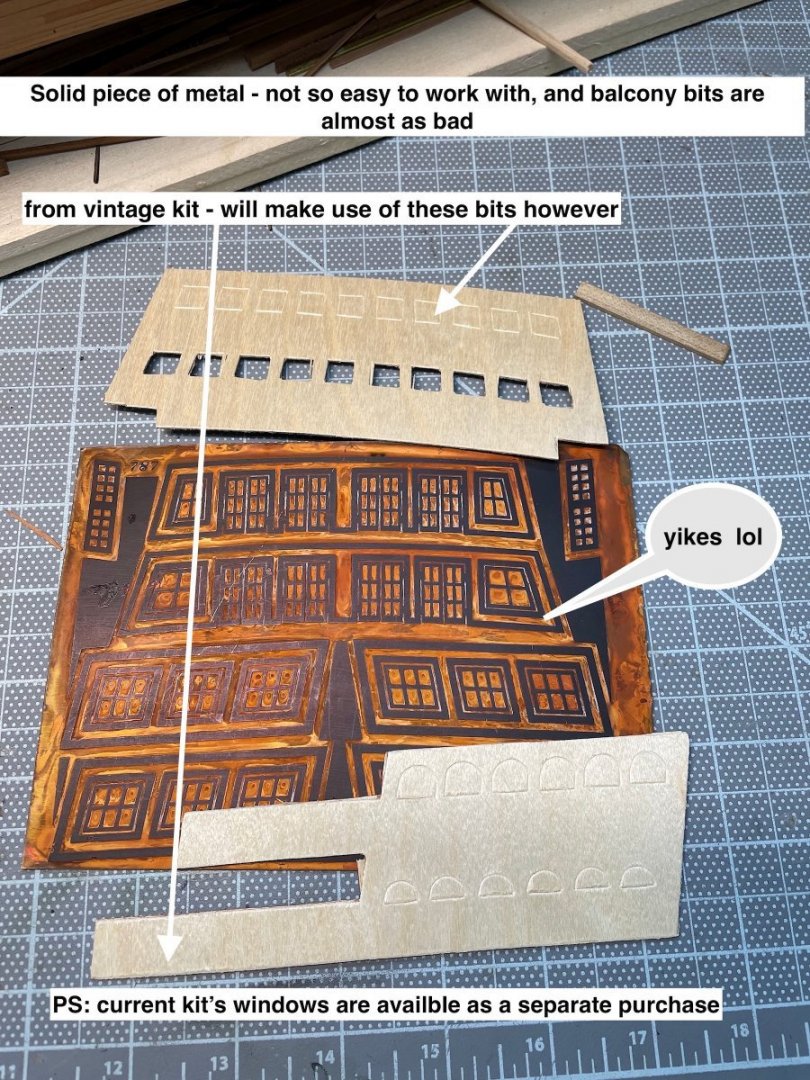
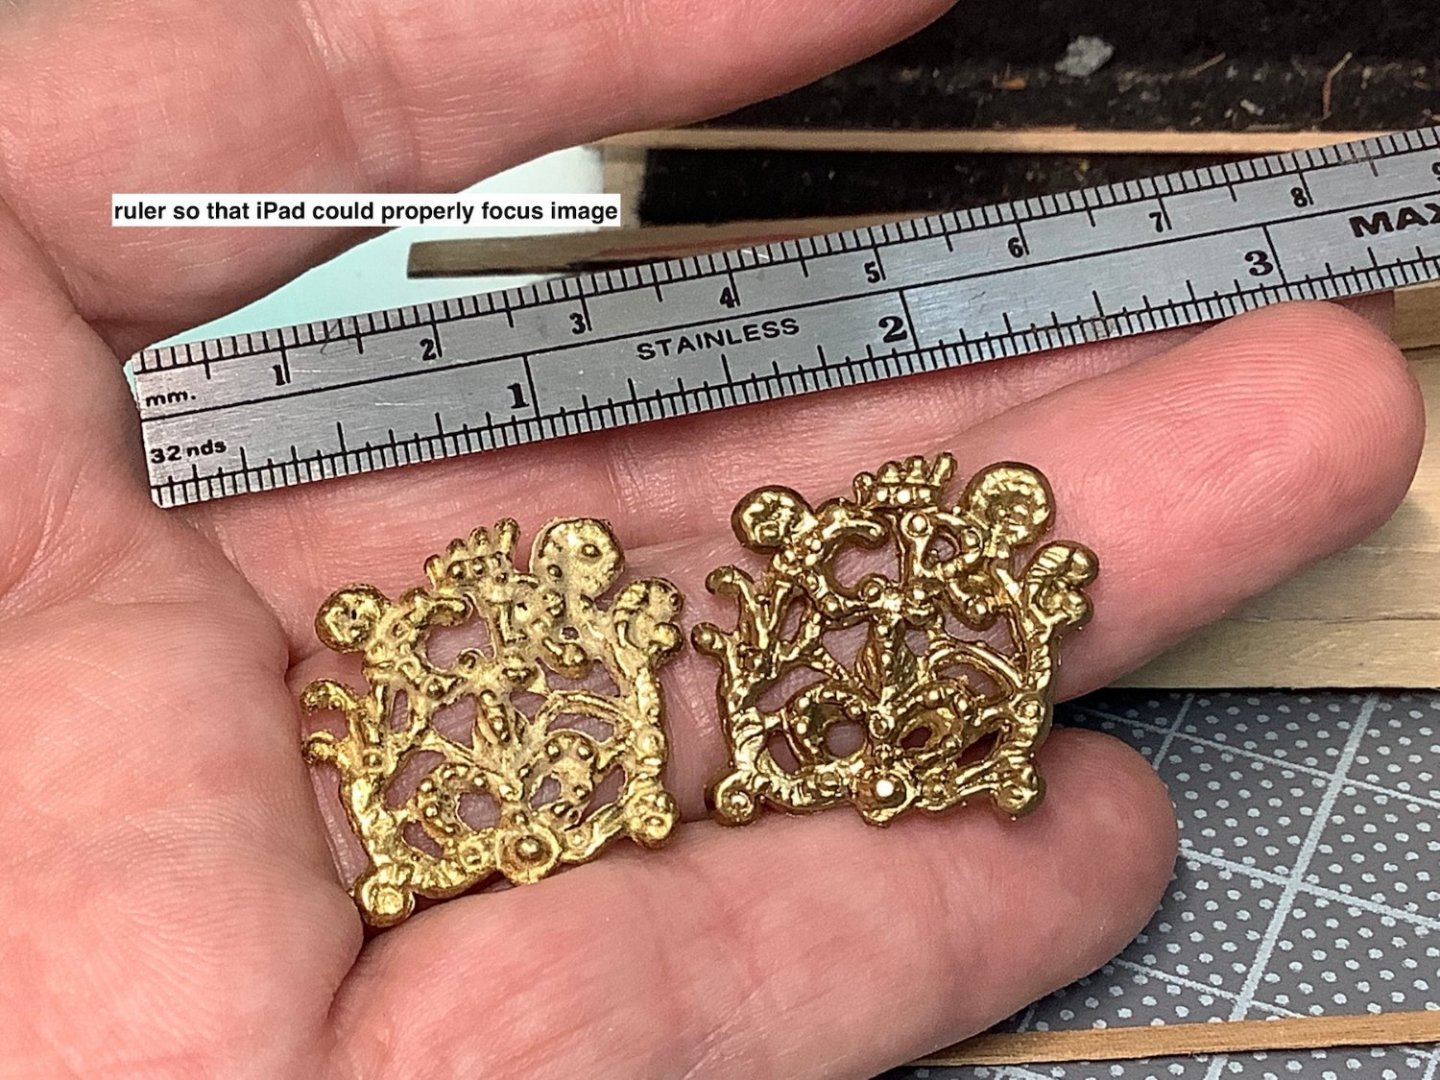
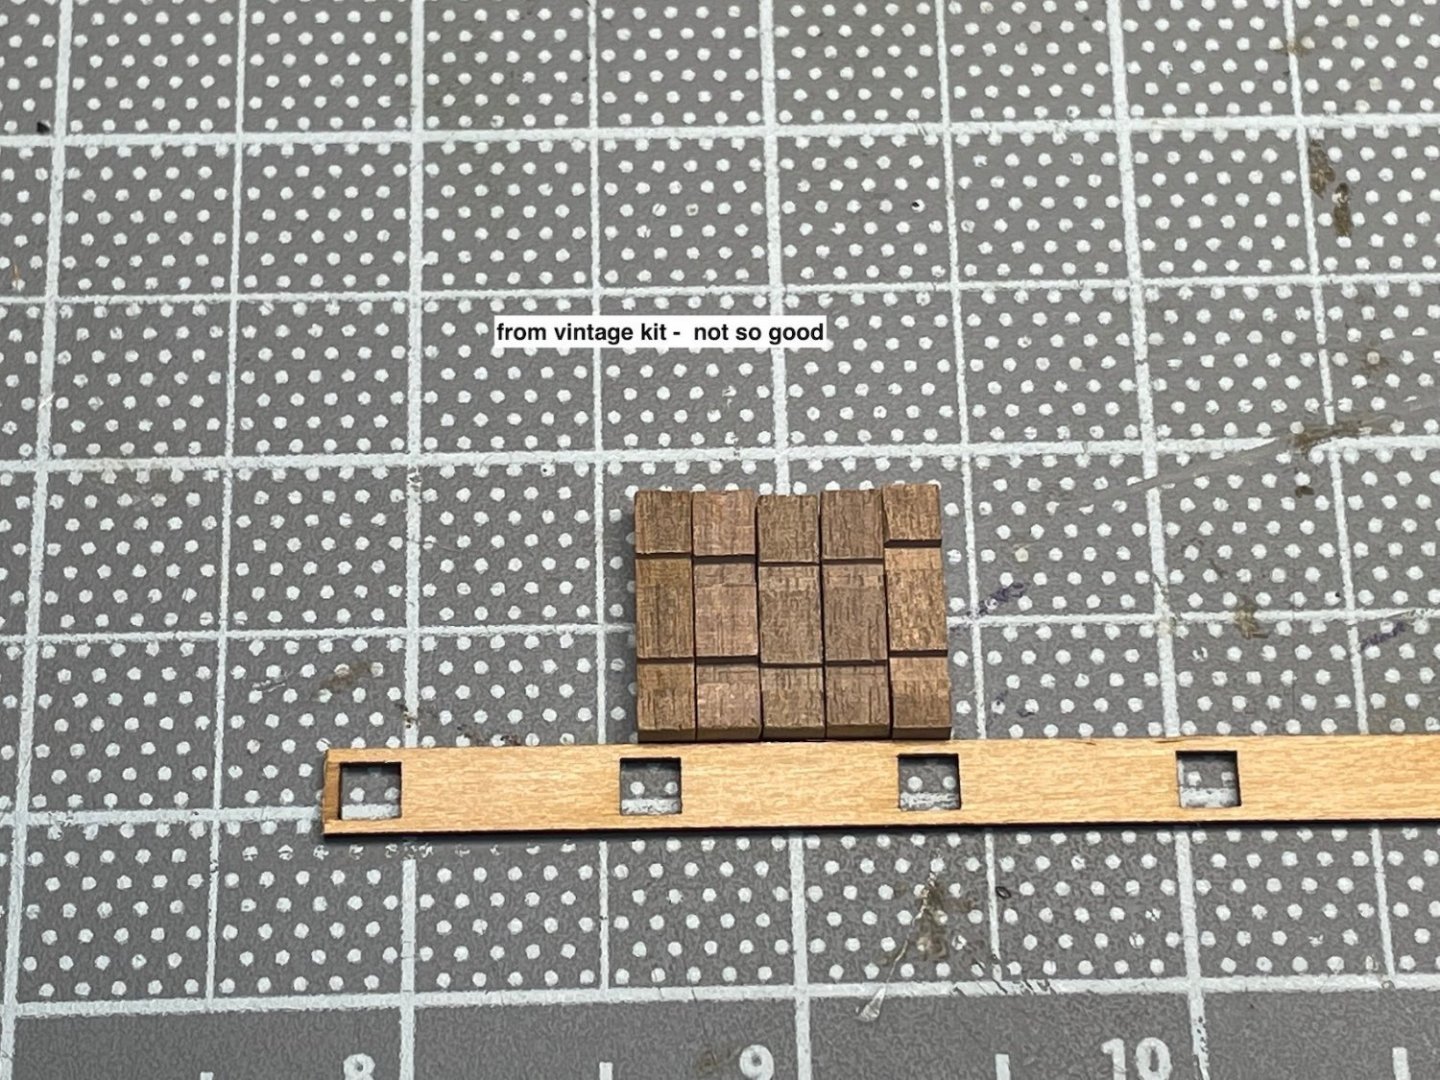
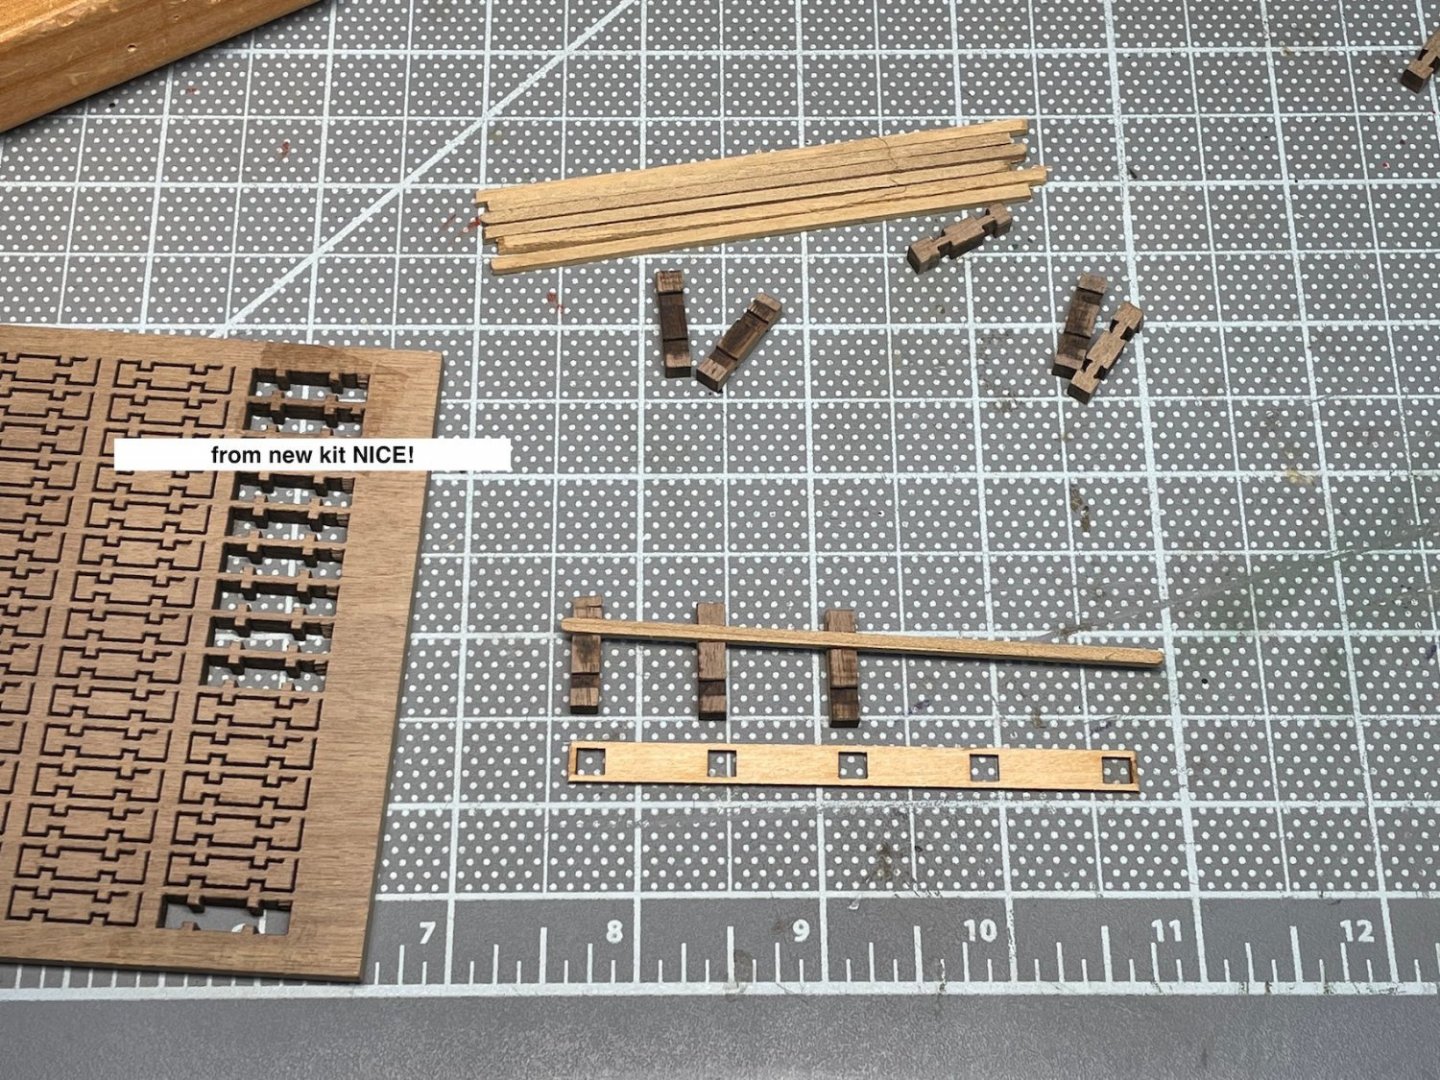
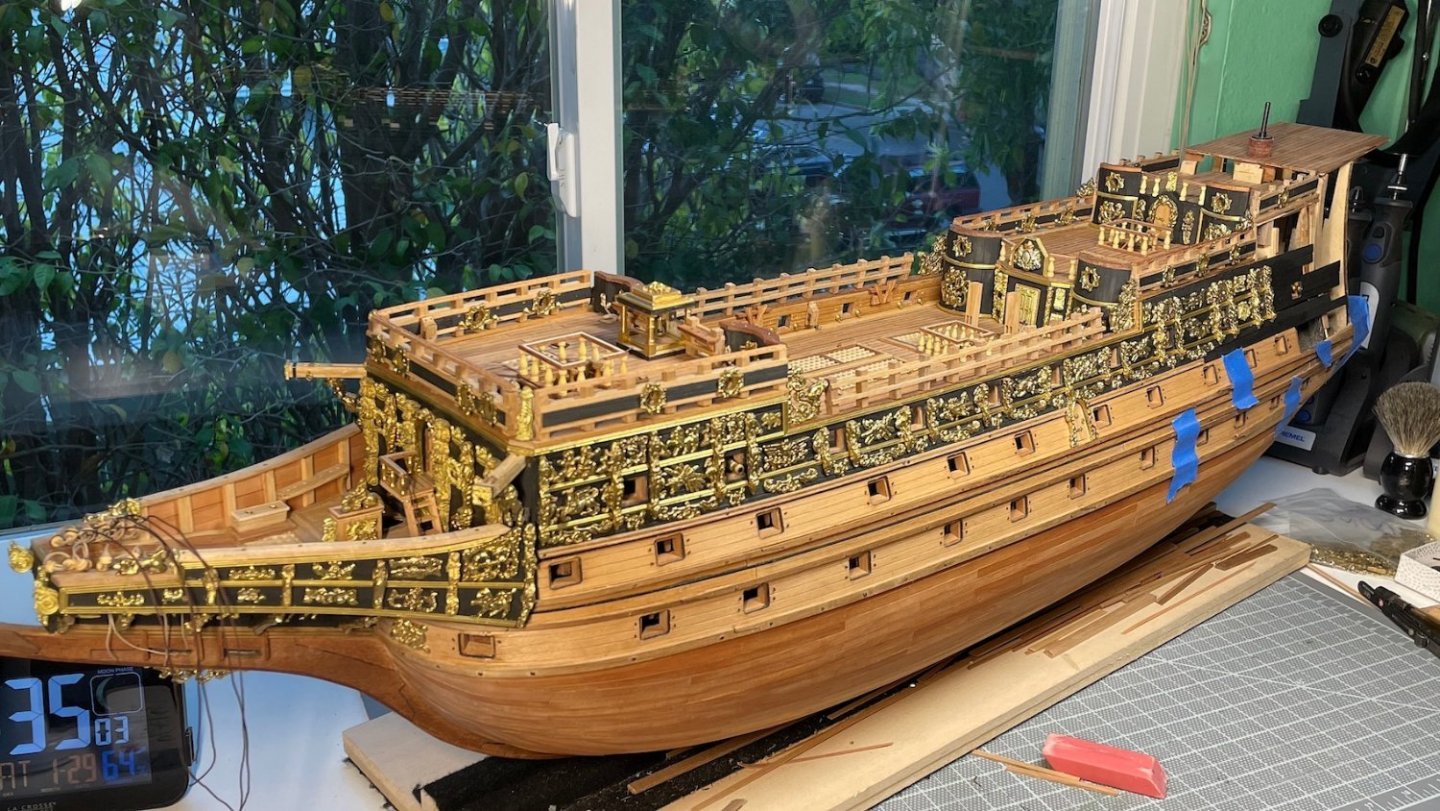
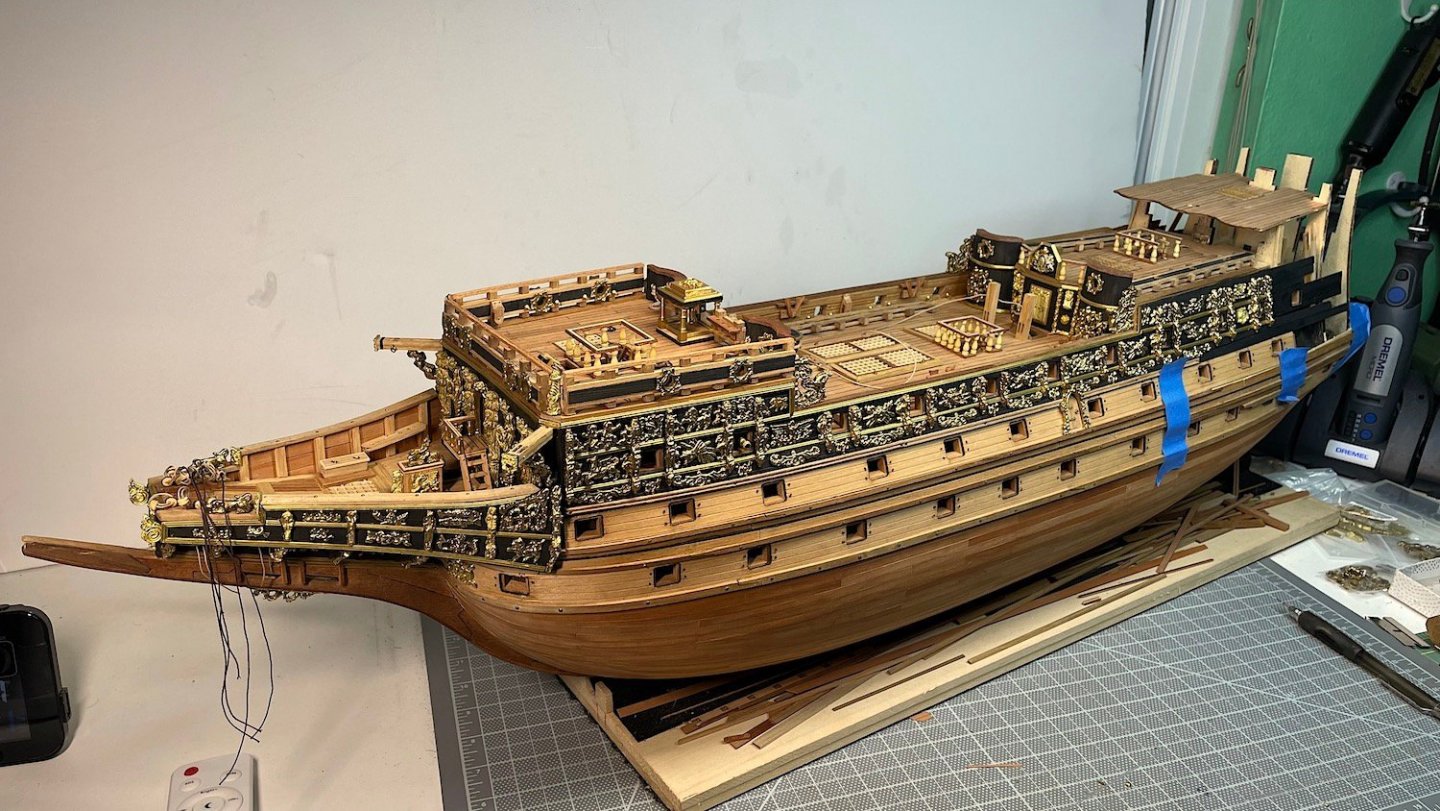
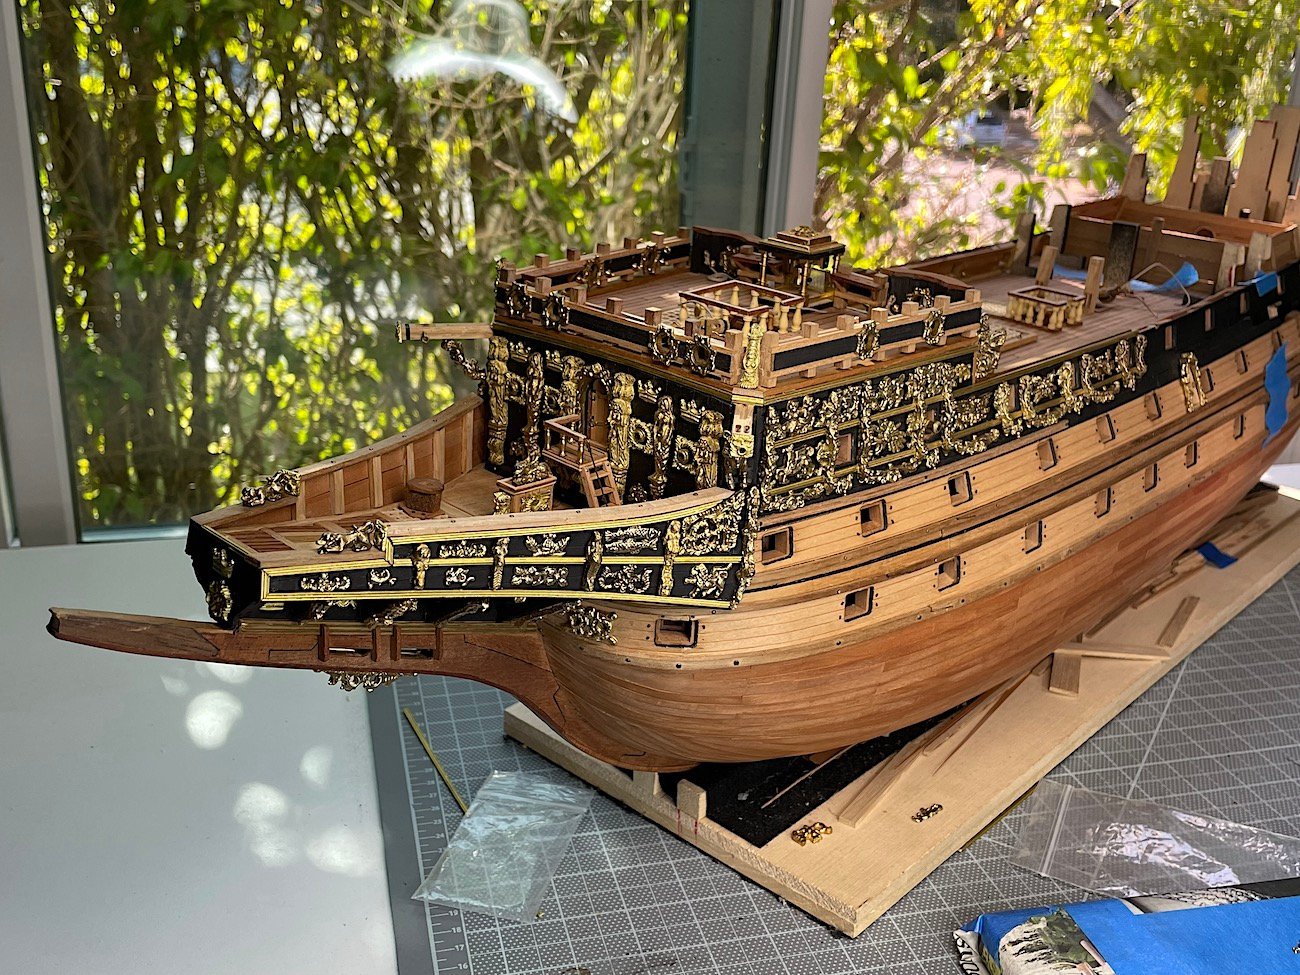
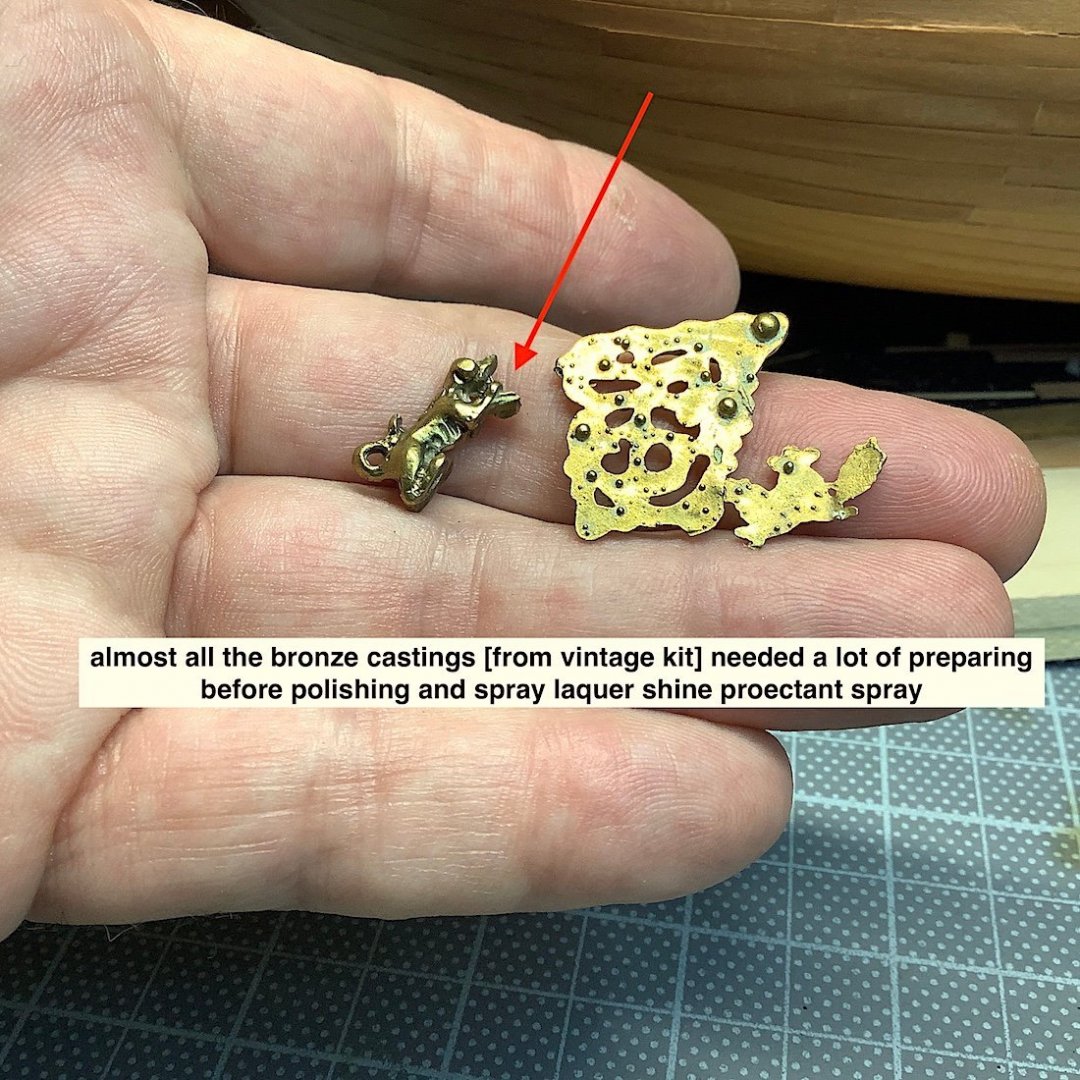
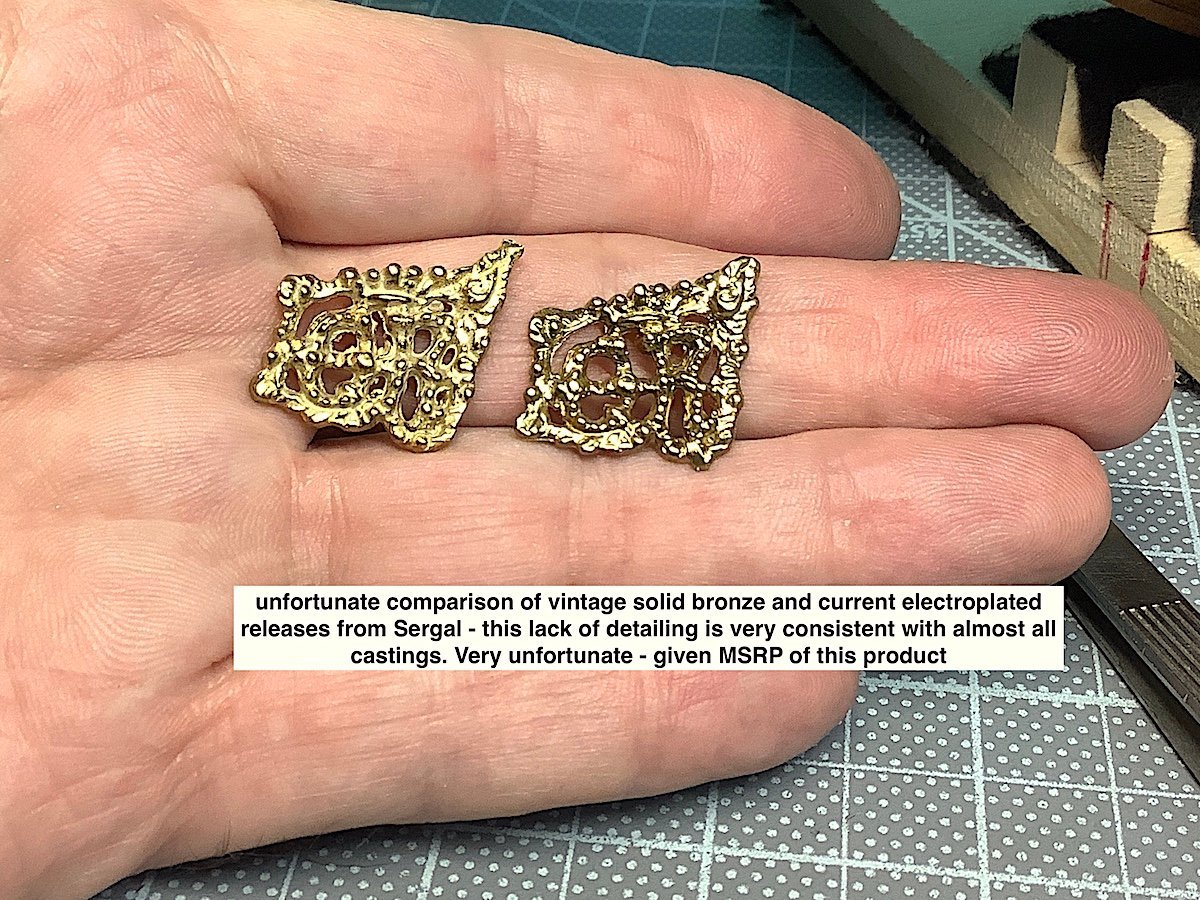
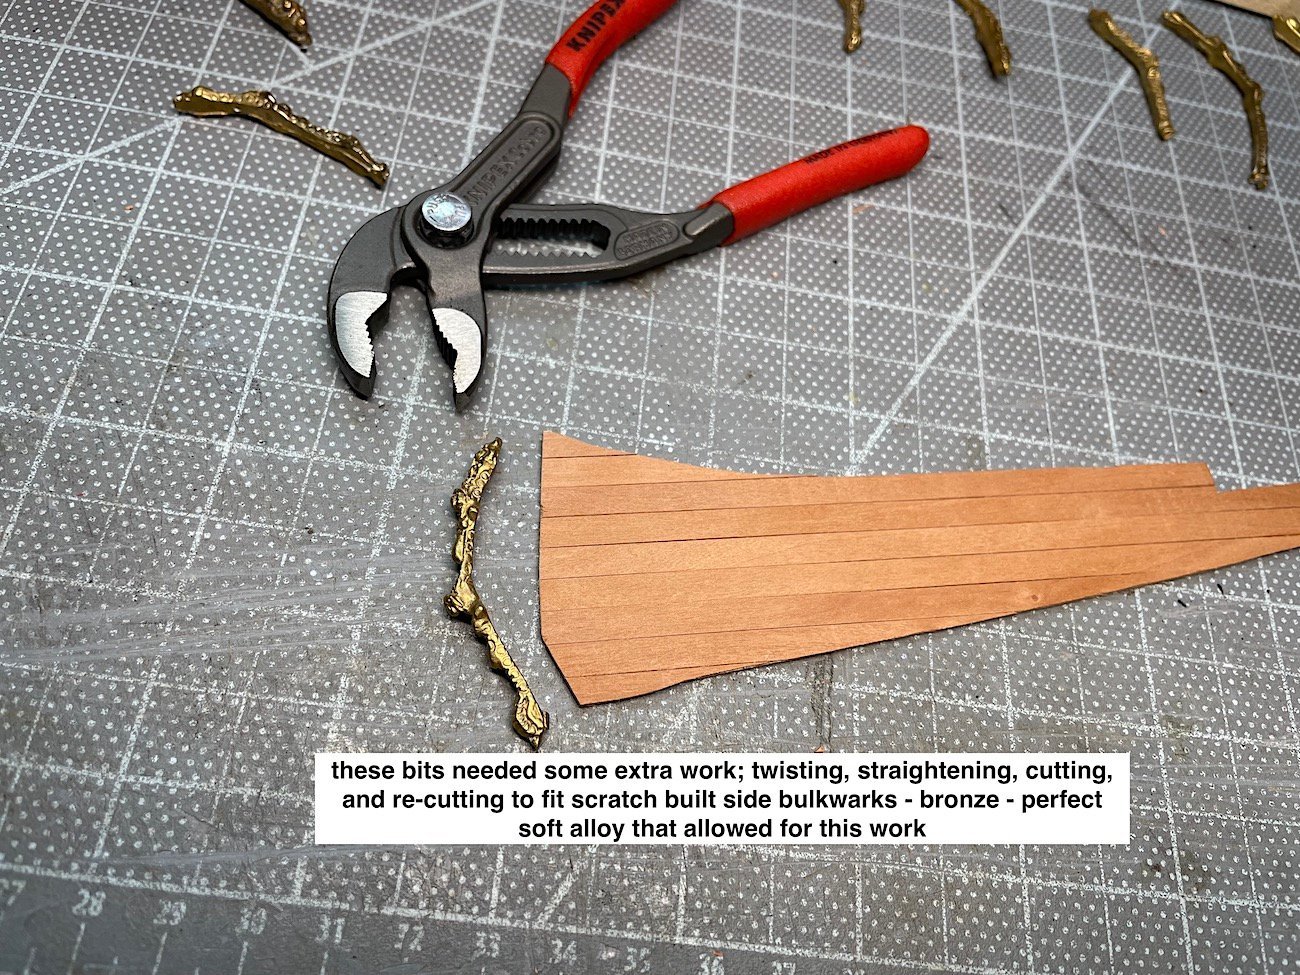
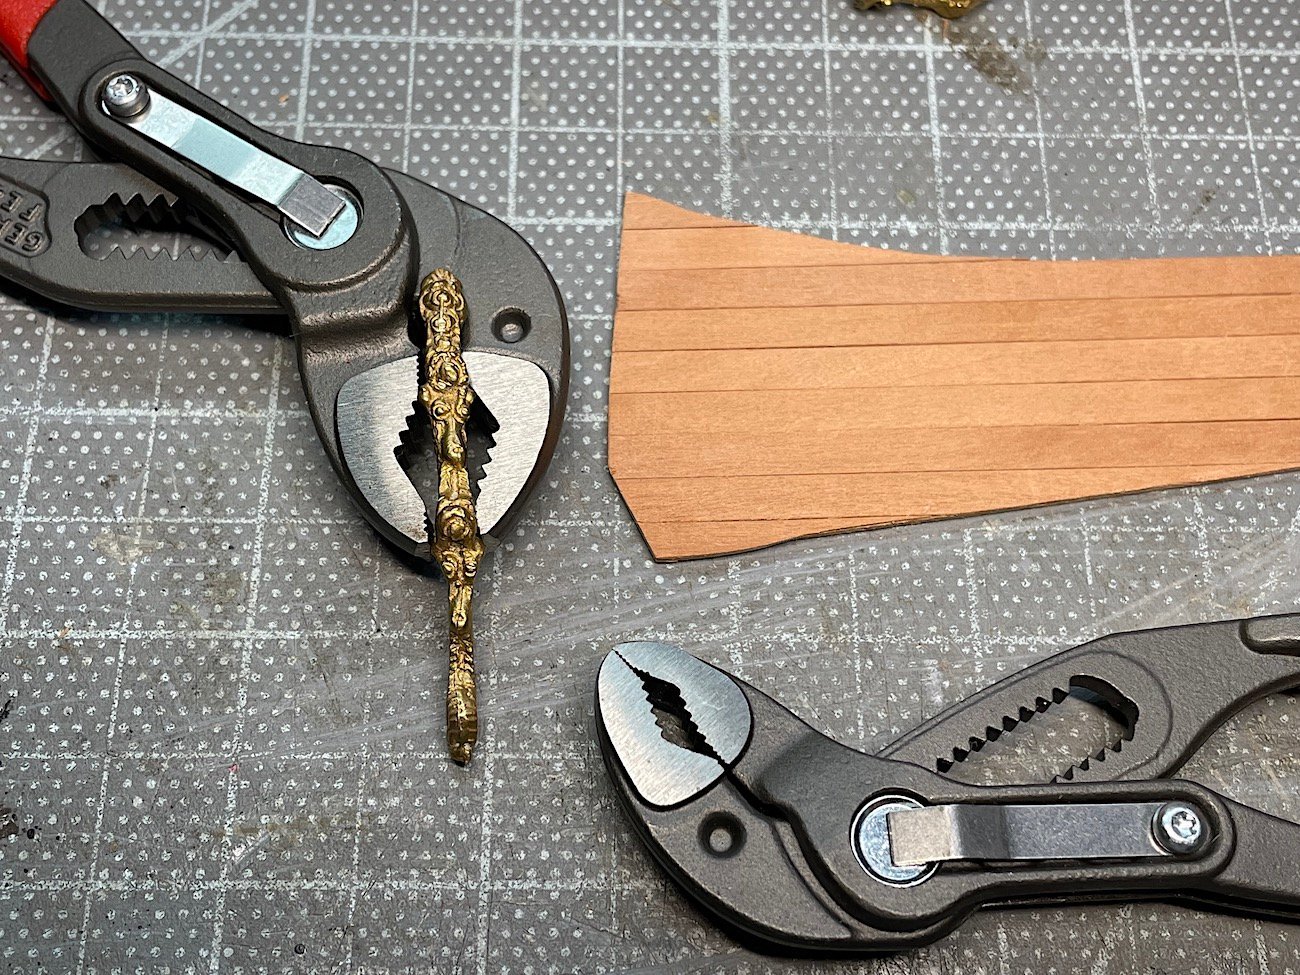
Almost back-to-back – work in progress updates Also, for noting the Great Upgrades within the current kit compared to its vintage release; as well as some changes that will be made for this build from kit instructions. Those of you who have been so kind to follow along know that I have been very negative about the current kit’s very poor 600+ metal bits (the heart of this ship no less) Current kit no longer includes solid bronze well detailed decorative bits, instead supply white metal bits that are electroplated with a “gold” plating, that somehow also preclude earlier solid bronze very good details. That said, stern area upgrades are super Excellent. Will use all of the included bits. As always so appreciate the amount of visits this log receives, as well as the kind likes, and comments from some MSW members. Thank You… PS: If Sergal had kept the solid bronze 600+ bits as well as the kit’s new upgrades this kit might be one of the best, in general, kits on the market today. It’s hard to recommend this current kit given its high retail price point – North of $1000 USD, and about €850+20% VAT in Europe – Hmmmm – these negatives are, of course, my subjective opinions… PS!! Big Kudos to builders who completed this vintage kit – much more of a difficult build IMO (very -at best) marginal instructions) – I’ve seen (and study) superb images of the old kit Cheers,


-
Frank: Thanks indeed - much appreciated. Trying to also raise my skill set a bit more as well. Yes, all good on this coast - can't say as much on your side hope that you are staying safe -it was quite a messy storm that millions went through!! Ian: Thanks as well your thoughts are much appreciated. Awesome link - it is still astonishing how some people's luxury of life still fascinates many of us today. The art in-and-of-itself is overwhelmingly beautiful - contextually speaking of course...
-
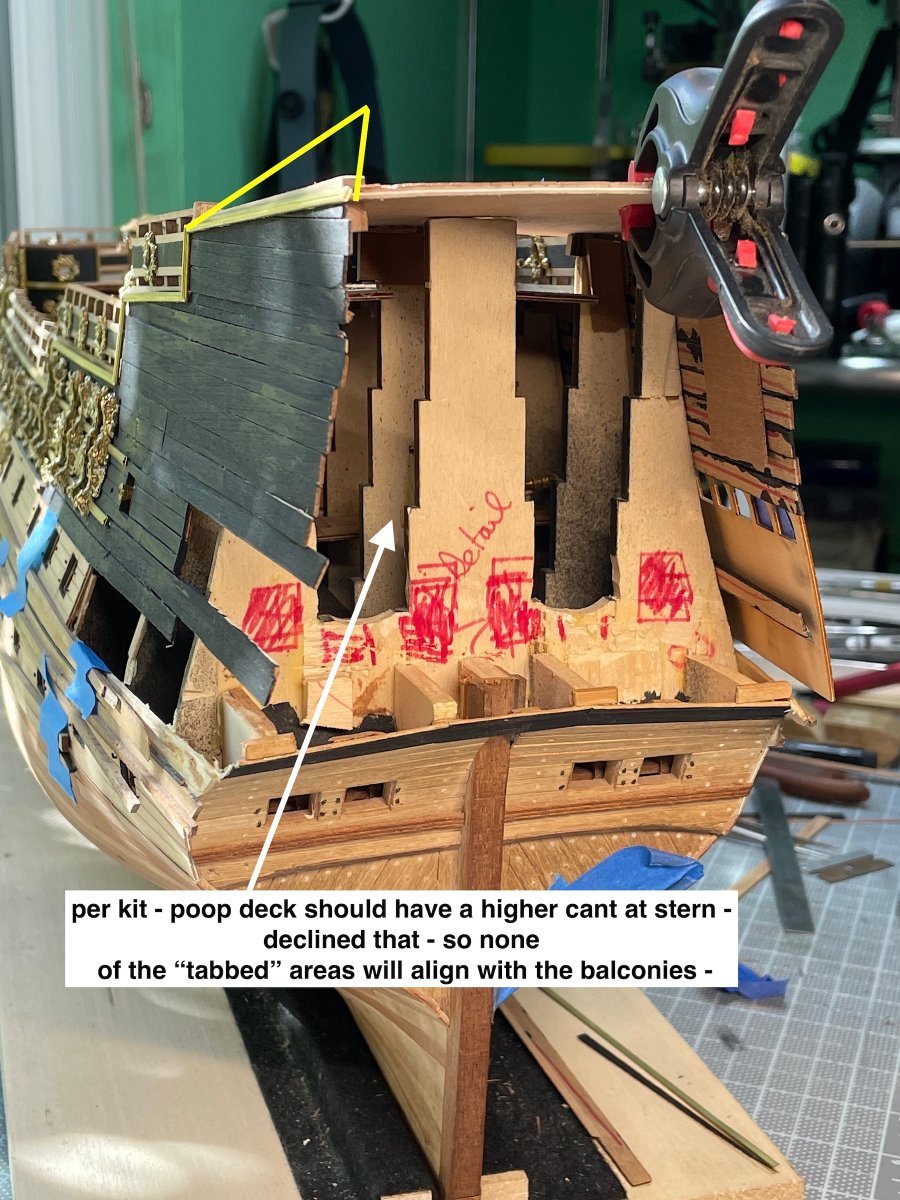
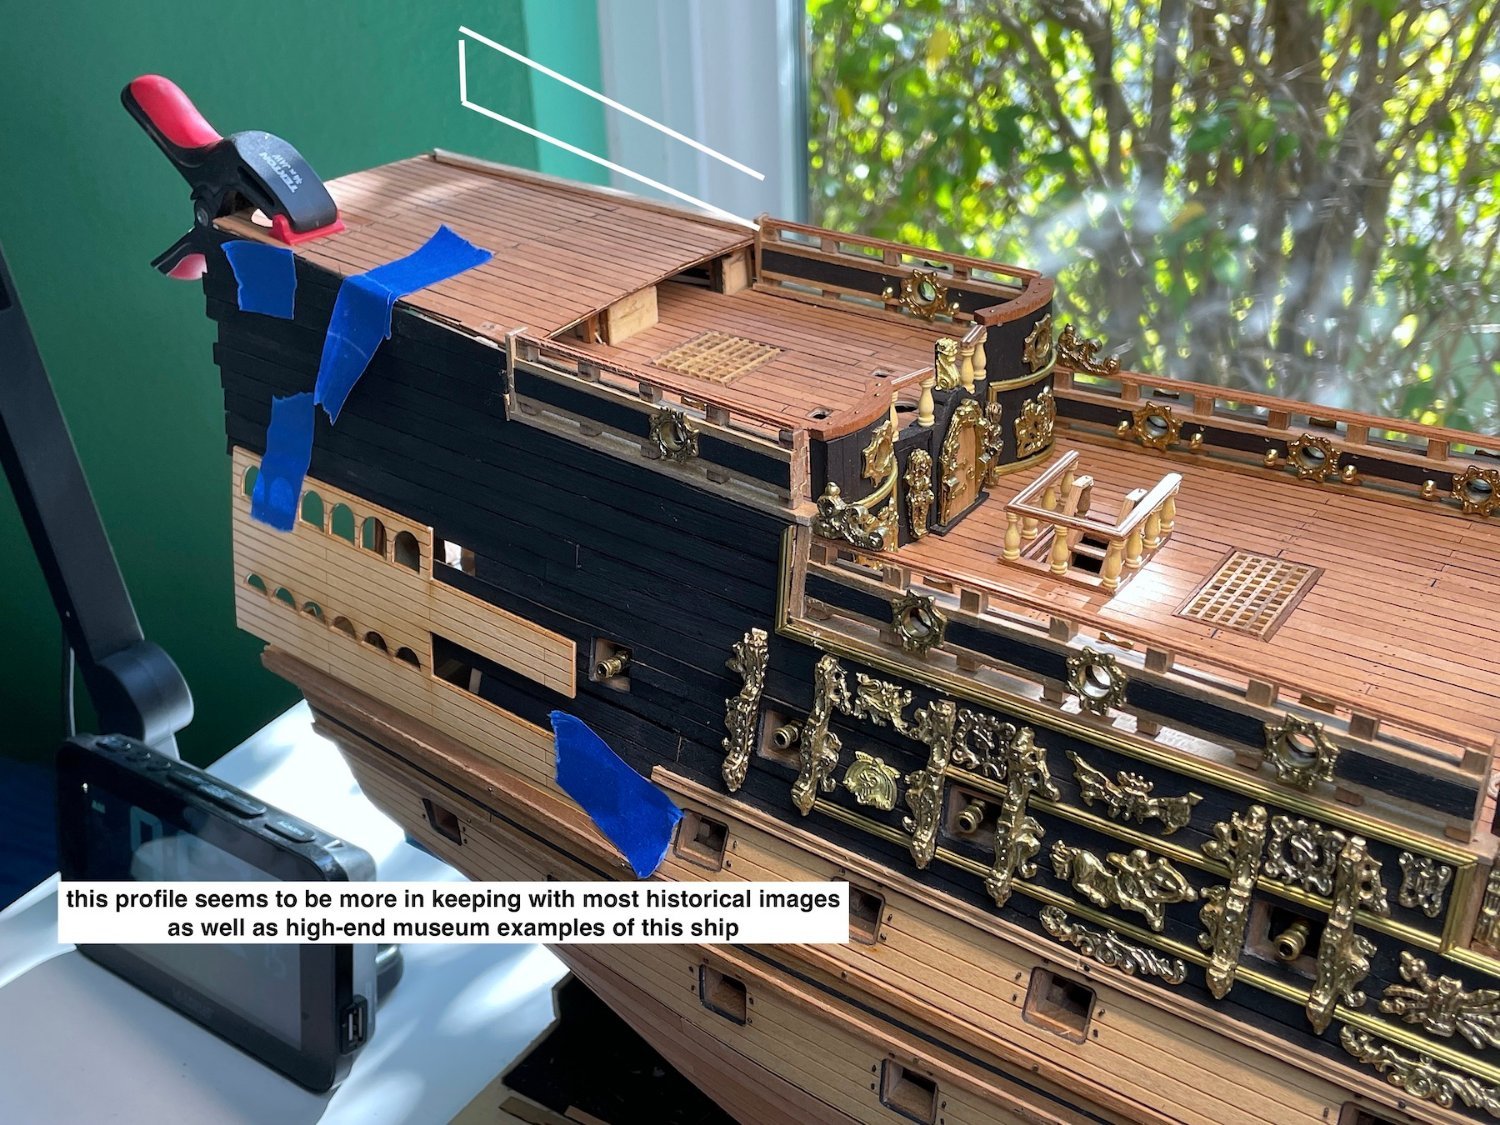
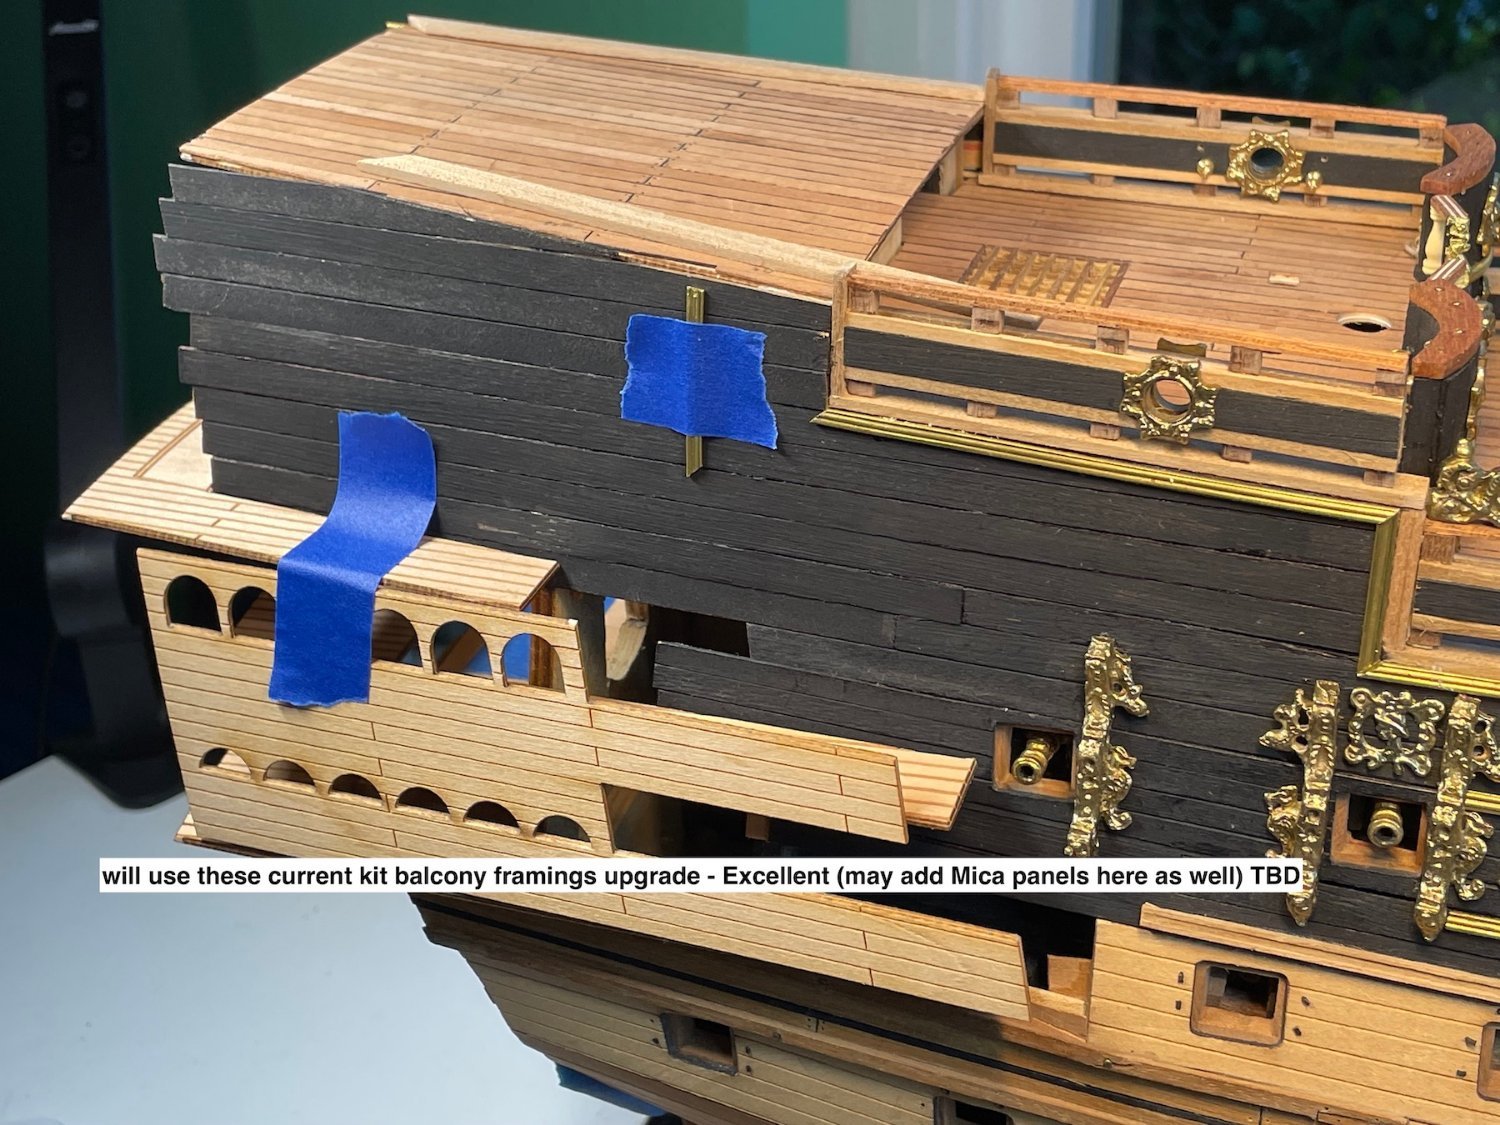
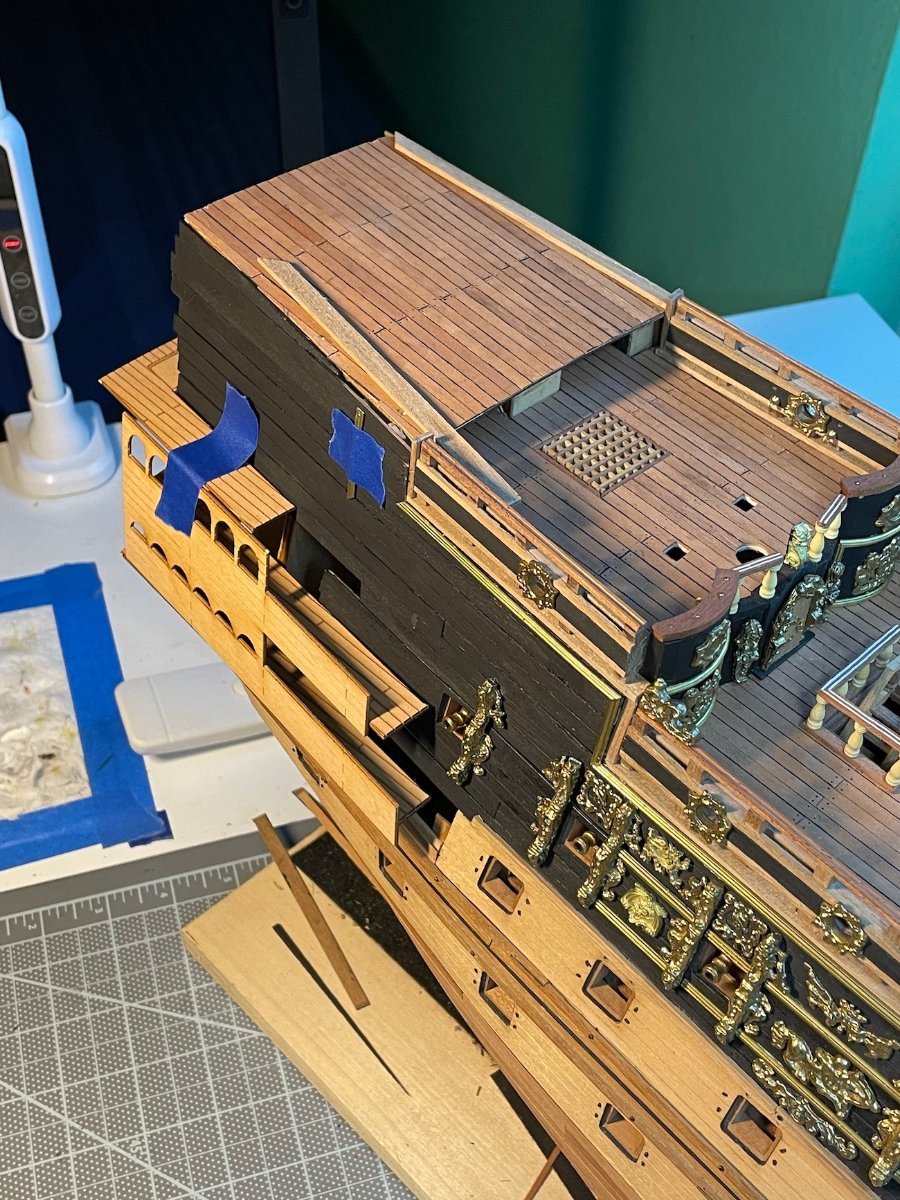
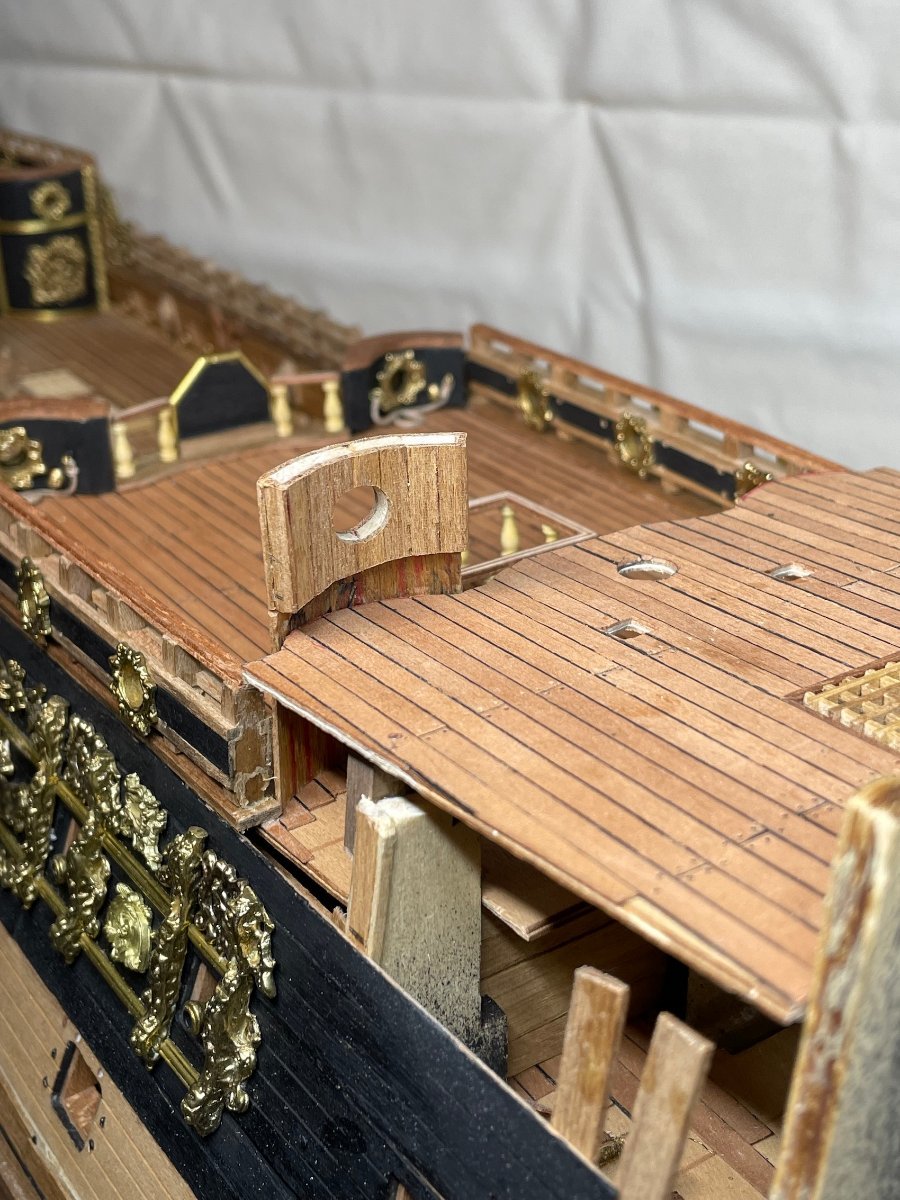
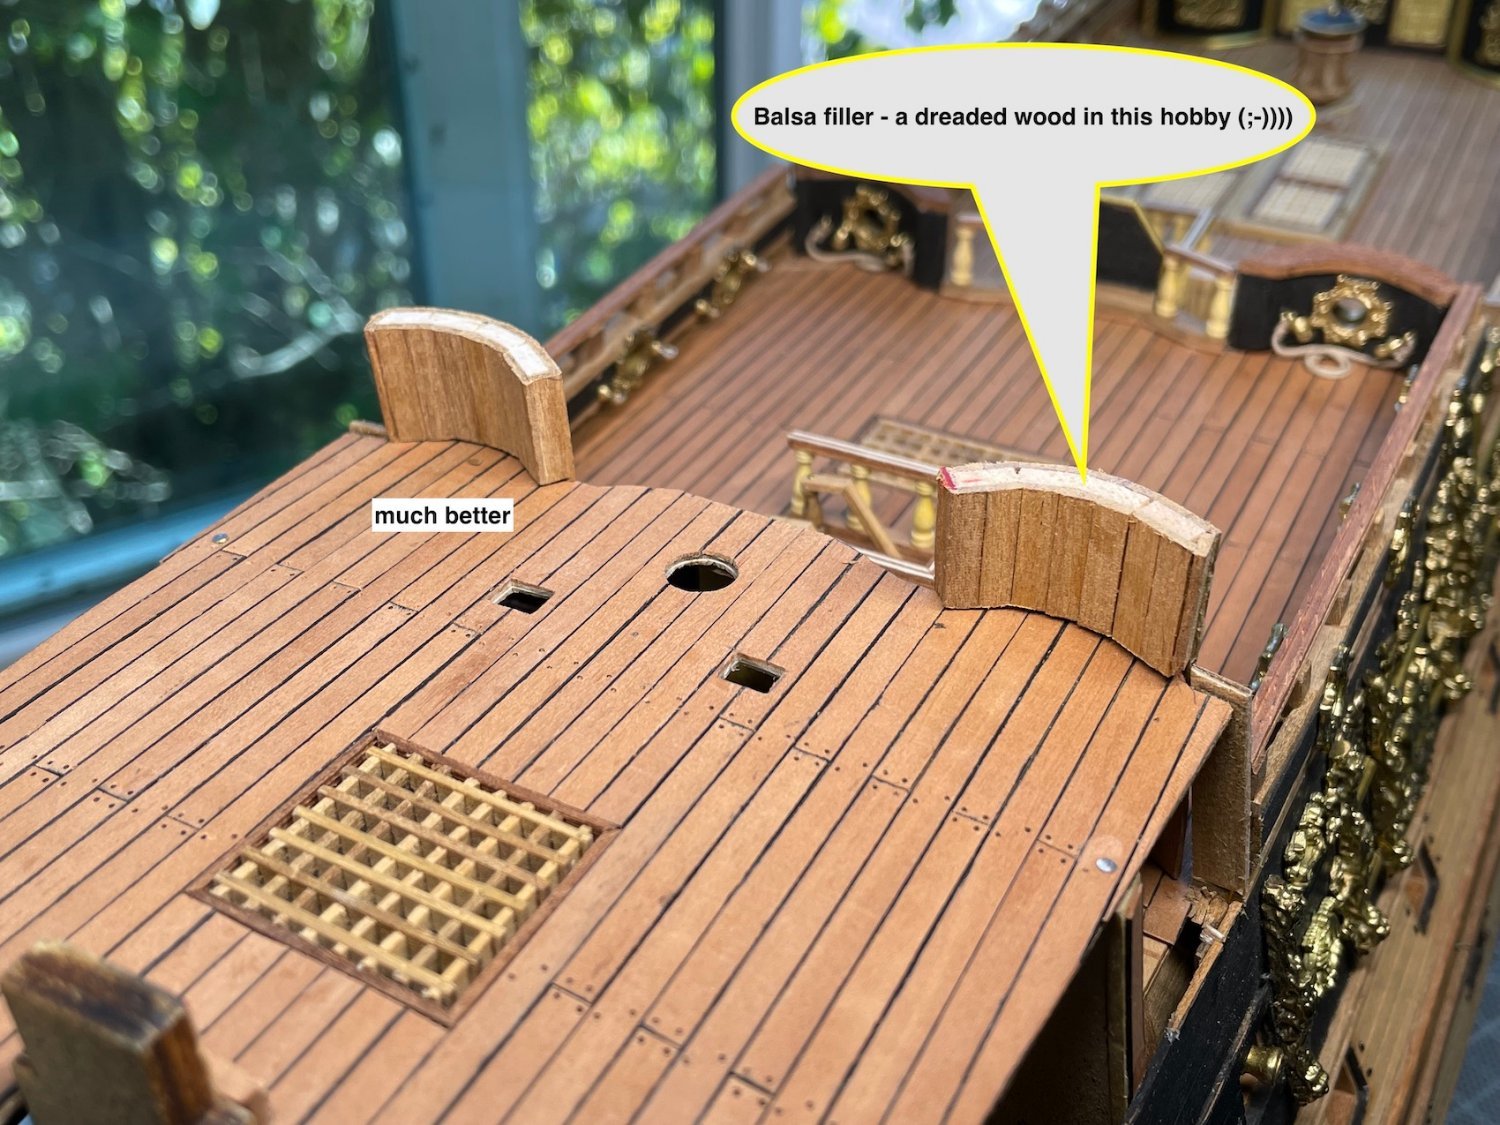
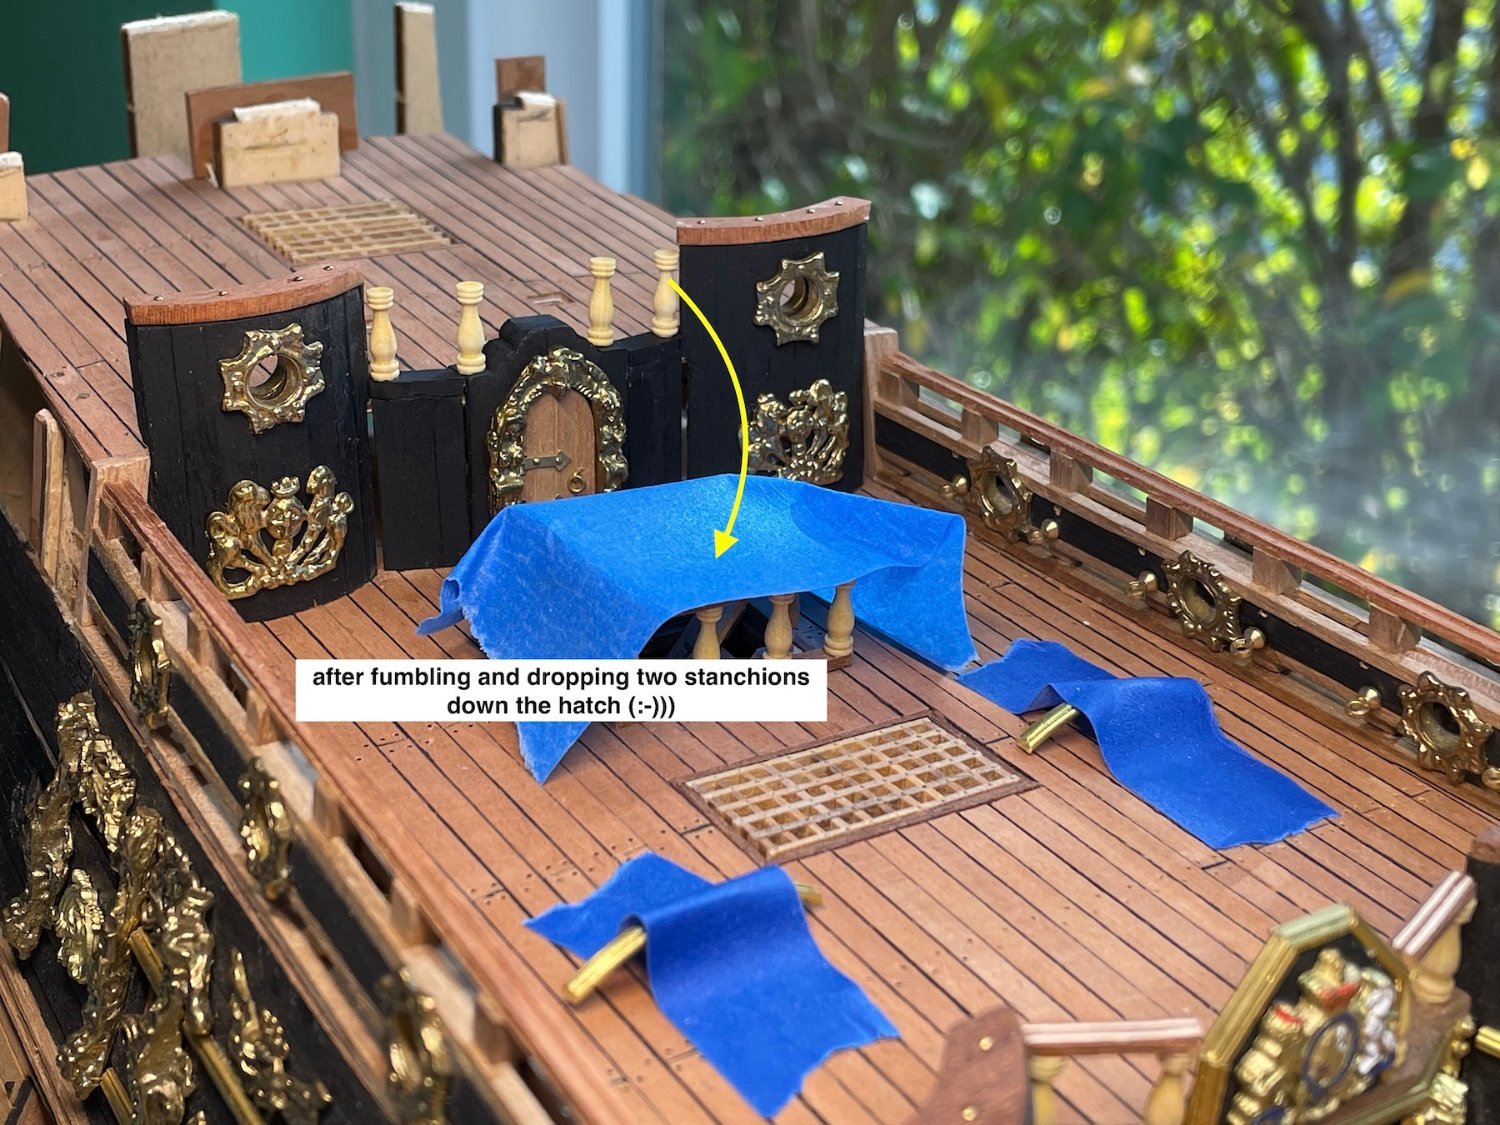
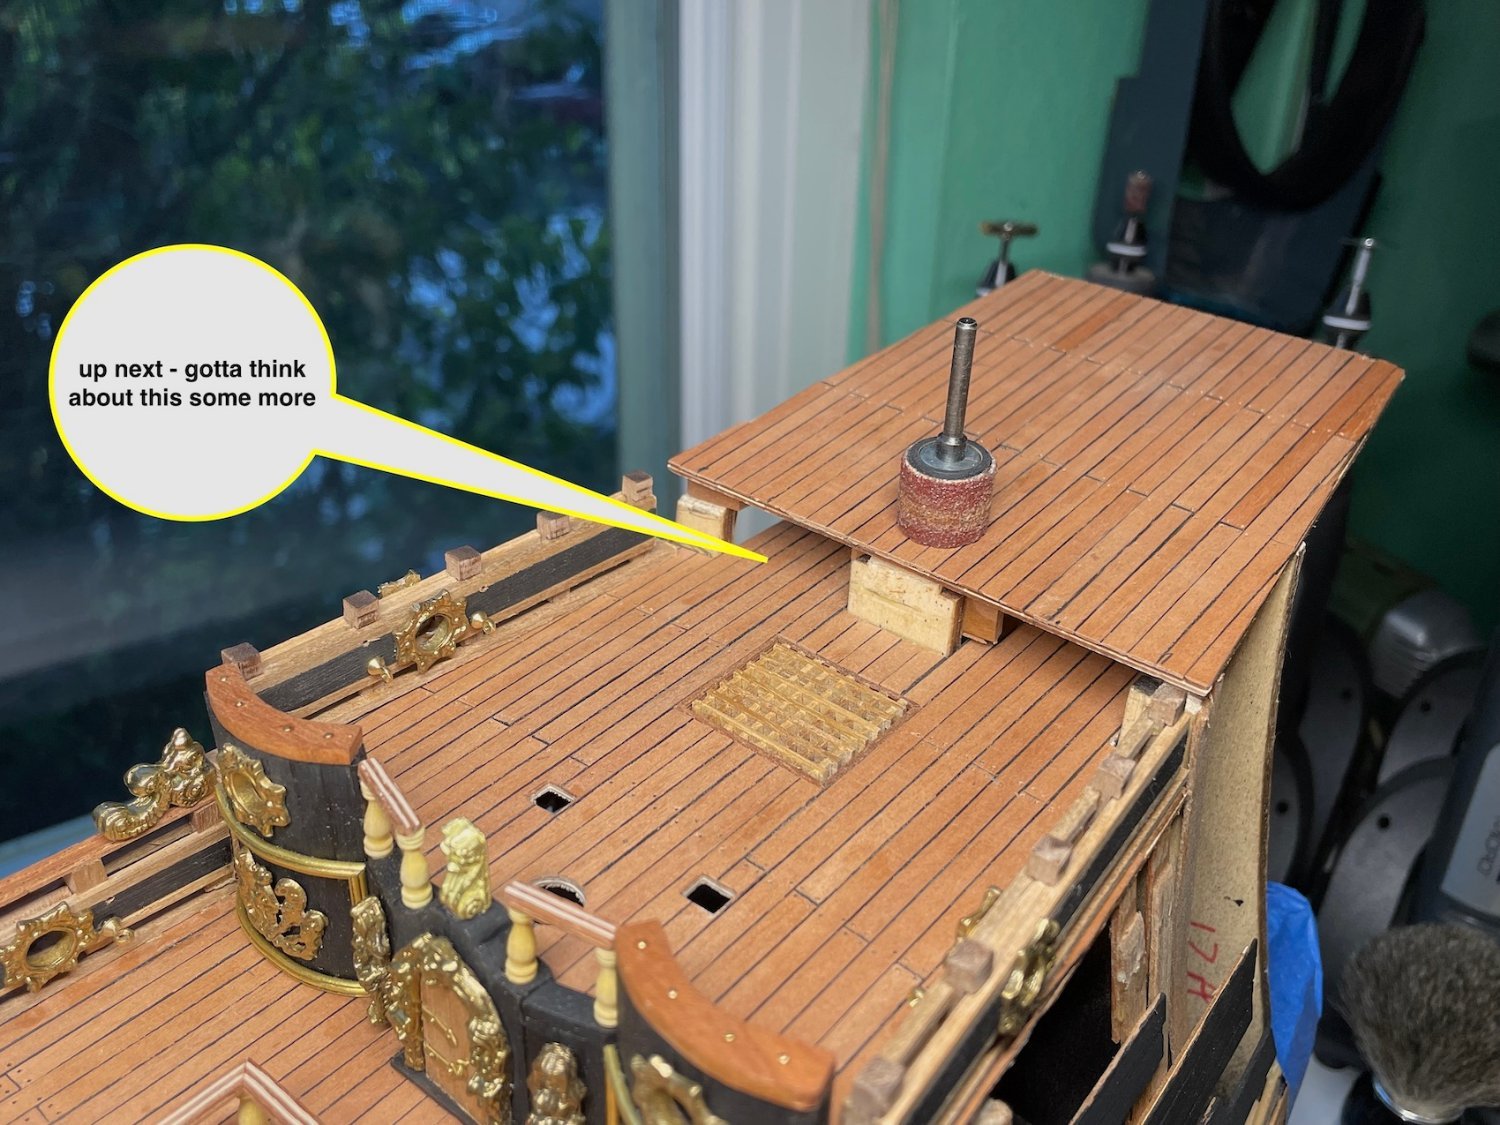
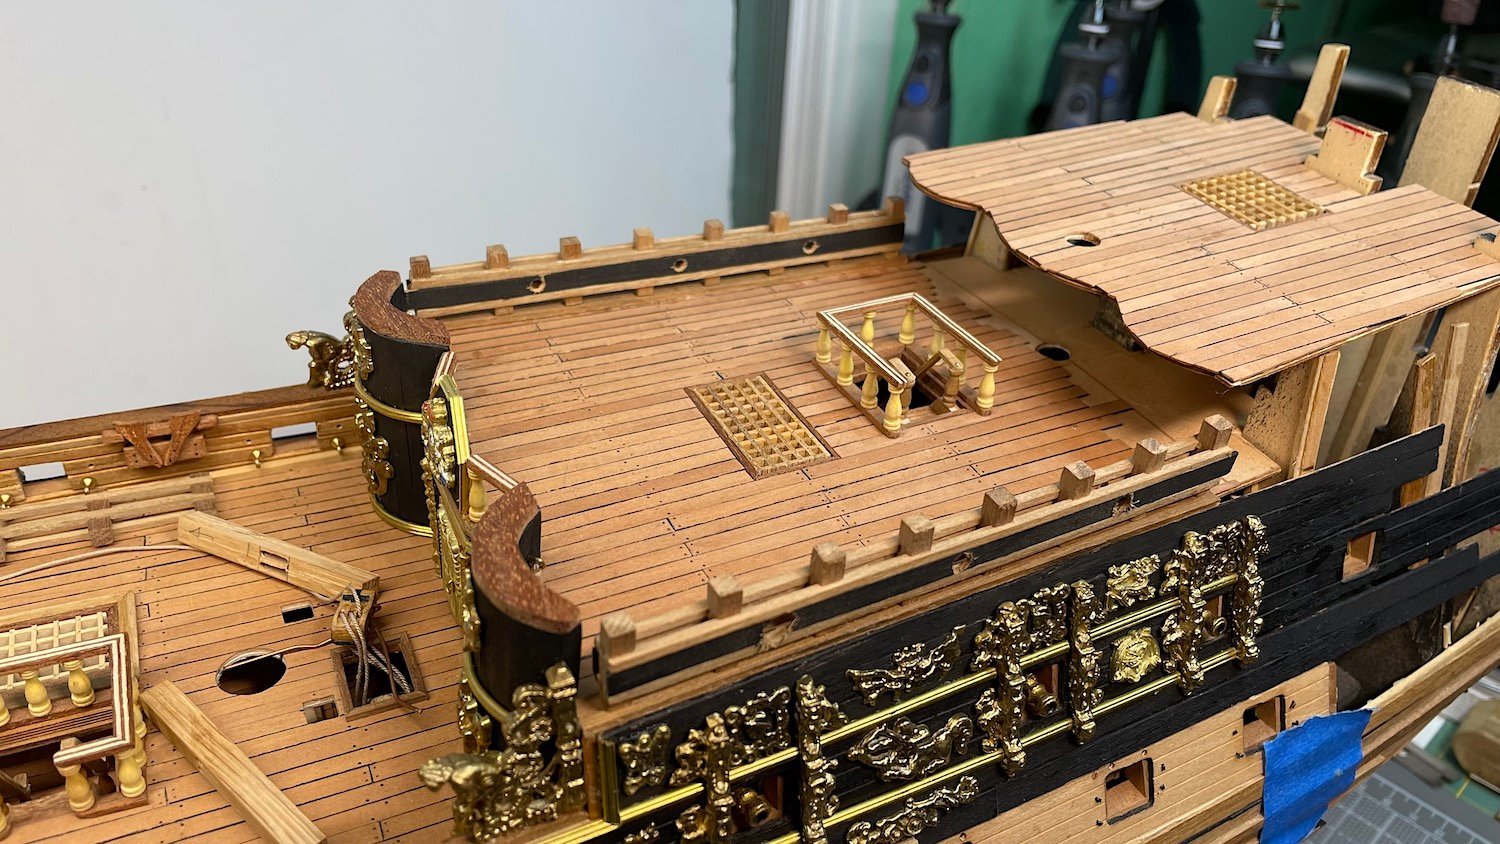
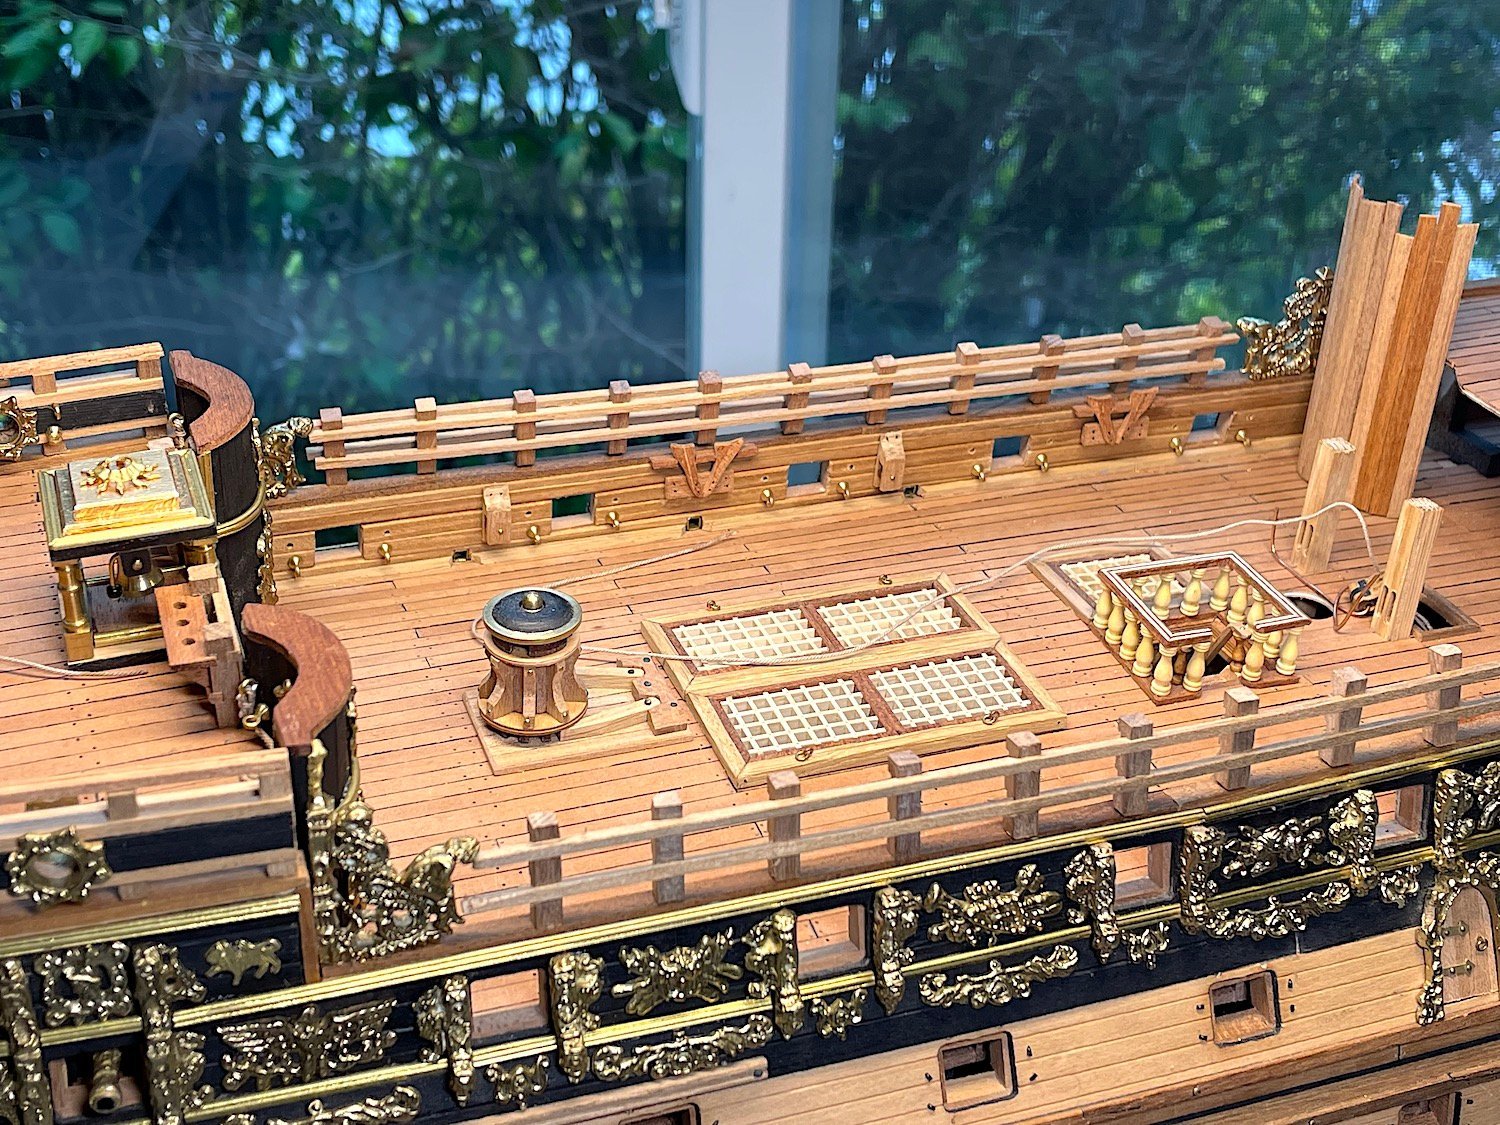
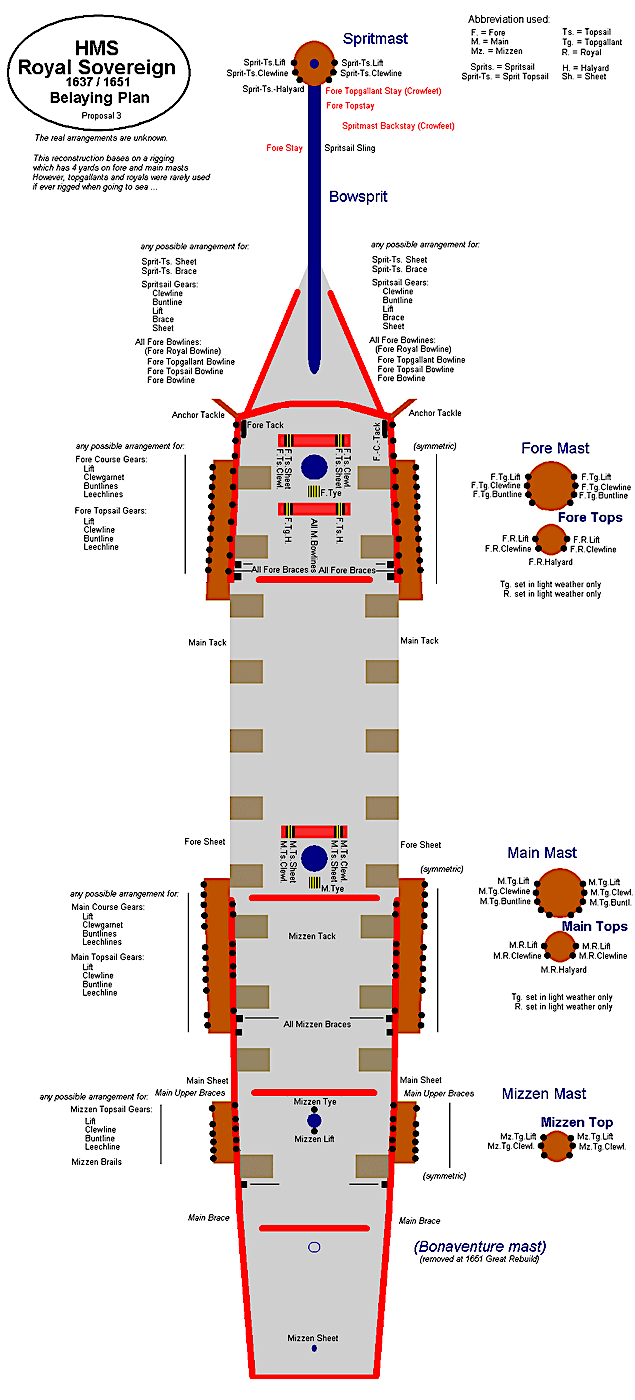
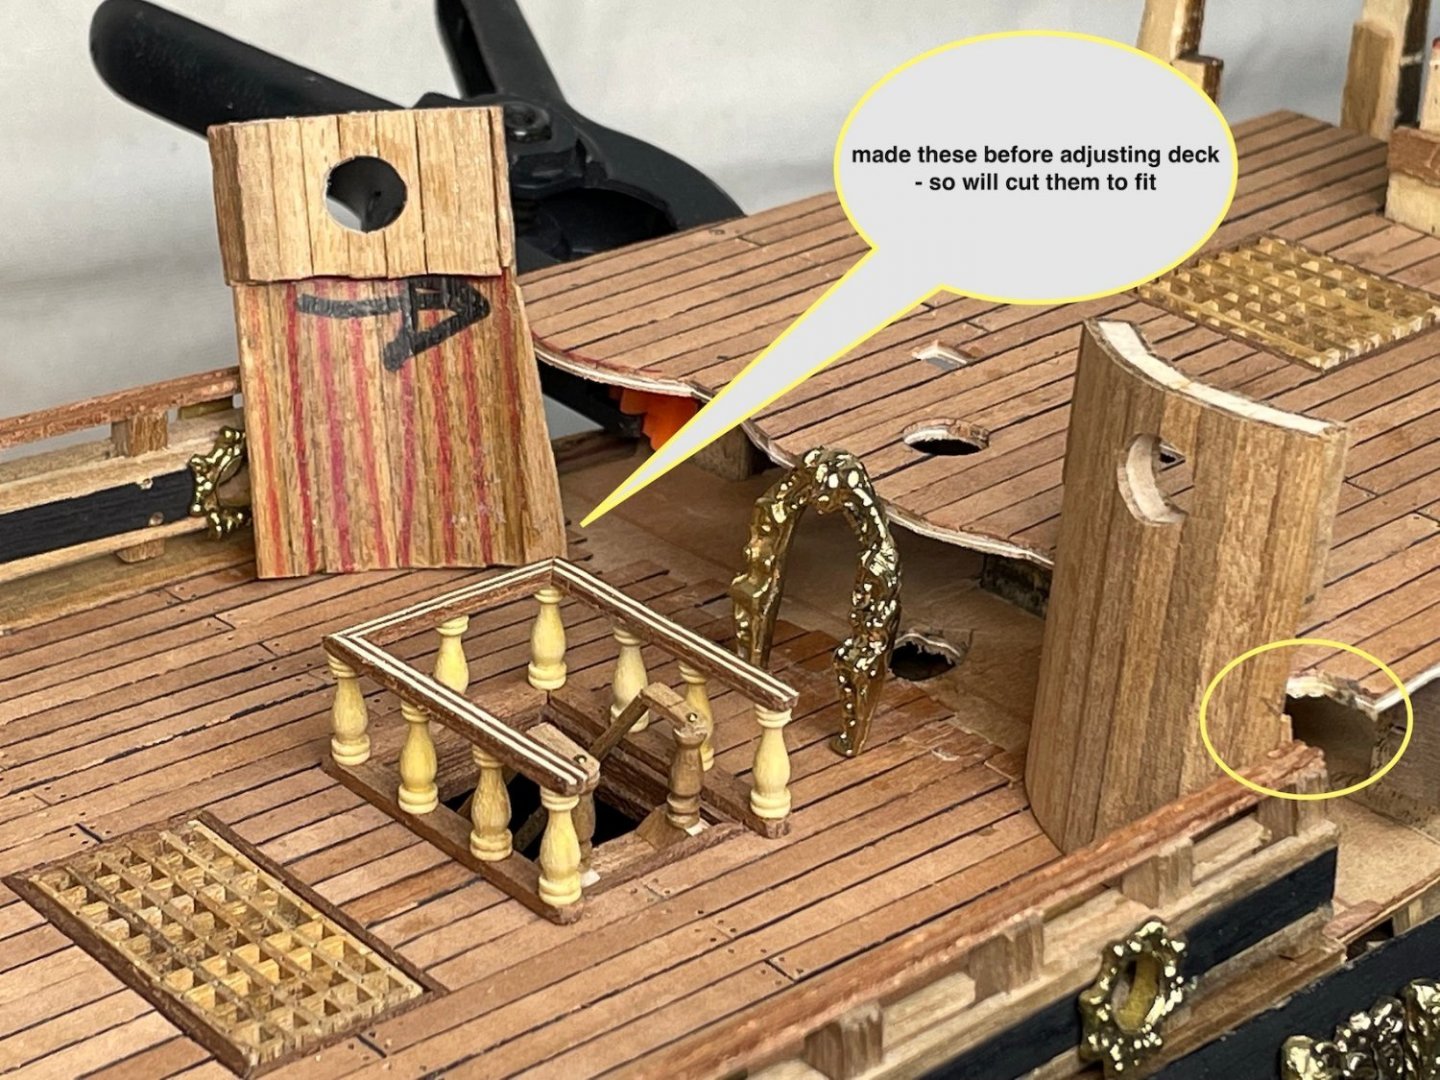
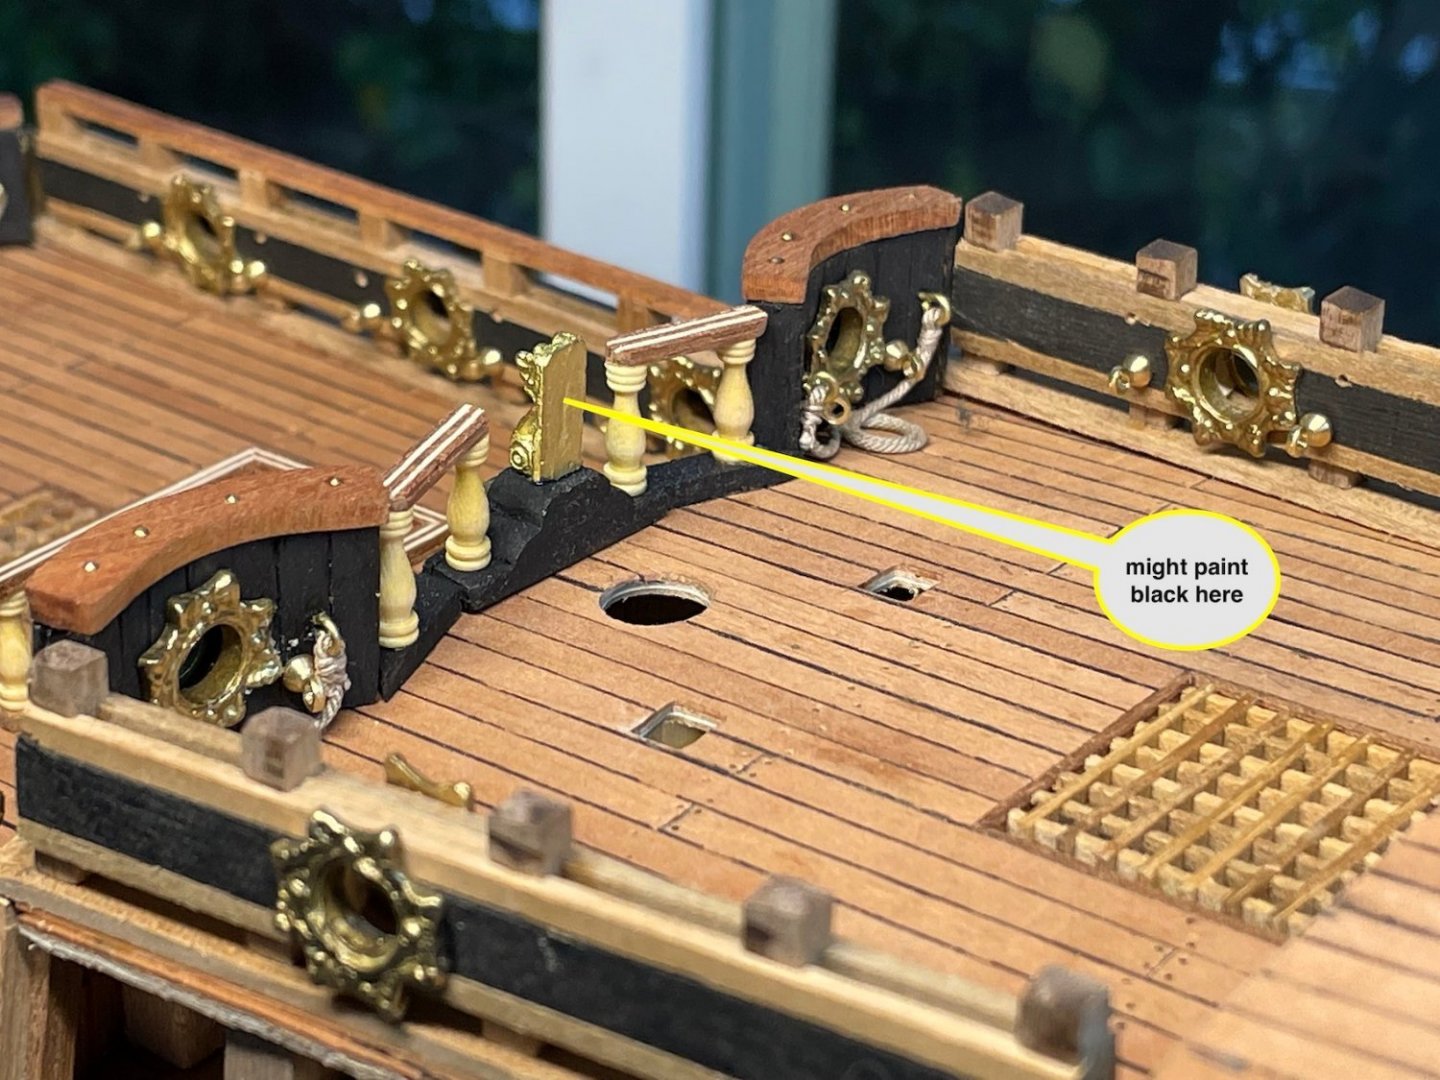
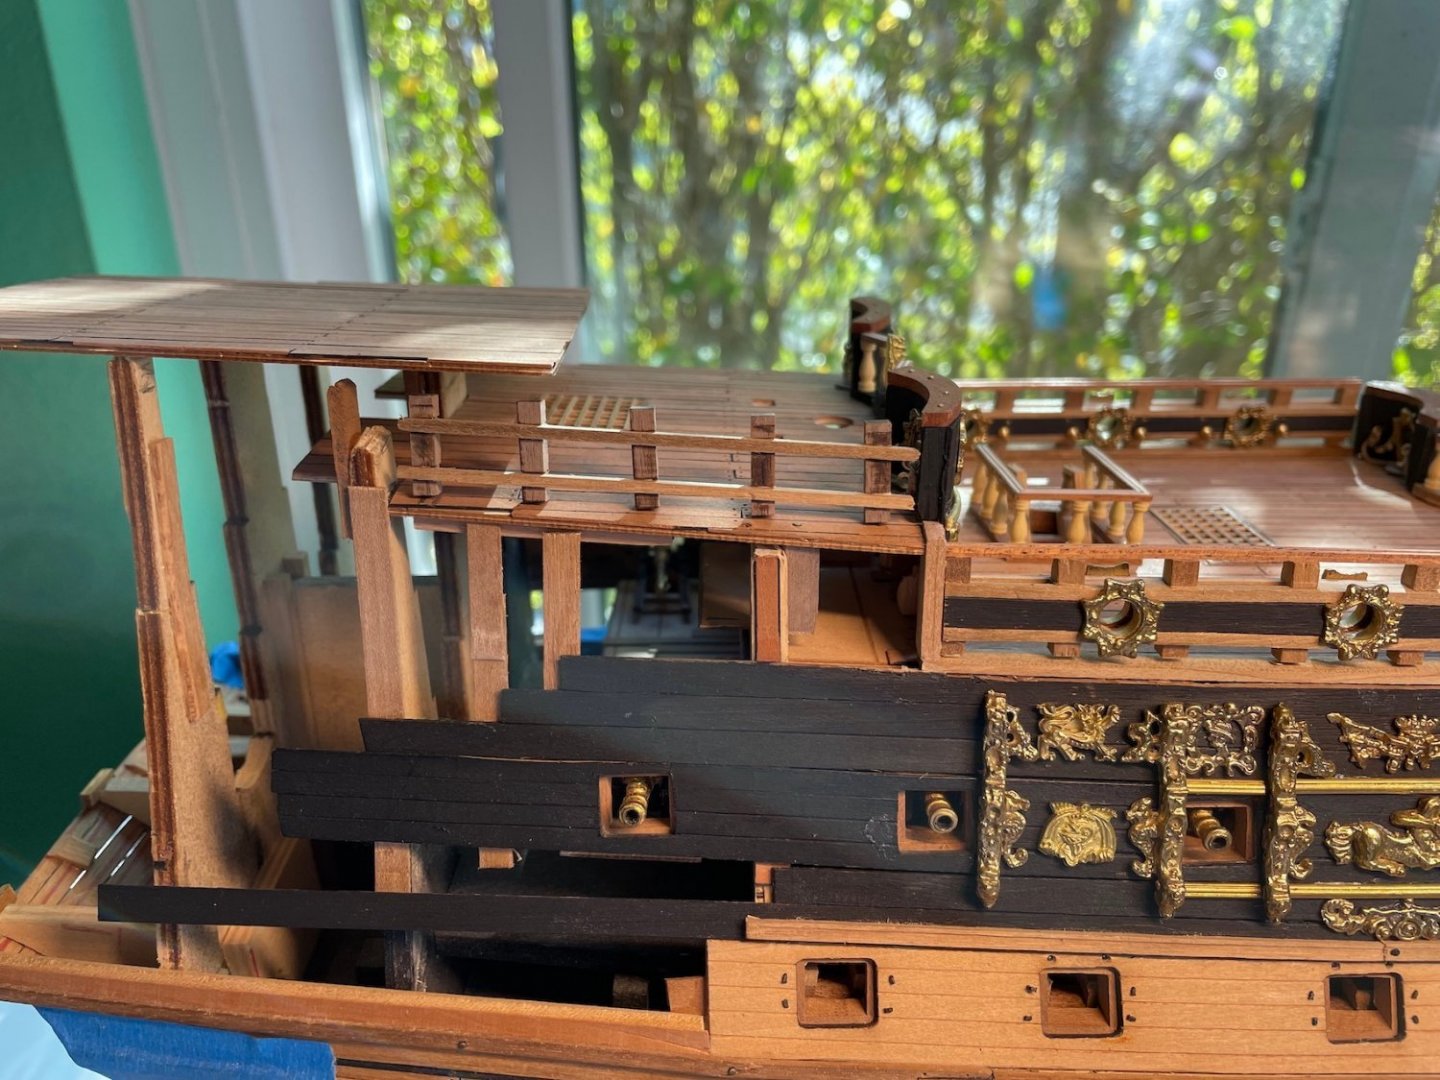
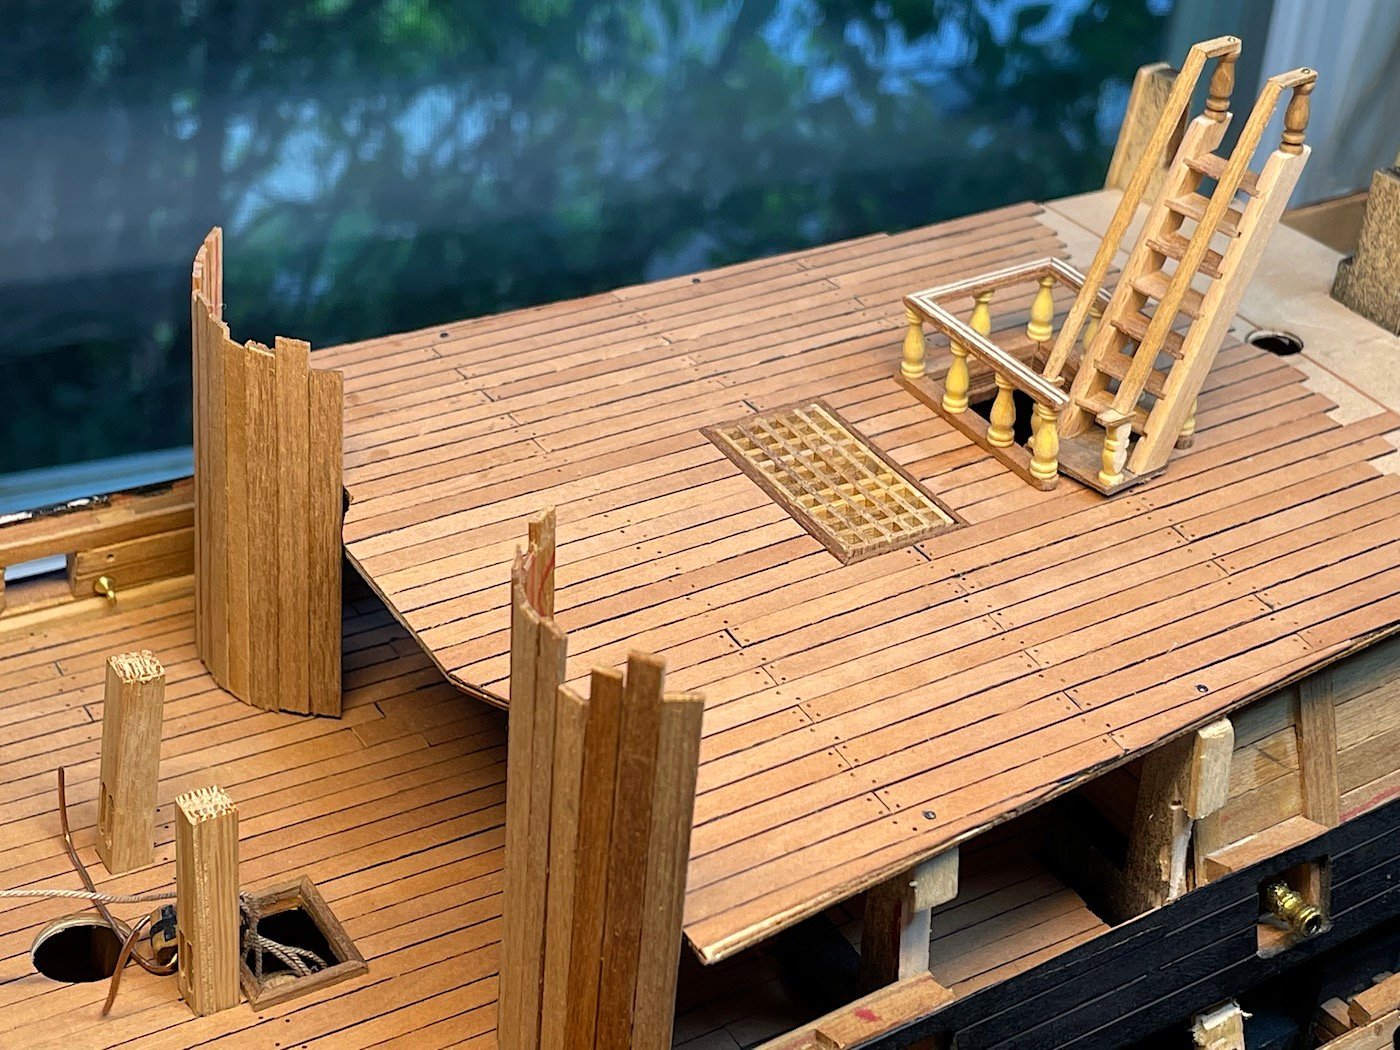
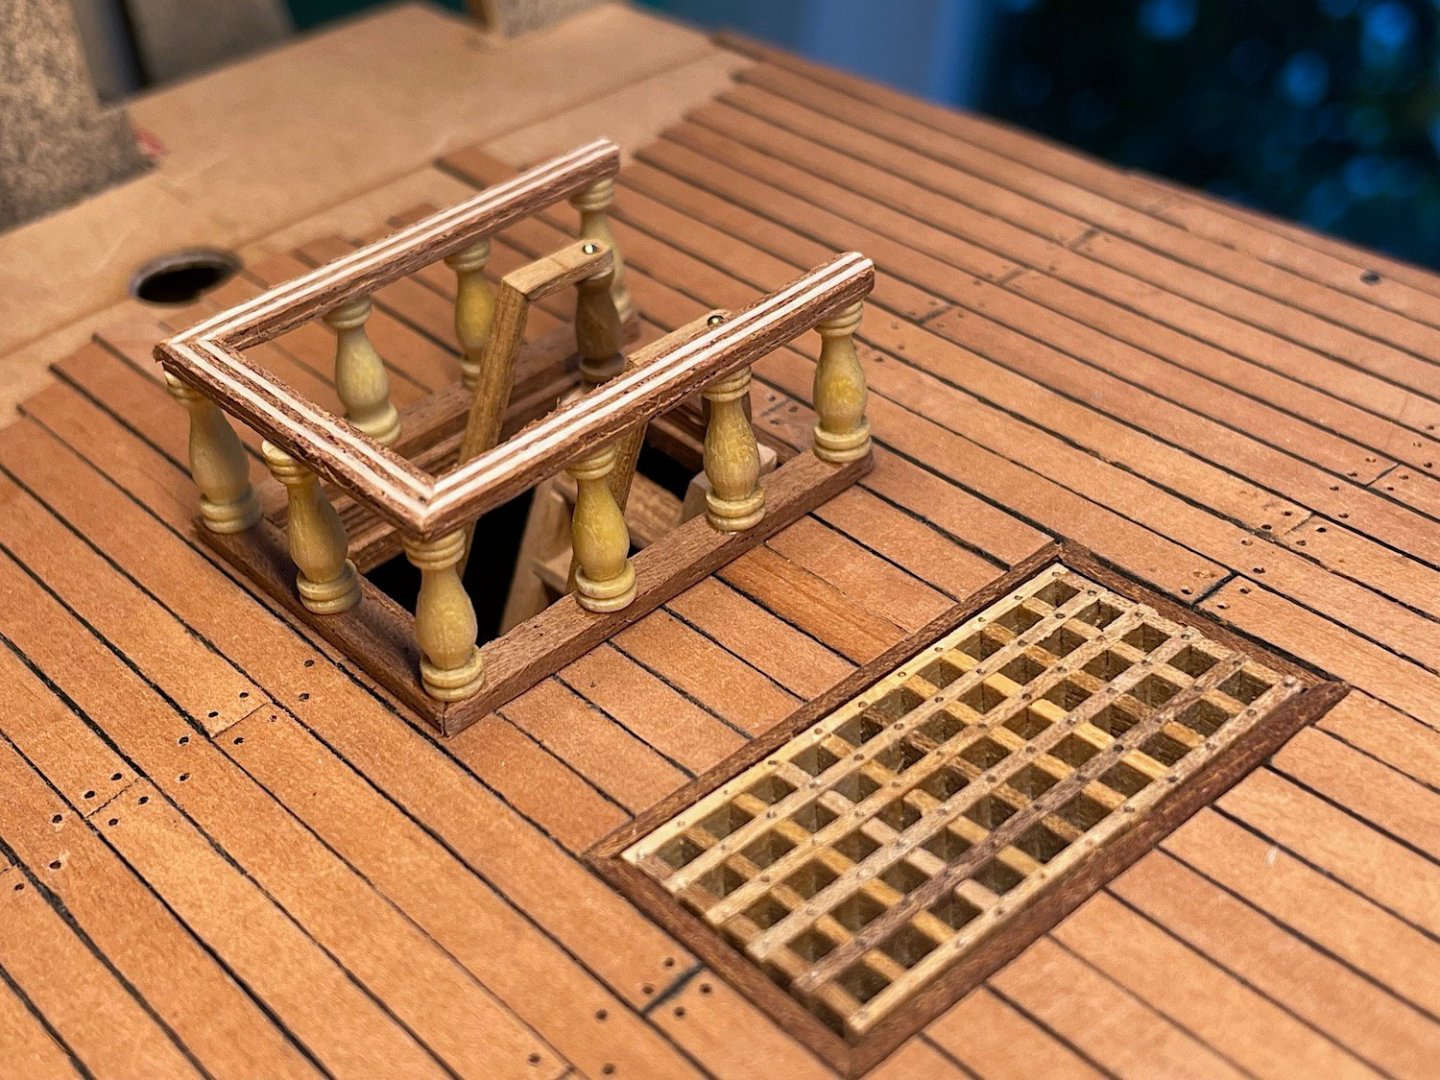
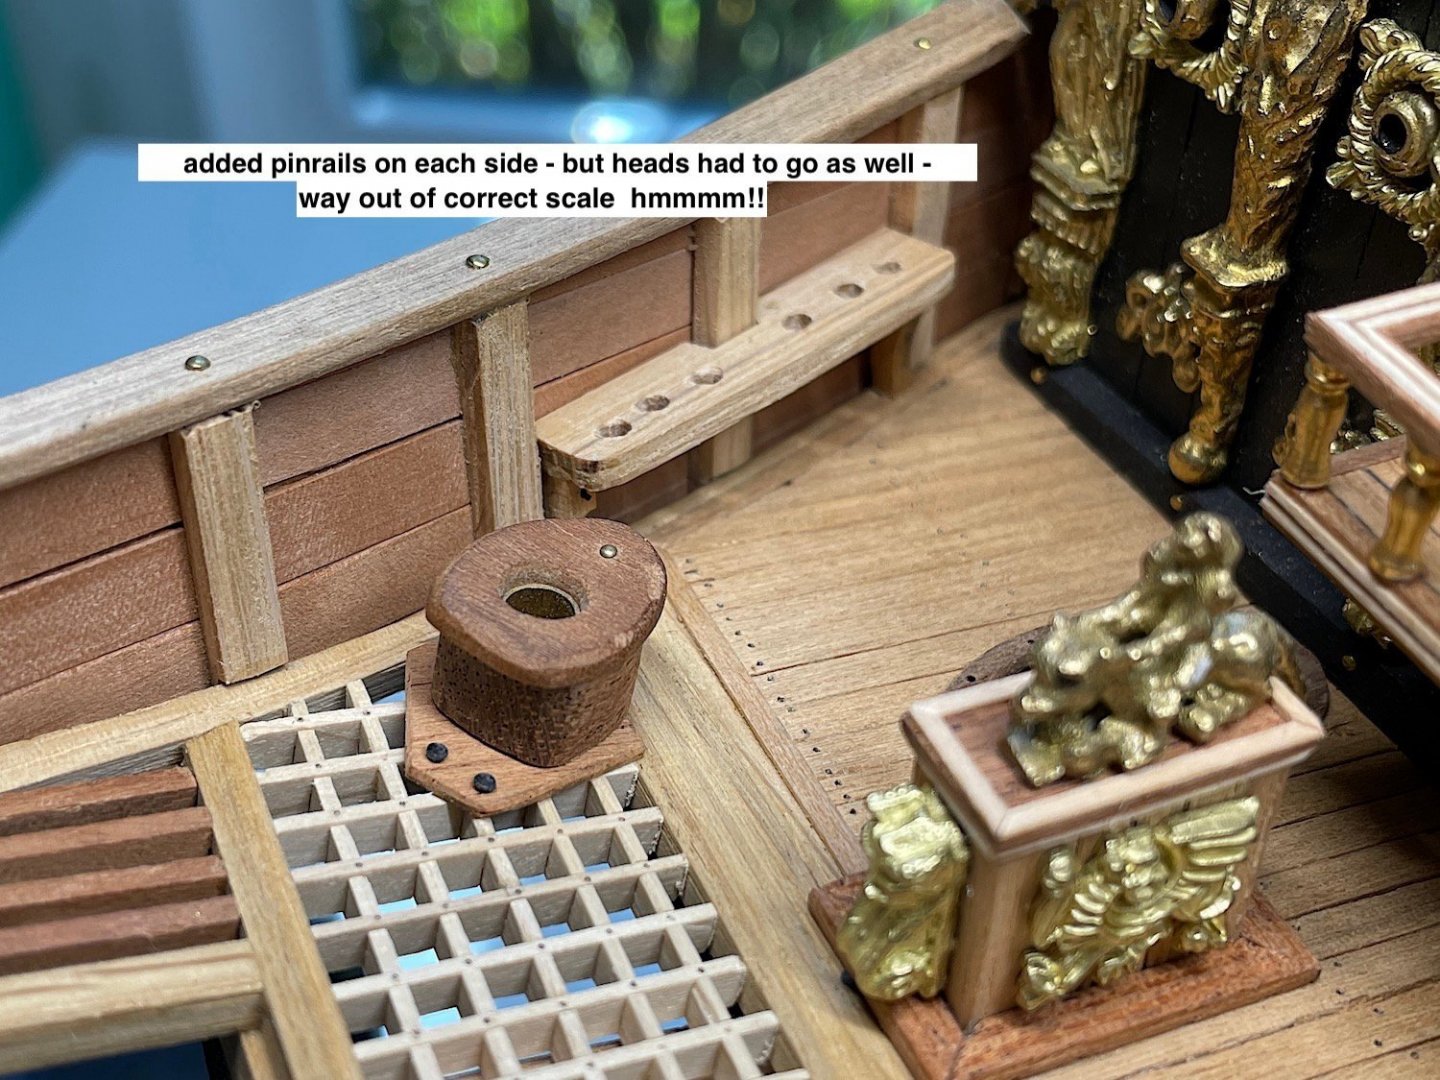
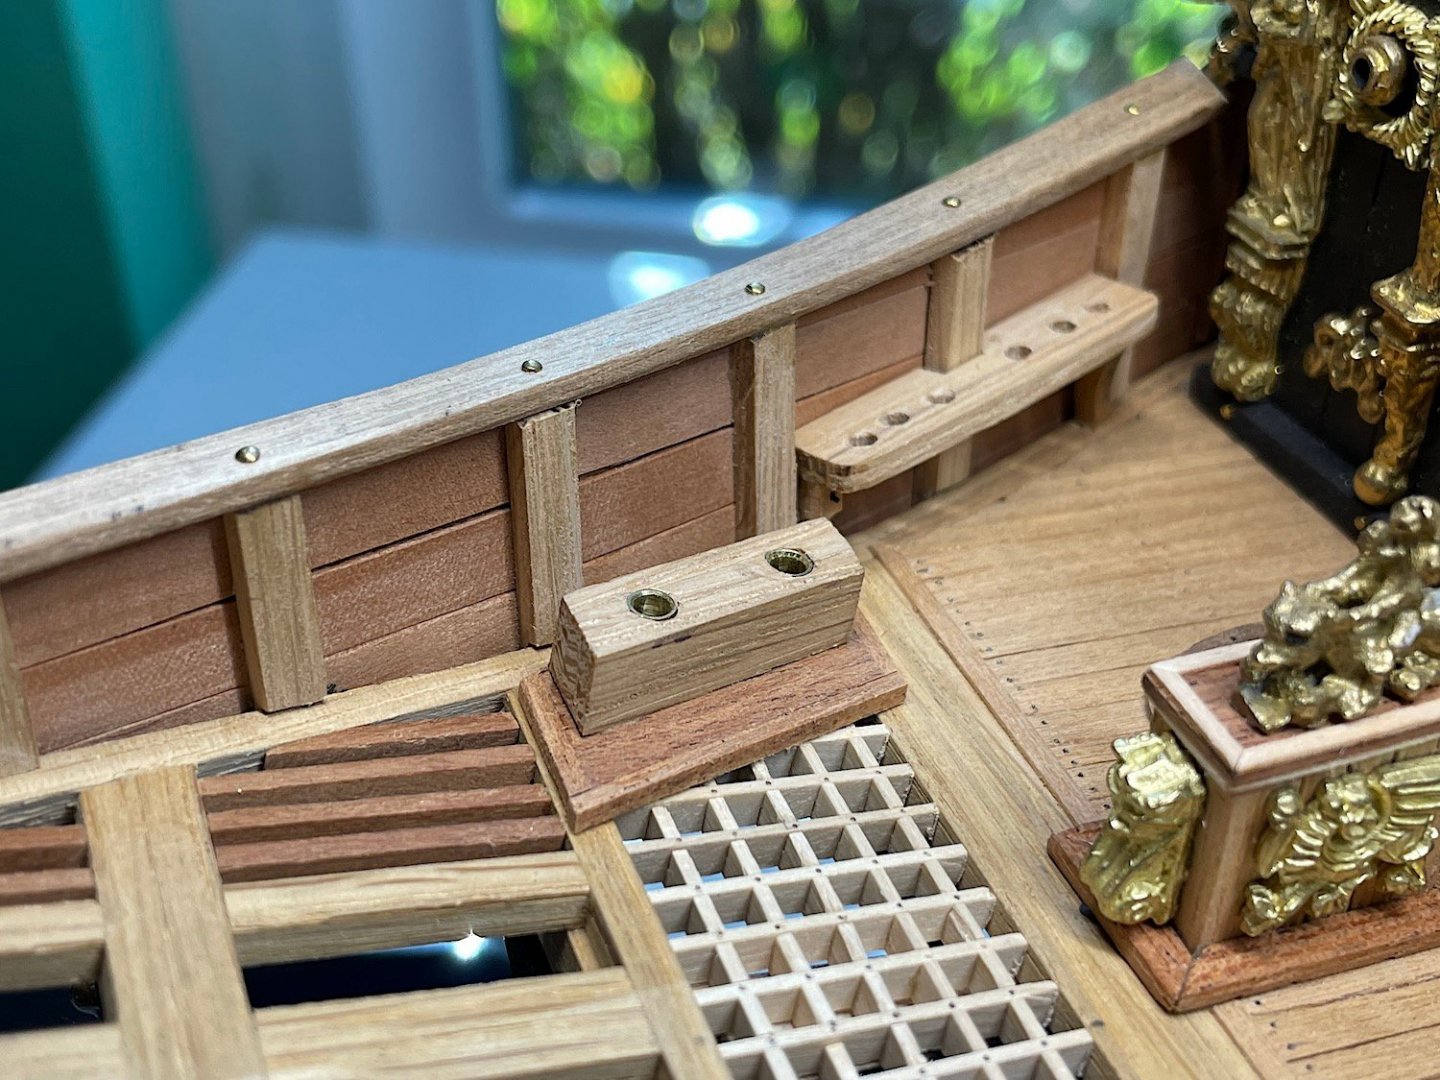
Hi all, Another minot bit-by-bit update. Quarterdeck bulkhead and deck side railings. As always thanks for your interest in this log. added text to images to limit text up here. Regards


-
Hans!, Thanks for you very nice comments. Your interest in 3D systems is very impressive. It will become a much larger part of this hobby IMO. Already big with car model builders. I also assume that kit manufacturers may start including fittings and such from 3D printers in the future. Regards.
-
John, yes those wheels are indeed excellent work 👏
- 238 replies
-
- 1
-

-
- Robert E Lee
- steamboat
- (and 3 more)
-
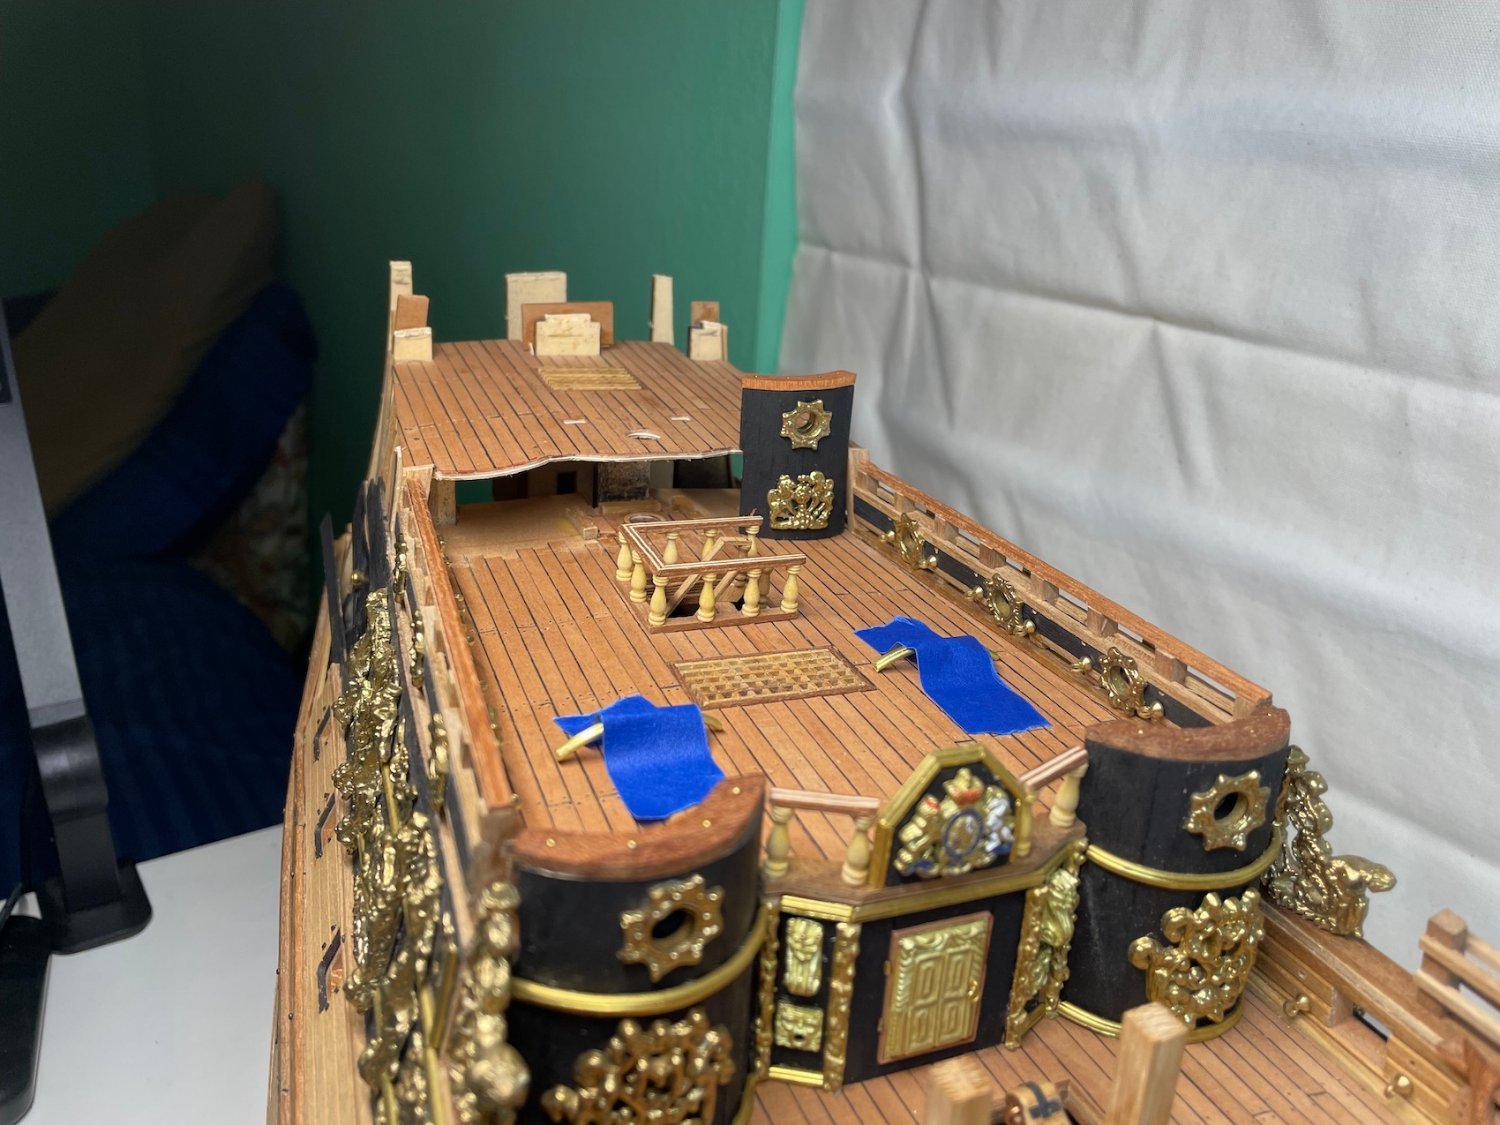
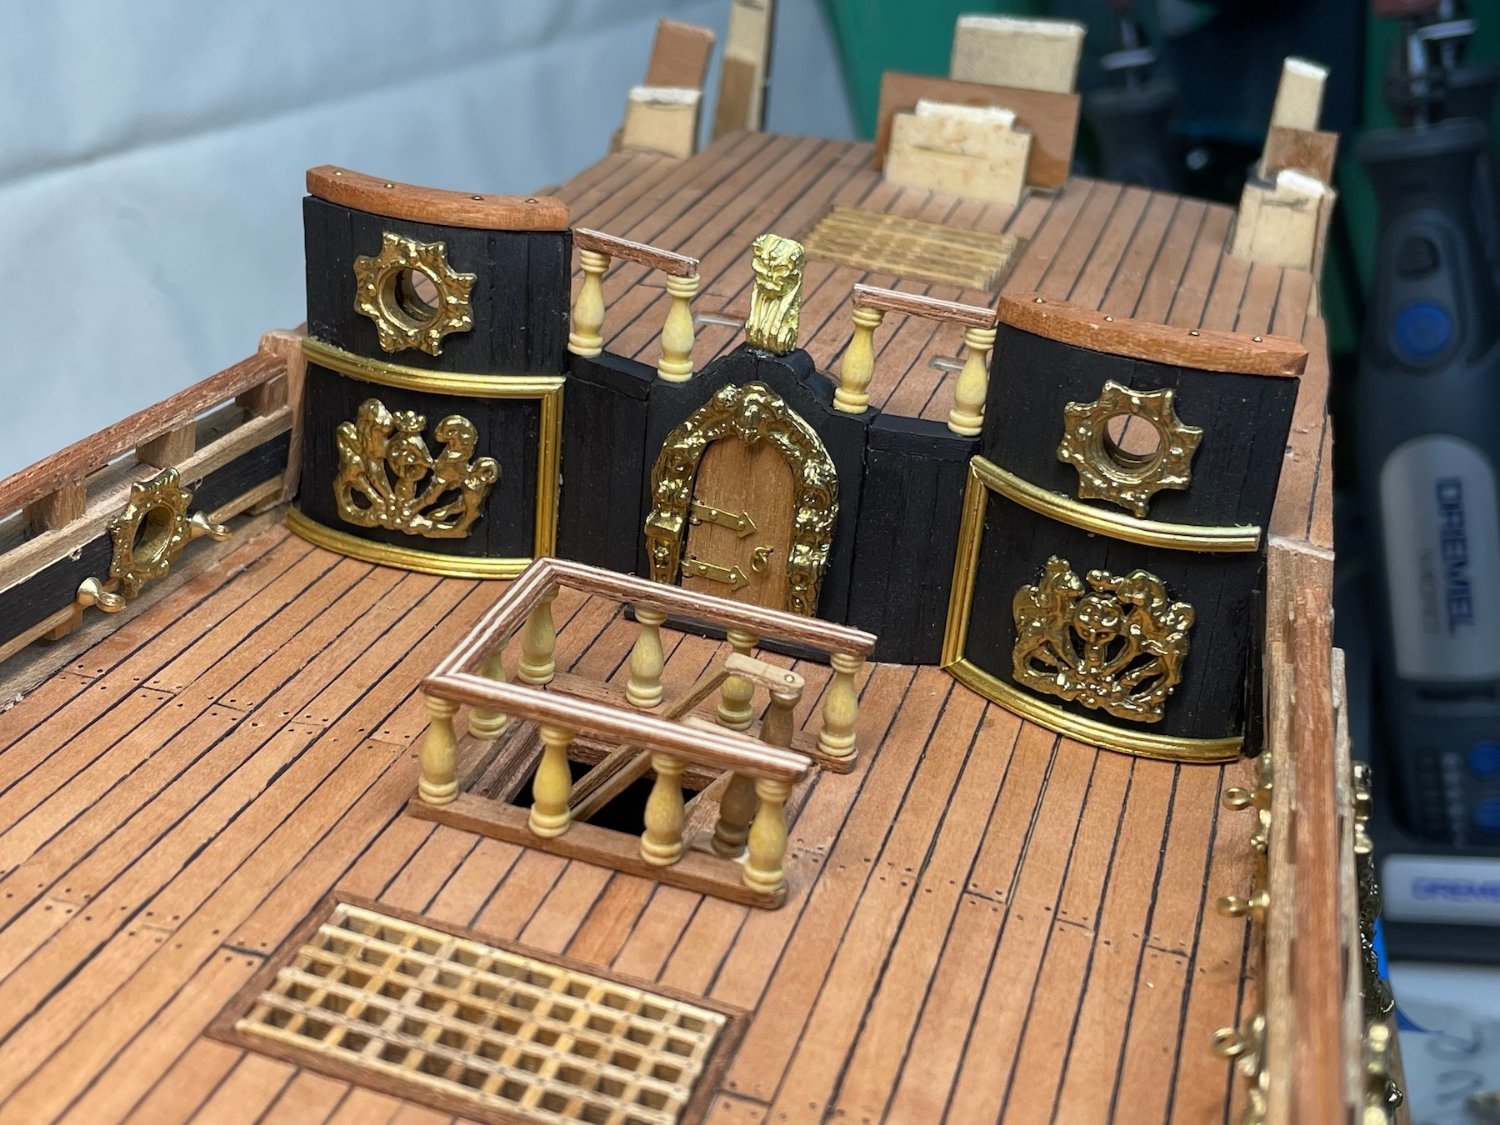
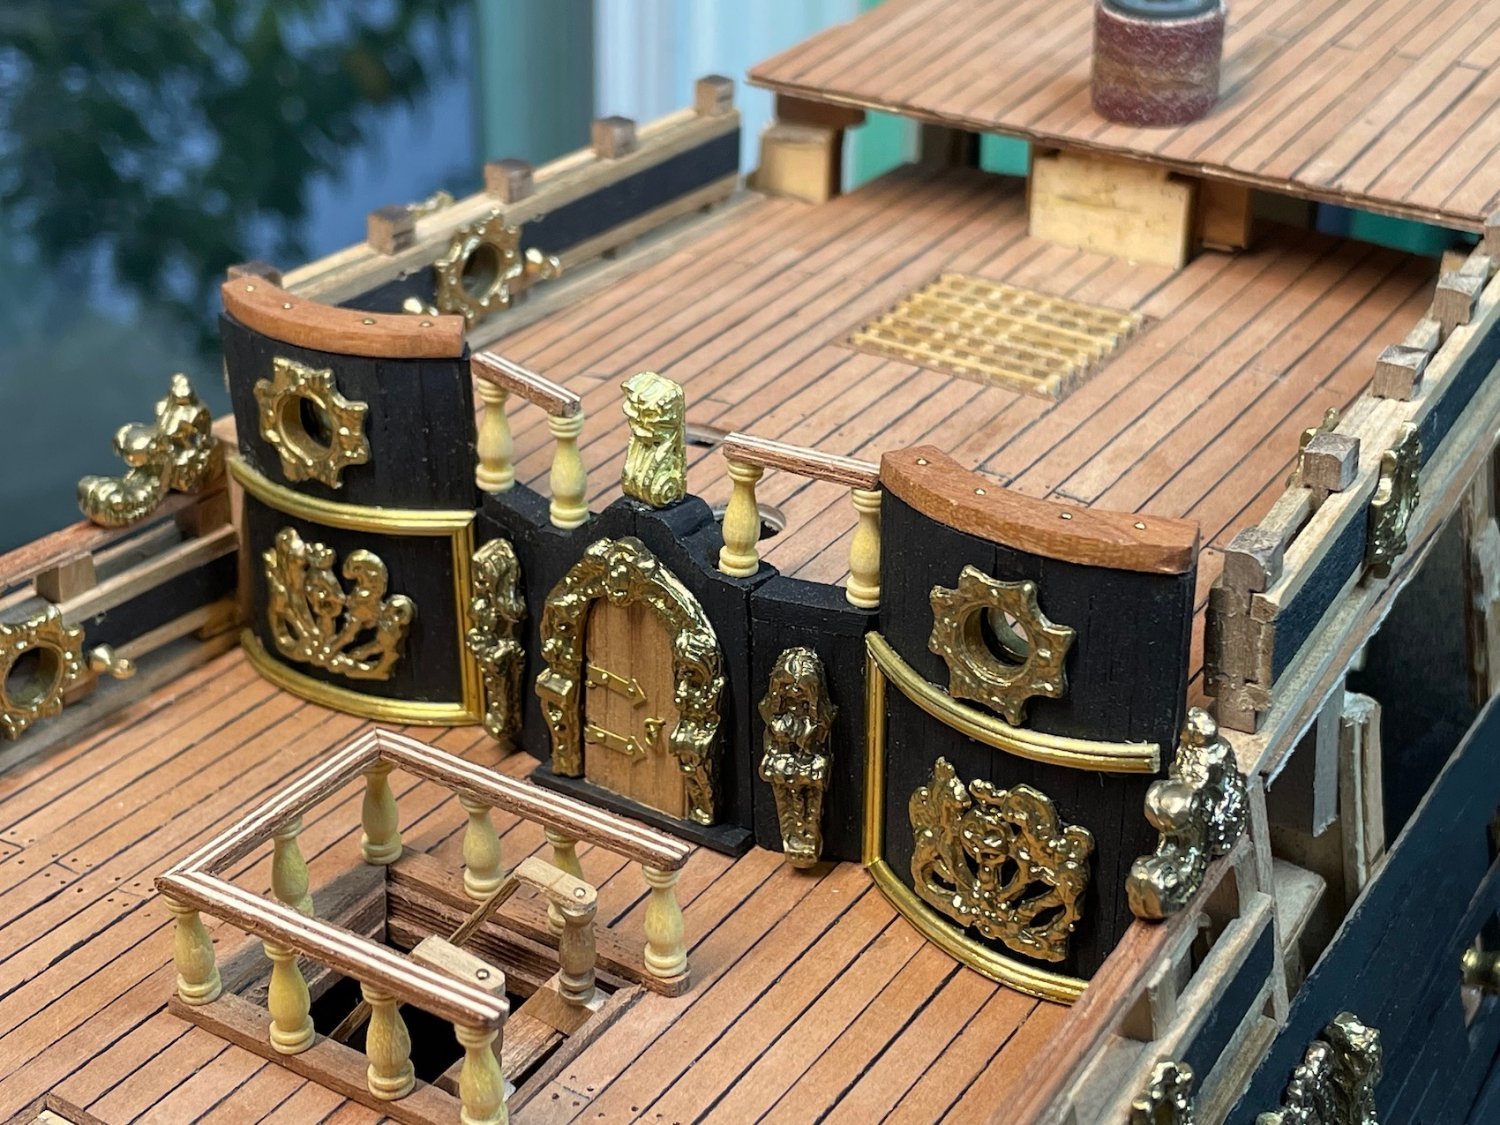
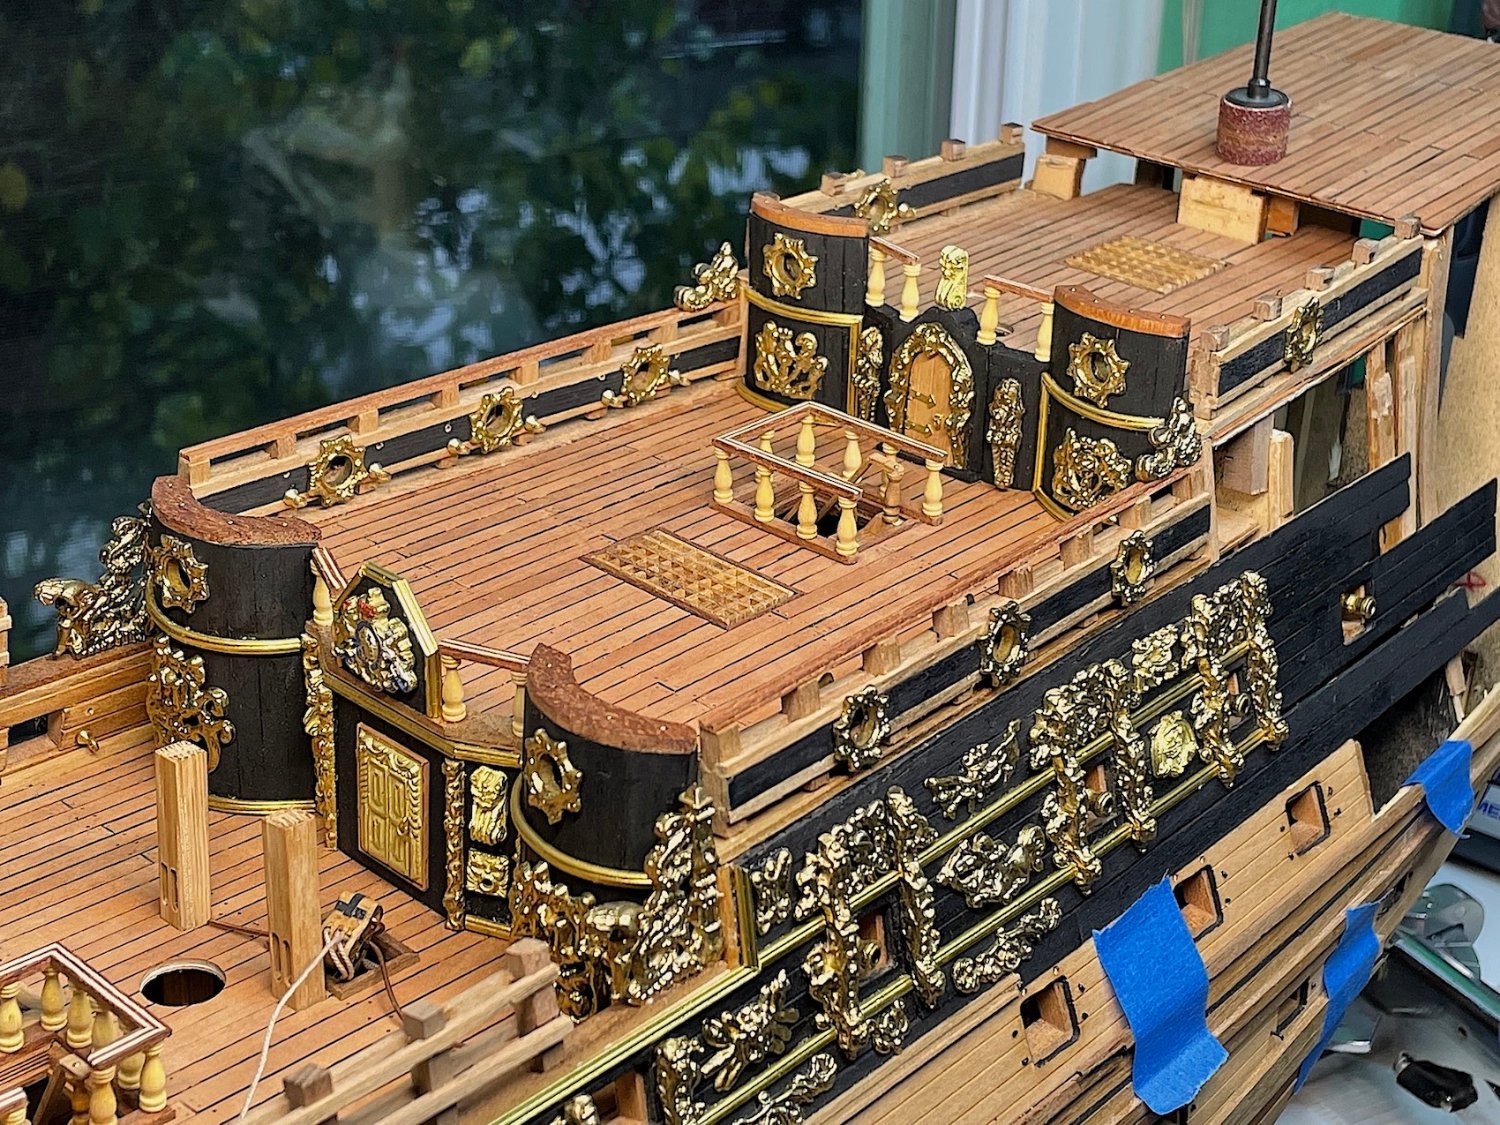
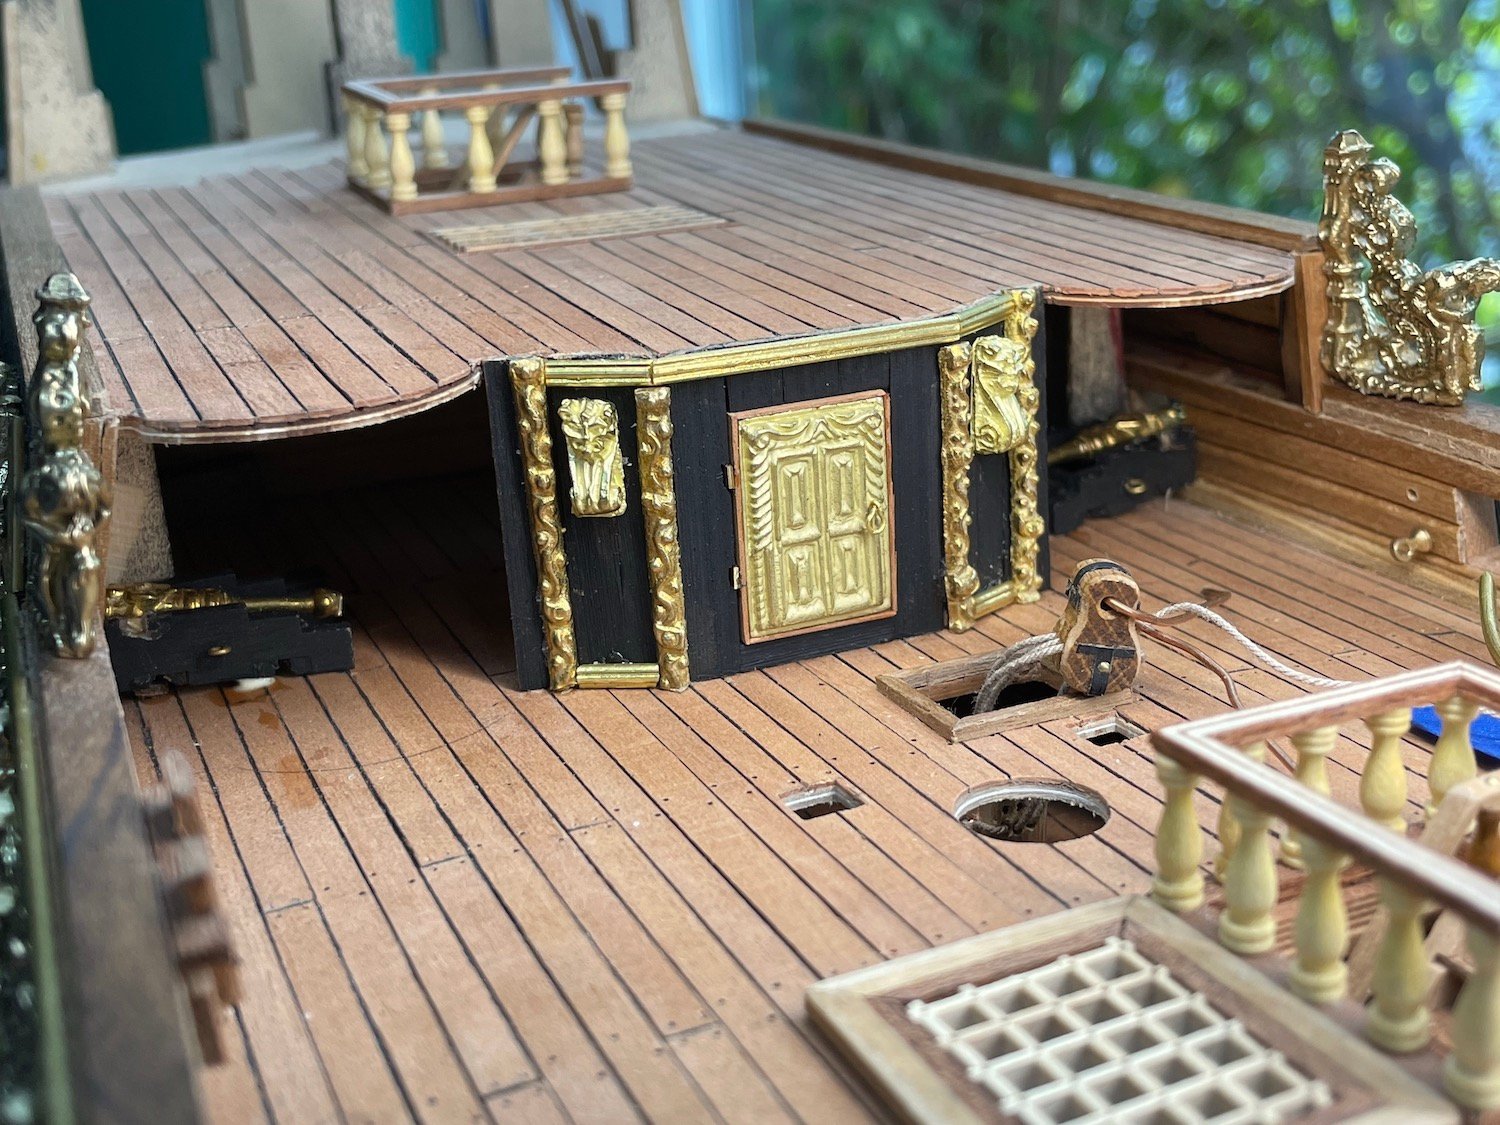
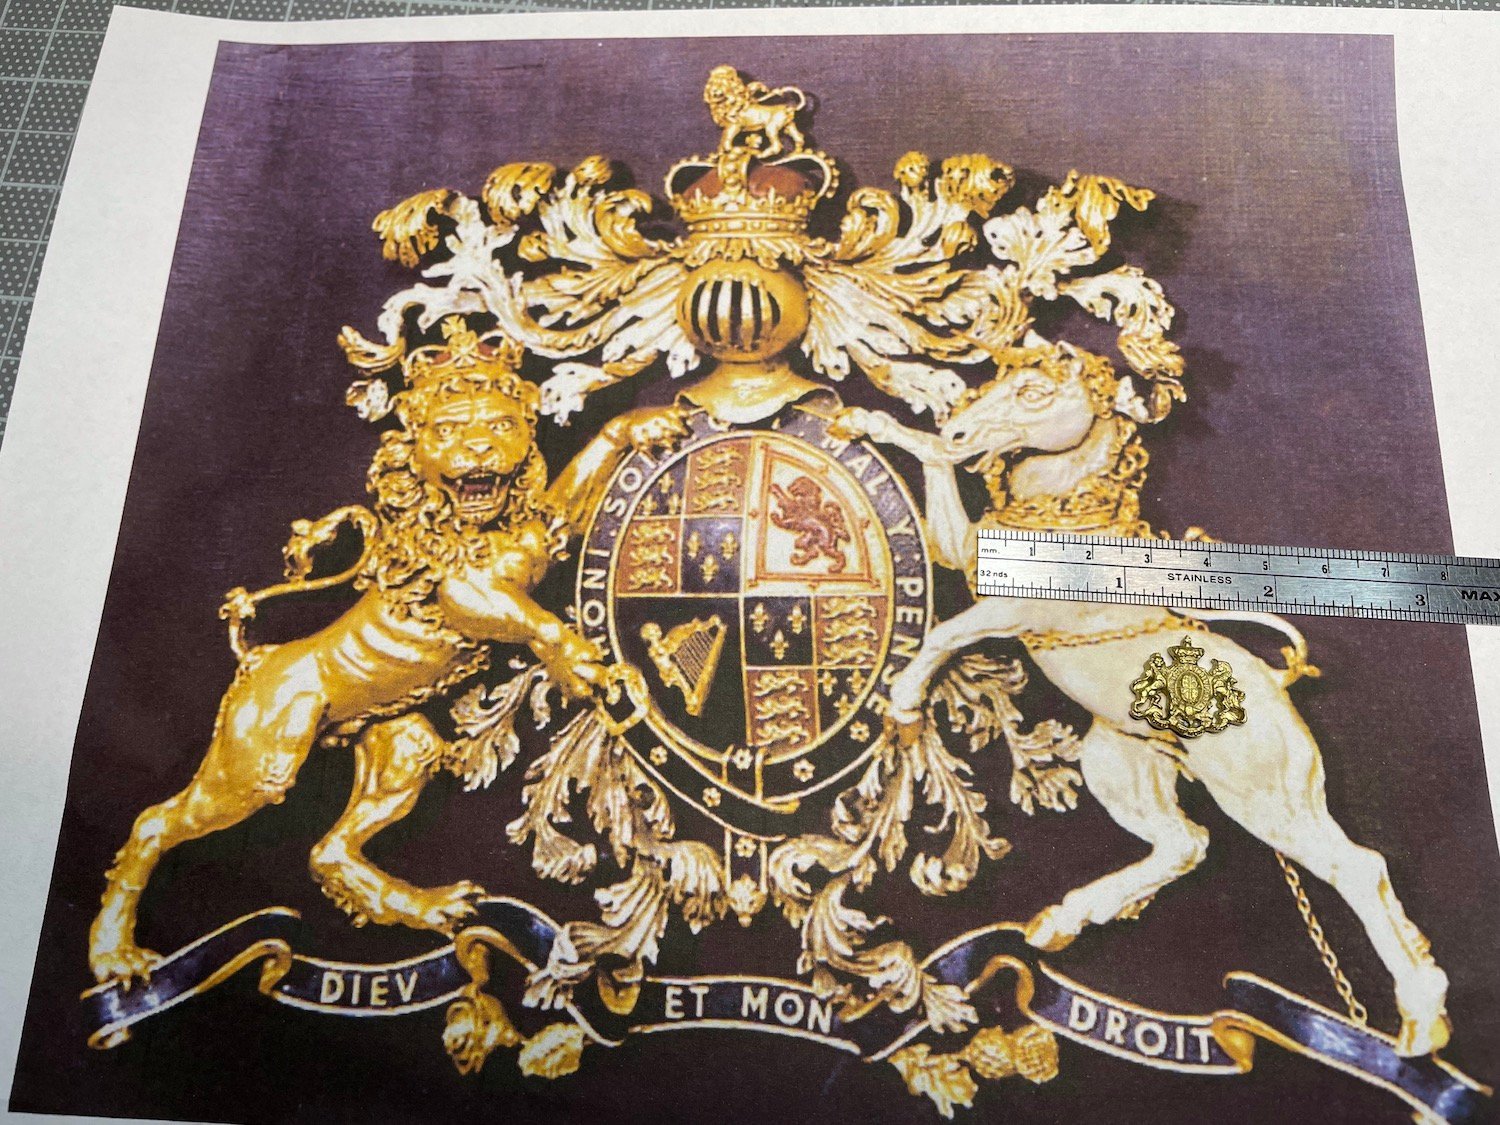
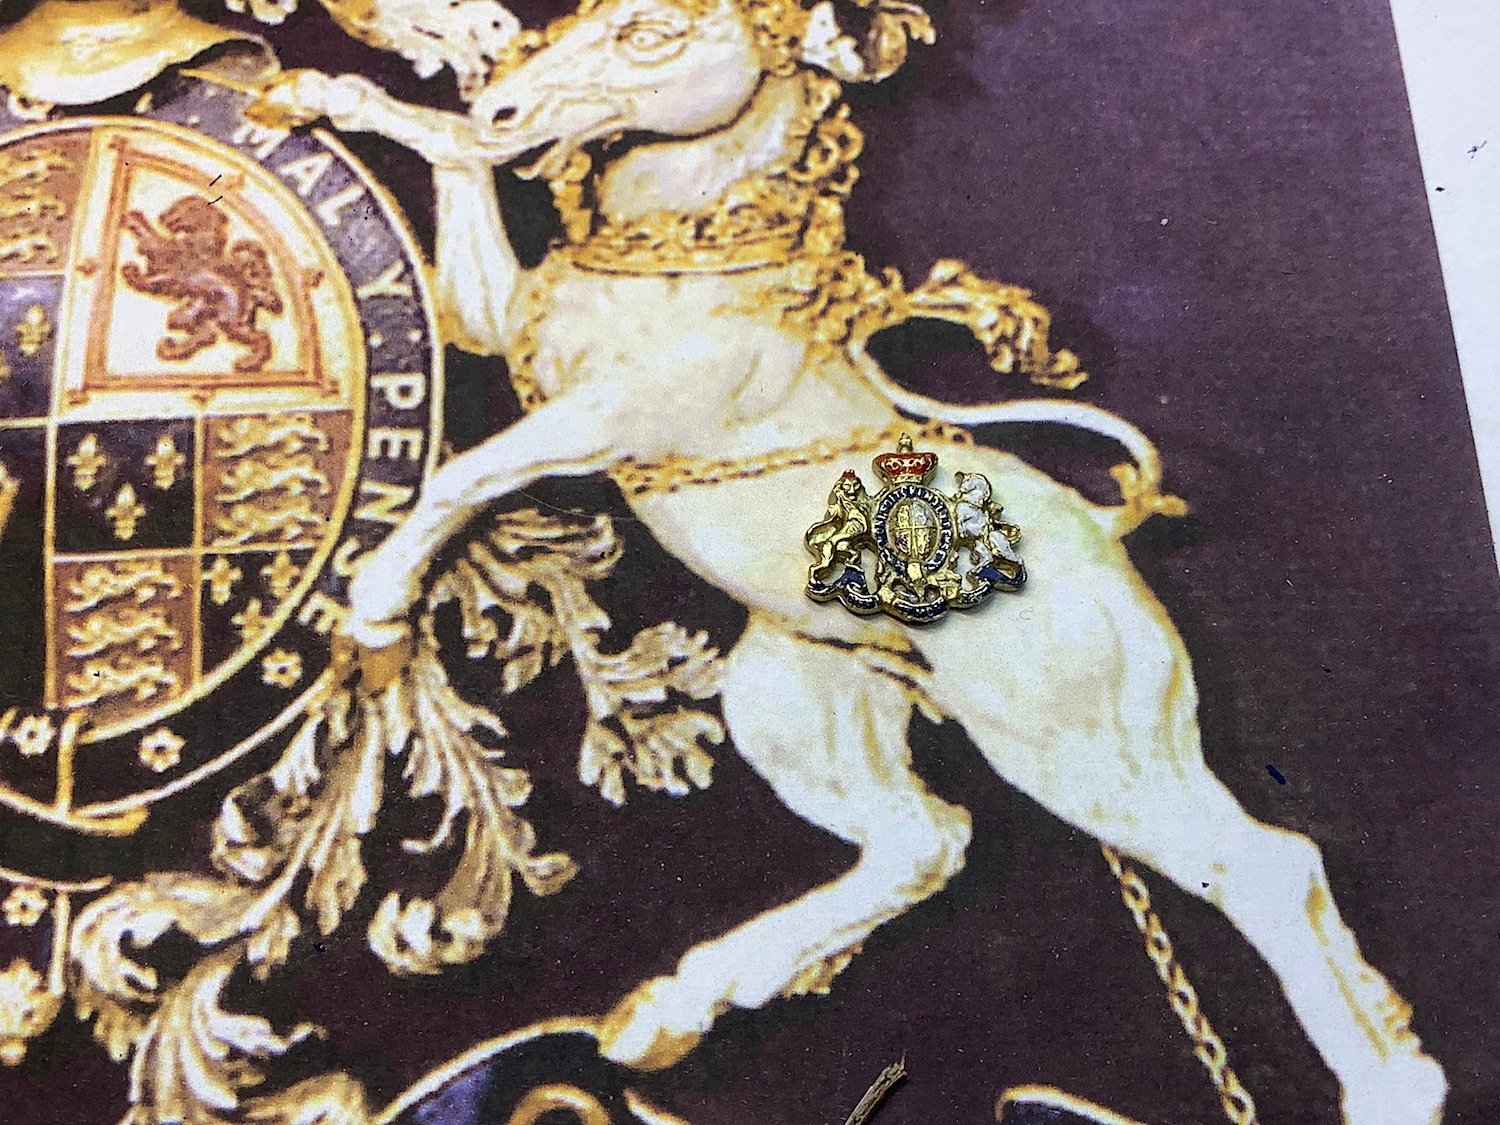
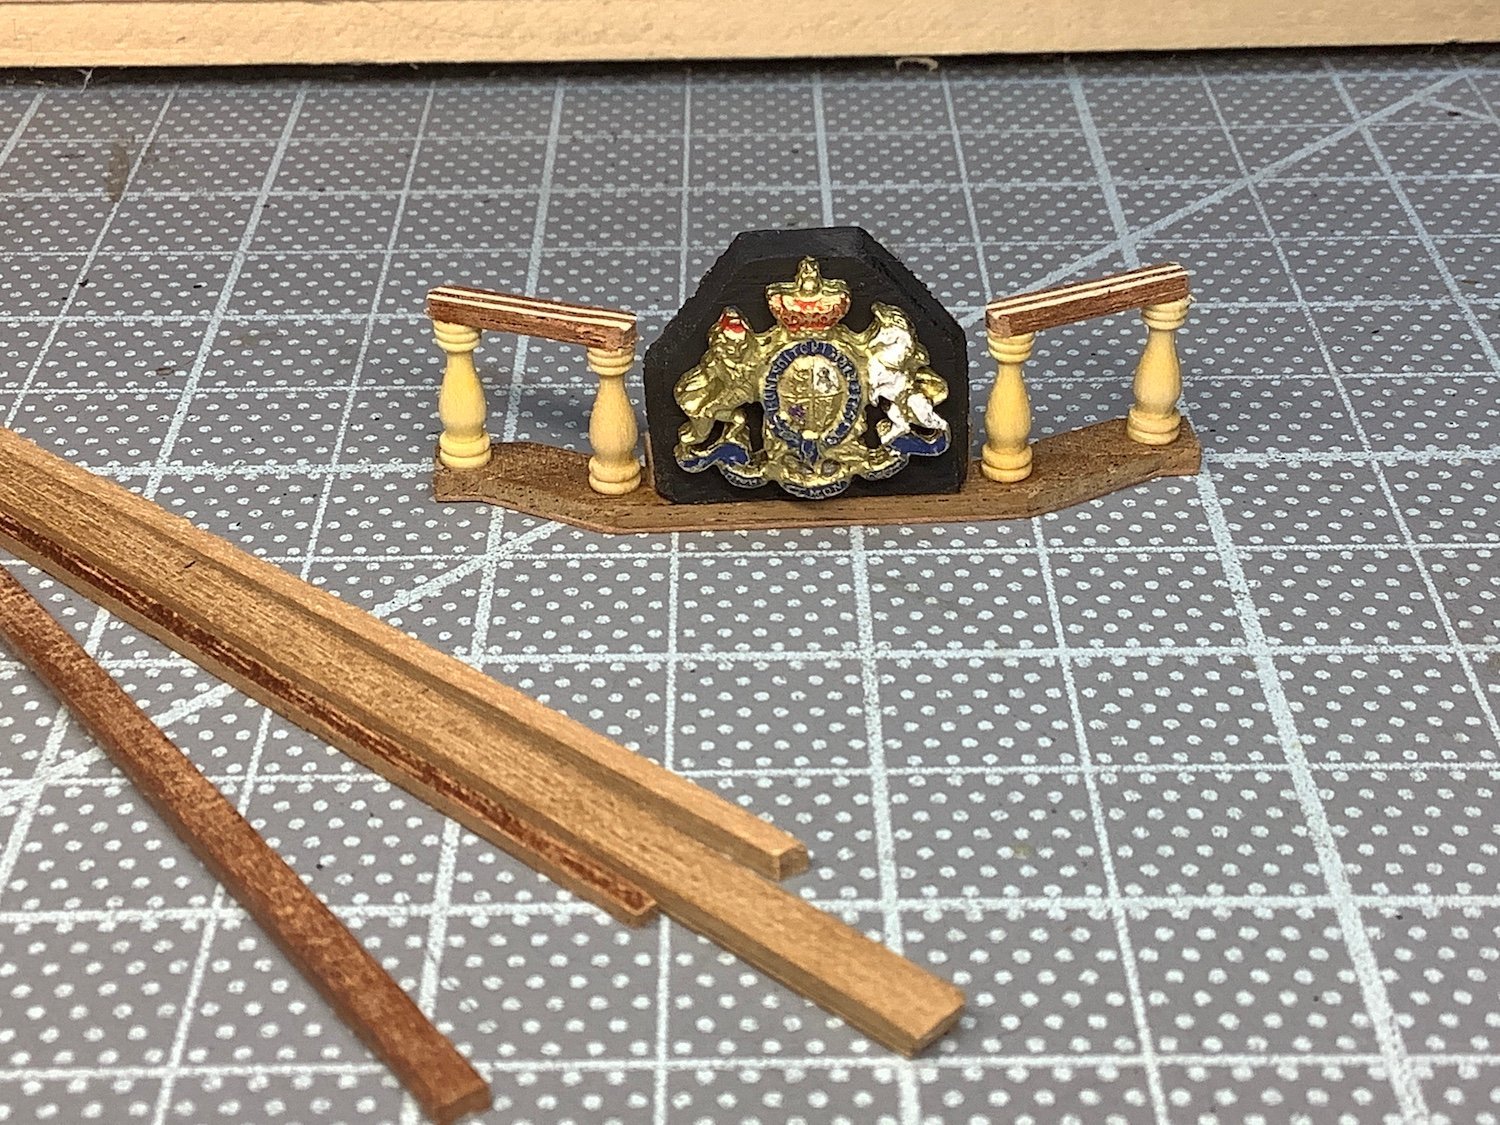
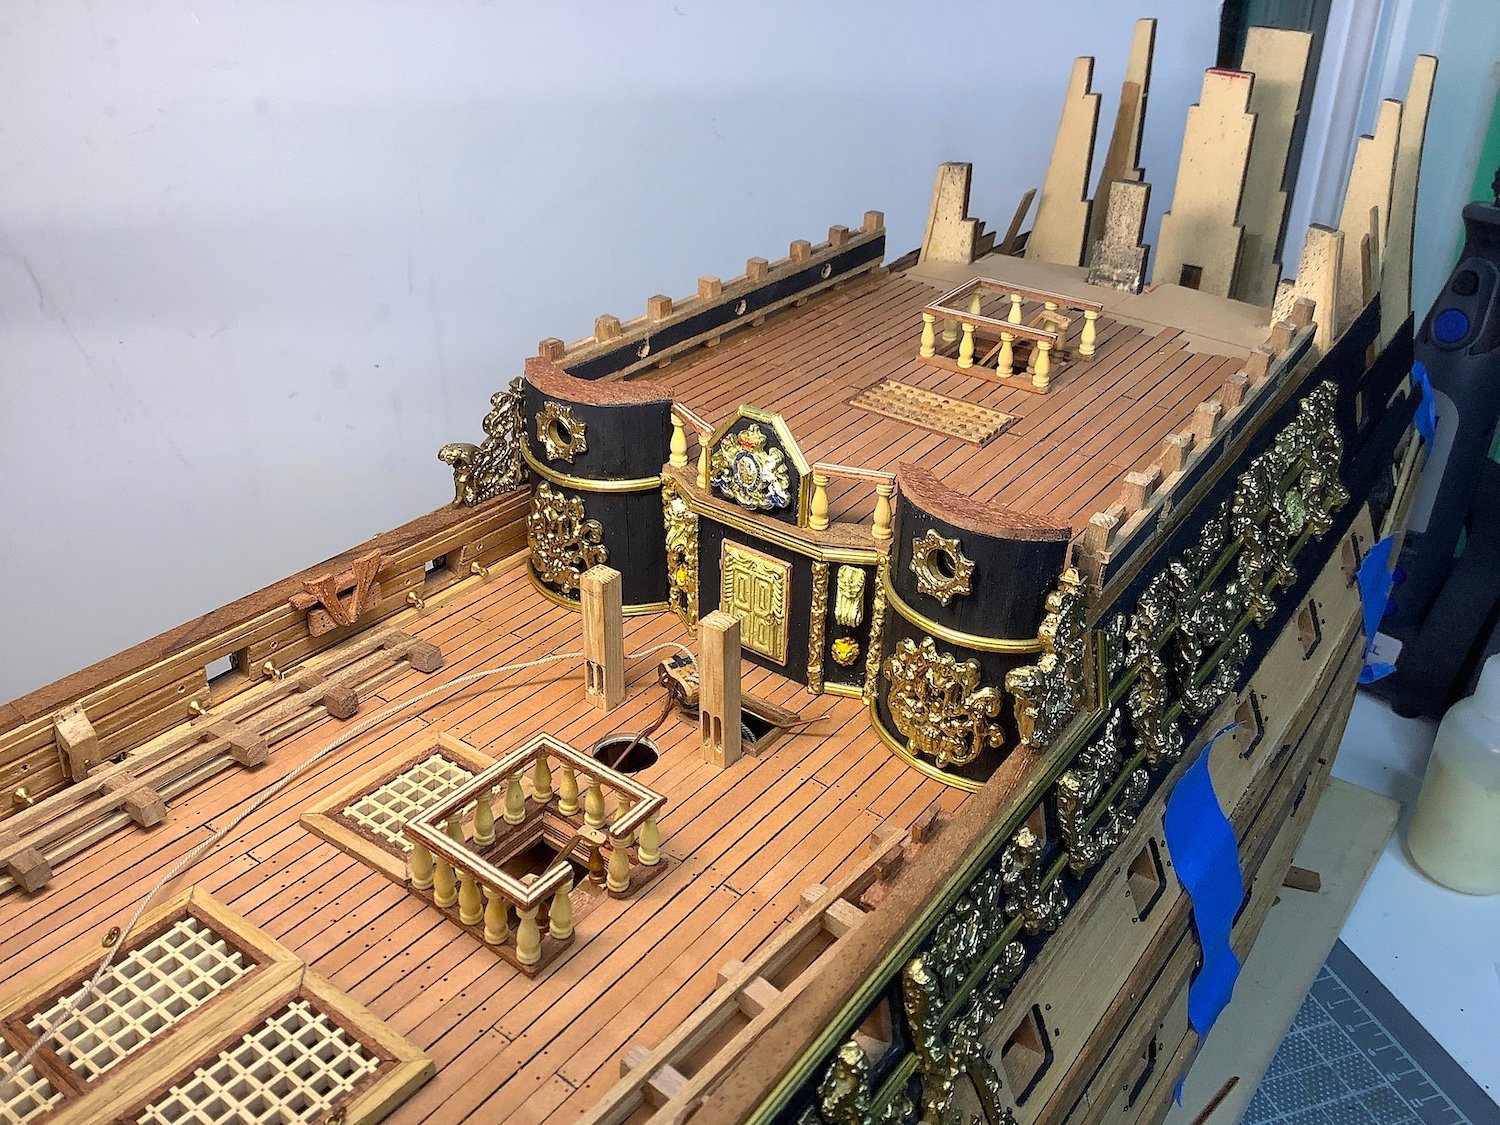
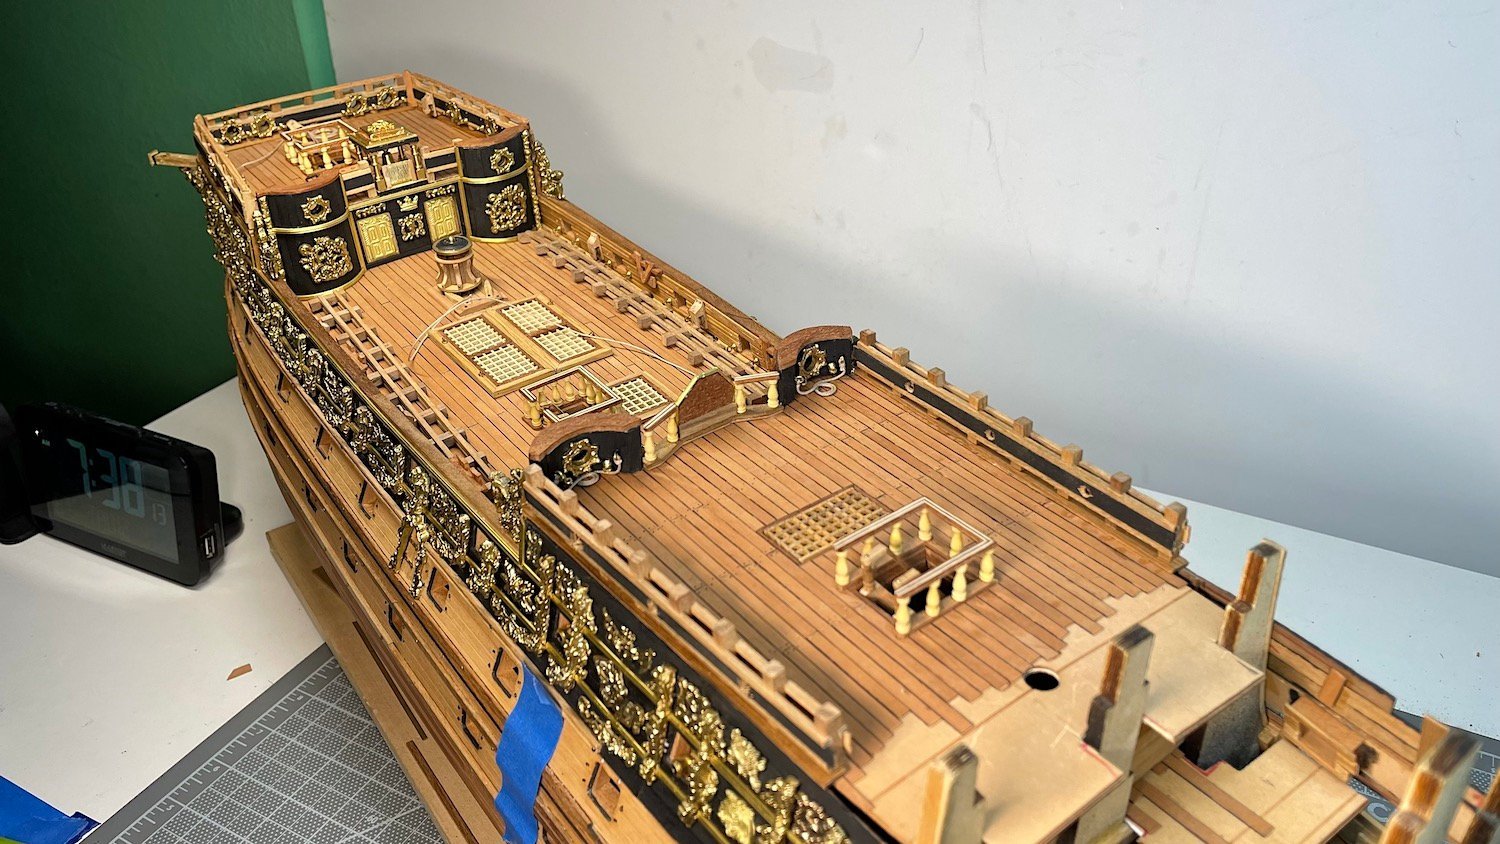
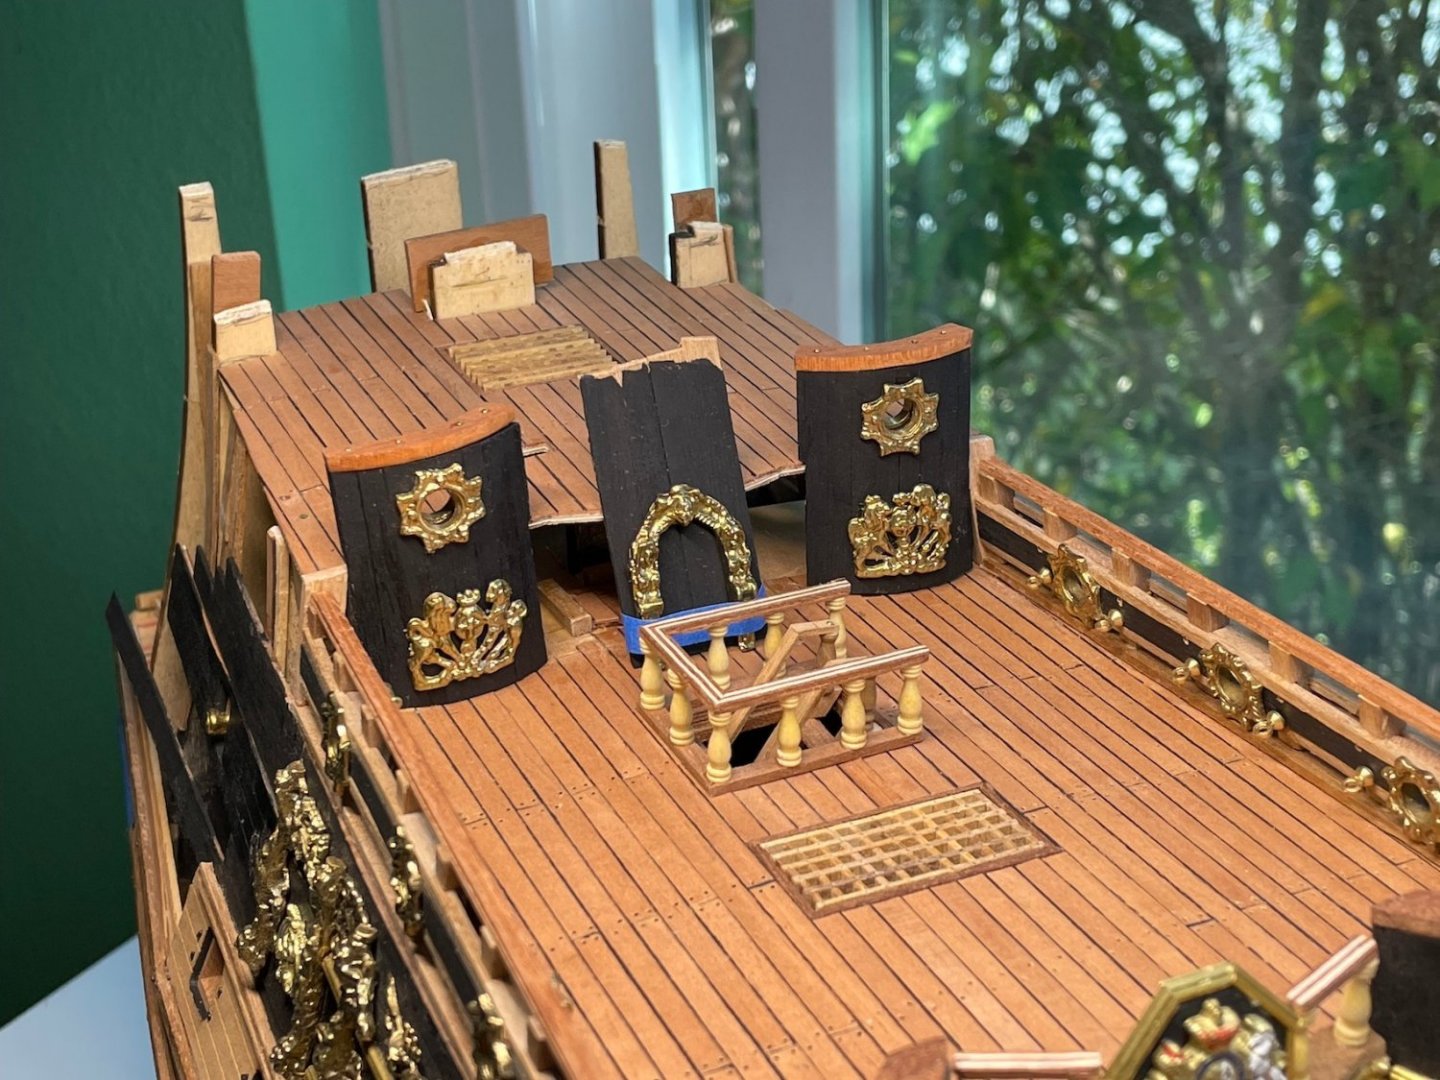
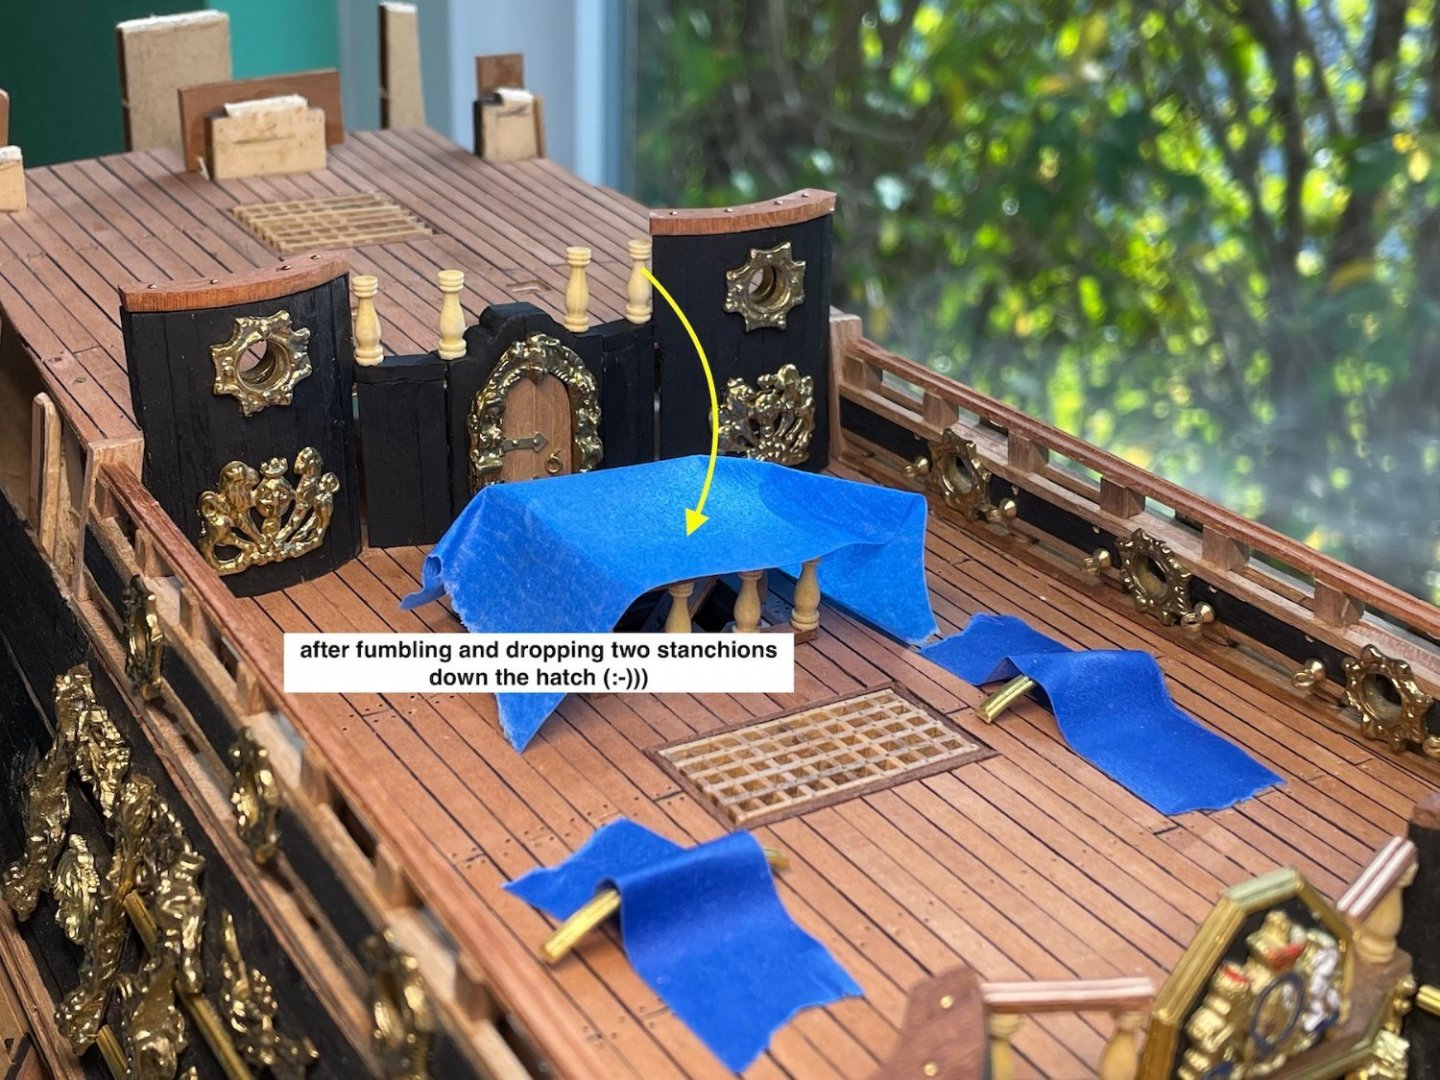
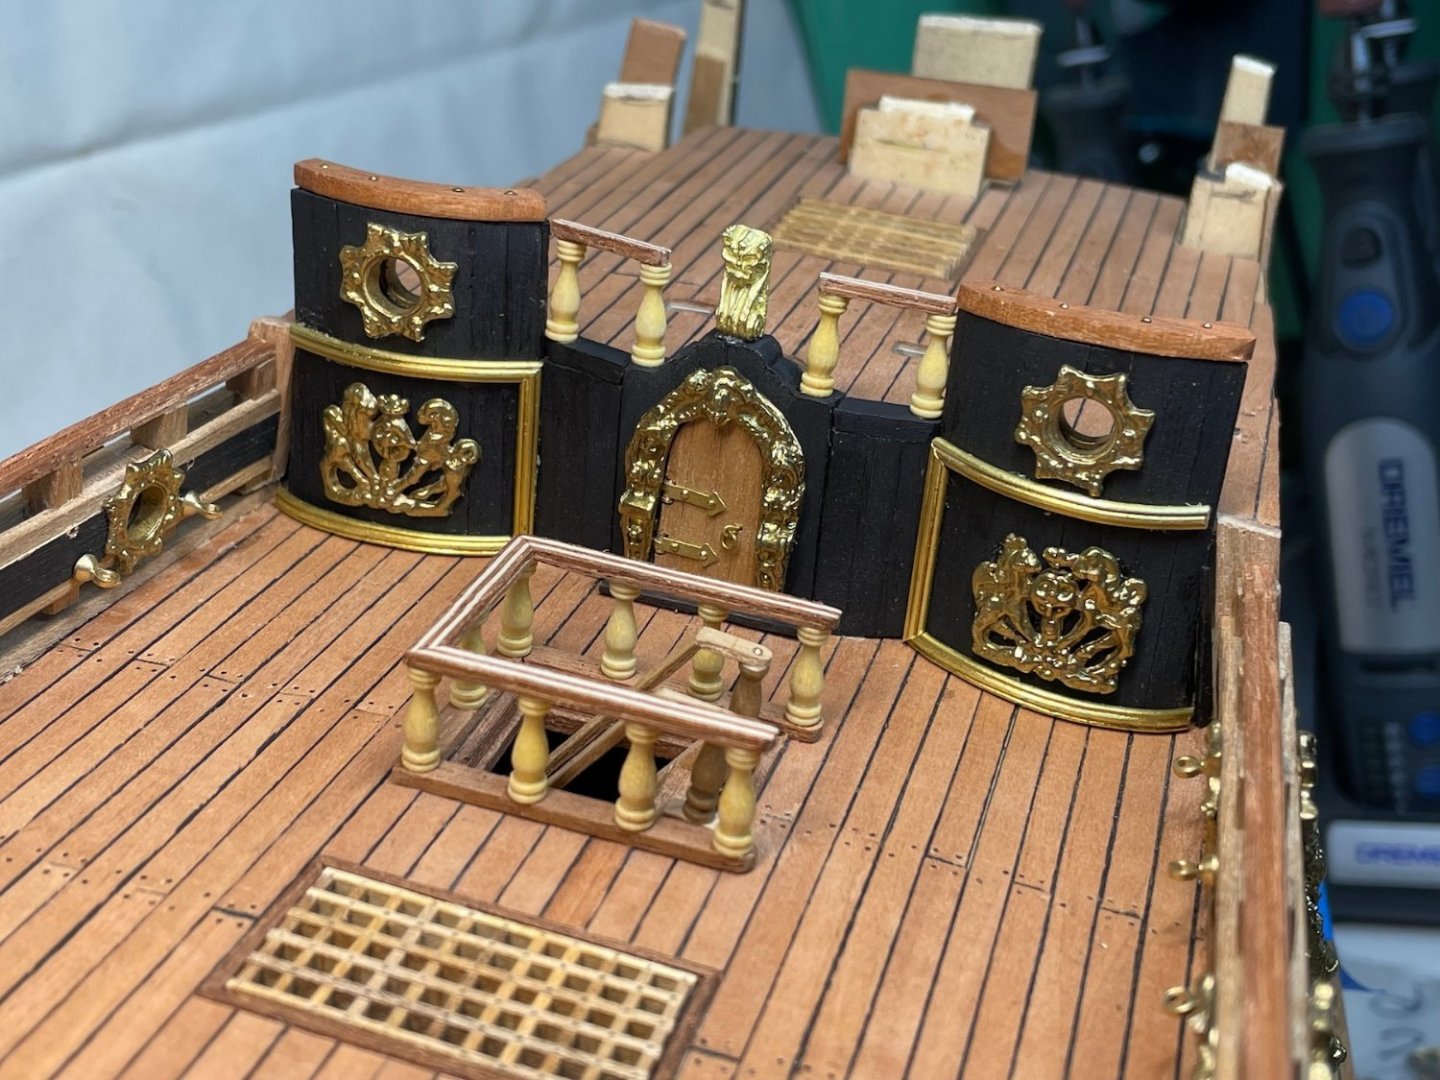
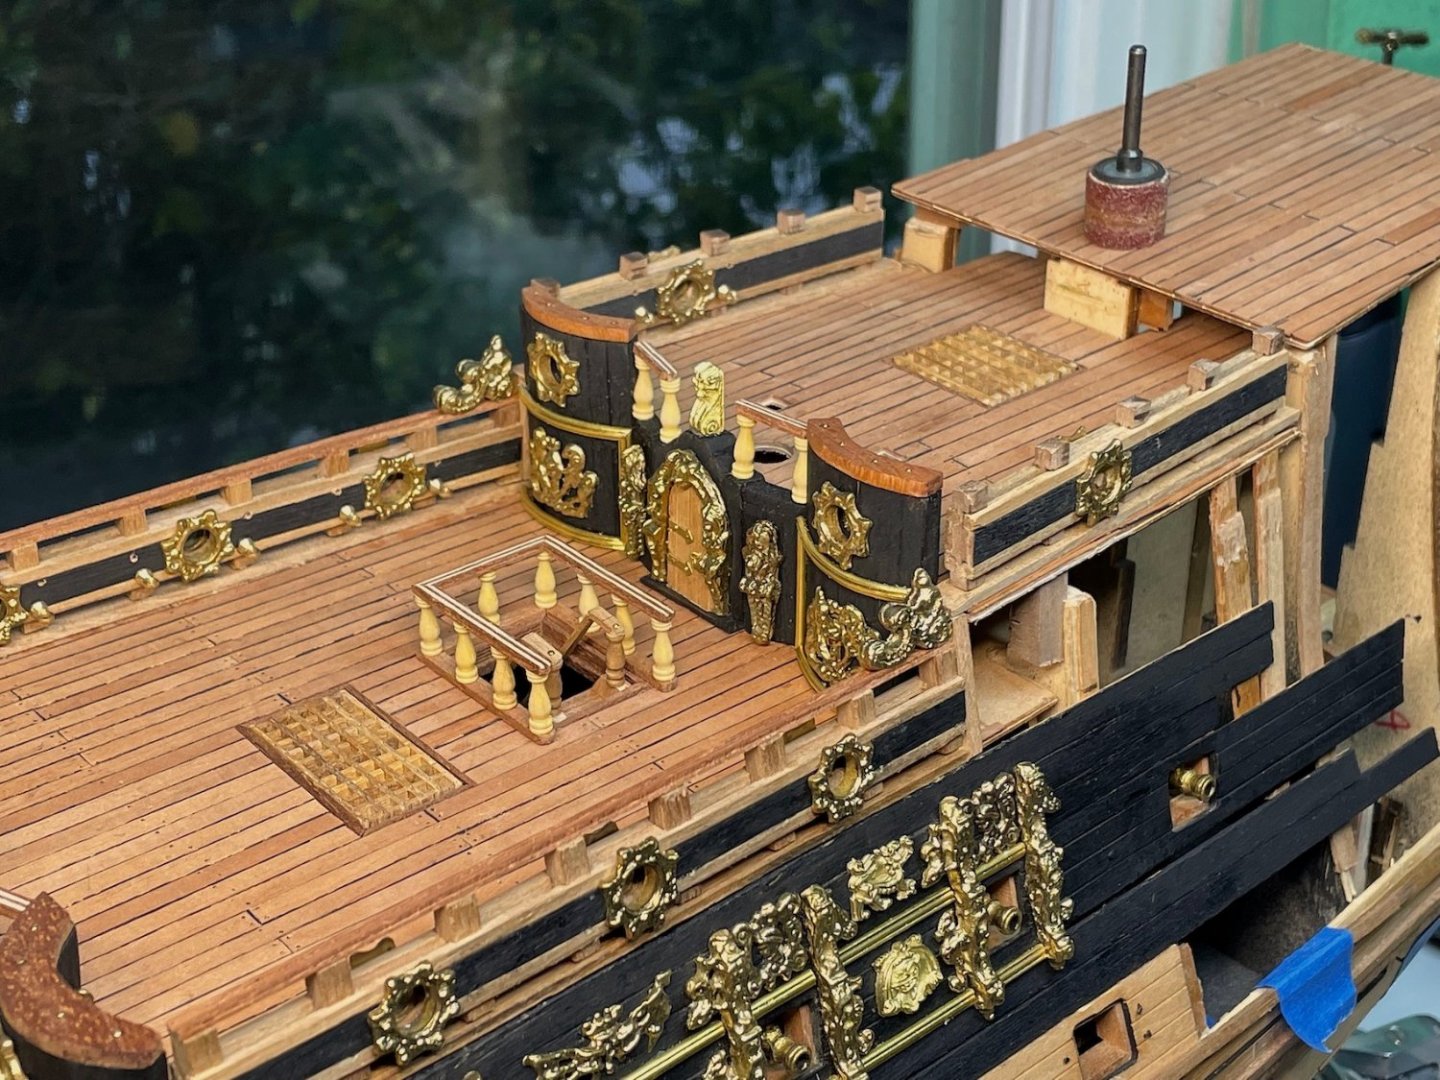
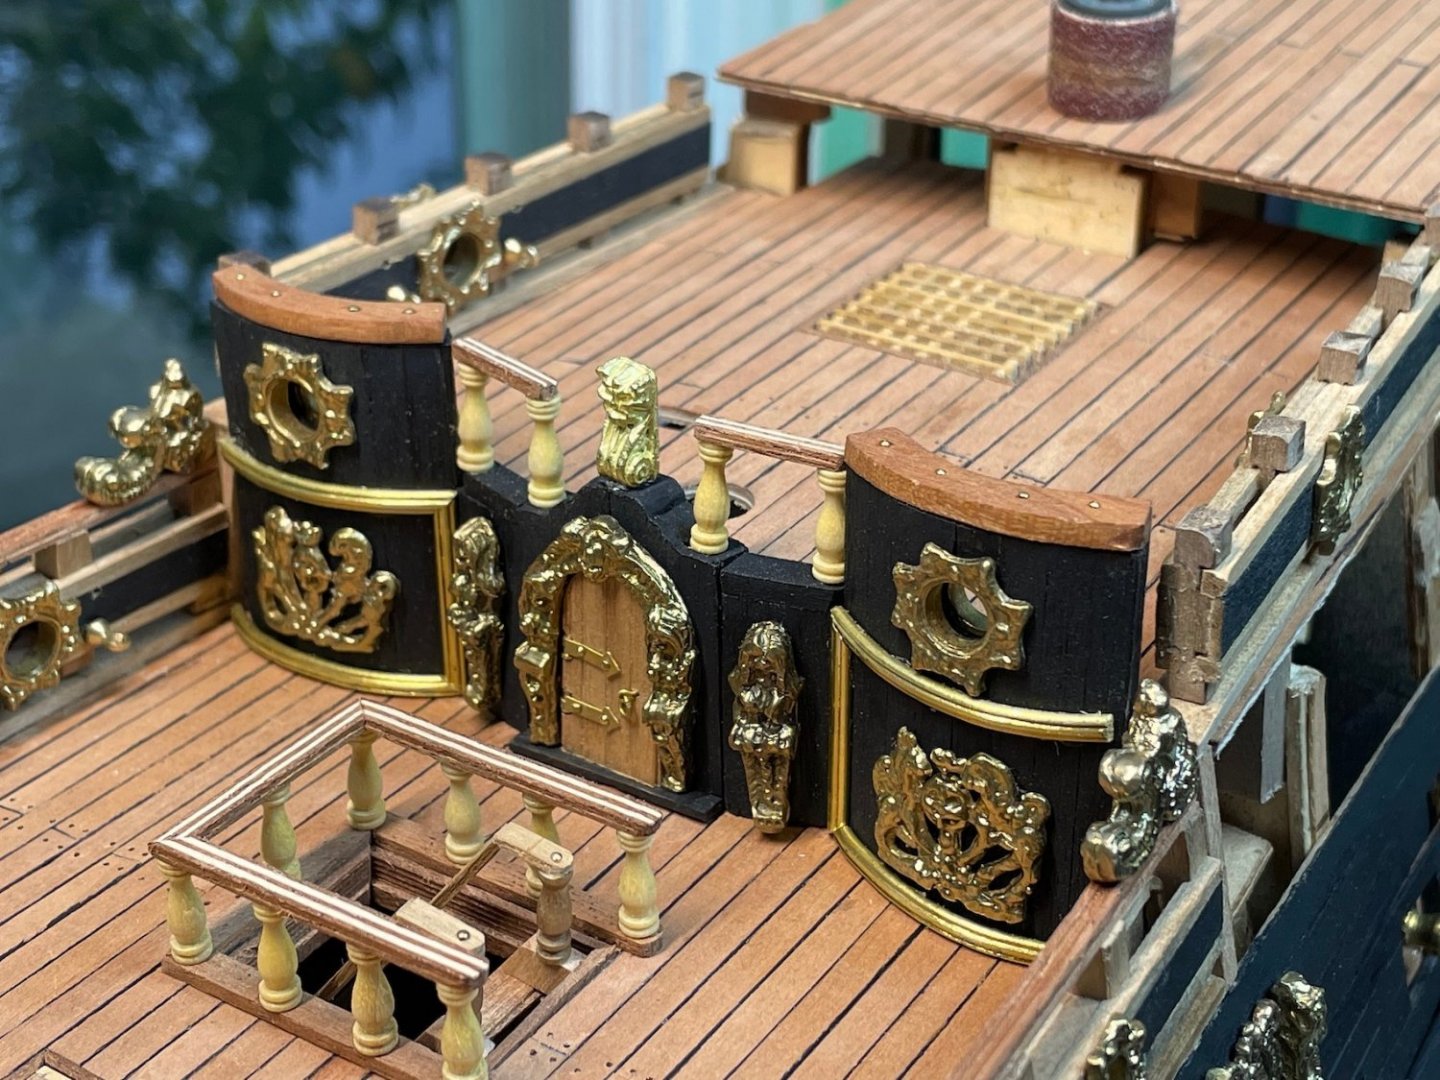
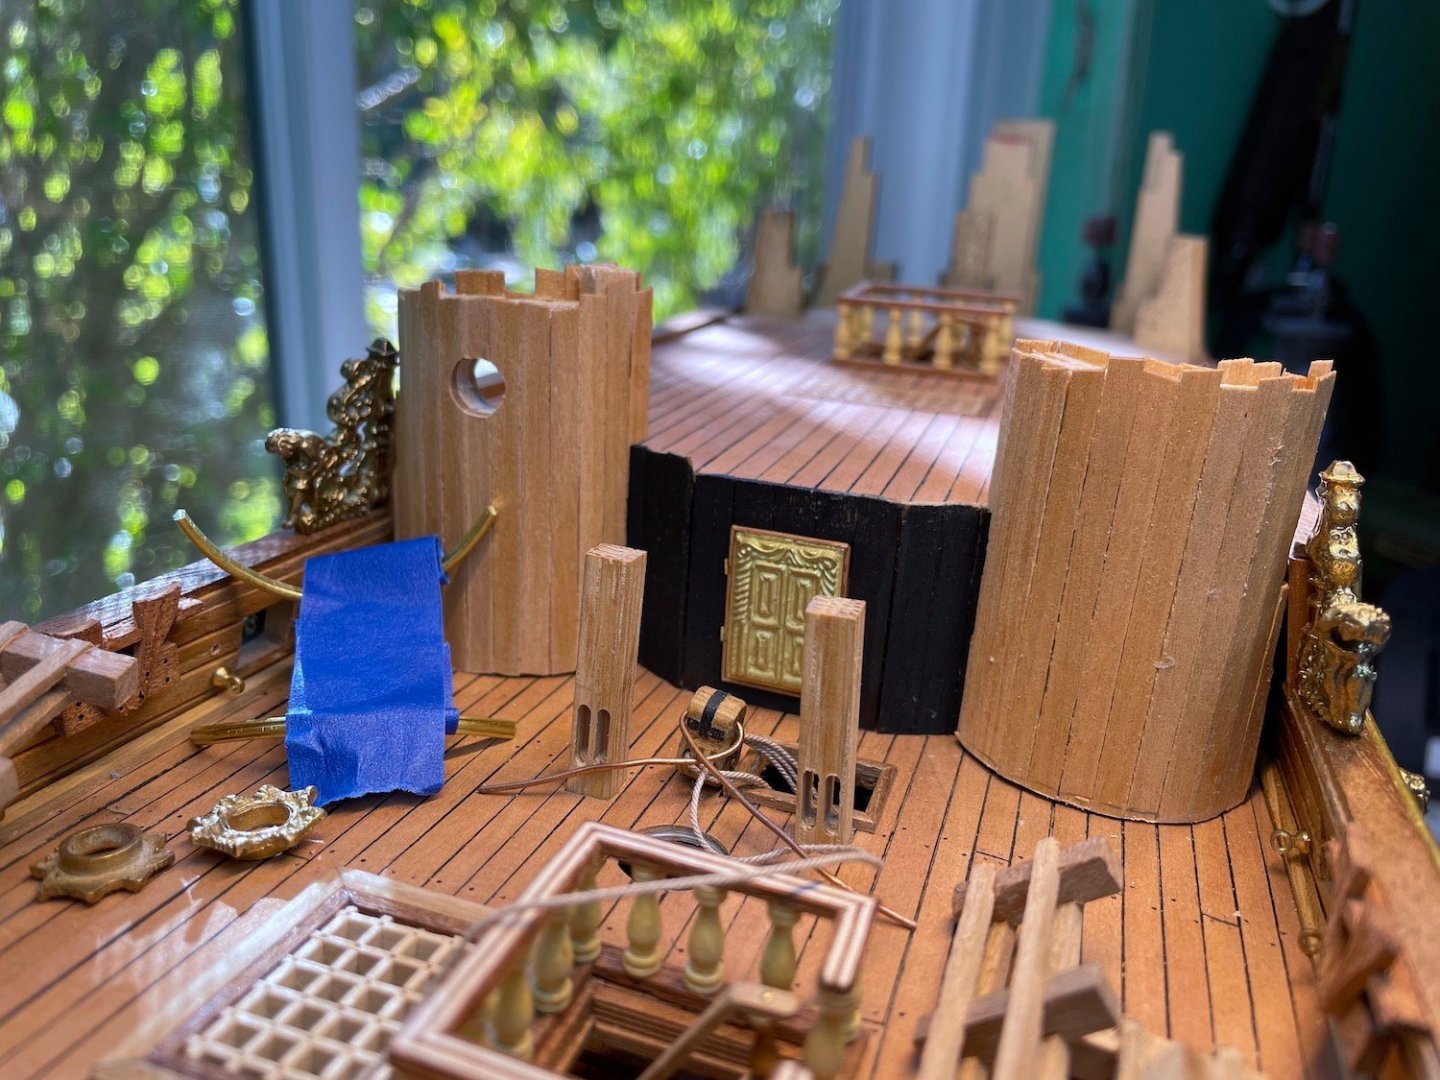
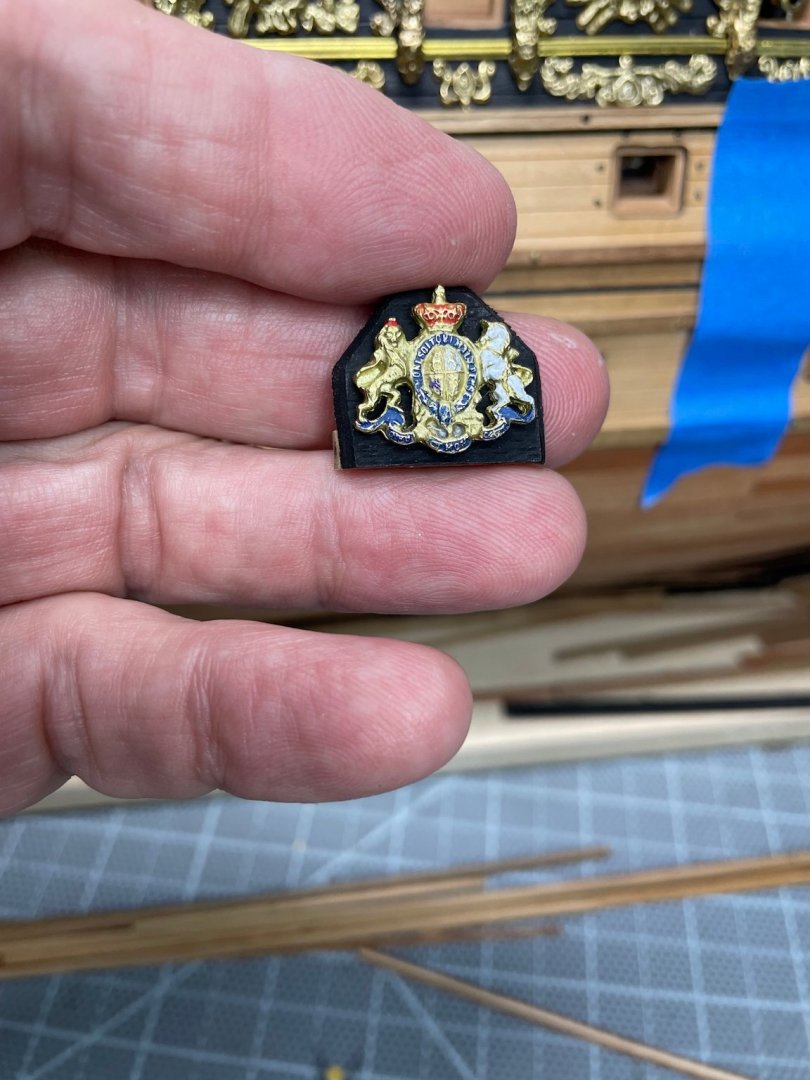
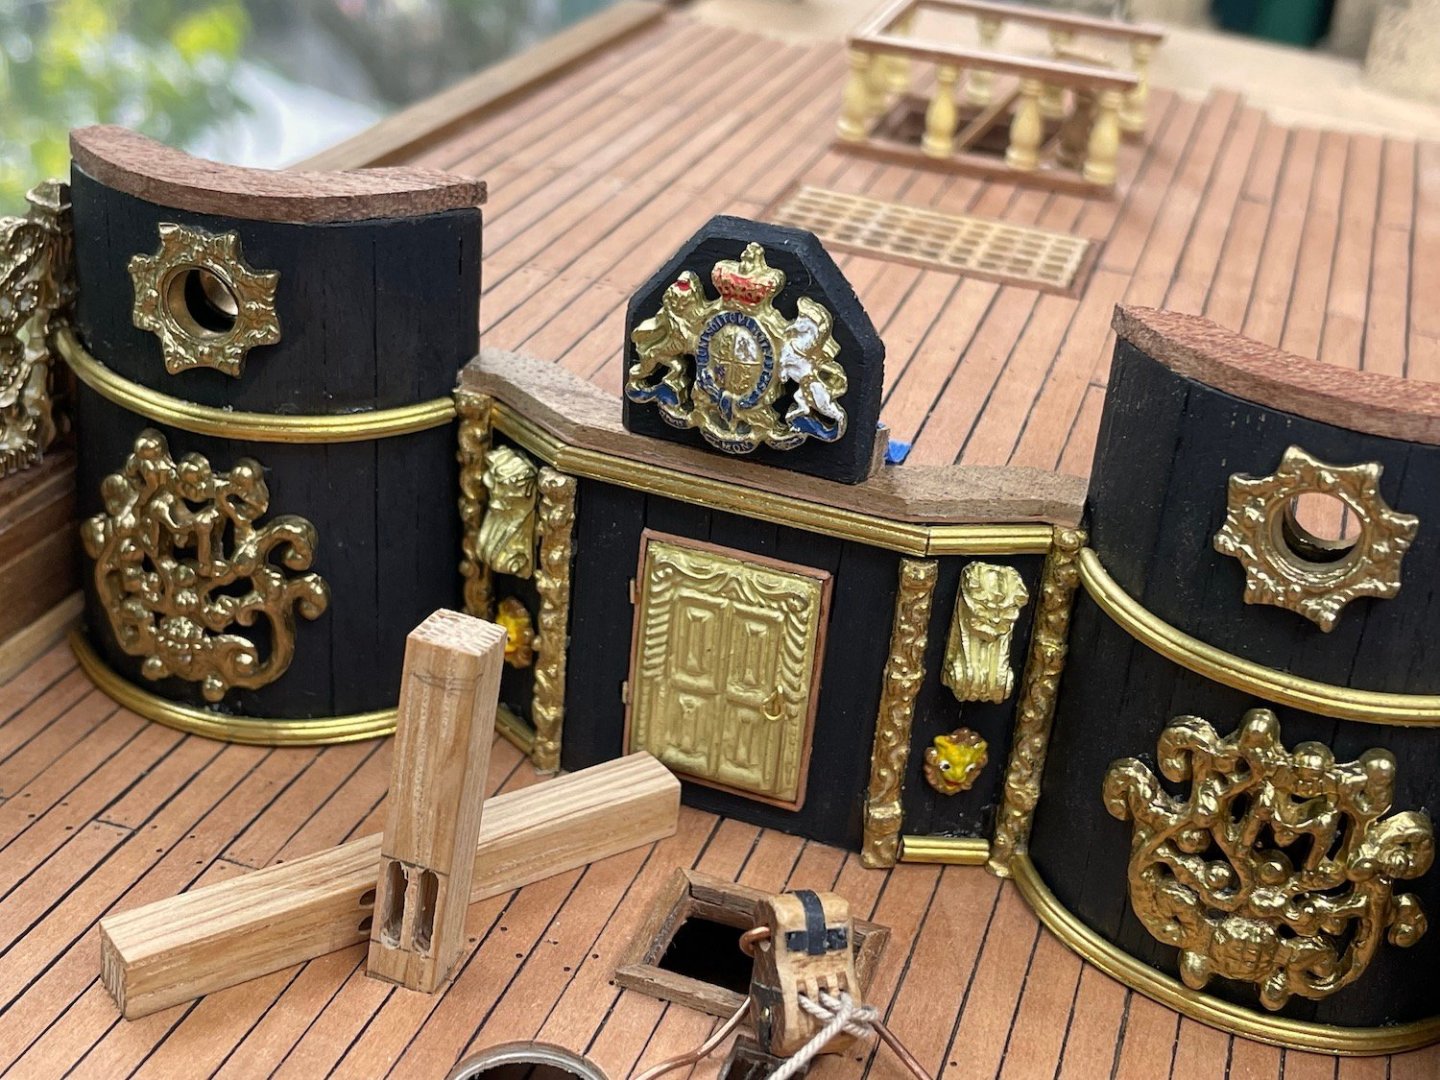
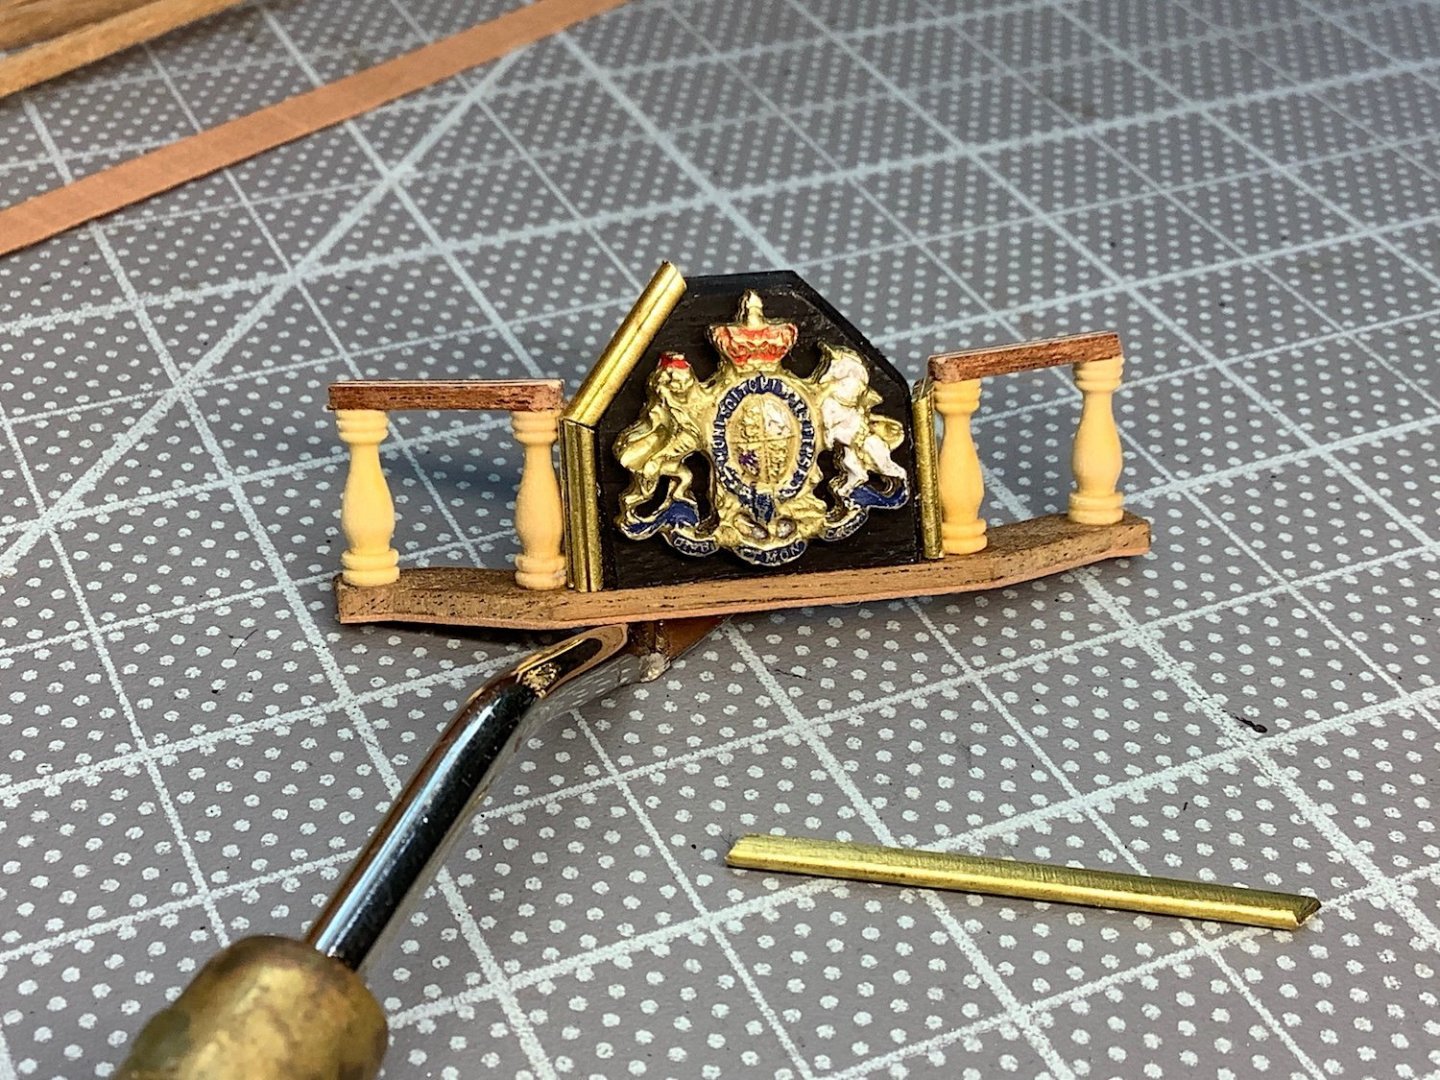
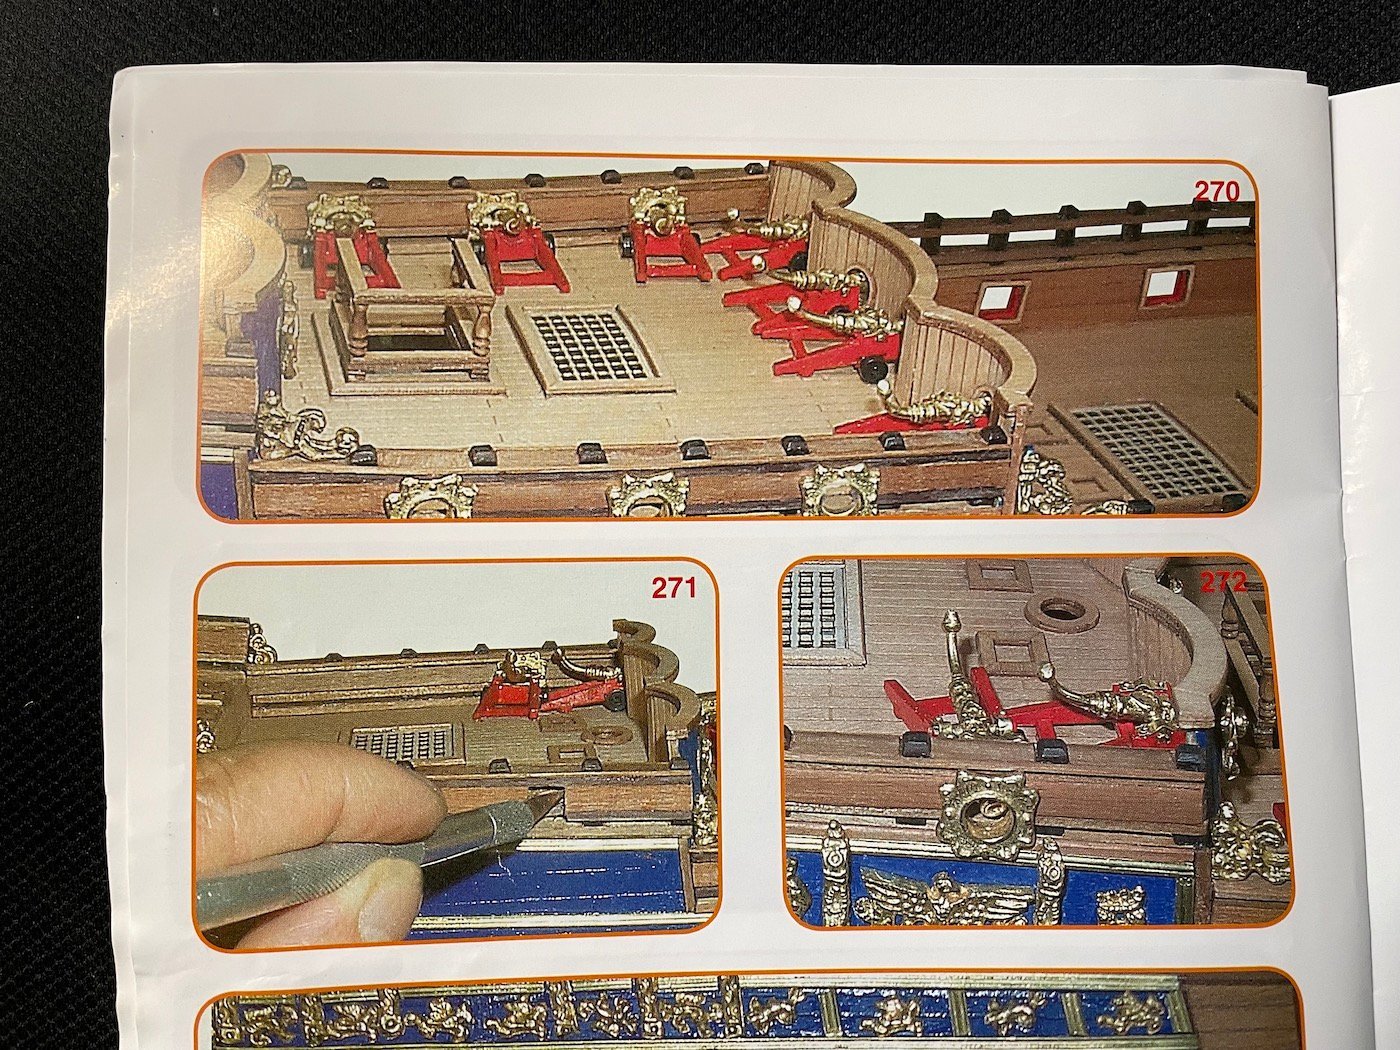
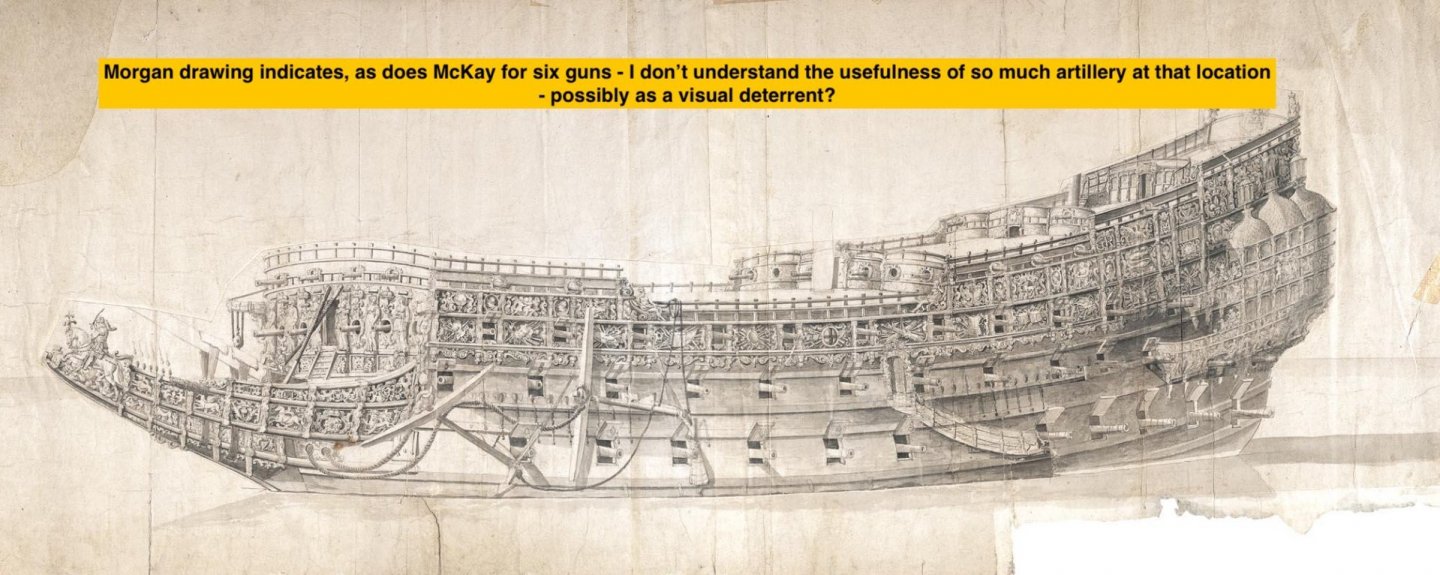
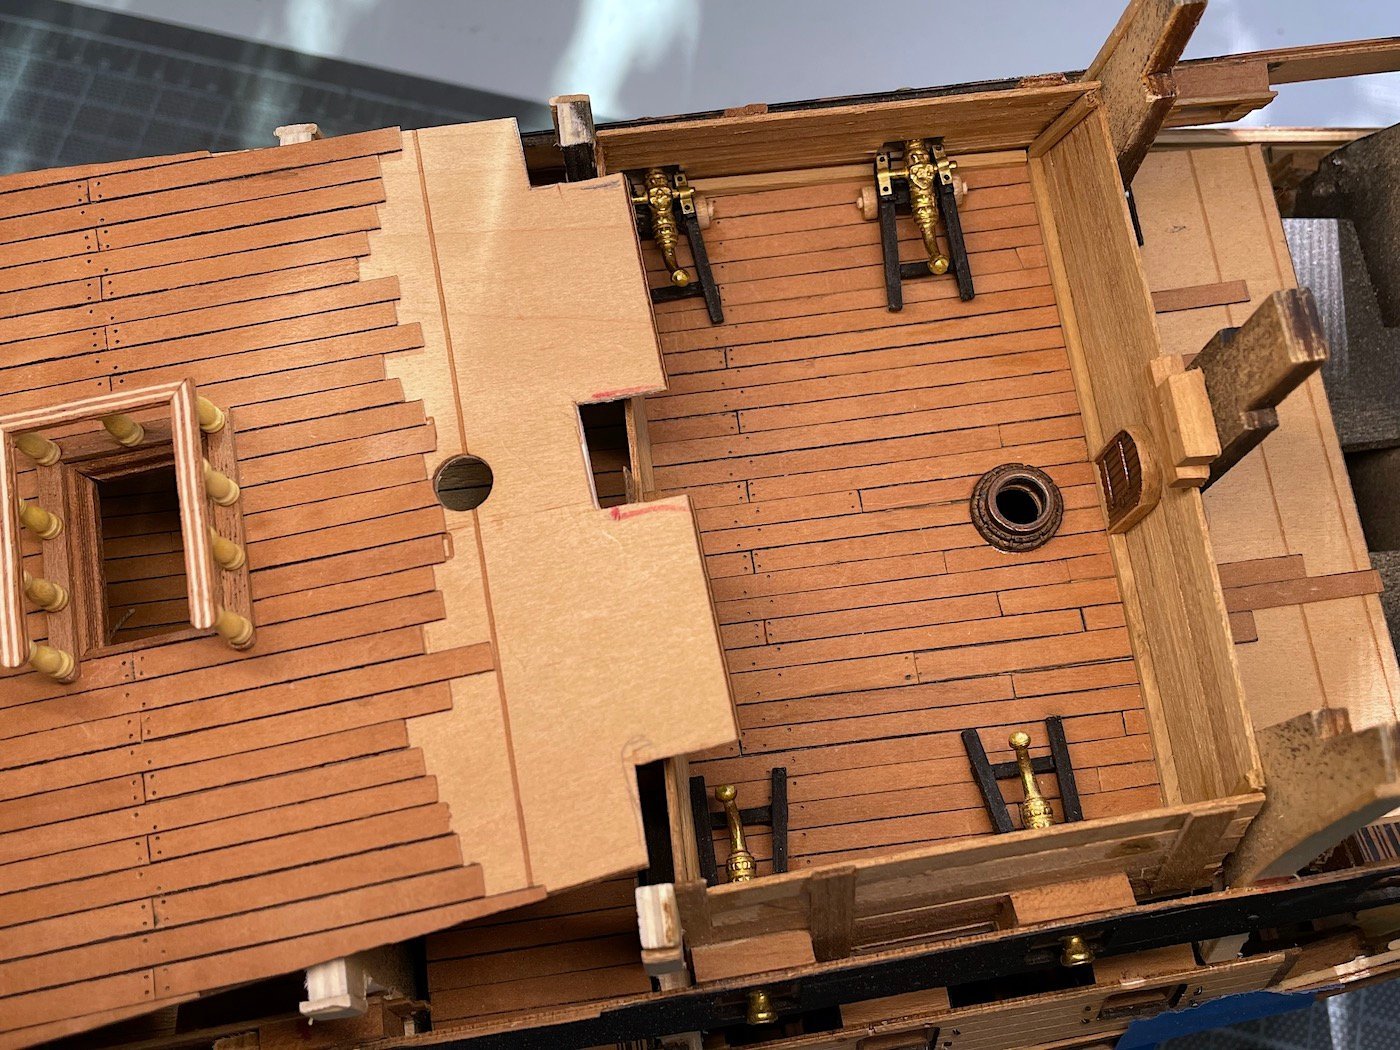
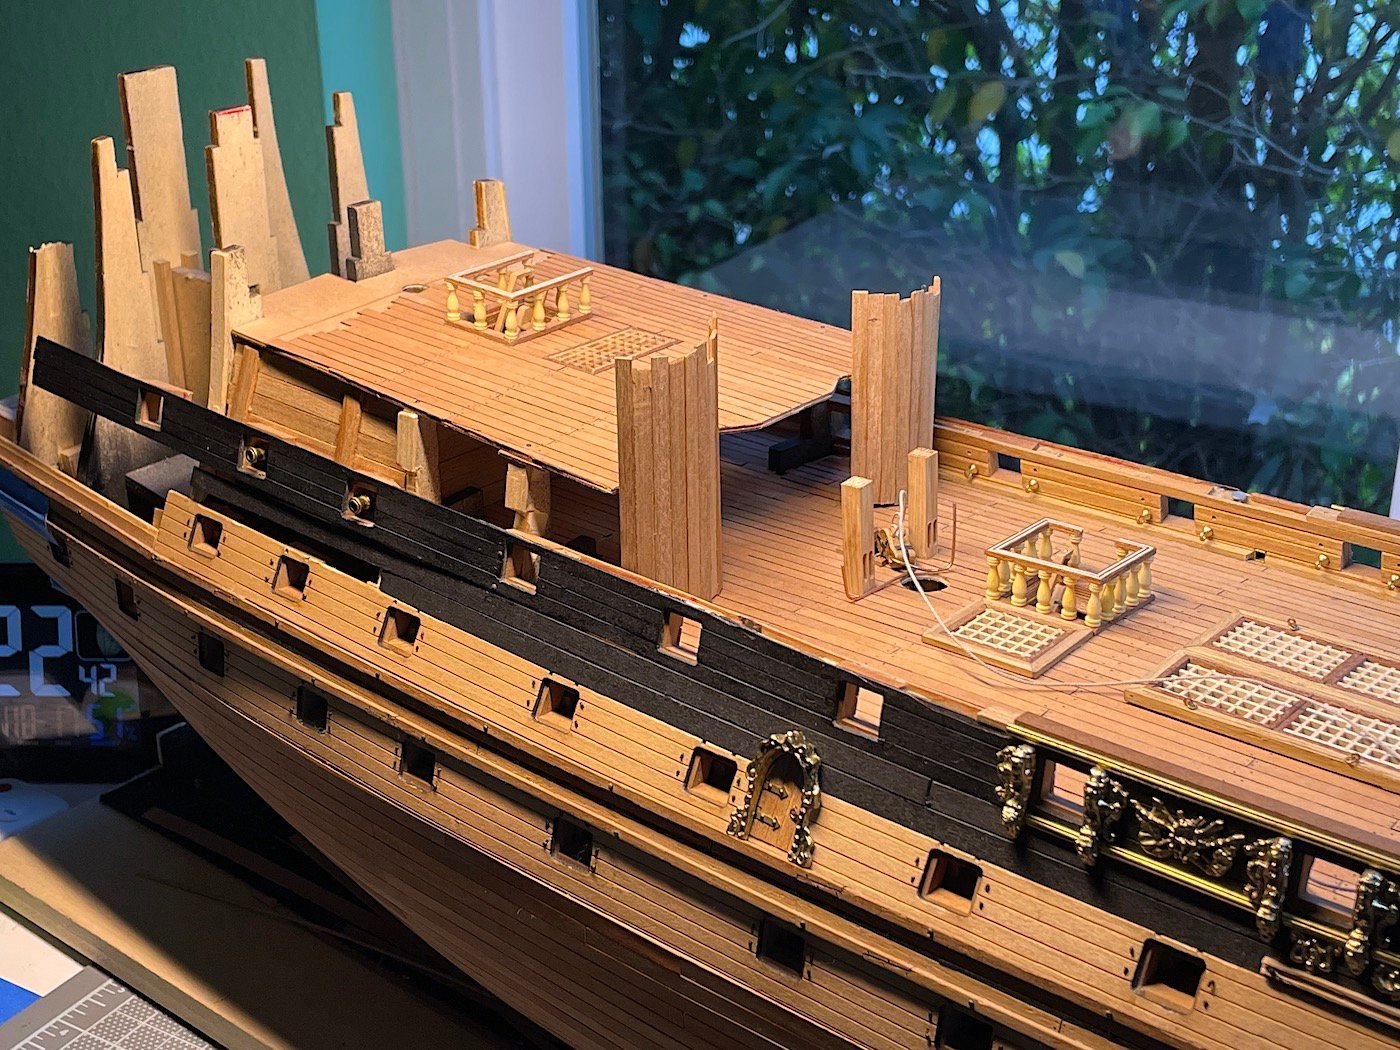
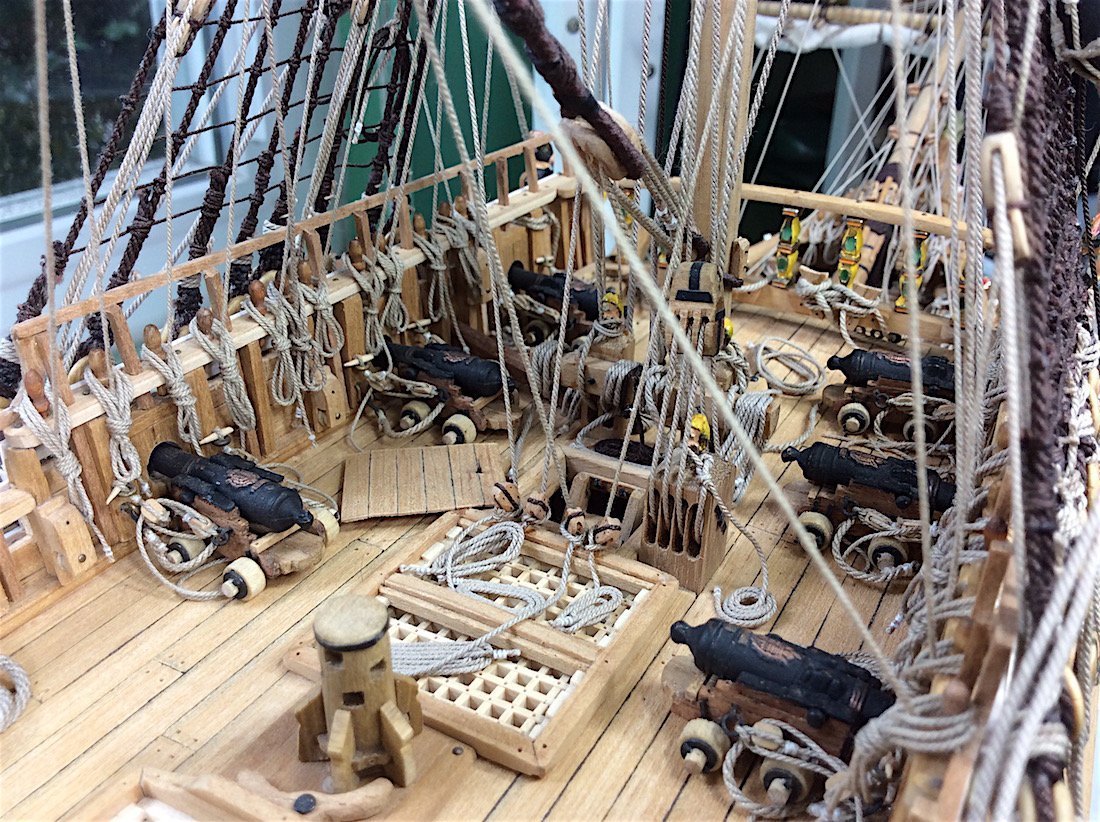
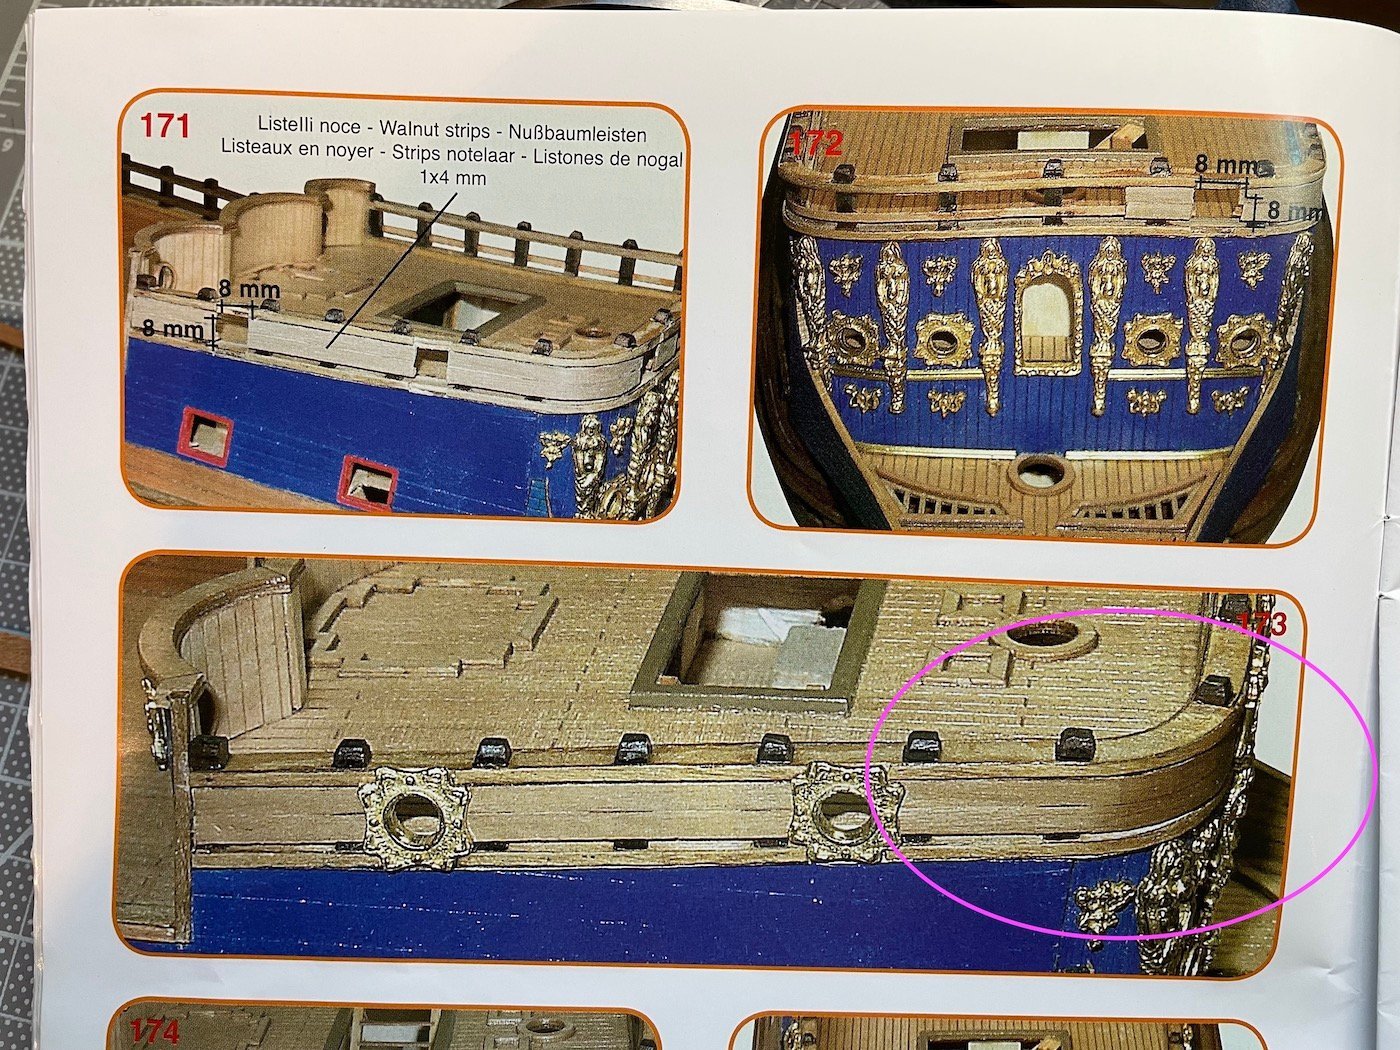
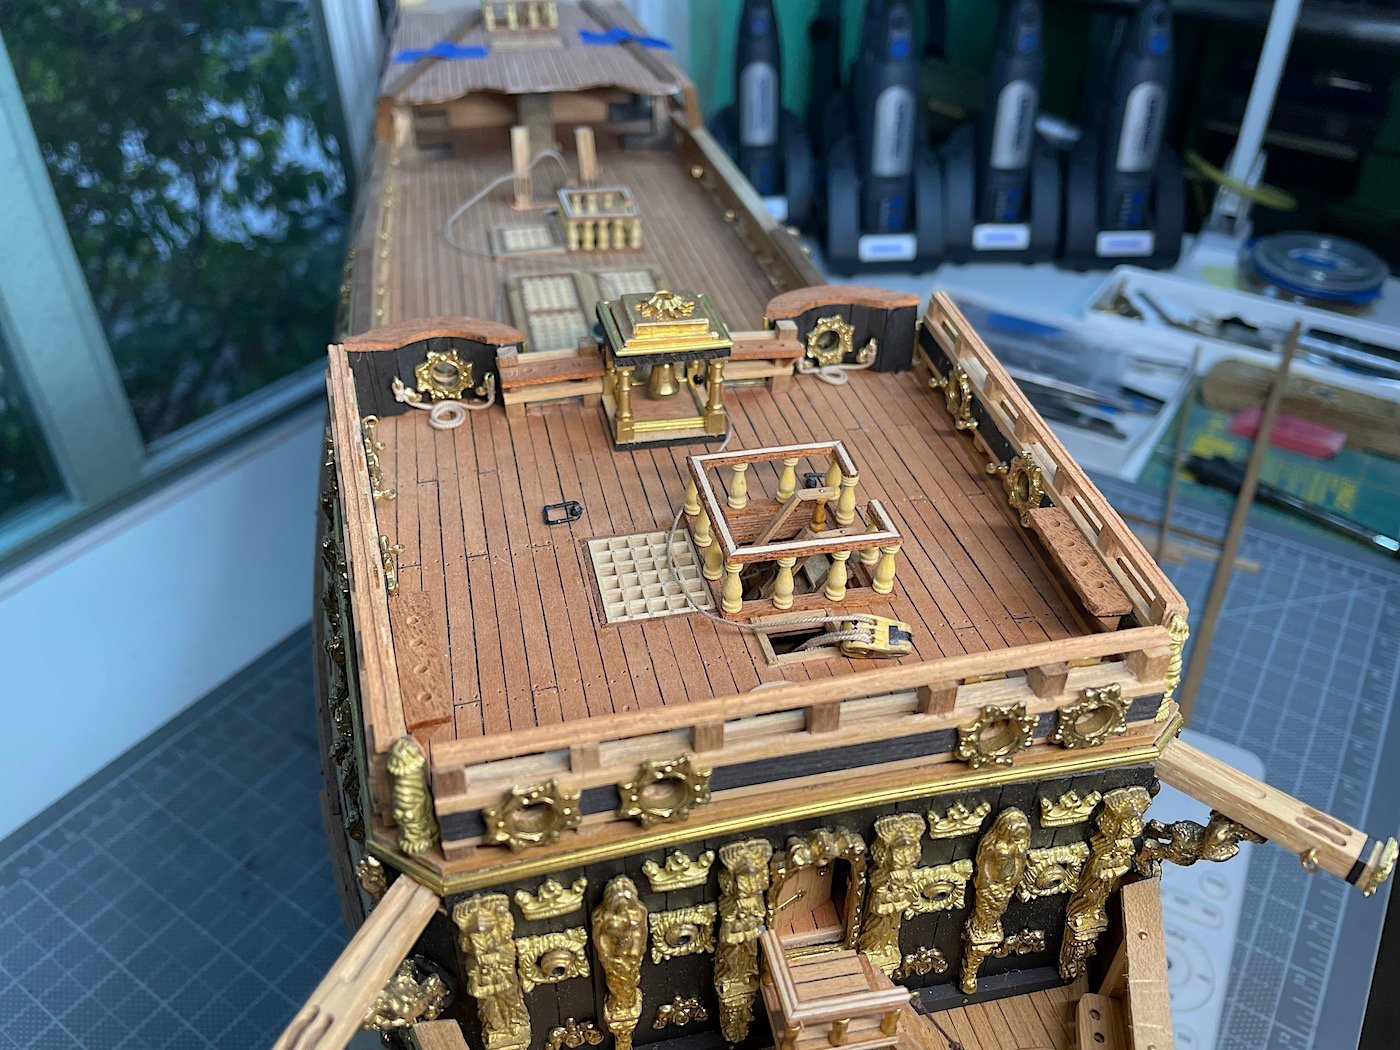
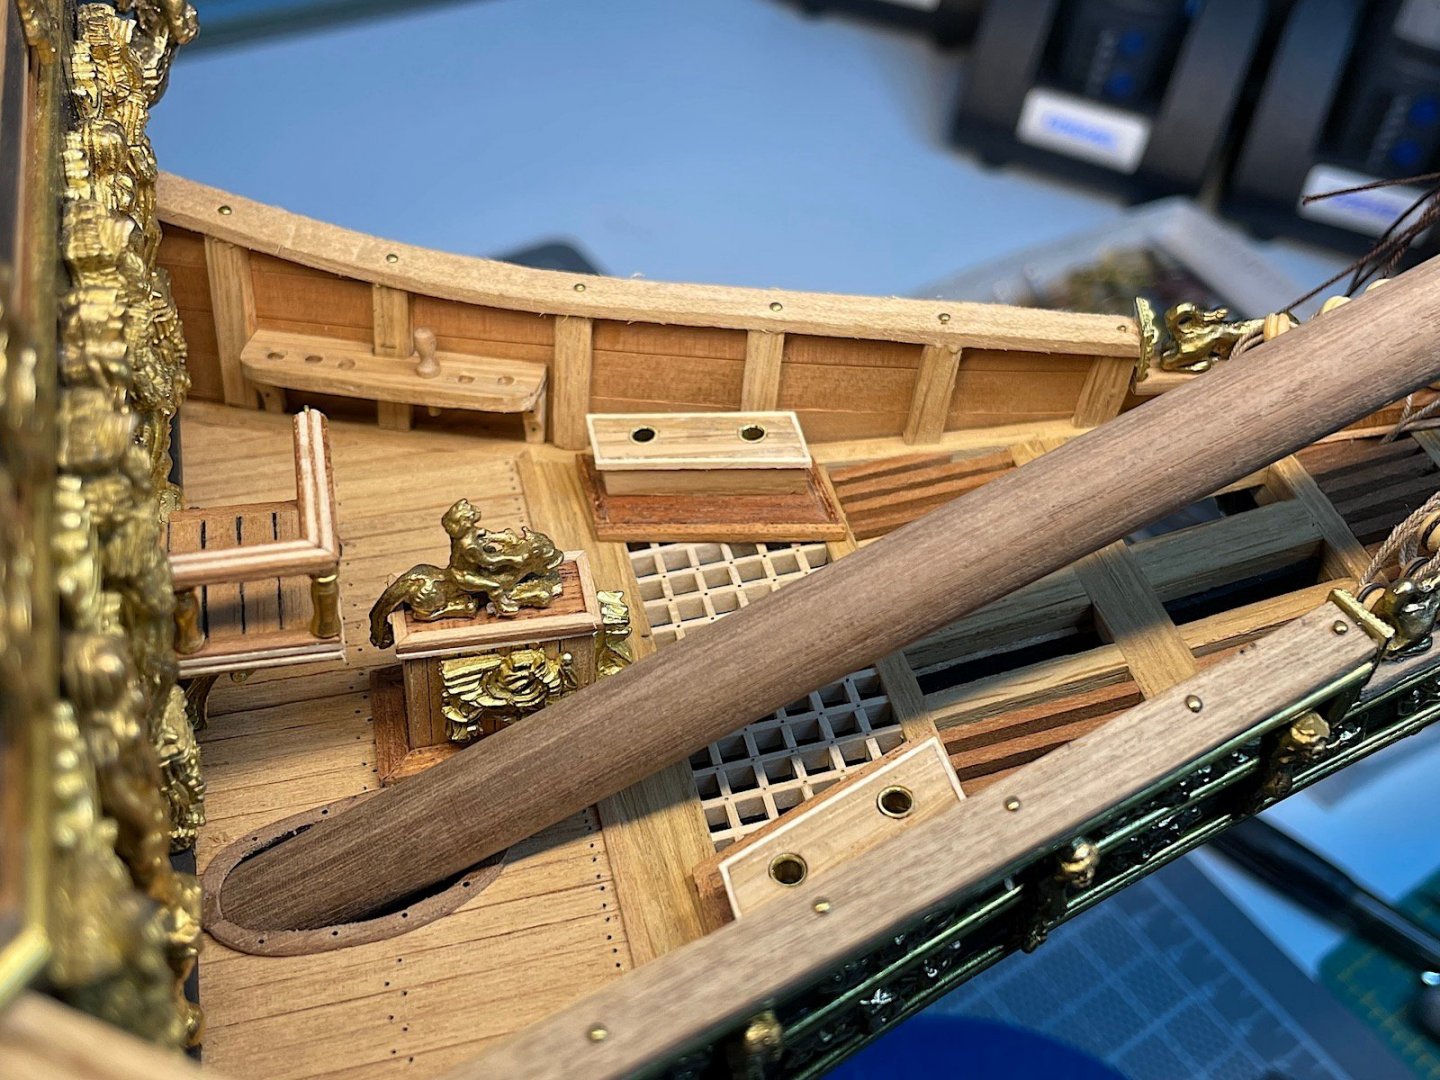
Hi all, Here are some updated images of work on the quarter deck bulkhead. A lot of “artistic” license here – Purists will be annoyed lol… Historical images do indicate most likely 4 forward mounted cannons – yup, I get that. Note last 4 images FYI…. I chose to allow for two, per an early drawing intended to illustrate proposed decorations – and those two won’t be mounted either (as they won’t be at the forecastle either when it’s time to add carriages to all of the upper decks. The visual intentions are for the side carriages to be rotated between the two openings (forward and sides) that are very near to each other on each side (see instruction guide image – much too crowded) I did add the recoil ropes purposefully. I could have, instead, just added two central cannon openings, then installed railings on each side of bulkhead, but I was determined to find a good location for the SotS crest that came from Amati bits, and I like how this sort of matches the look of the centrally mounted bell at the forecastle. Now onto the next area – I very much appreciate your visits, likes – thanks indeed.


-
Thanks Frank.... Will post some updated images in the next few days...
-
Welcome back Frank, congrats on downsizing - awesome shipyard setup 👏 You hopefully also have nice spaces for your previous builds? Ship looking good as well. Regards,
- 510 replies
-
- 1
-
-
- reale de france
- corel
- (and 1 more)
-
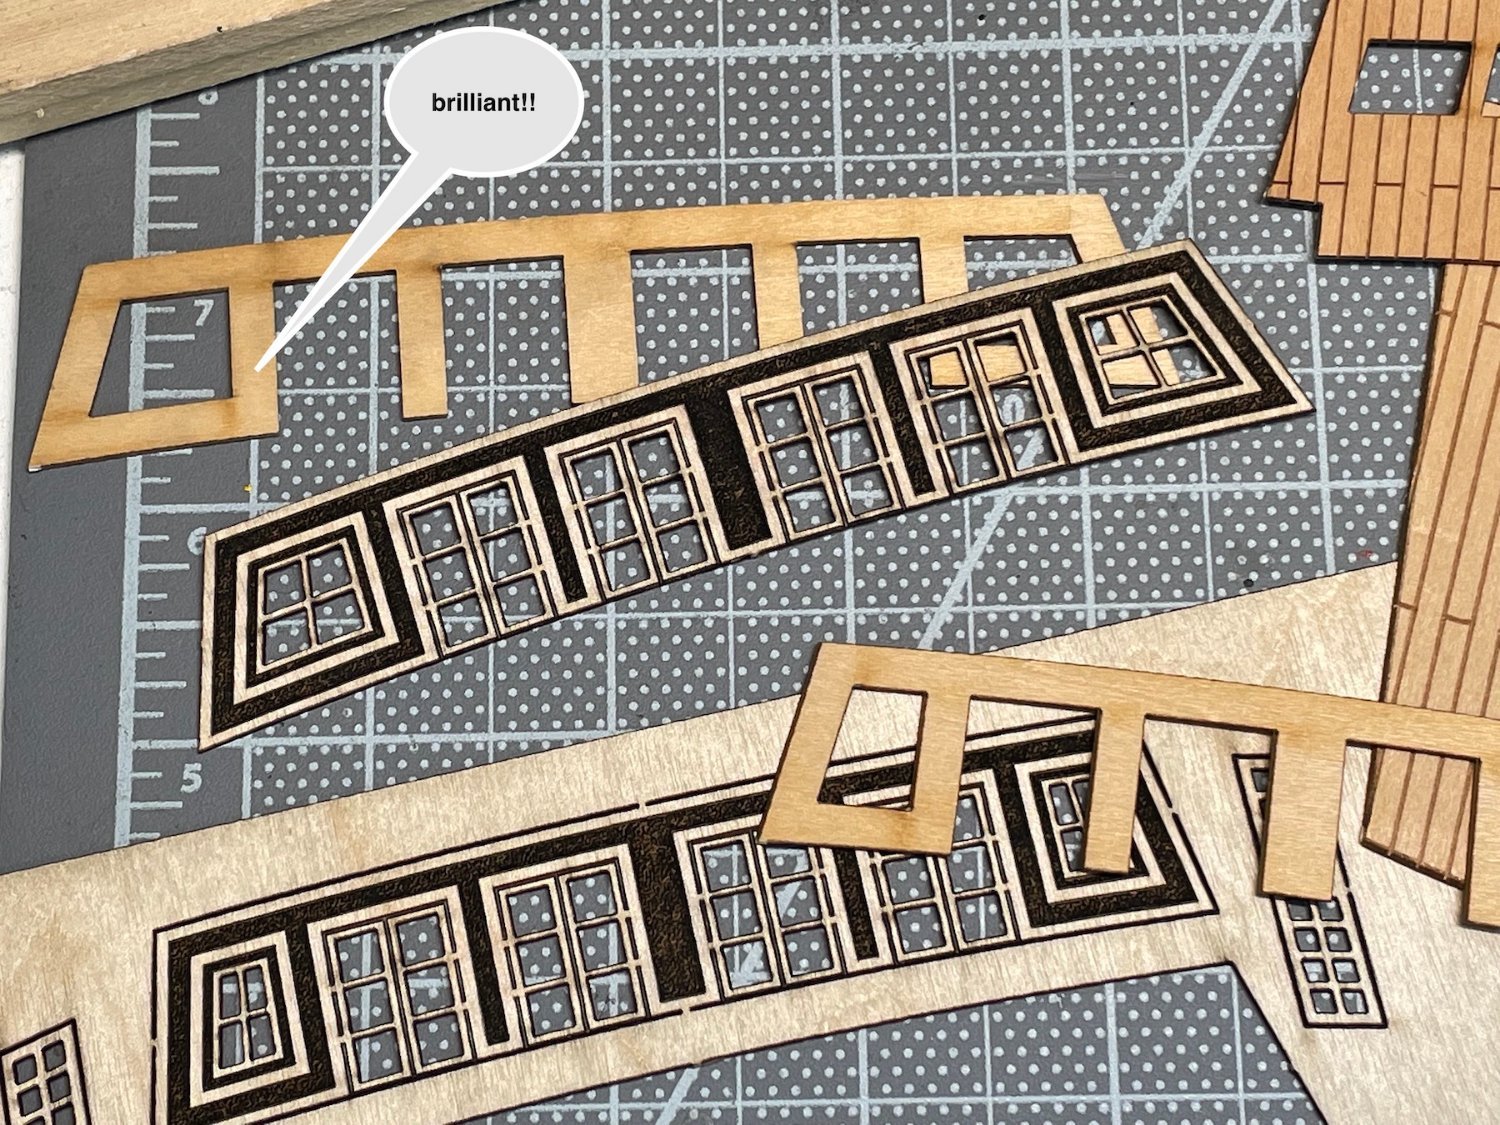
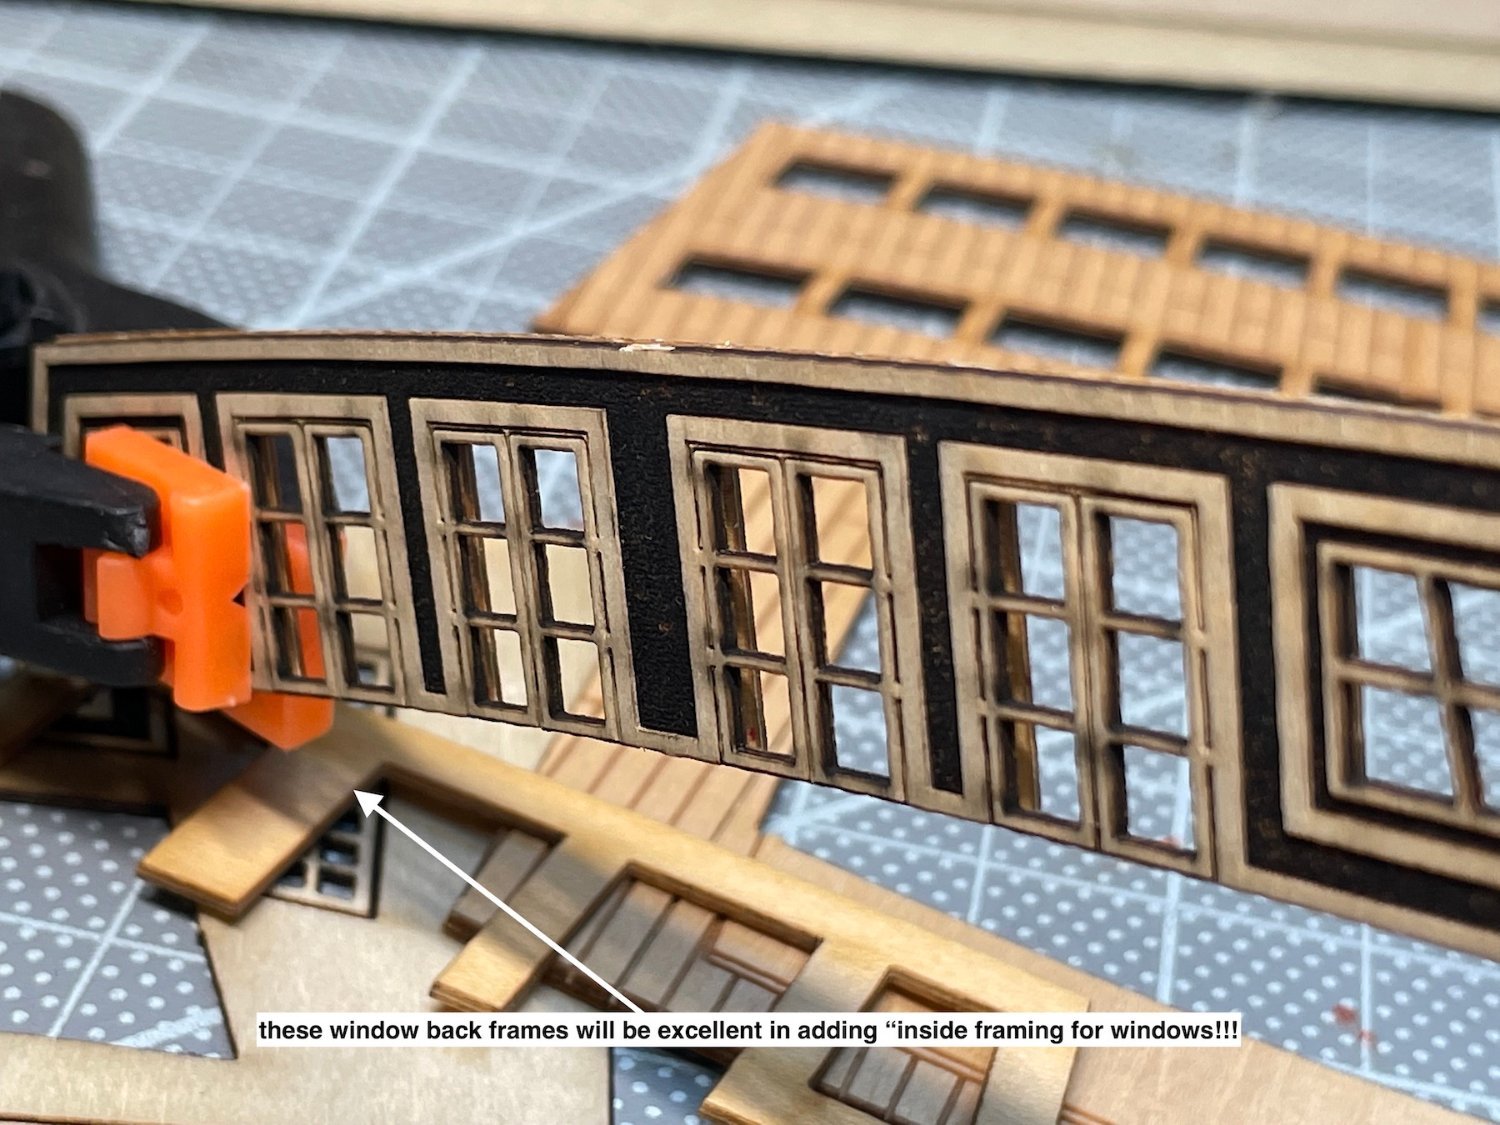
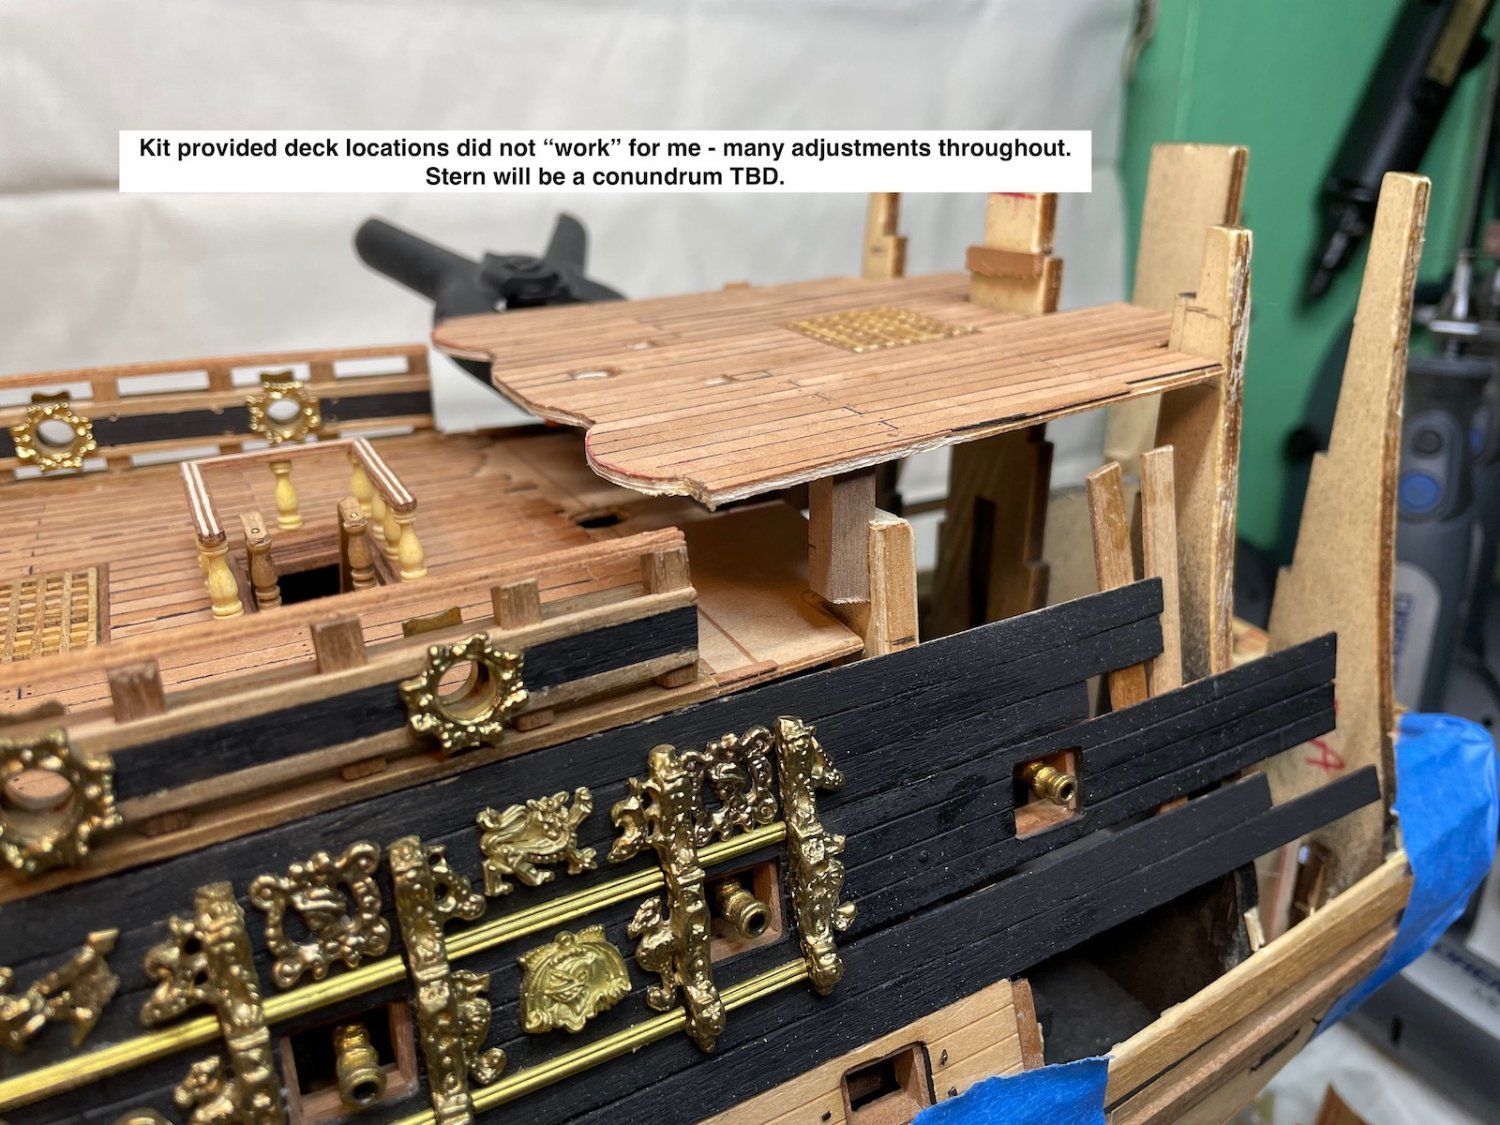
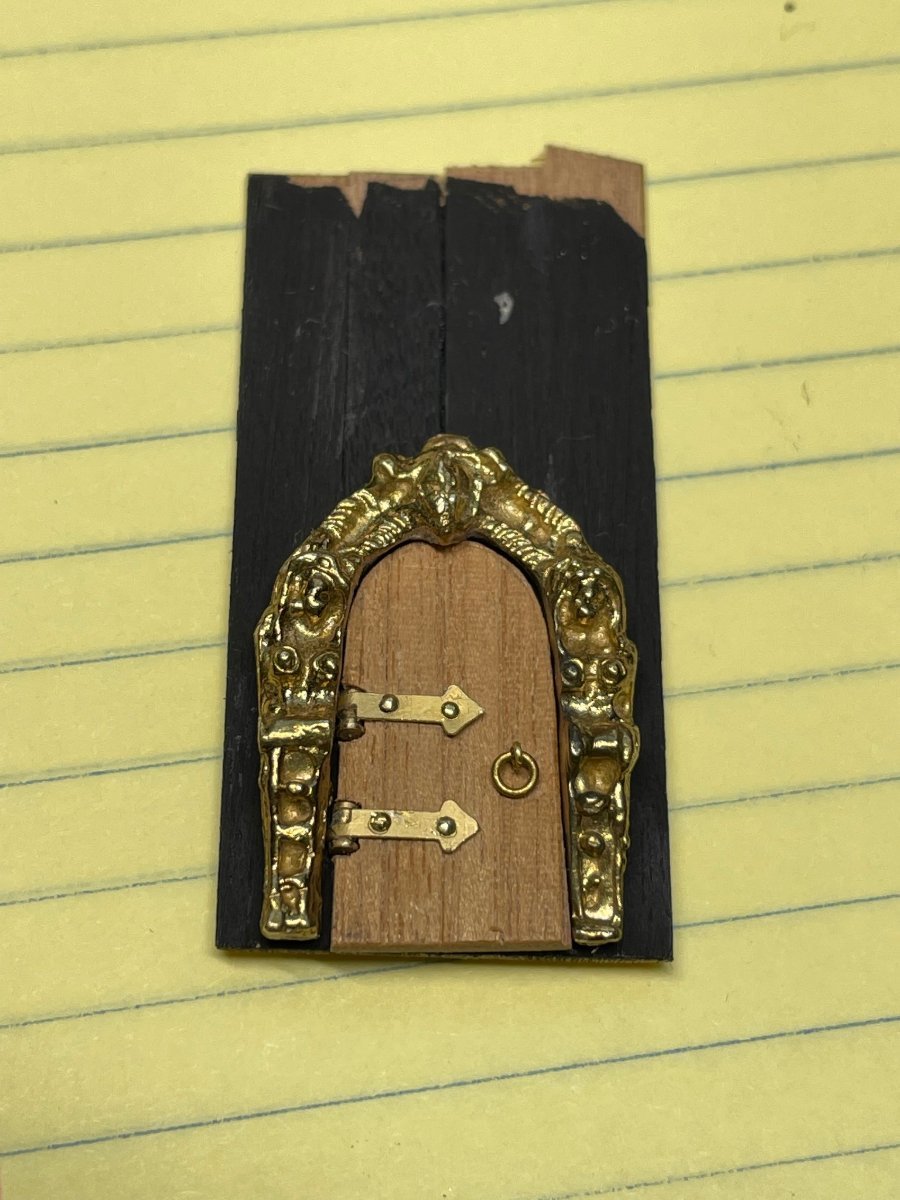
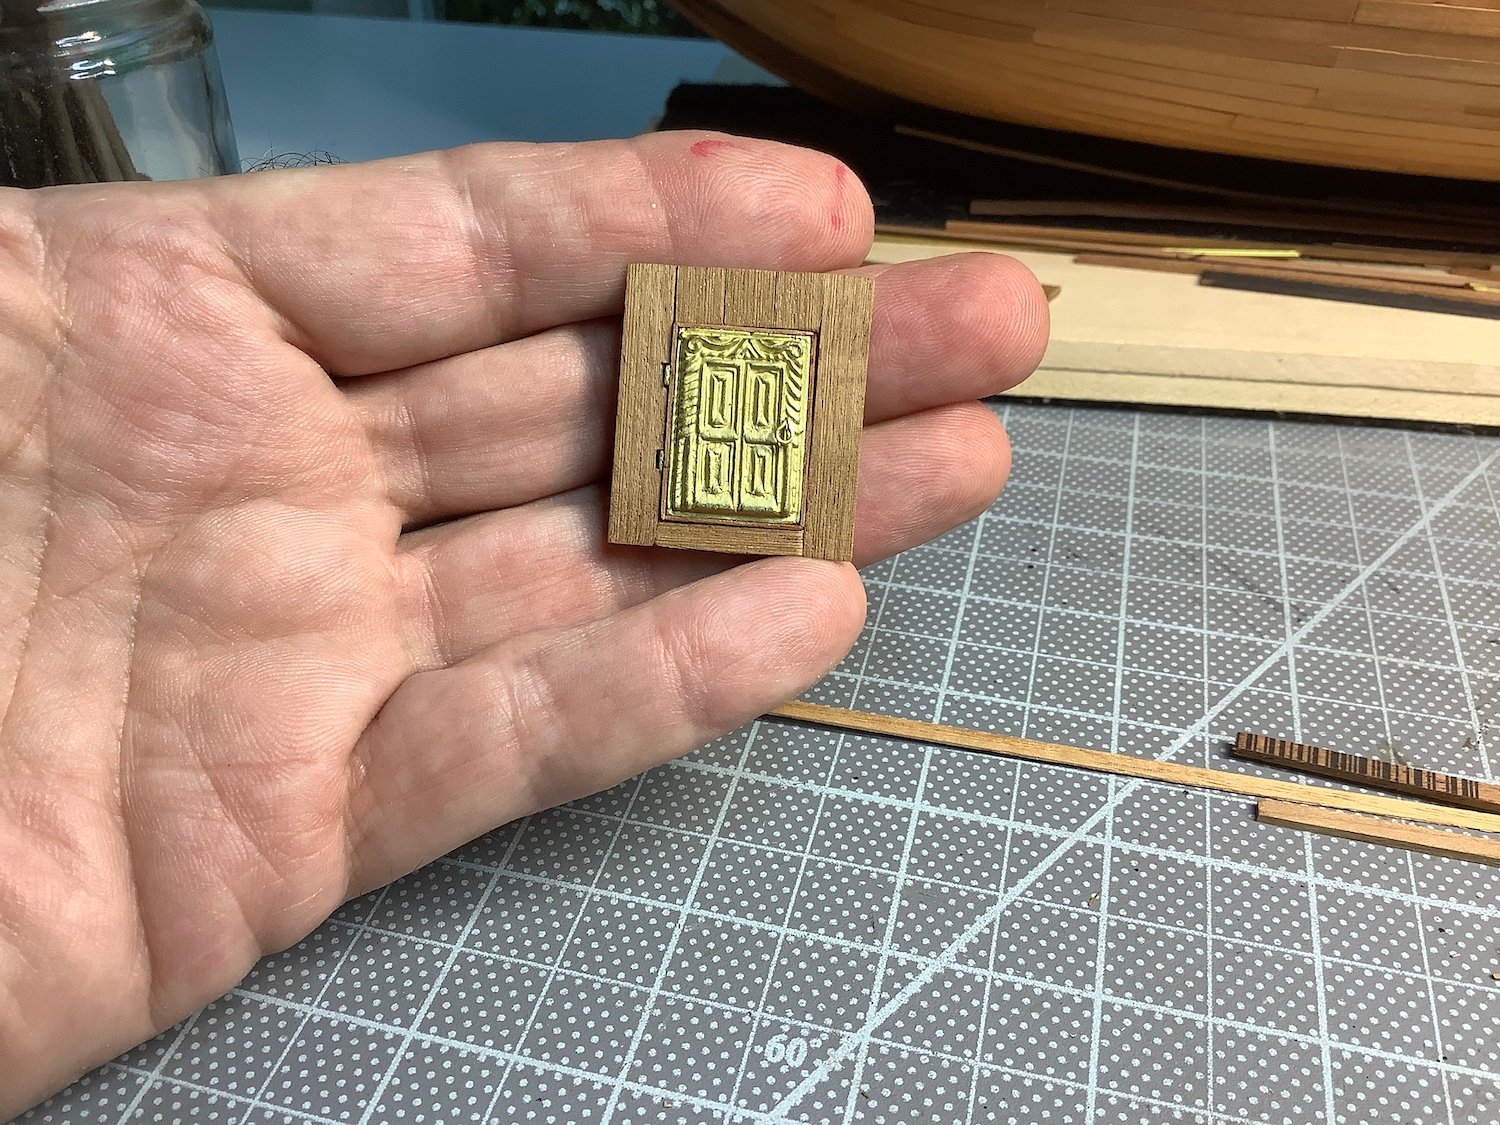
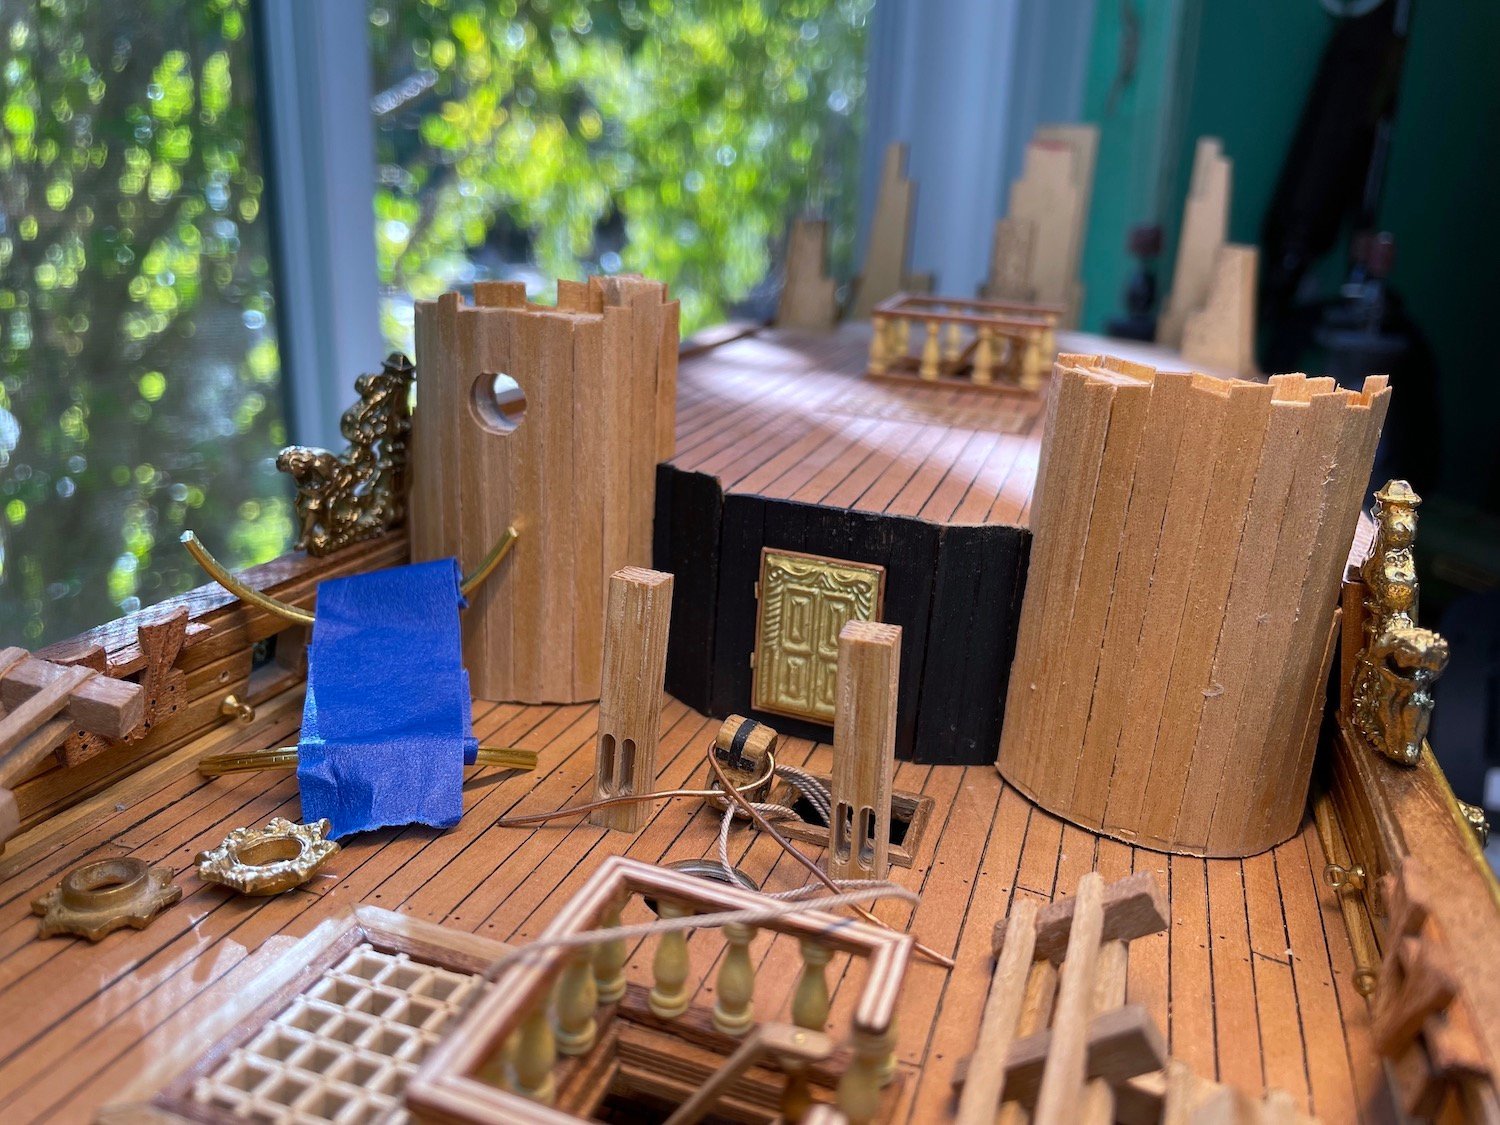
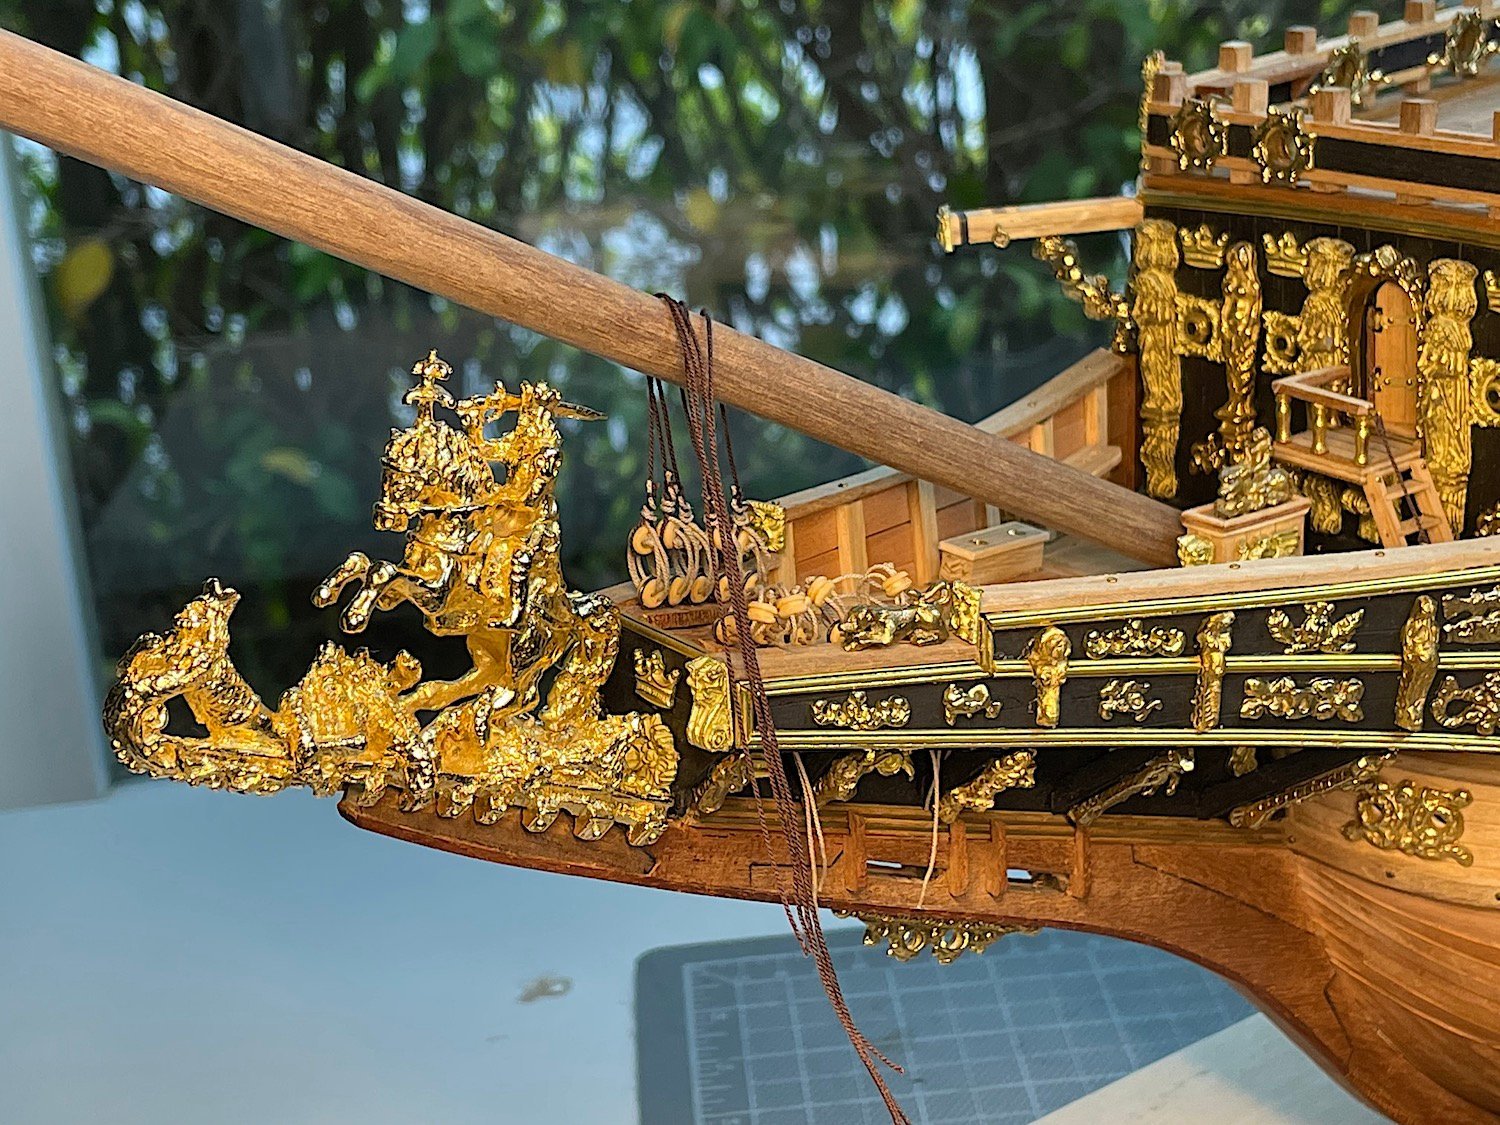
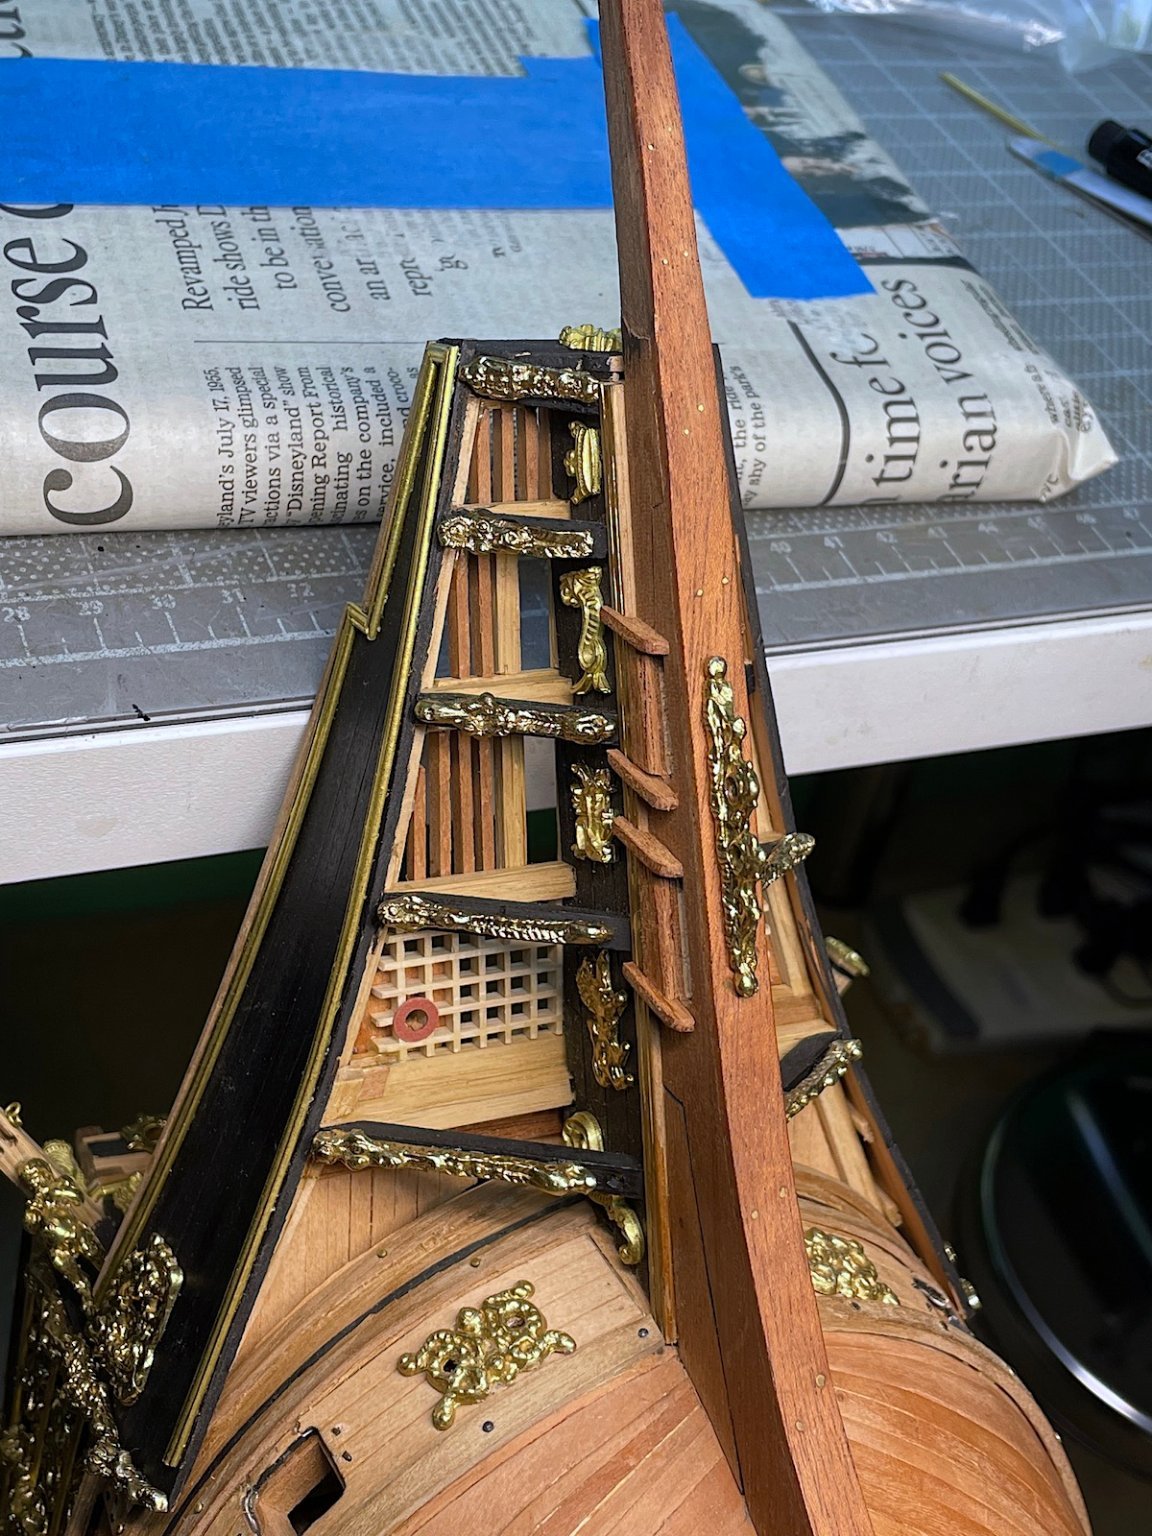
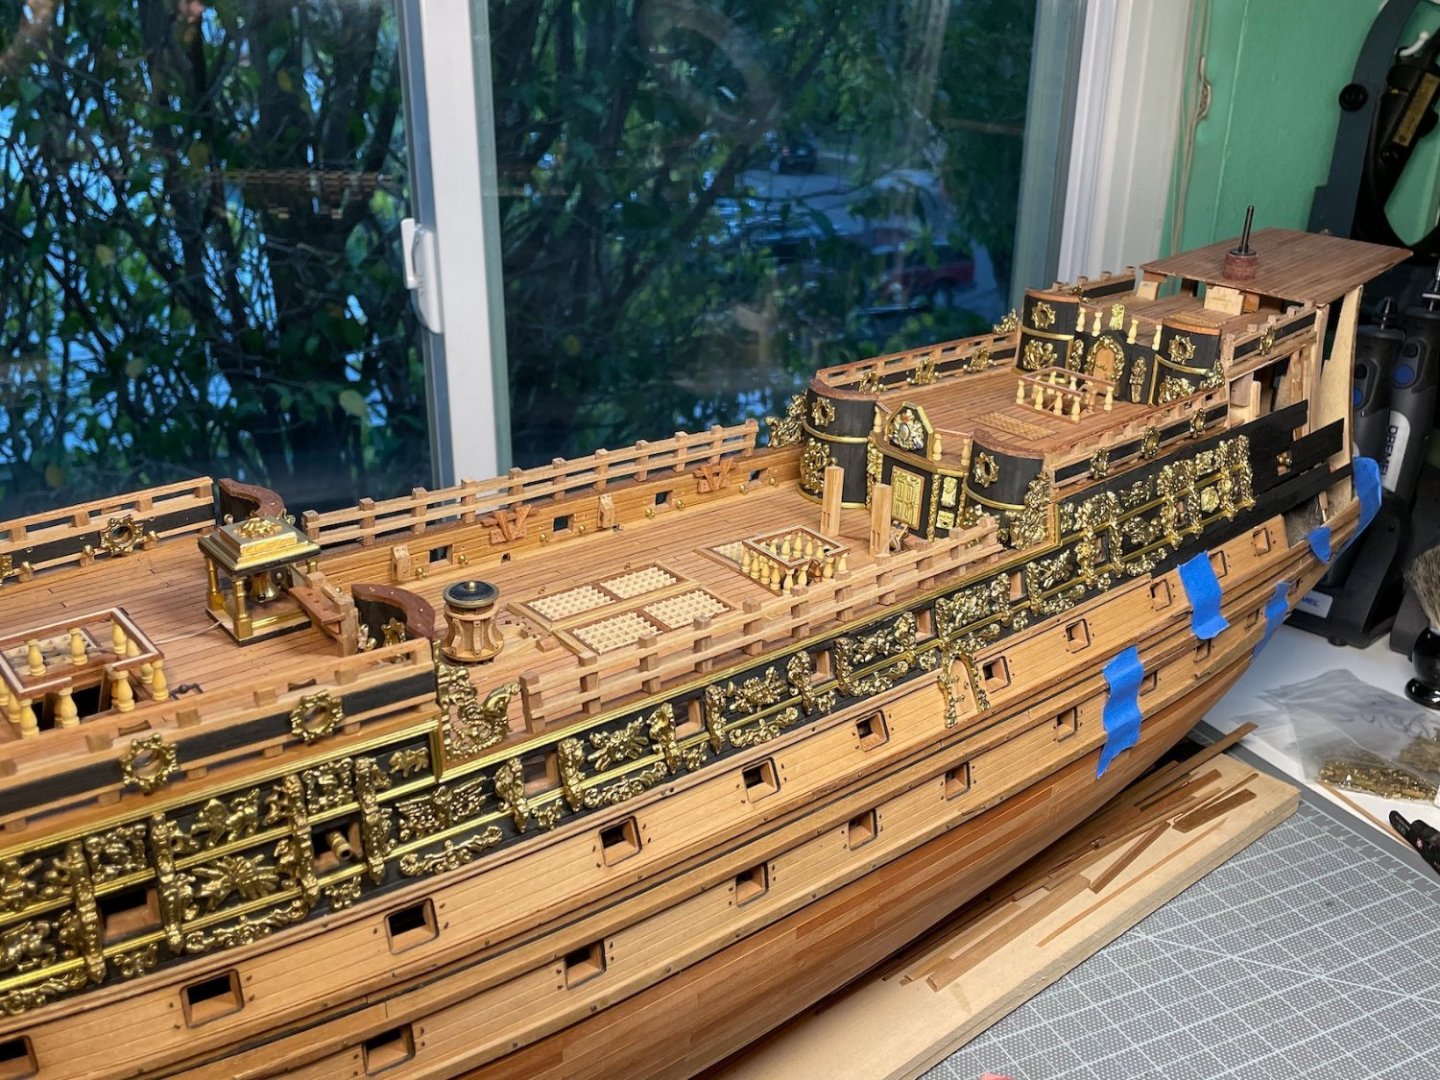
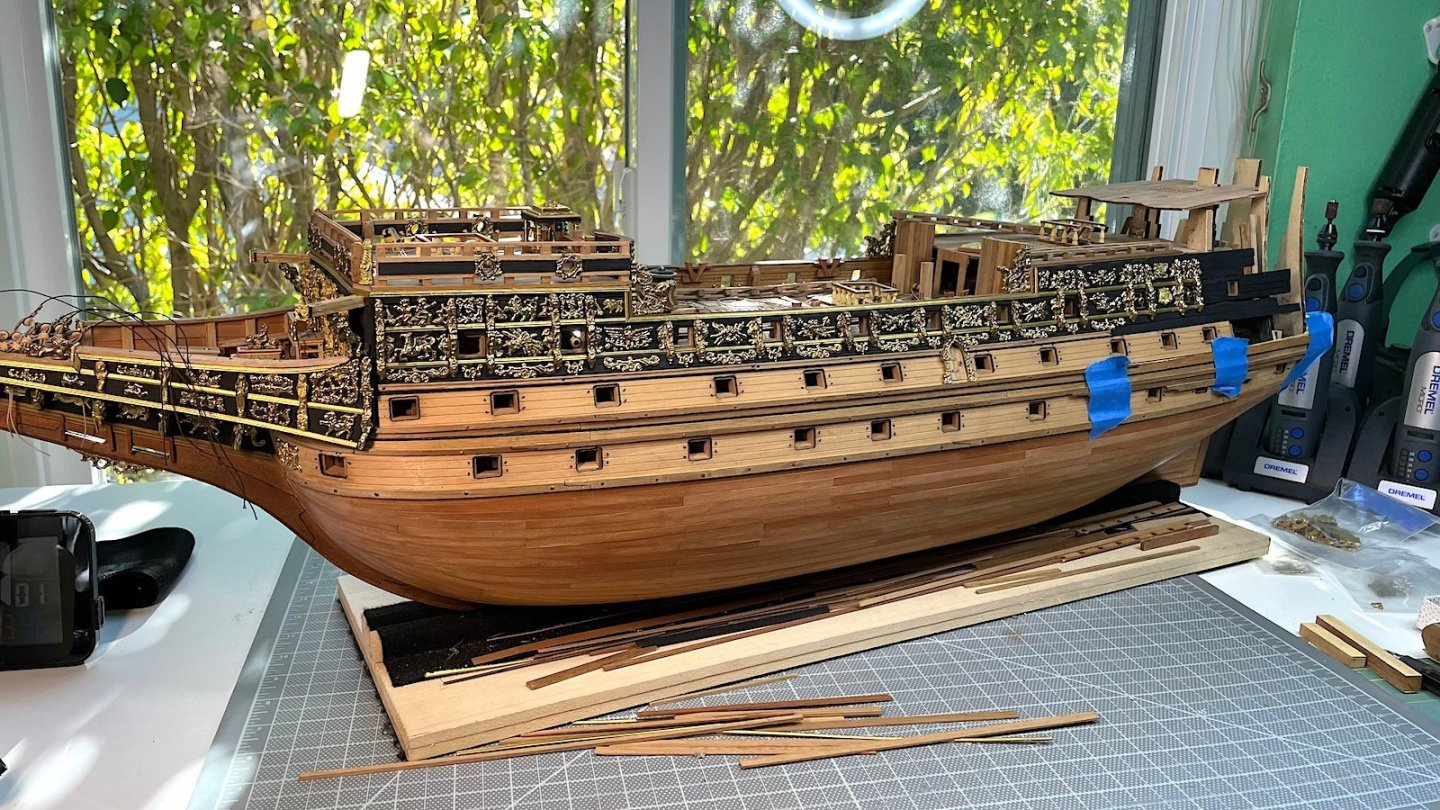
Allen; Do you have a build log - could not locate one for your build? Minor update some quarter deck and upper hull bronze installations. Need to start seriously thinking about the stern, galleries and balconies. Plan on scratch building that entire area (except for the window framings (kit provided bits are excellent!) PS: The bronze bits are actually much "warmer" looking - iPhone doesn't seem to "see" that - Yea I could play around with the images in iPhotos or in Preview with my Imac ---no biggies Enjoy your holiday weekend (if you celebrate that holiday) Cheers,


-
Mark, So so sad to read this. We've (so many of us) have become internet friends with you over the years.....Best wishes for your family as well Sincerely,
-
Siggi, Been following..... superb work! - I will try to copy (hopefully haha) some of your detail work for my current build. Your ship is so excellent indeed. Regards,
-
Lee, Thanks for your kind words - will be very happy to assist with anything that you might require ....
-
Joseph, Very nice start - will follow along as well. Regards,
-
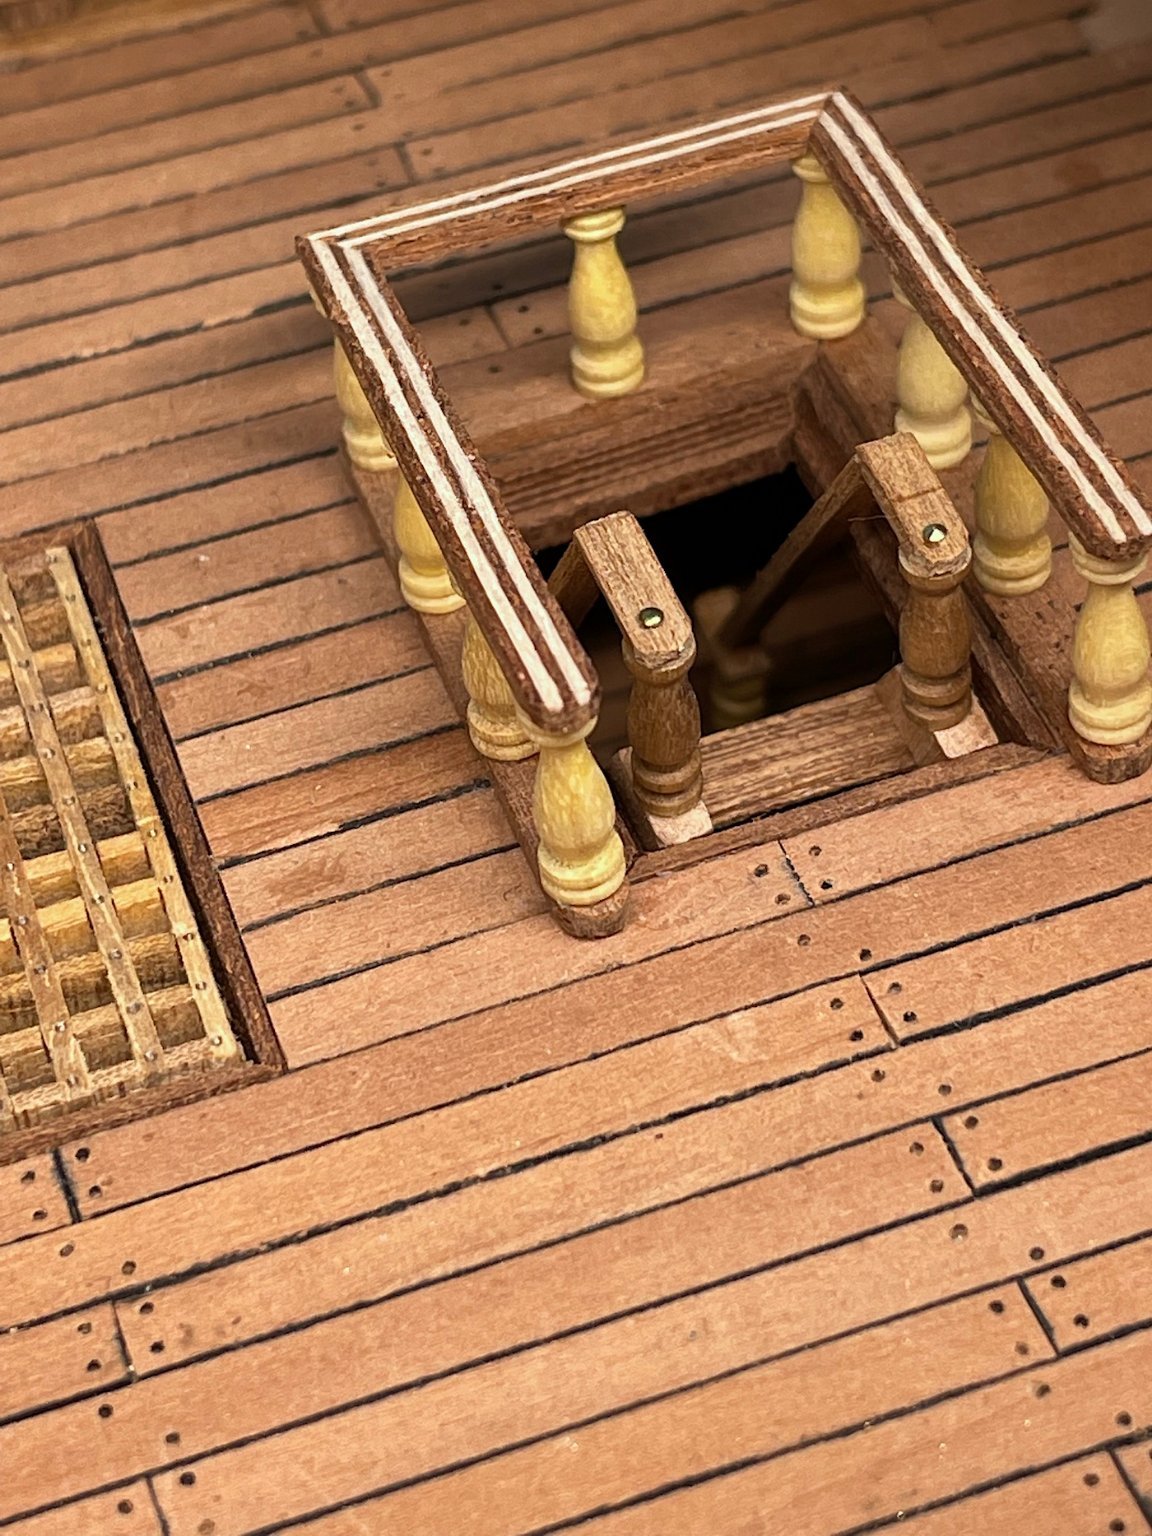
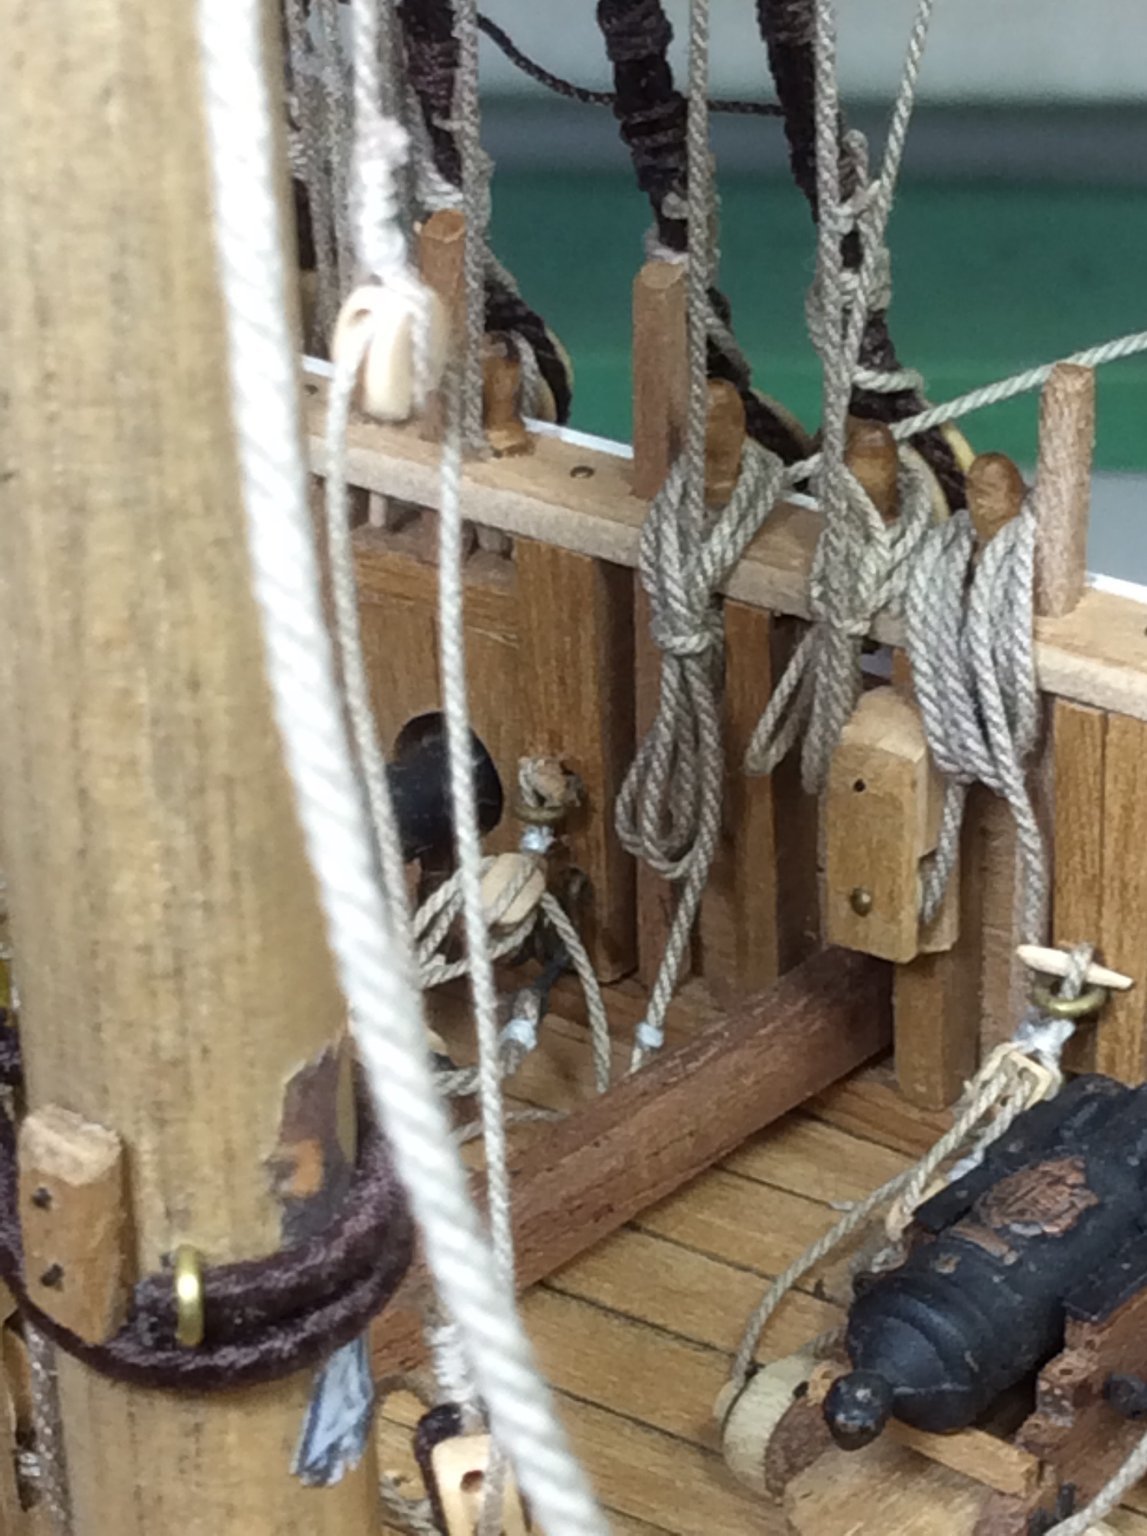
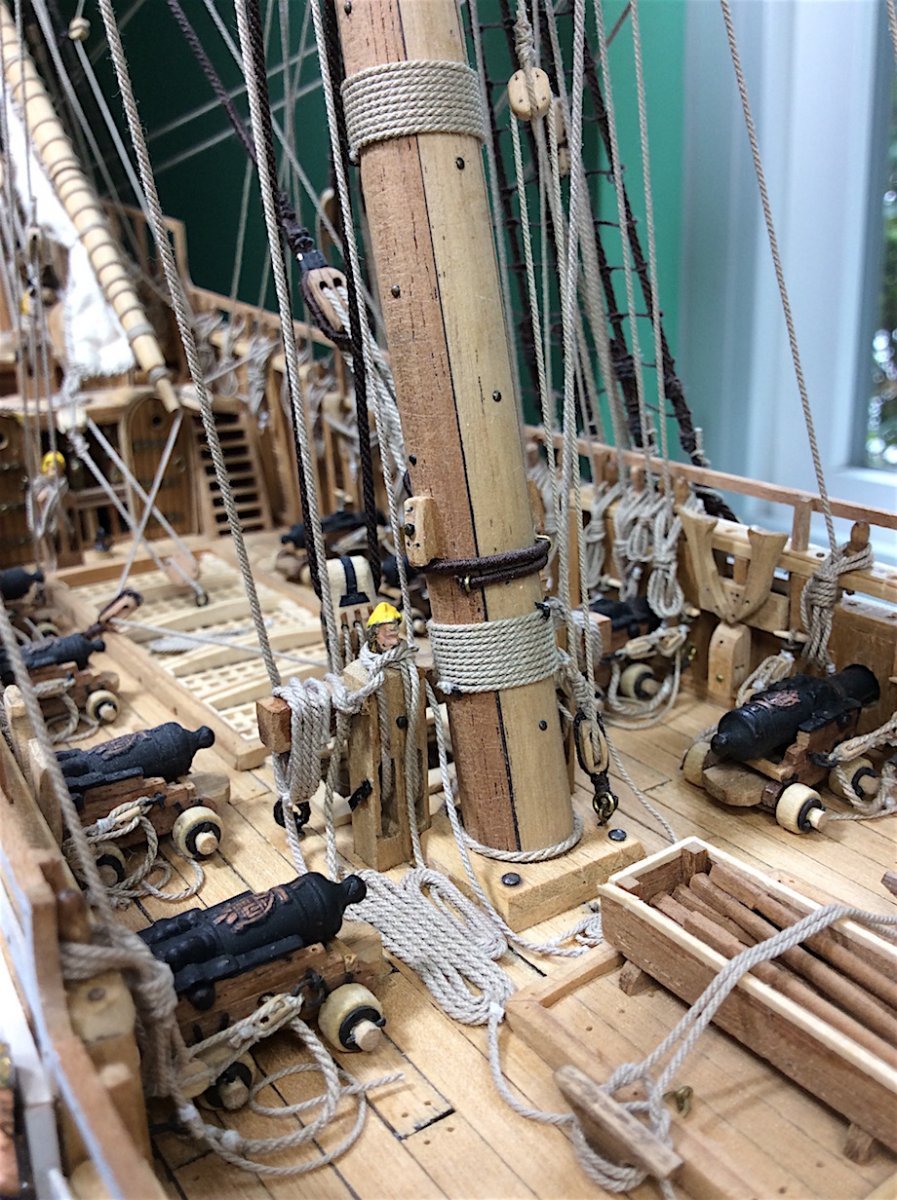
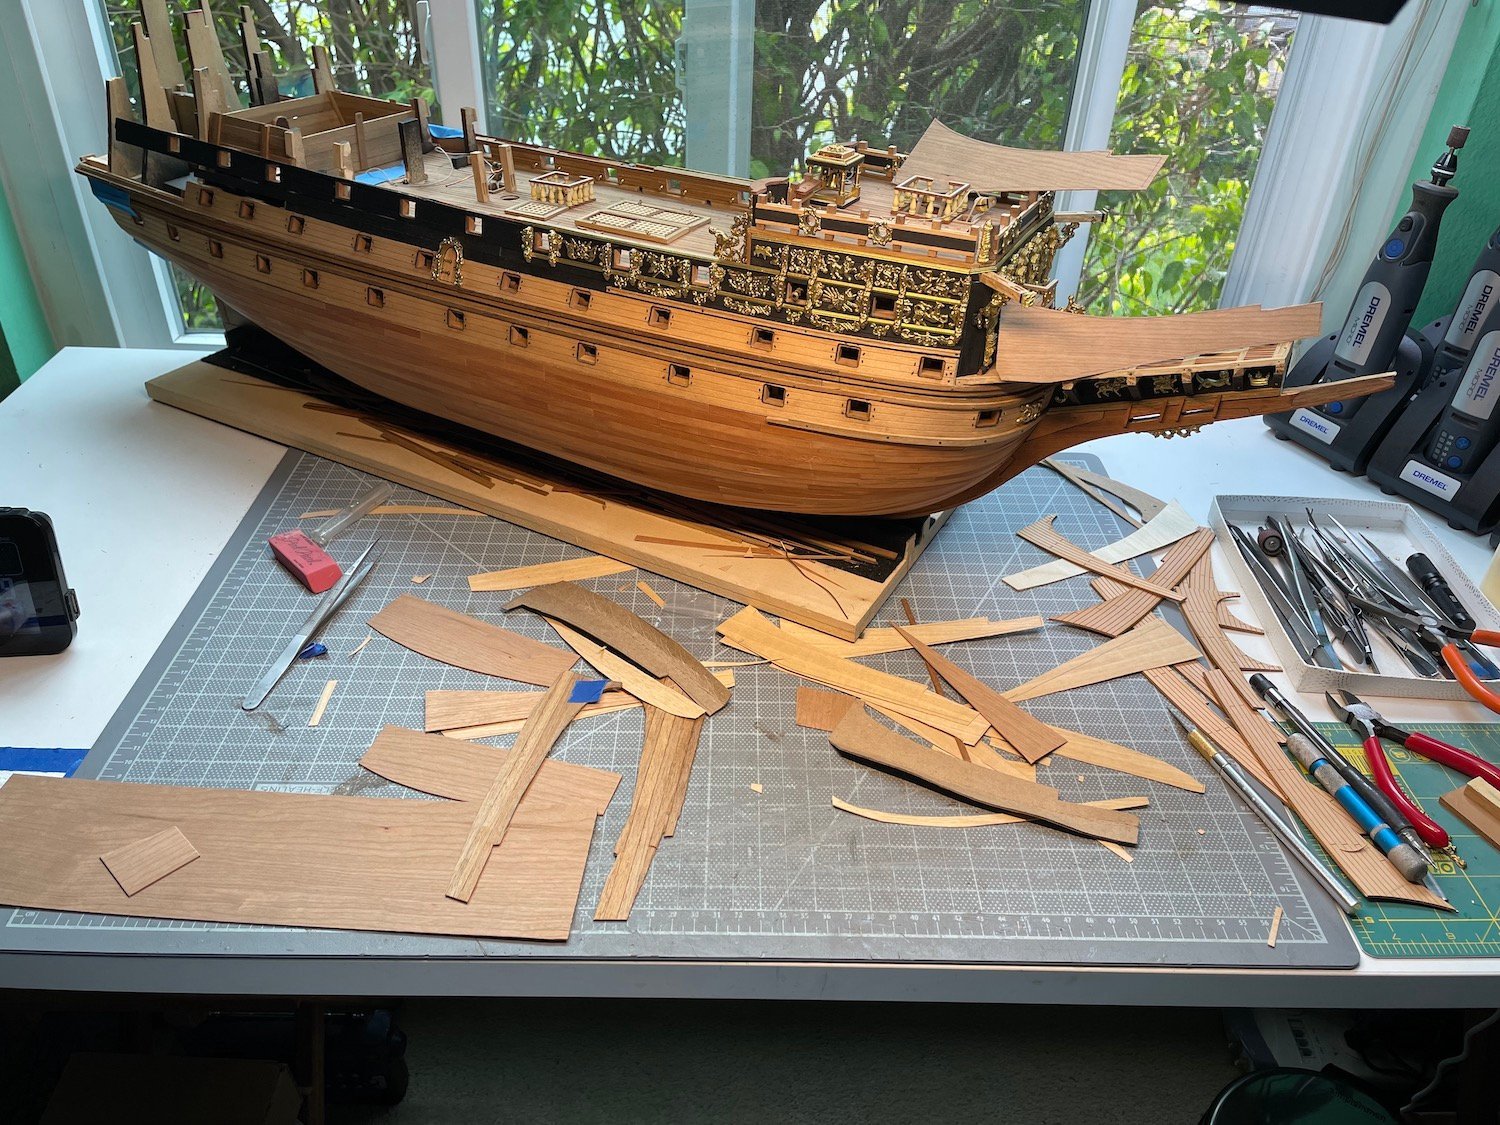
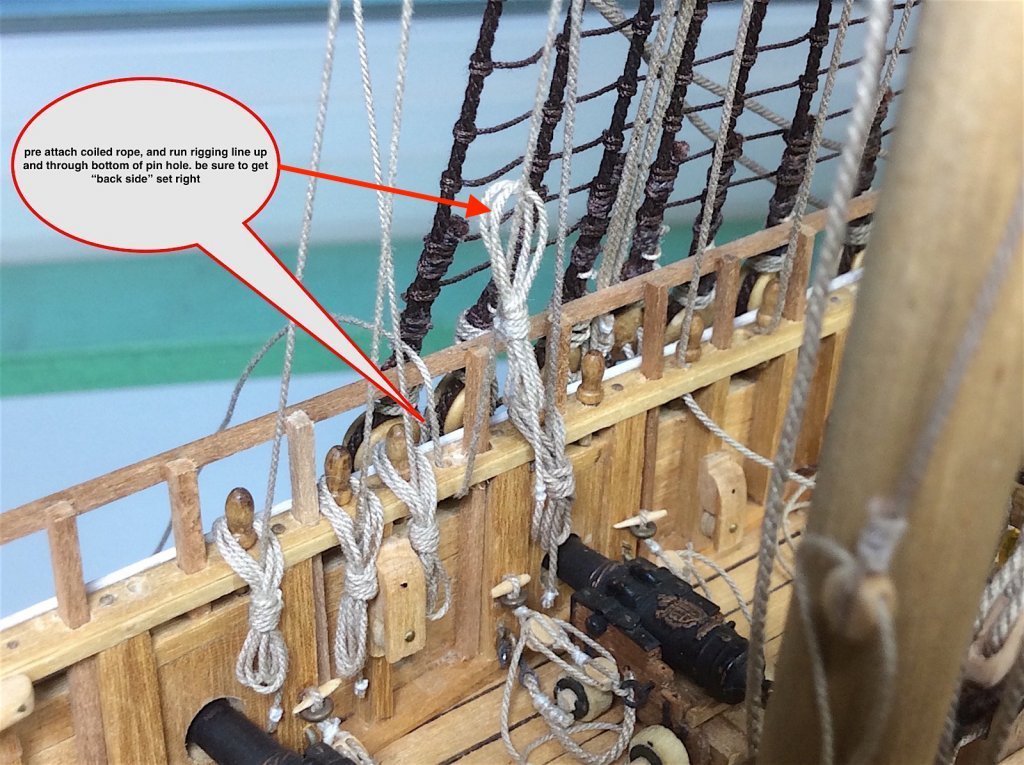
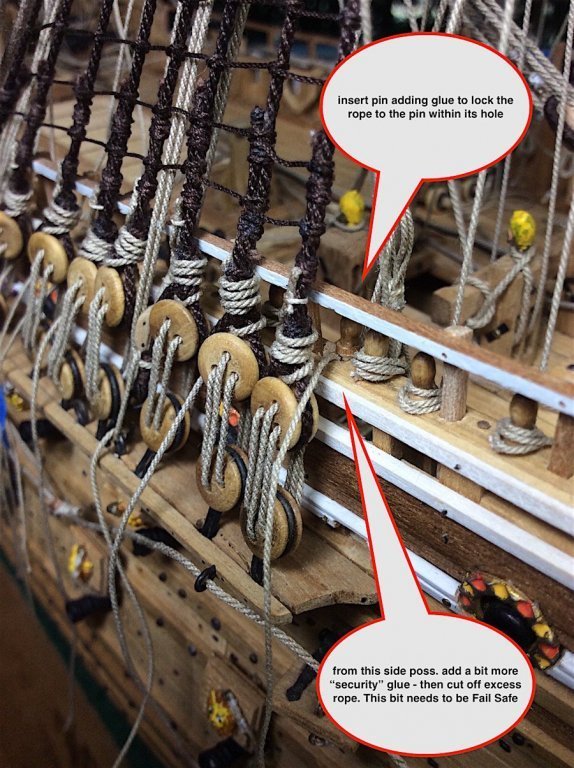
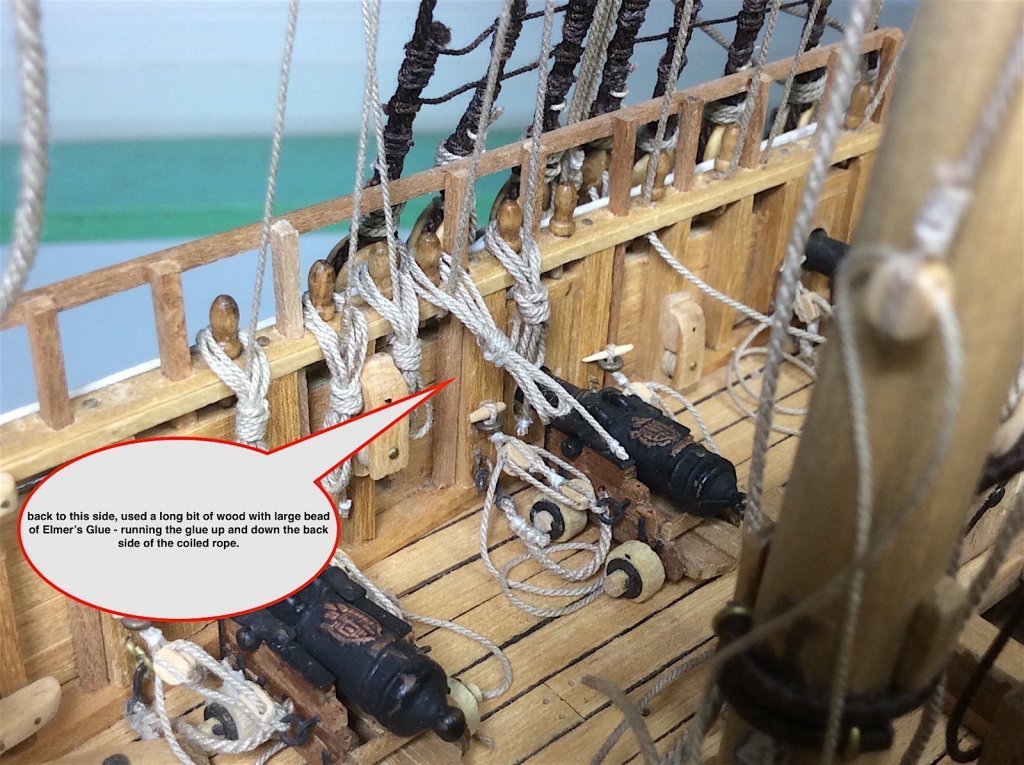
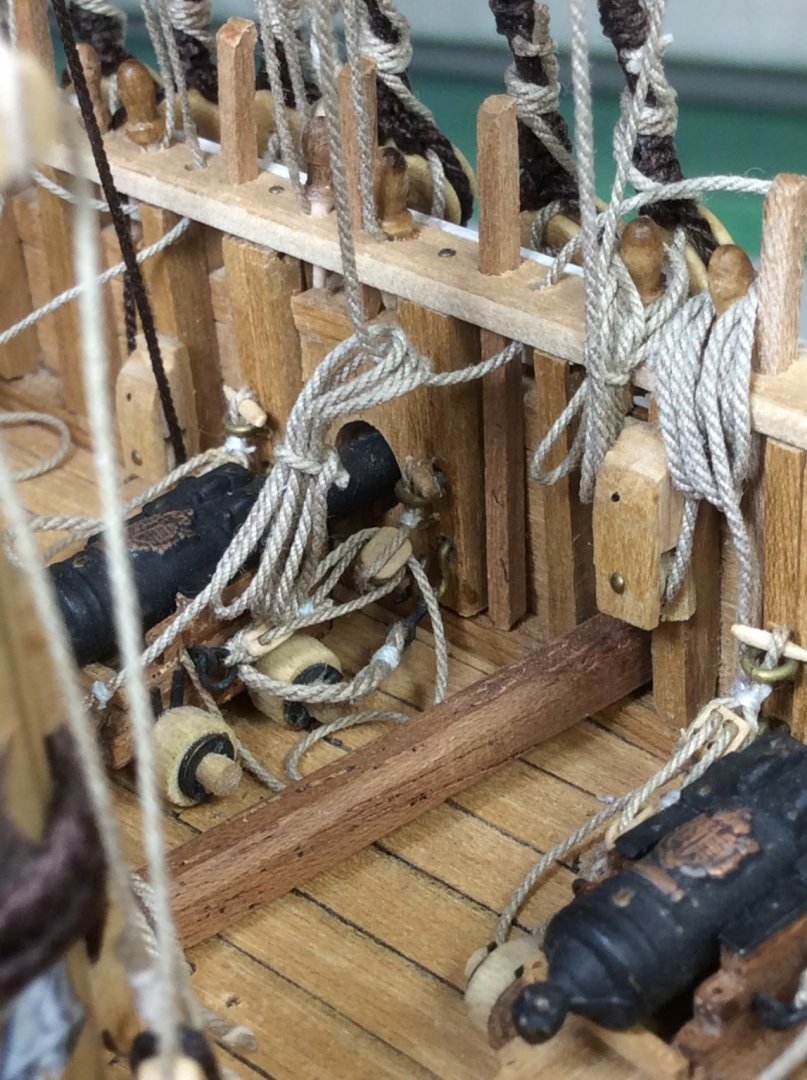
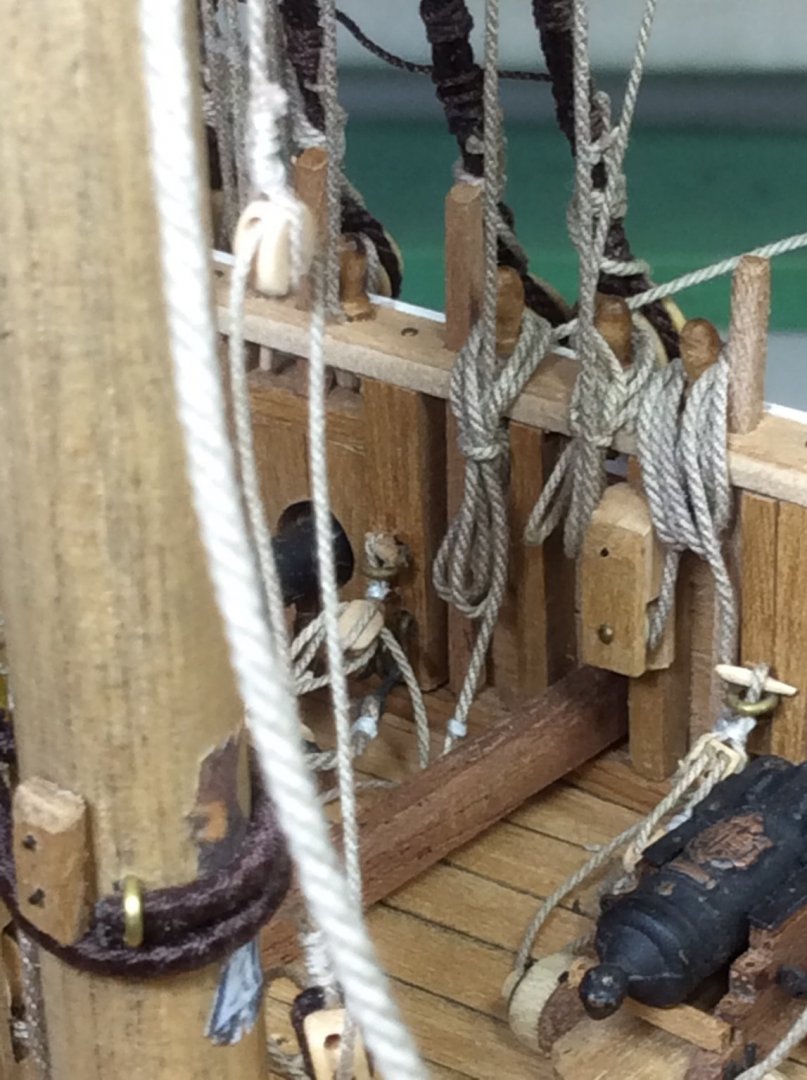
Allen; Thanks for your very detailed post, and interest in this build log. 1) Yes, you are certainly correct – kit manufactures mostly include generic -one size fit all pins. I have purchased smaller wood pins from Cornwall Model Ships in the UK (they are my main after-market “go to” source, including kits). With regard to the pin holes that seem too big. Yes, they are, but there is a method to “my madness” that I have found super helpful, and excellent when installing running lines, especially when adding sails which add several dozens of needed extra lines and pin locations. These images from my Vasa log - my method. drilled overly large holes that allow for inserting properly scaled ropes as well as leaving room for later inserting the pins. So; Insert a given rope from the underside of the rail. Slightly tension the rope then temporarily insert the belaying pin to temporarily "lock-in' rope tension– do the same with all ropes, one area at a time. DO NOT yet glue the ropes and pins together because after tensioning a rope – another will slacken and not look properly tensioned – of course!! – so it’s a back and forth many times – Once all tensions look “ok” then remove pin – added a CA Gel to its tip and insert it into rail hole, that would also glue the rope into place. One at a time works very well... Cut off the leftover line right at the pin (topsde of rail), then slip the rope coil over the top. This will hide the cut off rope and look as if the left over rope is correctly coiled about pin head. PS: I will remove those pinrails from the forecastle rails on the Sovereign. Regarding the hull planking, No -- instructions, as in most kits -- just run single long planks from bow to stern. Second planking also offer the same method. Builders need to look at other sources to get proper plank looking historically “correct”. Especially with kits....For this build I wanted to use Pear wood (arguably wrong -but looks great IMO). Stained some planks here and there to allow for a better “look”. That created an issue – I did not do a fine second sanding – that would have removed the staining. It also meant that I could not treenail the hull as I had done with the Vasa (used a wood filler – then sanding). And needed to be super careful in properly aligning and spacing second planks. As far as historical accuracy – touch-and-go – I looked at several other sources, as well as trying to emulate the proper look from visiting other builder’s logs. Still learning here….I spent more time learning how to properly plank the decks for this build. Good learning for me there… Flags, super nice of you to offer your help. Your knowledge is very impressive indeed. I have two sets – the ones that came with the Sergal, I also purchased an Amati flag set for their now discontinued SotSeas. Both flag sets are certainly made of “too thick” material – and yes a “correct hang” are one of the most difficult bits to get right in our hobby. I will look at Chuck’s instructions. Thanks for the tip. Syren are the only blocks, and ropes that I have used for my previous two builds, this one will also be detailed with Chuck’s ropes, blocks and some deadeyes. I have not yet thought of flags, but thanks so much for your offer of assistance – I may, indeed, take you up on your offer. I will take some measurements --- Last image update of mid-ship work.. Again, thanks for your very informative post…. Regards,


-
Allen, Thanks for all the info and questions, I am putting together detailed thoughts and responce..... Regards,
-
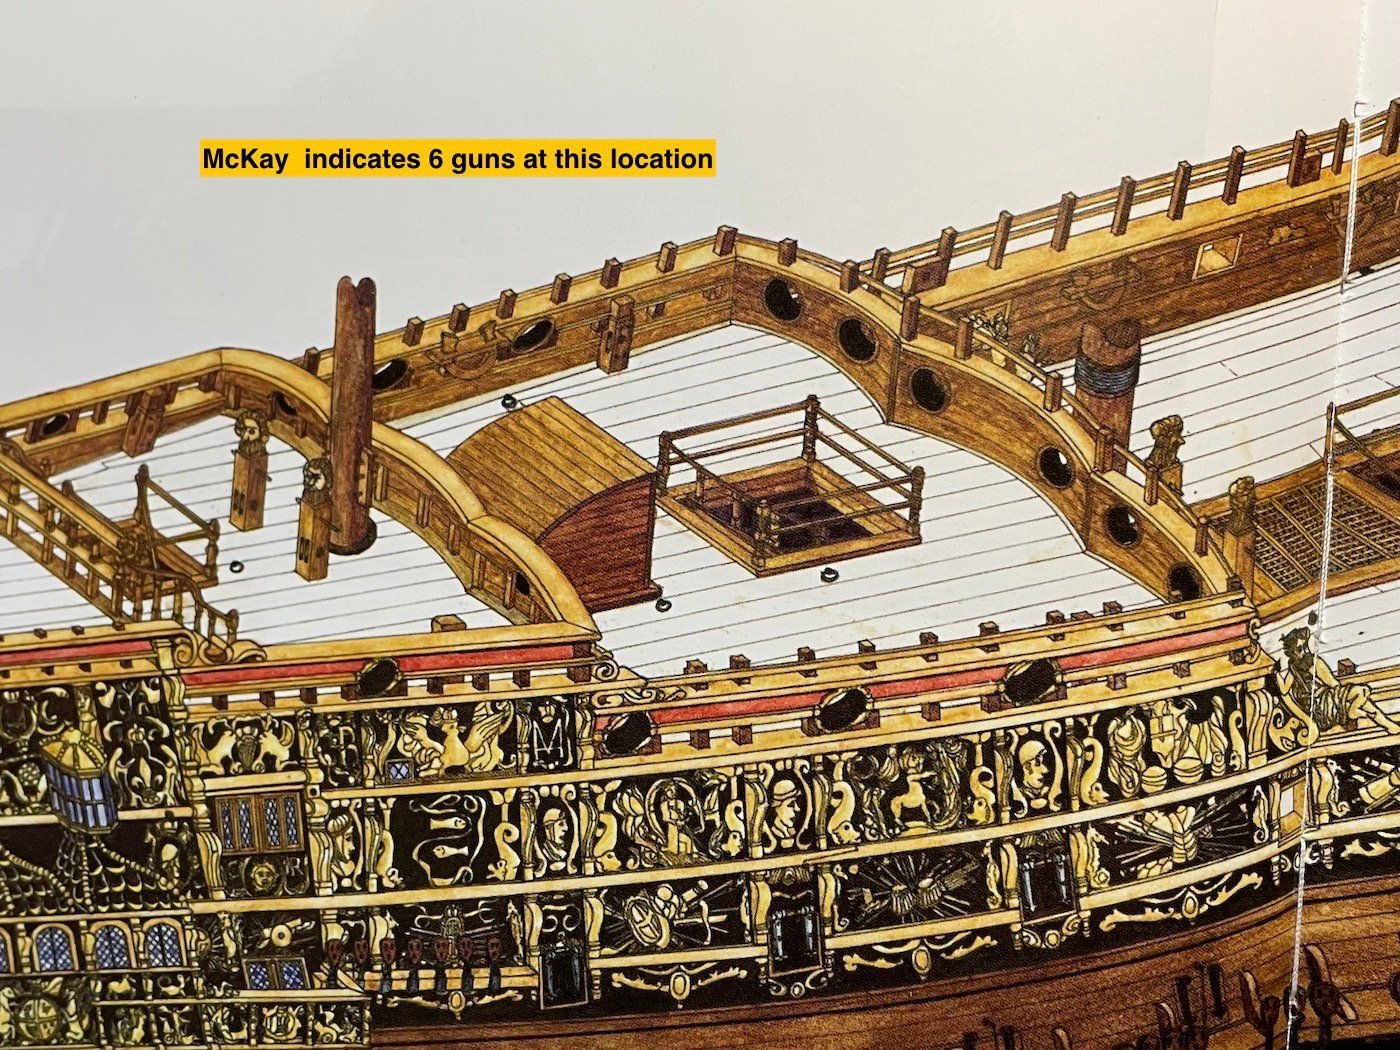
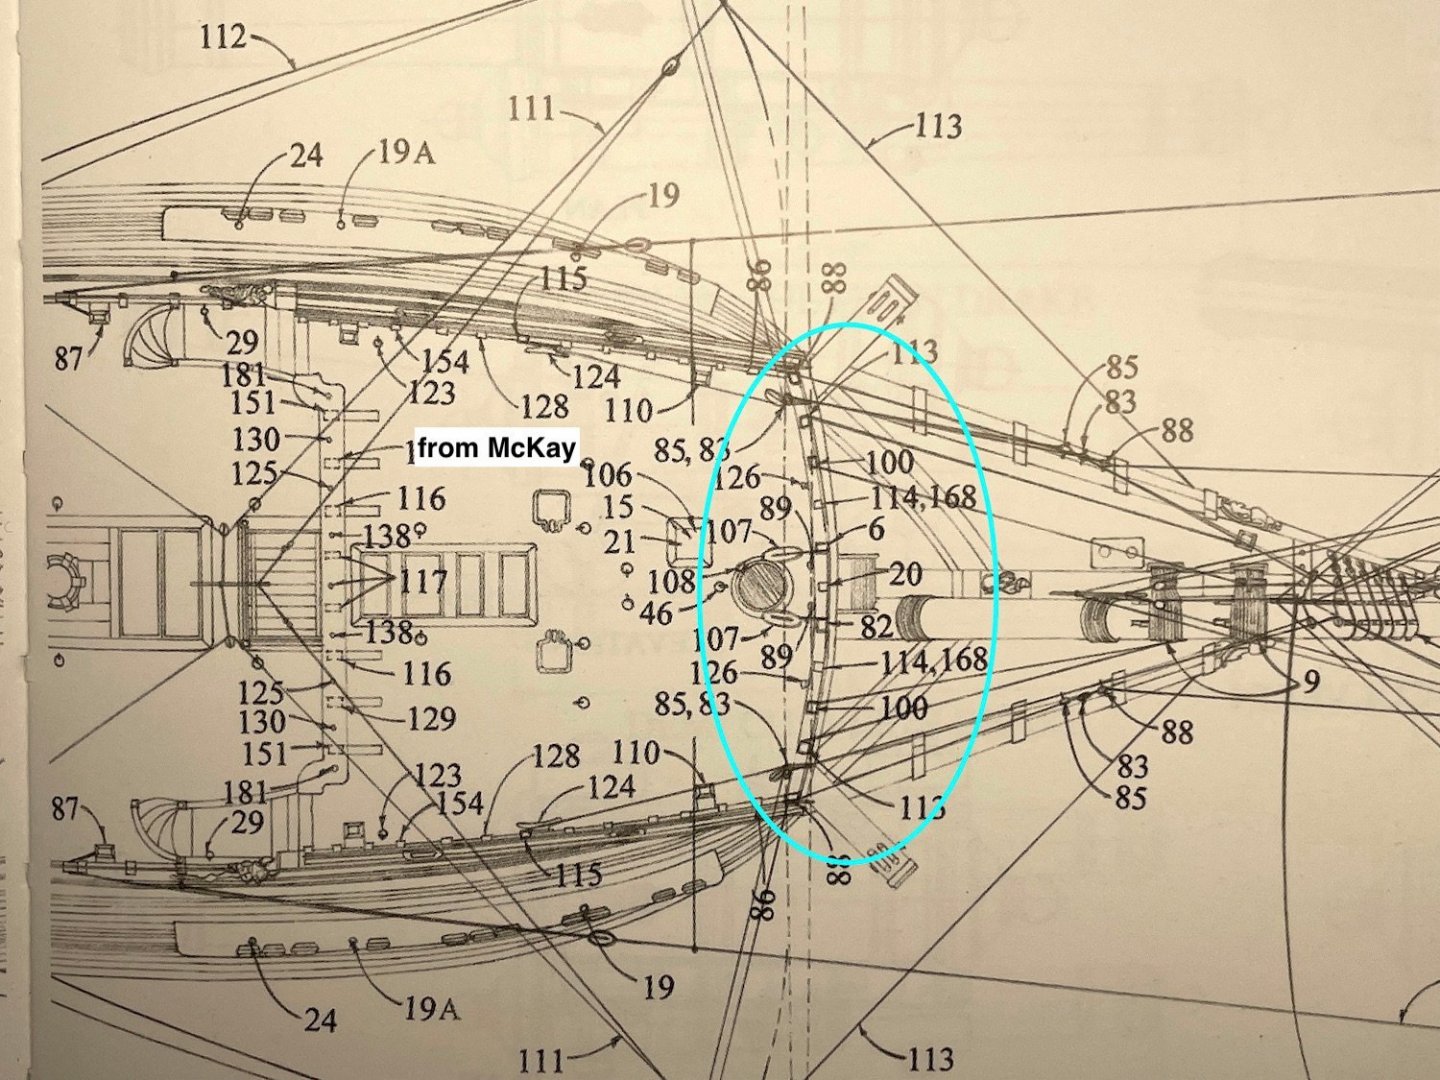
Nice on the sails. I did the same for my Vasa, though for my Santisima cross section used the "wrong" method - ship only viewed from front in its case so much less detail work. Your "correct method" came out very well in scale - looks great. May have missed it - will you be building a SotS? - I use the McKay book as well - great info and excellent line drawings. Cheers,
- 756 replies
-
- 3
-
-
- galleon
- golden hind
- (and 2 more)
-
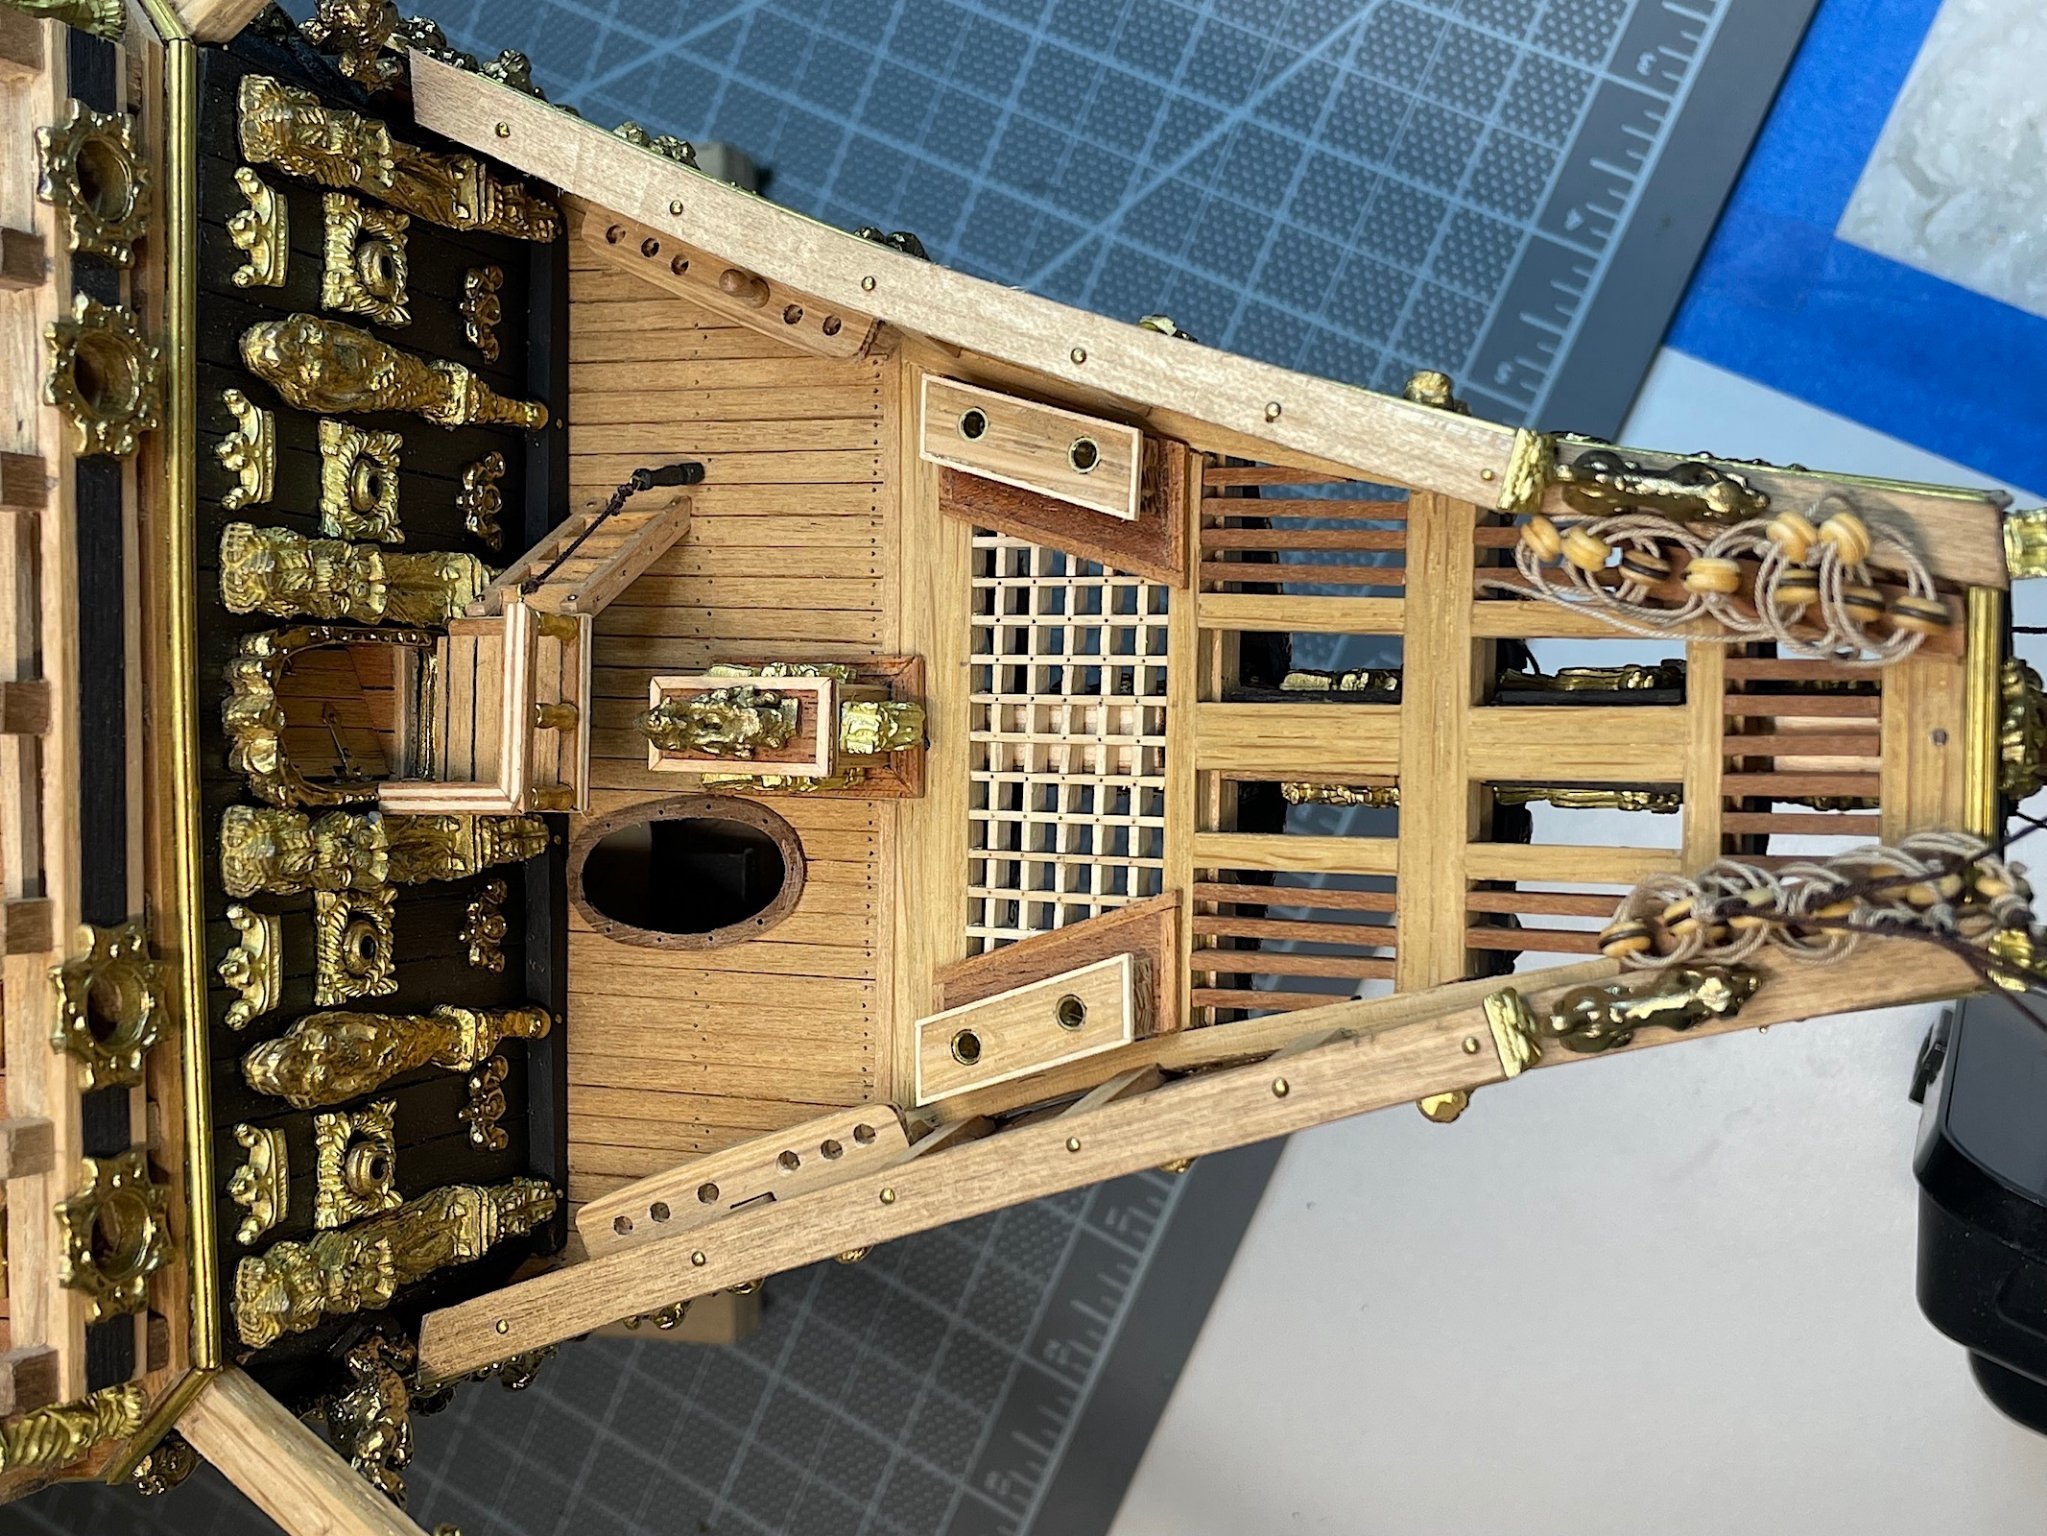
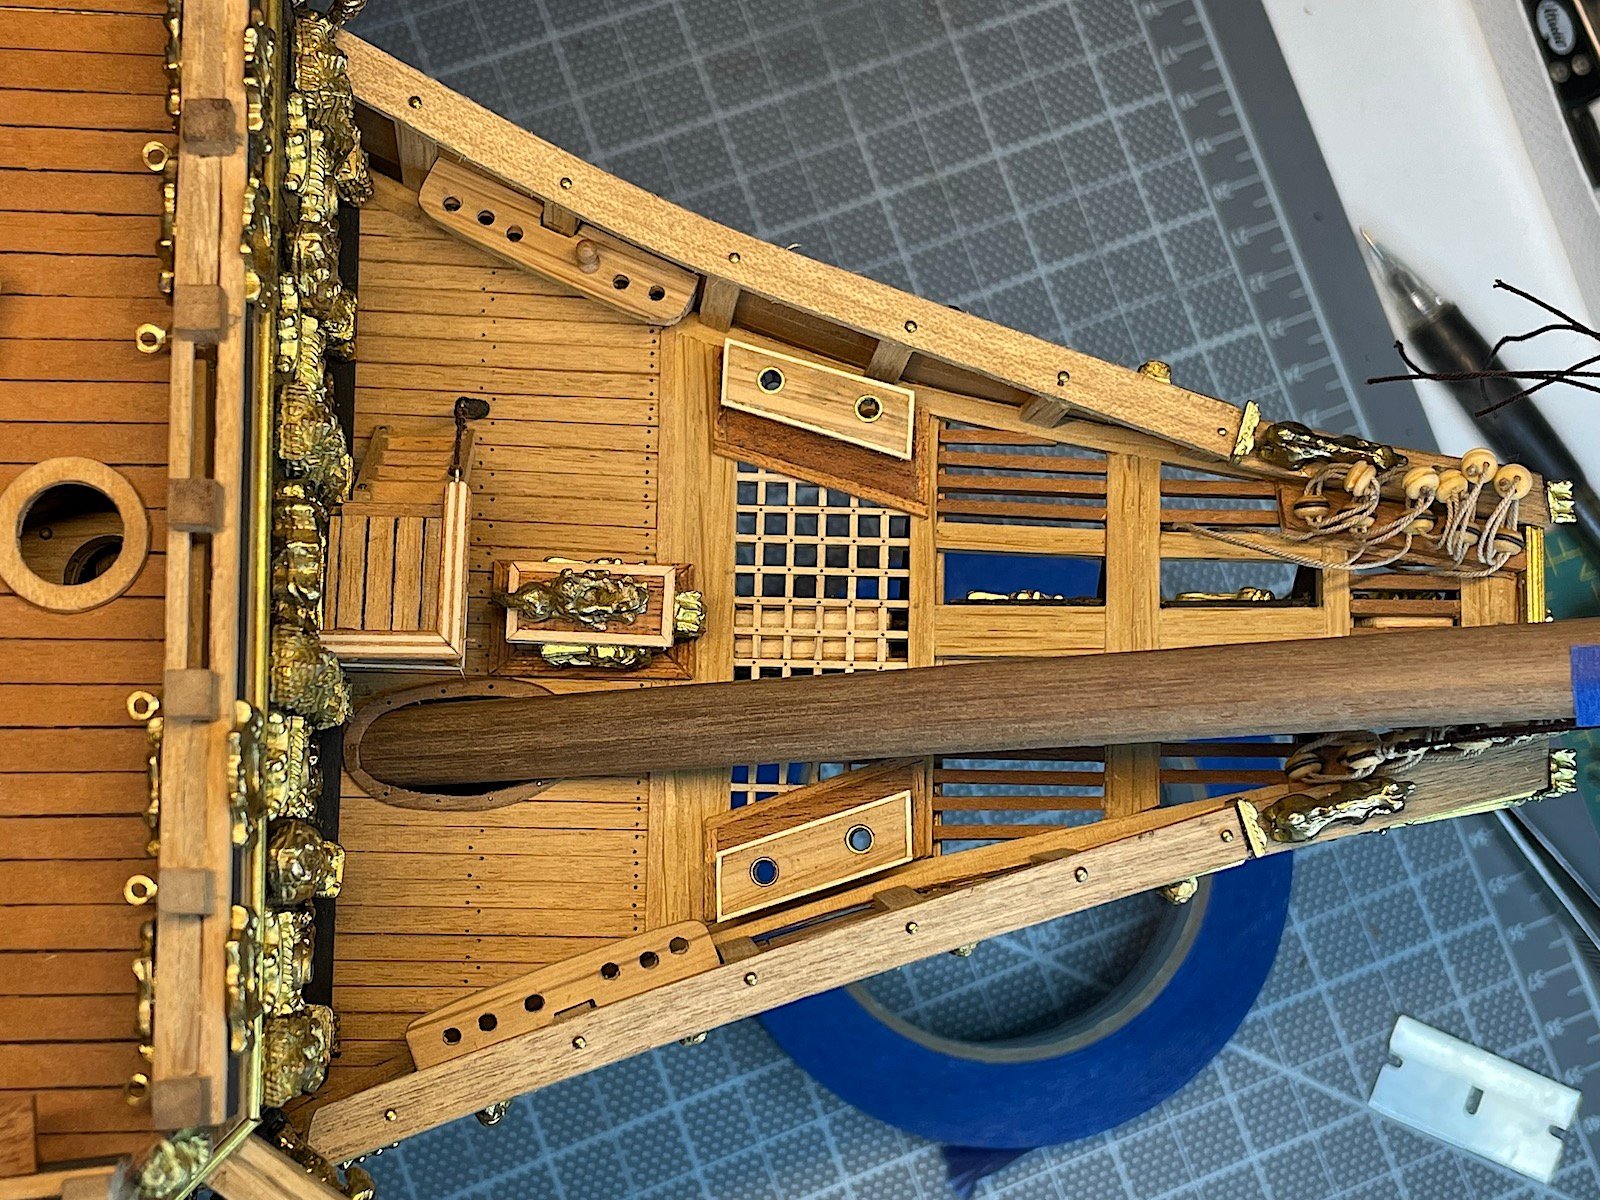
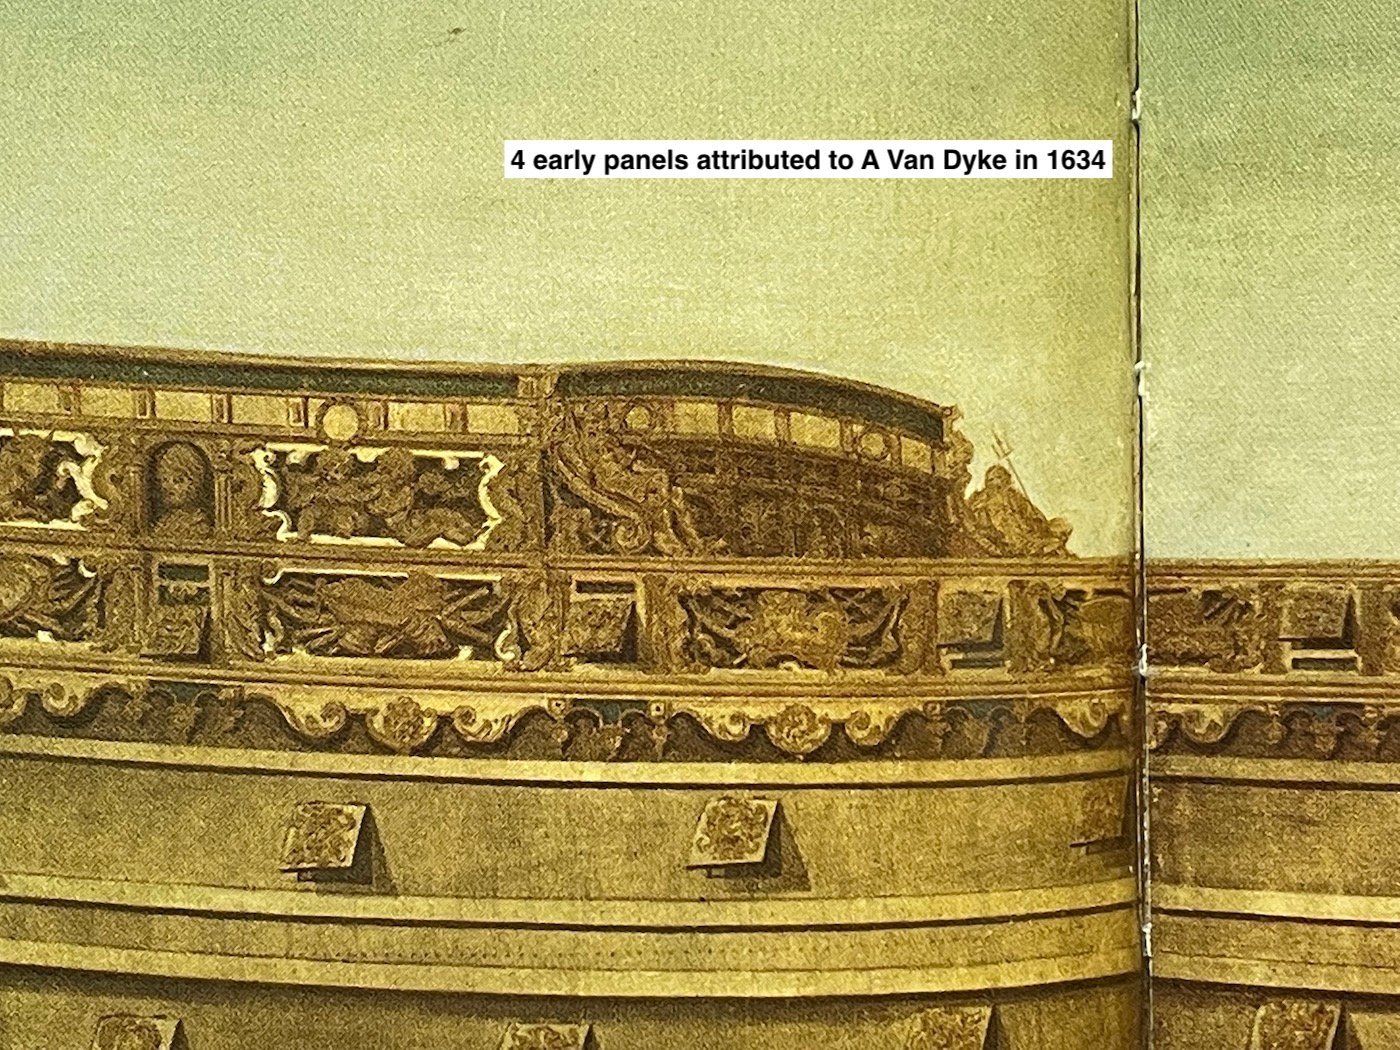
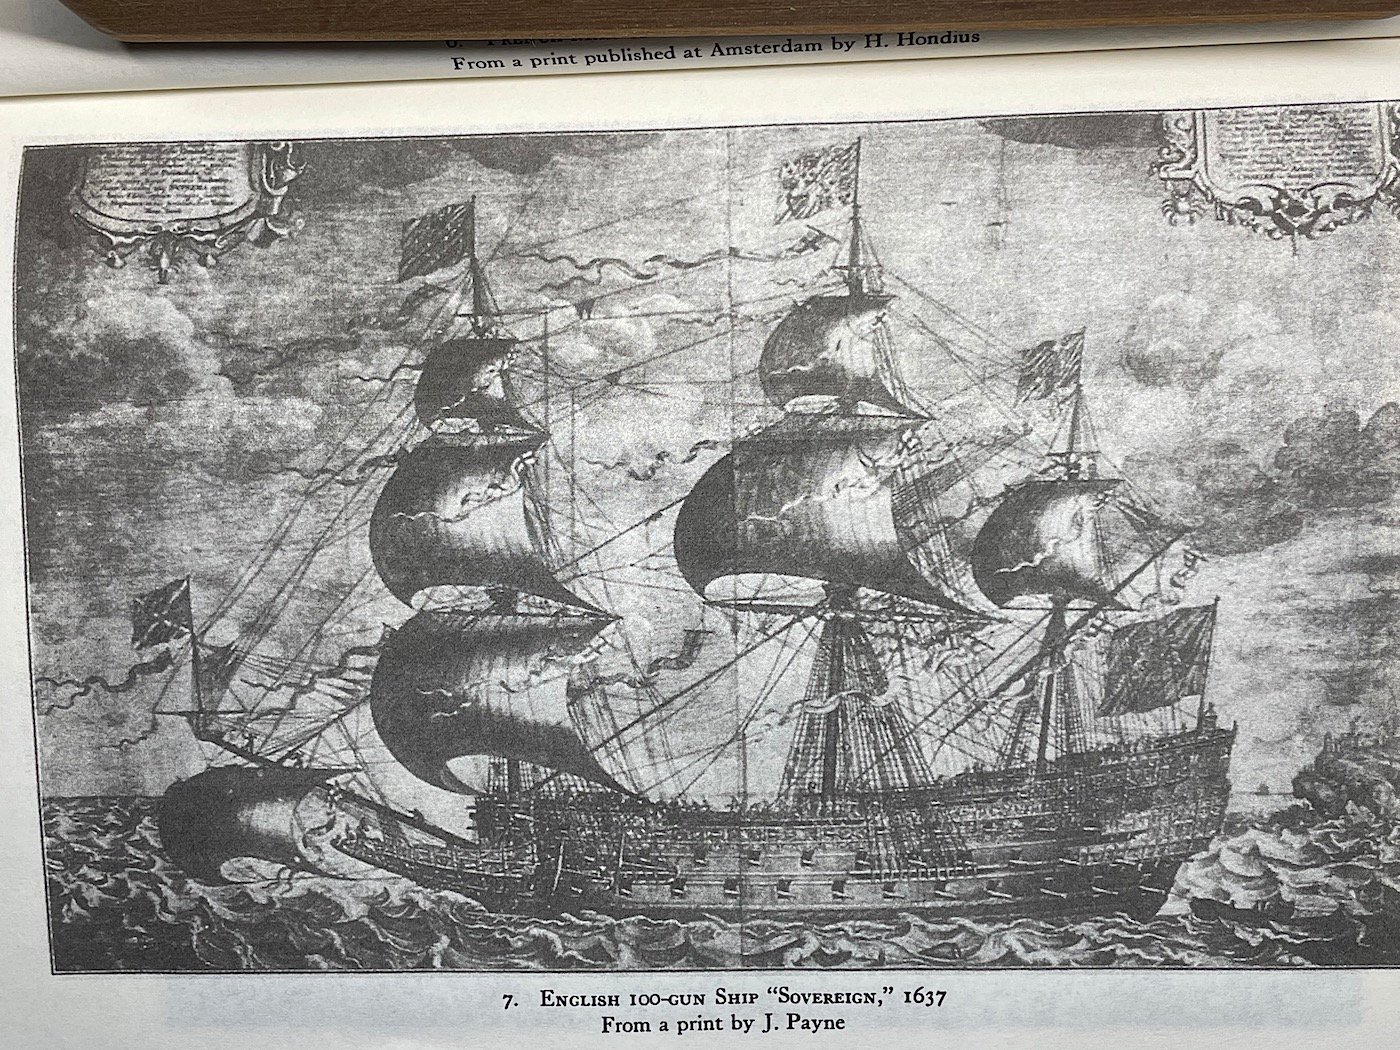
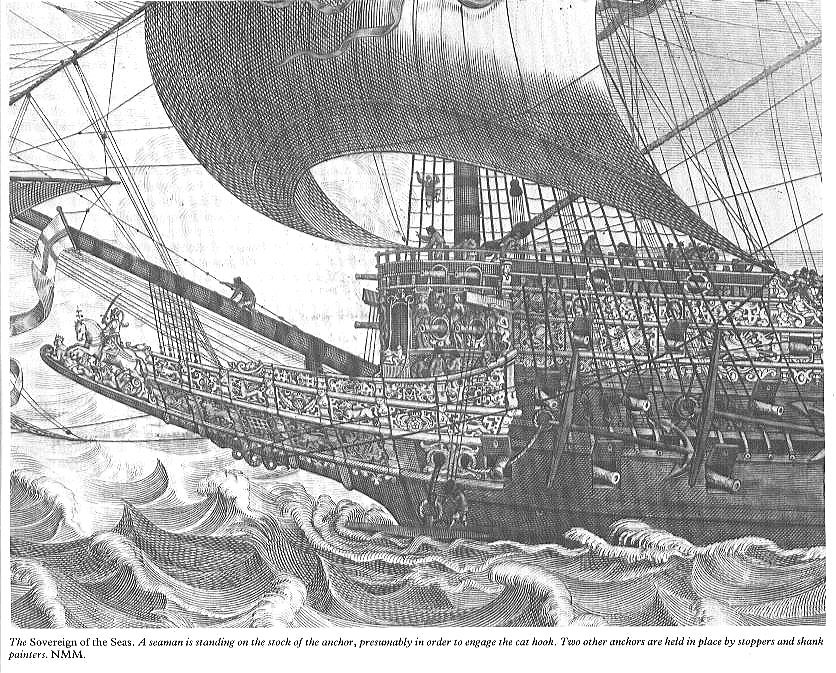
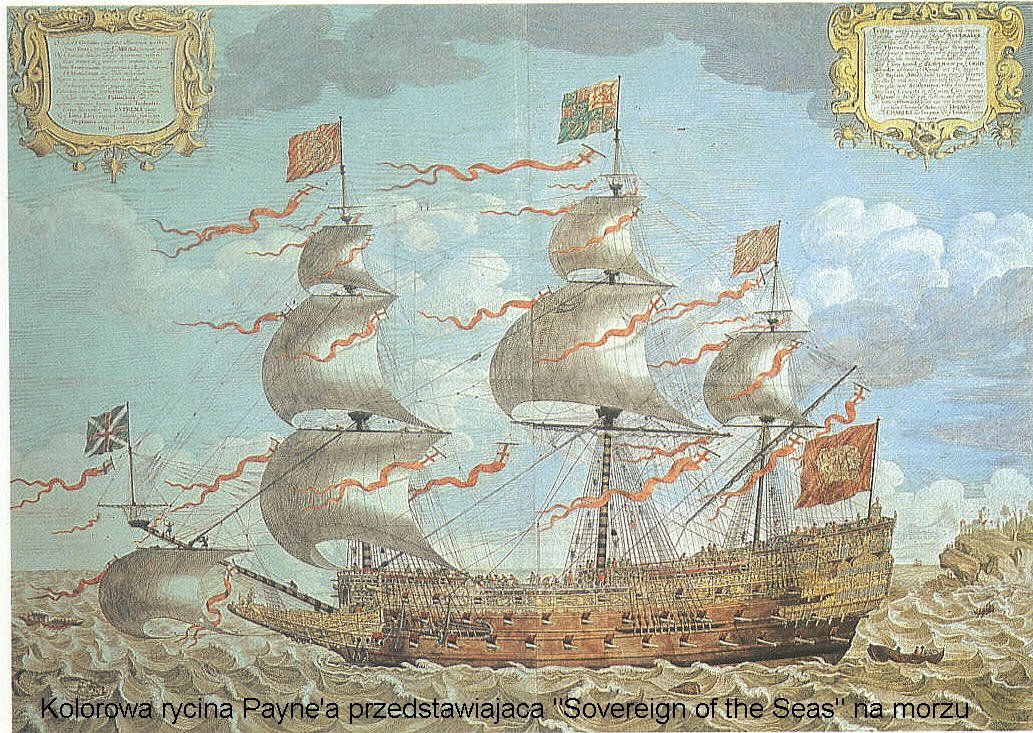
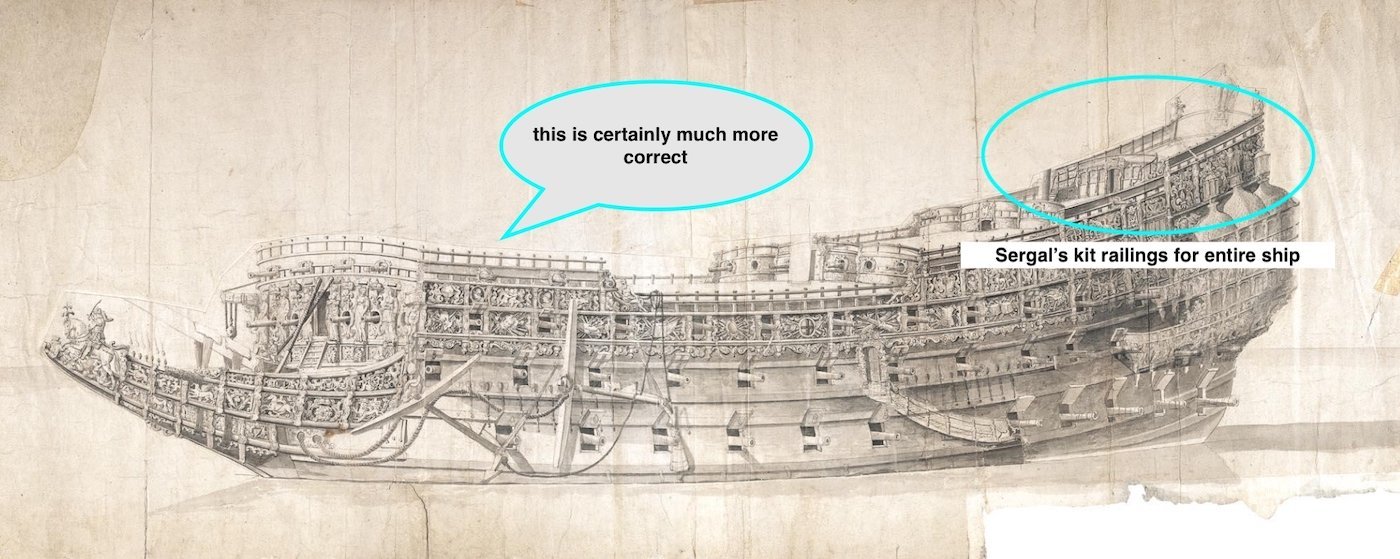
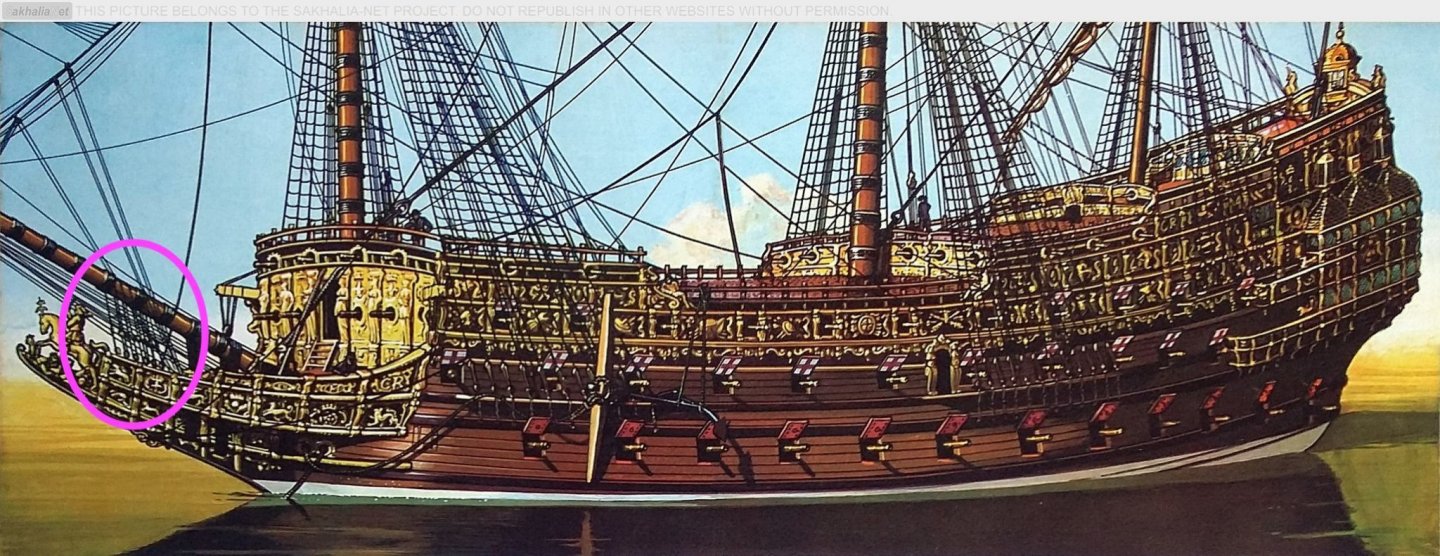
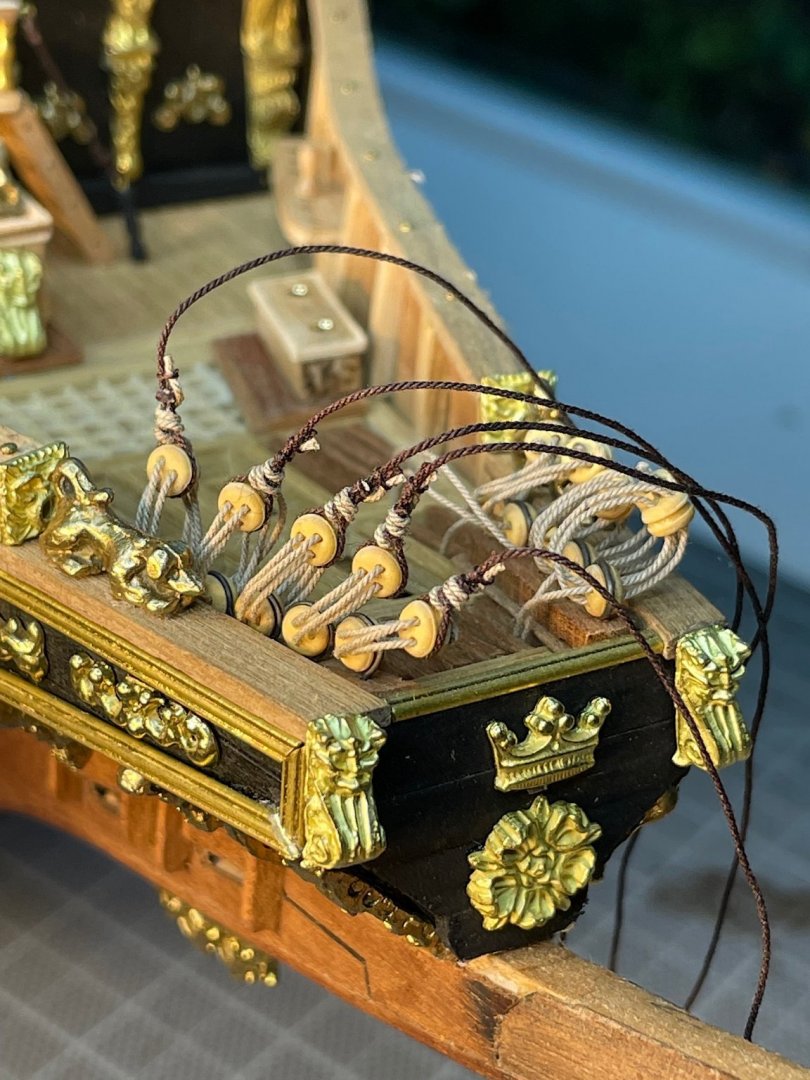
Allen: Thanks for your notes from D. Lee – much appreciated. I do have the McKay book – Having built a 1637 Vasa and used much info sourced from the museum, it does appear that the Dutch did use pinrails, at least in the forward beakdeck bulkwarks ,as well as a single pin rail crossing over from port to starboard. (McKay seems to agree re: SotS) That said I have yet to find contemporary images that indicate ropes attached to forward forecastle bulkhead rails – see examples below. Big thanks for your post as well as your kind words. Thanks….For the great images !!! So I am re-visiting the belaying pins “issue” especially at the forecastle deck. The Sergal kit also does not allow for lashing ropes at forward, or side forecastle railings. My work around will be to add a cross timbers above all railings. This would preclude adding pin rails as much as possible. In any case, its clear to me from other sources that I use, including McKay’s that the Sergal rigging plans are very inaccurate. And they don’t include running rigging plans for adding sails. The end results will probably be a hybrid, Vasa (similar vintage), McKay and Anderson Frankenstein monster rigging effort. Also given that no specific empirical rigging data are available for ships of that vintage, adds to the conundrum. Adding sails are still in mind but hmm.... I have not been very consistent of late, in responding as quickly as I should. I have been busy with much more away from home work of late – more than I expected, but enjoying it nonetheless. Also need to catch up with other build logs..... As always thank for comments, likes and just dropping by.


-
Lee, You are off to a very good start - will follow along as well. Regards,
-
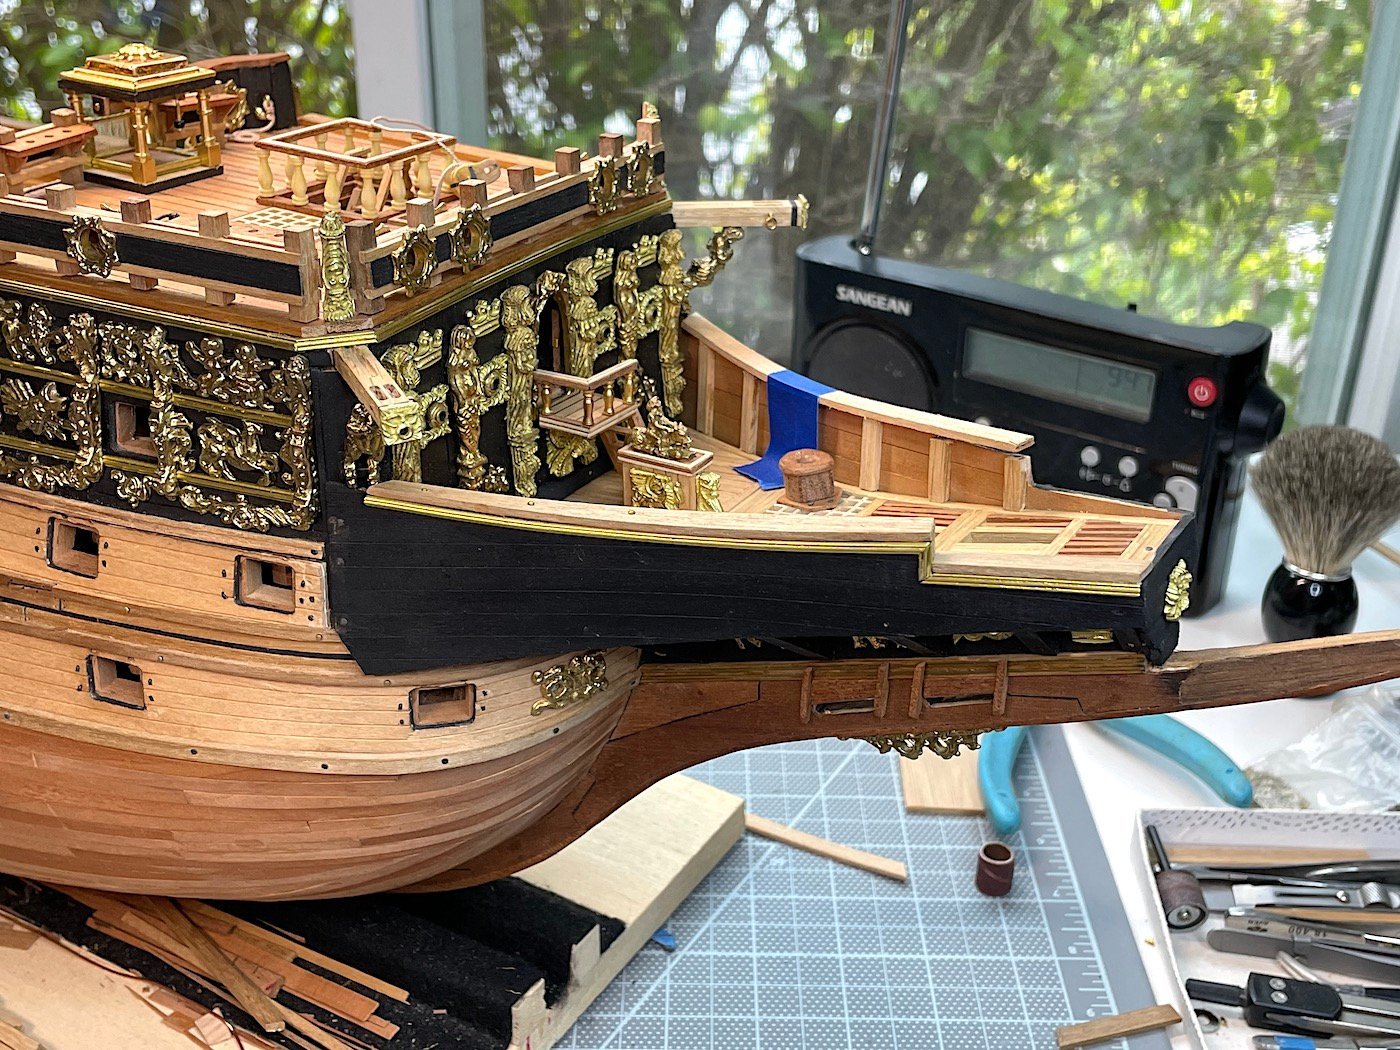
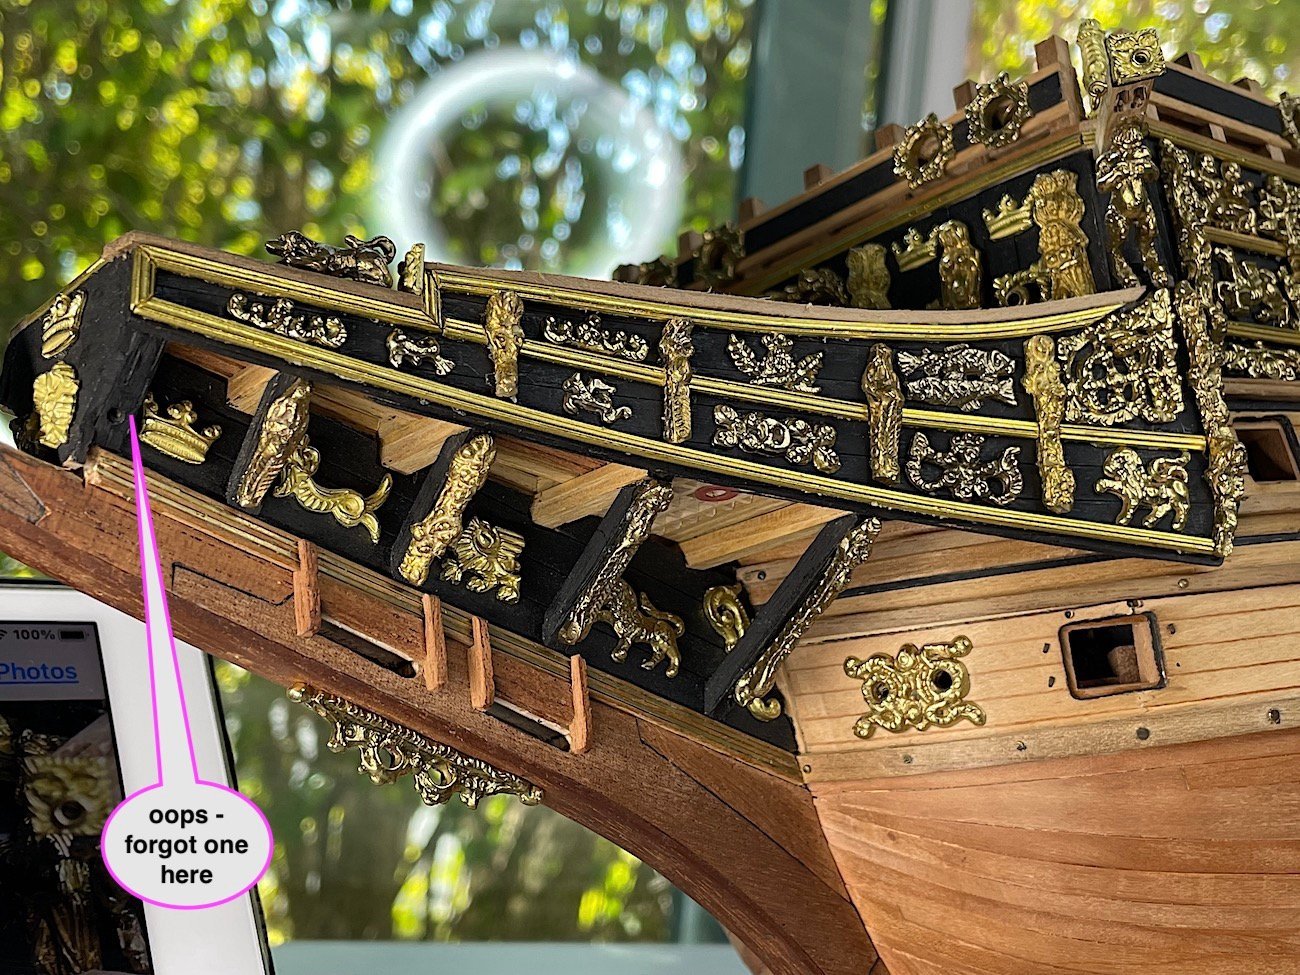
OC. Thanks always so kind with you comments 👍 Finished the beakdeck bulkwarks as well as doing some needed fixes. Image notations reduce needed text....... Ropes and deadyes are from Syren - So glad that Chuck's company is again selling ropes.


-
Robert, Just catching up - superlative work - a real pleasure following and learning as well. Cheers,
-
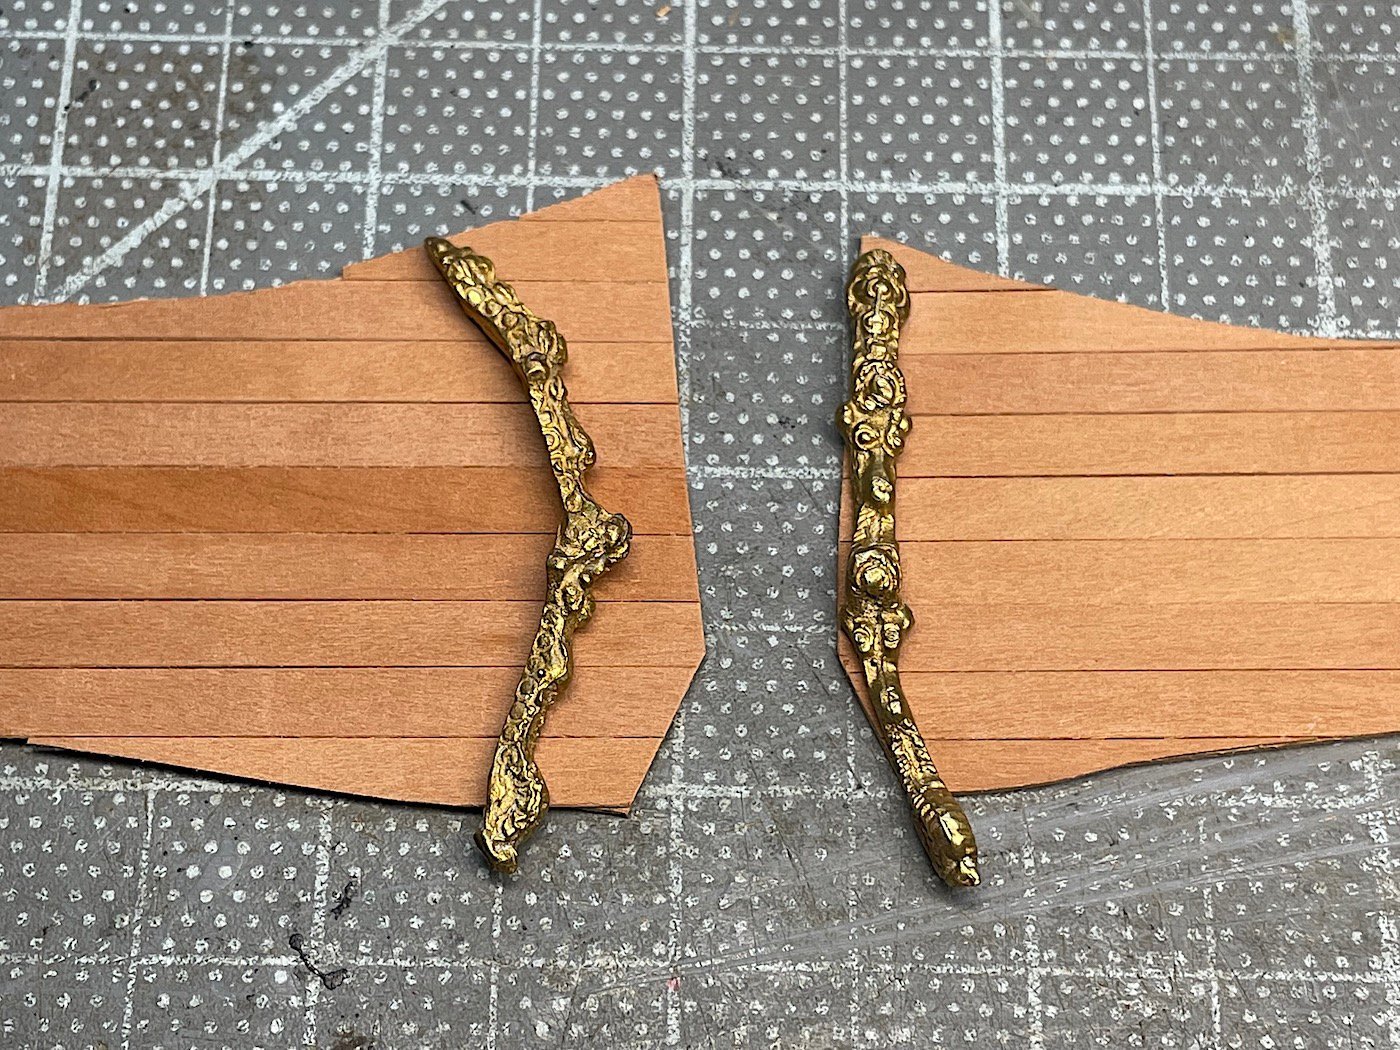
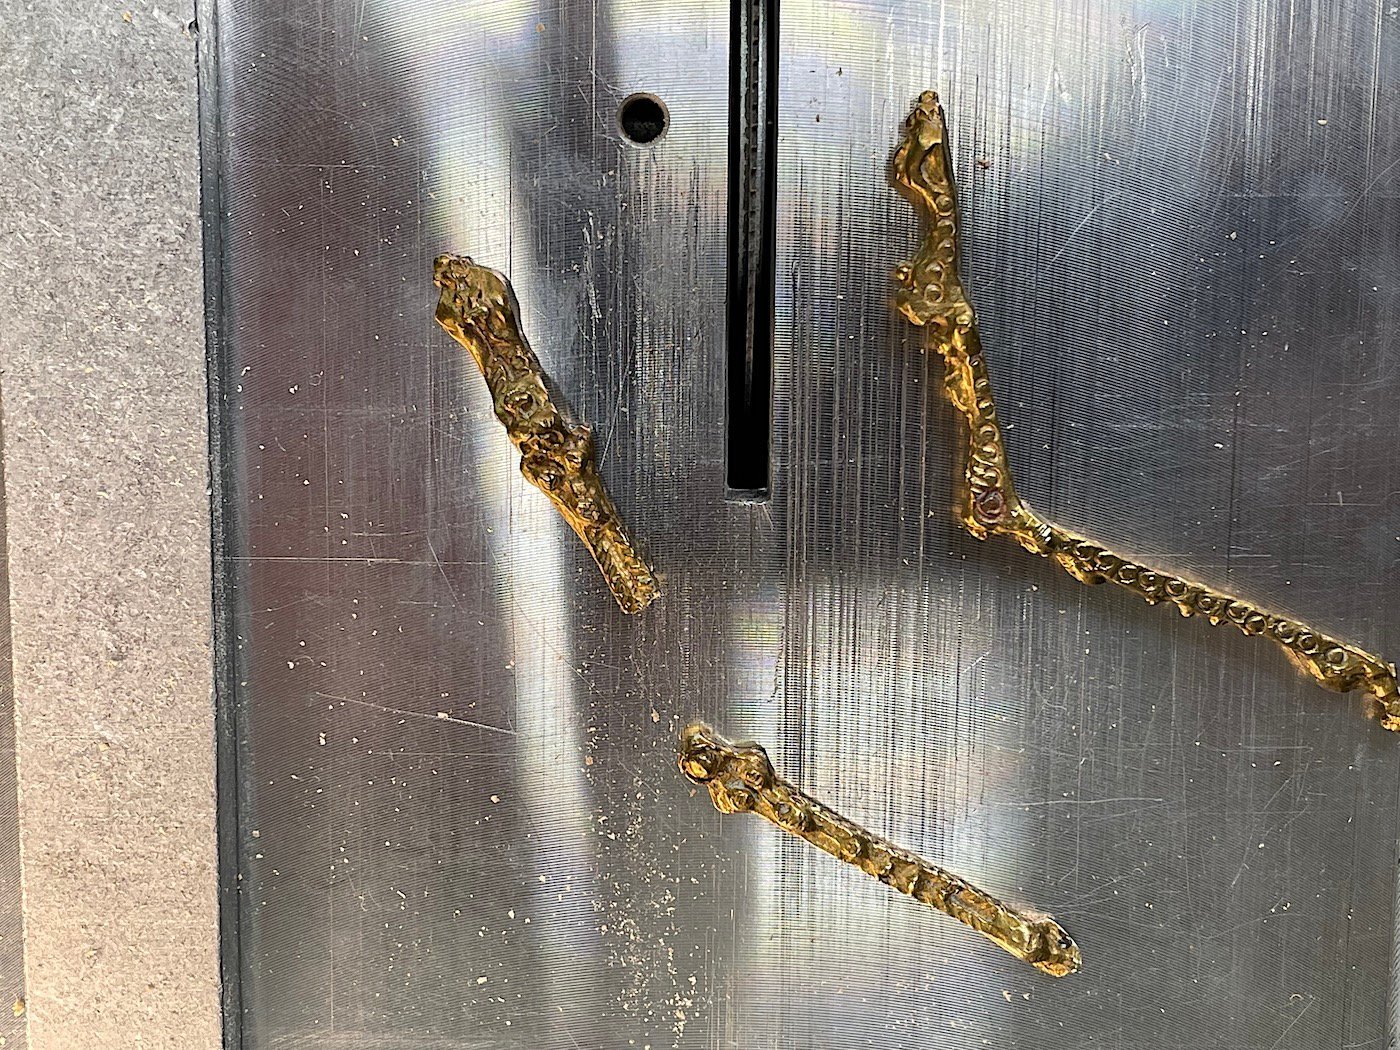
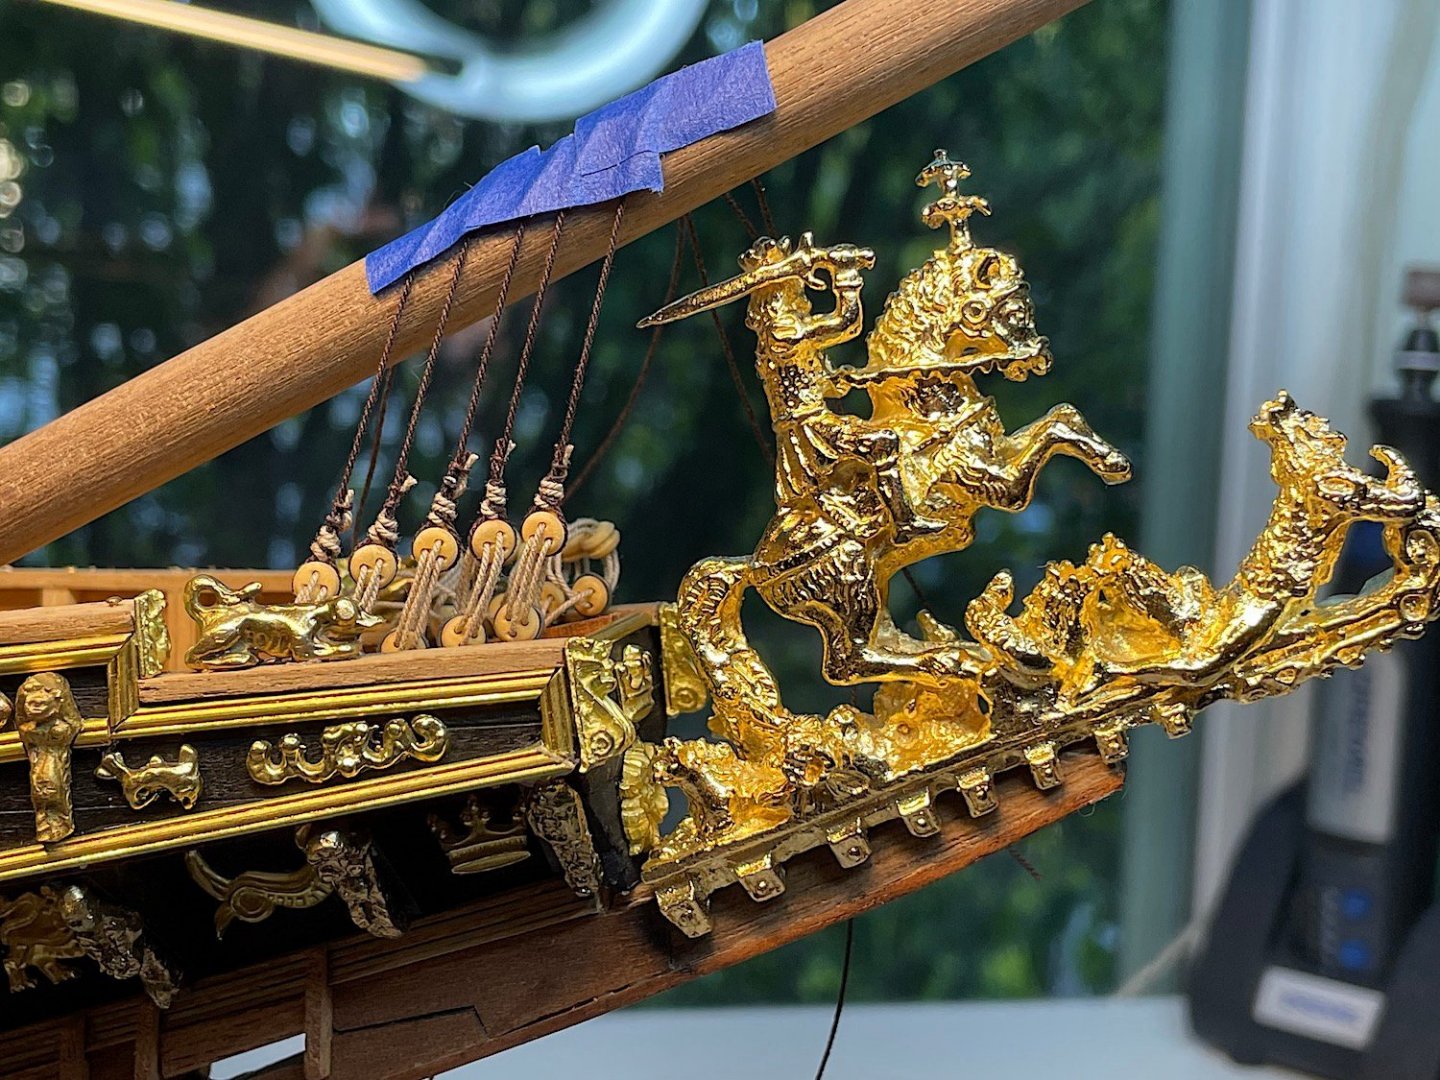
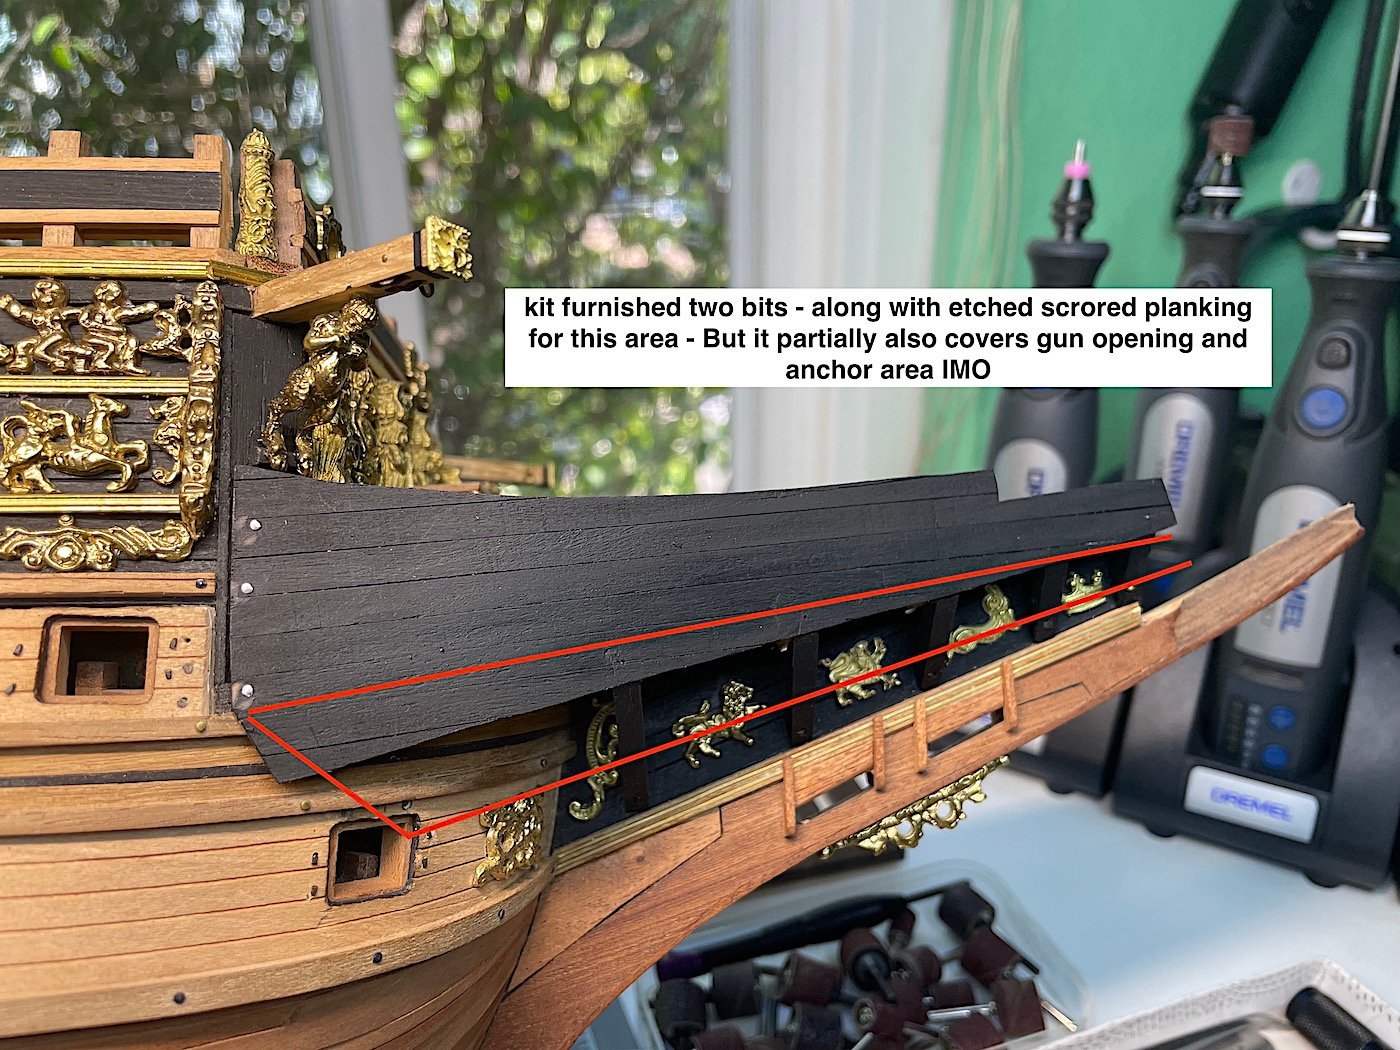
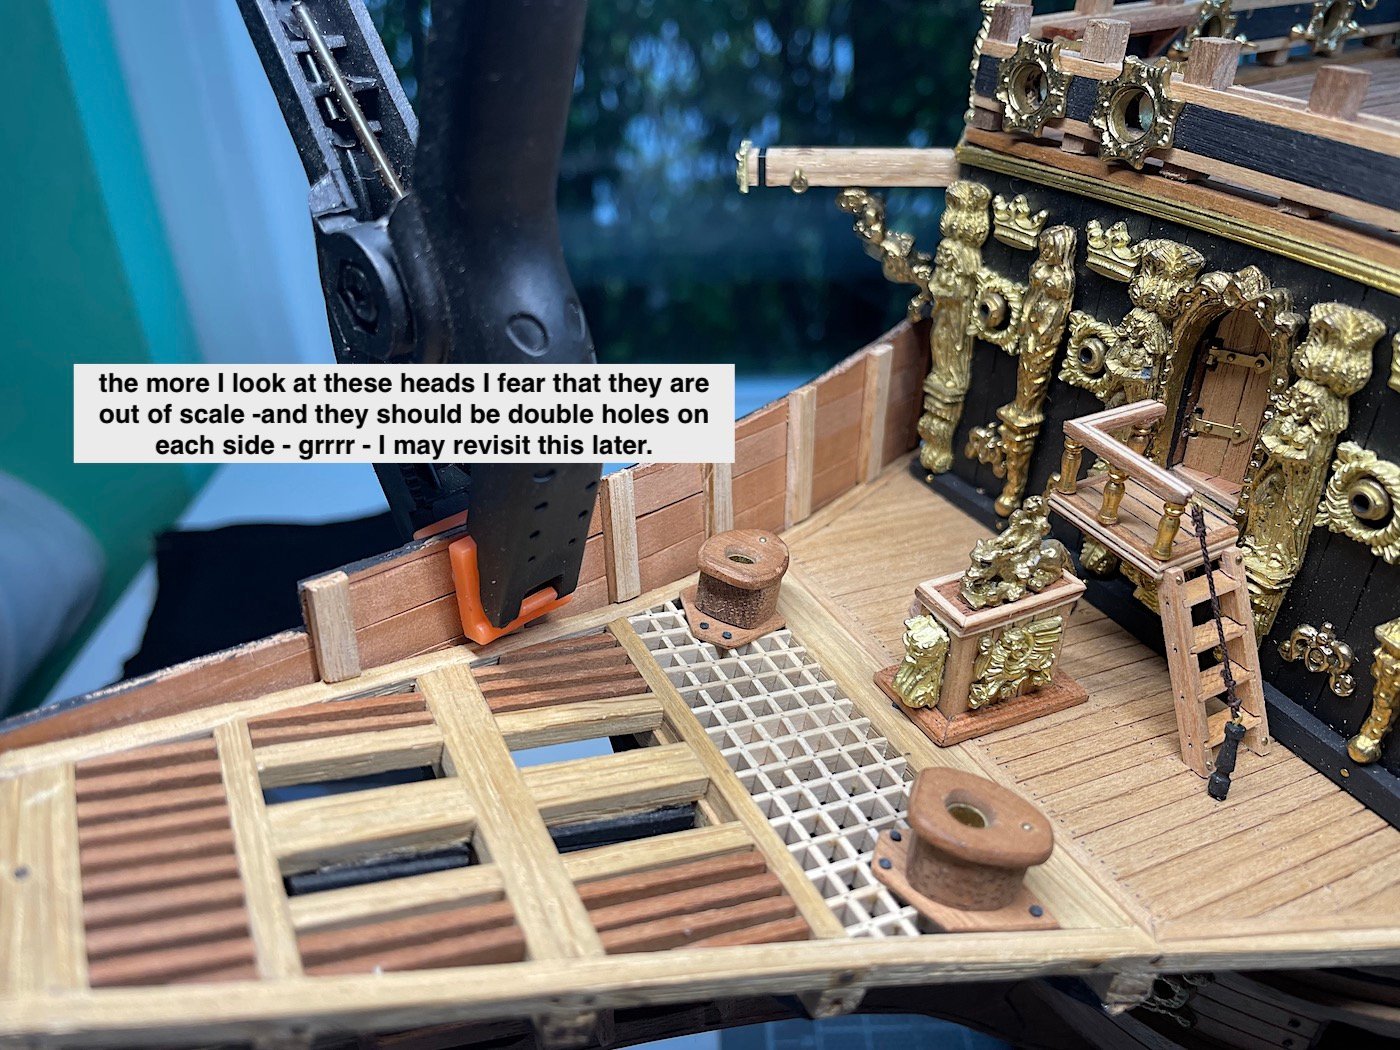
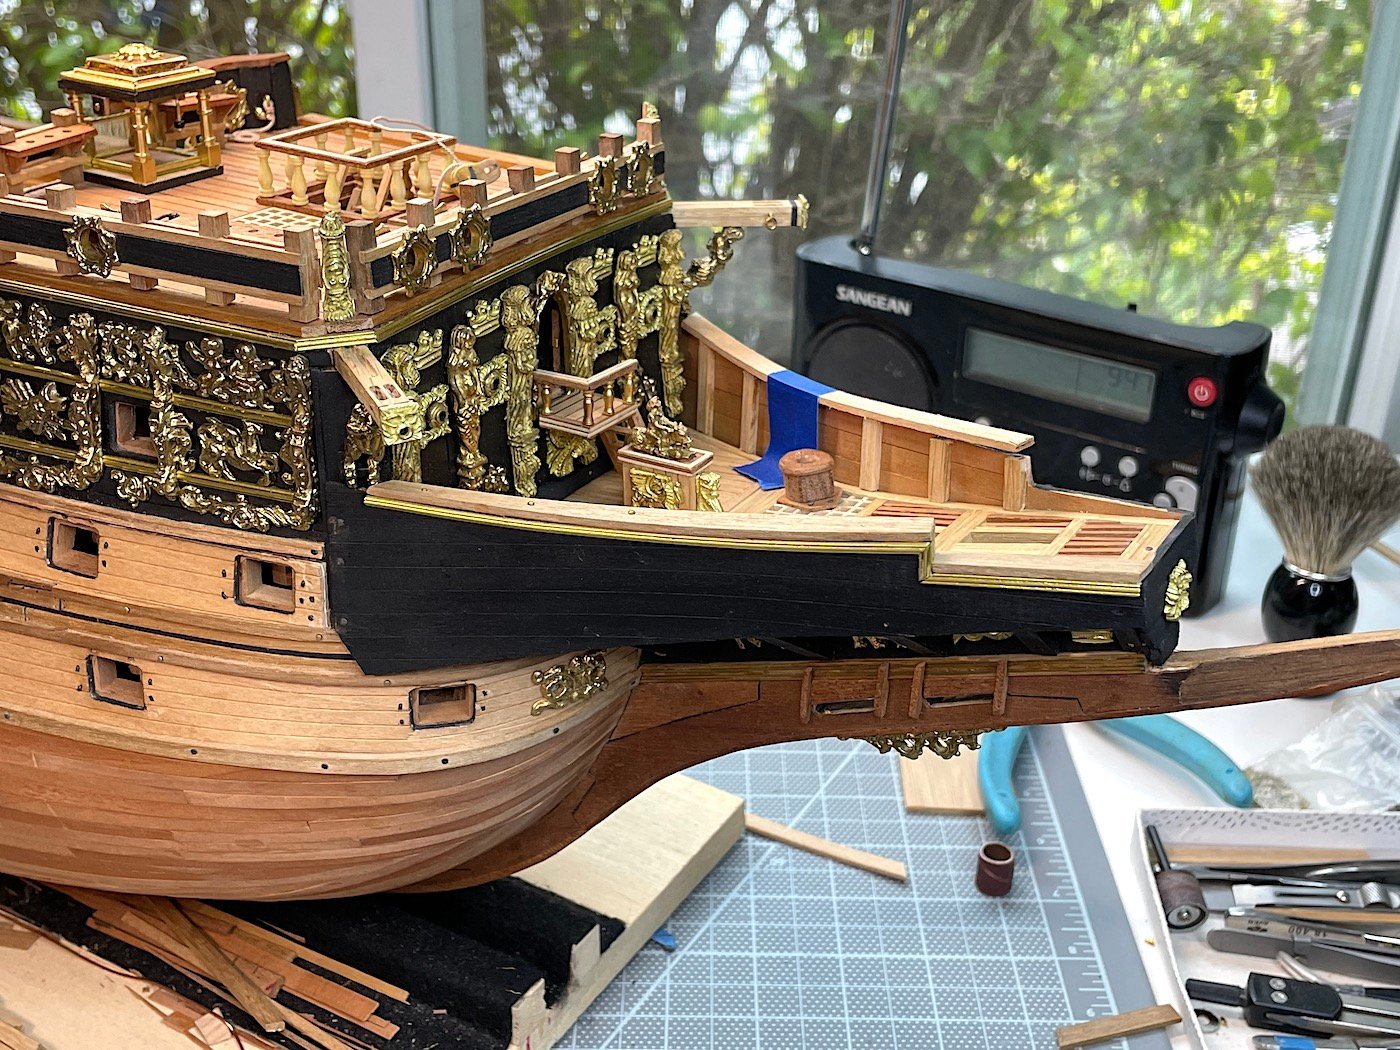
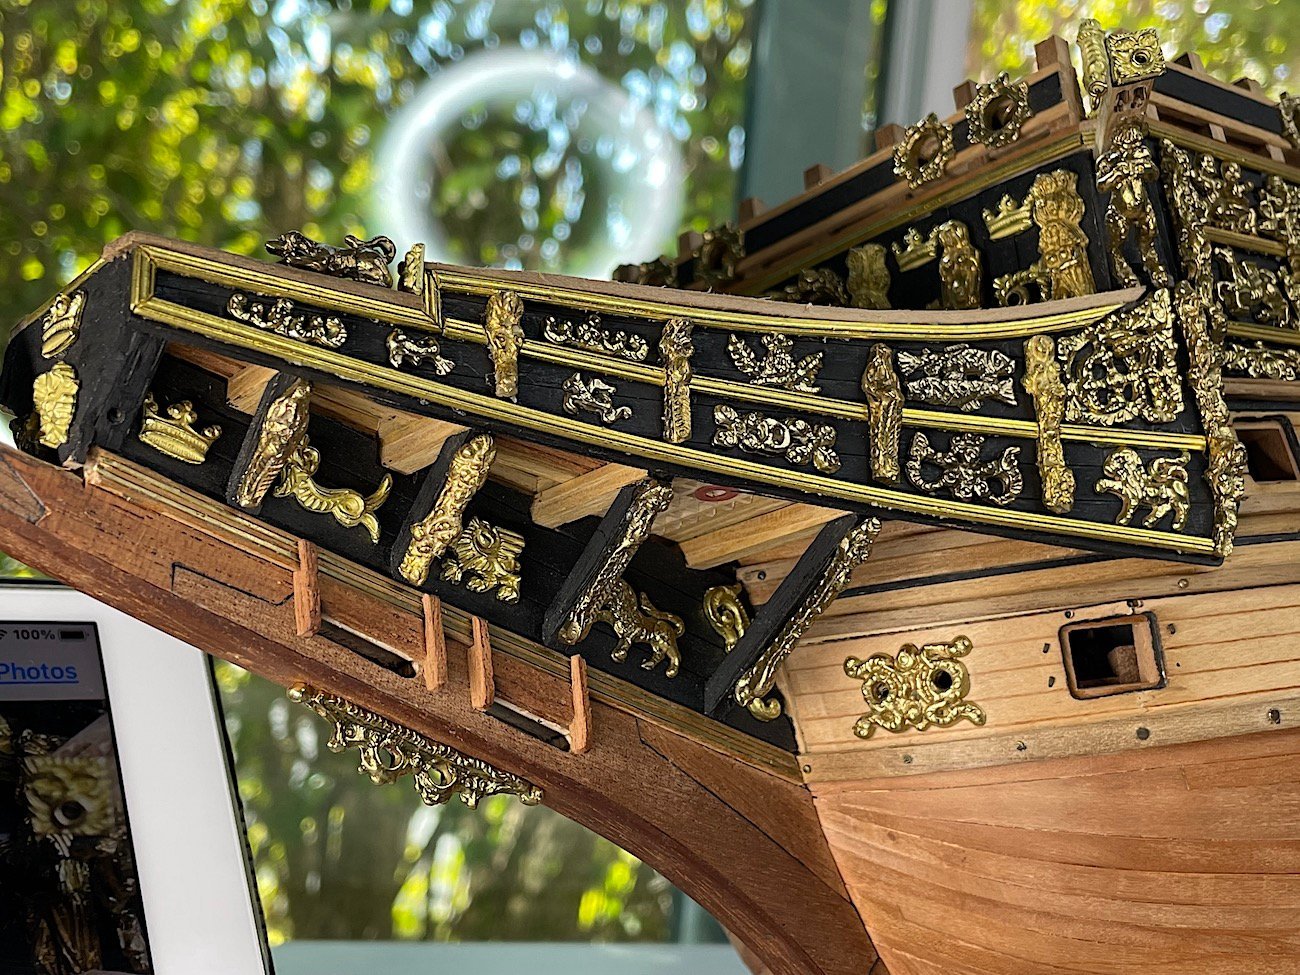
zappto: thanks for your thoughts much appreciated Some updated work beakhead bulkwarks:


-
Ulises Sorry about that - I new that if I had followed the instructions it would have created that big problem with my Sergal Sovereign - You will sort it out I'm sure. FYI - since mine is mostly scratch built the Sergal instructions were of little use. But as you also "see" the Sergal build instructions are "assss" backwards. Especially after initial framing (which I of course followed) -- Now good luck perfectly locating the hull cannon door openings to the inside dummy cannon drill locations - that's another issue with Sergal's very poor construction instructions. You are doing fine work so far.
- 35 replies
-
- 2
-
-
- Mantua
- Sovereign of the Seas
- (and 1 more)
-
Patrick, PKD, Frank, EJ, thanks for your very kind words much appreciated. Finally working on the beakhead bulkwards. I have put this off for too long - mostly because I did not "get" how to correctly scratch the two sides, given that the lower deck support framings as well as the deck were scratch built. I think that I have it down now -- will post when it's all done. Thanks for your likes, comment, and or just dropping by. Big continued thanks as well to members that are following this project. thank you