HOLIDAY DONATION DRIVE - SUPPORT MSW - DO YOUR PART TO KEEP THIS GREAT FORUM GOING! (Only 24 donations so far out of 49,000 members - C'mon guys!)
×

md1400cs
-
Posts
2,839 -
Joined
-
Last visited
Content Type
Profiles
Forums
Gallery
Events
Everything posted by md1400cs
-
 Ferit, I am missing your updates, OK now start that One line and get going. I need my Ferit Berlin "fix". (:-) (:-) Michael
 -
Matti, Nice updates. I also agree the cannons that even Corel included are incorrect. I purchased some after market replacements. The same that Nigel showed in the photo. They won't be accurate like Clayton's but the weather deck cannons will look so much better than kit supplied pieces. And only a "few" of us will even realize the errors (:-) B.E.'s link might be the best solution for you. I know that you are a stickler for accuracy (:-) Regards, MIchael
-
ZyXuz, Nice update. You cannon jig idea is excellent. I will make one as well. Thanks for the idea. Regards, Michael
-
Your build, with each update, just keeps raising the "bar". Awesome work. Michael
-
Nigel, Nigel, After I got the email updating a posting on your SOS log, I clicked in. Yes, your ship needs to be on the other side of our world, the side where many michelangelos also exist taking blocks of wood and creating astonishing ships timber by timber. You are now where you belong, with some of the best of our artists. The kit side also have builders that make me swoon with envy (in the positive sense) of how excellent their work also is, however building a complete ship plank-by-plank from just looking at pieces of paper is amazing. I then clicked on your page 1of your log, and spent a wonderful time revisiting your entire build. I had forgotten, in some areas, of how amazing it is. A wonderful way of having my morning Laté. Regards, Michael
-
Thanks Guys, B.E. Yes, point taken. I have learned so much from great artists here at MSW, and now that I am feeling a bit more confident with my skills, I will add more "info" to my log as it moves forward. If I can assist with an occasional "idea" for an another builder, that will be great. As you know, you have also been an invaluable guide for me with this ship. Jan As always, thank you. I have been so pleased to occasionally see a bit of my own reflection in parts of your very beautiful Vasa. And you are always so thoughtful in mentioning me in your log as well. Please, reflect and improve upon your fine ship however it pleases you. Everything here is happily reciprocal. Regards, Michael
-
Thanks, That was very helpful. I could not find one at the usual places, or through a google search. I just bought the one you linked for me on ebay. I can certainly remove the wood handle and attach it to a small table vice. That Amati one looks very nice, but...the cheaper will be perfect. Again Thanks!! Michael
-
ZyXuz, I'm happy that I just discovered your log for this ship. You are doing a beautiful job. I will follow along One question, if you don't mind, I really like that rounded tool that you used for the ladder. What is that called, I will look for one? Thanks...Michael
-
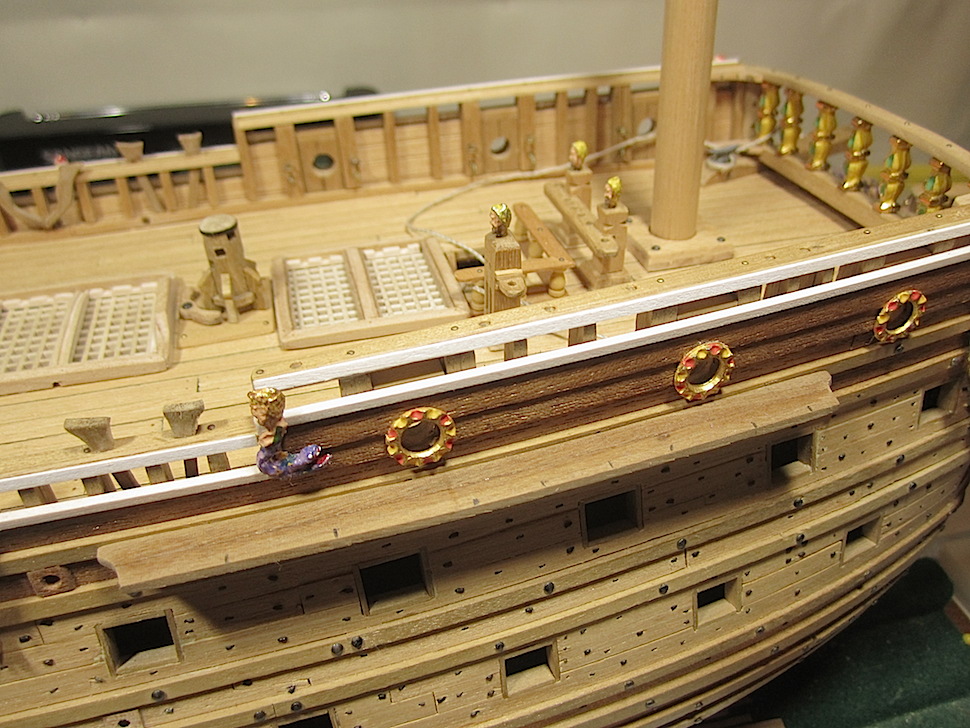
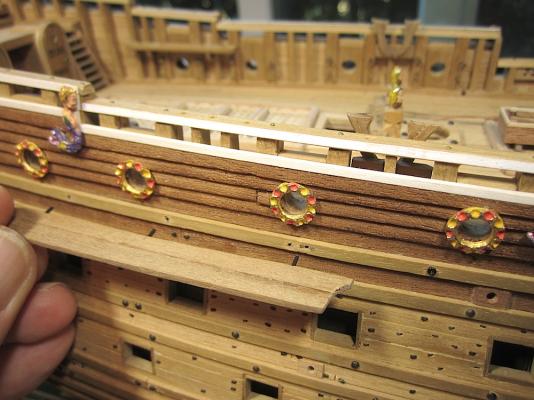
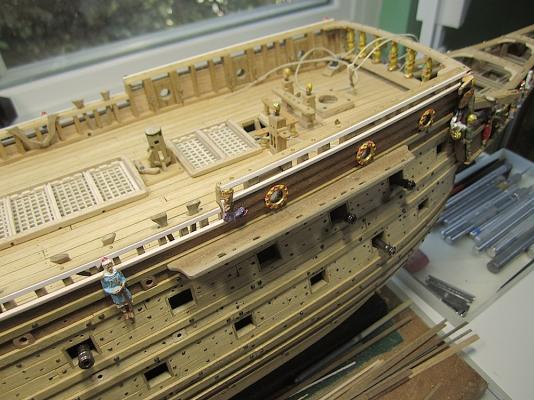
Part two of the hull's new trim piece installation. Thanks to all of you for just looking in, posting, or clicking "like". So nice, works as a substantial catalyst for improving skills as well as collectively developing some very nice Internet friends in the process. As we all do, I also find a lot of pleasure, and learning by visiting other builder's logs. Ok... ------------------ Having grooved, sanded, shaped, and painted the two strips I had to decide how to properly install them. My first thought was just to overlay them above the existing planking, and cut them in several places during installation as they butted up against some of the cannon decorative rings. But that was too risky because the slight but continuous curve from stern to bow would be lost at the artificial cuts. And at the areas that would only require a slight curved trim removal to allow space for the cannon rings might just crack or break the strip during the install. So, I removed the cannon ring decorations, and then cut out and removed one row of existing side planking allowing for a seamless install of the new trim in one piece bow to stern. I first measured and cut a piece of wood to make sure that the gap spacing was correct and that the new strips would run evenly parallel above the existing larger longitudinal hull timbers. I then decided that glue was not required but merely used small brass nails. Started at the stern, with the trim in place drilled holes trough the trim and into the hull. As I went along I pushed in the nails allowing for an easy way to keep the intended curve; so far so good. You might note that the nails were installed at and through the weather deck vertical cannon frames. Two reasons; 1) it allowed for more depth for the nails, and during the next step (cutouts) the strips should stay secure and not loose their slight curve even with out glue. Next will be the cutouts, and trim gap spaces for the cannon rings. That will certainly cause some stress. Any big error and I'll have to go back to the Proxxon and start all over again. Not news to many of us, I'm sure (starting again that is) I'll post when completed. Regards, Michael PS: Edit pics loaded all out of order again, but easy to figure out. Hmmm


-
Ron, Your post really left me stunned. Whoa thank you so so very much. I'm embarrassed, though very appreciative. Thanks for finding this build as being special. But put things into their proper perspective, after you look through some of the other really beautiful projects here at MSW, mine will fall into place where it really belongs (:-) You are still so kind for having lavished such comments in my direction. Thanks so much for taking a lot of time going through my log, to the frustration of your children, and schedule no less ! Cheers'.... Regards, Michael
-
John, Nice super detailing. Looking great. I'm also learning a lot about this ship, its history and the hard work these wailers put up with. I'm enjoying following your build. Regards, Michael
- 2,250 replies
-
- 1
-

-
- model shipways
- Charles W Morgan
- (and 1 more)
-
Tim, A big thanks, with a resume such as yours I'm really touched by your super nice compliment. (:-) Michael
-
Keith, You must also visit B.E.'s Pegasus above and beyond being an art piece, his skills with the Proxxon mill are so excellent. Great teacher. Michael
-
Dave, Funny. Thanks, On the bright side your very special current build can't make any use of the mill.
-
Keith, Thanks for your nice words. It will be a while before I get "good" with this new toy, but I have found that on the other side of our world (the scratch build folks) You know, where a lot of "Michelangelos" of this art exist; they seem to do a lot with milling machines. If you have not; check out, as an example, Alexandru's HMS Victory. His texts and pics are great. He has the MF 70. Heck, forget about the milling tool on his build, you will be astonished by his art. It does not (no-wrong wording) it cannot get any better. Regards, Michael Michael
-
Ling, Yes you are right. Thanks there are distinctions. I pulled this out of an online nautical term dictionary. CHAIN-PLATES. Thick iron plates bolted to the ship's sides, and to which the chains and dead-eyes that support the masts by the shrouds are connected. CHAINS, or CHANNELS, or CHAINWALES. Broad thick planks, bolted edgeways against the ship's sides, abreast and abaft the masts, used to extend the shrouds from each other, and from the head of the masts. The Vasa used wood channels. Thanks for the clarification. Michael
-
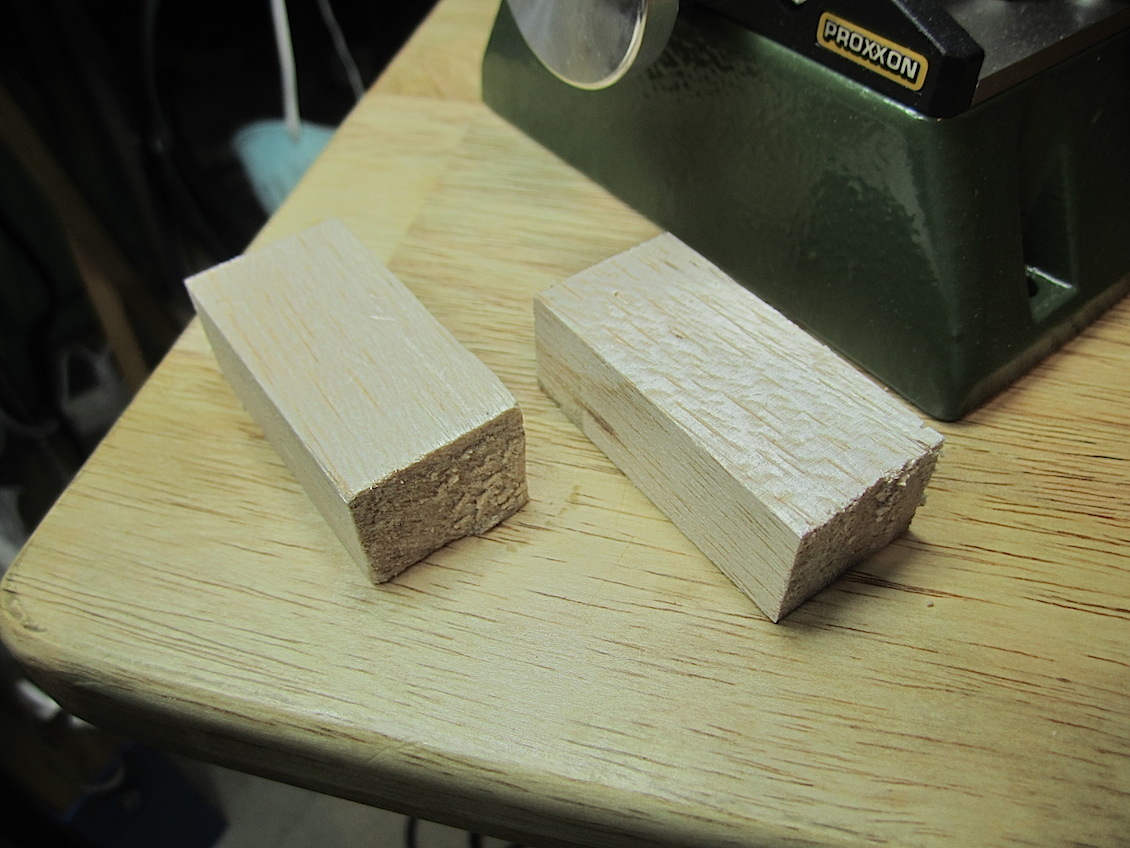
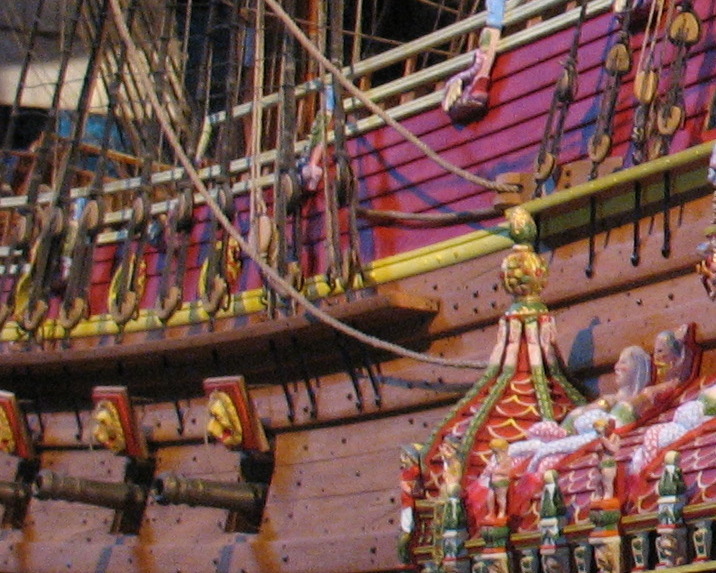
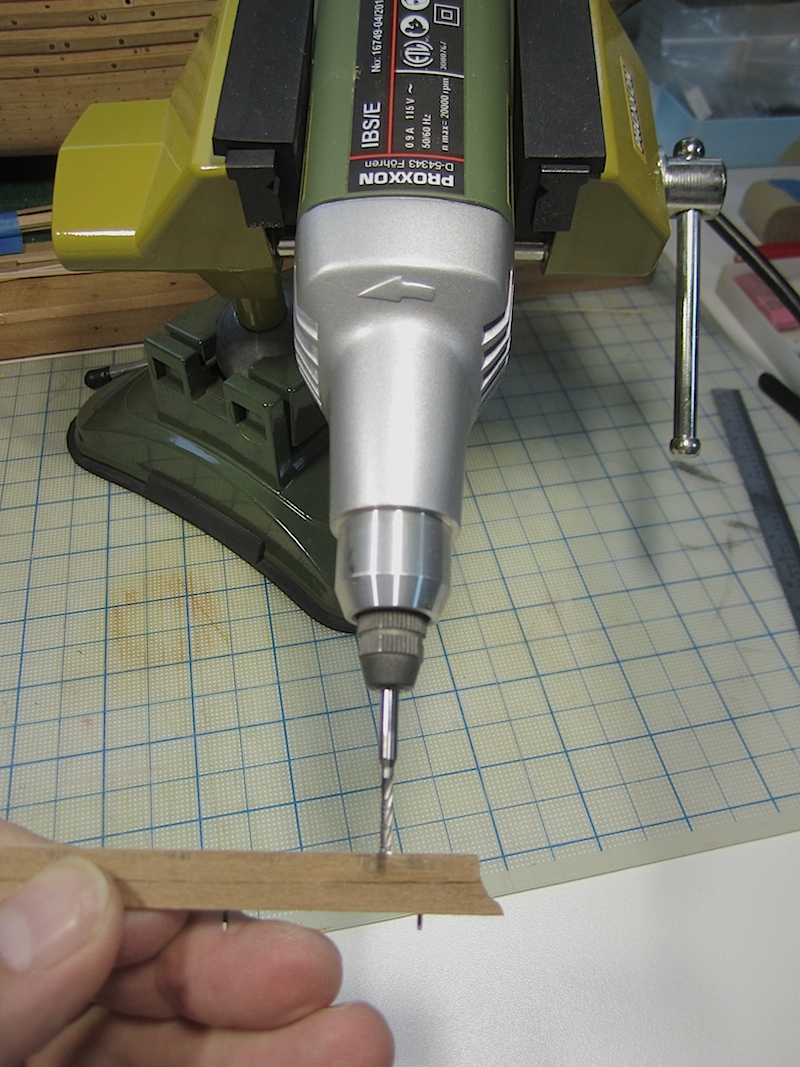
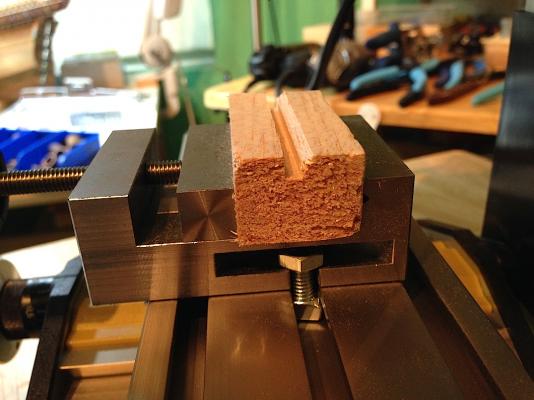
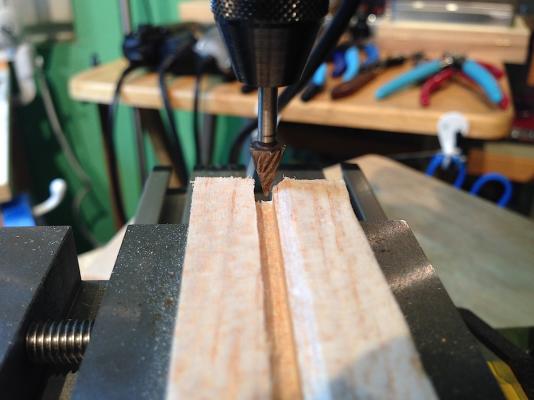
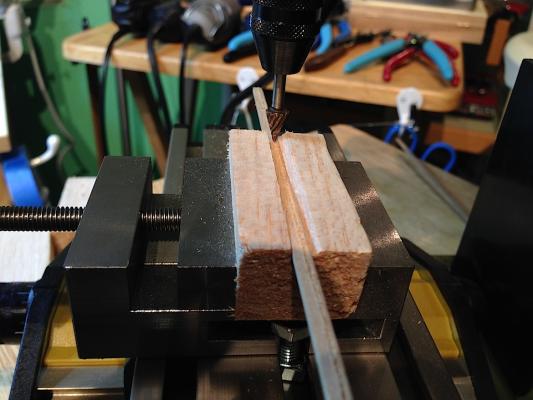
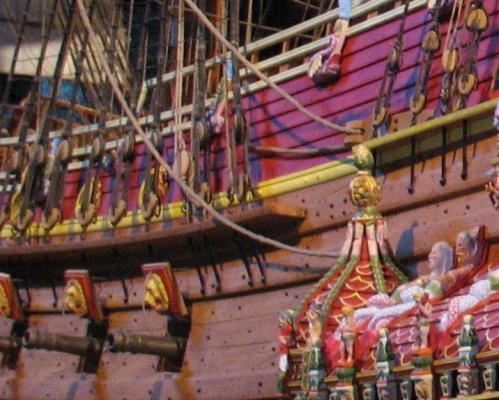
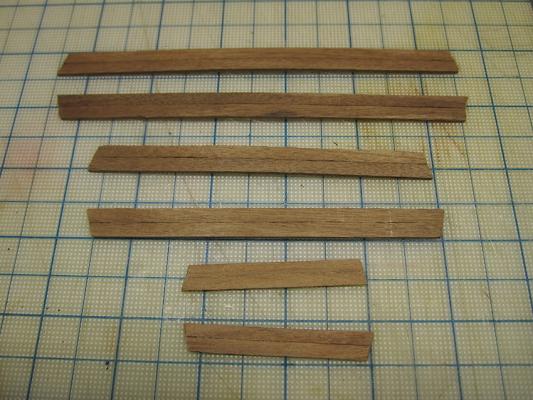
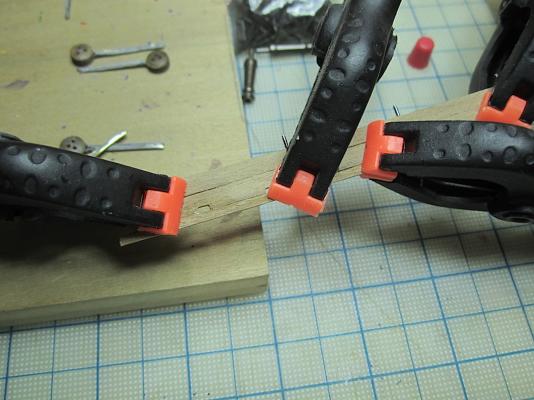
Hi everyone, Well this update makes me very happy. It highlights my first attempt at using the Proxxon MF 70. Challenge: As noted in the just previous post, I did not add two long trim pieces that would then secure the mizzen mast chainplates on each side of the hull just above the lower galleries. The first two pics of the 1/10th(yellow trims) highlight what I need to accomplish. The big conundrum was how could I add the grooves that run along those two pieces using the MF 70. The pics below illustrate my solution. I used a balsa block as a guide for the strips. Balsa seemed the best because I could run a very tight groove as the two strips were being pulled through, and the balsa would "give a little" but keep the strips straight. I then cut another wider upper gap trench in the balsa block favoring one side because when I would run the strips through, the needed groove was not in the center. You can note this in the 1/10th pics. After attaching the groove bit, I tried a couple of sample strips. Didn't want to go too deep and then end up cracking the trim pieces, as they will need to be bend slightly to follow along the hull lines. Well I'm really happy about how this turned out. This MF 70 will be a huge asset for improving my skills. I'm also super happy with how tight the Proxxon tolerances are; very slight two or three millimeter adjustments in the X Y Z axis created adjustments just where I wanted the bit to bite. Five stars for this tool. Now a bit more detailing, sanding, adding nail holes, painting and installing the strips, and I can move forward with part two of the chainplates. A bit wordy, this post, but I'm like a child with a new toy. (:-) This first use of the tool was very basic, but swimming always starts at the shallow end. Thanks for looking in. Regards, Michael


-
Mark, Came out so beautifully. Looks excellent. PS: Every time I look at your Vasa, it still amazes me how you did those white scallopings on the galleries. Michael
-
Ulises, SO nice of you thanks. Very much appreciated. But rigging may be my Achilles heal. I will certainly NOT reach your level of art. MIchael
-
Mark, Thanks. I know that you spent a lot of time with those railings, My mindset was that it was with the milling tool. However your time sure was well spent those metal railings they look so original to the 1:1. Didn't know about all of that plywood, sort of cost cutting on their part .Too bad. But, your build sure is coming out beautifully. Michael
-
Nigel, Thanks, so nice of you to look back in for a response. I have decided to add the two missing longitudinal planks. For the fix I also want to also try out the milling tool, I just need to figure out how to brace long thin strips of wood to add a groove to the two long trim pieces (see pic below). The idea is to emulate the 1/10th. That yellow piece in the pic is what I would like it to look like. However the trim pieces are only 3 mm wide, and some 50 mm long, so my lack of any skills with this new mill may cause a bit of frustration. Alternatively I will just forgo the grooves. Regards, Michael
-
Mark. I have a question, if you don't mind. I think that you mentioned that you added a ridge on your deck railings using your Proxxon milling machine? What did you use to attach the long strips as you were rotating the lateral wheel to get that perfect looking ridge? PS: Your railings look so excellent. Regards, Michael
-
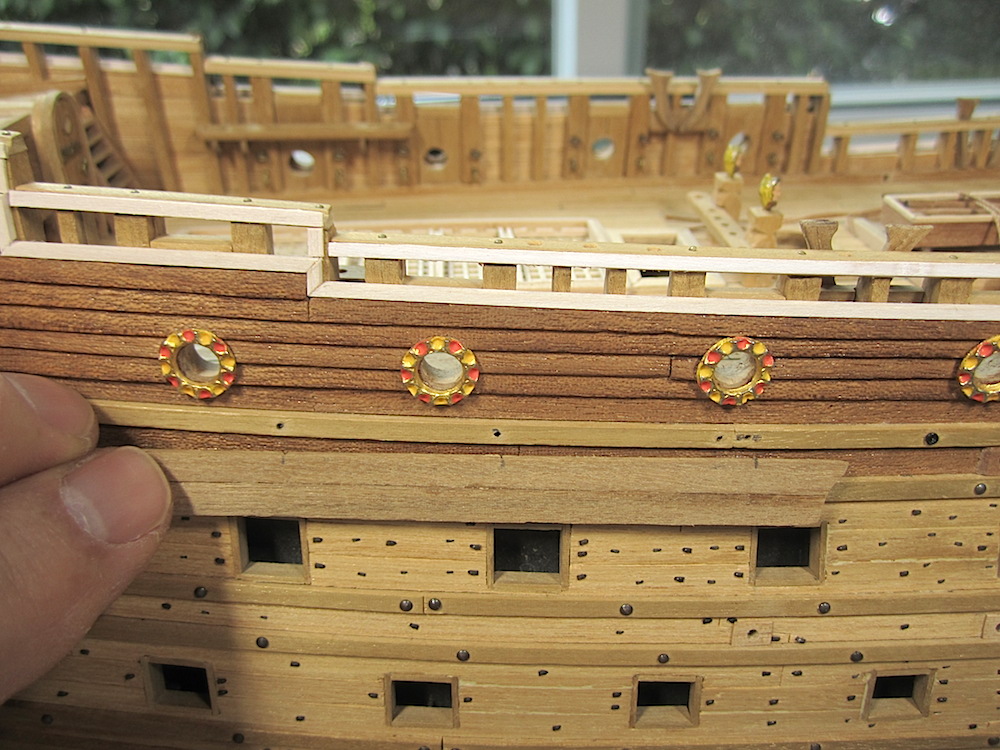
Hi Everyone, revised posting from yesterday's Part 1 of 2; chain-plate installations. Nothing new here, I've mirrored how most of you install these when there are no bracing timbers above or below the plates. In regard to this build there is, of course, an other error. The chain-plates, above the galleries, are to be attached to the hull upon, or just below large longitudinal timbers that run the length of the upper outer hull. I did not install these on each side. In deference to Corel their instructions were correct, I just missed it. I have an idea for a fix. Again, thanks to all of you for spending time here. Regards, Michael


-
Nigel, No need to waffle, as you might have assumed I'm looking forward to visiting your new build log. Michael
-
Ulises, I keep repeating myself.your rigging details and work are outstanding. Your rope making skills are excellent. congrats! Do you have rigging plans for the running rigging, as well as what Corel provides for standing rigging.? Regards, Michael