DONATION DRIVE - SUPPORT MSW - DO YOUR PART TO KEEP THIS GREAT FORUM GOING!
×

md1400cs
-
Posts
2,856 -
Joined
-
Last visited
Content Type
Profiles
Forums
Gallery
Events
Everything posted by md1400cs
-
 Theo, Beautifully executed work, a pleasure and a learning experience following you log. Michael
 -
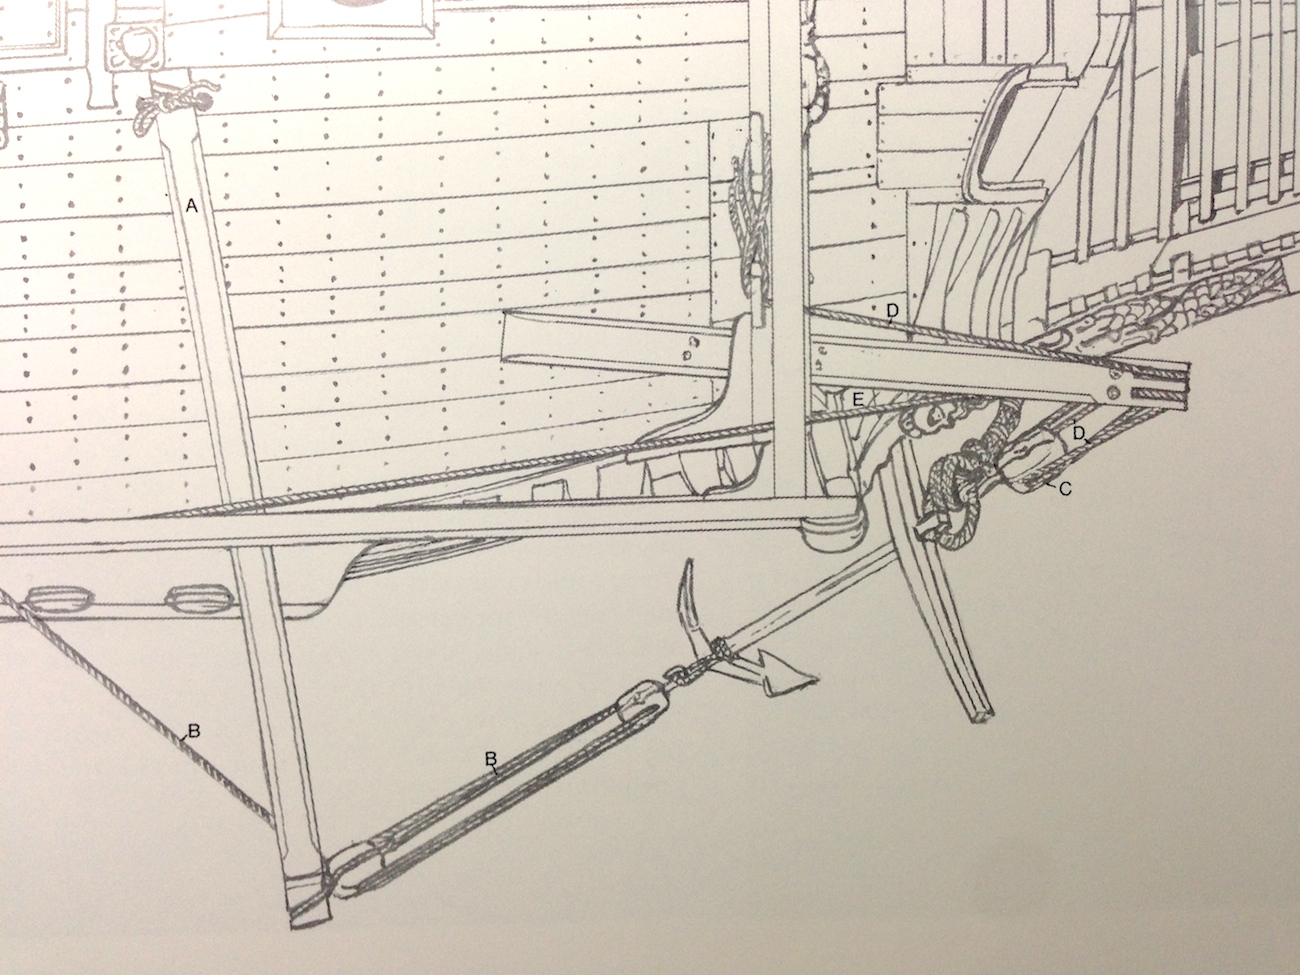
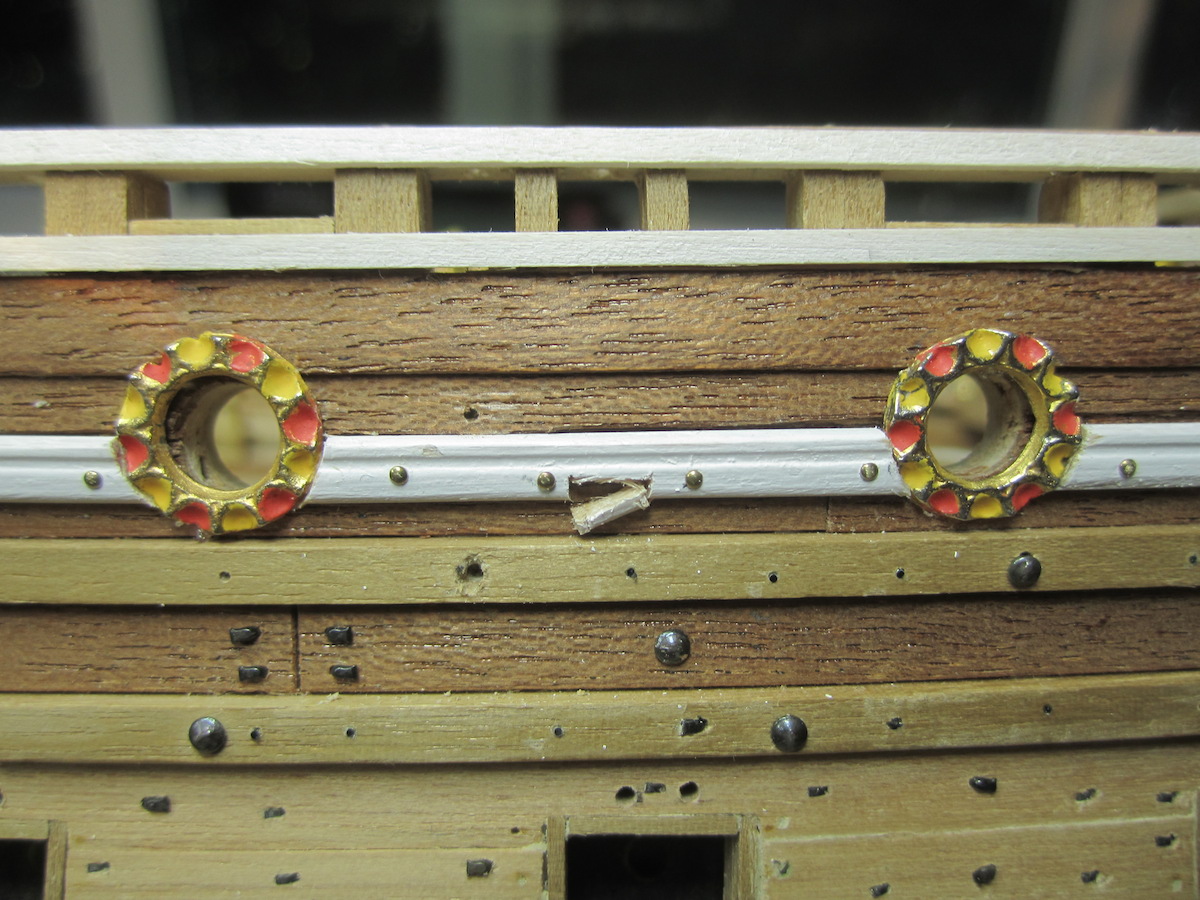
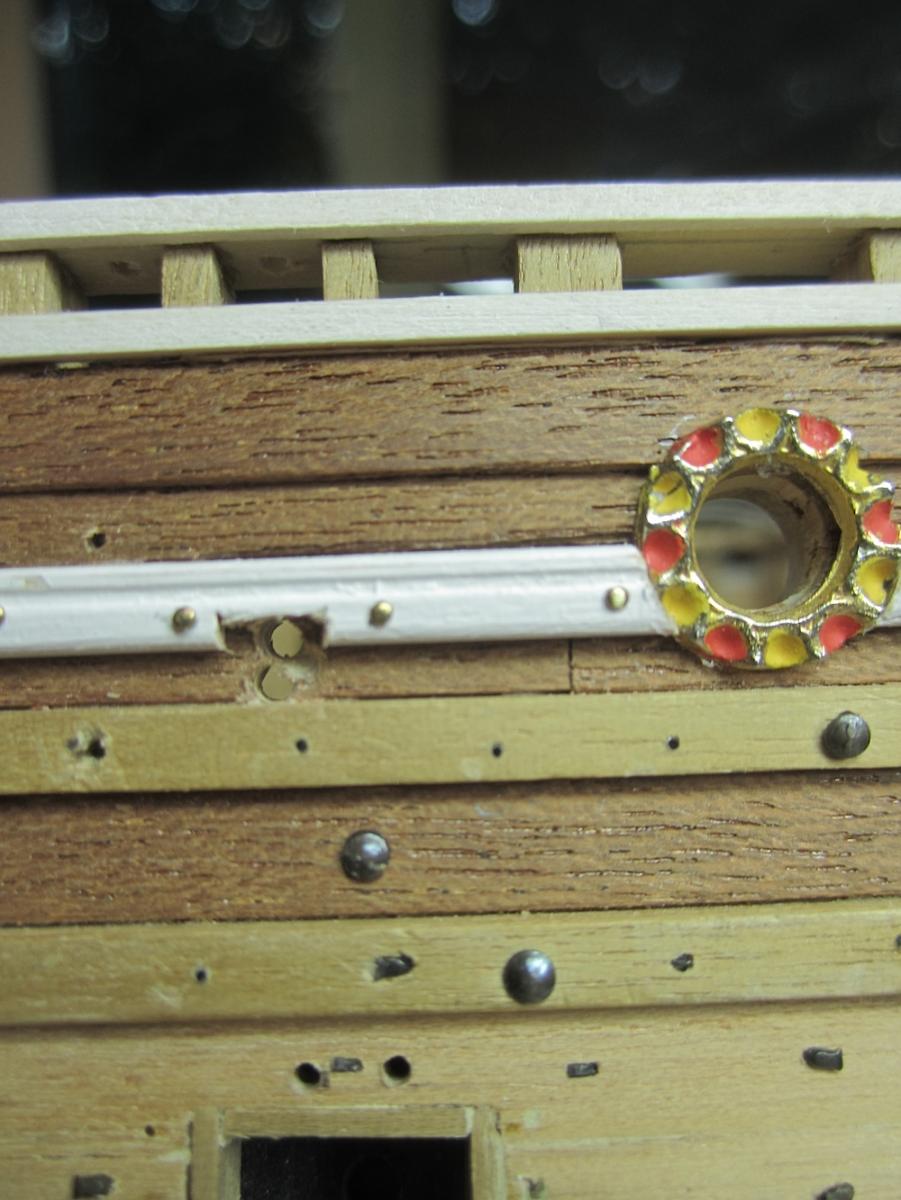
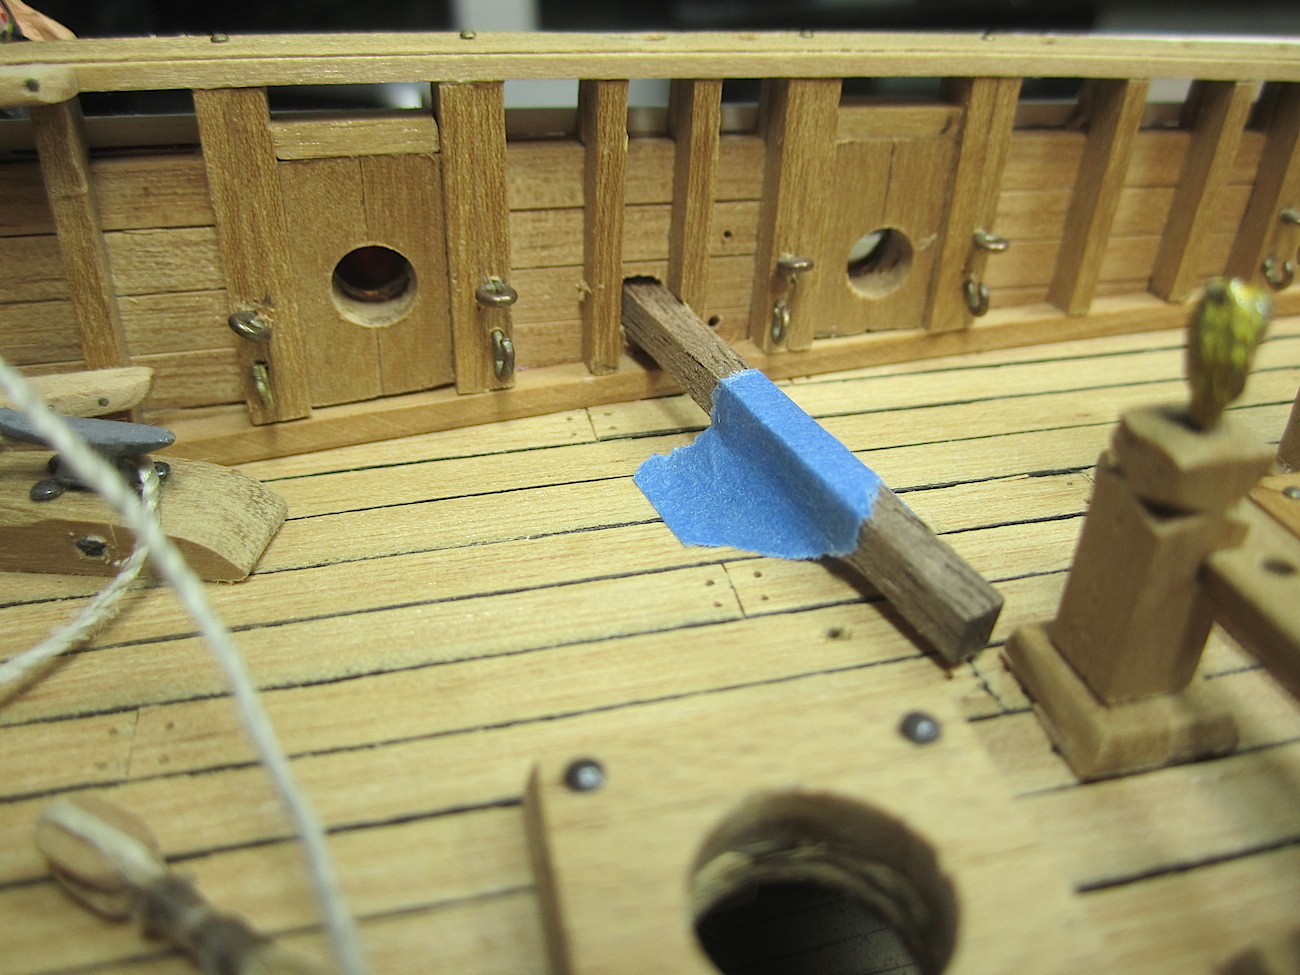
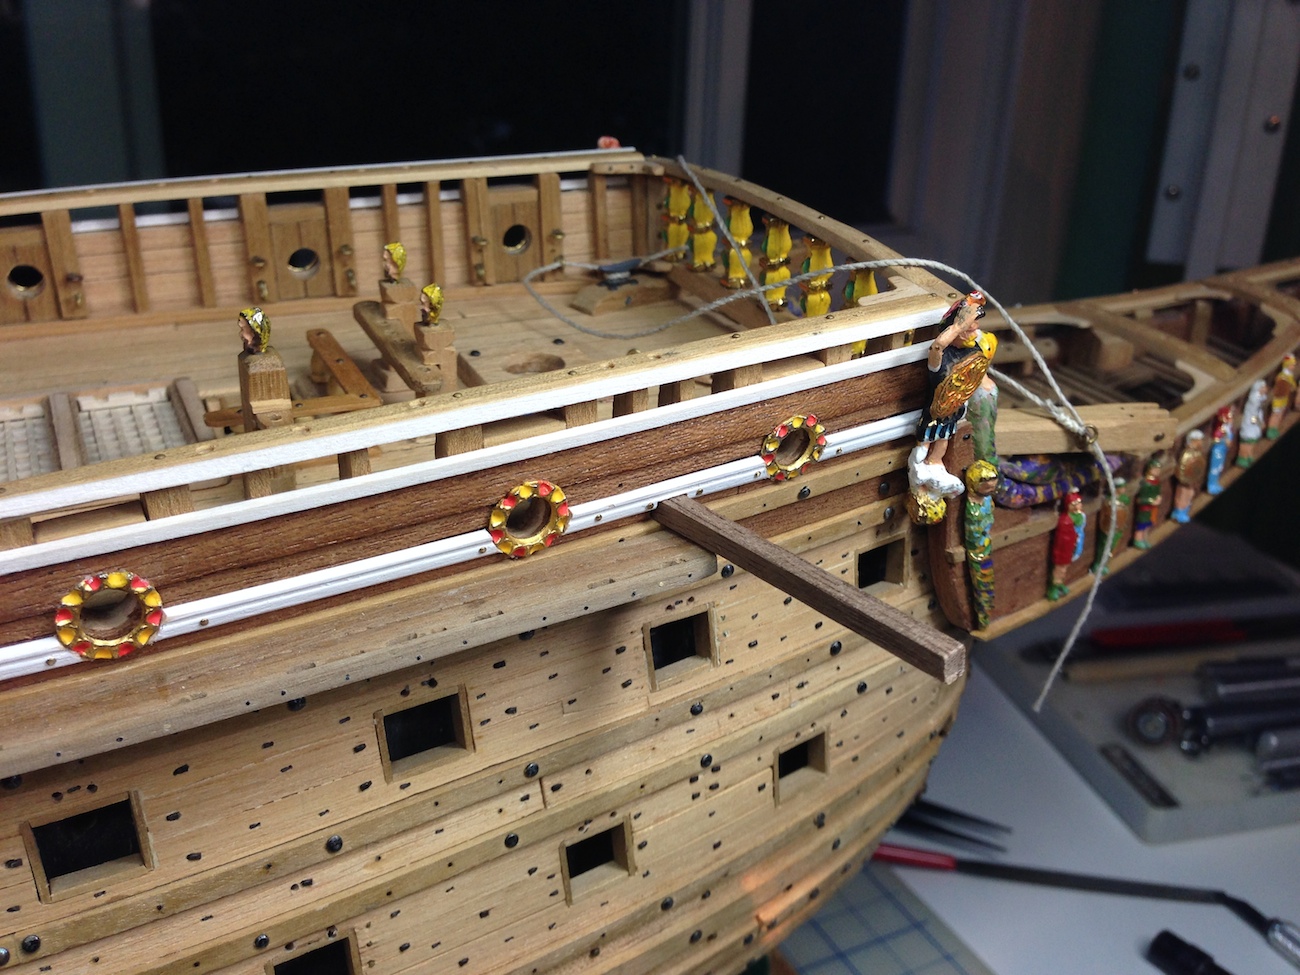
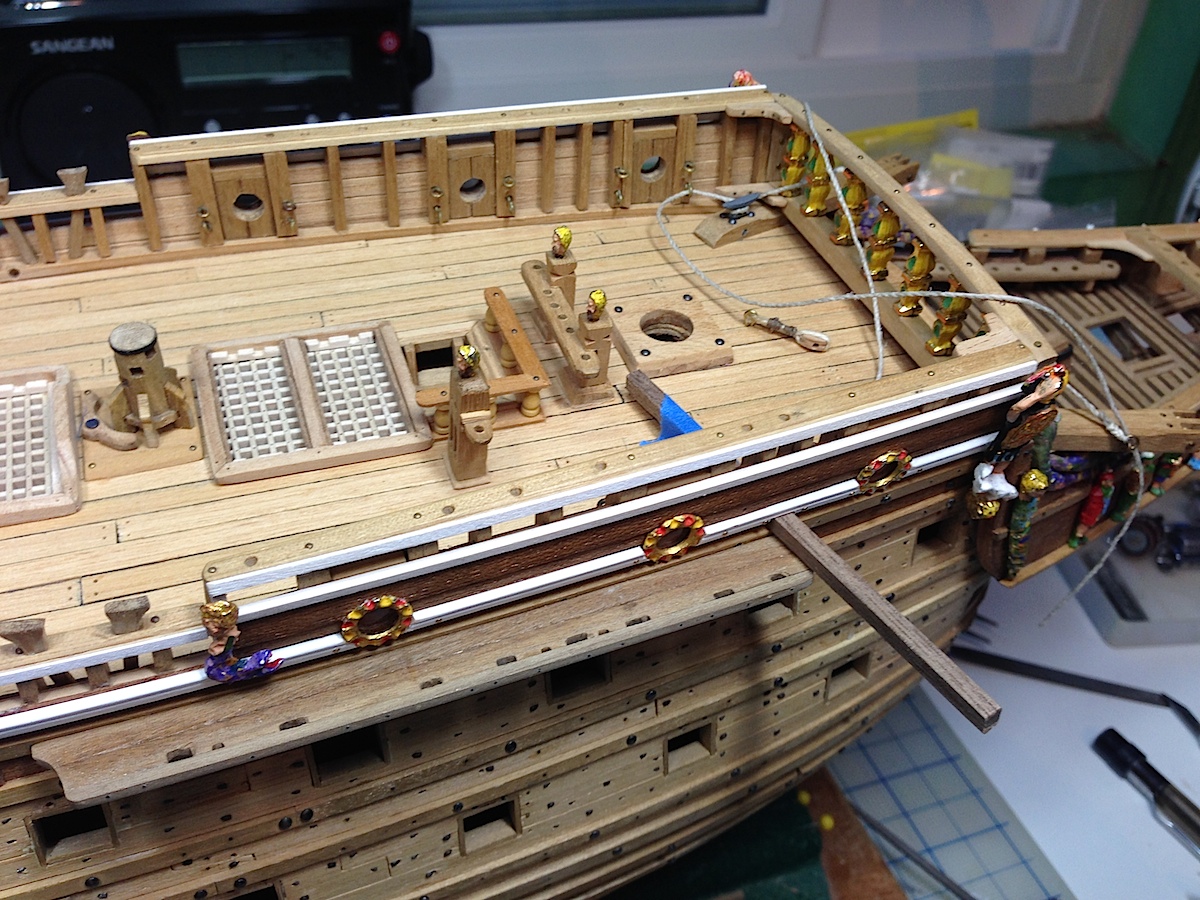
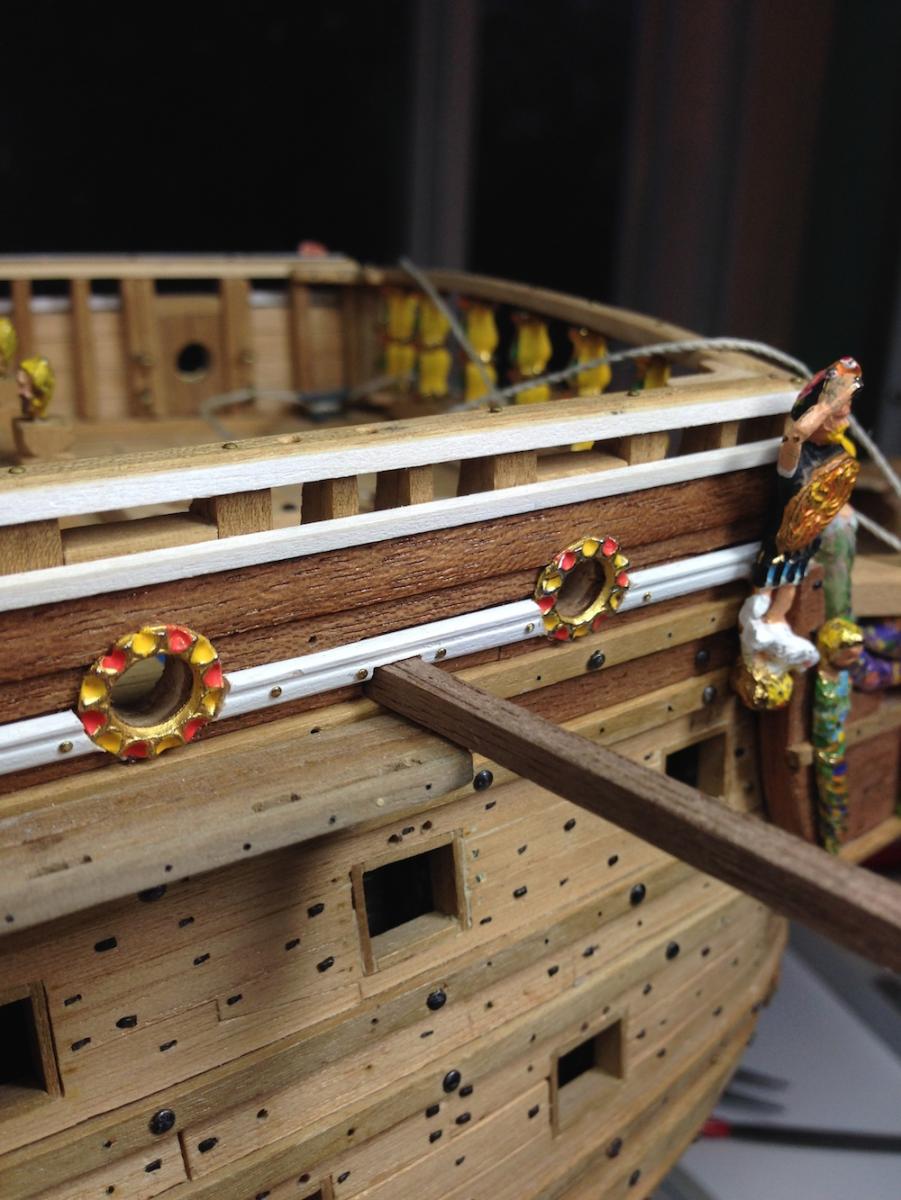
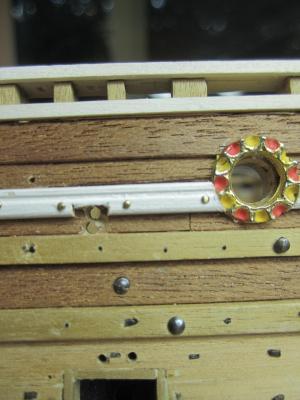
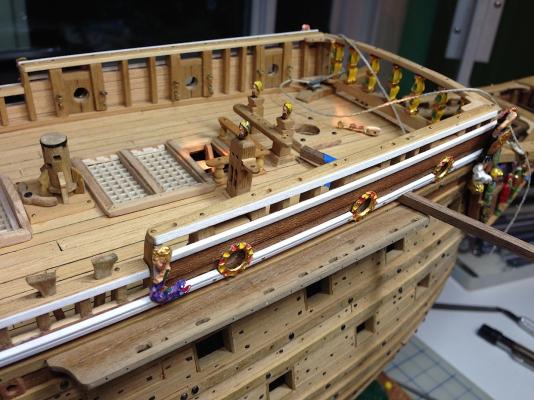
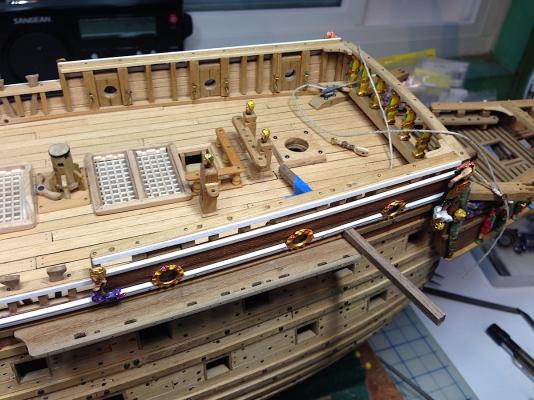
Hi everyone, Firstly happy New Year (:-) Taking a break from building the channels I thought that the perpendicular anchor catheads would be good time filler. As you note, this small update is just a starting point. That timber is wrong as well. Ouch, on the view from on the weather deck pic you can see two small holes just to the right of the cathead timber. These two pilot holes I drilled to determine the height, as it would come through on the weather deck. Well, I drilled these from the outside of the hull and grrrrr, they were in the wrong place. I should know better than to work in the shipyard only one day after New Year's Eve. PS: As you can see in the first pic the 1:1 at one time had those mounted, but no longer. Maybe it was a weight issue? Michael


-
Frank, Thanks for the link. Hmmm they sure have beautiful ships there. Re: sander I have one that also has a sanding belt on one side. I was not aware that these tools were also known as thickness sanders. I will have to learn how to do that. Michael
-
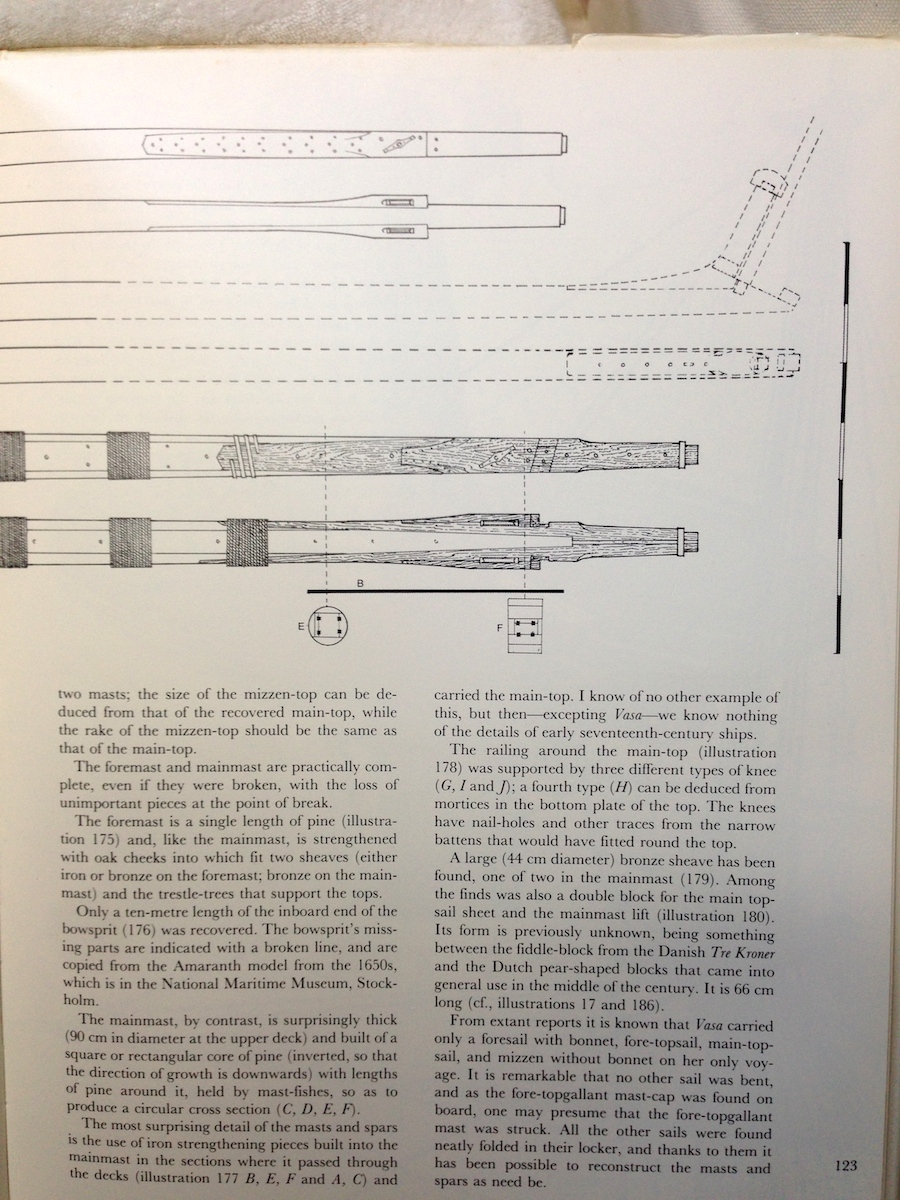
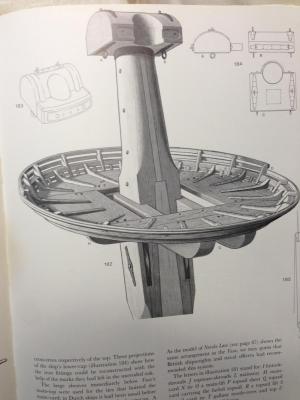
Some pics of the main mast. The "Dream Vasa" site prob. has a more accurate looking main mast. Clayton's Vasa seems to have used that look as well and not Landström's The Royal Warship VASA for the main mast assembly. Though I asked Clayton how he put it together and he said that he "scored" the mast to make it look as though it was assembled from several pieces. Michael
-
Mark, I have some good drawings of how the main mast looked assembled (the Landström book). If you need any pics. I'll be happy to post them. Regards, Michael
-
Mark, Super impressive update. You are right your cannon wash looks perfect. You painting details on the figures are also very beautiful. You are very nicely capturing the look of the Vasa. Are those the cannons that Sergal includes in the kit? They look so much better than those Corel's "parts bin" issues. Michael
-
Frank, Your deck work is setting the standard, and raising the bar very high. Perfect....Thanks for the detailed "how to". Your weather deck is really a work of art. PS: what thickness sander and saw are you using? And to think that I was all done buying tools (:-) Michael
-
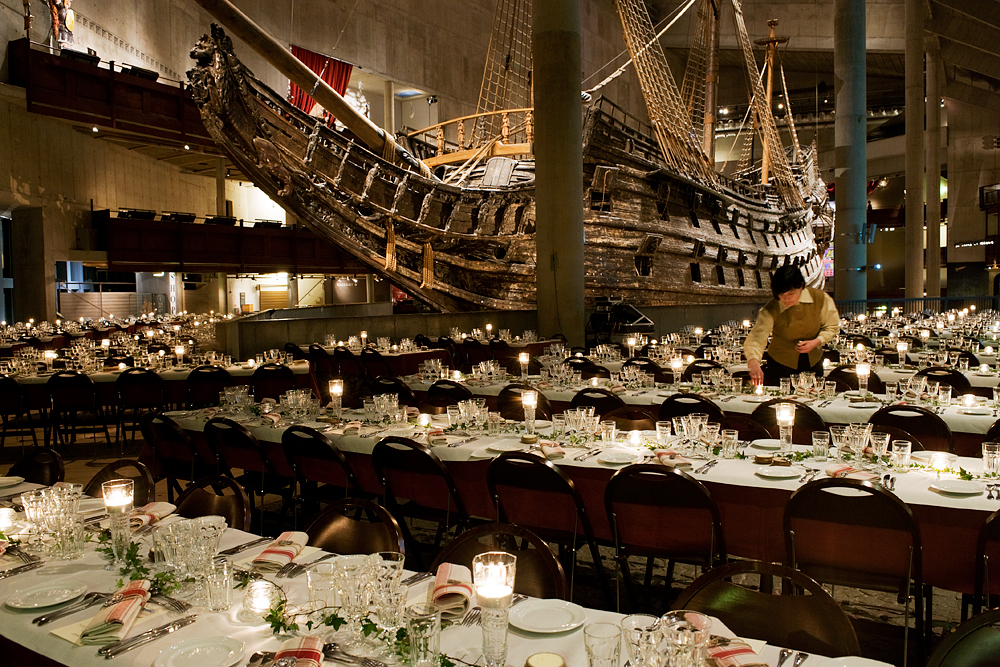
John, In Stockholm at the Vasa Musett. You as a fan of visiting ships this is highly recommended. It is the second most visited museum in Europe, with over a million visitors a year. Of course the ride to get over there aint cheap (:-) PS: Do NOT visit Stockholm in the dead of Winter. ! --------------------------- OOPs JanV had just answered above. (Winter still holds) MIchael
-
Joachim, Nice to see you back at "work" in your shipyard...you are doing nice work with the ropes. Having a ropewalk is so helpful. The kit supplied ropes are usually inadequate, especially on a ship such as yours where so much attention to details are everywhere. Michael
-
JanV, Yes, I ordered a bottle through Amazon. Could not find it locally. Again thanks for the idea. Michael
-
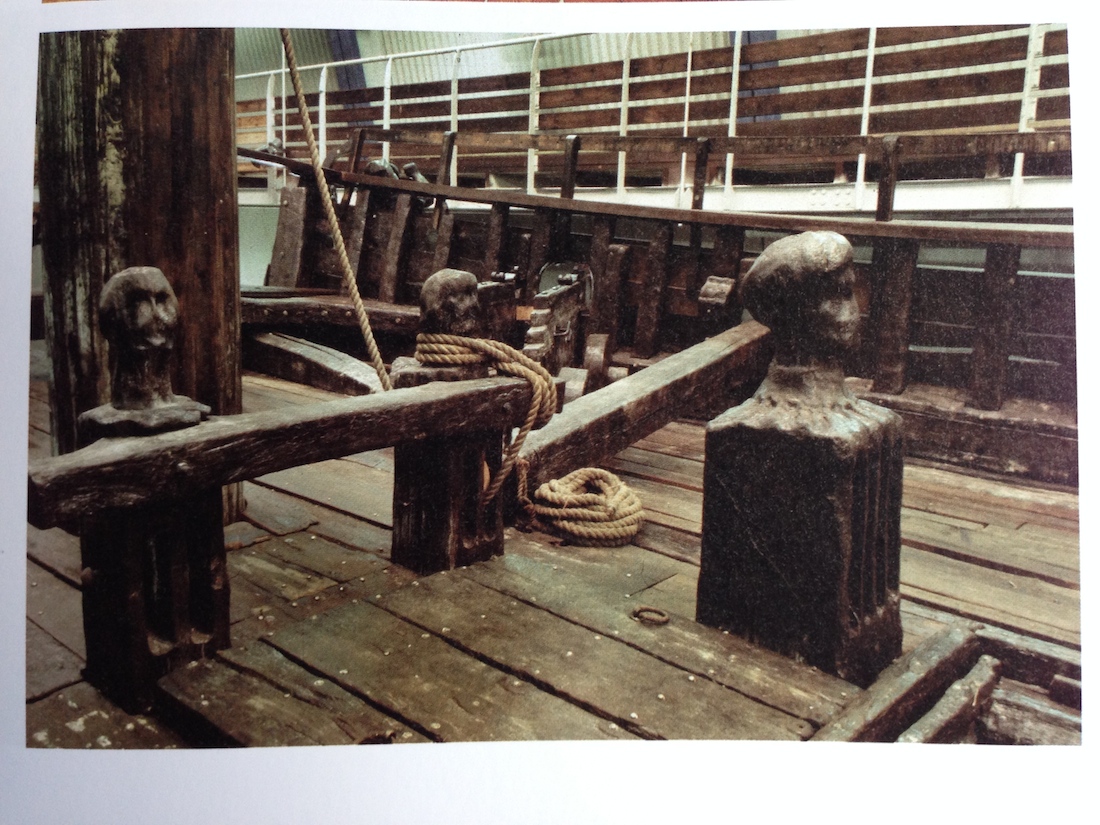
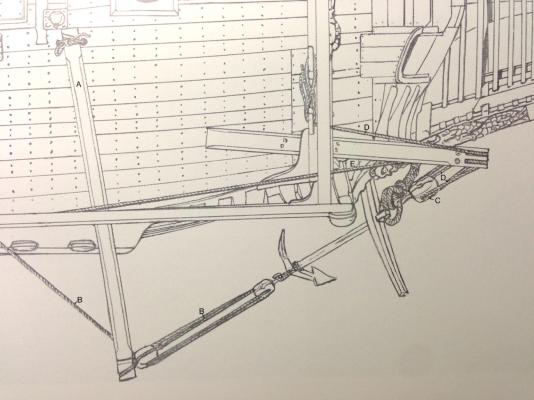
Hi Vasa guys, I found this pic today while "surfing" It's one that I have never seen. Posting it maybe it might be of help to some of you. Have a really good New Year's eve (:-) Cheers, until next year, MIchael

-
Frank, Welcome to MSW. You will have a lot of friends here including the Vasa builders. Very excellent idea to pre build-in the gun carriages into the lower and upper gun decks. Your pics look great (excellent size) It will be a pleasure to follow along. Regards, Michael
-
JanV, Thanks for that idea "brass black" I have wanted to add some small round headed nails to the hull, but they were brass, and would look odd. I will get this item and add the nails. Excellent. MIchael
-
Beautiful work coppering the hull Rob. Looks spectacular. Enjoy the "white", we are sadly missing any "winter" where I am. The driest rainy season in recorded history (:-( Michael
-
Matti, Nice pics. Your painting details on those small creatures that run along the breaks at the upper railings is so excellent. Nice work ! Michael
-
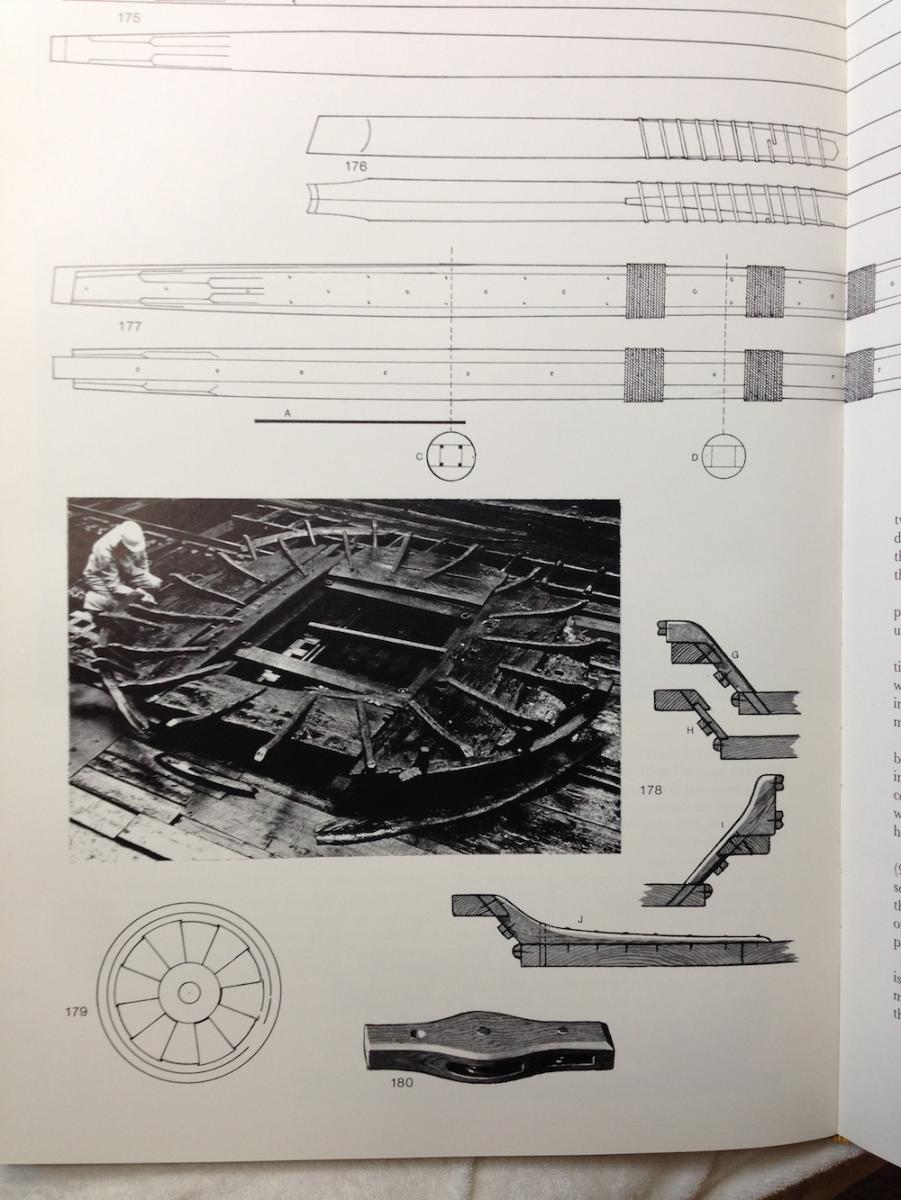
Jan, Nice progress. She is looking excellent. It looks as if you will also be adding the two side timbers that hold the anchors? I plan on doing this as well. There is a photo in Vasa I that shows those beams as well as in the Landström book. Nice detail work at the bow. Michael
-
Hi Kriss, Just discovered your Vasa. Super nice. Your paint details are so excellent, these will help to make all of the difference by adding super special touches. Your stern paint work is beautiful. Nice work. It will be a pleasure to follow. Michael
-
Mark, OUCH..sorry to hear that. Get better soon. Looks awesome. Nice work on the cannon lids. PS: regarding tools in general, check out Alexandru's last two pages using the entry level Proxxon DB-250 lathe (if you have not already visited). Genious work /Scratch built section HMS Victory. He is Yoda times 1000. Michael
-
Theo, As usual, beautiful updates. You're quite an artist. Don't stress over those trim borders, those were the first thing my eyes were drawn to in that photo. Excellent. Many of the actual details of this ship are still a mystery (:-) Michael
-
ZyXuz, Nice update. Looking so excellent. PS: Love Thailand, spent many years traveling in Asia when I was working. We always stopped in BKK first, then went on into other countries after a few days of rest, golf, great food, amazing people. Michael
-
Andre, Beautiful update. She is looking excellent. Michael
-
Vince, Beautiful....... Michael
-
Joachim, thank you. Please have a wonderful holiday season as well, I will very much look forward to your A V updates in 2014. Sincerely, Michael
-
Tom, Thanks, will do Michael