HOLIDAY DONATION DRIVE - SUPPORT MSW - DO YOUR PART TO KEEP THIS GREAT FORUM GOING! (Only 24 donations so far out of 49,000 members - C'mon guys!)
×

md1400cs
-
Posts
2,839 -
Joined
-
Last visited
Content Type
Profiles
Forums
Gallery
Events
Everything posted by md1400cs
-
 Karl, Too perfect to easily comprehend. Stunning Michael
- 662 replies
-
- 1
-

-
- bonhomme richard
- frigate
- (and 1 more)
-
John, Big thanks. Noted on the clicks. I gave it a quick look, but will return and spend quality time looking over everything. I might tho pull the trigger this time. Sorry about the Costa Rica problems. Nice place with very nice people. Though San Jose is not much to write home about. Michael
-
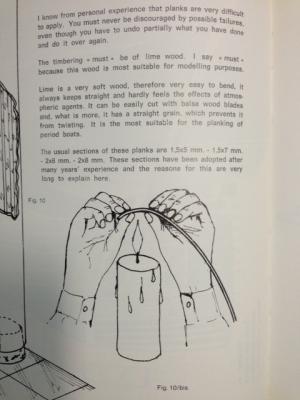
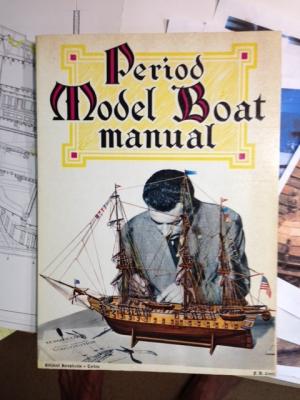
Buck, Matti, I must be very old school. The bulb idea I had not really heard of. I always thought that soaking the strips in hot water was the answer (:-) once I saw an old photo with some guy bending a stick over a lit candle. Here is the reference. I had forgotten that I still had this old book. Eddison would be proud of you using his application for model ship building (:-) Michael
-
Ferit, Actually with the few thousands of hours that I have in the air, the very last thing that was ever on my mind was jumping out of the machine for sport. Hmmmm not for me. PS: Oh !, I just read that the the best hotels in Europe are found in Turkey Congratulations (:-) http://news.yahoo.com/best-hotels-europe-found-turkey-151700813.html As always, a pleasure to share conversations Michael
-
John, I have to imagine that the camel was truly a wonderful learning experience building it. Is it not a miniaturized version of the 1:1; are not all of the cables spars, control surface hinges and wiring correct?. Their Curtiss Jenny also looks awesome. Were digressing I know (:-) Michael
-
Ferit, Beautiful photos of what must have been a wonderful holiday. The weather seems to have cooperated. Welcome back to your daily life. PS: love those alto fracto cumulus clouds (:-) remind me of my aviation days, though I'm now involved again on a part time basis. PS2: Boy that parachute rope sure got you very high ha..ha... that was a joke (beautiful photo of a beautiful place). Regards, Michael
-
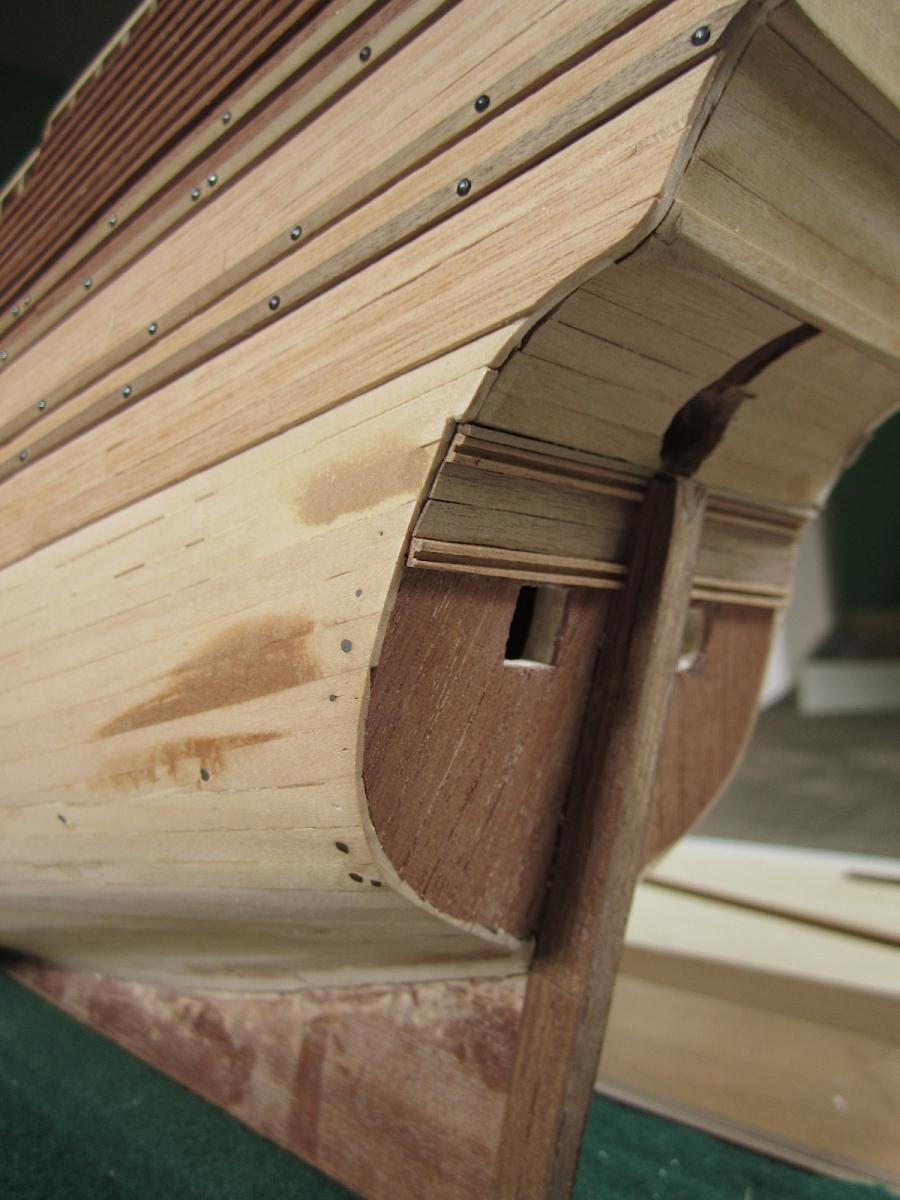
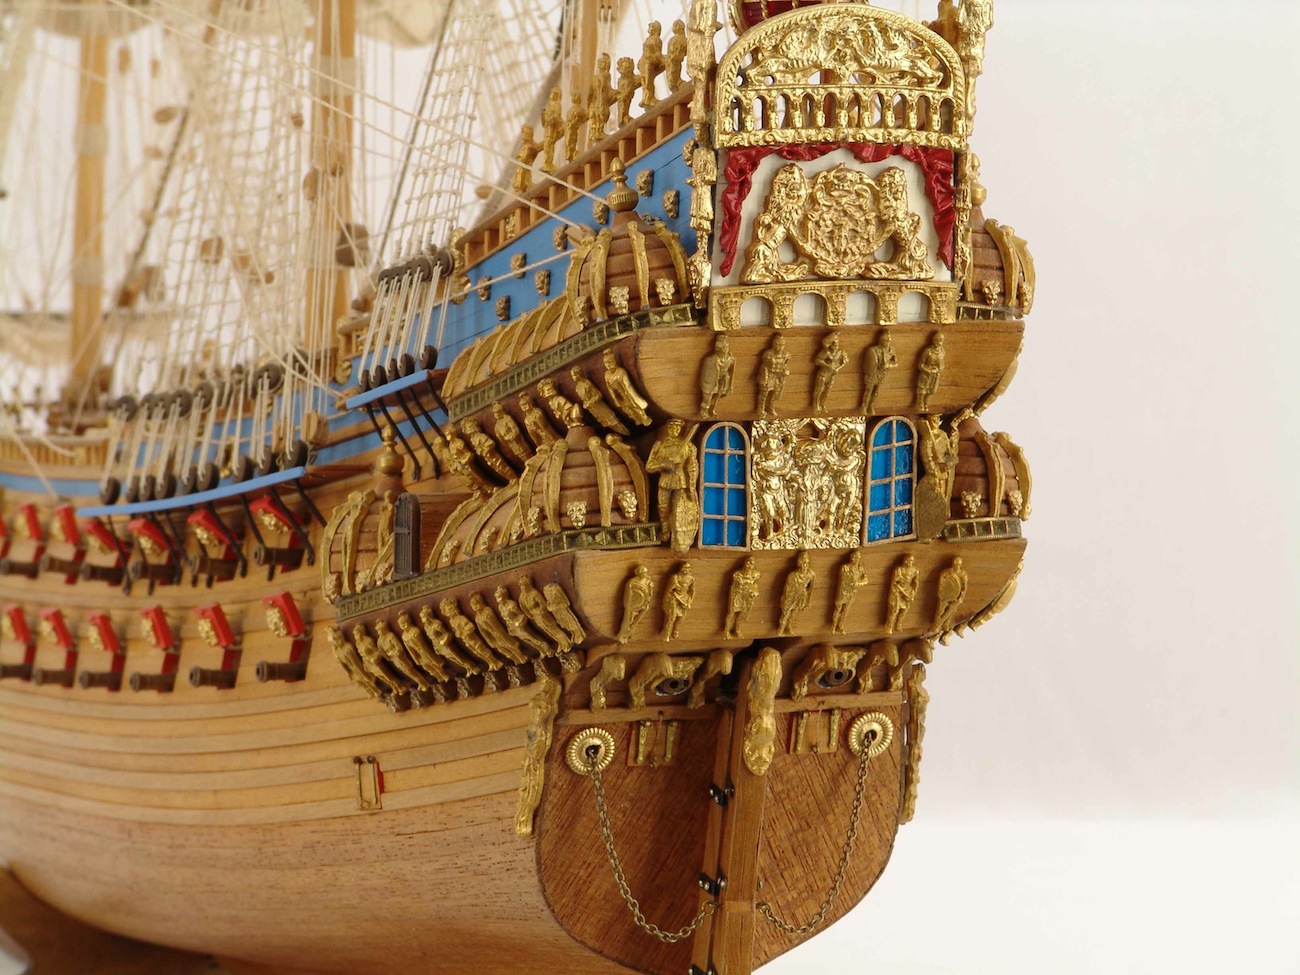
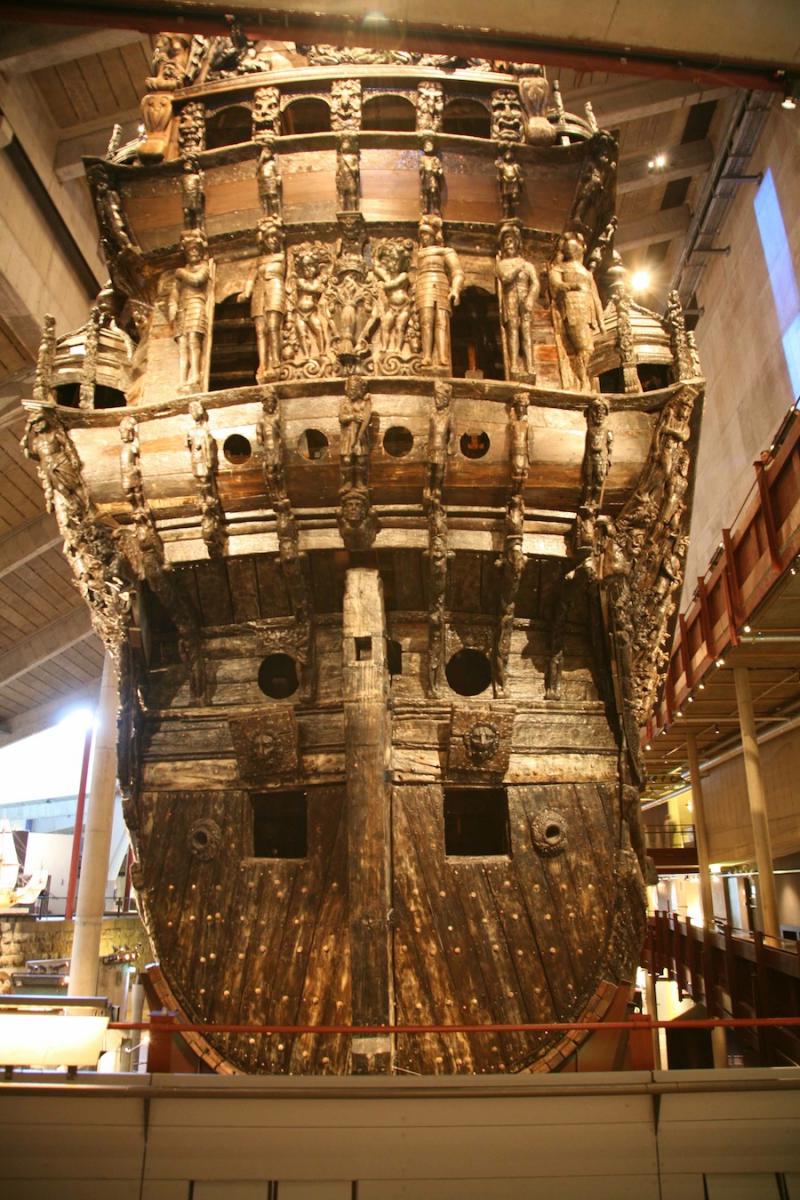
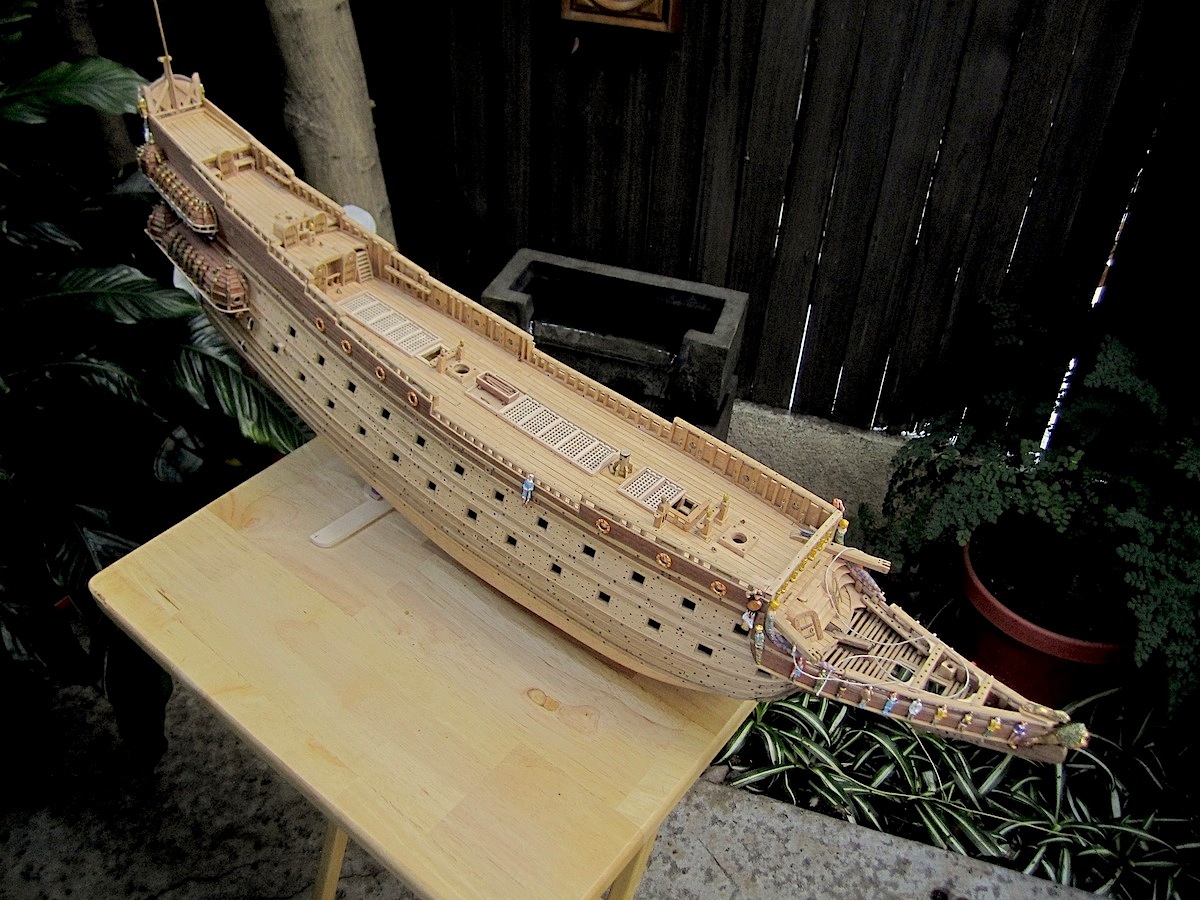
JS, Thanks for your nice thought. YES I know (:-) I now know, of soooo many errors with this build, including what you rightfully pointed out as incorrectly shaped weather deck entry housings. FYI: I started this build about nine years ago, and after an initial start it sat in a closet for several years. It was, at the time being build exactly as Corel intended, along with its many errors. I was ignorant and had not looked for source material. THAT has changed. Over the last 2 years or so I have been "catching up" with the build, which included a lot of re-building. I purchased several books, including the Museum book Vasa 1, the Hocker, and Landström books, I should receive his (L) this week (I note that your photos come from that source) I also have the pdf version of same, along with several sheets of the museum plans; I have also been helped by other members who are also building the Vasa. Adding to that, my files now contain many hundreds of photos of the 1:1, the 1/10th as well as many of Clayton's photos. So going forward from 2 years ago I became much more aware of how it should look. But JS, this is all recent history (:-) I built the weather deck nine years ago from the Corel plans. So this build, in its current state, has gone through some "re-building. I wanted to fix the errors that could be fixed. The weather deck entry door will not be part of those repairs. Too late. I have learned a lot here at MSW by reading, looking, and by many times thinking OMG some of our member builders are astonishing; specially on the scratch built side of the "wall". I'll never climb over that wall..ha ha.... For your edification, as well as my piece of mind. I offer these examples of "fixes. I appreciate your looking into this build, thanks. Stern as Corel intended+some extras even back then.My repair of Corel stern in progressmostly repairedA super excellent exactly as Corel intended build, from a European builder.this one speaks for itselfMy attempt at doing the stern as best I can per the 1:1 Regard, Michael


-
John, Thanks !! PS: I love your Sopwith Camel. Everytime Model Expo has a sale I think of getting it.
-
Frank, Thanks Big Time for your NOT over the top (:-) "Like This" emails clicks. Actually I am so touched, and honored. Whoa!!! At first I thought that somehow they were repetitive emails of a single send. Then, looking at the time markers I realized that they were in fact multiple appreciations. So very thoughtful of you to look through, and make "thumbs up" as you followed this build. I am really privileged that you connected with this effort. I am left very touched by your kindness. Regard, Michael
-
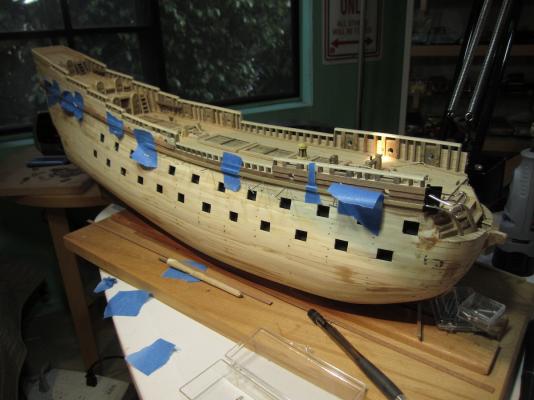
Hi, Just posting a couple of pics to see if I can see what Mark T. was pointing out. PS: Hard to remember that it looked like that. Only those of us who actually enjoy this great hobby understand how much time these boats/ships take. Not a complaint, merely an observation, Also two pics of what my screen looks like as I load. They appear to all line up in order of loading. I see no option for a numerical adjustment after they are in que. No biggie MJD


-
Mark, Yes, it took a while, but in retrospect I think worth the effort. Thanks so much for your post. It's always nice and helpful to get feedback (:-) Michael
-
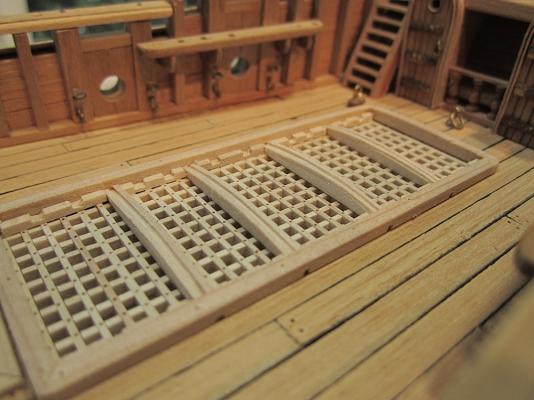
ZyXuz, Appreciated. The gratings really helped. Had I not fixed those I would have always regretted it. But there are also other areas that are not right. Thay will have to stay as is. I am learning for my next build (already under my table) (:-) MIchael MIchael
-
Mark, Again thanks. Of the several current Wasa builds presently all have such charms of their own as well. Thanks for your thoughts. My wife suggested, some time back, that I should put mine in the bathtub for 300 years to really capture its real look. Its on my mind MIchael
-
Jan Thanks. I also like to look at other builds and incorporate some details. Thanks for sharing that. As I've said before yours is really so nice. MIchael
-
WW thanks so much. I appreciate your interest as well as your very complimentary posts. Thanks for your interest as well. MIchael
-
Nigel, Thanks (:-) You certainly know about detail work. Your nice words are a real treat. Regards MIchael
-
Mark, Thanks. I'l look for that next time. Nonetheless your jpg. which is for a pc, does not look the same from my Mac when I load pics. I do appreciate your suggestion..
-
Thanks Matti, getting there. Now I will actually move forward..... PS: I now have to give up on getting the photos in the right order. I numbered them, I added notes to each one, I loaded then IN order. And they still came up all weird half way through. I know that a moderator some time back gave me some hints. Didn't seem to help. I wonder if the MSW mainframe is not so happy communicating with Macs (:-) MJD
-
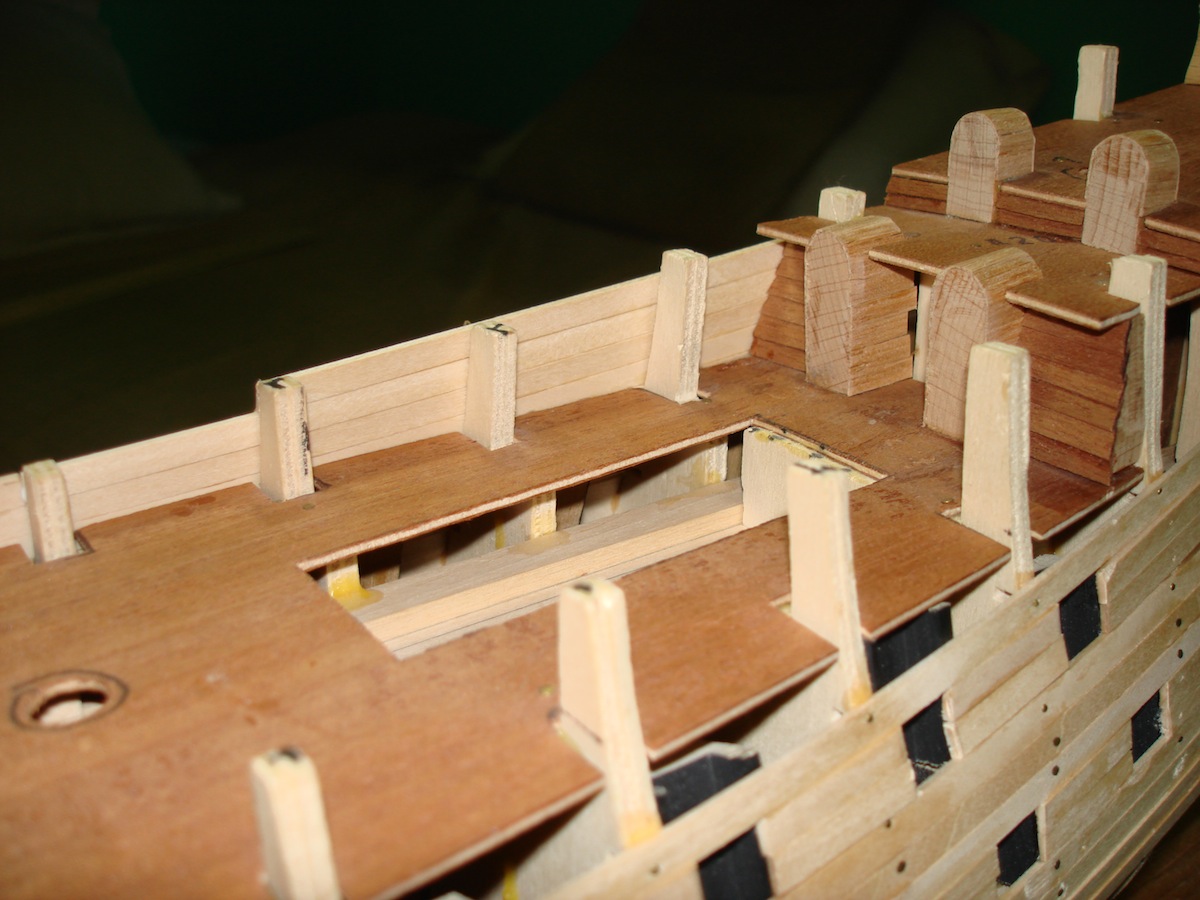
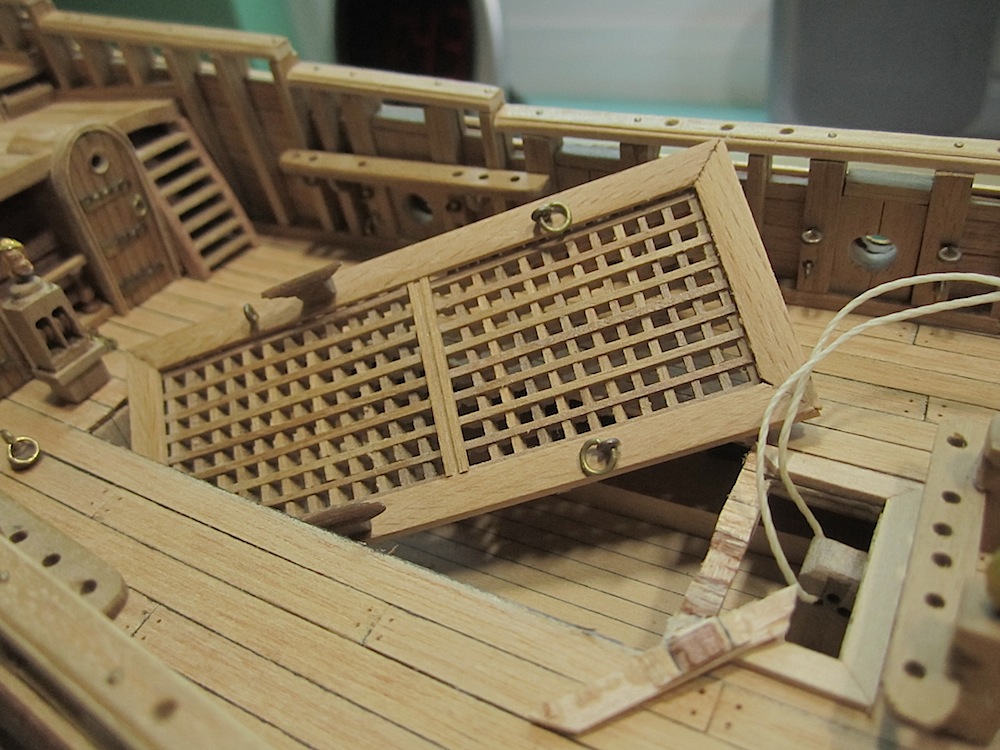
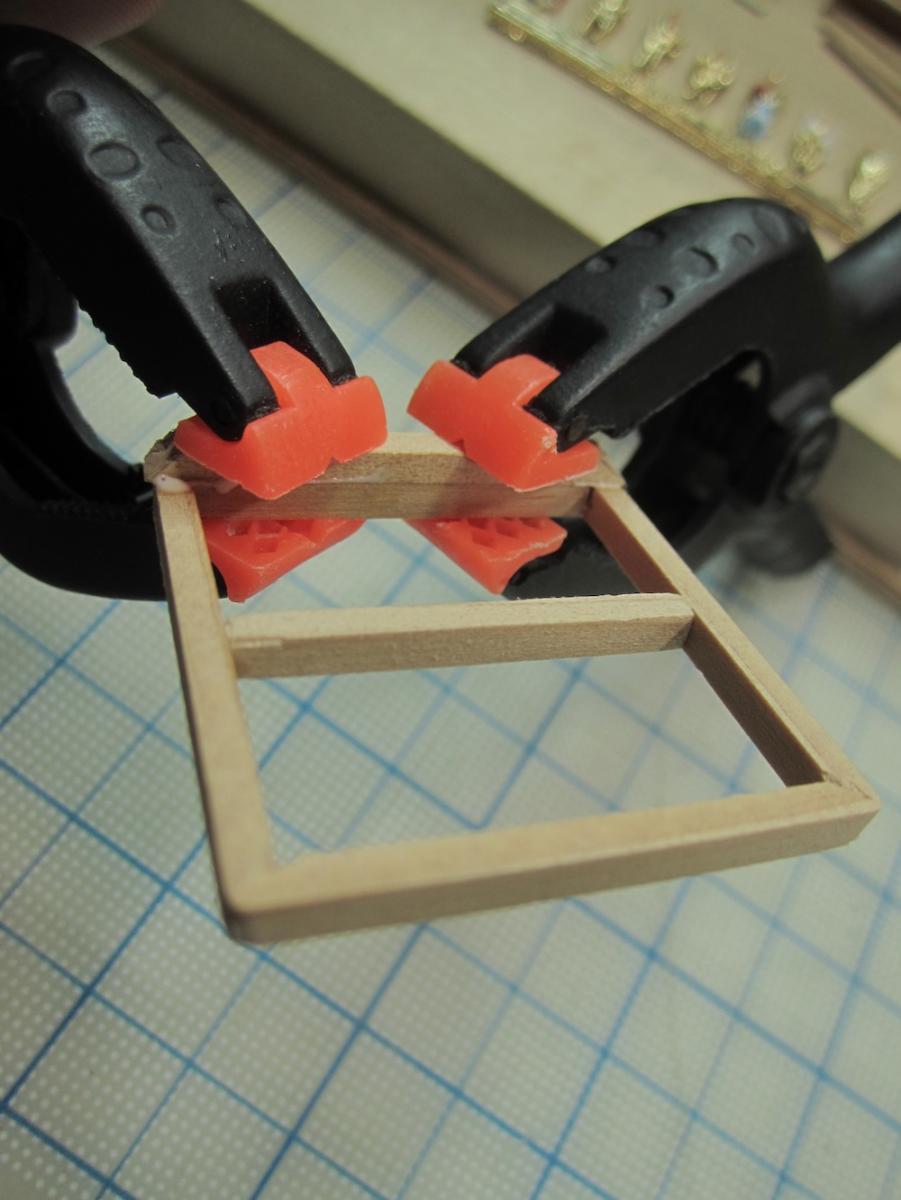
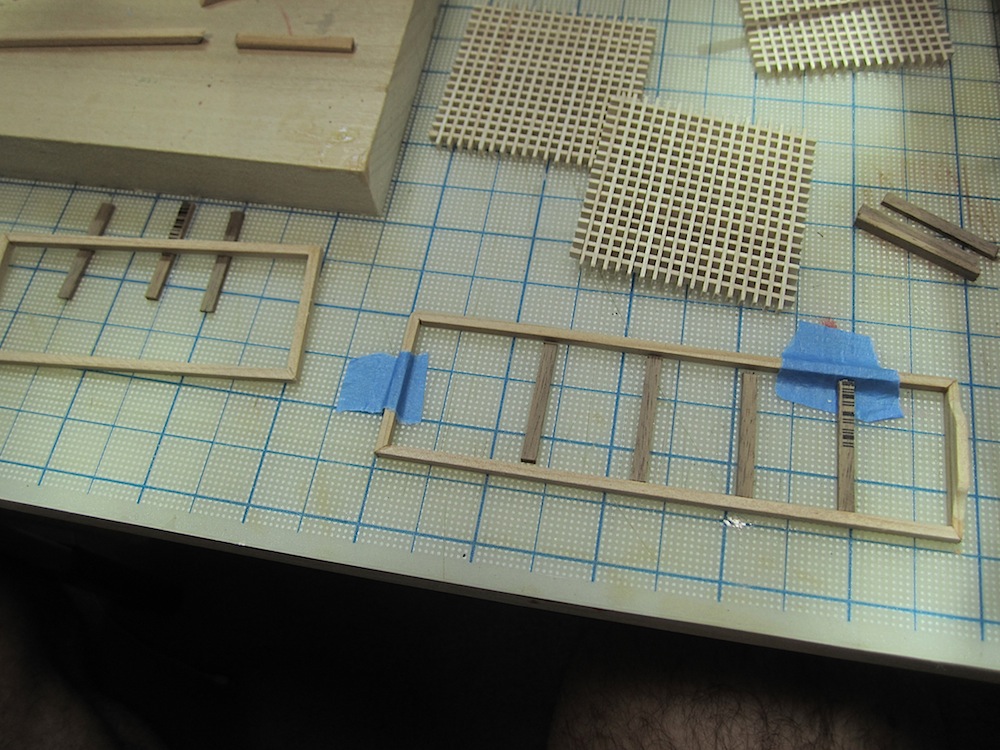
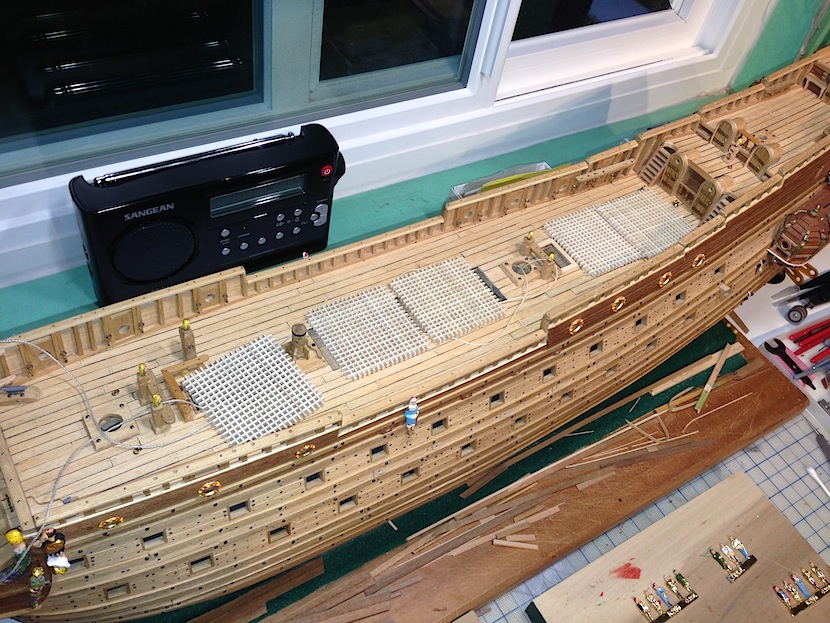
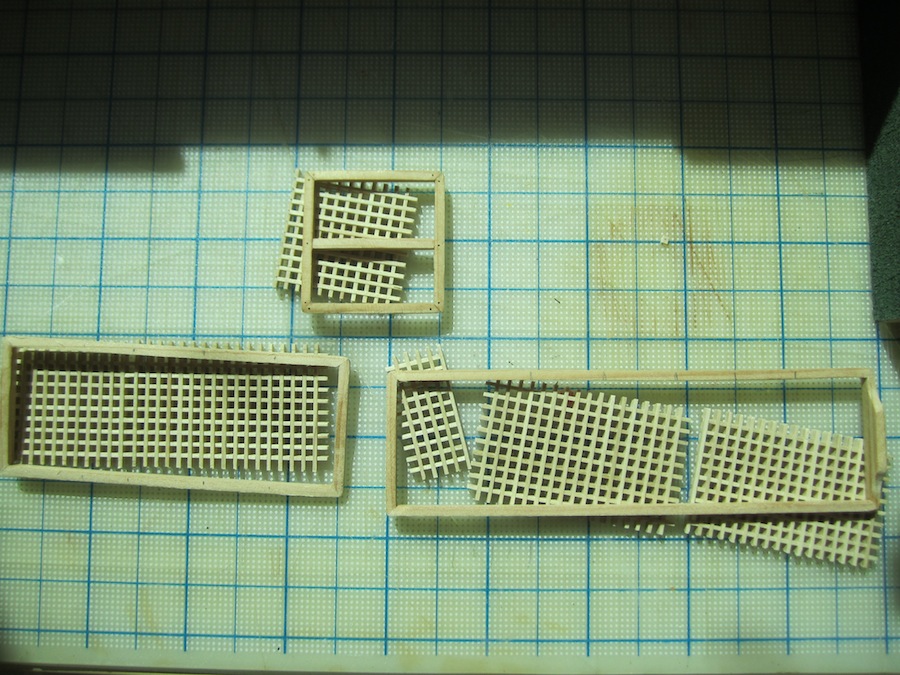
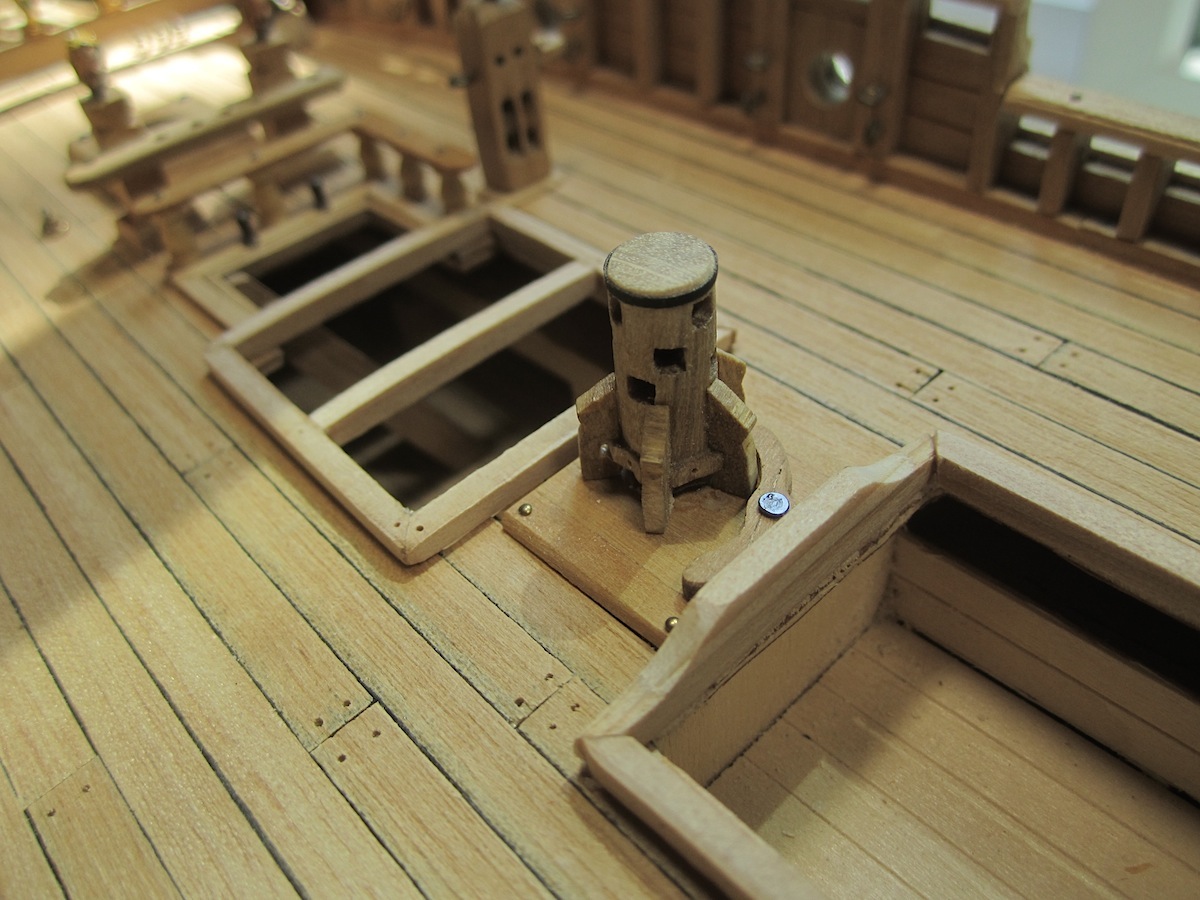
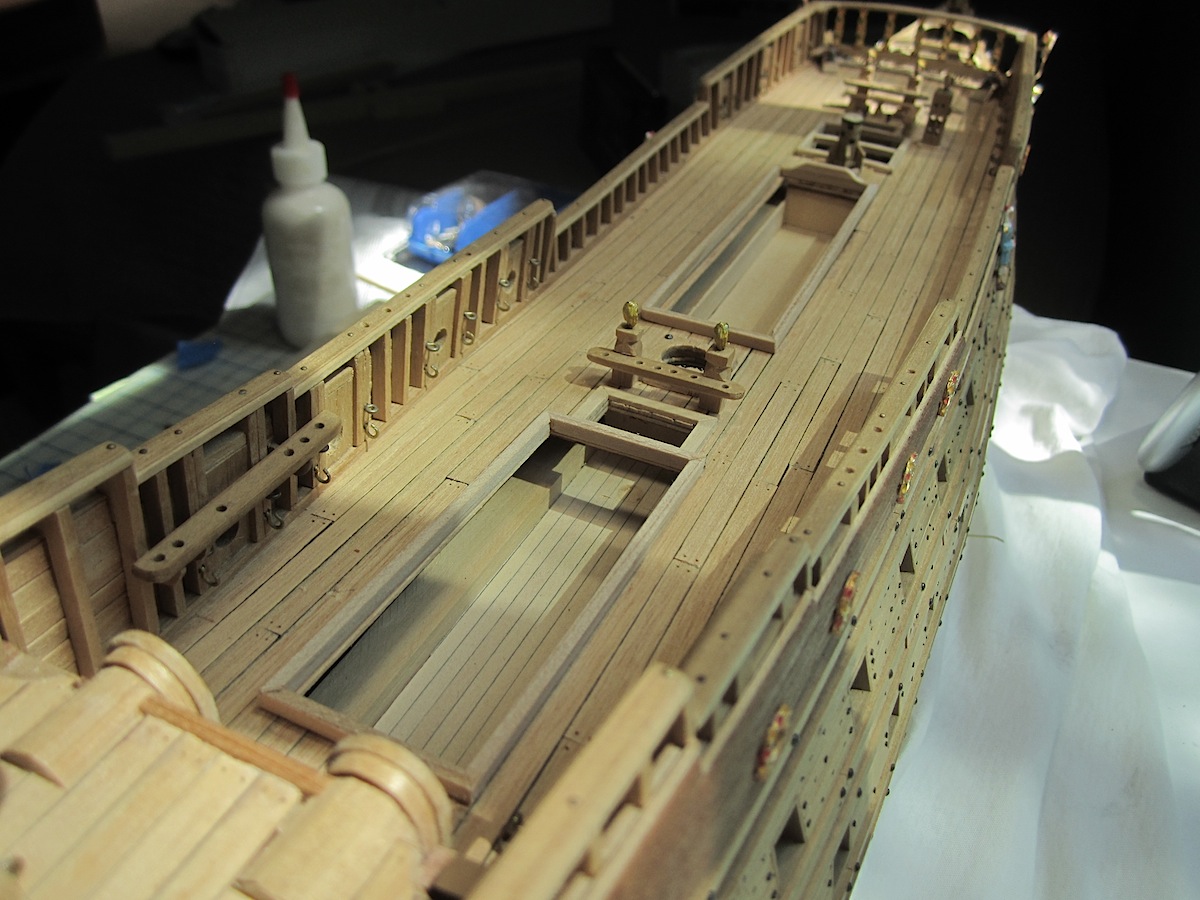
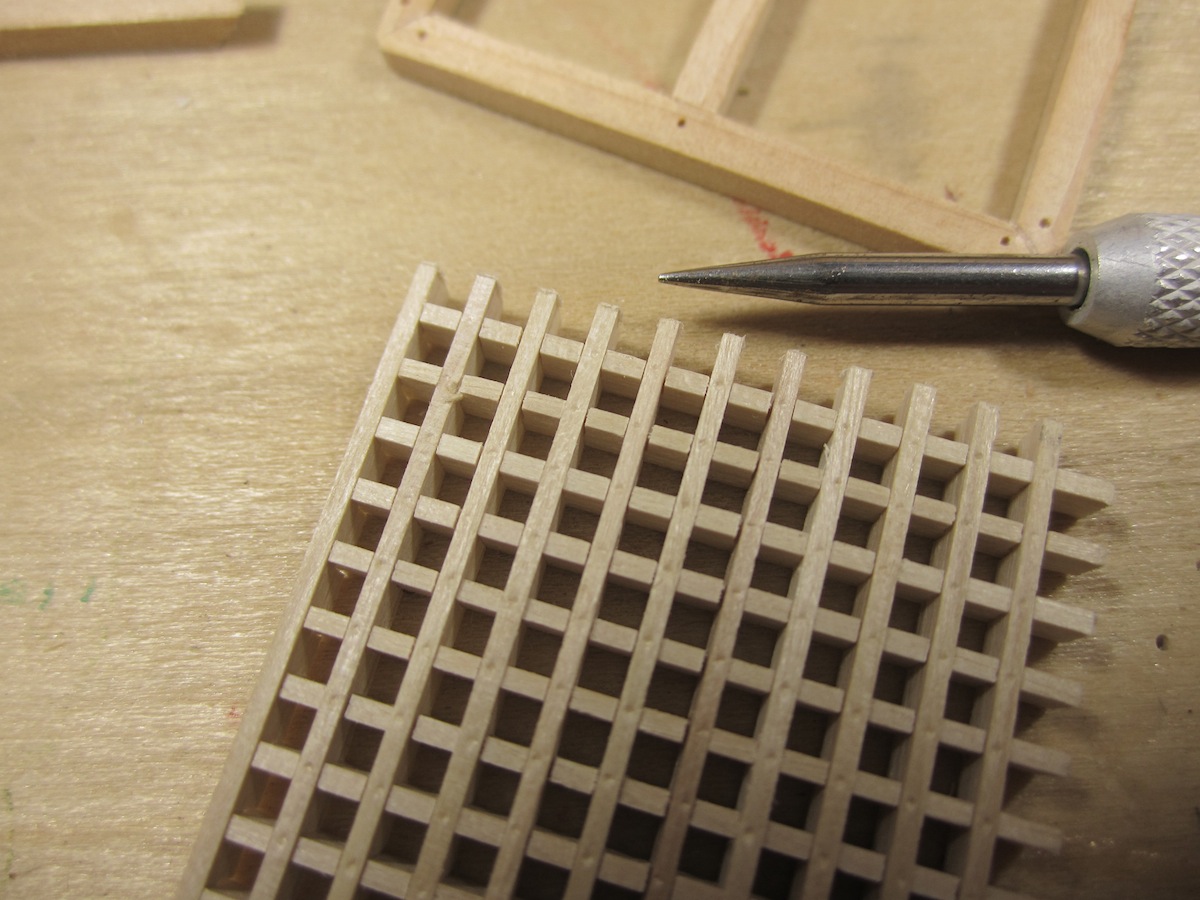
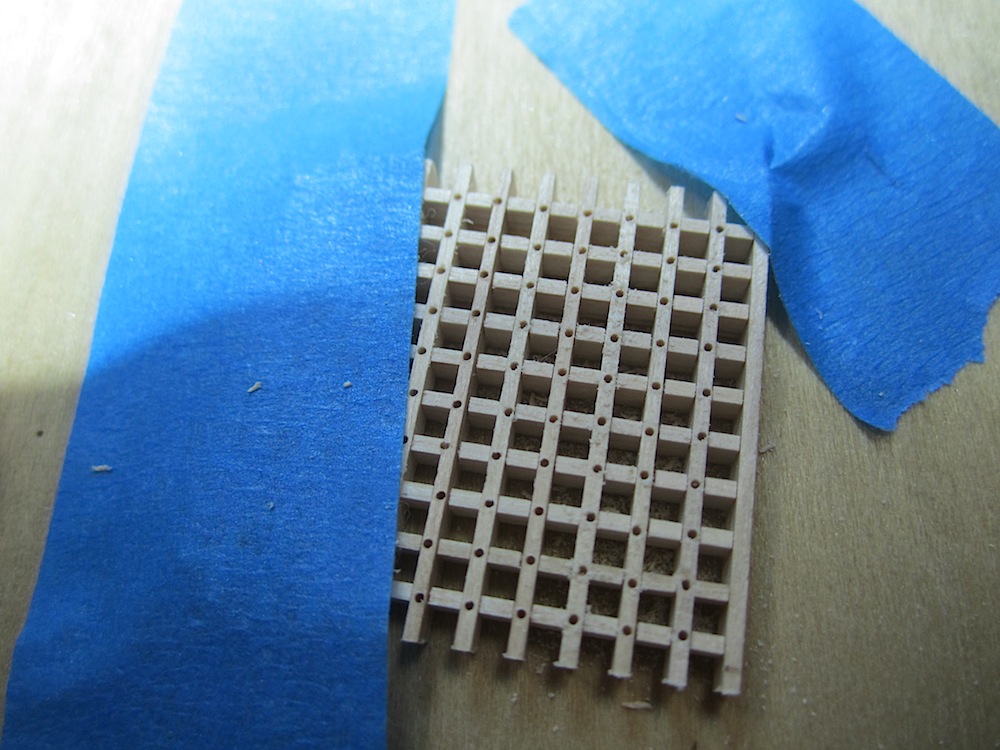
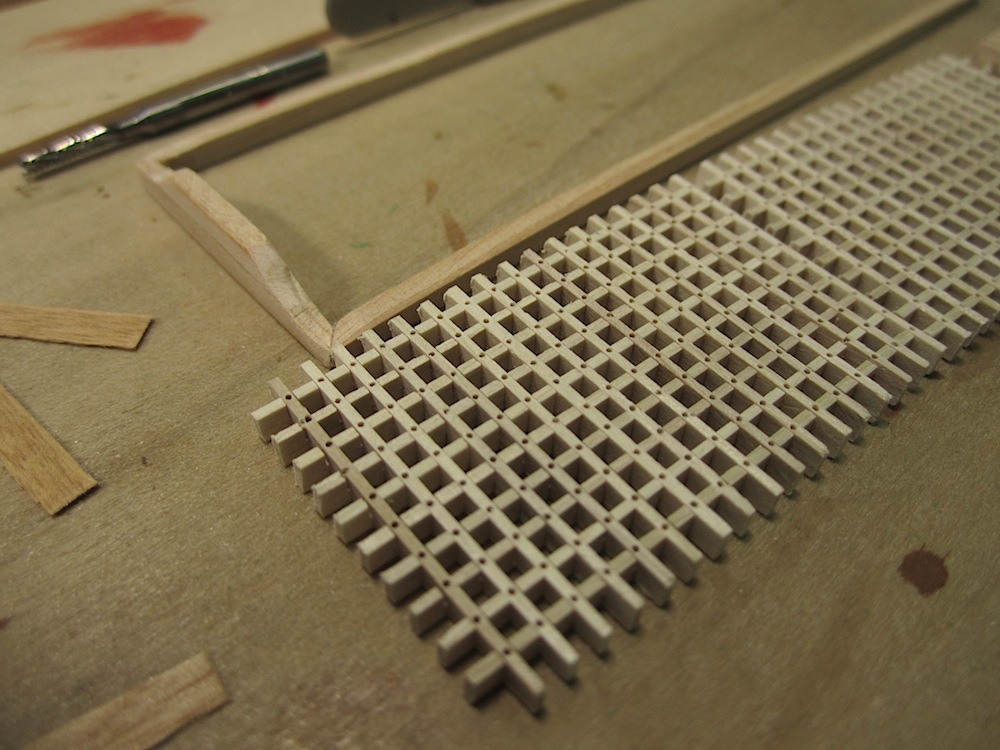
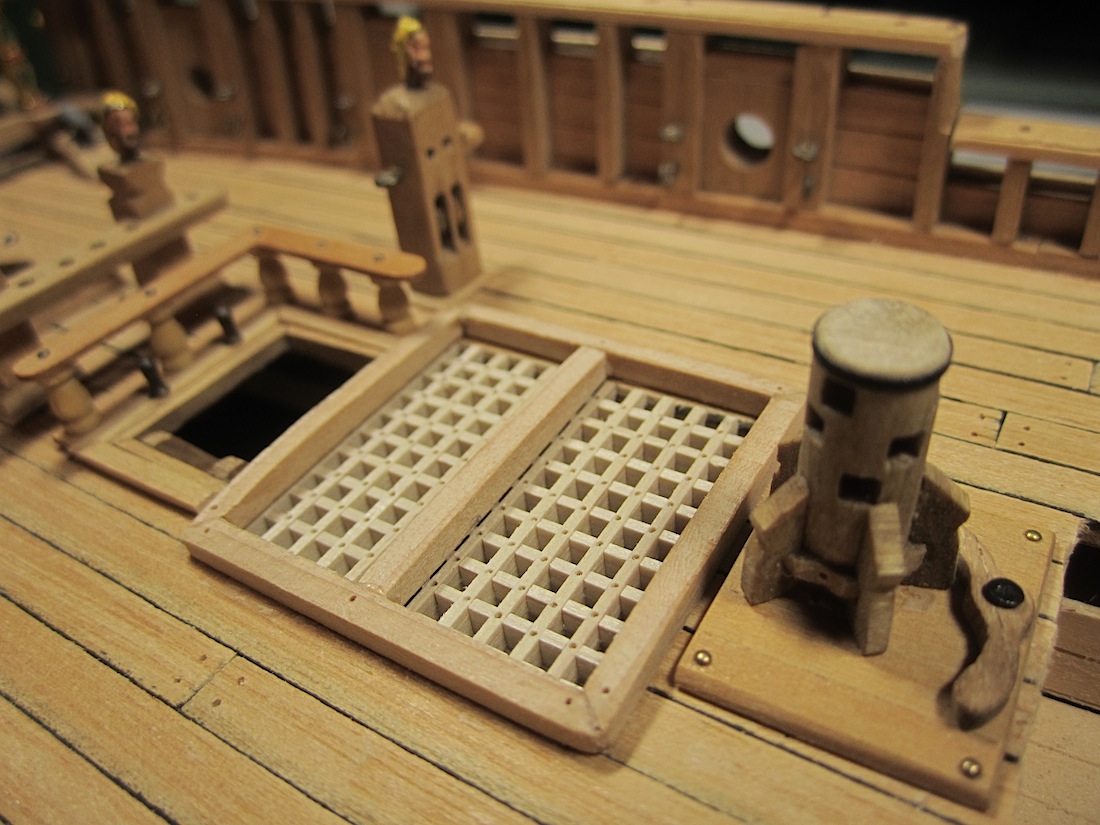
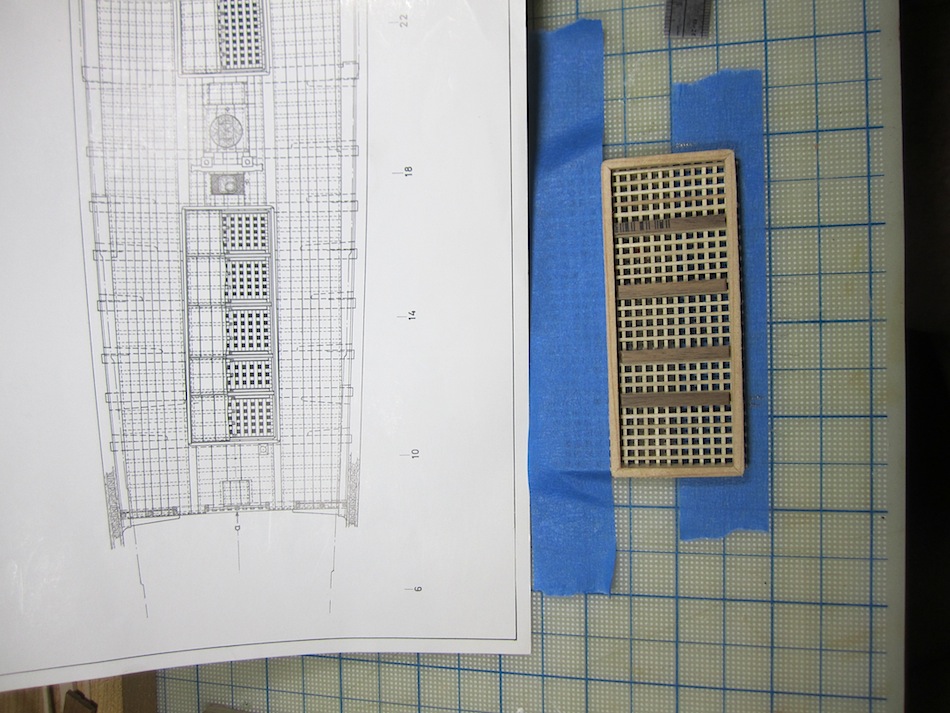
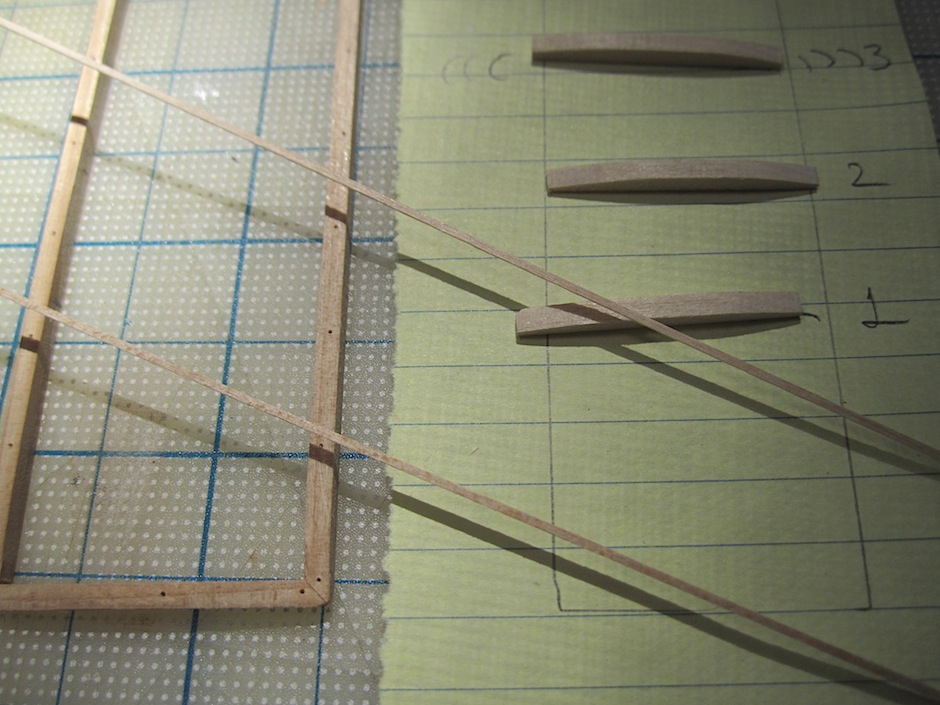
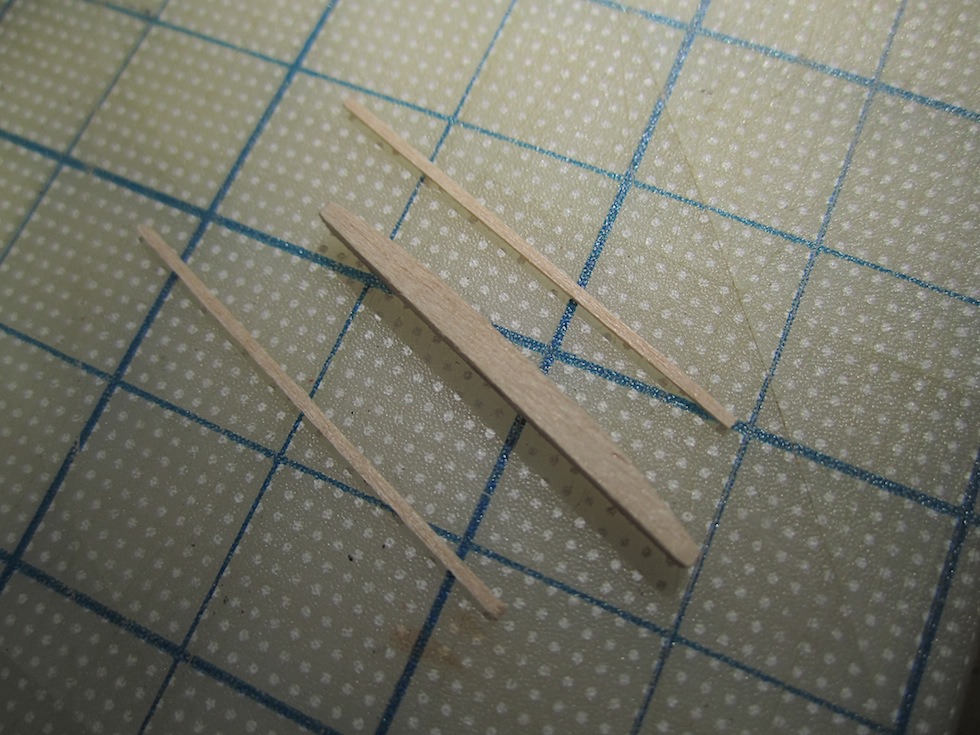
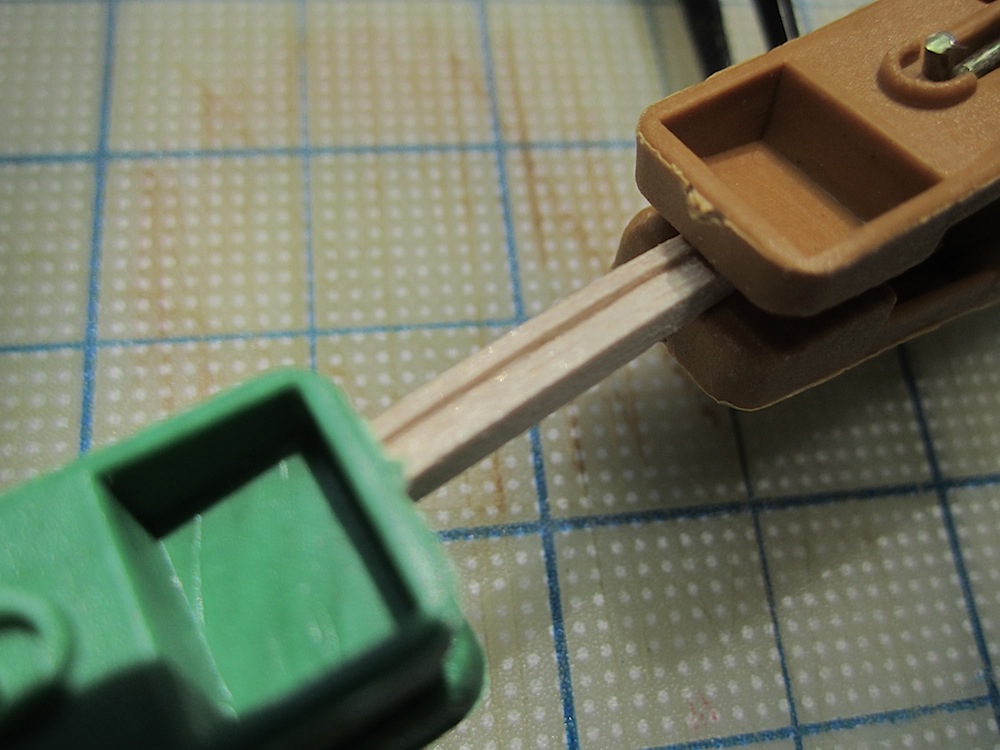
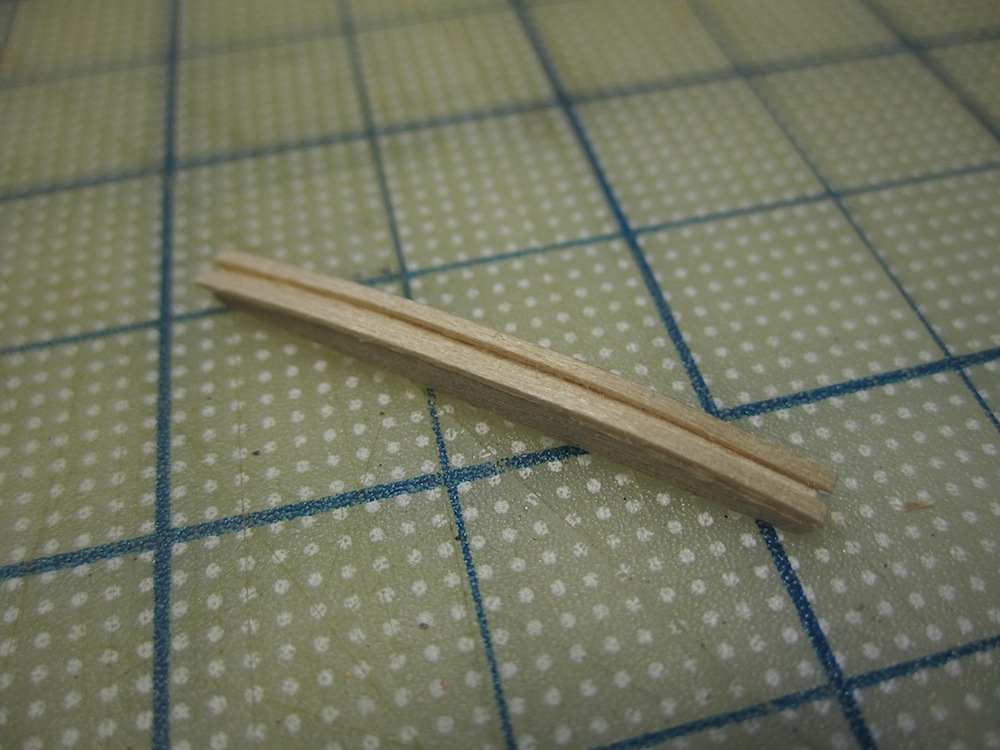
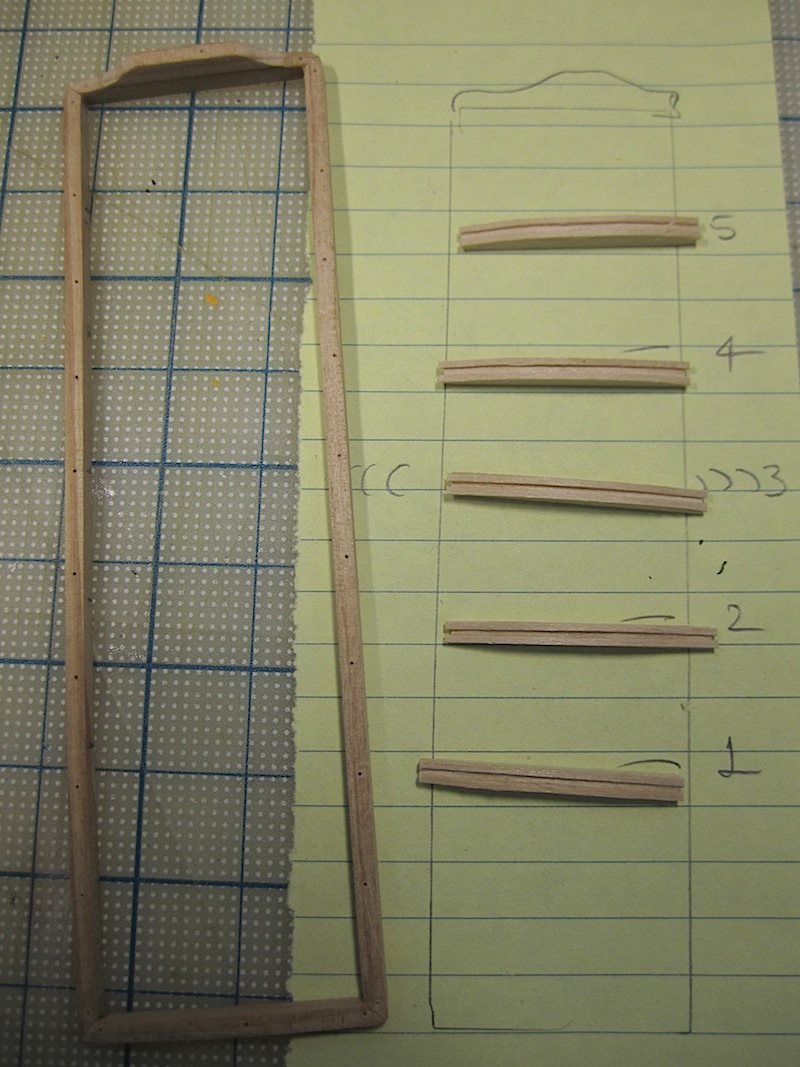
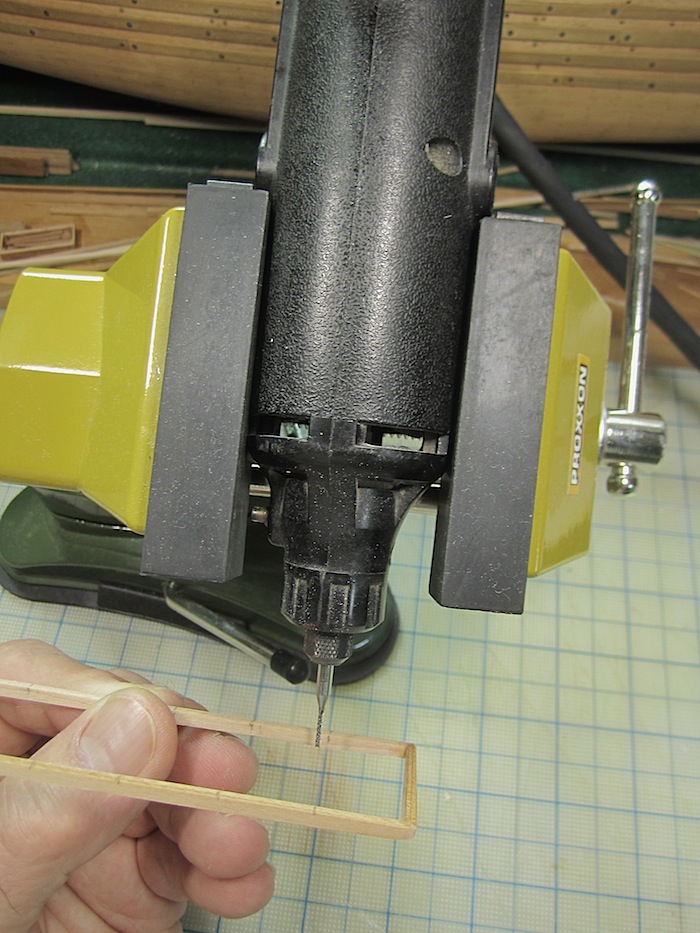
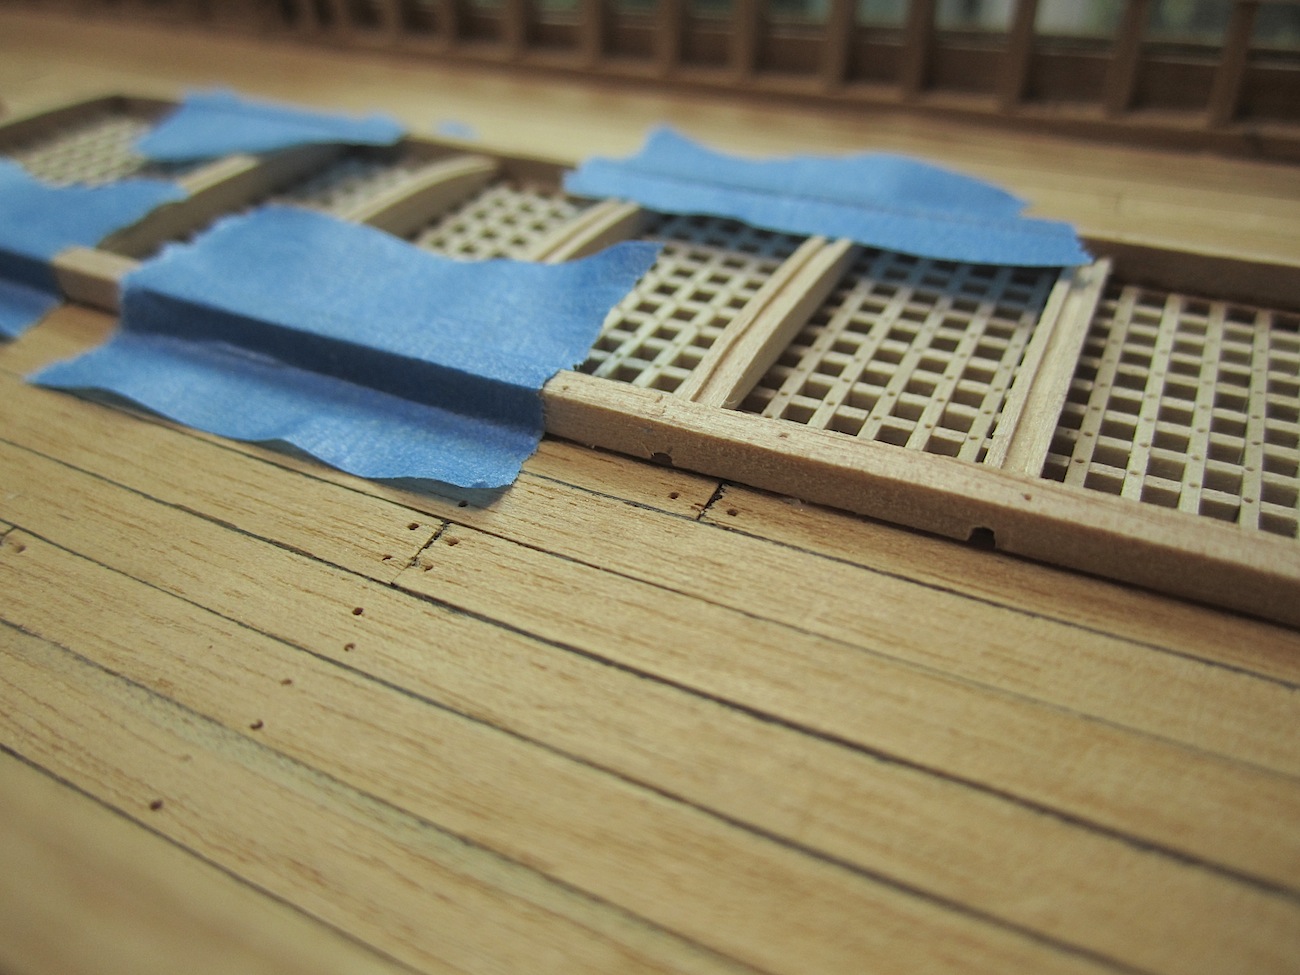
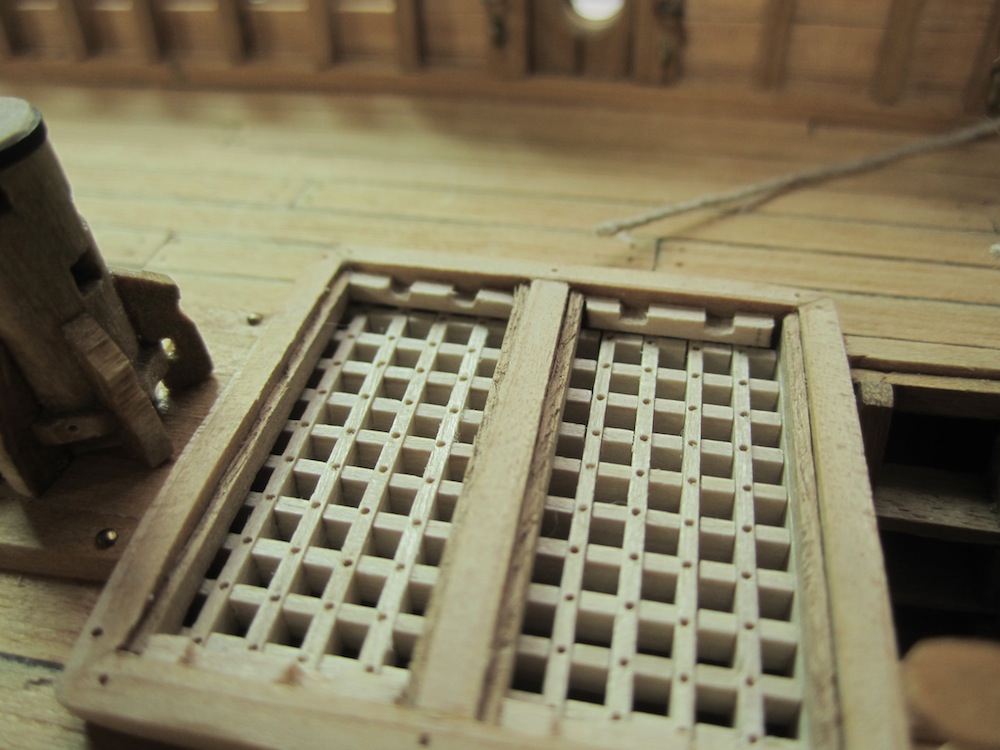
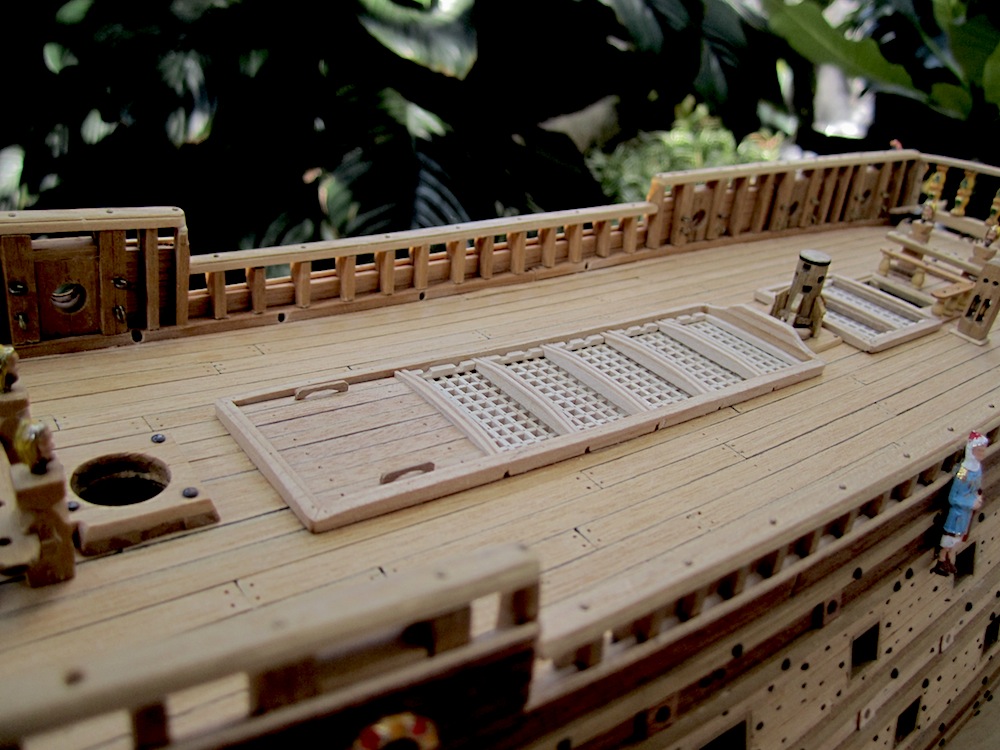
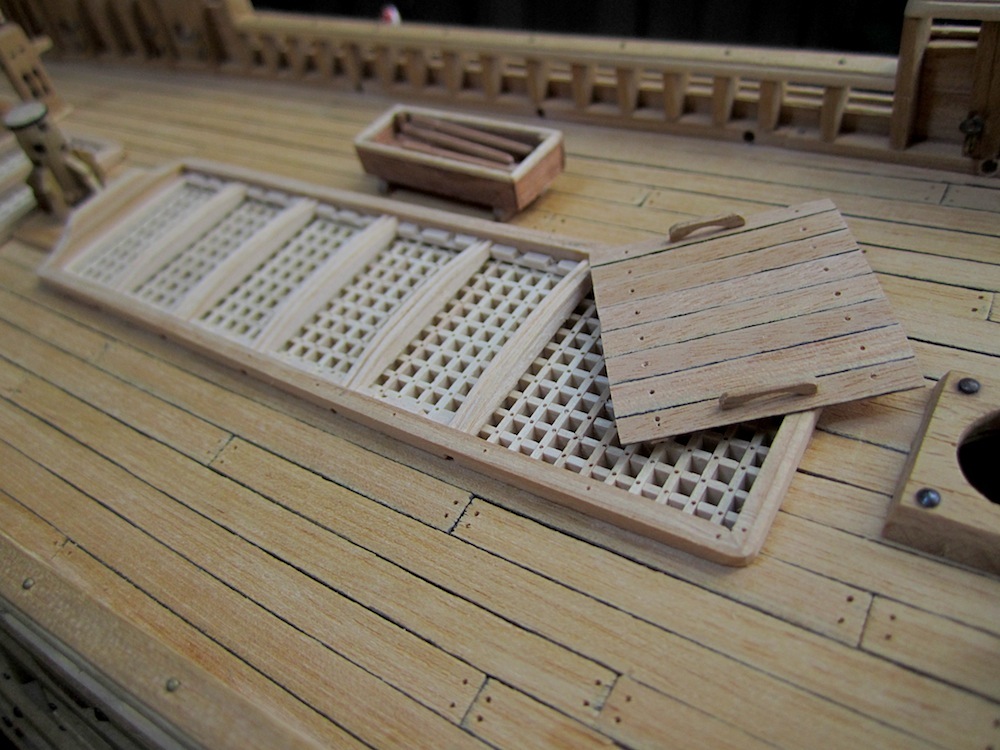
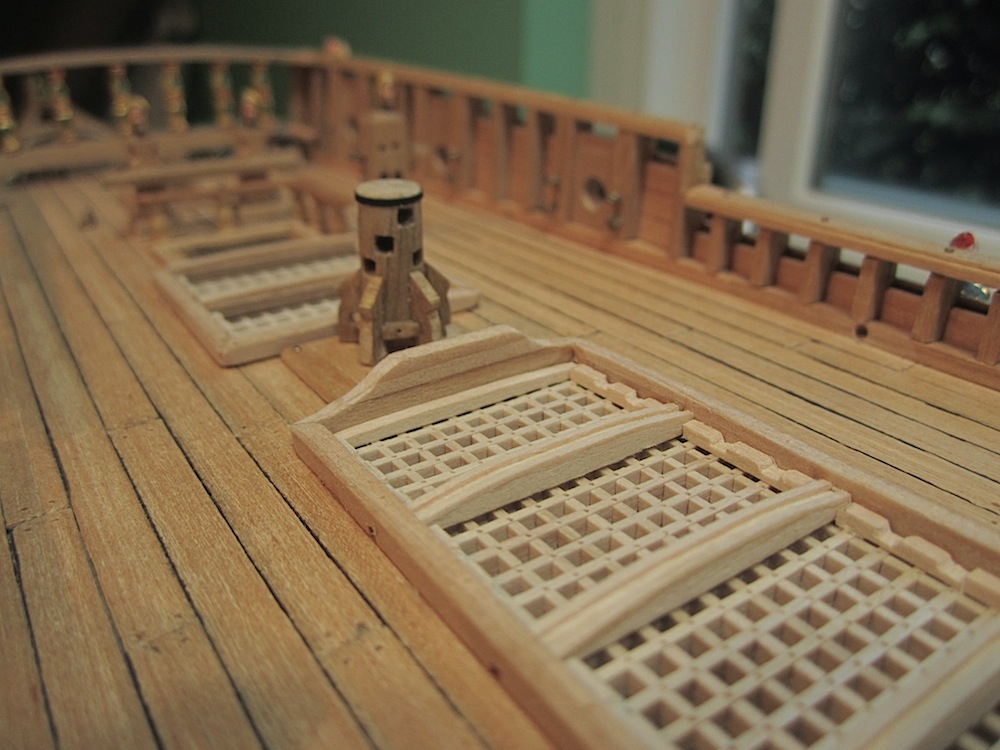
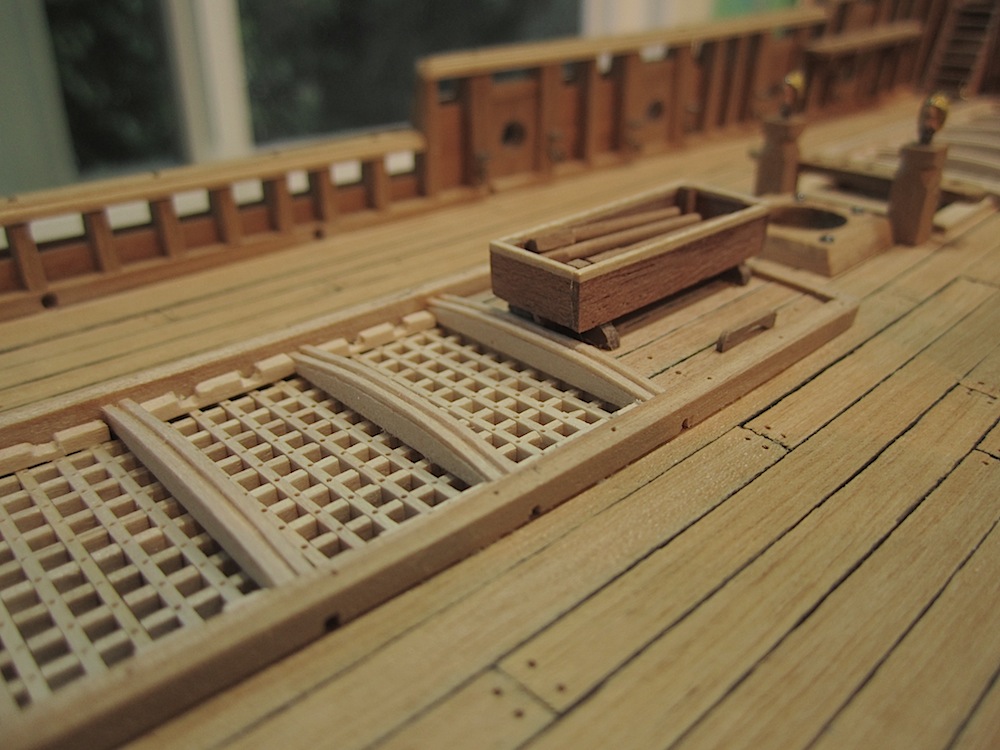
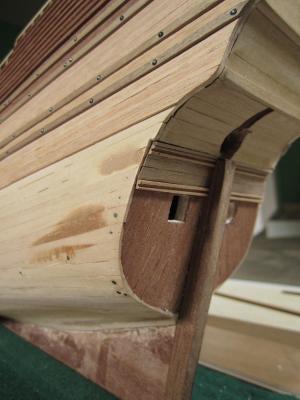
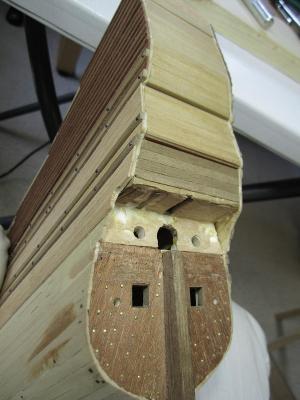
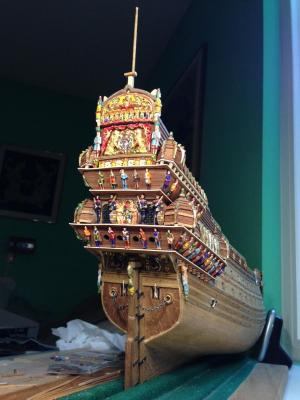
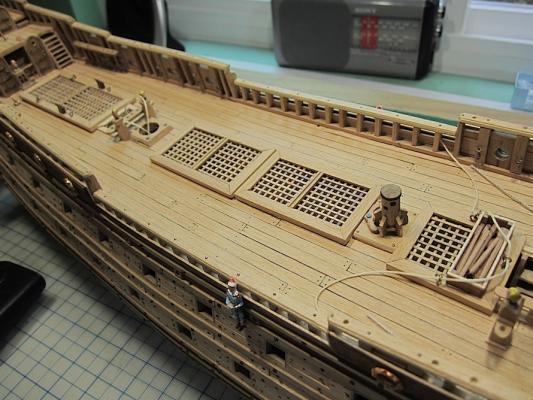
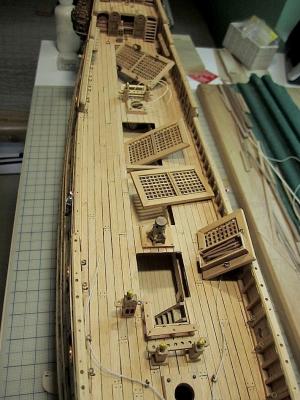
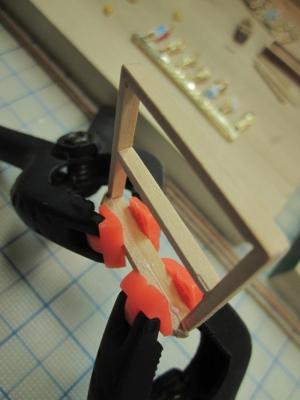
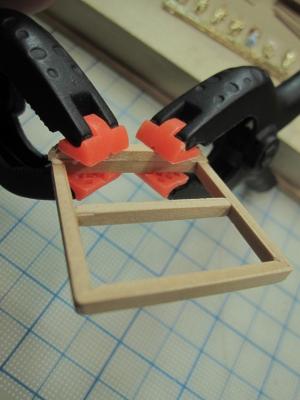
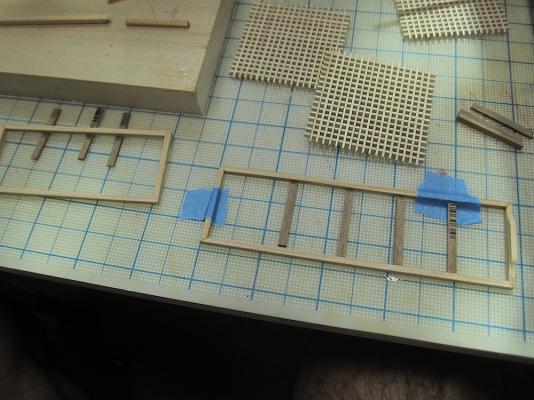
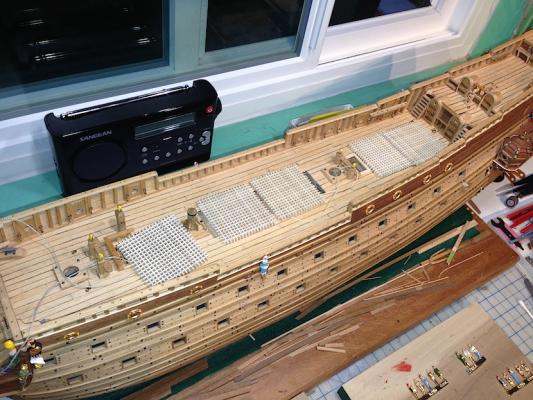
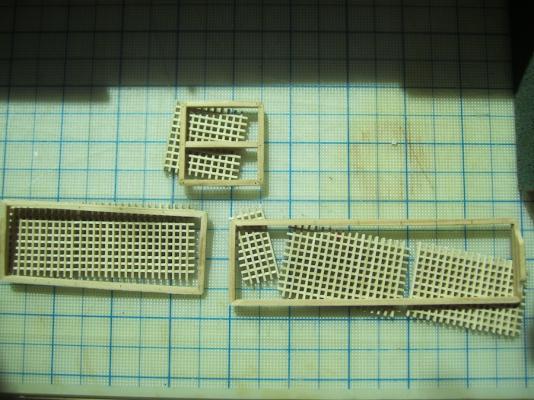
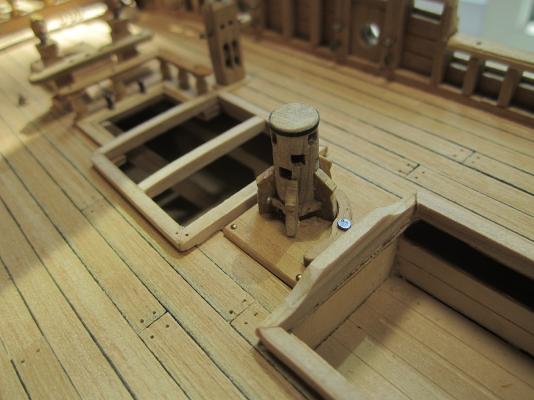
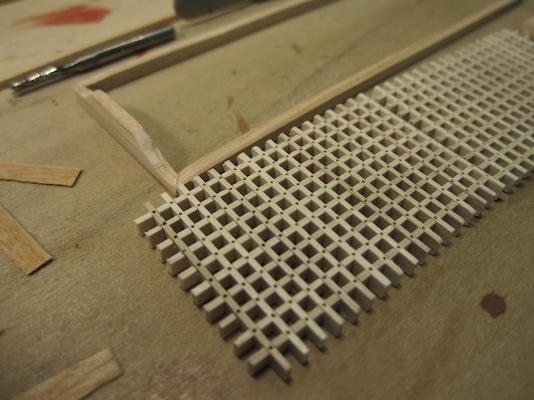
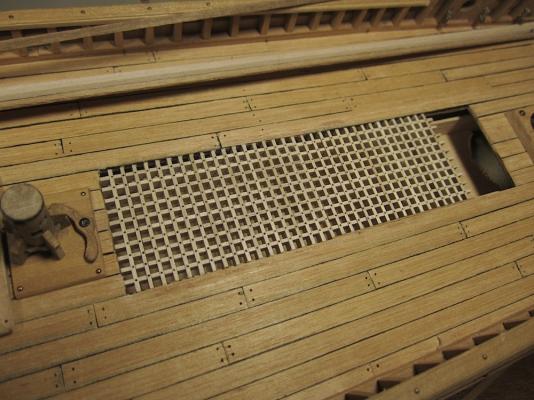
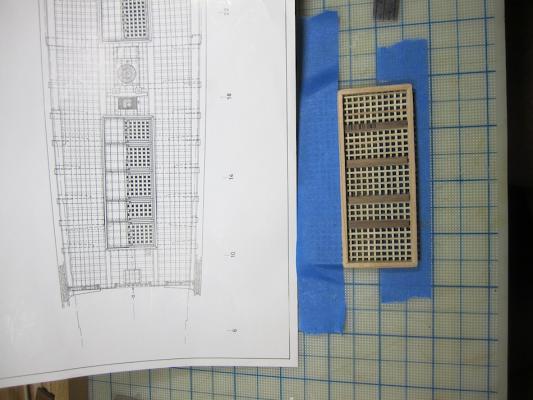
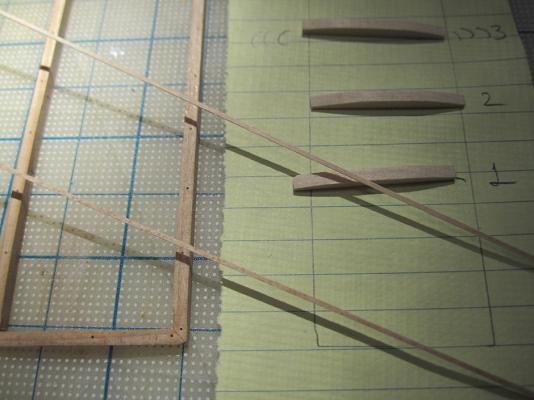
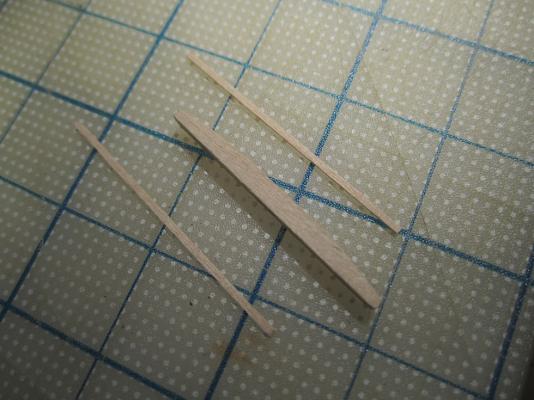
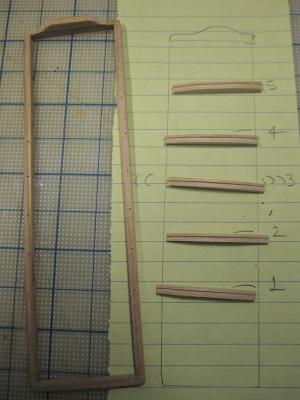
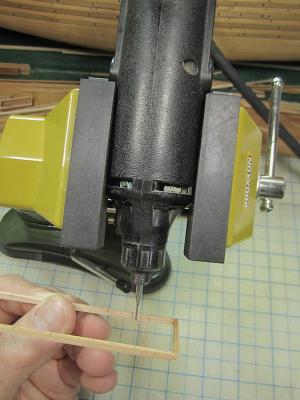
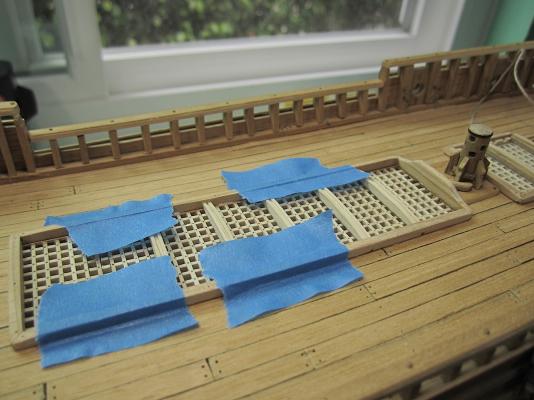
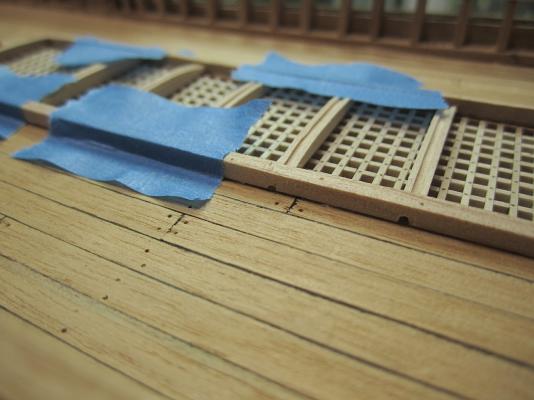
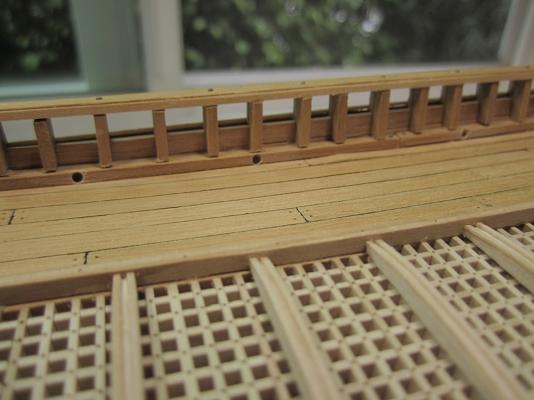
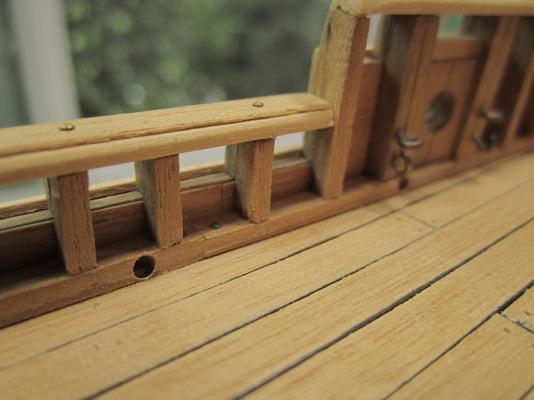
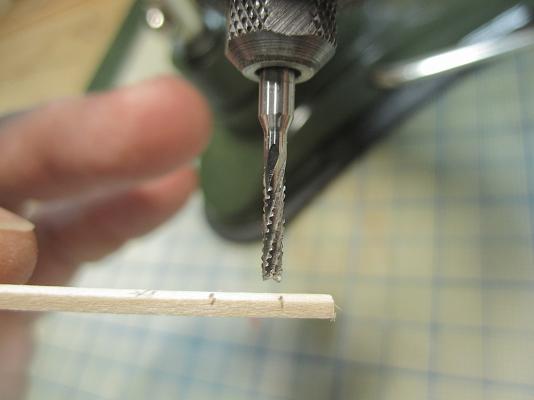
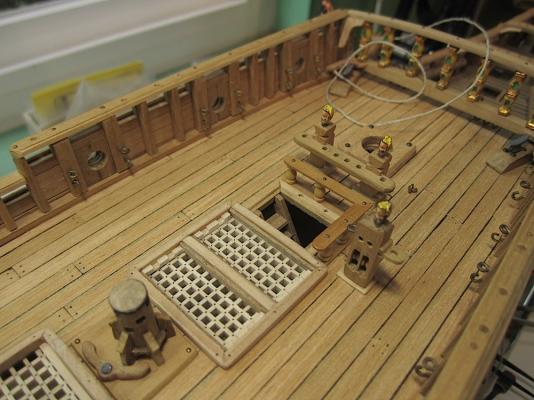
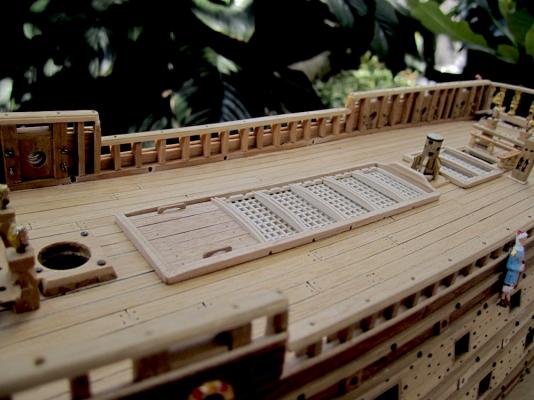
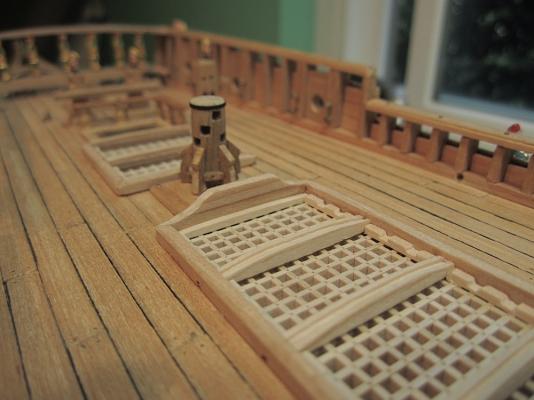
Here is the latest retro-update. When I first started this Corel kit, I was very ignorant in general regarding 16th century nautical accuracy as I was putting this boat together. In fact I was uninformed in general. I have, since joining MSW, had a steep learning curve. And I am now much more aware of what I am doing and how "things" should look. In that regard, the weather deck gratings needed to be removed and replaced with examples that were appropriate for this ship. As well as properly built. So my rebuilding continues. I ordered some new gratings as I could not correctly fit those that were removed. I further decided to follow the 1/10th example by simulating cross member nails in the gratings. After much detail work this is how it turned out. I'm much more satisfied with this latest fix. Though I do still see errors that I could have circumvented had I been more knowledgeable, and better skilled (for example early in the build, I would have correctly tree-nailed the deck, and recessed the lower and upper cannon openings). Moving on...I took Matti's suggestion and installed a cover over one of the grating frames (thanks nice idea) I apologize for the, too many photos in this update. I may have lost my sense of proper perspective. I personally love to look at a lot of photos here at MSW, so I took some liberties with this post. It also occurred to me that many of you whom I follow are very informative with your notes. From which I have become a better modeler. So this post will include more written details. Again thanks for looking in.original grating installation removalslight damage to deck framing. Easy fixstarting construction of new correctly shaped frameschecking for proper fit. On the capstan I also tomahawked the top a bit. I was too tall. Now it looks much more in scale to the original. The upper deck is not complete, but I had no intention of creating it, as some of you have done so beautifully. So from the weather deck looking down it looks correct.experimenting with the cross member nails look. I used a punch to first set marks for the super small drill bit. I found that, on a test piece, the drill bit would sometimes roam before biting into the wood. So, some of the holes were too far off center. The punch marks precluded that. This task took a while.getting there as well. I understand that each grating frame should stand as a separately framed piece, but as a static display this was, for me, in the aggregate OK.initial positioning. Close up shot "gives up" the holes, but viewing with the naked eye from a normal distance almost impossible to read, unless you're looking. Very nice Trompe L'oeil. Purists will be saying, "Hmmm cheating are you?" Yes I am, and I did (:-)measuring for the inner frame separators starting construction of inner separators. The woods had curves on the upper surfaces as well as creases down the middle. So I chose this solutionI curved the tops and added small strips to each upper side. These small strips allow the curved upper surface to maintain its visual perspective. adjusting fit for inner framesset up for small transverse cuts in lower portion of main framesgluing the frames in place, ready for inner pre-measured frames.took a break and drilled out weather deck water drains now preparing transverse cuts for upper inner frames. I then used fine sandpaper to flatten the inner transverse cut. small cut out pieces are now in placethose cover handles will be removed and replaced with metal rings. I was trying to be "creative again".


-
Matti, Yes indeed, your stern as well as your painted figures along with the rd timbers are really super nice. R/ Michael
-
Andy, On the contrary in your case close-ups' highlight your super well replicated attention to details. Always a pleasure looking in on your build. Regards, Michael
-
Lawrence, Thanks so much for your very kind thoughts. They are, of course, very much appreciated. I will update some new build details in the next day or so. Again thanks for following this build, very nice of you (:-). PS: love your country, been there twice Regards, Michael
-
Andy, Finally got caught back up on your build Whoa looks awesome. So in catching up; 1) have a nice trip 2) welcome back home 3) sorry about the trees Your rope details are super nice to look at. Your build is magnificent. A real treat for the eyes. Regards, MIchael