knightyo
-
Posts
527 -
Joined
-
Last visited
Content Type
Profiles
Forums
Gallery
Events
Everything posted by knightyo
-
 Beautiful craftsmanship!
 -
It's looking really good Doug. Also, if you have a major error on your sills/lintels, you can file them flush with the hull, and insert thin pieces of wood to fit, which can be indistinguishable from the other method. I know I did that on a number of mine, and it's possible I did that to all of them! Alan
-
US Brig Syren by knightyo
knightyo replied to knightyo's topic in - Build logs for subjects built 1801 - 1850
There are now officially 4 nails in the Syren. Just test fitting halfway, here. And of course the camera didn't focus on the nails, and I hadn't noticed until uploading....I also intend to blacken these. I DO have a pewter oxidizer in the garage, but am not quite sure if that will work on brass. I'm researching this a bit. I also discovered that my pin vice is nowhere to be found. I used my fingers to enlarge the existing holes with a larger bit. That didn't feel wonderful, so hopefully I can find the pin-vice soon. If not, I'll head to the hobby store. I also discovered by taking this pic that the gunlid "straps" need to be sanded down a LOT, or replaced with metal. They definitely need help. Of course these will eventually need nails as well! Perhaps it would be neat to leave the nails shiny brass against the black of the straps. Although it would be strange to have a mixture of nail colors, I guess.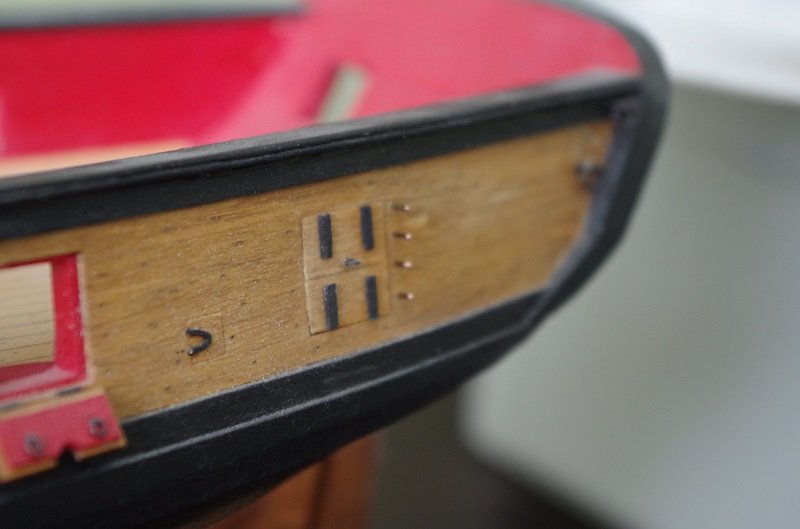
-
US Brig Syren by knightyo
knightyo replied to knightyo's topic in - Build logs for subjects built 1801 - 1850
For some reason, my post above wouldn't allow me to post the pic..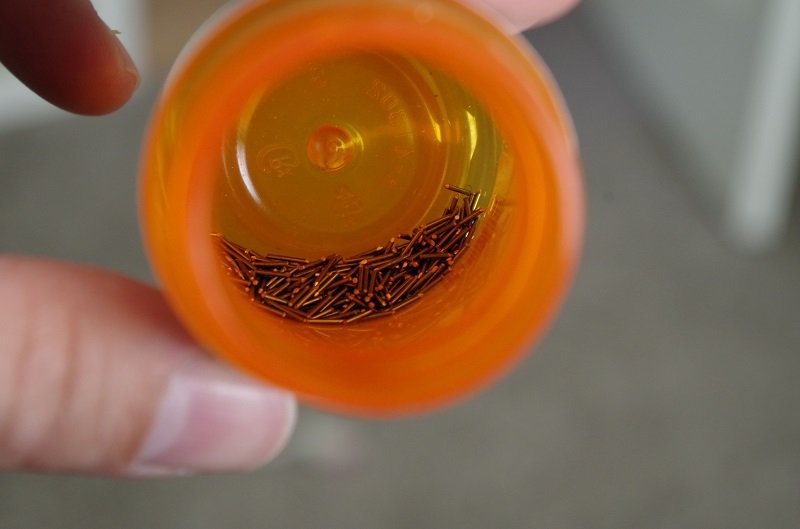
-
US Brig Syren by knightyo
knightyo replied to knightyo's topic in - Build logs for subjects built 1801 - 1850
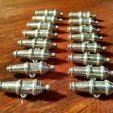
In theory, there are 400 miniature brass nails in this container. The heads of the nails are just a bit larger than the shafts. I used a steel ruler to "cut" and shape the heads of the nails, as it has a 90 degree angle, and each "side" would get a 45 degree bevel. I'd like the heads to have been a little larger than the shaft, but this is do-oable. The issue encountered which caused consternation is that the pliers I used to cut the nails from the wire as they were complete also pressed the metal at each cut point, creating a flat end which was usually also wider than the shaft. Sooo... I had to file down the ends of every single nail down to the shaft width or less, so they'd insert into the hull. At least it was very easy to do so. The entire process was actually extremely easy; it just took time, and couldn't be done in one sitting. I just worked on them in numerous mini-sessions throughout the week. Why bother creating all of these, when they can be purchased, you ask? I do have a number of nails about the same size, and they just don't look as "realistic". I also wanted to try out a new technique to see if I could pull it off. -
This model is going to be gorgeous when sanded.
-
US Brig Syren by knightyo
knightyo replied to knightyo's topic in - Build logs for subjects built 1801 - 1850
Thanks guys. I woke up this morning and had a nice hot cup of coffee while perusing MSW. I then constructed about 180 little nails. That was really a fun way to start out the day. I think I have around another 220 nails to go. -
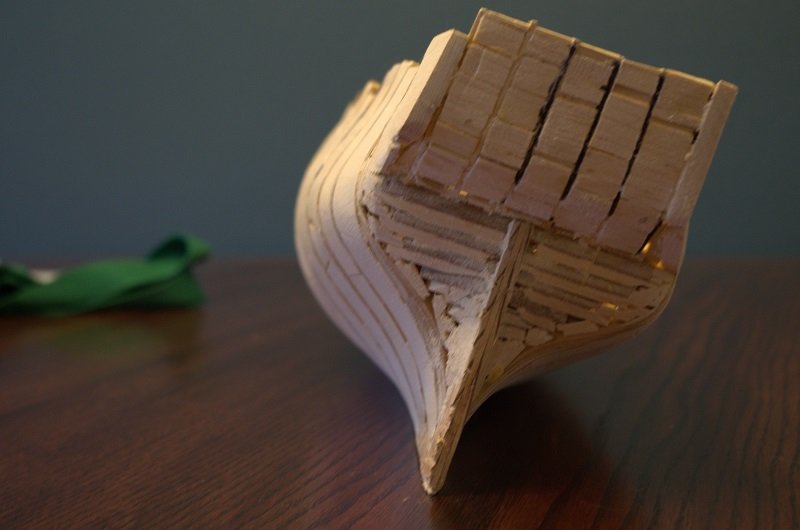
Stern before sanding.
-
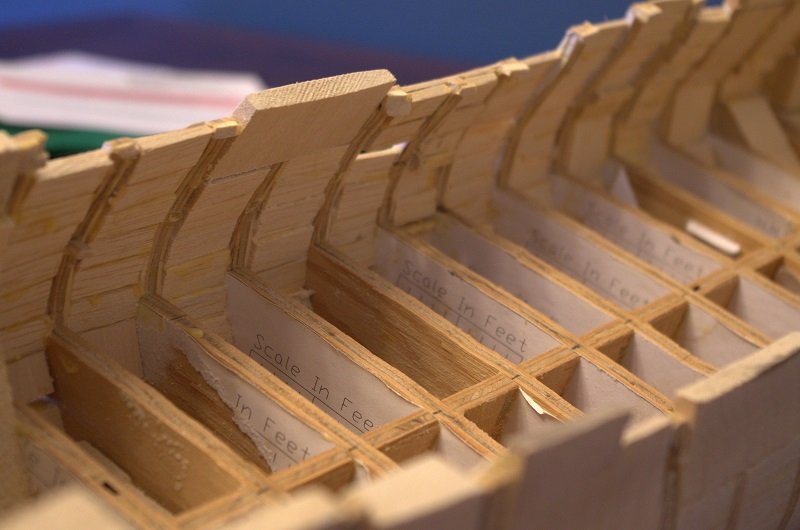
Photo of the inside before sanding. There's a part of me that really enjoys having horrendous "innards" to my models, which are then covered up with planking. You can see how much sanding needs to be done on the inside for a smooth surface. I'm also cutting out the center pieces of the templates, and setting them on the tops of the bulkheads. By doing so, it's really easy to see which inside aspects of each bulkhead need to be sanded.
-
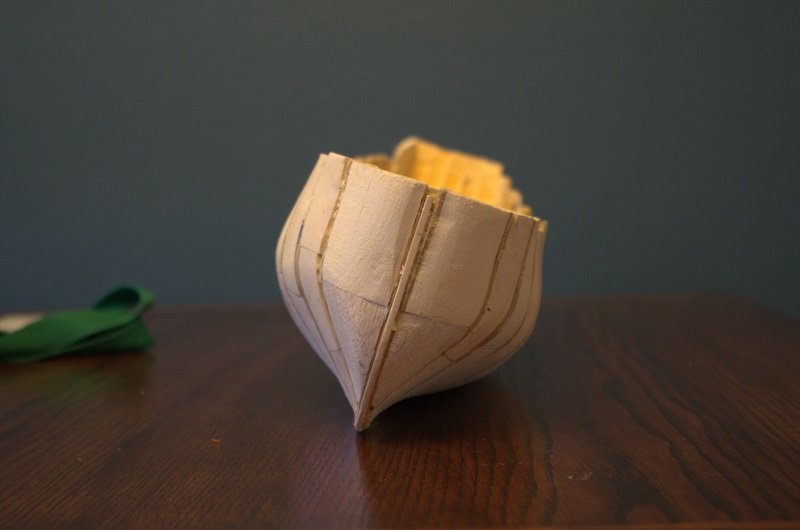
Front view after initial sanding. I went "all in" with my basswood filler pieces. I cut and glued basswood throughout the entire model, to ensure I'd have a nice and smooth surface for the planks to lay upon. After more sanding, this should be a pretty nice surface.
-
This looks ghastly, but all of this will be covered with exterior wood later anyway. Here, I'm going for accuracy and strength. The stern "risers" have random pieces of basswood glued between them for strength. The counter section also shows basswood pieces which have been inserted between the pieces from the actual templates, which have been sanded to shape.
.jpg.ac8e220997022cfb3f87cd6cd8227bbc.jpg)
-
Assembling the stern pieces with basswood
.jpg.f59e3171e5c799a4c58627b3370a89ef.jpg)
-
The difficult part about these particular bulkheads, is that if you cut them out to match the inside thicknesses of the templates, the tops of the bulkheads are very thin, and prone to breakage. This is alleviated by gluing scrap material to the ends of the bulkheads. In this case, basswood.
.jpg.18744e5d3a42b1badfaccb1e38a6588d.jpg)
-
I do remember having scale issues. For those who are resizing their plans to a different scale, it's definitely a good idea to be careful. I had to create an entirely new profile former due to printing the plans out incorrectly for the scale I chose.
.jpg.d46b0ca351758d40c2ed3c65d292dbdc.jpg)
-
Bulkheads cut out, and dry-fit into place. They haven't been glued yet, as evidenced by the mis-alignment of a few. I think I took the pic just to see the general shape of the hull.
.thumb.jpg.6cbaf35e12b2f8494dbb2b48eb970a25.jpg)
-
The profile former is just standard plywood. The photo shows the attachment of the rabbet piece
.jpg.4ee5aae6640083dcc8d9a5fc31bee829.jpg)
-
I used to have a Triton log, but it went down with the crash years ago. My priority is to finish my Syren, but thought I'd post my old photos with a few comments. I don't see a lot of POB logs on here, and suspect people considering the POB version might be hesitant due to the lack of logs, and mentions of a bulkhead which might be out of scale. I've rescaled the plans to 1:64 which is my preferred scale. The keel pieces are pear. The photo shows a number of test pieces.
.jpg.33e42242ae4f129f3bcb4684b8a3614b.jpg)
-
US Brig Syren by knightyo
knightyo replied to knightyo's topic in - Build logs for subjects built 1801 - 1850
Below are a few of my nail "tests". The broken stick right to the left of the gunport has the smallest of the nails I created today. The next stick has larger nails. I also applied black paint to the upper nails to see how they looked against the hull. If I do end up using black, I'll chemically blacken them. The black nails pictured looked misshapen, due to cheap acrylic paint globs on top. Also... Apologies for the dust and cobwebs! I expected to see that when looking at the model again. What I did NOT expect to see was the little dash of red paint on the left side of the gunport. That will be remedied tomorrow.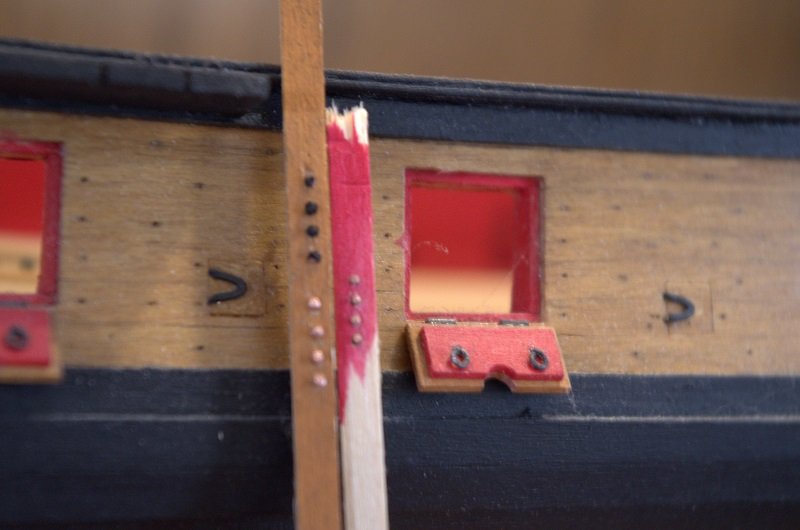
-
US Brig Syren by knightyo
knightyo replied to knightyo's topic in - Build logs for subjects built 1801 - 1850
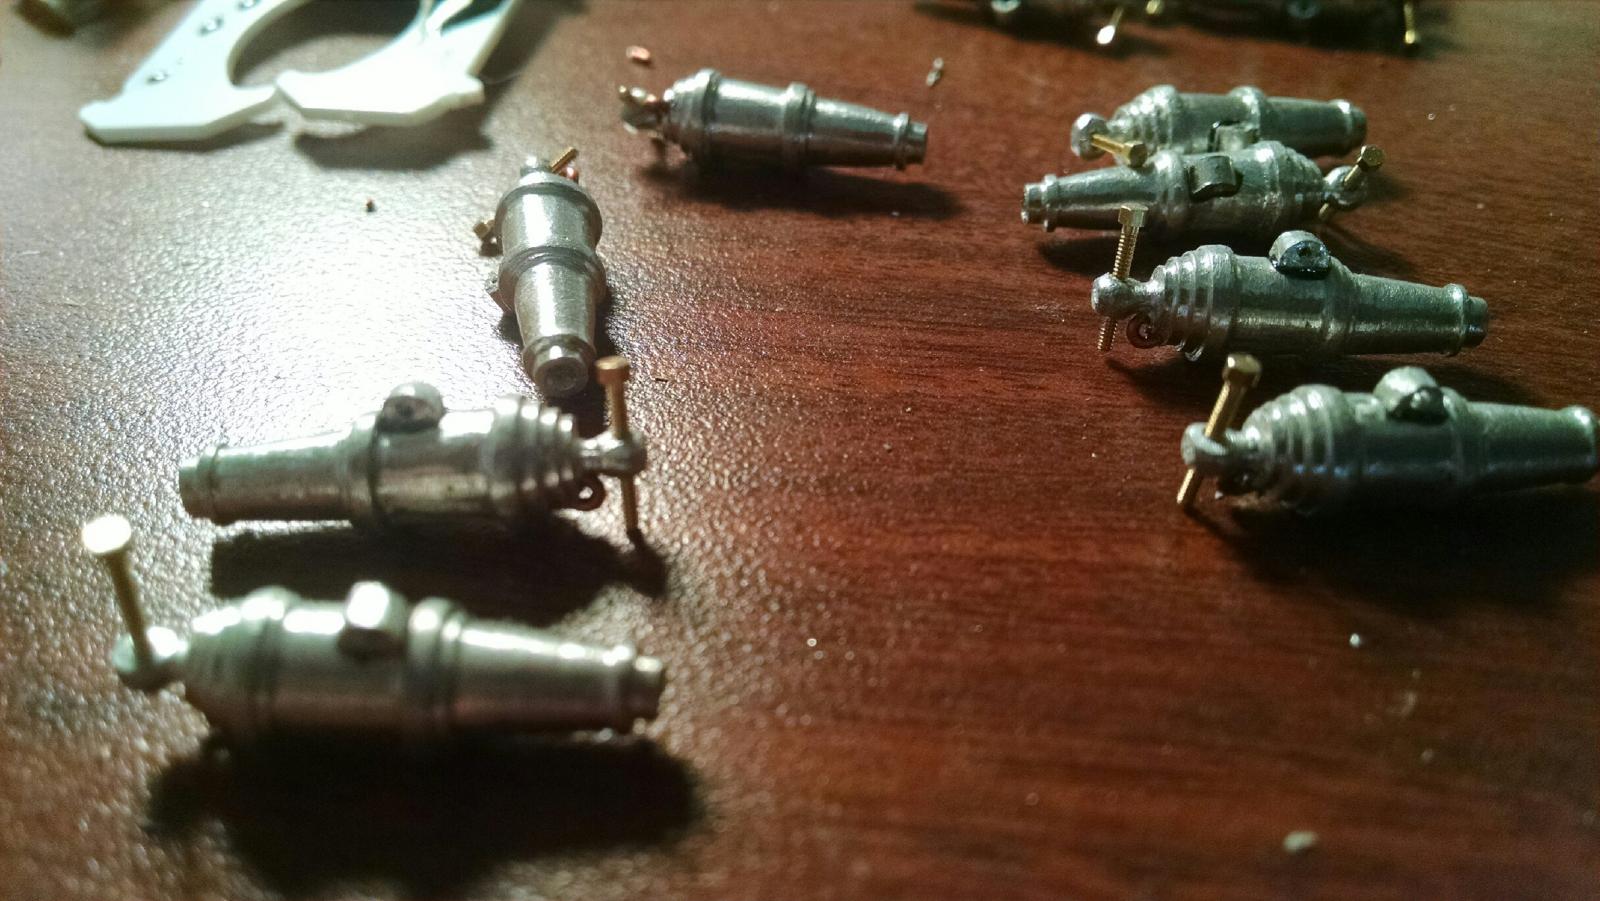
Almost two years between posts and progress. Life has slowed down a bit for me in recent months, and I've been able to start getting back into the hobby. I've created silicon molds for the "devices" used to secure the bottoms of the guns. It's proven extraordinarily challenging to manufacture these (am using pewter, the same as the guns). I've actually been working on these for months off and on, and teaching my pets new swear words. When I don't have the patience to work on these parts, I've been working on my Triton, since I'm in the "easy" stage of shaping the hull. Man, that part of a build is satisfying. I've also been watching Dr. Mike's method of creating nails with extreme interest, and have decided to create nails using his technique (practiced the technique quite a bit this morning). I've decided to incorporate nails into the hull of Syren, inside and out (haven't decided which metals to use yet), as well as the insides of the gunport lids. I'm thinking brass nails would show up really nice against the bright red of the gunport lids, but might blacken them. Either way would technically be inaccurate I believe, as they were surely painted over on the actual ship? I'll probably use the same pattern as on the Constitution below.
-
I've used Ebony once, and vowed never again. You have done a fantastic job with it. Very impressive!
-
US Brig Syren by knightyo
knightyo replied to knightyo's topic in - Build logs for subjects built 1801 - 1850
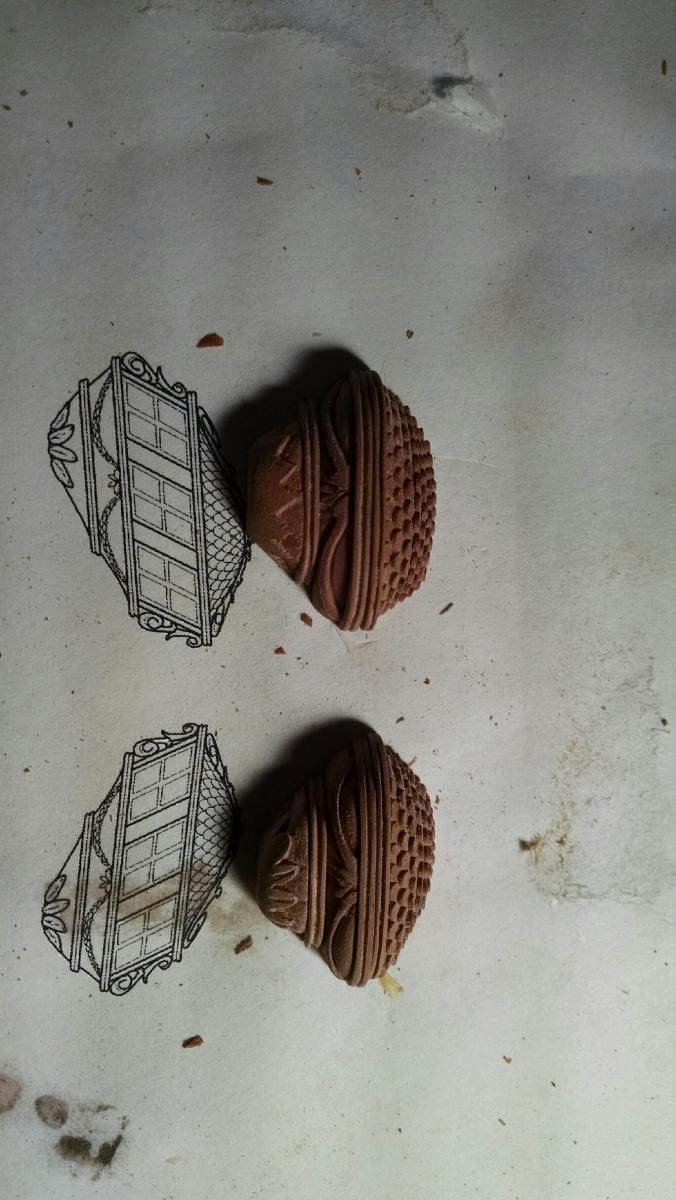
Still working on the quarter galleries. I "think" I'm about half done with these things. All of the shapes have been rough cut, and I'm now just trying to shape everything with blades/files/sandpaper/swearing. I wish I had more pics to post, but these things are really taking a long time. I pretty much work on them as long as I can until either my back starts hurting, or my eyes refuse to focus any longer. I'm really looking forward to finishing these, and then installing the windows, etc..
-
US Brig Syren by knightyo
knightyo replied to knightyo's topic in - Build logs for subjects built 1801 - 1850
Thanks Chuck, it's a blast to be working on this again. I'm still following your practicums step by step. If you see me start heading down a wrong path anywhere, just let me know! -
US Brig Syren by knightyo
knightyo replied to knightyo's topic in - Build logs for subjects built 1801 - 1850
Today I was able to rough shape all of the quarter gallery components with the exception of the windows, which I'll tackle after the main components are finished. I've set the components next to each other in order to give a rough sense of where I'm headed with these. The molding pieces are pretty well sanded to their final dimensions. They just need to have the molding lines fine sanded so they are all uniform. The "filler" pieces are all very "fat" at the moment. I'm planning on carving as much of Chuck's detail I can into these, and want to have a lot of wood to work with in order to increase the odds that I can carve something acceptable into these things. If the carving process turns into a train wreck, I'll just sand and shape everything smooth and pretend it's supposed to look like that.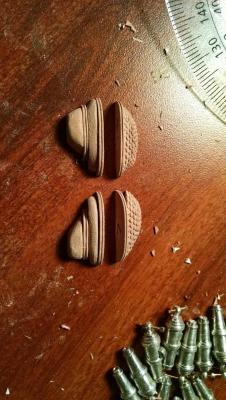
-
US Brig Syren by knightyo
knightyo replied to knightyo's topic in - Build logs for subjects built 1801 - 1850
The miniature brass bolts arrived, and they fit my pre-drilled holes really well. However, when the bolts were seated in the holes, alignment issues between the bolts, breech rings, and the piece which lets the carronades move up and down became very apparent. I've removed and reseated about half of the bottom rounded pieces as a result. I also worked on the 2nd rounded pear pieces of the quarter galleries. They are roughly shaped like the upper pieces, and now need to have the molding scribed within. Once those pieces are done, I can start working on the windows; that is going to be extremely challenging, but also probably pretty fun.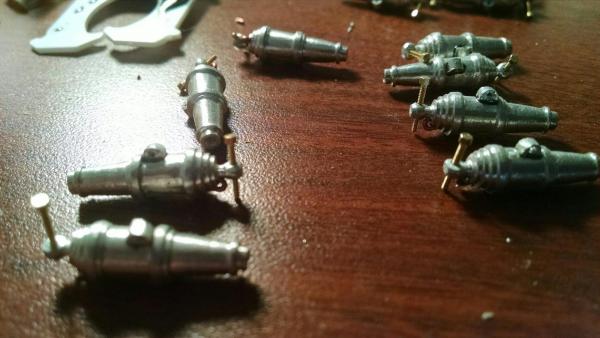
- 77 replies
-
- 10
-

.jpg.1152b7540cc5dd2136e8c264608c0bab.jpg)