knightyo
-
Posts
527 -
Joined
-
Last visited
Content Type
Profiles
Forums
Gallery
Events
Everything posted by knightyo
-
 Thanks Doc! I've been perusing the POF logs, and it's clear that my bow section at and under the waterline needs to be far sharper. This will bring the lower section of the hull in the bow area "back" to the lower deck template. Unfortunately, this means I'm going to have to do a major restructuring up front; I'm going to experiment a bit, and create my own hawse pieces from the POF plans and insert into the model. I need to be quick about this however, as the weather outside is starting to get chilly, and my "sawdust" projects are always put on hold in the winter. I'll get as much done on this one while the weather holds, and then move back to the Syren when it gets cold. Alan
 -
Dan, What about creating your own deck "planks" out of veneer or foil, similar to Doris? How wide are the planks on the print? Would it be possible for you to glue very thin cuts of wood together and sand down thin in order to create planking? You could use the existing deck as a planking guide, and to turn that deck from a frustration, into a masterpiece! Alan
-
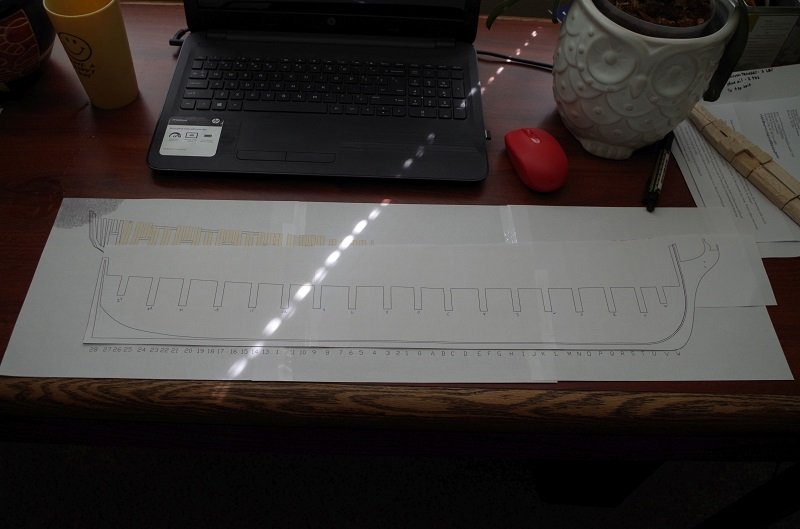
It might seem funny, but I'm still pondering how the lower deck template is fitting on top of the bulkheads. There really is a big gap in the bow area between the edges of the template and the hull; yet the front bow bulkhead template fits vertically within that section smoothly. That bulkhead station really is supposed to be that wide. I've compared the tops of the bulkhead templates to the drawings, and verified the tops of the bulkheads match the height of the lower deck. I've test fit the gun deck templates in their estimated places, and they seem to fit very well. The two decks align very well with each other as well. I printed out the plank-on-frame profile, and overlaid the POB profile on top, just to make sure I didn't have any issues there. Everything lined up perfectly. Whew! I was also able to verify that station "0" on both styles of builds were located in the same spot, as that's how I'm lining up the deck templates into the model. Edit: The card modelers among us will get a kick out of the top left section of my plan and water cup. Alan
-
It sure looks like you've matched the Argus' stern section well. It's been fun to watch the modifications you've been making. I wonder how many times one of the cannons right outside the door was fired when the crew knew someone was on the crapper? Probably depended upon the captain's sense of humor. Alan
- 1,135 replies
-
- 3
-

-
- model shipways
- syren
- (and 2 more)
-
Thanks Jason! I'll definitely need to do some more template fitting in the bow area. I think the next step will be to dry-fit the gundeck templates to see how well they match the curvature of the hull, and go from there. Once the decks are installed, I'll probably go back into my old postings and make notes for others on what I should have and should not have done, in order to make the process easier for the next builders.
-
US Brig Syren by knightyo
knightyo replied to knightyo's topic in - Build logs for subjects built 1801 - 1850
Ok, the rivets have been removed, and I've "cleaned" the rest of the holes on the port side. My pin vice actually gave me a blister doing this, so starboard will be done on a different day. I'm also thinking about running basswood through my drawplate for the trennails. I'll need to run another light coat of stain over everything in order to darken them once they are installed. I was going to work on the quarter gallery carvings a bit more, but broke the last #11 while working on the Triton. Looks like I'll be making a dash for the hobby store at lunch tomorrow!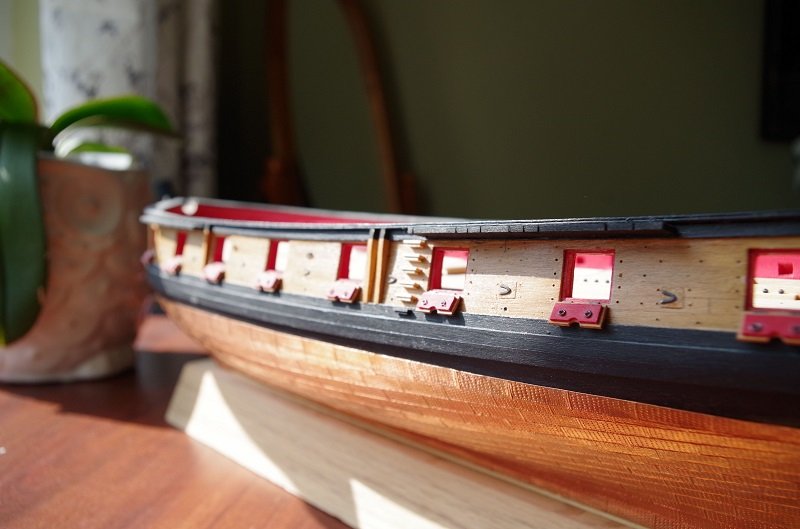
- 77 replies
-
- 10
-
-
I've been whittling away at the internal "structural" planking back to the bulkheads in order to allow the deck templates to seat properly. The midsection is fitting well on each side, but I do have a worry about the bow section. There is quite a gap from the edge of the template to the side (same for the other side). The internal vertical bulkhead template fits well in this area, so I'm a bit confused. Alan
-
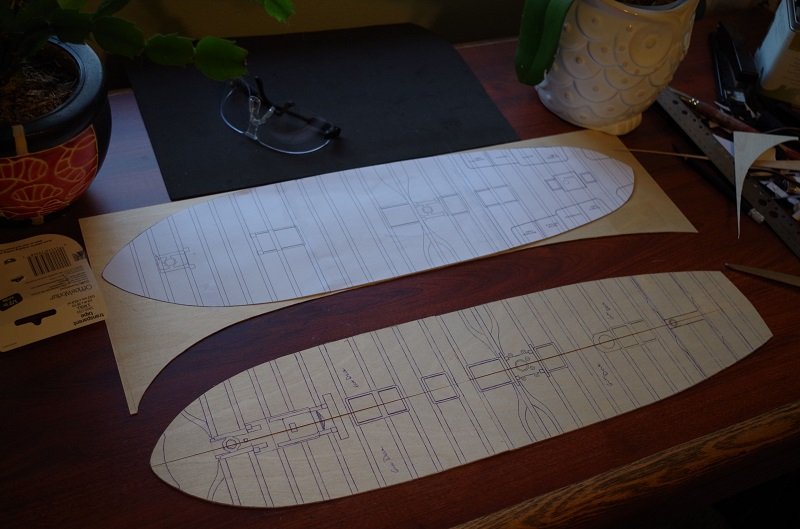
The decks templates have been printed to scale and taped to 1/32" plywood. I then used my xacto to cut out sections, tracing their edges onto the plywood. The plywood has then been cut into quarters so it can be placed within the model. I learned this method from Chuck. The gundeck guide is complete with the exception of cutting out the hatches, so I'll now work on the lower deck. I've already planked the sides of the hull where the lower deck will be seated (warning for future builders), so I'll have to sand the edges of it in order to obtain a proper fit, or remove that band of planking. I'll probably cut/sand/shape that planking band just to ensure the deck fits precisely into the model, since I know the deck dimensions, etc are exact. I'm also going to draw out the deck planking pattern onto the decks in order to make sure the planking is done correctly, and that deck features are installed in the proper locations. I'm planning on placing an order for 1/16" Maple Strips from Woodprojectsource.com. I'm planning on using Maple for the decking, and pear for the entirety of the rest. The cross-sections have really been fun to peruse, as you can examine the woods other builders have used, and determine the look you desire. For me, pear throughout is the most appealing. Alan
-
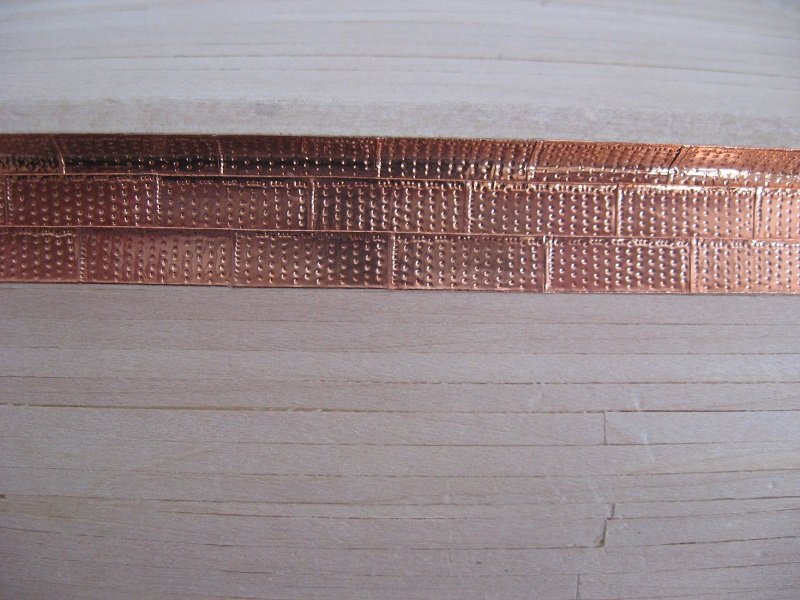
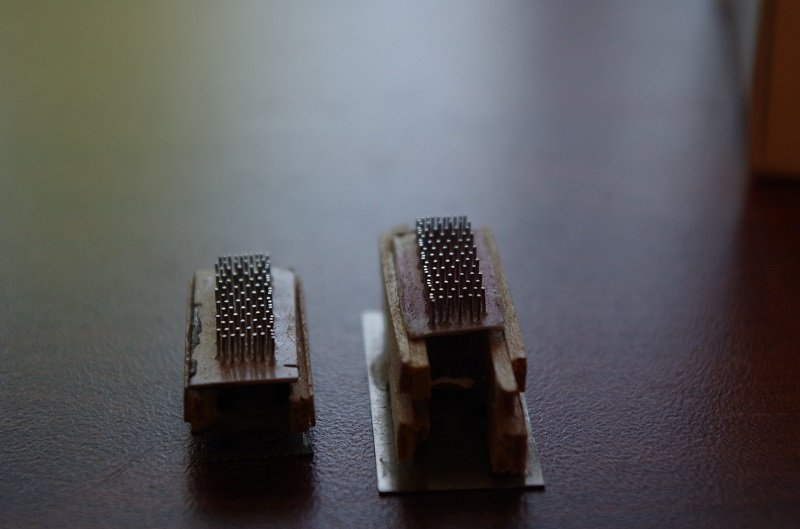
Hi Doug, I made a jig very much like yours and used diabetic needles. I printed out the pattern I wished, glued it to thin cardboard and slid each needle through the proper "hole" in the pattern so they just stood out the other end a touch. Resin was then applied between the shafts in order to keep them from moving when I filed the "sharp" ends of the needles. On the "blunt" end, it looks like I used liquid steel in order to affix a backing I could press down upon. I "think" my diy jig allowed for "wobble" as well, so I didn't need to pull the unit straight off the tape, which made it easier to disengage. It does take a little practice to use the jig, but you do become proficient fairly quickly, and that part of the project becomes fun rather than a burden. You can see along the edges where there are a LOT of rivets, that they aren't perfectly symmetrical indentations. I'm not sure if this is from the jig nails "moving" after repeated use, or if it was because I was too lazy to align them perfectly before launching into the indenting process. Probably the latter, unfortunately. Edit... For the life of me I couldn't remember why I'd made two jigs, until I realized one was for port, the other for starboard. The pattern I used did differentiate. Alan
-
US Brig Syren by knightyo
knightyo replied to knightyo's topic in - Build logs for subjects built 1801 - 1850
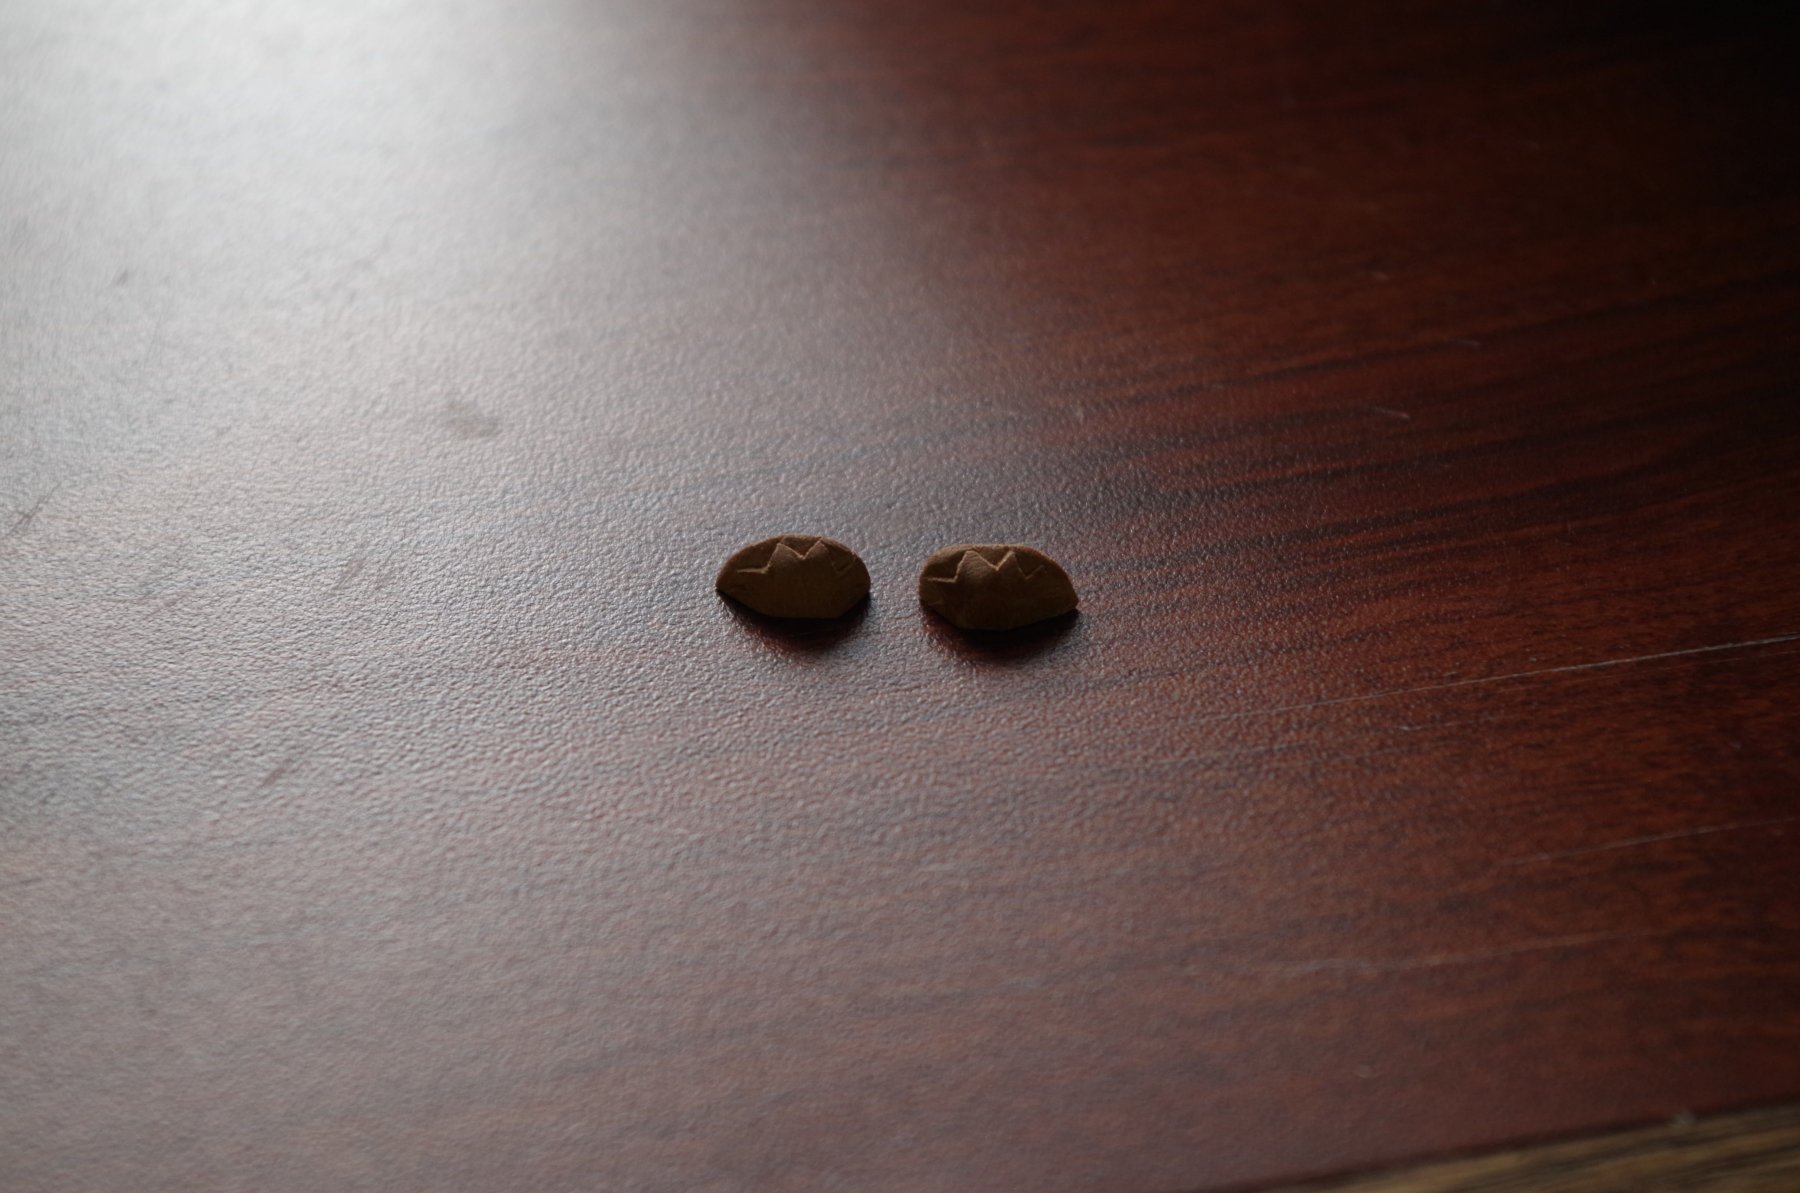
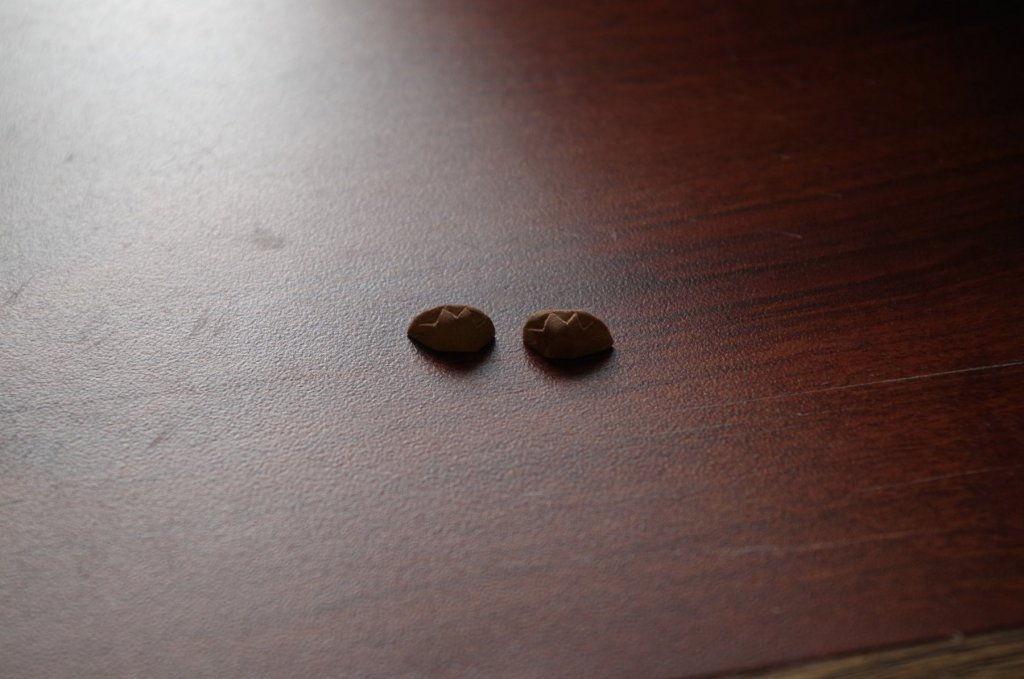
Thanks Steve. A small update on this one. Still working on the figurehead and quarter gallery carvings. I have a couple figureheads in different stages of carving. The one one the right will probably be the final unless disaster happens, which is a fairly good possibility. I'm just working on these a little at a time. The one one the right becomes a little more acceptable after each session. The tiny pieces in the next pic are the bottoms of the quarter galleries. The patterns have been rough cut into them, and now it's just a mater of shaping the leaves, and then putting the assemblies all together. I secretly have extremely high hopes for these quarter galleries. They are in pear however, so it will be interesting to see how they look against the basswood hull. I've been set straight on the rivets on the hull (a huge thank you to those who have stopped my folly!), which I was indeed doing incorrectly. A posting down the road might actually show a new pear hull to match the pear of the quarter galleries, figurehead, stern carving, etc. The only thing stopping me from doing that right now is that it would be exceptionally hard to do well. The rivets can all be pulled/corrected with a bit of work, but I'd also like to change the pattern around the gunports in order to have 2 holes in the ends of each plank. We'll see. There are some fairly severe pros/cons both ways. Alan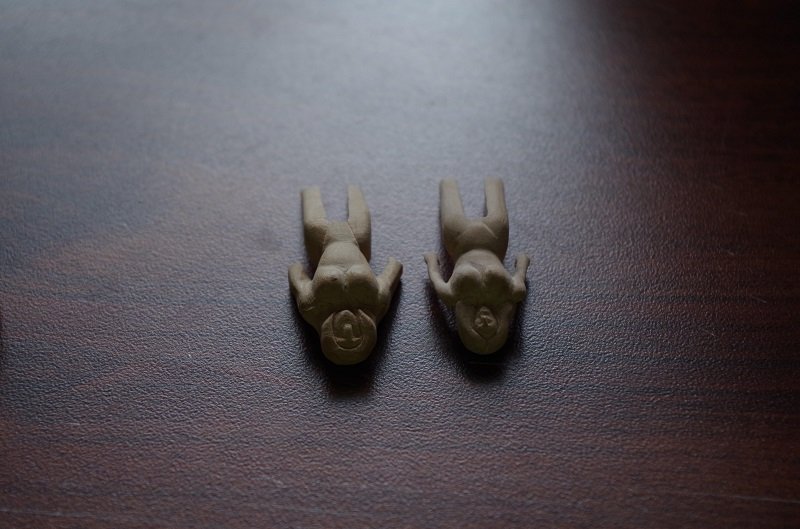
-
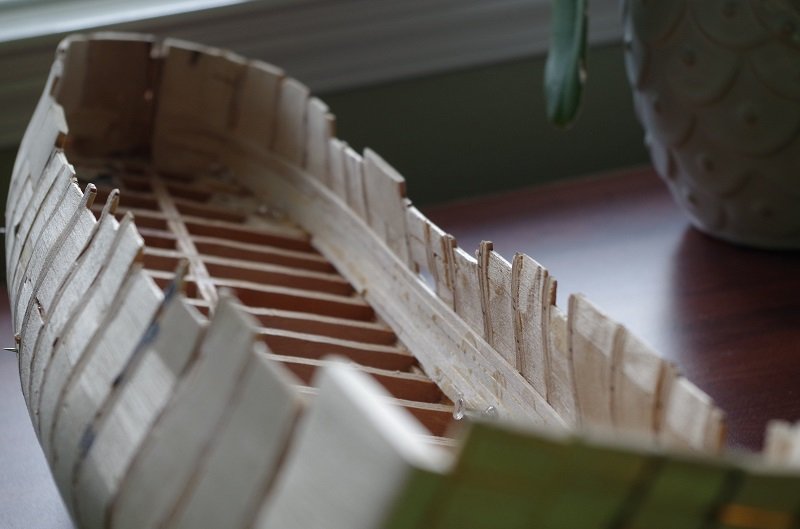
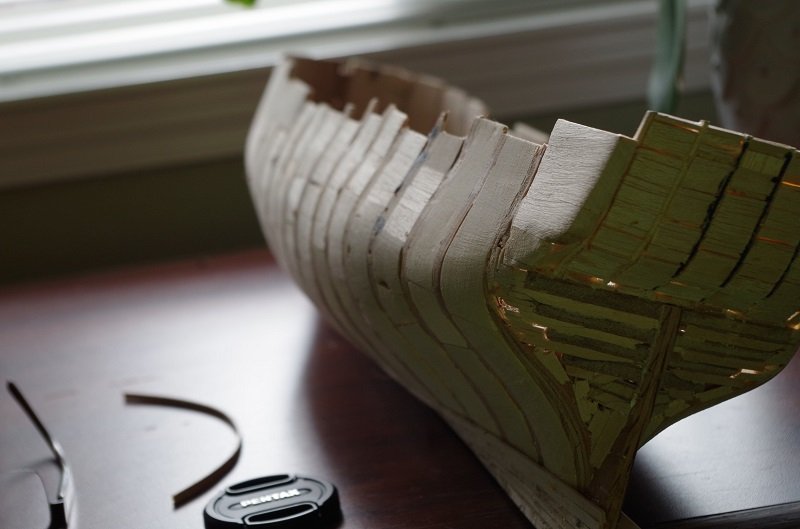
Making a bit more progress here. The first pic shows planking up from the tops of the bulkheads to the deck clamping line. I'd originally glued a single plank along the line, but have come back through and installed planking underneath in order to help with the strength of the hull as it's so fragile at this point. It was fun to install planking in a fast/haphazard way knowing it won't be visible and that I still don't need to be careful about appearance yet. The only thing that I'm concerned with at this point is stability/strength. However the tops of the bulkheads in the middle will be a different story. I'm thinking about using maple for the decking throughout, and the tops of the bulkheads will be a nice place to practice deck planking, as I've not planked a deck since 2008! It also appears that the planking in the center could be somewhat visible if I leave the hatches off on the gundeck, etc, which I'm planning to do. The tops of the bulkheads don't have a camber at all, but I'm thinking that's not a huge deal, and won't be discernible from above on this deck. The second pic just shows the contour of the hull (stern still needs to be shaped as well as a few other areas) at this point and the beginning of the planking up from the keel (not installed yet, as I'm going to double plank this one). Now that I have a number of planks installed on both sides from the keel up, I'm going to pretend that this is the "real" planking, and will practice shaping stealers, etc if they are required. I've given myself different dimensions of space to work with on each side so the calculations will come out differently, giving me more practice, etc before I install the final outside planking. Am still debating about what wood to use for the outside planking, but am considering a mahogany veneer. Alan
-
Hi Doug, yes, extremely similar to what David described. He just described it far far better than I!
-
Hi Doug, I had something similar happen to my Syren when I applied the Golden Oak. In fact I think mine looked exactly the same. If I recall, I lightly sanded the darkest areas, applied more stain to the lighter areas (and probably repeated this process a few times), and finally used washes of different tones of acrylics in order to blend the colors together. It's totally recoverable. Just takes time and tinkering. Alan
-
Hi Mark, I can sure identify with that! I'm one state to the right of you, and thought it would be fun to work on my figurehead in the shade on the porch... It was NOT fun being out there. I think it's right at 100 at the moment. Alan
-
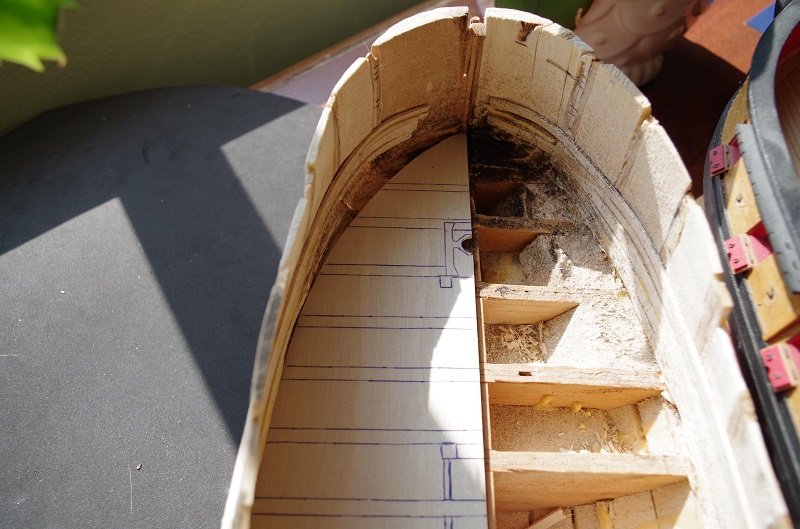
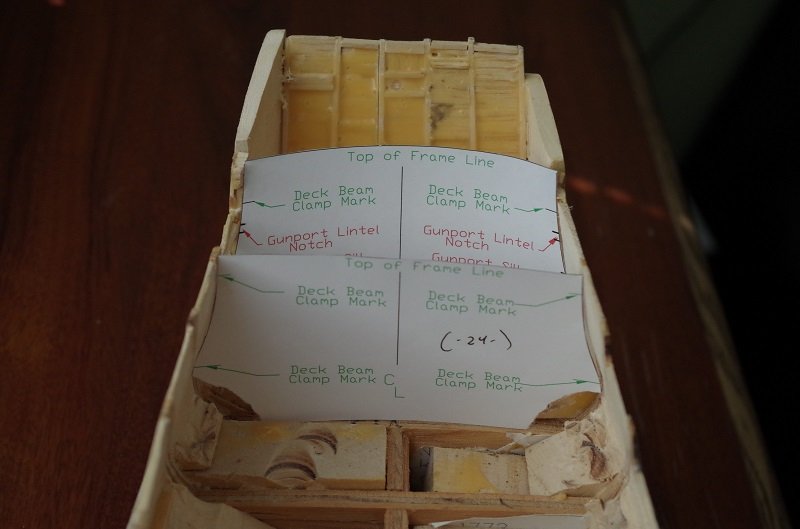
Ok, I believe I've found the offending bulkhead template. I'd remembered there'd been a question regarding one of the POB Bulkhead templates before the server crash, but for the life of me couldn't remember the issue. In the photos, you can see that the insides of bulkhead template 24 rest flush with the inside of the hull. However bulkhead template 27 is FAR too wide. I'd initially thought I'd just forgotten to resize down to 1:64 scale, so reprinted the template. Unfortunately, that is the "correct" size. If I were to widen the hull in back to accommodate the width of this template, I'd end up with a strange hull indeed. In theory, since I have a smooth run along the hull all the way back to the transom (I still actually need to sand the area behind the last bulkhead MORE, I think the template is incorrect. I'm extremely open to others' thoughts on this one. This is also the beauty of working on two ships at once. When a snag is hit with one ship, you can move to the other build whilst resolving the issue with the first! Alan
-
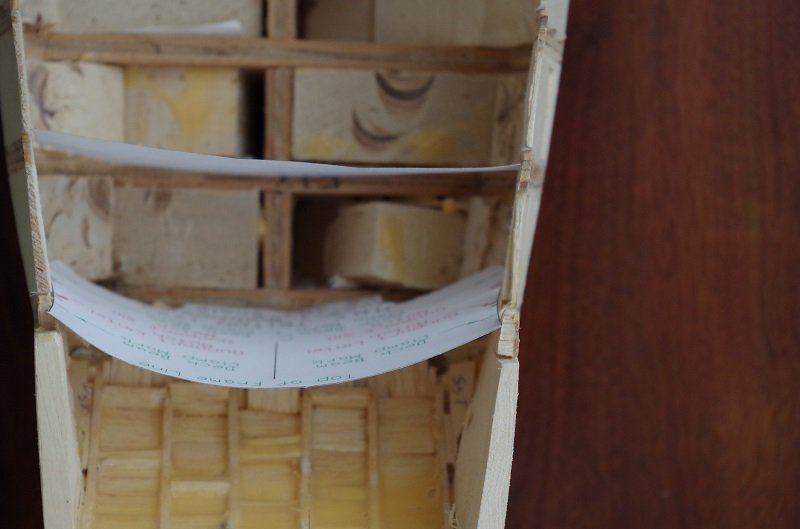
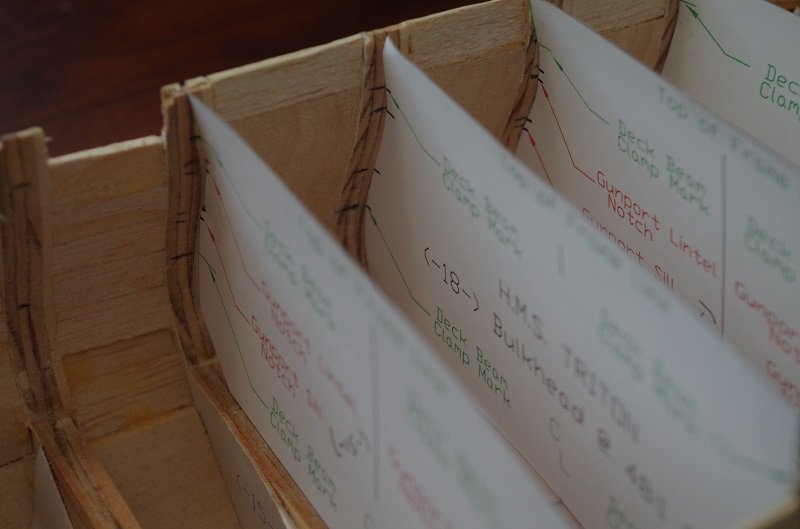
I thought I should show the steps I'm taking in order to mark out deck clamps, etc... Especially if I'm doing anything wrong.. I've cut the templates to fit the insides of the hull, resting on top of each bulkhead. I've also sanded the insides of the hull in order to match the contours of the templates. I'm now transferring the template markings onto the insides of the bulkheads accordingly. I plan on running a plank along the deck clamp line from stem to stern to serve as a support for the deck beams. I'll also be planking the inside of the hull up to the deck clamps to add strength. The hull is extremely fragile right now. I believe I'll also need to lay down planking on top of the bulkheads in a few areas, which will be visible from a hatch or two.
-
Hi Paul, I'm also looking forward to seeing your build log. Cdogg hit the nail on the head with his post. Once you post a log (with photos), people will start offering help when you ask specific questions. Alan
-
US Brig Syren by knightyo
knightyo replied to knightyo's topic in - Build logs for subjects built 1801 - 1850
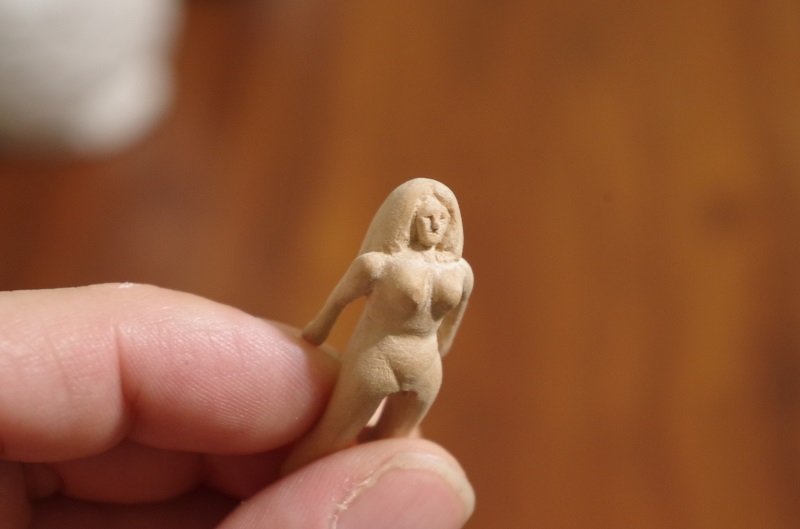
Mini-update.... Below are photos of my roughing out the figurehead. The pattern I'm using is from an old Heller kit (I think the kit was actually Sirene?).. At any rate, my version is slowly starting to look like a human female. A few days ago it looked like some type of ghoul. I'm very hopeful to have a passable figurehead in time. I'd say she's about 1/4 way complete. This is the first time I've ever carved a human form, so it's really been a challenge. What has been even MORE of a challenge however, is the pewter piece you can see above the heads of the figureheads. This is one of the pieces in which support the cannonades. There will need to be 32 of them... The amount of time I've spent trying to turn out 32 identical pieces is astonishing. The piece above was created by a silicon mold and pewter. It still needs to be shaped... Along with the other 31 pieces.. I'm just happy I have a mold now which is providing adequate pieces. Creating enough vent holds for the pewter to flow through the mold without actually compromising the mold was a bit tricky.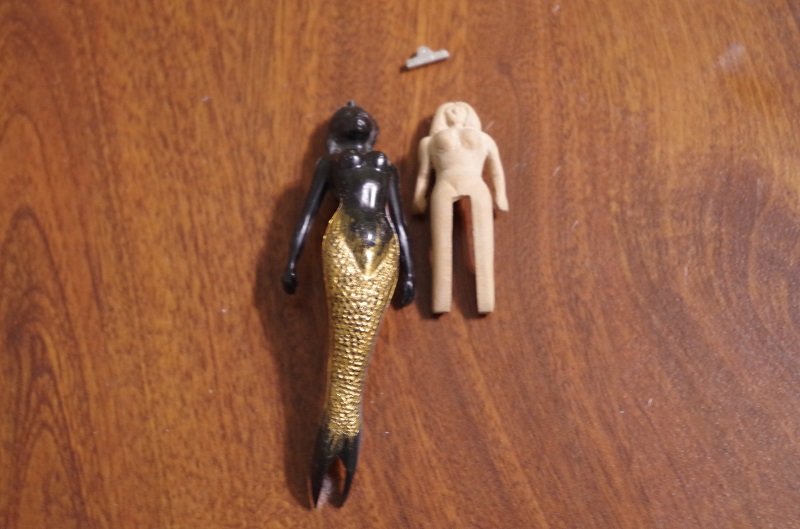
-
Welcome aboard! I agree with you, but unfortunately for me, my spouse's tolerance for my hobby is inversely proportional to the size of my models. Thanks Christian!
-
US Brig Syren by knightyo
knightyo replied to knightyo's topic in - Build logs for subjects built 1801 - 1850
I'm also thinking about doing this on the inside with the rivets. You guys DO have me reconsidering the whole nail thing tho.... I'll make you a deal and stop the nail folly for now, and work on the quarter galleries and figurehead, while I think about what I've done.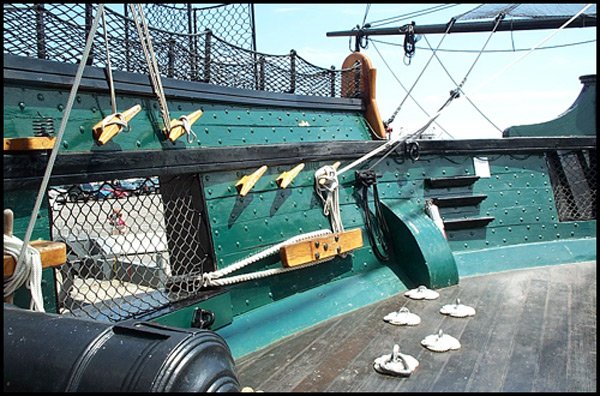
-
US Brig Syren by knightyo
knightyo replied to knightyo's topic in - Build logs for subjects built 1801 - 1850
Here's the link to Alex's build which I'm trying to emulate a bit. Below is a pic of his Cumberland, and next to it the Constitution. I "think" the last pic is Alex's Cumberland as well. At any rate, these are the looks I'm trying to achieve.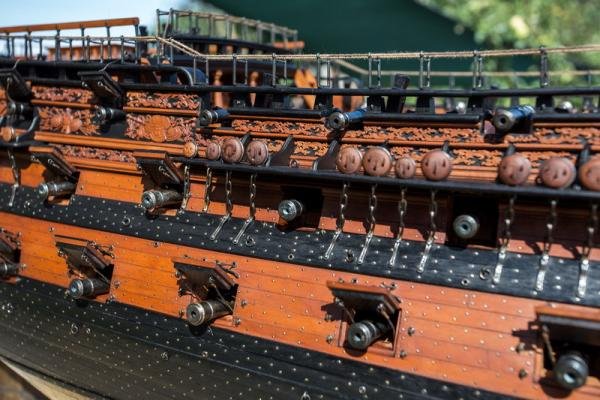

-
US Brig Syren by knightyo
knightyo replied to knightyo's topic in - Build logs for subjects built 1801 - 1850
What are your guys' thoughts regarding the stern decoration? I think I ended up carving an item which was smaller than the pattern. I must have made mistakes, and "hid" them by carving off the offending parts. Should this carving be "thicker" overall? I think this could be pried off and replaced without risking too much of a catastrophe....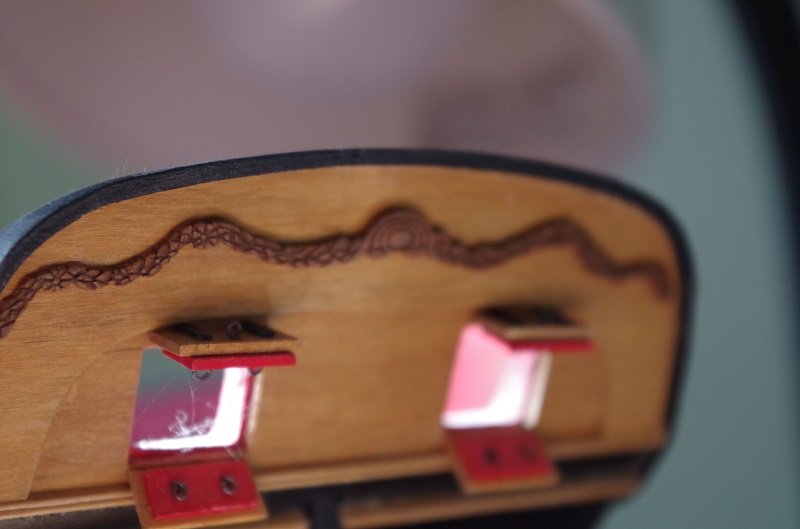
-
US Brig Syren by knightyo
knightyo replied to knightyo's topic in - Build logs for subjects built 1801 - 1850
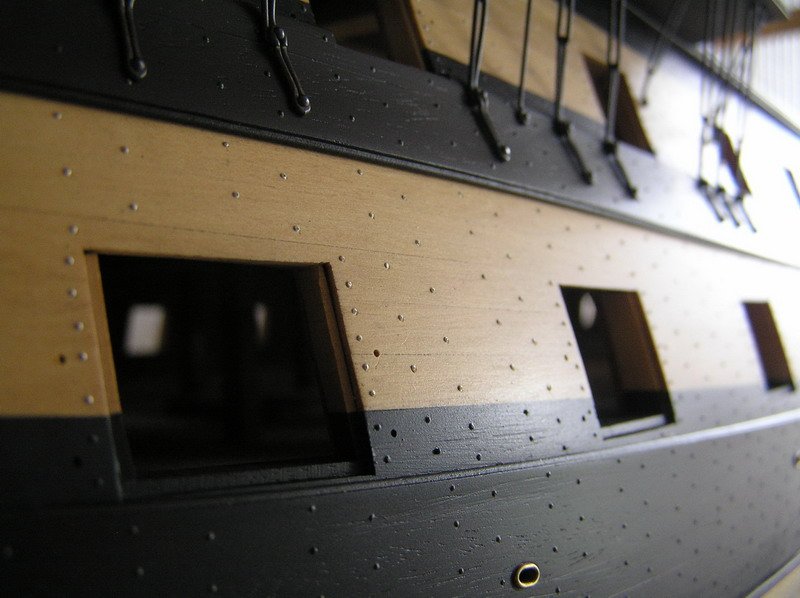
It's begun! Remember how I said that these nails would be blackened? Even though the oxidizer I have is "designed" for pewter, I was going to give it a try. However, the admiral instructed me to read the MSDS sheets on the oxidizer. After reading said sheets, I decided it might be best to experiment with alternative blackening schemes. The first "recipe" was to use Palmolive dish soap. After about a week and a half, instead of blackened nails, I just ended up with extremely clean and bright nails. Not to be deterred, I followed the second recipe. This entailed boiling two eggs and crushing them up in a Ziploc bag along with the items to be blackened. This DID work a bit. I now have a set of nails with various "shades" of color. I was originally hoping for a consistent dark black across the board, but I'll admit that I do look the likes of these. They also look like they've been painted along with the hull. As you can tell, I'm trying to talk myself into being satisfied with these. I suppose they will also "tarnish" over time. Below is the start of the installation process, which is extremely satisfying. By taking close up photos like this, it's also helpful to identify areas which need to be filled! I'm also not happy with the uneven gap at the bottom of the gunport. We'll see what can be done about that.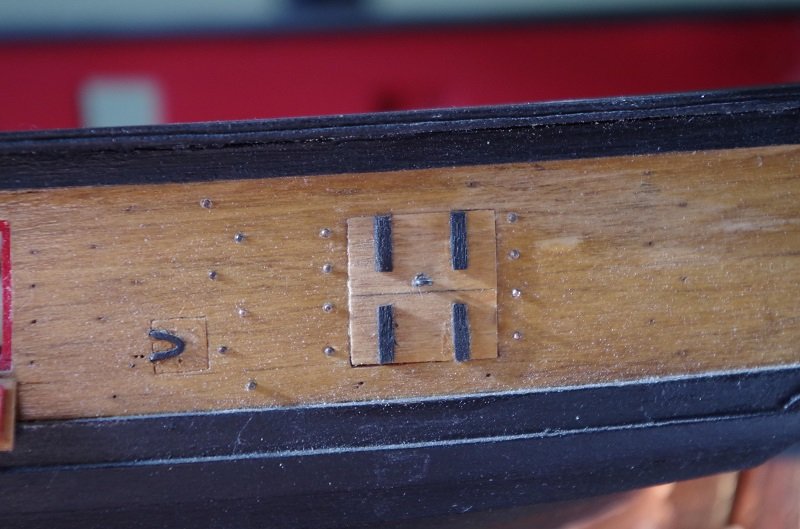
-
I'd highly recommend the Syren. The instruction provided literally walks you through every process, step by step. Also, if you get stuck at any point, there are a lot of logs to view, and people within the forum to help; especially the creator the the model, Chuck. Instead of a possibly frustrating experience, you'd most likely have a very good experience.
-
US Brig Syren by knightyo
knightyo replied to knightyo's topic in - Build logs for subjects built 1801 - 1850
Thanks Thomas! It's going to be very satisfying to finish and install those quarter badges. My pipette's arrived yesterday, so I'll be playing with the chemical blackening agent this weekend. Items to be blackened are guns, nails and "gun holder thingies". Alan