-
Posts
527 -
Joined
-
Last visited
Content Type
Profiles
Forums
Gallery
Events
Everything posted by knightyo
-
I received a battleship kit around age 7 or so (Revel Missouri) which I destroyed; I think I also probably sniffed too much of the interesting model glue. The thing that really spurred my life-long interest in building was the positive reinforcement I received from people regarding the "models" I made from cardboard; mostly fairly crude representations of Star Wars vehicles. The cardboard was free, there were no toxic glue fumes, and I honed my skills for a good while before eventually getting another plastic kit in which I was able to build a respectable model. Alan
-
I choose the model in my closet that I have the most guilt for not yet having finished. Alan
-
My wife has a condition which has resulted in severe scarring of the brain, and it's been a continual "rewiring" process for years. The brain definitely does figure out how to do certain tasks again by rewiring itself to bypass damage. To get back motor skills, I'd actually recommend an x-box or similar game in which the game is played exclusively with your hands. The more you use your hands, the quicker the brain will rewire. Video games are the first things that come to mind for me, but anything which forces your hands to perform over and over and over and over... It works, it just takes time. The other thing I'd recommend is to purchase Drawing on the Right Side of the Brain. It is an amazingly enjoyable book which teaches you how to draw, and I think consistent drawing would also be beneficial for the rewiring process. Alan
-

Worst Planking Job Ever
knightyo replied to rhephner's topic in Building, Framing, Planking and plating a ships hull and deck
It looks like you are beginning to conquer the hardest part of the hobby. I don't have a single model that didn't end up being painted on the bottom; you can also add weathering to a painted hull to turn what you might have initially considered a liability into an asset. Some modelers also like to add a second layer of thin veneer planking of high-quality wood over the top of the hull. P.S. You can also "save" your first model by strategically gluing thin strips of balsa or basswood, sanding smooth, painting, sanding, and then repeating as often as it takes. Alan -
Actually, maybe thin, laser-cut plastic templates that a modeler could use to "sponge" paint through onto the carriages. That might yield the most realistic look of all. Edit: I think there needs to be a North American distribution center for these kits. I'm assuming that if I purchase this kit, I might as well book a flight to the U.K. to pick it up in person as that would probably be cheaper than the shipping cost to the states. Maybe I'll schedule a vacation for the wife and I to visit the U.K. "just a sec honey, I need to go pick something up real quick".
-
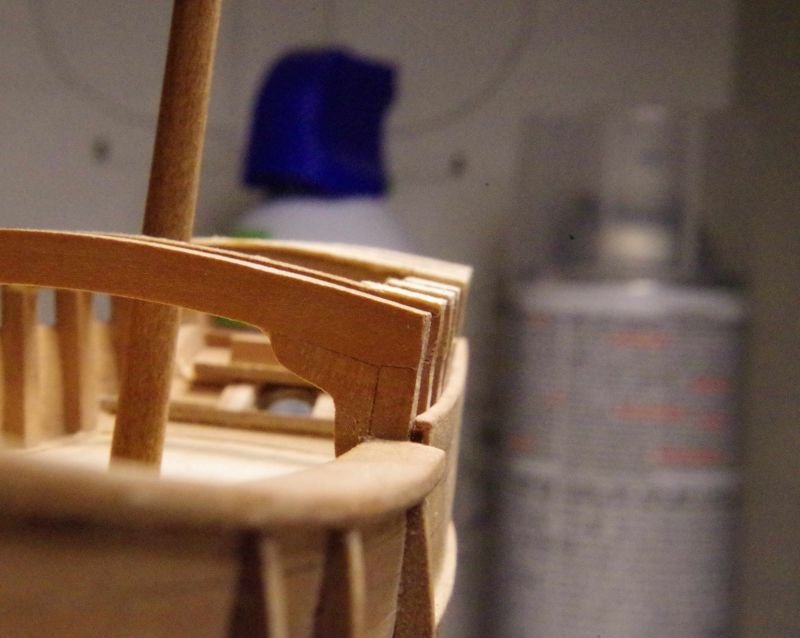
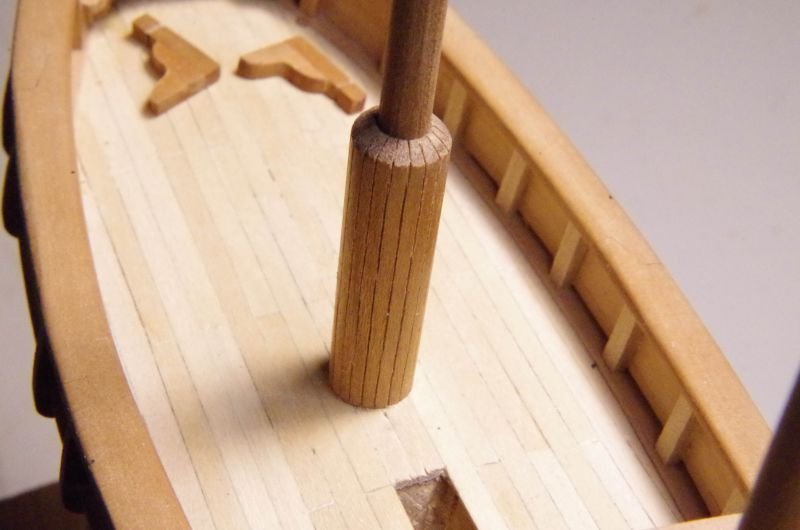
Still plugging away as time permits. The deck beams and hanging knees have been installed. It's not an optical illusion that some of the beams appear to be missing. I had to install the beams and sand them to proper shape, before cutting a few of them out to allow for the installation of the fragile internal components consisting of a lighted lamp which will sit on a shelf above the rudder and the binnacle, which will sit right behind the mast shown. I'm trying to do all of the "rough" work before attaching the fragile pieces and rudder. (note to self: don't forget to shellac interior before installing deck above). Below, the main mast and its partners have now been installed. The tops of the partners just need a touch more careful sanding to get everything uniform and then they will be done, apart from the eventual shellac. The parts laying on the deck are my next mini-project. They still need to be further refined before installation.
-
I won't ever be able to finish the models I already have, but this is mighty tempting. I have to ask.. Have you thought about having Aubrey/Maturin figures as an option as well? I'd imagine just about everyone who has read the novels would buy them, especially if they were molded playing their respective instruments. Alan
-
I've performed that method of planking on a number of ships. It feels fun and rebellious to plank in that manner. Just sand the ends sharp to fit on each end, and use plenty of wood glue. Once the hull is sanded, provided it's going to be painted, or have another run of planking over the top, it will be fine. If you look at my Syren log, some of the photos show this type of planking method used. The hull is then covered with copper, so no one knows that it was improperly planked. Alan
-
For a first-grade class project, I built a car out of a toothpaste box with an engine mounted in the front of the box (I think from an old hot wheels car) which gave the appearance of a funny car. I can’t recall all of the detail of the model, but what I DO remember is the amount of praise I received from my teacher. I grew up with two sisters who were both a decade older than I; my parents didn’t really have the desire/energy to bring up another child, so I was always left to my own devices and rarely received any type of encouragement. Getting direct praise from that 1st grade teacher was like a drug (now I understand, literally :D), and I think still plays a part in why I create. The scratchbuilding bug had hit me early, all due to a random comment from a schoolteacher. Reminiscing about this is making me want to see if she’s still around; it would be fun to let her know what an impact she had on a little kid back in the 70’s.
-
I usually find figures on ships to be major negatives, but the look and feel of your figures match the ship perfectly; outstanding job! Alan
- 508 replies
-

Problems with blackening brass
knightyo replied to Desertanimal's topic in Metal Work, Soldering and Metal Fittings
I've had similar frustrations and ended up applying black acrylic paint which ended up looking better than the powder coat. Next time I have a part to be blackened, it will be a standard prime/paint, which is also far more enjoyable than playing around with caustic chemicals. Alan -
Welcome! You hit the jackpot in finding this forum. One of my favorite things to do on the weekend is to brew up my beverage of choice and casually view others' build logs. Eventually, you'll notice that you are developing a preferred niche to view, and will probably then start a model in that niche. It's nice to have others' build logs to refer to when you are building your own model as you can see how others have worked their way through challenging sections. I may be in the minority, but I get more satisfaction in viewing other people's posts about their work than I do in actually doing my own work. Now that covers mornings. For evenings, it's nice to fall asleep after reading historical fiction in this genre and there is almost a cult-like following of the books authored by Patrick O'Brien; the Master and Commander series of books. There are 21 books in the series and many people find them to be very soothing to read; I've been reading the series annually for years and years now. We've all heard of comfort food; these become comfort books for a lot of people. Alan
About us
Modelshipworld - Advancing Ship Modeling through Research
SSL Secured
Your security is important for us so this Website is SSL-Secured
NRG Mailing Address
Nautical Research Guild
237 South Lincoln Street
Westmont IL, 60559-1917
Model Ship World ® and the MSW logo are Registered Trademarks, and belong to the Nautical Research Guild (United States Patent and Trademark Office: No. 6,929,264 & No. 6,929,274, registered Dec. 20, 2022)
Helpful Links
About the NRG
If you enjoy building ship models that are historically accurate as well as beautiful, then The Nautical Research Guild (NRG) is just right for you.
The Guild is a non-profit educational organization whose mission is to “Advance Ship Modeling Through Research”. We provide support to our members in their efforts to raise the quality of their model ships.
The Nautical Research Guild has published our world-renowned quarterly magazine, The Nautical Research Journal, since 1955. The pages of the Journal are full of articles by accomplished ship modelers who show you how they create those exquisite details on their models, and by maritime historians who show you the correct details to build. The Journal is available in both print and digital editions. Go to the NRG web site (www.thenrg.org) to download a complimentary digital copy of the Journal. The NRG also publishes plan sets, books and compilations of back issues of the Journal and the former Ships in Scale and Model Ship Builder magazines.


