
HOLIDAY DONATION DRIVE - SUPPORT MSW - DO YOUR PART TO KEEP THIS GREAT FORUM GOING! (Only 44 donations so far out of 49,000 members - C'mon guys!)
×

knightyo
-
Posts
527 -
Joined
-
Last visited
Content Type
Profiles
Forums
Gallery
Events
Everything posted by knightyo
-
 I'd highly recommend purchasing a small drawplate and creating your own trennails rather than using paste. It takes a lot longer, but man it's satisfying to install them. Alan
 -
Are you and Doug copying each other? lol. It does look like you two are in the exact same spot. Alan
- 242 replies
-
- 1
-

-
- syren
- model shipways
- (and 1 more)
-
Doug, I think this is one of the most satisfying parts of the build; especially after you sand everything smooth. Alan
-
No pics today, but I've cut out the remaining forecastle template in order to help align the bow sections. Never again will I simply ram pieces of wood into a stem section and happily sand to what I feel is a pleasing shape. lol Today I also found a yellowed piece of paper in my Triton folder, from "Australia" Dirk, who had given me advice when I was working through issues in my stern area years ago. His advice was so good I printed it! I thought I'd type it out below for future builders..... ------------------------------------------------------- G'Day Alan, Ok here are a few ideas for the stern. You are going to need to build this up from a variety of drawings and some you might have to make templates for and use the trail and error method. Use good card paper for this. Basically you need to work off the quarter deck template, (plan below). This is going to give you the deck camber, something you need to keep in mind and use it all the way. Remember it curves 2 ways port to starboard and viewing from above it curves fore and aft the other way too. This quarter deck is seen so you need to get this right. You will need to make up your own template for the gundeck extension. To do this place a temporary batten along the stern frames to give you a basic shape. You might need to make up a temporary stern board to do this. Doesn't need to be curved fat piece will do the job at this state. Use the line plans if necessary to get its final shape. This gun deck extension doesn't need to be cambered as its covered and not seen but needs to be set in the right position otherwise the rear of the hull is going to be out of whack. The slope of the stern board is also important. Use the plan below to give you this angle. You might want to try bending some thin aircraft ply here, steam bending seems to work here but not all the time. Again a template needs to be made here as its a fiddly shape. If the bent ply method doesn't work I would be using a solid balsa block and sanding thin the shape. You can always plank it later. If you do plank it use the counter timbers plan. They are another difficult shape to get right. Don't force them laterally it doesn't work. The planks bulge out and look bad. Sort of spiling and template method needs to be done here. Get this bit right and it looks great. Mine didn't go all that well and needs to be done over. The solid block ends under the quarter deck beam. The taff rail above I made from a solid piece of timber. Another difficult job. If I had to do it over again I would make it up using a series of "spikes" drilled and glued into the solid block mentioned above, then plank the thing. Maybe even use thin aircraft ply. Where the stern chase guns go use a solid piece in either side so as you can bore them out later. Don't drill them, it will splinter. Get a few grinding stones for the Dremel and use them to bore your way through and finish up with one stone of the correct size. You get no splinters using stones and the finish is smooth an looks great. I use this for mast holes in decks also. Remember the stern chase gun ports are horizontal to the deck not at 90 degrees to the stern board. Be careful and really concentrate here doing this job. Should have mentioned before use the quarter light frame plans to get the outboard angles for the stern board. the stern board angles vary across their width, the outermrost ones, (port and starboard) corners are more vertical then the centre stern board posts. The outermost ones also slope inboard so watch for the angle changes. The inner posts gradually go vertical. I keep referring to them as posts but of course they are pars of the solid block.
-
I wholeheartedly agree with Yves! I'll take it a step further as well. These models are simply superb, and should probably be kept under glass in order to protect against dust as well. Alan
-
Today was sanding day. I'd installed additional "filler" blocks in the bow, and have been sanding the bow back to them. This has started to bring the bow section into alignment with the deck templates. Below is a pic showing the templates quasi-sitting in position (I bumped the table before taking the pic, which threw things out of whack a bit, but you can see what I was doing). By sticking a dowel straight down through the mast holes in each template, I was able to ensure the gun deck was in alignment with the lower deck, and to help me to be sure I was sanding the bow area back appropriately. Before sanding, the deck templates were removed. The funny thing in all of this is that if I'd been paying more attention to the bulkheads while sanding initially, I wouldn't have had to do this. For some reason, I felt the bow was far more rounded than it really is, and shaped the bow filler blocks accordingly. Wow, that was a major error. Hopefully future POB'ers read this series of posts, and don't make this same error. Now I need to correct the bow shape on the next deck up! Time to cut out another template..... Alan
-
Casting them yourself is a really great feeling if you want to go that way. I turned my "master" in a mini-lathe, but I know people who have just placed dowels in DIY drill setups and have achieved great results. Once the master is done, it would be easy to shape the bottom piece, and glue to the master before casting. My favorite way to cast is with 2-part RTV rubber and pewter. It's really easy, actually. Alan
-
I actually cast these myself, which turned out to be an extremely good learning experience. This is when I learned that when casting an item, cast ALL of the item. The rounded parts on the bottom of each carronade? I didn't cast them with the main barrel, and had to saw/carve/file/shape every single one by hand later. I'd offer to send you a set of these, but then you'd need to need to do the same thing I did, and would probably curse me for it. The offer is open however, if you like self-torture. Alan
-
That's a NICE recovery on the stern! It's extremely satisfying to be able to hide things under eventual paint and copper plating. Alan
-
US Brig Syren by knightyo
knightyo replied to knightyo's topic in - Build logs for subjects built 1801 - 1850
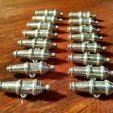
Ok, I want to sincerely thank everyone who expressed their opinion on the trennails. The pear came out perfectly compared to basswood, wire, etc... AND... my worries about the pear blending in too much with the hull were unfounded. I learned that the natural oils from my fingers would significantly darken the ends of the trennails once installed! These are also incredibly satisfying to install. I know a lot of people prefer to use filler in order to simulate these, but these really are a lot of fun to do. Yes, they take about a year and a day to make, but it's worth it. Shaping the ends into points with a small file while holding in a pair of tweezers works wonderfully. the holes in the hill are extremely tight fits for these, so care must be taken to install fairly short trennails. It's pretty easy to bend these if they are too long while trying to "force" into the holes. This process has also given me the opportunity to "correct" some of my misaligned holes, which I've been doing as I've been working my way down the hull. The pic below shows the drawplate I've been using to shape the trennails. During this process however, I've determined that it is difficult to seat the nails perfectly flush with the hull. I've been using the flat end of a the drawplate to press them in the last little bit, but you can tell from certain angles that they aren't perfectly flush. A brand new xacto blade gently run across the tops finishes the job, but it is pretty easy to also scratch the sides by doing this. If this was a model with no stain yet applied, this wouldn't be a problem at all; a final sanding over them would do the job very well. I might actually lightly sand the hull down a bit in order to yield "perfectly" flush nails, and a "clean" look. There are dangers in this, as I've mentioned the hull has many layers of acrylic and stain already in order provide a uniform color. I also have to remember that the pear trennails will be significantly harder than the surrounding basswood, and to sand accordingly. I think the benefits outweigh the risks, however. I'll make a final evaluation after the nails have all been installed... I'm About 1/4 of the way done at this point. Alan EDIT: And now I see the pic I took is blurry. Of course. I'll take more pics when I'm done.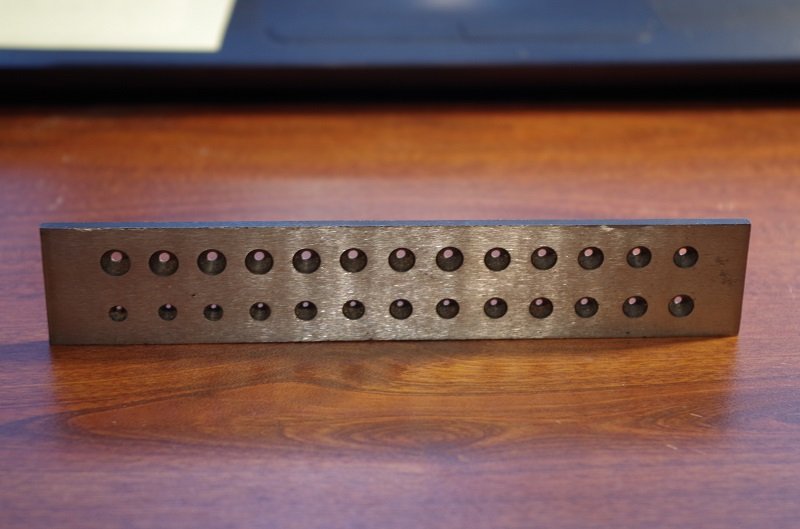
-
US Brig Syren by knightyo
knightyo replied to knightyo's topic in - Build logs for subjects built 1801 - 1850
Thanks guys. Pear it is! Alan -
US Brig Syren by knightyo
knightyo replied to knightyo's topic in - Build logs for subjects built 1801 - 1850
Ok, which version of the 3 trennails do you guys think looks the best? I have not installed them all the way, as I know I'll be pulling them back out. They are sticking out a couple millimeters. If we are being historically accurate, I suppose the pear at the top would be the most correct in color because it matches the color of the rest of the hull. I love pear, but I do admit to being a little worried that the pear won't be "visible" enough. It would be a shame to put in a lot of time installing these, and not have them visible. The unstained basswood below sure stands out, but of course maybe too much? The lowest is the wire again, but with no "head" this time. As I learned, it is by far the least historically accurate, but does have a happy medium between the pear/basswood. I'm tinkering with staining the basswood a bit, but again... There's no way I'd be able to get a uniform color with stained basswood trennails.... I also see that the top right nail hole is off.. damn.. Alan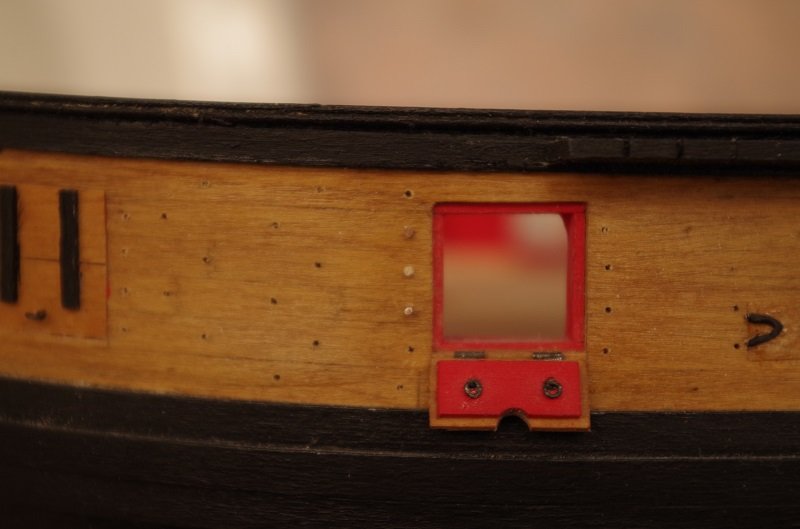
-
US Brig Syren by knightyo
knightyo replied to knightyo's topic in - Build logs for subjects built 1801 - 1850
Thanks Chuck! I know this should have been completed about 8 years ago, but I'm getting there. lol Alan -
Beautiful work. And your shop even has an Emergency Stop! I need one of those! Alan
-
US Brig Syren by knightyo
knightyo replied to knightyo's topic in - Build logs for subjects built 1801 - 1850
Just a quick update. I've used my pin vice to "clean" the holes in the hull on the starboard side. I'm about 1/2 way through. My fingers are sore. I've also found that my drawplate doesn't make trennails small enough to insert into the holes. I don't want to enlarge the holes any more, so am thinking of alternatives. I might go back to the wire idea, but not have "heads" on the wire. Just pieces ending up flush with the hull, which should darken over time to match the hull color... Might also do the filler/putty method, but am leery of sanding the hull at all, as I have about 2500 layers of various color applied in order to get the basswood color to be somewhat uniform... Alan -
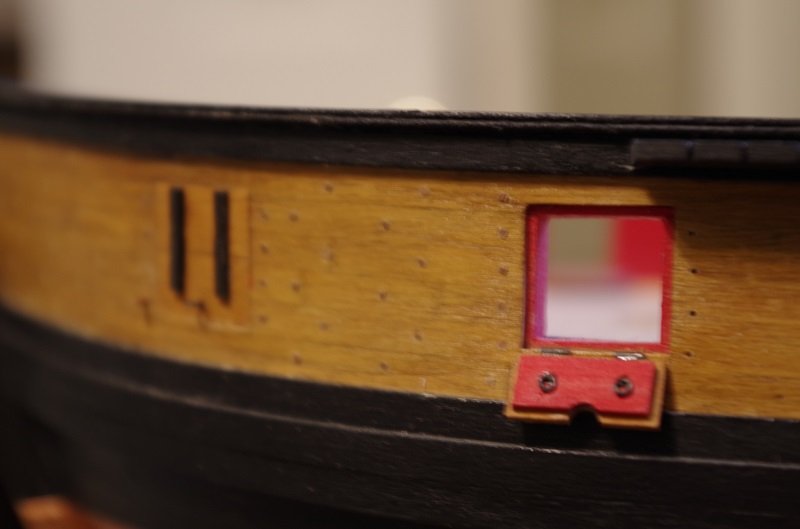
I used "cheap" acrylic red paint from a craft store. They have a billion different shades to choose from, and it's extremely easy to apply. I believe I watered mine down a lot, just to make sure it flowed properly, and then applied a number of coats. Your hull sounds a lot like mine before I applied copper. Mine was "untraditional", so it was a relief to be able to hide my irregularities. lol For the jig, I was able to find little diabetic needles at the pharmacy which worked really well, once the "sharp" ends were filed down. Alan
-
Great research! I've had time to insert additional filler wood in my bow... Hopefully I'll have time to sand the bow to correct dimension today. Alan
-
I've been looking over the drawings and others' logs, and I'm not sure. It looks like the below builder incorporated them, however. Alan
-
Hi Heinrich, This is where I should have been more methodical. I used a Dremel tool (with the small sanding drum) to sand down the wood blocks. But, I should have been far more careful during that process, as I removed far too much wood! Alan
-
Hi Heinrich, I feel qualified enough to answer #4. I think the way you are showing the photos is perfect. As you say, at that angle, no one would be able to obtain any use from the pictures by printing them out. It also makes it easier for you to describe your questions. Pictures are great!
-
Great progress! To me, this was the most satisfying section of the build.
-
Hi Heinrich, Thank you for the tip! I'll ponder that quite a bit. The planking I've installed so far from the keel up is just to help provide a smooth surface for the "final" planking. (They are just 1/8" x 1/16" random strips of basswood). I don't have the keel attached yet, so the planks just end at the bottoms of the bulkheads. Those planks will also be sanded down to almost nothing, in order for me to have a thin enough bottom for the keel to be installed against. If I had it to do over again, I don't think I would have installed all of the filler pieces between the bulkheads in the middle sections of the ship. I'd thought that by doing so, I'd have a "perfectly" shaped ship to install the final planks upon, but there are just too many sections which aren't satisfactory. Since I'm intending on installing a very thin final veneer to the hull, I know that this thing is really going to need to be smooth! Alan
-
Hello Heinrich, I'm not at home at the moment, but I "think" the bulkheads are 1/4" thick. Once you have the plans, you can print out the profile former, and measure the slots. That will show you how thick the bulkheads need to be. I used standard plywood for the bulkheads, but used basswood (or lime/linder) wood for the filling pieces, since it's so easy to sand, etc. I would definitely print out the plans and create the deadwood pieces between the sternpost and keel. The pieces don't need to be pretty. they just need to be complete enough in order to lay planking over the top of. I did this on my version, and inserted basswood filler pieces between the plywood pieces; once everything was sanded smooth, I was left with a nice base for future planking, but most importantly, also had accurate dimensions back there (I hope ). If I had done this in the bow area as well, I wouldn't have to do the re-work I'm currently undertaking. Alan
-
I just dropped by expecting to see a few update entries. It turns out I had 4 pages to read! You are a quick modeler, and I'm envious! Alan
- 1,135 replies
-
- 3
-
-
- model shipways
- syren
- (and 2 more)
-
It's great to see another POB builder on board! I've already made all kinds of mistakes I can warn you about as you catch up to me. Alan
