Glenn-UK
-
Posts
3,175 -
Joined
-
Last visited
Content Type
Profiles
Forums
Gallery
Events
Everything posted by Glenn-UK
-
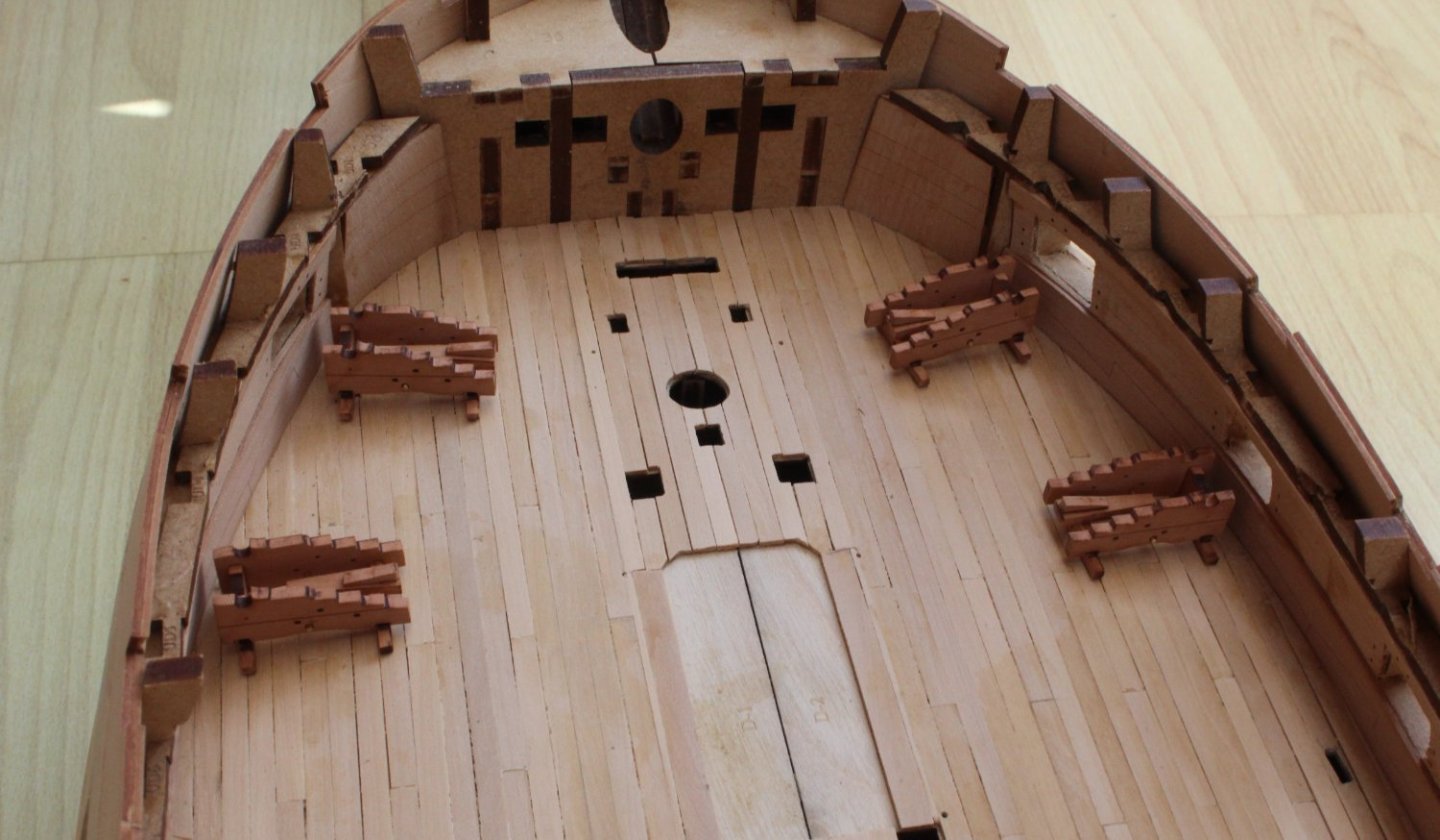
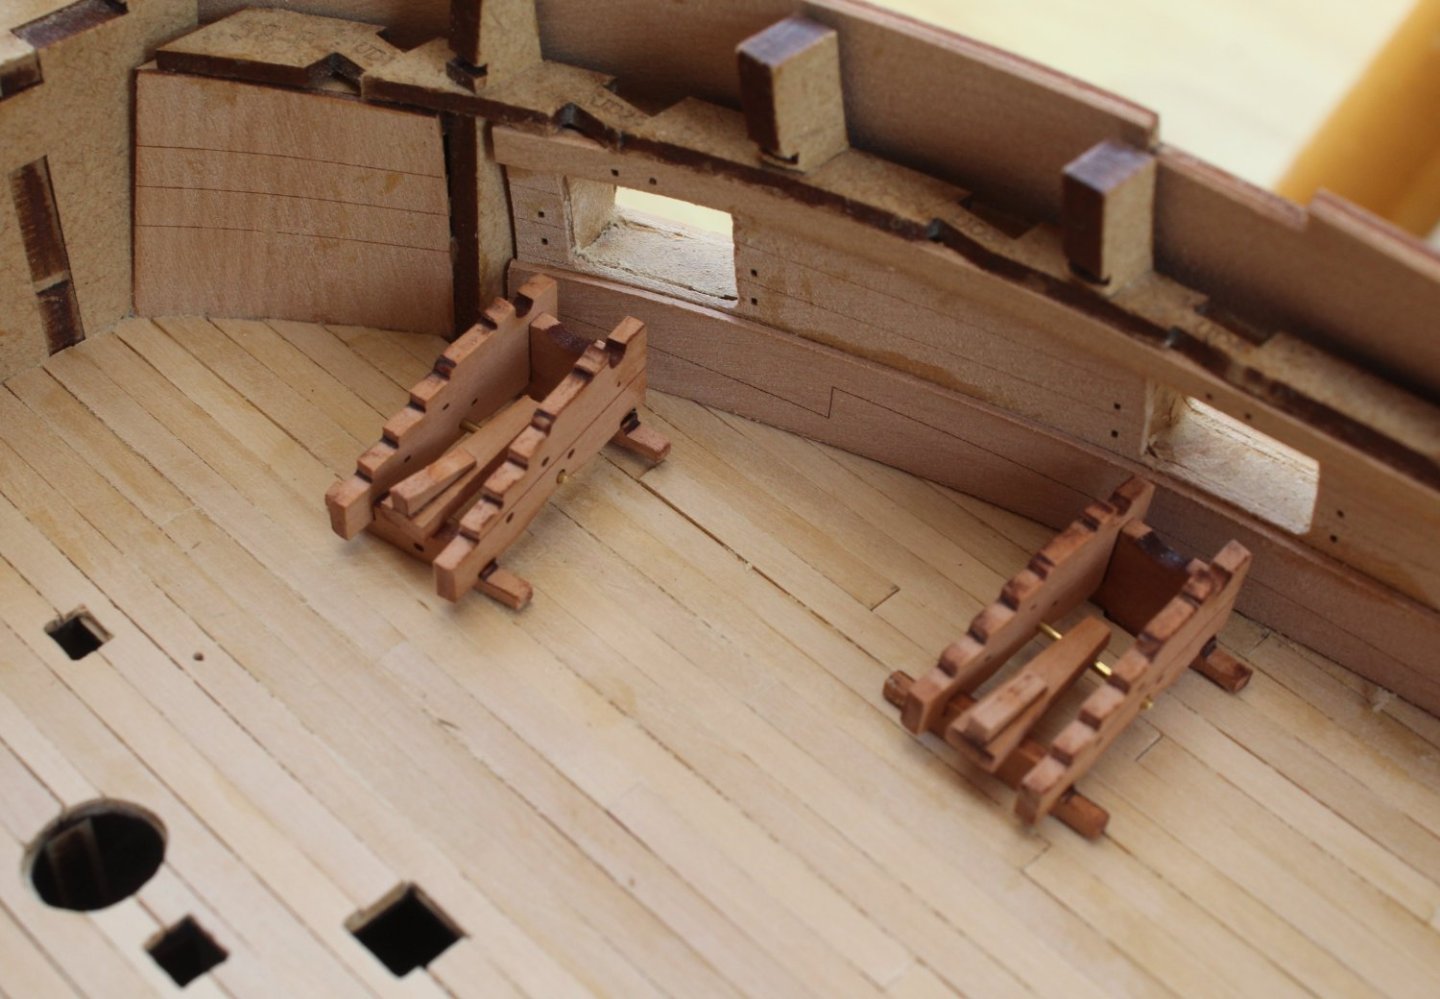
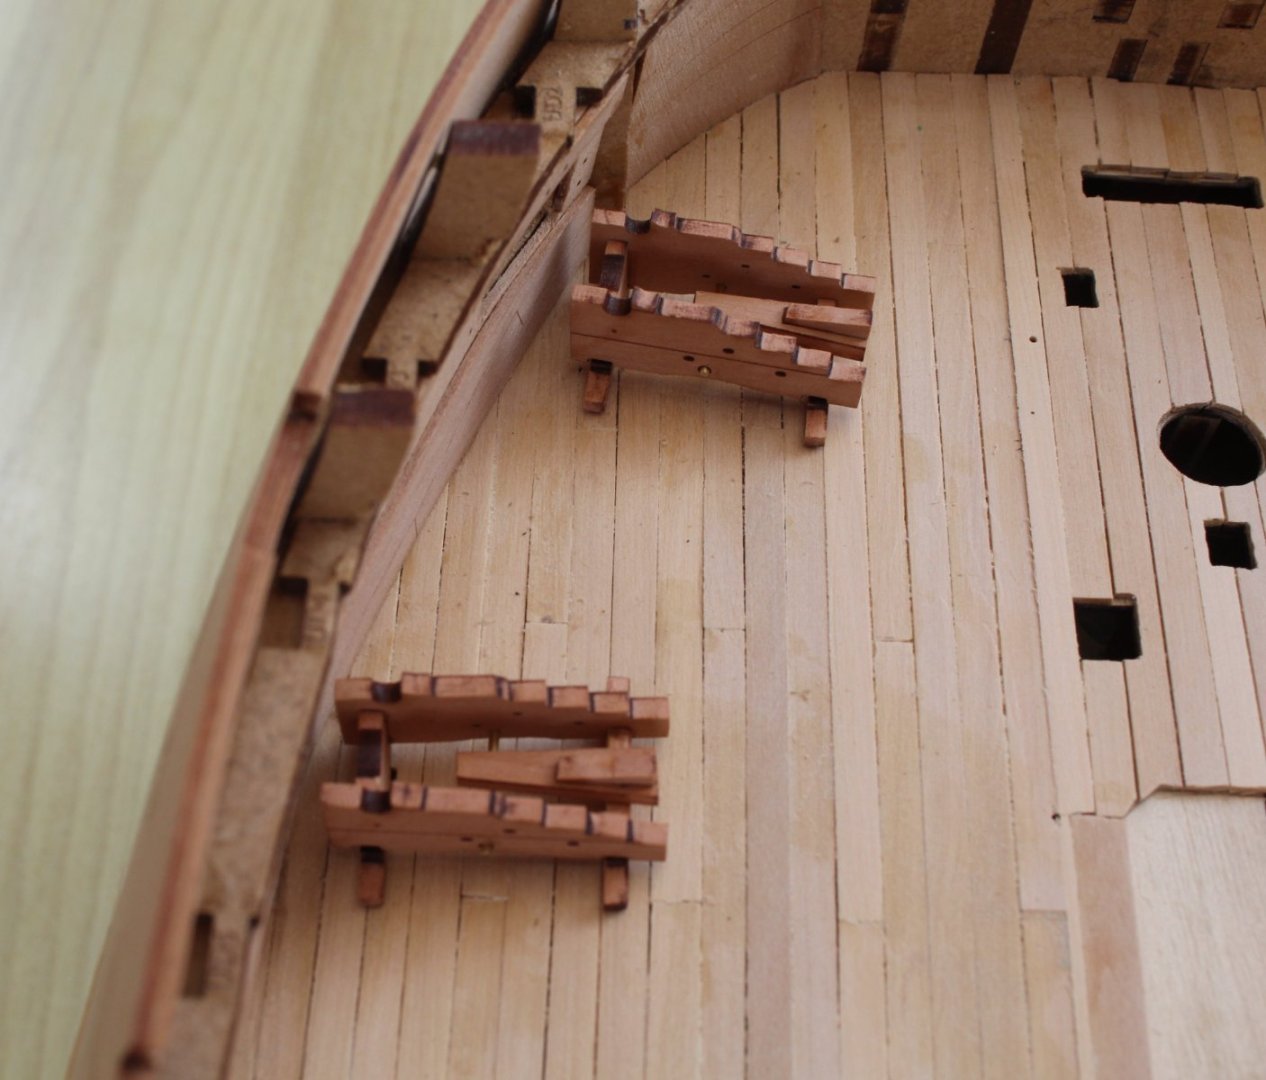
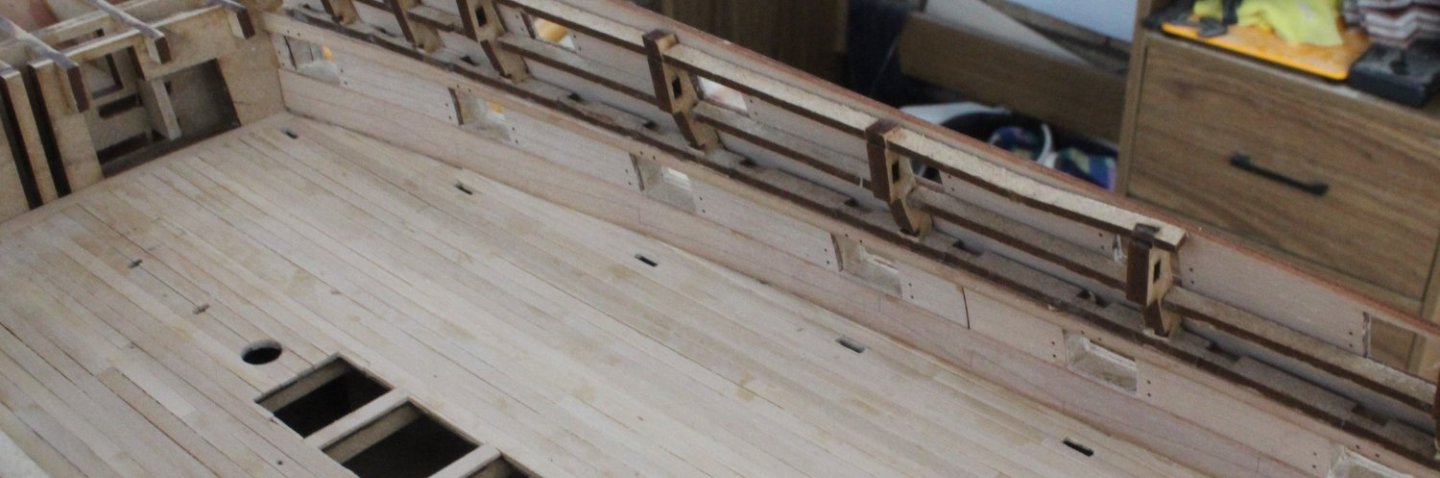
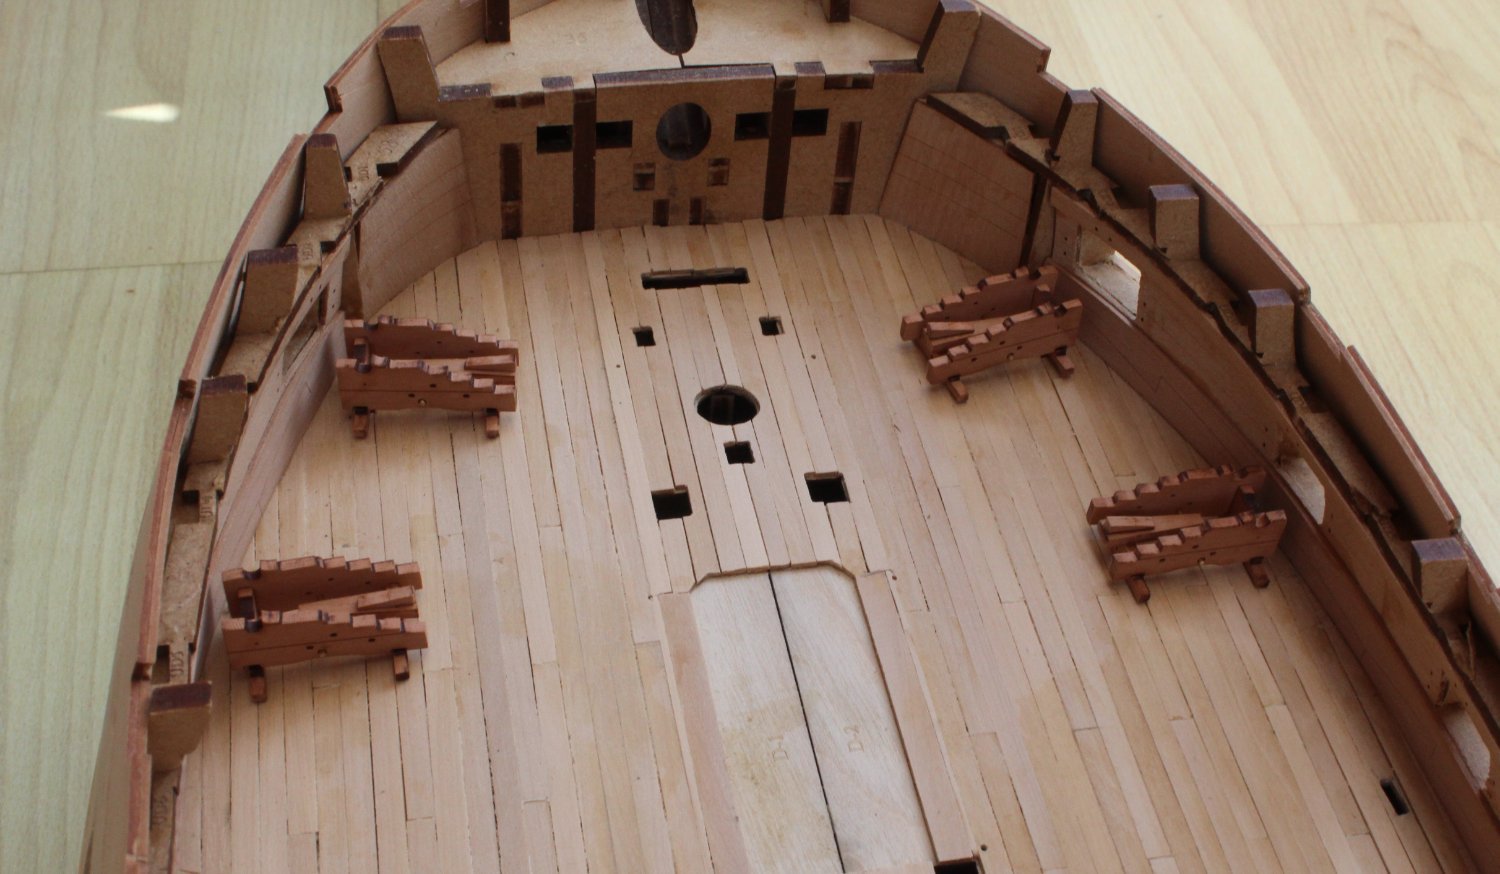
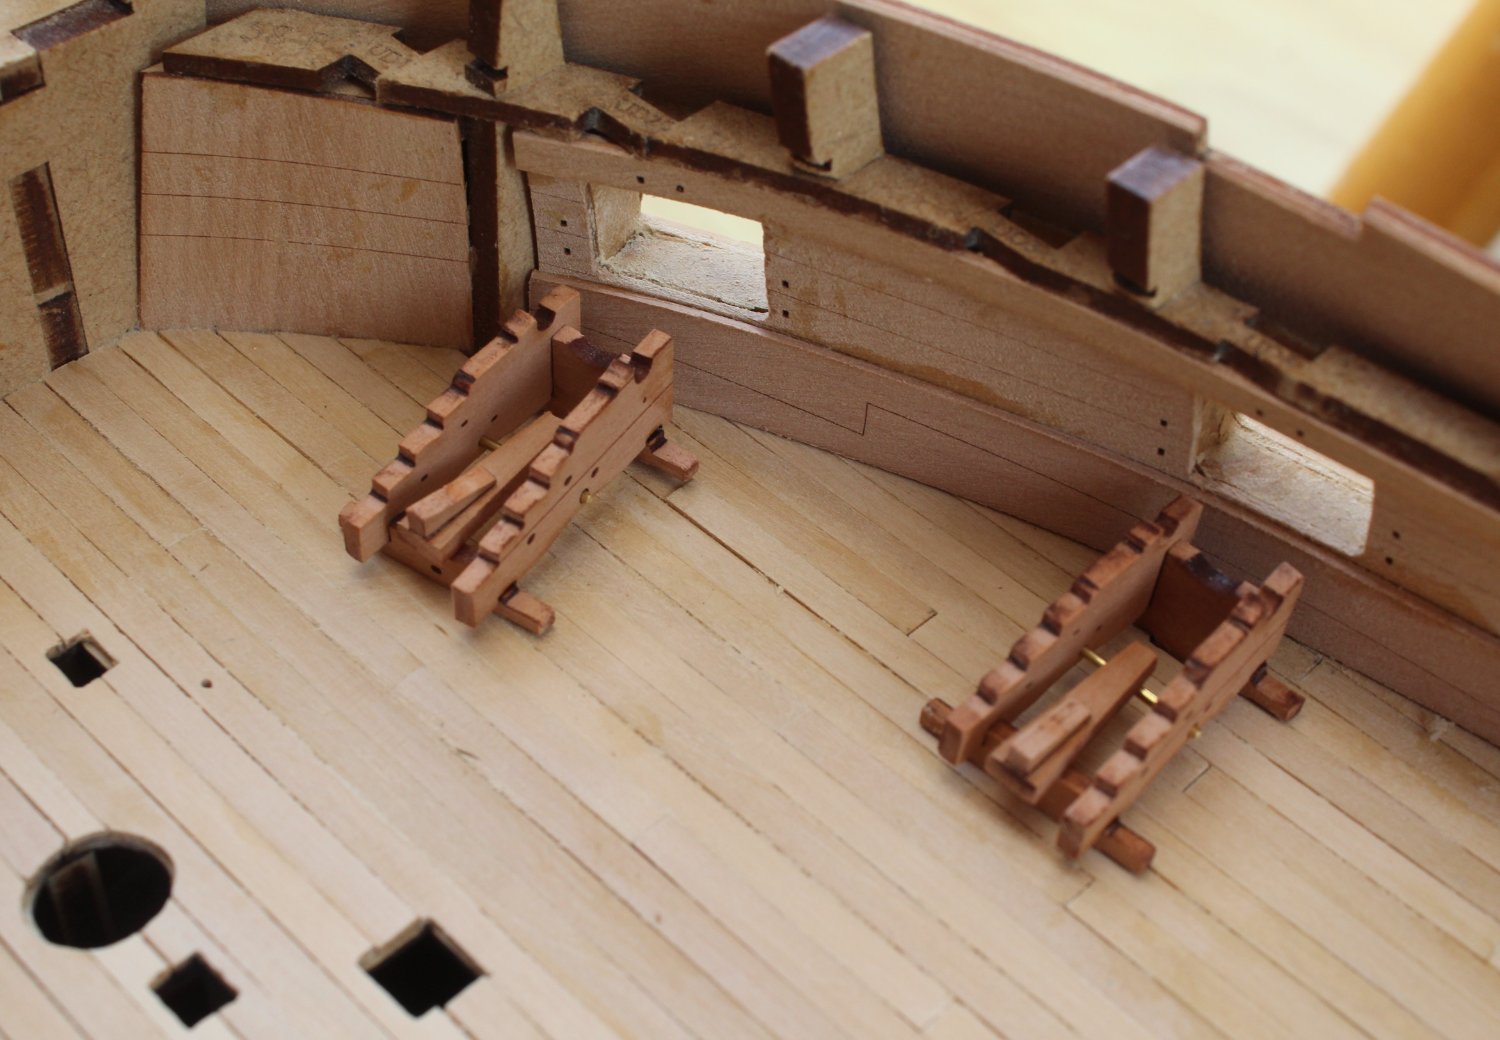
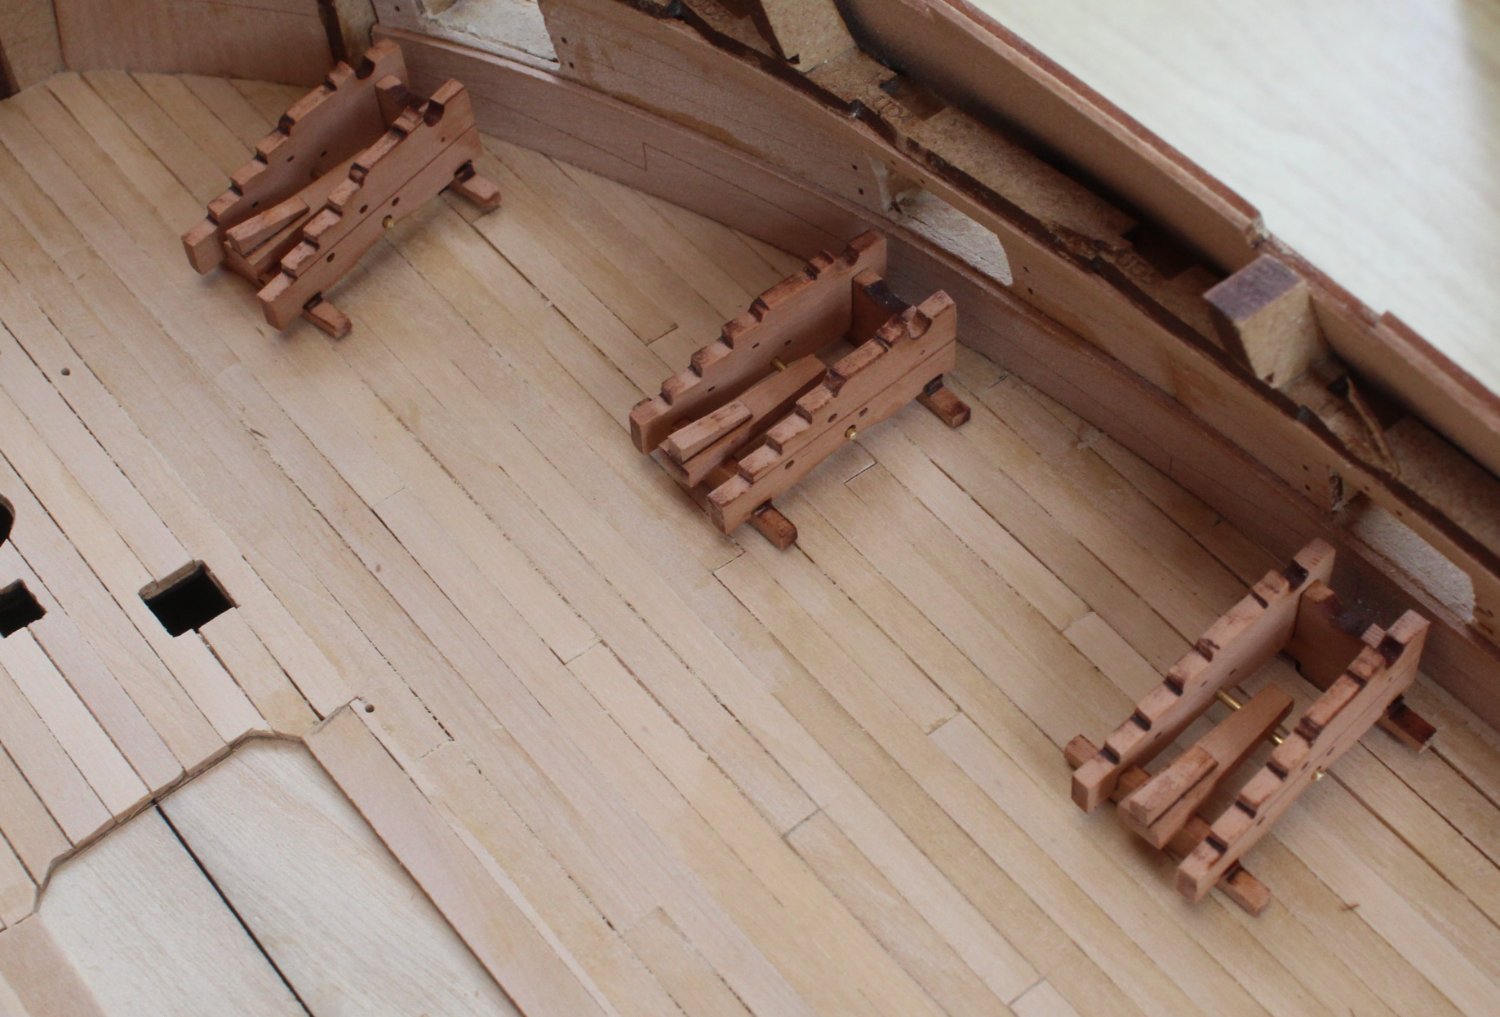
 24lb Cannon Carriages I have now completed the basic assembly of the gundeck 24lb cannon carriages. They are ready to be painted along with the gun port openings, inner bulwarks, spirketting and upper ledge patterns. As can be seen in the two attached photos the cannon carriage tabs all locate in the slots created when planking the deck with boxwood. Although the manual suggested using 0.8 brass rods to support the carriage stool bed and quoin assembly and I opted to use 1mm brass rod as it a better fit for the holes provided in the gun carriage side patterns.
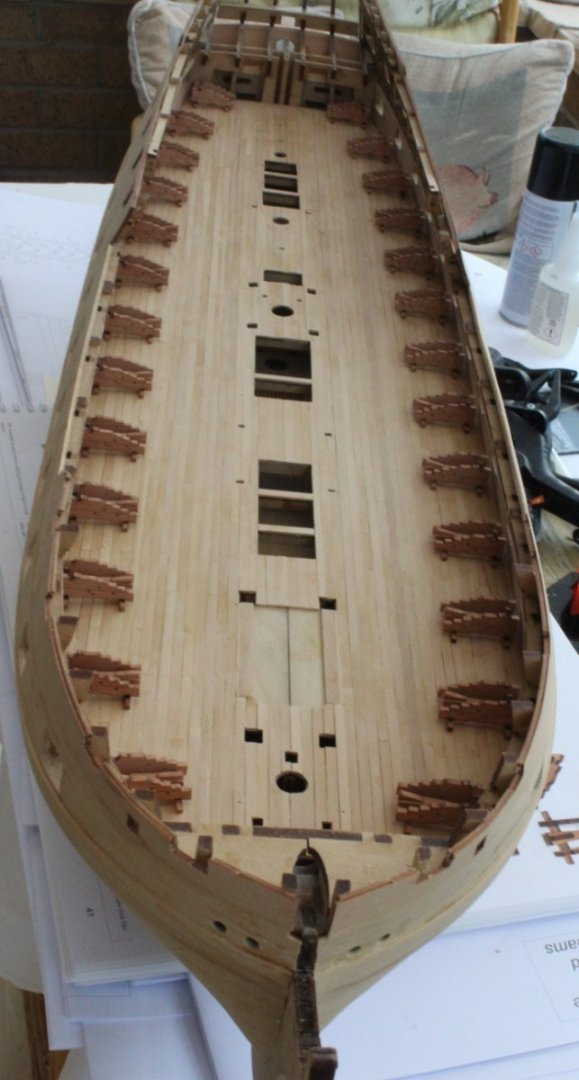
- 587 replies
-
- 9
-

-
- Indefatigable
- Vanguard Models
- (and 1 more)
-
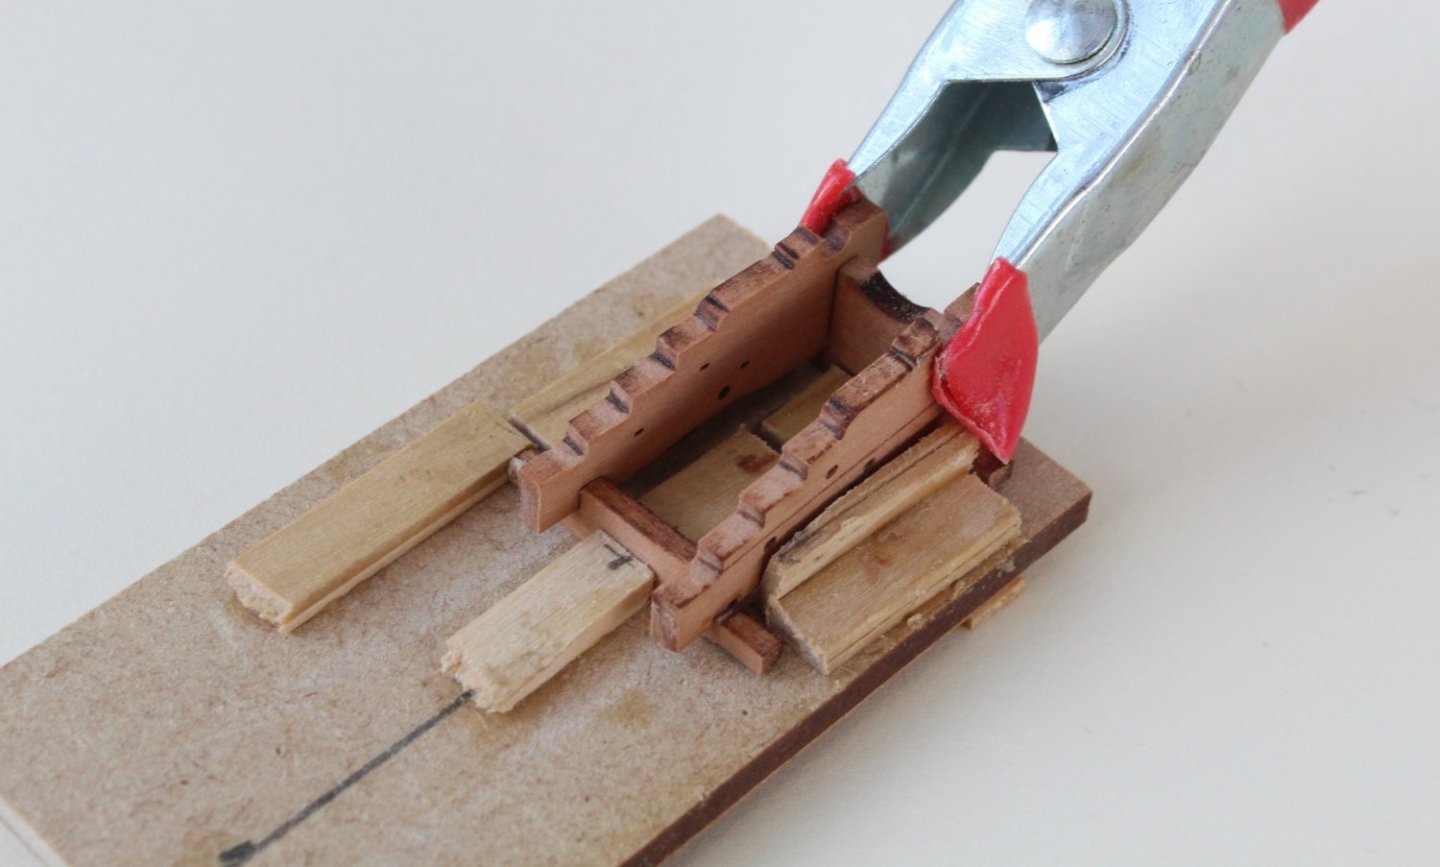
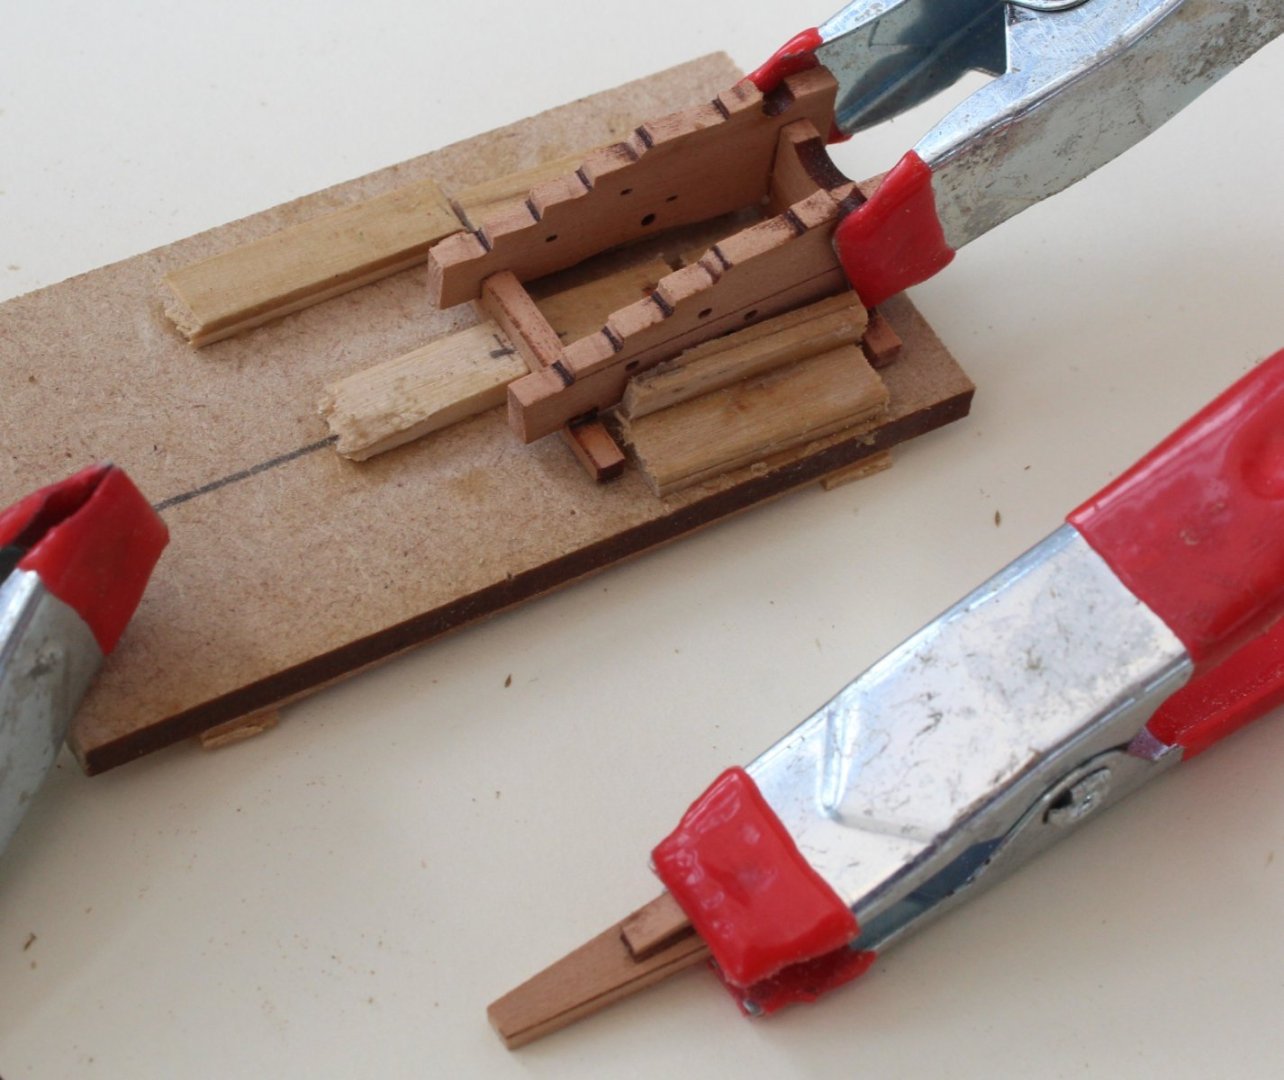
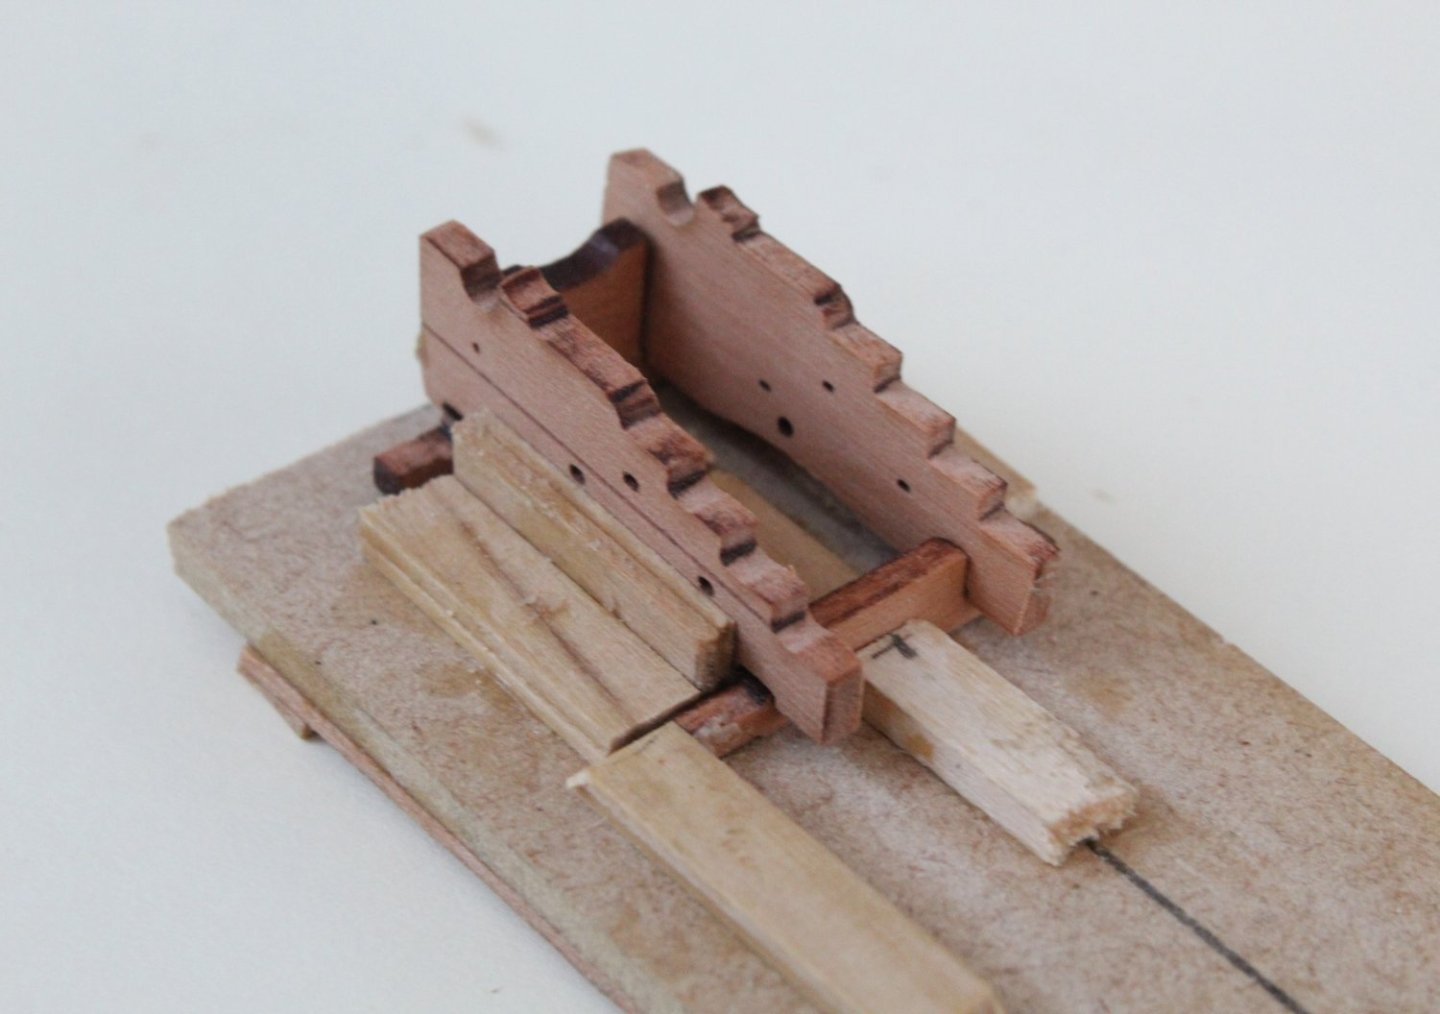
24lb Cannon Production (26 to make) - The Start As detailed in my last post I built a simple jig to aid the assembly process of the 26 off 24lb cannons. With the front and rear axles loaded in the jig glue was applied to the joints and the two carriage side panels were added. The carriage sides were clamped to the front axle as the glue was curing. I am really pleased that I invested time in building the jig as it has really helped me with the assembly process. In a short space of time the first 4 cannon carriages were assembled and they are now ready to be painted before the wheels can be added. I have found the ideal storage area for the assembled frames. It was then time to book another river cruise along the Blue Danube from Budapest to Salzburg, via Vienna, departing middle of next month. After a spot of lunch the next cannon was added and the 6th cannon was assembled in the jig. Production is going to stall due to family birthday celebrations (not mine) and visitors coming to stay for a few days. I am hopeful I can still sneak a few hours in the shipyard.

- 587 replies
-
- 8
-
-
- Indefatigable
- Vanguard Models
- (and 1 more)
-
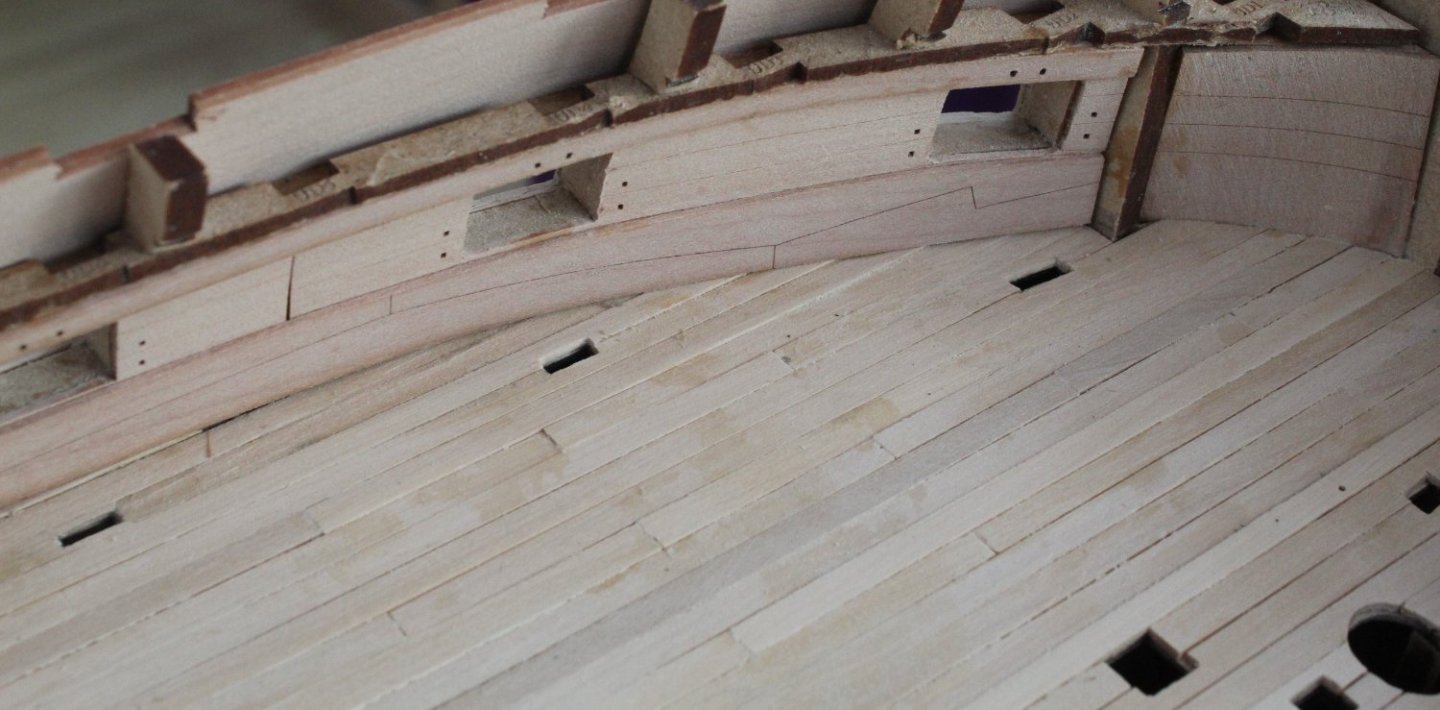
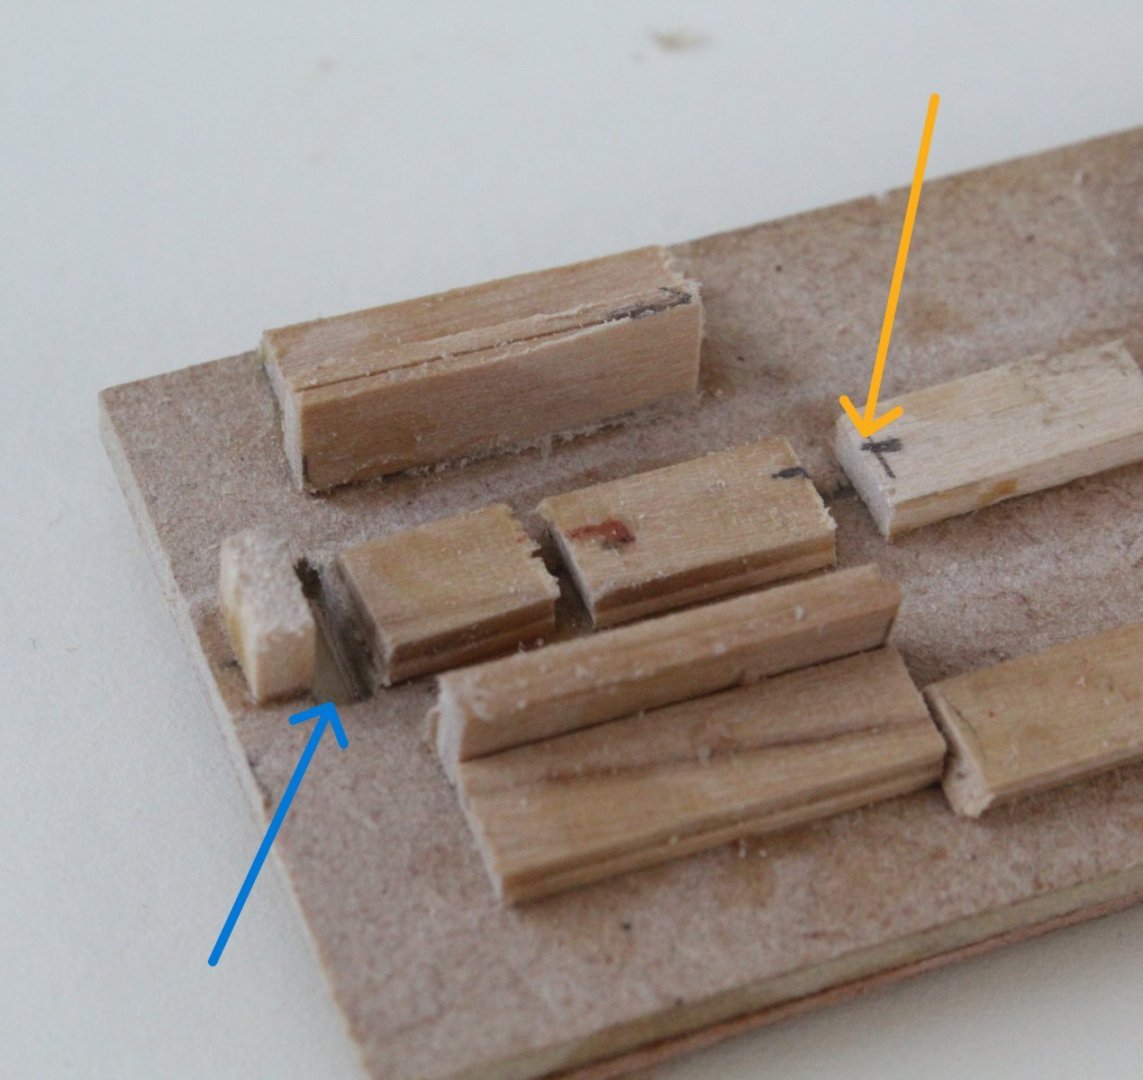
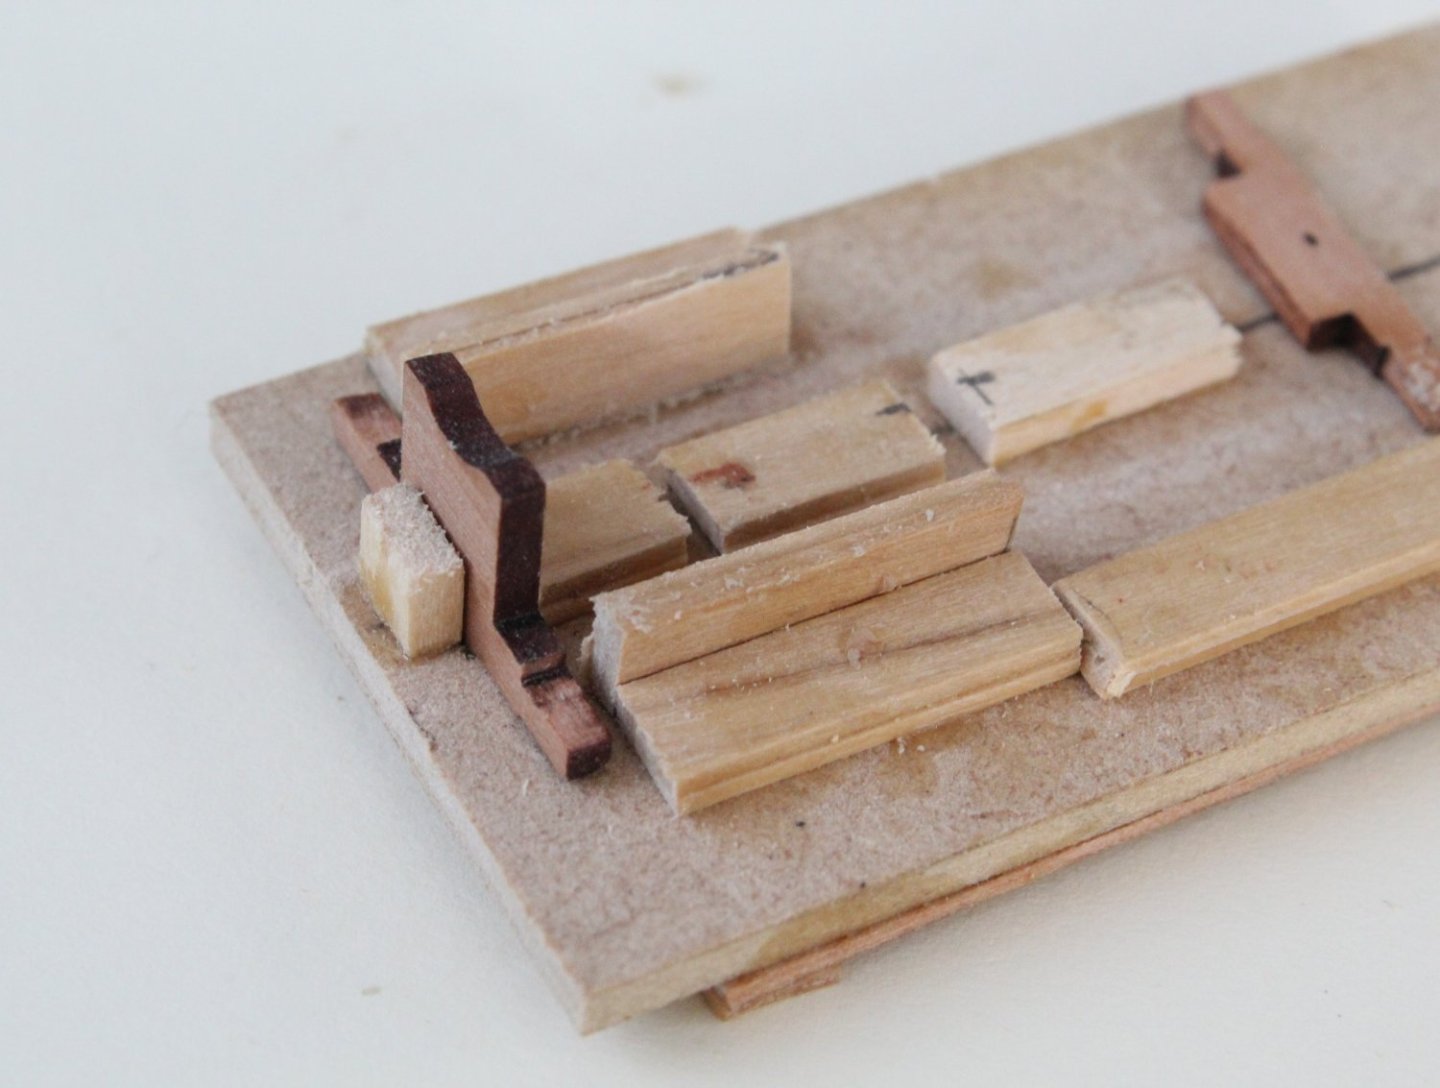
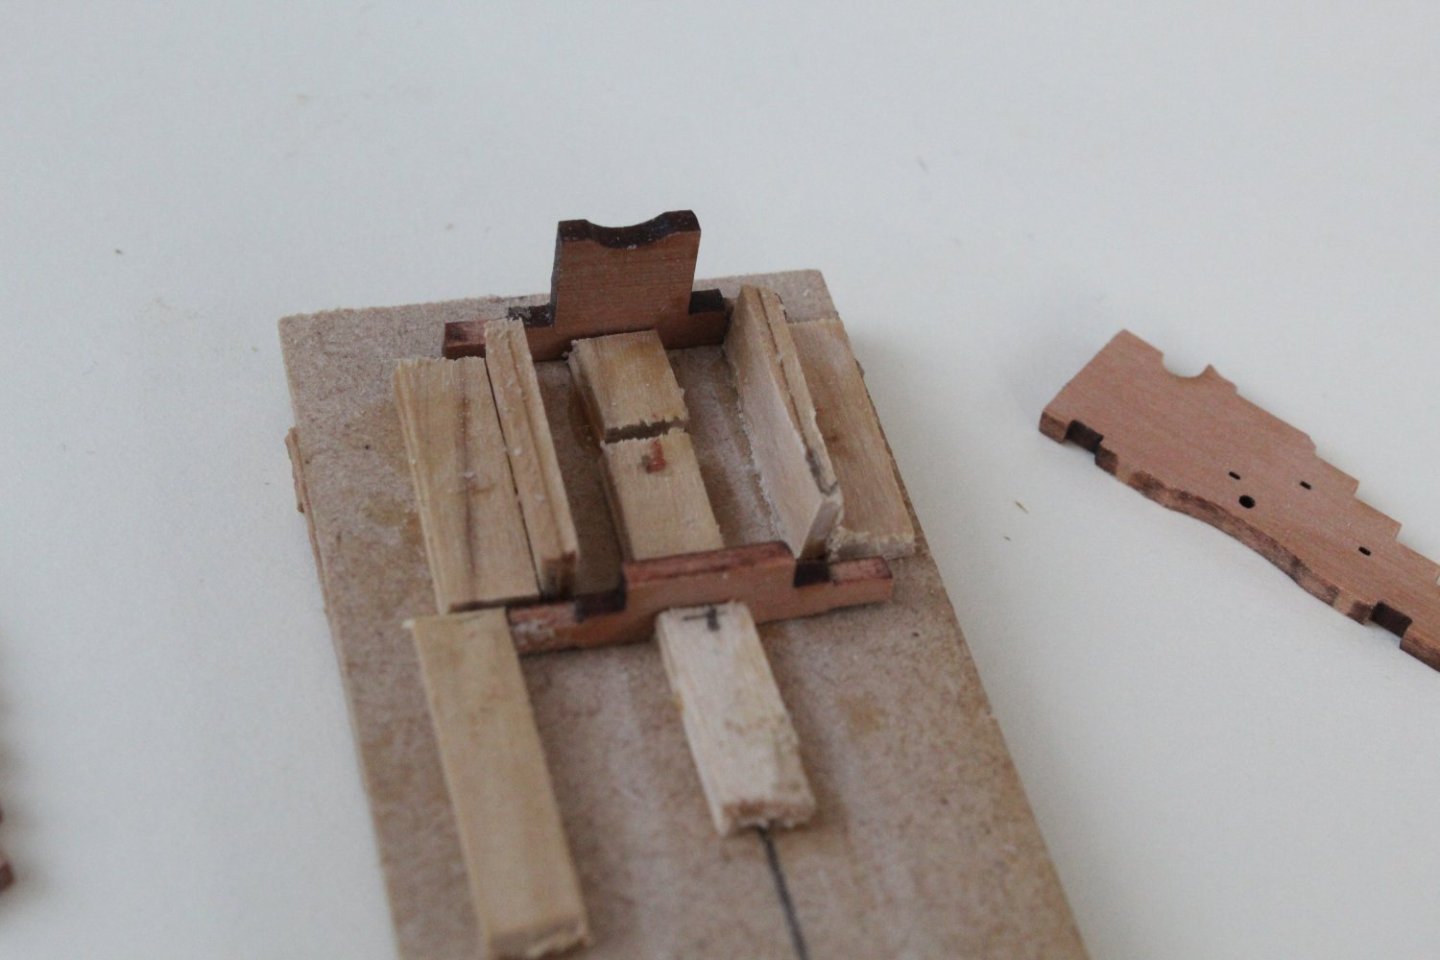
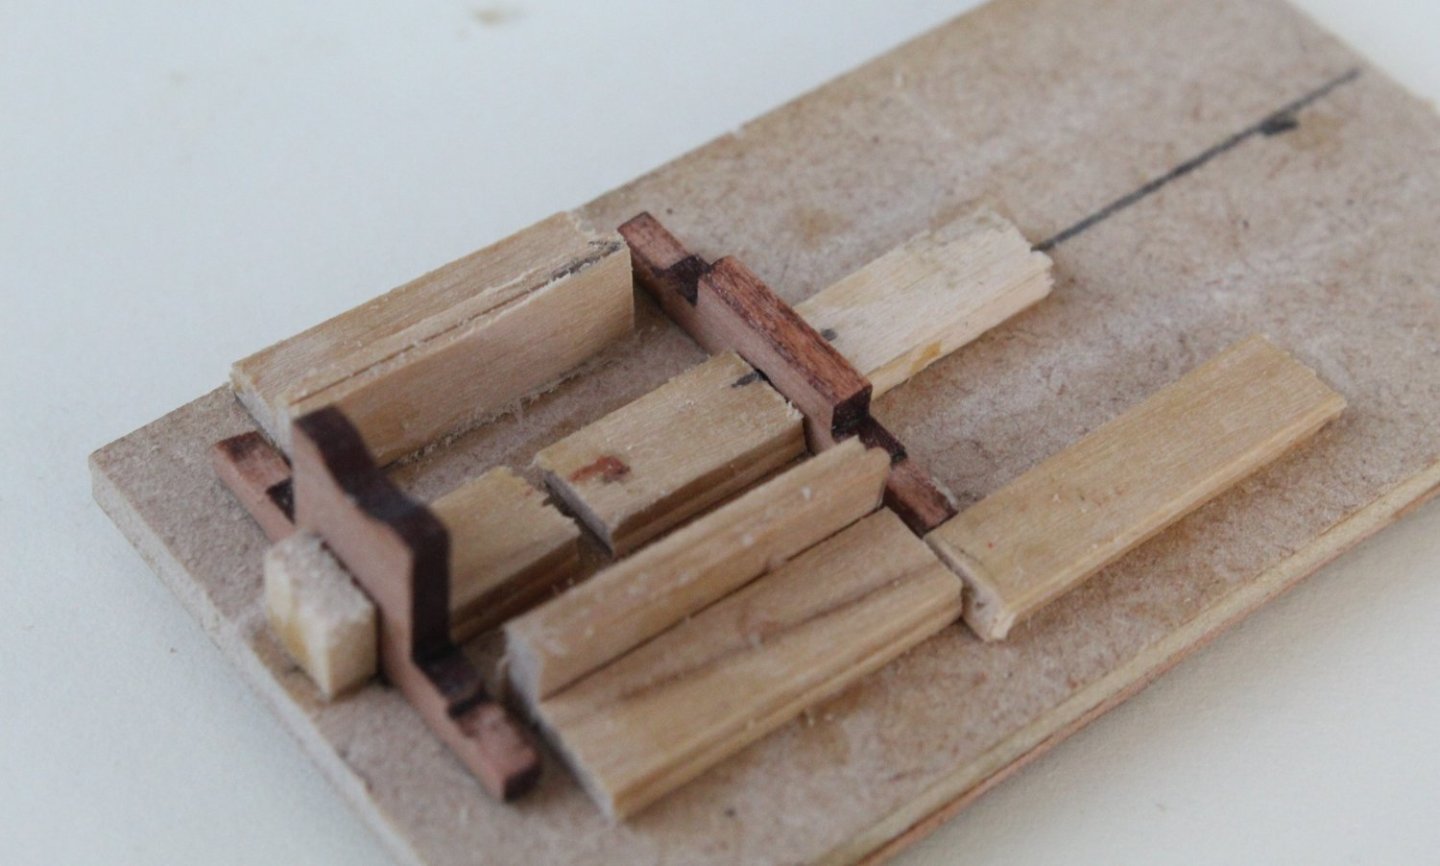
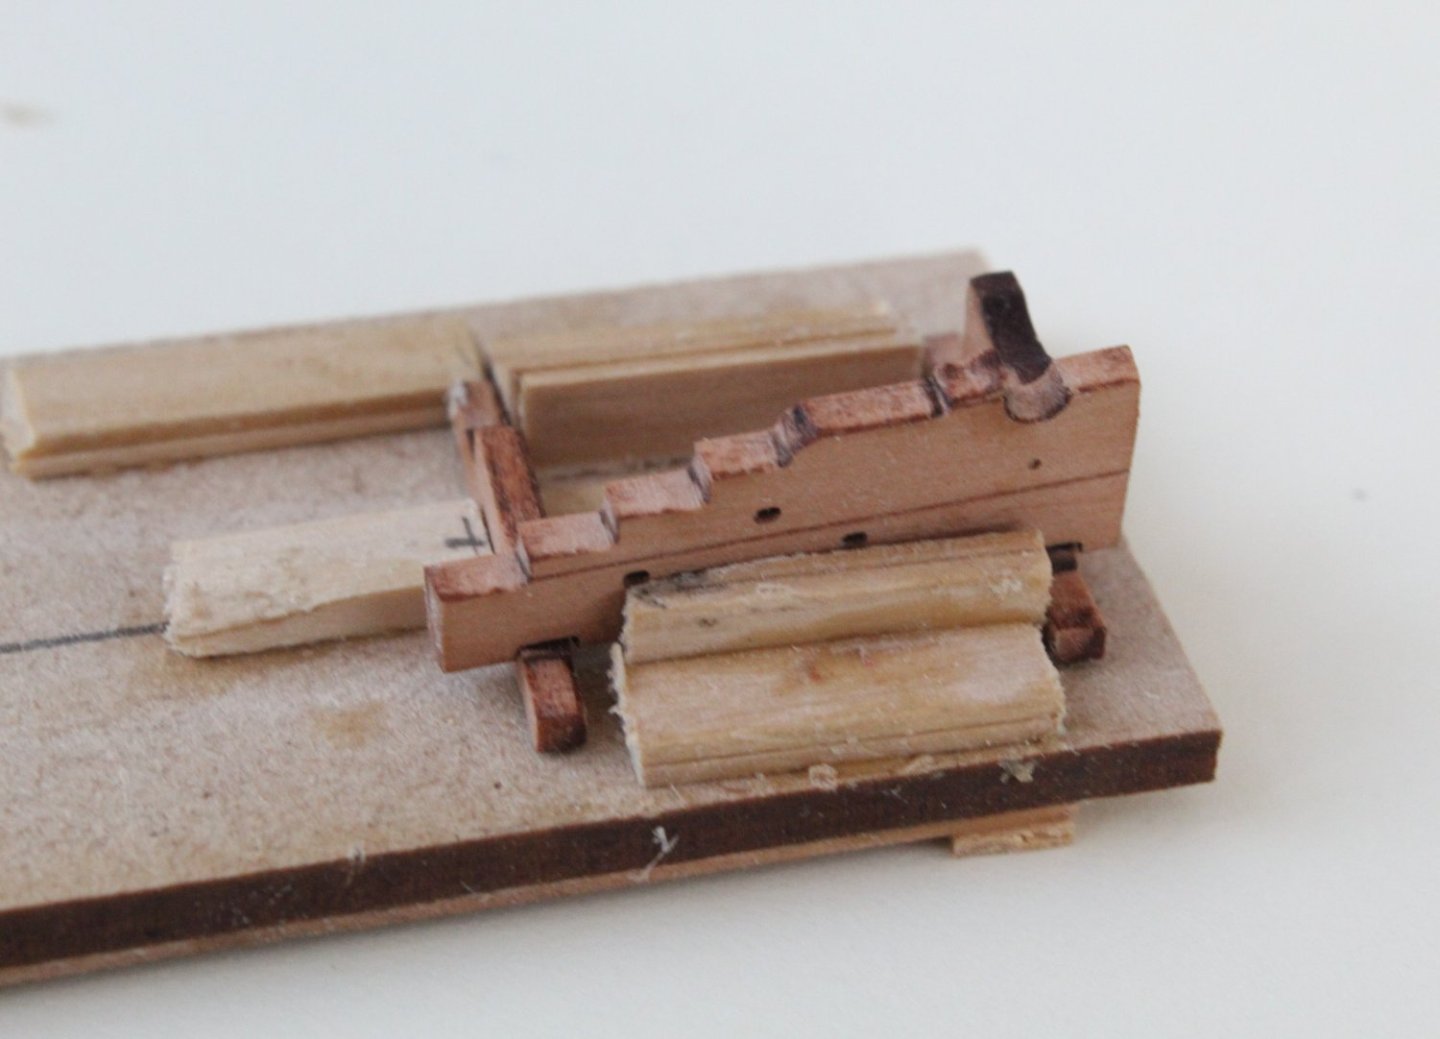
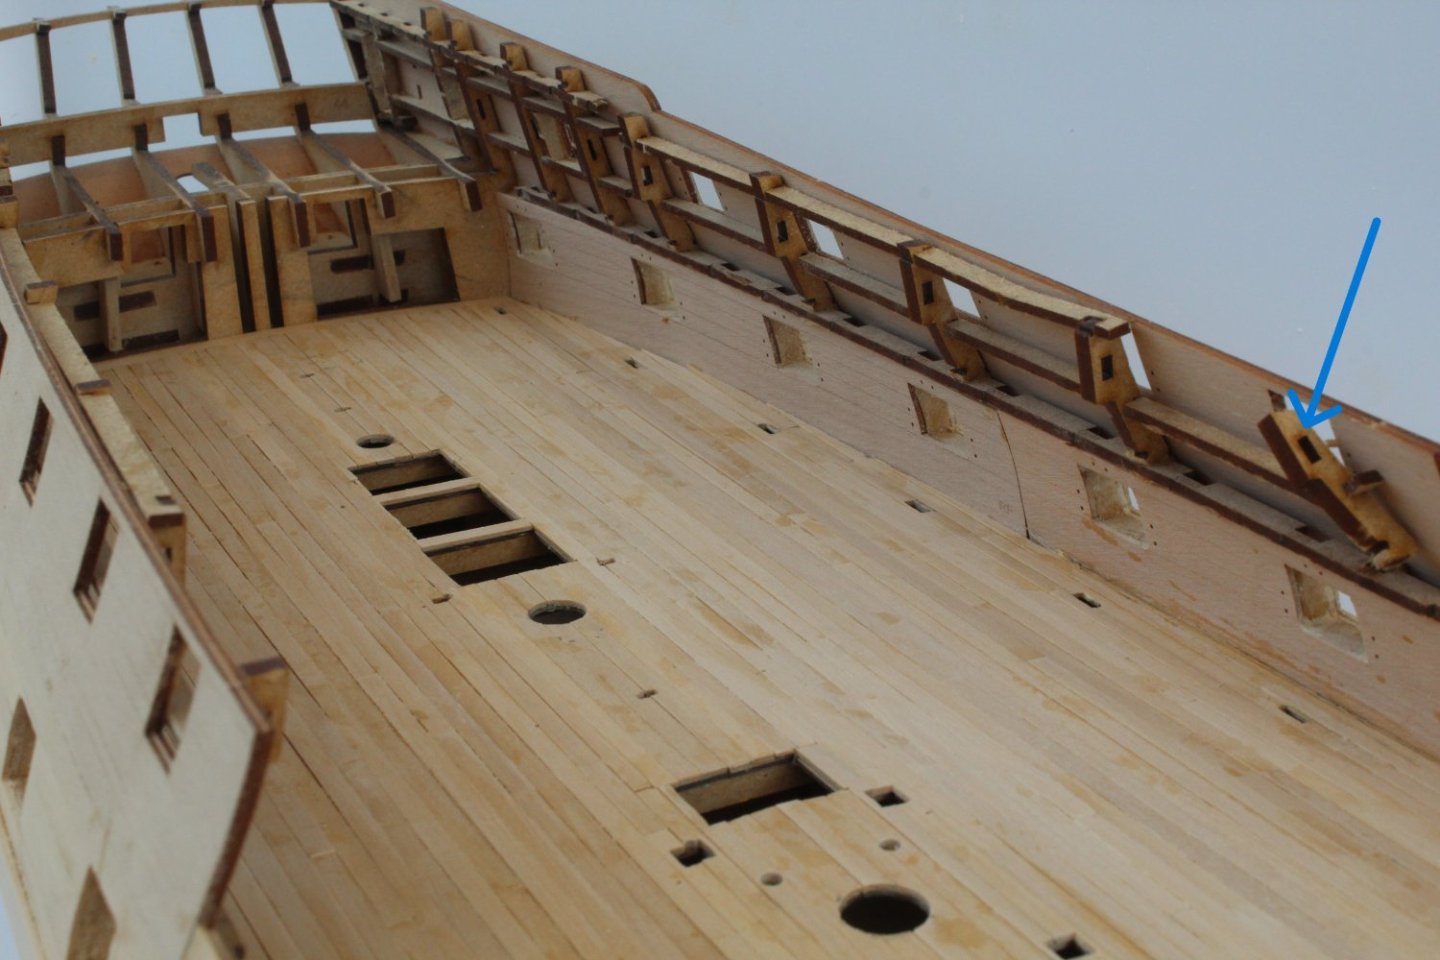
Spirketting and Upper Ledge Patterns After giving the planked deck a good scrapping, I am now reasonably happy with the end result so I more inclined to add a WOP finish rather than a wood stain finish. I decided that I would paint the inner bulwarks red after the spirketting and upper ledge patterns had been fitted. With the laser char removed from the top and bottom edges of the spirketting and upper ledge patterns it was a relatively easy task to glue and clamp the pattern in place. I have ordered some additional material with a view to adding a waterway between the gun deck and spirketting, therefore any paint seepage under the masking tape can be covered up. I have added some photos of the spirketting and upper ledge patterns in place. Cannon Assembly Jig It is probably a bit OTT but I ended up making a jig to aid with the assembly of the cannons this afternoon. Starting with a base I cut a slot for the front axle gundeck locating tab, as shown by the blue arrow in the next photo. The yellow arrow indicates where the rear axle will be positioned. I added a side stop to ensure the rear axle is centrally positioned. This is not strictly necessary as I also added to side supports for the cannon side patterns. In the next photo the front axle has been added to the jig. I added a back and front to ensure the front axle is not leaning forward or backward. The rear axle is now positioned in the jig. Next the first side pattern is added, making sure it is fully seated on the two axles. The other side piece is now added to the jig. In the above photo’s the cannon shown has only been dry fitted. I will try a test glued cannon assembly in the morning, and fingers crossed I will be able to release the assembled from the jig. As each cannon is in the jig the next cannon parts can be removed from the sheet and the laser char removed to allow time for the glue to grab. Once I have built the 26 off cannons they will be painted. In the build manual a short length of 0.8mm brass bar is linked between the two side panels. Having checked the fitting I believe this should be a 1mm copper bar, has any of the other builder noticed this?
- 587 replies
-
- 6
-
-
- Indefatigable
- Vanguard Models
- (and 1 more)
-
Dooh! I read that as followed by, chalk that up to a senior moment
- 587 replies
-
- 3
-
-
- Indefatigable
- Vanguard Models
- (and 1 more)
-
Thanks for the advice. I do have some Vallejo Acrylic Varnish. I am interested to know why this is applied before the scraping. I was really pleased with how the cannon slots turned out.
- 587 replies
-
- 1
-
-
- Indefatigable
- Vanguard Models
- (and 1 more)
-
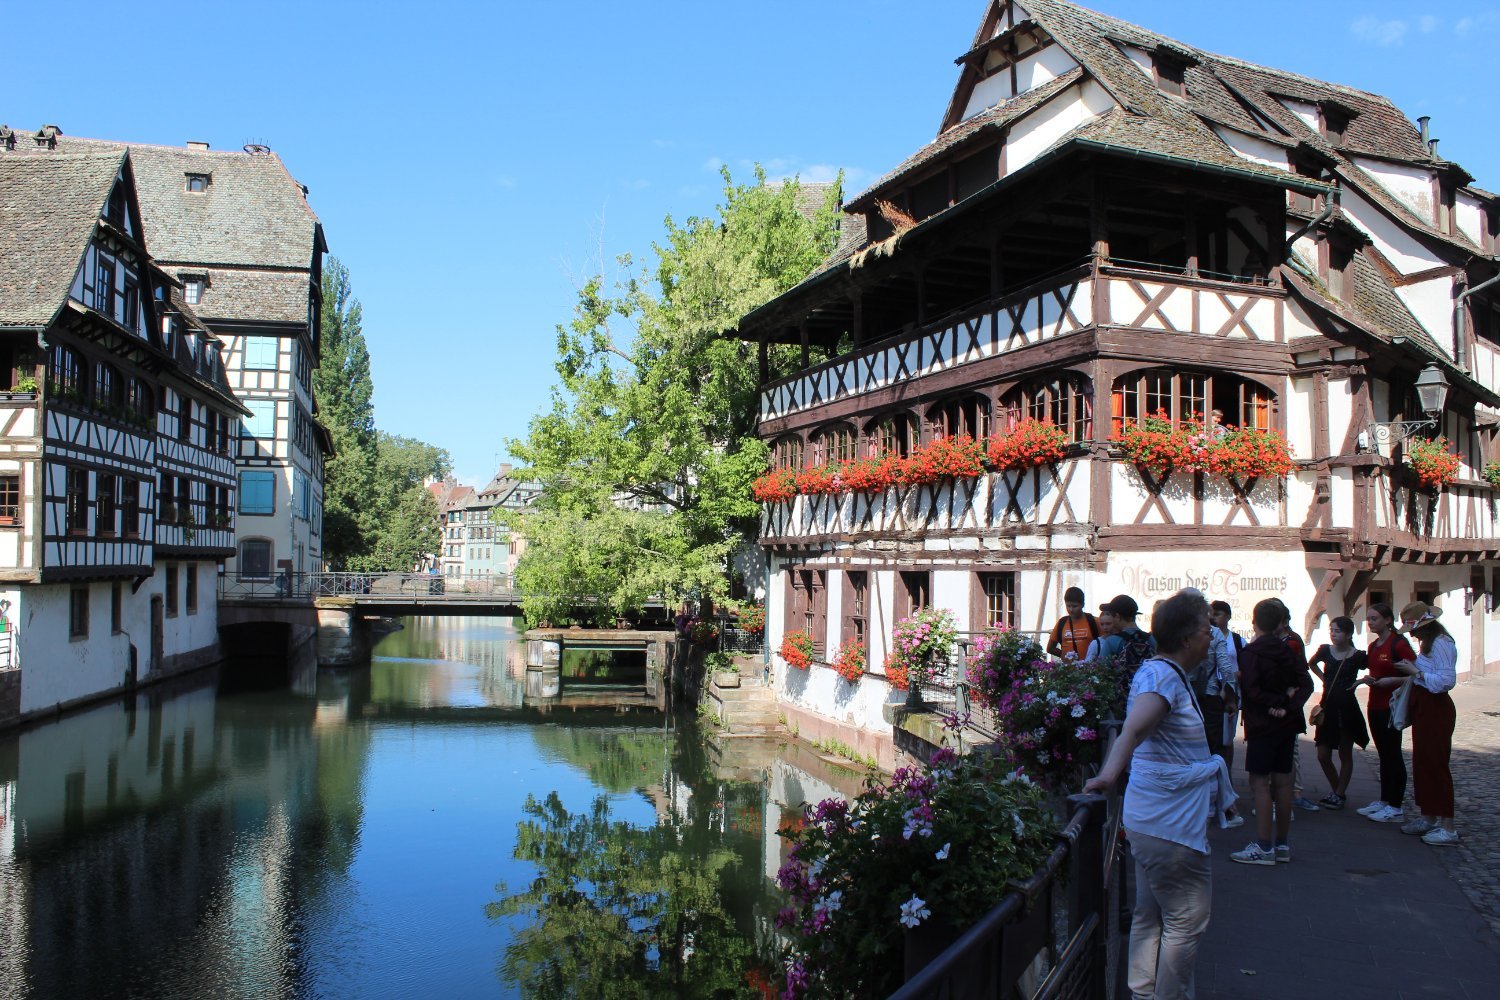
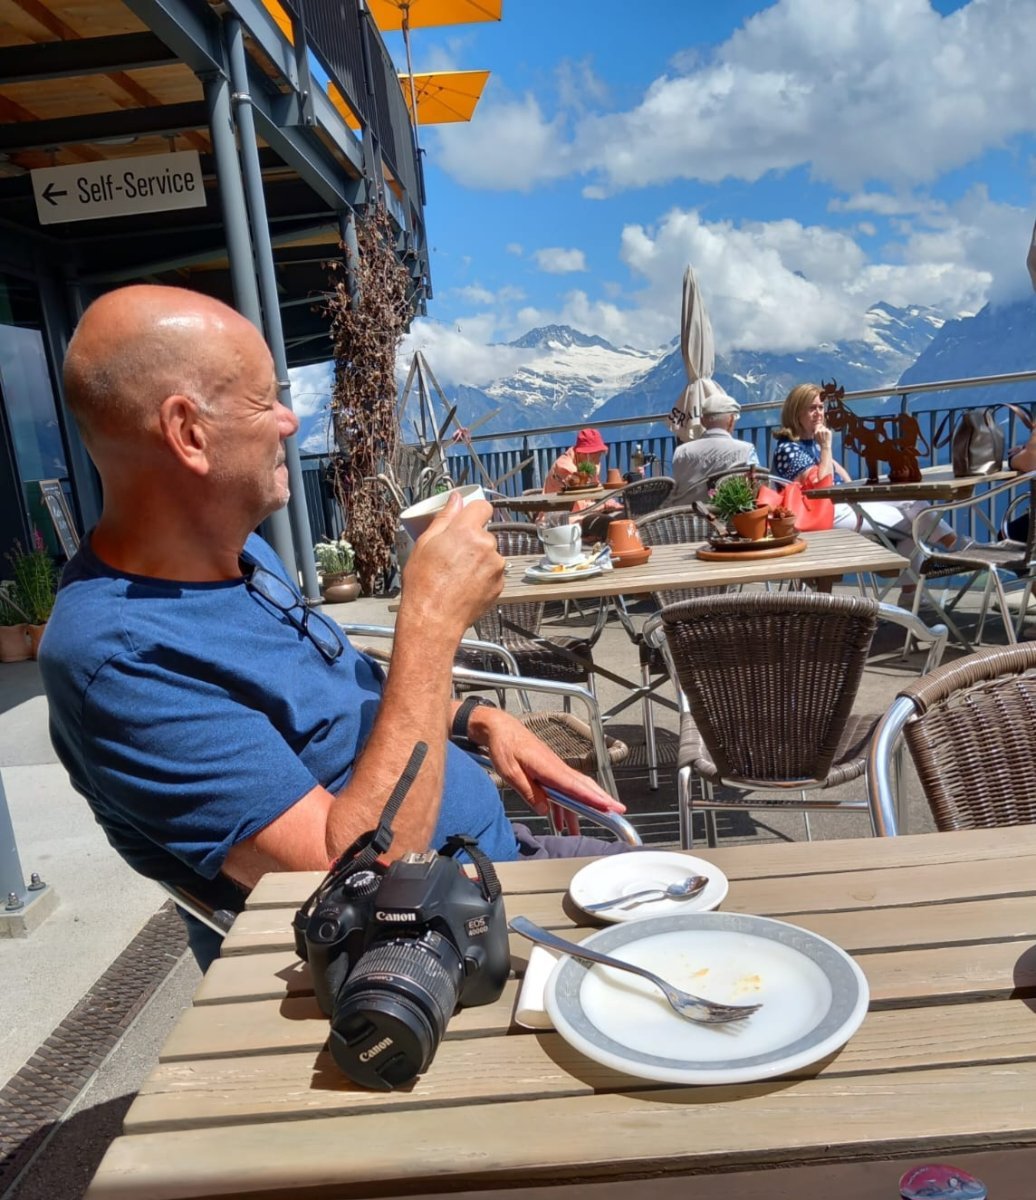
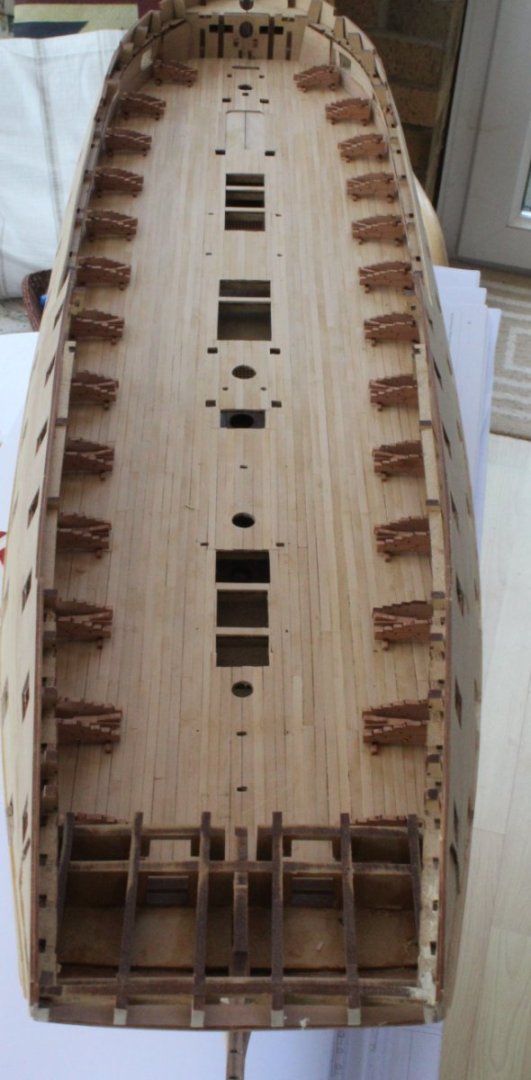
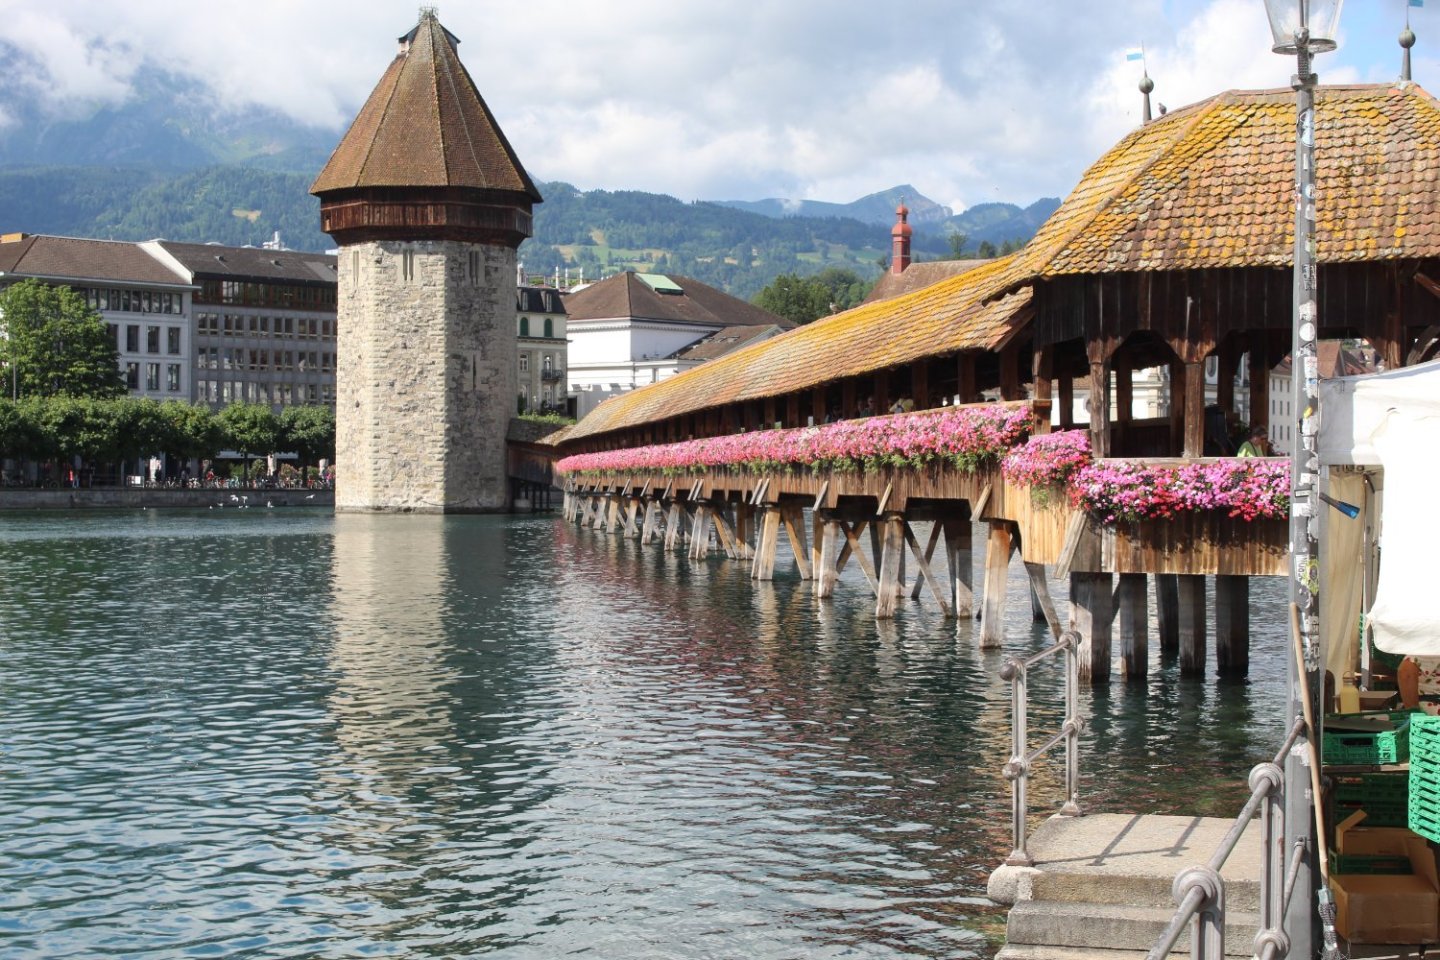
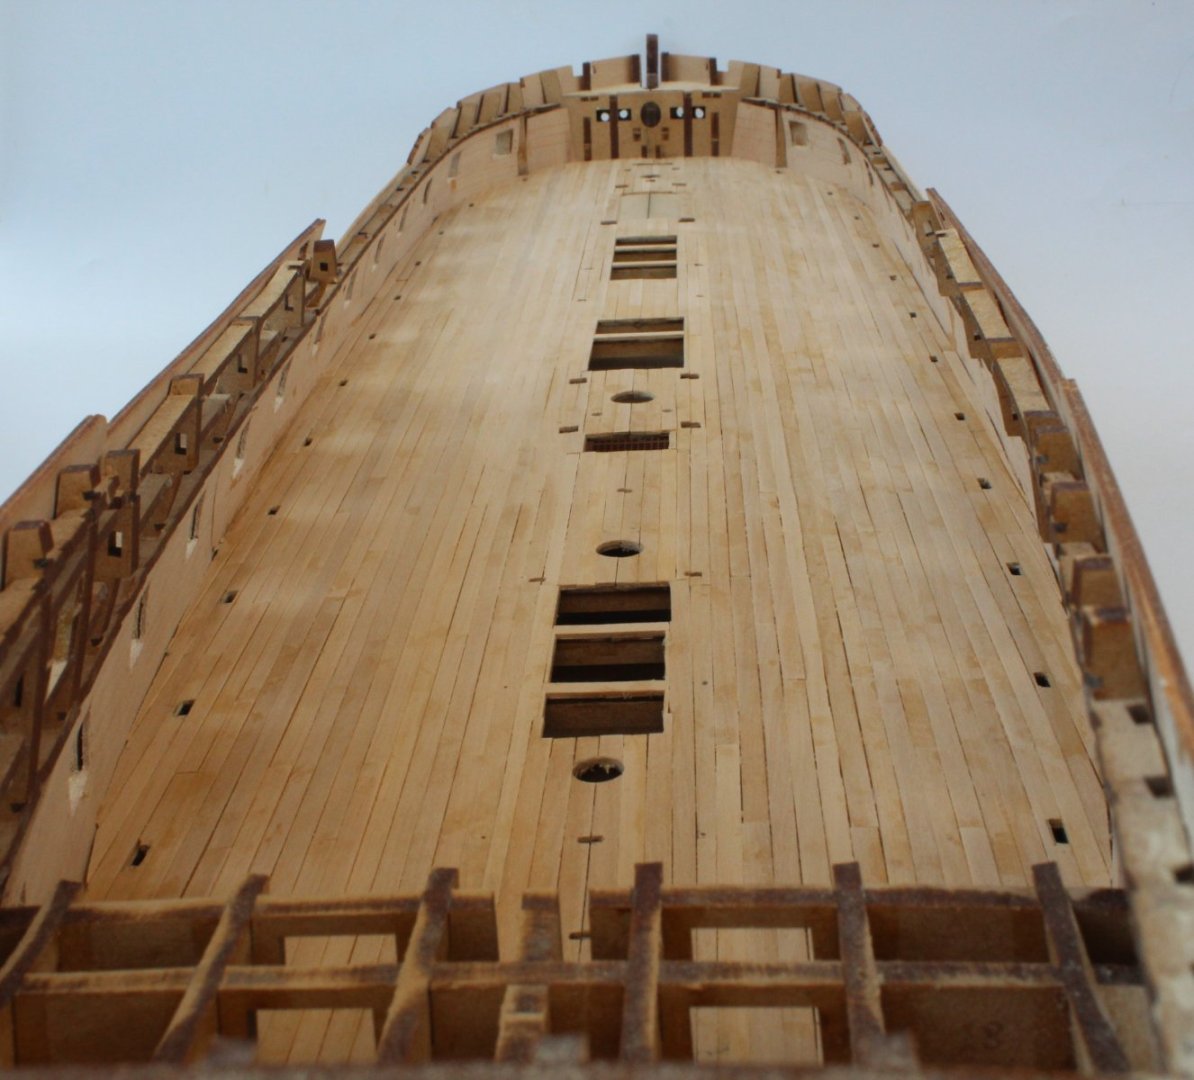
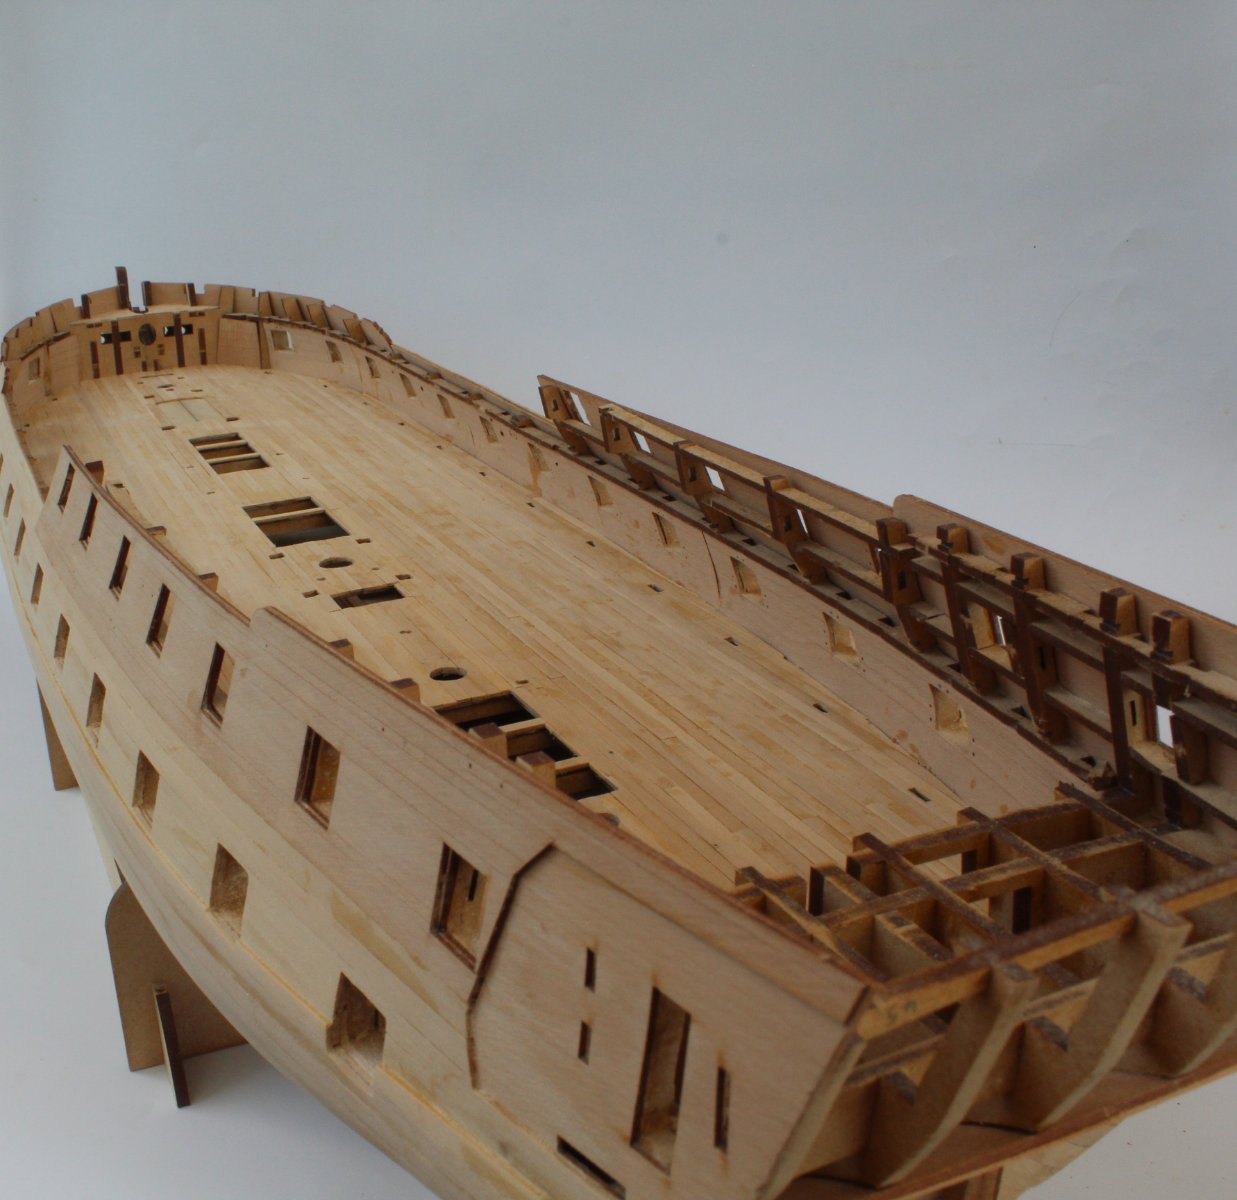
Gun Deck Planking – Completed I have now returned from an amazing European holiday, as can be seen from the three photos I have included in the post. We were there during a red alert heatwave, which suited me as I love the sun. The Eiger (Left hand side of photo with the summit in the clouds) Strasbourg (Very scenic) Lucerne (A fantastic covered bridge) As my back is now much improved, I have been able to spend a bit more time in the shipyard this week and I have finally completed the planking to the gun deck this afternoon. The gun deck planking will now need to be cleaned up. I plan to use a blade to scrape the gun deck planks. As there is some colour difference between the planks I have ordered some different water based wood stains so I experiment with some different colours (on scrap wood samples) to see if I can get a nice pale wood stain finish. If I am unable to find a suitable stain finish I will simply add a WOP finish to the planking which I know will look good. Whilst I wait for the wood stains to arrive, I might turn my attention to painting and assembling the cannons so I check how they will look when placed in their locating slots. As each cannon locating slot was added during the planking process I did make sure the cannon tab would locate in each slot. I have added a selection of photos of the completed planking. As can be seen in the final photo I did manage to damage one of the bulkhead ears. The ear can be glued back in place without any difficultly.


.thumb.JPG.28732190d2a0d134cfc33d5e41b01eda.JPG)

- 587 replies
-
- 6
-
-
- Indefatigable
- Vanguard Models
- (and 1 more)
-
Looks good. I have been considering buying an air brush. Which one did you get?
- 233 replies
-
- 1
-
-
- Indefatigable
- Vanguard Models
- (and 1 more)
-
Thanks. The back in much better but the waist is much fatter with all the fine dining
- 587 replies
-
- 2
-

-
-
- Indefatigable
- Vanguard Models
- (and 1 more)
-
Hello Dave. We had left Lucerne earlier in the day and taken the cog railway to spend the afternoon at Schynige Platte.
- 587 replies
-
- 2
-
-
- Indefatigable
- Vanguard Models
- (and 1 more)
-
Excellent workmanship. I wish I had your patience and skill.
- 648 replies
-
- 2
-
-

-
- Indefatigable
- Vanguard Models
- (and 1 more)
-
As I cruise down the Rhine, bathed in sunshine do I get envious of the excellent progress the other Indy builders?, such as @Kevin, @ECK and @Blue Ensign A picture is sometimes better than words I should return to the shipyard sometime next week

- 587 replies
-
- 11
-
-
- Indefatigable
- Vanguard Models
- (and 1 more)
-
I have done a little bit more on the deck planking. I have found it necessary to use plank off cuts to hold some of the deck planks in place as the glue cures to ensure the planks are nice and snug to the adjacent planks. I will be AWOL for the next 9+ days as my wife and I take a nice train journey to Basel (Switzerland), via Paris (and the riots) and then will enjoy a 5 star cruise up the Rhine to Dusseldorf, with plenty of places to visit, including: a) Lucerne and Bernese Oberland b) The Black Forest c) Strasbourg d) Speyer e) Rudesheim, Rhine Gorge and Koblenz f) Cologne
- 587 replies
-
- 7
-
-
- Indefatigable
- Vanguard Models
- (and 1 more)
-
It looks like you've made an excellent job of the 2nd planking
- 233 replies
-
- 2
-
-
- Indefatigable
- Vanguard Models
- (and 1 more)
-
I am spoilt for choice for my next project.
-
Looks great, excellent workmanship as always.
- 648 replies
-
- 3
-
-
- Indefatigable
- Vanguard Models
- (and 1 more)
-
Many thanks. Also much of this planking will be hidden by the upper decks and gangways.
- 587 replies
-
- 2
-
-
- Indefatigable
- Vanguard Models
- (and 1 more)
-
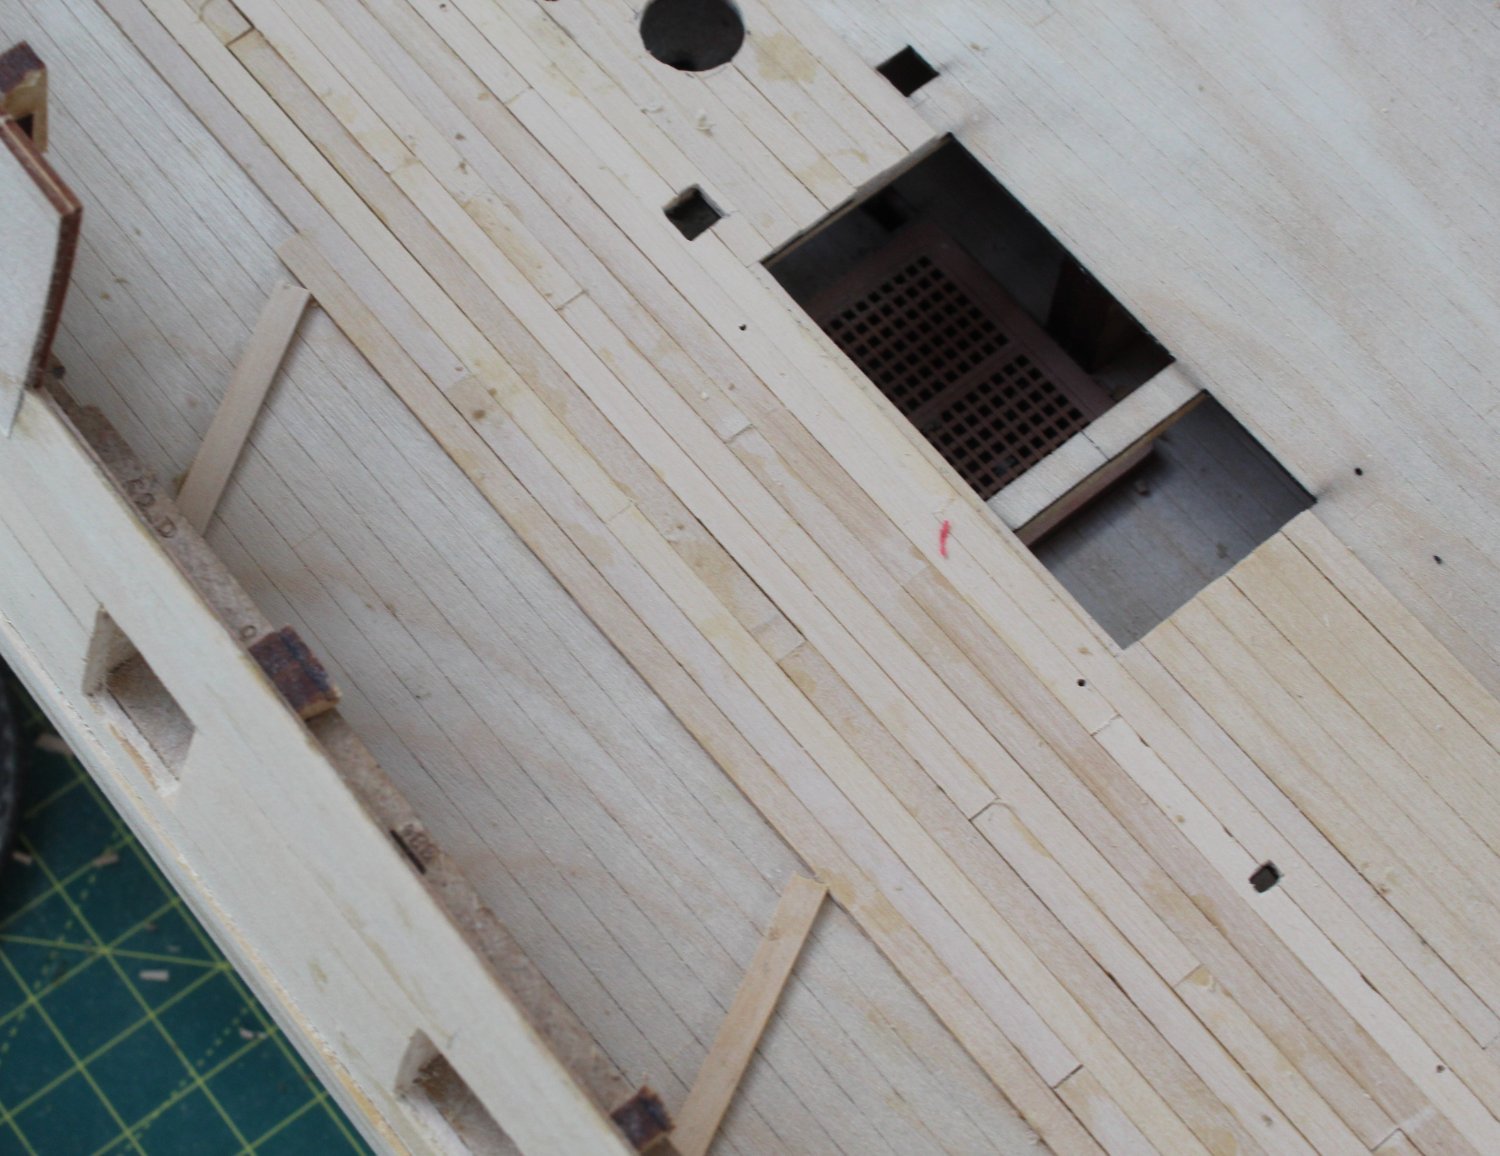
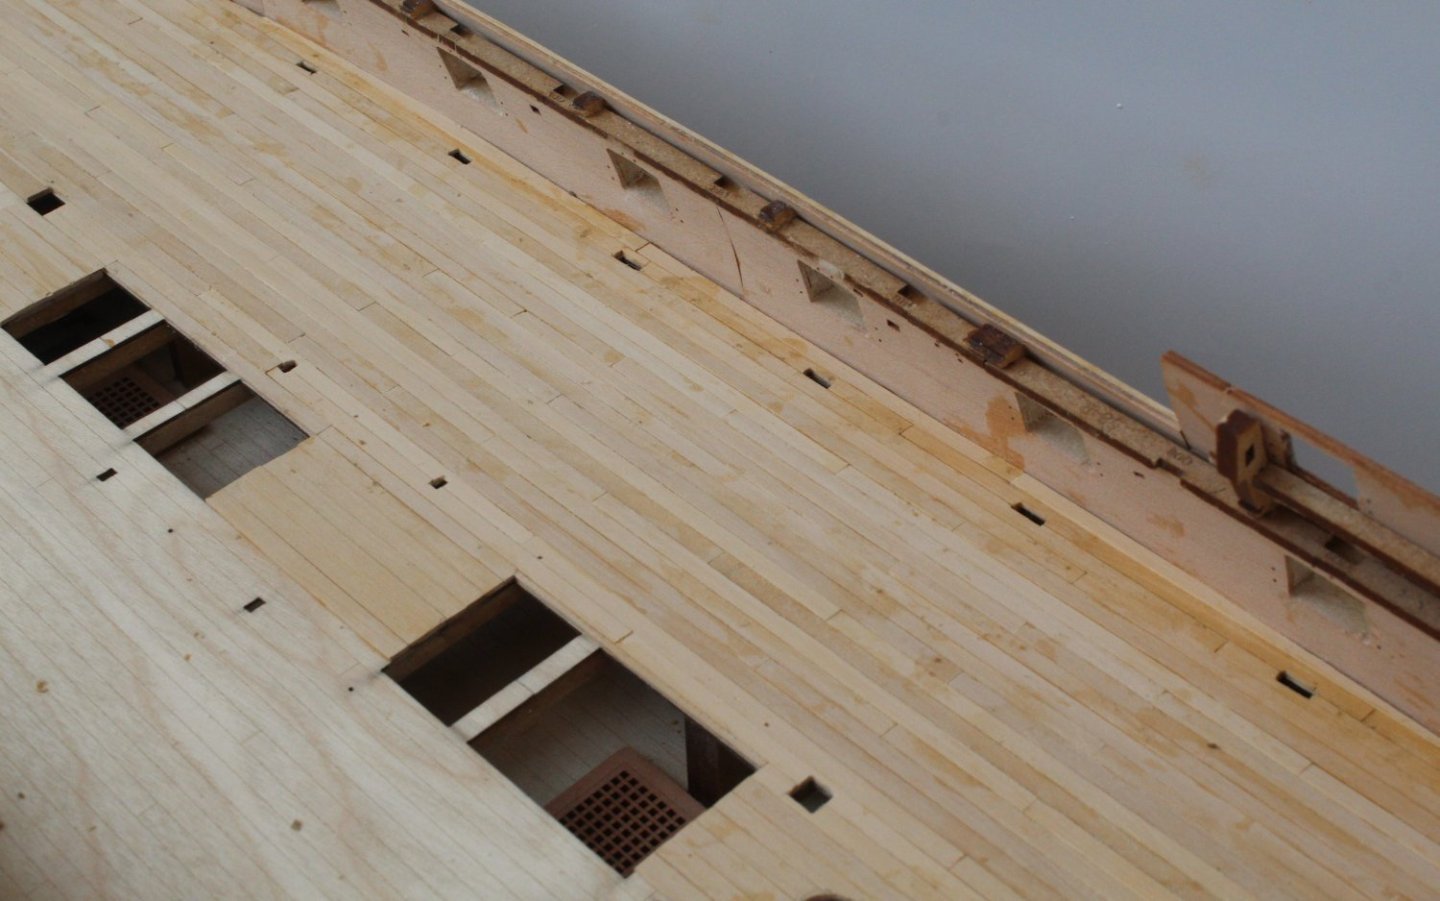
Gun Deck Planking – Left-Hand Side Started Before I start planking towards the left-hand bulwark, I need to complete the infill areas around all the hatches. Using the laser etch line on the gundeck base as a guide the first I added a set of planks from the bow to the stern. The first two planks that were cut and glued in place are shown in the photo below. The next task was to cut and glue the various inner infill planks. The completed first hatch infill area is shown in the next photo. The next hatch infill is soon completed as there was not much work required. The next section required a lot more work, but with careful measurement and accurate cutting the infill was completed and the bitts were test fitted. The final hatch to infill was straightforward and one of the deck beam support was test fitted. The infill to the stern was the final task. I decided it was unnecessary to open up the area for the final hatch, but I did mark the area where the hatch would be located and then did a dry fit as can be seen in the next two photos Next is a photo of the stern area with the deck support beams test fitted. To ensure the eyebolts are correctly positioned I am using a simple jig and the one shown has been set for the first pair of eyebolts. The supplied boxwood planks do vary in colour so before I start the planking toward the left-hand bulwarks, I will try to sort out the best colour matched planks. 19 planks lengths will be required to complete the left-hand side.


- 587 replies
-
- 5
-
-
- Indefatigable
- Vanguard Models
- (and 1 more)
-
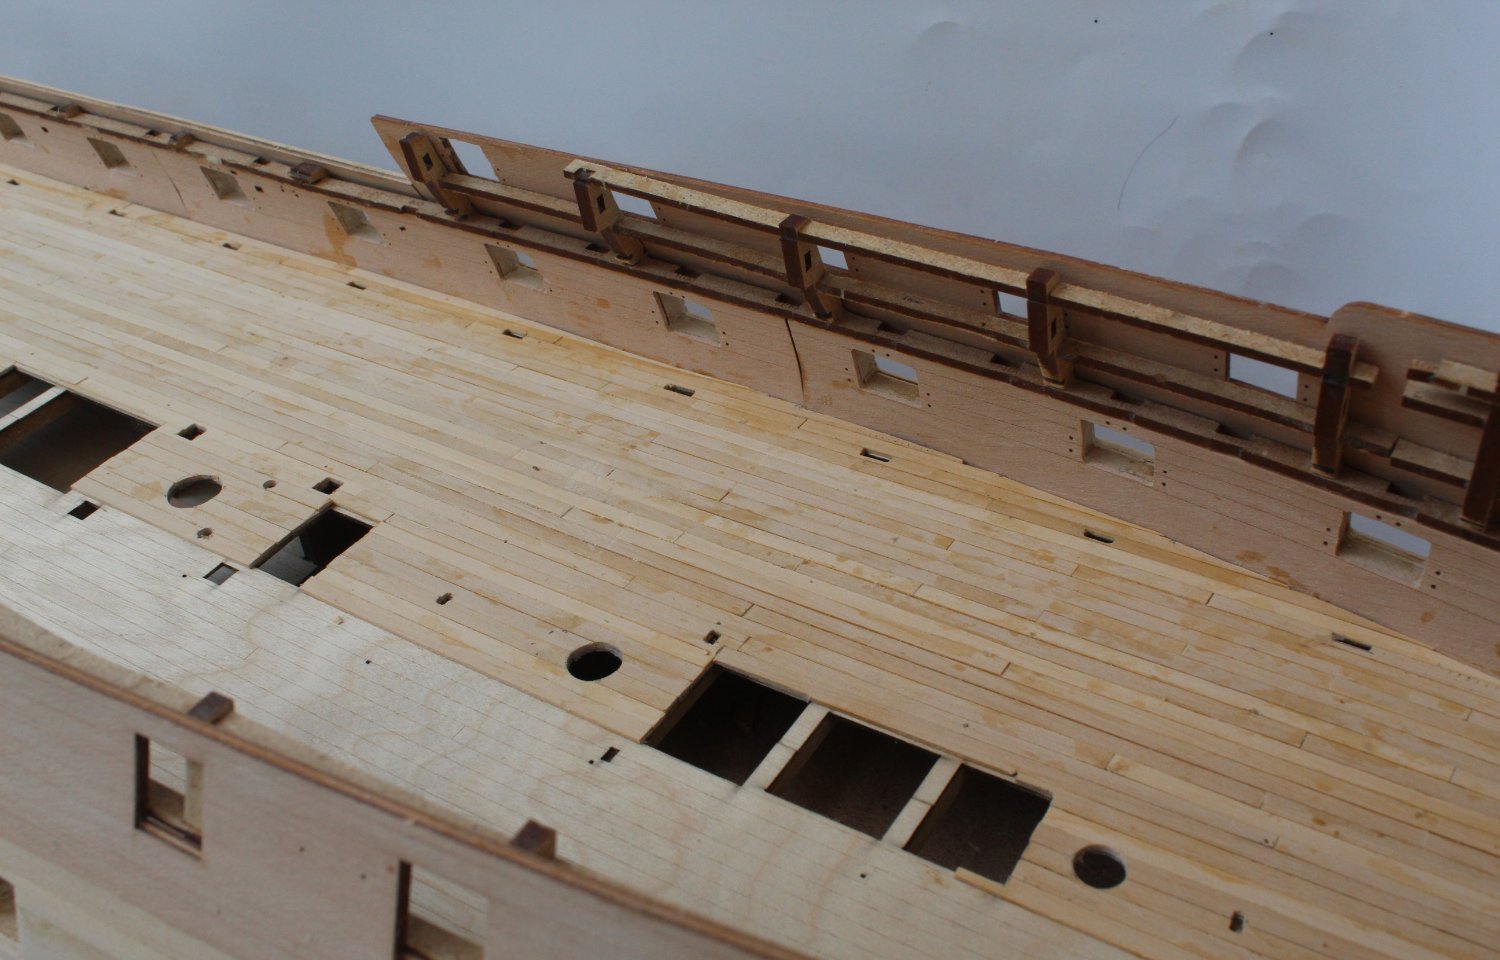
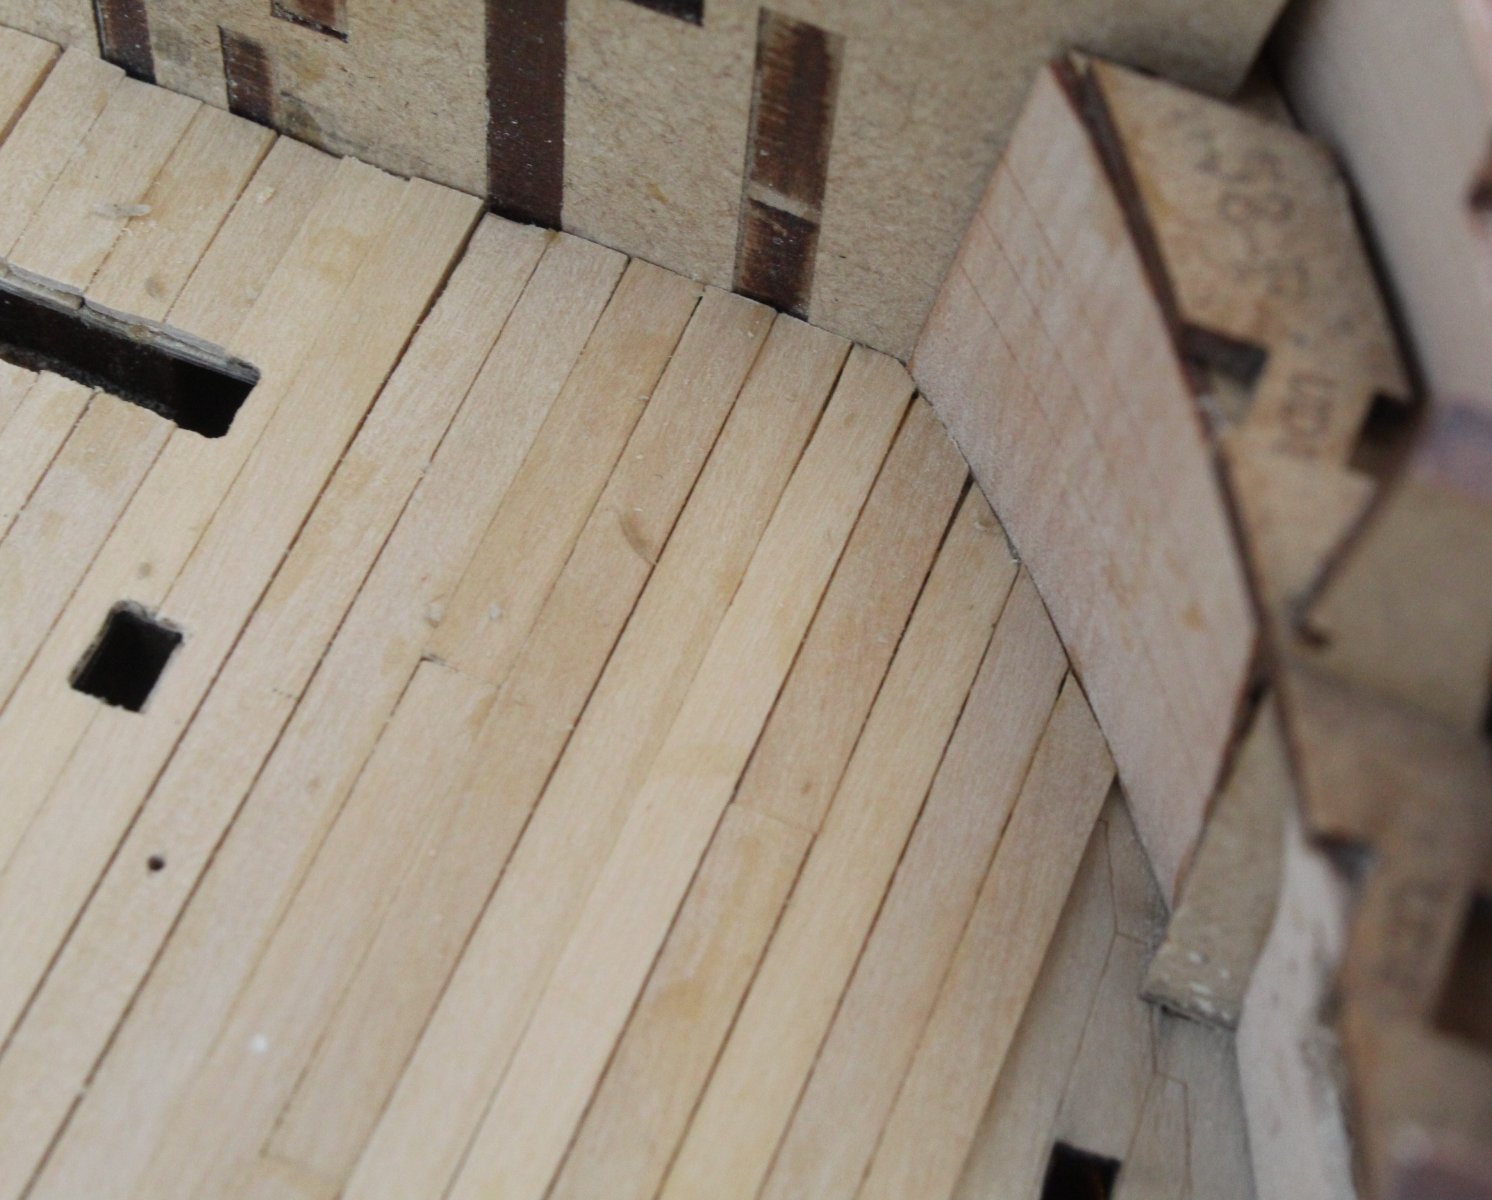
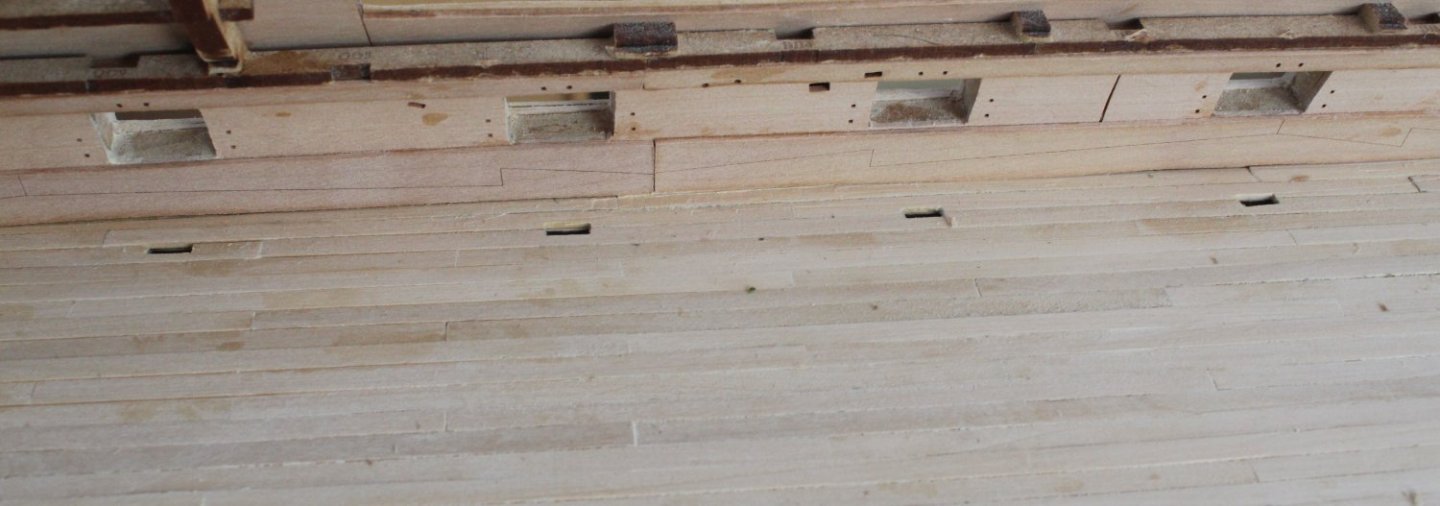
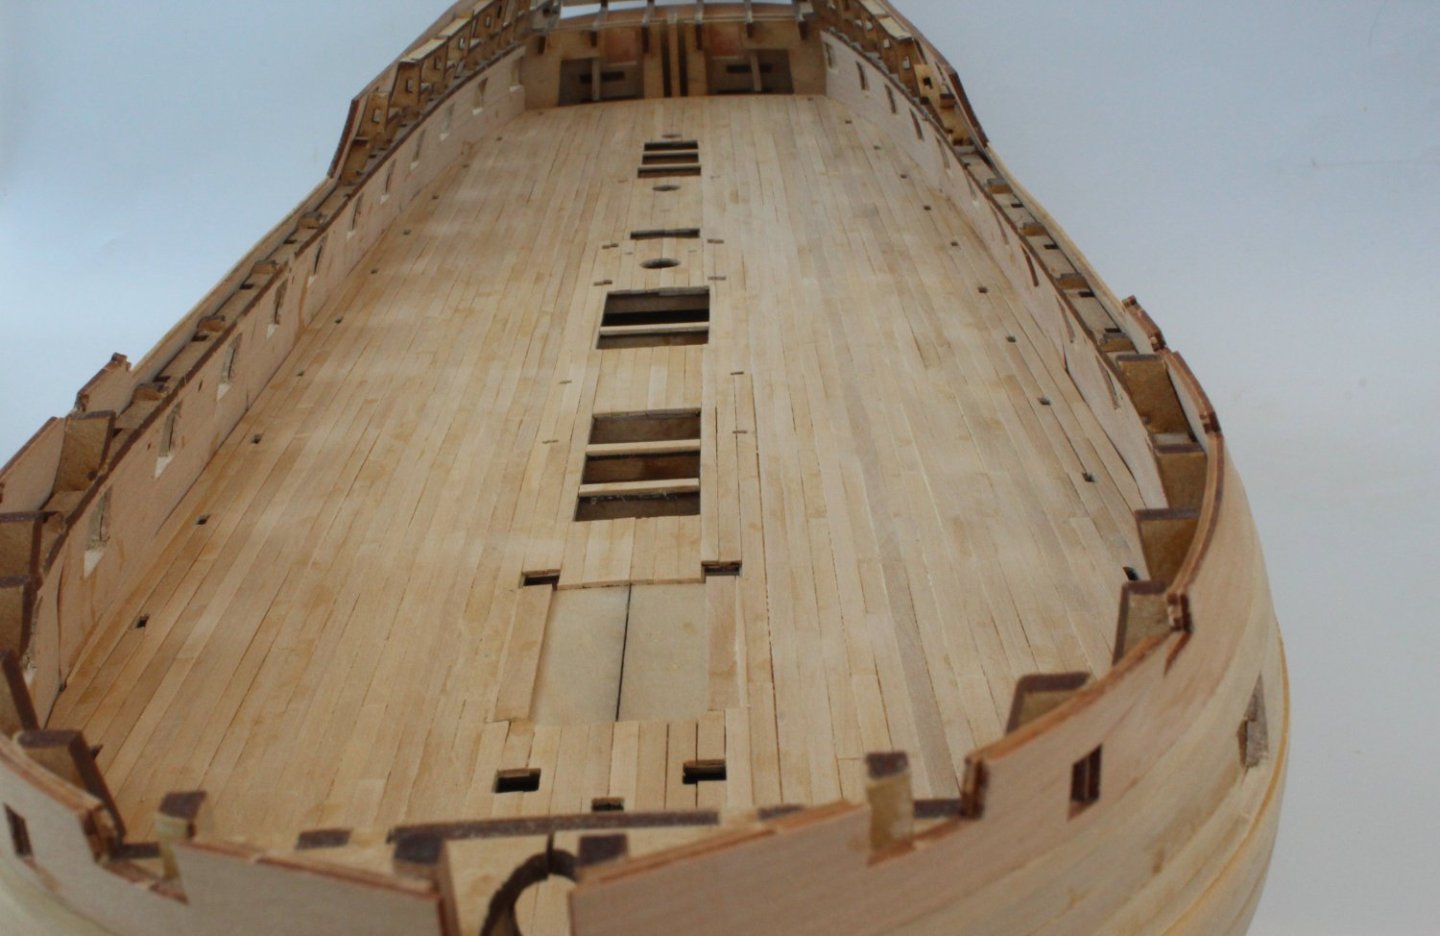
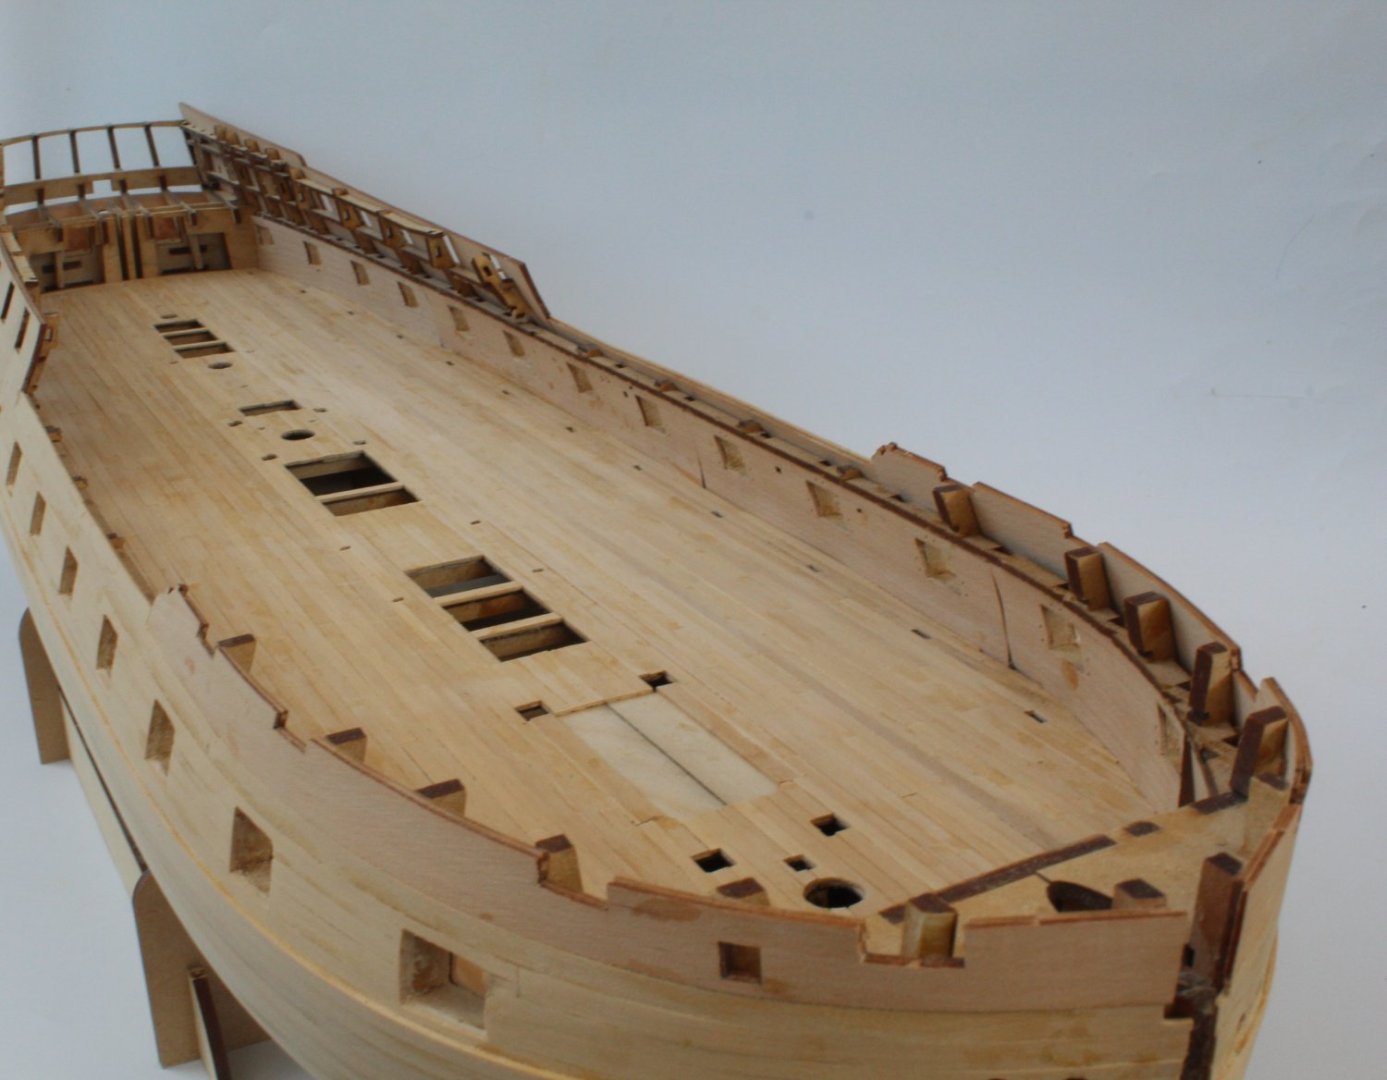
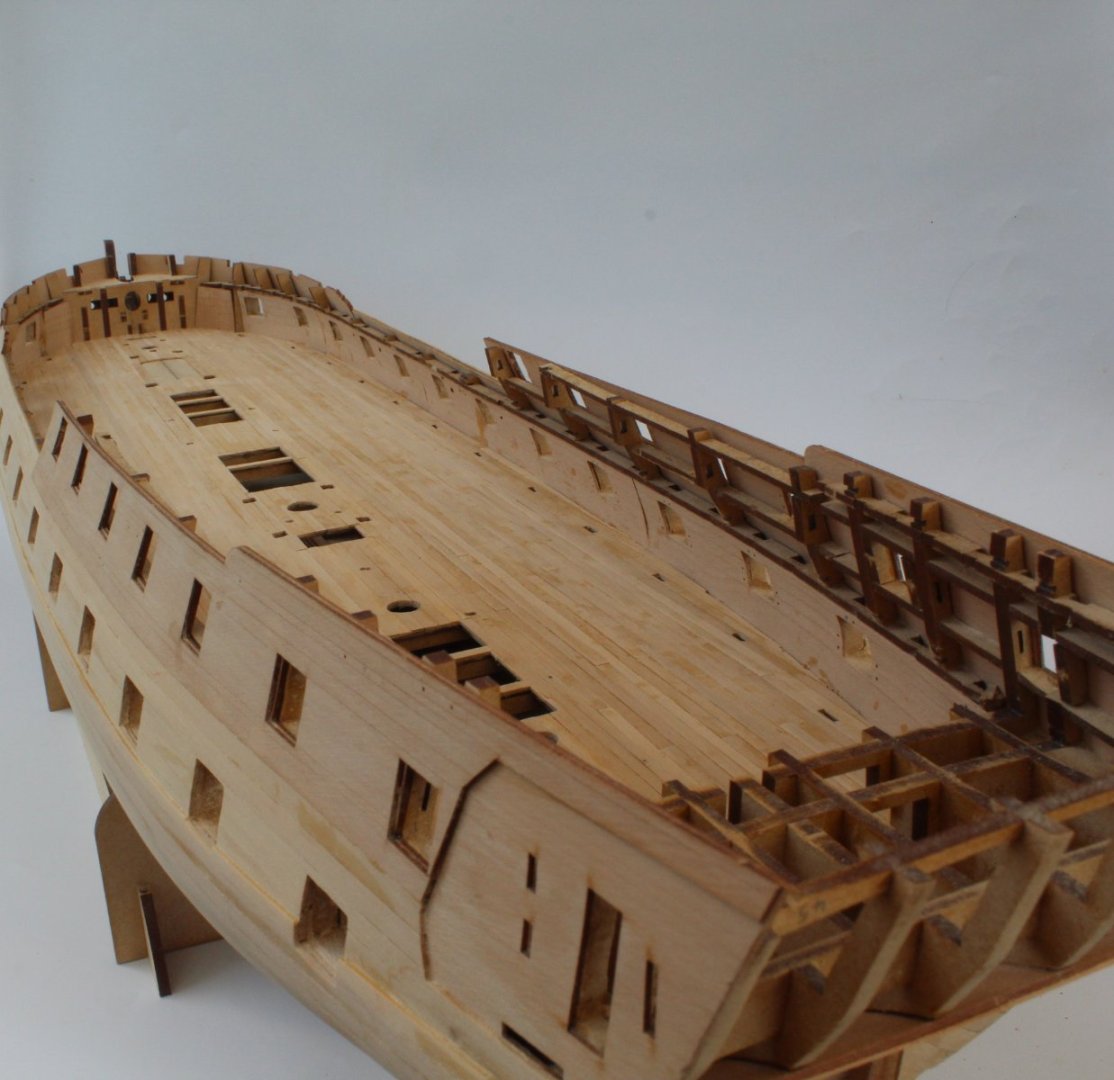
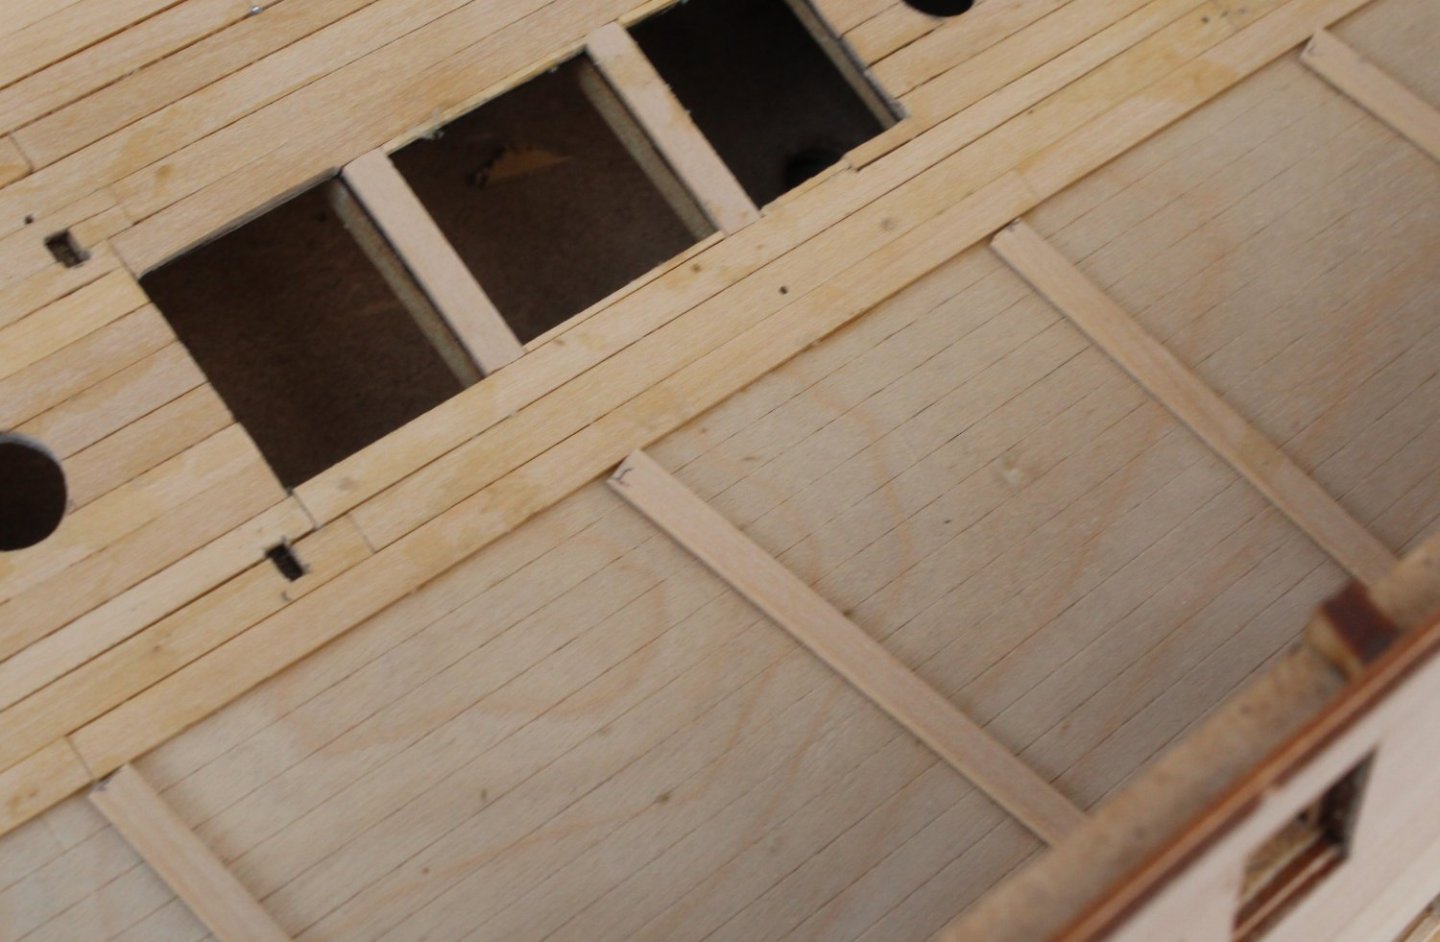
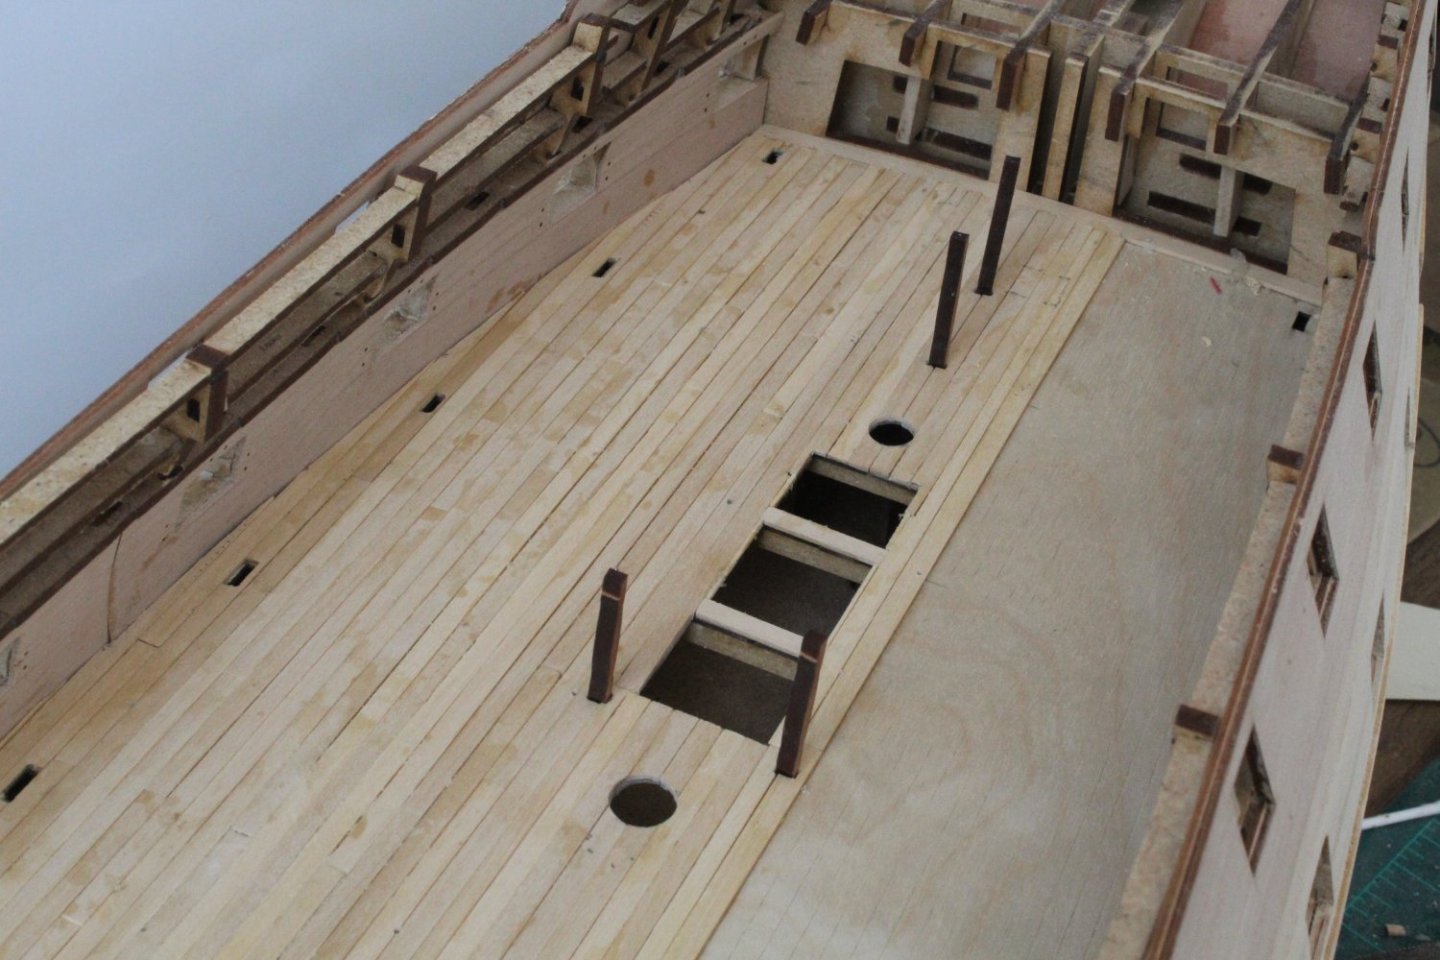
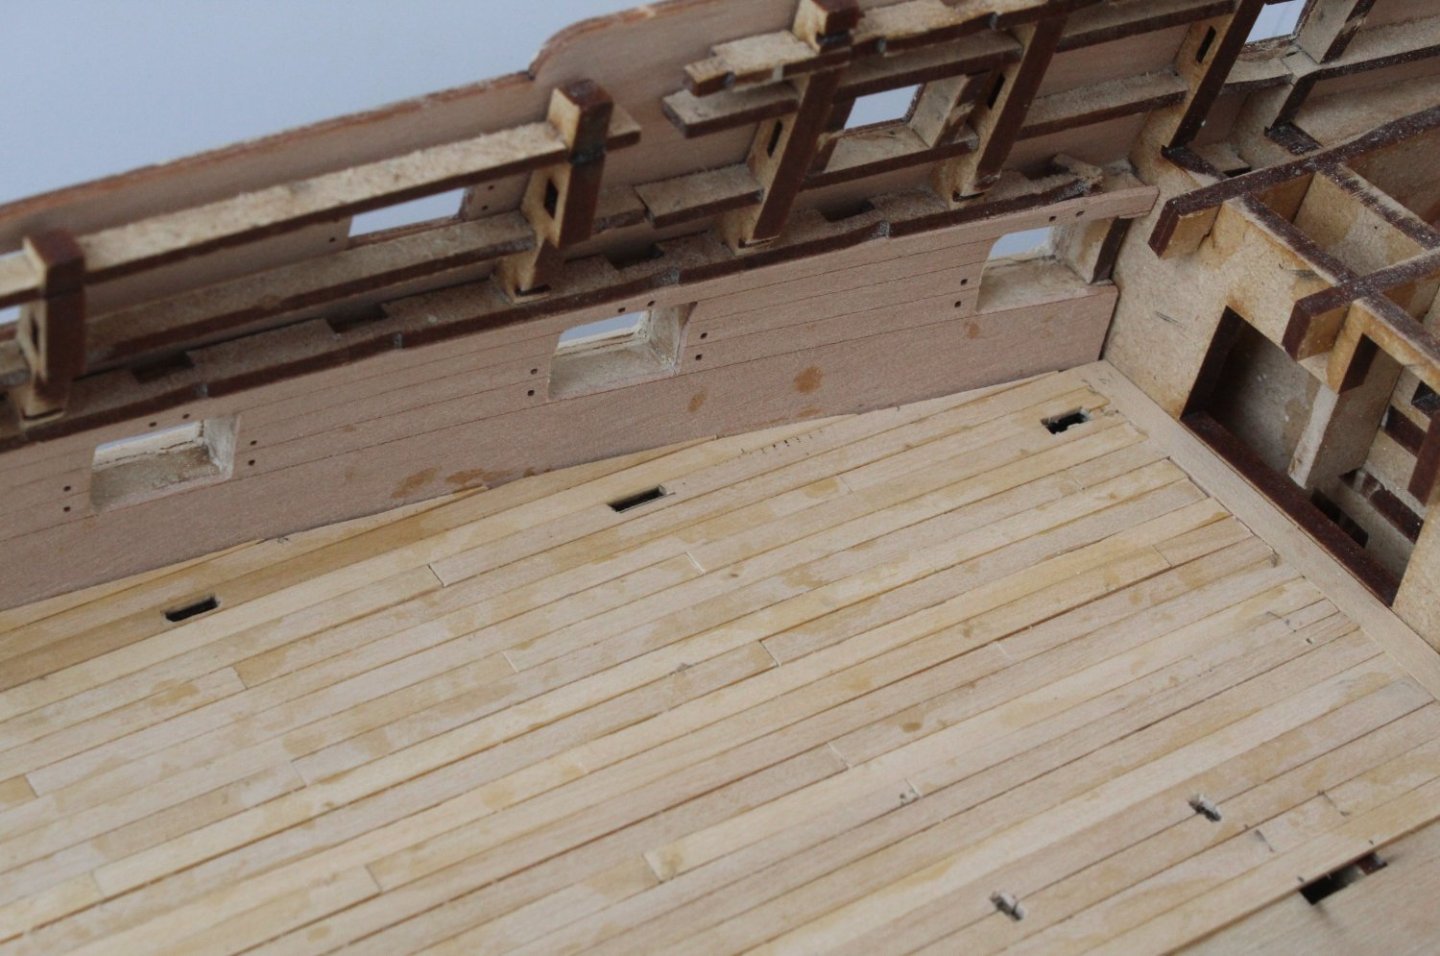
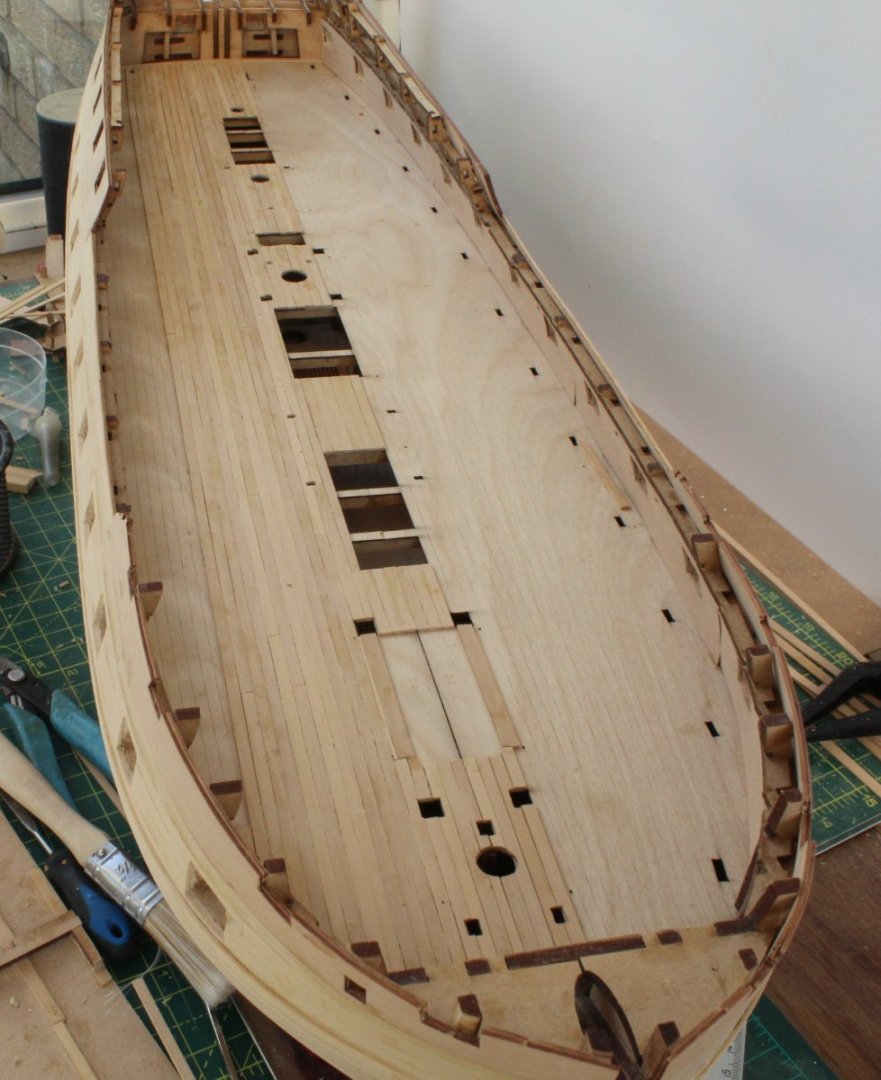
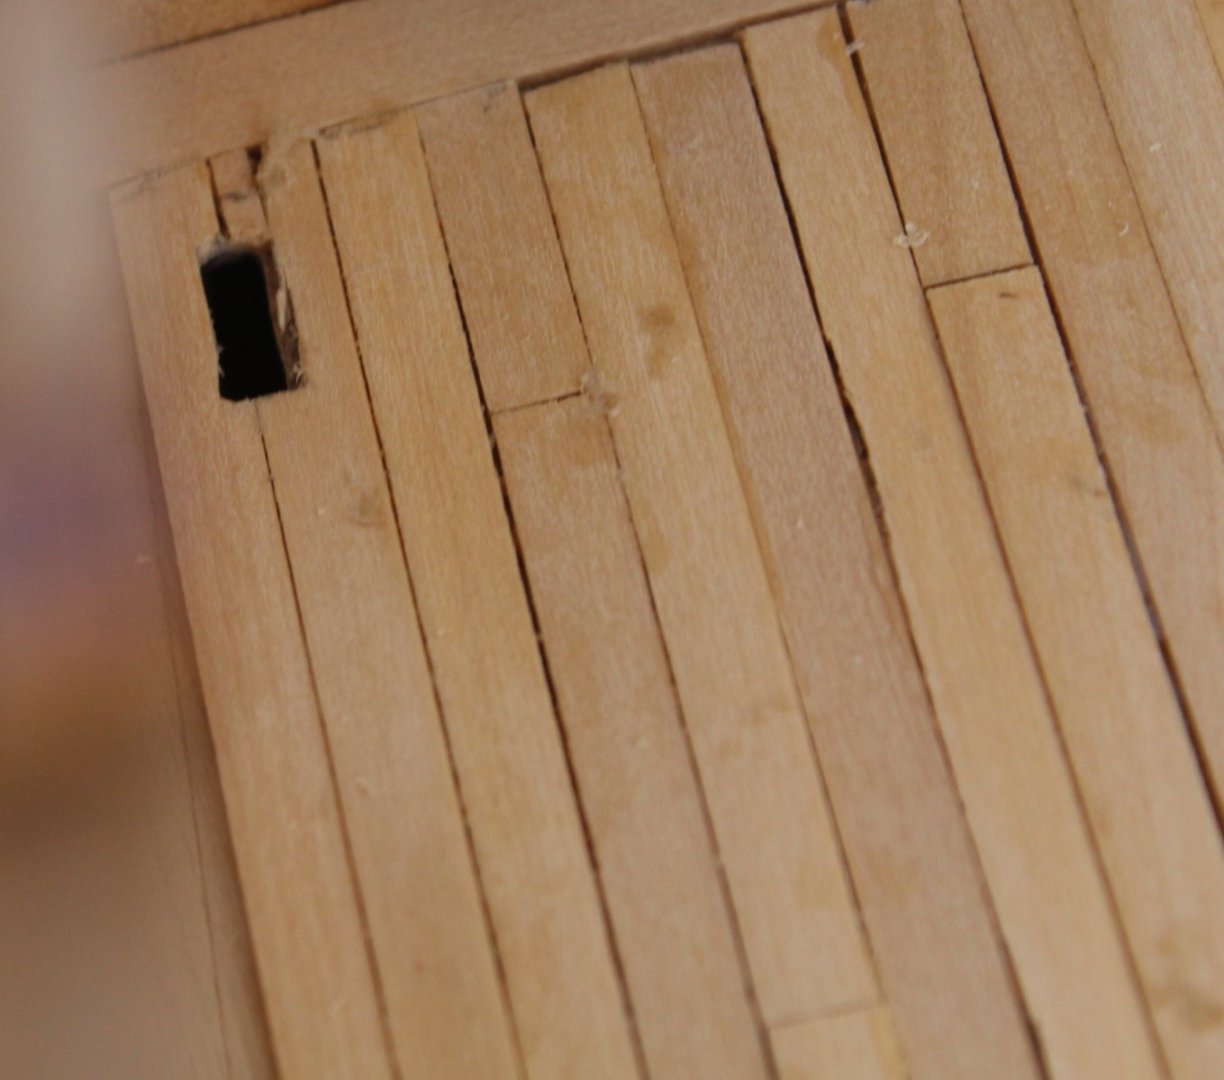
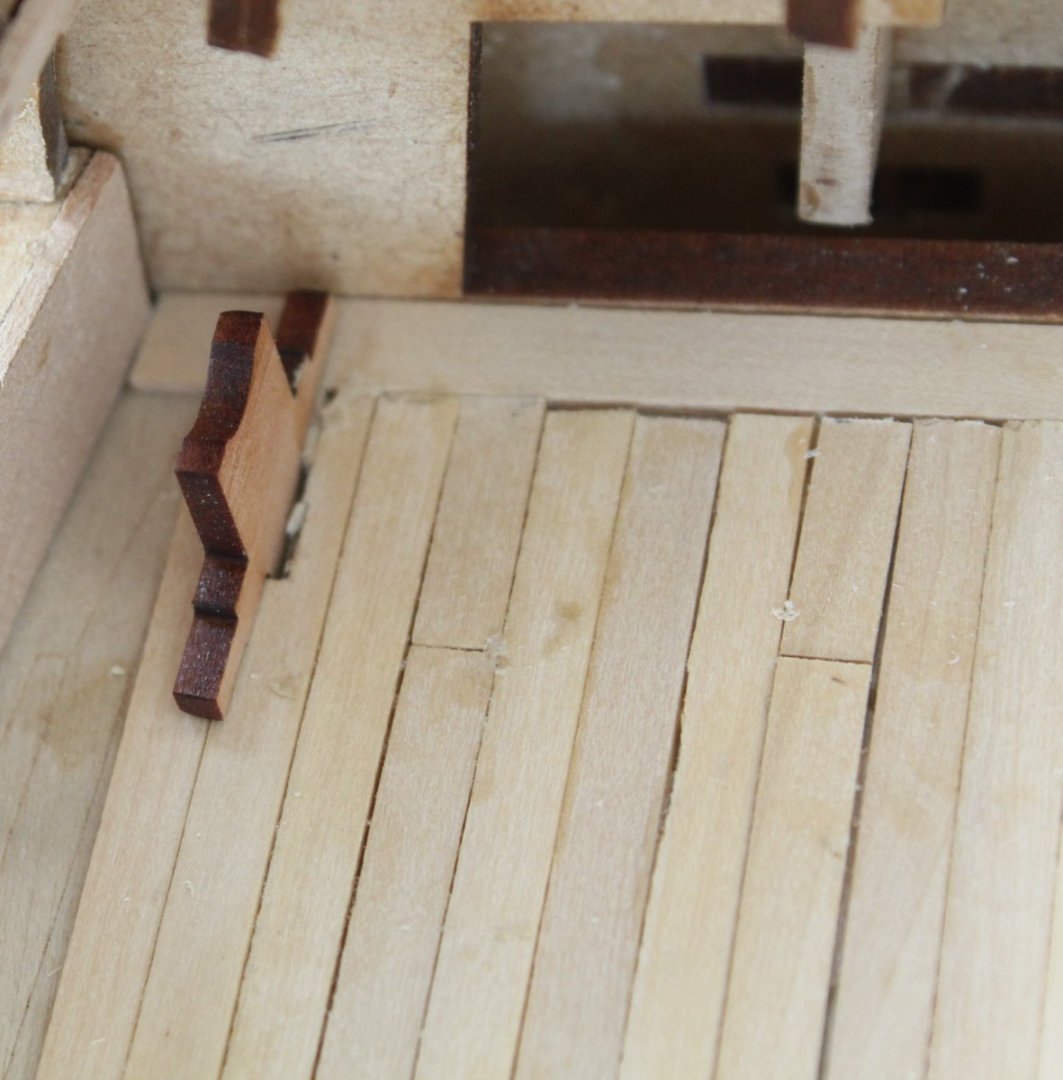
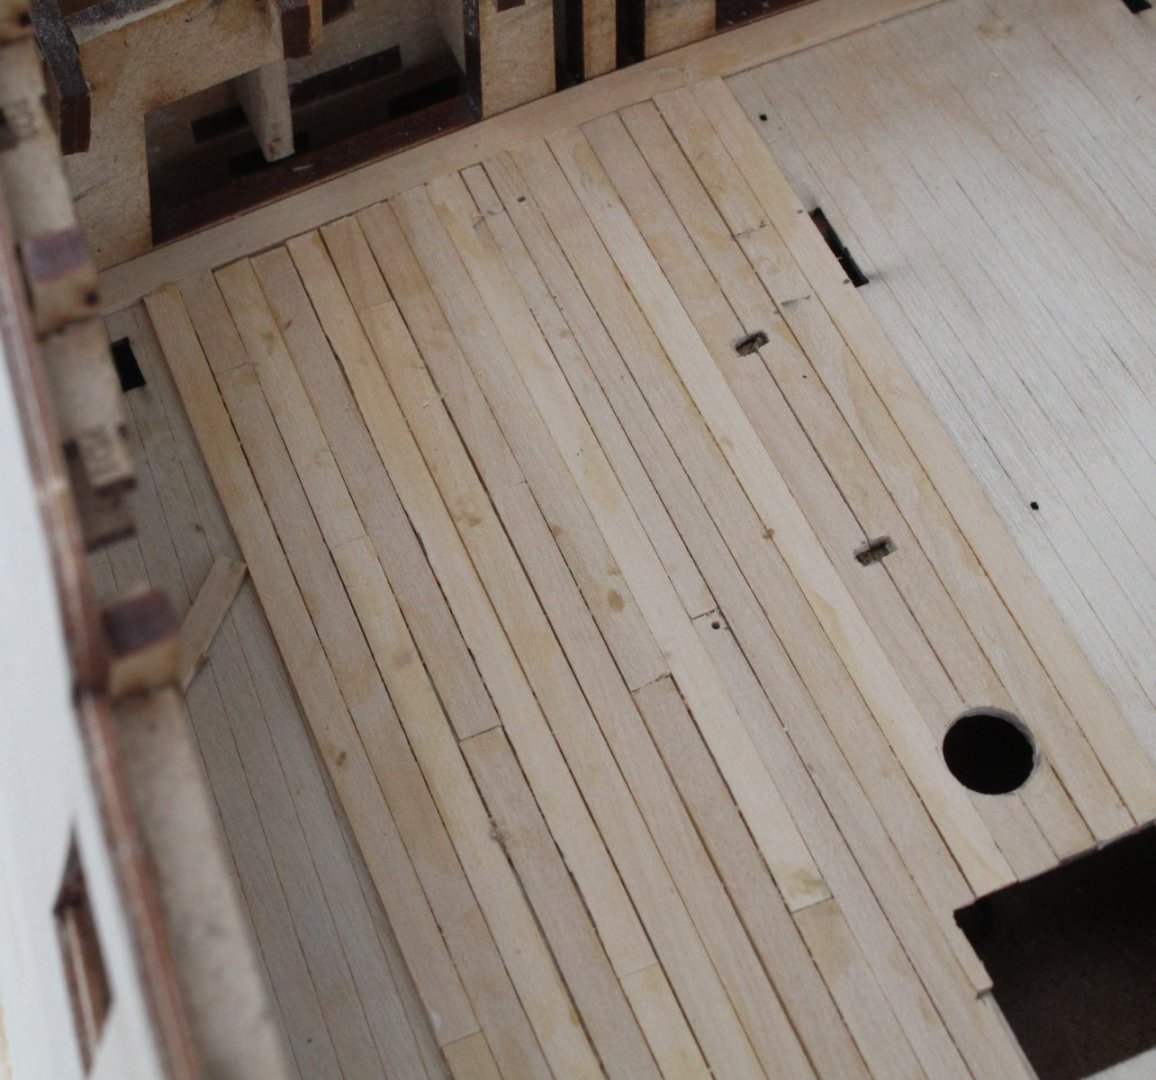
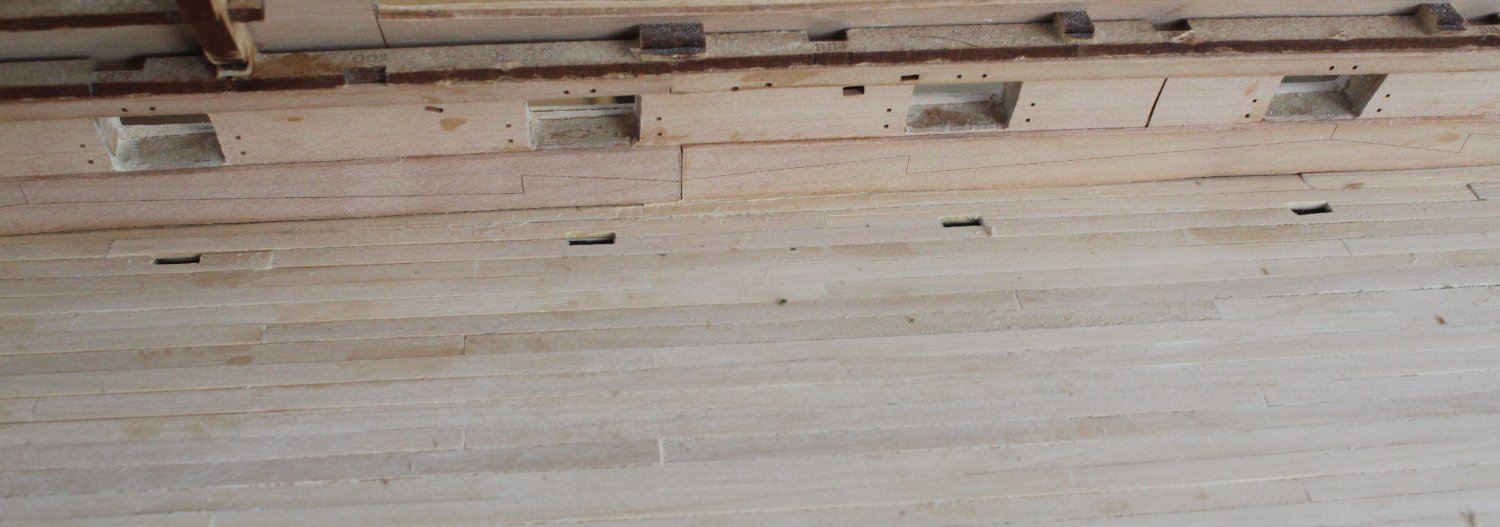
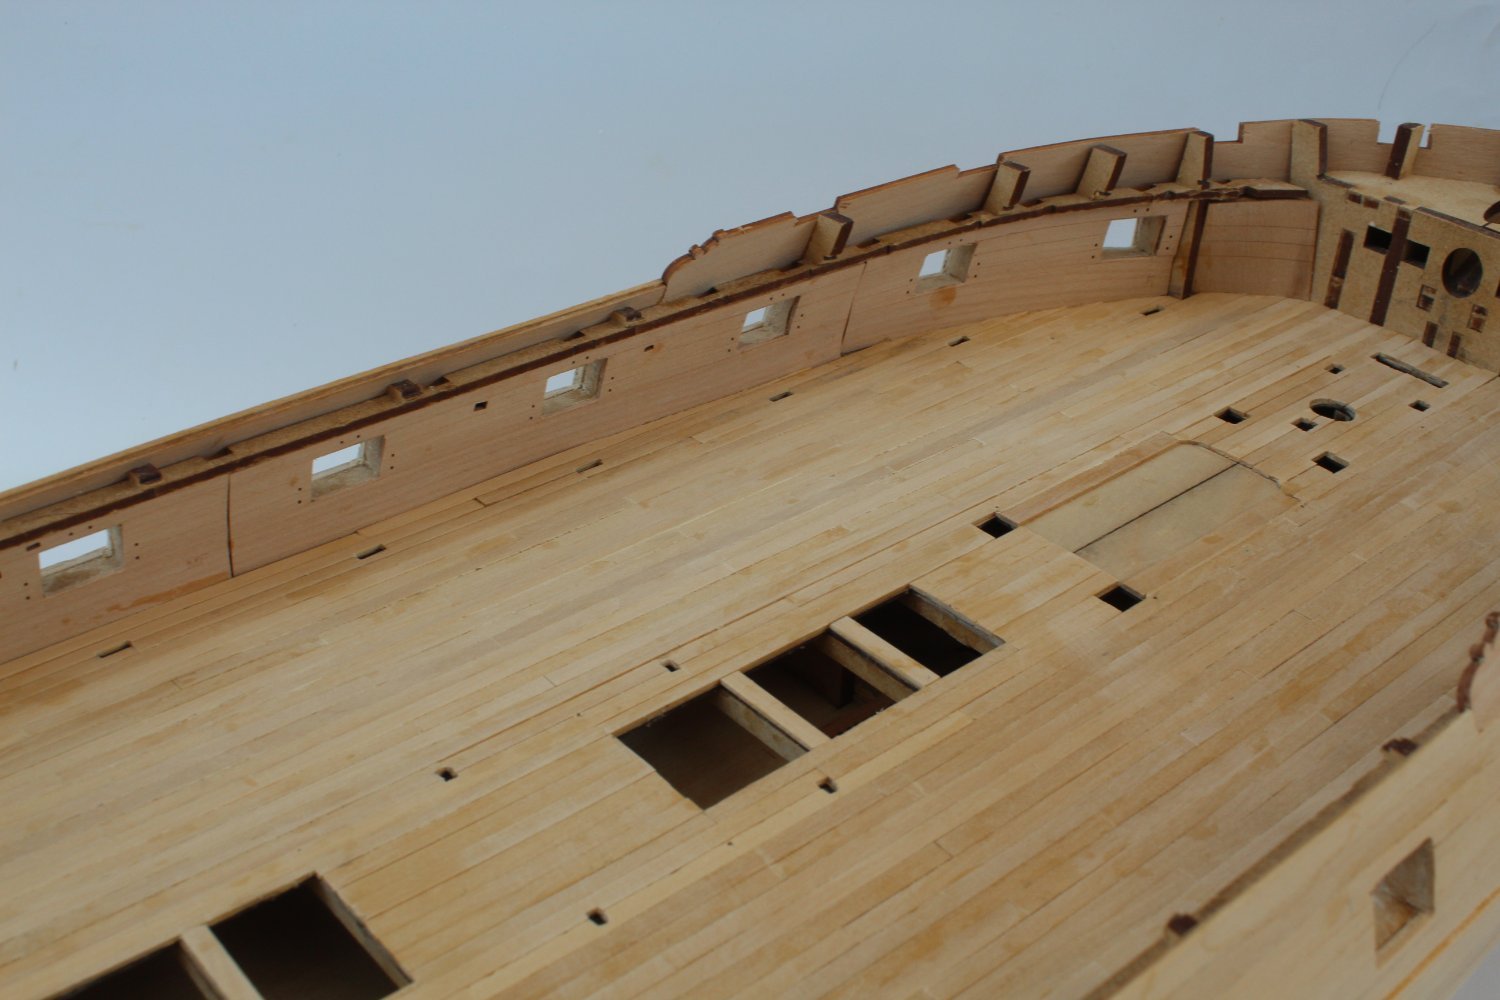
Gun Deck Planking – Right-Hand Side Completed I have now completed the planking of the right-hand side of the gun deck. As stated in my previous post(s) I am using a 3-butt shift pattern, with a plank length of 100mm and 25mm offsets for the required butt shift pattern. This equates to approx. 6.4m long planks at full scale. I was fearing adding the cut-outs for the cannon bases would be tricky, but it turned out to be relatively straight forward, especially when using the 100mm plank lengths. As each slot was cut it was tested using one of the cannon base parts. Although I really like the boxwood finish I might, once the completed deck has been scrapped clean, consider using a wood stain. A little bit of experimentation is in order before I decide to use either a WOP varnish or a wood stain. I have attached a few photos of the planking, noting these planks still need to scrapped clean.


- 587 replies
-
- 7
-
-
- Indefatigable
- Vanguard Models
- (and 1 more)
-
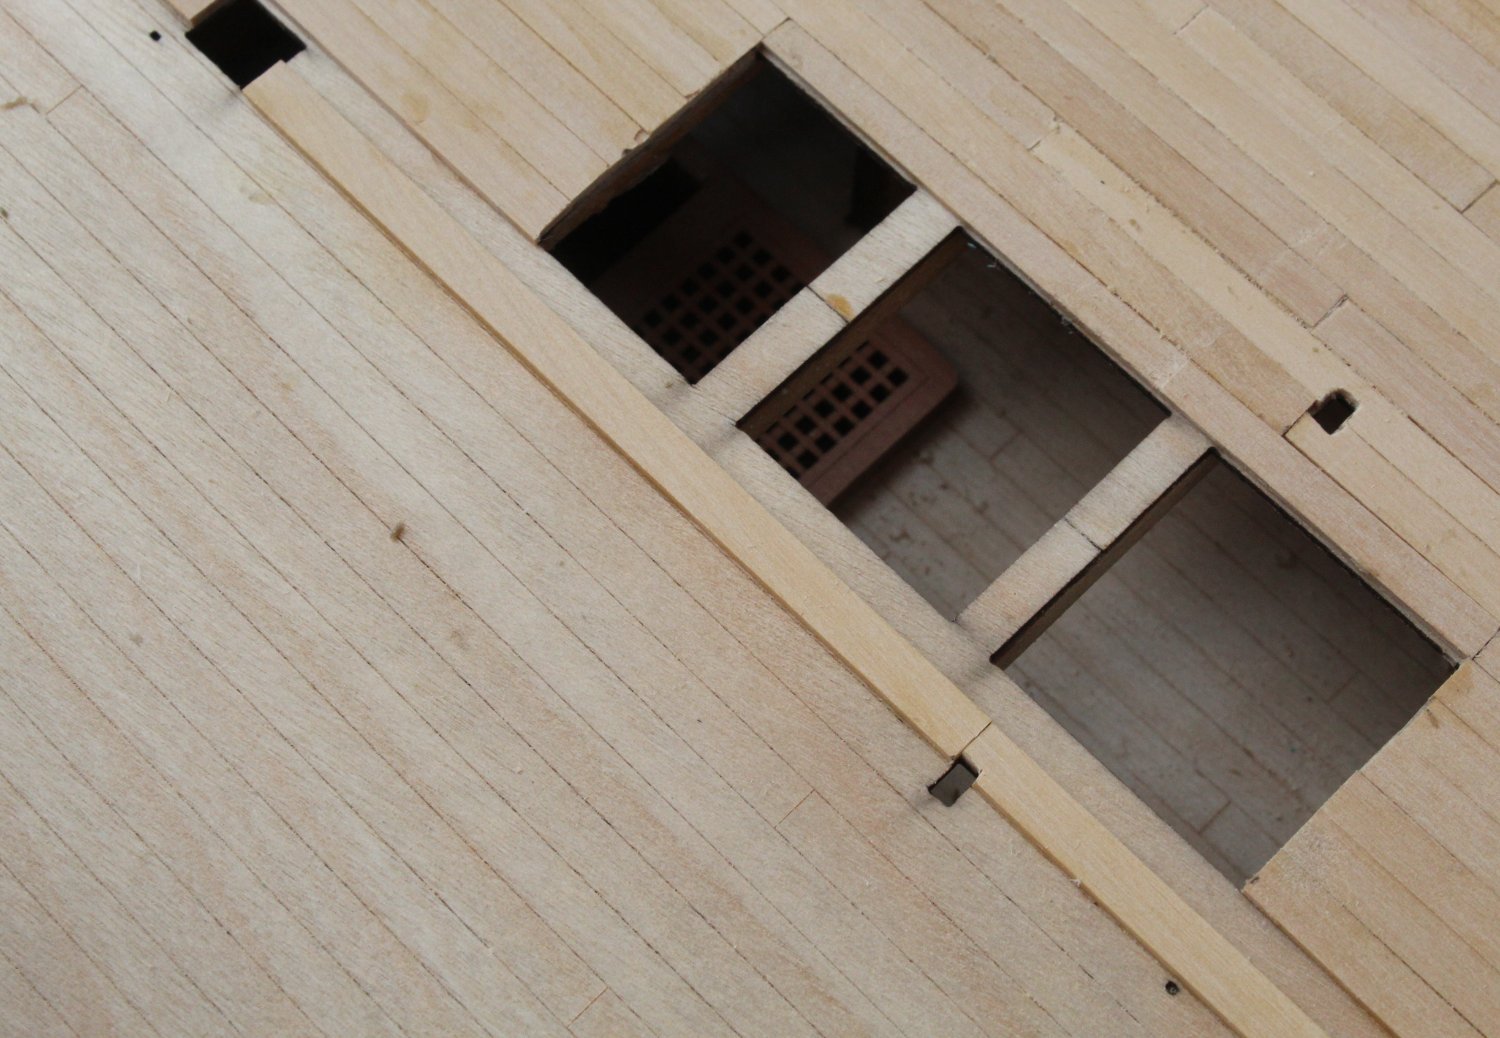
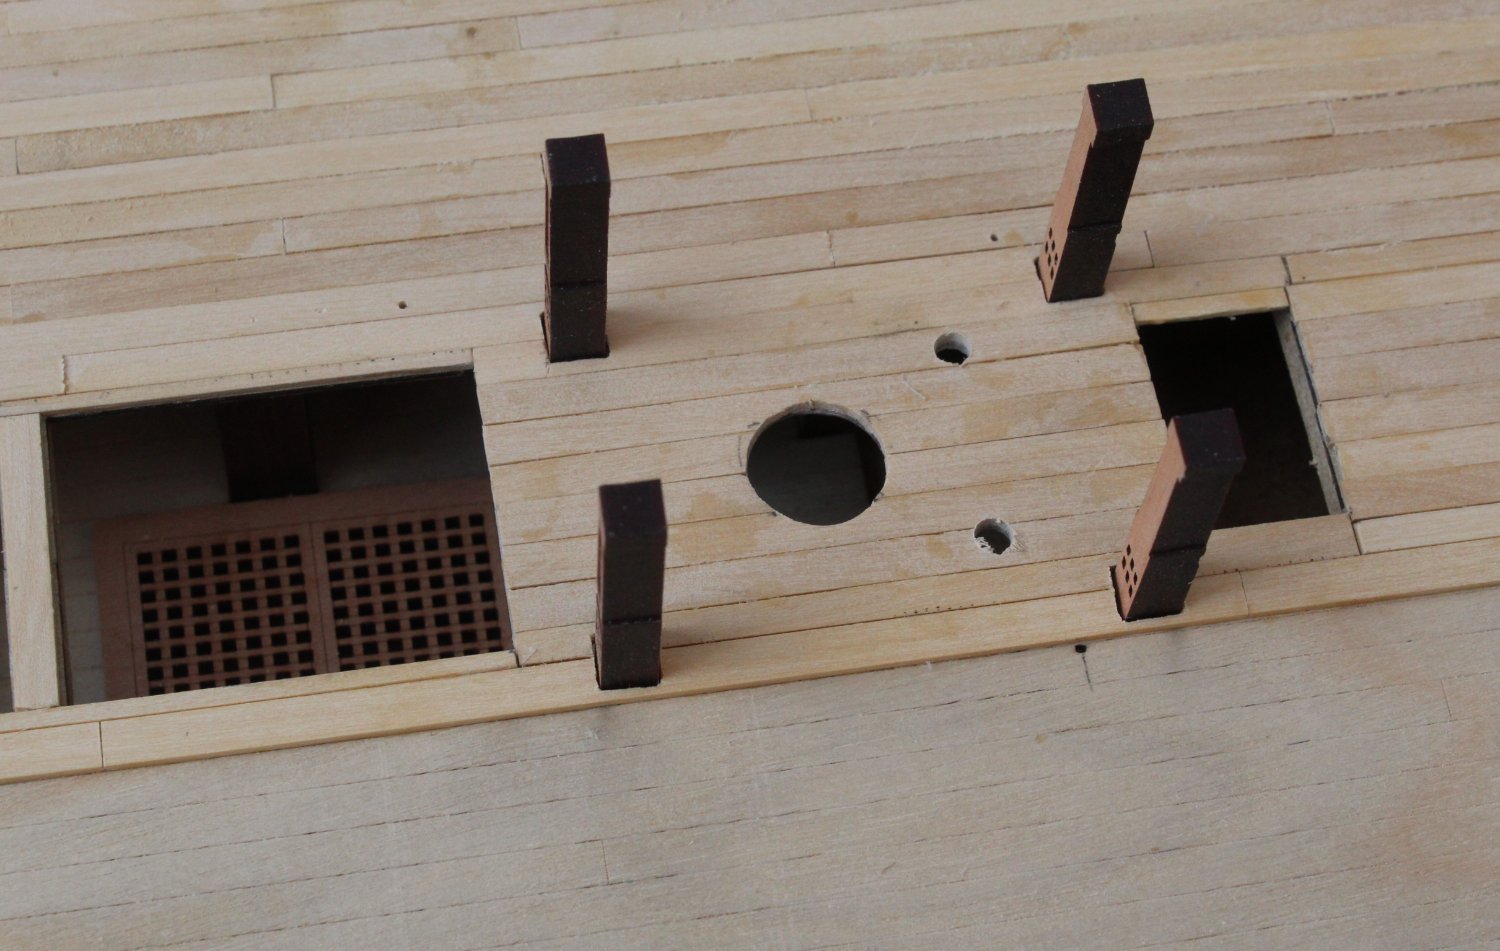
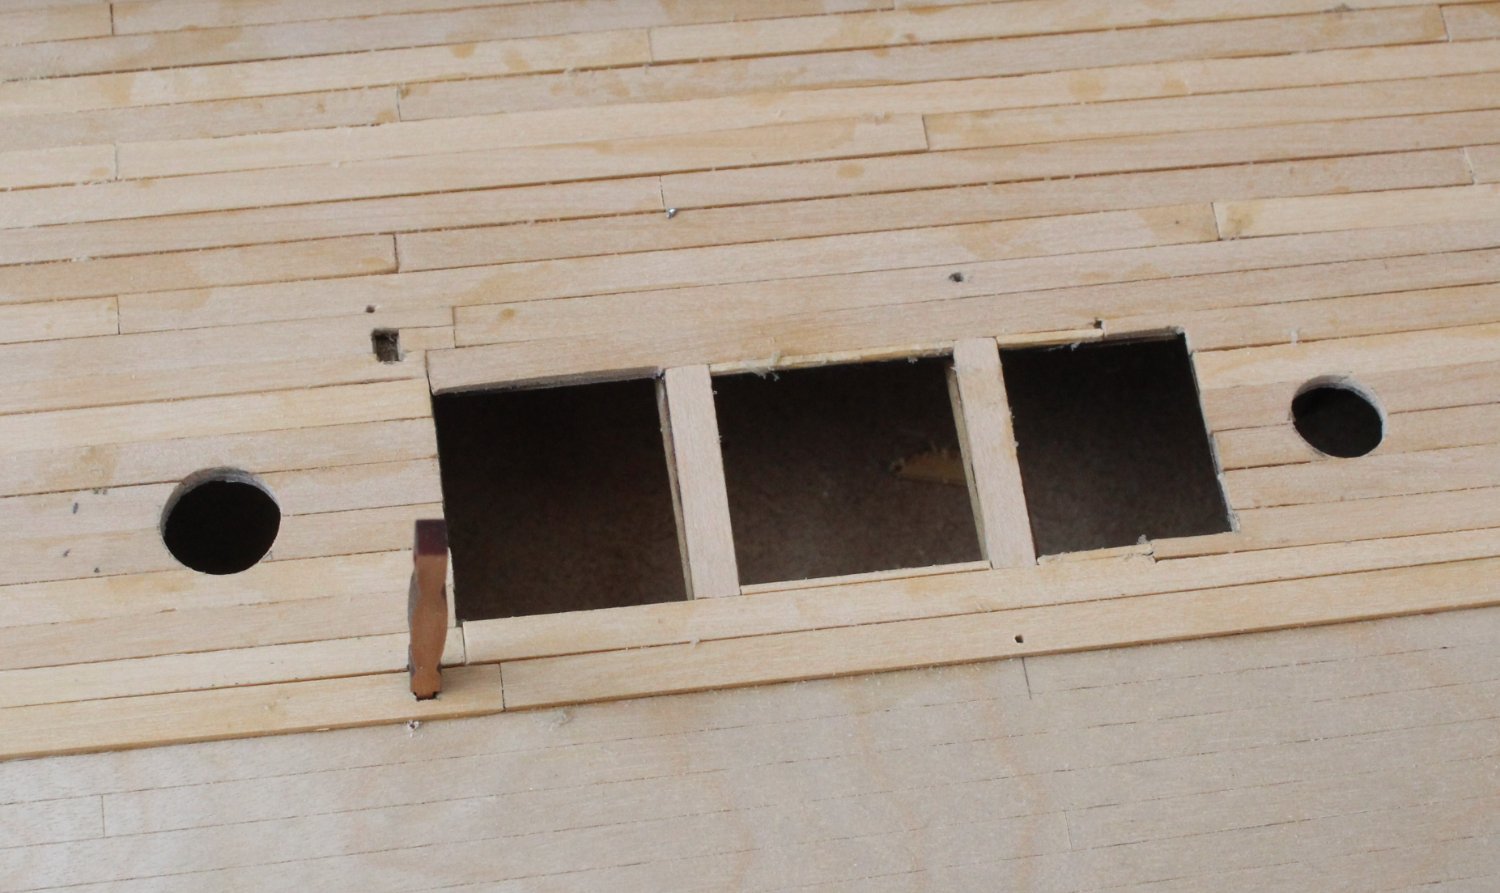
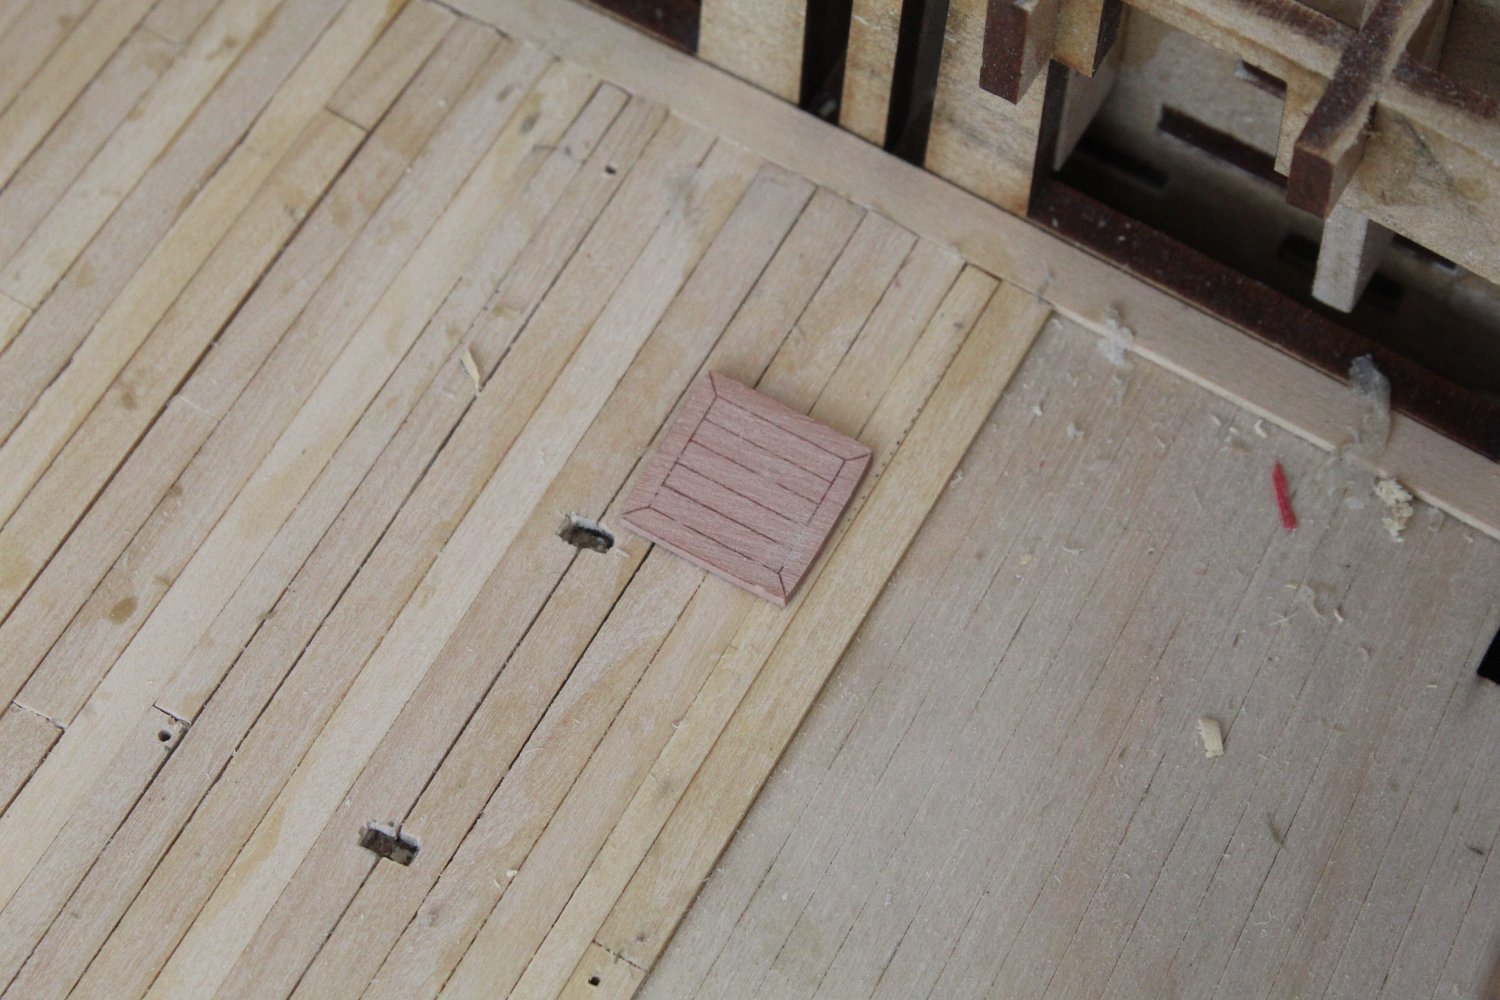
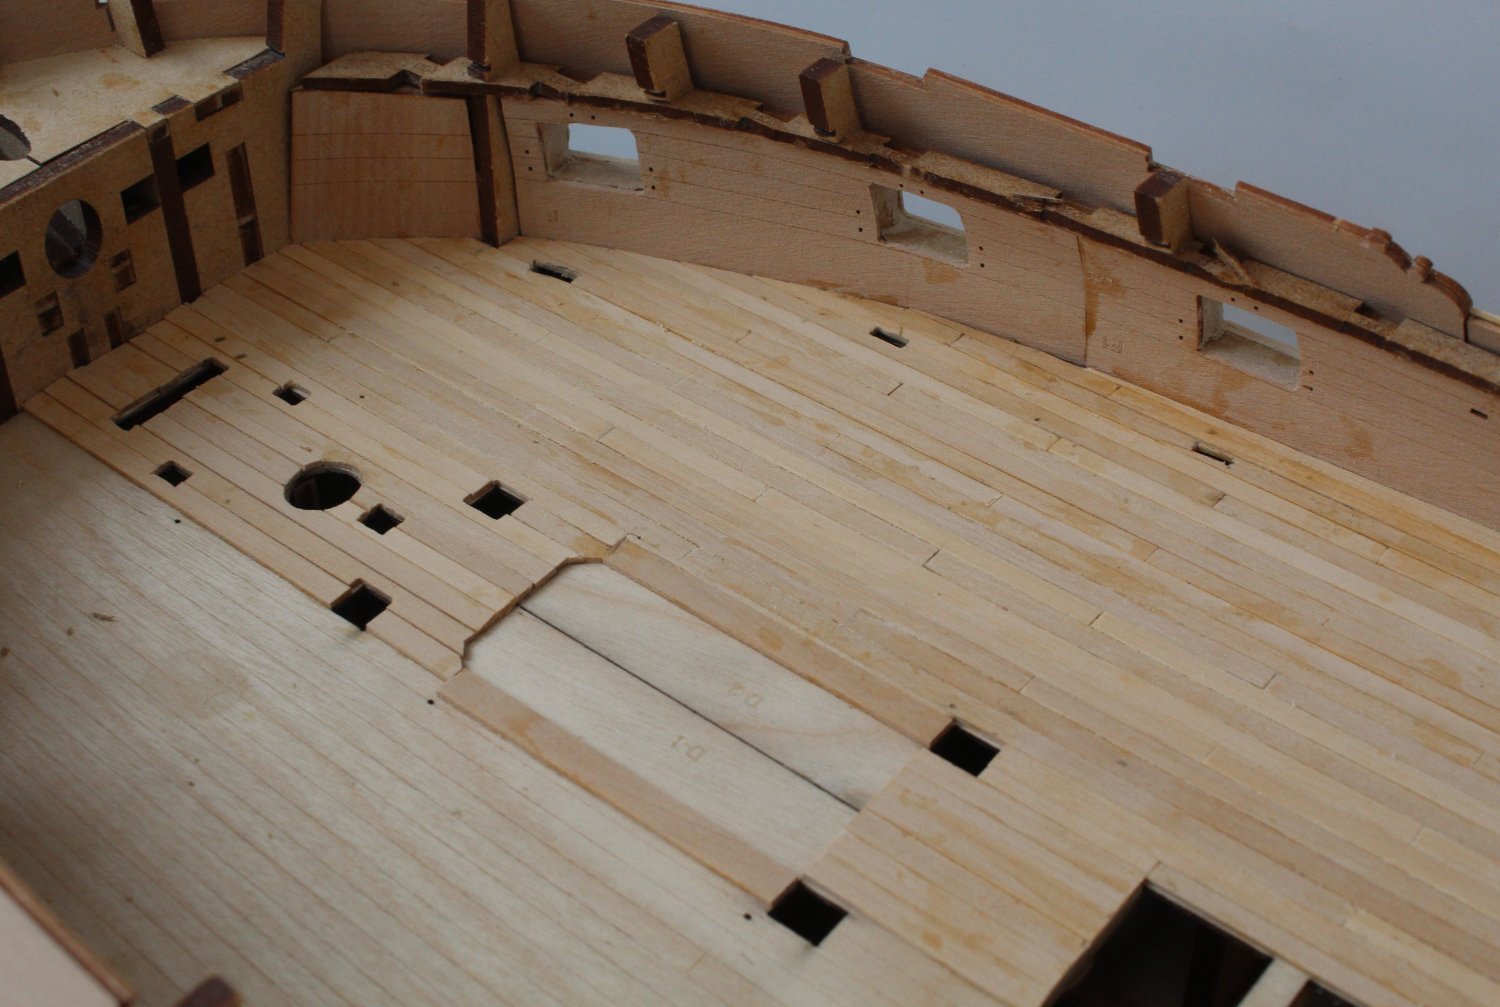
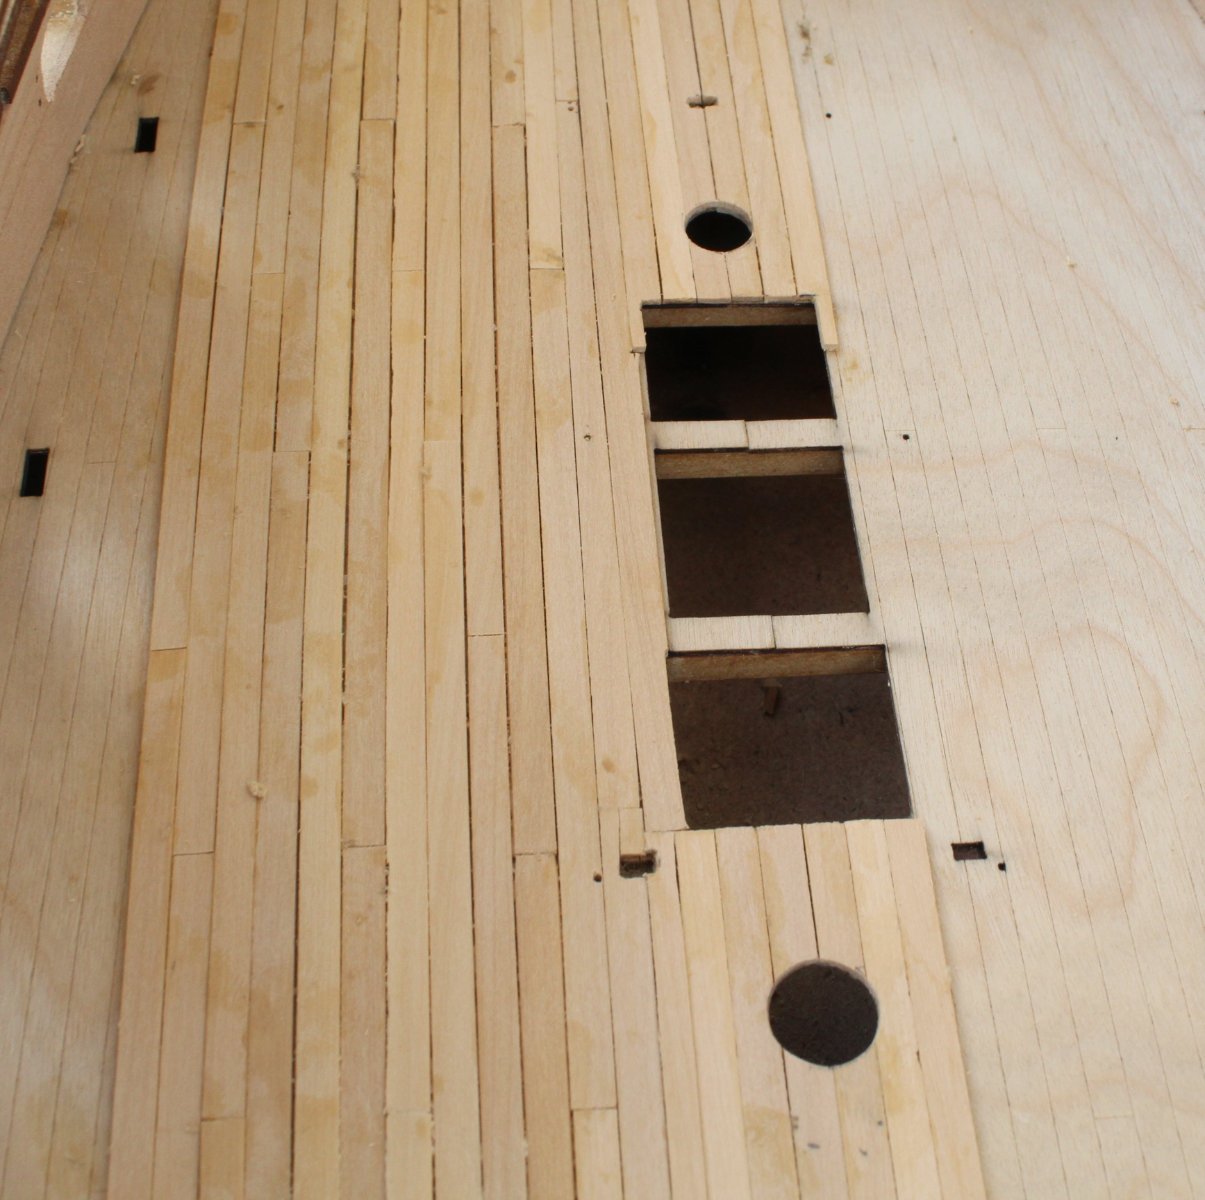
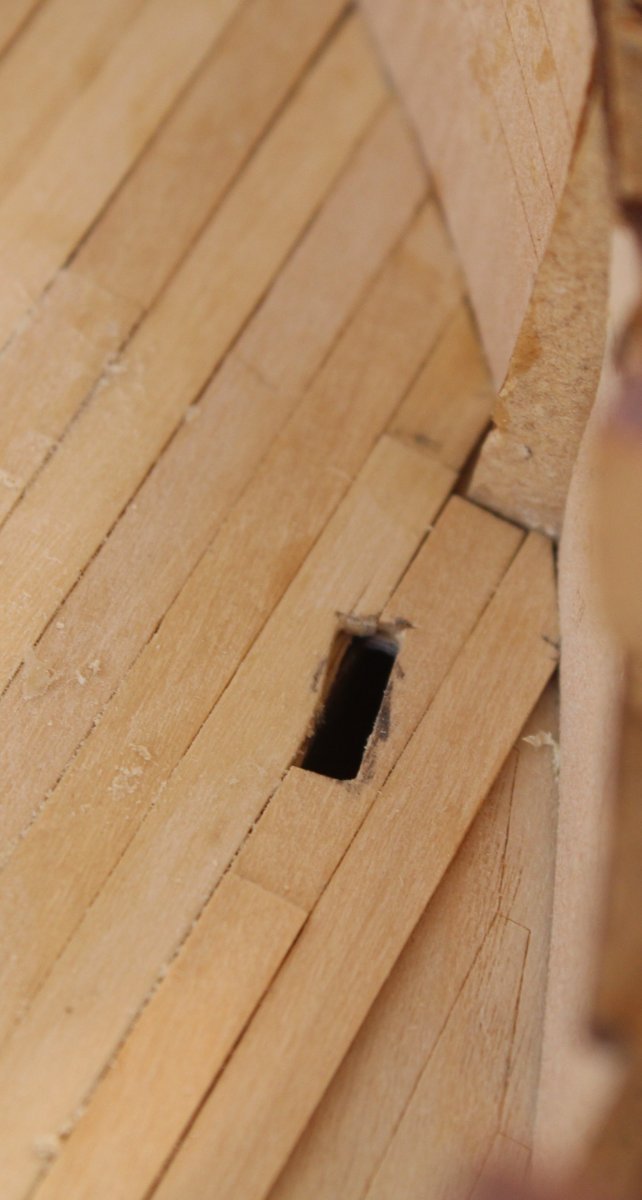
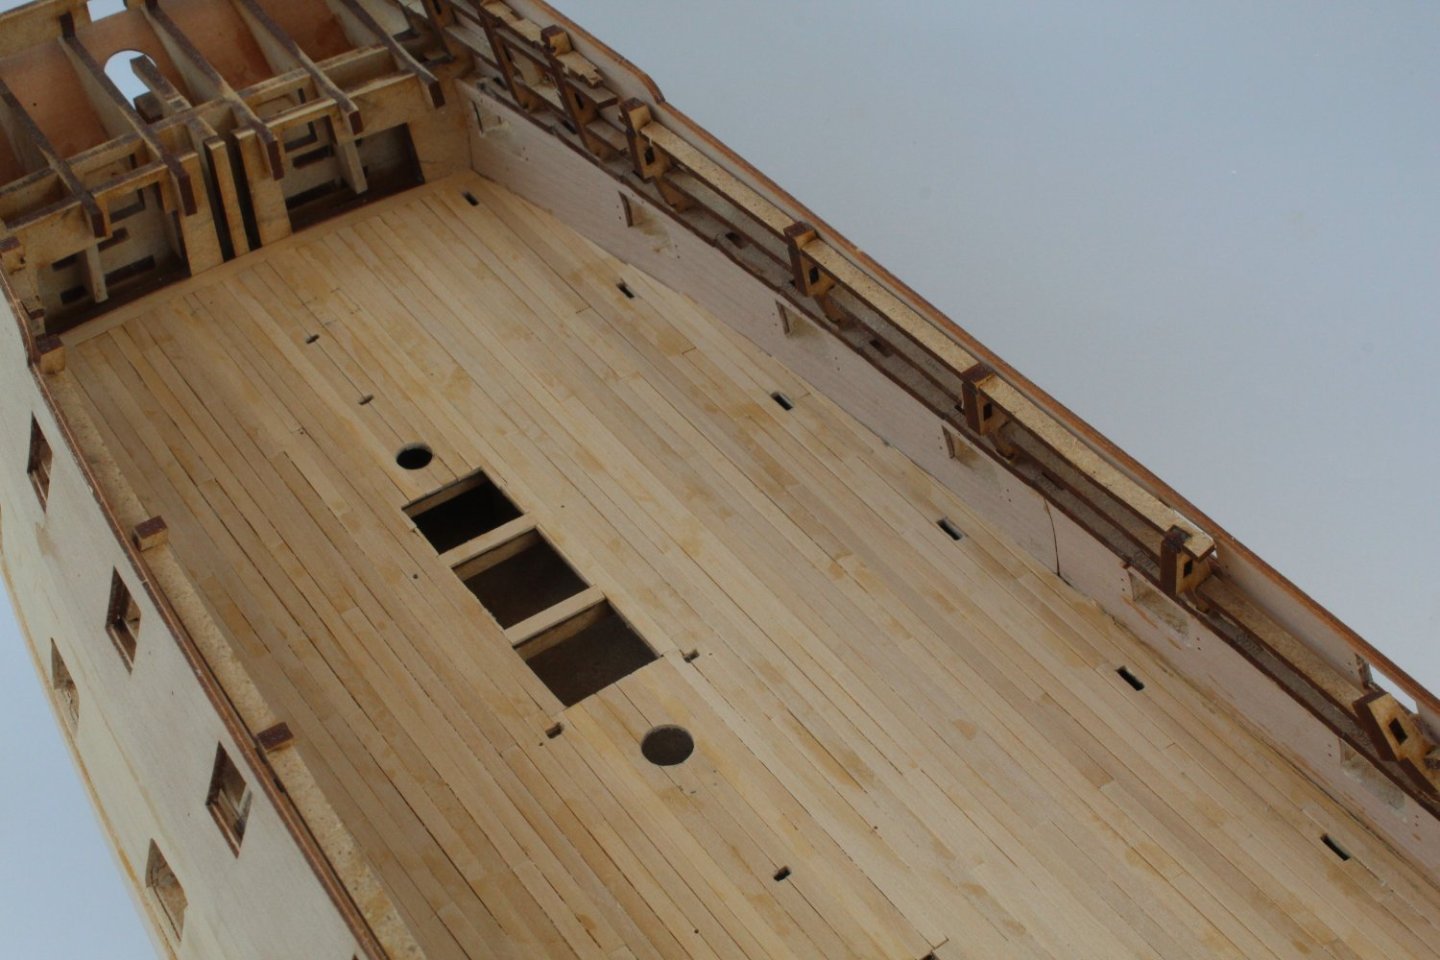
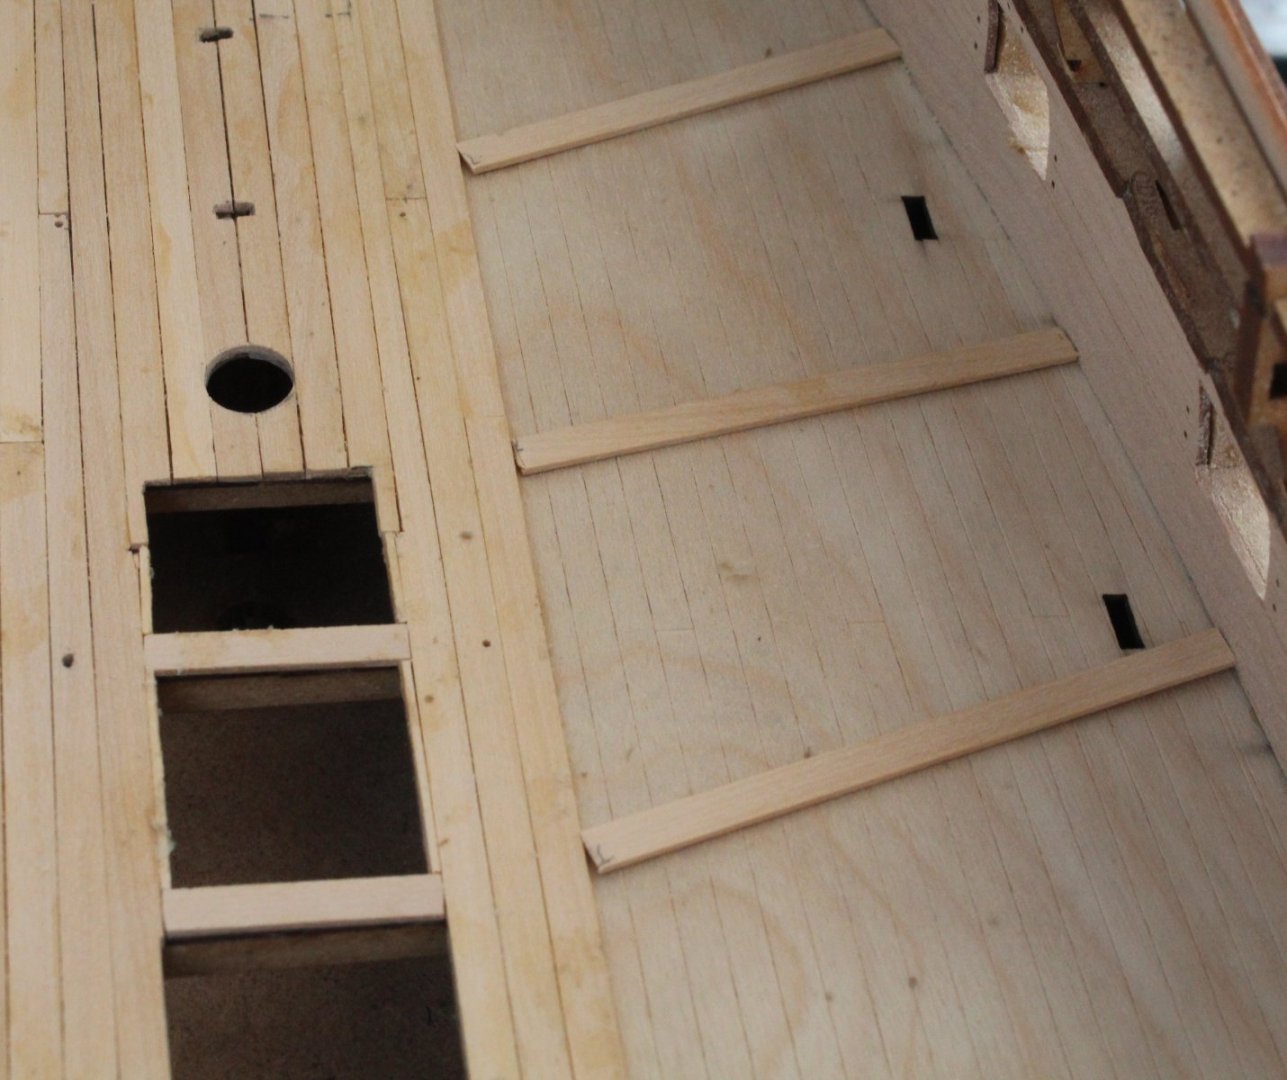
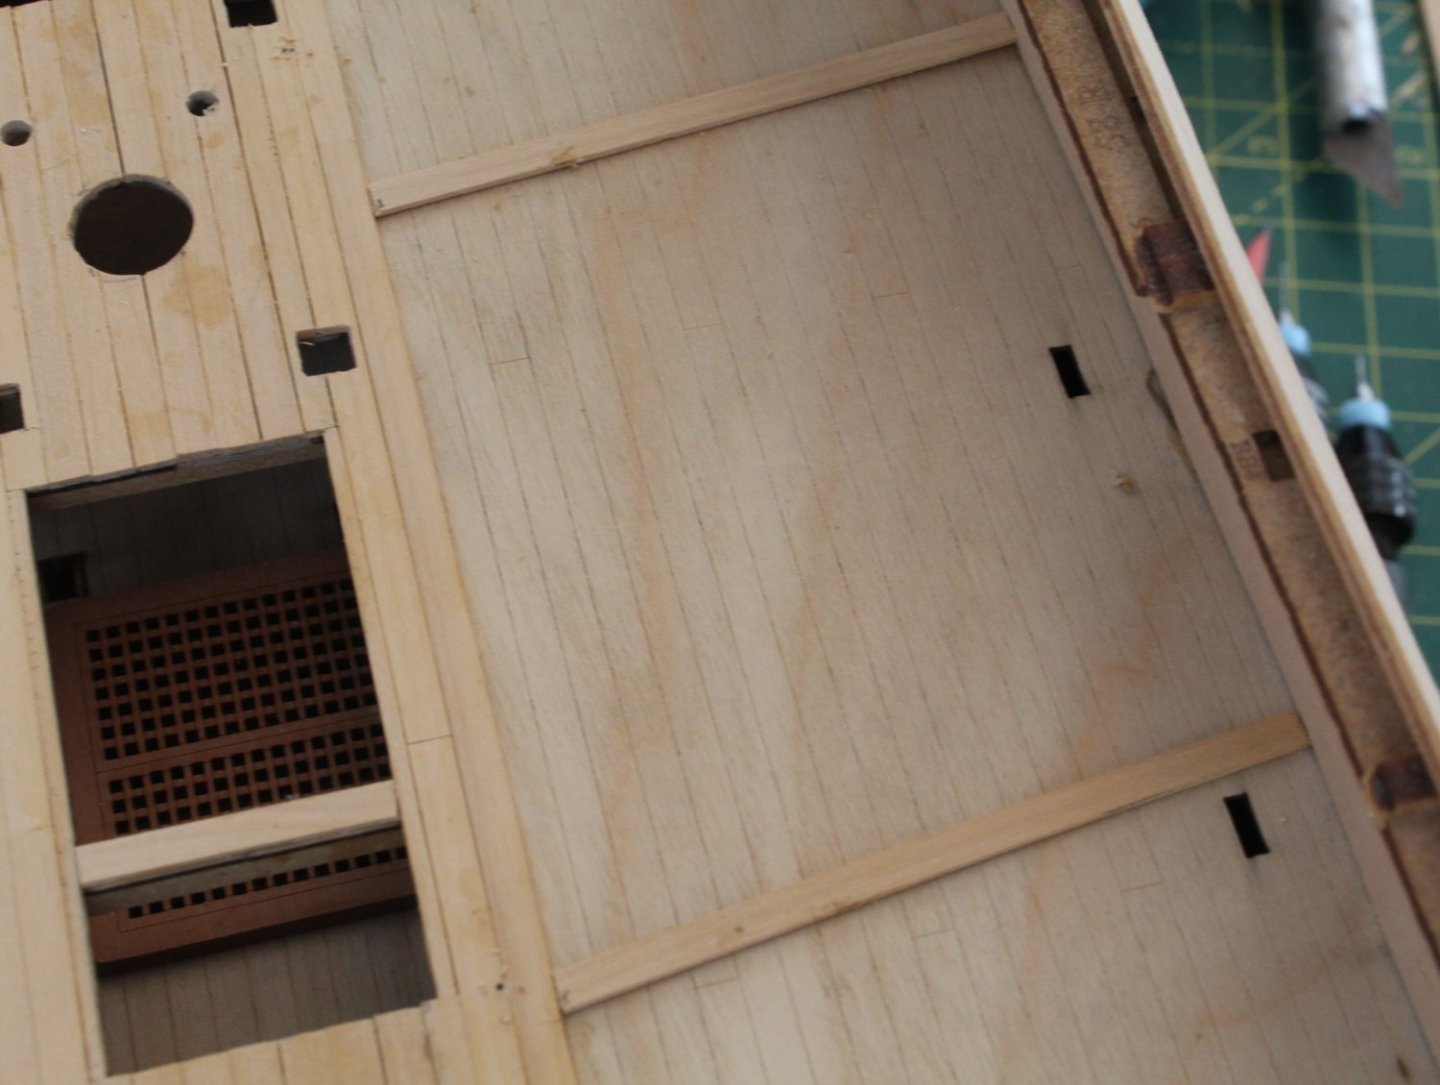
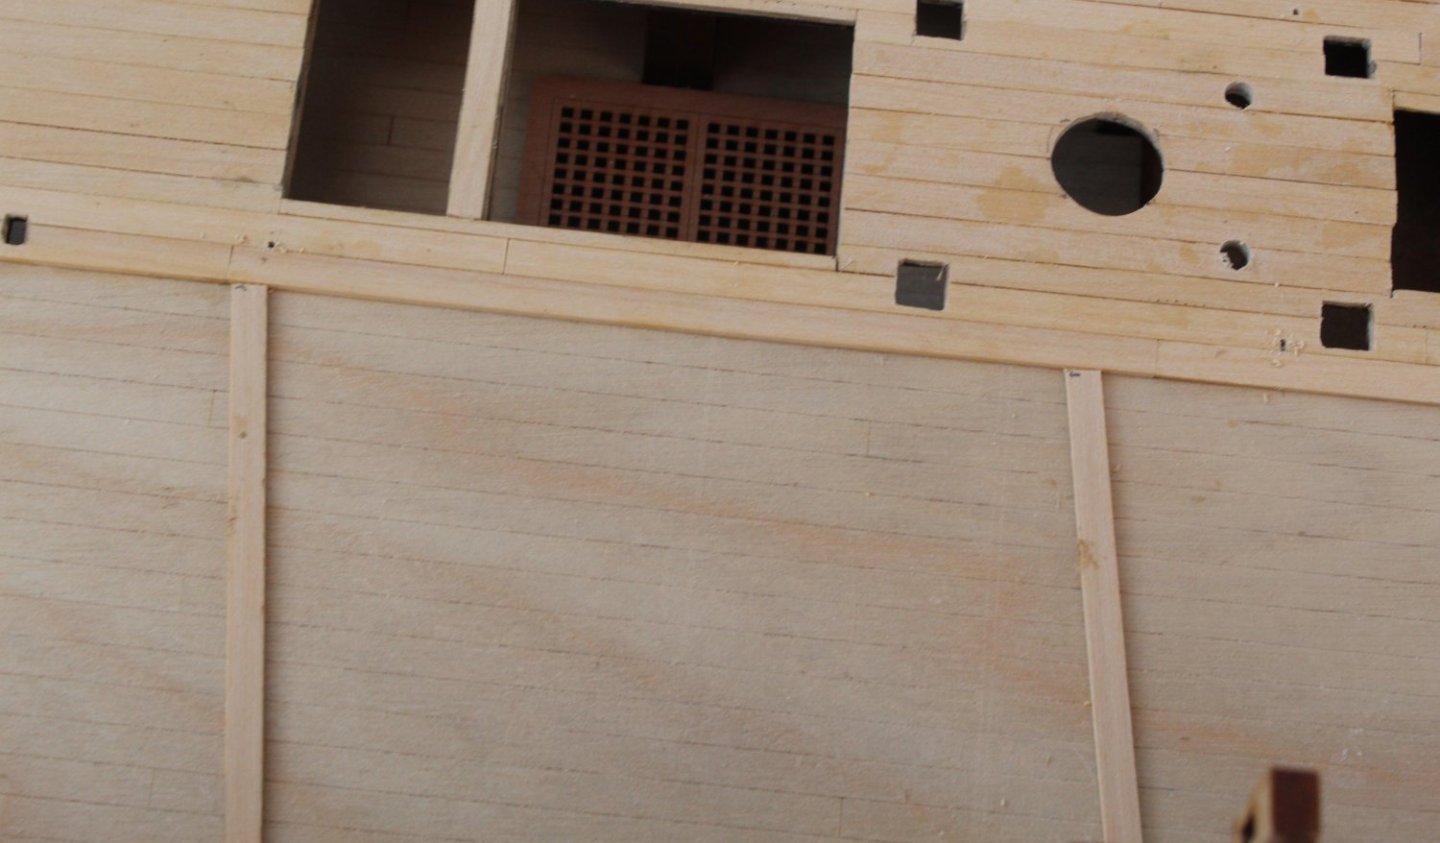
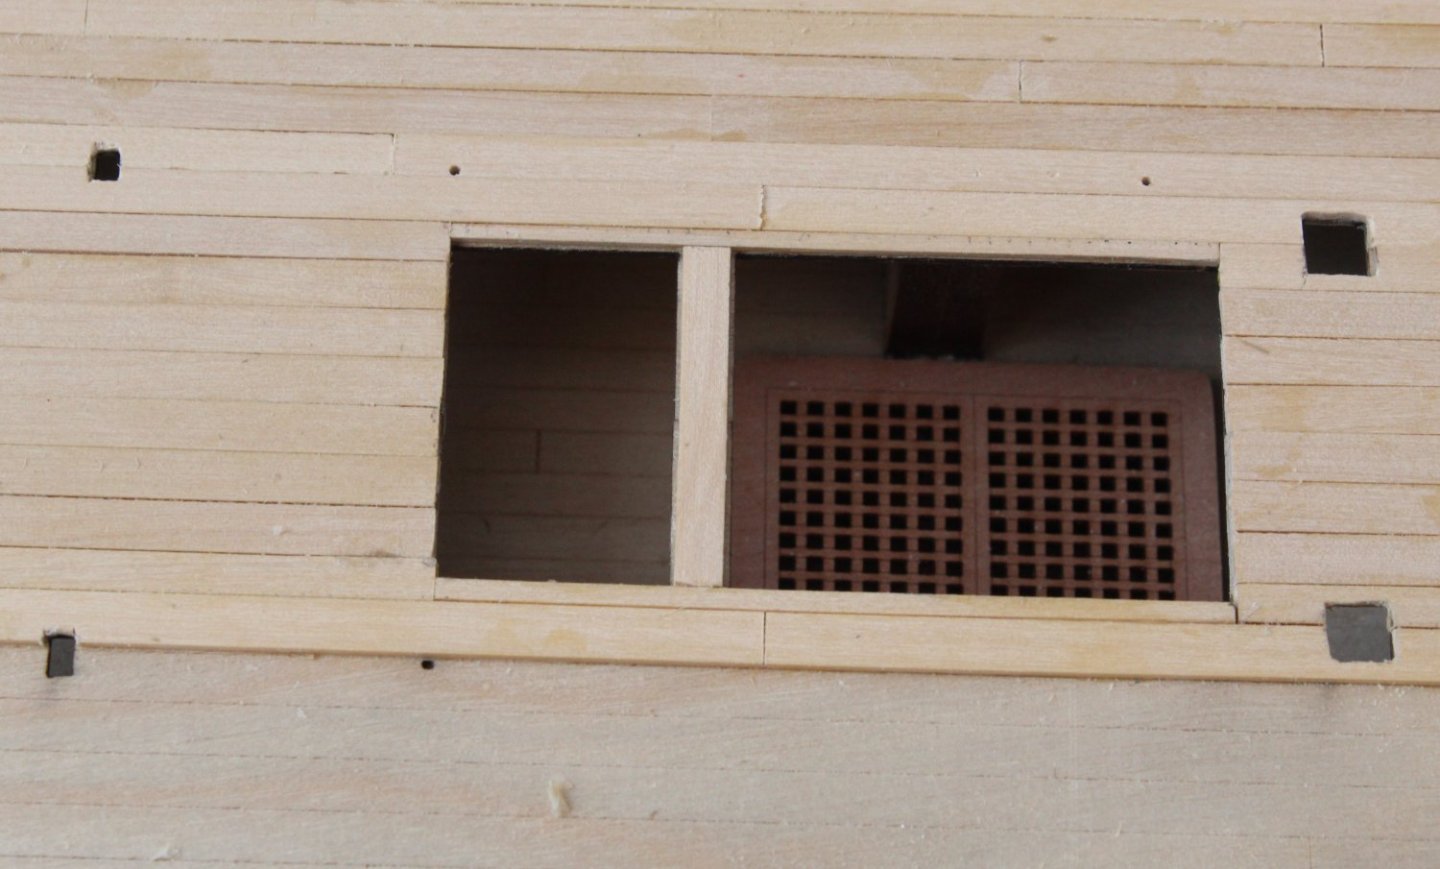
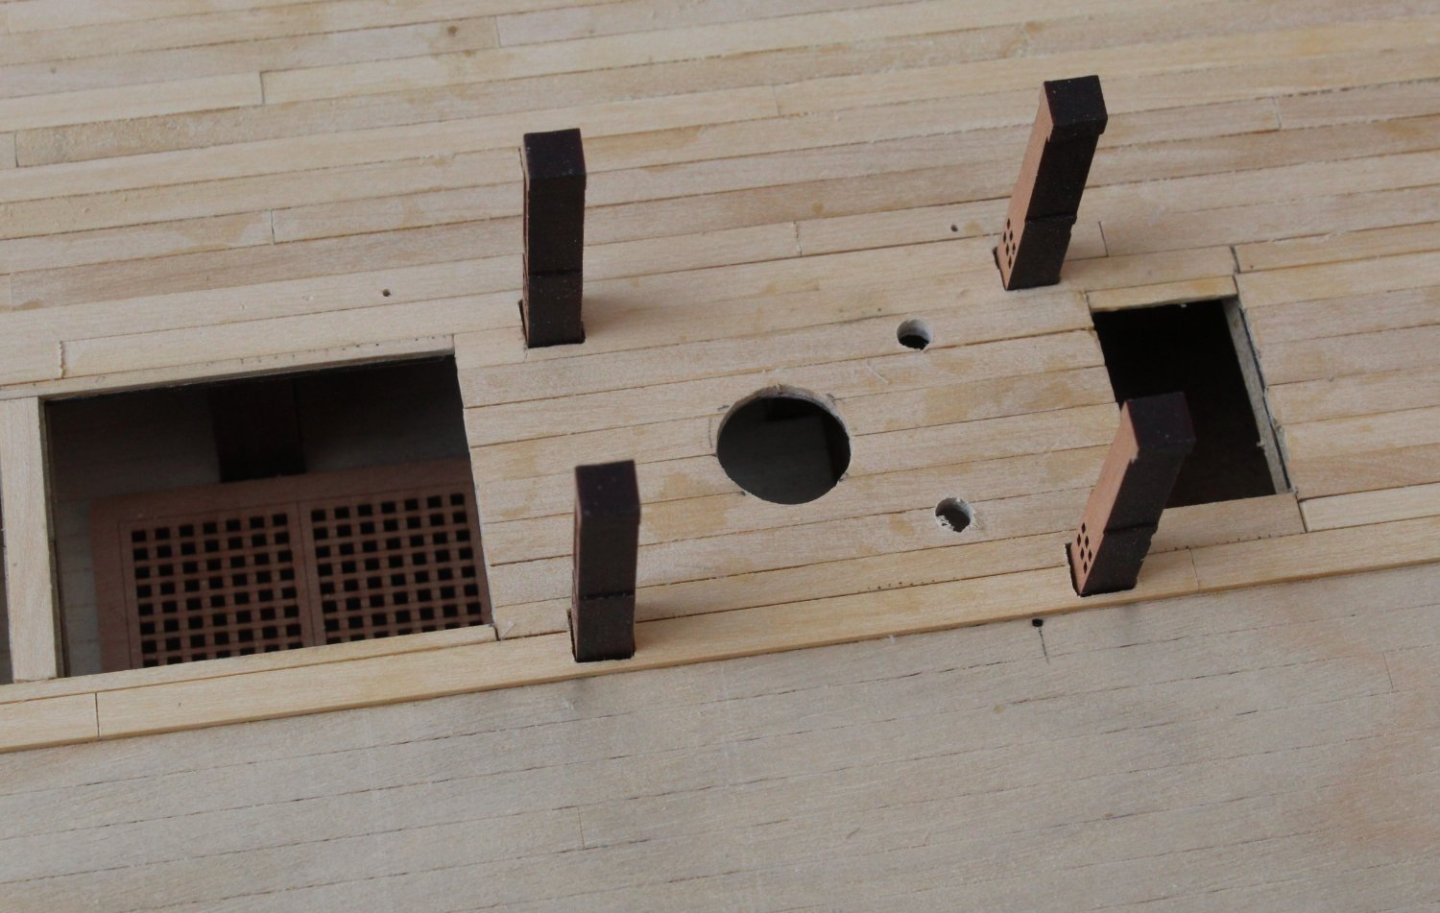
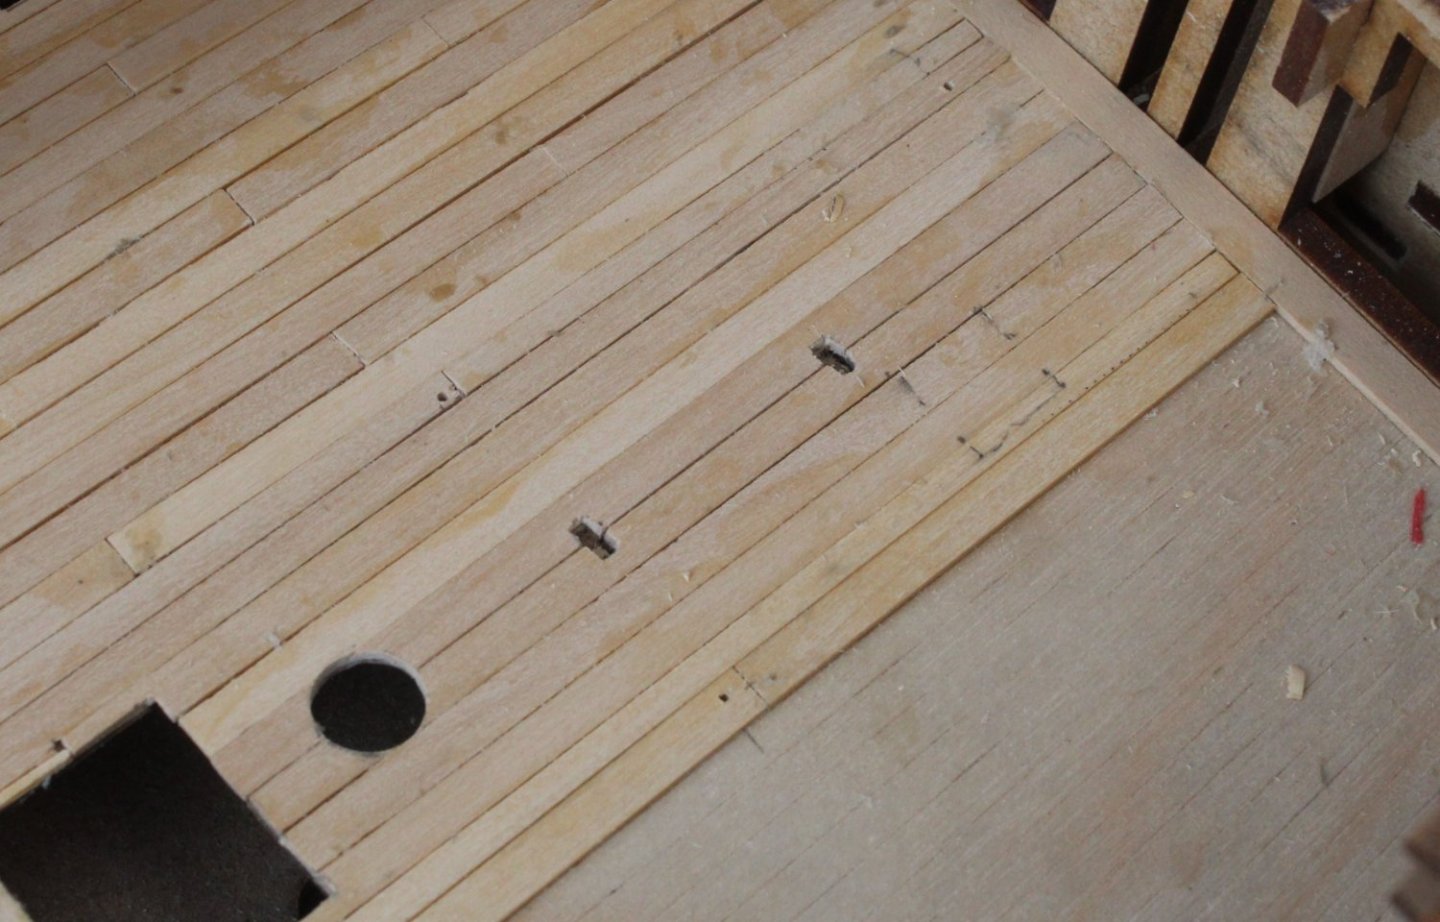
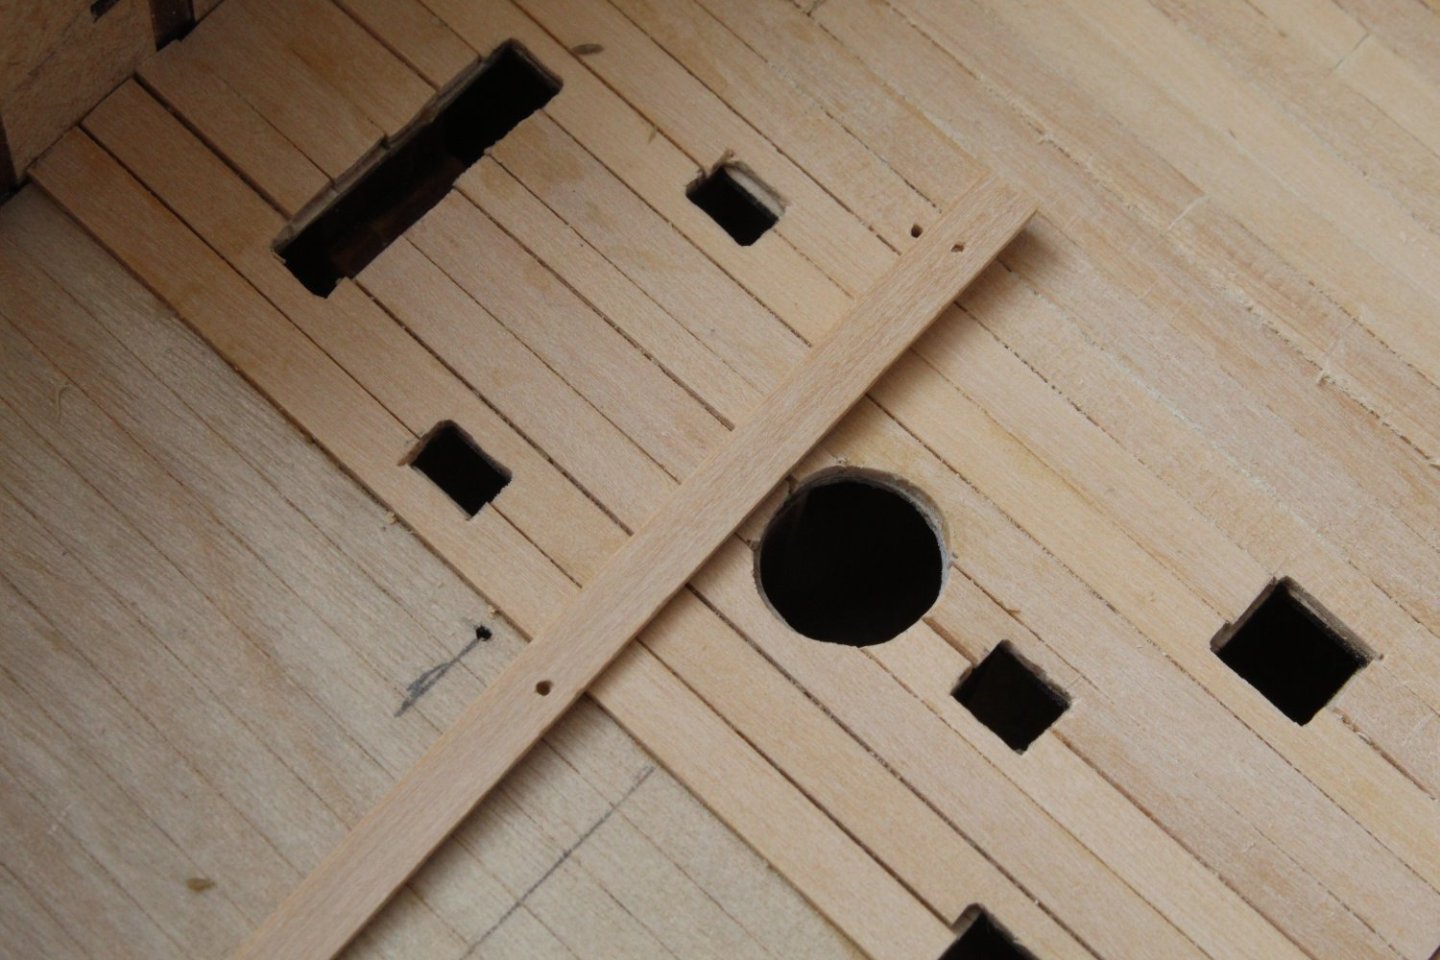
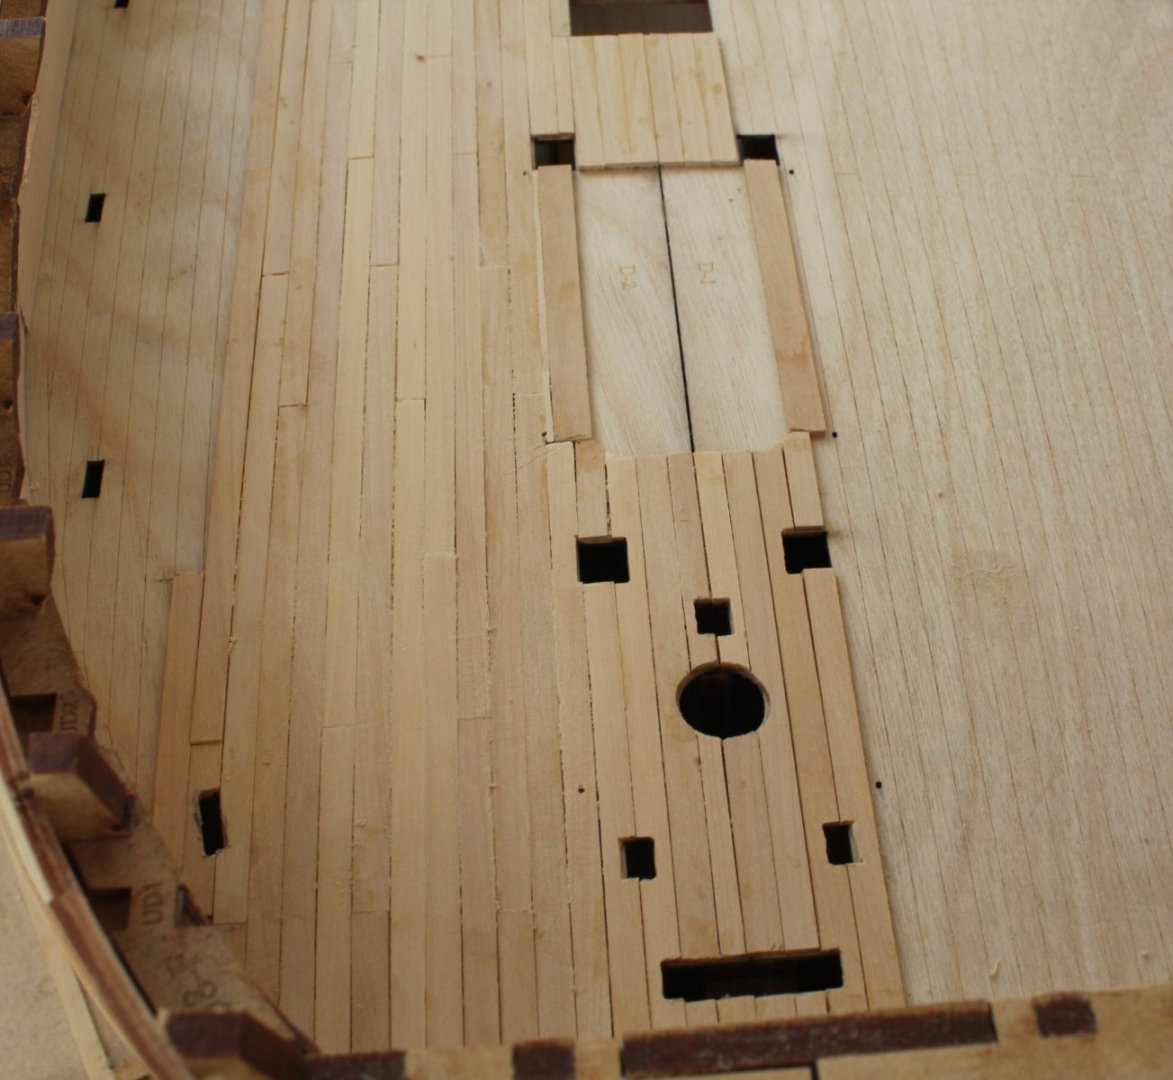
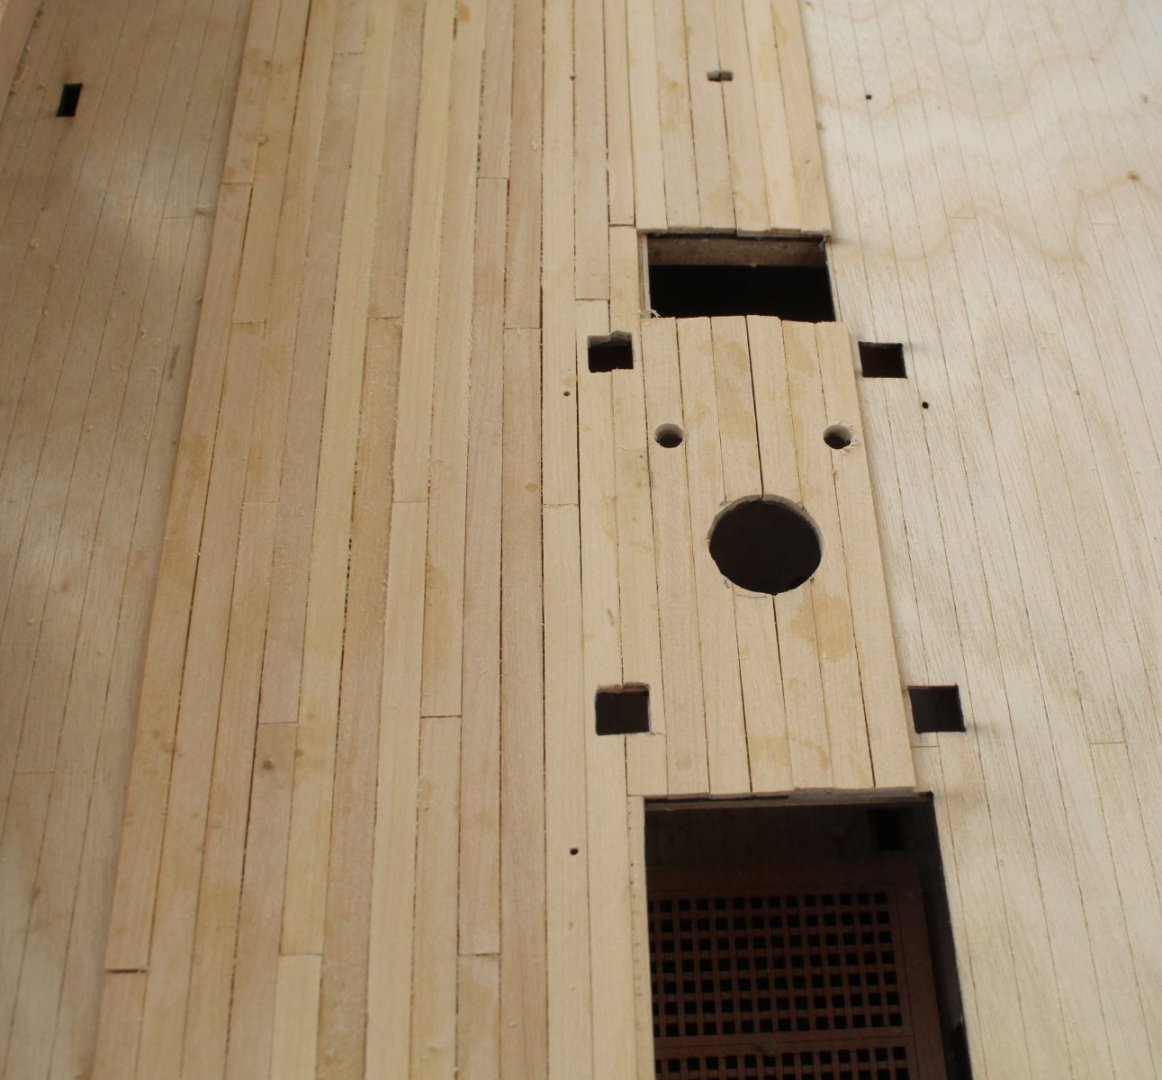
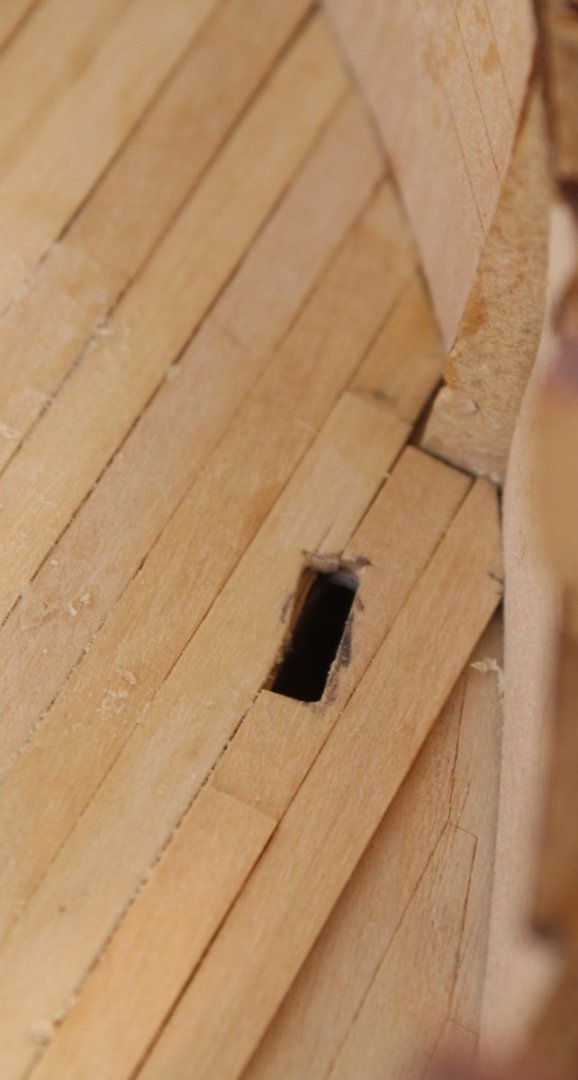
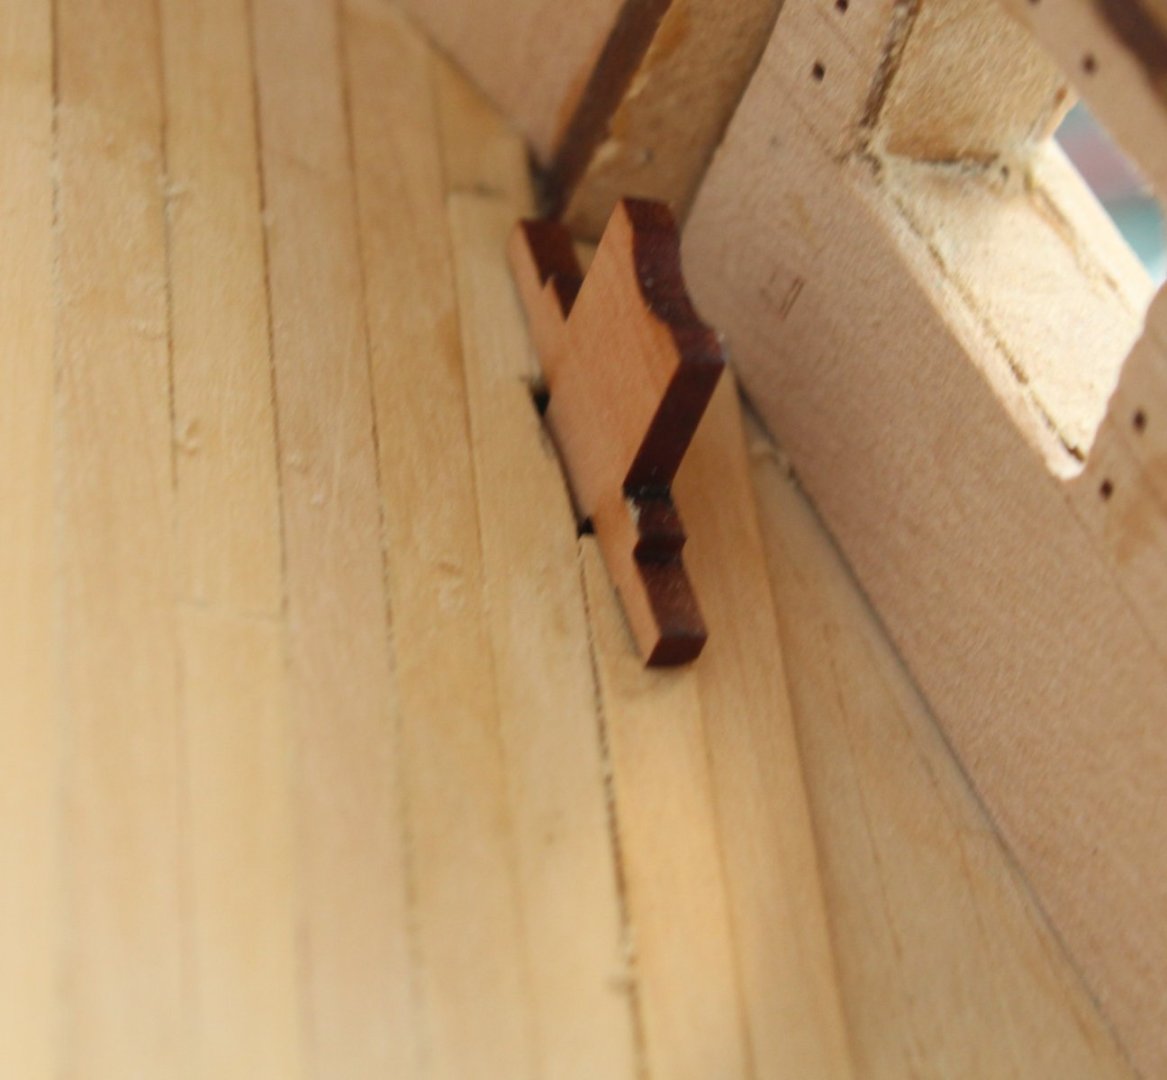
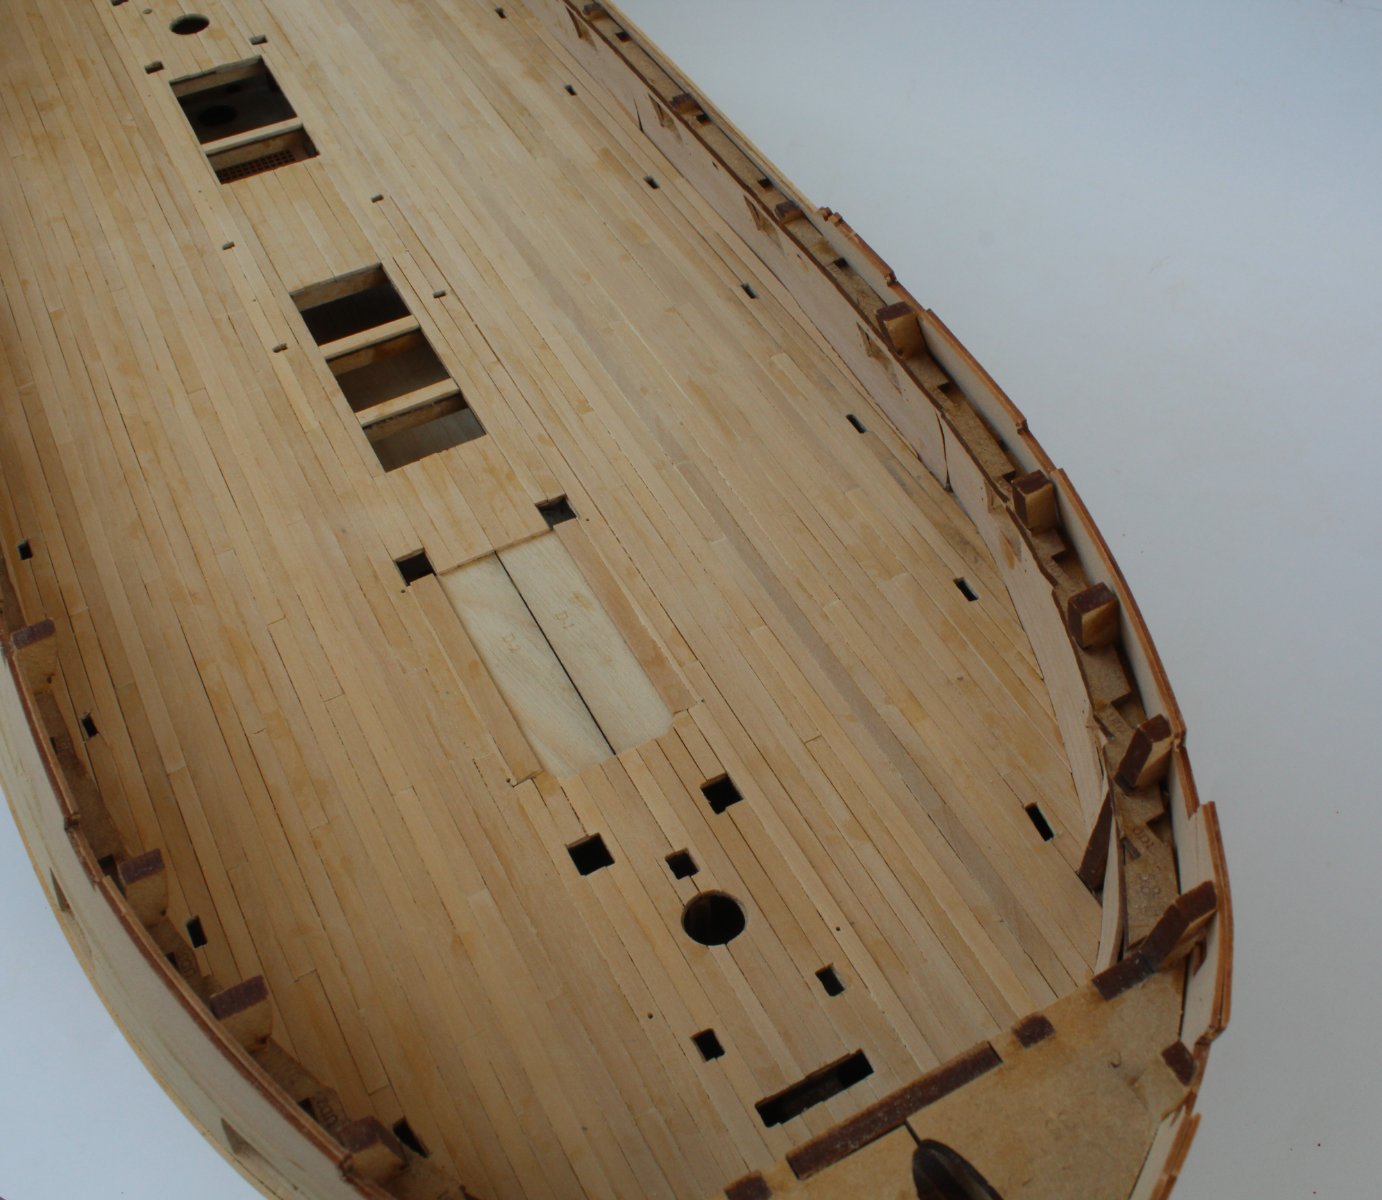
Deck Planking – Update I realised that I had omitted any photos of the central section deck planking in my last post, so I took a few pictures showing this aspect. The first photo shows the current state of the gun deck planking. The next few photos are some close ups of the different central openings. As each opening was made I did make sure the various deck items would fit be it hatches, bitts, masts, etc. As mention in the last post as the planking approaches the right-hand side inner bulwarks I would have to include the openings for the cannons. As can be seen in the next set of photo’s I have now created the first two openings, one for the bow and one for the aft cannons. These openings are checked with the locating piece of the cannon.


- 587 replies
-
- 7
-
-
- Indefatigable
- Vanguard Models
- (and 1 more)
-
I remember it took me several weeks to add 3000+ copper tiles when I built Caldercraft's HMS Victory so I'm not surprised this task will take you some time to complete, even without the interruptions of gardening related work.
- 443 replies
-
- 6
-
-
- Indefatigable
- Vanguard Models
- (and 1 more)
-
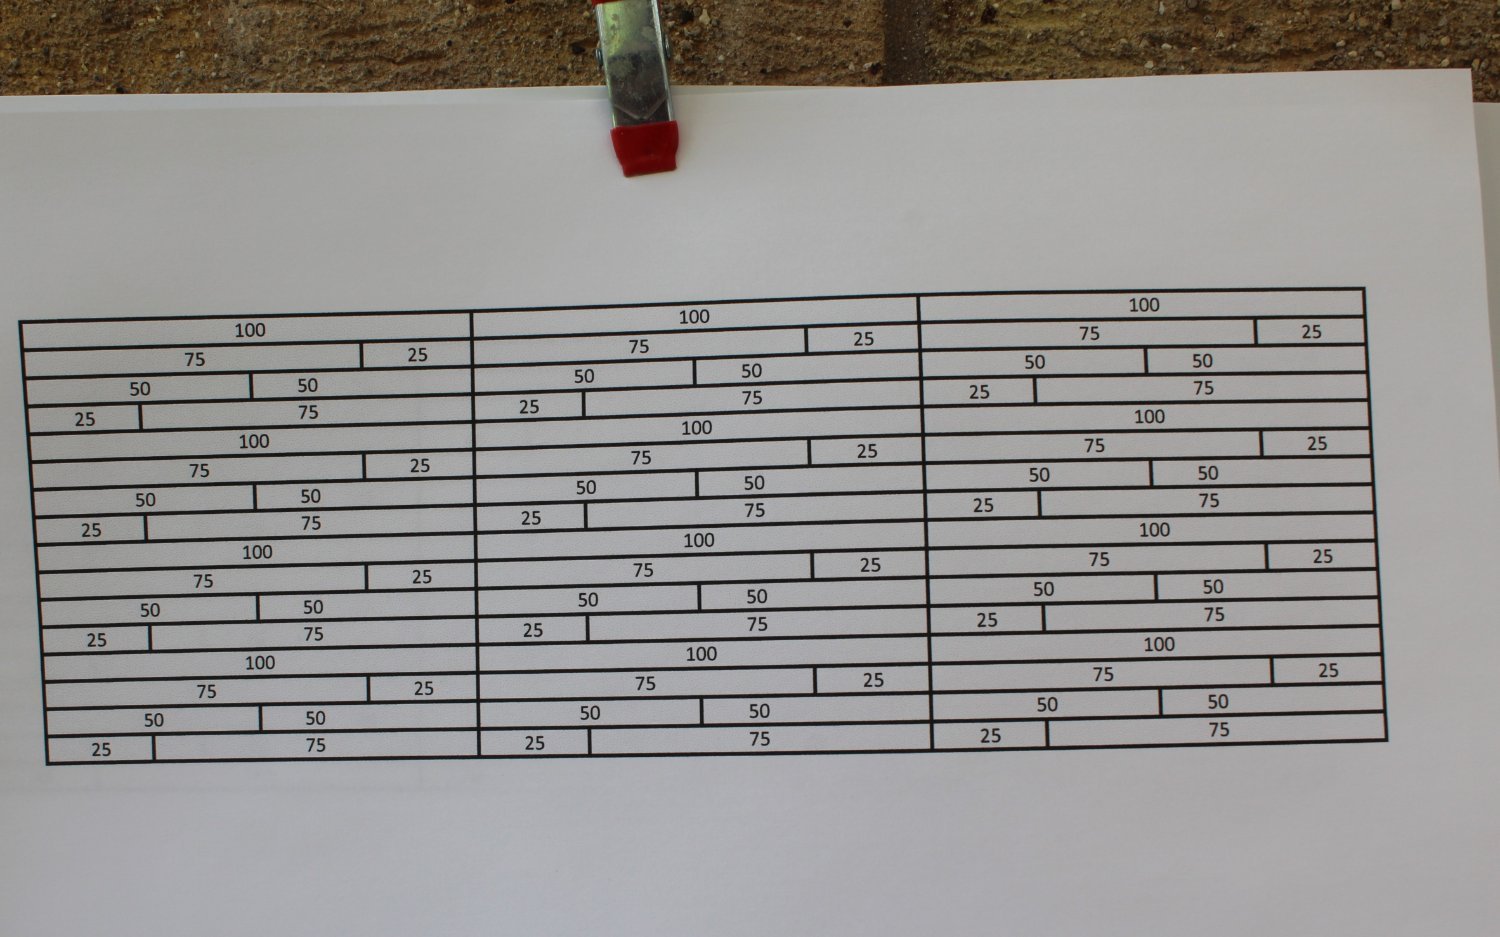
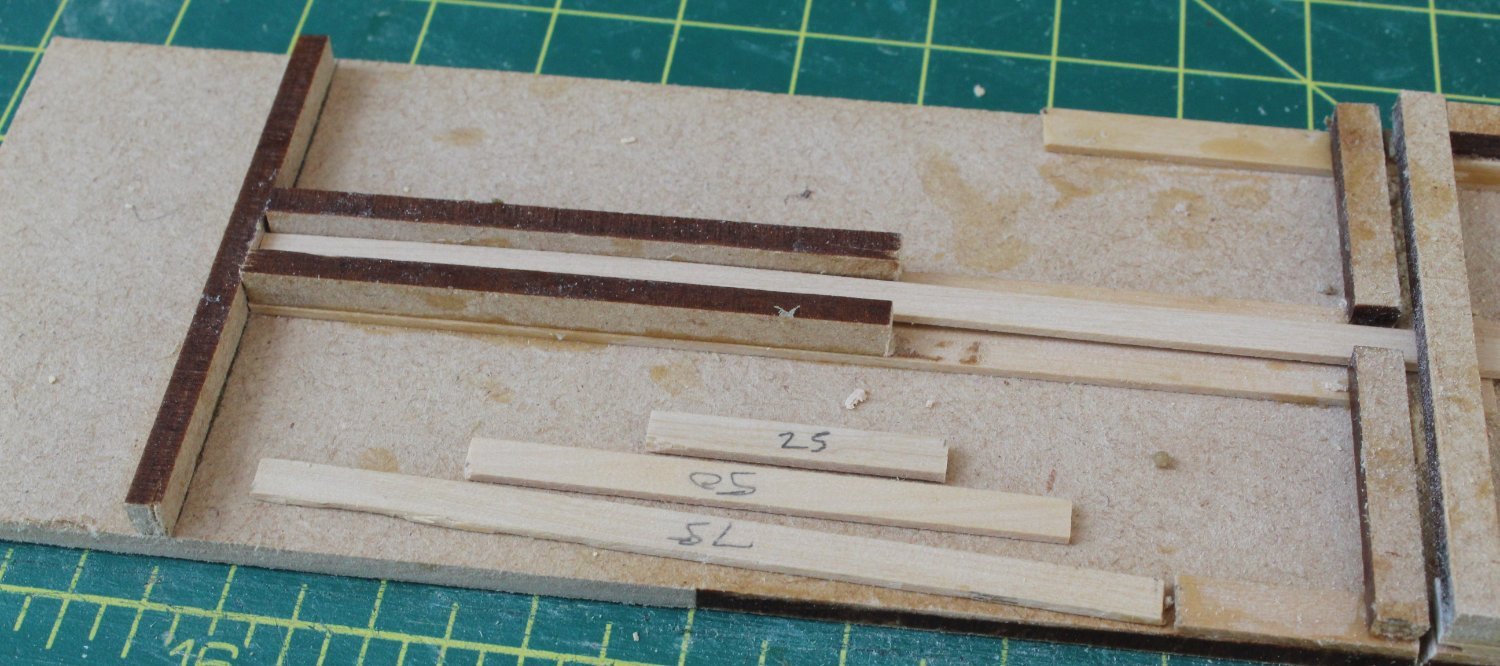
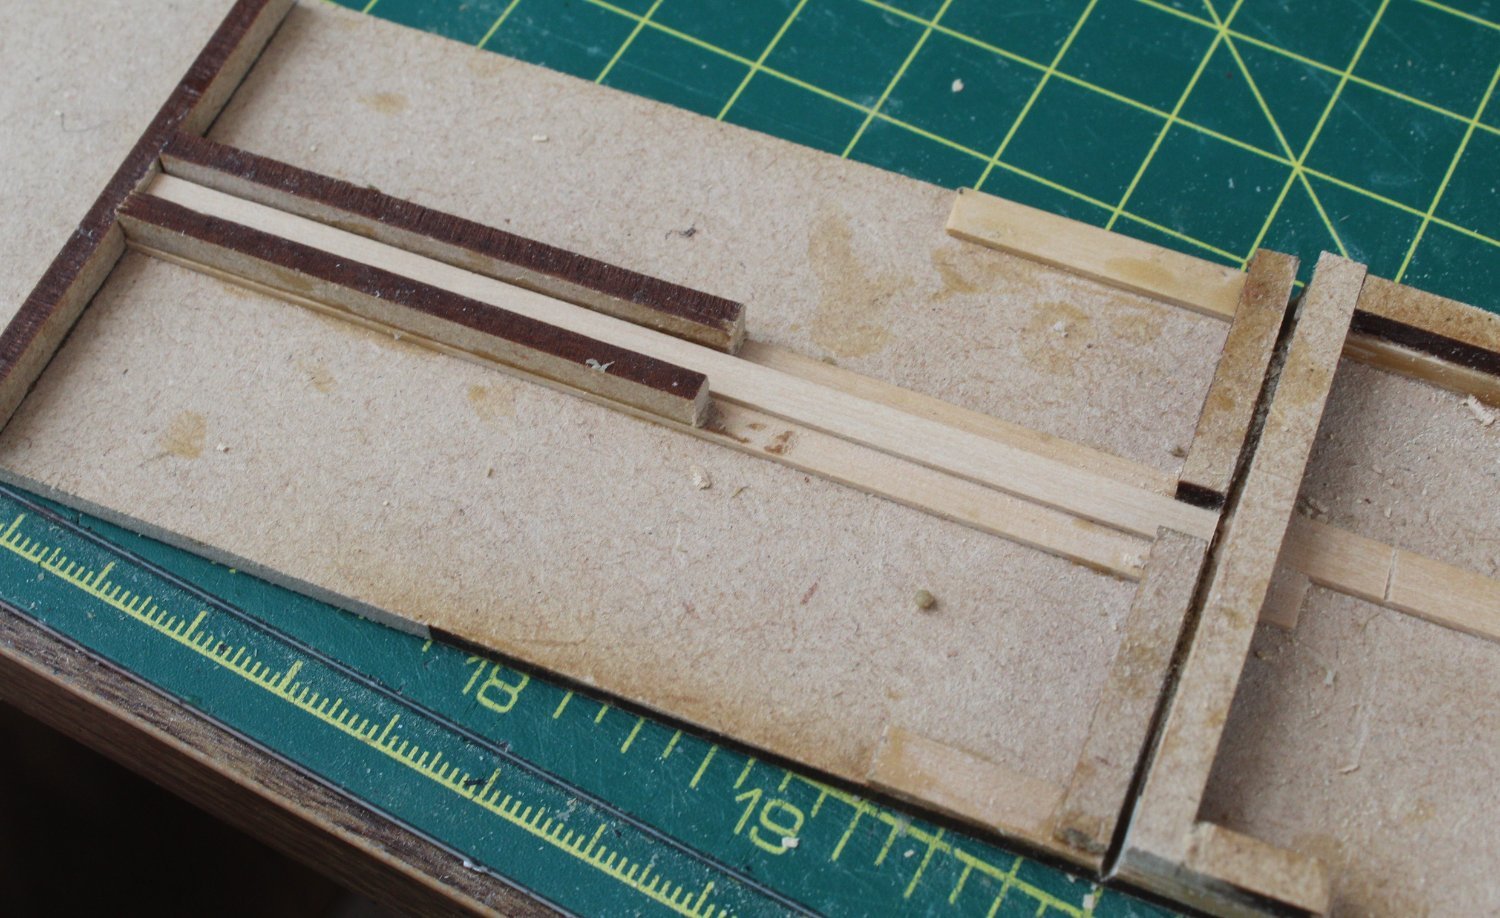
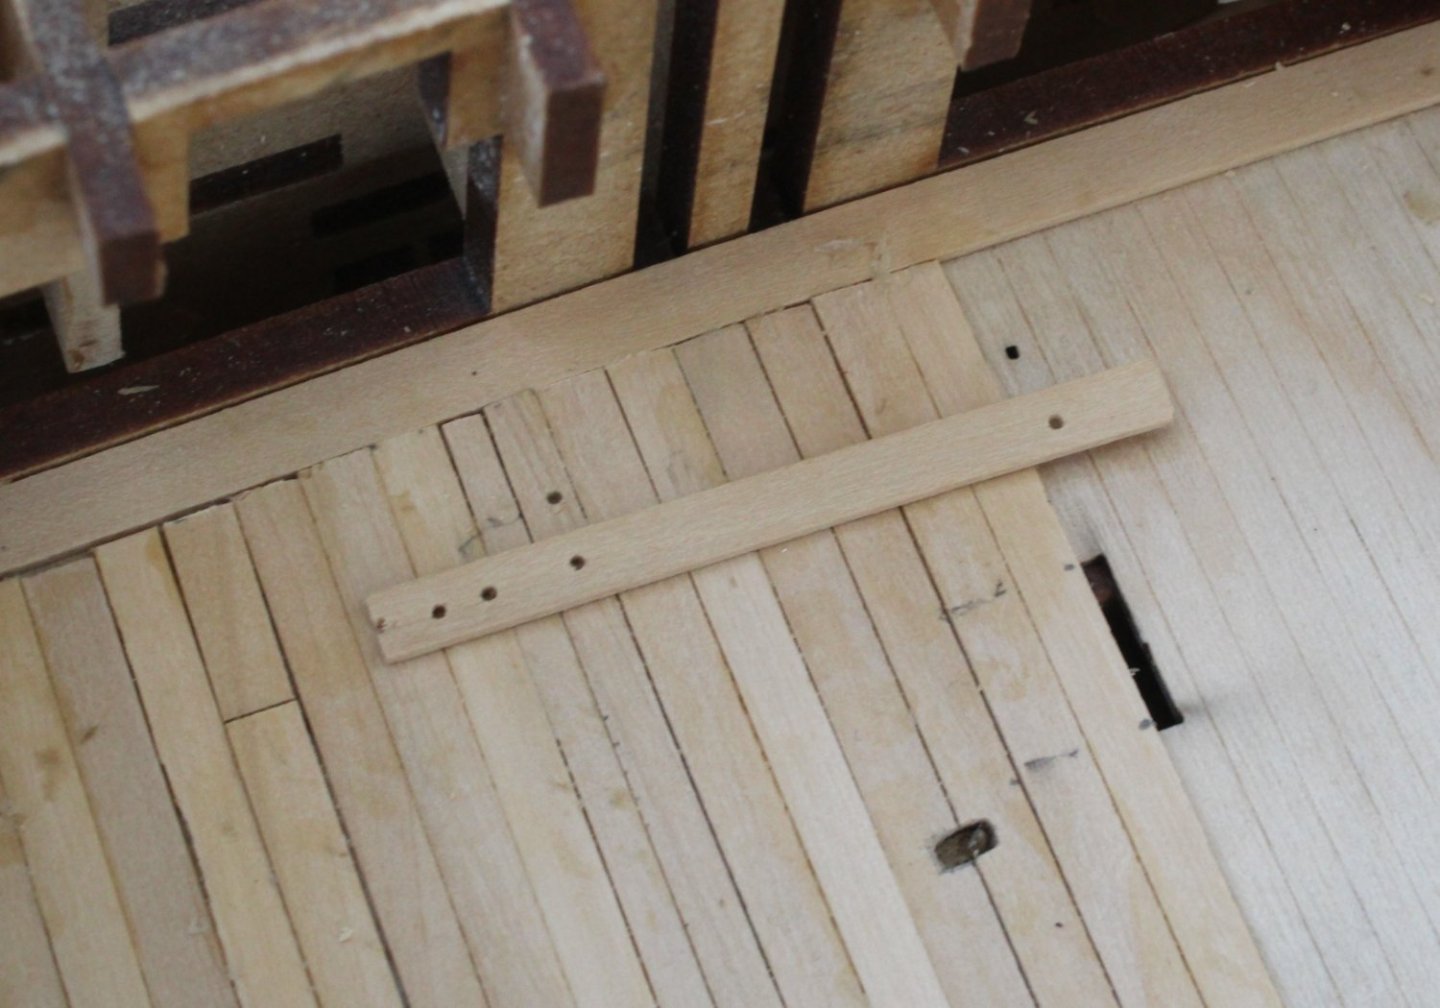
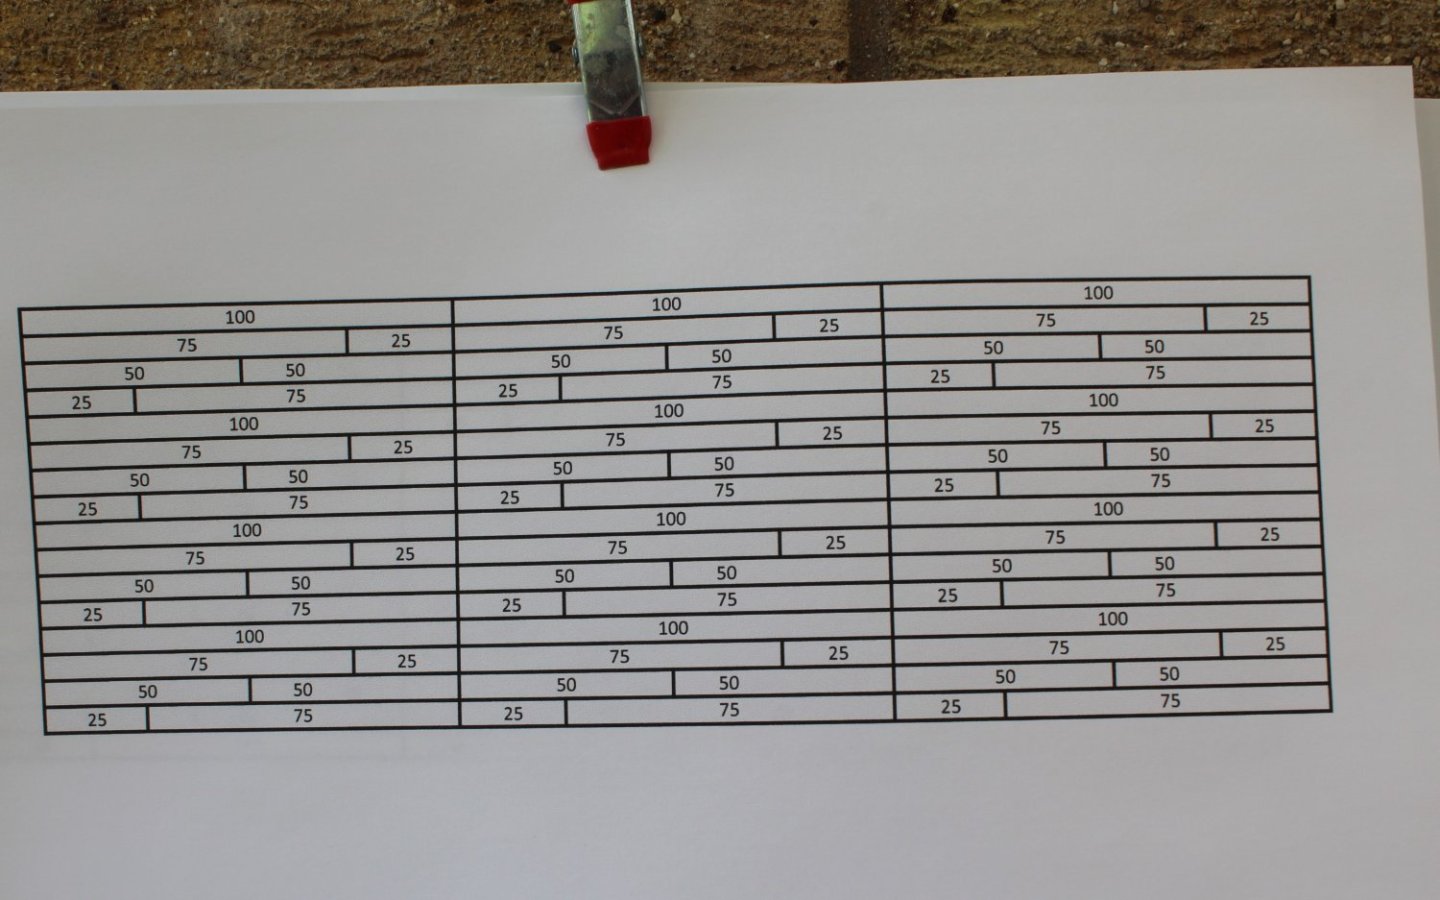
Deck Planking – Very Slow Progress As reported a few weeks ago I have been incapacitated with an ongoing prolapsed disc. The back pain did relocate to the outer and front part of my right thigh which indicated I had developed meralgia paresthetica (nerve entrapment as a result of the disc prolapse) and is caused by compression of the lateral femoral cutaneous nerve that provides sensation to the skin covering your thigh. Thankfully it has been warm and sunny so I have spent a great deal of my time sat in the garden developing a nice tan and doing the exercises provided by the physio to help. Over the last four days the pain has finally started to subside, and I no longer need to take the oral morphine for the pain relief although there is still a tingling sensation in the right thigh. As a result I have now been able to return the shipyard however I am keeping my sessions short for the time being, limiting each session to no more than 20 minutes with plenty of rest between each session. I am using a 3 butt shift pattern for the deck, with a plank length of 100mm, but I'm not using the shift pattern around the central section cutout area. I have also made some templates which can be loaded into my plank cutting jig (see post #145) for cutting the shorter planks (25mm, 50mm and 75mm). I started by planking the area around the central deck section moving outward toward right-hand bulwarks. To ensure I get the eyebolt holes drilled in the right position I used a simple template, as shown below. To ensure I get the best possible join between planks I add an indication mark to the back of the plank to show where the next plank should be orientated so the two planks are fitted end to end with the common cut line. The next 100mmL plank has just been cut I (and is still in the jig) as is ready be glued in place. Once I have cleaned up the edges I apply a coat of titebond to the underside of the plank and then it is placed in on the deck. I have found it useful to use some offcuts to hold the glued plank in place whilst the next plank is being prepared. The 3 butt shift pattern can also be seen in the photo below. I am not adding a margin plank to the first part of the bow area, as this will not be visible once the forecastle deck has been added. The stern area is not as neat as I would have liked but again it will not be visible once the upper deck sections have been added. Fun times ahead as I will need to add the cut-outs for the deck cannons. Once the deck planking is complete it will need a good scrapping with a sharp blade before the WOP is added.


- 587 replies
-
- 6
-
-
- Indefatigable
- Vanguard Models
- (and 1 more)
-
Slow and steady with the tiling, looks good so far.
- 443 replies
-
- 4
-
-
- Indefatigable
- Vanguard Models
- (and 1 more)


.JPG.64ed9cab8ad7a000109cedd26f4e6a46.JPG)