HOLIDAY DONATION DRIVE - SUPPORT MSW - DO YOUR PART TO KEEP THIS GREAT FORUM GOING! (89 donations so far out of 49,000 members - C'mon guys!)
×


shihawk
-
Posts
709 -
Joined
-
Last visited
Content Type
Profiles
Forums
Gallery
Events
Everything posted by shihawk
-
 Hi Mike .. I,m afraid u misunderstood ,i was congratulating Chris on his new baby , those days are long gone for me . will be a granda soon !!!!!!! lol. I haven,t been on that much for a while so yes i think the Vic did burn me out for a while plus i got hooked on a computer game which wasted a lot of my spare time ,but i,m back in the workshop ,started a Triton scratch build and waiting on wood supplies . I noticed u still building a few planes or have u moved on to something else now , i only look in on the site once in a while now and have gotten out of touch ,.Once i get going with the Triton project properly i hope to be back on more often . Hope all,s well in the highlands and your battoned down for a long winter ,s modeling ???
 -
First thing ,, Chris.. many concgats on your new arrival , I can,t imagine what name u would have come up with had it been a boy ??? Thank you for your kind words..I did have diffs getting the motivation to finish the Vic even to the shortened version , The rigging broke my spirit !!! But I was surprised when I visited the real Vic last summer that her masts have been shortened similar to mine . I did start a Triton section but discovered a major flaw in the early part of the build so have now moved on ,as was always the intention ,to the full Triton 1;48 POF . Finding it a challenge but as before I just have to keep reminding myself I am the captain and do my own thing . did start a log on the Triton section but not much there yet , still getting my head around the plans ??? good to hear from u again . Boyd Marty .. If I remember correctly I spent a lot of time experimenting with thread , wire etc for the frames but finished making the complete windows from small strips of Lime .. a very tedious but rewarding method . Check other logs there may be a simpler method ..On checking my log I see I did not document it very well at the time and don,t remember the exact details , sry I can,t be more help .. Boyd
-
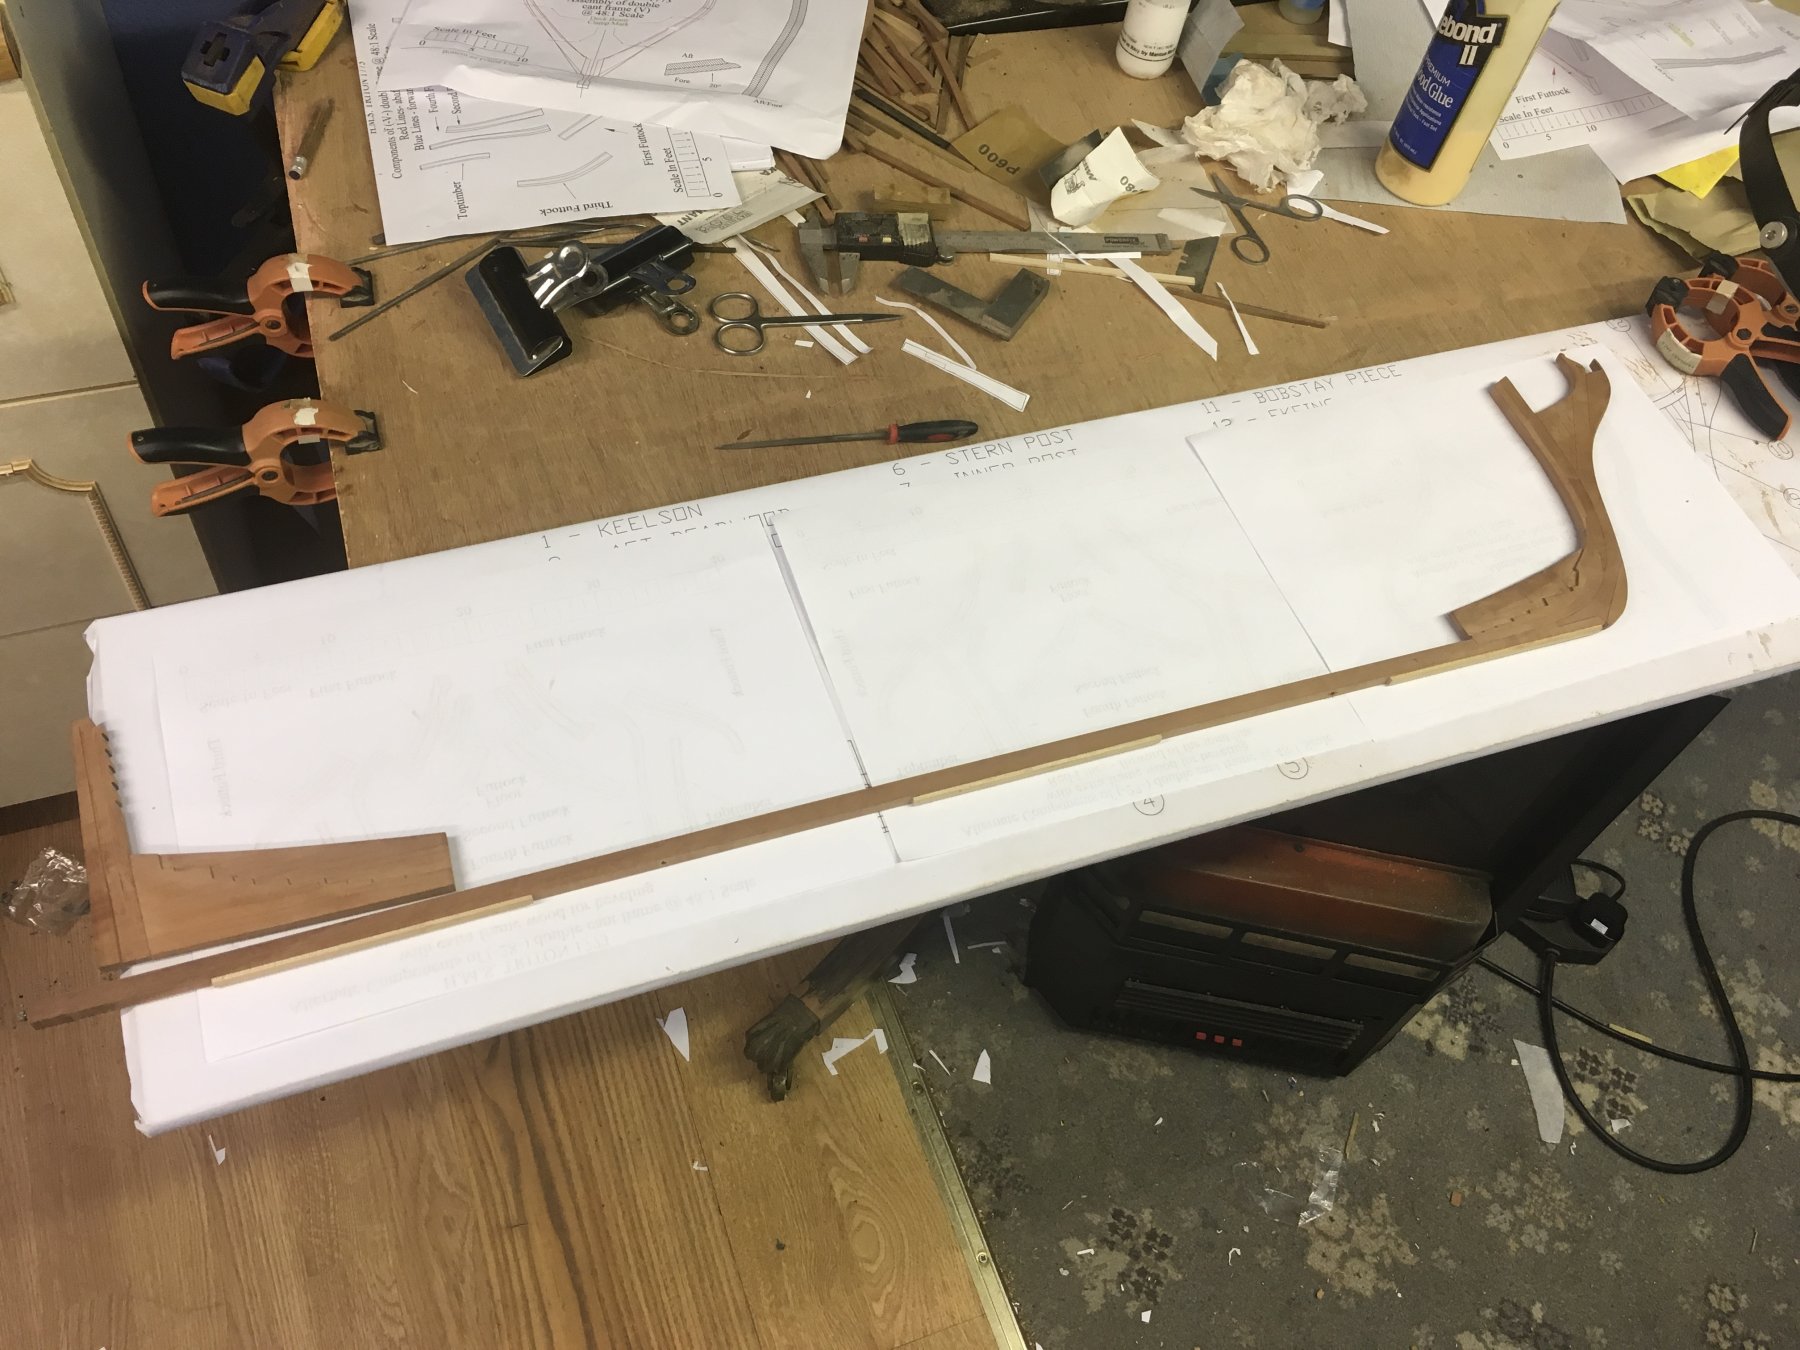
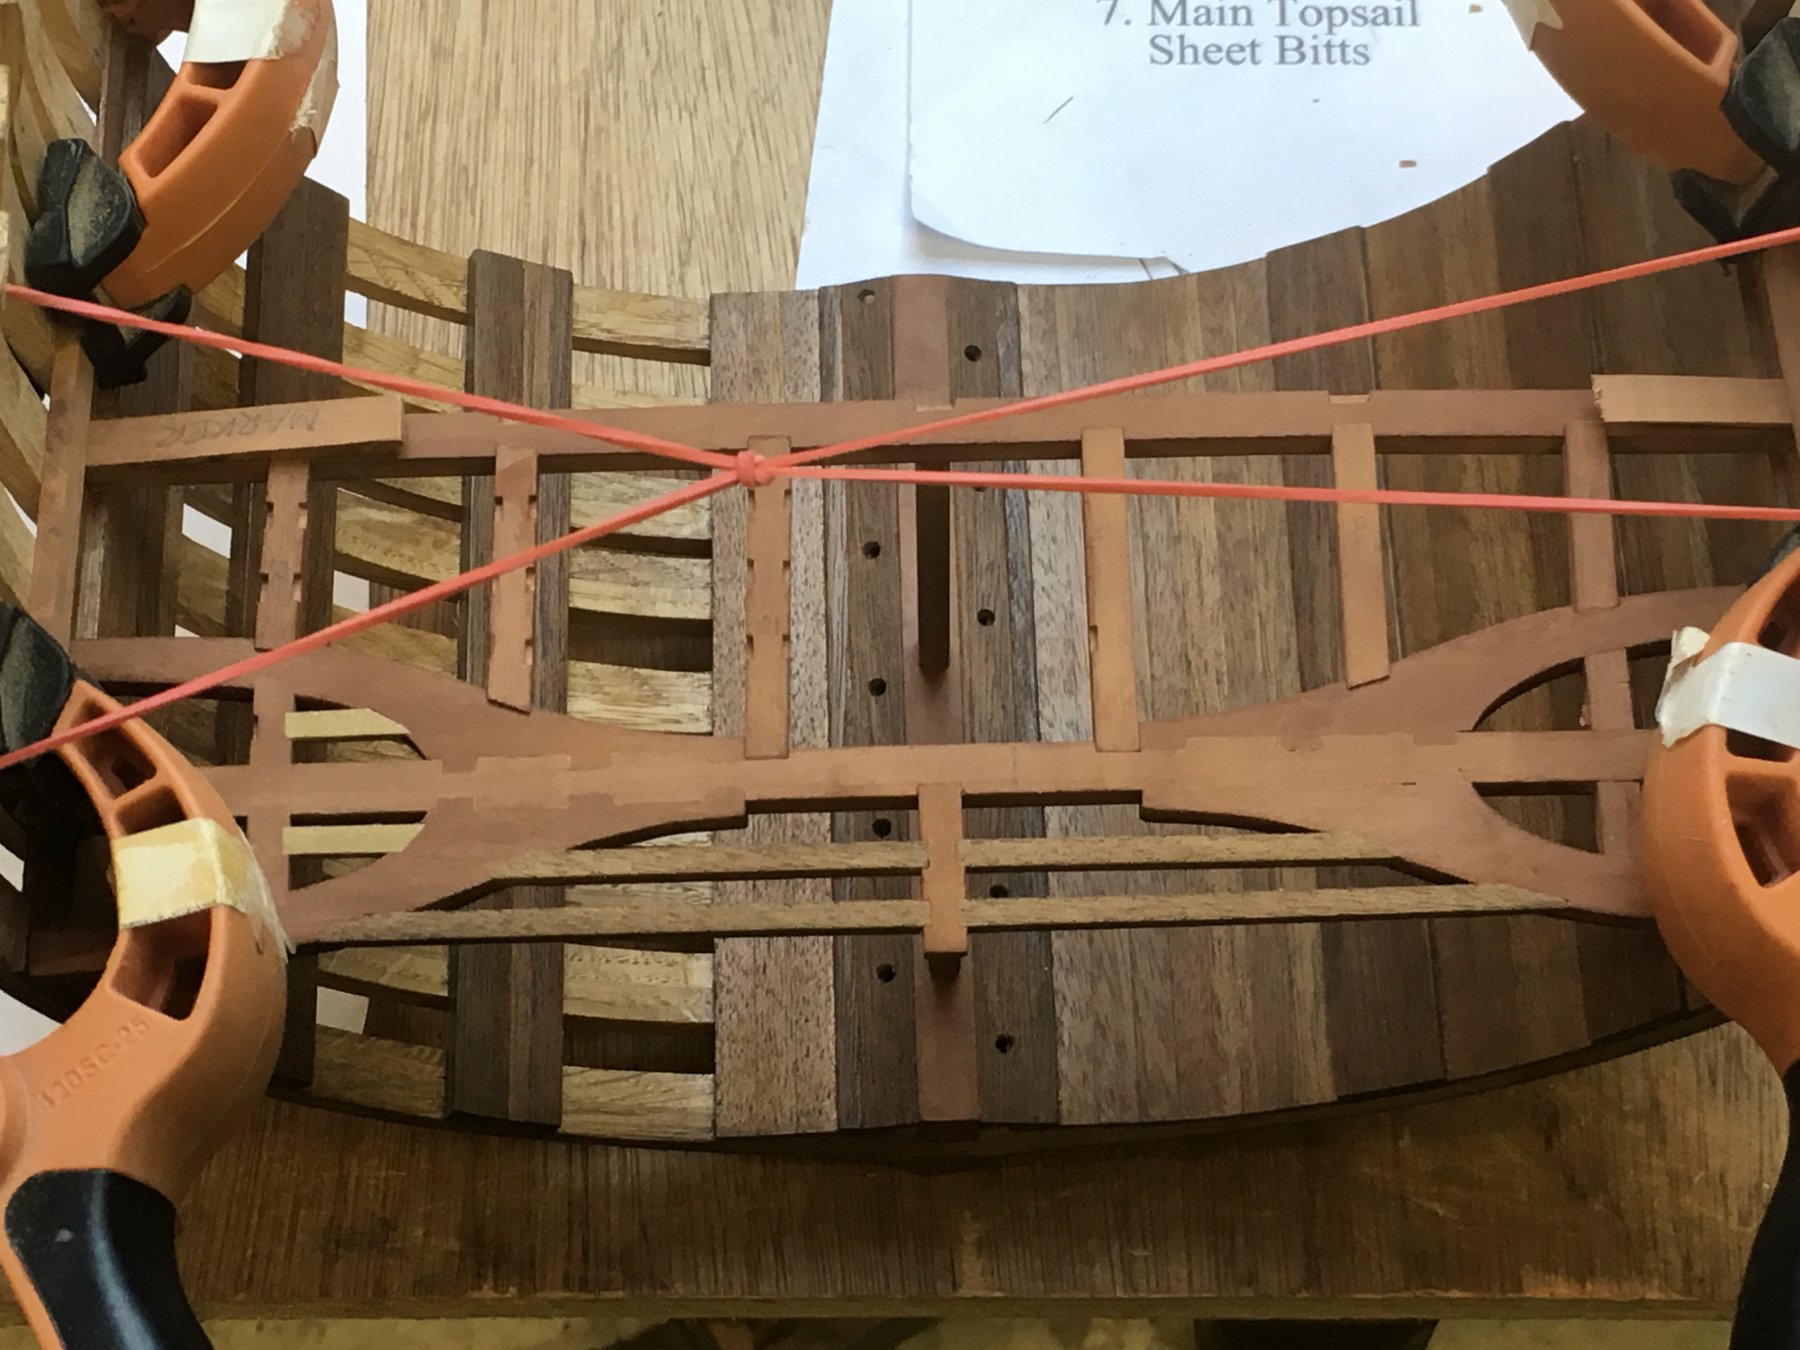
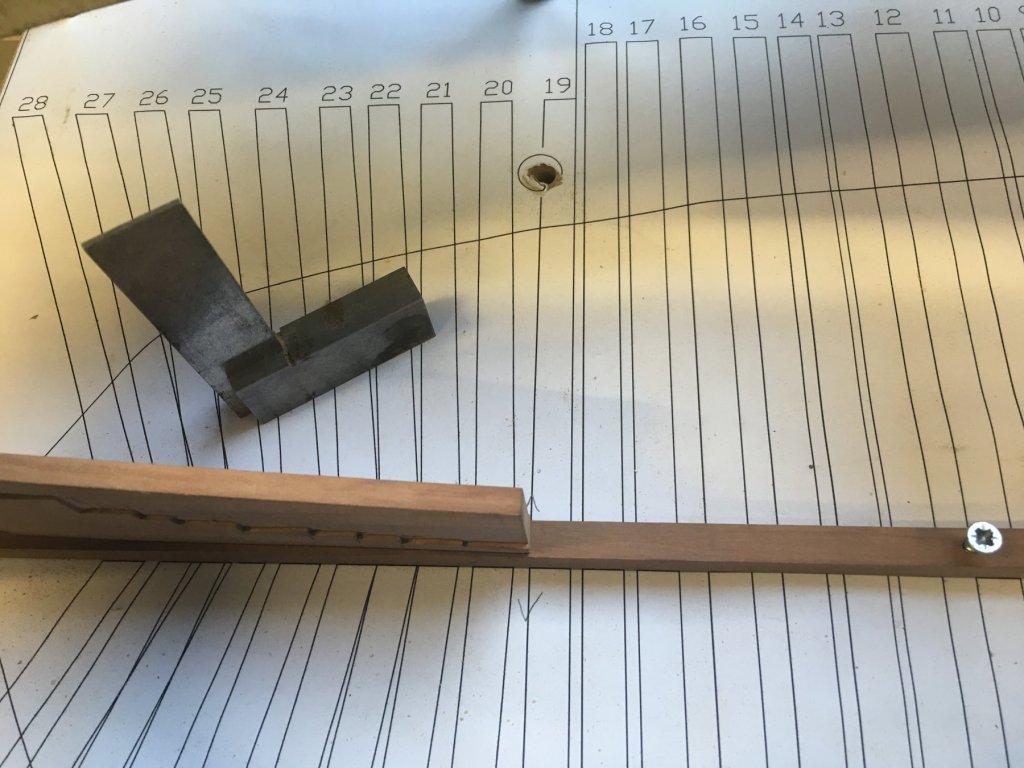
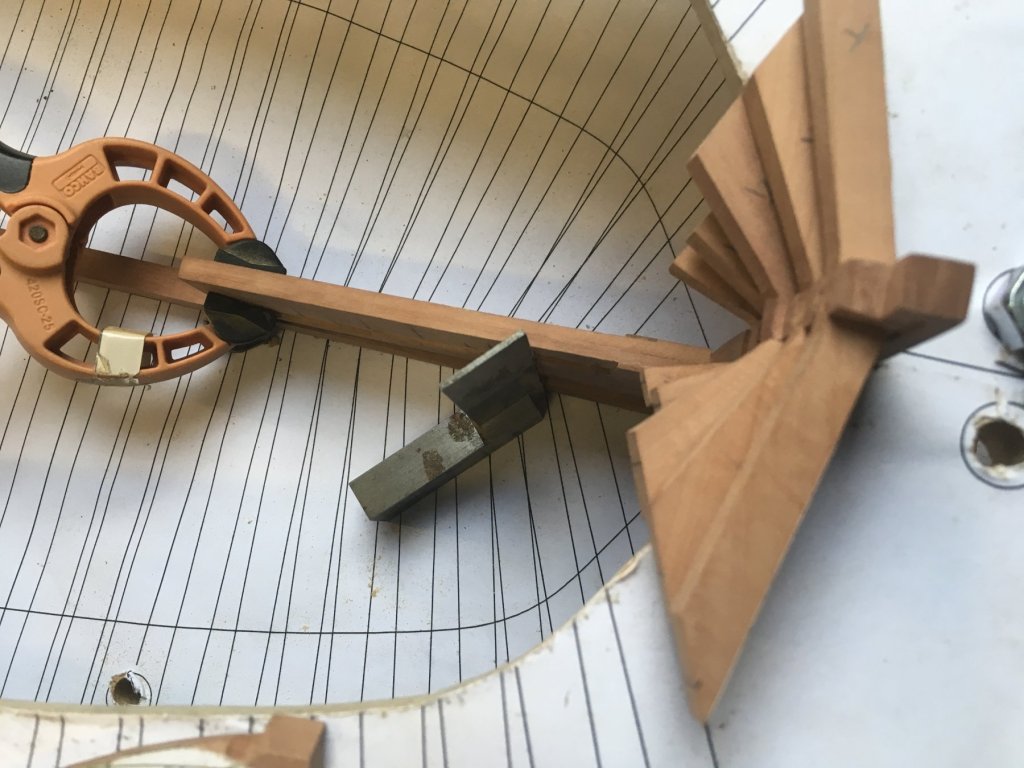
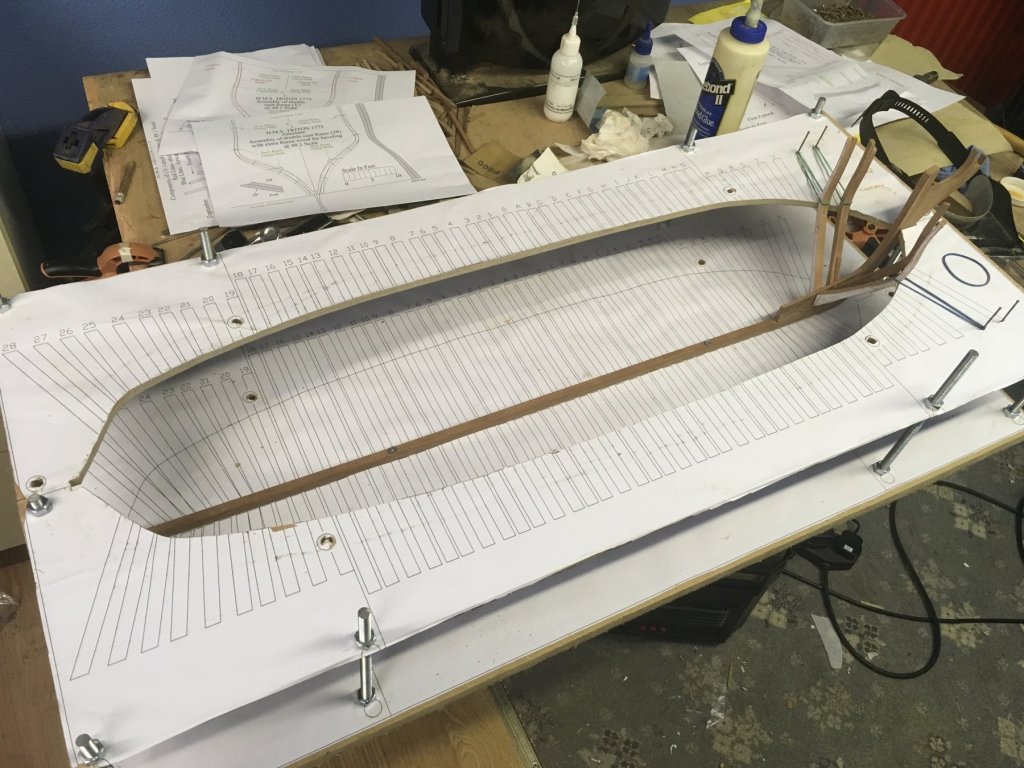
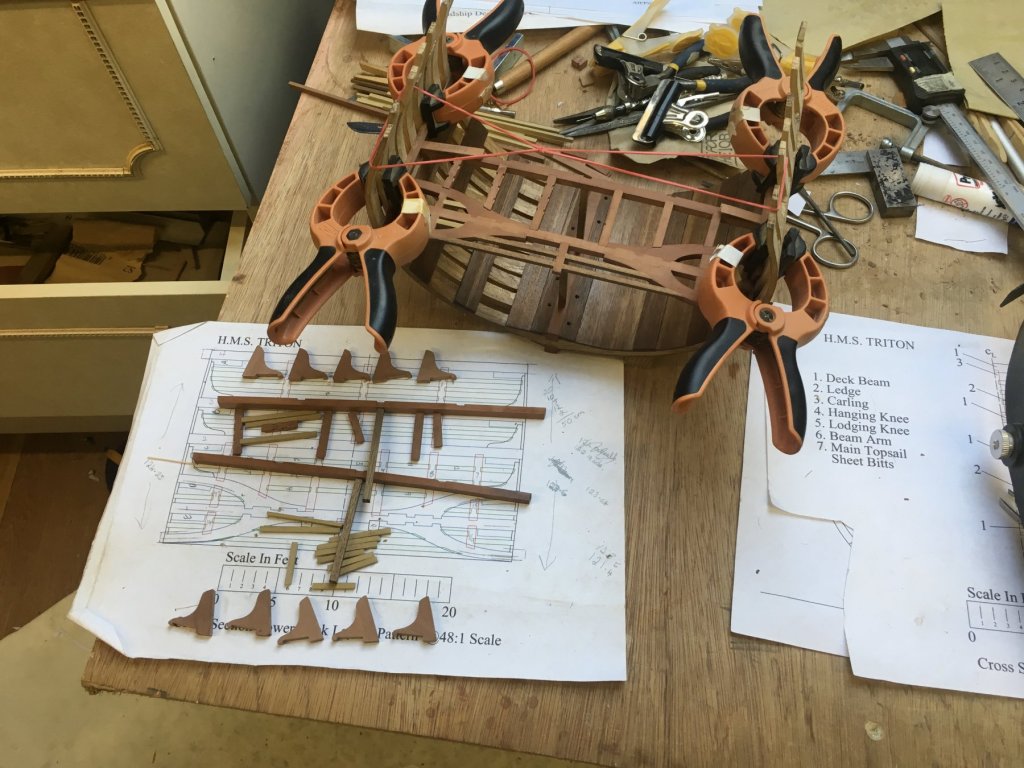
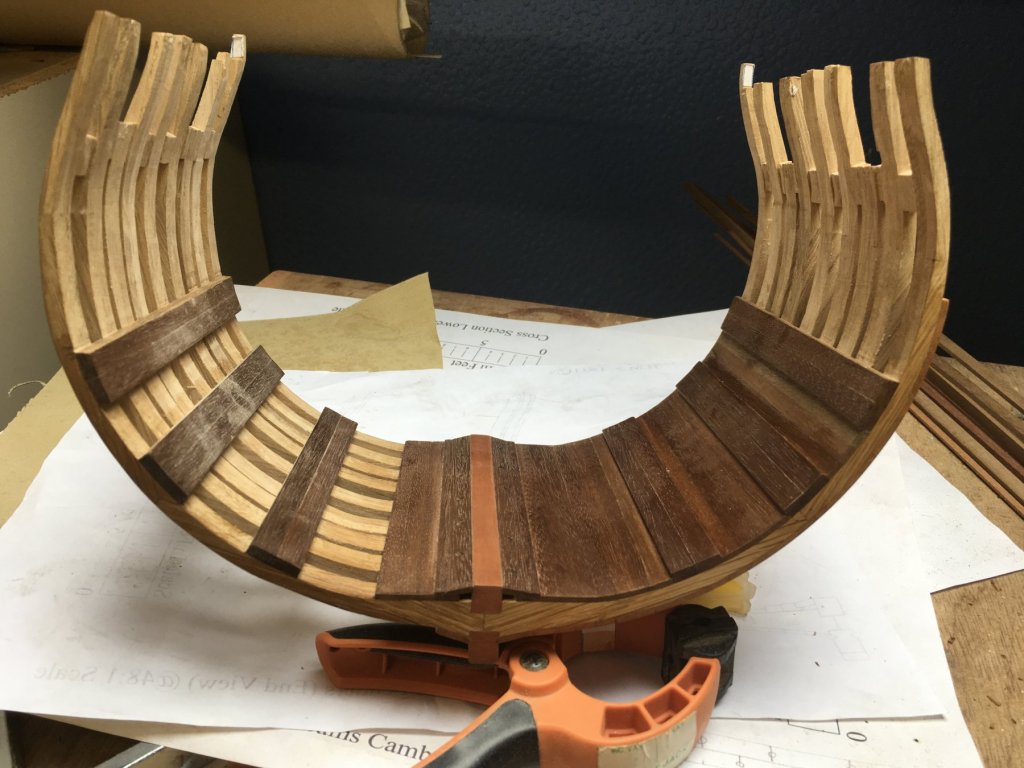
I decided that one of the main things in this build is getting definate points to measure from . For the aft section i used the aft line on the 19 frame to set the whole aft piece , On the same theme i made sure the filling frames all ran flush to the Rabbit line .although i don,t intend to plane this it hopefully will keep everything in line . This is not a kit , there are no instructions and please forgive my ramblings but maybe somewhere down the line they may be of help to some one . I must admit i am finding this a challenge but an enjoyable one .


- 30 replies
-
- 10
-

-
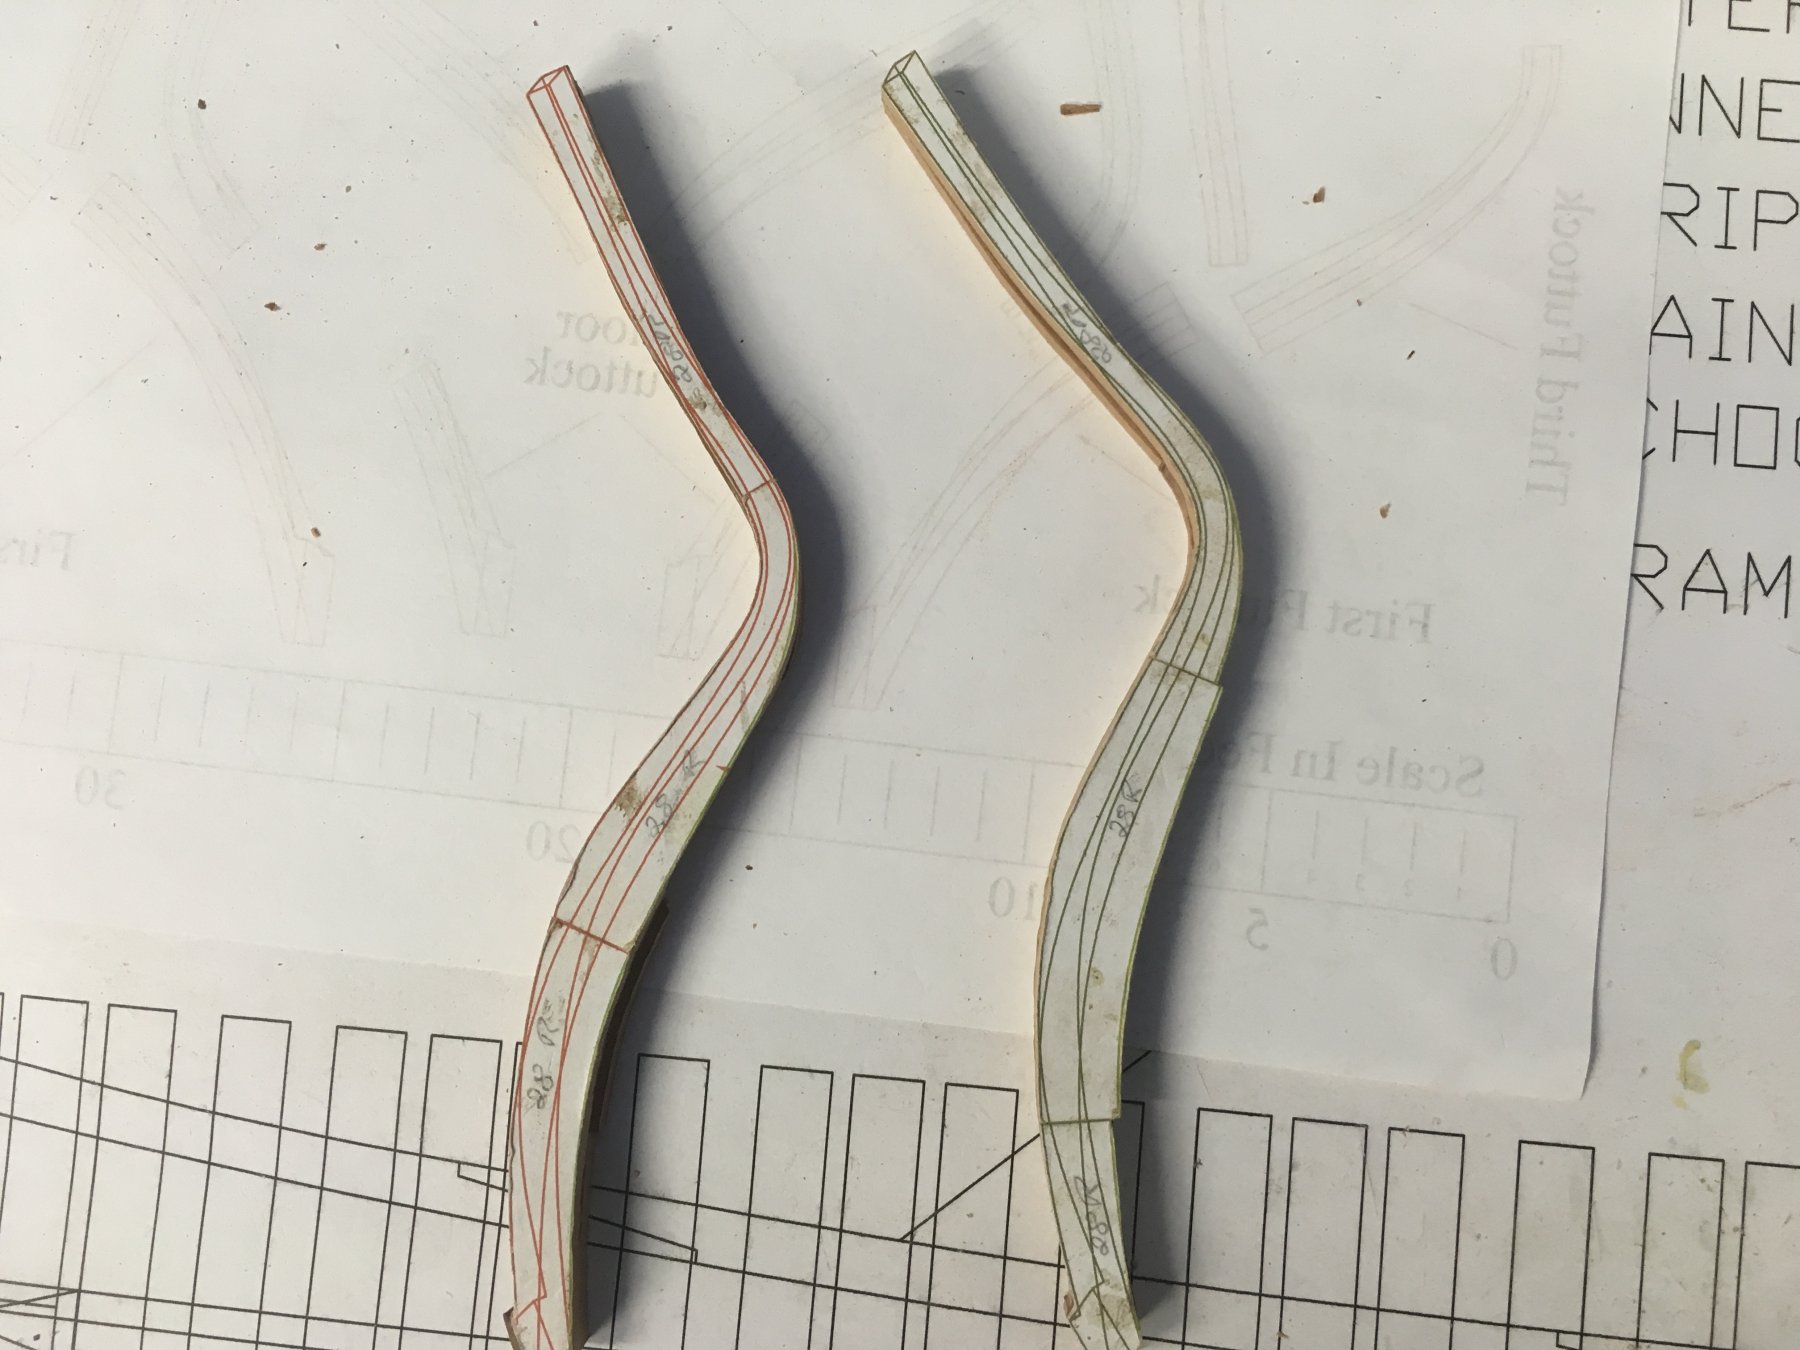
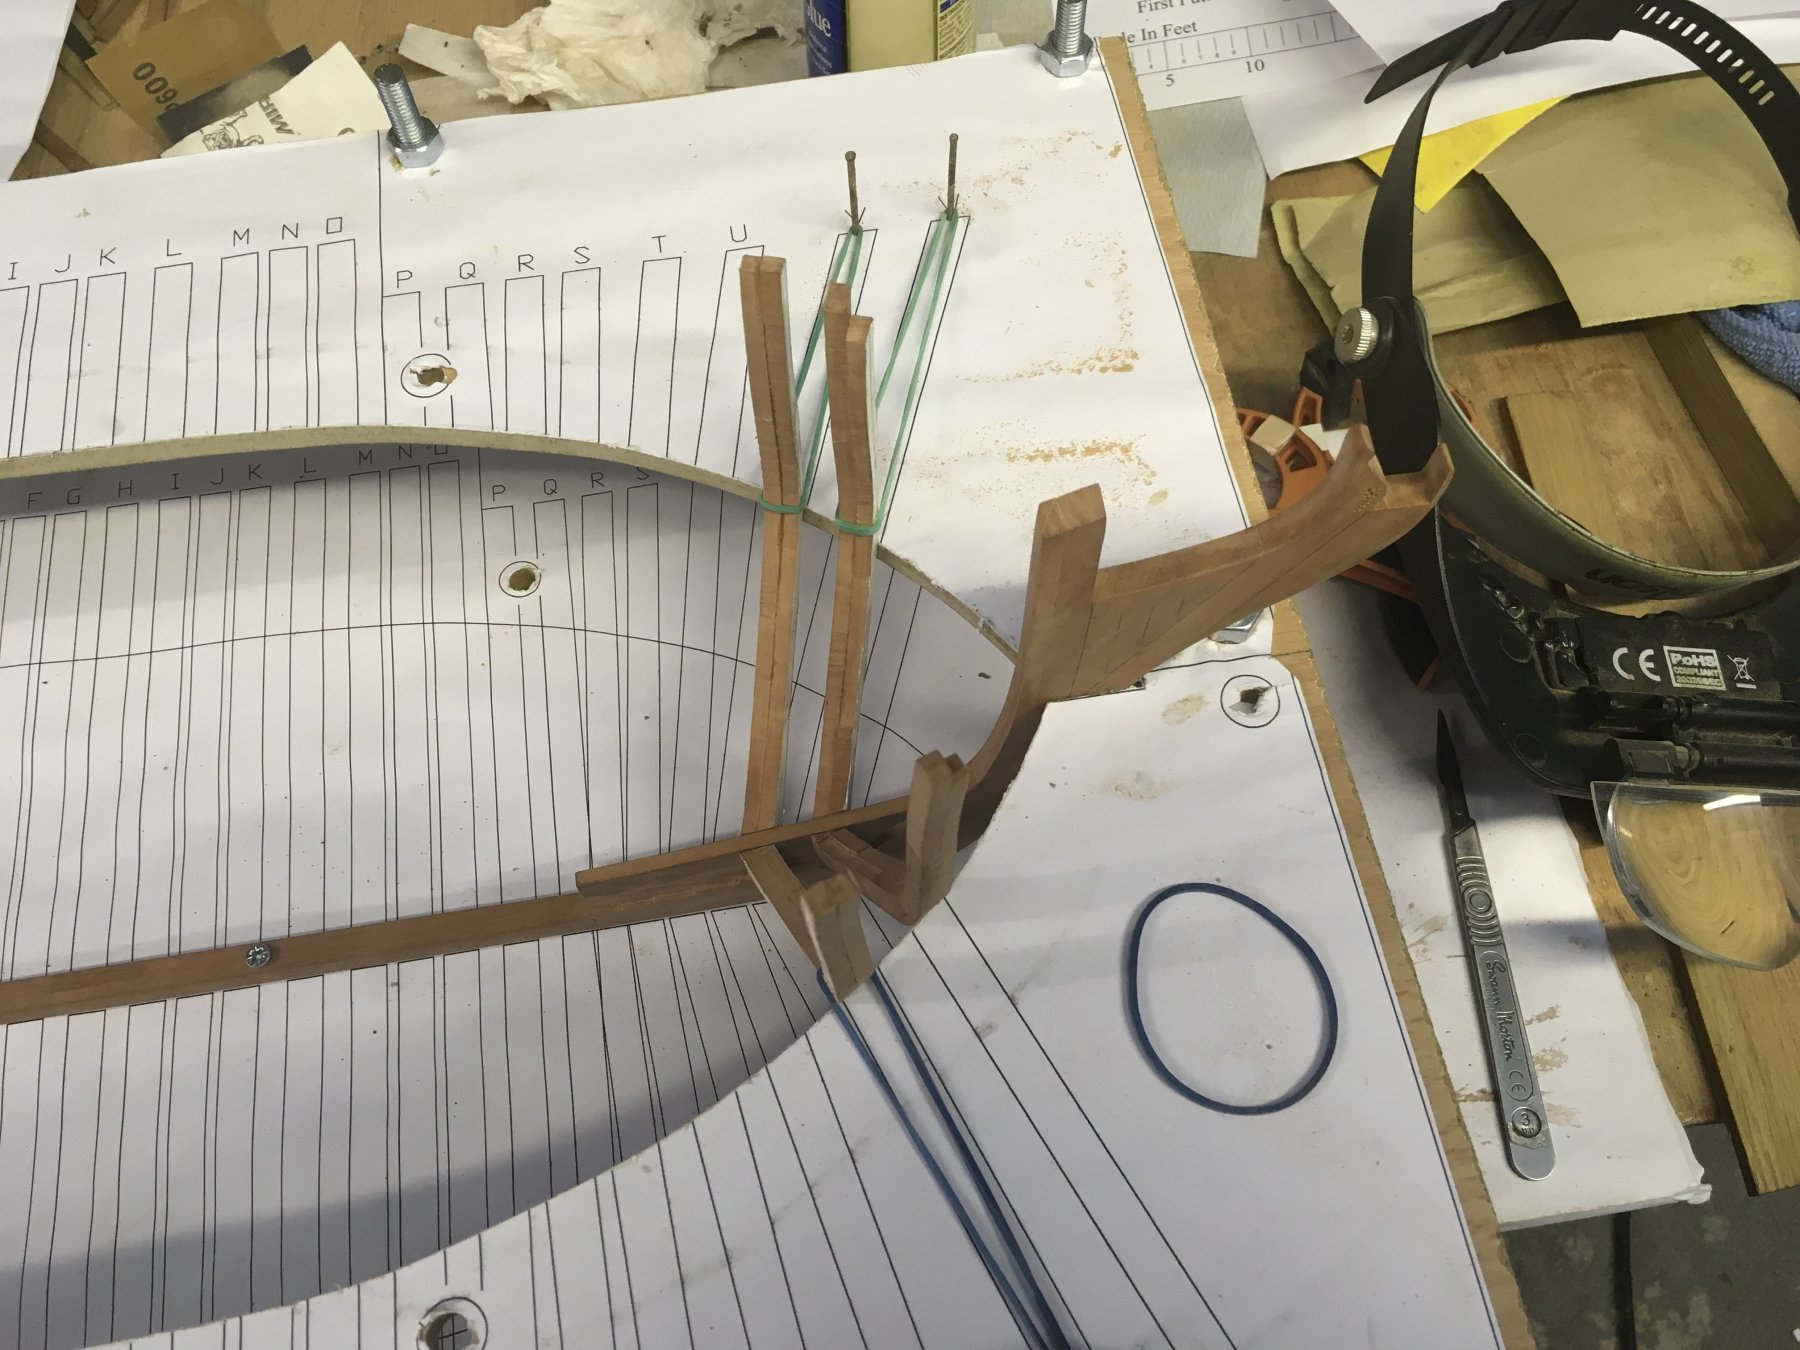
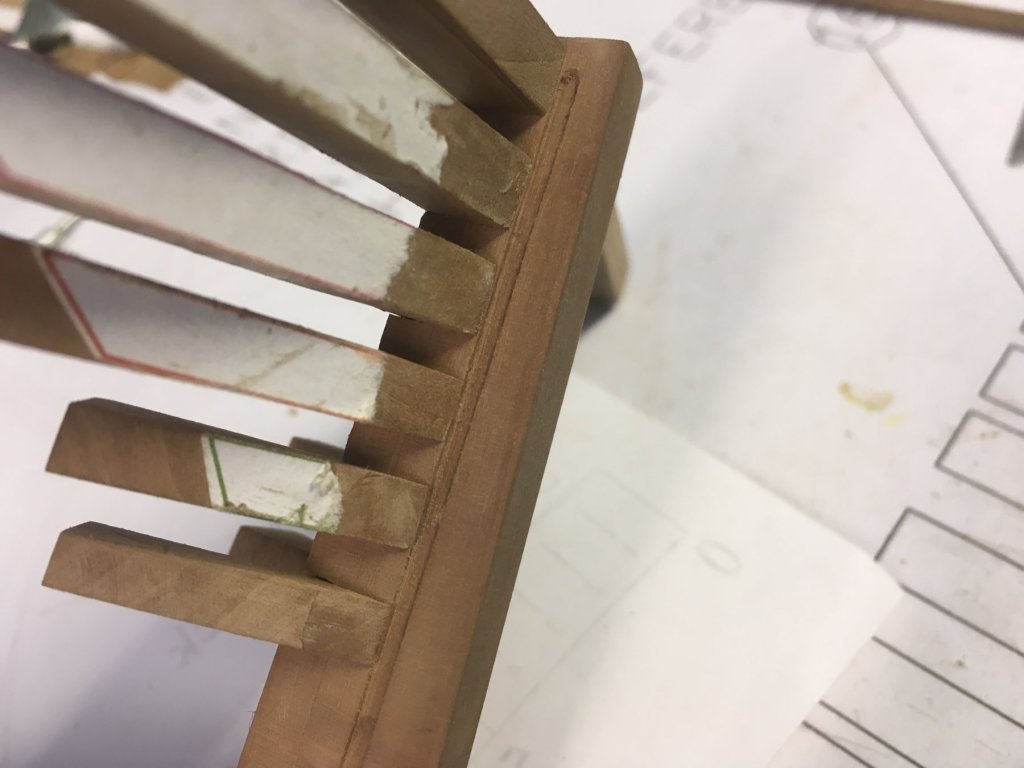
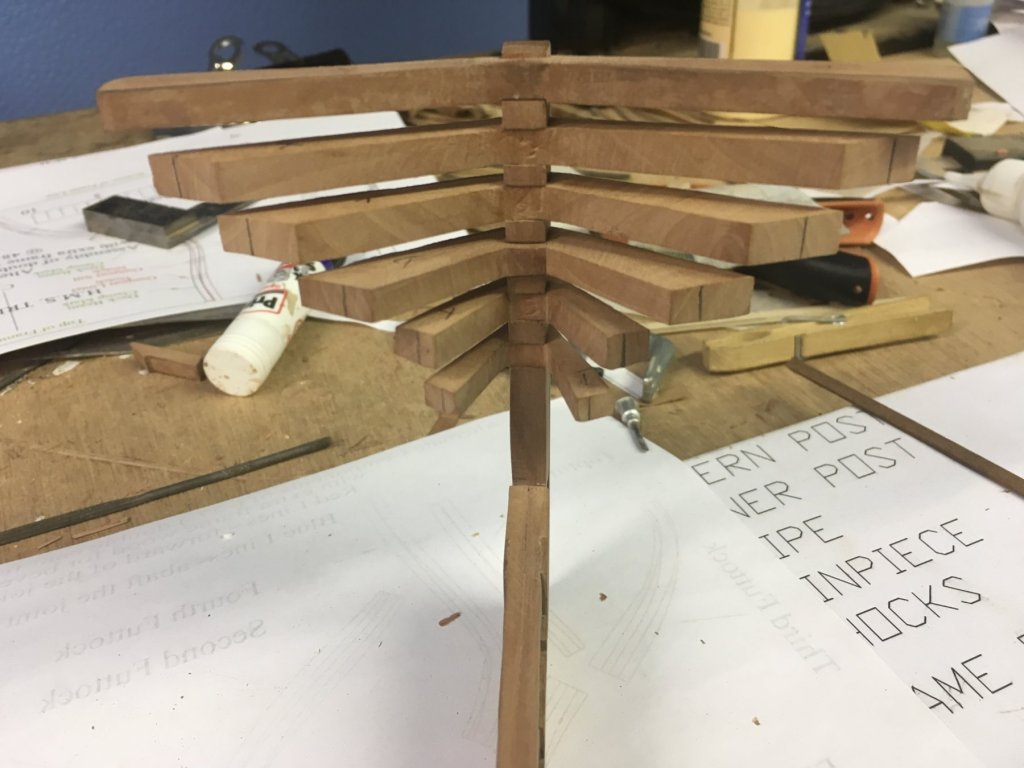
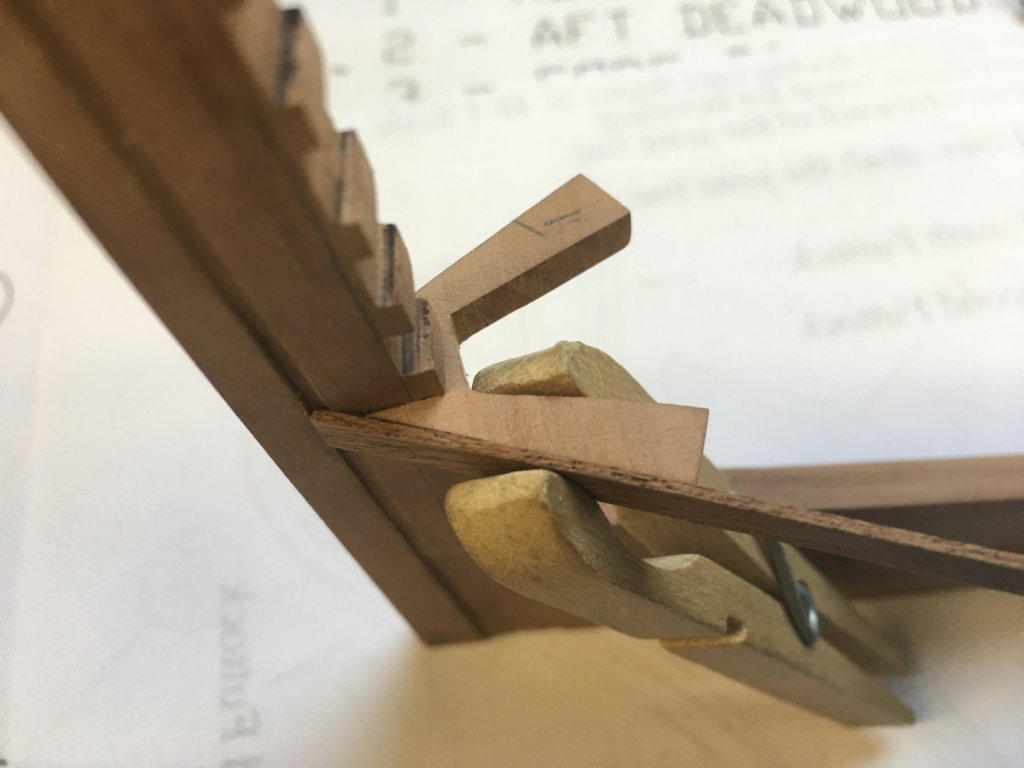
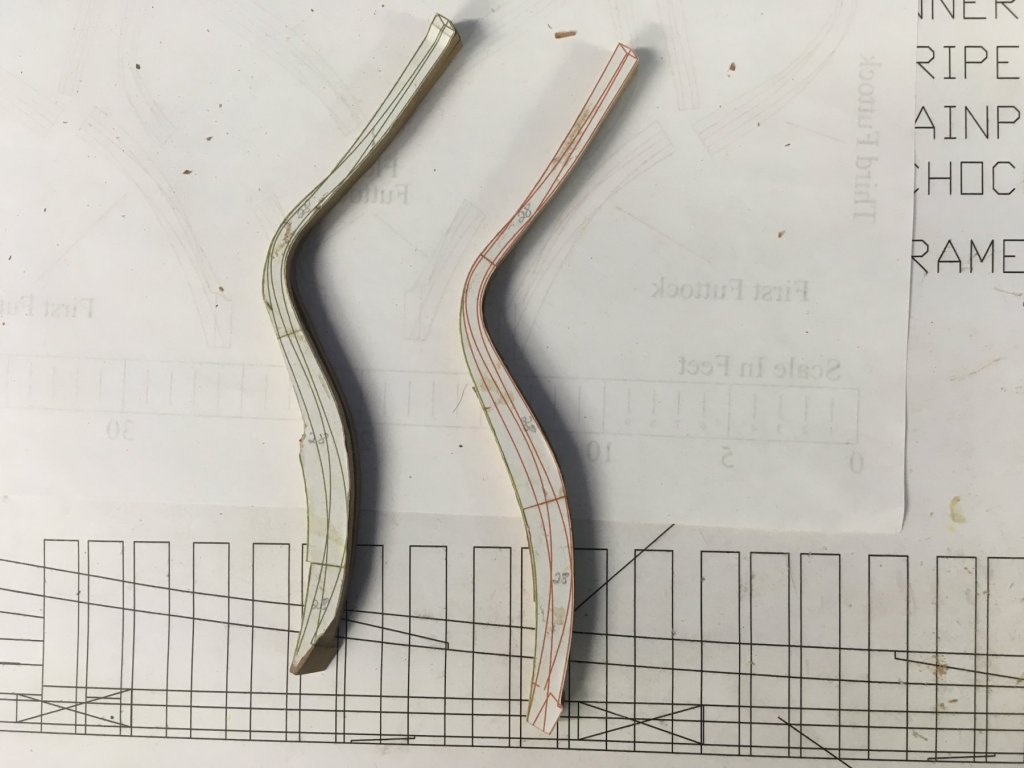
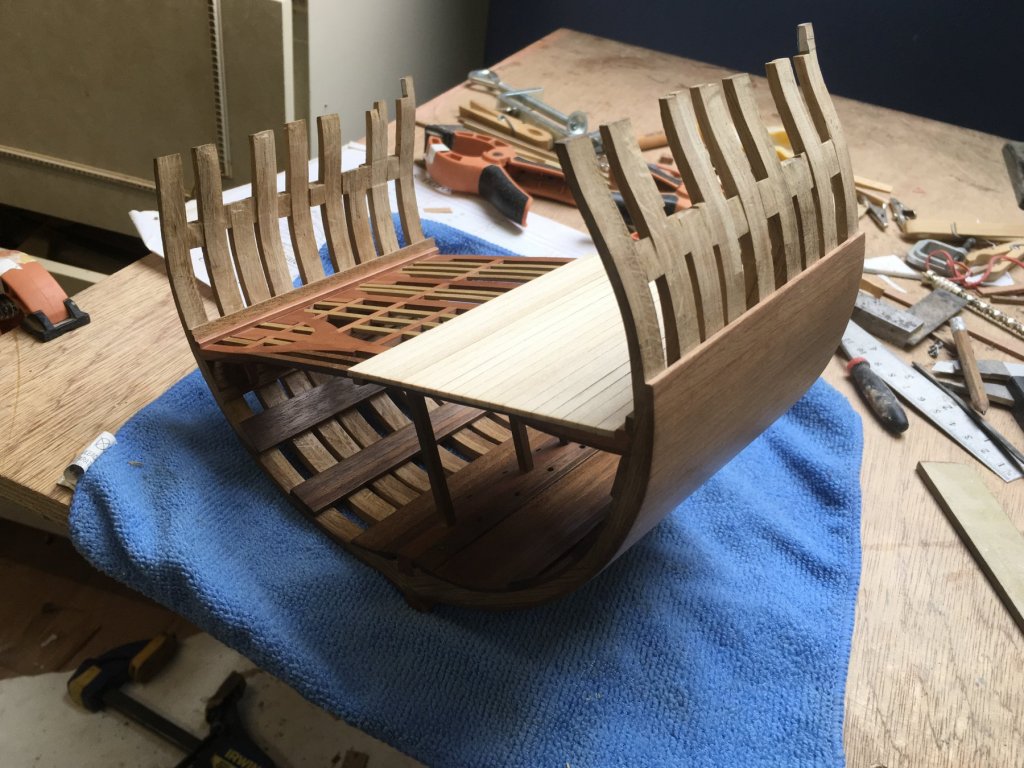
will probably need tp redo the aft deadwood piece but will wait untill i fit the cant frames just in case i need to make more changes . The fore cant frames seem to work out fairly well but the aft ones are causing me a few headaces . i get confused by all the lines and where to trim , have tried various methods , even the blue /black lines on one side and the red on the other , this got me even more confused ???. trimed them down to see if i could get my big head around it and decided the best way is to remake them and leave the triming untill i have 28 connected to the filling frames . i realise this will mean a lot of fairing but better safe than sorry . would like to add to make sure and check which color of frame goes aft and which fore as they do change from bow and stern . Have also decided to remove the top of the building frame untill i get the aft section sorted as i have difficulty seeing the fit of the cant frames ,but may replace it when doing the mid frames . Have made up the filling frames but they also will not be faired untill fitted !!


-
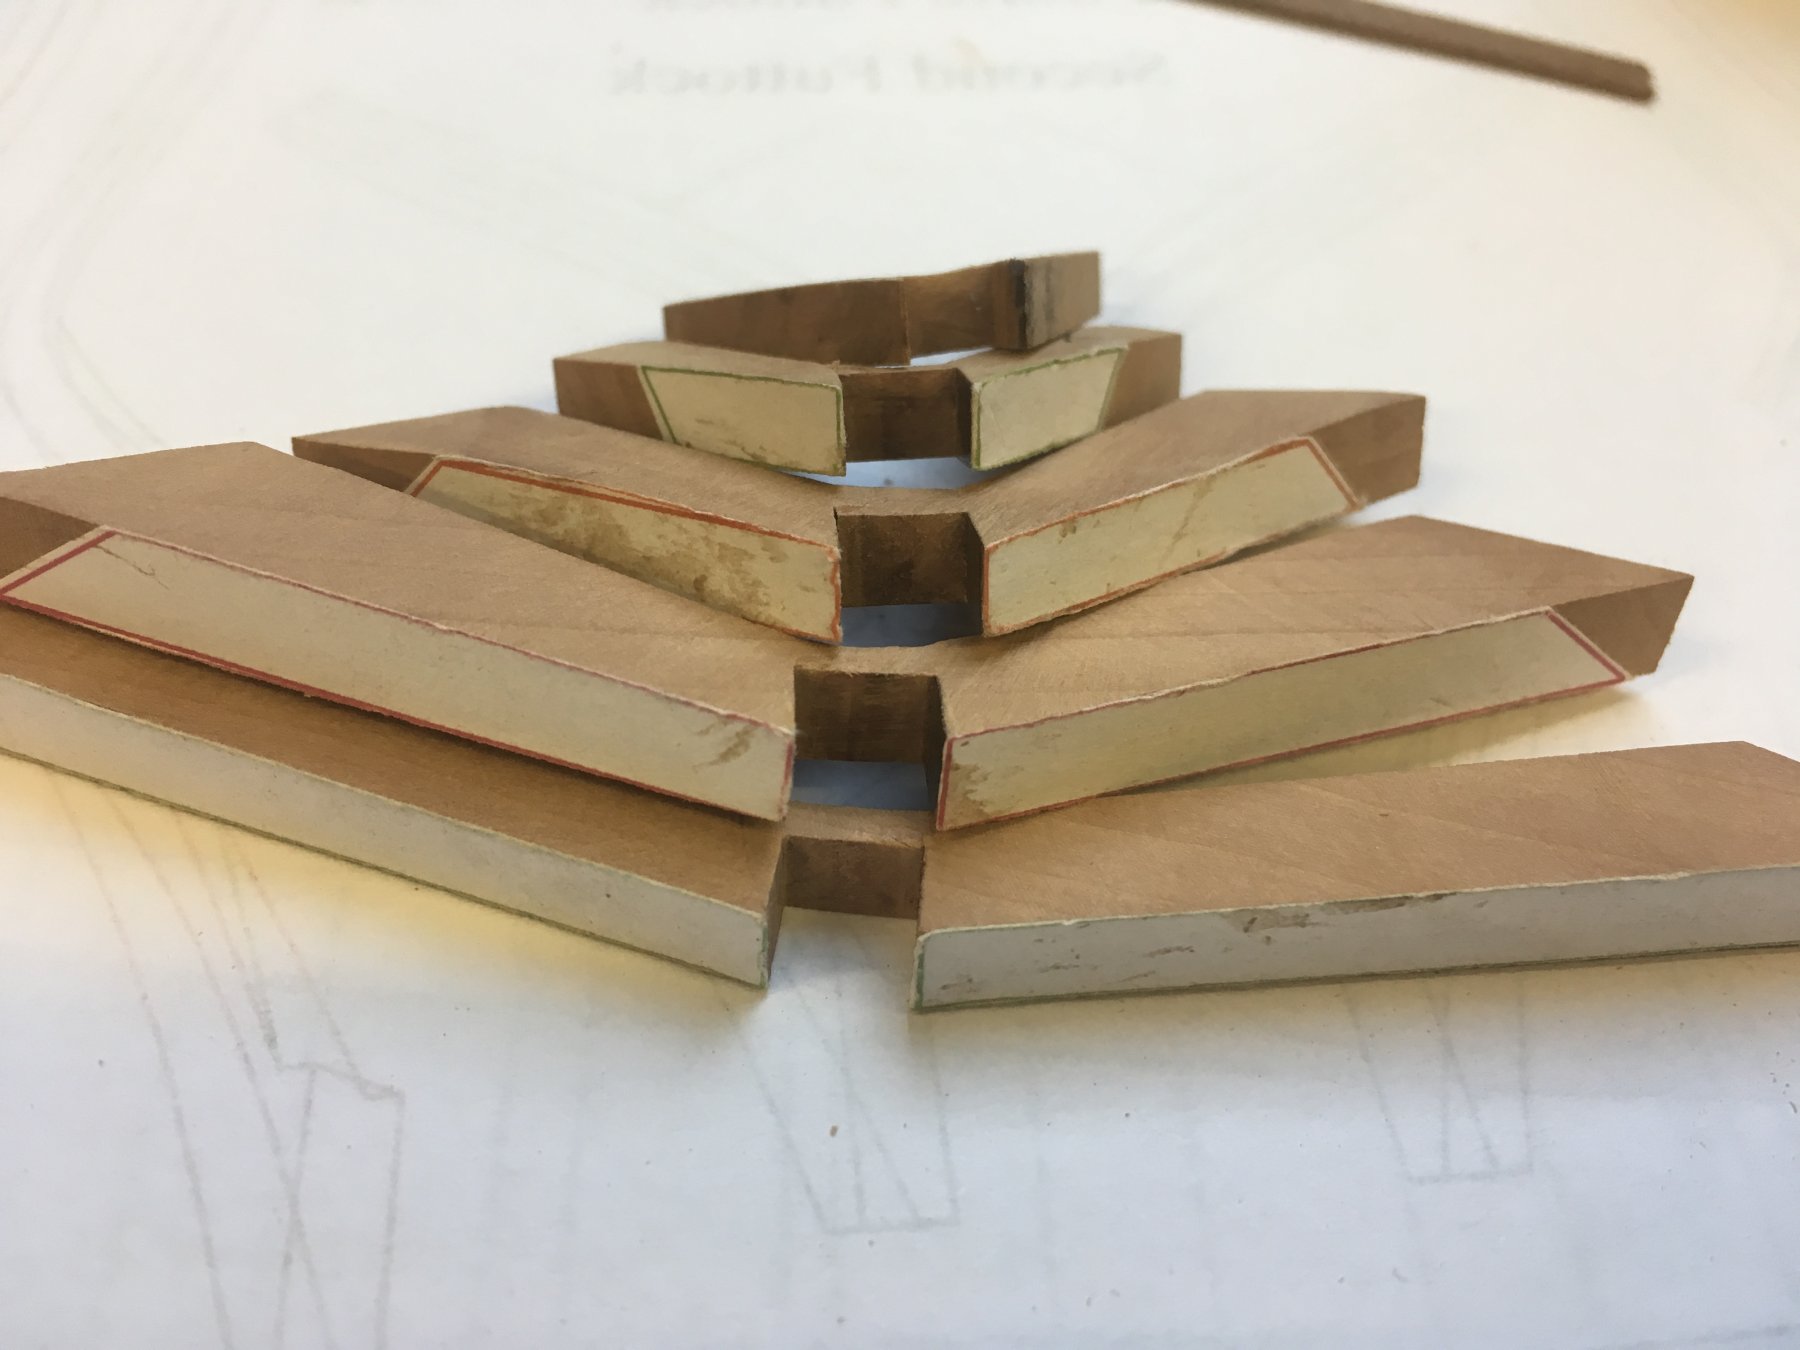
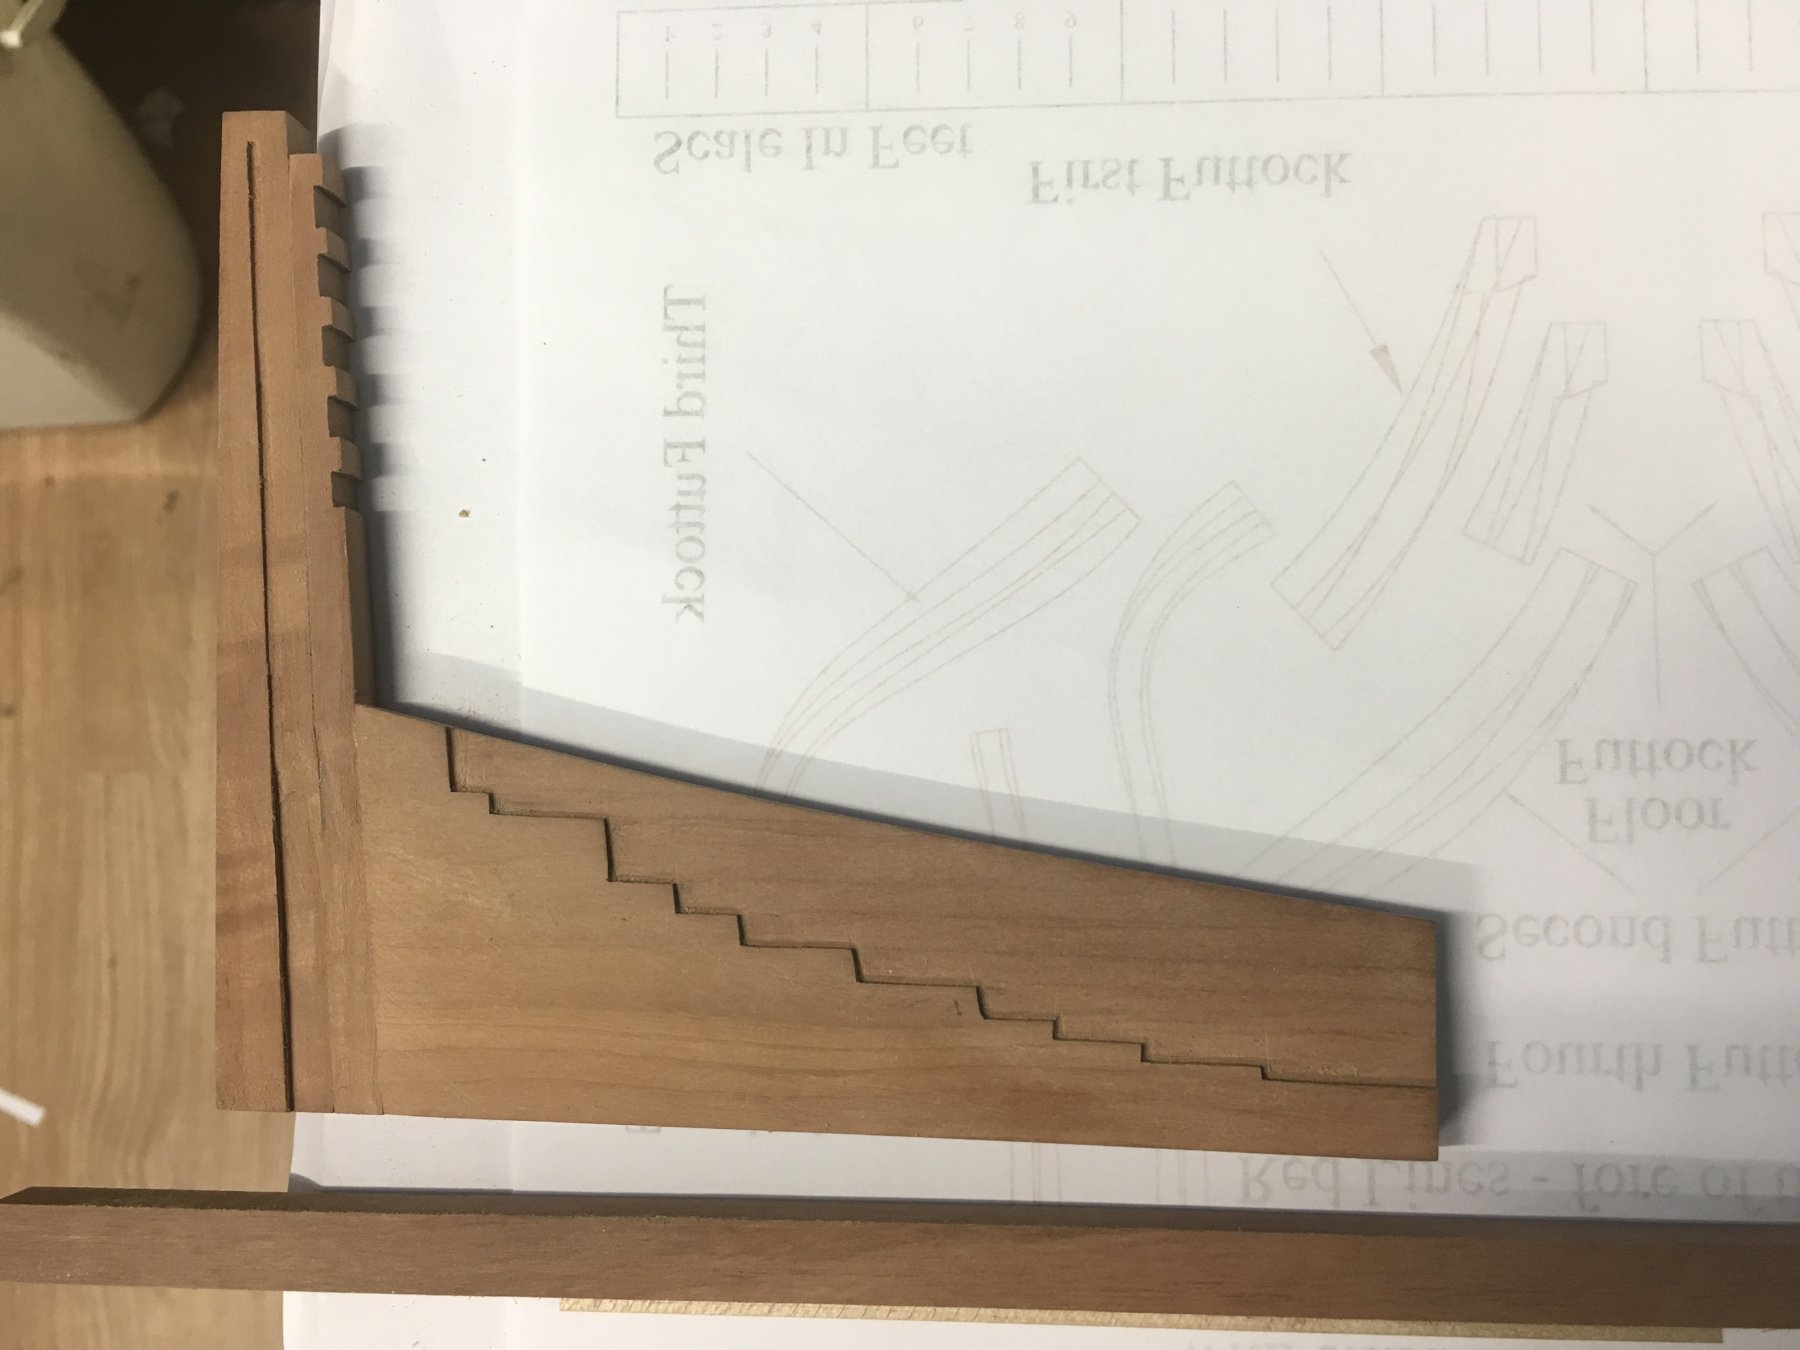
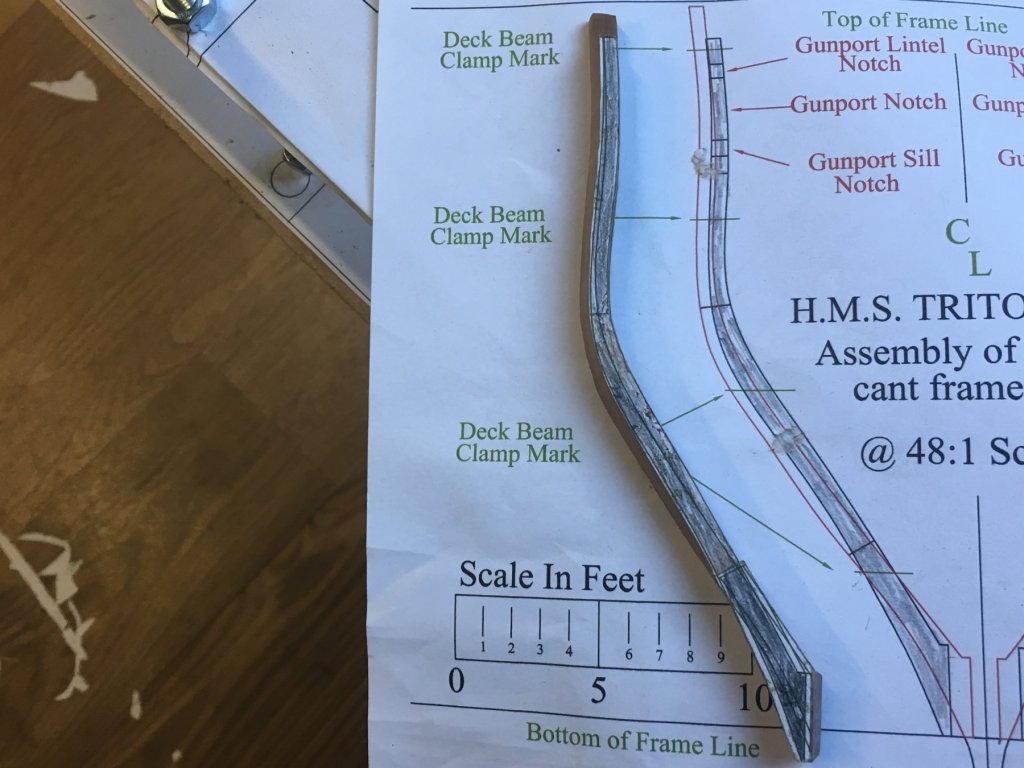
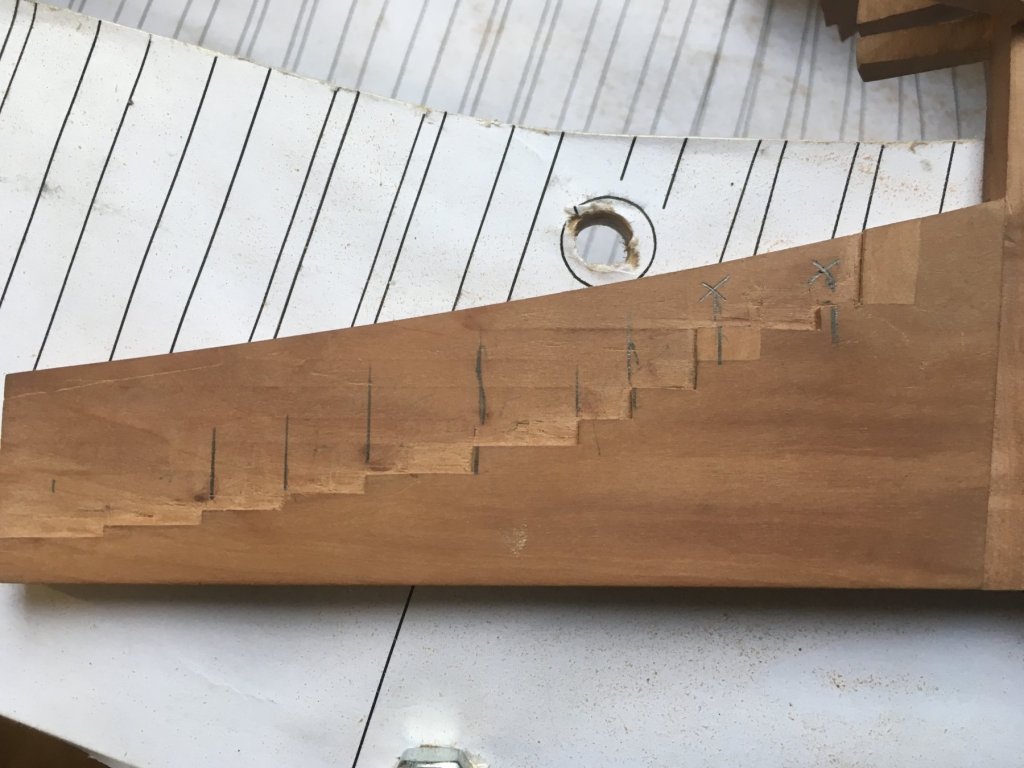
i thought i,d report on progress .. or lack of it ,, Aft deadwood , i had mentioned the possible variation on a couple of the plans ,and hoped that the Disposition of frames plan was more accurate and recut the deadwood piecs accordingly ,, Turns out it was still slightly of so finished up measuring of the baseboard plan and hope this will be more satisfactory , as u can see some of the patches need triming to suit the 3,rd measurements ?

-
If u look under . Caldercraft fittings .....Decrotive fittings .... u should find what u need ?
-
i believe he means Cornwall Model Boats . i think that was where i bought mine years ago??
-
Hi Jorge , i just thought i would return the visit , you are of to a good start and keeping everything square and straight from the beginning . i see u have a furry helper ,, usefull to calm down in times of stress . Have fun !!! Boyd .
-
Thanks Jorge , i know there is no such thing as the perfect model , not for me anyway and yes i will certainly try out all the strange idea,s i think up and t hen probably go back to the original plans ???? The main hull will be Pear , not sure yet about the internal stuff . Boyd.
-
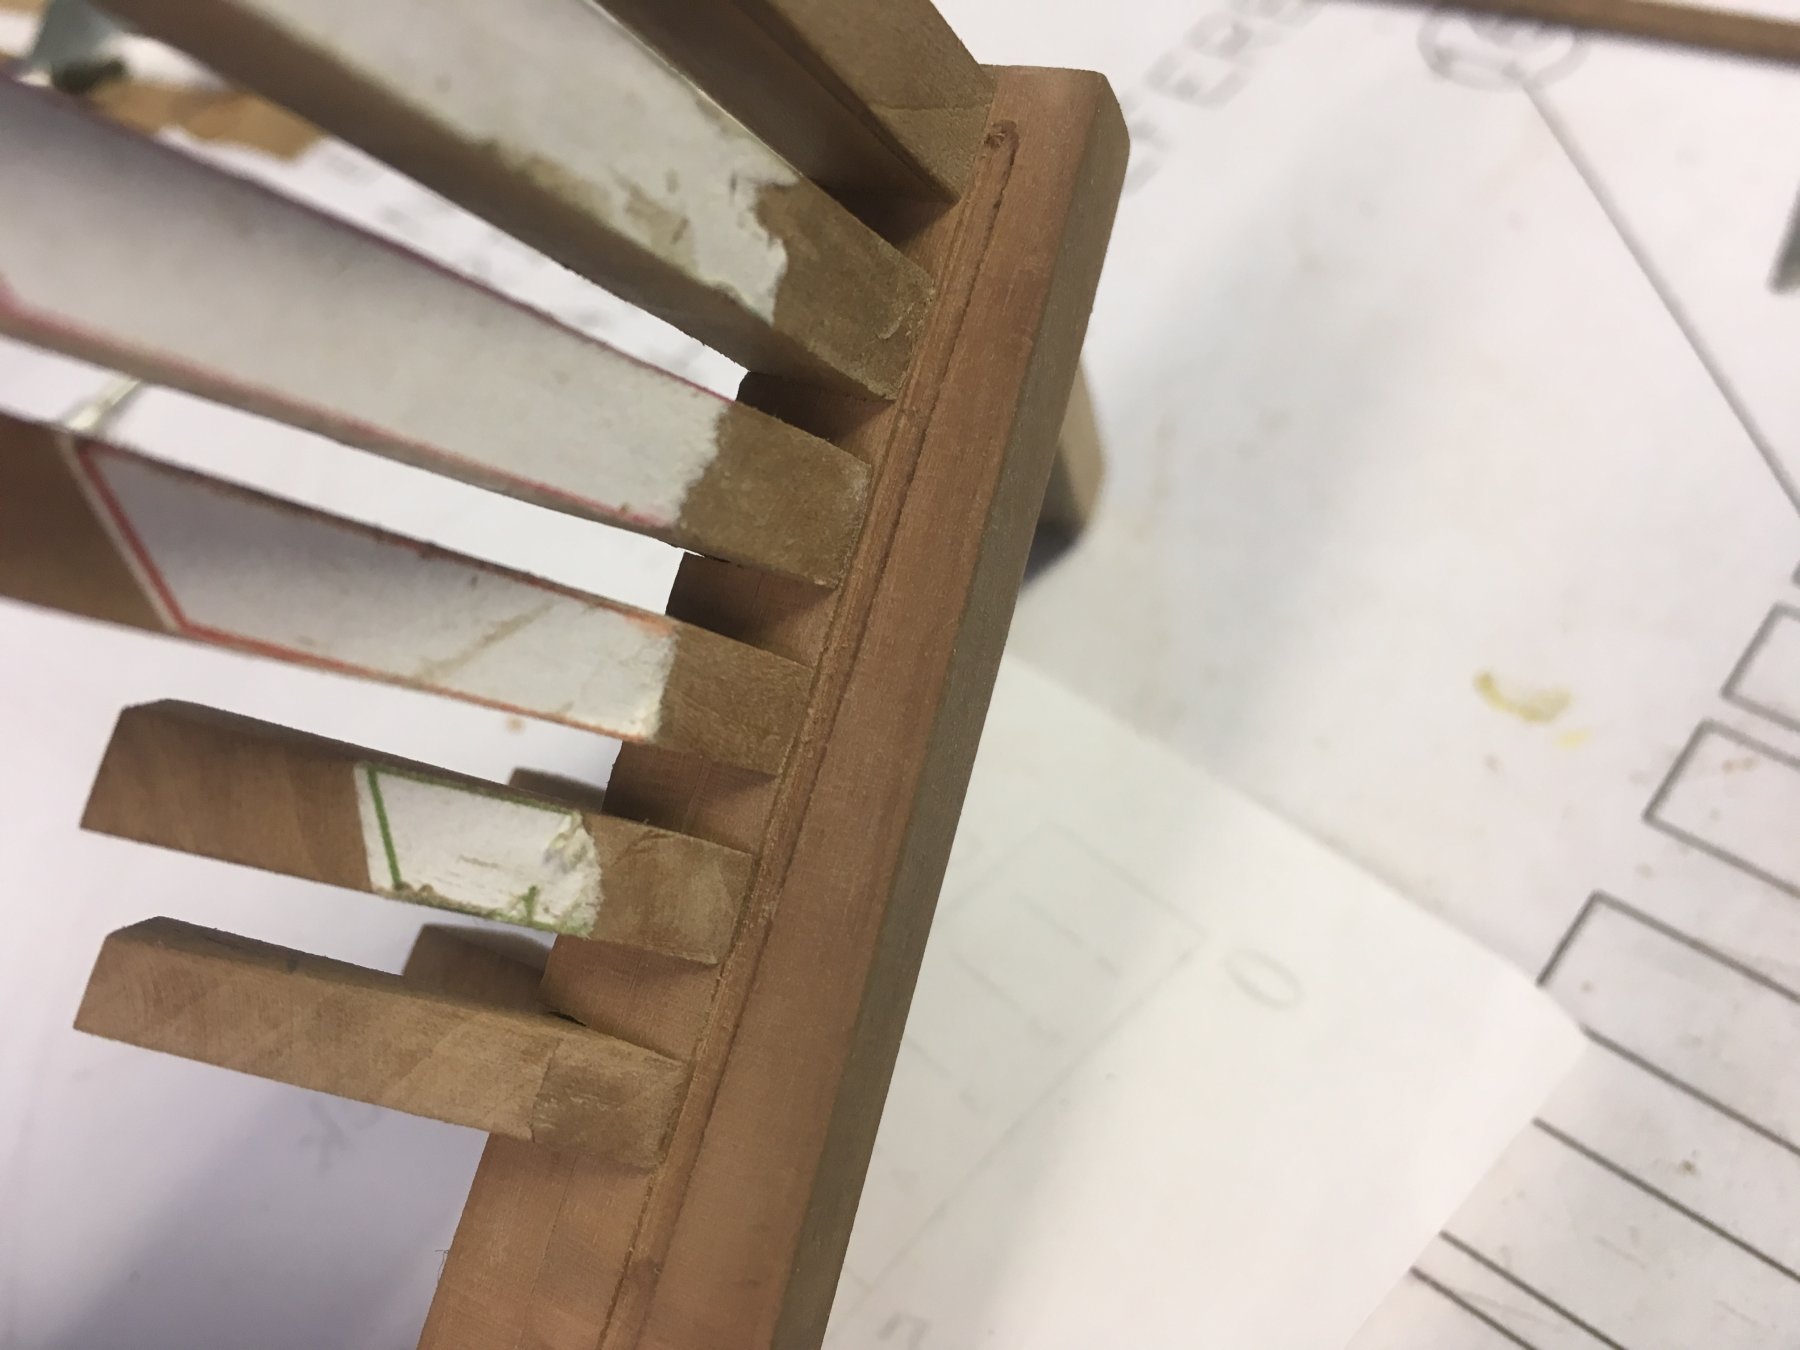
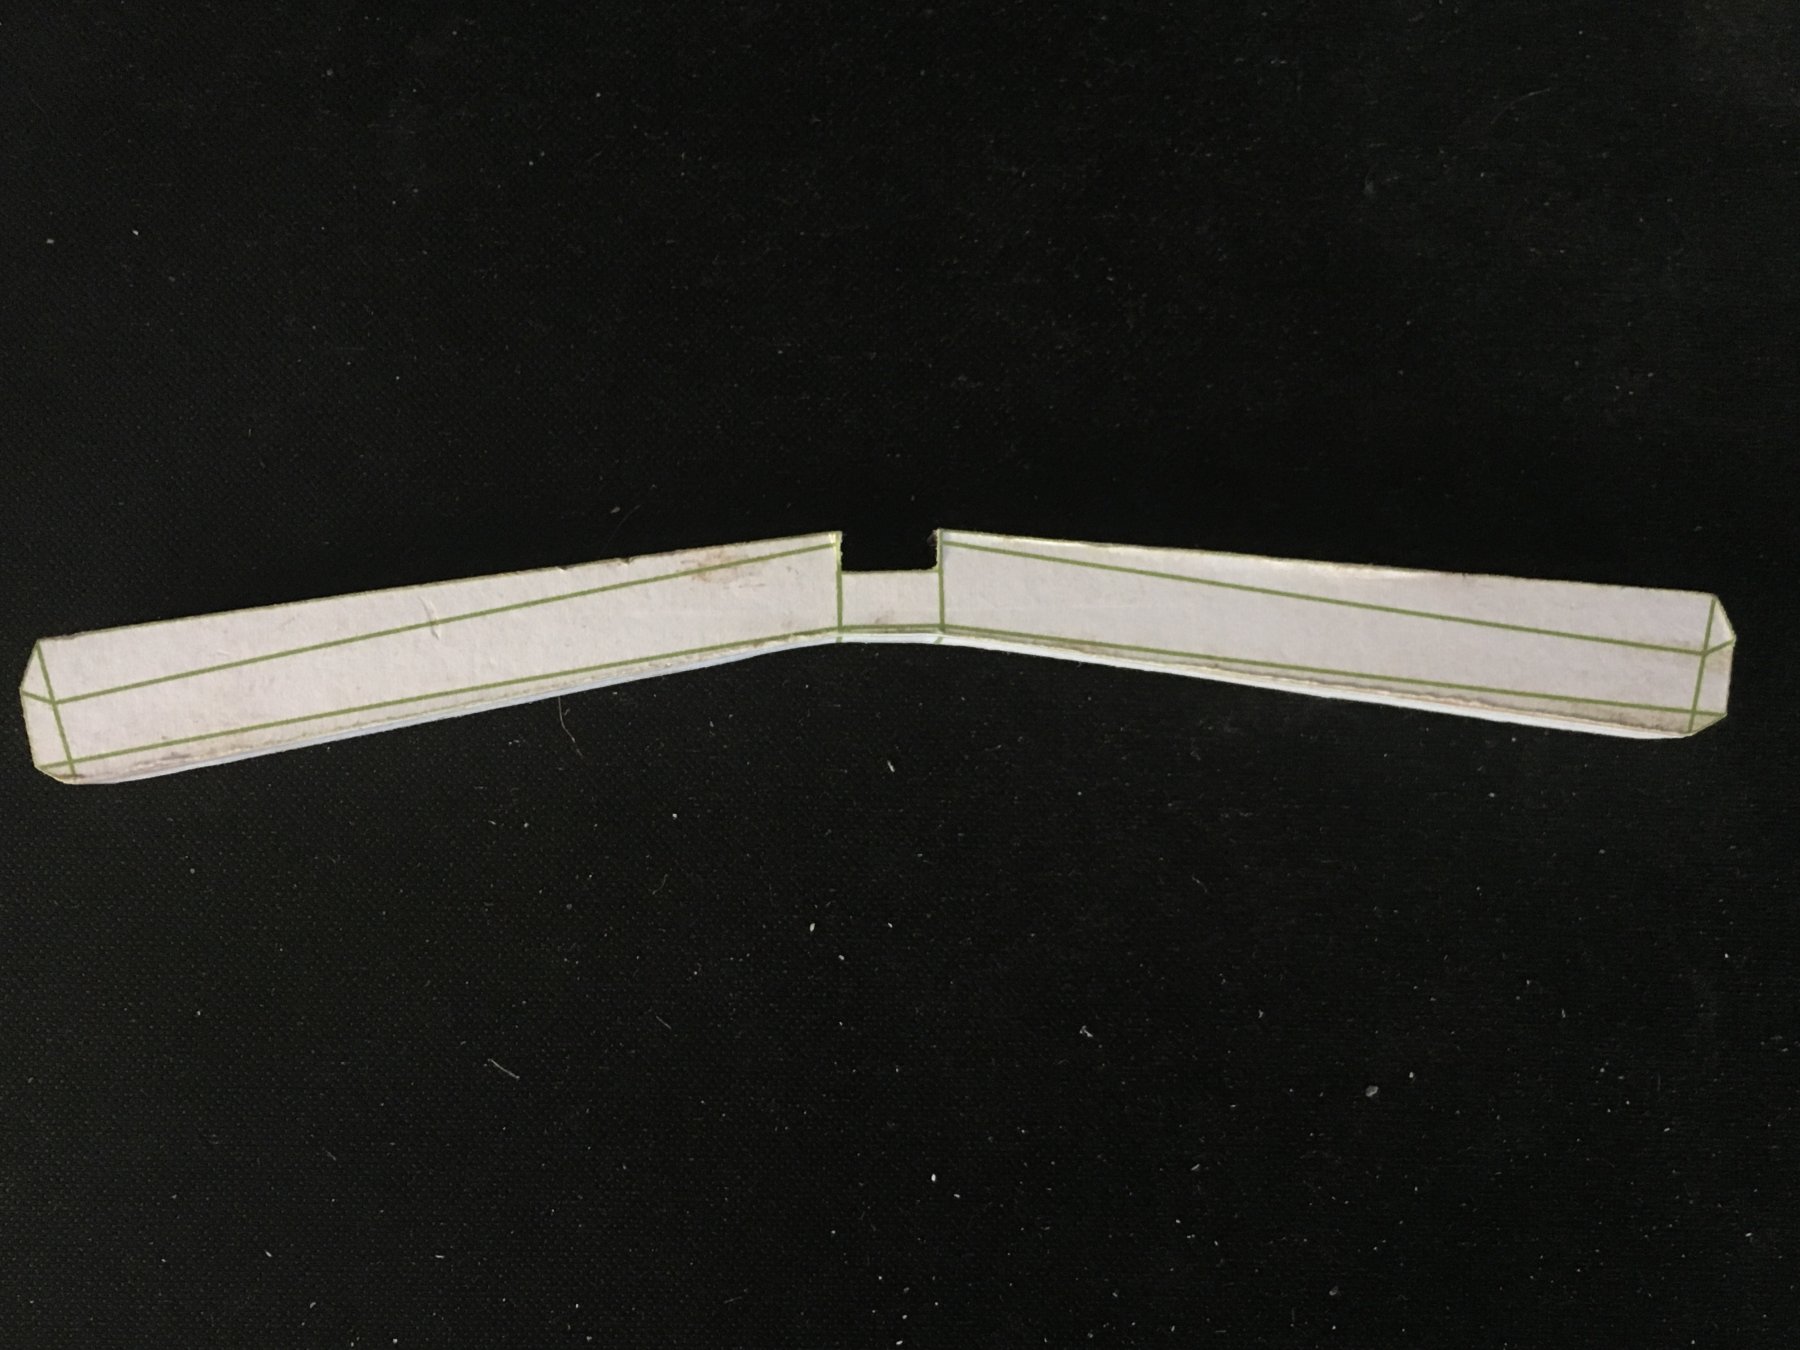
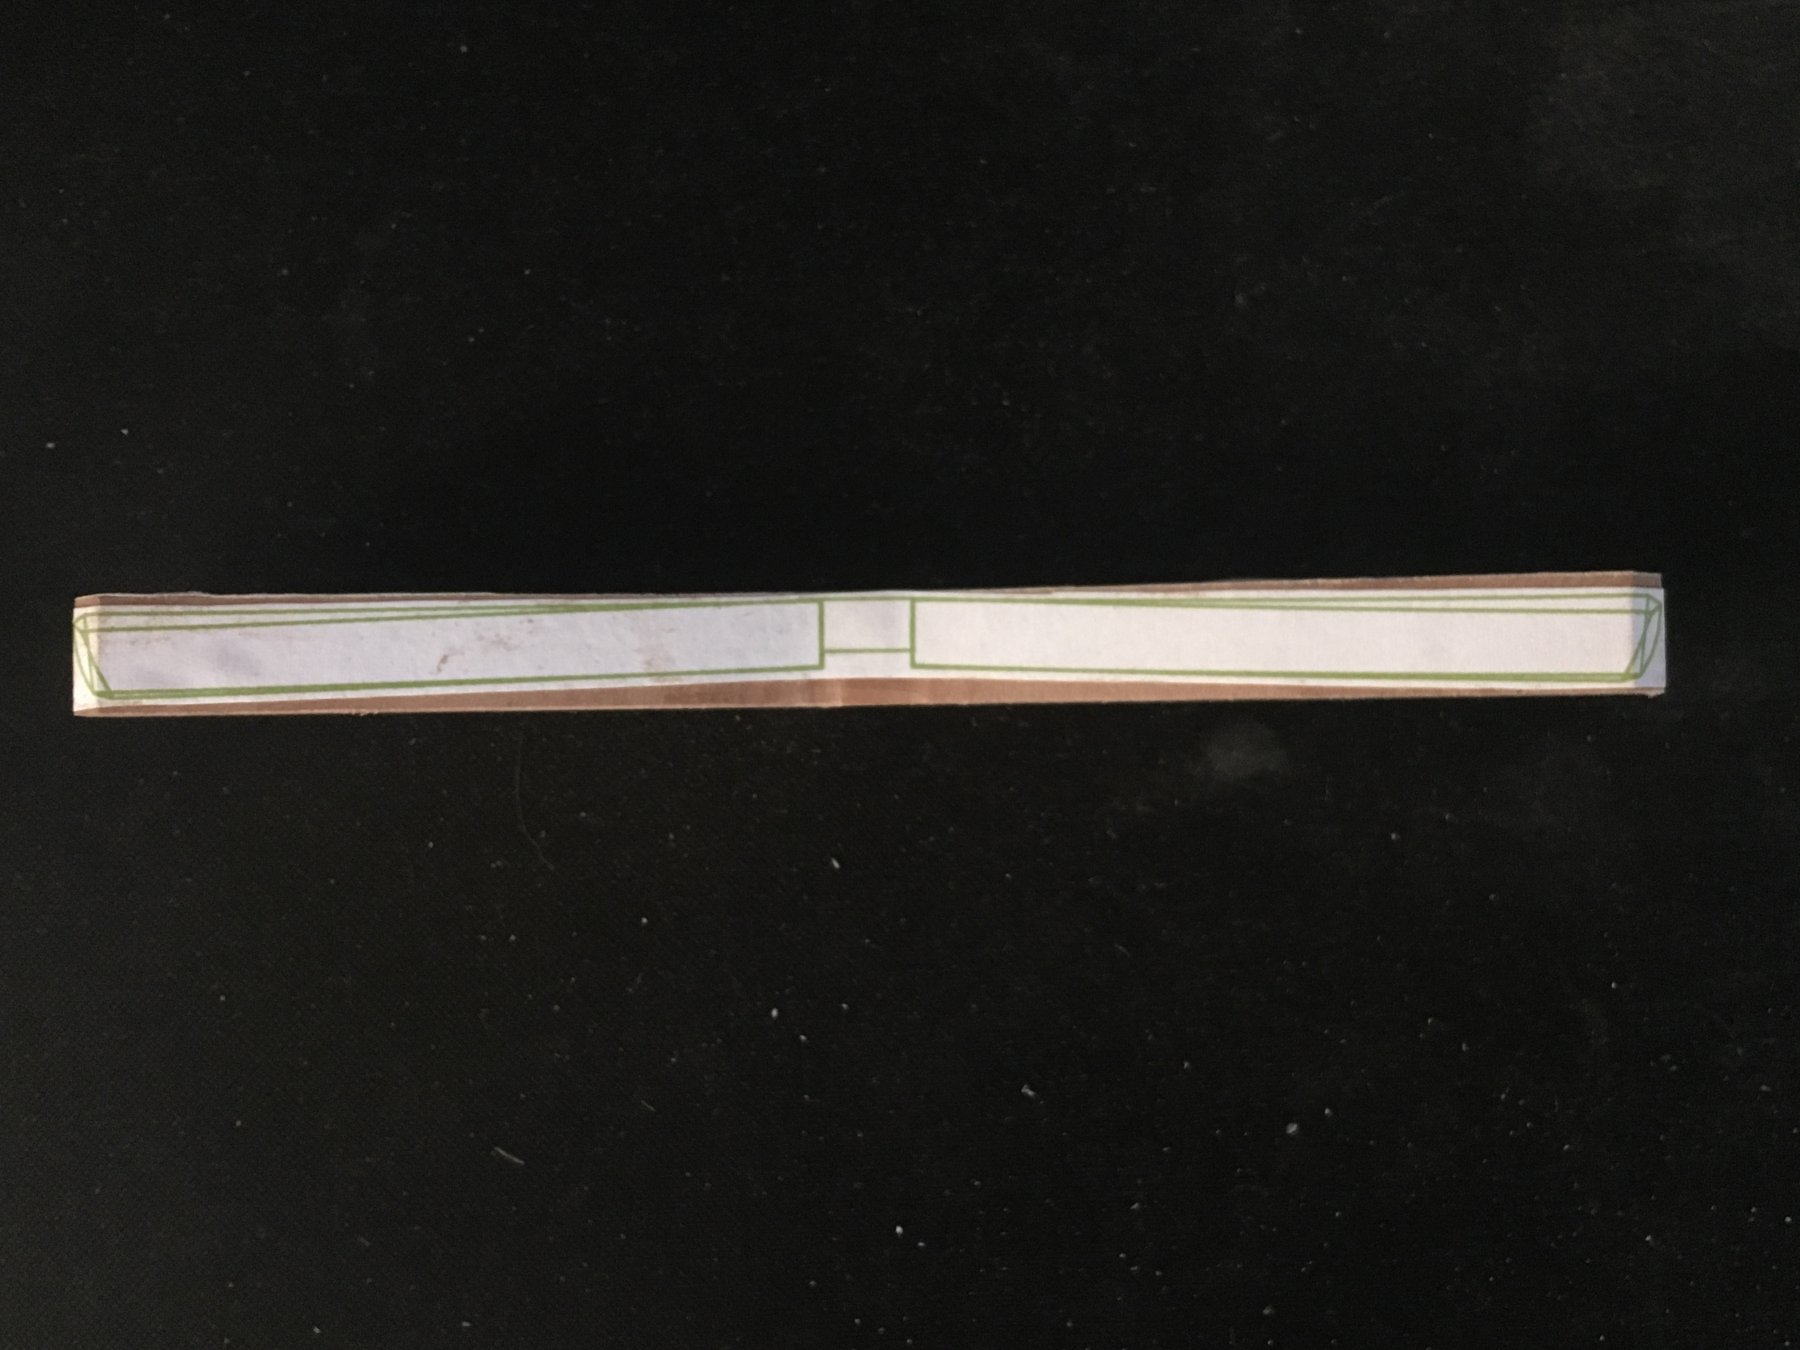
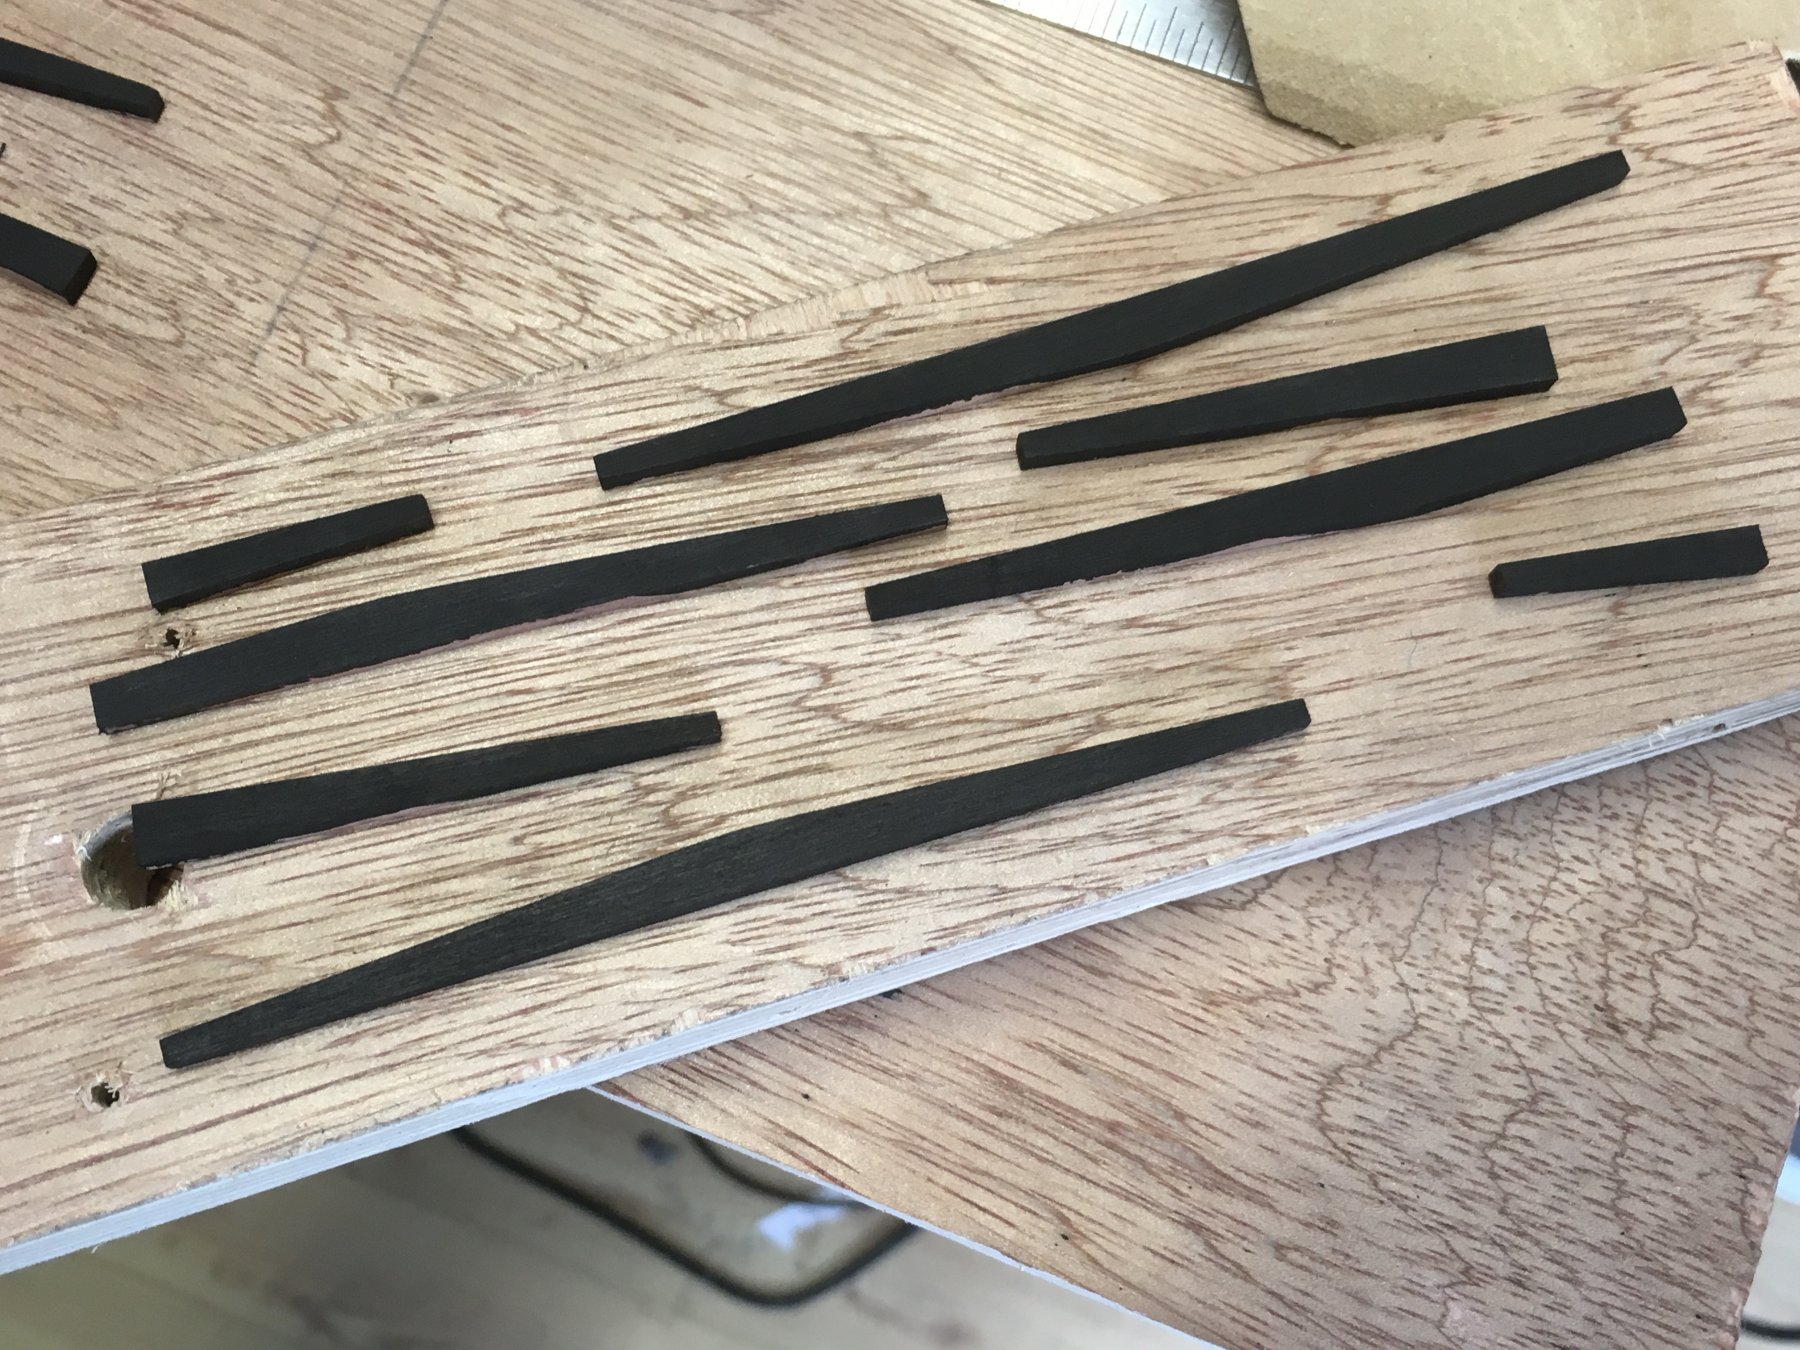
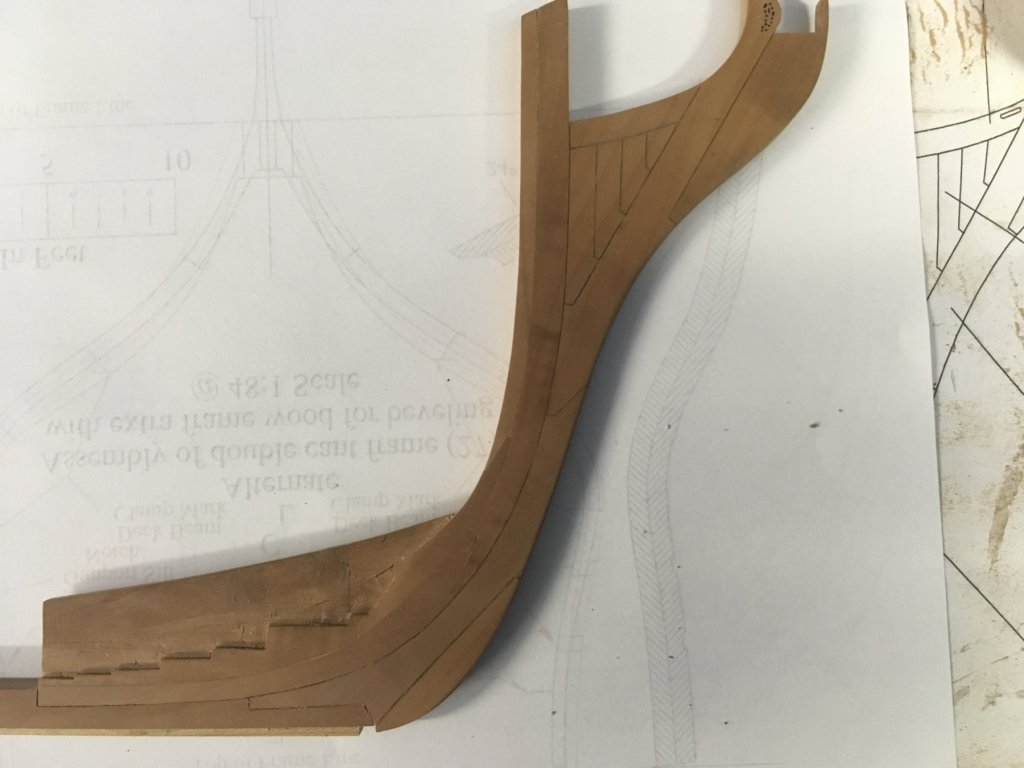
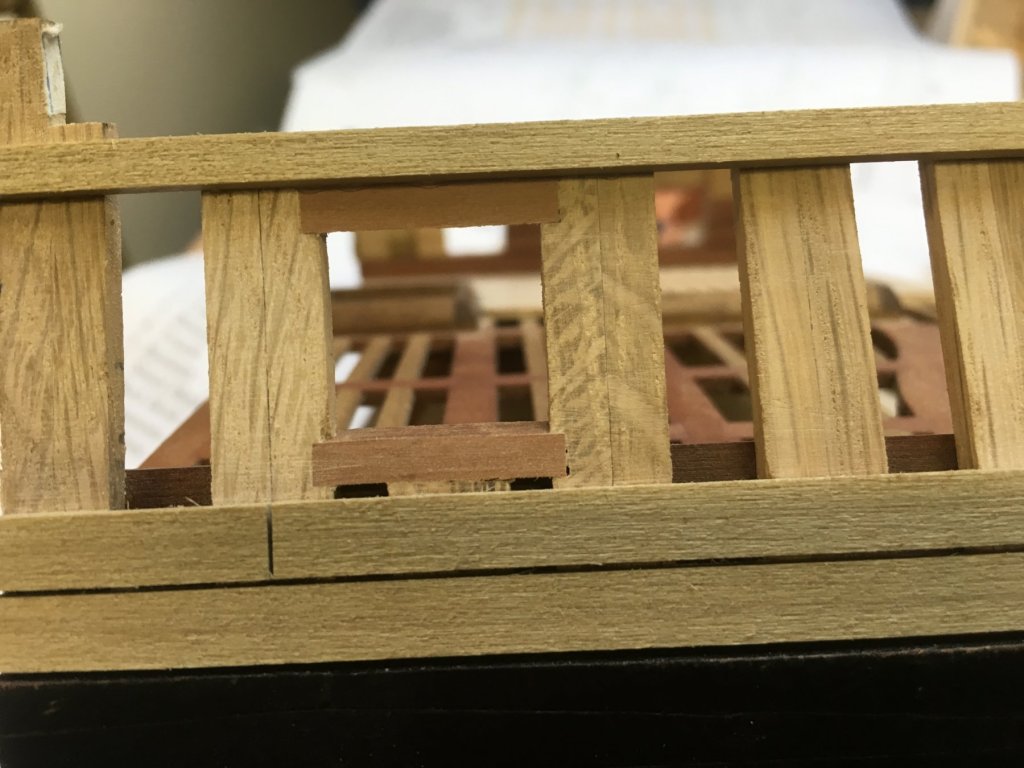
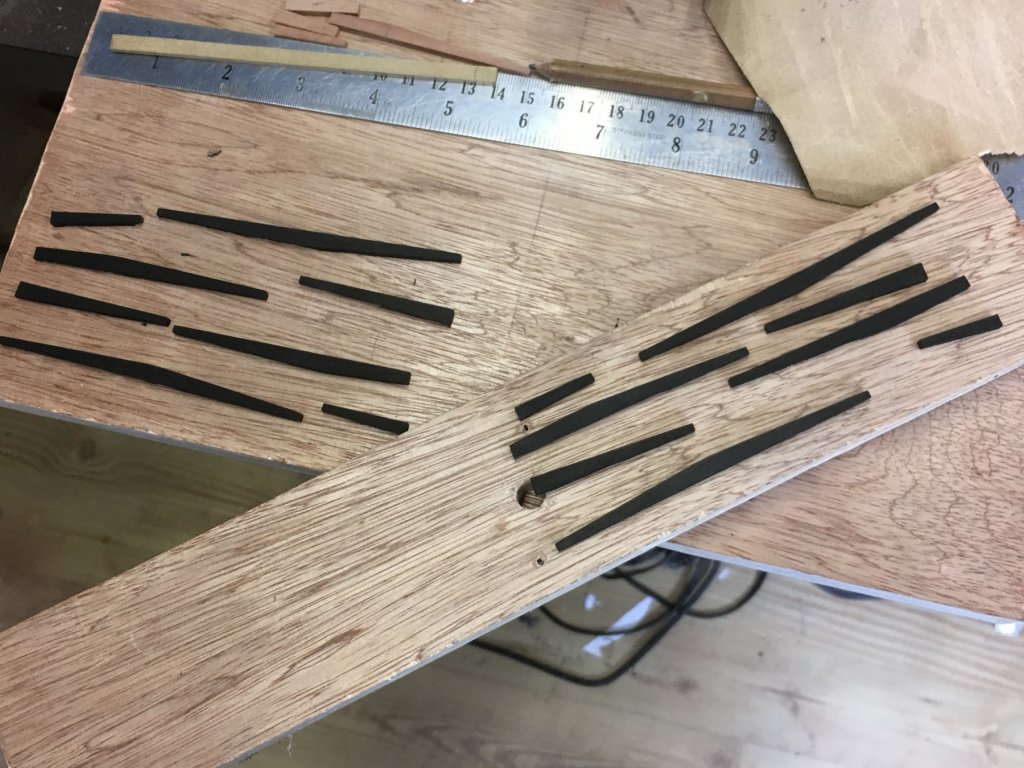
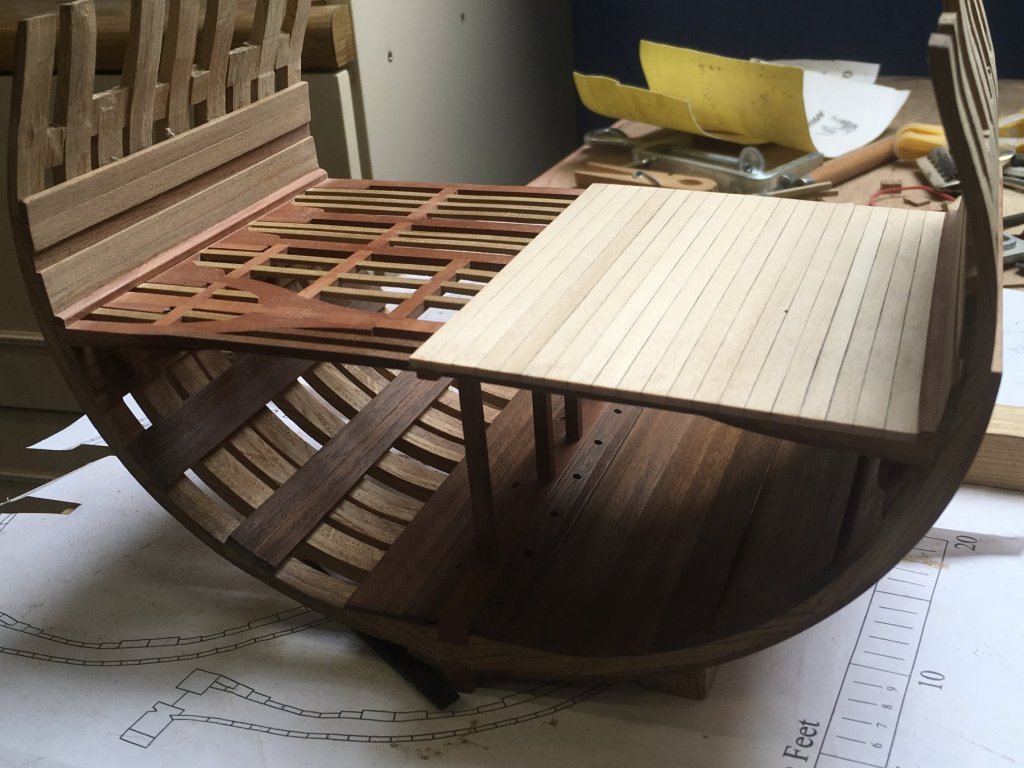
My first few weeks of this build have raised quite a few questions , some of which i have figured out , i think , but some are still bothering me so if i can raise a few queries without sounding completely stupid it may help me to get some things straight in my big head ?? I should point out that i build for the overall look and therefore may cut a few corners , i was never a fan of treenailing or simulating every bolthead but may yet consider either or both as i proceed . I also find myself lookin for simpler ways to achieve the look i want , a good example of this is shown in the last pic where most of the bow section is made from 2 pieces of wood and the caulking simulated by scribing and filling with a dark wood filler ,, i intend doing the same on the keel ,although most of the joints will not be seen anyway ? Now to my first question ....The stern deadwood again i made from a single piece and measured as accurate as possible from the keel plan but on double checking on the lines on the build board the groves for the cant frames do not appear to be correct , however the measurement s on the Disposition of Frames plan appear to be more in line ,should i go by this plan instead or am i missing something . I noticed in a few of the other build logs this also appeared to be a problem but no one explained the conclussion ??? Next .. i have been thinking about making the frames from a single piece or rather two pieces with a scarf joint above the keel . however i read in some of the logs that these plans are not suitable for a single , would it be safe to assume that the most of the mid frames would be suitable even if the cant frames are not , main reason i ask is i need to order wood and find if easier to order cut to size . Enough for to-nite ,thanks in advance to anyone who can shed some lite on my queries .
-
Hi all .As promised in my section log i have decided to give the full Triton build a try and have spent the last month or so trying out a few things to see how to proceed . This time i am going for the measure , measure and measure again approach as there will be a lot of time (years probably ) invested in this project i figure i should start as i mean to go on and try to do as good a job as i can . I have only built a couple of kits and my last the Victory i finished up scratch building the most of it anyway so i thought why not go for it and try a complete scratch build ,plus i find the look of a fully framed hull without planking and showing all the inner construction so much more appealing , some of the builds on here are truly amazing . I may be dreaming but if i don,t try i will never know what my limits are ? I see from the build logs that very few have finished this build and i can understand why , this is a very big commitment and i hope i will be able to finish eventually but time will tell ! My experience with the Triton section taught me quite a lot but probably the main thing was the difference in woods , yes , i have discovered PEAR !!!! , a vast change from the kit supplied woods and for that reason most of this build will probably be pear , but it,s early days yet and anyone who knows me know things may change ??? A few pics of progress so far


-
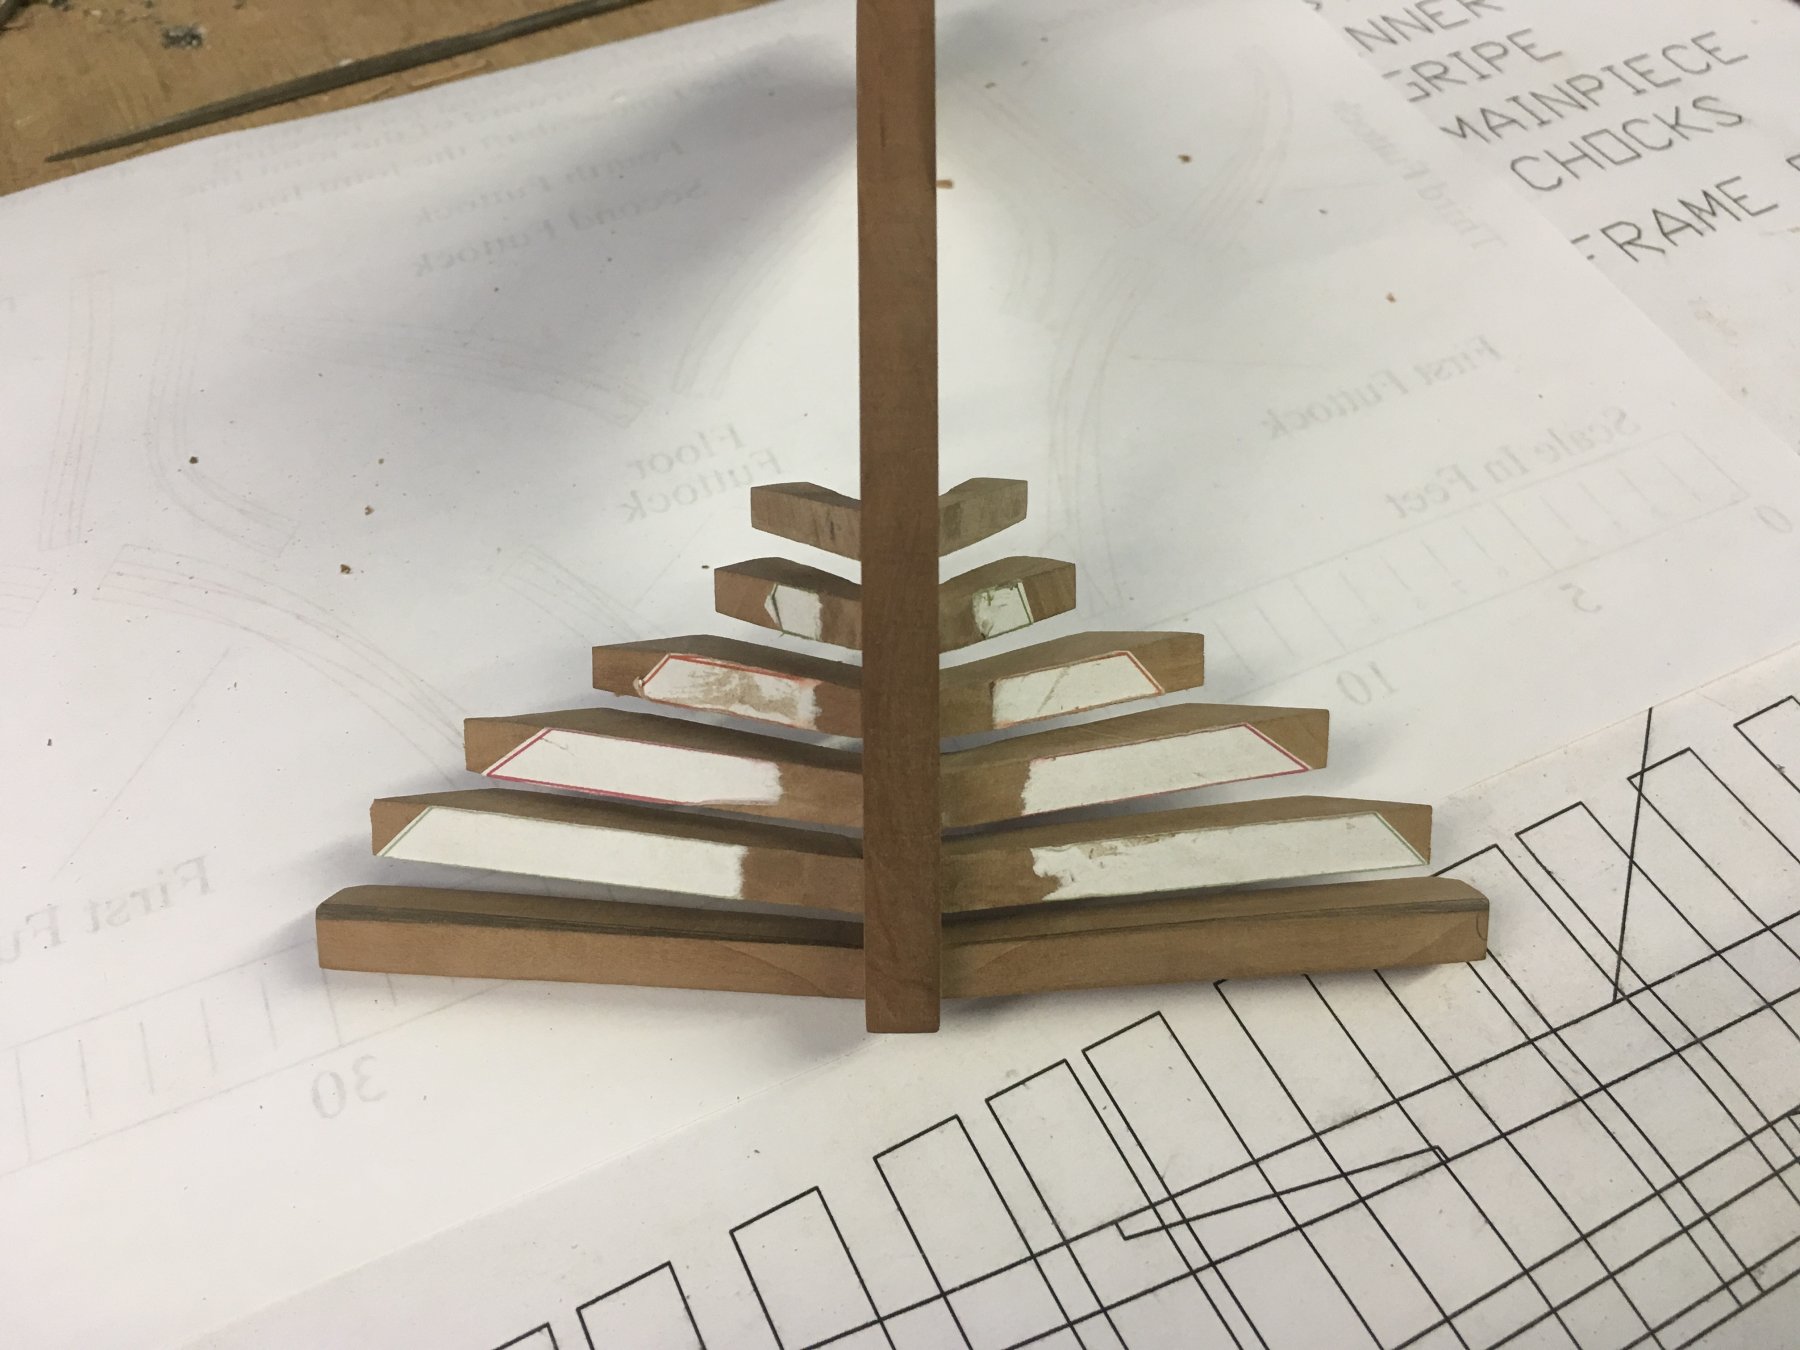
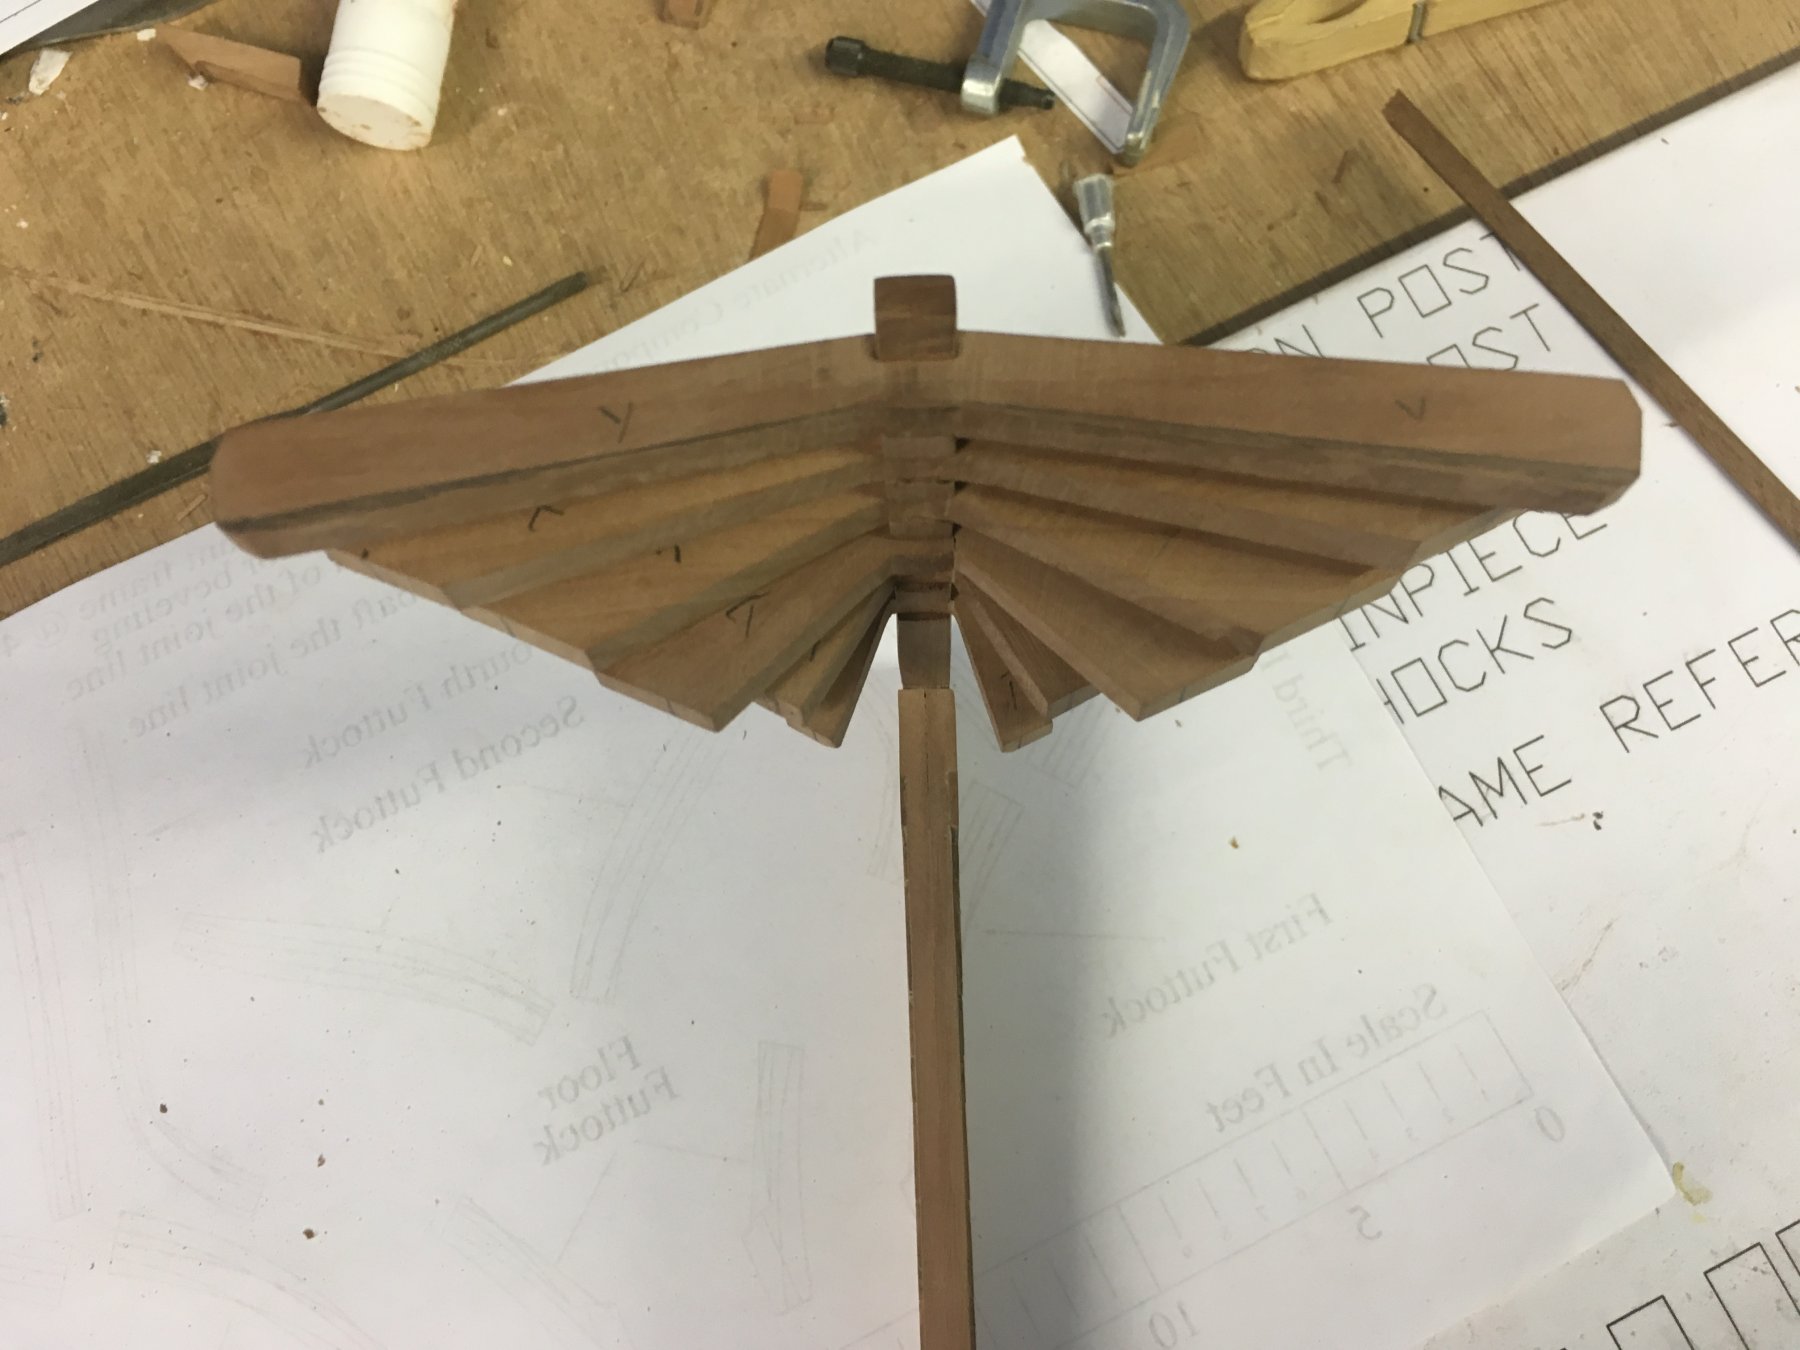
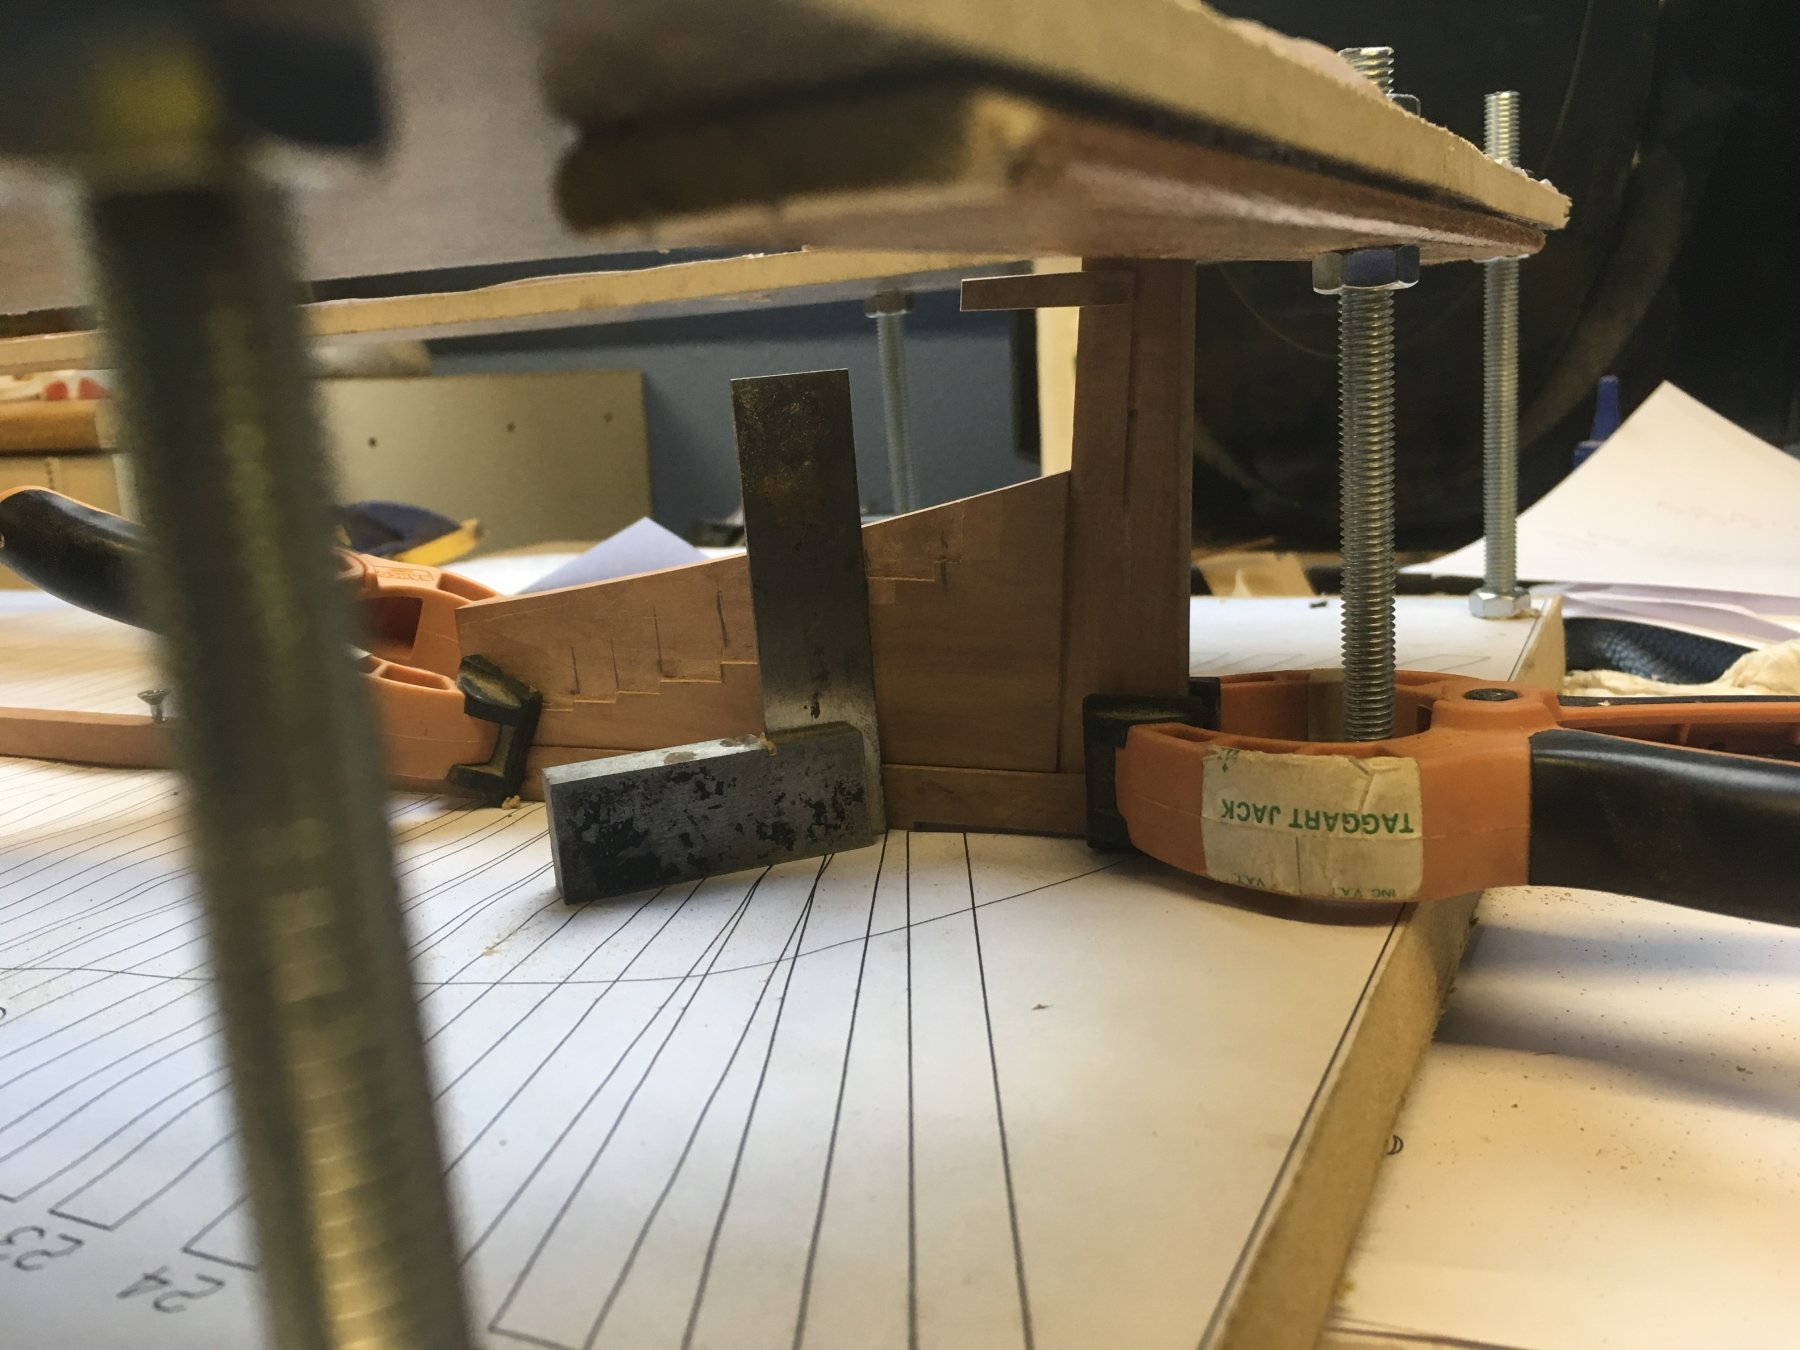
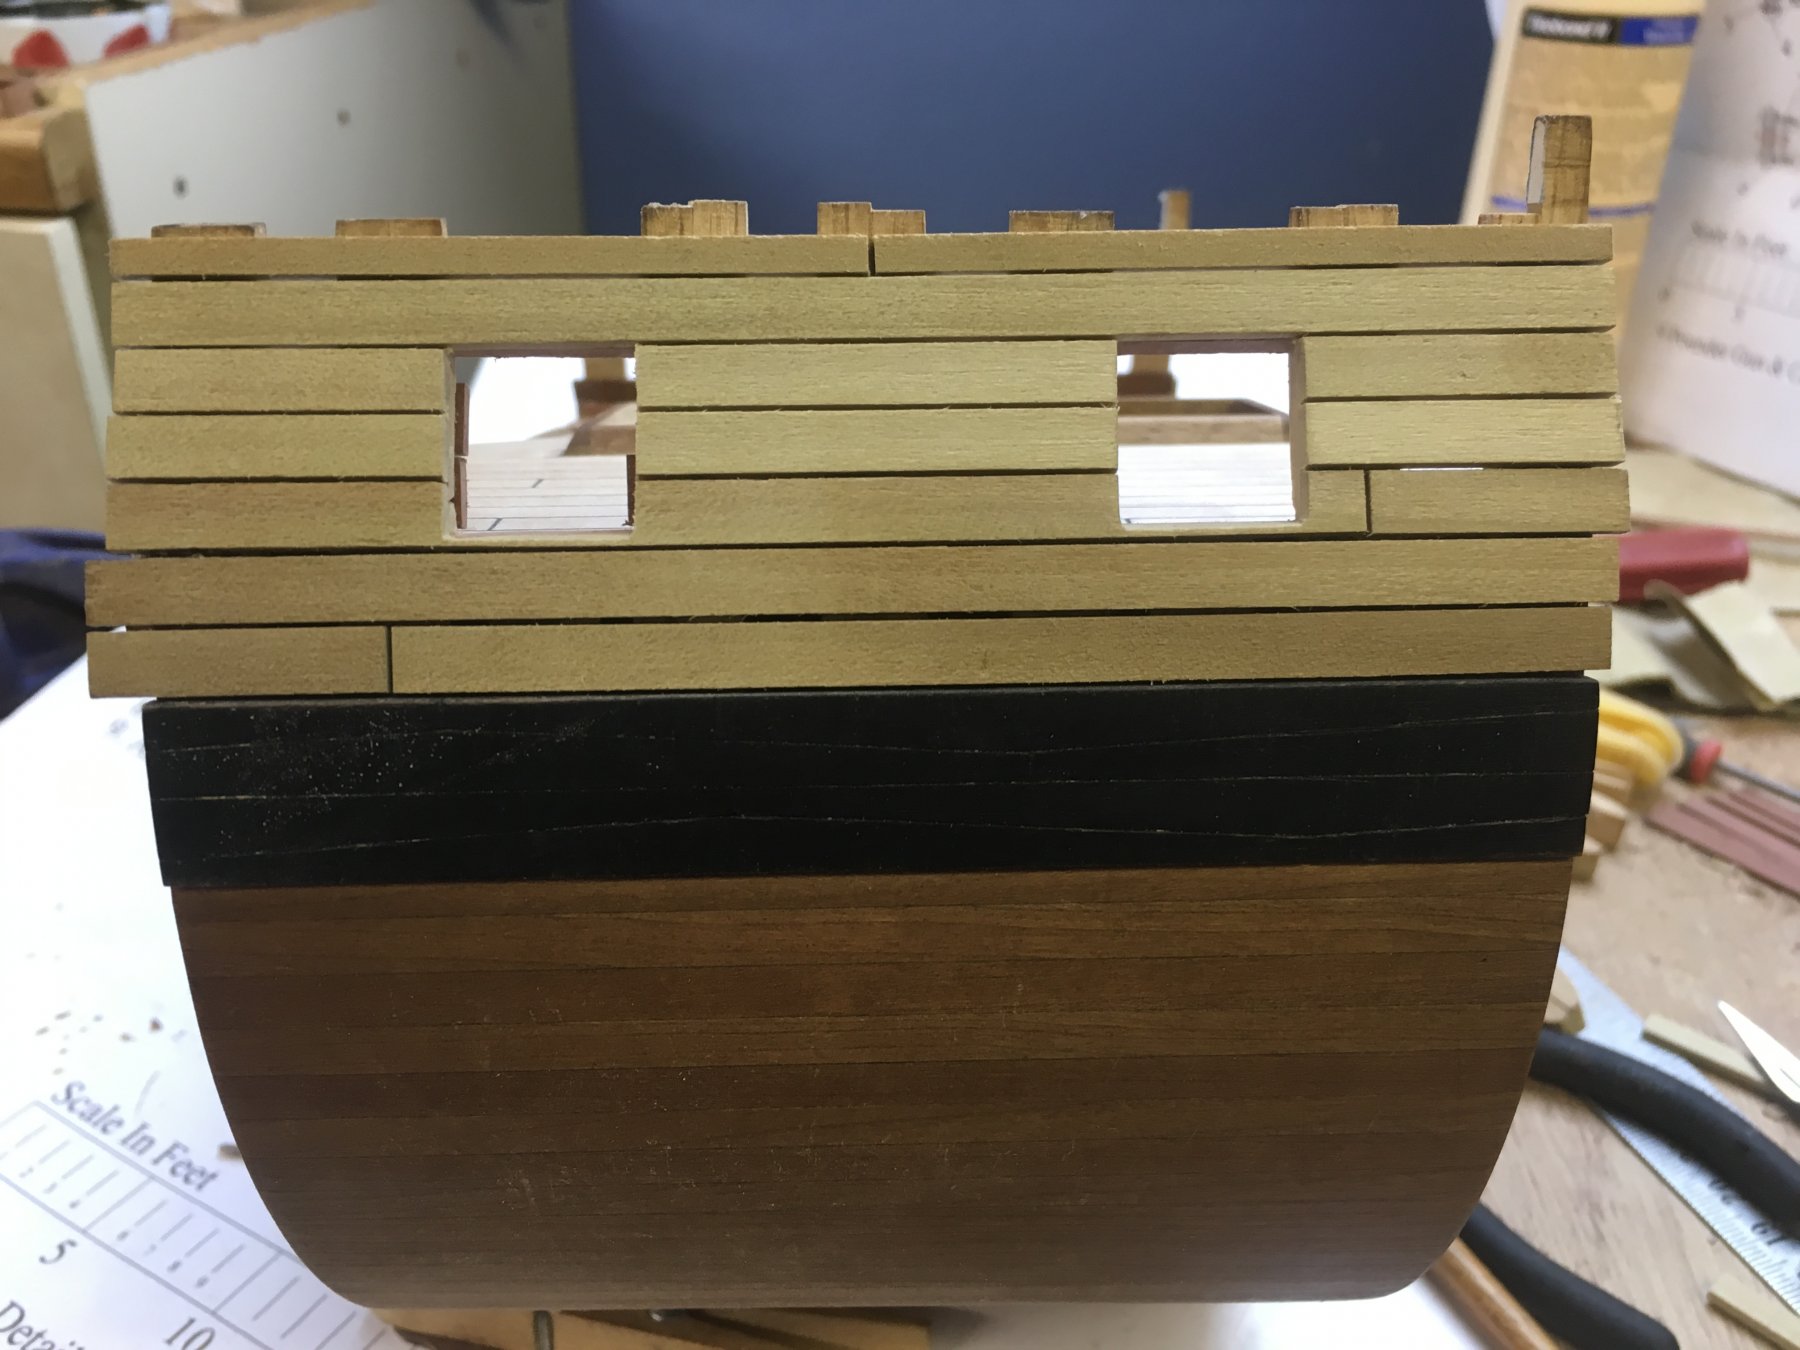
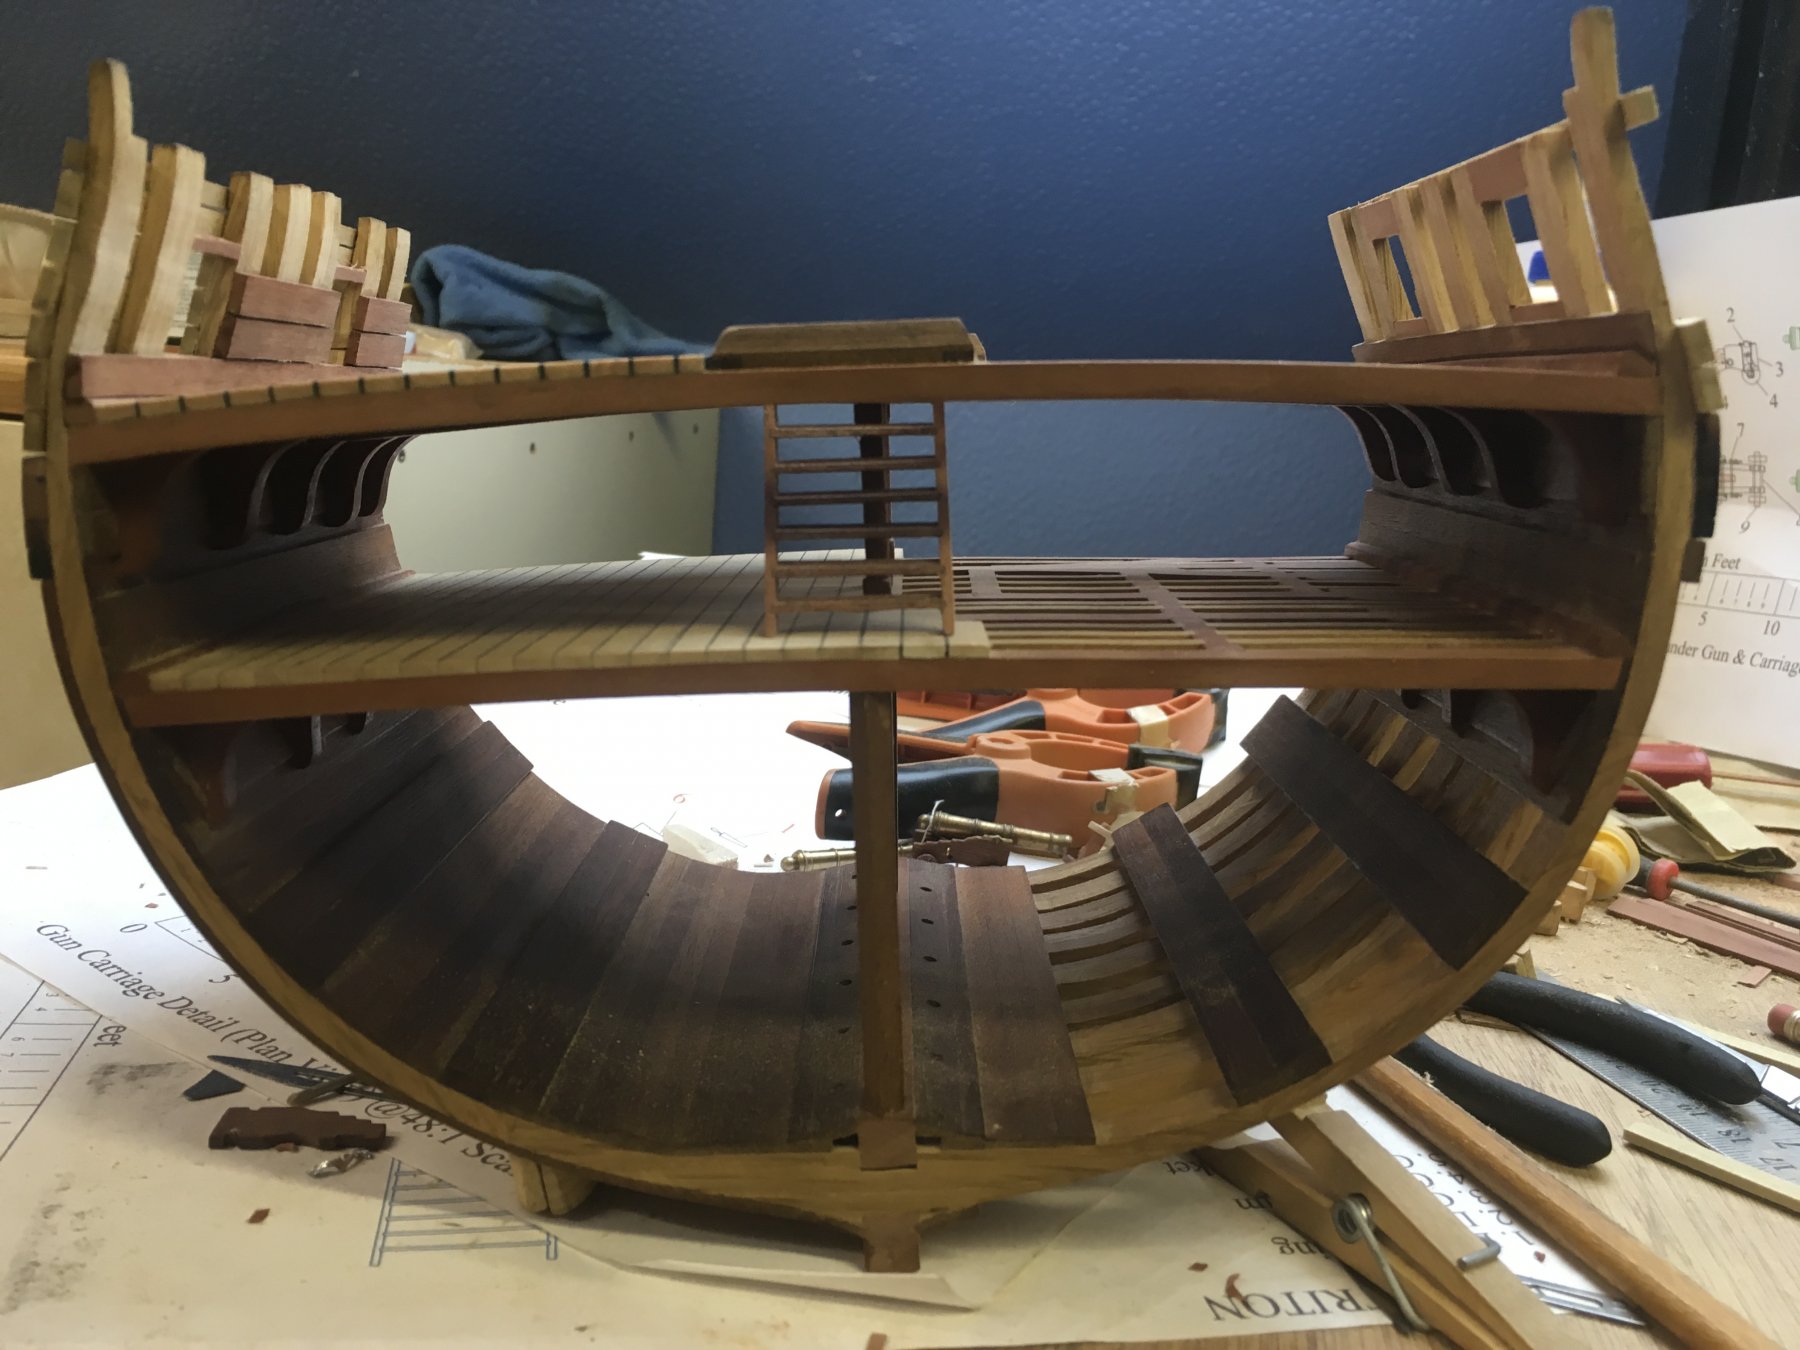
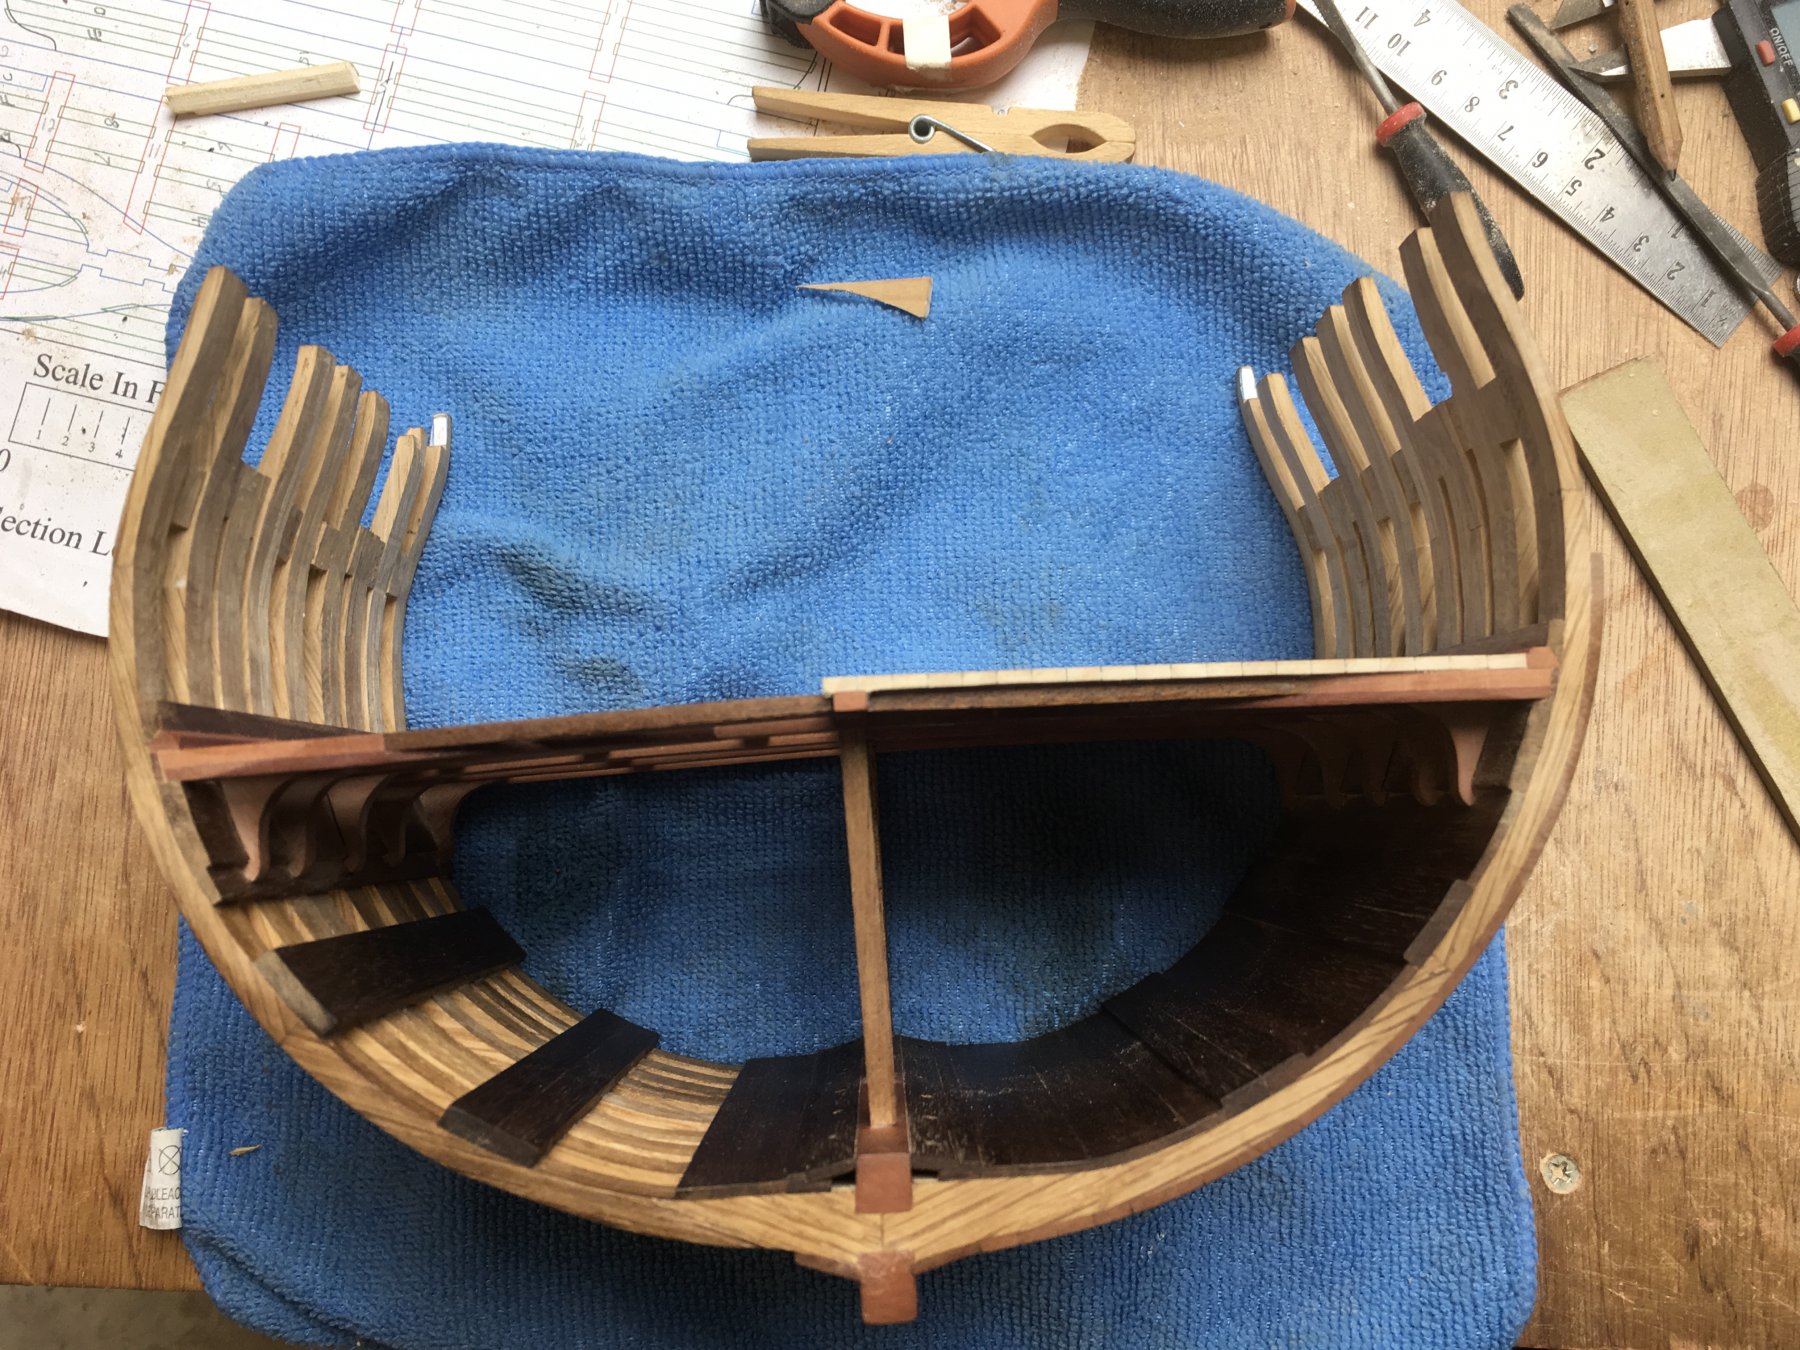
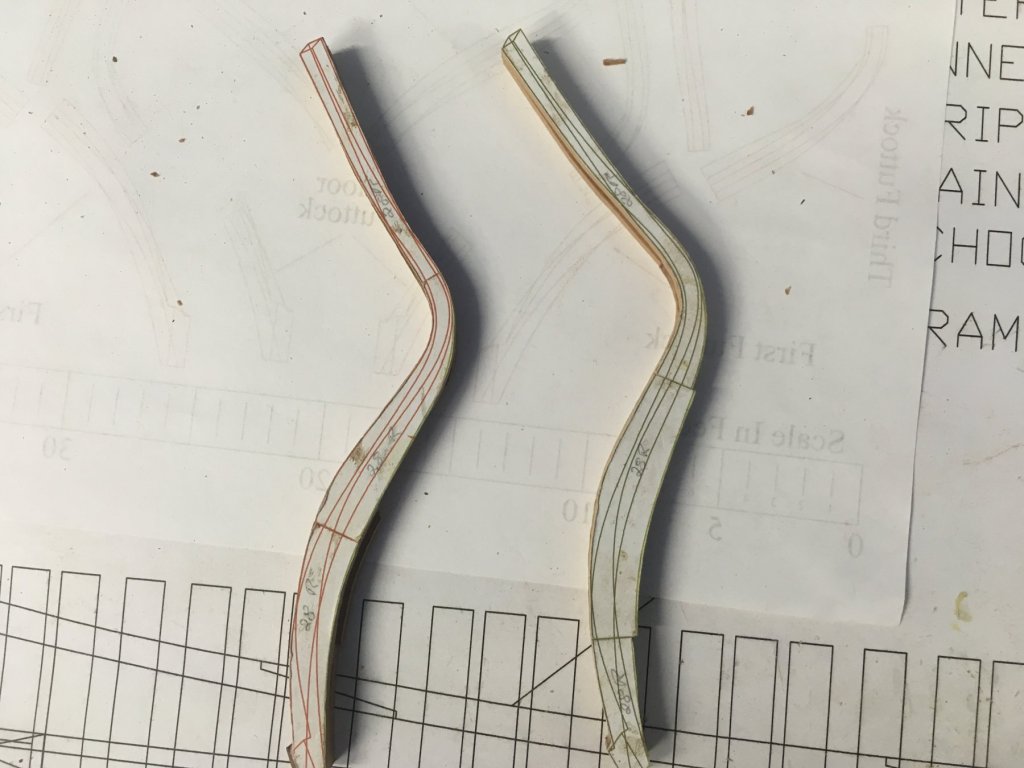
Just a few pics to show progress and lessons learned . Main lesson is that scratch building is very diffrent from kit,s in that accurate measurement and calculation become a lot more important . I neglected to construct a proper build frame and late on in the build discovered a 6 mil difference in width at front and back as can be seen in the last pic dipite my efforts to work with it . So i have decided to waste no more time on what will always be a flawed build . Dispite this i would recommend any potential scratch builders to give this section or similiar a try before attempting something large as i have learned a few valuable lessons along the way . eg caulking at this scale is different from my usual 1:64 or 1:72 scale . Good news is i have now started the full Triton build and have already got the build board sorted ,, see lesson 1 learned !!! .I hope to start a build log soon but am slowly trying to get my head round the cant frames etc before i publish to many mistakes


-
Welcome from N Ireland , i,m with u on the natural wood .
-
Welcome from N Ireland , Look forward to your build as u obviously have a great eye for detail . Boyd.
-
kit review 1:80 Endeavour - Ship Model Okumoto
shihawk replied to James H's topic in REVIEWS: Model kits
Sounds and looks good ,, My thoughts are that it would be a good introduction to POF for someone like myself with no experience of reading and converting real plans for a scratch build ,. It would certainly give a better idea of what is involved in fitting out the interior etc . The only downside is the 1 : 80 scale , not sure my big paws could handle it ?? But may look into it further and see . Tks for the update -
Welcome Rory , i,m not long back from a visit to Yeovil , i have a son workin there , lovely country . you will get any questions answered here so just ask , Have fun,, Boyd.
-
Welcome ,from sunny" and it actually is " N Ireland . Boyd.
-
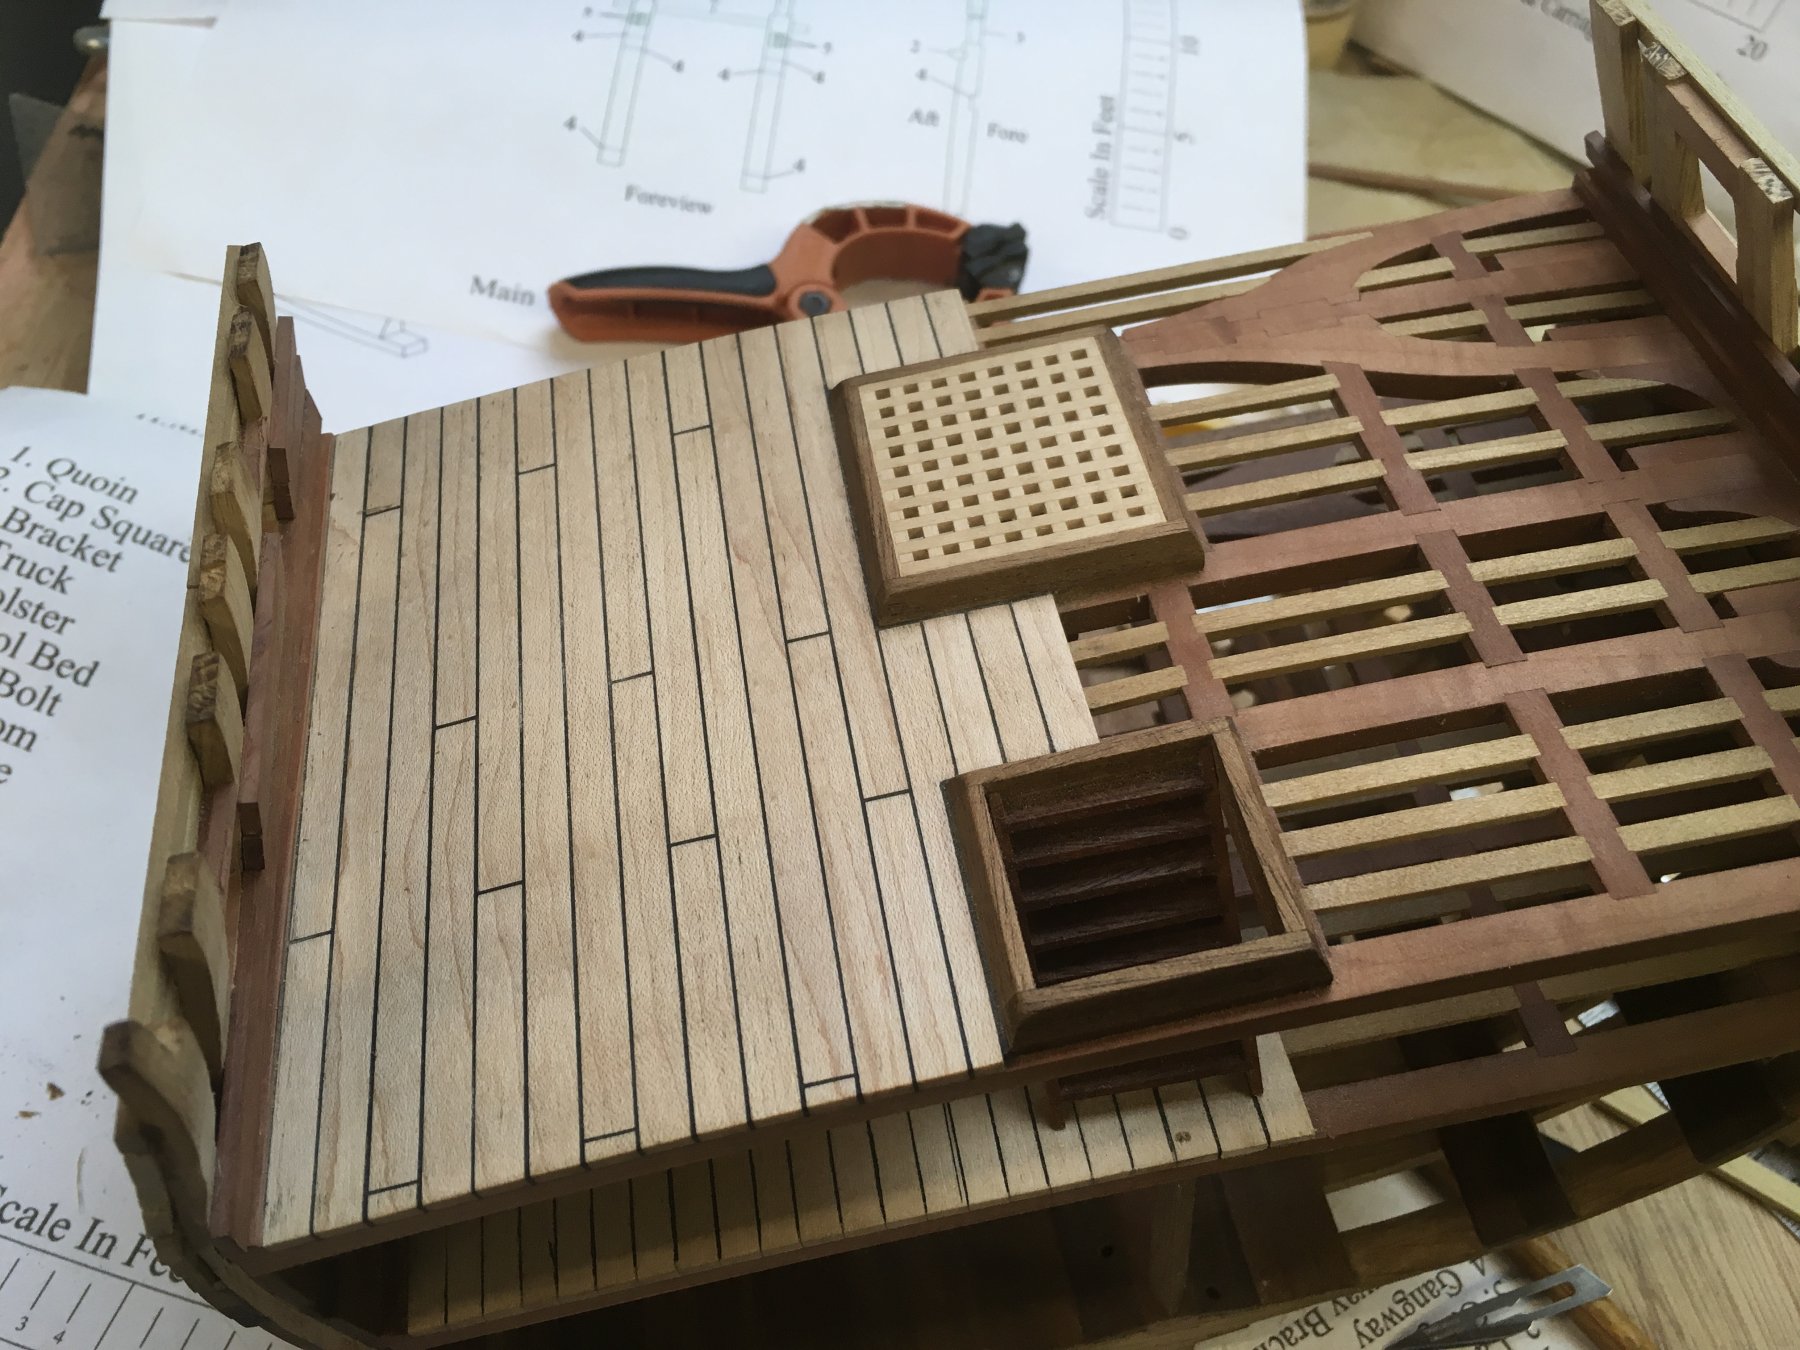
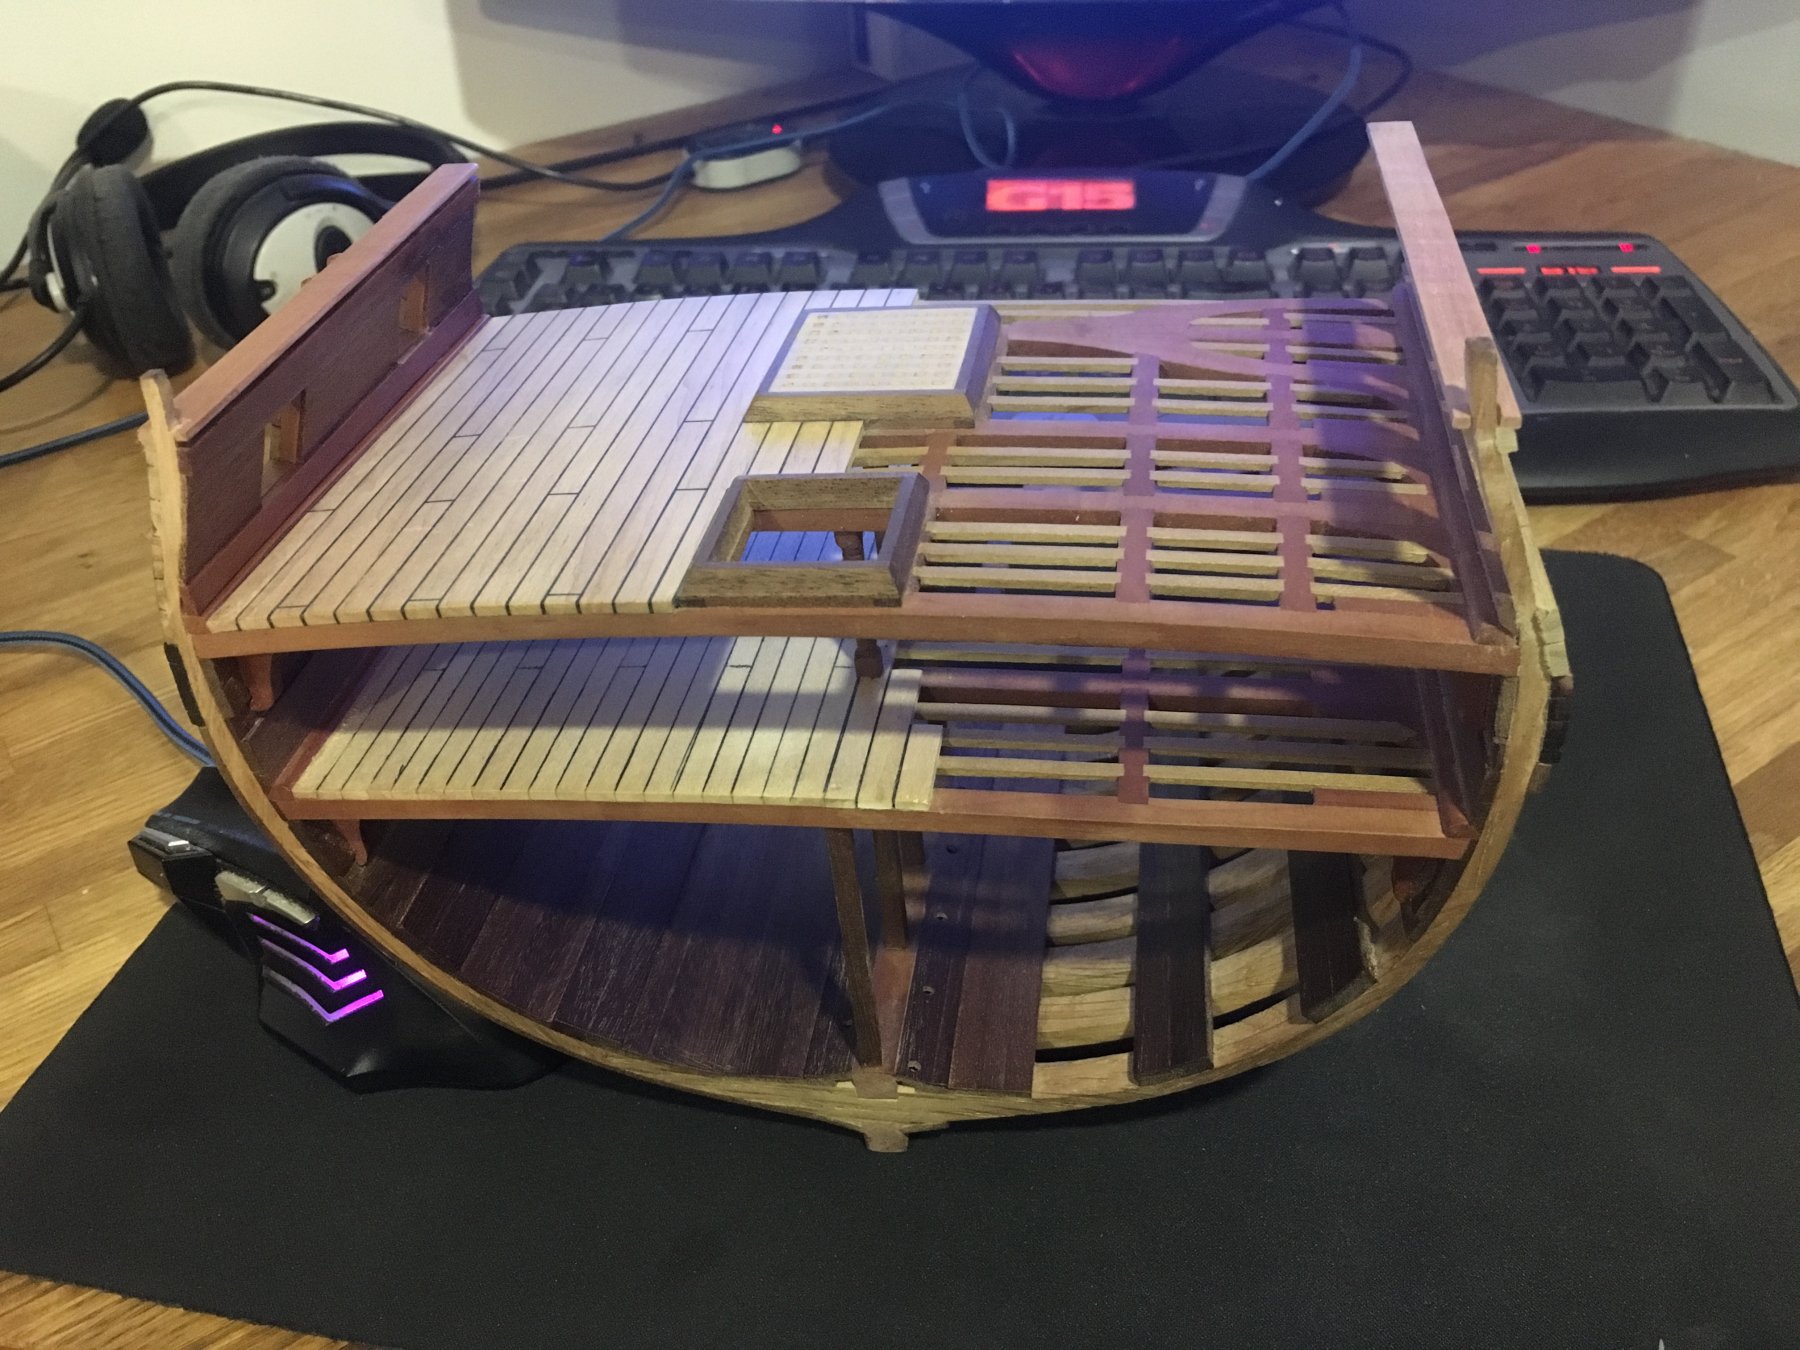
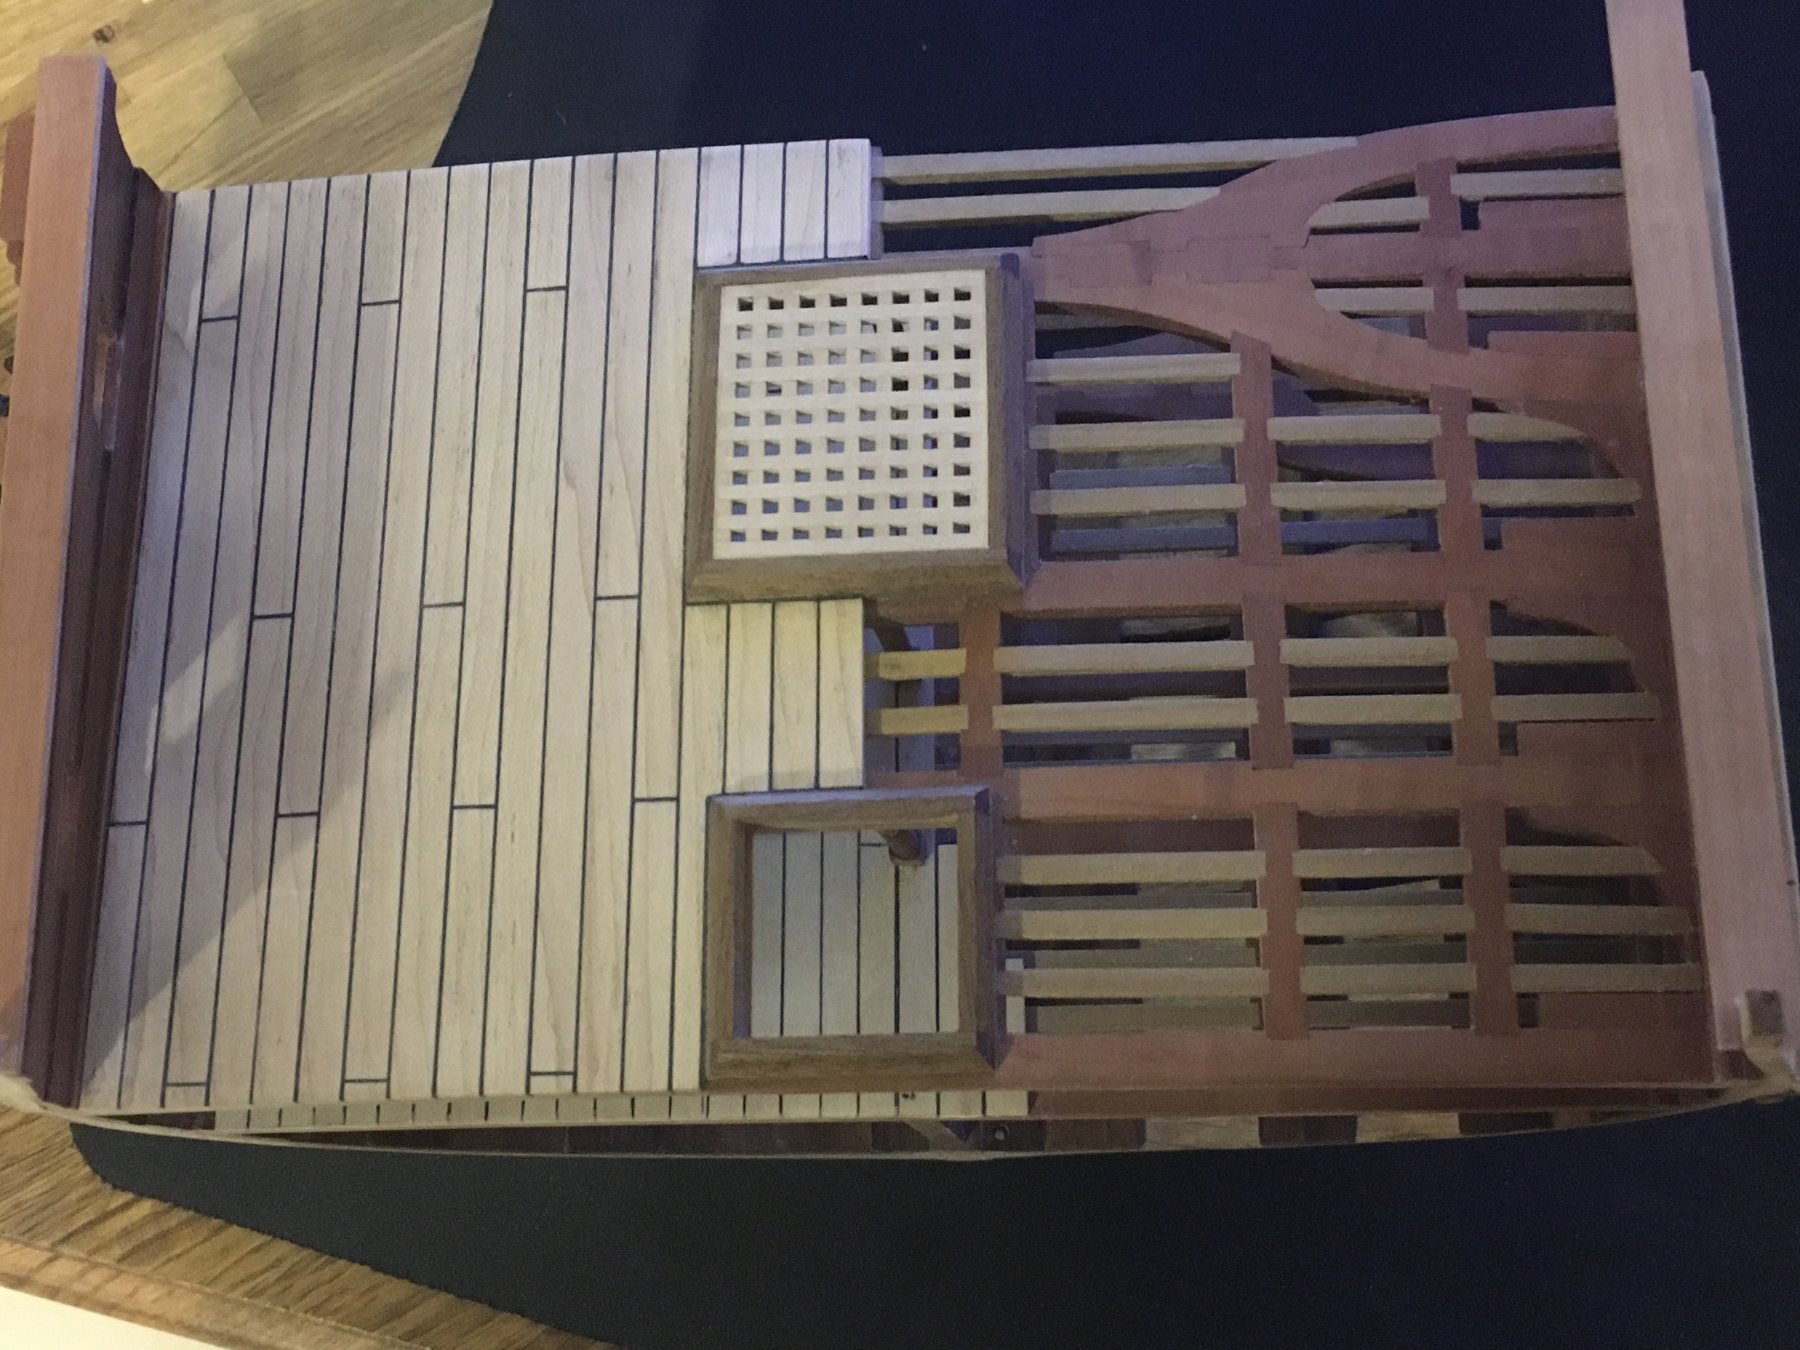
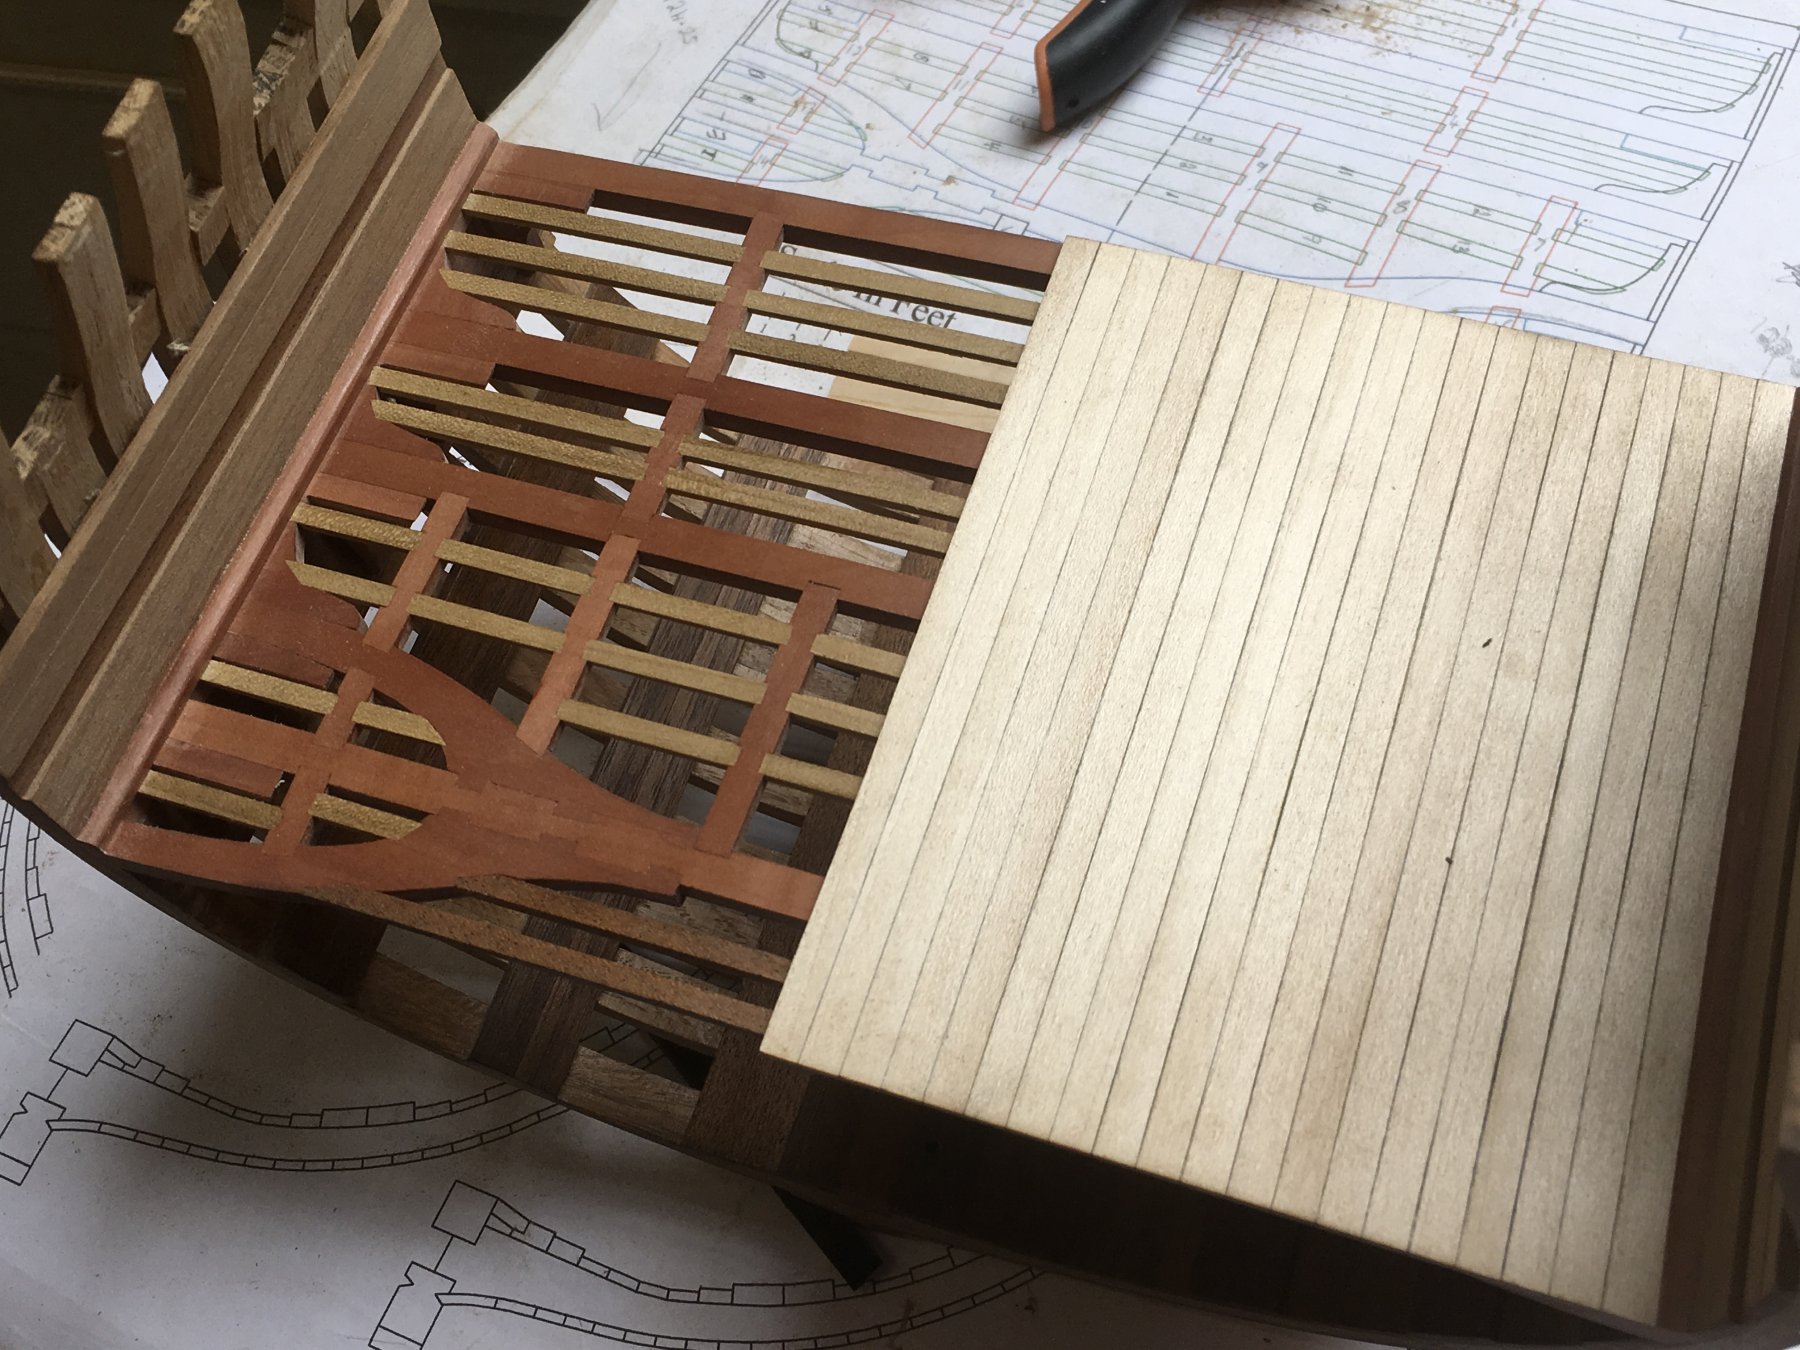
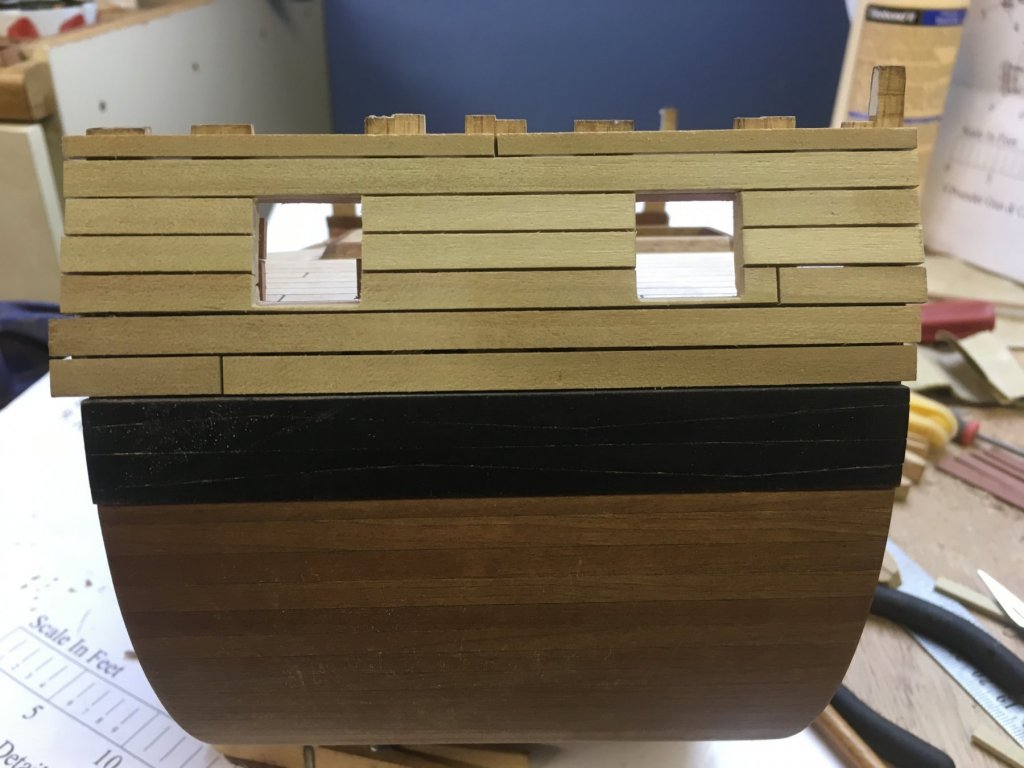
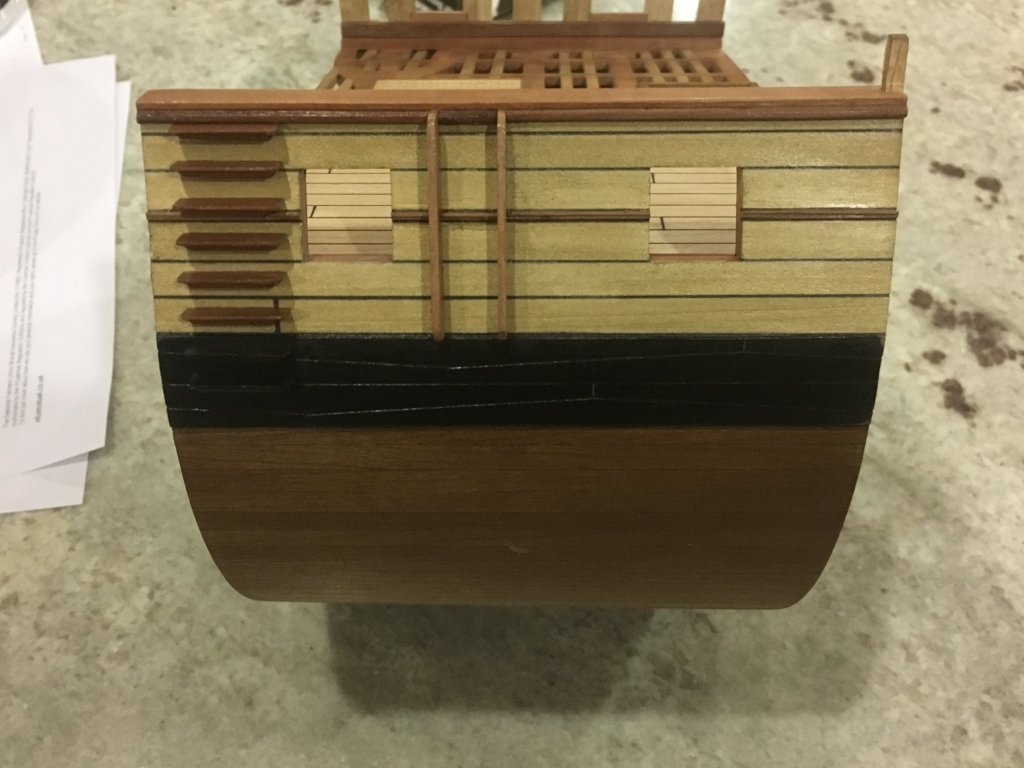
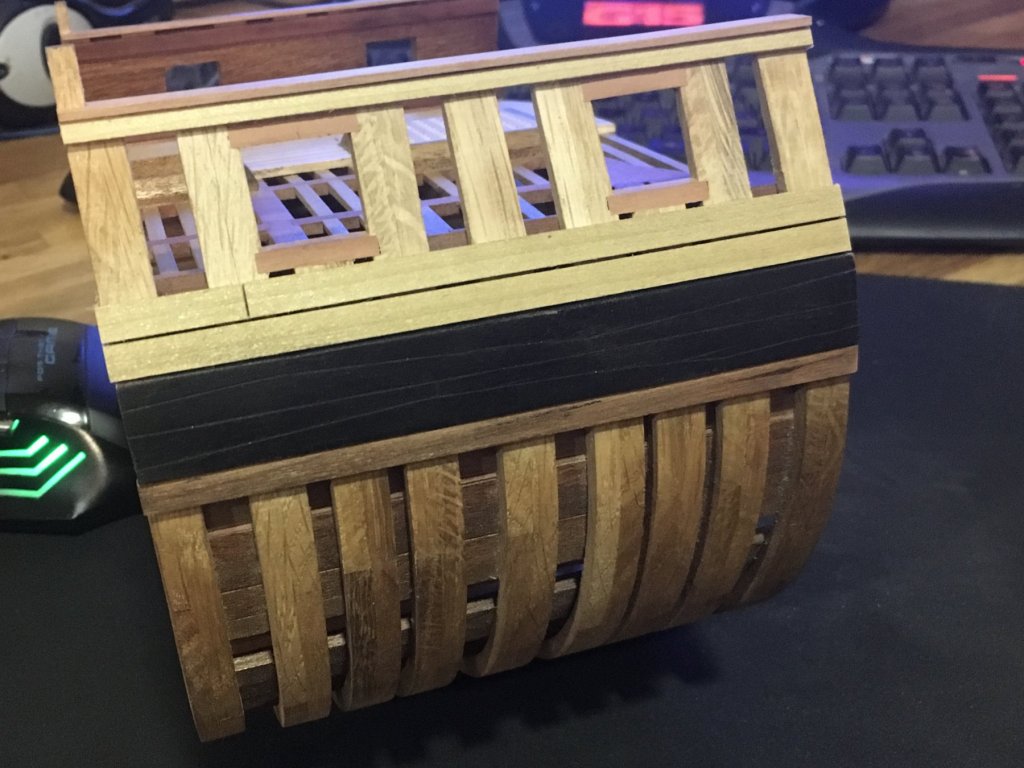
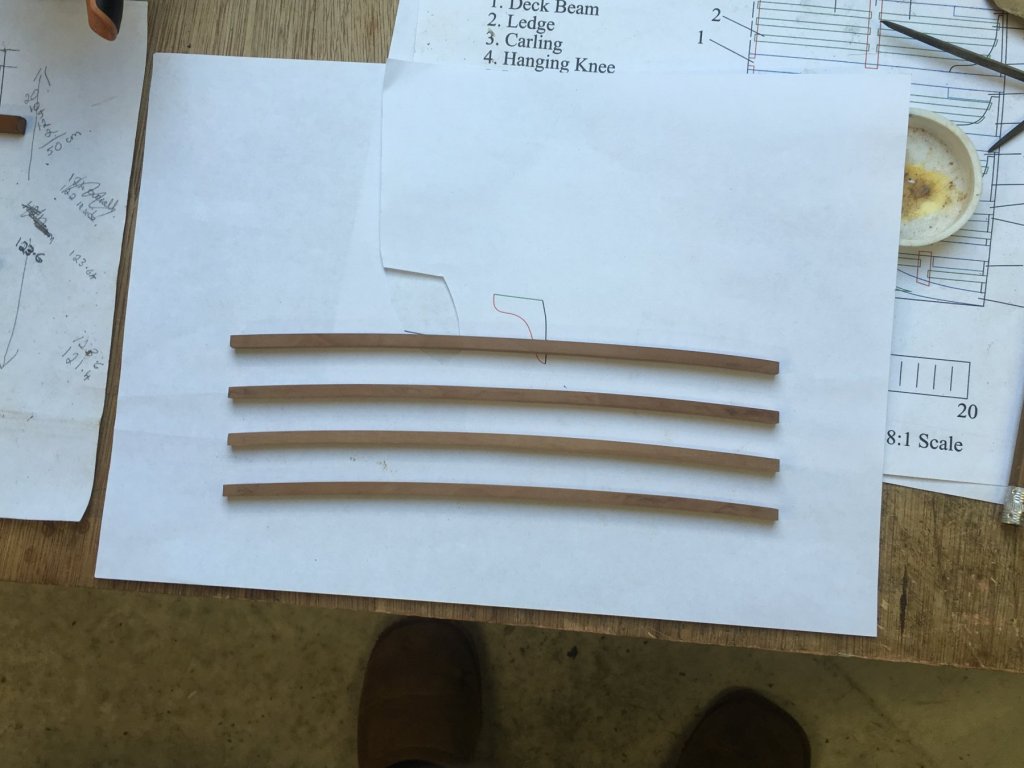
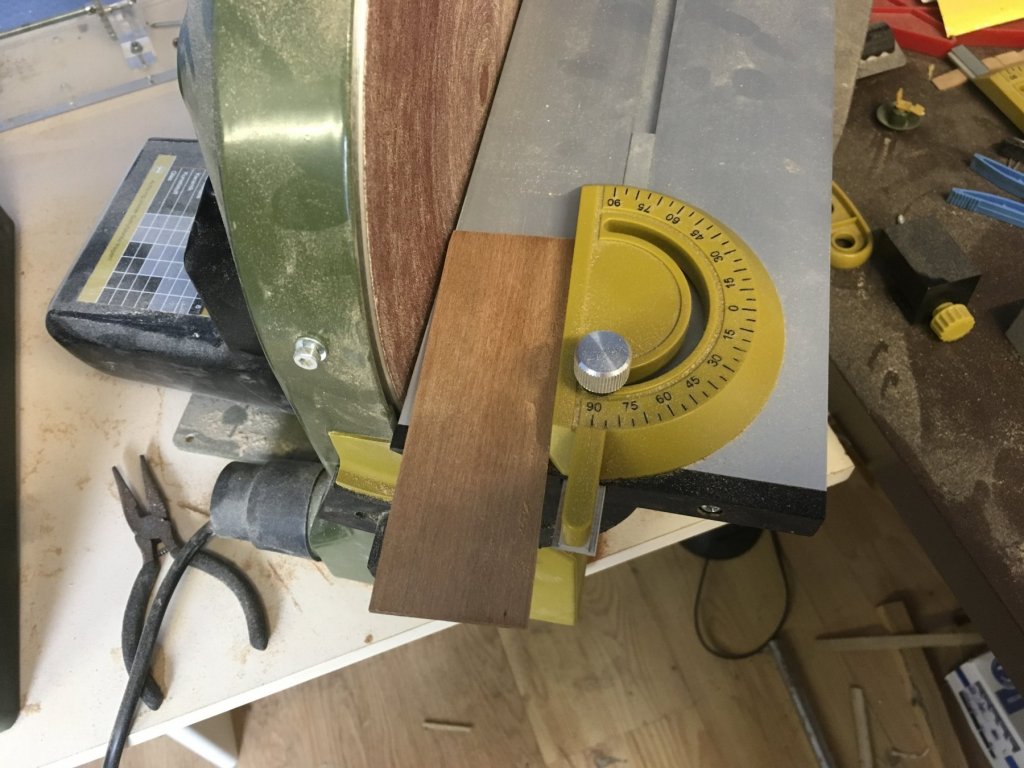
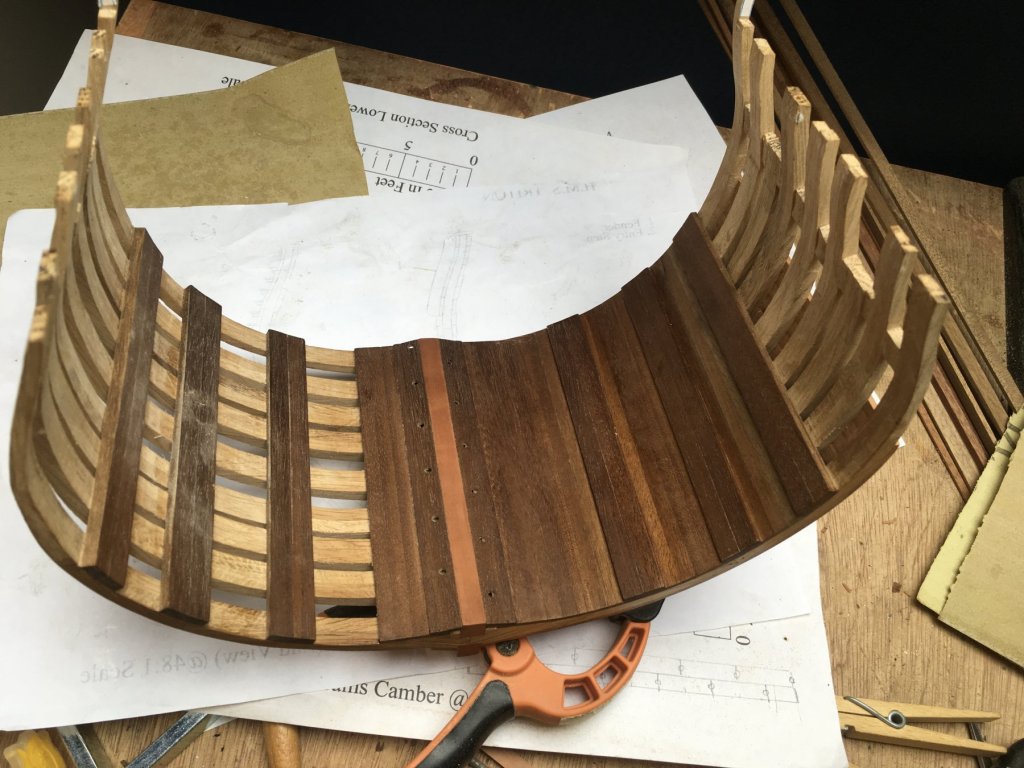
The learning process continues , a few pics of the process , nothing new as i have used the other excellent build logs as a guide . a few lessons learned , at this scale 1:48 the pencil method of caulking i think is not thick enough and will experiment on the upper deck for improvement , and may even consider treenails ?? although the chances of building a full ship at this scale are small, learning new skills was the whole idea , and would like to thank those involved in it,s planning and conception ,it certainly has opened up a whole new side to the hobby !! Next lesson learned is to keep everything as square and even as possible from the beginning to save time and work later on !!! Next is unless u have the proper tools and skills buy your wood as premilled as possible , in my case i,m having a few probs continually resetting saws and remembering settings , but maybe thats just me . On the subject of wood , i have found pear and cherry a real pleasure to work with compared to some of the kit stuff which i was used with , and will deff use them in future . One other point is i changed my glue type to a fast setting variety but think i have overdone it and will change back to a slower set , last pic shows a simple way of shaping the wales , worked fairly well but needs refining . As usual my report would read , doing ok but could deffinately do better , all i can say is i will try ???


- 19 replies
-
- 12
-
-
Welcome Mike , I well remember wondering what the heck a rabber line was and did i really need one anyway . My advice would be do research as u go along , get started the build , start a build log ,and as the questions arise just ask . best way to learn is by doing !!! Have fun ,Boyd
-
Welcome Mark. I finished the Billings Vic a short time ago although it was what i called a shortened version i found it a very interesting build . You have done a superb job on what many including myself have found a very challenging build , mainly i suspect due to the limited instructions ?. You did have the advantage of having the real thing in your backyard and having visited it a couple of days ago i can only imagine was the best instruction plan possible , but that does not take away from your obvious building skills . Good luck with the Diana and i look forward to your build log . Cheers Boyd
-
Welcome Andrew , ask all and any questions ,usually someone here will have the answer . Have fun ,Boyd .
-
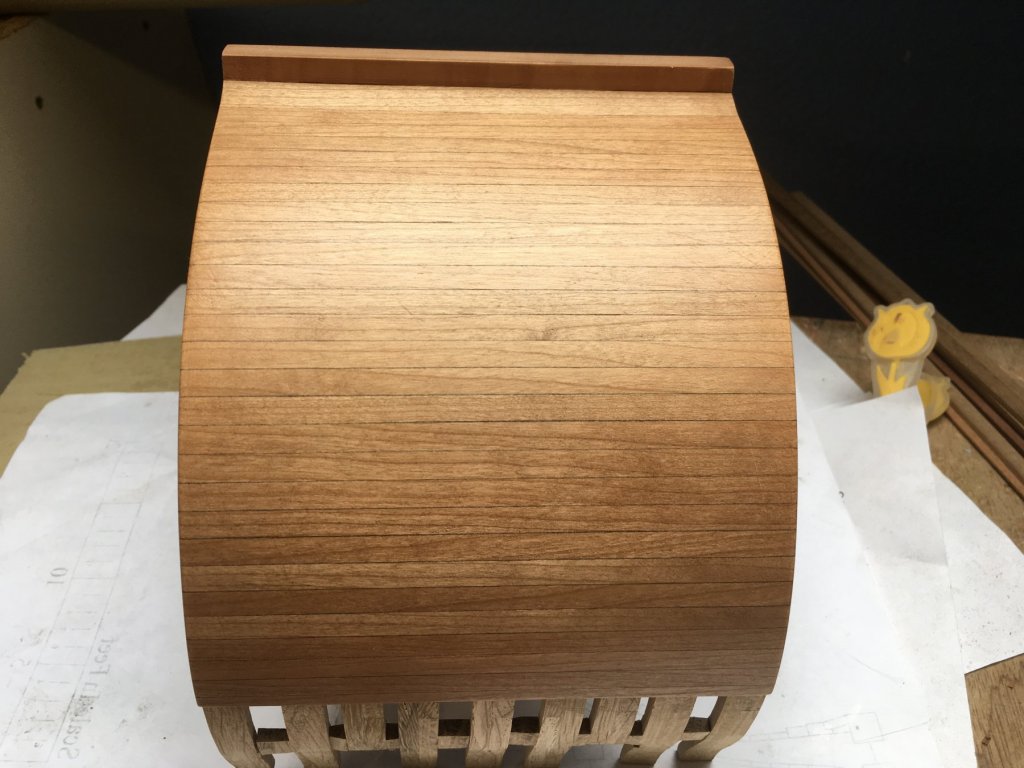
I forgot to mention that i don,t think i will use treenails , unless they are done very well even at this scale i feel they can look unrealistic ,, only my opinion . You will also notice the planks are continuous ,again sinply to save time ,, lazy bugger ain,t i ???? I used a pencil for caulking ..
-
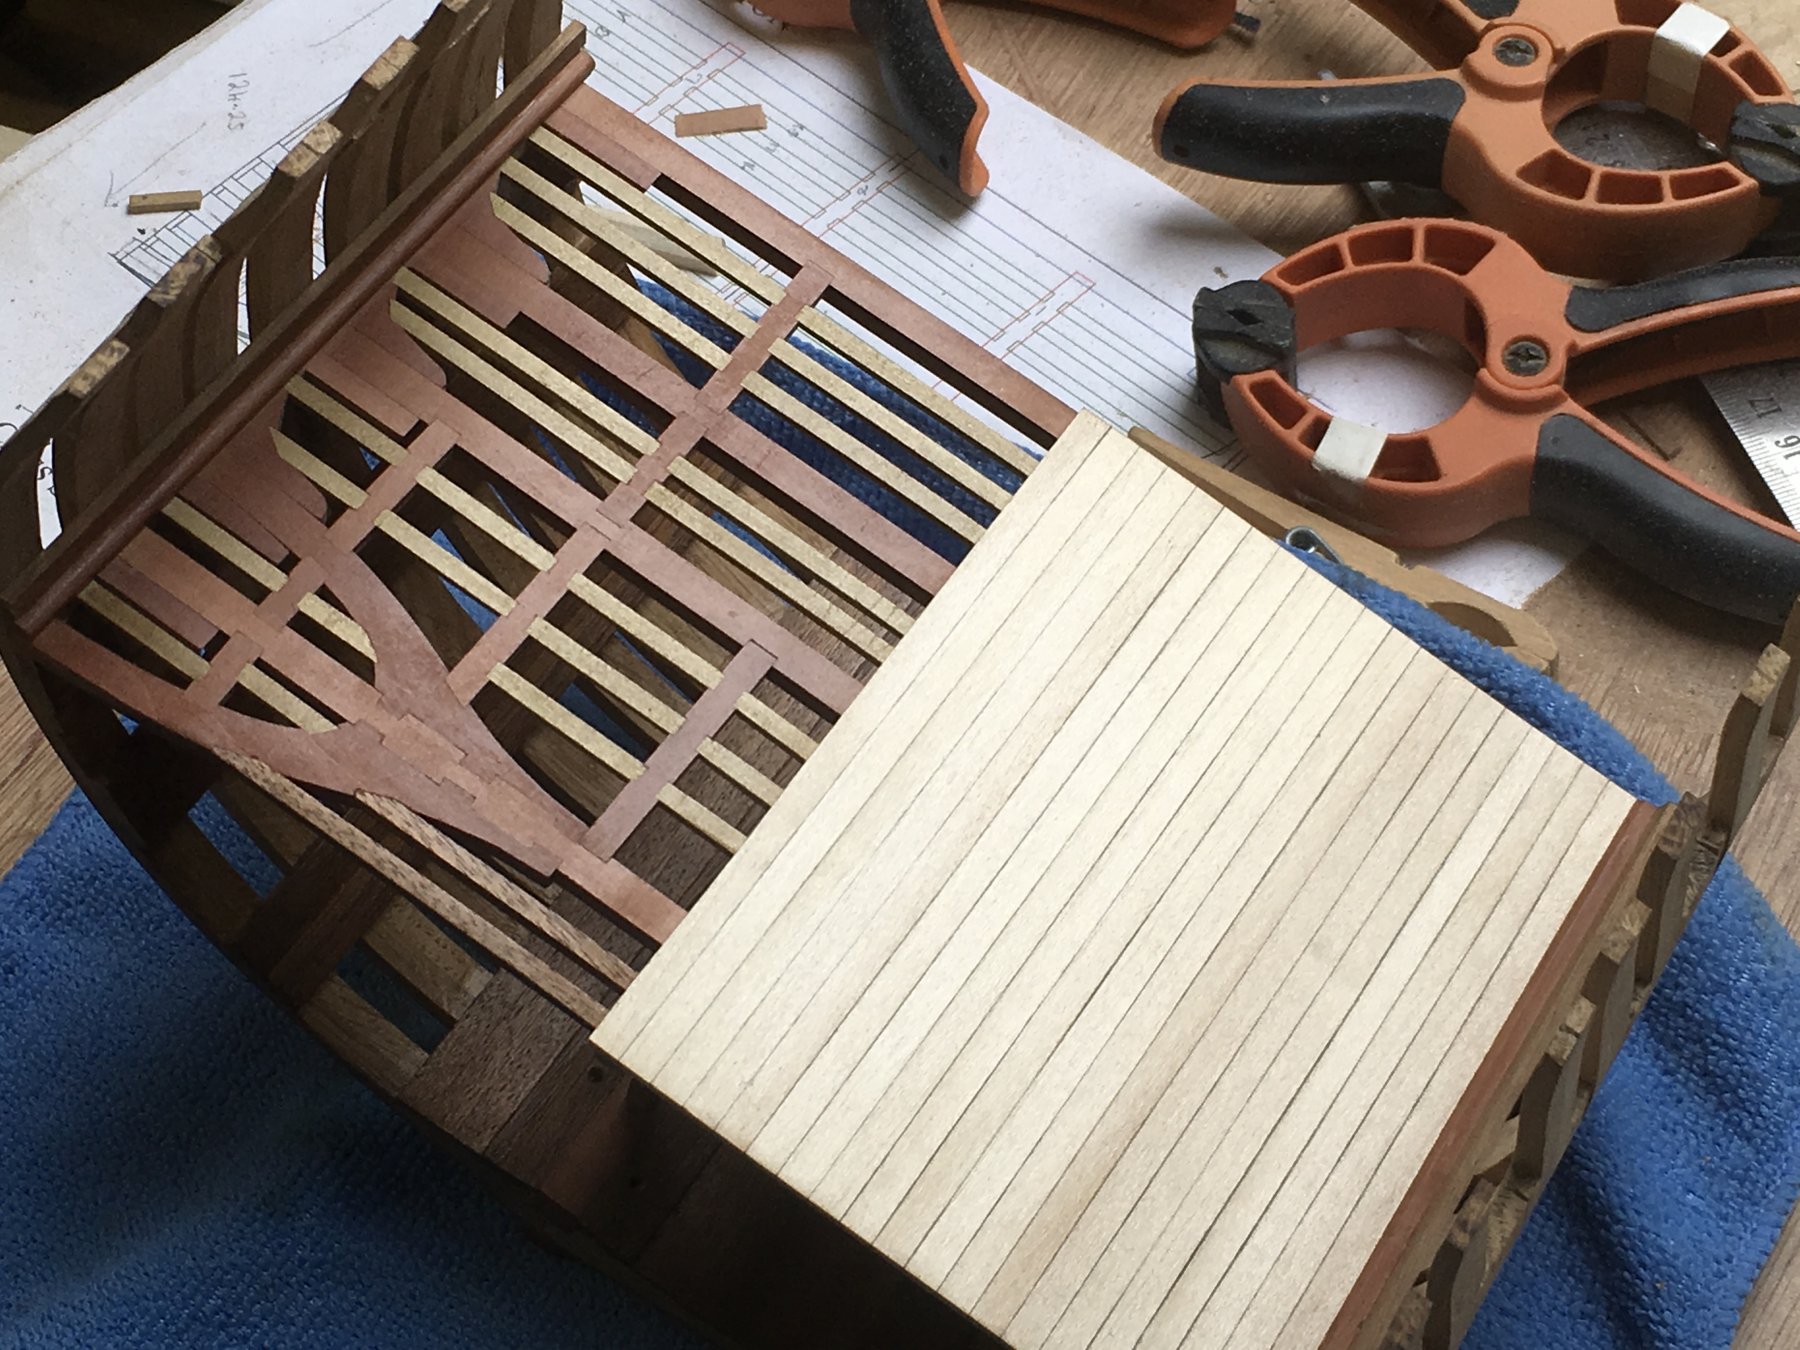
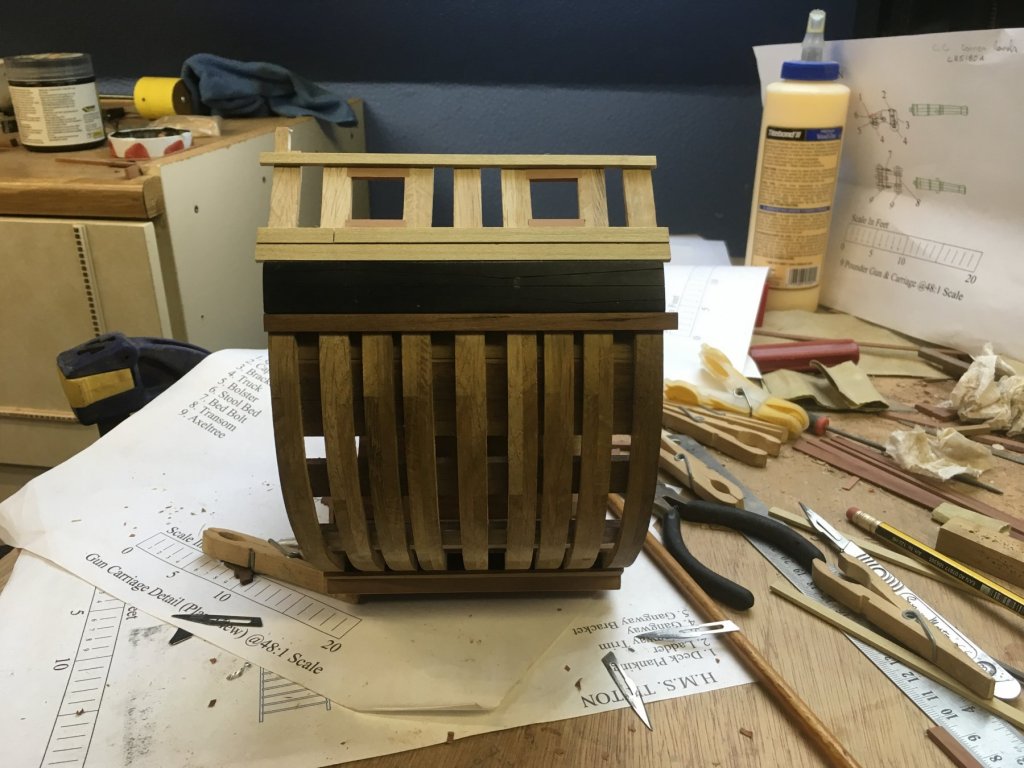
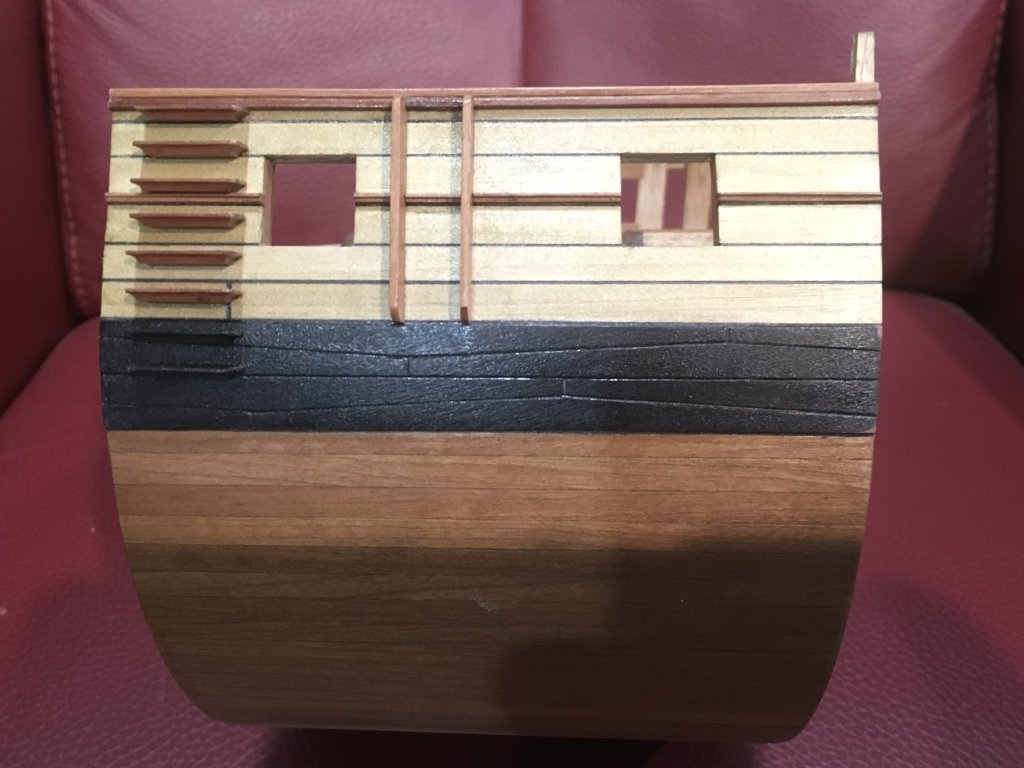
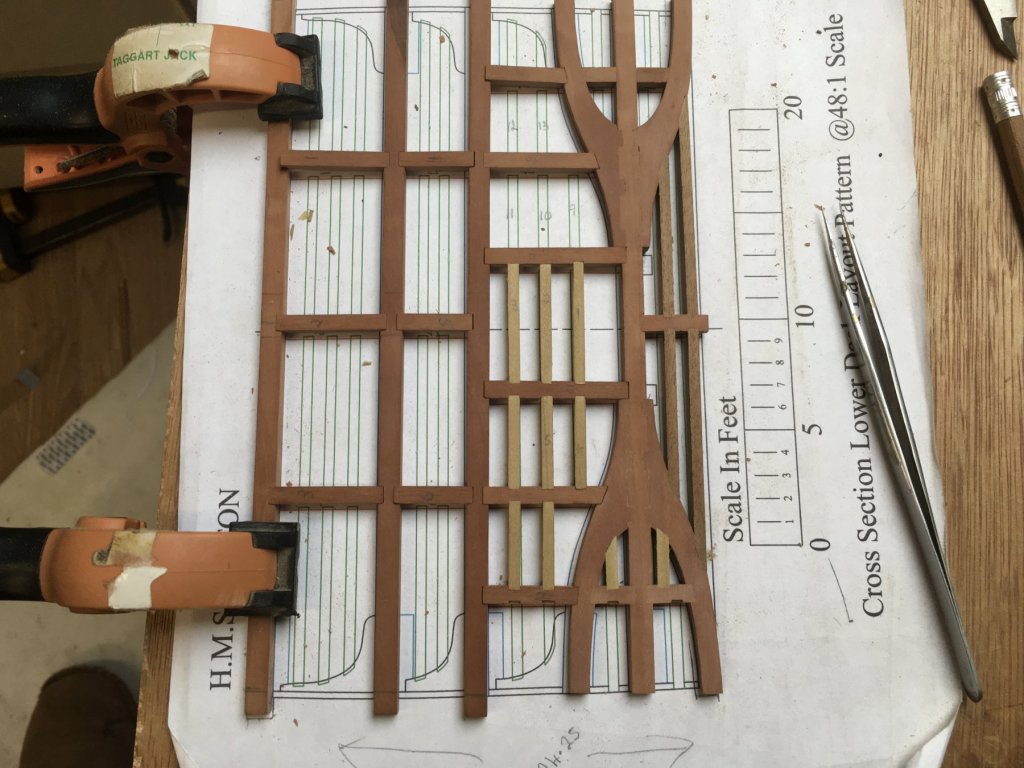
Just a quick update on progress so far , i don,t need to go into to much detail as others have covered pretty much everthing thankfully . Decided to continue with the frames i have and with a lot of sanding they will do the job , lesson learned is spend time getting the frames as well constructed as possible . have planked one sid up to the wales with cherry , i,m happy although i did miss a few flaws in the wood which only show after varnish ,perhaps in future i should number them as i cut them of the sheet to be sure to be sure . Be cause i was to lazy to use a proper build board there is a difference of about 2mm in the distance from side to side , can be easy remied now i know it,s there . Work on the lower deck continues , i hope to complete it of ship and then build it in which means i can make the last beam struts to suit if there is any variation . I find most problems can be overcome if found in time ,,, fortunately ..I may not "joint " the fine struts under the side of the deck which will be planked ,i can learn enough of one side to maybe do a better job on the gun deck ..
-
Thanks for the welcome folks , i realise i,m a late comer and have all u to thank for your build logs which i have relied on . I,m not one for measuring to the last 0.5 so am inclined to make things fit as i go along , and cut a few corners so i hope u won,t be dissapointed . Basically i want to find out if i,m up to the full Triton build , time will tell ???
-
Welcome back ,, Now thats what i call a workshop !!!!!!!!!