Old Collingwood
-
Posts
11,579 -
Joined
-
Last visited
Content Type
Profiles
Forums
Gallery
Events
Everything posted by Old Collingwood
-
 Thank you sir, its coming on seeing the woods through the trees now with the hull. OC
 -
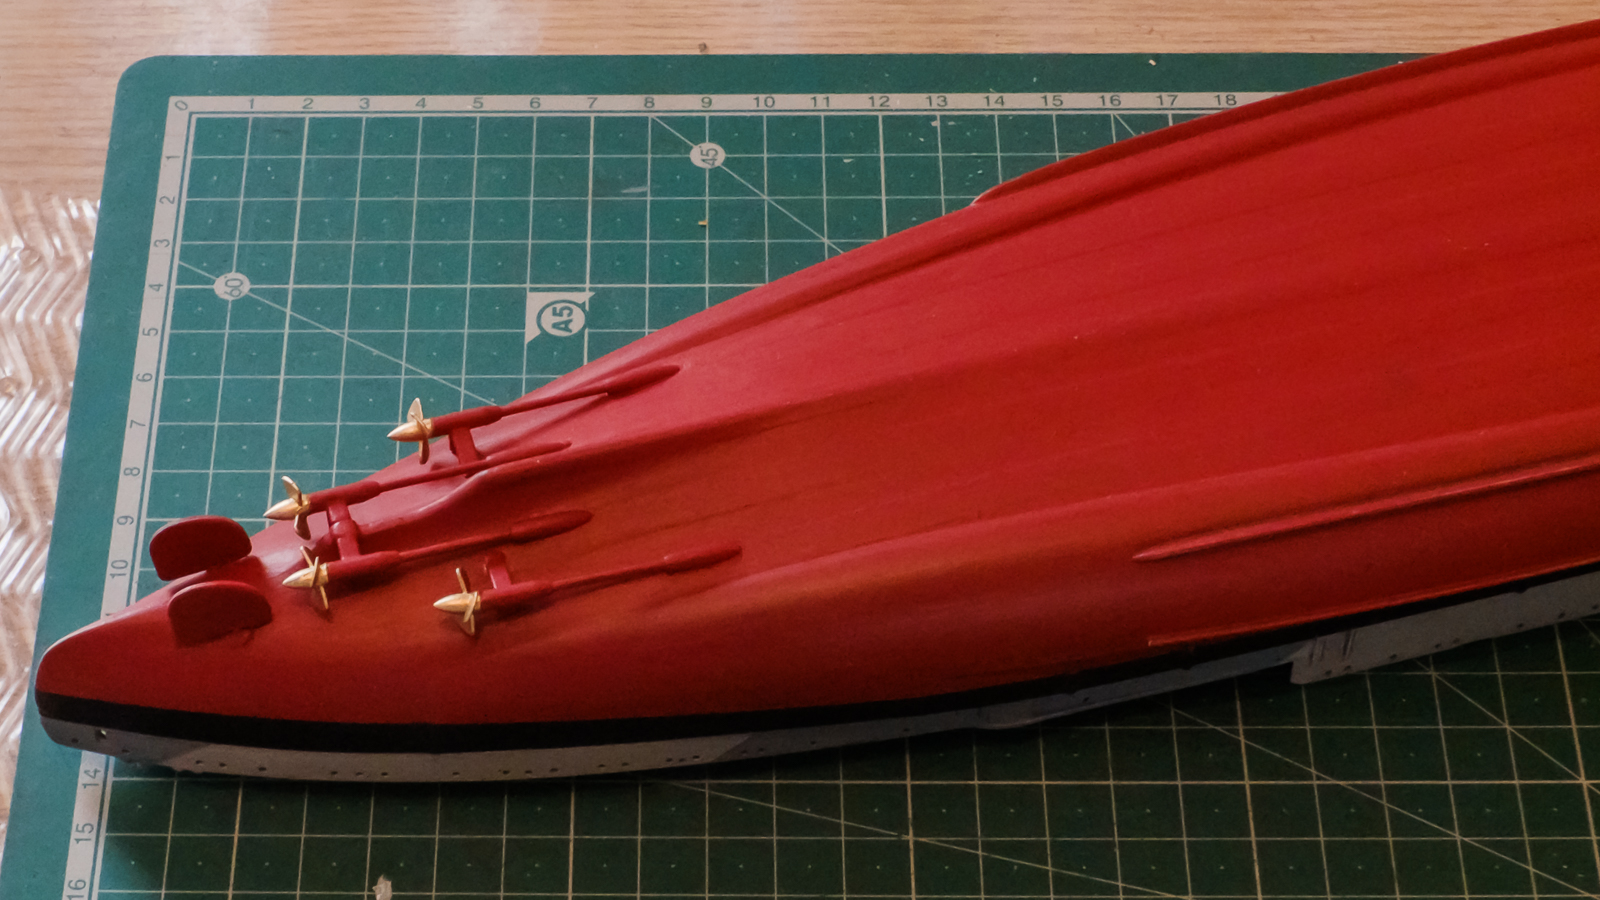
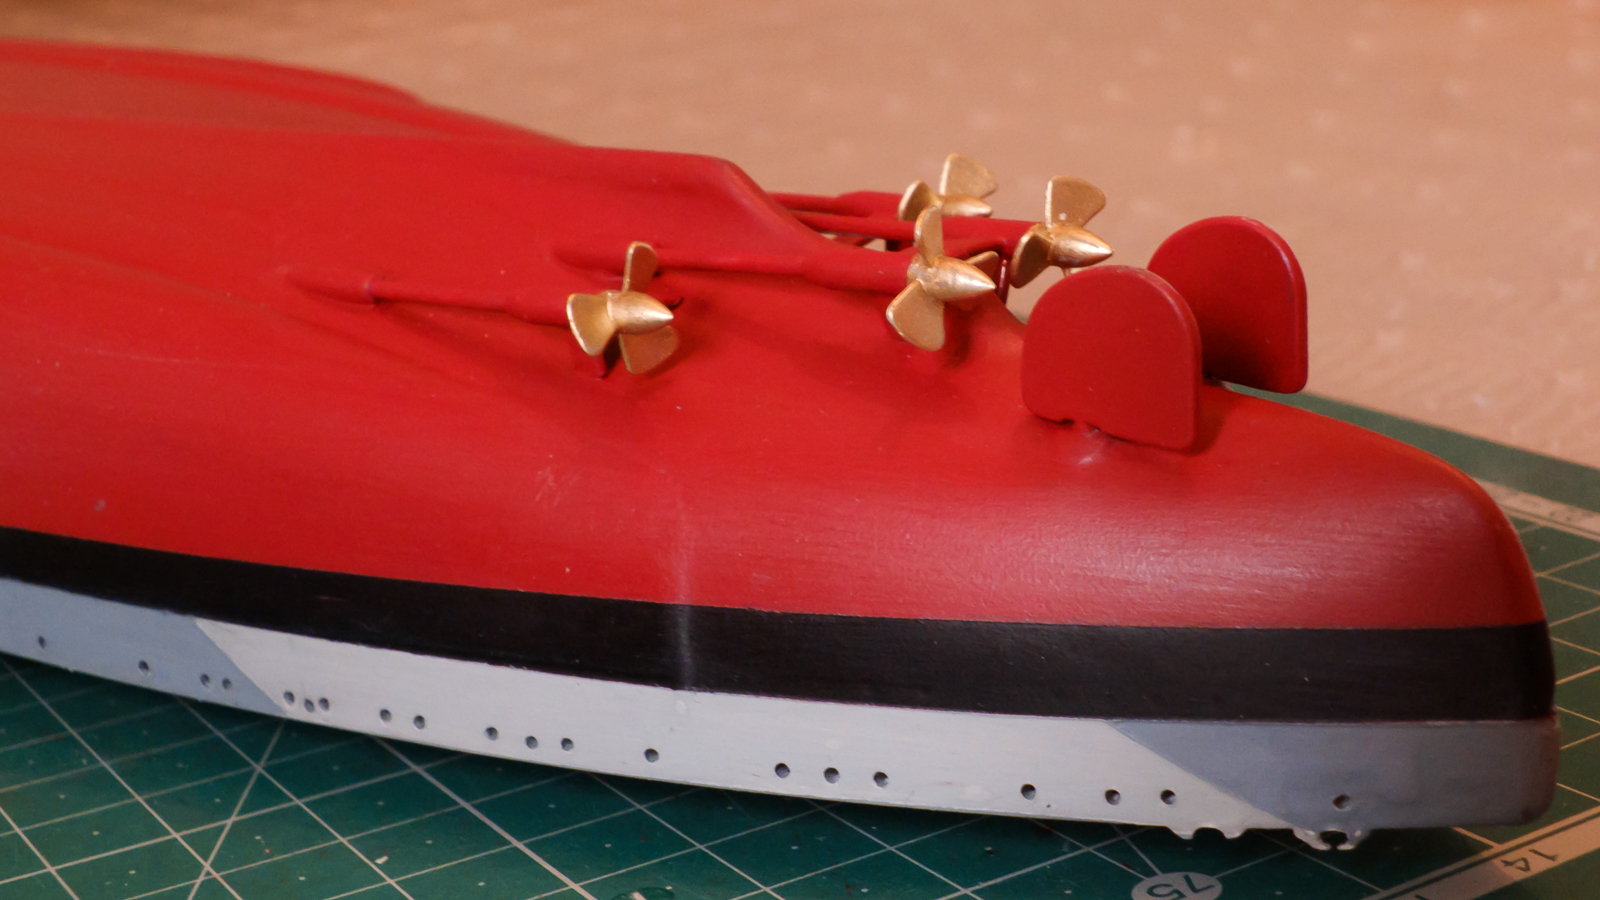
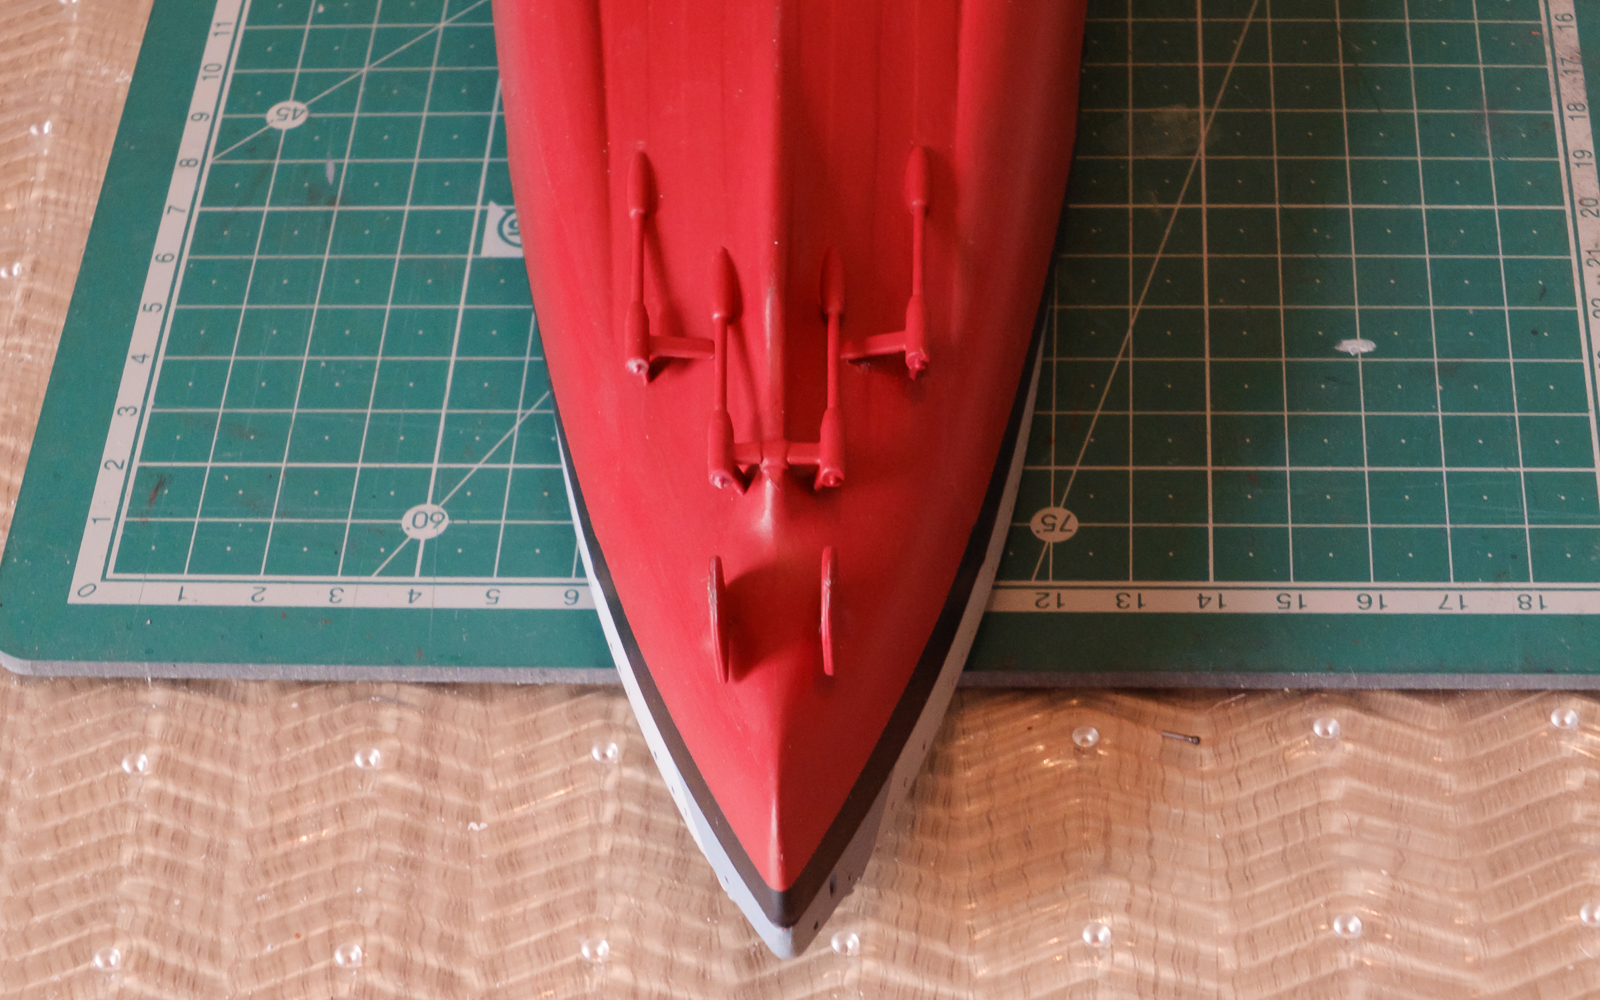
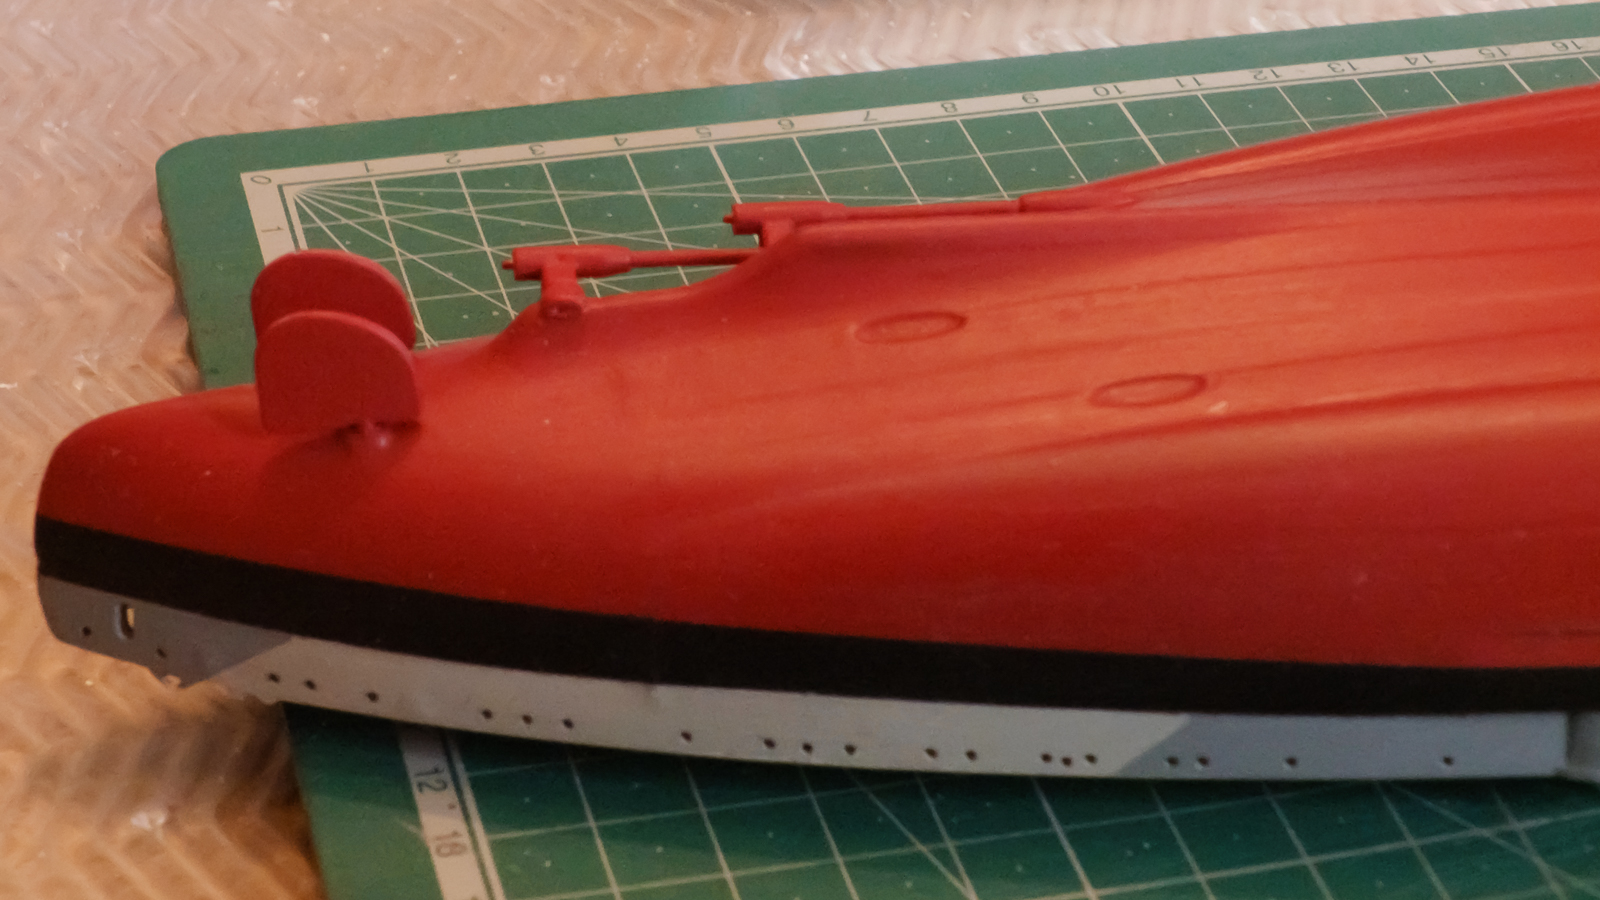
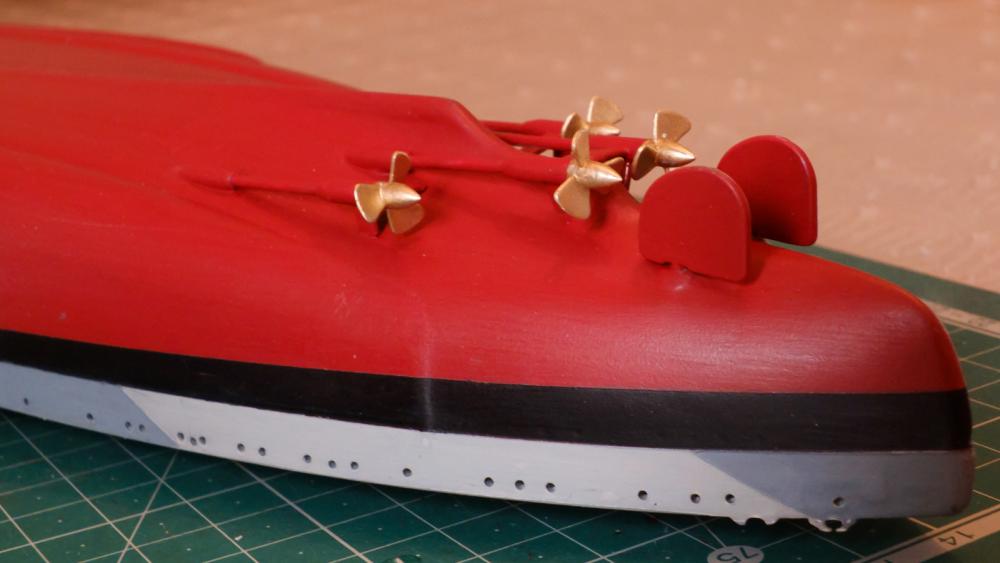
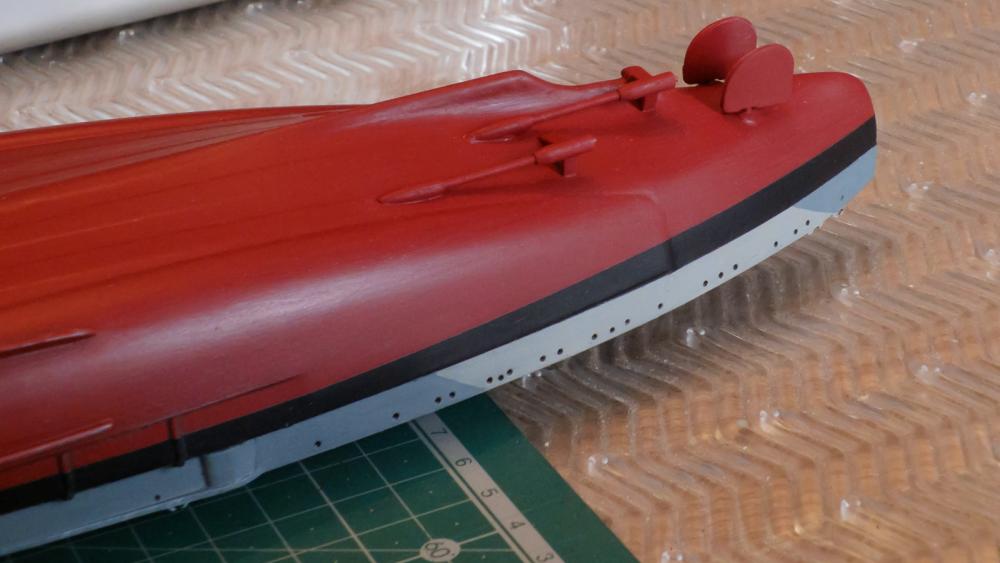
Finaly for today anf possibly a few days due to decorating, I decided to have a go at the screws, I have gone with the kit ones as they look quite good, I tydied them up a bit then gave them a coat of paint while off the shafts, then dried them with the normal hairdryer and glued them in place. OC.


-
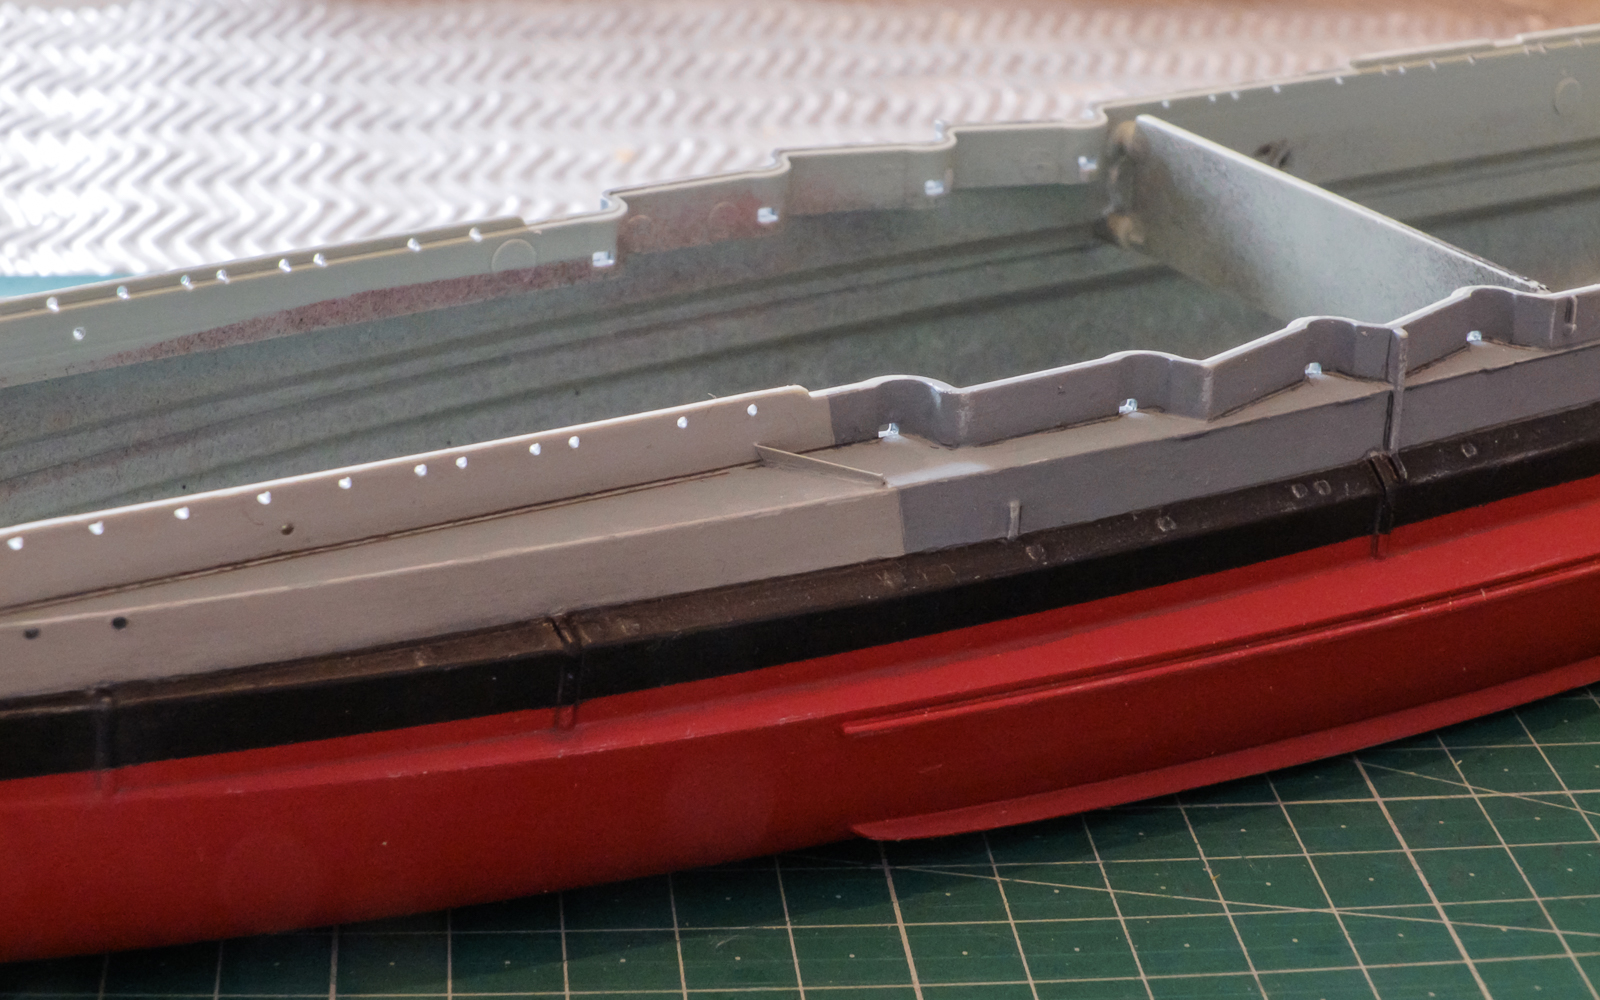
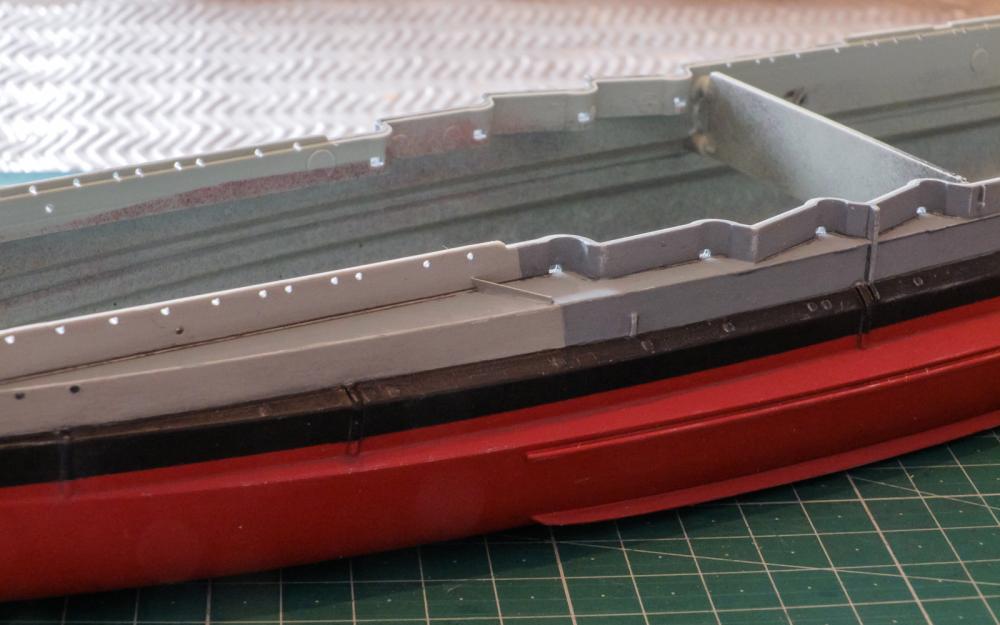
I also attached the breakwaters to the 6Inch mounting deck, this was done with a light application of PVA then painted. OC.
-
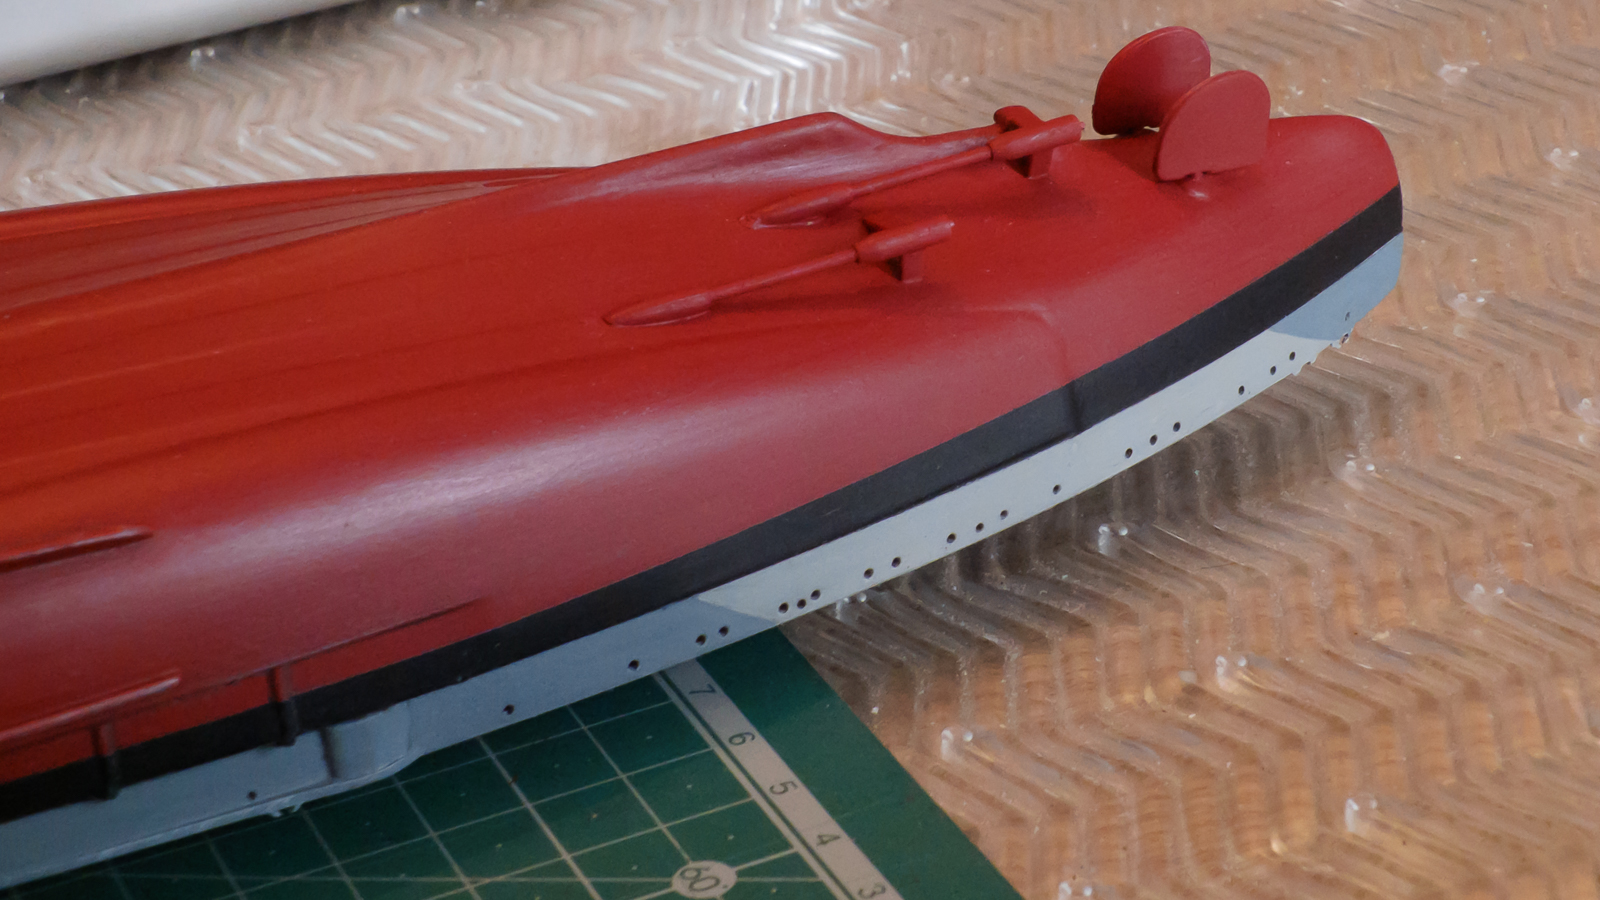
Right folks here are a few pics showing the prop shafts and the paravane mounting after I drilled out the holes for the linkages. OC.


-
I will take some tomorrow I promiss i will then have to pack her away for a few days possibly a week as the room needs decorating and I need to get it done before playing with my toys OC
-
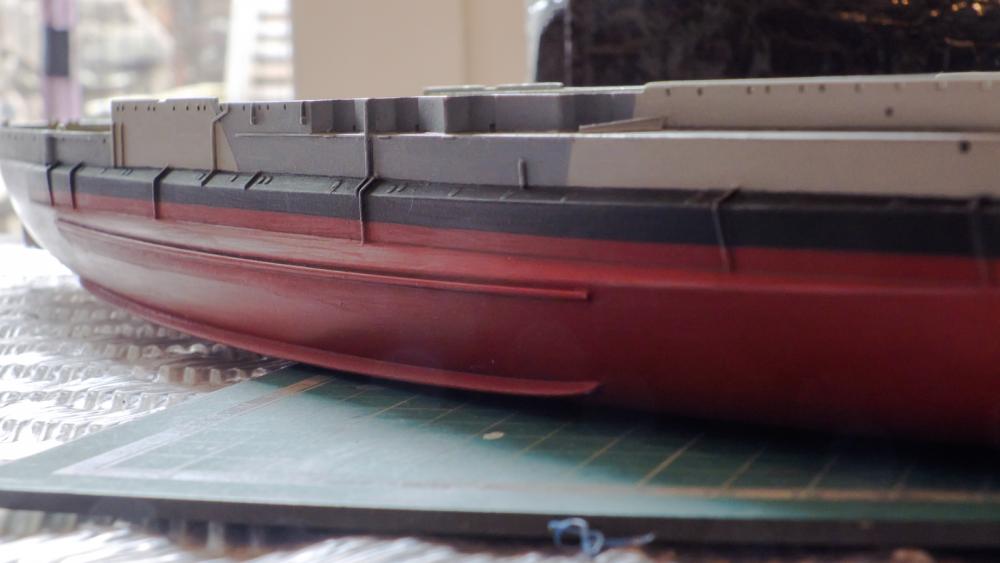
Just a quick update folks - I finnished off fitting all four prop shafts, then touched up the colour then added a couple of coats of top coat to blend it all in, then after finding out what the block on the bottom bow was for thanks to folks on here, I drilled out the two small holes taht would have had chains attached. I then returned to the 6 inch gun shelf and sorted out the port and starboard waterbreaks, these had to be cut from the etch sheet then the bottoms of these needed bending 90 deg's to act as a ledge, I then sat them a small amount of watered PVA then when dry painted them as they should be. Next will be two ladders leading down to the 6inch battery ledge from the Forecastle deck. OC.
-
Looking great greg, really tidy detail work and clean paintwork OC.
- 342 replies
-
- 4
-

-
- dreadnought
- zvezda
- (and 2 more)
-
Thanks for having a look mate mutch appreciated. OC.
-
Hiya, thanks so mutch for finding that out - I had wondered for the past year what it was for, I kind of stupidly thought it might have been somekind of counter weight or something. OC.
-
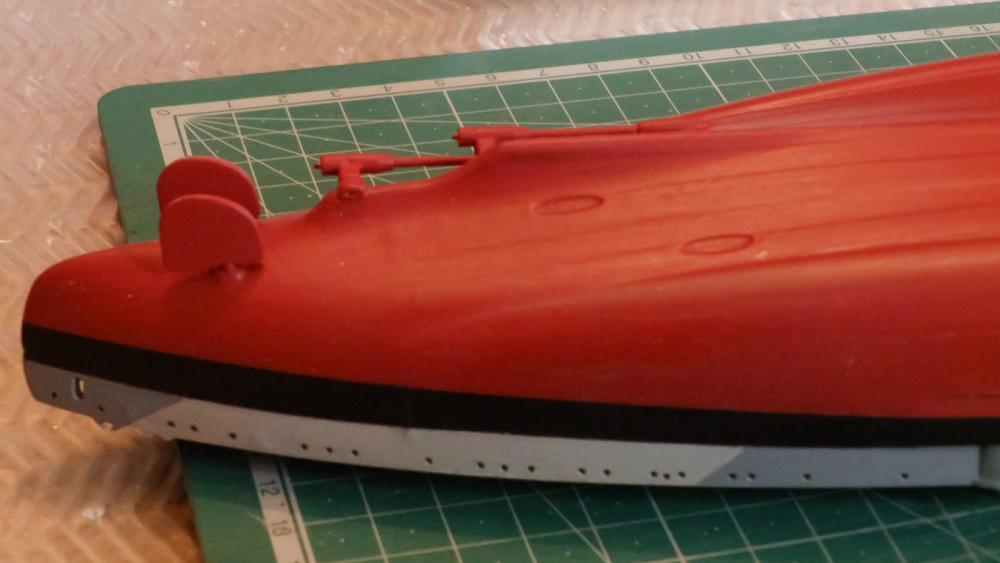
I started on the Rudders and Prop Shafts, I needed to do a bit of studying to see which shaft is which, but after looking at the instructions and dry fitting - it all came clear, I fitted the rudders first just a slight bit of drilling out for the rudder arms, then I glued them in place, next was the shafts, afterwards I touched up the paint around them. I also fitted the bow bottom fitting (A counter weight)? not sure of its purpose. Here are a few pics folks - OC.
-
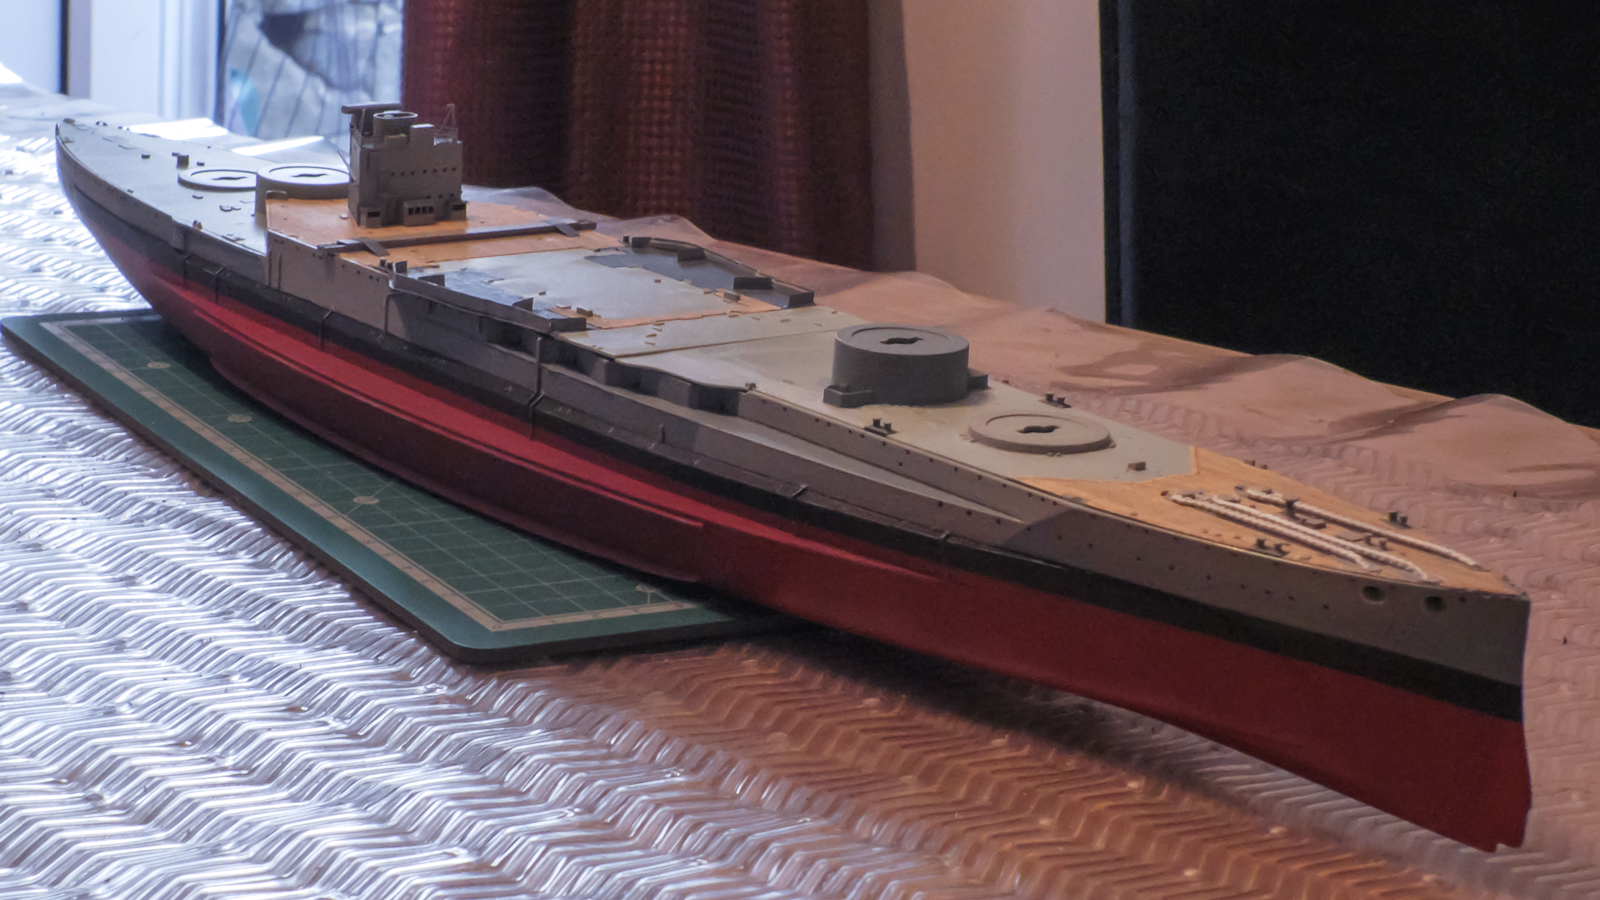
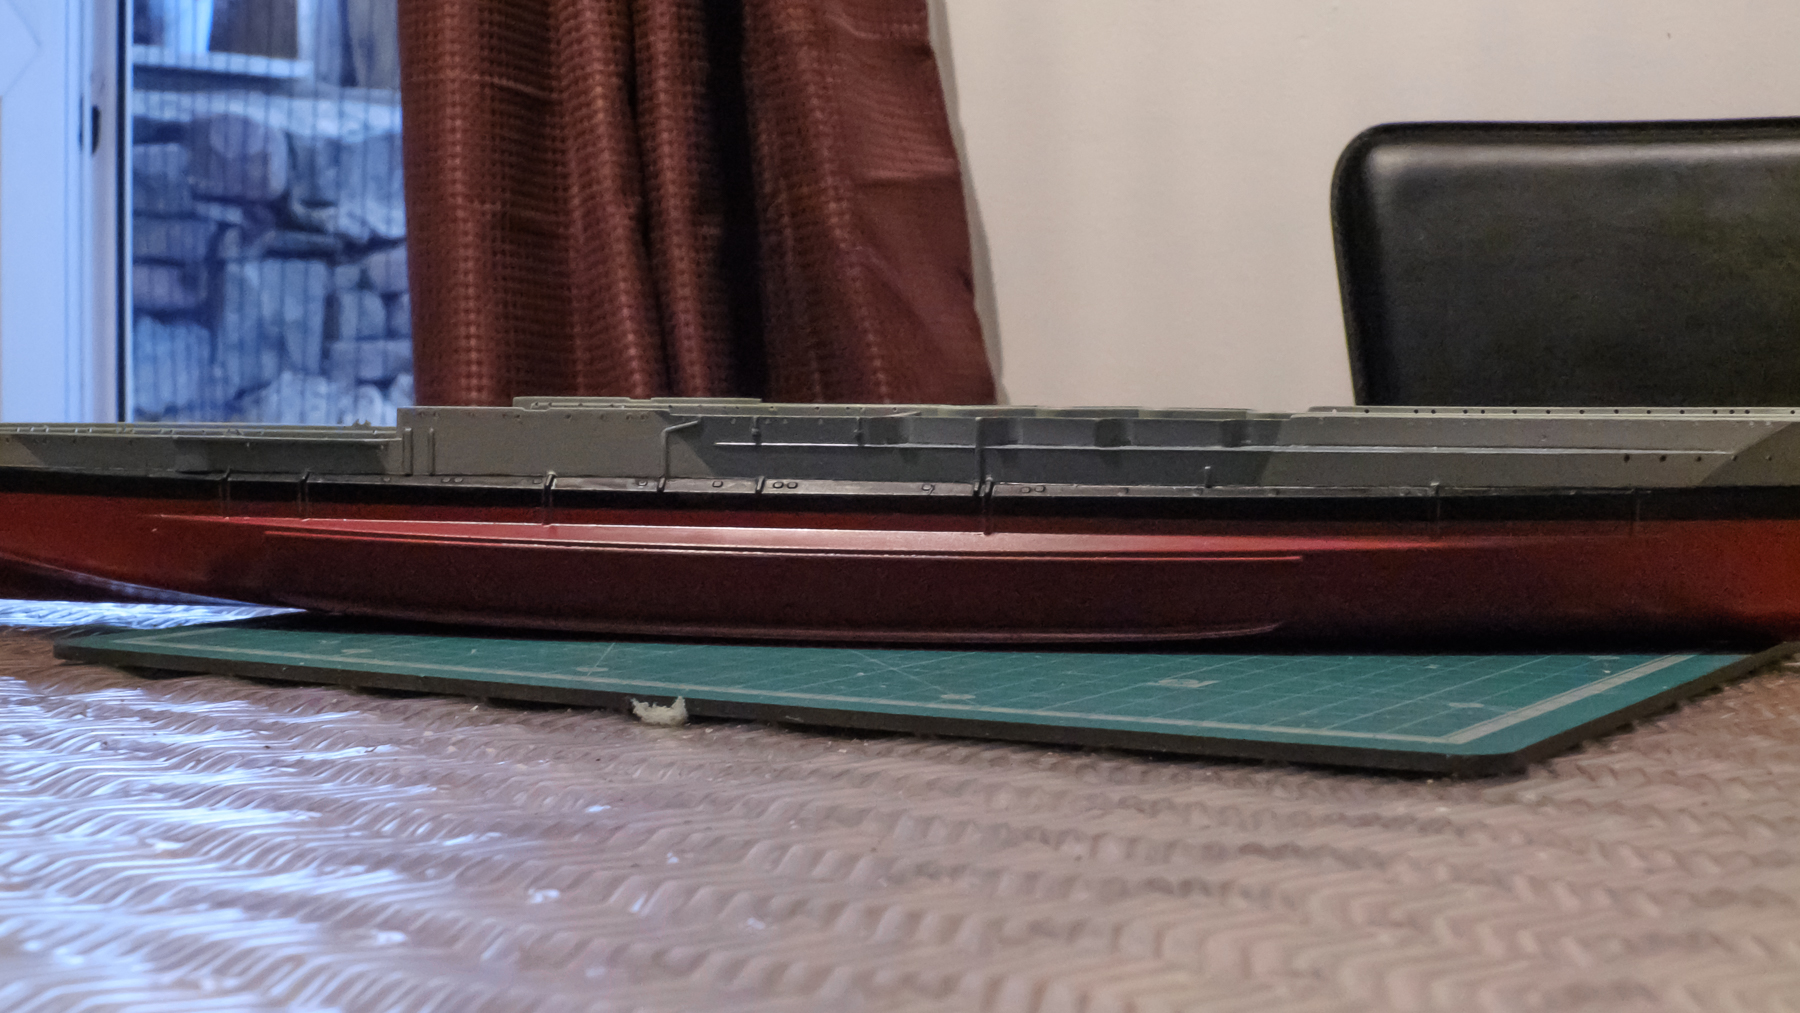
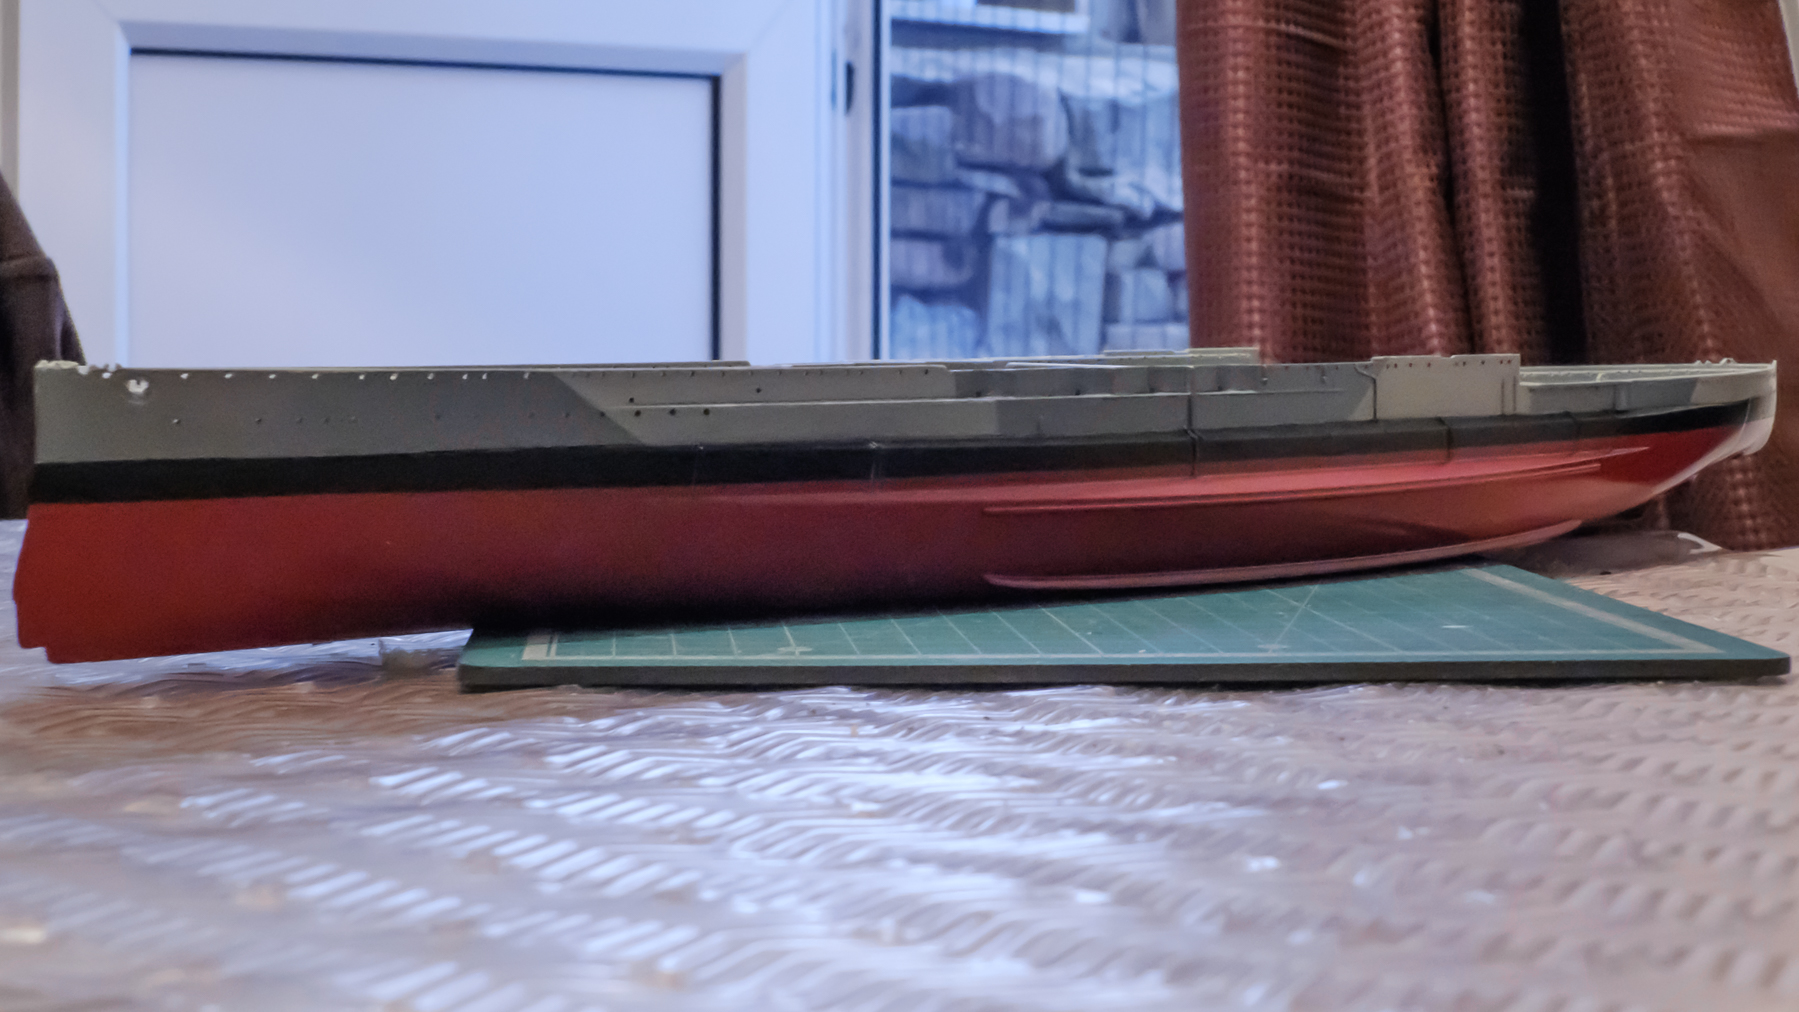
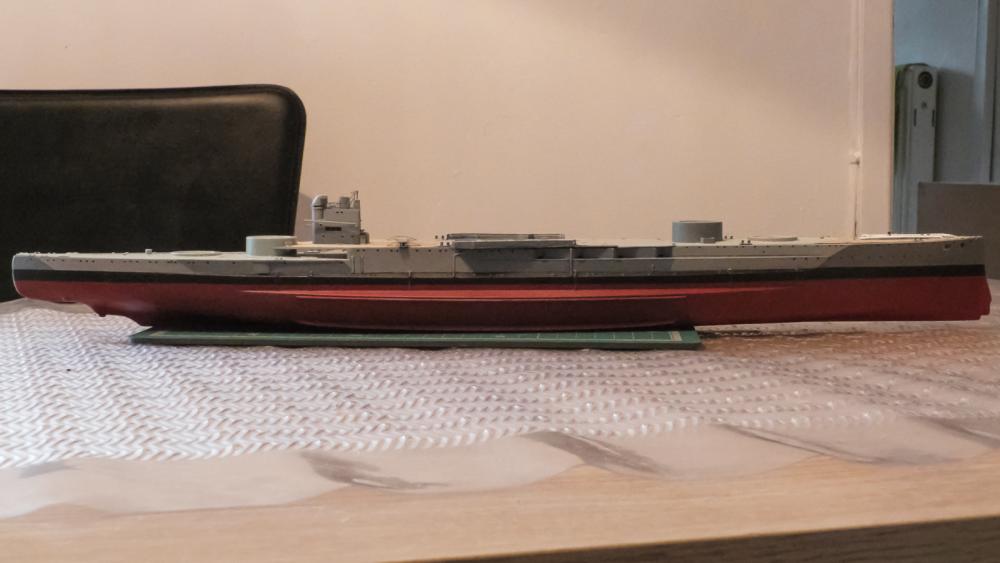
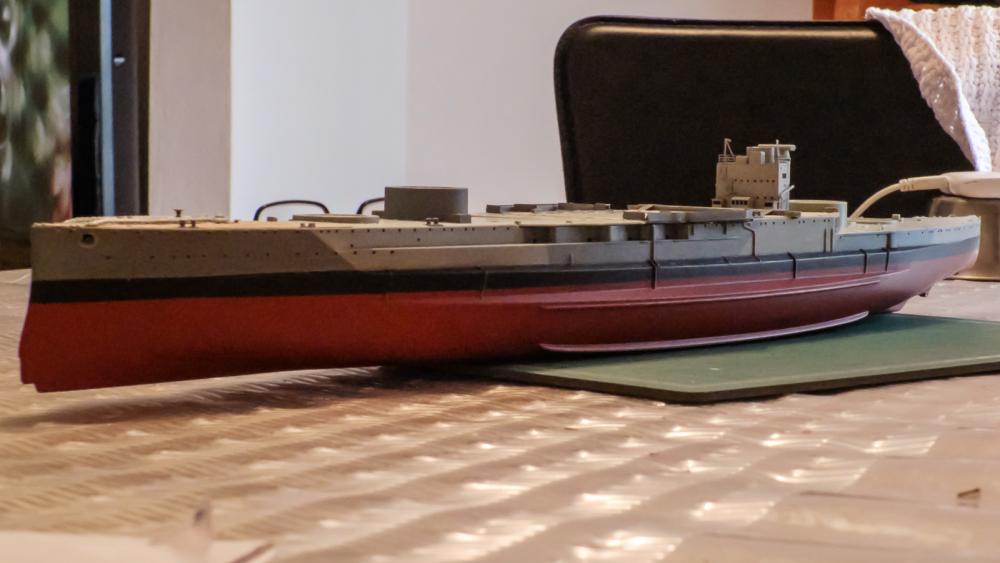
An update folks - with pics I carried on layering the top coat on the hull, and decided to dry fit the deck parts for a bit of a photo shoot. OC.


-
Like I said to the wife - its should be like a metal version of a painted surface - although mat in colour still smooth metal. OC
- 342 replies
-
- 4
-
-
- dreadnought
- zvezda
- (and 2 more)
-
Just a bit of lightning with almost like a artists powder white - just to catch the high points and details, but if you are like me I want my hull red around a dull satin colour, best achieved by buffing a mat sheen I think, , thats my approach with my hull and I would think yours is not far off that. OC
- 342 replies
-
- 4
-
-
- dreadnought
- zvezda
- (and 2 more)
-
Just an update folks minus pics though, I started on the lower hull by giving it a good clean down and blast with a hairdryer to remove dust, then i diluted a bit of vallejo Mat top coat and procceded to hand paint the hull, with the largest but managable brush I have to hand, I tried to follow defined areas with detail boundaries, and built it up in stages of thin coats added with the venerable hairdryer. After a few coats it was covering quite well with just a light scattering of fine brush marks, these should rubb out with a cloth when its hardened. OC.
-
Hey greg, i'm loving the detail in the hull very sharp, what are you going to do with the anti fouling on the bottom, apply a mat varnish or similar? OC.
- 342 replies
-
- 2
-
-
- dreadnought
- zvezda
- (and 2 more)
-
Hey! Are you going to post up your Warspite build, it would be interesting to follow OC
- 342 replies
-
- 5
-
-
- dreadnought
- zvezda
- (and 2 more)
-
Hi, yeah checking the photos I have she did serve quite a time with white chains and was kept in that state for most of her active life. OC.
-
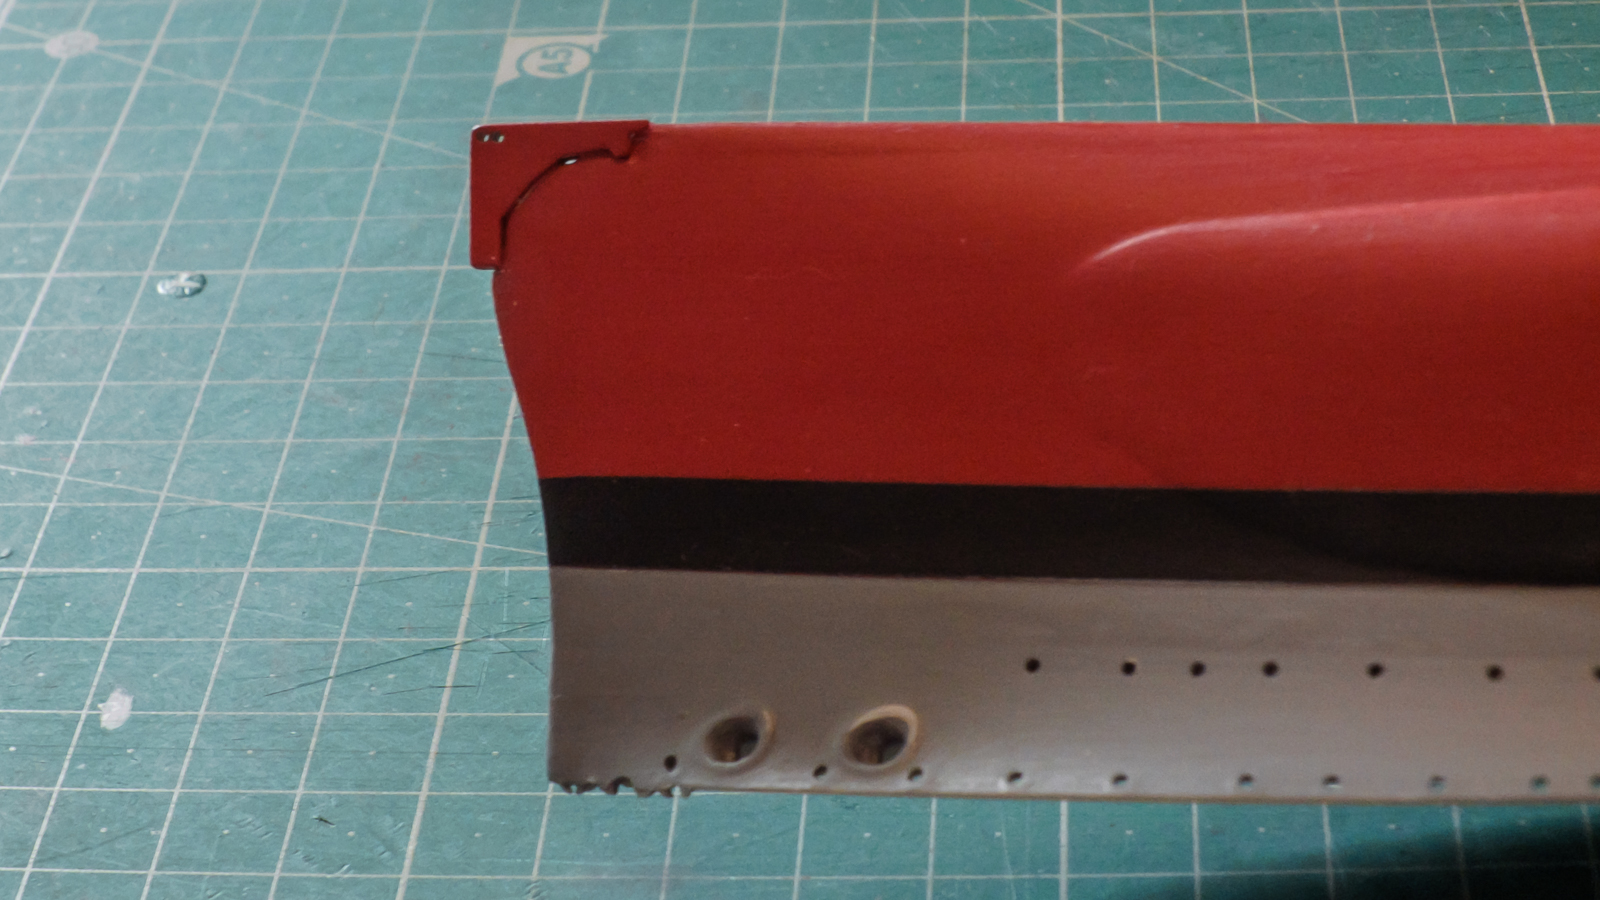
Decided later today i will firstly reduce the width of an overhang that was there for the 1918 fit, when she had more 6 Inch guns both forward and aft, in later life she had these overhangs reduced, and planked over close to her hull sides, after doing this i will dry brush a light grey colour over her upper hull before highlighting her details with a dull white. OC.
-
Looking nice greg very clean and as you say - good to get the main hull painting out the way, always feels like an achievment when thats done, is that AP 507C on the hull? standard RN paint colour to help keep the temp down a bit on ship in hots climates. OC.
- 342 replies
-
- 4
-
-
- dreadnought
- zvezda
- (and 2 more)
-
Loving your progress greg - the armour plates look a treat, she has a great shape about here and no boubt quite daunting in her prime. OC.
- 342 replies
-
- 4
-
-
- dreadnought
- zvezda
- (and 2 more)
-
Thanks greg, Next stage will be to add the odd small additional things like the dropped ledge water break, then I will do a bit of light highlighting - dry brush style, then the hull will be turned upside down while i work on the rudders and props/shafts, then the attaching the transfer draught markings and finishing off the hull with a couple of flat clear coats the protect it, It will then be put away back in the box while I continue the deck section details etc. OC.
-
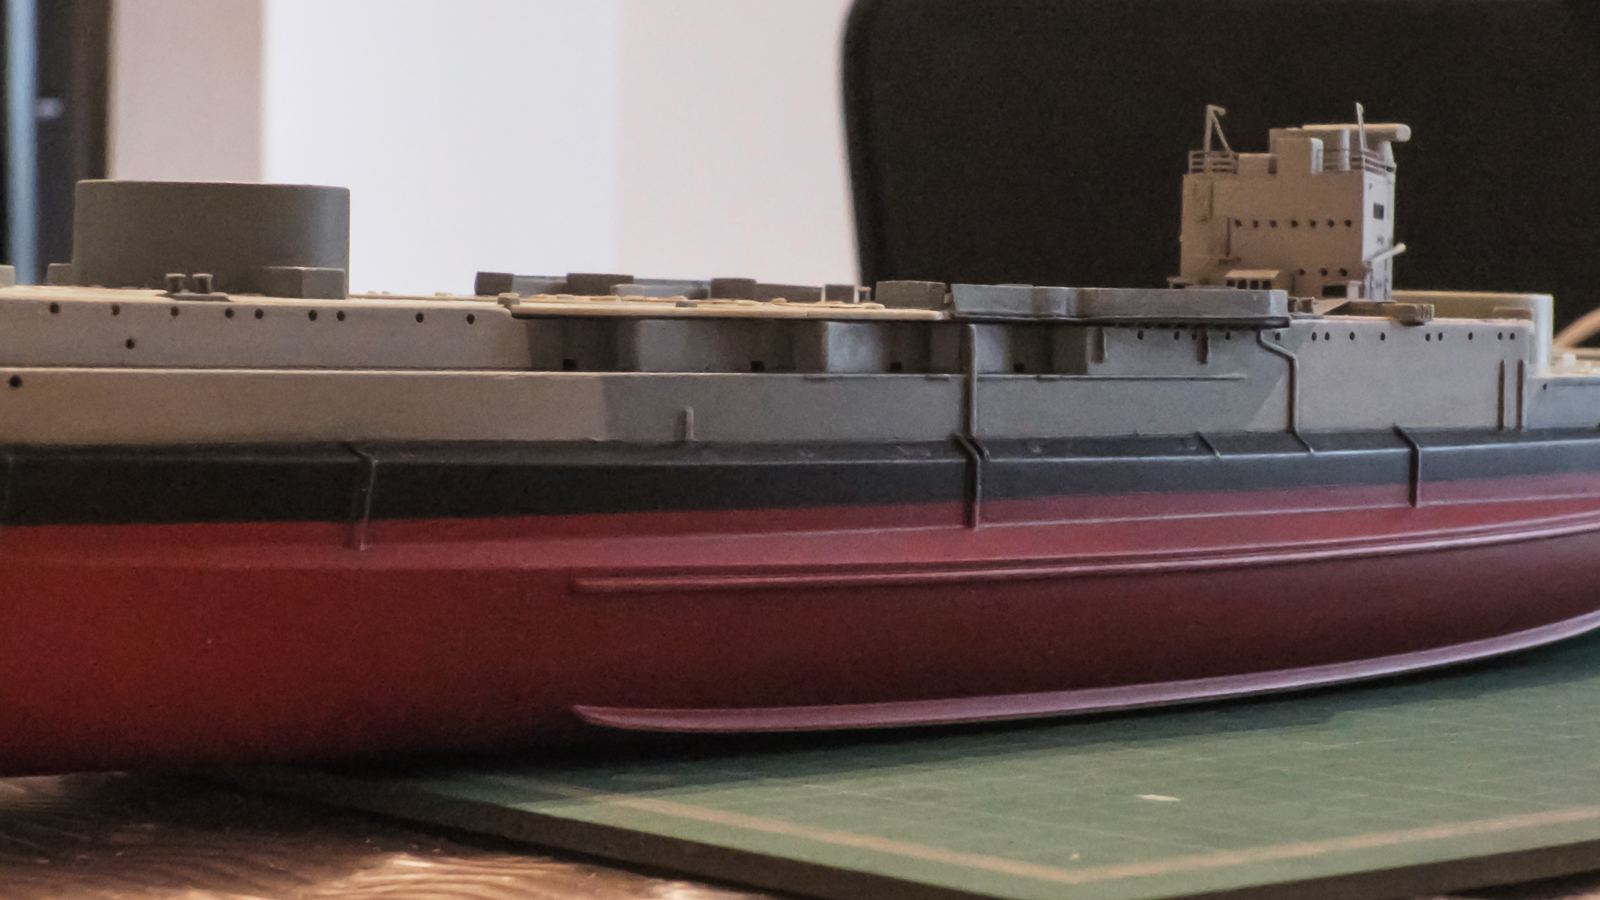
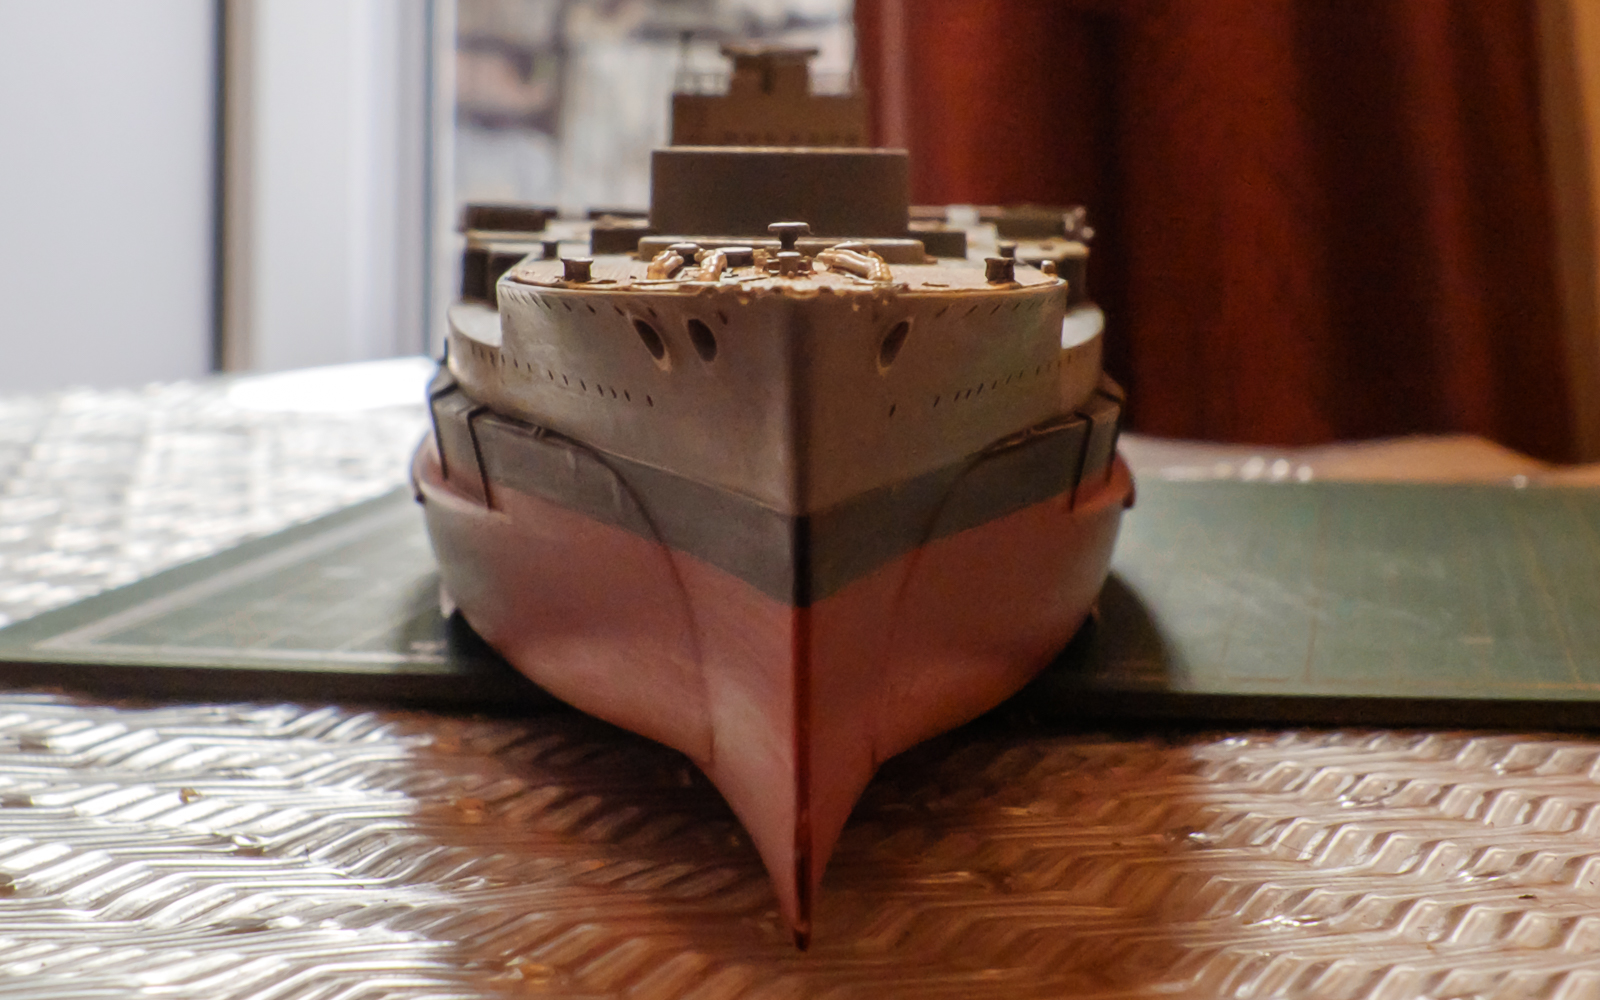
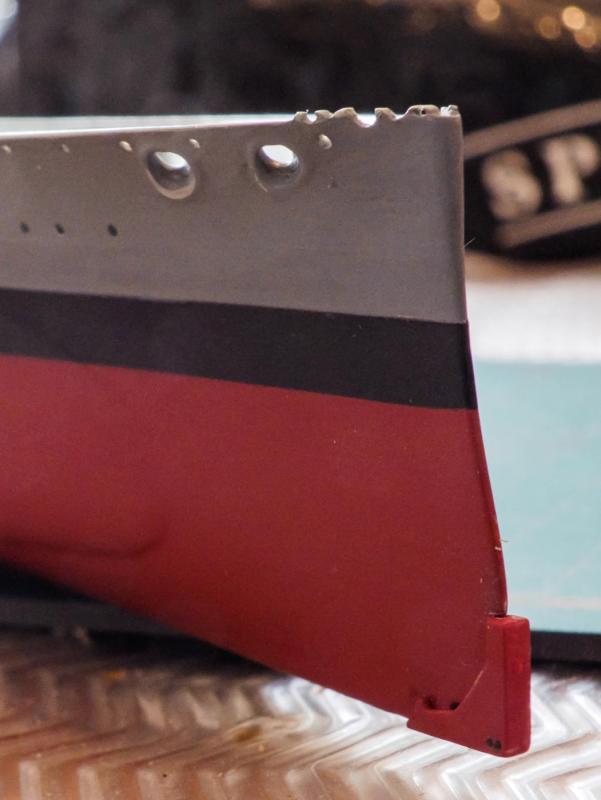
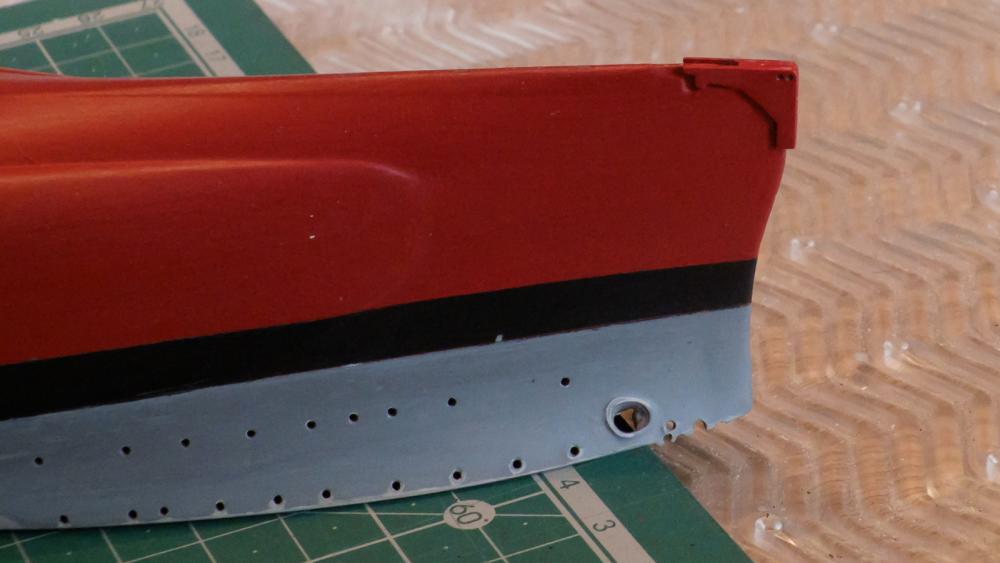
More work on the hull today - I started by re drilling out the port holes that had been blocked up a bit by paint, I then had to re build the front fairleads by drilling and shaping with a round file, this took quite a bit of time and lots of re checking under the magnifier, after all the shaping and fidling was done i got out a fine sharp pencil and worked on the recess lines to create a bit of shadowing. Here are a few pics folks - I think its going in the right direction folks? OC.


-
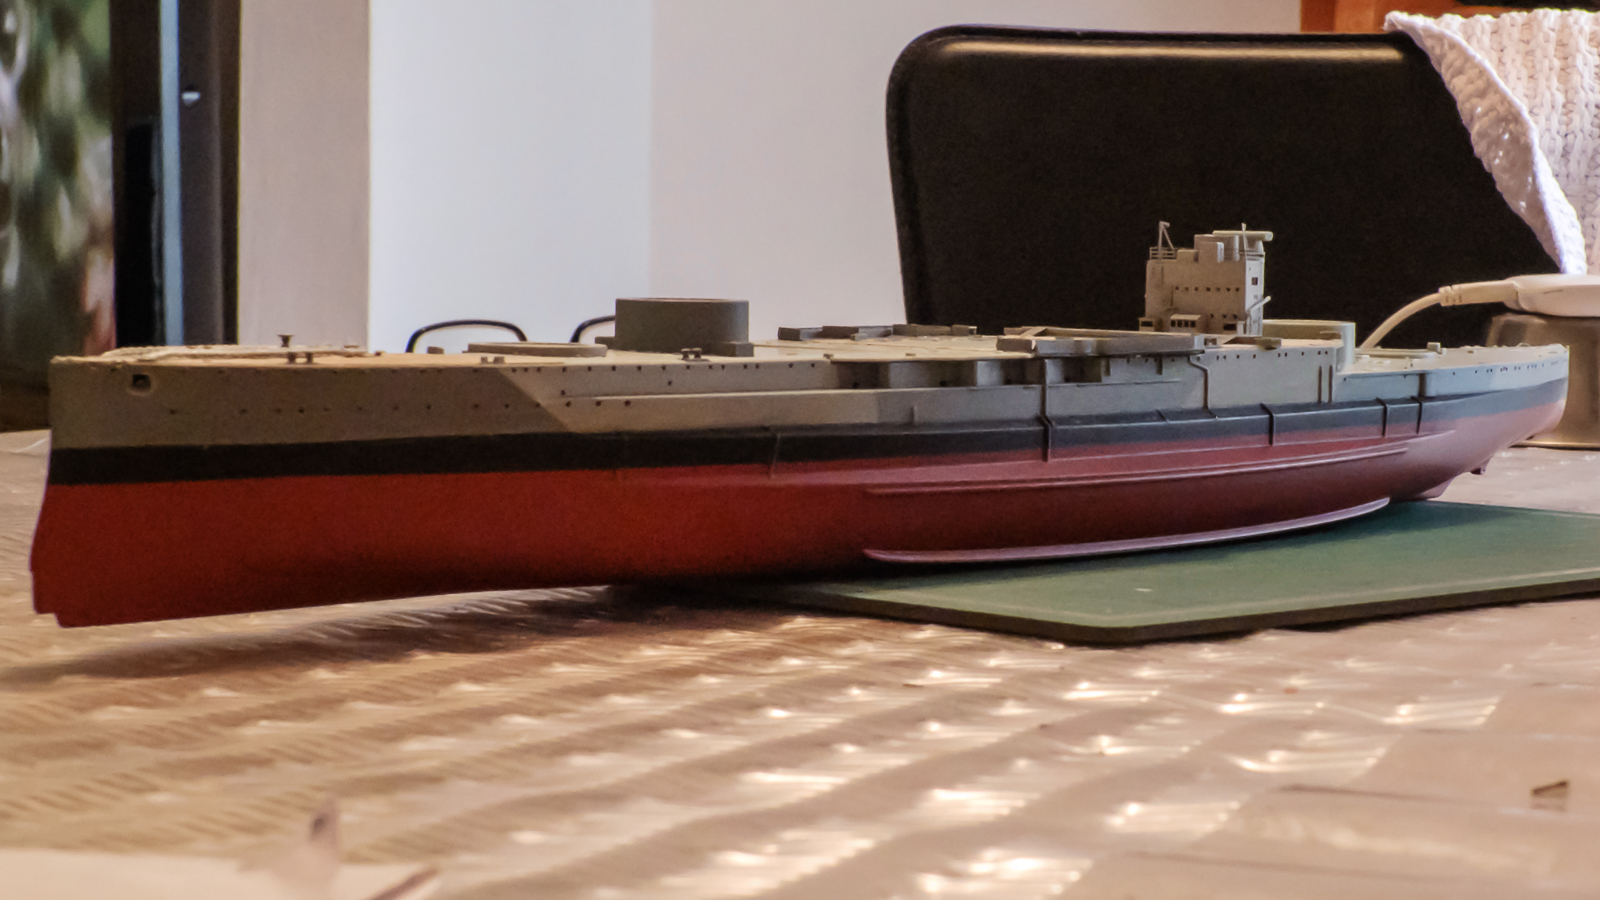
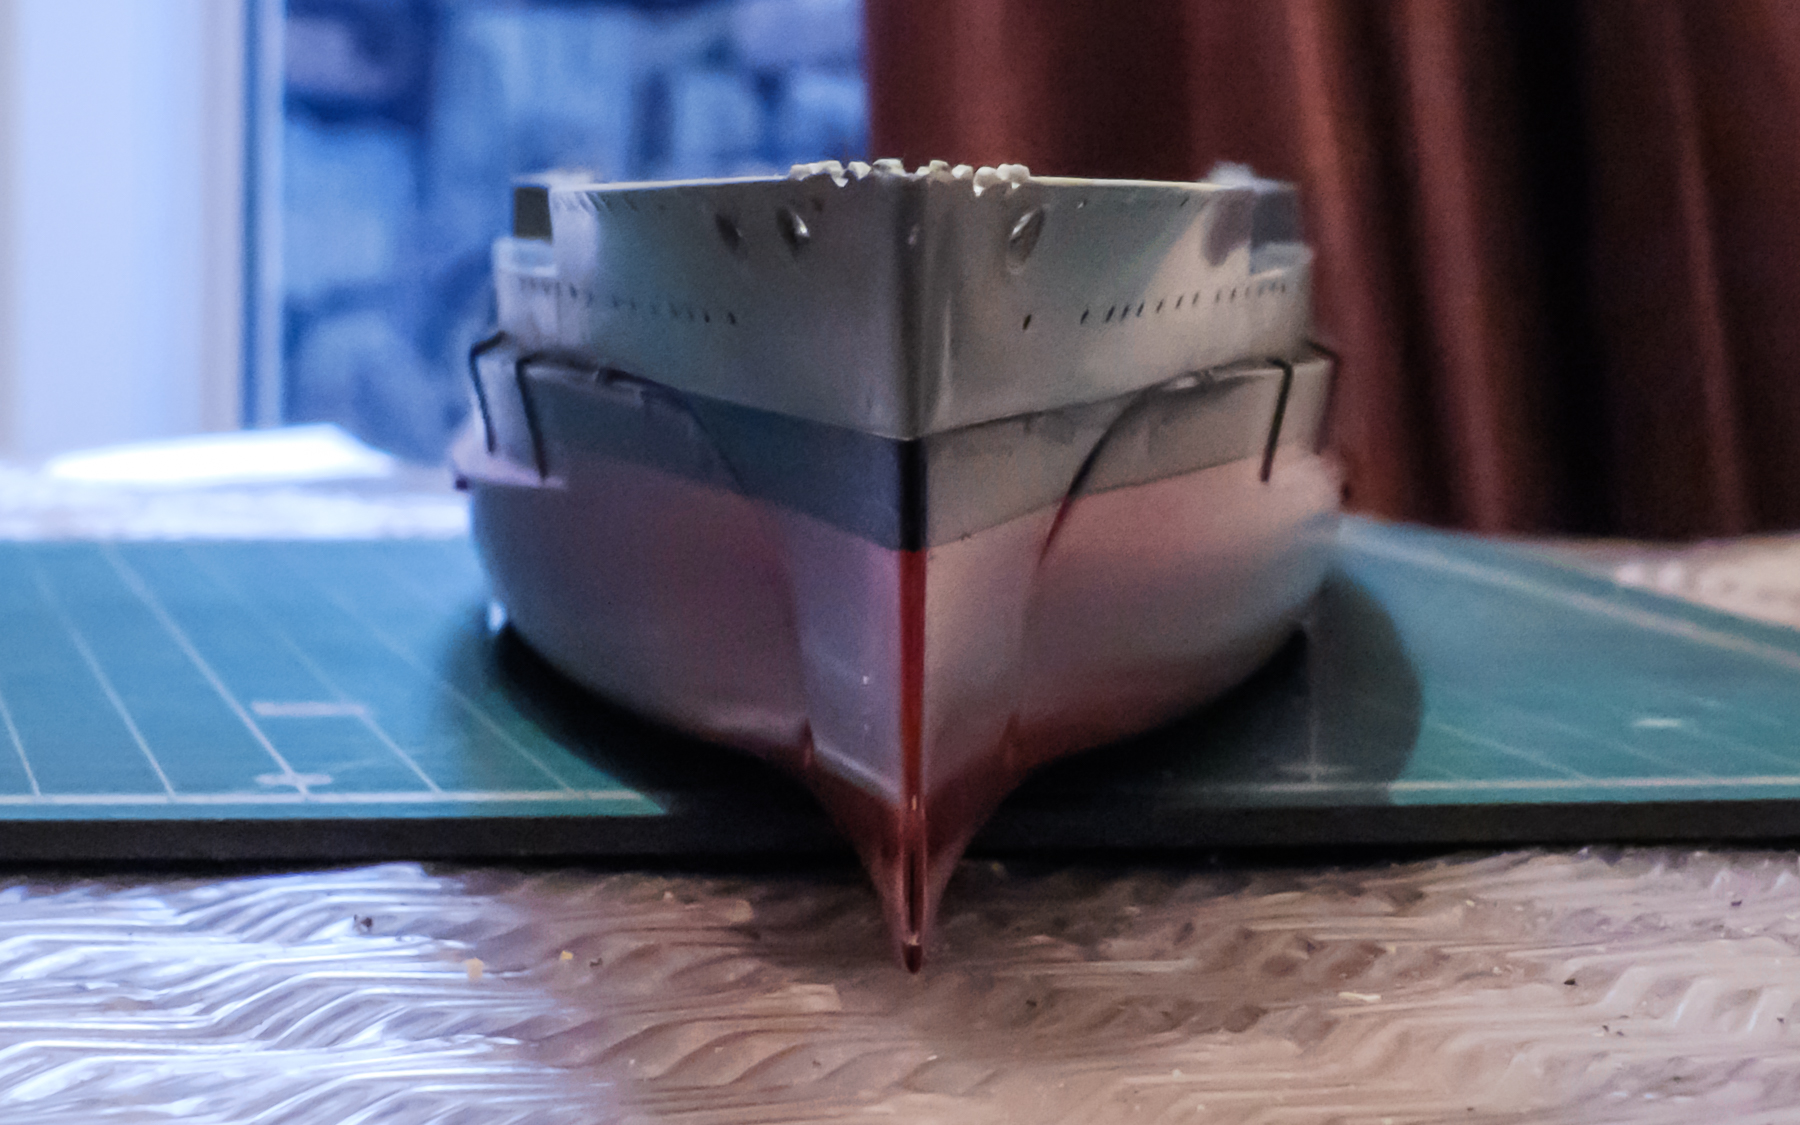
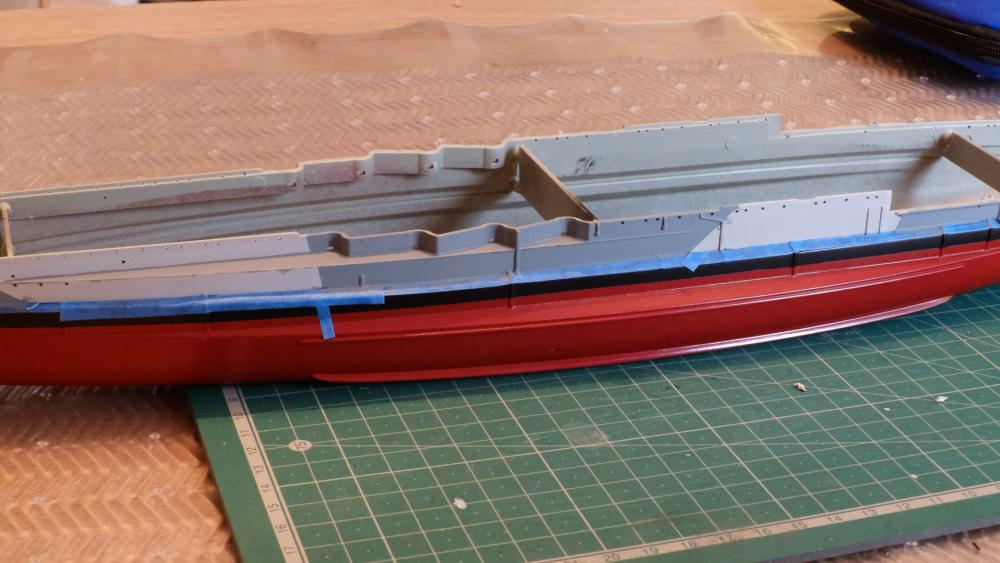
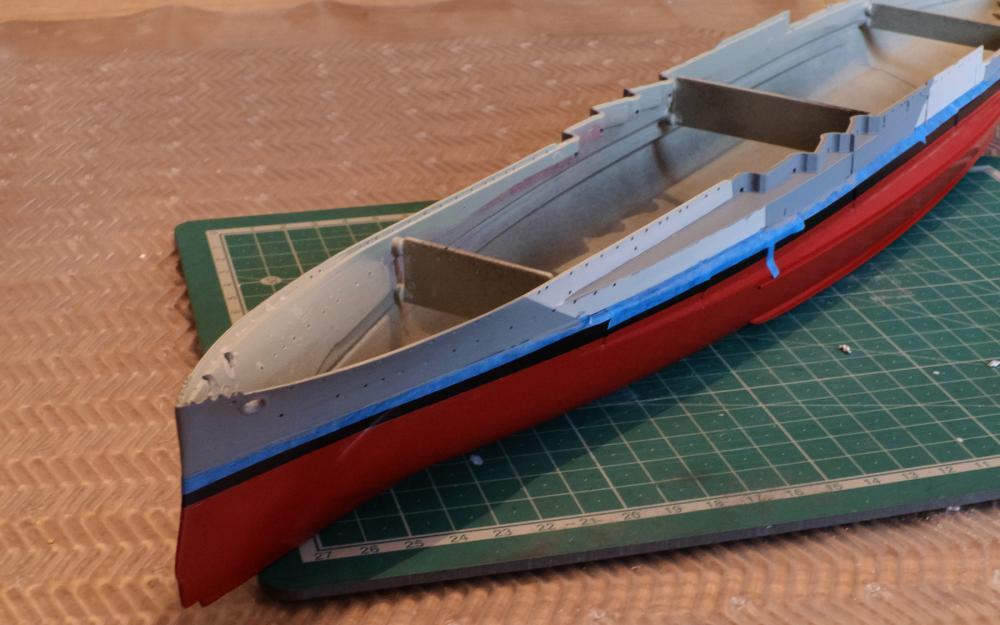
Right folks - I have done the other stage in the camo colour on the hull, basically just by putting some tape on the edge of the darker shade then applying the same thiness of acrylic with my brush, a bout the same amout of coats was applied with drying stages by the wifes hairdryer, this is a Fantastic way of speeding the whole process, as it allows me to put coats on more or less strait after each other. I removed the tape but as expected there are ridges where the two colours meet, but I should just be able to sand these down very lightly, when the paint has hardened fully, I will then dry brush lightly along the edges to blend the two colours in, and also do some highlighting and a bit of shading to the hull. Its great to see the hull 75% done as it was an area I was dreading OC.
-
Hull Time again, I had only painted the starboard side before with both camo colours, so to give my deck parts a break I decided to get the hull out and start masking up then painting the mid grey colour, i painted by hand with a small brush and put on about 8 thin coats with hairdryer drying between coats so I could put on as many coats so quickly, I have only the one shade on but will add the light grey tommorow after maskin up the reverse. Hers are a couple of pics. OC.
-
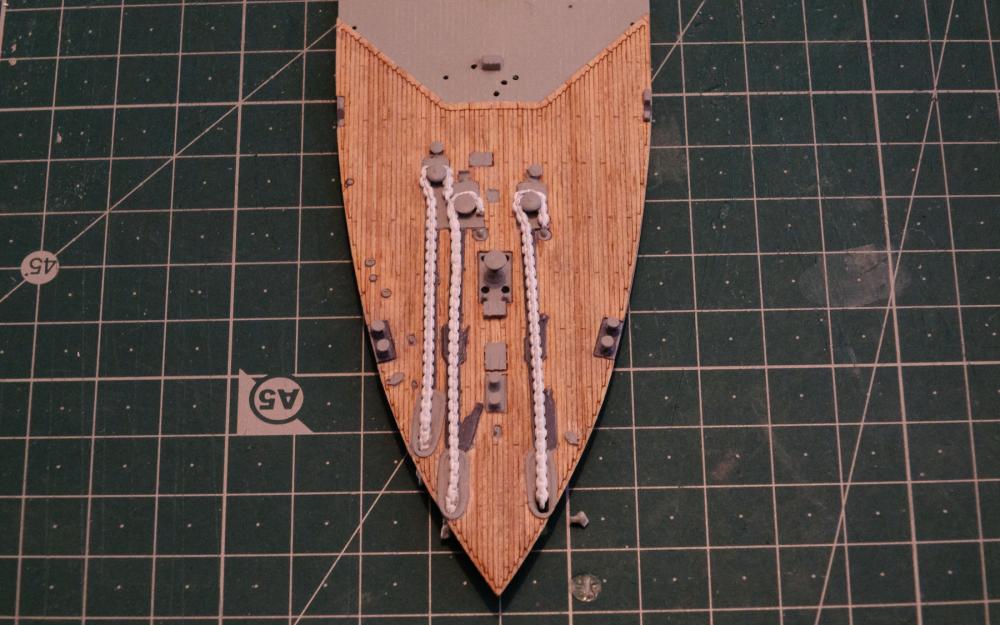
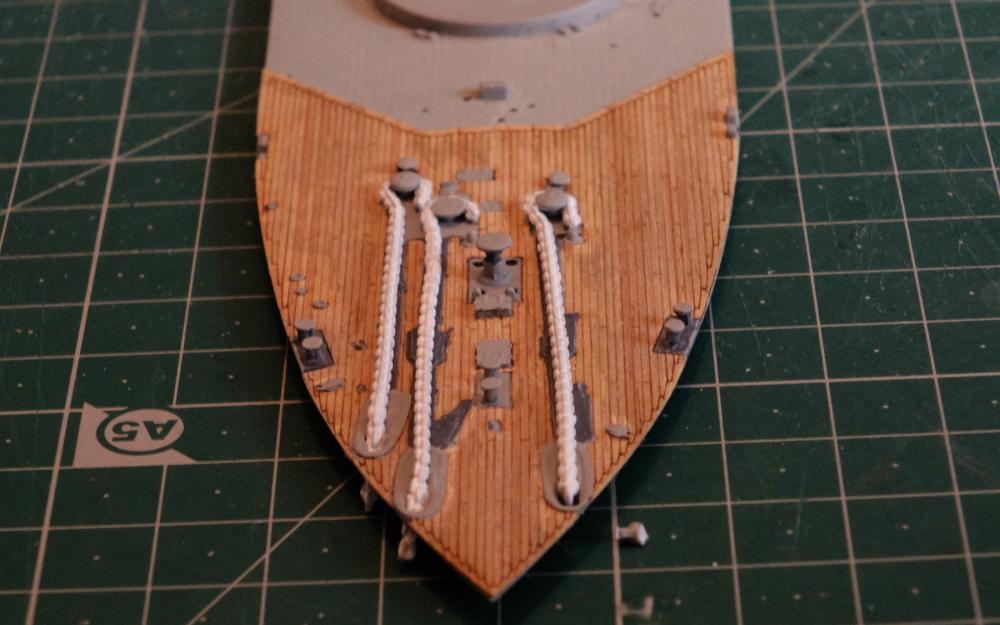
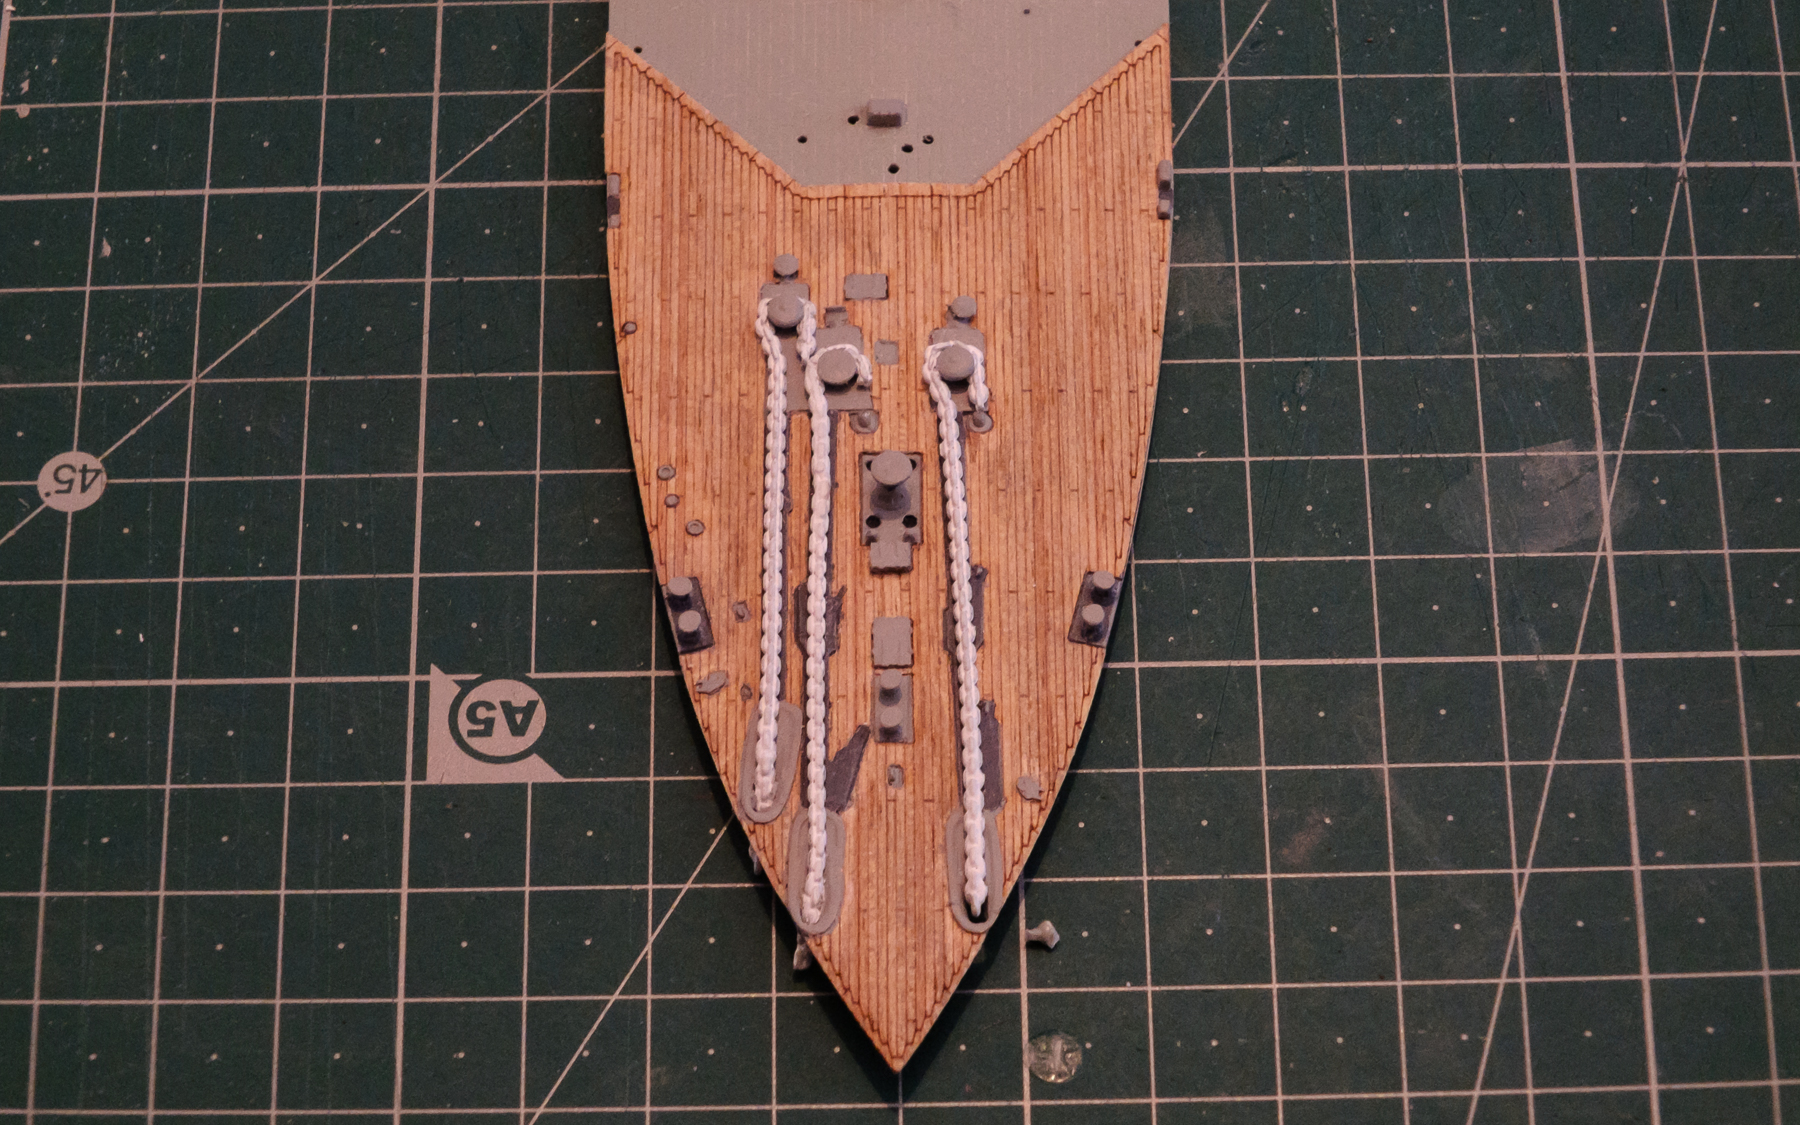
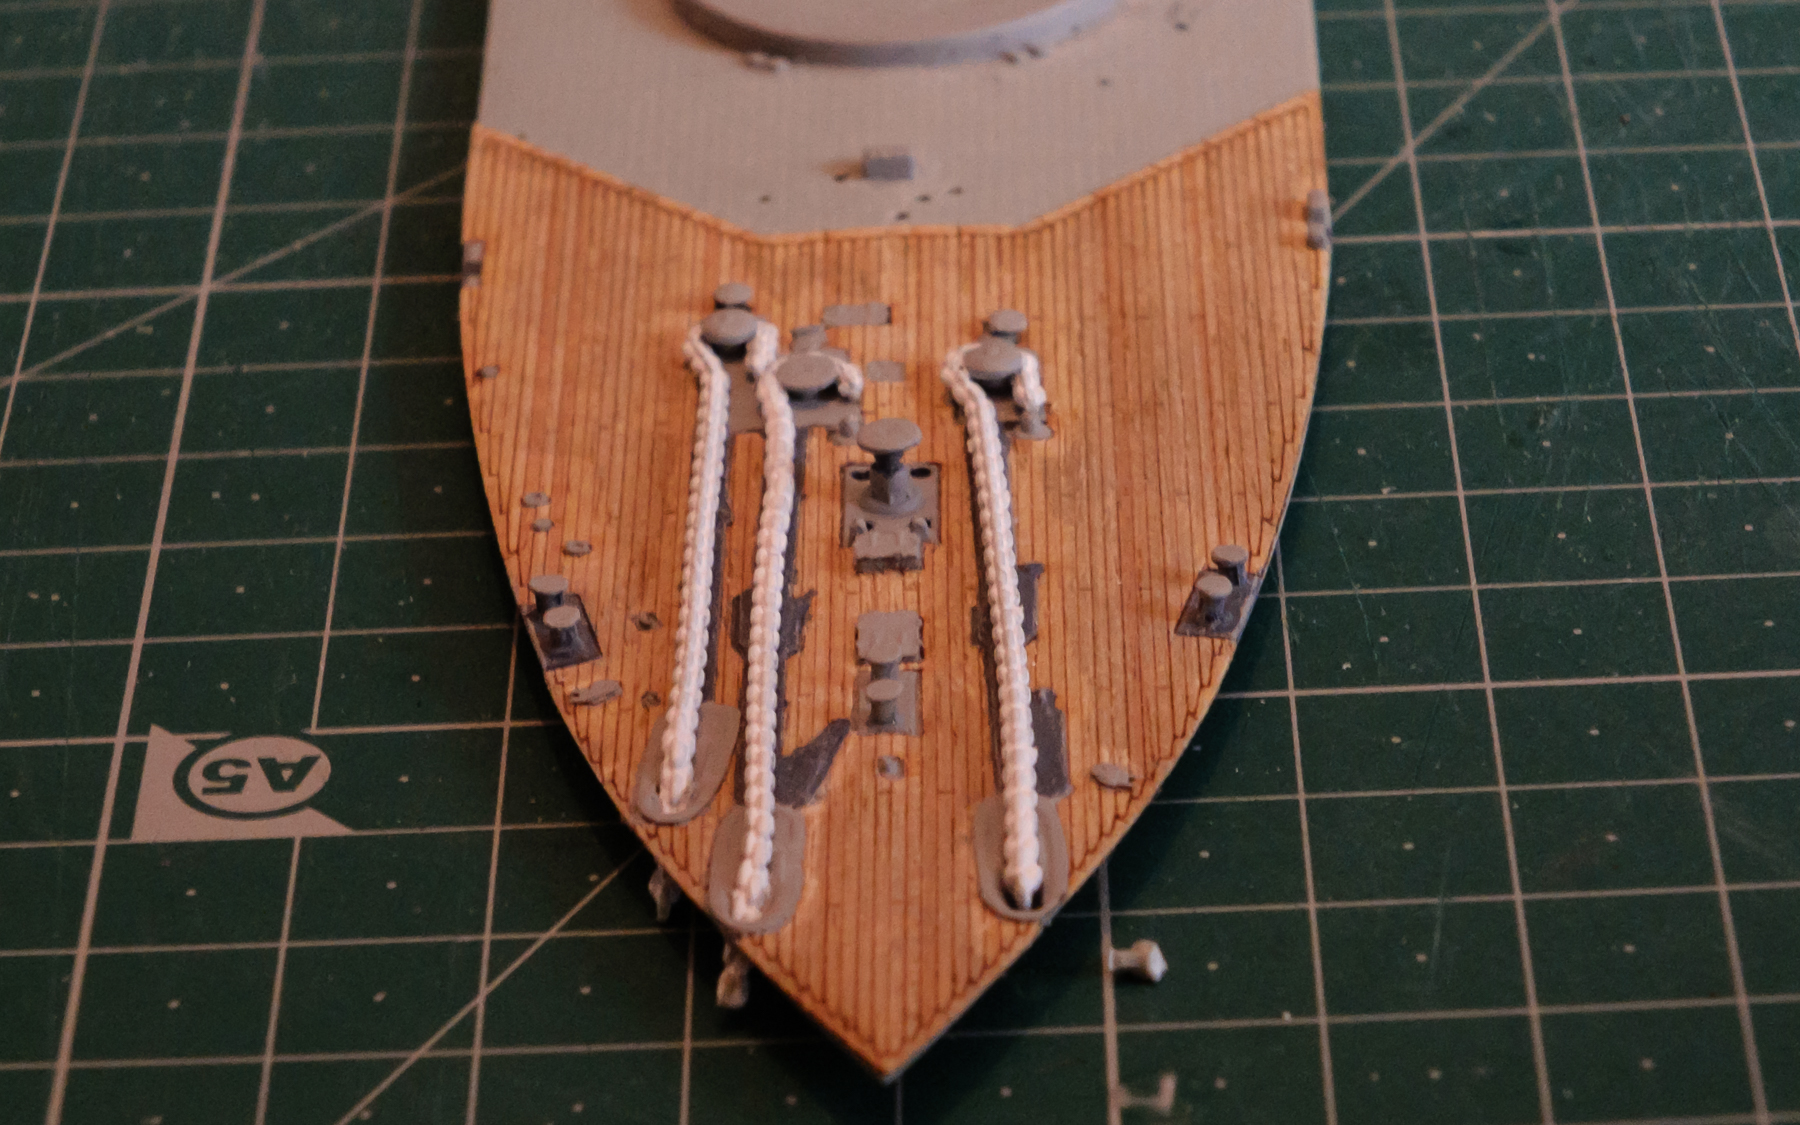
I did a bit more work today on the bow deck section completing putting the anchor chains in place, i then gave them a white paint coat. Here is a couple of pics. OC.