HOLIDAY DONATION DRIVE - SUPPORT MSW - DO YOUR PART TO KEEP THIS GREAT FORUM GOING! (Only 24 donations so far out of 49,000 members - C'mon guys!)
×


Old Collingwood
-
Posts
12,098 -
Joined
-
Last visited
Content Type
Profiles
Forums
Gallery
Events
Everything posted by Old Collingwood
-
 I use one of those extendable pencils that you push the end to extend more lead, they are ultra fine but for an even fineer line you can sand the tip abit, I tend to use it in the inside corners where there would be shade and around water tight doors and around details, just to give some separation from the protruding item. It works well if you then apply your top coat over the top of it to seal it. OC.
 -
What do you use for the shading lines - a pencil? thats often recomended - I use that technique and it sometimes works, you would have to have a look on my build I used a pancil for shadow work on the hull. OC.
-
I've gone cockeyed just looking at your small work - next time I look at my build it will be back to front. OC.
-
She is looking Superb in that case robin - Really stands out now she looks like a museum item showing off your beautiful work.
- 473 replies
-
- 6
-

-
- greek bireme
- dusek
- (and 1 more)
-
Thanks pat I soon un-stook myself from the cream cake that was so precisely stook to my fingers(the rear walkway came away also) OC.
-
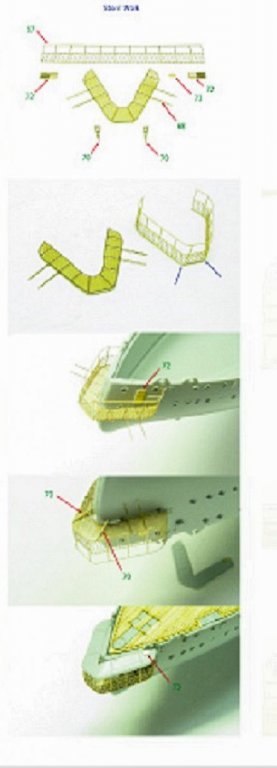
More work on the rear walkway, I started by offering the part up against the stern to see how it fits, then I applied a thin coat of CA and pressed it in to pleace, then a light sanding and a few more light coats of mid grey. Here's a couple of photos folks. OC.

-
One day I will have to get round to carrying on with this build, I have her sat on the shelf, and all the parts to finnish her in the box, I was put off a bit by the plank bending errors and snapping - splintering planks, from just normal boiled water heating method(left in a tall glass with boiling water) OC.
- 455 replies
-
- 2
-
-
- slightly modified
- greyhound
- (and 1 more)
-
Thank you my friend, no worry about getting the walkway stuck to my finger but - "you know those sticky custard slice cream cakes"? managed to get that stuck to my finger, not good eating a sticky cake while building a model. OC.
-
So - back on with the rear walkway today, I gave it a few coats of mid grey and left it to dry, its a bit rough looking, but it will be tucked away at the stern so no one midships or forward will notice it - just keep the captain away from it or it will be holystone duties for the painters for weeks. OC.

-
Thanks robin, close work through magnifiers dont help either, looks ok well actually stunning when I take my glasses off. lol. OC.
-
So - as i just explained to carl - I could not let it defeat me, so I took the parts and run hot water through them to remove any traces of PVA, then under our kitchen halogen lights and my magnifier I tried again using direct super glue, firstly attaching the walkway base to the rail, then the roof, mind you I managed to get more super glue on my fingers than on the assembly. At least its securley put together now even though its a bit rough and slightly distorted. OC.
-
Thanks carl, think I maaged to salvage it (In a fashion) its a bit miss shaped but is super glued a bit stronger now(got most of it on my fingers) OC.
-
Well that hasn't worked out well - whole walkway structure fell appart after I glued it all together, and its all a buckled mess - combination of lack of dexterity - holding small parts, and inabilty at glueing and securing such small areas. So guess it will have to be Warspite but minus the walkway (not very realistic I know) OC.
-
Taking shape. OC.
-
Some good work going into it my friend, your doing great work there. OC.
- 133 replies
-
- 4
-
-
- jeanne d arc
- heller
- (and 2 more)
-
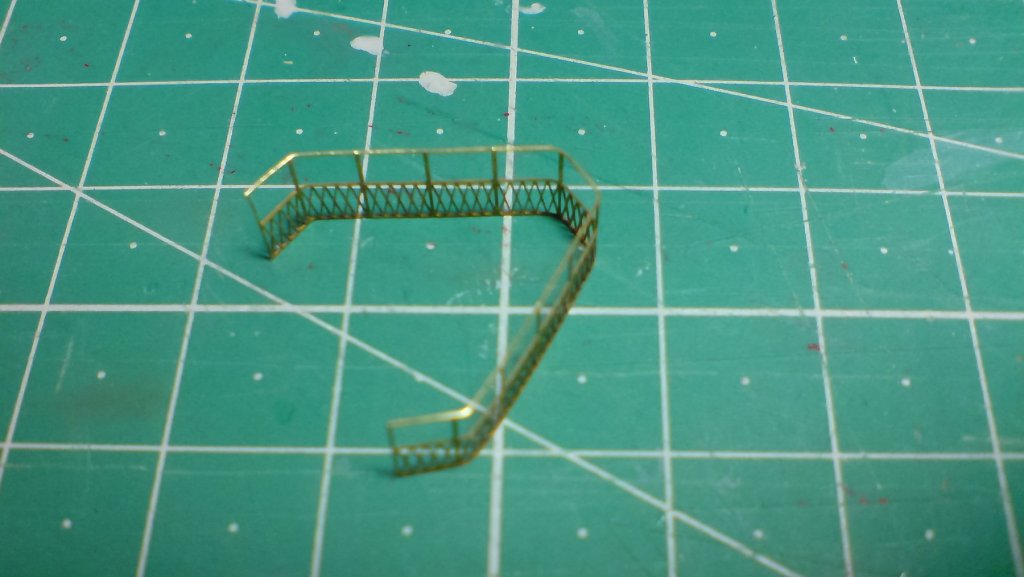
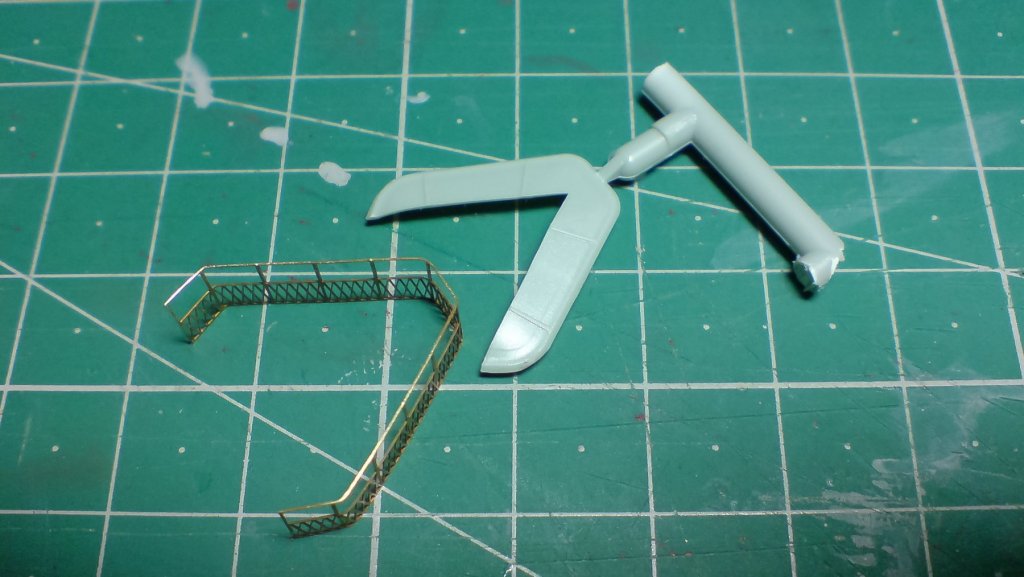
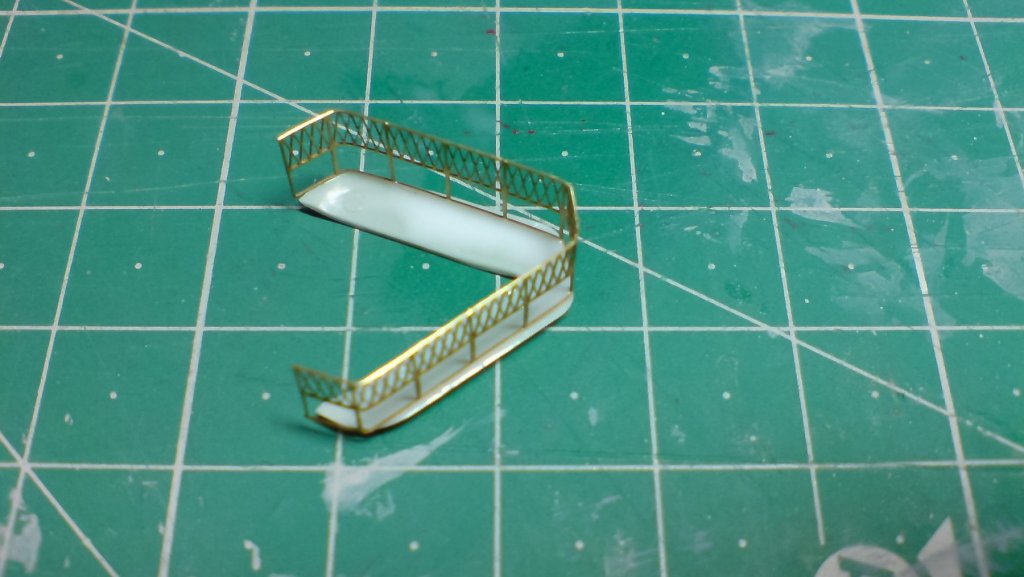
I started on the rear walkway today folks, first I had to cut two pieces from the PE fret namely the floor and railings, then after a slight sanding of the edges next step was to bend the railing to meet the shape of the plastic roof section, I did this by bending it against a narrow sanding stick, as it was gentle enough not to damage the PE part, but also strait enough to get the fold, after doing this and comparing the shape to the roof - I layed a troth of PVA and layed the railing to it positioning it carefully then left it to dry. Next I turned me attention to the walkway footplate, this again was a PE part but I decided to attach it to the plastic footplate part after thinning it slightly - this will give it a liitle bit more strength. When they have set before adding the floor I will bend them into shape slightly more accuratley, ready for a bit of CA glue to secure them prior to painting the insides. Another reason for using the plastic footplate along with the PE is to make a better surface to glue it to the hull. Here are a few photos of the parts folks. OC.
-
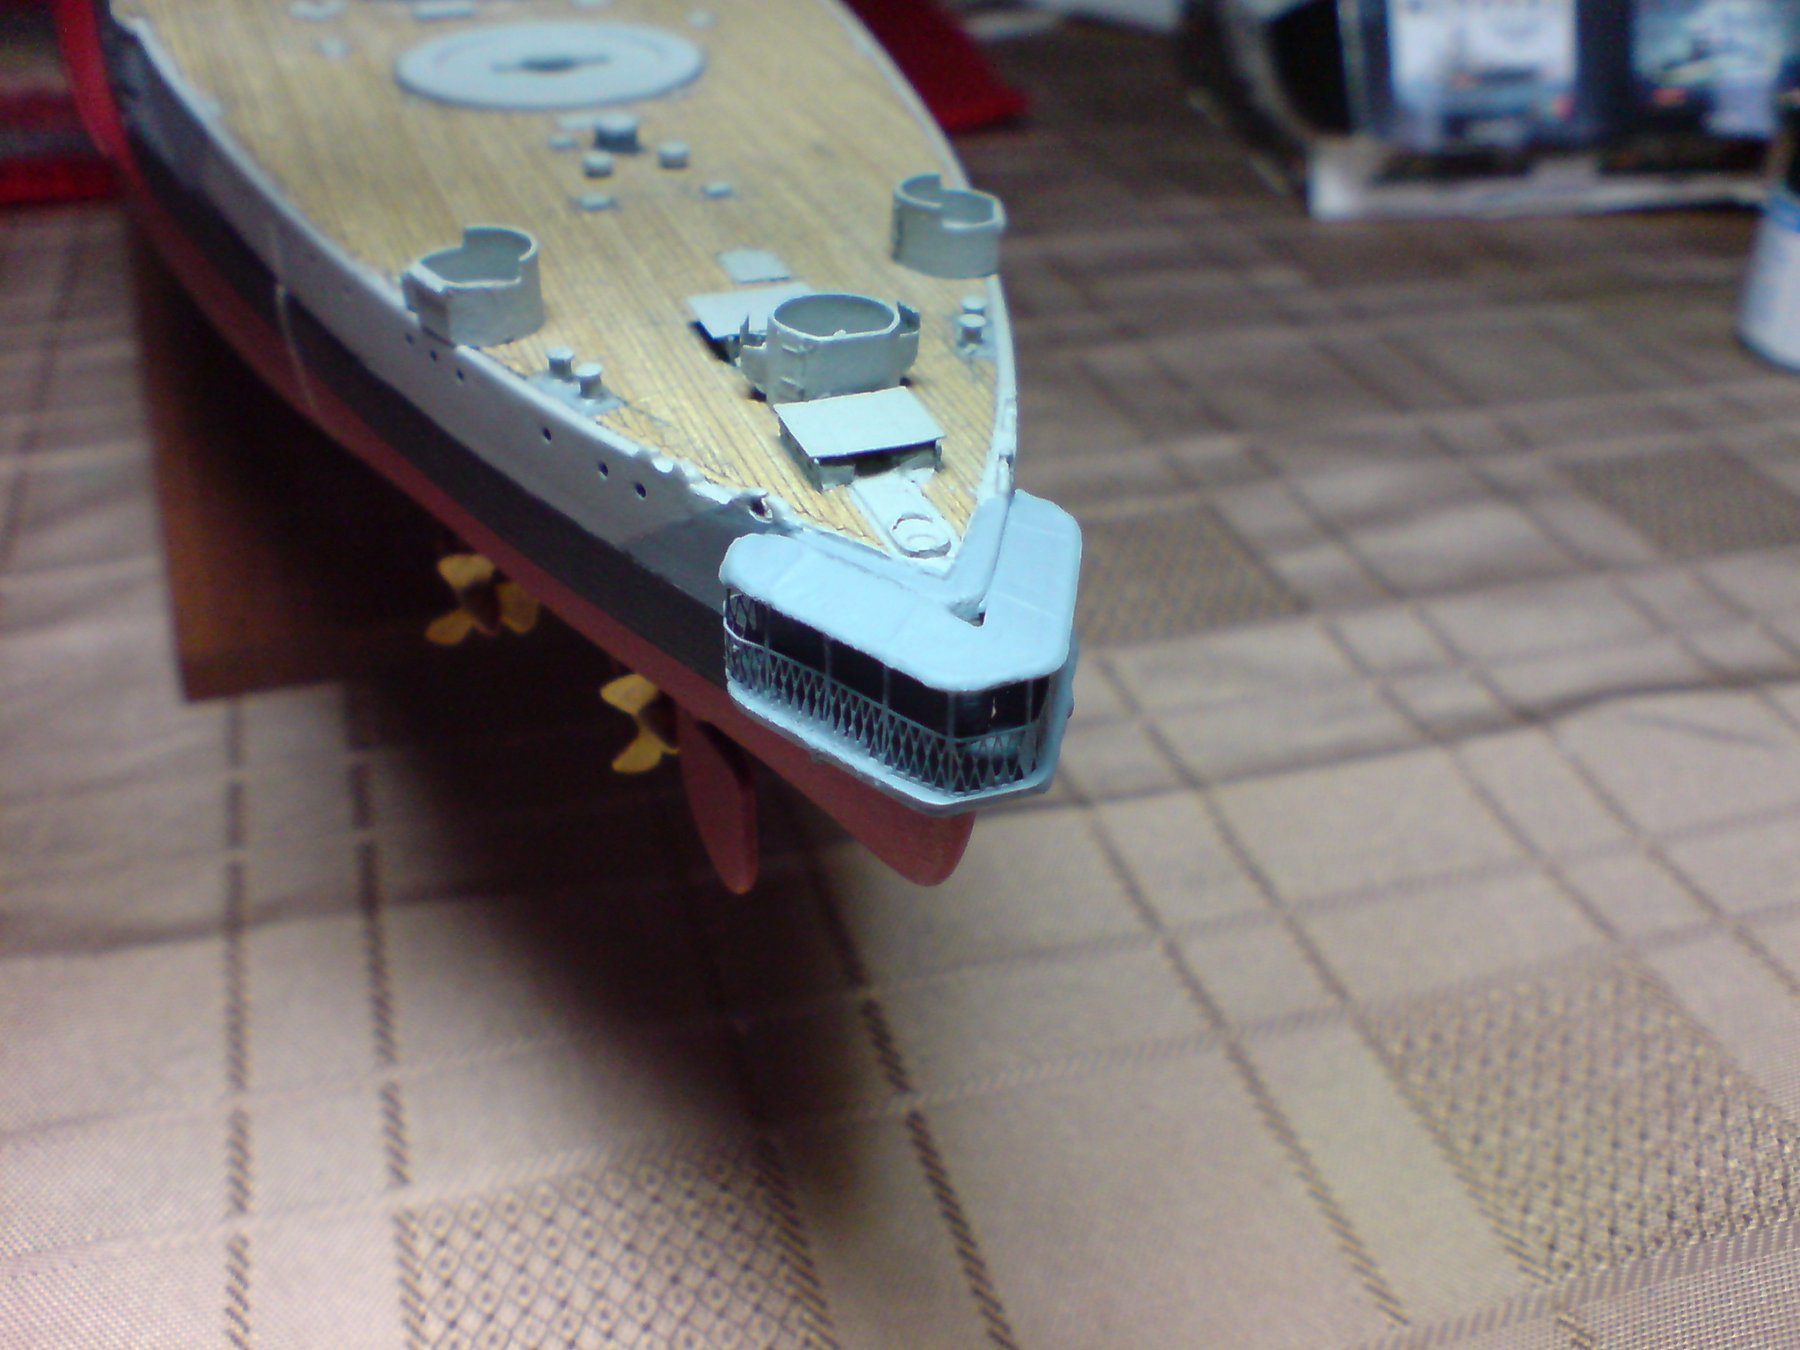
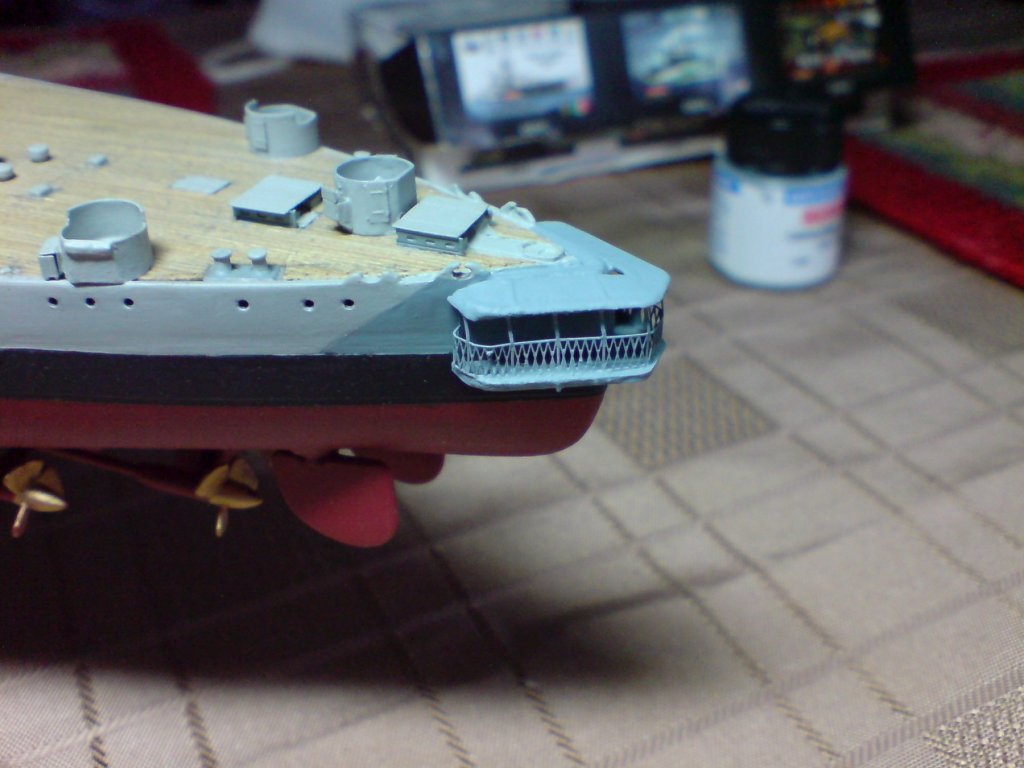
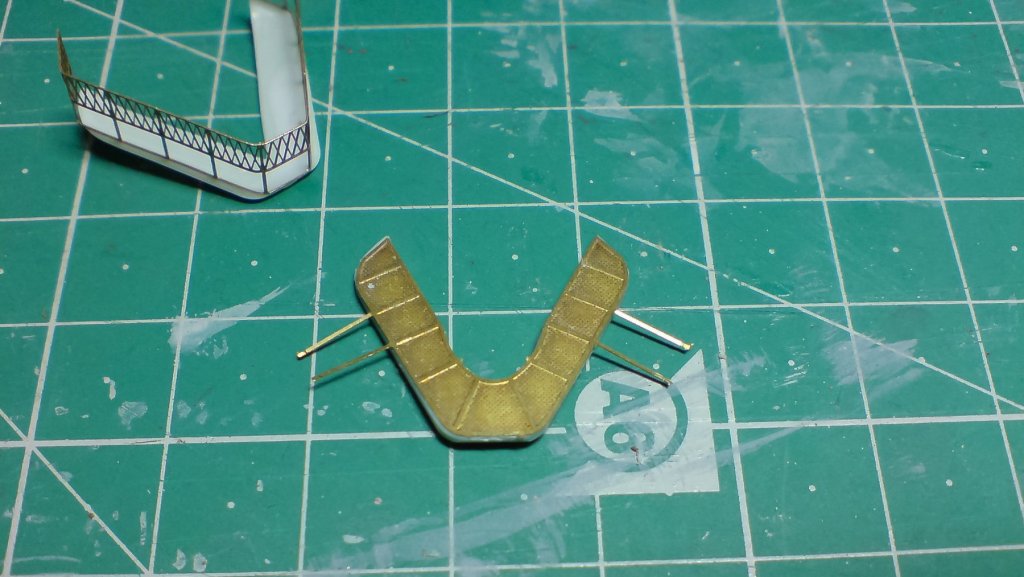
Slight change of plan I thnk, as I have been working from the stern - forwards, I think tomorrow I should work on the stern walkway, as this is a mini kit in itself and requires some PE parts. Here is a photo of how the parts look and when fitted to the ship. OC.
-
I still salute your experise greg I know not just me but a good few of us think you are a master craftsman, and have established a benchmark on here pushing the boudaries of plastic modeling. Good on you greg. OC.