HOLIDAY DONATION DRIVE - SUPPORT MSW - DO YOUR PART TO KEEP THIS GREAT FORUM GOING! (89 donations so far out of 49,000 members - C'mon guys!)
×


Old Collingwood
-
Posts
12,104 -
Joined
-
Last visited
Content Type
Profiles
Forums
Gallery
Events
Everything posted by Old Collingwood
-
 Hello there, yep i know of Glenn, i read his posts with a great level of interest, i have sent him a pm but not heard back from him yet, i love the work he is doing its an amazing achievement OC.
 -
Great work there my friend it just shows what is possible in plastic as well as wood OC
-
I decided to take a look at her decks today as some of my paints have arrived i cut them from there shackles and started to tidy them up. first off was to get a better join of the front and center sections by sanding the join plate, after this my attention turned to the shields infront of the 4inch guns on the deck, these needed there scale thickness slimming down as i understand the armour plate here would have been about 6inches, that equates to about .4mm at 1/350 scale so i set about with my file and sanding stick. The decks will get a lot more detail work from me in course and allowing for the detail kit or not?, but i finnished off today by giving them a wash down to get rid of any gremlins etc. OC
-
Hi there, Yep i am either doing her as she was just before she had her 6inch guns removed, or just after her last refit when she did and possibly as she displayed to take part in D Day. either way she will be in her latter days. OC
-
I was wondering about the bottom hull red color on my HMS Warspite build, i know British Second World War ships used a paint called RN19 Anti Fouling Red, i still have some Red Ochre that i was using on my Napoleonic period RN build inner bulkheads/gun ports. Could i use this paint to simulate the Anti Fouling paint? as i belive it is a very early version of Red Oxide, so possibly later paints used on the bottom of RN hulls may have been based around this type of color? Any ideas folks please. OC
-
I achieved a good amount today out in the sun i started work on the other hull side with the rear uppermost armor platting, marking it as before then scribing a line before scarping away to get a different hull thickness as in the above picture, but after studying some pictures i decided that the different hull depths with what i had done for the armor plate was to much, so i sanded the difference back to make it more subtle but still visible. Both hull sides are now ready to be introduced to each other and bonded for life, i may put some extra stiffening inside the hull to help with its structural integrity. OC
-
I am really appreciating the replies folks, thanks to all, another question from my never ending list - what sort of ratio would you water down an Acrylic paint from a new bottle/tin etc, say 50/50 or is that to much making it to runny? And also any thoughts on a good WW11 battleship Bottom Hull color, i am kind of leaning towards Vallejo Hull Red color, but as Royal Navy ships used a color called RN19 Anti Fouling Red, i dont know how different the two might be? Sorry for all the questions folks but any ideas please? OC
-
I have just picked up some blue low tack tape so with any luck this will do? i will try the trick with taking some of the stickiness off them laying them on some glass/tile etc first. OC
-
Thanks Joe, have you any tips or advice on masking tape for the Boot line(as HMS Warspite has a lot of details to mask around) and for the camo Stripes/bands as i assume these would not have been hard sharp edged and more of a feather edge? OC
-
How about conventional household wall filler mixed with a bit of PVA glue, would that not work in areas like covering up port holes etc? OC
-
Hi Joe, I have just ordered a white Vallejo primer in Acrylic and also the authentic WW11 western approaches range from a company called LifeColor, again in Acrylic, i have also ordered from Vallejo their sand colored Acrylic that i will add some light grey to - to simulate bleached salt worn wooden planking. I already have a bottle of Acrylic red ocre that i am hoping to use for the bottom RN anti fouling red hull paint, my plan is to assemble both sides of the hull minus the deck and prime this after a thorough wash with detergent and water, then i was going to mark of the Boot topping line and paint the Red hull first, then after a few days allowing to dry, i was going to mask the top of the Boot line then paint it black. Then afterwards move on to masking the patterning and painting sowly each section. OC
-
Superb work Glenn, i am following this with Special interest due to my own build on here OC
-
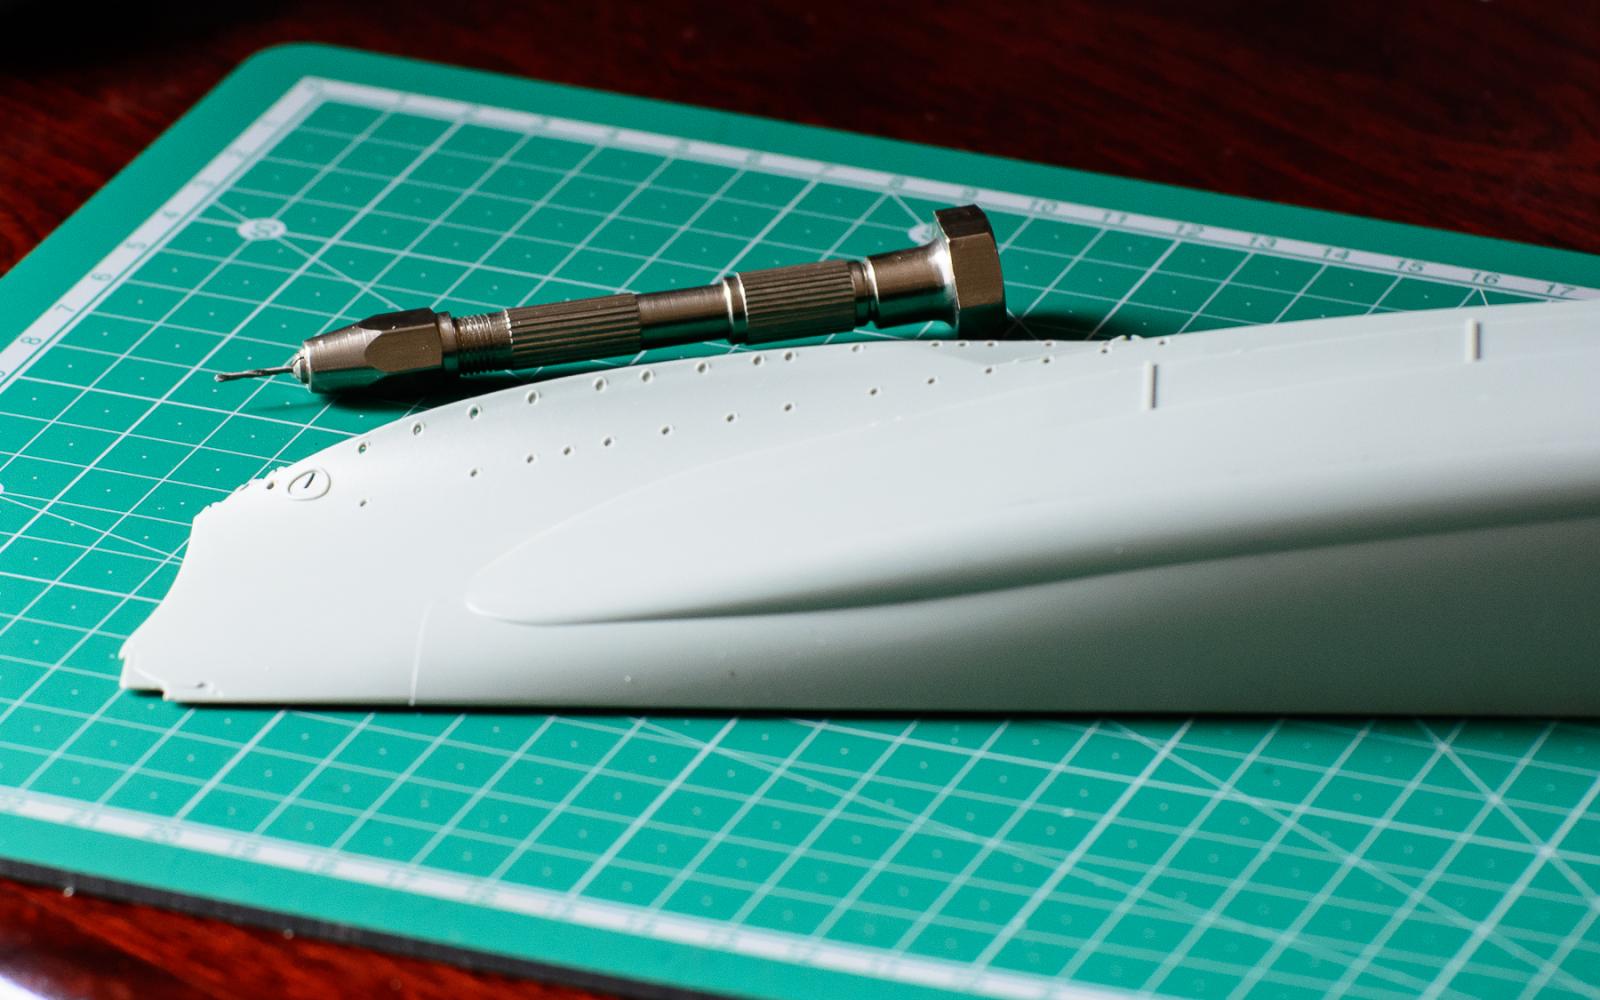
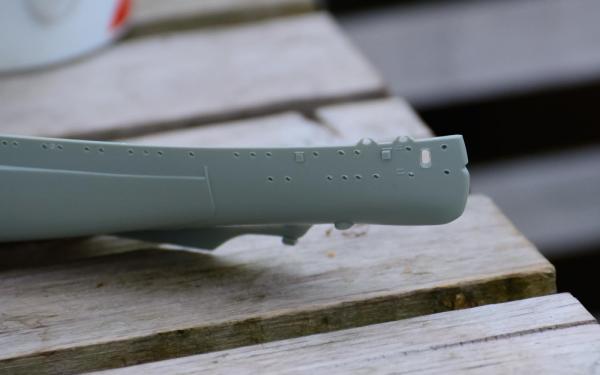
I started work shaping the rear armour difference from the position of the veranda forwards towards the main armour belt, i started by measuring and scribing a line, i then used a scalpel knife and starting at the line i gently scarped away from the line until i had reduced the thickness slightly, i took a picture before i had cleaned up the dust. OC.

-
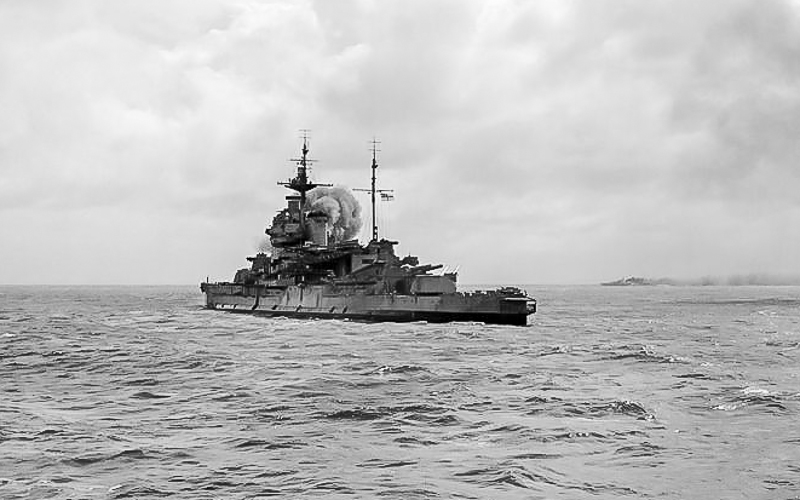
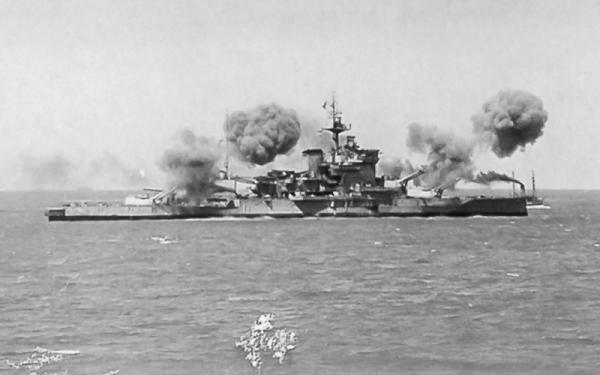
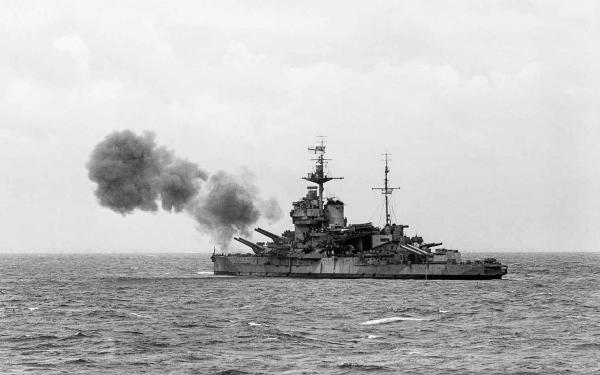
Here are a few pictures from my archives showing how i am going to display here(the year and configuration i mean) as i will be building her as a full hull stand mounted and when i can build one - in a case... OC.

-
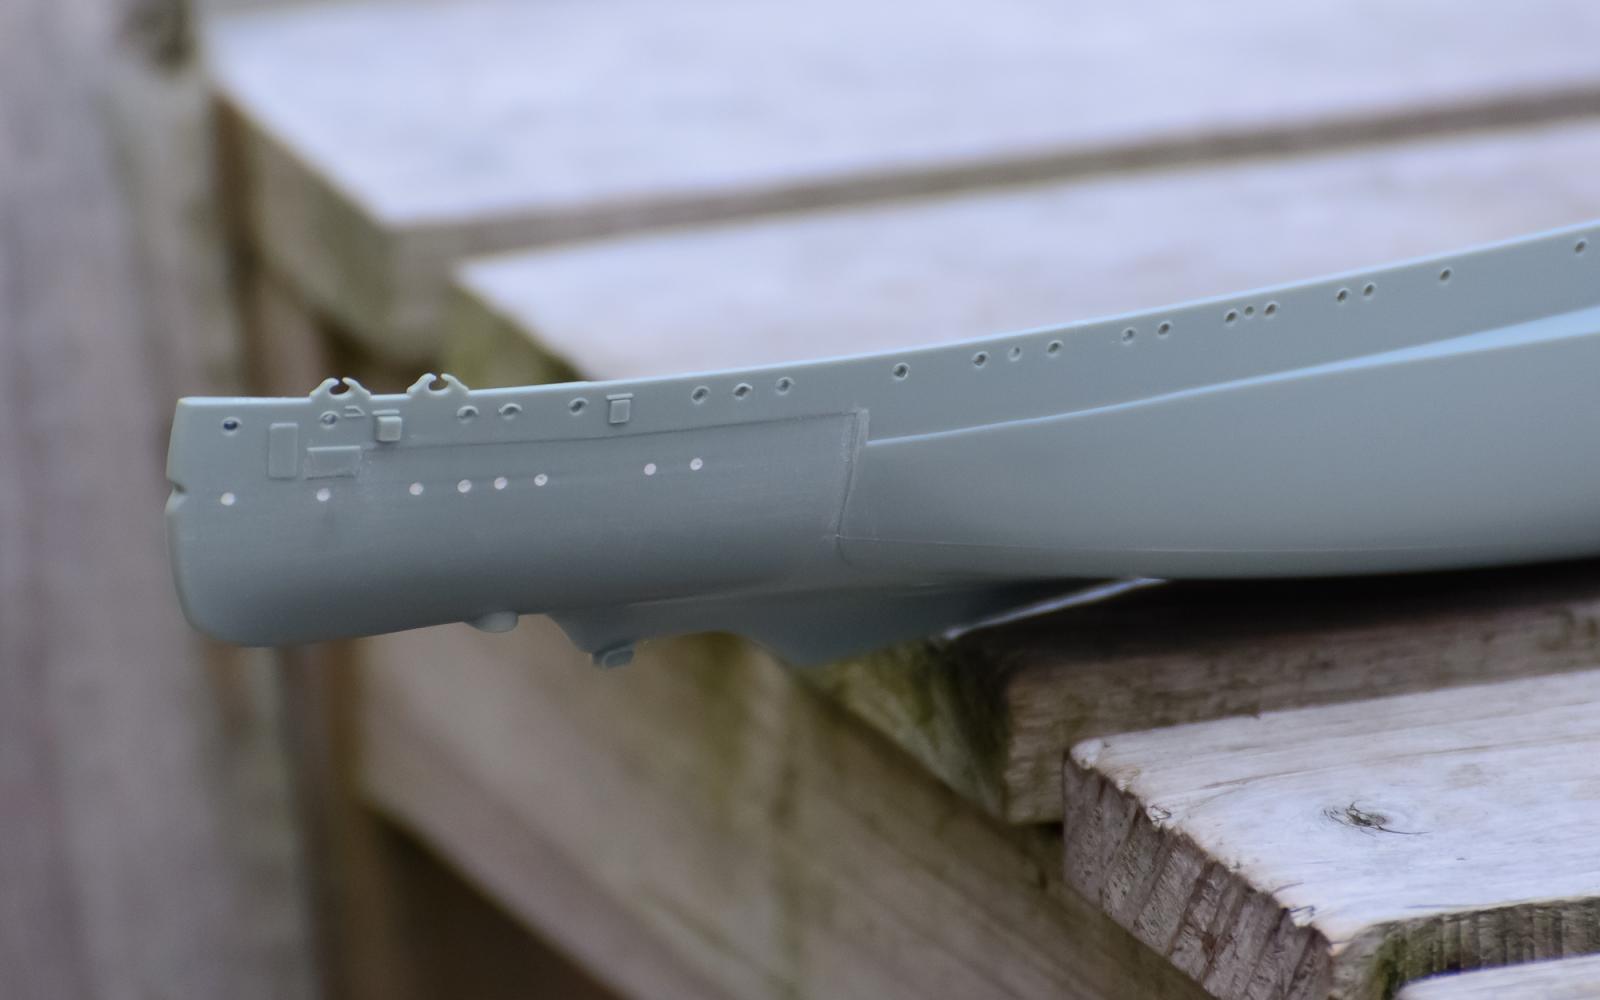
A bit more work was done today by sanding the filled in lower stern port holes and the frame of the veranda water tight door, as it was standing prowed of the hull, i also scribed a line along the section of hull from the first 6inch gun is and forwards, i was able to use a template scribbing tool that i held in place with a few crock-clips then gently ran a scalpal blade along its edge. I then turned my attention to the openeings for the anchor chains in the hull and where they are just slits within circular rims, i opened these up but tried to get a tube affect pointing up and rearwards by using a round needle file, i will see how this mates up with the deck openings nad adjust or add some filler or tube if i need to, i finished off both sides by using a soapy sponge and washing the plastic down to remove - greese/dust etc. That was todays bits done... OC
-
I am also considering doing a bit of sanding around the stern to simulate the different hull thicknesess due to the armour belt, and from the bow flowing back to the first 6 pounder gun, i will scribe a slight line to also show am armour plate join line. OC
-
After studying some pictures of her in her late 43/44 look i noticed that she has had her black boot line extended further up towards the deck, and nearly touching the bottom of the stern veranda, this has made me decide to cover up the stern bottom row of portholes as they would be so close to the water. I can only assume in her later years around DDay she must have been more heavy possibly from the additional smaller gun emplacements, and the extended boot line was to illustrate how she sat lower in the water, i might be wrong with my conclusion but it does look this way though OC
-
On the preserved Victory they do walk around tours, but nothing compared to this even if it is in minature, on the real thing it would take a very large cast of renactors to get across something like this,,,again Superb OC
-
Many thanks or your advice - the more the merry-er, i have a good selection of brushes and i am use to painting by brush most smaller sized models, and with acrylics i only started using them with my admiralty range on my wood build. As i am now building a 1/350 scale plastic a ship build in plastic will be the largest i have built/painted, so this is why i was wondering about the best way to paint the expense area of the hull? i can break the painting up into sub-sections i think? by masking off sections of armour, and try to get a smaller area to fill with paint easier from the brush, i just dont like the idea of having to fill an area from bow to stern about 20" in one sweep, i think that will be asking for an un smooth finish by anyones standards? OC
-
A bit more work was completed today outside in the sunshine i drilled out the other section of port holes and scribed a bit more of the edge details, but i also decided to open up the doorway to the stern veranda, this will have a door fabricated as well and display it in the open position, here is a picture.. OC.
-
I am building a 1/350 scale plastic HMS Warspite Battleship and i am looking for advice on hand painting with brushes my build please, the first area i will tackle will be the hull - this are i think i can break up into smaller areas and mask off around different bulged sections and armour plated sections, this would cut down on the area needed to be covered in one swoop etc. I will be painting the bottom hull section first upto the masked off boot line, but wondered if anyone has any advice/tips regarding this please. OC
-
I will repeat the same on the other hul side then install the hull supports before joining both hull sections together, i will then work on the constructed hull and clean up the seam at the bottom where the two halves join, i am also considering opening up the anchor chain openings as i am sure these should be tube like and not just slits like they are at the moment. OC
-
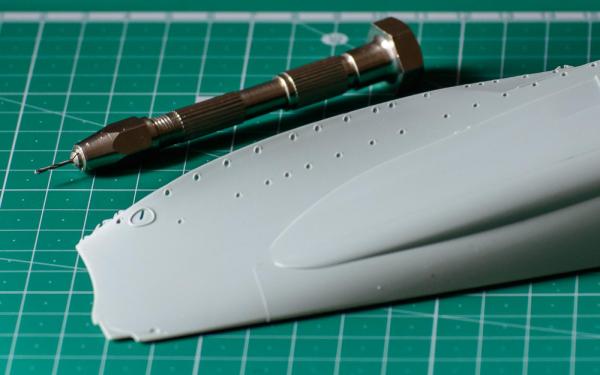
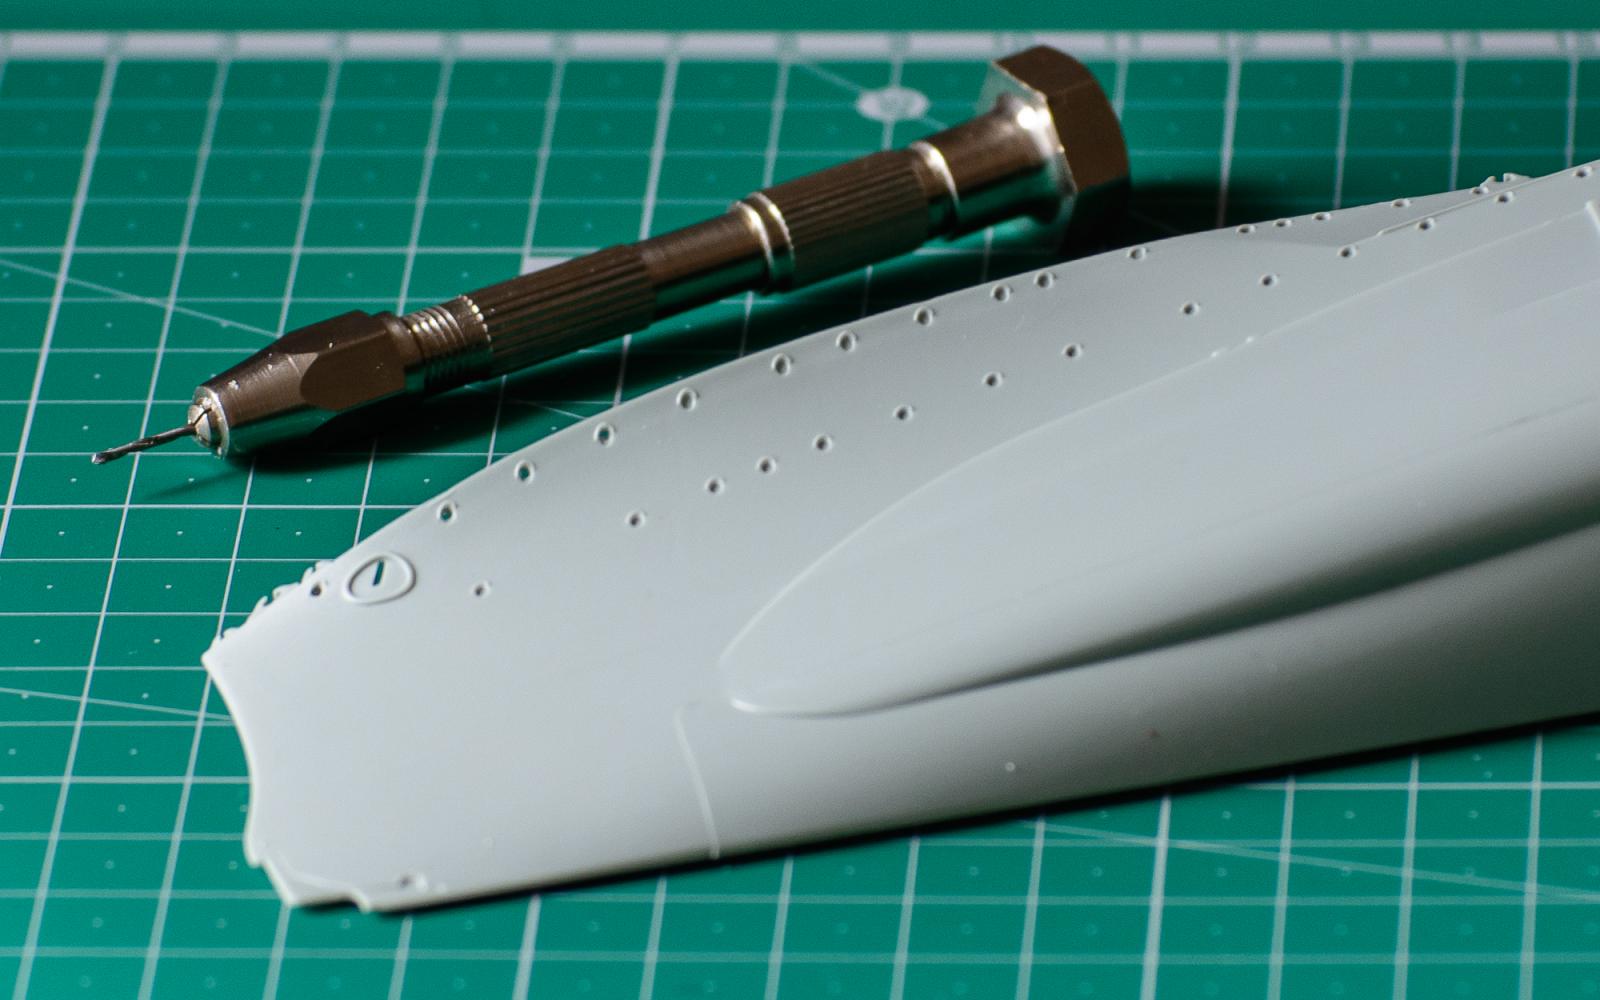
I have started on the one hull side using a fine drill on the many openings, while i was at it i also scribed along the inside edges of some of the details. OC