HOLIDAY DONATION DRIVE - SUPPORT MSW - DO YOUR PART TO KEEP THIS GREAT FORUM GOING! (89 donations so far out of 49,000 members - C'mon guys!)
×


Old Collingwood
-
Posts
12,104 -
Joined
-
Last visited
Content Type
Profiles
Forums
Gallery
Events
Everything posted by Old Collingwood
-
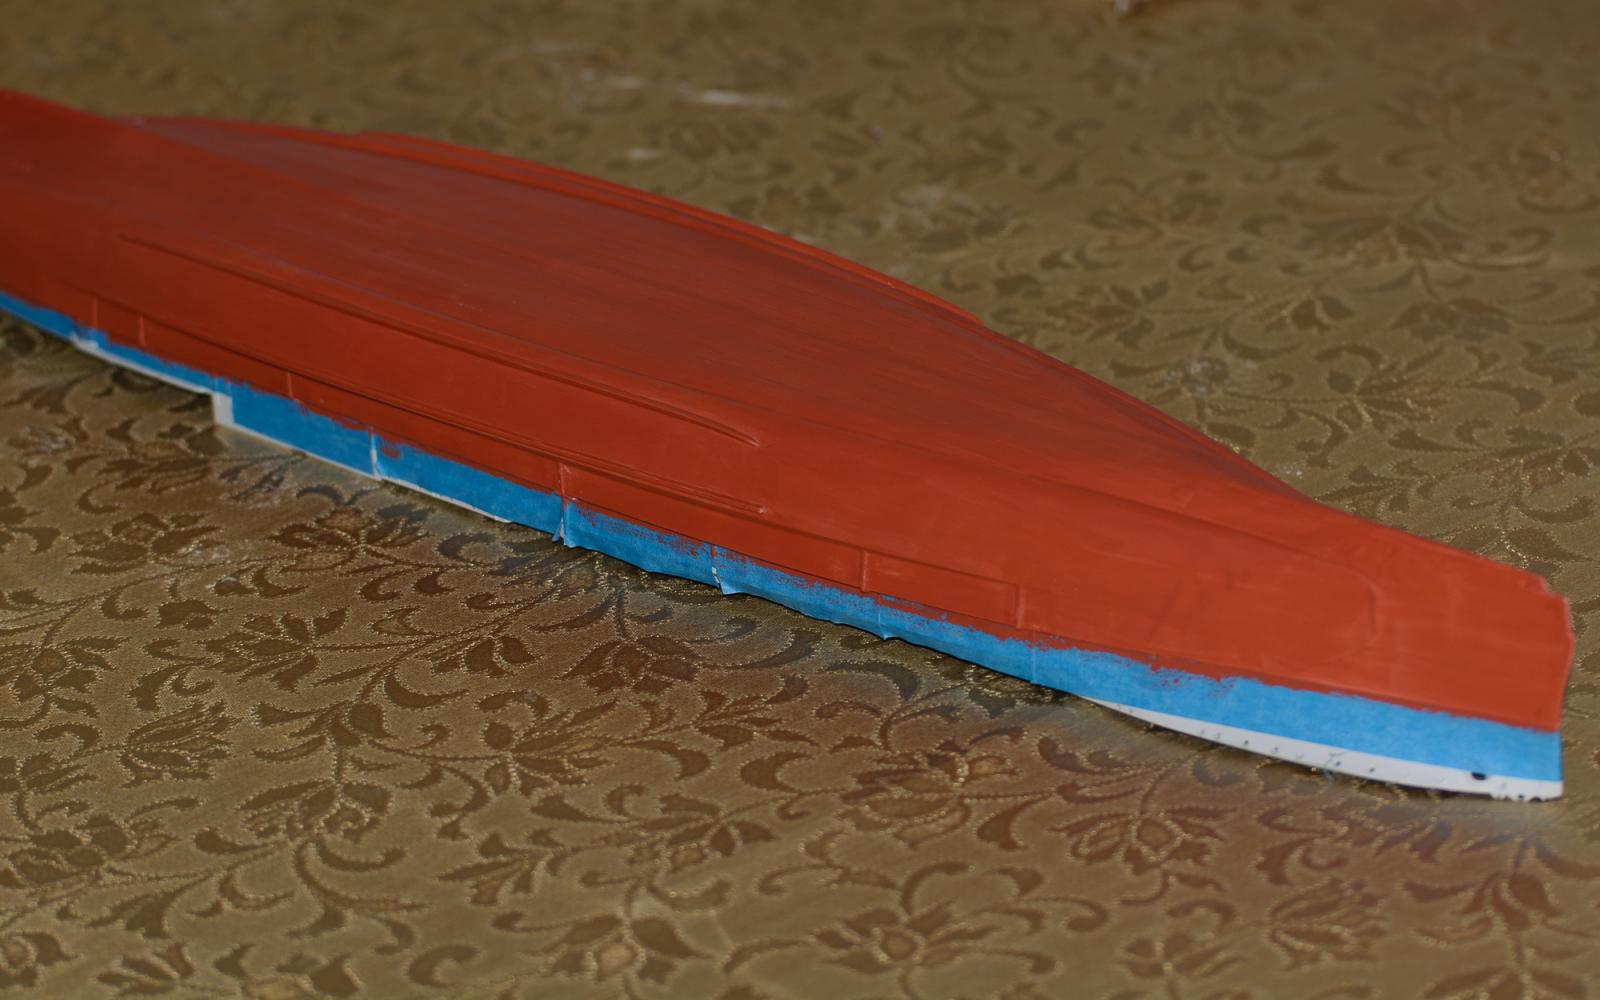
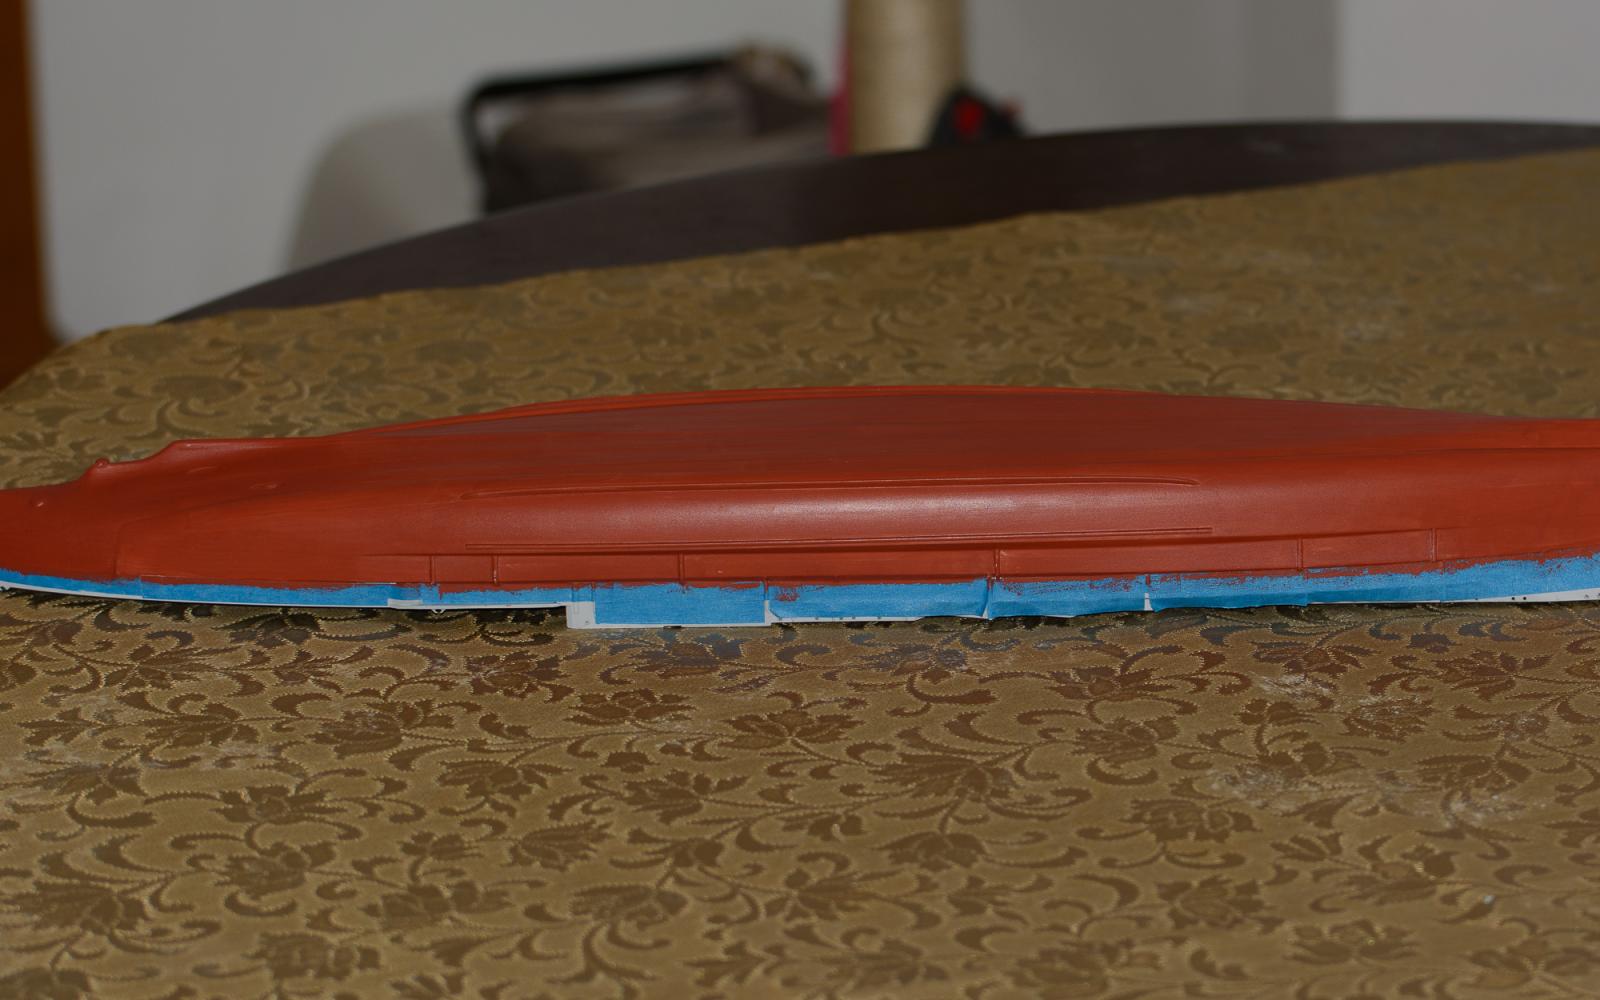
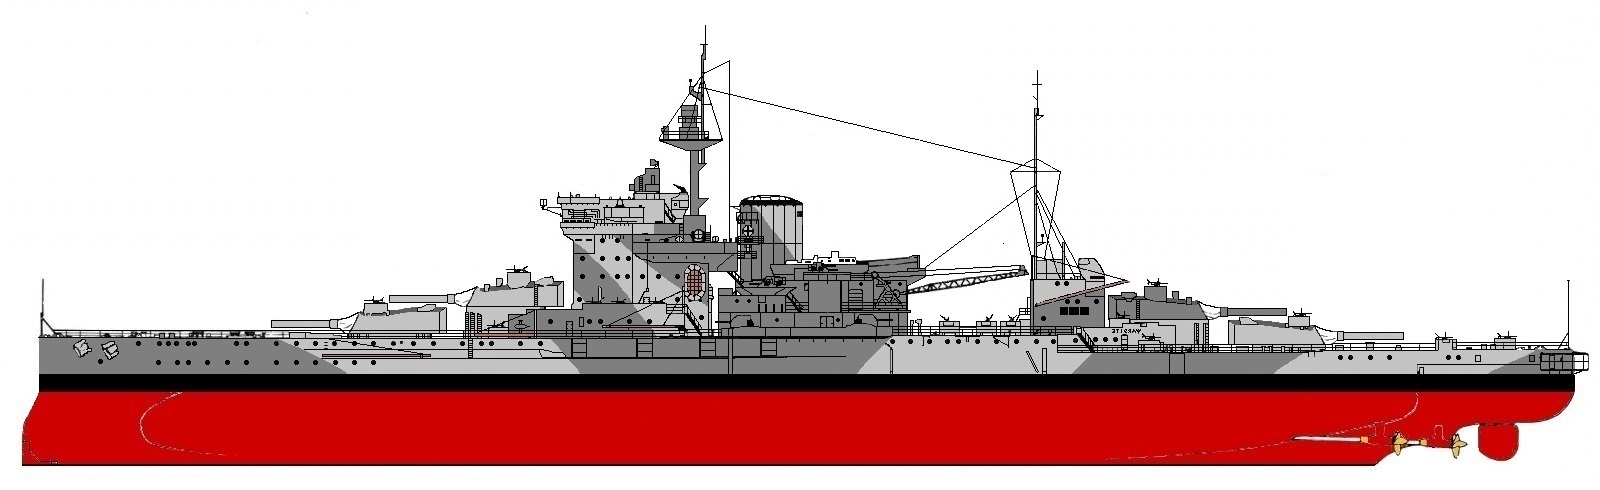
 Hi folks, a quick update, i purchased a rattle can of a hull red color today and after a bit of prep work by some wire wool, and brushing it down, i set about spraying the bottom hull, i found this quite easy although i was holding my breath a bit through nerves incase i made a mess off it, but it has turned out ok and much better than i could have hand painted it. OC.
 -
P E with me is a learning curve requiring a patient attitude and a lot small steps with breaks in between, i have also realized that this can not be done without working underneath a magnifiyer or opto visors, and i am learning as i go along and cleaning up my work again under magnification, as i finnish each stage. OC
-
Hi folks - just a quick note to say that i have not deserted my cause, just another passion of mine called me away from the build bench for a few days, i will have my mojo back and continue where i left off - with the pe work on the mid deck section around the 4inch guns, i left this stage with the armour plate pe placed in situ, awaiting a coat of paint prior to me fitting the paper metal deck area around/underneath the 4inch gun mountings. OC
-
I think i will need to give in and pursavere (heck i know that word aint spelt right) i mean just give it a try, as i have some metal on metal to do yet.... OC.
-
I finished off the one side today with the fourth blast screen bulwark, these little .....fellas have been very tempromental and have been ungluing them selves, with the slightest movement, i cleaned and scrapped where they were due to sit, and even had to lay a wash of PVA White Glue around them. i just hope that the paper sheets will help to hold them in place. Its weird because i read that PVA is good for securing etch brass in place? OC
-
Well the pe armour plating is making slowwww, but positive progress, the PVA glue seems to be doing its job of securing then vanishing, this should make it easier when i place the simulated metal deck sheet down, because of the delicate nature of each fixed piece of pe, i can only work on one piece at a time than put it up wellaway from miss moggy cat, who does like to have a walk on the table to see whats going on and where her food is OC
-
Completely crazy and beautiful work it kind of brings to life victory in a way that you could only imagine, if you spent a night there down on the gun decks with all those lost spirits..... OC
-
Thank you kindly sir, hey if you run out of pop corn i have some multi cherios i could let you have. OC
-
I have carried on with the armour for the 4inch gun bulwarks and managed to complete just one more plate, its kind of very taxing and hard work focusing under a magnifier, i find my eys go and i end up cross eyed, the wife keeps saying to me "who are you looking at when i am talking to you"... My plan as mad as it might seem is to finish off the four plates on the one side, then i will glue the paper strips down, to kind of trap the lips of the etching plates and fingers/toes and everything else you can cross, this will keep them in place as so far i have done without CA superglue, as i hate this stuff with a passion, i could tell you a story of a friend who glued his eyes shut - by accident with CA glue.... OC
-
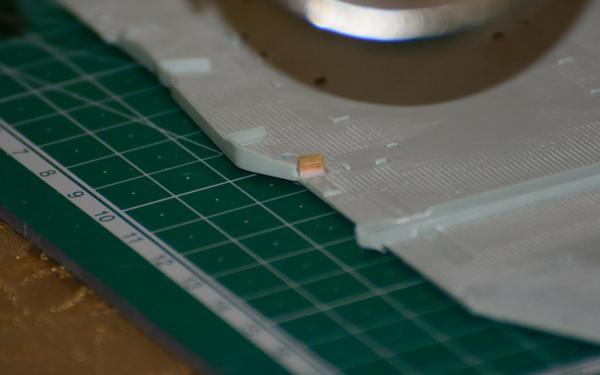
Despite the disaster with the hull (i am going to pretend a buch of drunken sailors painted it ) i decided to carry on with a bit of etch stuff, i am working on the armoured plating bulwarks around the 4inch guns, i cut this from the spru with a sharp knife and bended the bottom for support, i then laid a small pool of PVA glue and sat the section in it, this looks worse than it is as the PVA should dry up and mainly dissapear. Hers a pic. OC
-
Hey there great work going on, the decking reminded me of what i had done with my wood planks on my other build, i used a self mixed solution of dropping a wire wool spongy type thing into an air tight container with vinegar, this was left for afew days, this was brushed over the wood planks and had the effect of bleaching just like holy stoning. Also with the hand rails would i be correct in thinking that they would be white metal work of uprights and middle/lower sections, and probably a wooden hand rail running the top length, i once traveled on a smaller pleasure liner and this had the same hand rail arrangement. OC
-
I had another go at the hull today as more paint arrived in the shape of Vallejo German red brown, but after a few coats it was way way to brown and dark, and not smooth enough, so i binned that color and went over it with a more red ochre color from my Admiralty Colors range, this went on horrible full of patches and brush marks, Its no good folks i just cant brush paint the hull - i have wrecked it. Seems to be the hull and getting its Red RN color on it that is spoiling evrthing else, like i said to wife - i can do great maessing about making tiny improvements by building things, but it falls appart when i have to paint a large area I just dont use a sprayer never tried one and cant afford one to experiment with, i guess i need to see if i can get an Acrylic rattle can in the correct color :( OC
-
Hi there, Thank you for following my build, painting by hand with a basil brush type device is all i am used to, i have never used or owned an air brush and only used a rattle can the once, on a plastic airliner and that went horribly wrong with overspray and runs galore, the hardest and most challenging section to paint is the lower hull Red area, but as i am going to paint this with a good primer that helps to self level and smooth out, at least that will be done and i will be able to concentrate on smaller masked areas on the rest of the upper hull where the two tones of grey for the camo are located. All the deck details should alos be easier to control with hand painting due to their size. Regards OC
-
Oh, How do you get a ship in a bottle? tell the captain its got rum in it........ OC
-
Just a quick update folks, i put a coat of Admiralty Dark Grey RN01, on the paper sections i had cut out to represent the metal deck areas that are to go under where the 4inch guns sit, this color is the standard RN color for metal deck areas, so i will contiue with it on the other sub deck sections. Oh, still waiting on my red surface primer and flat black for the boot line, i will be able to continue with the hull then OC.
-
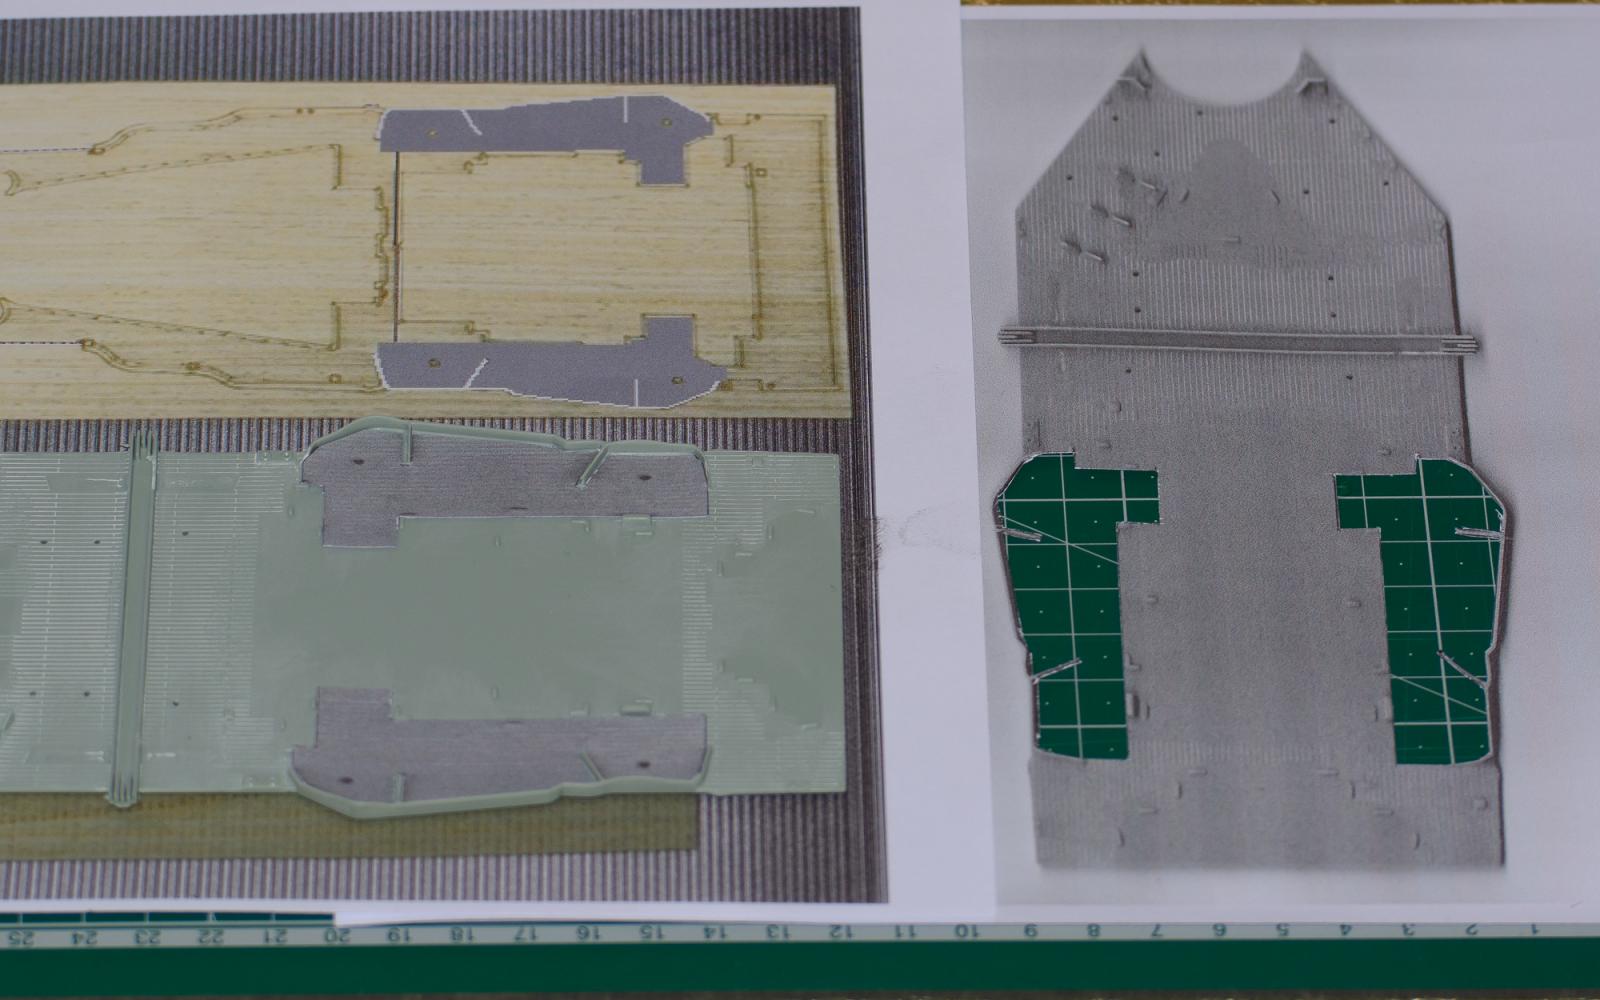
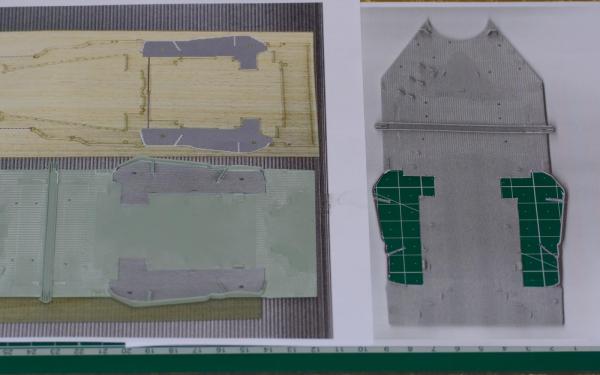
While i m waiting for my new paints to arrive i decised to have a look at the seperate deck sections, i have not decided yet when i can get some wood decking but i have decided to carry on as if i am getting it, so after a lot of researching different sites i have come to the conclusion that the raised plastic simulated planking would be better sanded off, also i have discovered that the areas around the 4inch guns - mid section had reinforced metal floors and painted dark sea grey, so i found a picture of the wood planking and also i did a scan of the plastic area from my model, and ended up with a few ideas. I marked out the metal area on my scanned part that was a 1:1 scale with the real plastic part, then i set about cutting this out with a sharp blade, i have done this for both sides and both are now awaiting a coat of dark sea grey, then the next stage will be to tidy up the bulwark area/shields that sit in front of the 4inch guns, and give them a couple of coats of paint before gluing the steel decking in place. Here is a pic showing what i mean. OC,
-
Hi david, coming on really nice a love your decking very tidy OC
-
Progress has stalled abit folks that first layer of my Admiralty Paints Red Ochre that i applied to the hull, started to come away it wasn't very hard even though i had left it over a whole day to dry I think i will have to try a different paint as it ju t doesn't seem solid enough, i have seen an Acrylic Vallejo surface primer in red, so possibly with a few drops of black it will do a better job? i need to search out a seller of it and purchase it before i continue with the water retention floaty type device we call a hull OC
-
Sutch sharp painting and very accurate detailing, she is looking swell. OC
- 45 replies
-
- 2
-

-
- saratoga
- aircraft carrier
- (and 1 more)
-
I started to mask off the boot line today with low tack blue tape, i had to cut this tape into small sections to fit in between the hull details, after completing this - that seem to take all day i let it sit then smoothed it down to get a good seal with a small sponge. I have now started hand painting the first layers of the hull red color, i have chosen to use my Red Ochre that i already had, this is close to Red Oxide and i believe quite close to RN Anti fouling paint, it looks a bit patchy at first folks but this shouls smooth and even out with more thin cooats and gentle sanding between coats - fingers crossed OC


-
Great work their tim she is looking so authentic and true to scale, i am dreading doing all my small bits and pieces at 1/350 scale on my build, esp the 20mm orli's they are so tiny.... OC.
-
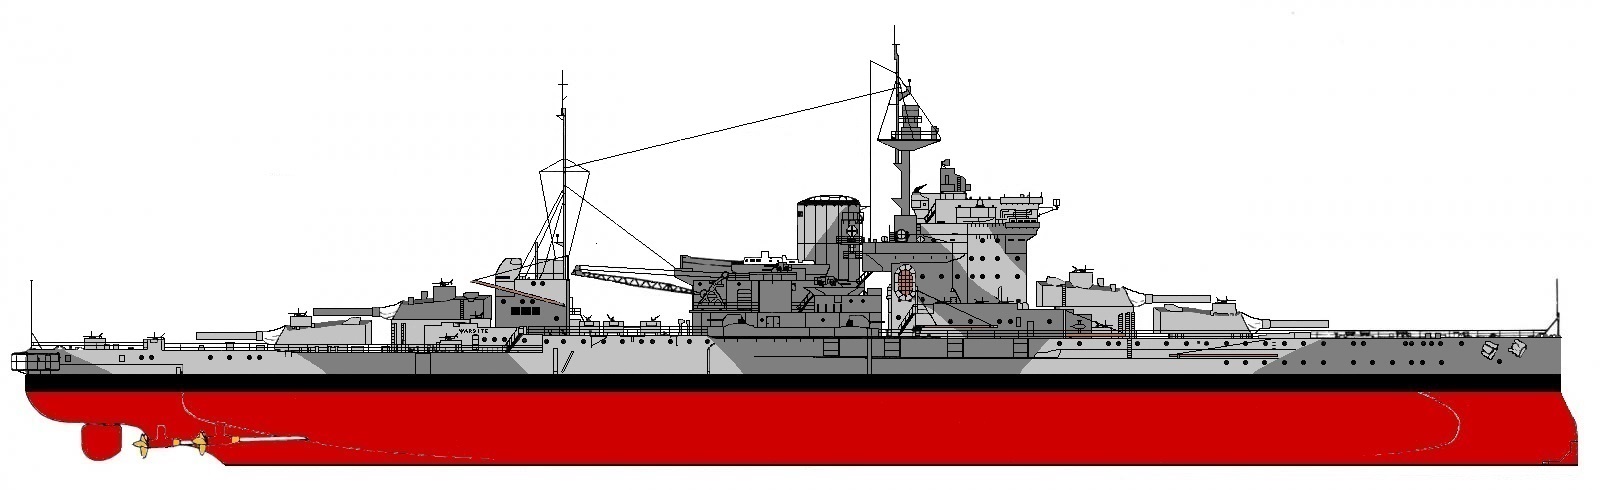
While i am just starting out on my journey with my Warspite build i want to thank all those who h ave liked my build, and follow what i have done, i will try to keep it interesting and hopefully without to many lows . Thanks for watching OC.
-
Hey - a great subject and in my fave old medium plastic A man walks into a Bar and goes "Ouch" it was a metal bar....... I too am trying to make plastic look like metal its a bit different from making wood look like "ermmmm" ...wood Anyway can i join in the watching please, i am rubbish in a group to shy, but if its ok i will sit i n the wings and watch. Oh yes nearly foregot - i used to build Accurate Armour resin 35scale tanks from Tiger to Warrior IFV. OC.