HOLIDAY DONATION DRIVE - SUPPORT MSW - DO YOUR PART TO KEEP THIS GREAT FORUM GOING! (Only 72 donations so far out of 49,000 members - Can we at least get 100? C'mon guys!)
×


rvchima
-
Posts
697 -
Joined
-
Last visited
Content Type
Profiles
Forums
Gallery
Events
Everything posted by rvchima
-
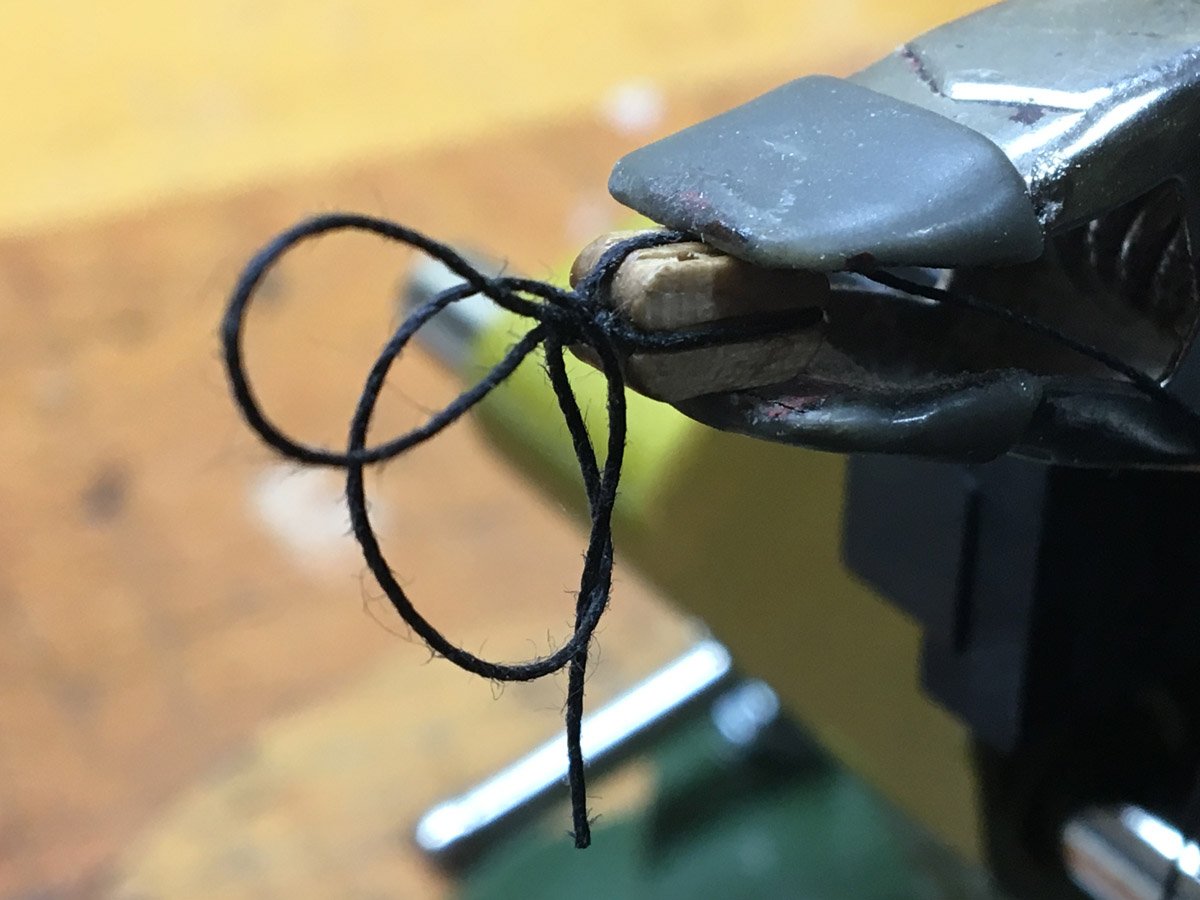
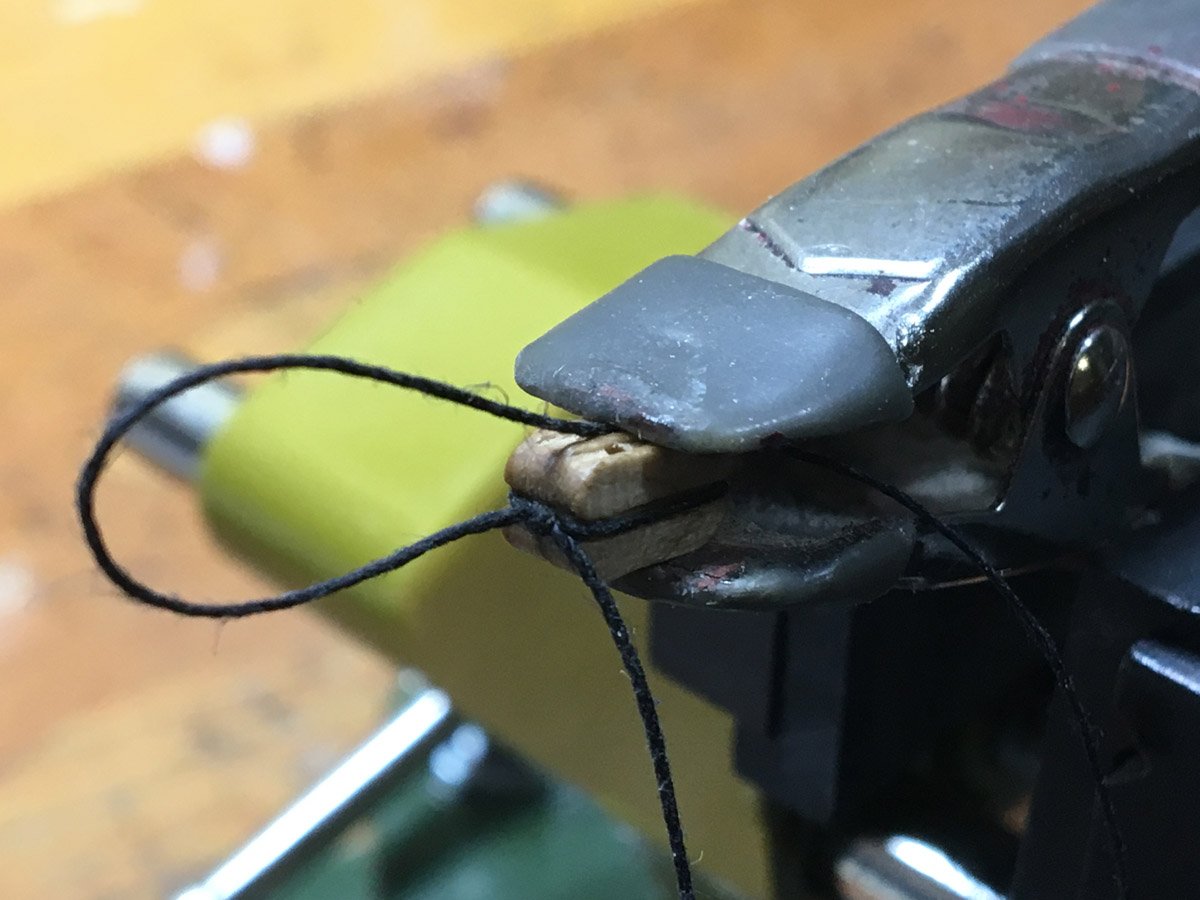
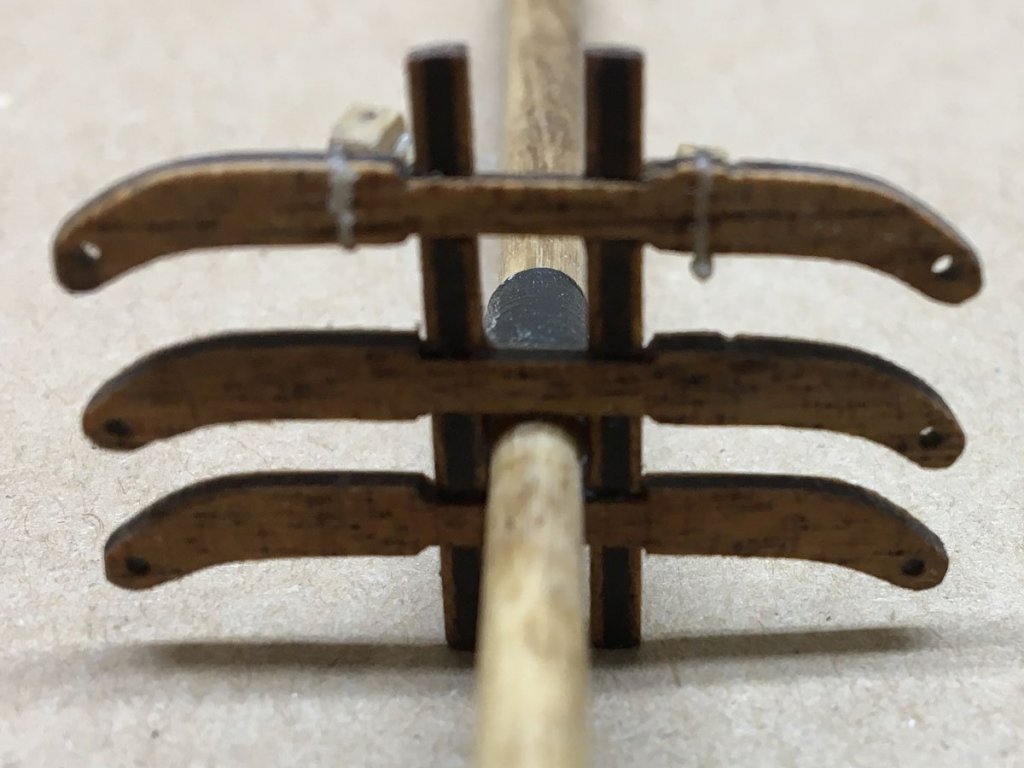
 Another Dumb Mistake but Quick Fix A few days ago I posted an image of the completed lower stays with the topmasts inserted temporarily in place. Well when I set the mizzen topmast in its top I realized that ... I had put the stay lines through the wrong hole! I even remember thinking "That forward hole is very tiny, so I'll just put the lines through the aft hole." Duh - that's where the topmast goes. I had visions of cutting the stays and starting over, but after some experimentation I found that I could disconnect the lower ends, slip the upper loops over the mast, and reroute through the forward hole. I did file the hole a little larger. The fix took about an hour. Here's the after photo. Study twice, rig once.
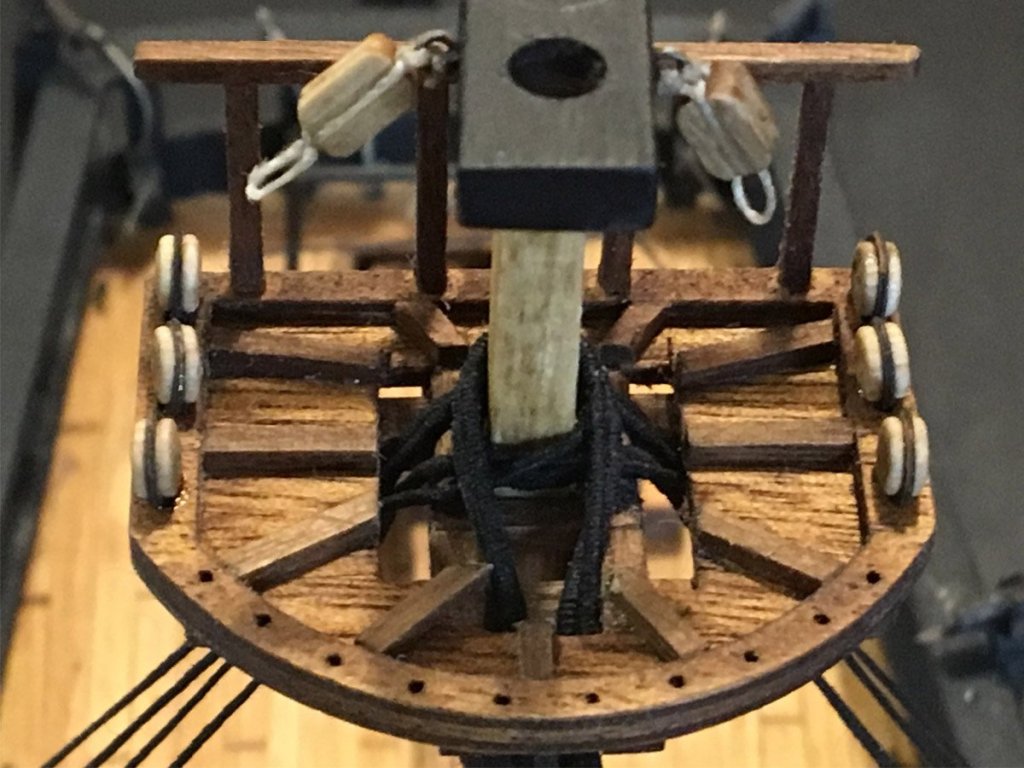
- 108 replies
-
- 1
-

-
- endeavour
- caldercraft
- (and 1 more)
-
Fernando, You have made a beautiful model of a beautiful ship. And it looks like you did it in record time. Does Mantua still sell the model? Rod
-
Fernando, I had trouble finding this post. You should consider putting your current and previous builds in your signature. Or is there some way to search for build logs or other threads started by a specific member? Rod
-
Are you buying or scratch building a case for the Endeavour? The suspense is killing me! I can hardly wait to see what you start next. Rod
-
Hi Fernando, I thought that you were considering building the Endeavour, but I'll plan to follow along on the Perseverance instead. Rod
-
Shrouds and Stays I've completed the lower shrouds and stays. It took me about 30 minutes per deadeye, or about 16 hours for all the shrouds, including seizing. Not too painful. Each of the stays were a little different and they took longer. The top masts are not attached yet because I still have to tie about 950 clove hitches for the lower ratlines! If you don't hear from me for a while you'll know why.

- 108 replies
-
- 5
-
-
- endeavour
- caldercraft
- (and 1 more)
-
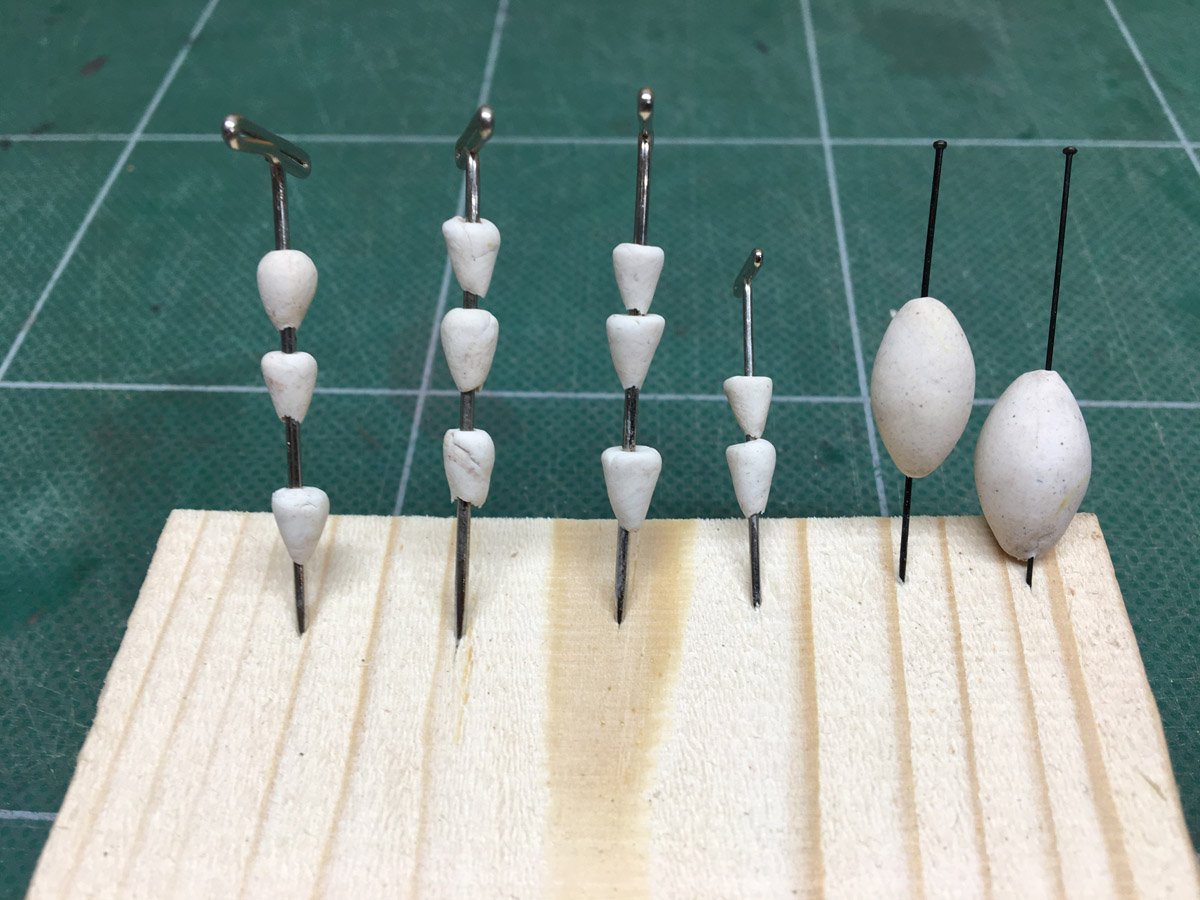
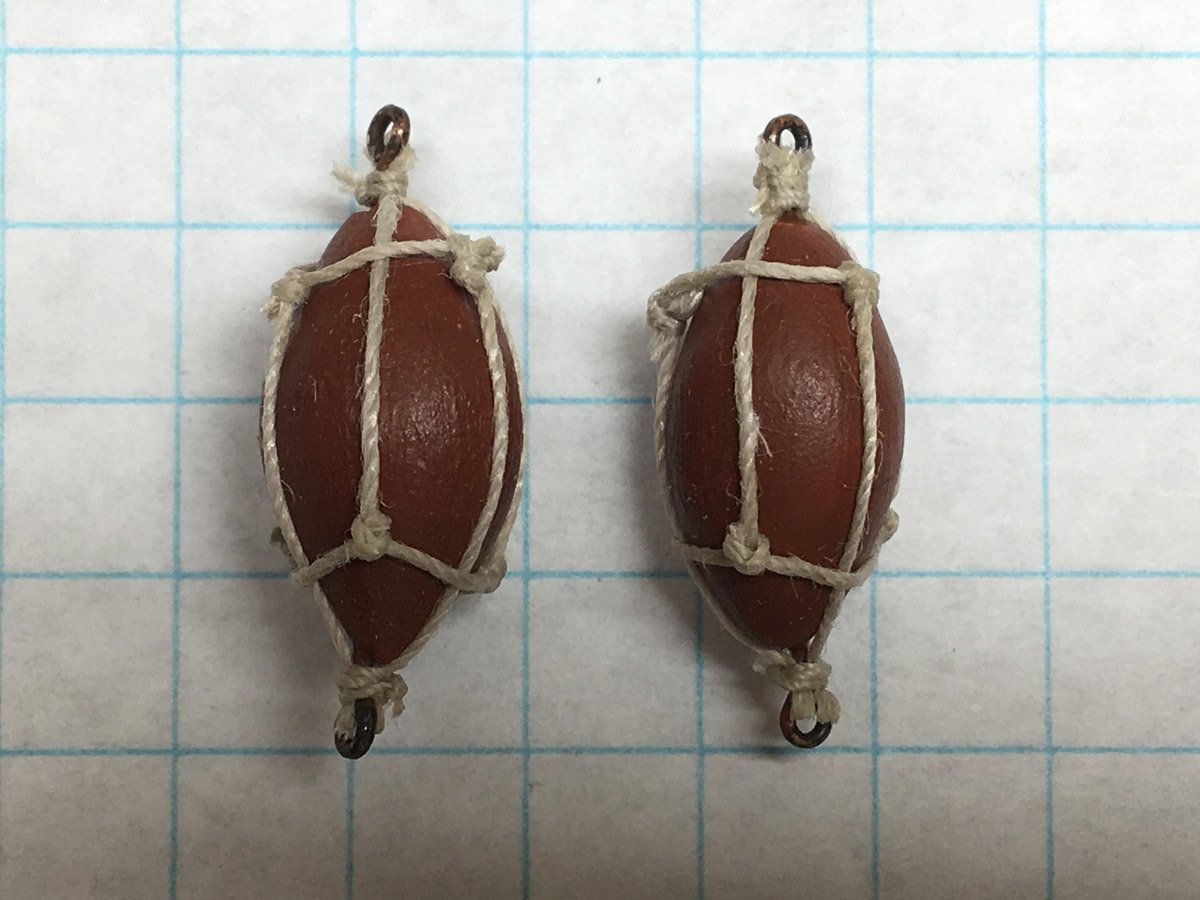
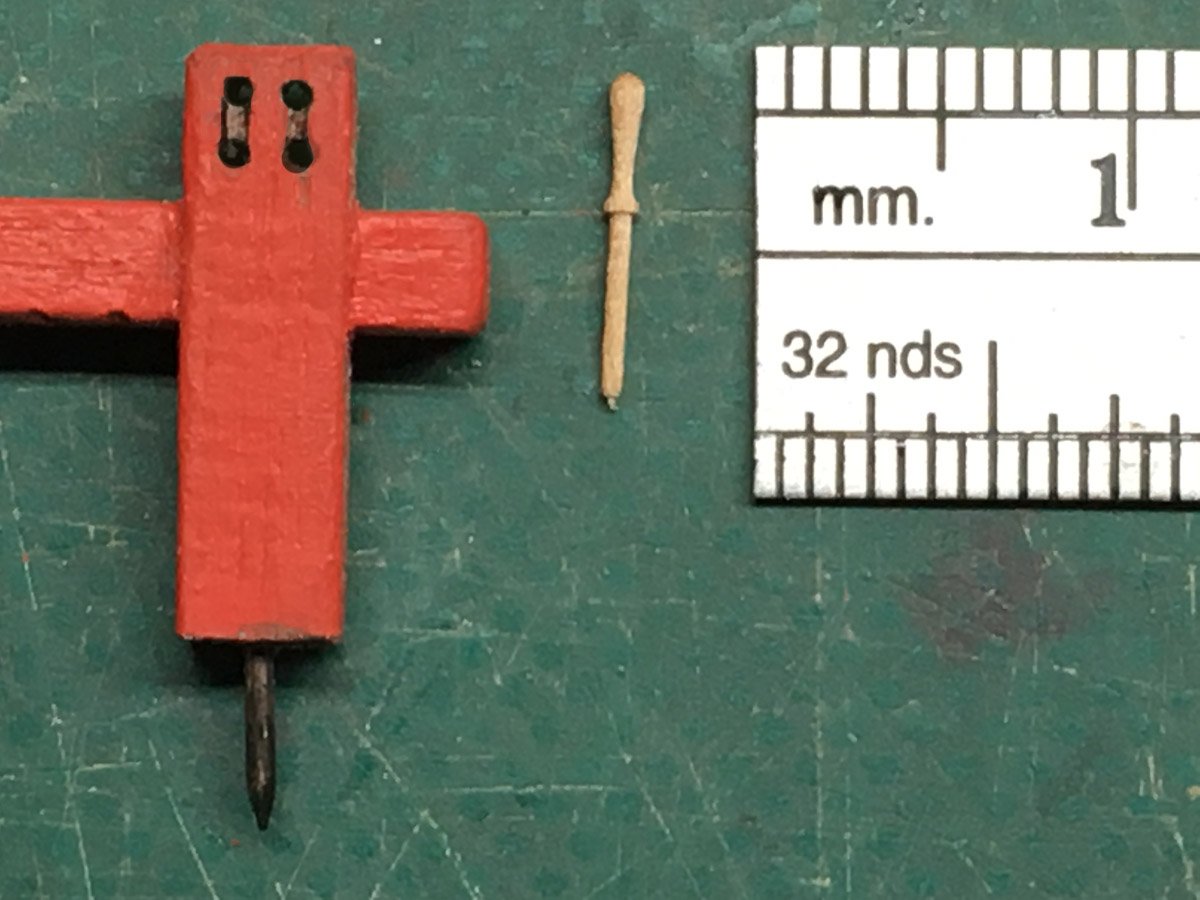
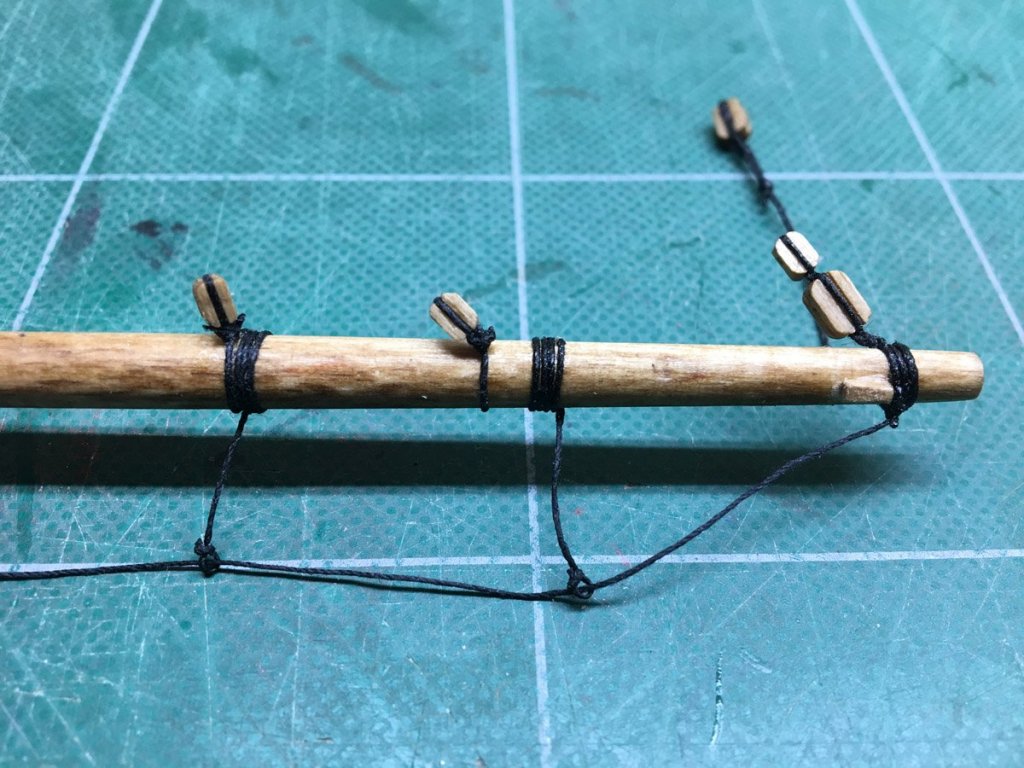
Mice and Anchor Buoys I needed some mice for the stays so I made them out of polymer clay. As long as I was at it I made two anchor buoys. The mice are very tiny. It was hard to get consistency so I made a bunch and used the best. I couldn't find drawings for the anchor buoys on the Caldercraft plans. They're probably there somewhere, but I built two using the Syren plans.


- 108 replies
-
- 3
-
-
- endeavour
- caldercraft
- (and 1 more)
-
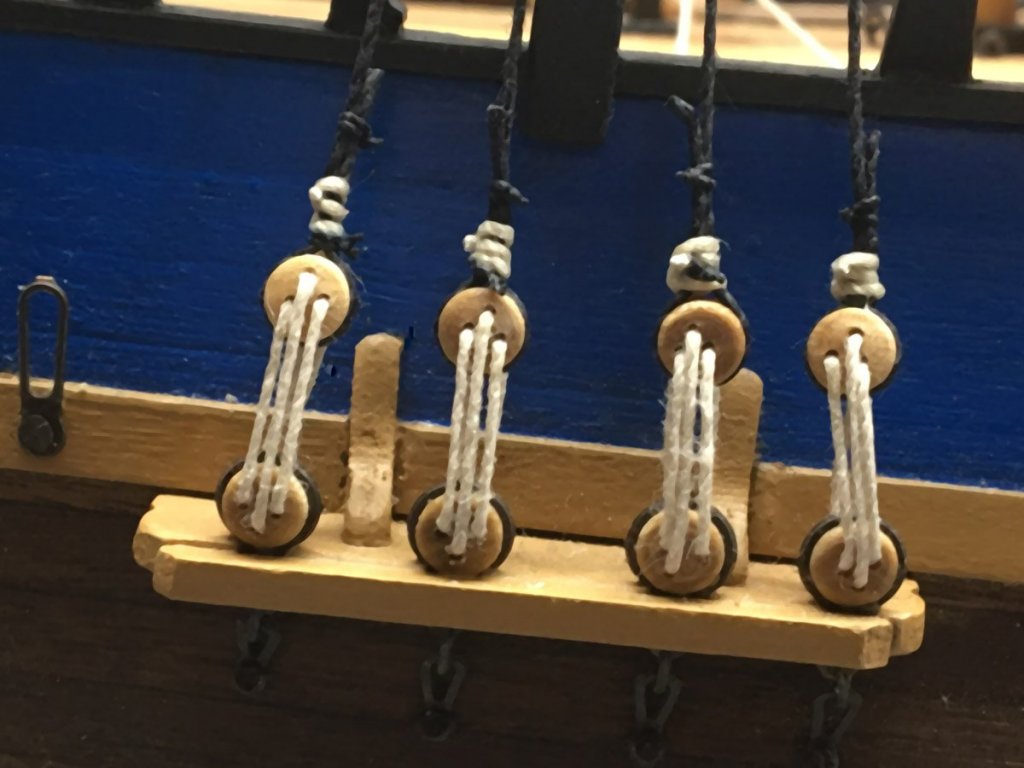
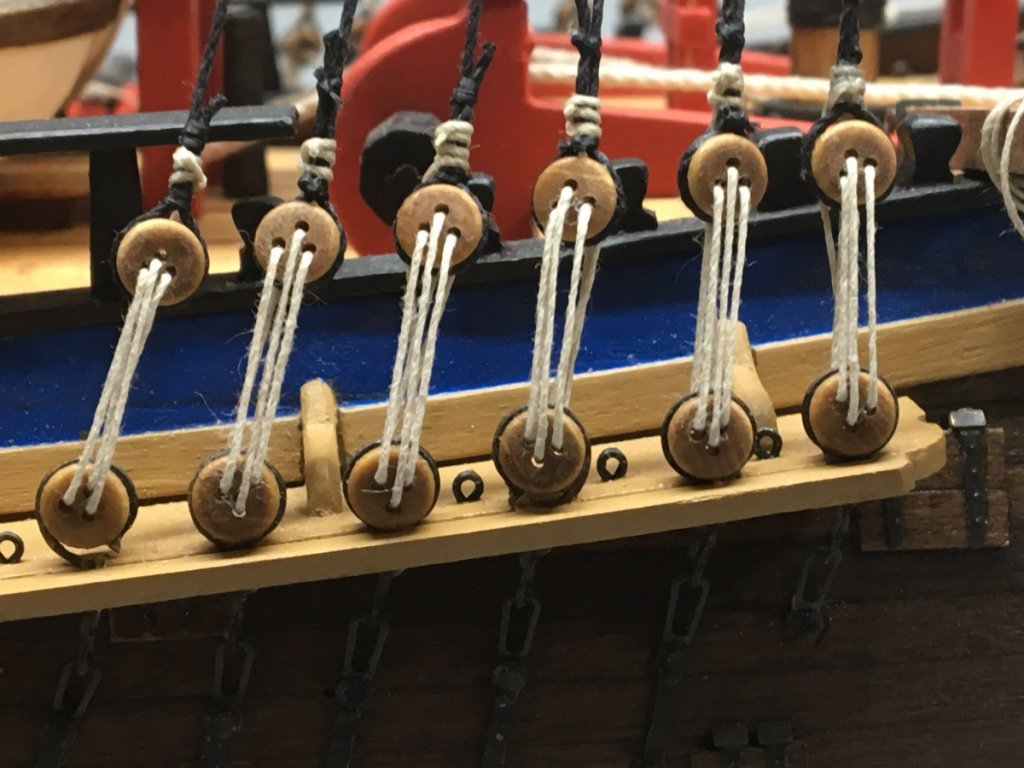
Serving I spent the money and bought Chuck Passaro's Serv-O-Matic from Syrenshipmodelcompany.com. I built my Syren model using Chuck's awesome 130 page instruction manual, and IMHO, you can't go wrong with anything Chuck sells. It took a couple of days to build the Serv-O-Matic (is that a great name or what?) because I took the time to sand off the laser char, stain, and urethane the cherry parts. It's very easy to use. Stretch the main line through the gears on either end and attach the ends to the nails with the spring clips. Thread some very thin serving thread through the main line with a fine needle and secure with a tiny drop of CA. Spin the handle with one hand while guiding the the thread with the other. Thread the serving line through the main line at the far end and glue. Coat everything with thinned PVA glue. I served 3 inches of line in the center of each doubled shroud, using about 1 yard of thread at 100 turns per inch. It takes about 5 minutes to serve one doubled shroud line. My first impression was that it wasn't worth the effort. I could hardly see the thin serving on top of the main line. But when I saw several shrouds stacked up on the tops I was totally glad that I spent the time and money.

- 108 replies
-
- 5
-
-
- endeavour
- caldercraft
- (and 1 more)
-
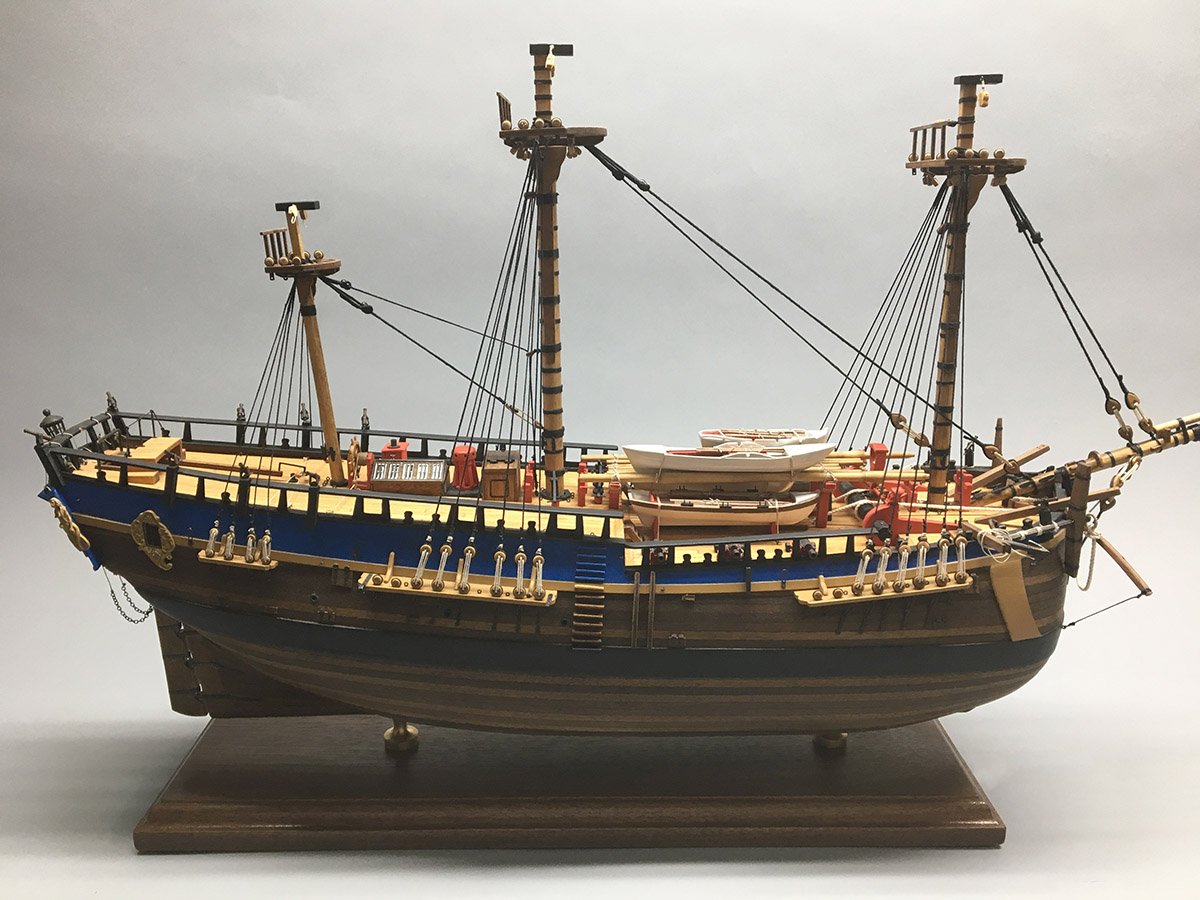
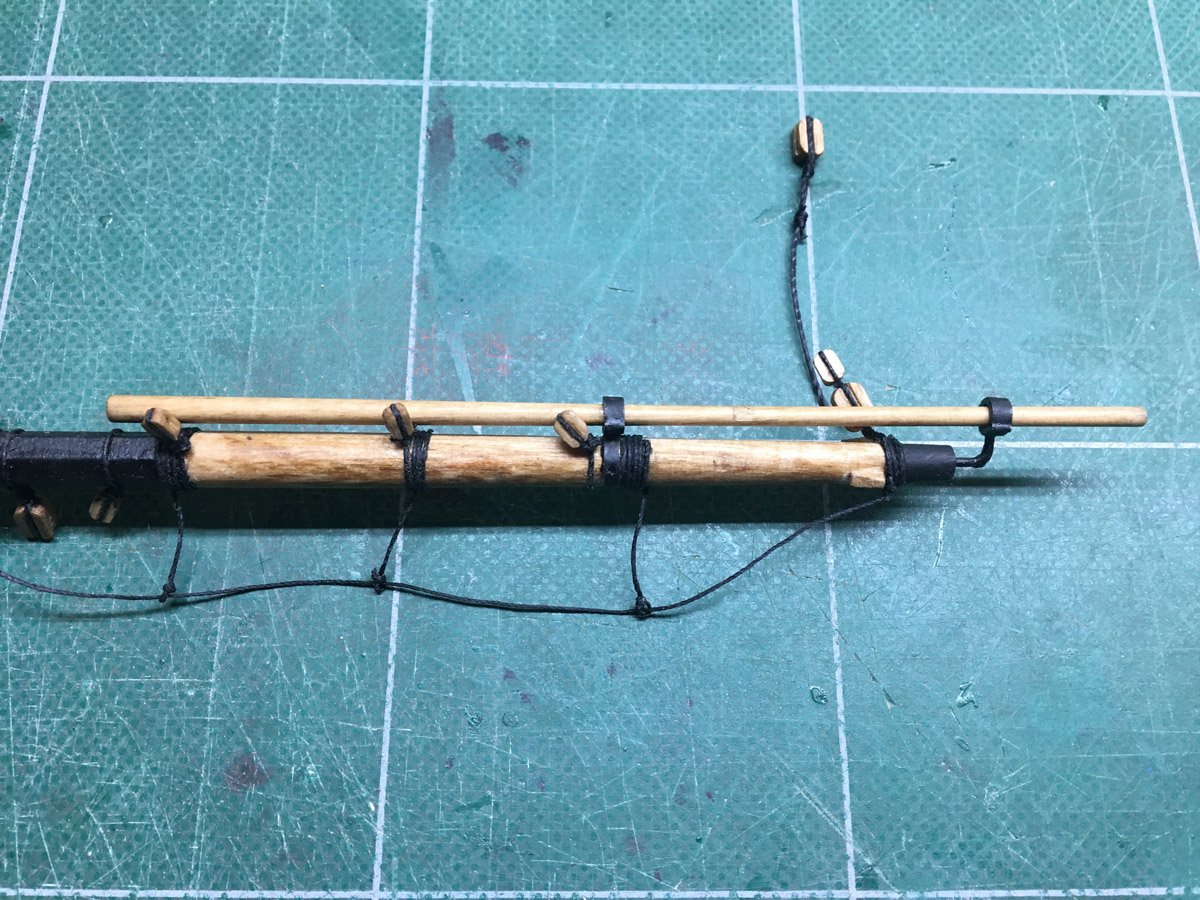
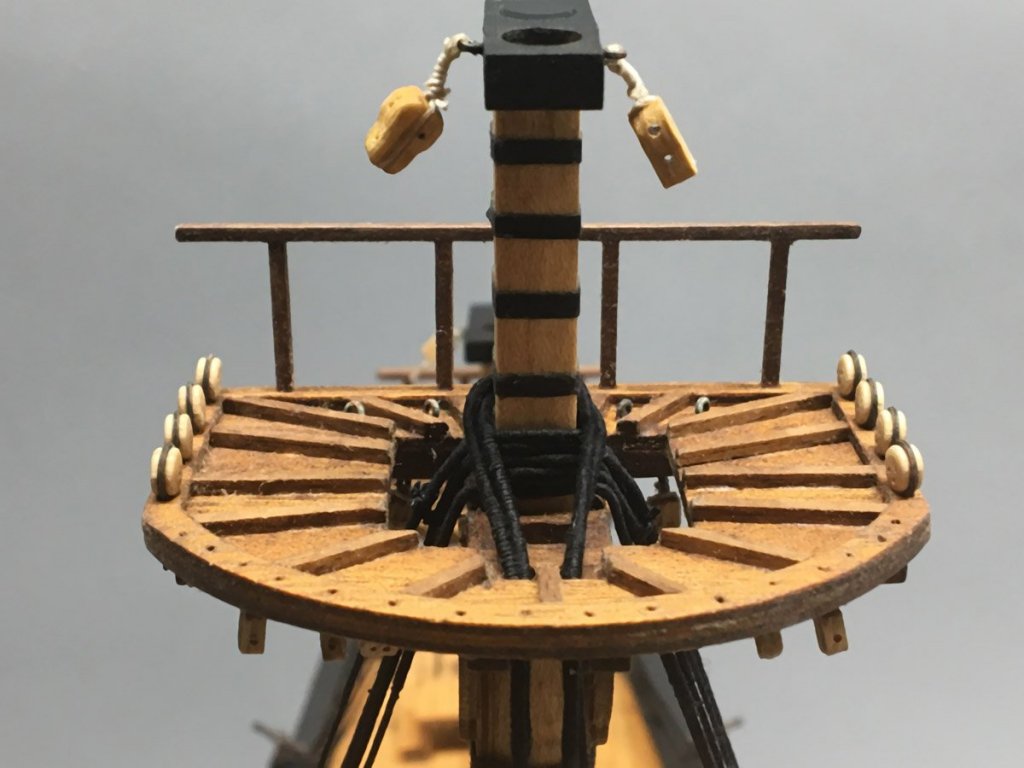
Standing Rigging I stepped the masts and started the standing rigging. Here's my jig for setting the deadeyes at a constant height - two pieces of wire glued to a piece of wood as thick as the deadeye hole spacing. and here are the lines of deadeyes from fore to aft. I've been using beeswax on the linen chord but there sure is a lot of fuzz when I zoom in ;(


- 108 replies
-
- 2
-
-
- endeavour
- caldercraft
- (and 1 more)
-
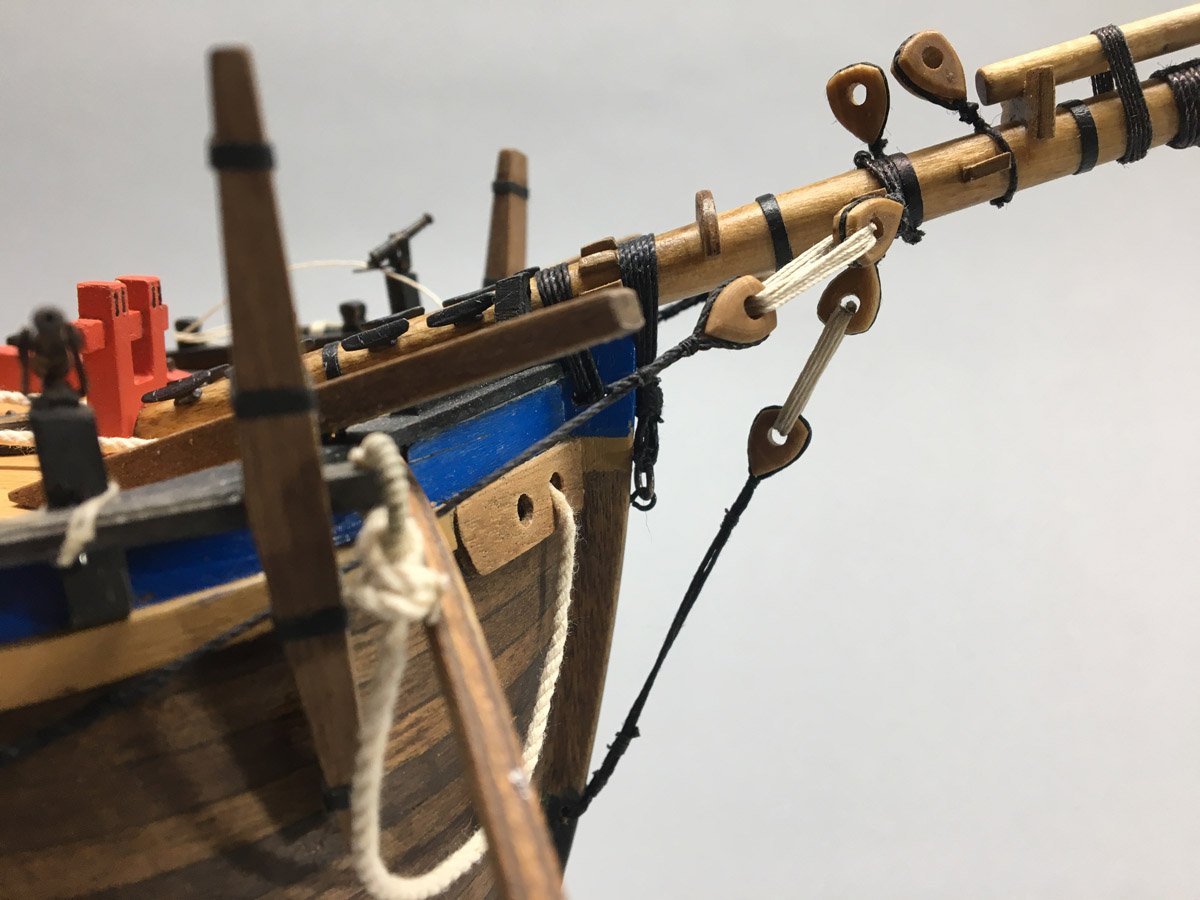
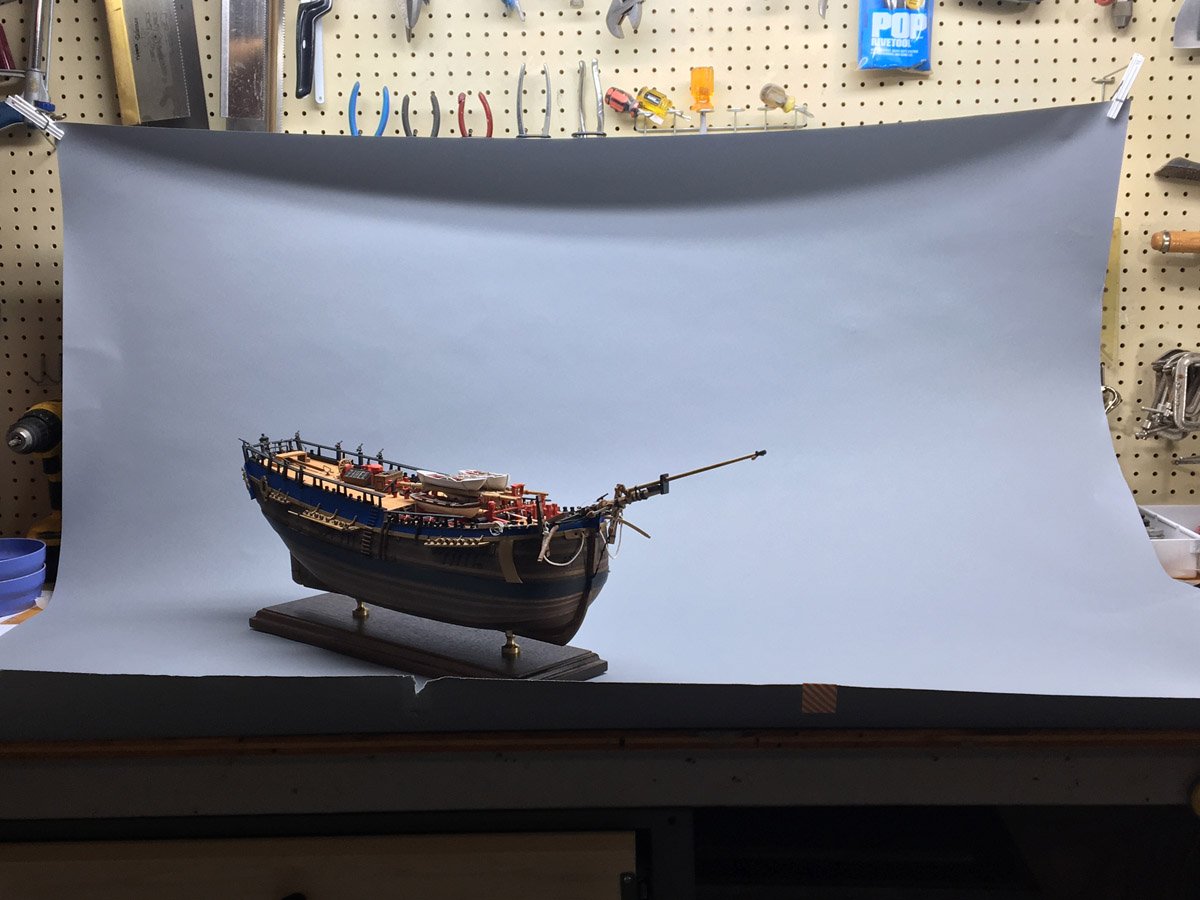
Bowsprit & Jib Boom After 6 build logs I finally invested in a decent photo backdrop. It's just a long roll of heavy gray paper 53 inches wide and 36 feet long. I chose gray so the standing and running rigging should both be visible against it. Here's my highly professional photo booth. You can see that I've installed the bowsprit and attached the stays. Here's a better look. Isn't that gray background great?


- 108 replies
-
- 1
-
-
- endeavour
- caldercraft
- (and 1 more)
-
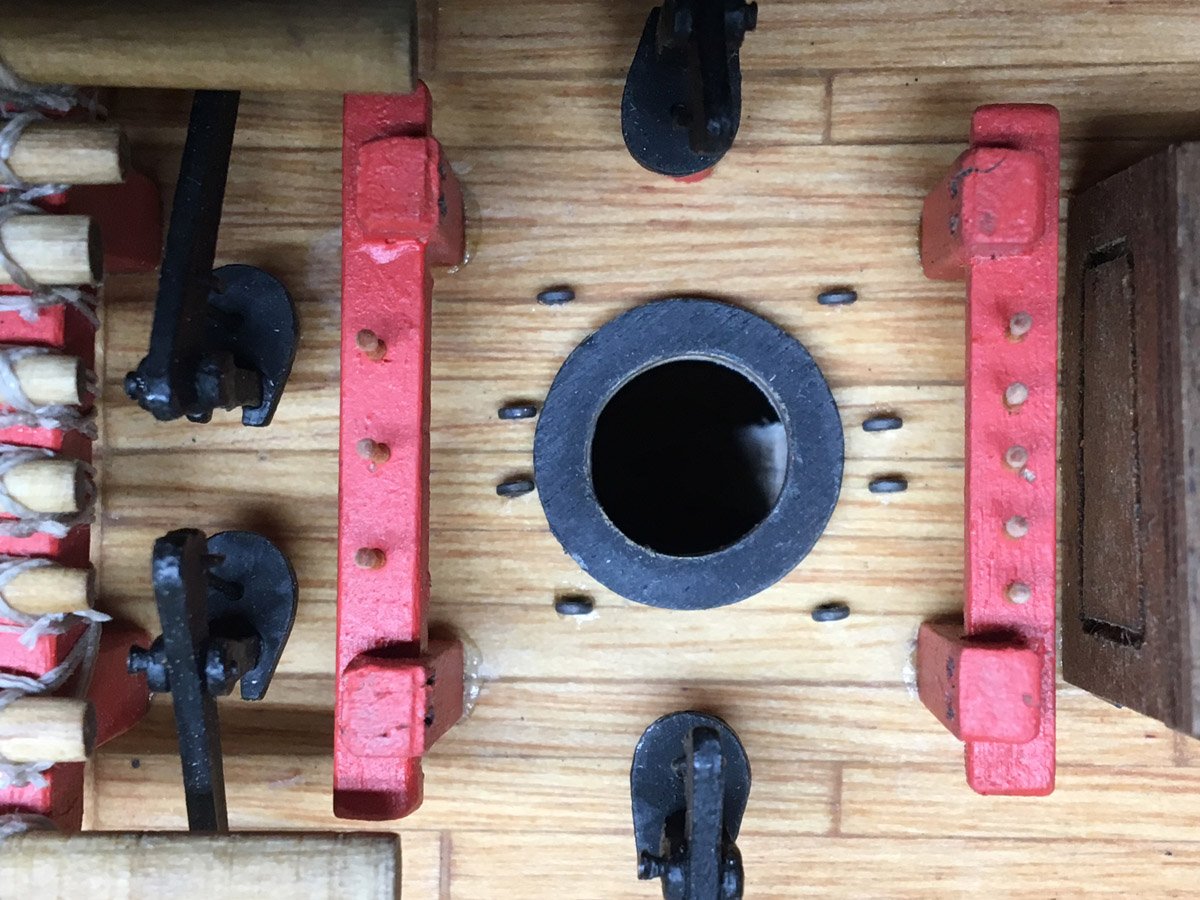
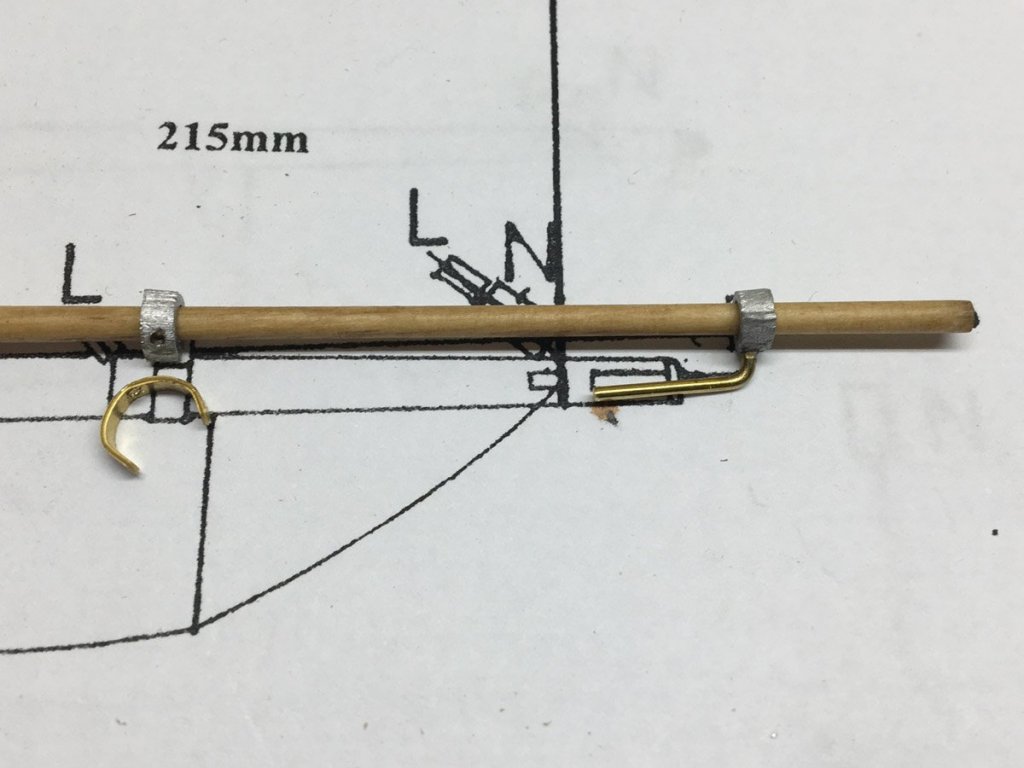
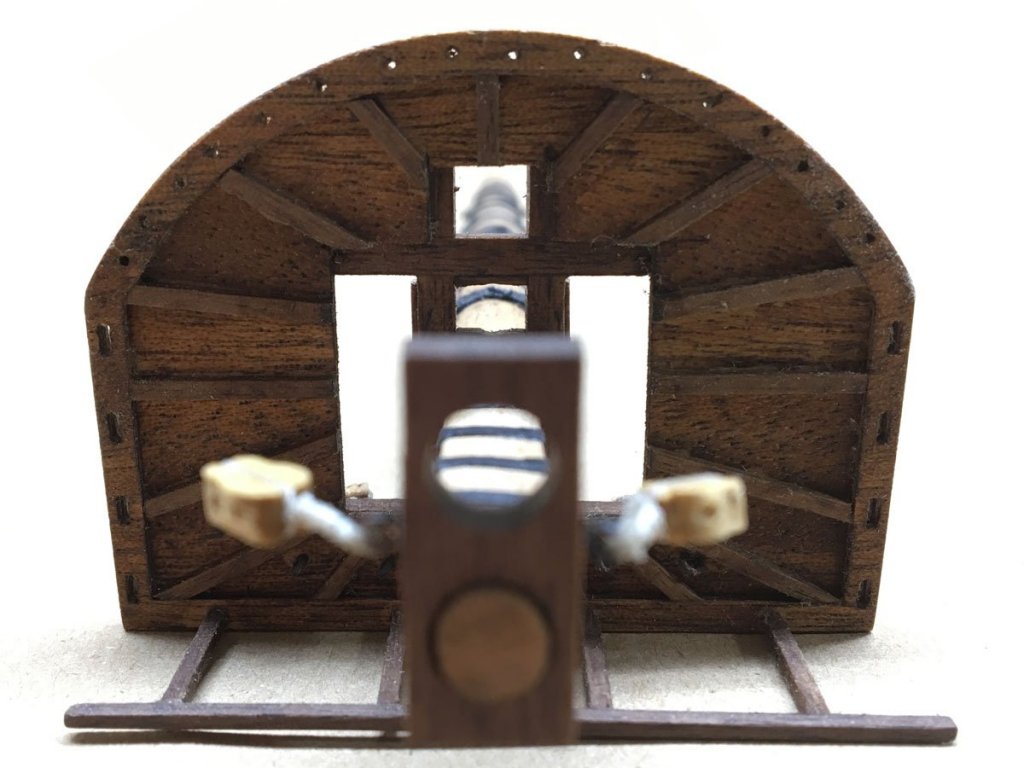
Belaying Pins With advice from Pat Banyan I realized that I would need some belaying pins and sheaves in the four bits on deck. Neither are shown on the plans for the bits, but running rigging plans do show lines connecting to various points along the bits. The kit only included enough wooden pins to fill the holes along the winch, so I ordered some more from ModelExpo-Online. I broke the bits away from the deck and added sheaves and pins. These are the tiniest belaying pins I've ever seen. I've had splinters bigger than this. But the pins are in and I'll have something to tie off to.


- 108 replies
-
- 2
-
-
- endeavour
- caldercraft
- (and 1 more)
-
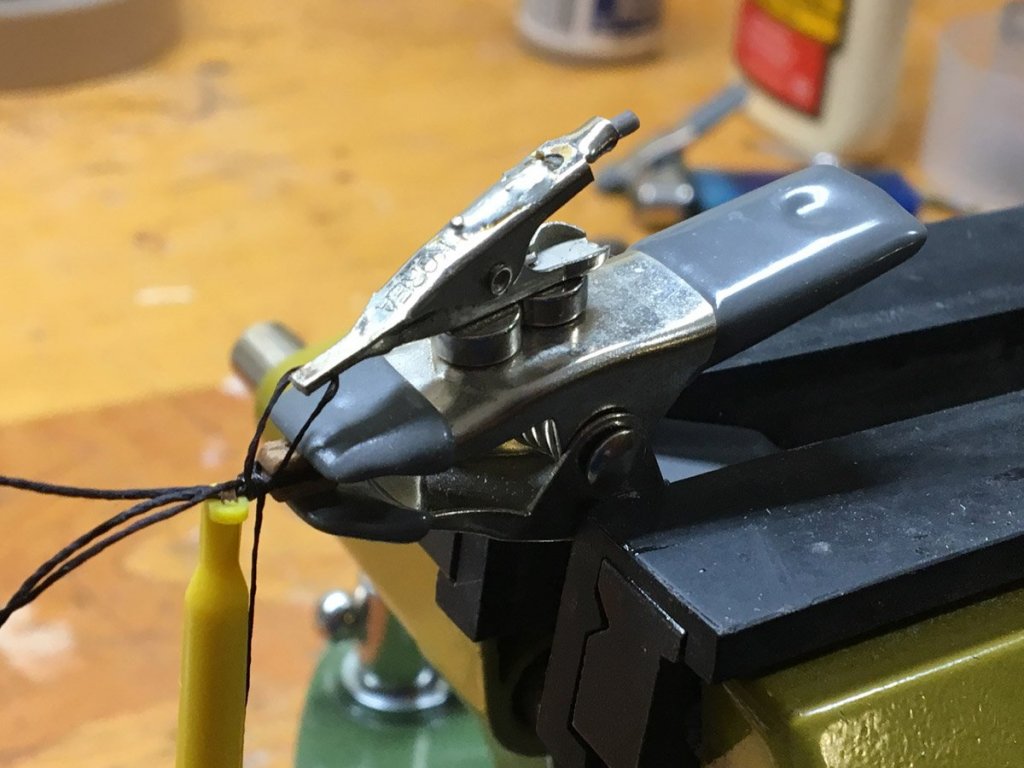
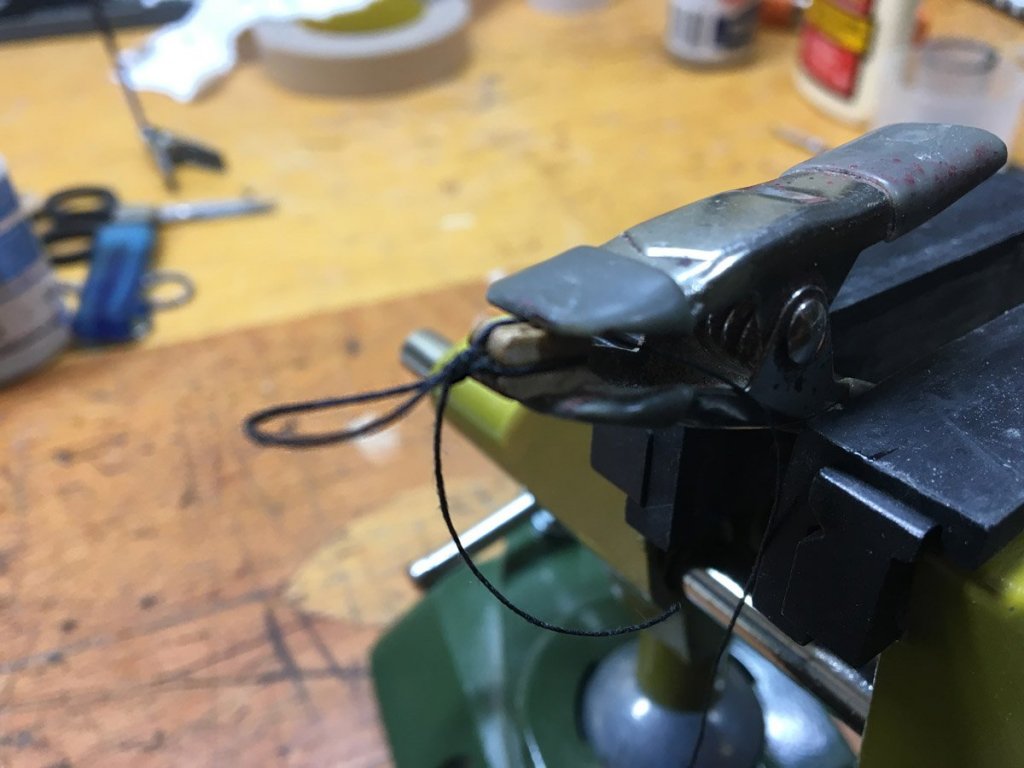
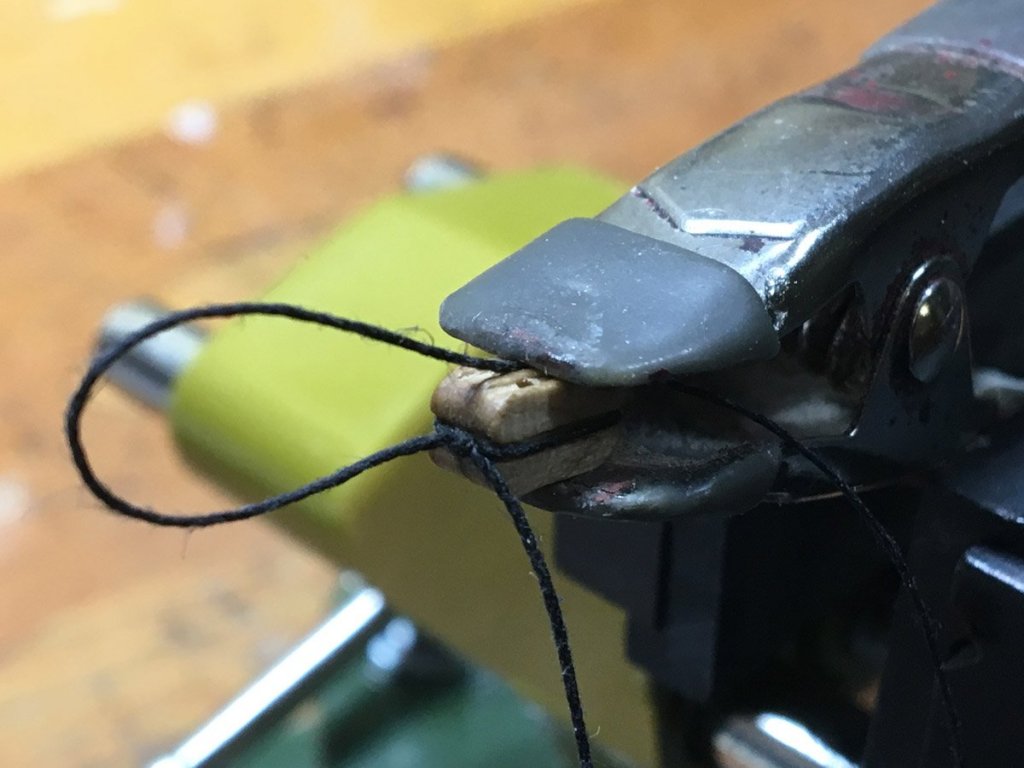
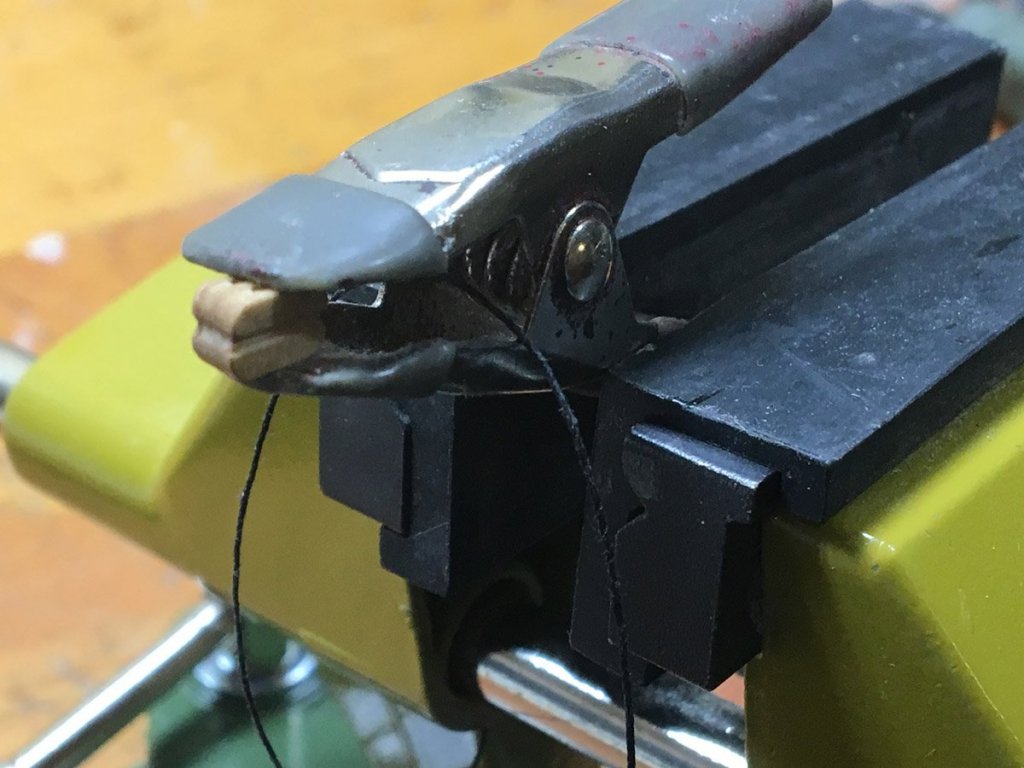
Tying Blocks Dave Row kindly posted detailed instructions for seizing a line to a block and attaching it to a yard. His method is pretty much how blocks are attached on real ships and the results are perfect. But it does take a while. I experimented and found a method that is a bit easier and looks OK to me. Hold the block in a spring clamp in a vise. Note to self - make sure the holes in the block are vertical so you don't tie the line over the holes. Slide the line behind the block. Tie the line with a tight square knot. Remove the block from the clamp, loop the long end of the line over the top, and put the block and line back in the clamp. Use the short end of the line to tie 2 or 3 tight half hitches around the loop. This approximates the seizing but is easier. The fake seizing line is the wrong diameter but mostly gets hidden against a yard anyway. Don't glue anything yet.Voila, the finished block. Slip the loop over the yard and pull the long end of the line to snug it in place. Put a drop of CA on the knot and around the block, then trim the short end of the line. It takes me about 3.5 minutes per block. This method doesn't look so good for blocks attached to a line, like the blocks hanging from the ends of the yards. For those blocks I am using exactly the method described by Dave, seizing them to the line with a separate, thinner line. That method requires a third hand to hold the seizing line. I used a couple of strong neodymium magnets to attach a micro clip (from my model rocket days) to my spring clamp. See Dave's post for the rest.

- 108 replies
-
- 2
-
-
- endeavour
- caldercraft
- (and 1 more)
-
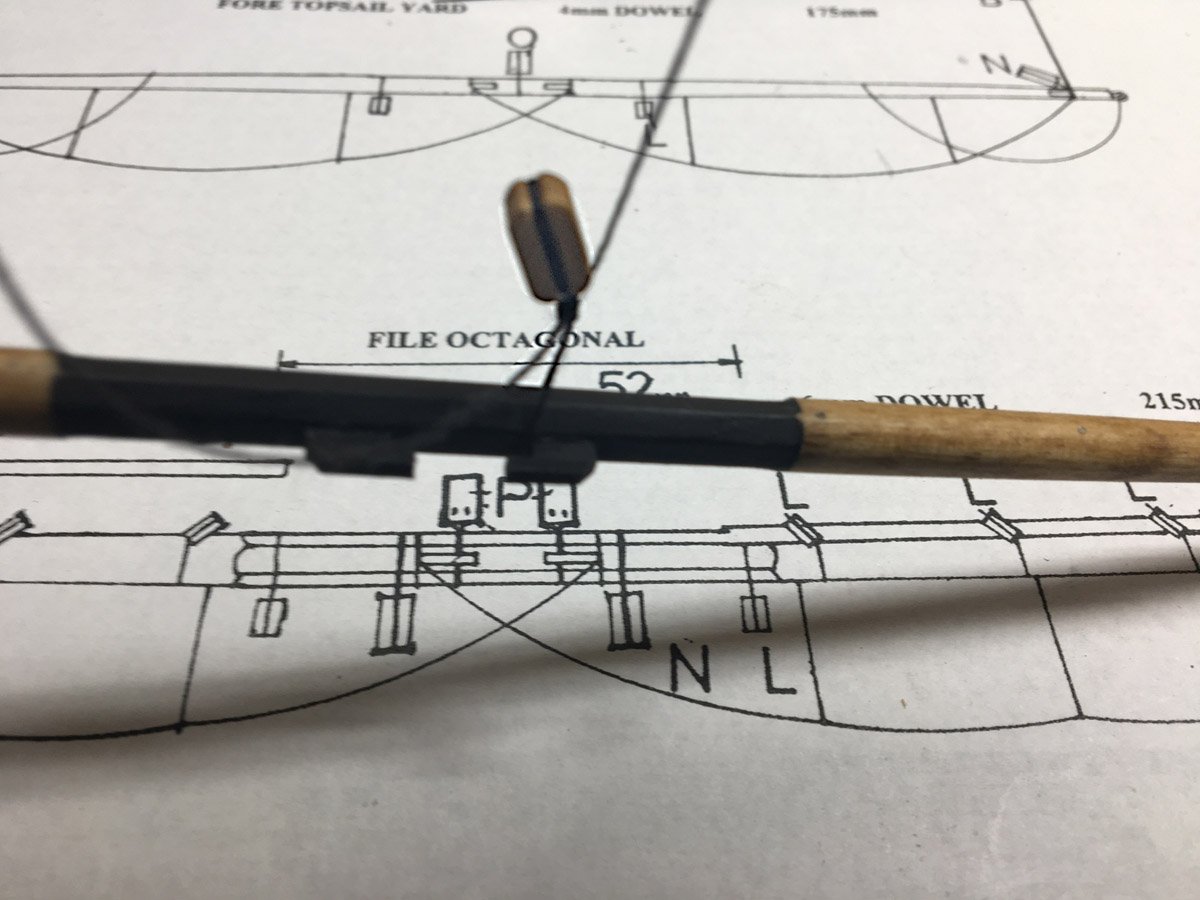
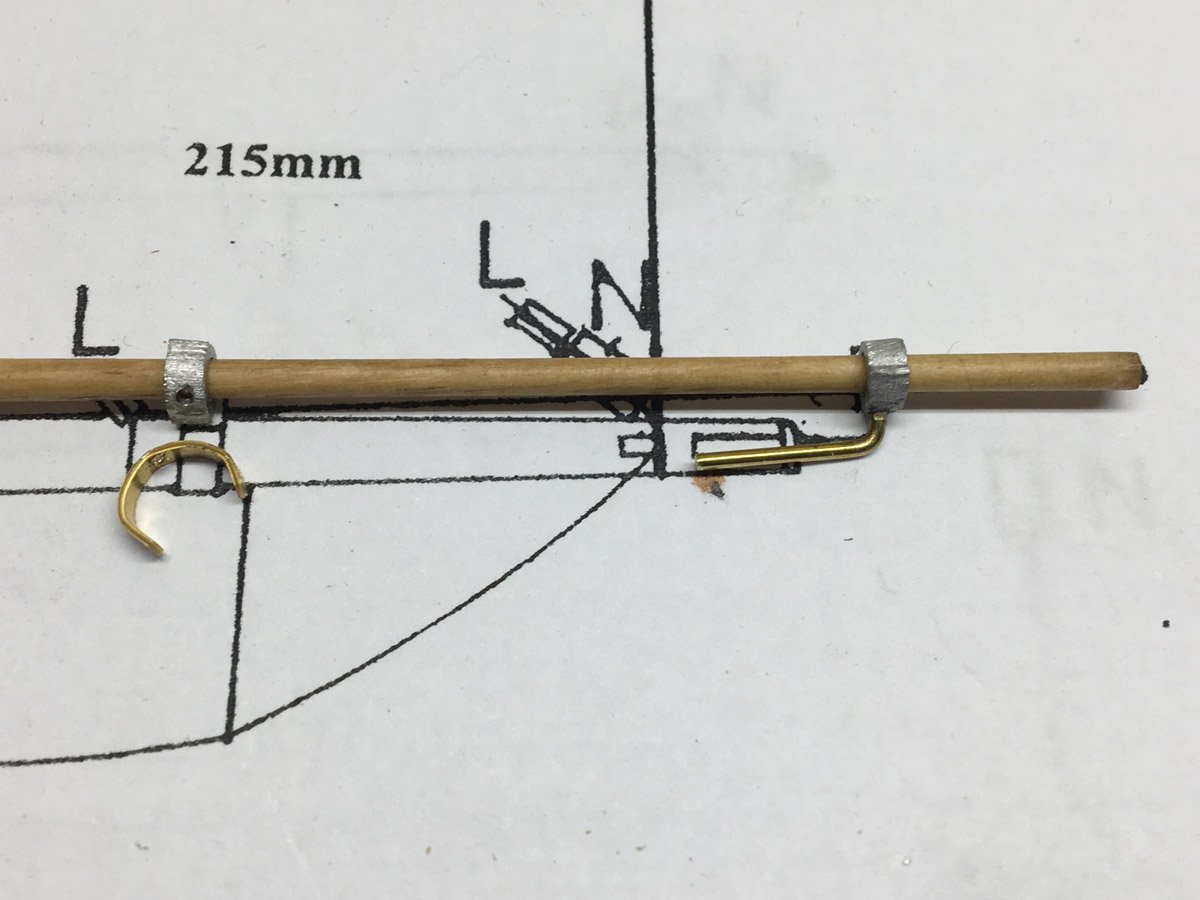
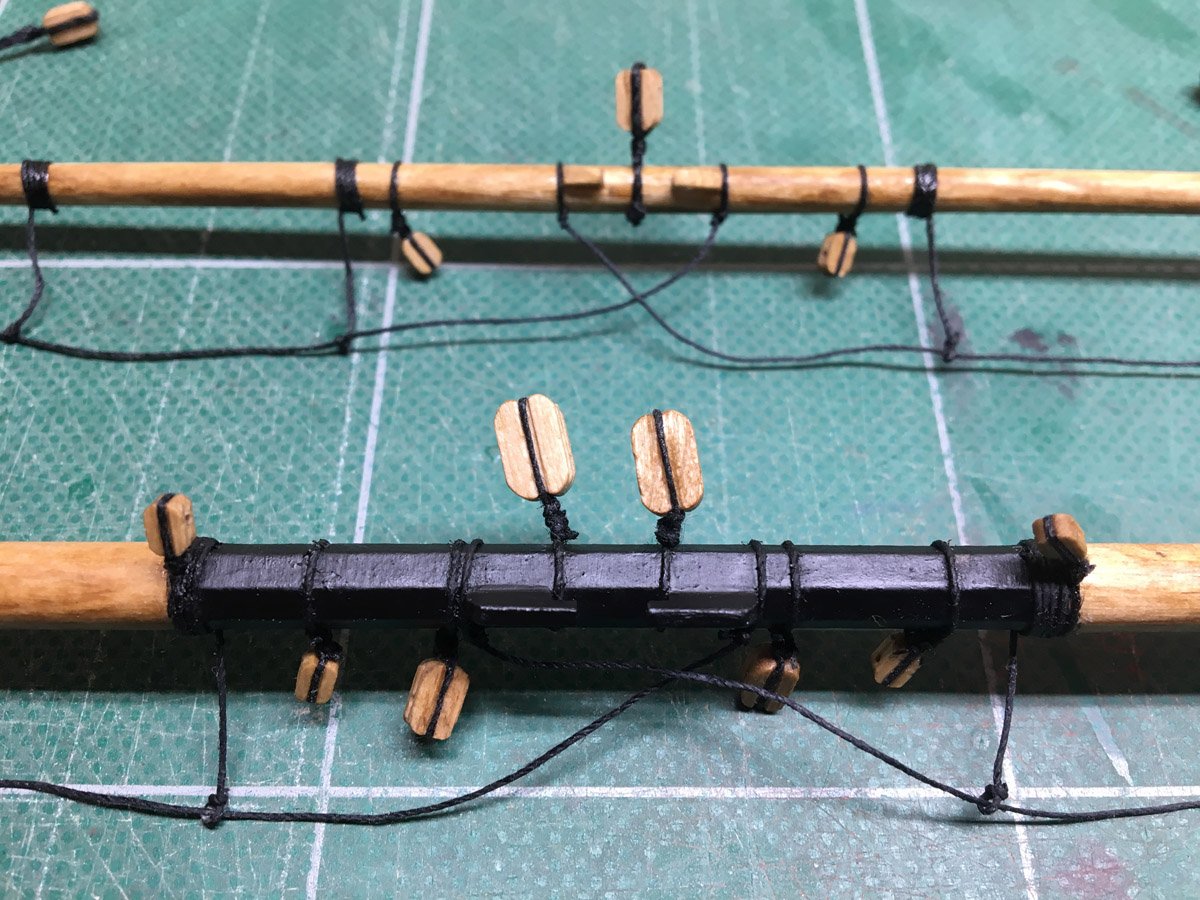
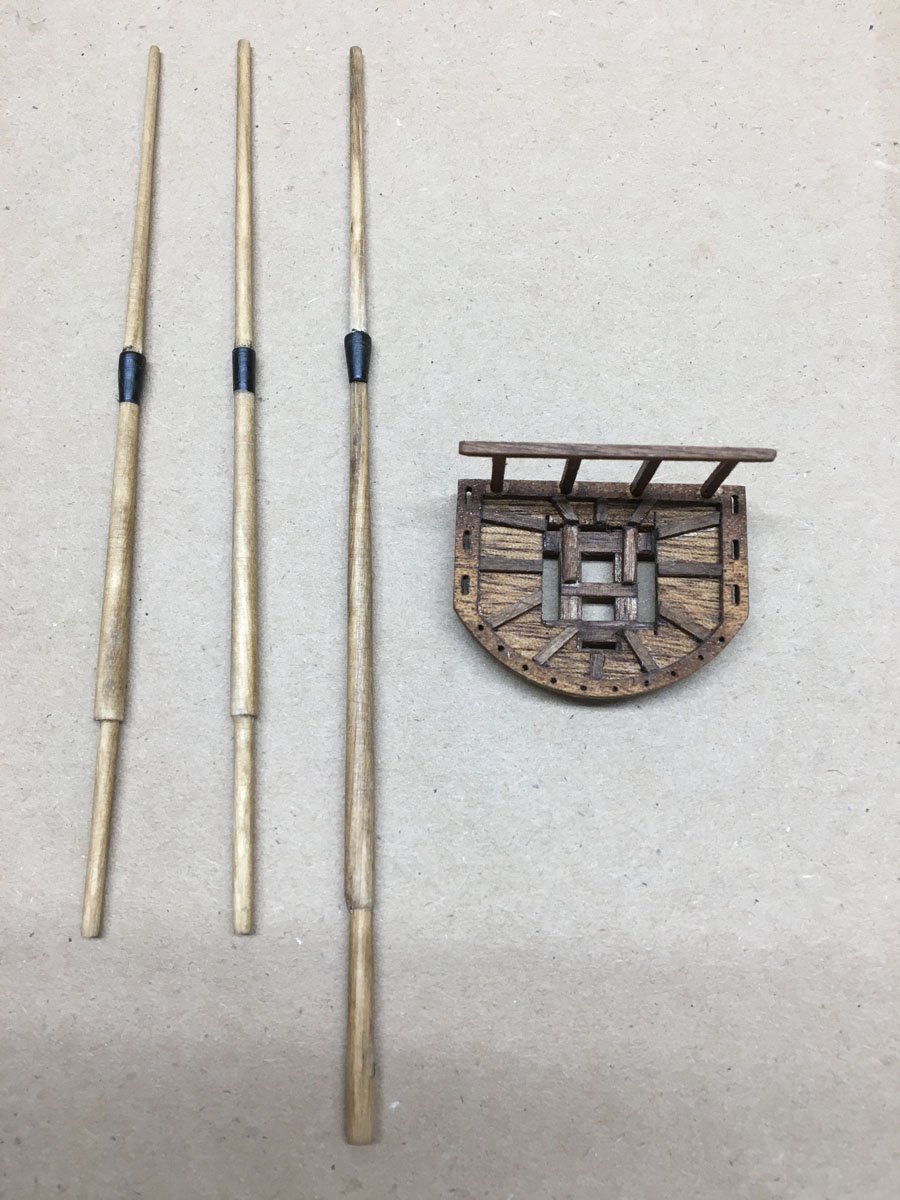
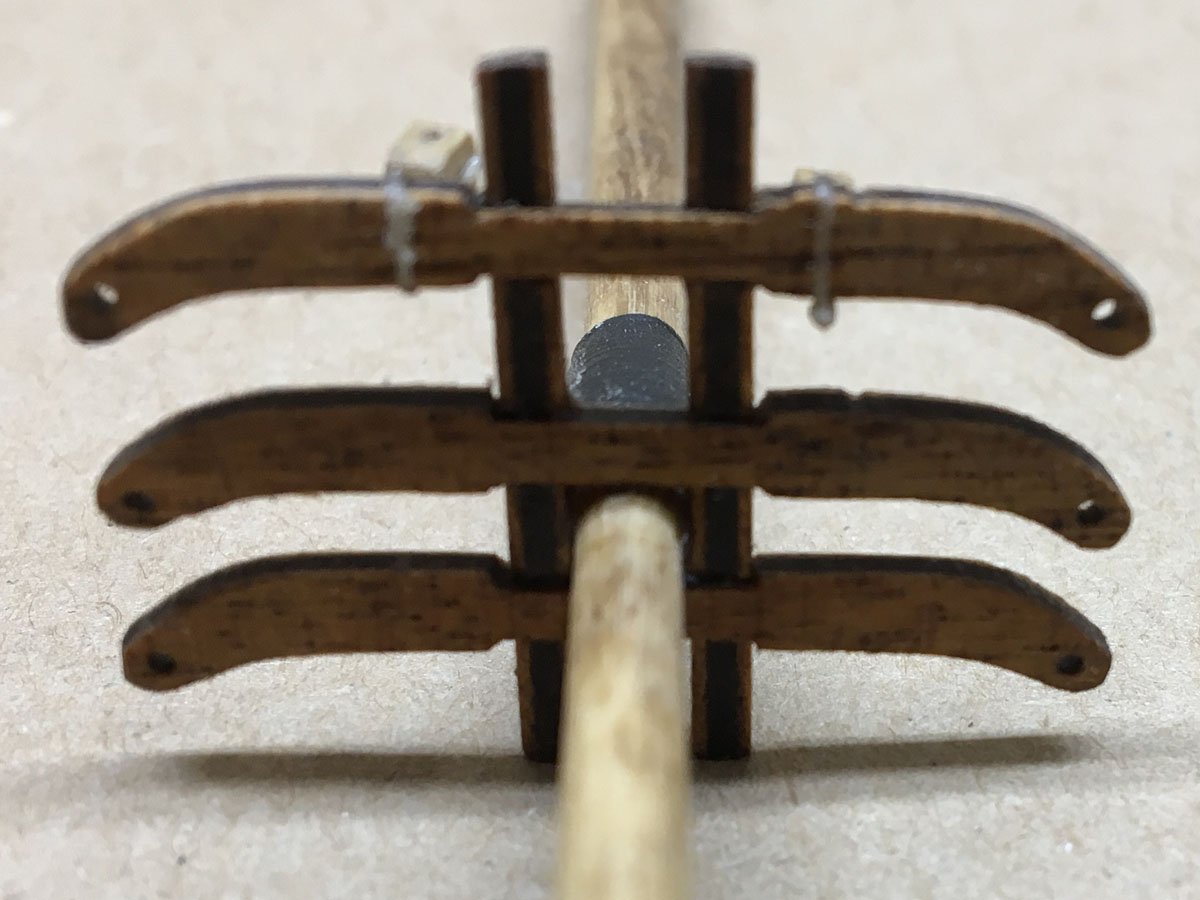
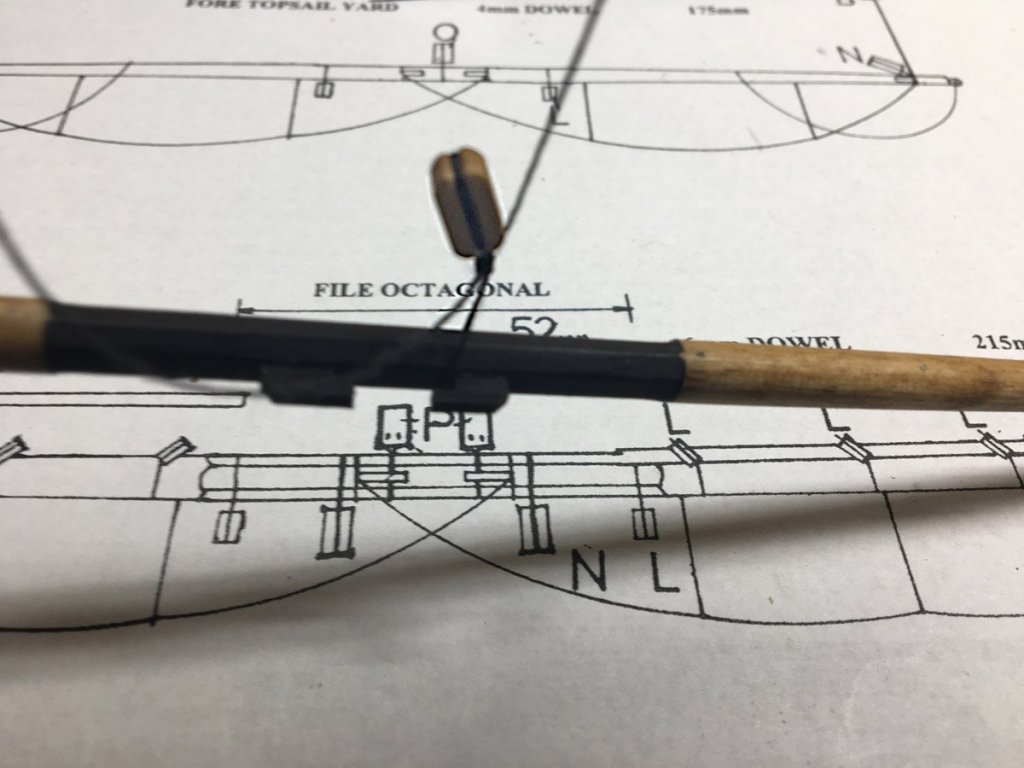
Yards I've got all the yards, flagpoles, and booms shaped. Thanks to Pat Banyan I ordered a jack, ensign, and commissioning pennant from Cornwall Model Boats. The main yard and main topsail yard are rigged. Oh s**t - I forgot the stunsail booms on the main yard! I've seen how Pat Banyan and Dave Row both made their fittings out of brass tubes and wire soldered together, and had visions of deconstructing the yard to slide the bands on. Then I looked at the Caldercraft plans. The rings are pot metal, almost no cleanup required. The bands are photo etched brass that just go 2/3 of the way around the yard. I looked back (longingly) at Chuck Passaro's thoroughly detailed 132 page plans for the Syren that I built 5 years ago. Chuck said that there is no need to solder the fittings because there is absolutely no load on them. No way to solder the pot metal anyway, so after a little metal work, a drop of CA, and a little paint, the stunsail booms were done. I put the booms on the fore yard before I rigged it ;^)


- 108 replies
-
- 3
-
-
- endeavour
- caldercraft
- (and 1 more)
-
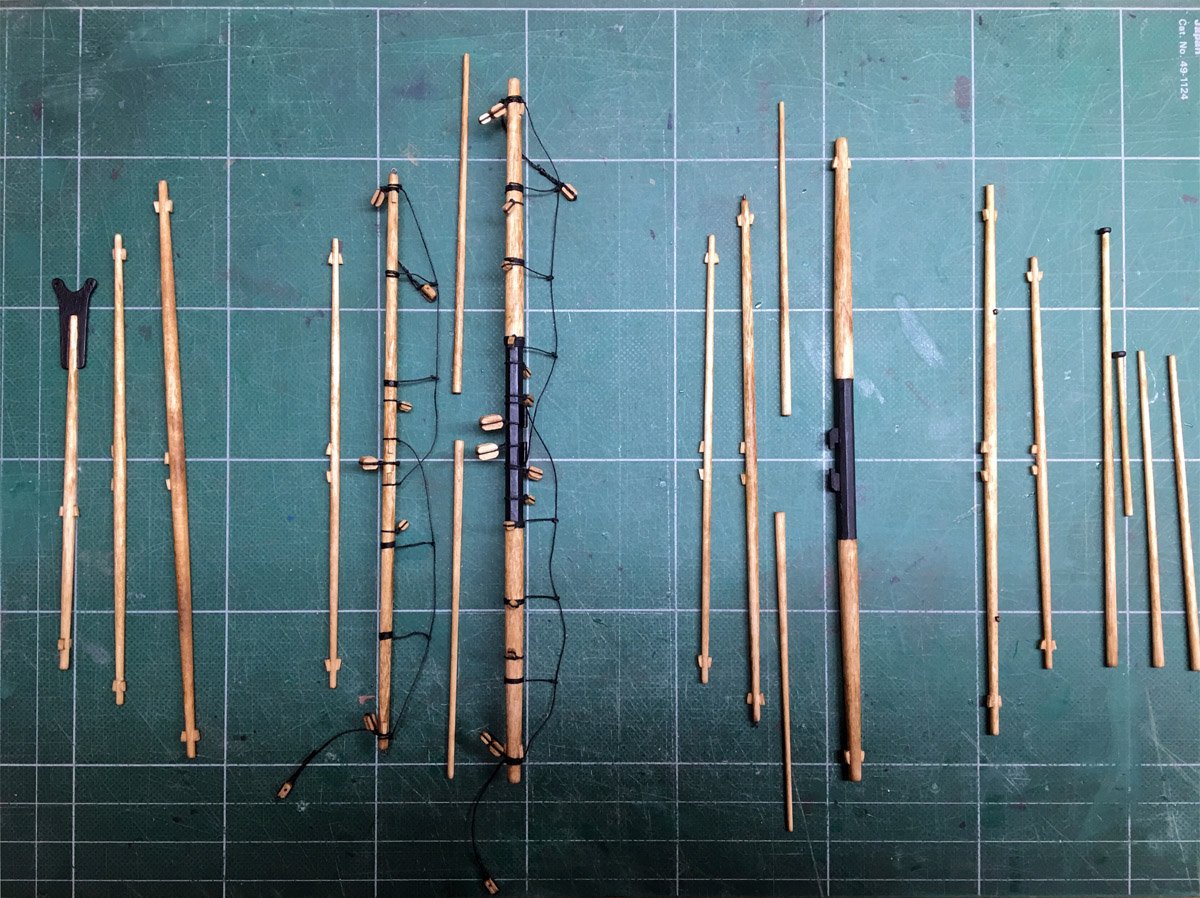
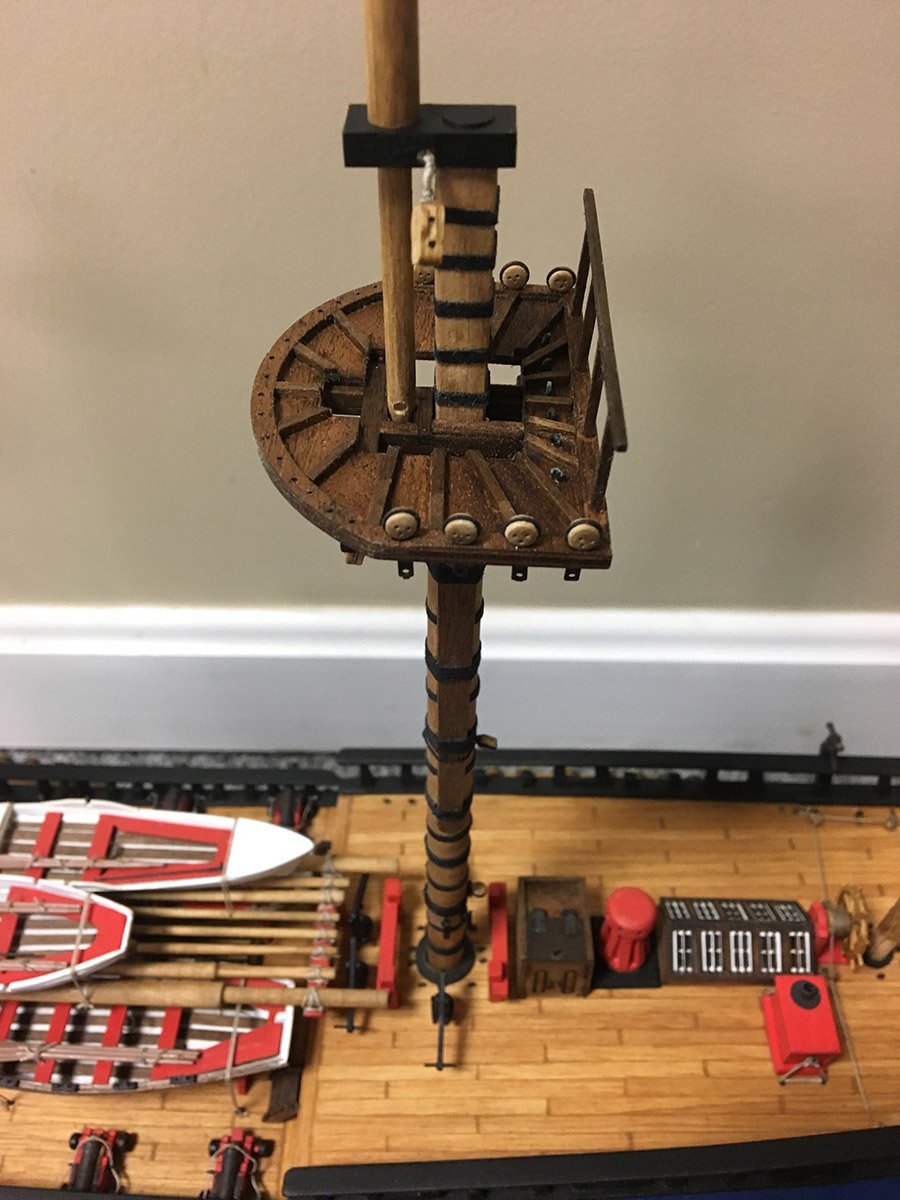
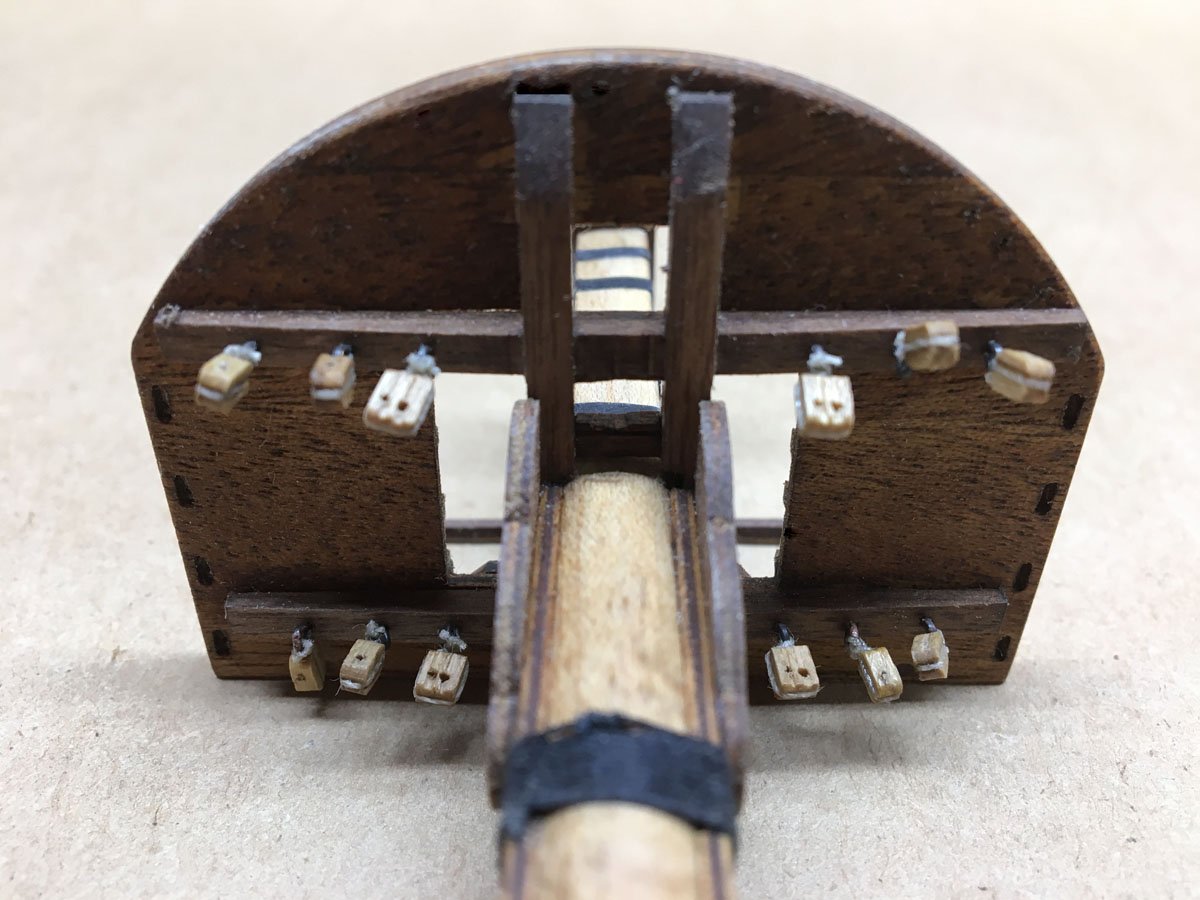
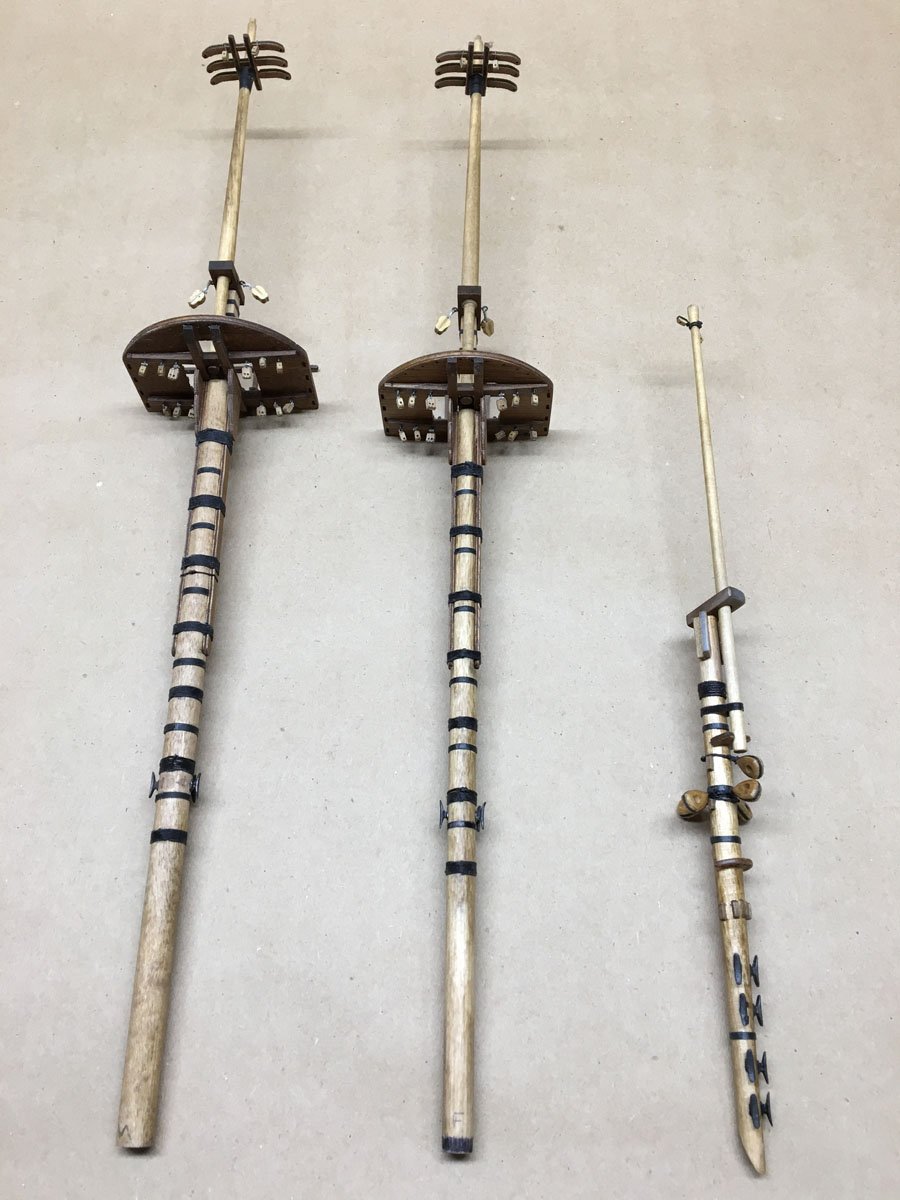
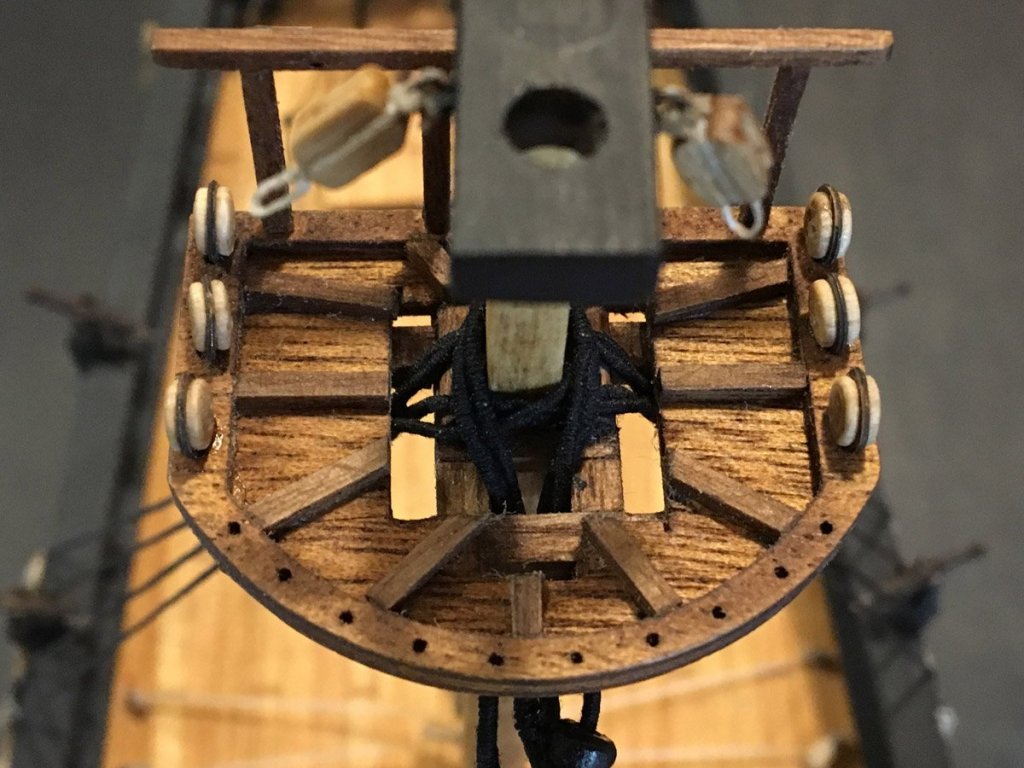
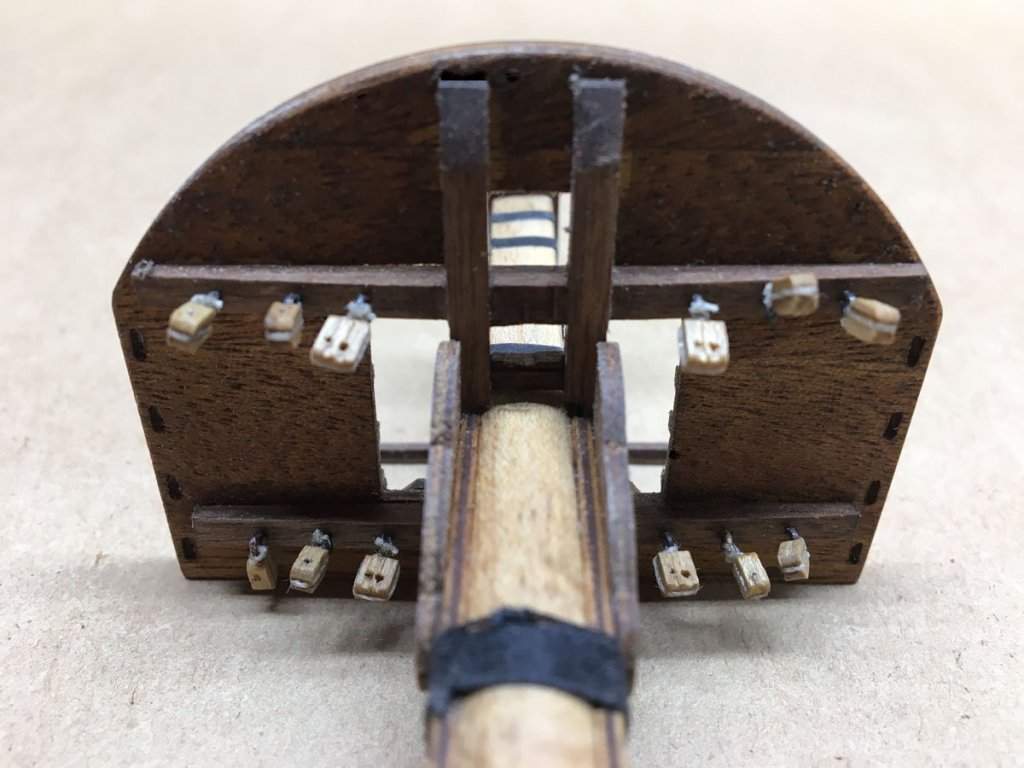
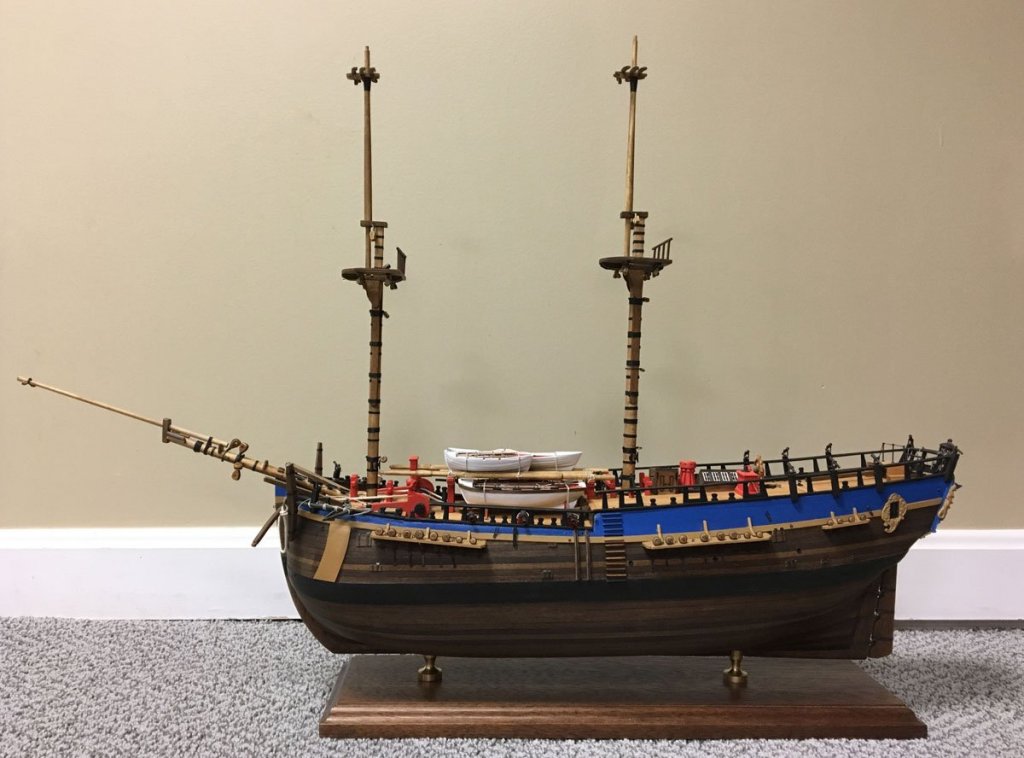
Masts Completed, 1 year, 24 days, 456 hours The masts alone took 58 hours. They are still in separate sections and are not attached to the ship. The deadeyes are set into the tops.

- 108 replies
-
- 2
-
-
- endeavour
- caldercraft
- (and 1 more)
-
Dave, Thank you for all the advice on rigging the blocks. Your photos really help explain the process, which is not too complicated after you see it. And I'll echo Fernando in complimenting your rigging tools. I've been working with a spring clamp held in a vise and two old fingers. It's time for me to get a little more sophisticated. Rod
-
Dave, Your single tye blocks (below from pp 26) are very clever. I can almost imagine how you make them based on some of your other posts, but would you consider showing an overview? It seems like the short end is cut off at the seizing. How do you prevent it from pulling out? Many thanks. Rod

-
Simply beautiful Dave! Thanks for all the effort you've put into your build log. It has been a great reference for me. Rod
-
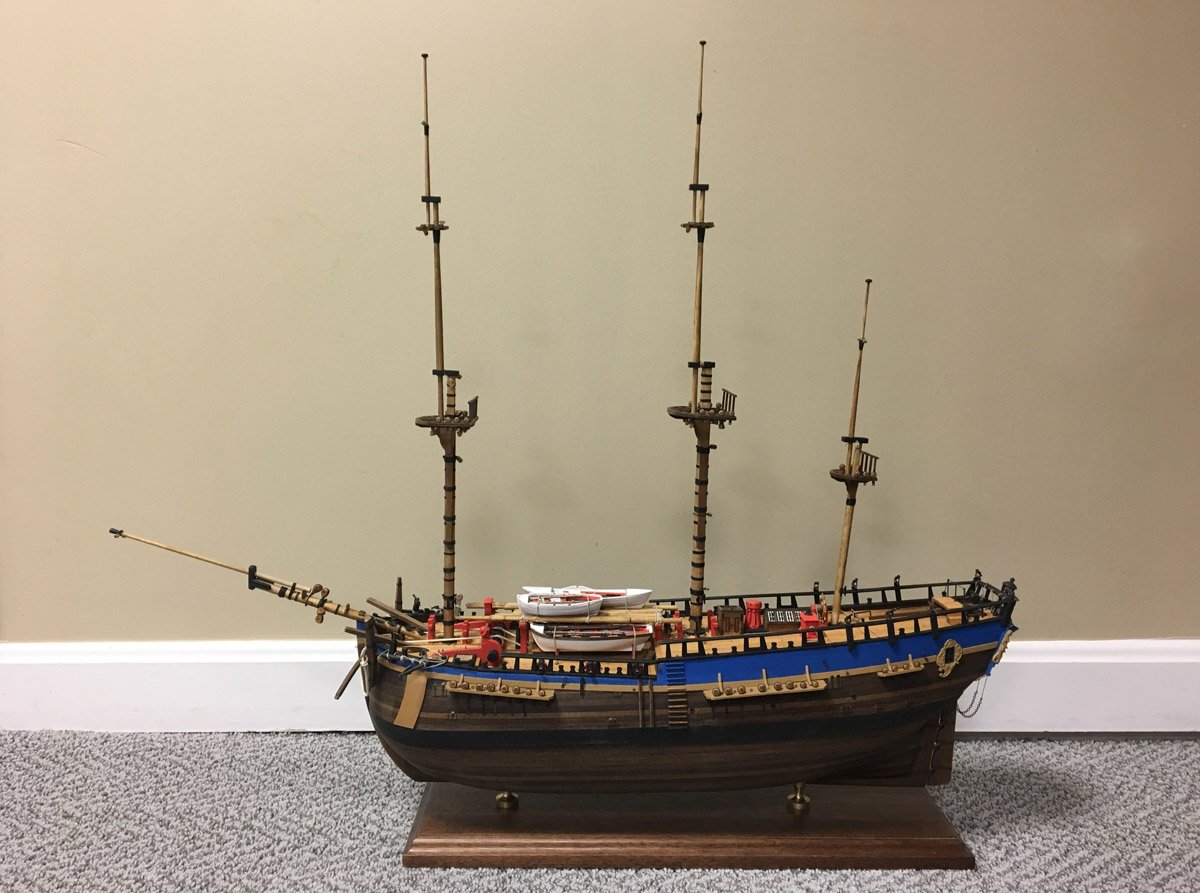
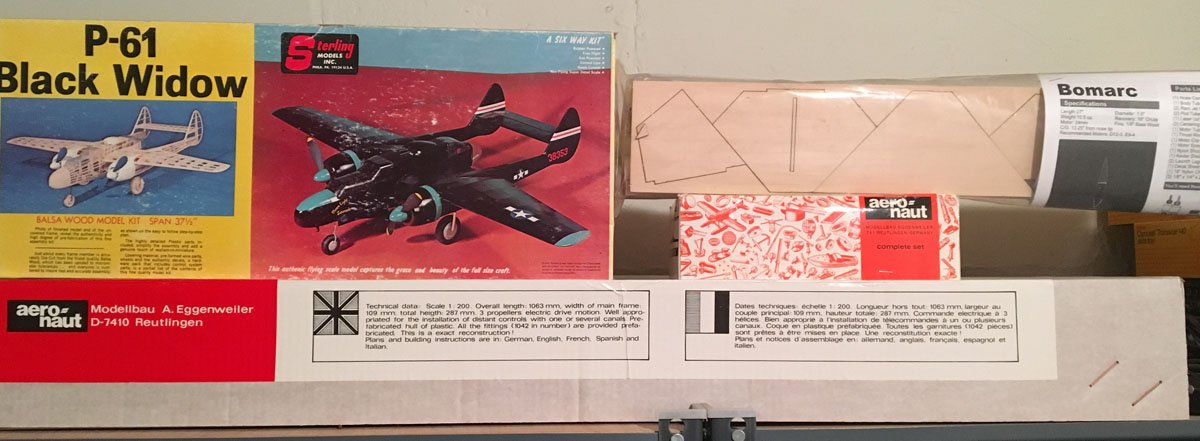
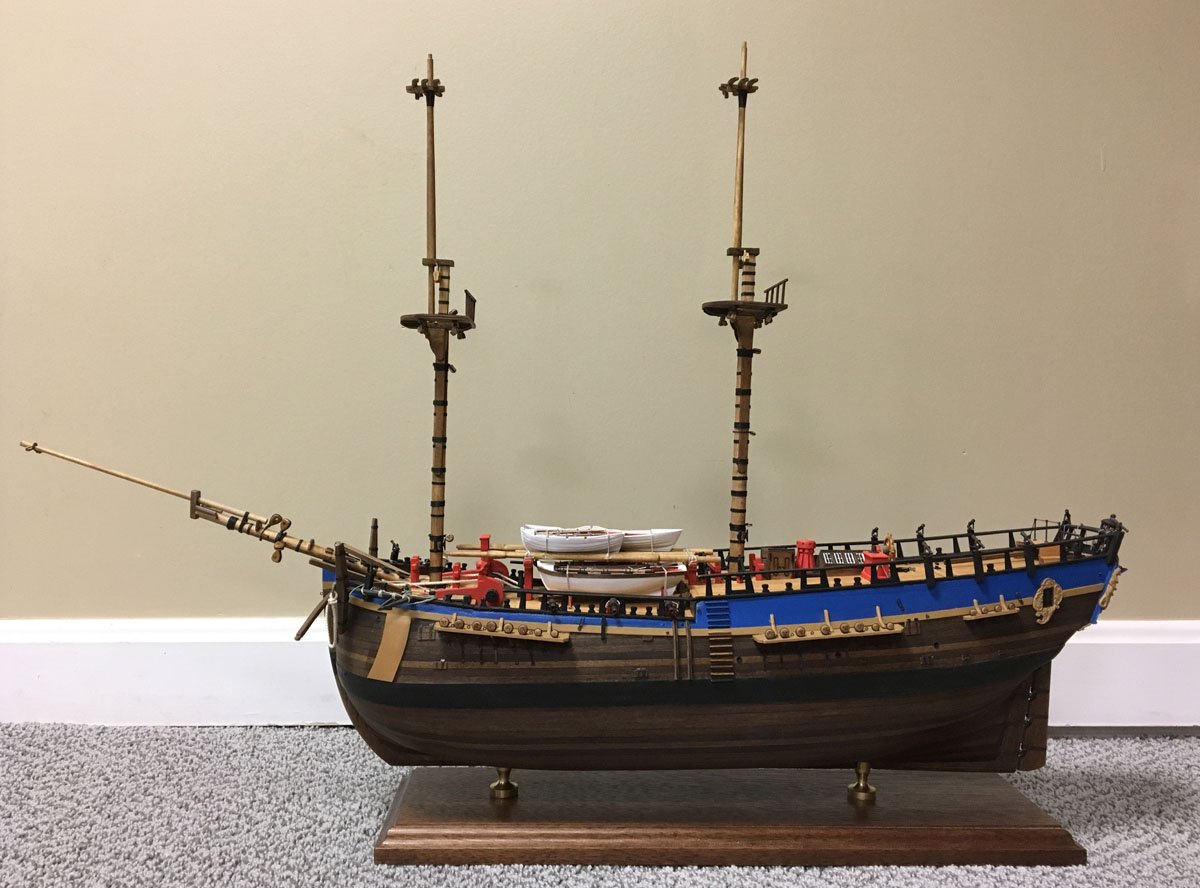
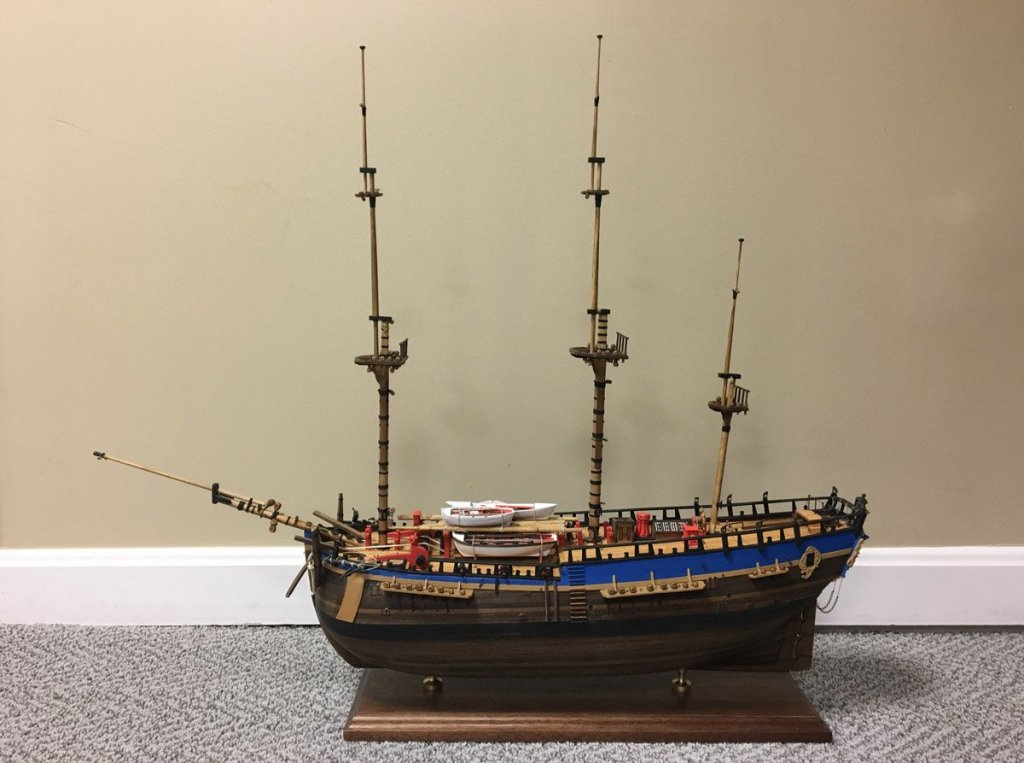
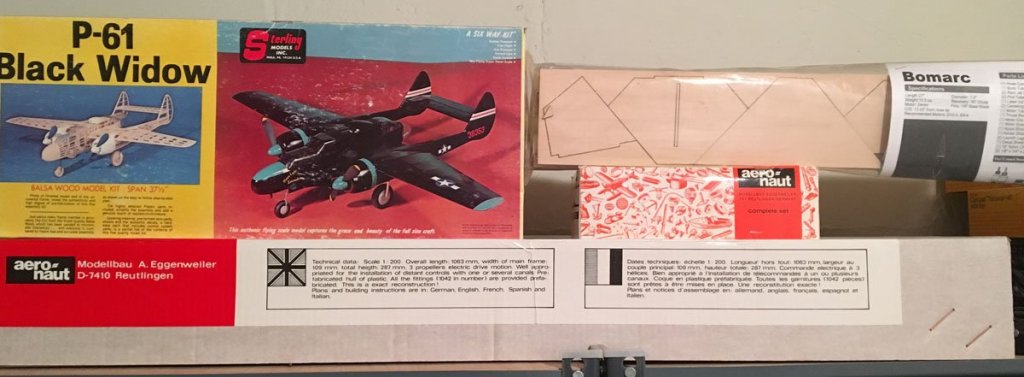
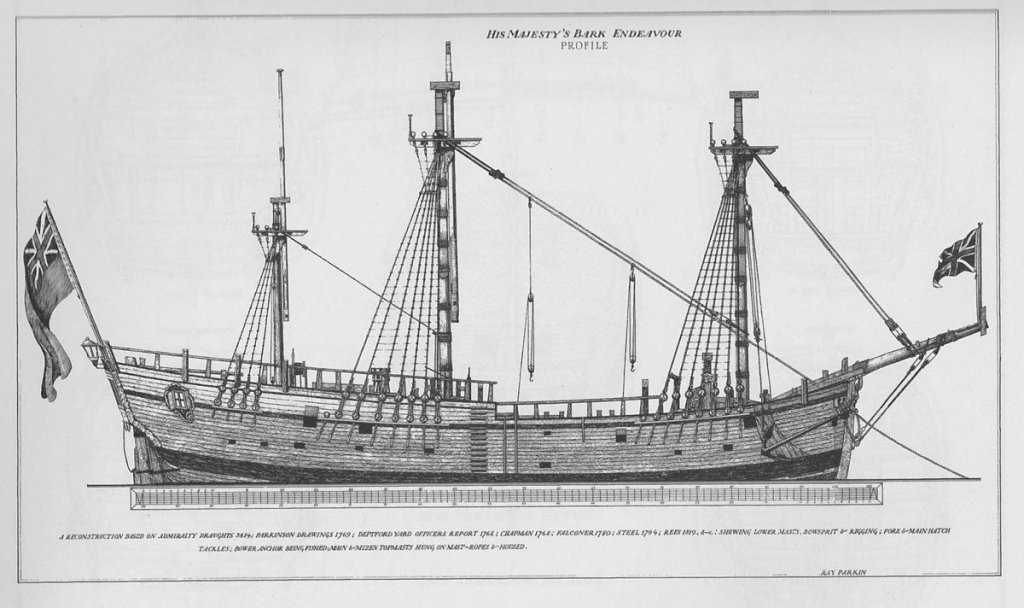
Bowsprit, Fore Mast, Fore Topgallant, Main Mast, and Main Topgallant Complete. 1 year, 9 days, 411 hours I actually completed the bowsprit and jibboom before my holiday but didn't have time to post. I did the rest over the last 2 weeks. Here are some detail shots. I I really like this drawing in Parkin's book of the Endeavour with only the main masts and standing rigging. I am toying with the idea of stopping my build at that point. This would make for a much more compact display case and probably save me 6 months. What do you think? Then I could get to these other projects waiting on my shelf sooner. That would be an Aeronaut kit of the Prinz Eugen heavy cruiser, a vintage Sterling kit of a P-61 Black Widow night fighter, and a Bomarc missile kit by Madcow rocketry. So many projects, so little time ;^)


- 108 replies
-
- 3
-
-
- endeavour
- caldercraft
- (and 1 more)
-
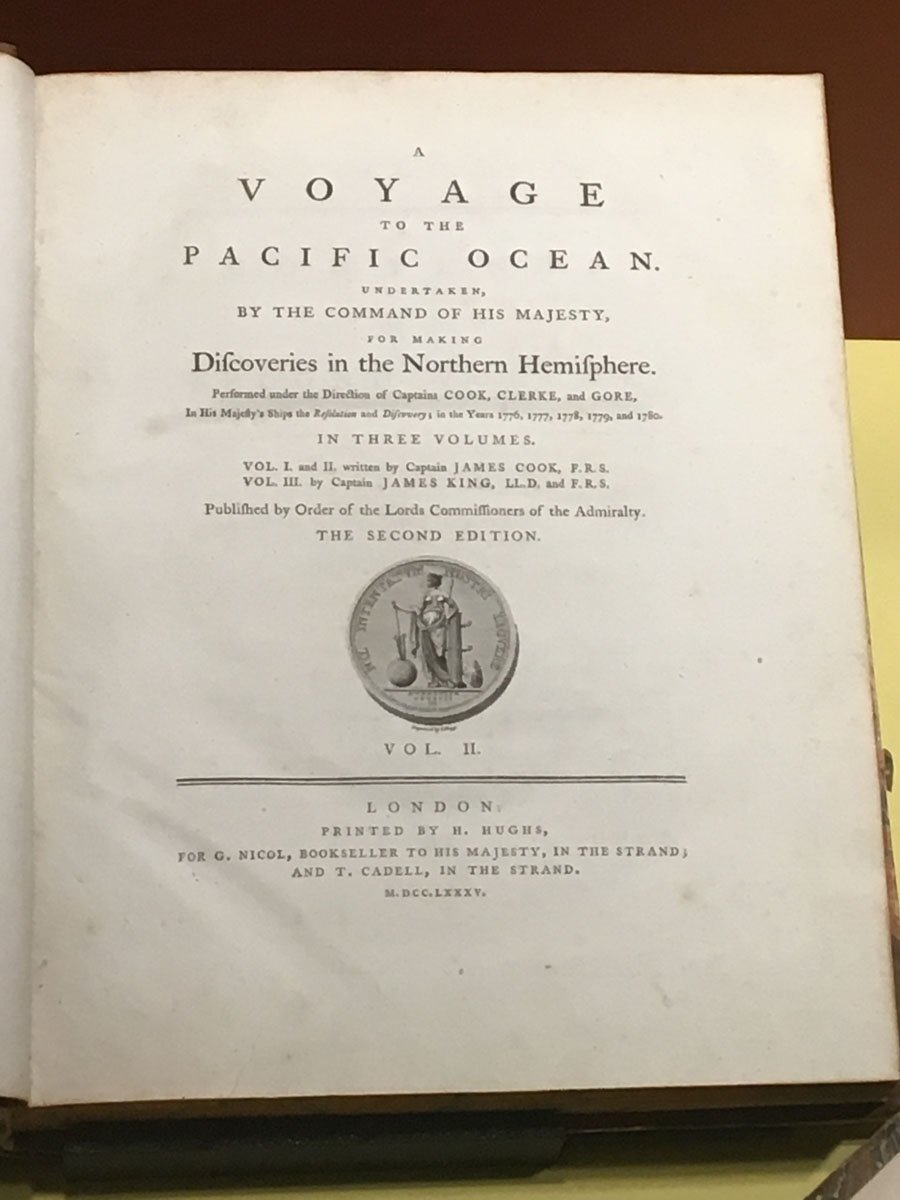
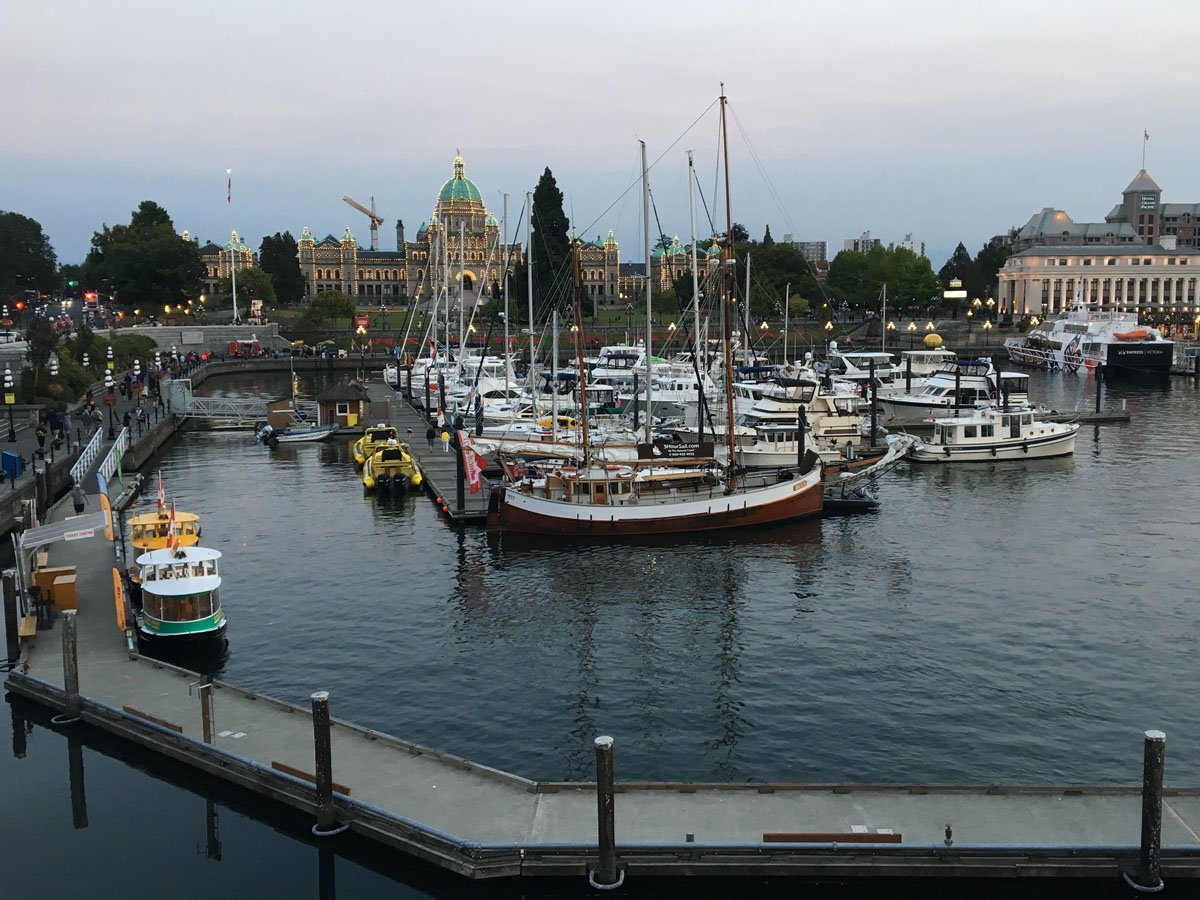
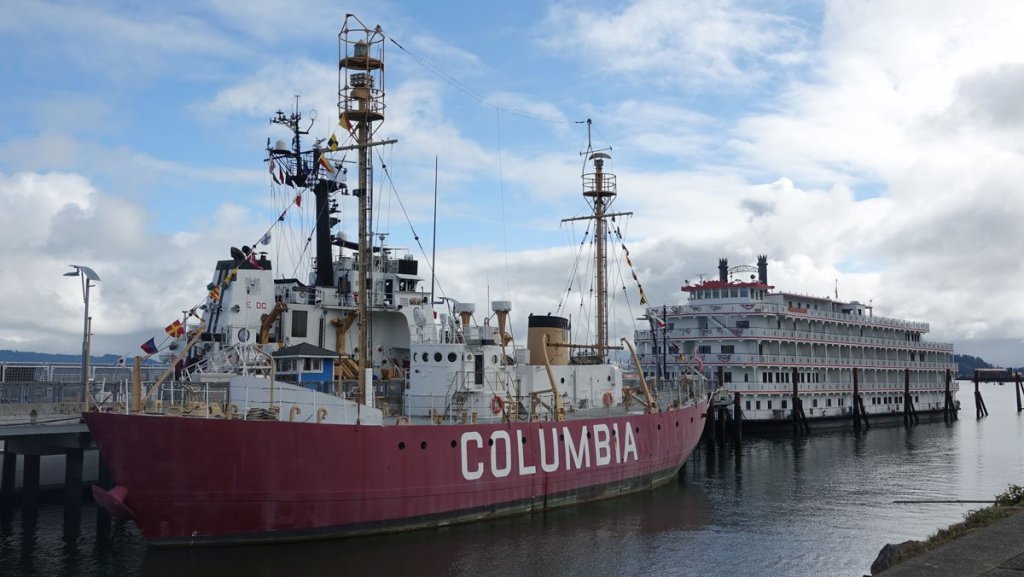
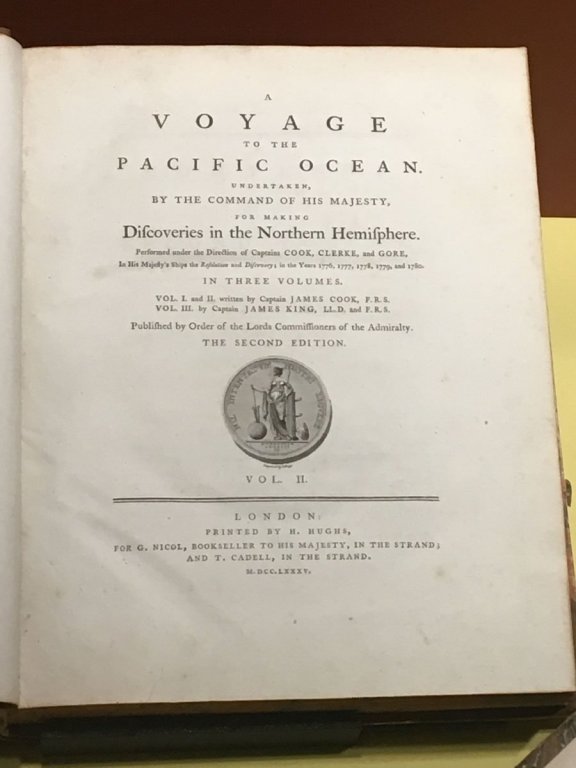
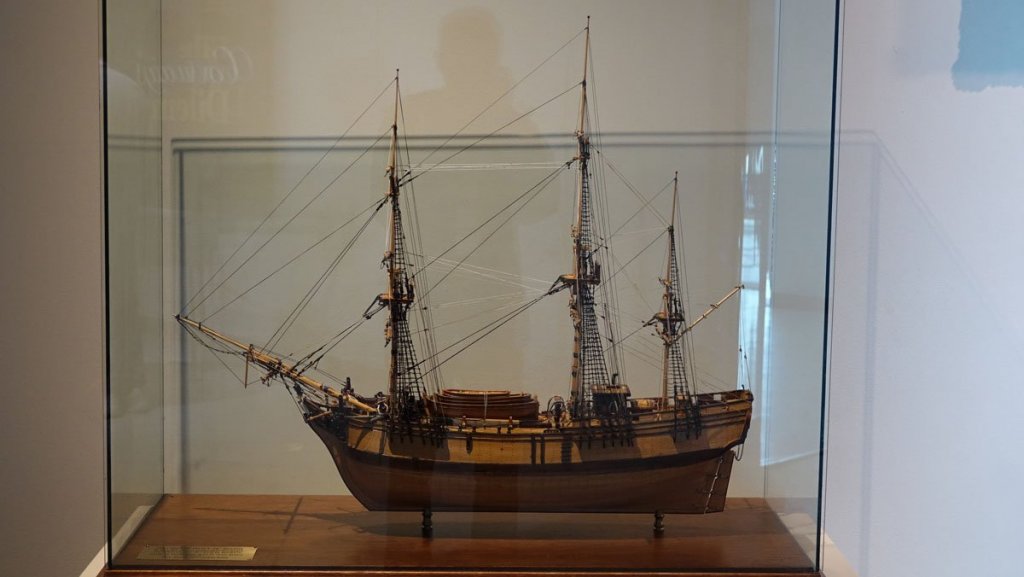
IMG_E7060.MOV I've been back from my holiday for a couple of weeks and promised to post a few photos. Here's a view from the stern of our ship. The wheel is just spinning freely in the water but it sure looks cool. The Columbia River Maritime Museum in Astoria, Oregon has the Columbia light ship anchored outside. Our ship docked right next to it. The museum was packed with ship models like this model of the Columbia Rediviva, the first ship to "cross the bar" into the Columbia River in the Pacific Northwest in 1792. They also had a second edition of the logs of Captain Cook, who explored the Northwest coast on his third voyage in 1778. I'll skip the photos of Portland, Oregon, Mt. Rainier National Park, and Olympic National Park, and end with this photo of the harbor in Victoria, BC. The domed building is the capitol building of British Columbia. The Royal BC museum is just off the photo to the left, and our hotel was the building on the right with the pointy tower and flag. What a beautiful city. I've been busy building masts. Give me a couple of hours to take photos and I'll be back.

- 108 replies
-
- 3
-
-
- endeavour
- caldercraft
- (and 1 more)
-
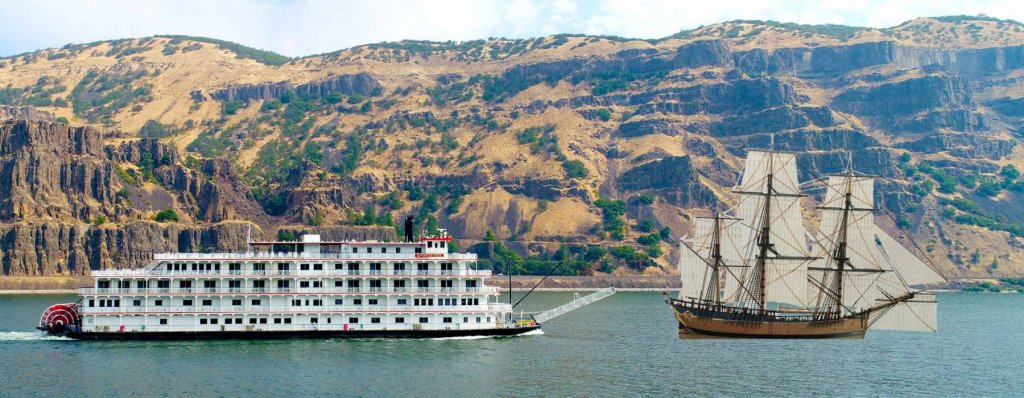
We are cruising through the Columbia River gorge in the American Pride, a "stern wheeler" with two steerable props and a free-wheeling wheel. At 295 ft it's about twice the length of the Endeavour.
- 108 replies
-
- 4
-
-
- endeavour
- caldercraft
- (and 1 more)
-
This morning I was tying 3mm blocks to eyebolts, getting ready for the tops. Near the end one block went flying. Far. I got down on my hands and knees with a flood light and searched the floor, with no luck. Then I swept the floor. Still no luck so I gave up. Two hours later I was washing dishes, and felt something on my head. The block was in my hair.
- 108 replies
-
- 3
-
-
- endeavour
- caldercraft
- (and 1 more)
-
Holiday Break My wife and I are leaving tomorrow for a week-long cruise through the Columbia River gorge on a modern stern wheeler. It covers the most of the width of the state of Oregon. Then we'll rent a car and visit Portland, Oregon, Mt. Rainier National Park, Olympic National Park, and Victoria, British Columbia, Canada. I'll post photos of any interesting river craft. Back in mid August.
- 108 replies
-
- 1
-
-
- endeavour
- caldercraft
- (and 1 more)
-
I just bought an interesting book at a local used book store. "The Neophyte Shipmodeler's JACKSTAY," by George F. Cambell, published by Model Shipways, 1962. It's 59 pages softbound and full of labeled drawings of sailing ship parts. It explains pretty well what things are called, how they work, and how they changed over time. It even explains what a jackstay is. There is no index but it's easy to flip through and find a relevant drawing. My favorite part is The Rigging It has been truly said that the rankest amateur can successfully rig, though he know not his mast from a hole in the ground. The original price was $2.50 US. I paid $8.99 for a 56 year old copy. And amazingly Modelexpo-online.com still has it for sale for $12.99.
- 108 replies
-
- 1
-
-
- endeavour
- caldercraft
- (and 1 more)
-
Fernando, Welcome aboard! I should explain that, in the model airplane world, what I am doing would be called standoff scale. It looks pretty good if you stand off a ways. If you want serious attention to detail check out Pat Banyan's completed build or Dave Rowe's nearly completed build.
- 108 replies
-
- 2
-
-
- endeavour
- caldercraft
- (and 1 more)