rvchima
-
Posts
712 -
Joined
-
Last visited
Content Type
Profiles
Forums
Gallery
Events
Everything posted by rvchima
-
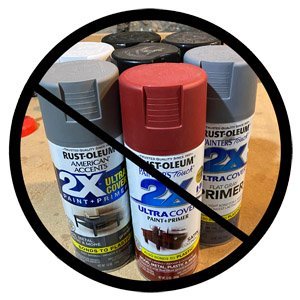
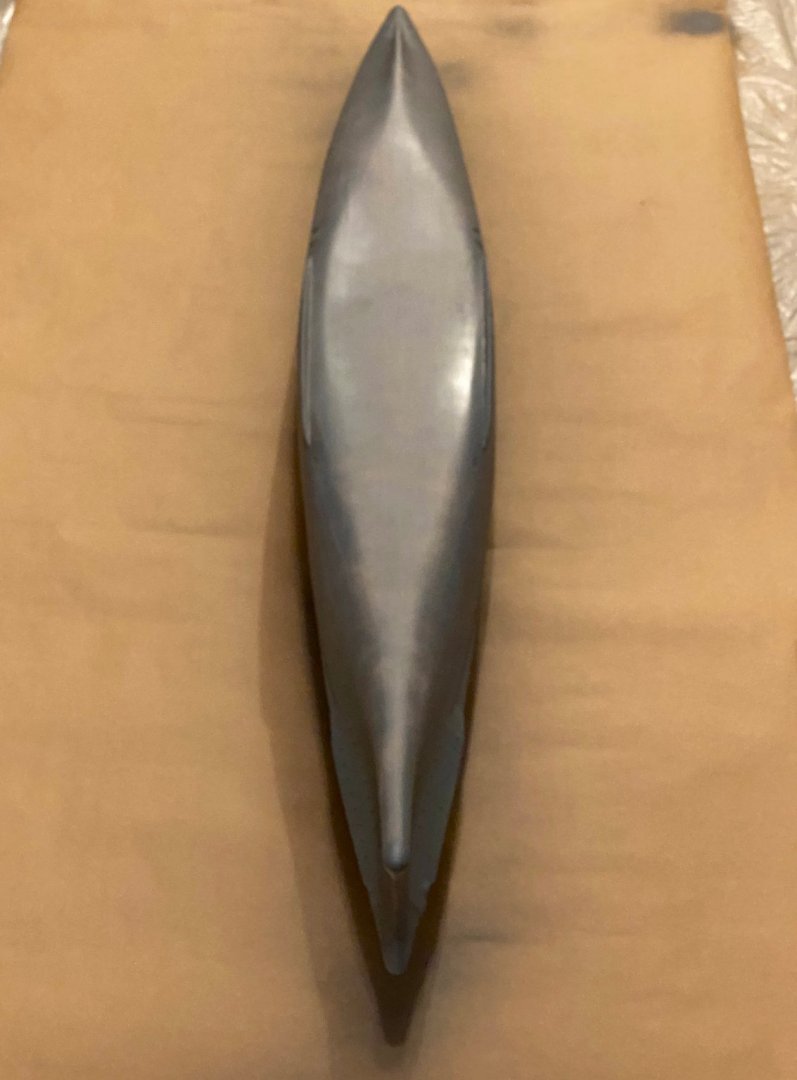
 More Deconstruction I started to sand the primer on the hull and found that it came off in gooey globs that clogged my sandpaper quickly. That was after 24 hours of drying time. I have had problems with Rustoleum products in the past. Last September I posted problems with Rustoleum primer not sticking to the hull on my Marie Felling tug. In 2016 I had problems with Rustoleum products on my Arleigh-Burke destroyer. Kurtvd19 did not have good things to say about their products at that time. Will I never learn? I eventually gave up and stripped the primer off the Bismarck with mineral spirits. I am discarding all my Rustoleum products and will never use them again.
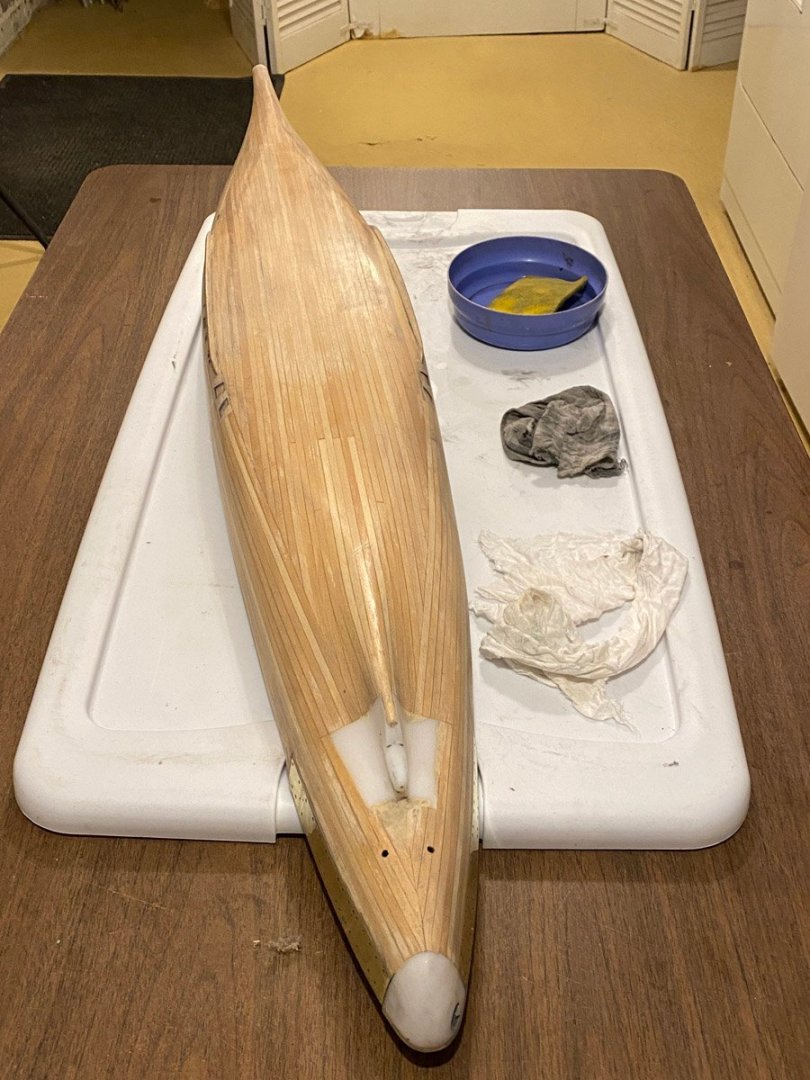
-
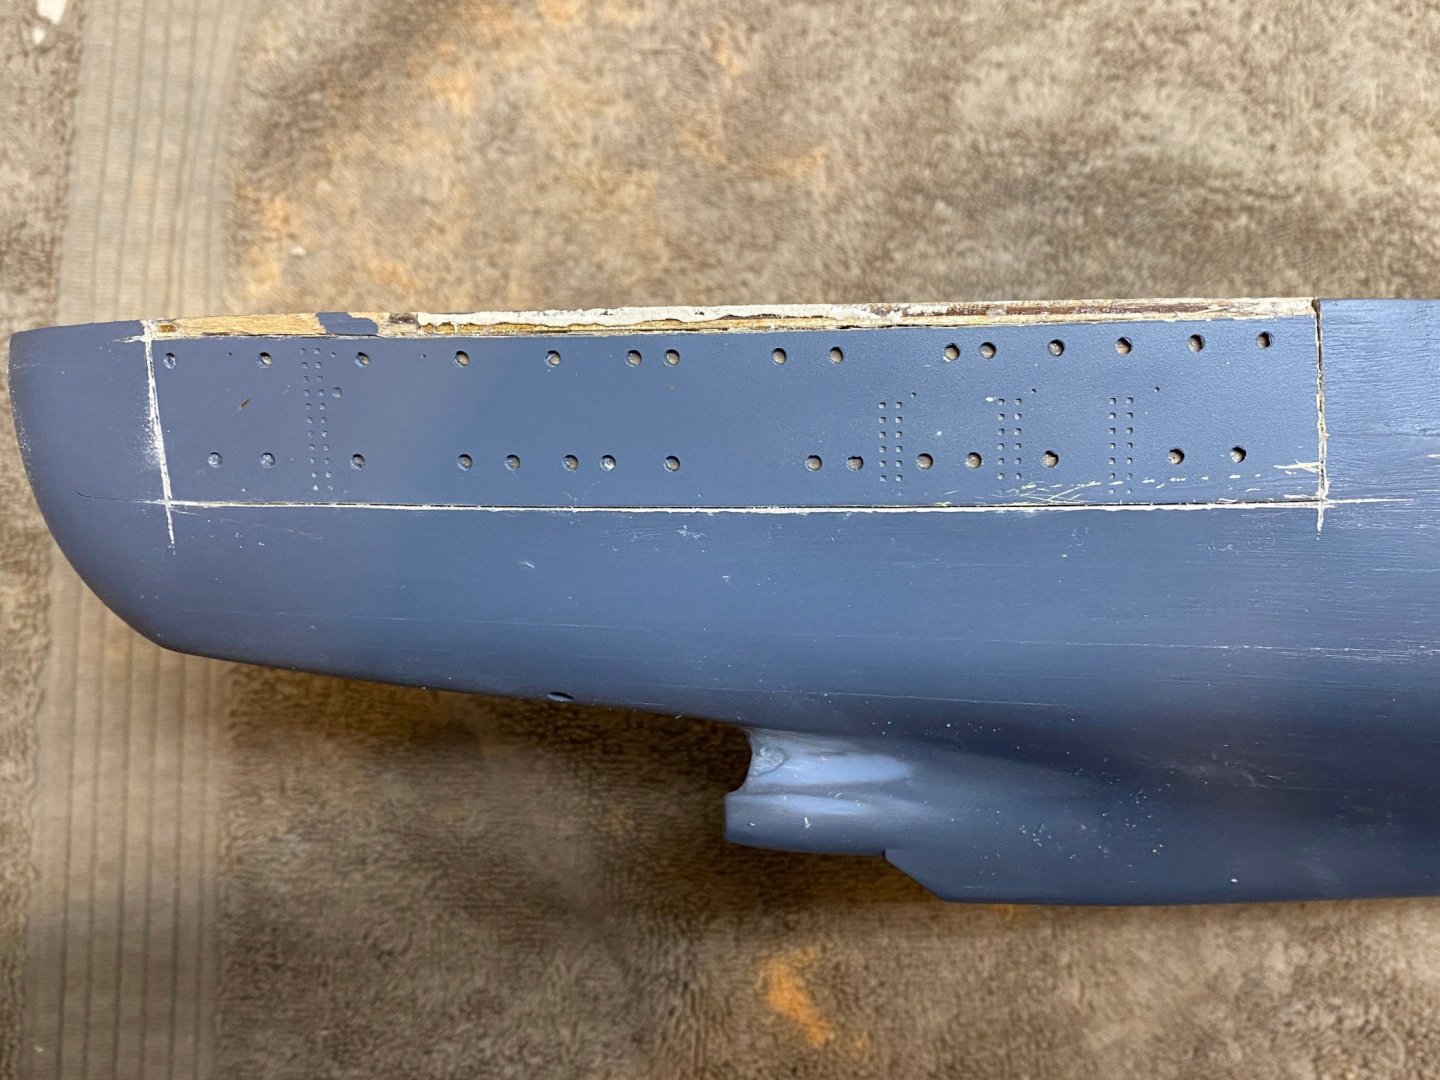
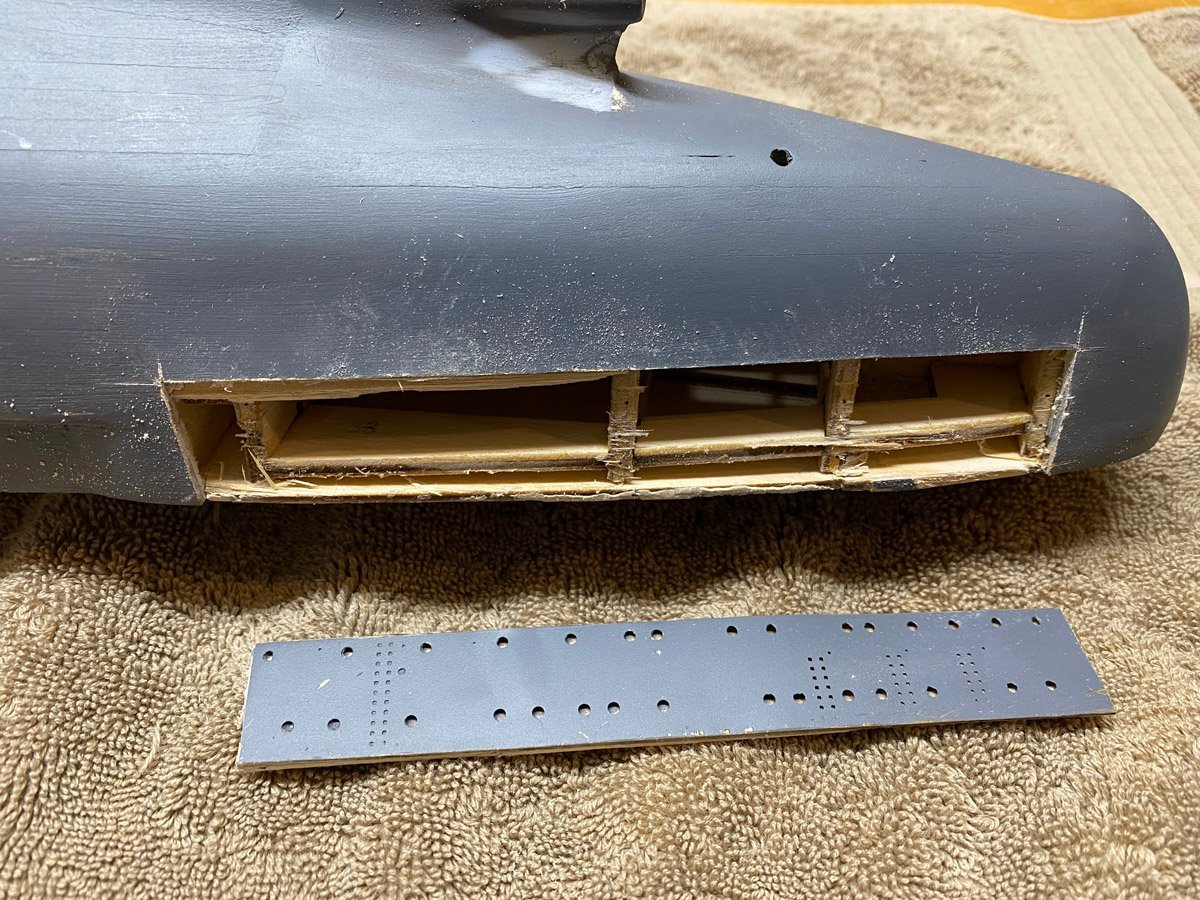
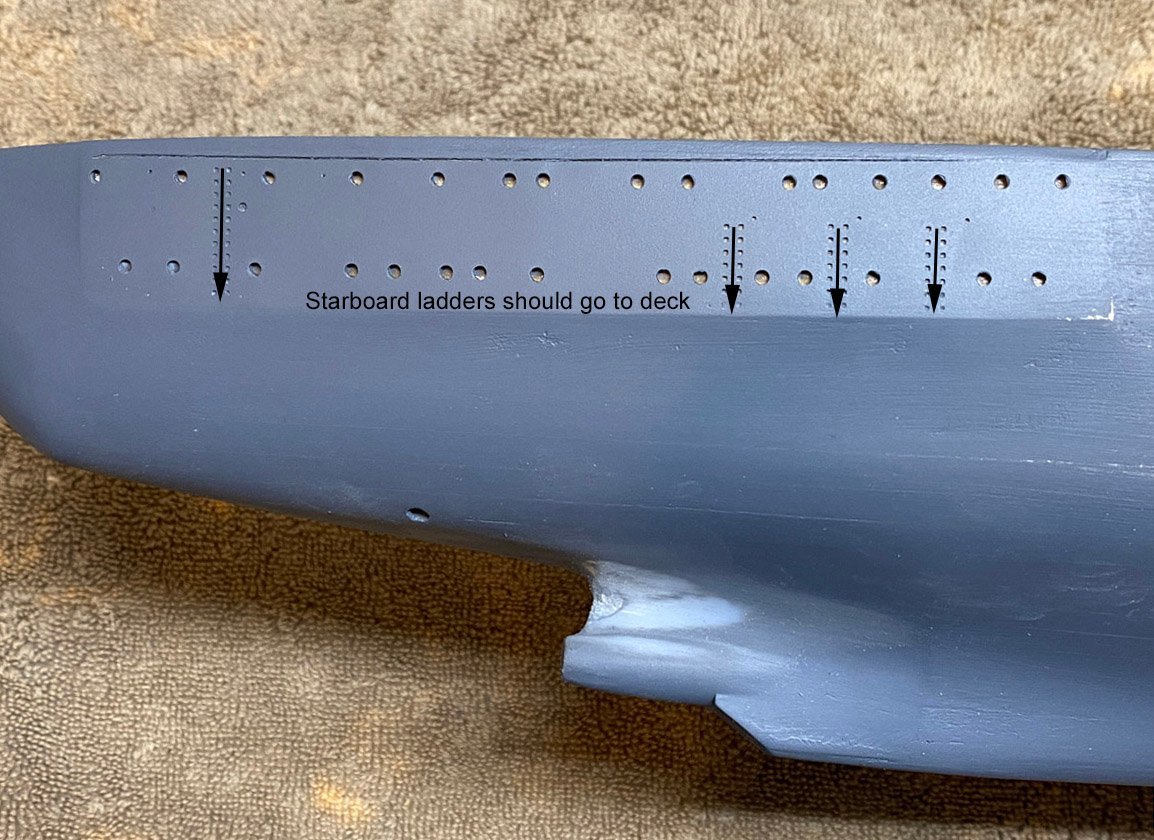
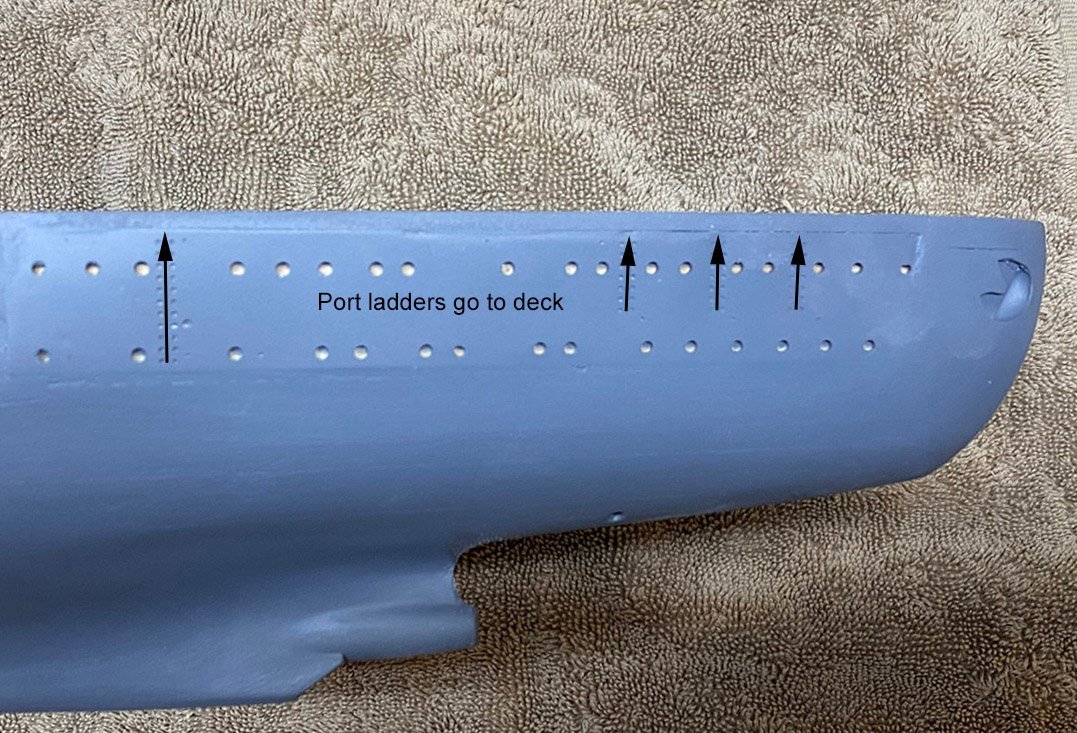
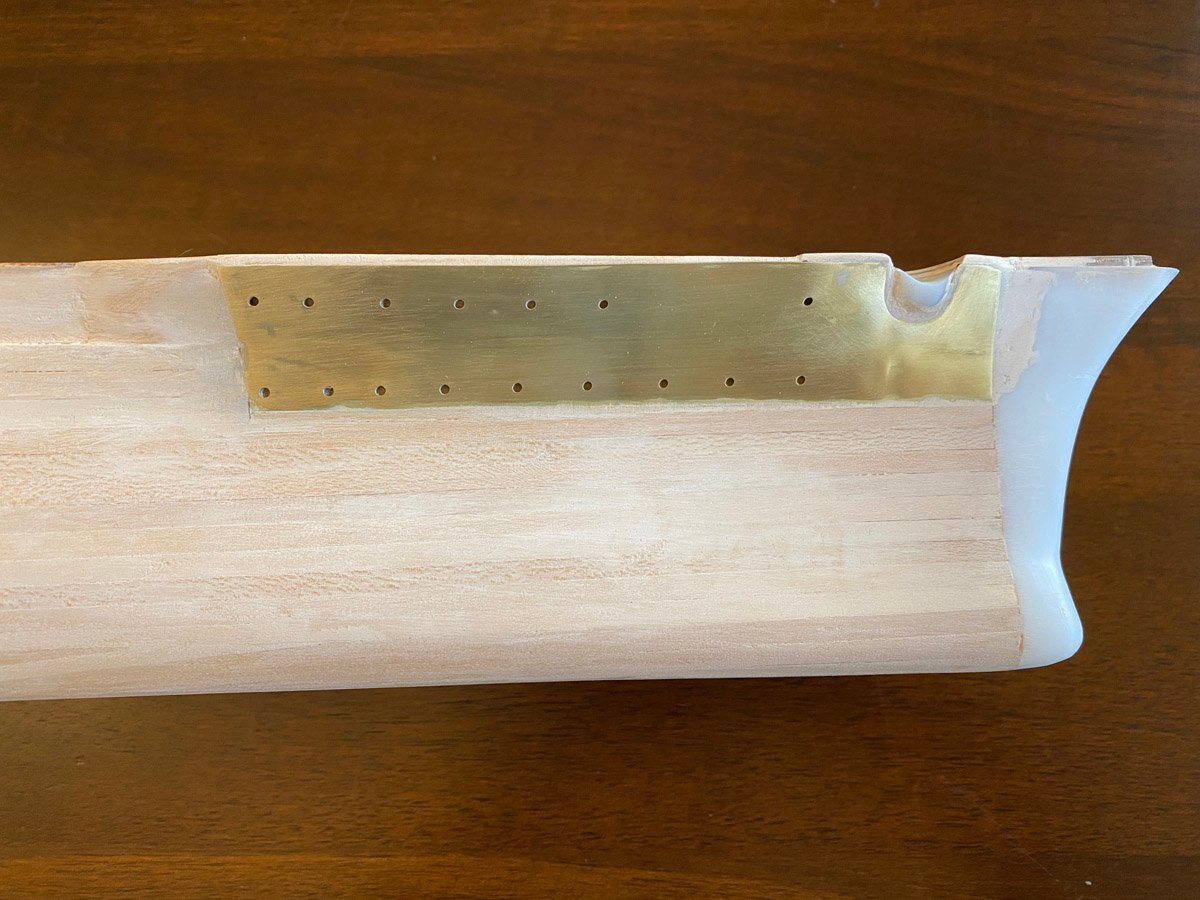
Every Project Gets One BIG Mistake While I was waiting for the primer to dry I read this post by Piet: Thank you for catching this Piet. You are absolutely correct -- I interchanged the stern porthole cutouts on the port and starboard sides. There are slight differences in the number of portholes that no one will notice, but to make matters worse I got the starboard side upside down. Explanation The area with the portholes has three layers: a layer of planks, a plywood layer with the portholes pre-cut, and a matching PE layer. The PE pieces have tiny eyebrows etched over the portholes, but when I lined them up with the ply, the eyebrows ended up between the layers and not on the outside. I overlooked that clue. In fact I got the bow wrong too, but that won't matter much. Here's the port side showing where the ladders go. I did not realize that all the tiny holes are for ladder rungs. On the port side all the ladders point up. It will be OK. On the starboard side the ladders point down. And so, Deconstruction The PE didn't get too mangled, so I should be able to flip that piece and butter it back into place.
-
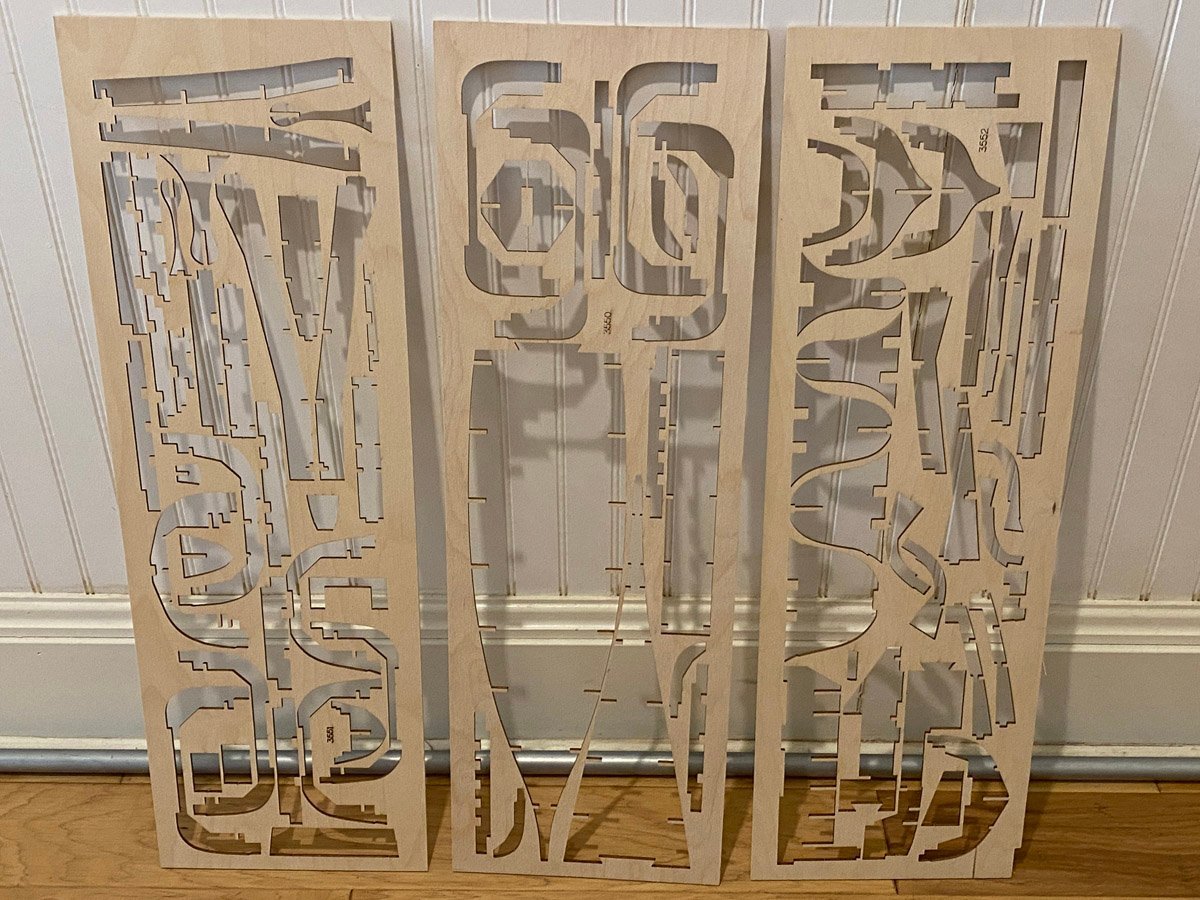
Primer So far I have used three full sheets of the laser-cut ply, built the hull, and sanded it until it looked like a piece of furniture. Time for primer.
-
Harry, Somehow I missed your build log. I haven't looked too far ahead in the instructions so it was interesting to see your work on the turrets. I will be following along. Rod
-
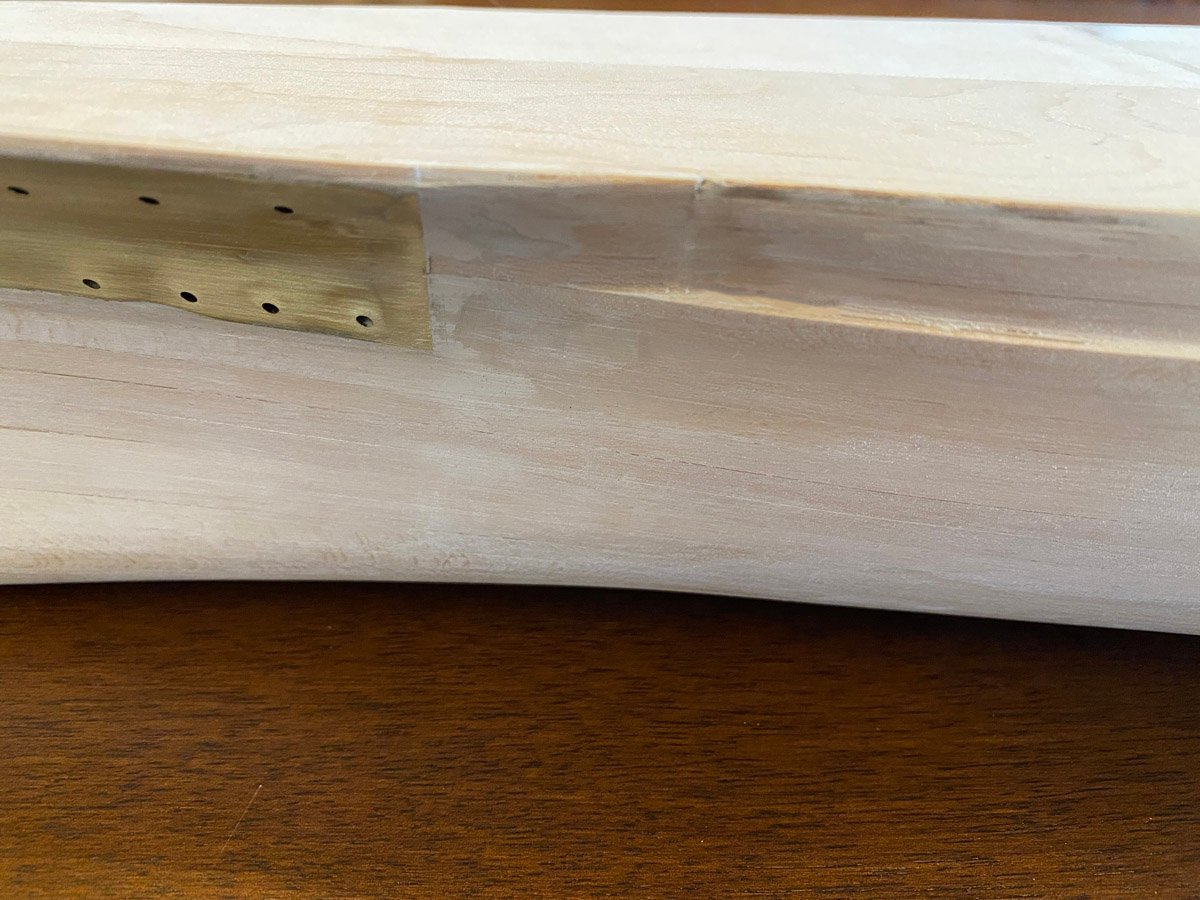
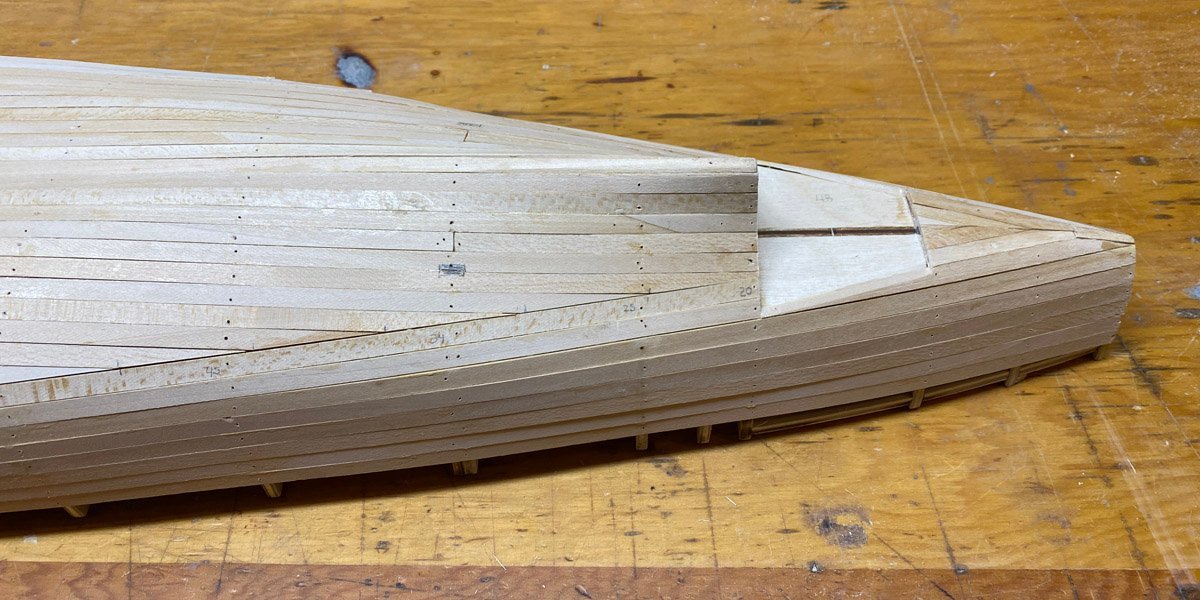
Side Step The instructions have somewhat confusing details about a step in the hull profile near the deck. The bulkheads have a small notch 12 mm high near the top that only get the first layer of planks. The rest of the bulkheads get two layers. This leaves a step about 1 mm wide along the center of the ship. There is little or no overlap of planks across the step, so it is a really weak joint. I squeezed some extra CA along that joint. There is a diagram of the armour belting on the Bismarck in Anatomy of the Ship, The Battleship Bismarck. Here I have copied the diagram on top of a side view of my model. The yellow belt near the deck was 145 mm thick but the green main belt was 320 mm thick. The difference is 175 mm, which at 1/200 scale becomes about 1 mm. I think that explains the step.

- 215 replies
-
- 10
-

-

-
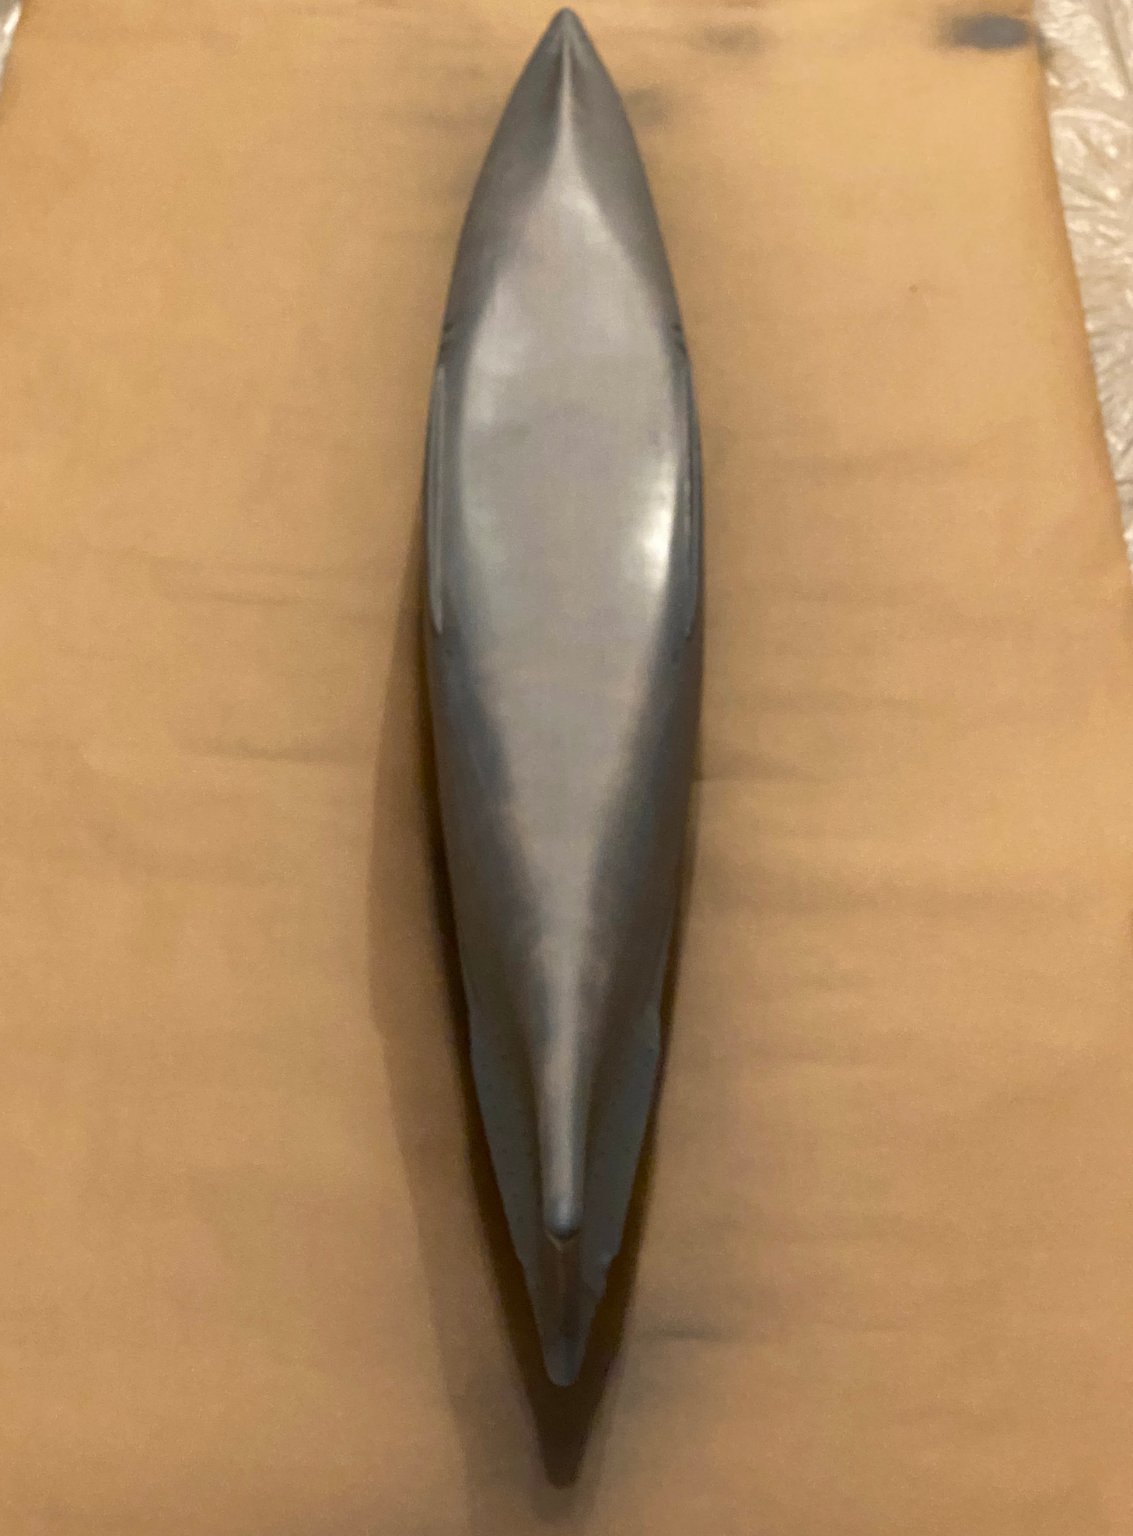
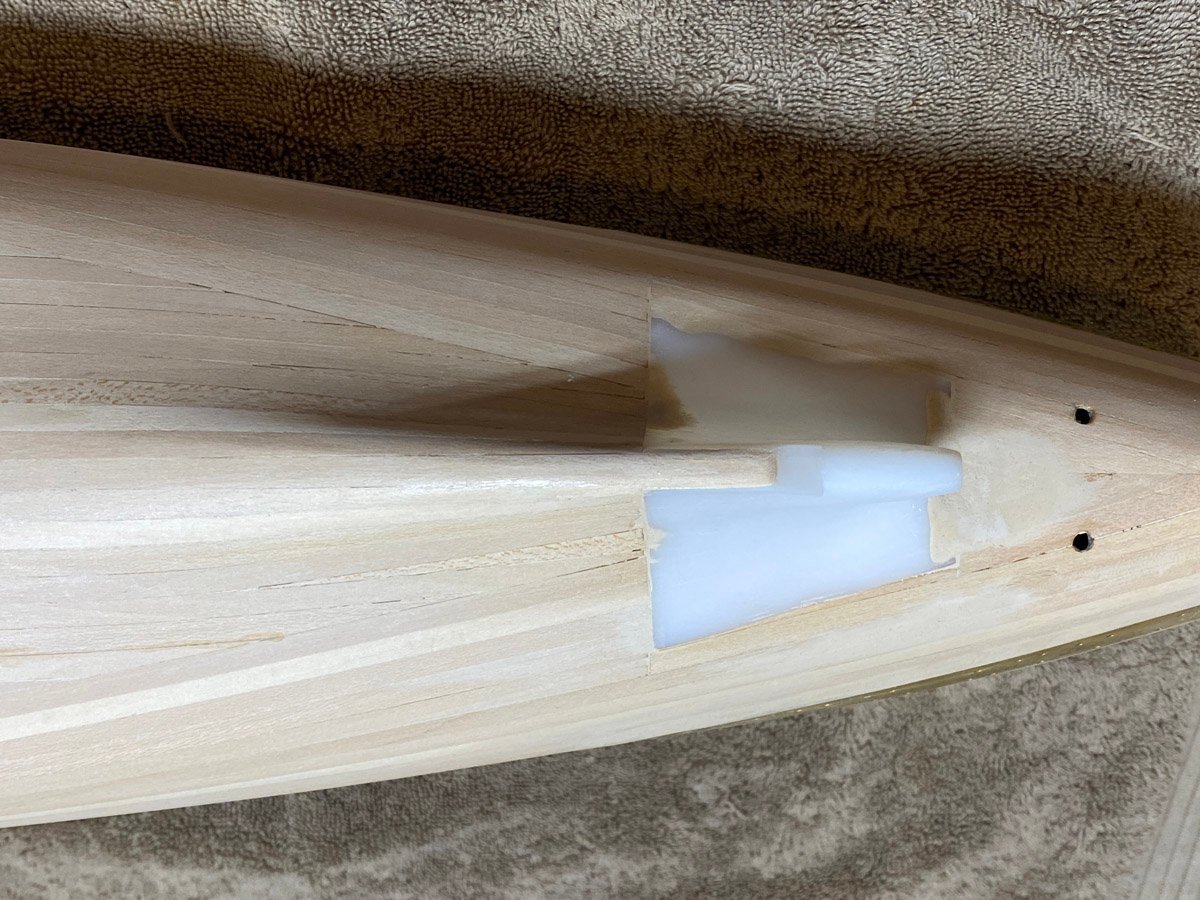
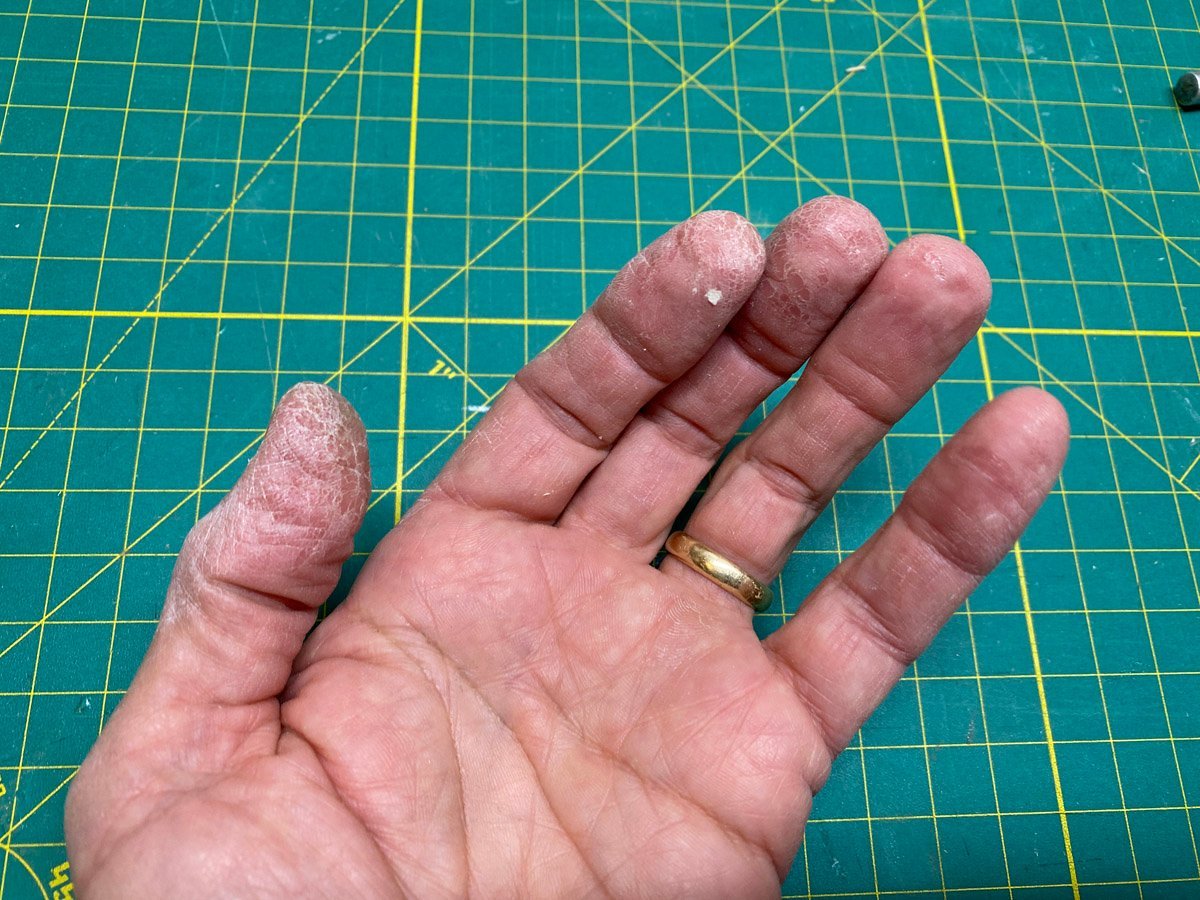
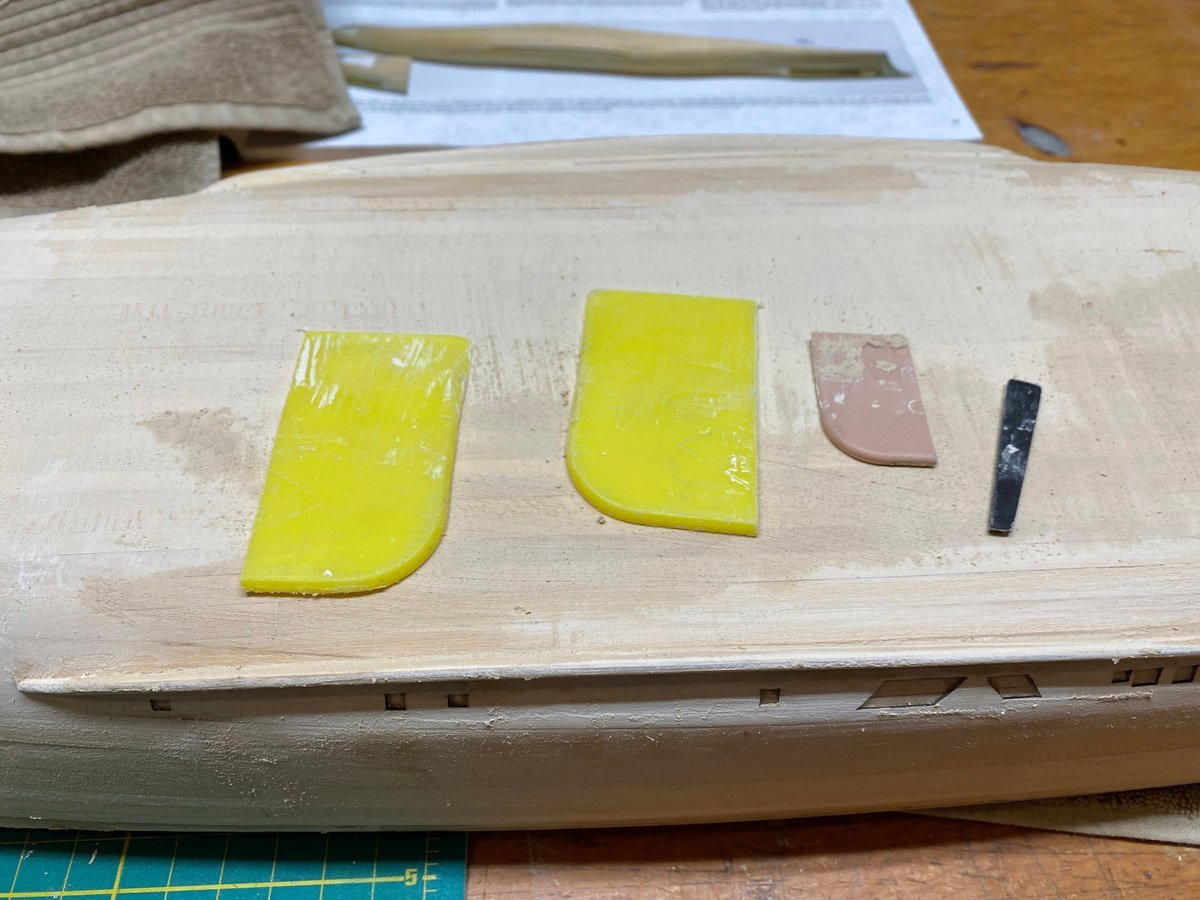
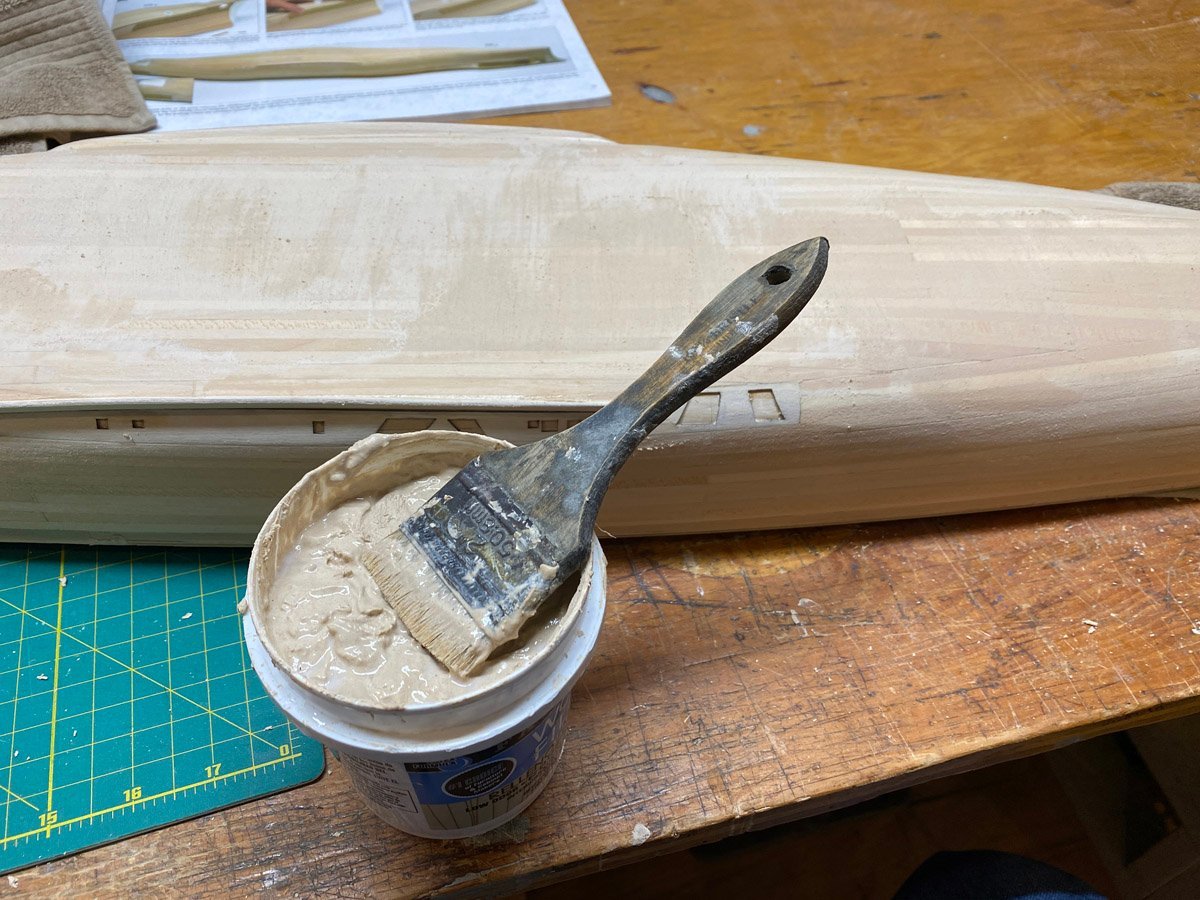
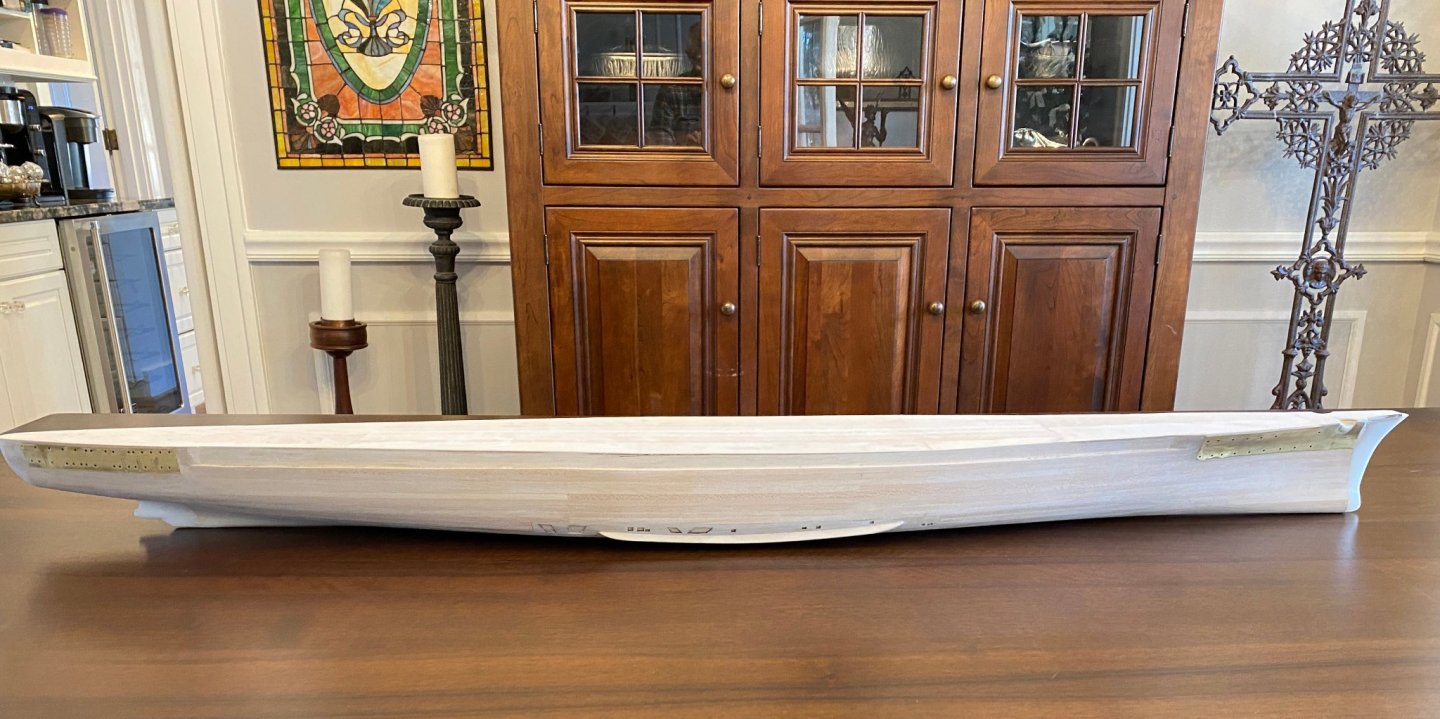
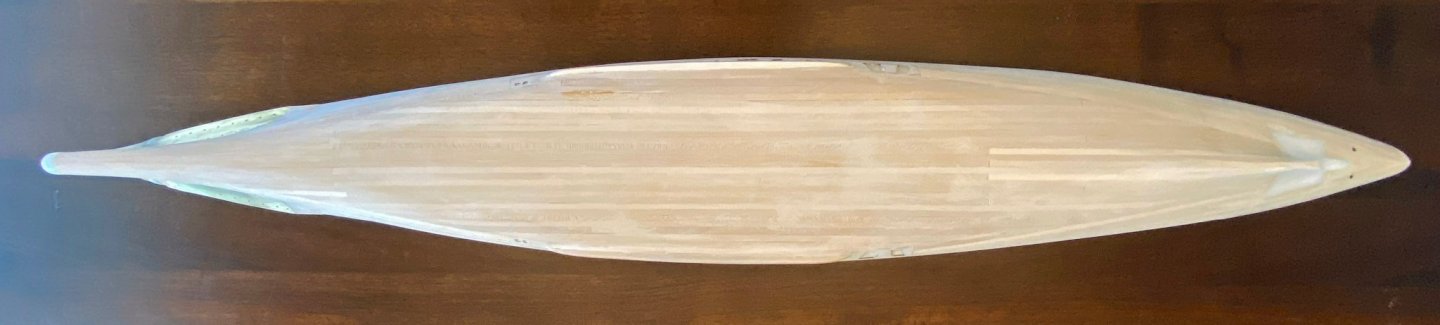
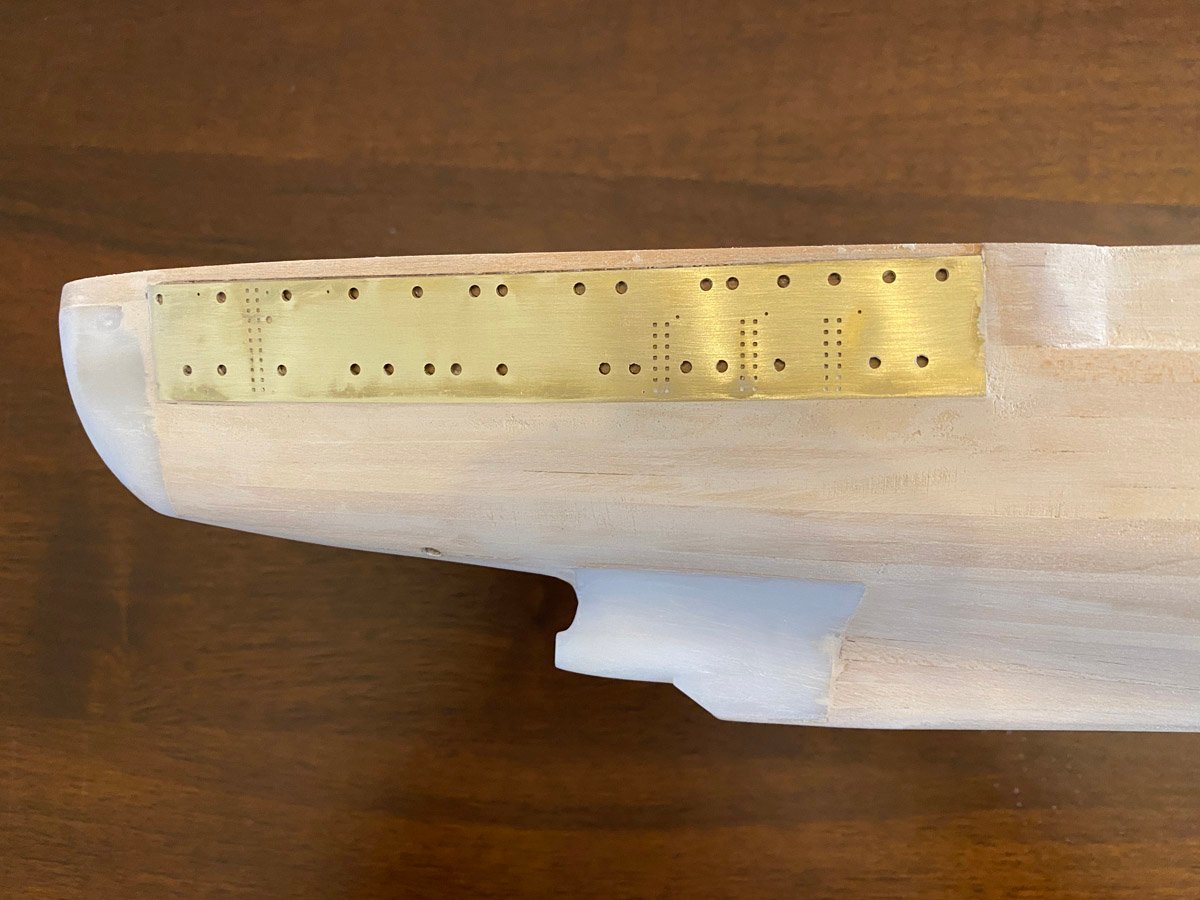
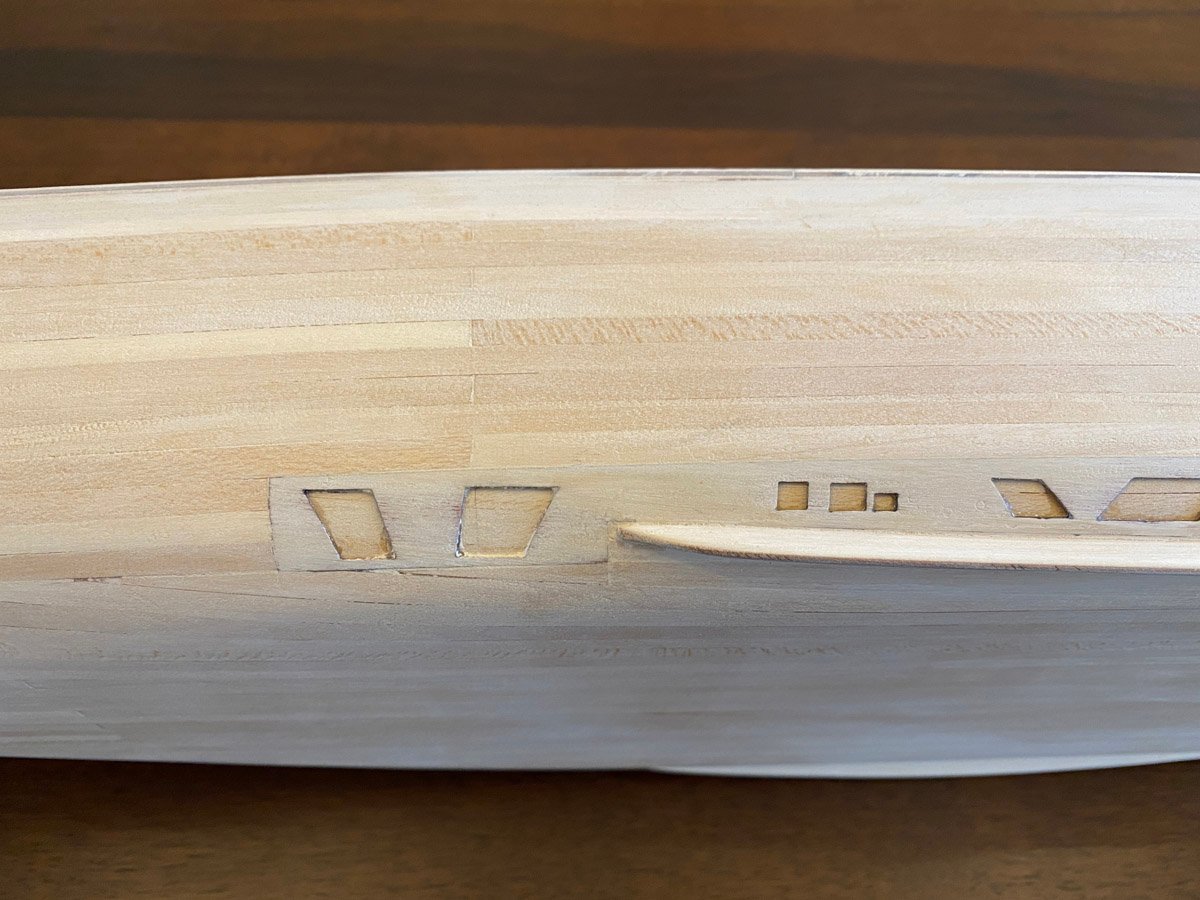
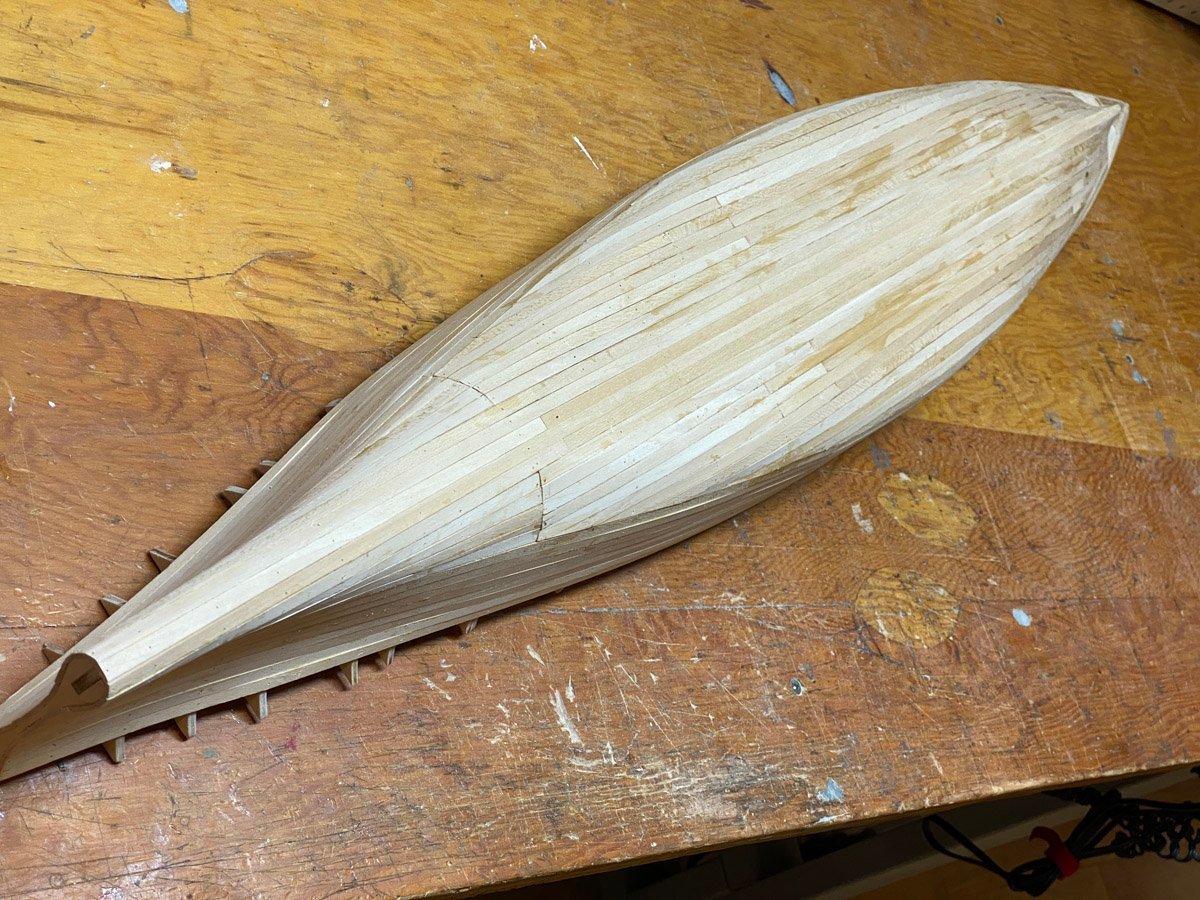
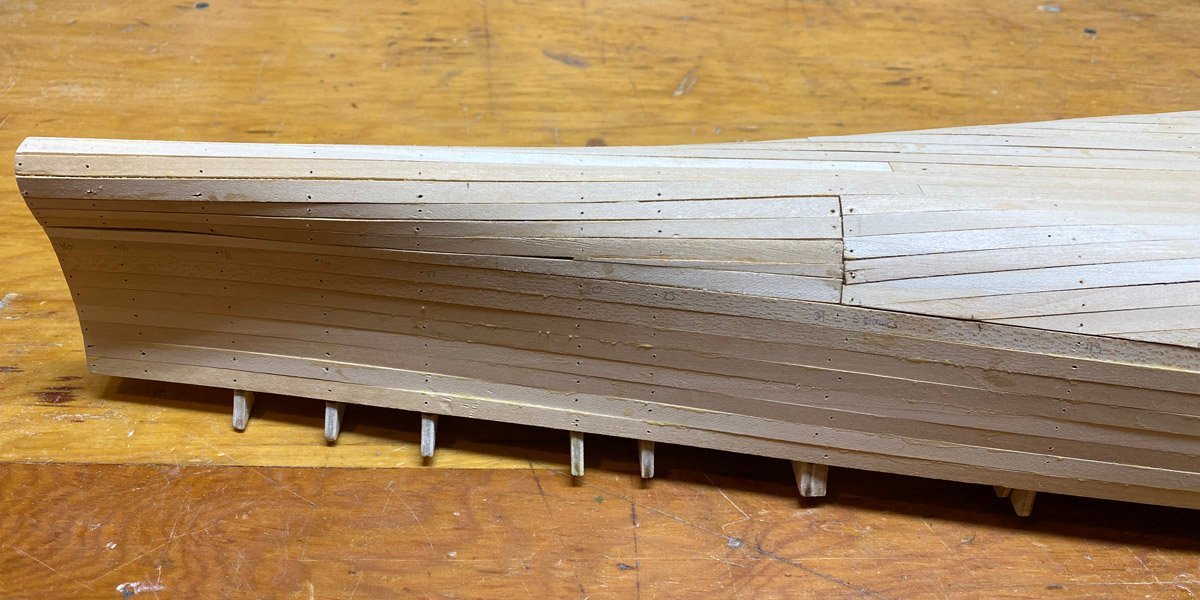
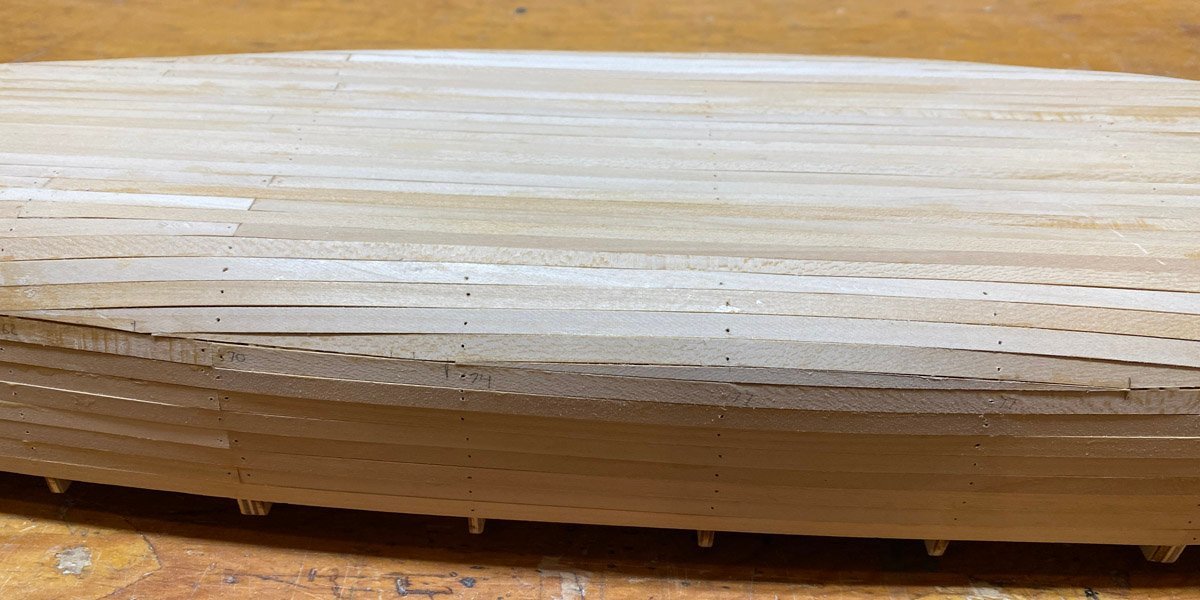
Second Planking Complete (almost) -- 95 hours, 51 days I haven't posted since just before Thanksgiving but I have been working on the Bismarck. I completed the second planking and have been sanding for days. The first layer planks are nominally 6.25 x 1.6 mm in cross section, but the second layer planks are 5.25 x 1.15 mm so the joints don't overlap. The first layer was glued mostly with Titebond but the second layer was glued with CA. Here's what my hand look like after several hours of planking with CA. Thank goodness for acetone. After LOTS of sanding I filled the second layer with Famowood wood filler, as recommended by Ted99. I started out using some plastic squeegees, which was slow, but then I thought of another way. One of my other hobbies is making stained glass lamps and windows. Leaded glass windows must be puttied to keep the glass from rattling and to make them weatherproof. Standard window putty is thinned to the consistency of yogurt and squeegeed into the lead came with a stiff paint brush that is cut off to about 1/2 inch long. I used my old putty brush with the Famowood and it went on quickly. I still used the plastic squeegees for tight areas and to remove some excess. After sanding I applied a coat of AquaCoat wood grain filler. This product is clear and much thinner than Famowood. It does a beautiful job of filling the grain and small cracks, but doesn't work as well for large voids. I still have some filler touch-up to go, and probably another coat of AquaCoat. Here are some views of the hull after the second planking. Side view I found the stained glass window in the background in an antique store and did major repairs on it. We found the wrought-iron cross buried in our yard (queue the scary music.) It is probably French or German from around 1880. It was broken in five pieces but I had it sand blasted and welded. Now back to the Bismarck. Bottom view Stern The PE brass piece fits exactly over a matching plywood piece. It seems like a good idea but it makes it impossible to sand that area to match the surrounding planking. All you can do is putty everything and hope for the best. The resin stern and center prop mount are also hard to blend in. Center section The thin plywood piece has cutouts for cooling water grates to be installed later. This piece was difficult to install over the curved hull. The instructions recommend using an Amati plank-bending tool that I don't have, so I just soaked the piece and worked slowly with CA and finger pressure. The anti-roll boards (does anyone know the correct term for them?) were laser cut from plywood, so they fit the contour of the hull nicely but were difficult to shape in profile. The center ply is harder than the surface plys and doesn't want to round over. I was short about 10 pieces of second planking but had I plenty of extra from the first layer and used that above the anti-roll boards. LOTS more sanding to reduce the thickness later. Bow The bow has the same problems as the stern with matching the PE and resin pieces.
-
Ted, What a coincidence that you've been to Lewis/Glenn before. Most people have never heard of it but I really enjoyed working there. I've been to Australia twice but never Canberra. It looks like a beautiful city, and should have been a nice place to work and retire to. I like the photo of your spray booth, AKA balcony. I am always surprised at how much over-spray paint dust accumulates after a big paint job. Your neighbors on 17 are probably wondering why their deck is all grey. I have used Rustoleum Colonial Red satin on several ship models and think it looks pretty good. I am curious to see how yours looks with Claret-wine. I just finished my second layer of planking and am now sanding, sanding, sanding. I will post some photos in a day or two, but have some questions for you in the meantime. Did you sand over any of the PE brass porthole pieces, and were you able to clean that up with filler or primer? Same question for the resin pieces. Should the deck edges be flush with the last plank on the step? I assume that it should be but I have some overhang here and undershoot there, and wonder whether to correct that now whole I'm sanding. Rod
-
Early in my career I attended a meeting at the Naval Postgraduate school in Monterey to discuss ways to use numerical methods to submarine noise problems. It was a little premature - the numerical methods weren't sophisticated enough and computers weren't powerful enough yet. But I made several friends in the Navy and eventually did a lot of work with students at NPGS and Pax River.
-
Very interesting! I will ask you next time I have questions about ships. Have you made any models of subs? I am a retired aerospace engineer with 34 years at NASA Glenn Research Center in Cleveland. I developed numerical methods for predicting performance of jet engine components, so I don't know much about ships but I am pretty good at trigonometry and can guess how a range finder works.
-
The Gee Bee is a diecast model. It was the only thing I had that was small enough to sit on the deck. I love the GeeBee and have made a couple of stick and tissue models of it. Very difficult to cover.
-
I am not an expert on warships but I learned a little while building my Prinz Eugen. Early in the war the range for the guns was determined using optical range finders that sighted on the bow and stern of the ship, then triangulated. I suppose that you would need to estimate the length of the ship as well. If the ship looked shorter because of the camouflage it would appear to be farther away and the guns would overshoot. Later in the war radar range finders made the camouflage obsolete. (Forgive me if you know all this and correct me if I've got it wrong.) For the deck markings on my Prinz Eugen I masked off the stripe and sprayed it red. I drew the swastika in Photoshop Elements, printed it on good paper, sprayed it with clear, cut the circle, and glued it on the deck. The rest of the model was painted in the March 1941 Baltic scheme - not for historical reasons but simply because I liked the dazzle camouflage and the red gun turrets. I suppose that I'll have to paint the Bismarck for the same time period.
-
Here is a link with drawings showing 6 different paint schemes for the Bismarck. The swastikas were painted over after the sea trials and before the battle of the Denmark Strait. http://www.kbismarck.com/drawings.html
-
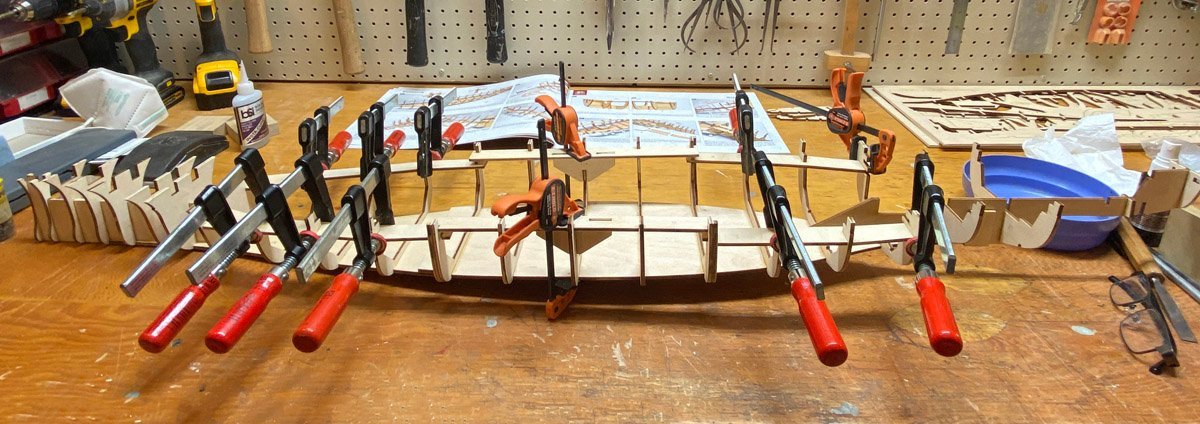
Ted, I just completed my decks and anticipated the problems with unevenness. Instead of gluing deck to frame piece-by-piece, I glued the entire deck together on a flat board, then glued the complete deck to the frame later. The mid-deck is incredibly complicated with 12 pieces to glue up. The whole thing could have been laser cut in one piece of plywood and still fit in the box. I suppose that the complex construction results from the original kit being packaged with an A4 magazine. I used Famowood filler like you recommended. It fills very well and sands nicely. Thanks for the recommendation.
-
First Layer of Planking Complete, 32 hours I completed my first layer of planking. I did not follow the layout shown in the manual - I just worked down from the deck using PVA and up from the keel using CA until the planks met. I used the supplied brass nails to hold everything temporarily but removed the nails as soon as each plank was dry. The photos are before I did any filling or sanding.
-
Ted, Your model is coming along beautifully, and quite fast. Thanks for posting all the helpful hints. I was in St. Louis for a wedding and a long weekend. I just completed my first layer of planking and will post photos soon. Rod
-
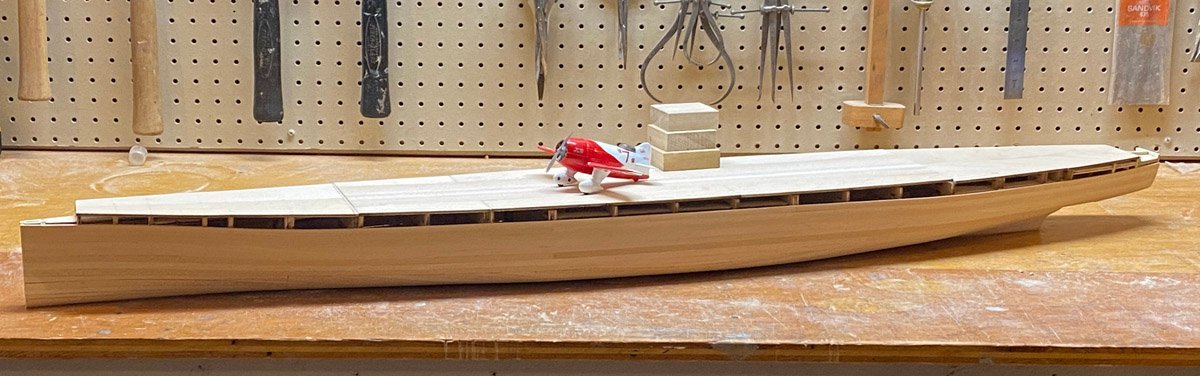
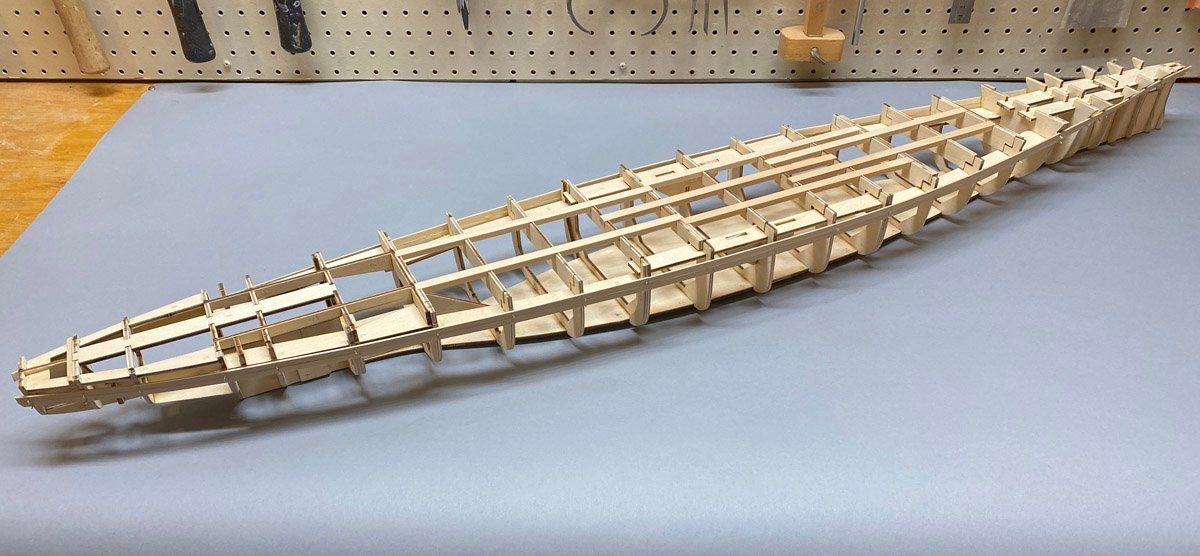
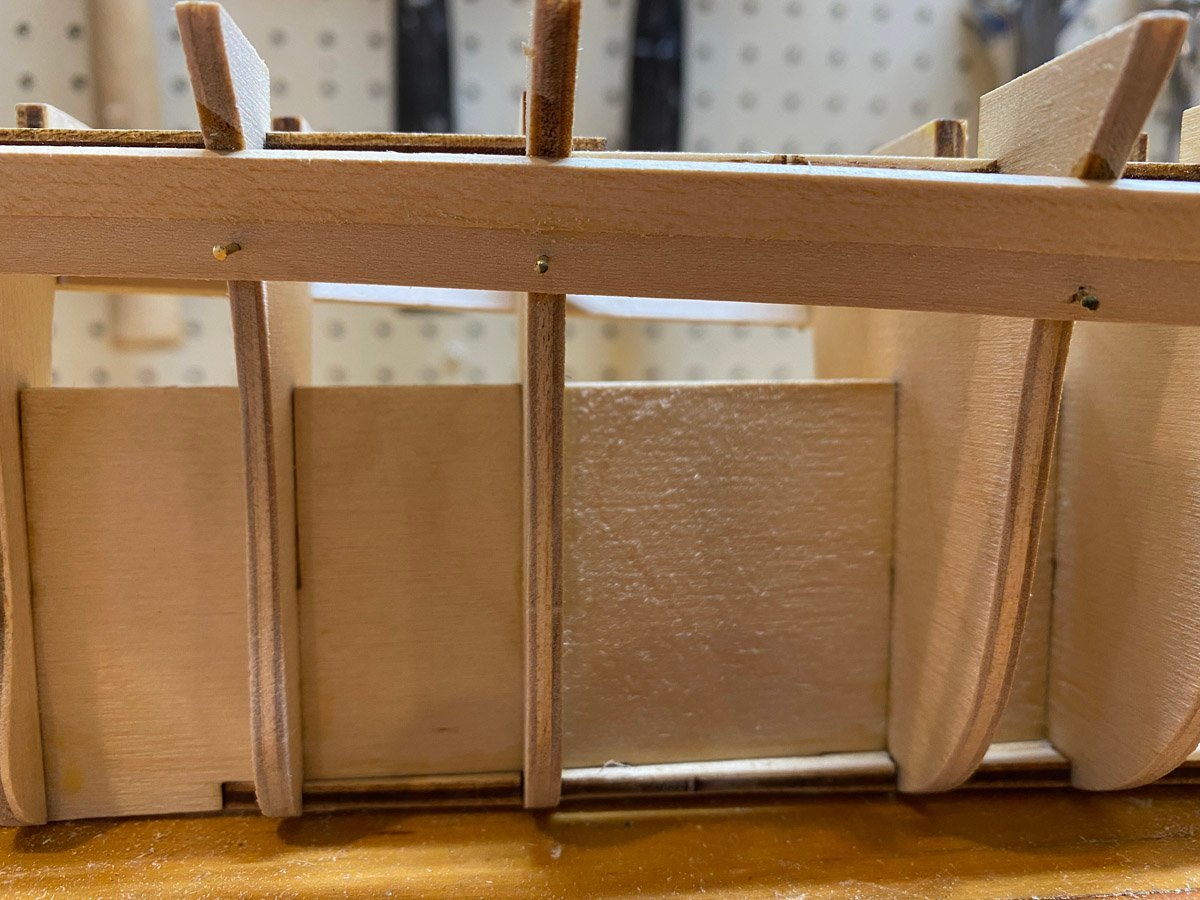
Hull Framing The upper mid- and aft-decks are made to be removable for RC. There is plenty of room in the hull, but no mention of RC installation in the instructions. I am building for display only but will wait to glue the decks in place. It may simplify construction or painting later on if they are removable. Ted99 mentioned that the planks vary in thickness. I checked them all with a micrometer and found that they varied from 1.52 mm to 1.84 mm thick. I sorted them into 4 piles to use in different areas. I have 9 layers of planking in place now, but only one early photo. Here's my technique: Anchor the end of a plank with a nail. Drill 0.6 mm pilot holes through the plank into all bulkheads. Set a nail in each hole using needle nose pliers. Repeat for matching plank on other side. Lift a foot or so of plank, apply PVA glue to the edge with a brush, and push nails down part way with pliers. This minimizes the time that the glue is drying in my pot and on my brush. I can do a plank in about 45 minutes and remove the nails an hour later.

-
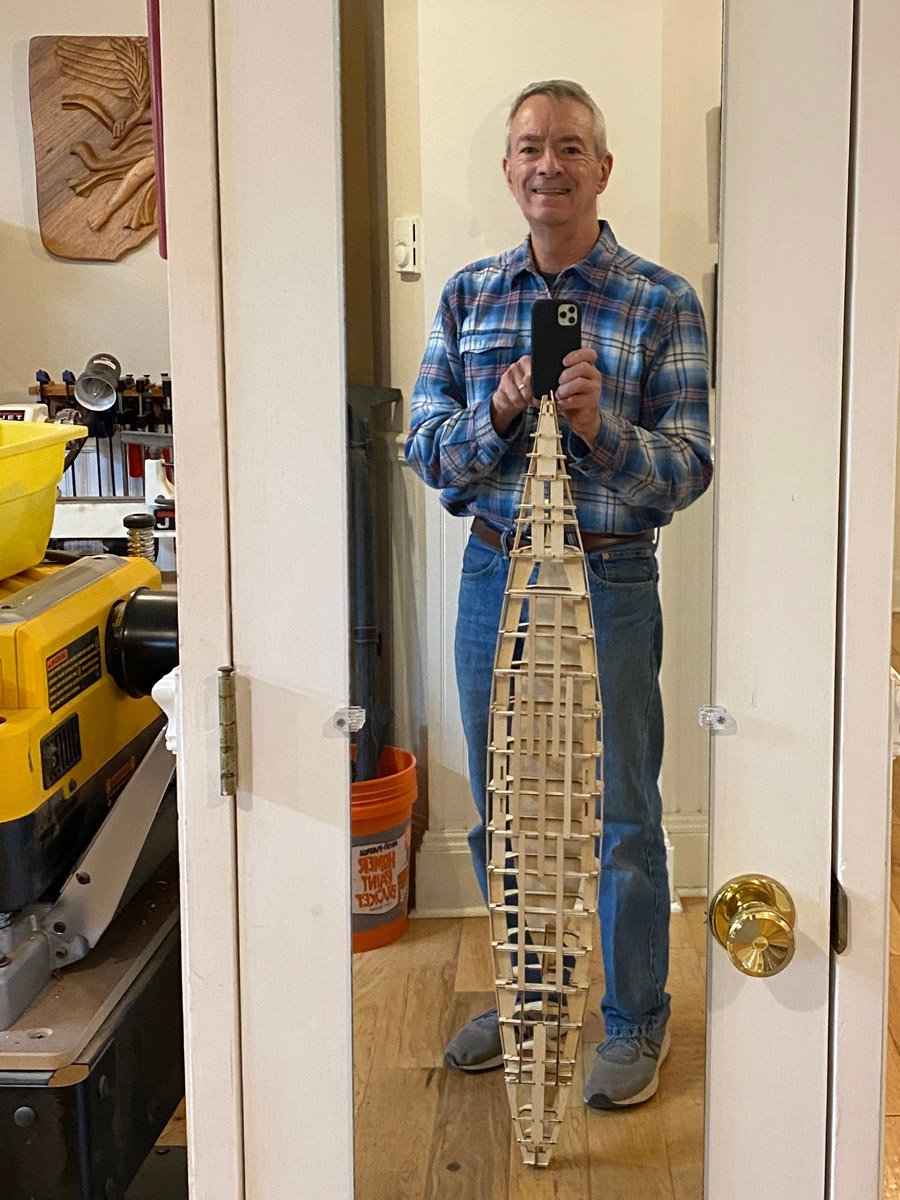
Sometimes I feel like I am assembling the skeleton of a prehistoric reptile. I guess, in a sense, I am.

-
I have not checked to see if every part in my kit is there. I hope that I'm not surprised later. I don't see any obvious damage to deck pieces. Do you mean the thick ply sub-deck, or the thin printed deck?
-
Ted, Beautiful job on the planking. I wasn't sure what filler to use but I'll try Famowood. I've used Behlen water-based grain filler in the past but it won't fill anything too deep. BTW, are you building for RC or just display? I am just building for display and am not sure whether to make the main deck removable as per the instructions or to glue it down. It may be easier to work on later if it remains removable.
-
This will be one big model So far the build is like those laser-cut mechanical models that you see everywhere. Pop out the parts and glue them together. I haven't actually cut a piece of wood yet. Planking the hull will be different. I keep looking for round formers for the bottom of the hull, but the Bismarck is basically a flat-bottomed girl (they make the rockin' world go round - Queen.)
-
HOF, Thank you for the links to the partworks builds -they should be helpful. At first glance I see two differences between the partworks model and the Amati model: 1. The partworks model has to fit in a magazine package, so the biggest parts are ~12 inches long. The keel pieces on the Amati model are almost 20 inches long. Stronger, fewer joints, but similar construction. 2. The complete partworks model lists at £799, or about $1090. I paid $699. for the Amati kit, and now see it listed as low as $563. (Sigh.) It must be expensive to put out 140 magazines and parts sets.