


rvchima
-
Posts
660 -
Joined
-
Last visited
Content Type
Profiles
Forums
Gallery
Events
Posts posted by rvchima
-
-
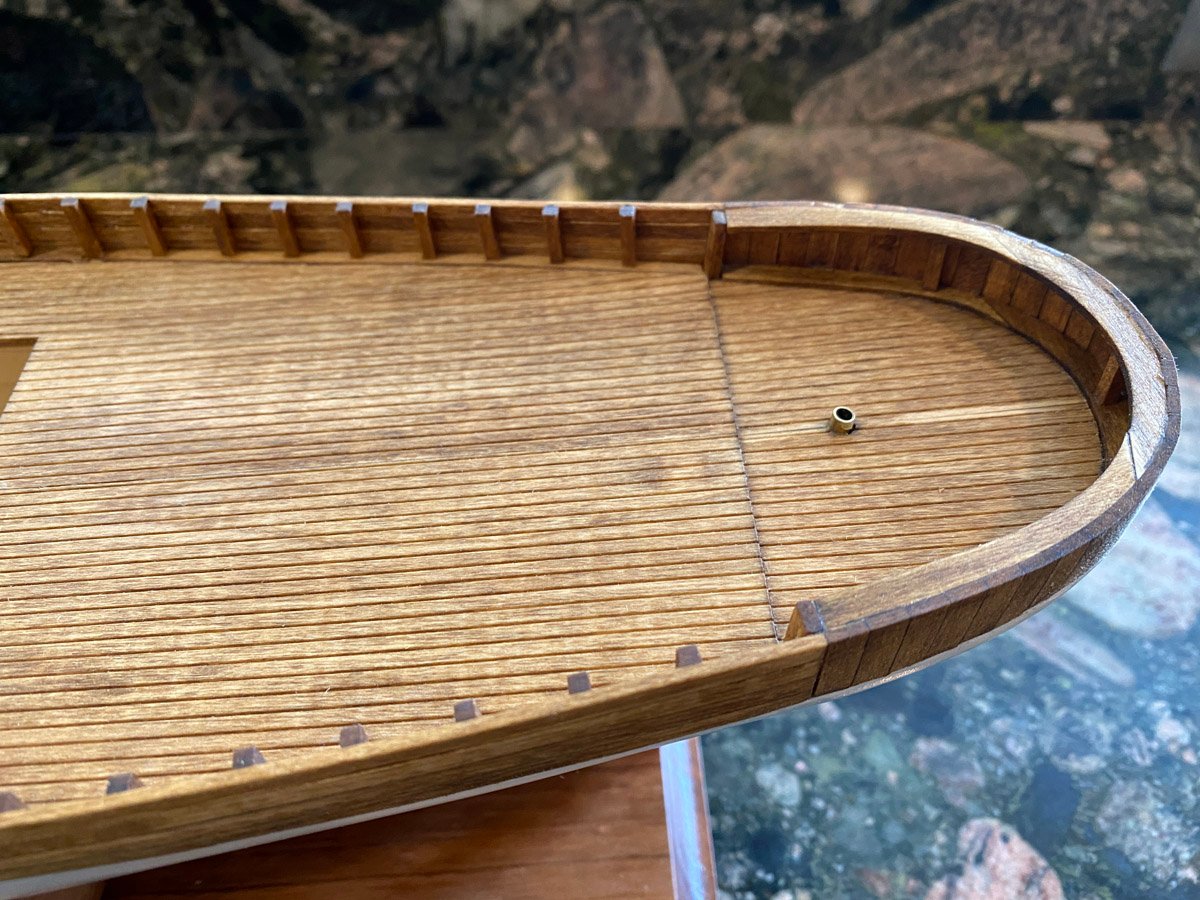
Hull Completed
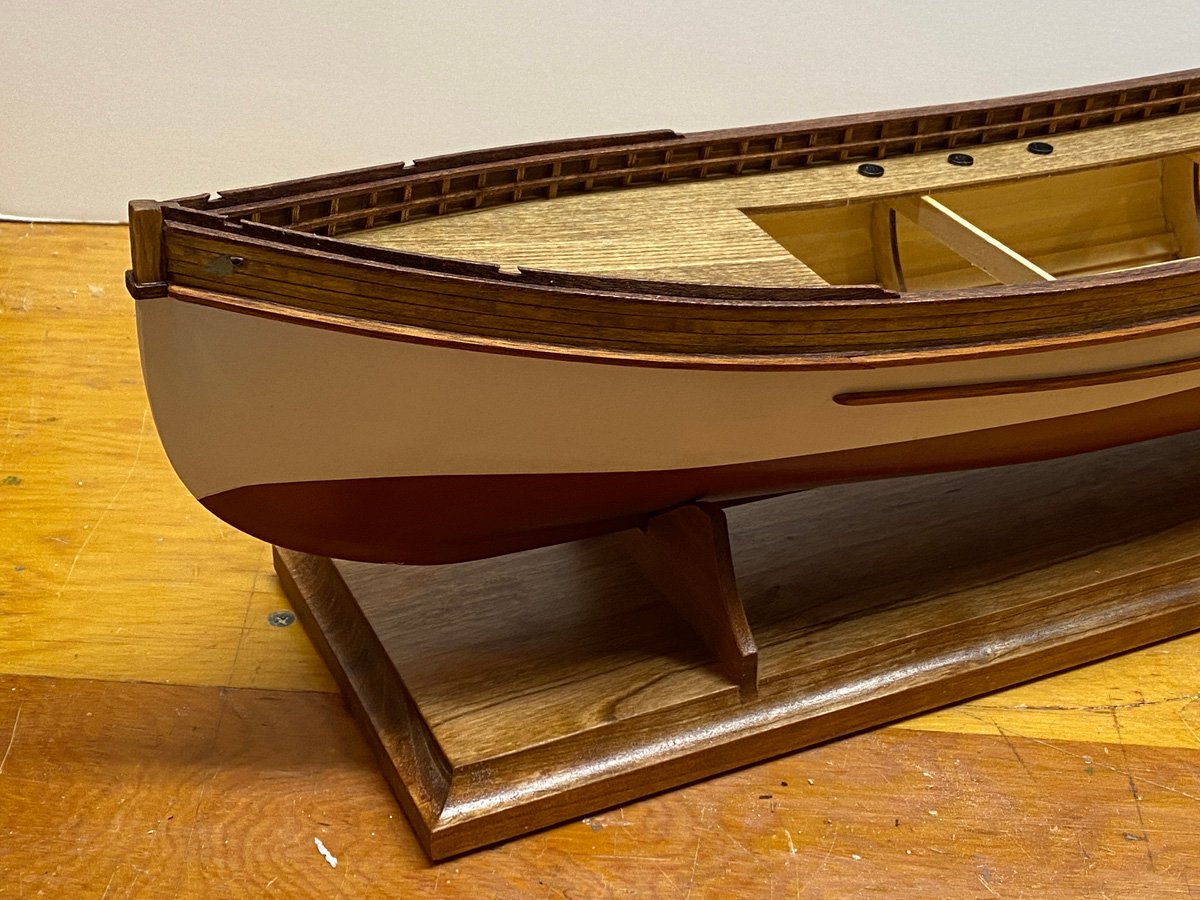
All the mahogany rails are attached and stained. I also attached 6 coal scuttles to the deck.
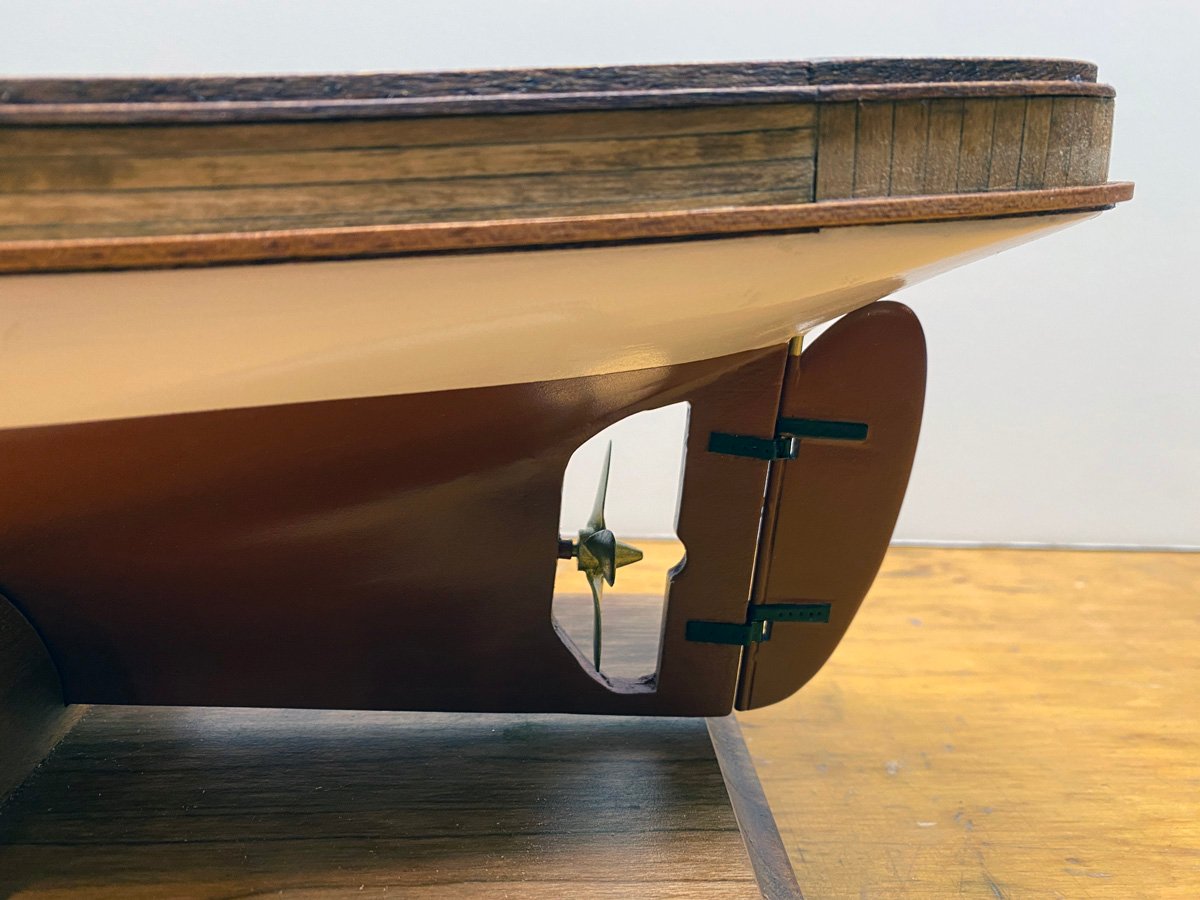
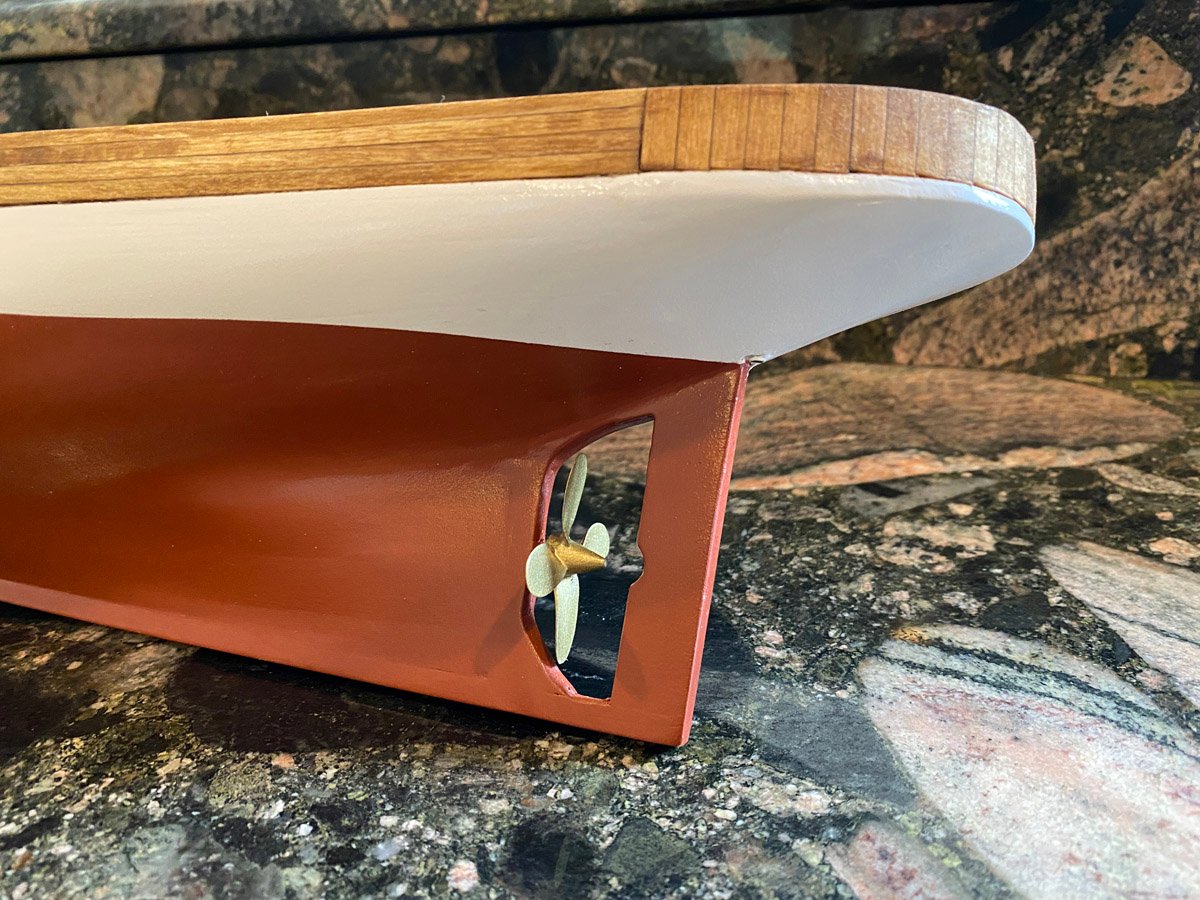
The rudder is attached. I made an amateur error of gluing the hinges directly to the painted surfaces, and of course they peeled right off. I had to scrape the epoxy and paint off everything, reglue, and repaint. The white metal prop came with the kit. I painted it "brass" but I'm not happy with it, so I ordered a Raboesch prop from Cornwall Model Boats in the UK. While I was at it I ordered a lifeboat kit to replace the block of wood that came with the kit, and a wooden barrel.
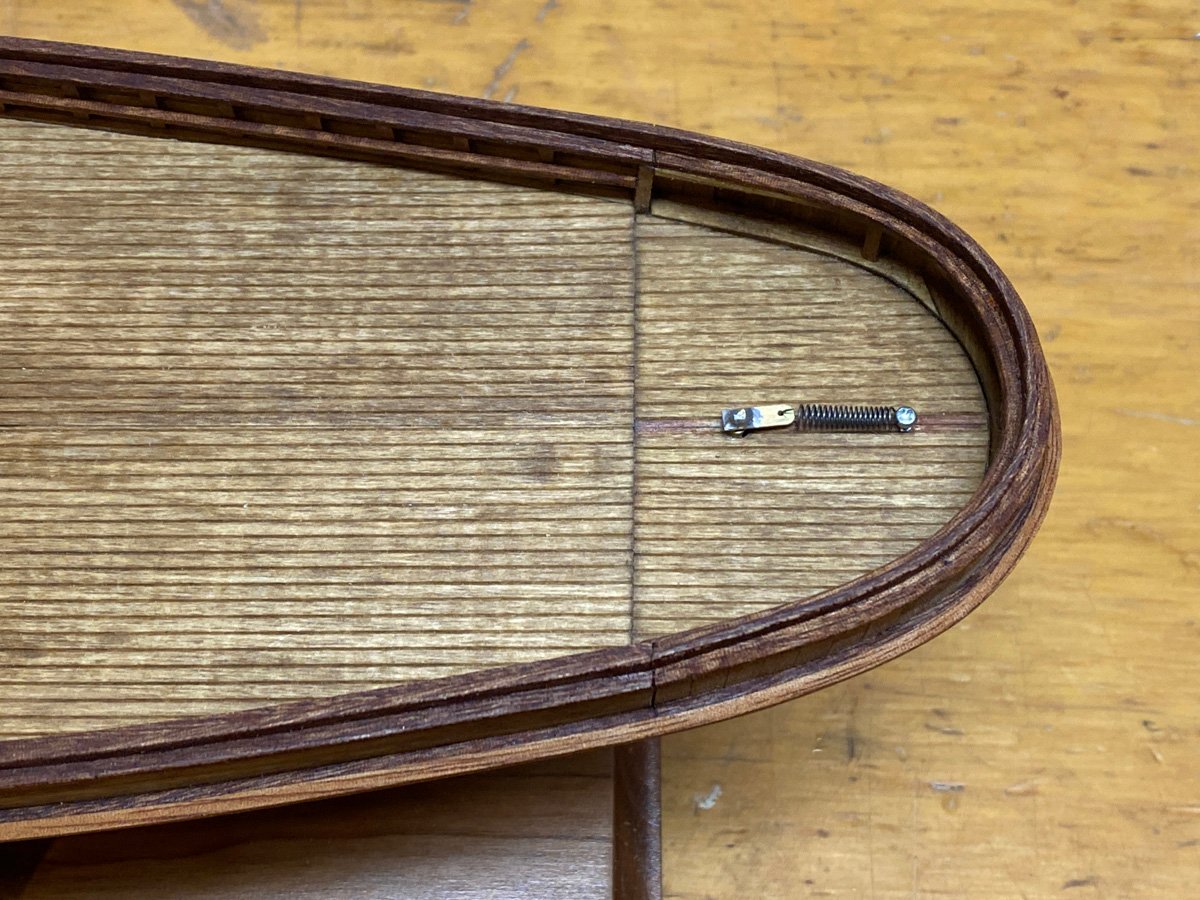
I added a spring to keep the rudder centered,
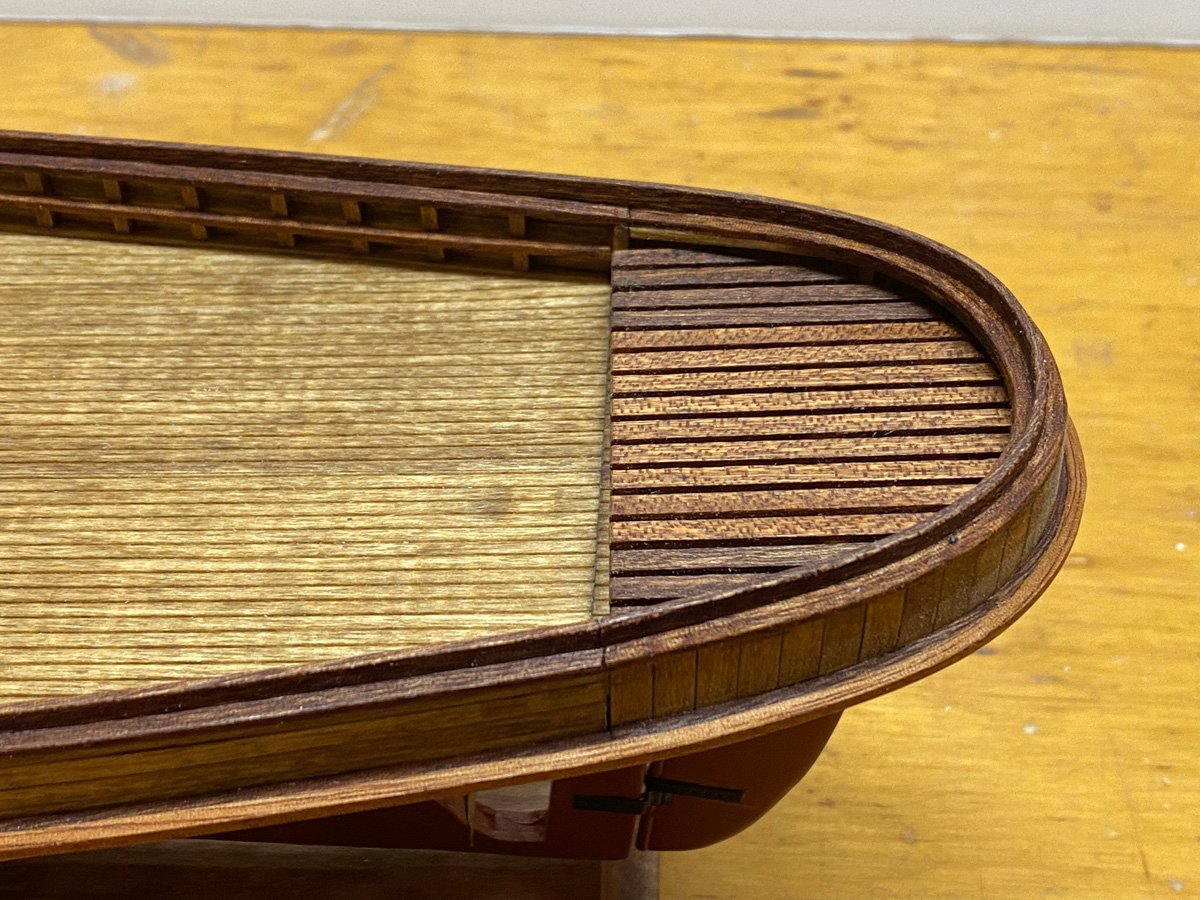
and covered it with a great grate. I intended the grate to hide the joint in the deck but it came out misaligned. Oh well.
- Prowler901, ccoyle, Cathead and 7 others
-
 10
10
-
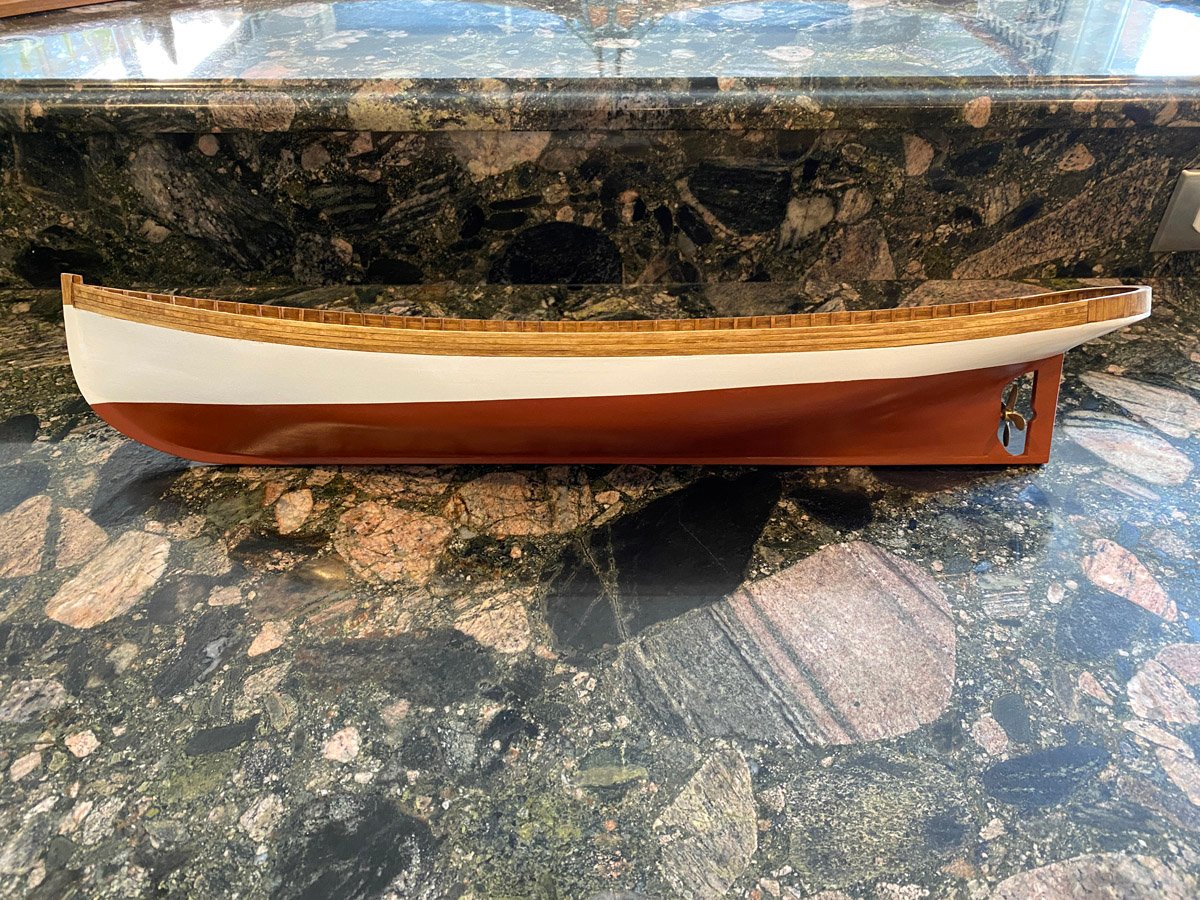
Hull Painted, Garboards Built, 65 hours, 51 days
I put in about 20 hours since my last post, and the hull is looking quite nice.
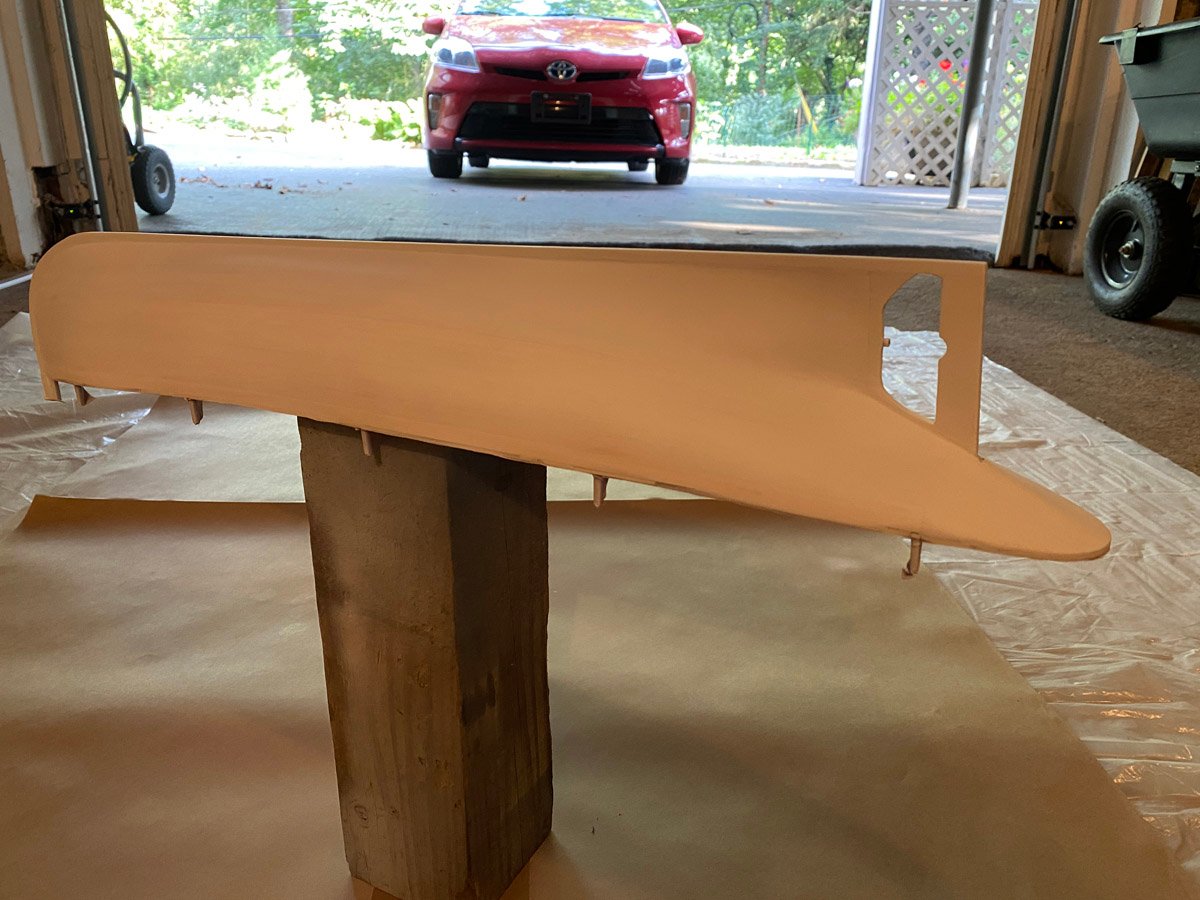
I opened my spray booth, AKA garage, primed the hull and painted the upper part white.
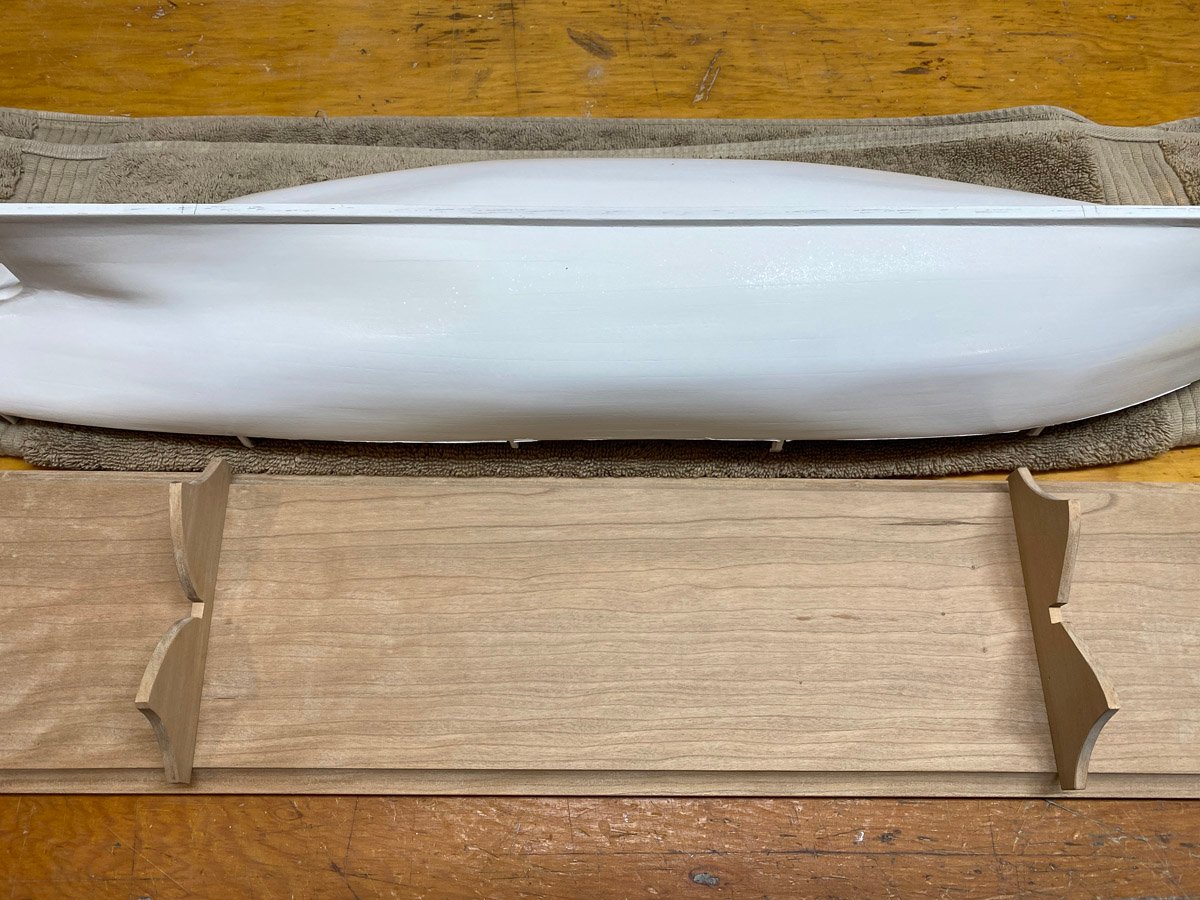
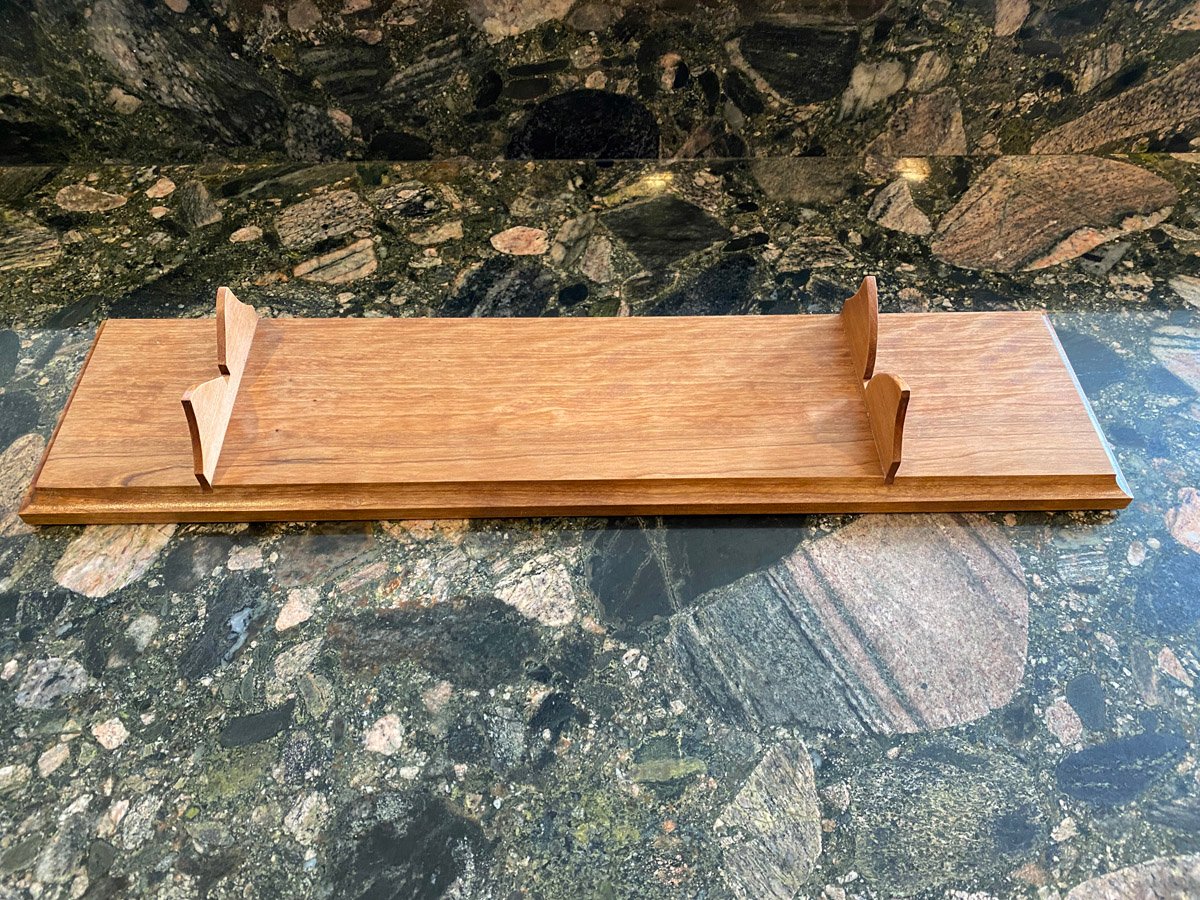
My wife bought the optional cherry baseboard from Bluejacket. It was nicely made, but it was not as wide as the laser-cut cradle pieces. I dadoed the base, trimmed the cradles to fit, and stained the base with Watco natural penetrating stain. Very pretty.
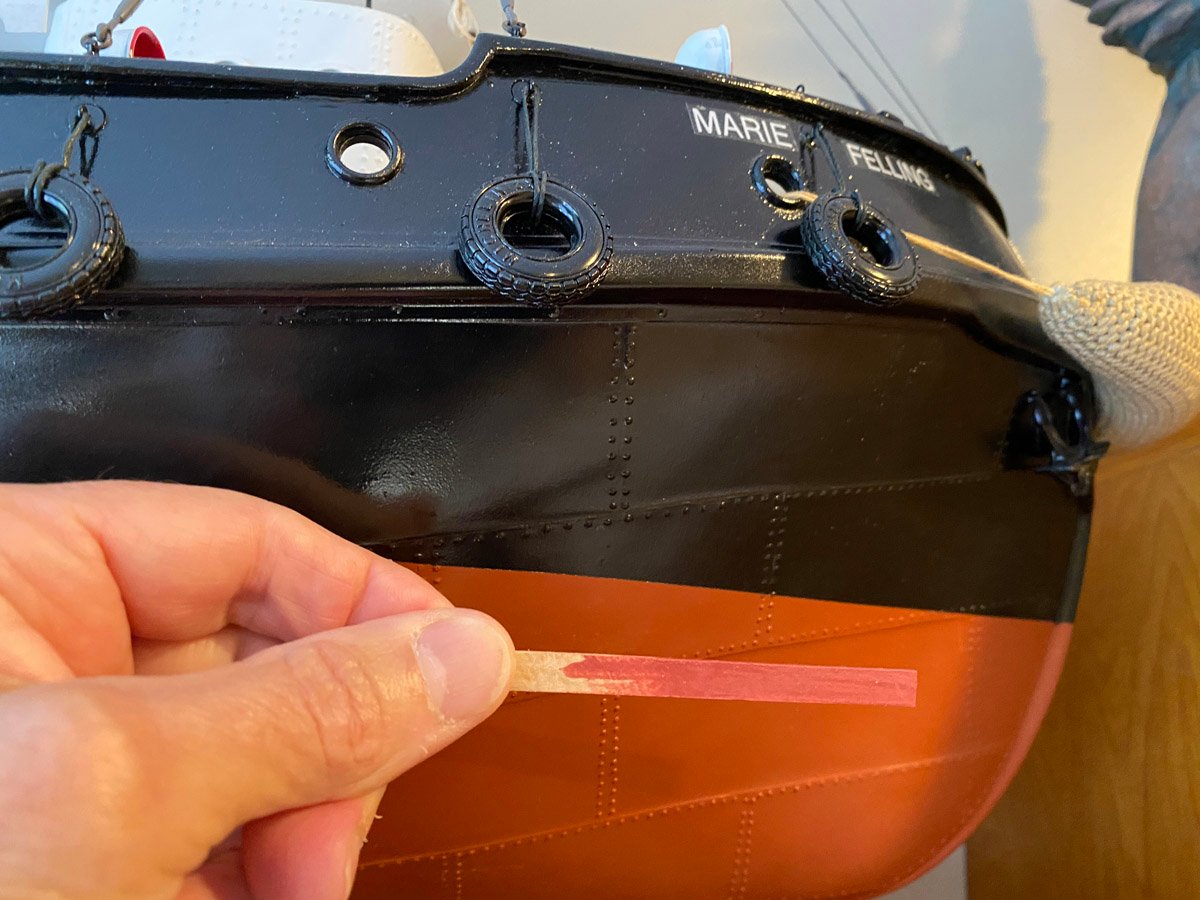
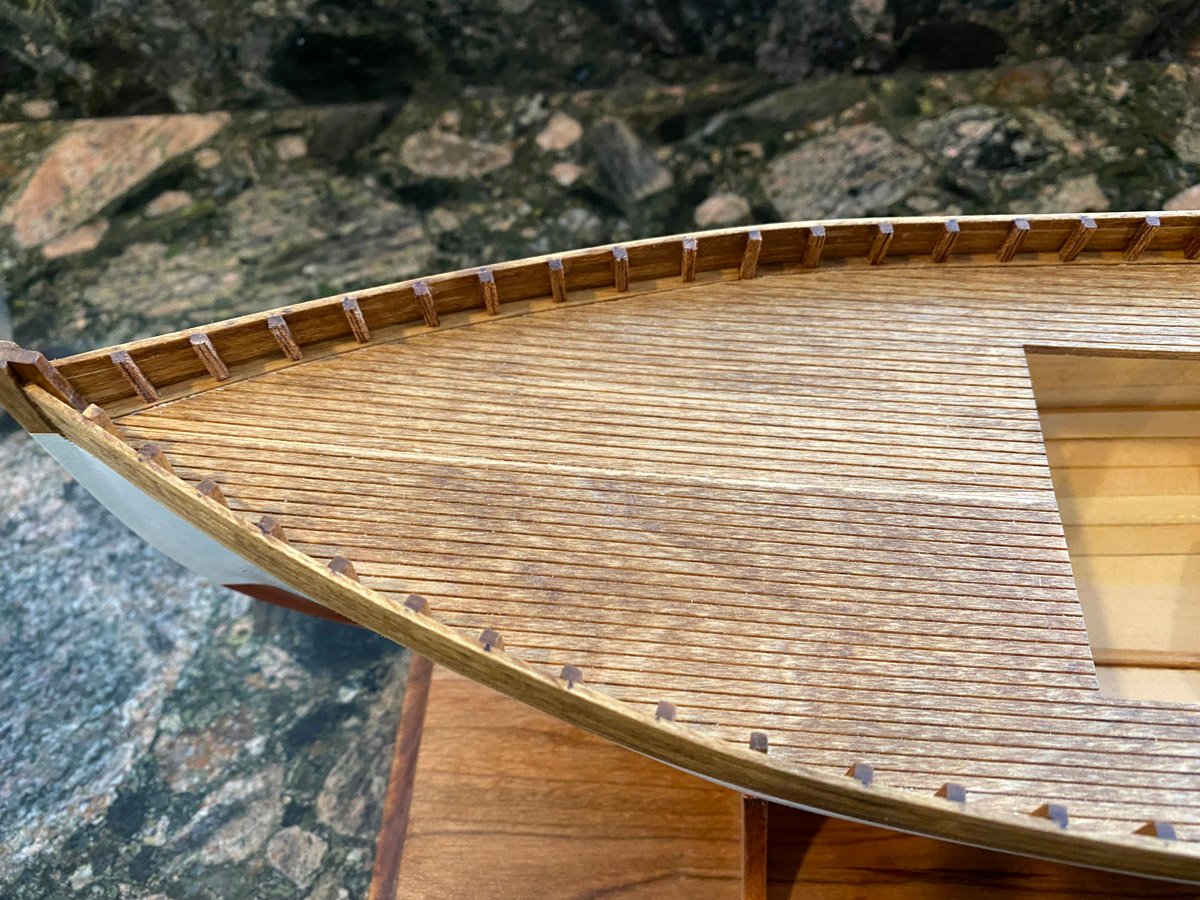
My wife also bought me the paint set from Bluejacket. It came with a 0.5 oz bottle of "anti-foul red" enamel that looked a lot like the paint on my Marie Felling tug. I still had half of a rattle can of that paint and used it on the bottom of the Seguin. After painting I attached the deck, waterways, bulwarks, about 80 vertical frameheads, and the stern planking.
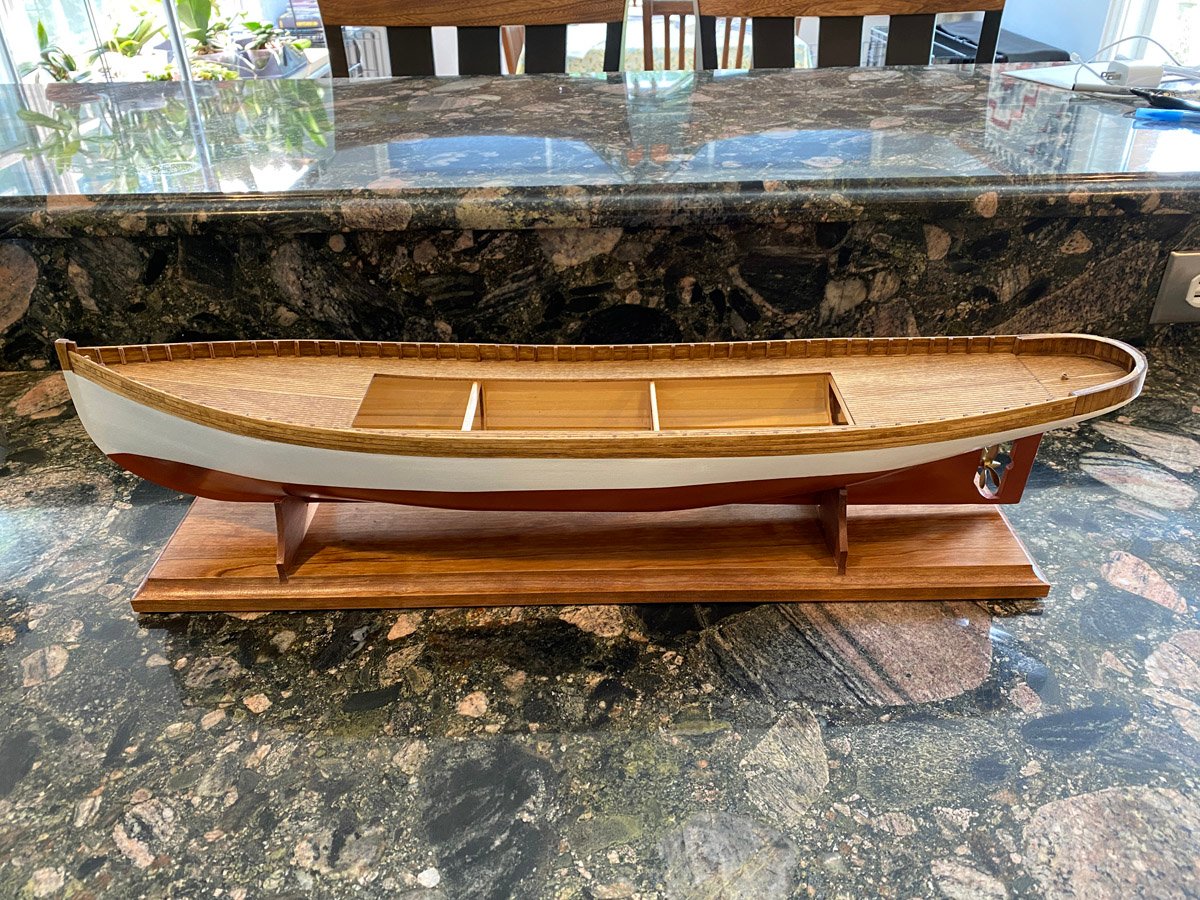

The nearly-complete hull weighs 8.8 oz or 249 grams. I'll bet that if I filled it with helium ...
Next comes hand rails, side rails, and rub rails in natural mahogany. The side rails will cover the gap between the lower white and upper stained parts of the hull.
-
I Digress...
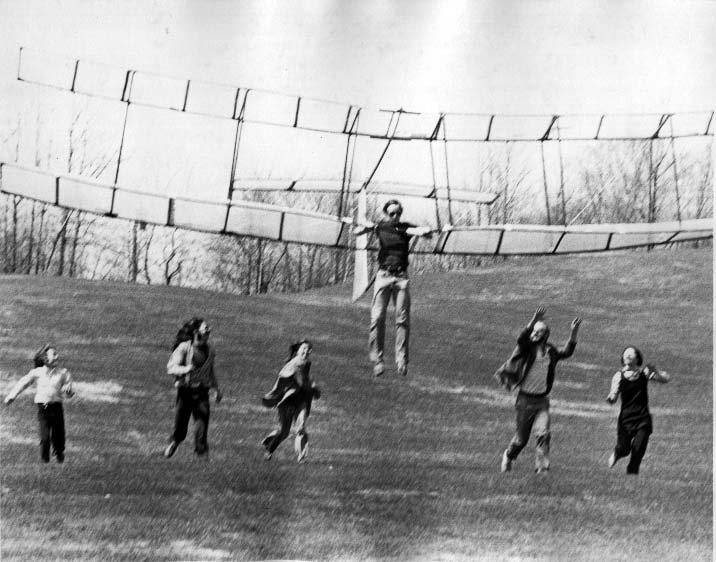
We visited Kitty Hawk, NC over our Labor Day holiday earlier this month. Kitty Hawk is where the Wright Brothers made their powered flights in 1903. The sand dunes there are still a popular location for hang gliding, so my sons, their wives, and I took lessons and each made 5 flights. This is me on one of my recent flights,

and back in 1971 in a hang glider that I made. That's my wife below my right foot.
-
On 9/17/2022 at 7:39 PM, CDW said:
Man, I love this ship.
On 9/17/2022 at 7:42 PM, hof00 said:Thanks Chap,
At this stage, I have a love/hate relationship with it.... 🙂
I know exactly what you mean Harry! But before long you will love the final product.
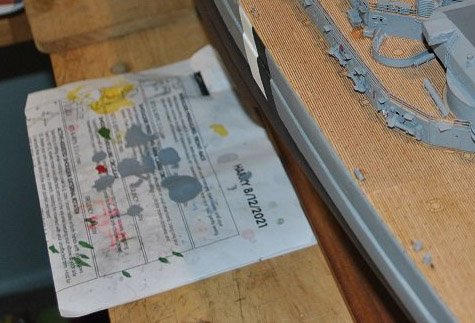
Your photos look great. It's interesting to see your work area, and even a hint of the NZ scenery out the window. Before you're done post a photo of your stack of partworks magazines.
-
Some Progress on the Hull
No, I haven't given up. We took a couple of long weekend trips and hosted a big block party, so between packing, driving, and yard work I haven't had much time to work on the Seguin. I have done a lot of filling and sanding on the hull, and just applied my first coat of primer. Then we'll see where the worst defects are.
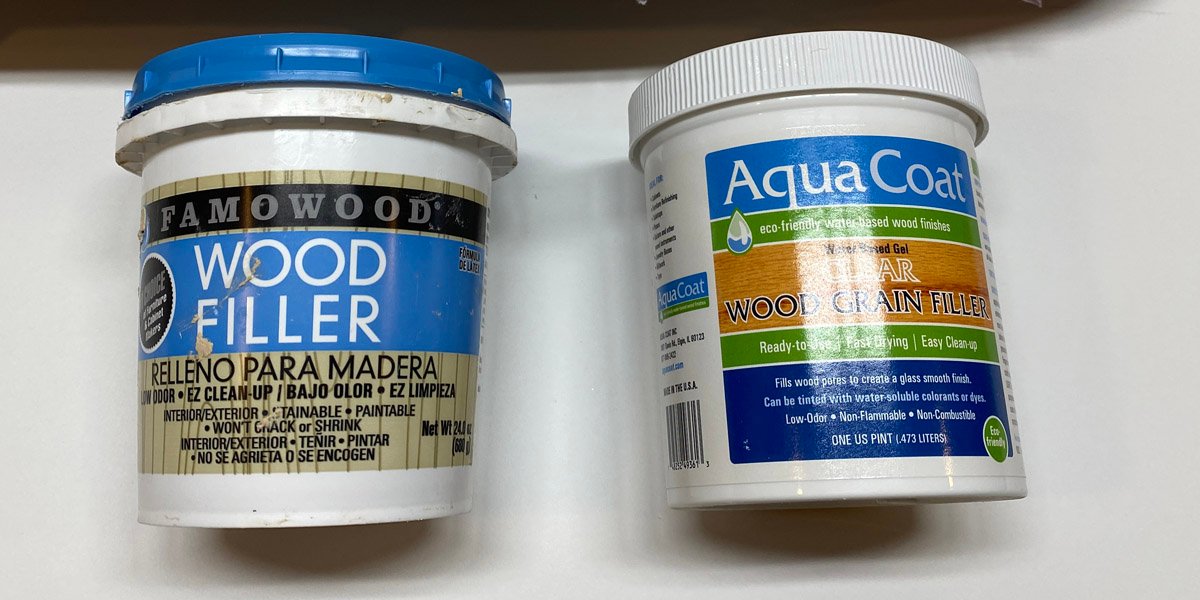
I applied two coats of Famowood thick wood filler, and sanded most of it off. It's for major cracks and minor reshaping. Then I applied 2 coats of Aquacoat thin filer. It's really for filling open-grained wood but it gives a mirror smooth finish on basswood.
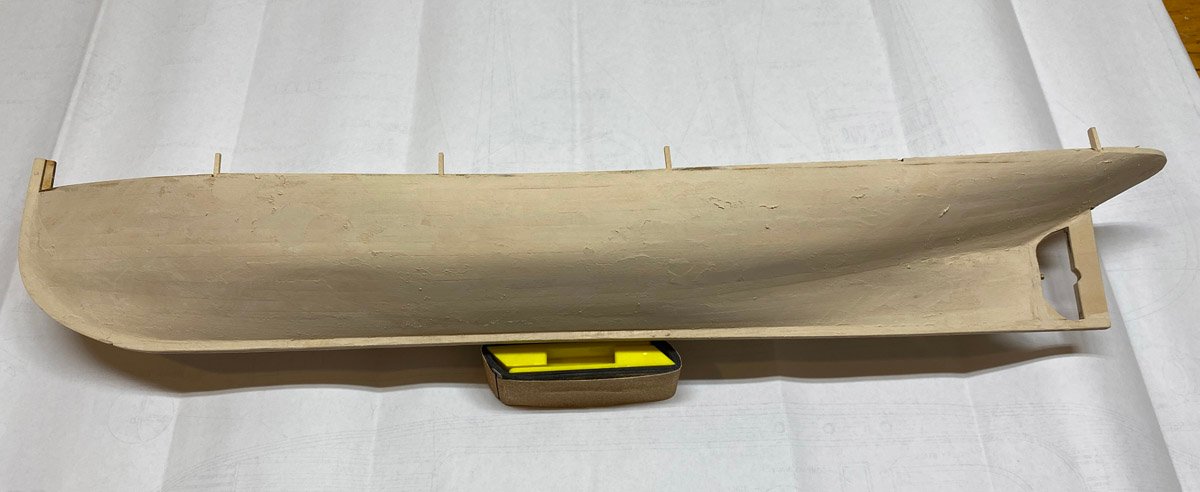
The hull looks pretty rough after the Famowood,
but much better after the Aquacoat. It's tempting to add some stain and leave it au naturale, but with the filler and CA residue, I am afraid that the finish would be blotchy.
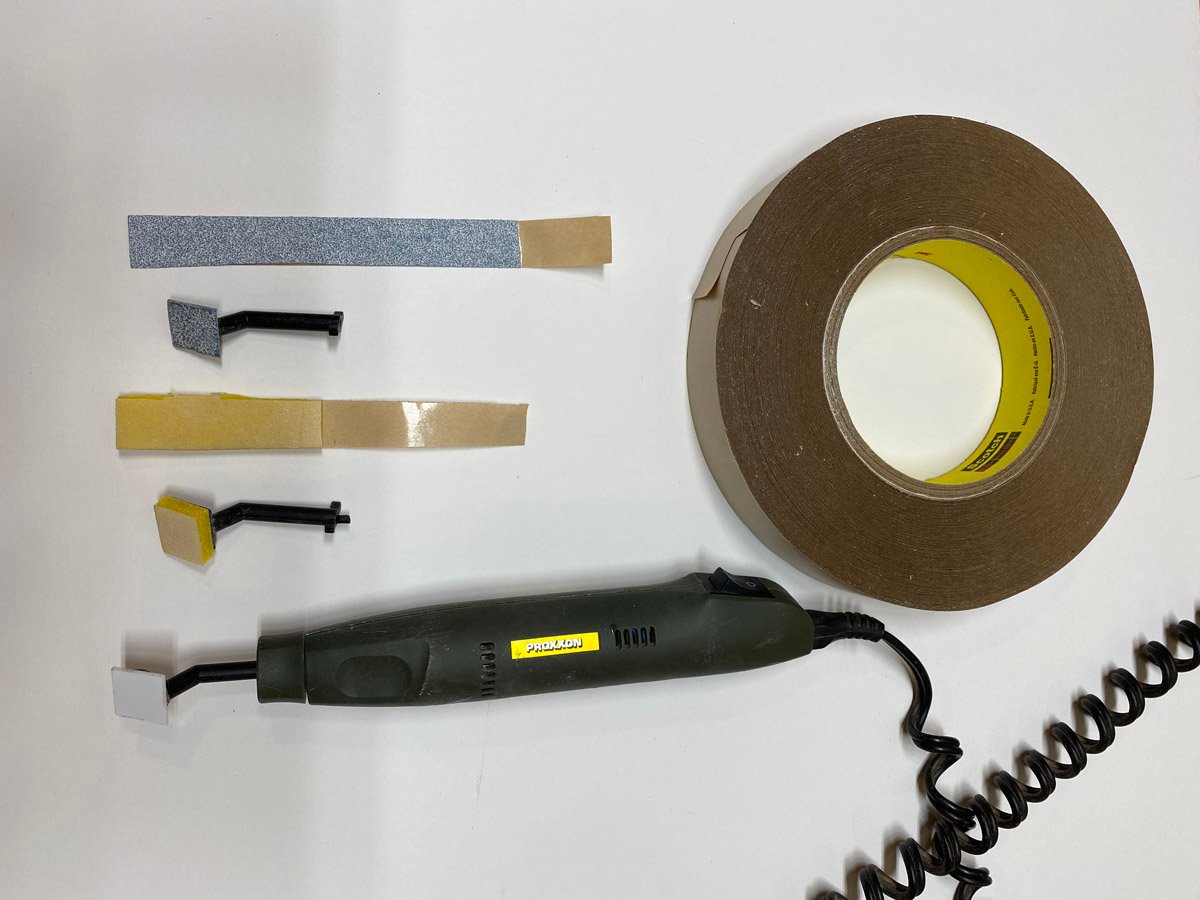
I sanded the hull by hand with a thin foam sanding pad, and used my Proxxon oscillating sander for the details. Proxxon supplies some terrible sandpaper sheets with the sander, so I make my own with my favorite sandpaper and double-sided tape. I make long strips and just cut of a new piece when needed. I was having trouble sanding the tight curvature on the stern when it occurred to me to make tiny pads out of the foam. They work great! Why haven't I thought of that before?
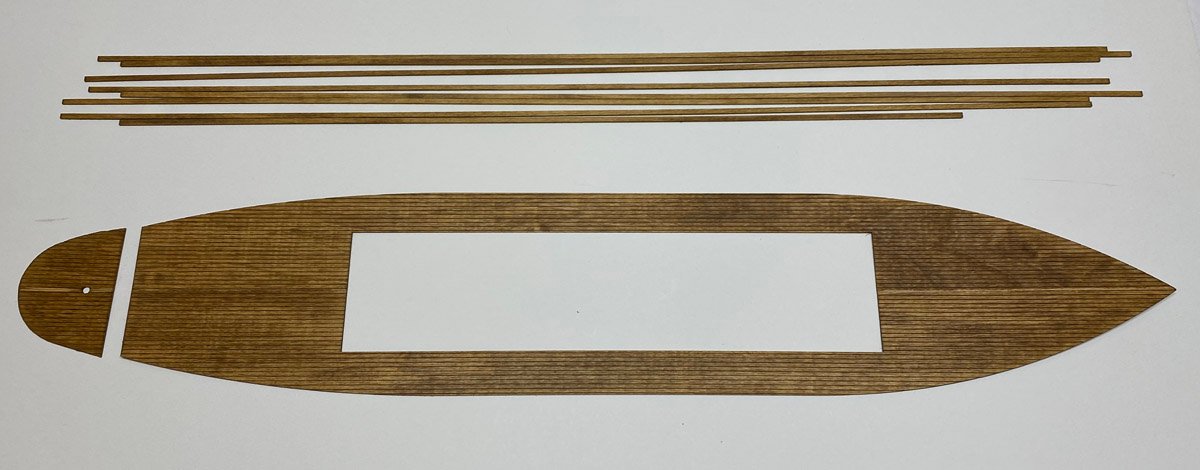
While I was waiting for the filler to dry I stained the deck and some basswood strips for the gunwales. They go on after the hull is painted.
- Canute, yvesvidal, Paul Le Wol and 8 others
-
11
-
I like the photo with paint splatters all over the paper. That's what a workbench is supposed to look like. 😀
- Canute, GrandpaPhil, mtaylor and 2 others
-
5
-
What a beautiful model! Outstanding work.
- Paul Le Wol and Dave_E
-
1
-
 1
1
-
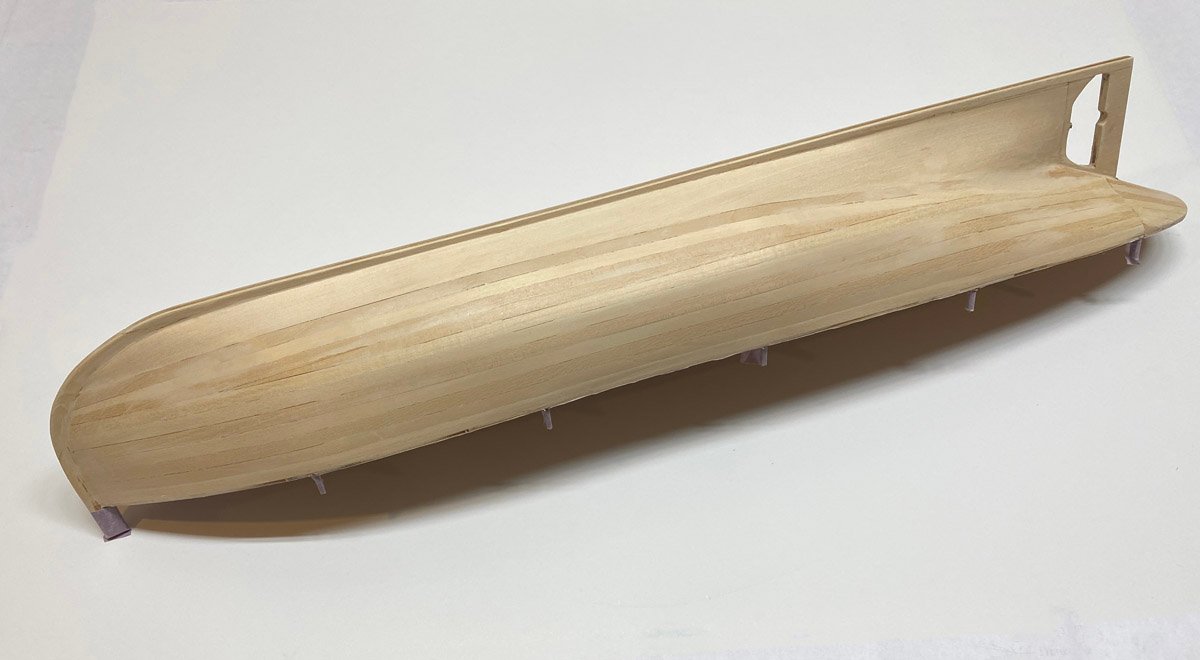
Planking
Planking begins at the keel with the garboards. These are large, laser-cut pieces that didn't quite fit. The instructions say to score the aft parts of the garboards lengthwise on the inside to help them follow the compound curvature. I scored one, soaked it in water, and it promptly split when I tried to install it. That was patched later. The other side worked much better without the scoring.
Planking continued down from the subdeck. I soaked the planks briefly in water, and glued them one frame at a time with medium CA and finger pressure. The gaps between the planks will require filler later. There is only one layer of planks, so no opportunity to fix this later.
Models of the Seguin on-line often show a beautiful varnished hull, but the planks would need to be varnished before assembly. The instructions say that the original color scheme was copper red below the waterline, and white above. That's what I plan to do.
"A little caulk and a little paint, make a carpenter what he ain't."
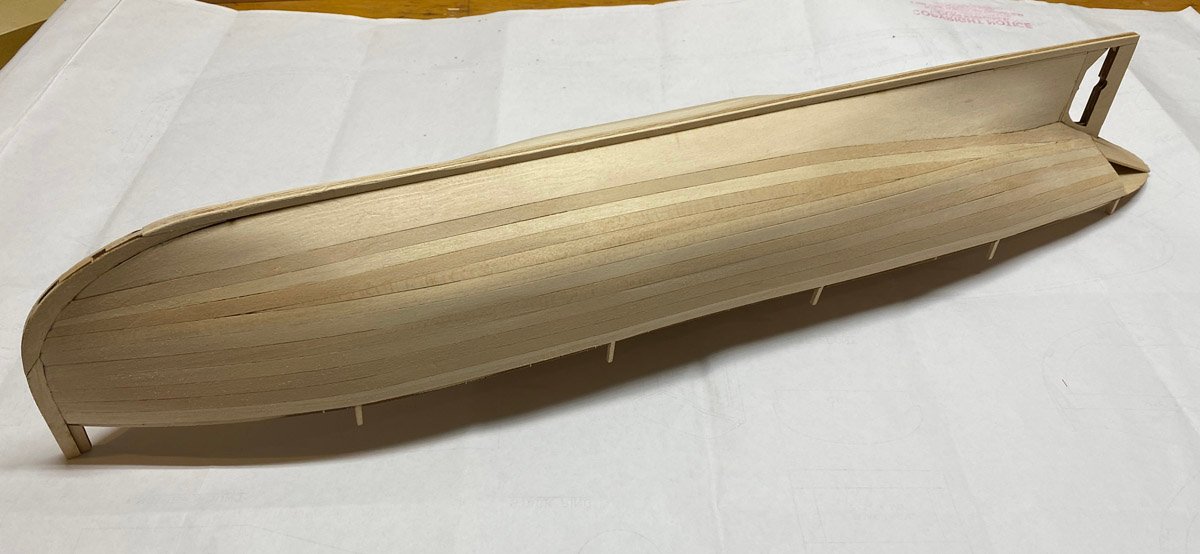
She looks pretty good after a lot of sanding, but still needs filler. The hull is flimsy with only one layer of planks. I coated the interior liberally with Titebond glue, but couldn't reach everything because of the sub-deck. It would be difficult to make this model watertight for RC.
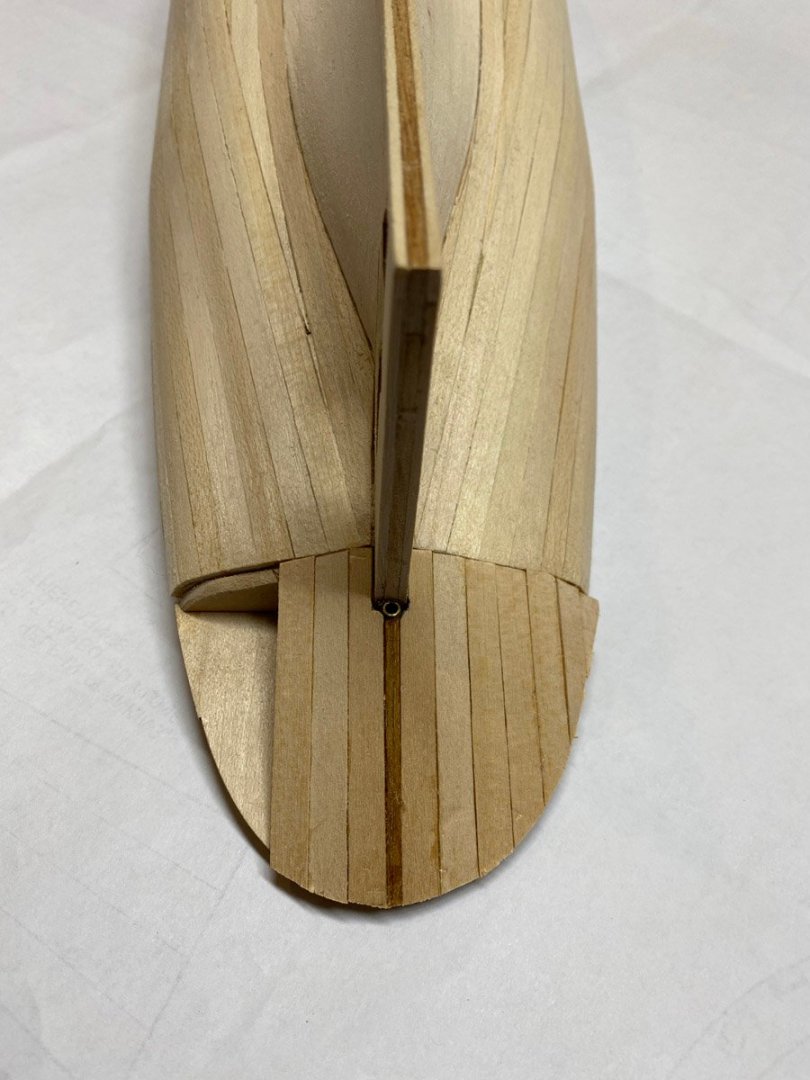
I had my doubts about planking the stern like this, but after sanding the shape looks fine.
The real deck needs to be fit before planking the bulwarks. I'll need to do some varnishing and painting before that. That means clearing out my spray booth, AKA garage, next.
- Canute, Ian_Grant, Prowler901 and 7 others
-
10
-
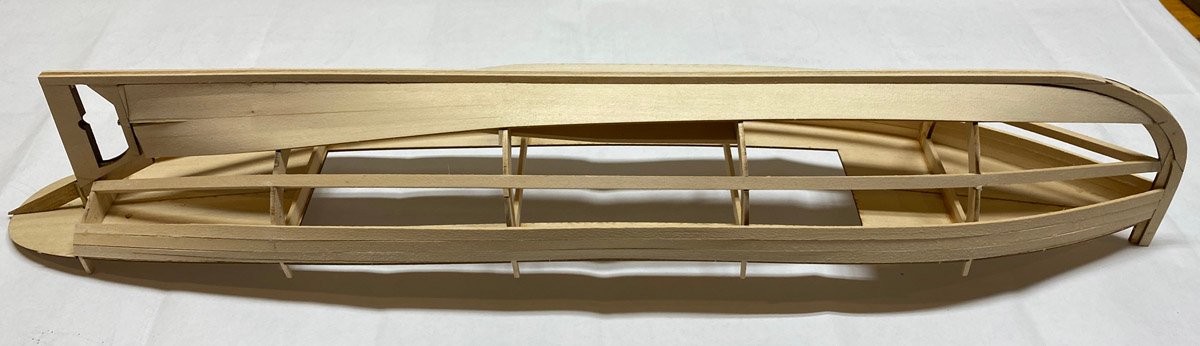
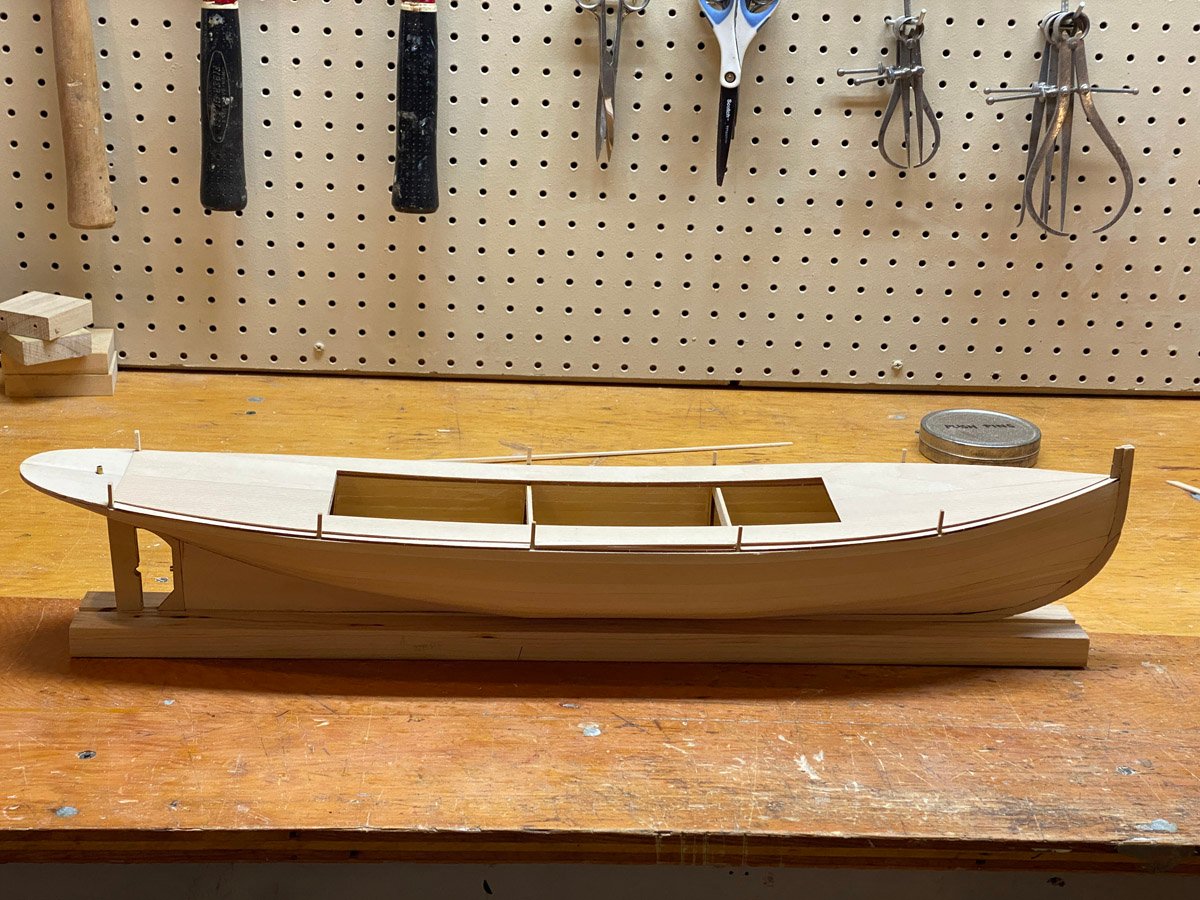
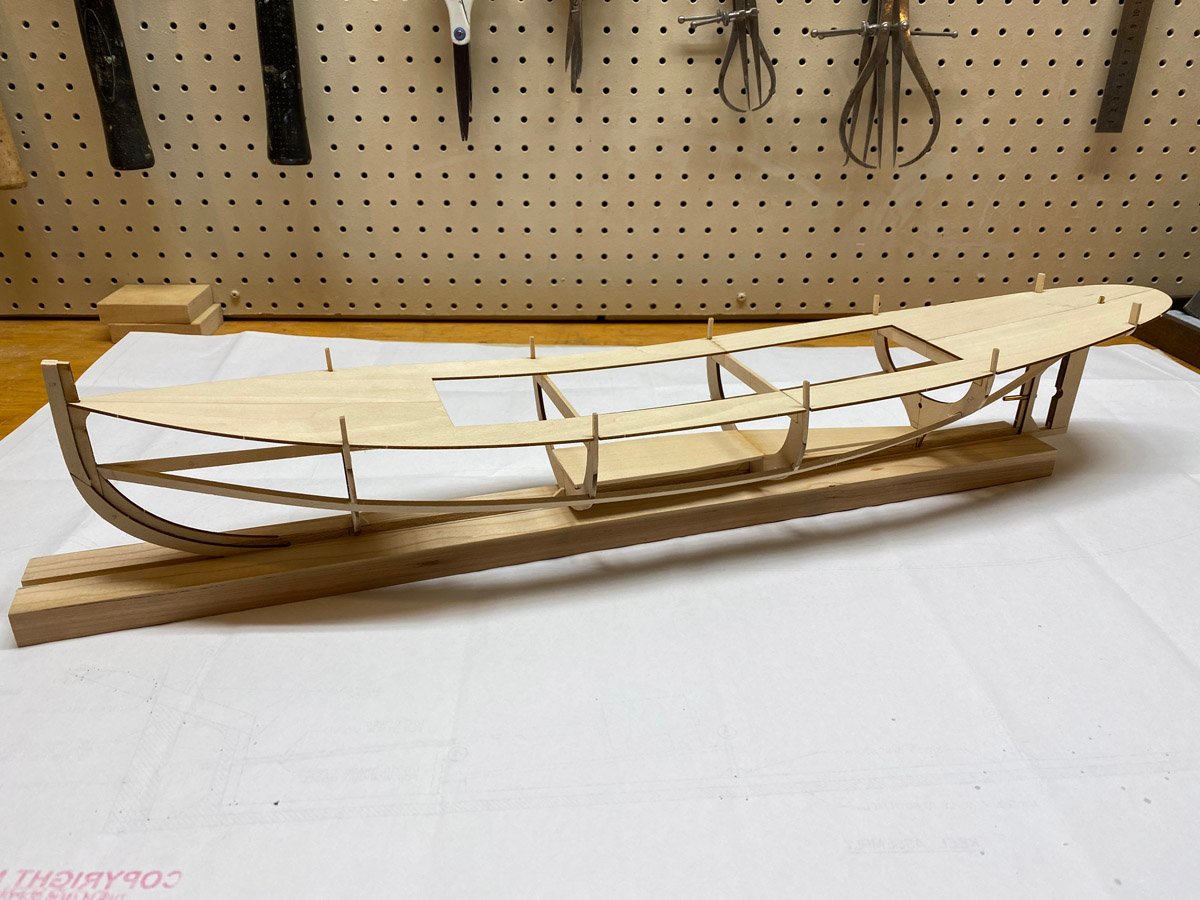
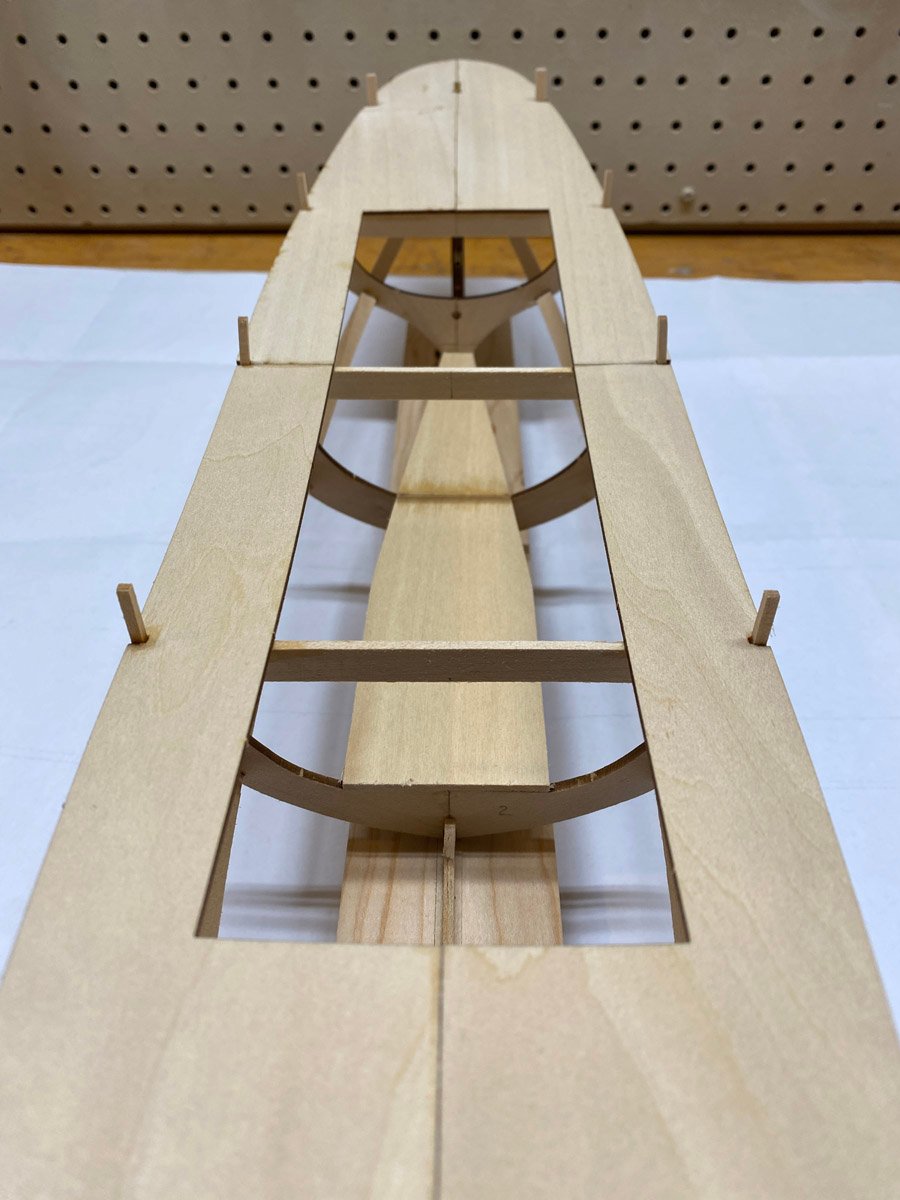
Framing
Nice to see some new names. Thank you for following.
I actually started building in early August and have put in about 25 hours so far. The framing and rough planking are complete. I didn't take enough photos but here's what I have.
 16 hours ago, gsdpic said:
Unless I am missing something, it looks to have a challengingly small number of frames/bulkheads. And the other build logs you mention do not progress to planking. Be interesting to see how you meet that challenge and any others that arise.
Yes, Gary, the model only has 5 frames, and one of them doesn't amount to much. The frames are built up out of laser-cut pieces and straight stock. They don't quite line up with the plans so you have to guess. The keel is built in 3 layers that leave a perfect rabbet for the garboards (first layer of planks.)
Assembling the keel, frames, and upper deck was really tricky. I cut a dado in a long board to hold the keel, then tack glued the frames in place. I glued the 4 subdeck pieces together, transferred the width between the frame uprights to the subdeck with dividers, and enlarged the notches to fit. I carefully put the subdeck in place and held it down with tape. Then I flipped everything over and glued the deck to the keel and frames from front to back with CA. Whew.
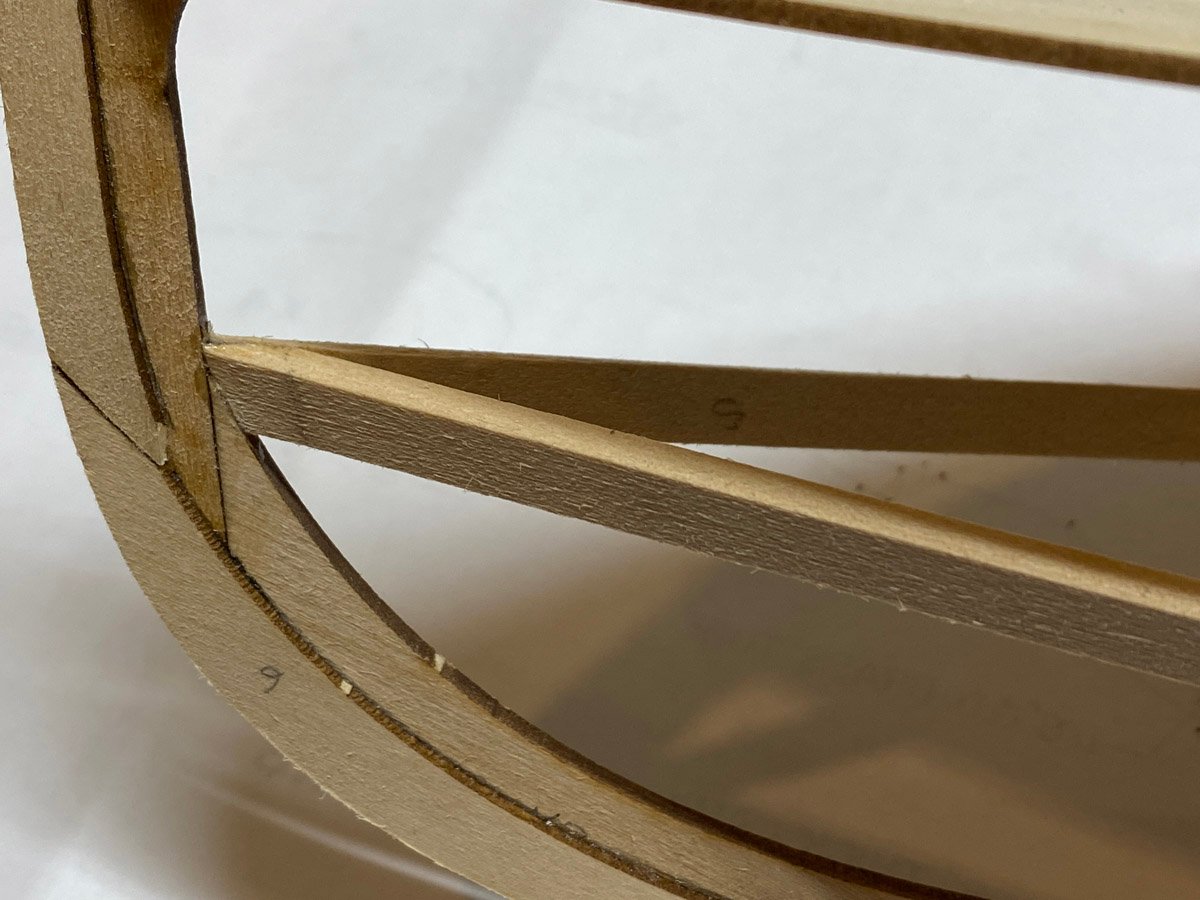
There are 2 heavy stringers for strength. Some of the pre-cut notches lined up, and some had to be enlarged. The joint at the bow took a lot of trial and error, mostly error.
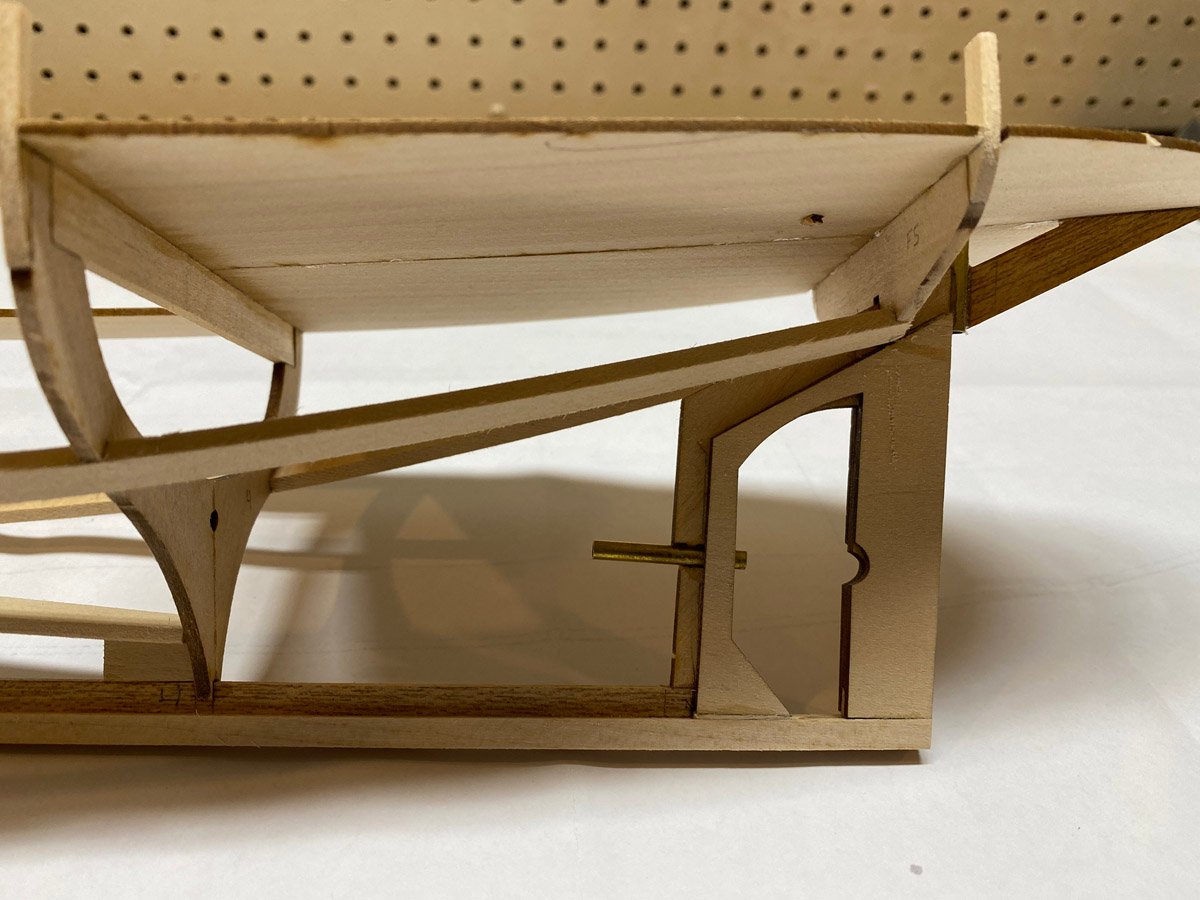
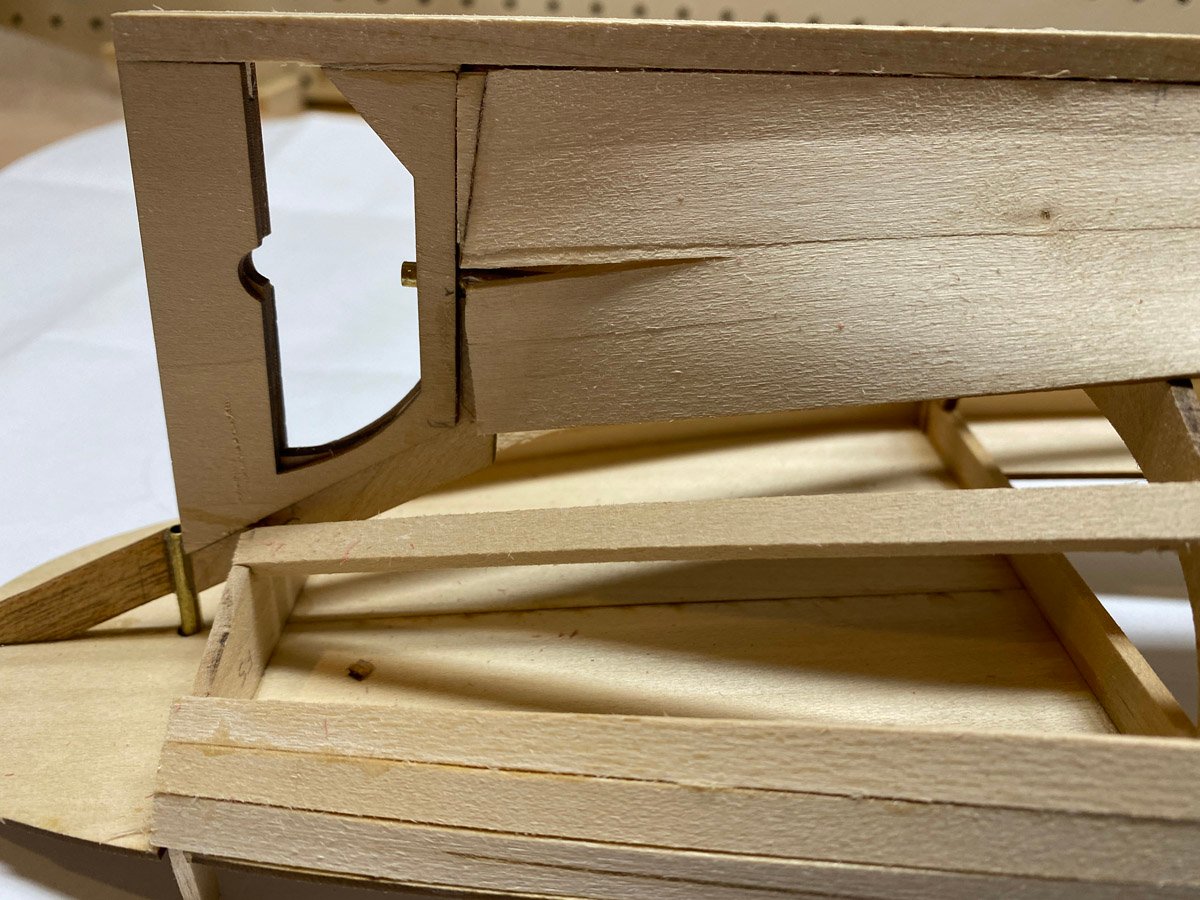
The stern has 2 brass tubes for the rudder and prop. The rudder tube has a beam attached to the rear deck that is quite flimsy at first.
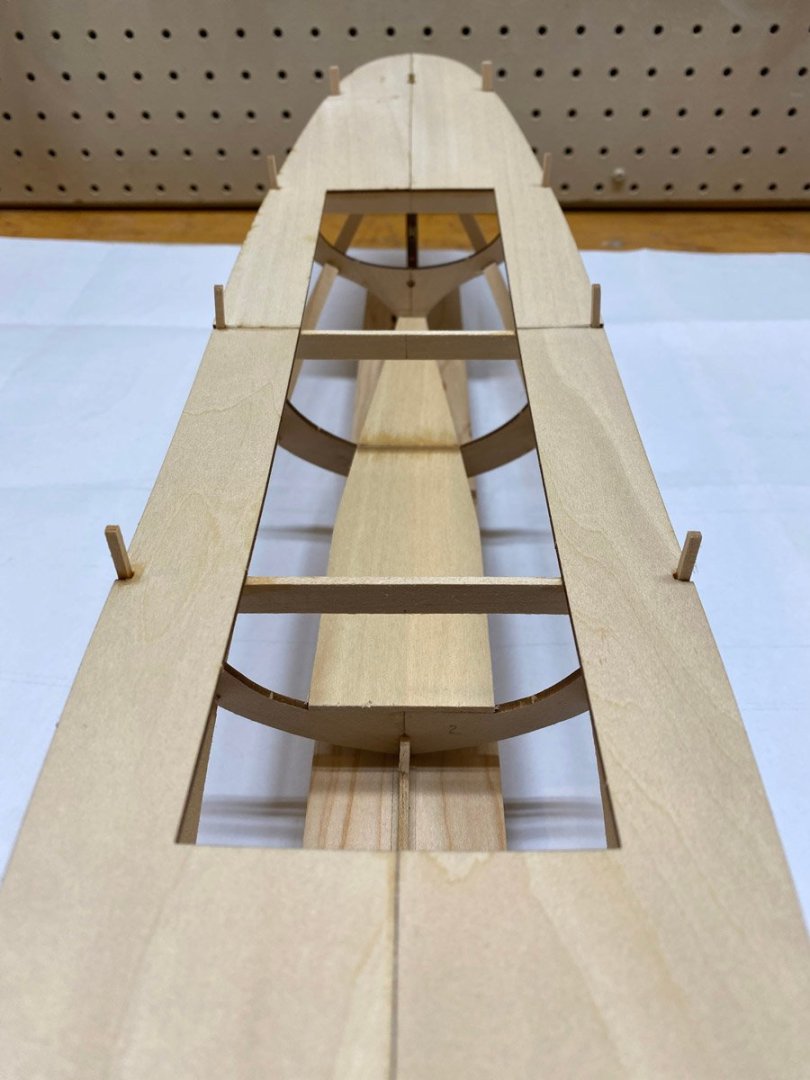
There is an interior tray for motor and servos. The plans show much larger pieces for the tray but it's not clear where they go. I am just building for display and won't use them anyway.
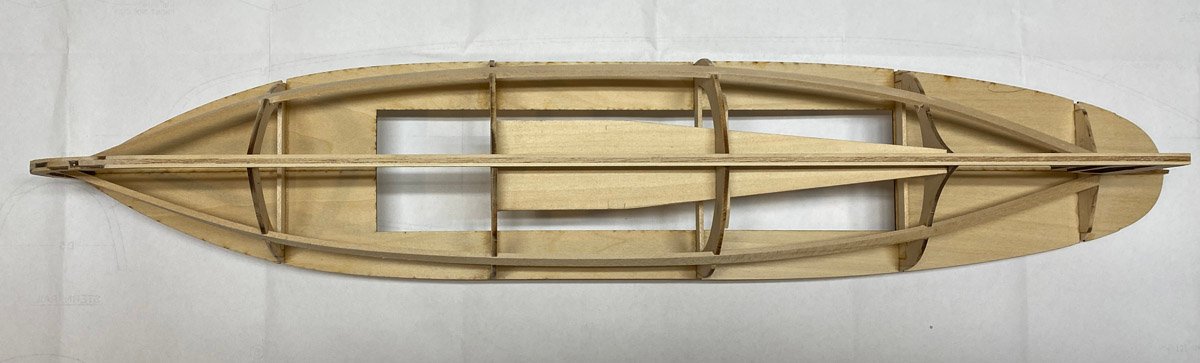
Bottom view of the frame.
-
Introduction
Back in May I was working to complete my Amati Bismarck model when my wife asked me what I wanted for my birthday. I thought that something smaller, with plenty of wood to cut, and no plastic or photo-etched parts, would be a nice change. I had actually had my eye on Bluejacket's Seguin kit for a while and asked for that. I built Bluejacket's Arleigh Burke destroyer in 2016 so I know that they make quality products, and I have bought lots of miscellaneous parts from them in the past and know that they provide good service.
There are only two other build logs of the Seguin on MSW, and neither of them got very far. I hope to show some completed photos eventually.
What's in the Box
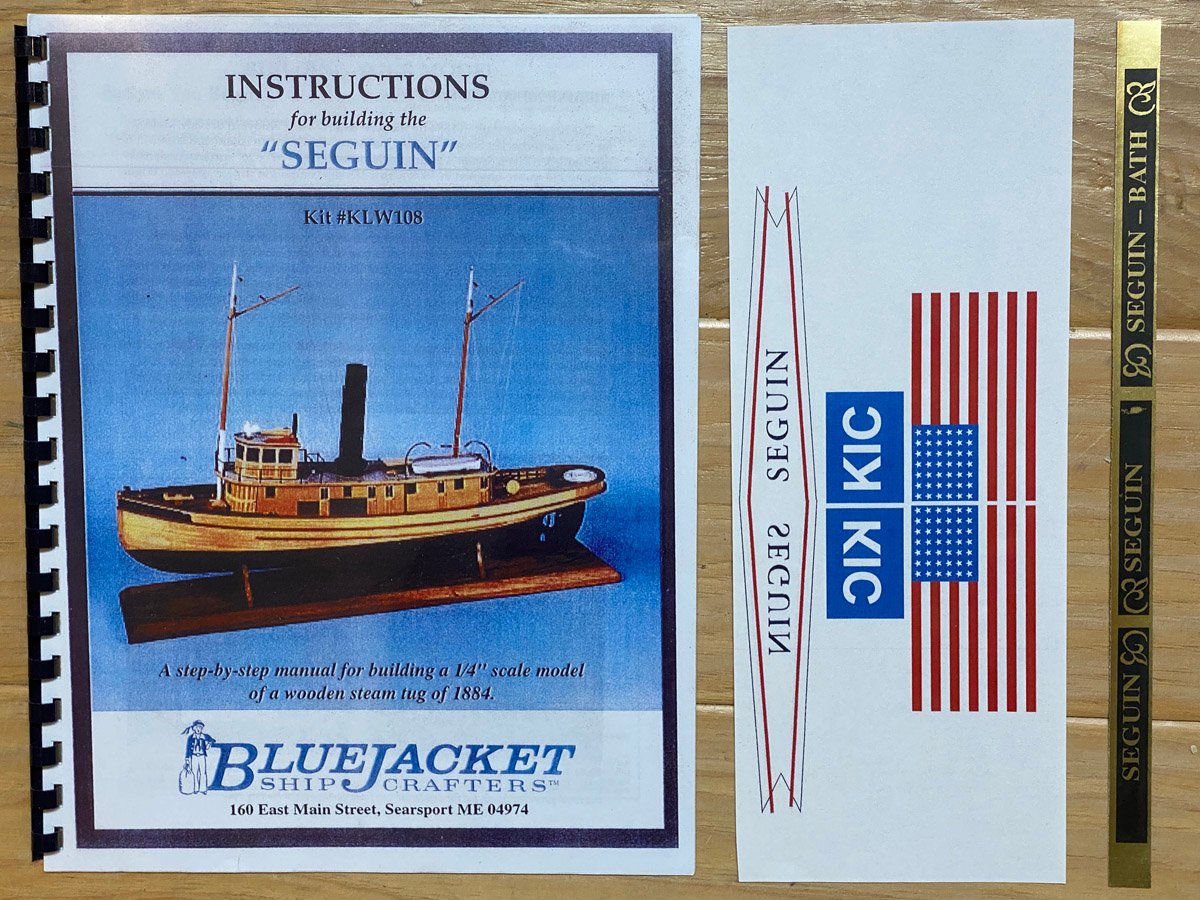
Instruction manual, flags, and nice gold-printed labels. There are lots of photos of cheap, souvenir models of the Seguin on line, but almost no nice photos of a completed model. The photo on the cover of the instruction manual is one of the best. The inside of the manual has been photocopied so many times that many of the photos are hard to make out. This really needs to be reprinted.
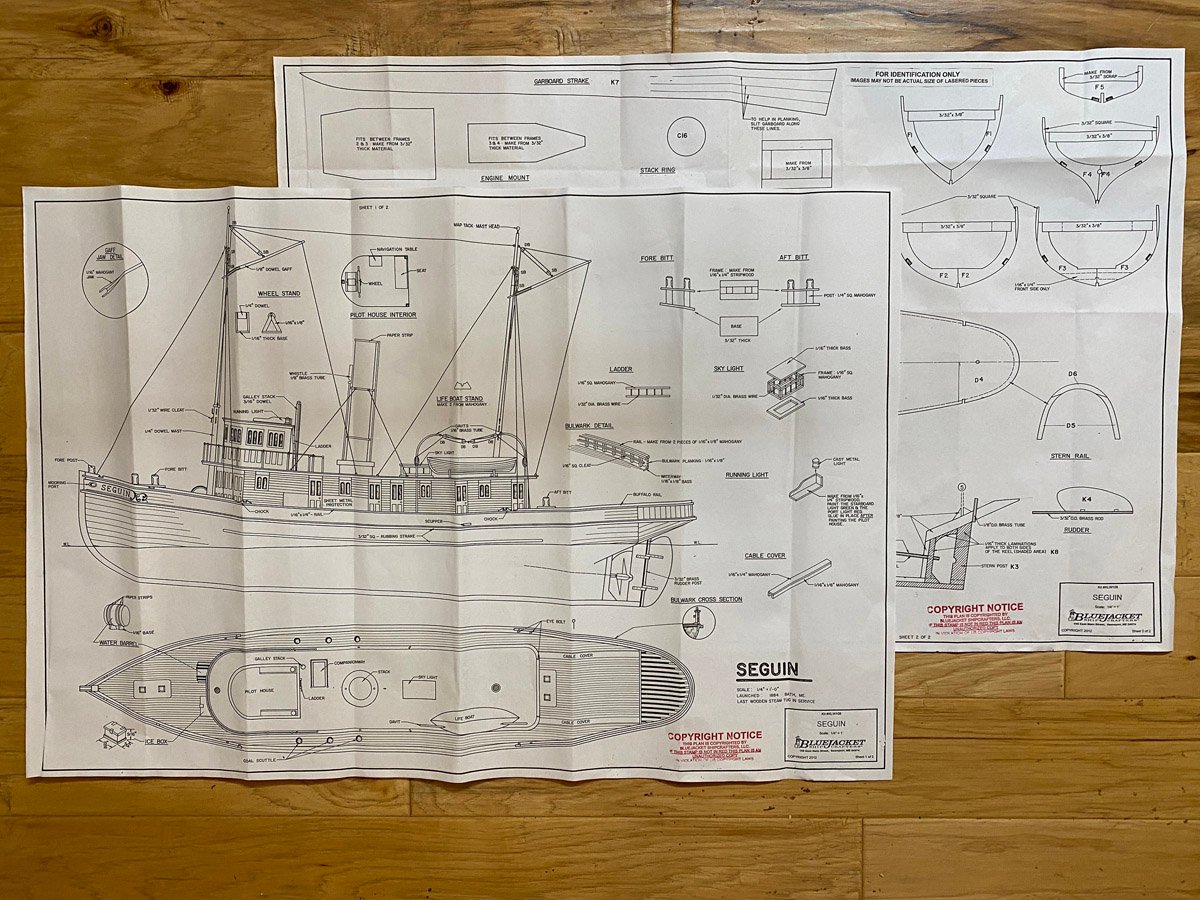
Two sets of (almost) full-size plans for details and framing. Note that the plans say "For identification only, images may not be actual size of lasered pieces." They are very close, but I always prefer to trust the plans over the laser-cut pieces.
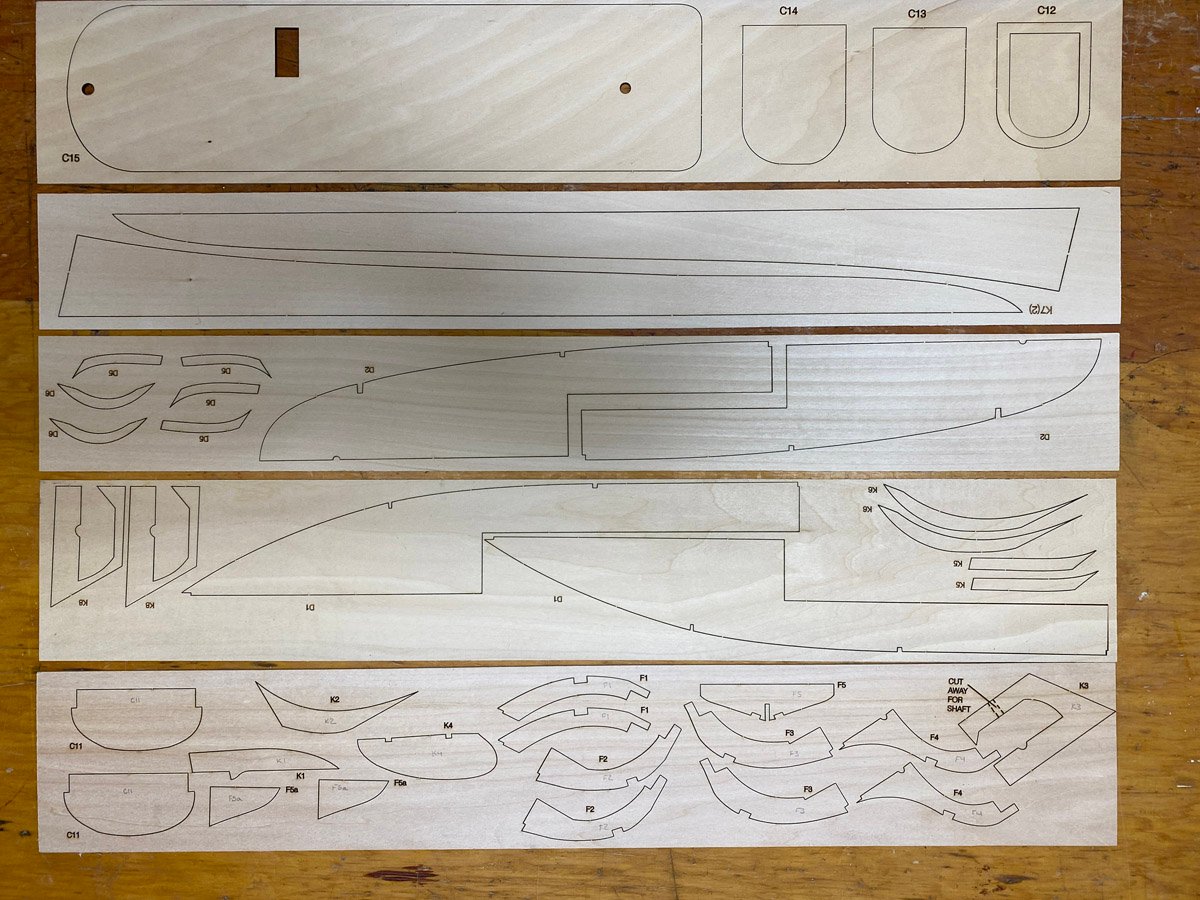
Five sheets of laser-cut pieces, perfectly cut with minimal charring.
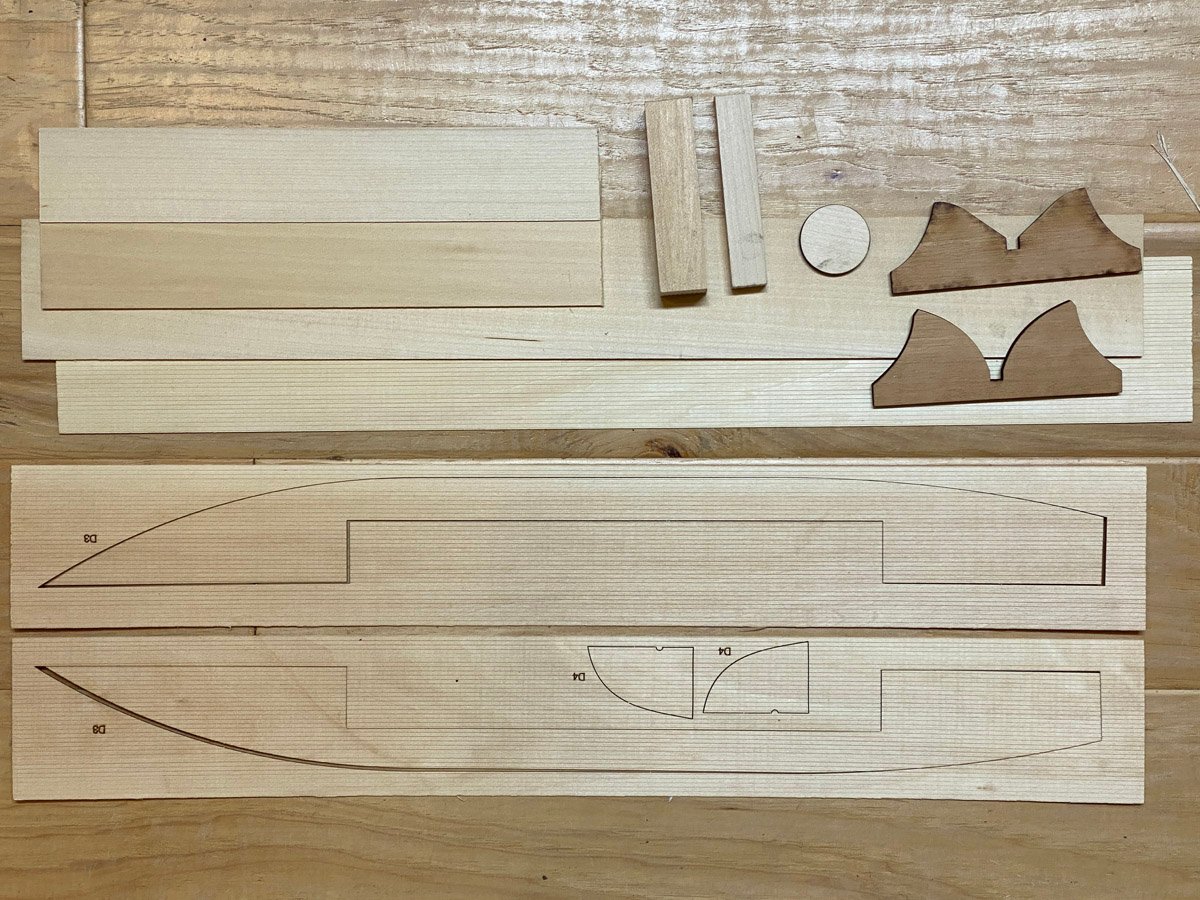
Nicely scored decking and paneling, miscellaneous wood stock, and (cherry?) cradles for a stand. The instructions say to take the large solid block and remove anything that is not a lifeboat. I may look for an alternative.
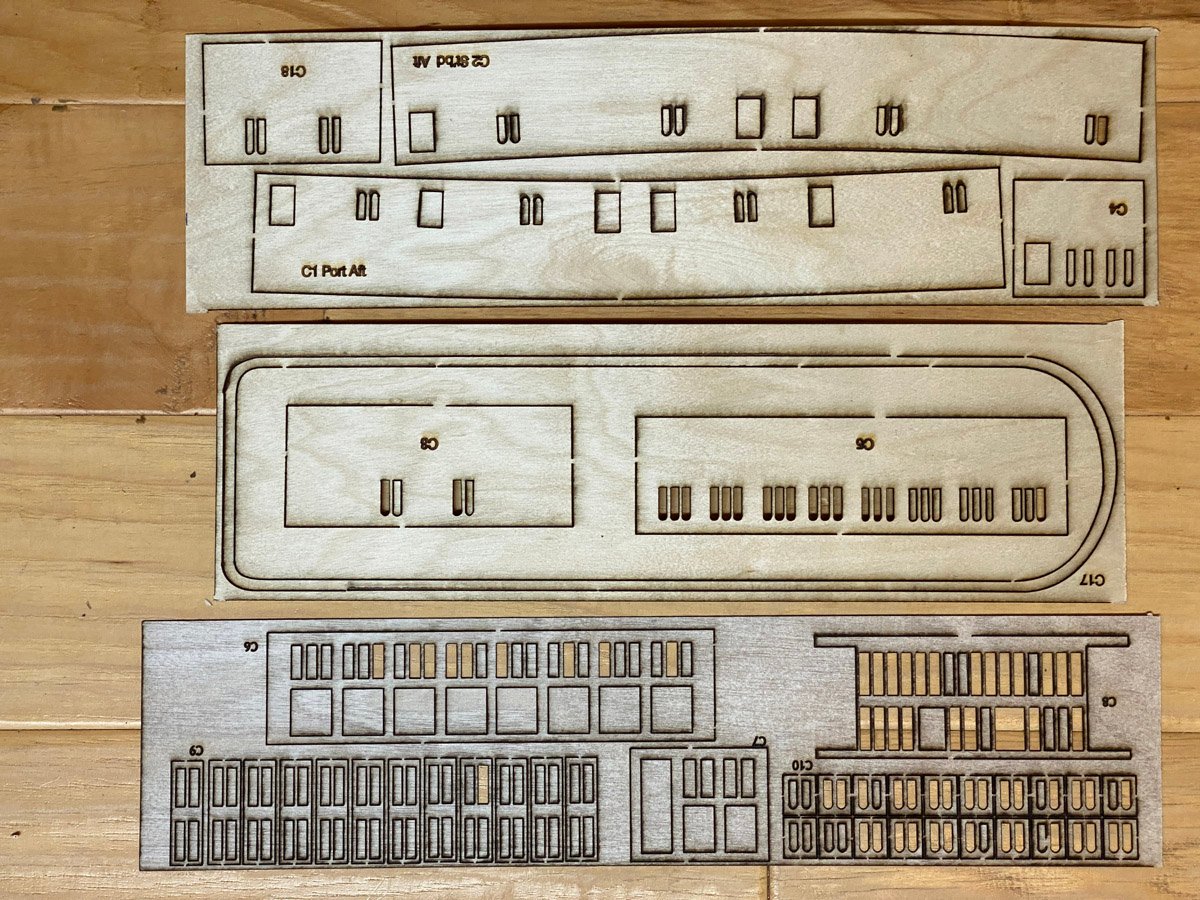
Laser cut pieces for the cabins.

Basswood and mahogany sticks, and dowels.
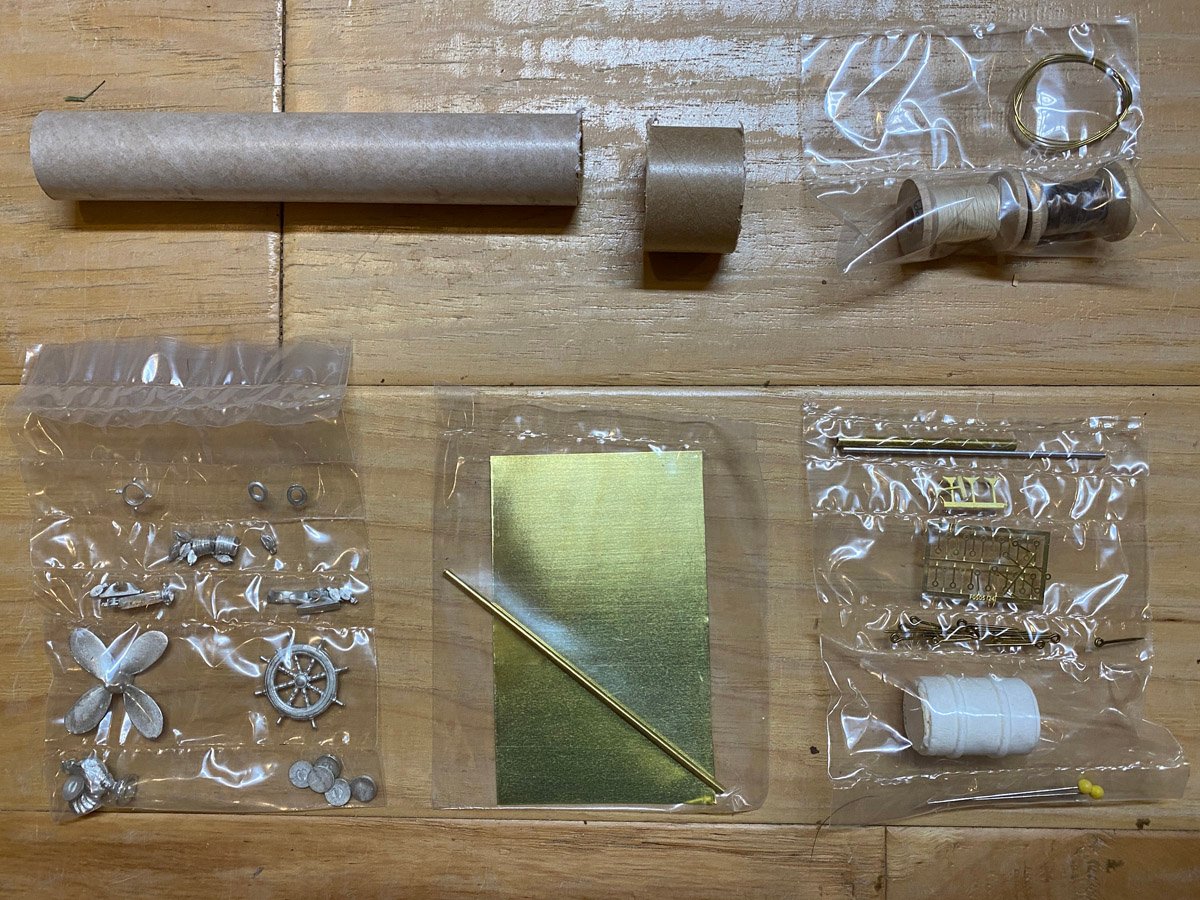
Cast prop and wheel, brass pieces, rigging thread, and poorly-cut model rocket body tubes for the stack. Oh no! There are some photo-etched eyelets in that bag!

My wife bought the optional paint set and cherry base. I usually rout my own base but this one is very nice.
-
It's looking very good Harry!
- Old Collingwood, mtaylor, Canute and 1 other
-
4
-
On 8/14/2022 at 5:51 PM, ted99 said:
I'm about to leave on a Cruise to Iceland, then Shetland IS. and Faroes on the way to Bergen. LOL, I'll be retracing the first half of Bismarck's last voyage. No work until I get back in about 3 weeks.
Ted,
Is this Holland America's "Voyage of the Vikings" cruise? The itinerary sounds similar. We took that cruise in 2016 and it was one of the most interesting trips I've ever taken. I know that you'll enjoy it.
Some advice from someone who just had Covid on a cruise:
Get tested just before you go.
Wear a mask on the plane and around crowds at airports.
Take some rapid test kits.
Take cough syrup, throat lozenges, nose spray, and a whole bottle of Tylenol. Pack the liquids in a zip-lock bag.
If you don't need this stuff you can leave it behind at the end and have more room for souvenirs.
Have a great trip!
Rod
- mtaylor, Old Collingwood and Canute
-
3
-
On 8/9/2022 at 4:25 PM, Joe100 said:
Some random Bismarck minutia, and some photos you’ve probably never seen.
Bismarck’s builder’s plate:etc...
I really appreciate all the Bismarck information and very interesting details about the ship. I do wish that I had worked more slowly to take advantage of this discussion. But I know that Harry will use it.
-
On 6/20/2022 at 11:53 AM, ted99 said:
Beginning to get a feel for what the completed model with unpainted brass will look like. Interesting how the i-phone camera shows the plastic as "blue", while my eye says "grey".
I love the exposed brass against the gray parts and black decks on your model. It really highlights all the work that you've put into your model.
I had the same experience with color mismatch from the iPhone camera or perhaps all the LED lights in my house. I eventually edited all of my photos in Adobe Photoshop Elements and just ran the "Auto Color Correction" option on everything. That seemed to help a lot.
- Old Collingwood, mtaylor, hof00 and 1 other
-
4
-
On 7/30/2022 at 10:18 PM, Joe100 said:
That is the stowed Priority Passage day signal. It’s often seen in photos when the ship is operating slowly and draught constrained. It essentially tells all other vessels around that “I have the right of way, regardless”. It was a 3d rectangle shaped like a “+” with a mesh center. Here are some photos:
When you don't have any idea what something is, don't you just love how someone on this site has the answer and photos to prove it? Thank you to Joe100, and beautiful work as always Harrry.
-
On 7/18/2022 at 7:59 AM, hof00 said:
Forward Wave Breaker - Constructed and affixed, lots of tiny PE Struts,
Those tiny struts are really difficult. You have to attach the top end so that you can paint the entire assembly, but it's hard to get the angle set. Yours look perfect.
- Canute, mtaylor and Old Collingwood
-
3
-
Looking very good sir! You will never notice the "gap" after everything else is attached.
Did you get your PE railings yet? How do they look?
It is hard for me to imagine that there are only four part-works issues left to go, but I suppose that you have a great many parts just ready to attach.
- Old Collingwood, mtaylor and Canute
-
3
-
The Best Laid Plans ...
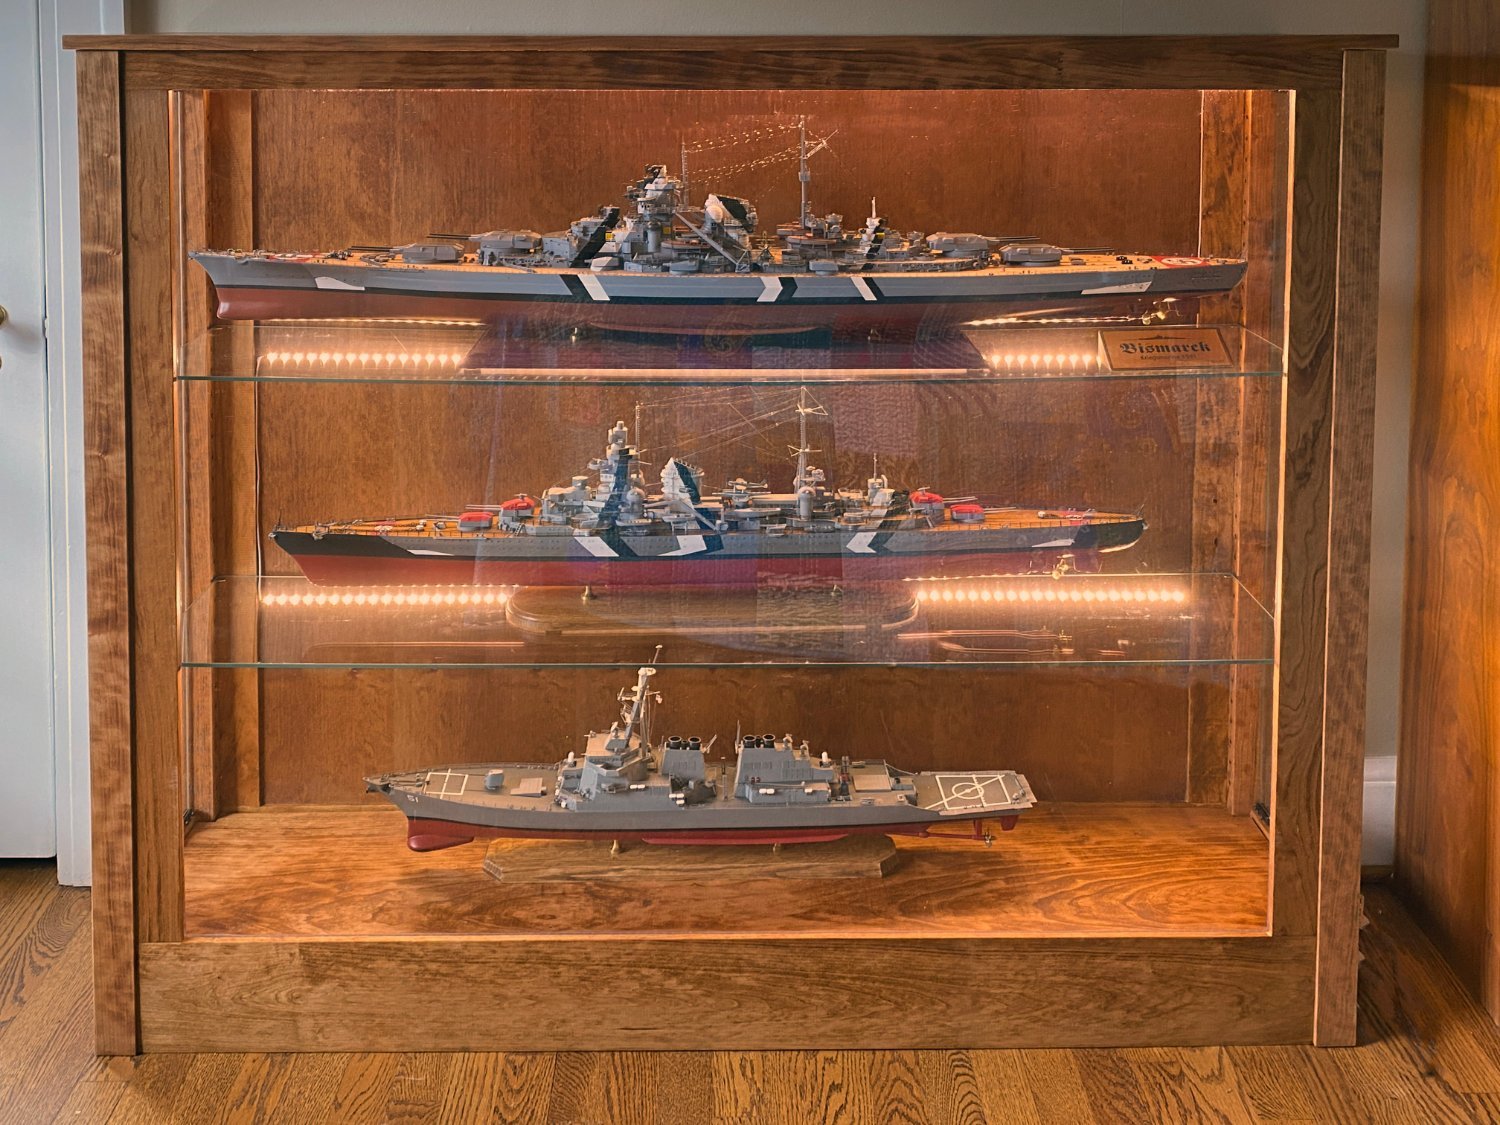
I rushed to finish my display case before my son came for our July 4th holiday. We have a nice, finished attic, and my plan was that he and I could carry it up there where it would not clutter up the living areas of our house. We moved it awkwardly from the basement to the second floor entrance to the attic stairs, where there is a full-sized door followed immediately by a steep staircase. Wouldn't you know it, but when we angled the case to go up the stairs it would not fit under the door frame. We studied the situation for a long time and finally decided that that the case was not going in the attic. Luckily we have a guest bedroom on the second floor with room for a display case, and that's where it ended up.
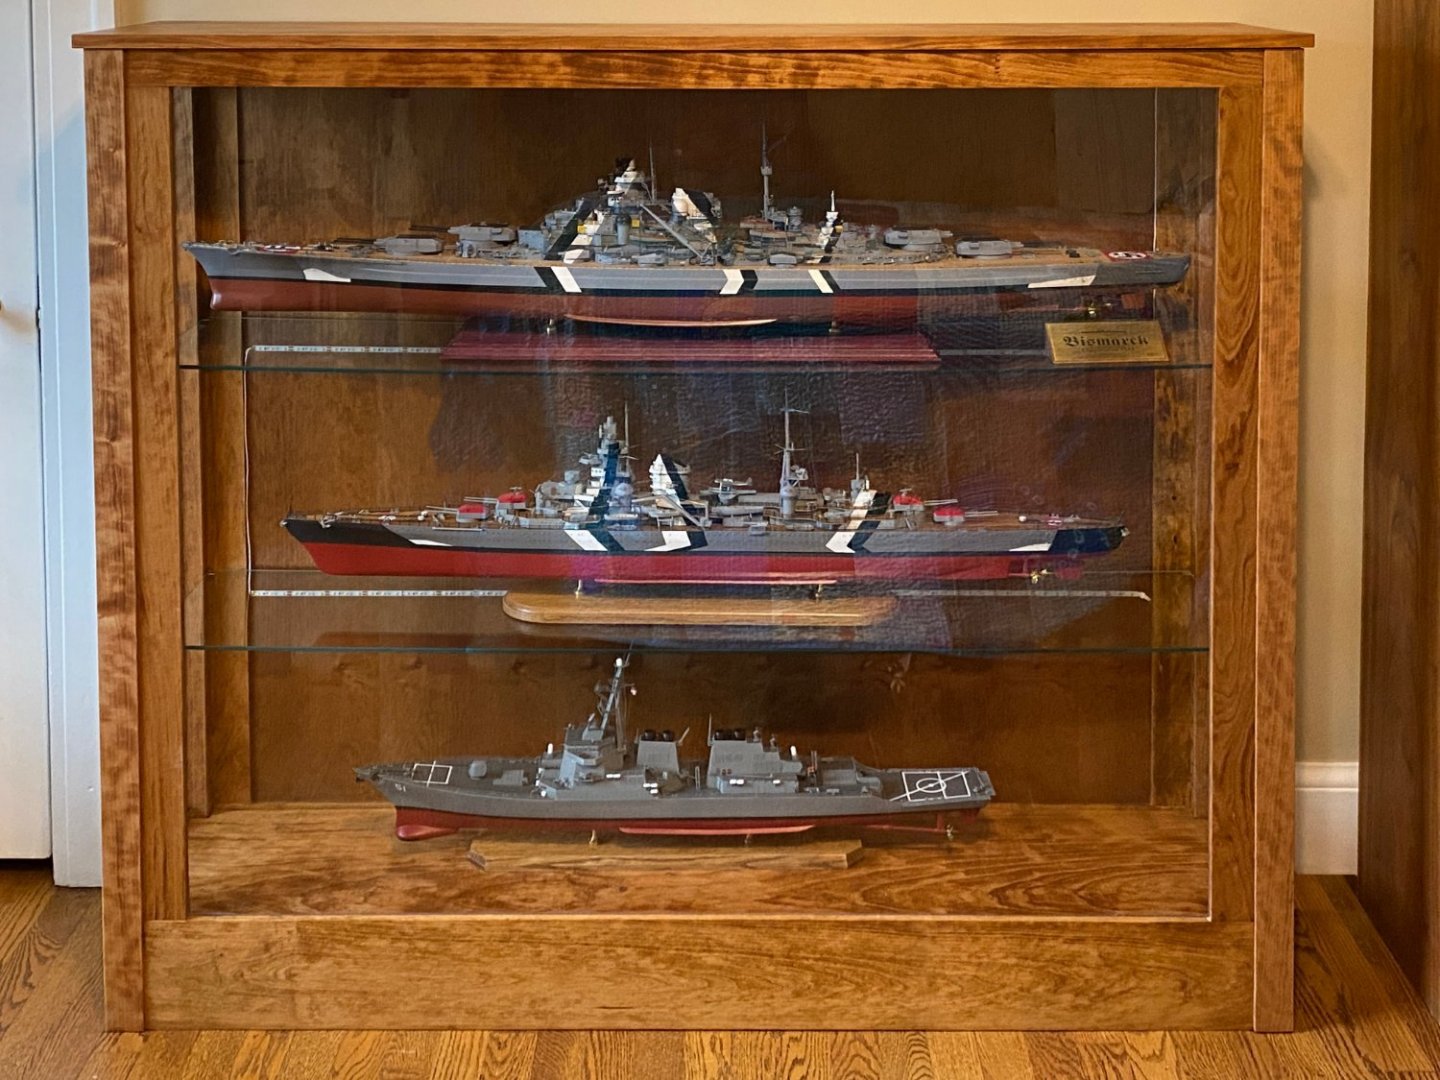
My glass shelves and doors all fit perfectly (whew), and so did the three models. The Bismarck and Prinz Eugen are both 1/200 scale, and the Arleigh Burke is 1/196 so they look good together. I could probably squeeze my U-boat in there too but at 1/72 it might look out of place.

I put rows of LED light strips over each model. They are very intense, impossible to photograph, and I'll probably never use them.
My advice to anyone planning to build cabinets for large models:
- Make separate cabinets for each model
- Make them stackable like an old Barrister's bookcase
- Forget the LED lights
-
-
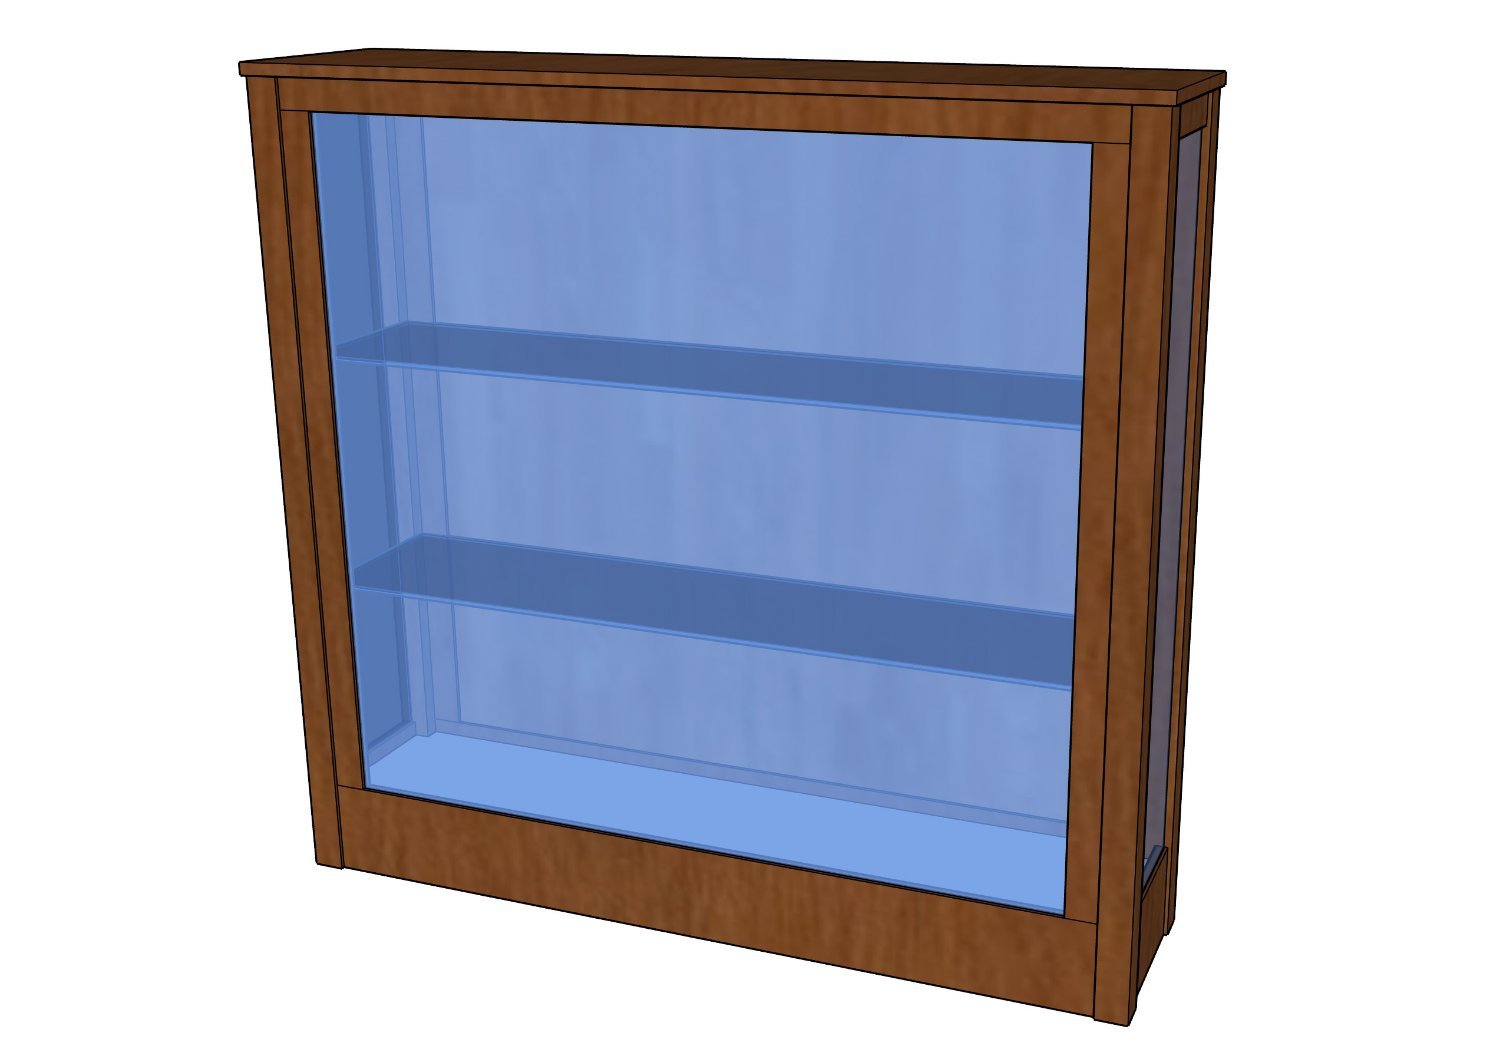
Display Case
I am building a display case for my three warship models - the Bismarck, Prinz Eugen, and Arleigh Burke. I started trying to model it in Sketchup, which I have used before. I wasn't happy with my original design so I started over with some simple sketches, and finished with a hand-drawn 3-view. I took a LOT of drawing in high school and one class in college, which immediately became obsolete- except when I want to make something. Here's my final 3-view from 8 days ago.
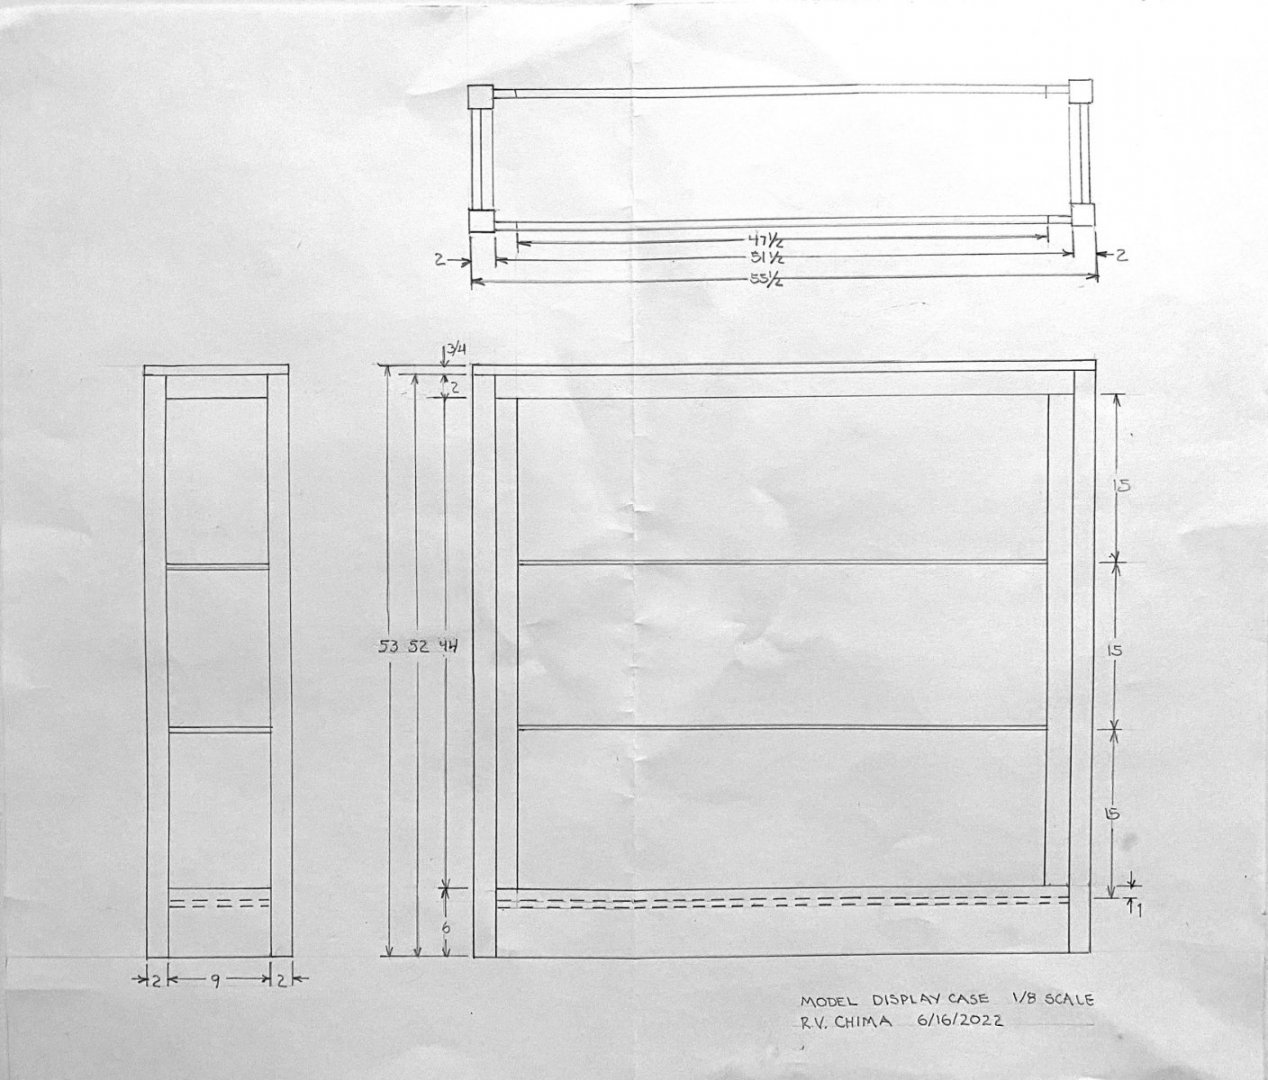
You can see that this is a BIG piece of furniture. The Bismarck is 50" long, but acrylic sells in 48" sheets, so that set the width. The Bismarck will be hidden a little behind the frames. The models are all around 14" high, so there will just be enough height for the three.
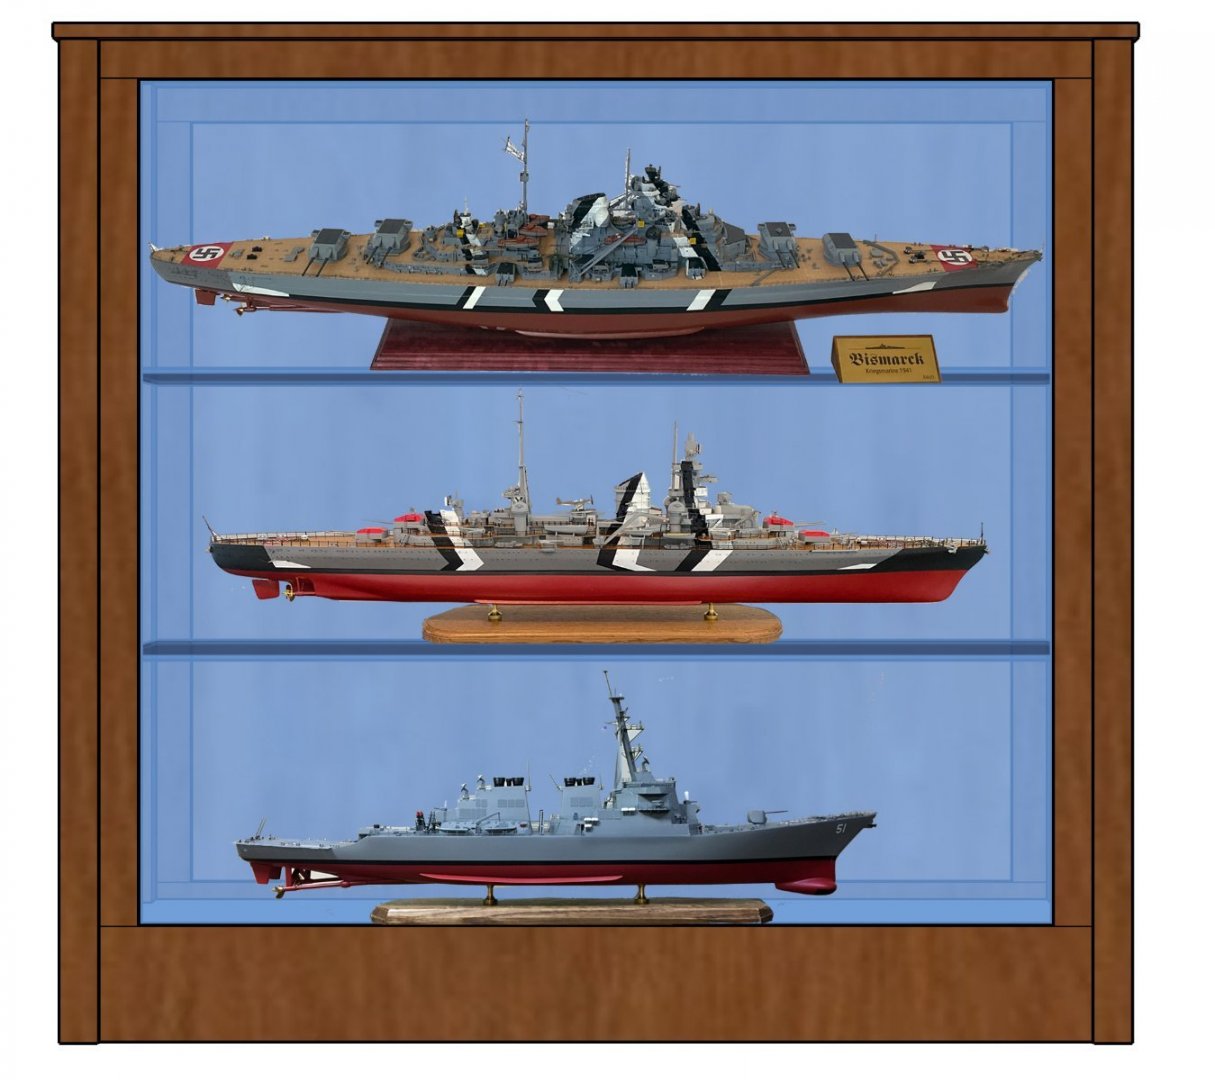
Later I went back to Sketchup and got some better views.

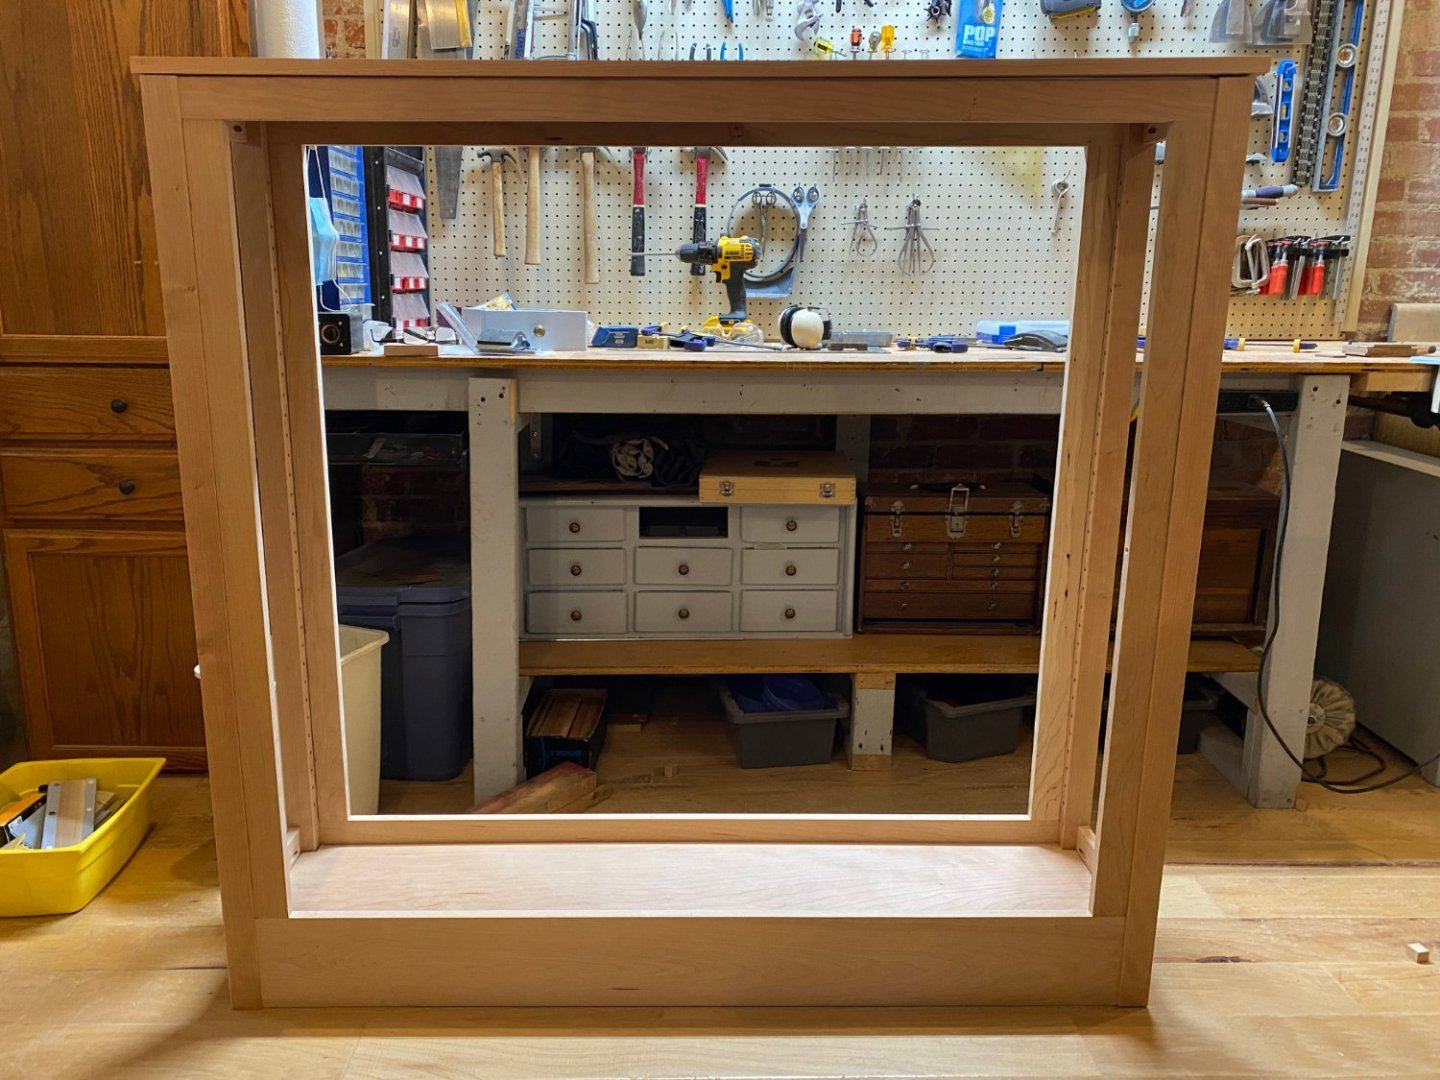
Last Friday I went to the lumber yard and bought $400 worth of cherry. Here's what I've finished since then.
A few days ago I ordered hardware and LED lights: $150.
Today I ordered 2 glass doors for the sides and 2 glass shelves: $225.
I also bought the acrylic front panel $115.
I haven't added it all up yet, but I think it was WAY more than I ever expected to spend on a display case. It will keep the dust off of three models, but right now my shop in our finished basement is covered with dust. Final photos soon.
-
Your photos look like the Bismarck is trapped in an ice floe. 😀
On 6/20/2022 at 11:53 AM, ted99 said:I will use the .7mm drill size that the instructions call for.
I don't remember what hole size I used. But cut out one stanchion and test the fit on a scrap of wood before you drill everything.
- Old Collingwood, Canute, mtaylor and 1 other
-
4
-
16 hours ago, hof00 said:
After much "Trolling" around on the Net, I found some 1/200 Chain Link Railing....
Chain railing Aber 1-200-02 (super-hobby.com)
I ordered four of these, hopefully, more than enough to do the entire perimeter of the Deck.
Very interesting! I've never seen anything like this. Some of the products still have you drilling holes though.
While you're waiting for the postman, try rigging 4 or 5 of the included stanchions on a scrap of wood. I think that you will find that it's easier than you expect. Spray the entire lot of PE stanchions with primer and one coat of gray first. Use a pin to mark the holes and drill with a tiny drill bit in a Dremel at low speed. The holes don't have to be very deep, so they won't poke through. Maybe 1 stanchion in 20 had to be cleaned out with a bit in a pin vise. I did that after they were installed and just backed up the stanchion with a scrap of wood.
-
Ted,
Beautiful work on all the fiddly bits. The decals look perfect. Your model is starting to look very interesting with all the exposed brass.
And with the Missouri and the Yamato under the bench, you will be busy for a LONG time!
Rod
- Canute, mtaylor and Old Collingwood
-
3
-
Harry,
Nice work on the deck. It looks like the gap is just about right.
Some of the stanchions are braced like an upside-down V (a lambda?) with the upright into the hull and the brace a bit higher glued flush on the deck. Cut one out and try it just so you know what to expect. There are plenty of spare stanchions.
Don't trust the specified hole dimensions for the turret mounts. Attach dowels to the turrets and then drill the holes undersized so that they fit tight but can still swivel.
- mtaylor, Canute and Old Collingwood
-
3


Seguin 1884 by rvchima - FINISHED - BlueJacket Shipcrafters - scale 1:48 - wooden steam tug
in - Kit build logs for subjects built from 1851 - 1900
Posted
Cabin & Pilot House
The cabin and pilot house are made from 0.96 mm laser-cut ply skinned with 0.86 mm scored basswood decking. The doors and windows are laser-cut 0.5 mm ply with a lot of char to sand off. That always leaves a charcoal mess.
The cabin and pilot house fronts are framed with basswood, with the ply bent around wet and glued with CA. Easier than I expected. Last night I thought I stained everything, so of course today I found the pilot house on my other bench unstained.
The roofs will be painted light gray. Here they just have a coat of primer and need to be sanded. The instructions say that the companionway (stairs) is optional, but the roof already has a hole cut for one. So you are going to make a companionway. There is no corresponding door cut on the starboard side, so I had to assemble the entire cabin with masking tape to see where the door should go. You can see it framed in on the left of the photo above. There is a rough sketch of the stairs in the plans but no dimensions or parts.
Here's what I came up with. Those are mighty steep steps. Again this just has primer and needs sanding. Maybe I'll add a brass rail after it's painted.