


rvchima
-
Posts
660 -
Joined
-
Last visited
Content Type
Profiles
Forums
Gallery
Events
Posts posted by rvchima
-
-
10 hours ago, hof00 said:
(Hope you don't get too many seismic events looking at where you have got the ship sitting!!)
Unlike New Zealand we rarely have seismic events here.
- mtaylor, Old Collingwood, hof00 and 1 other
-
 4
4
-
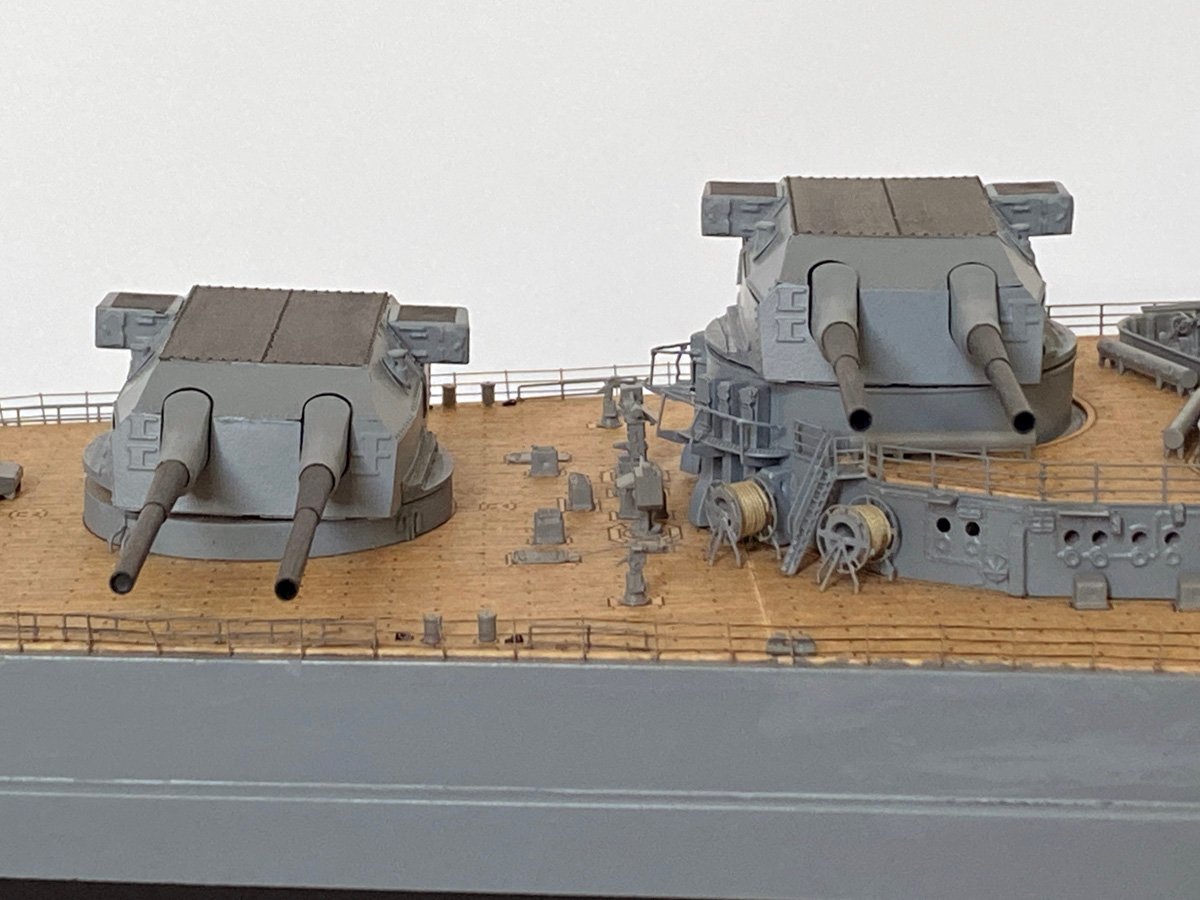
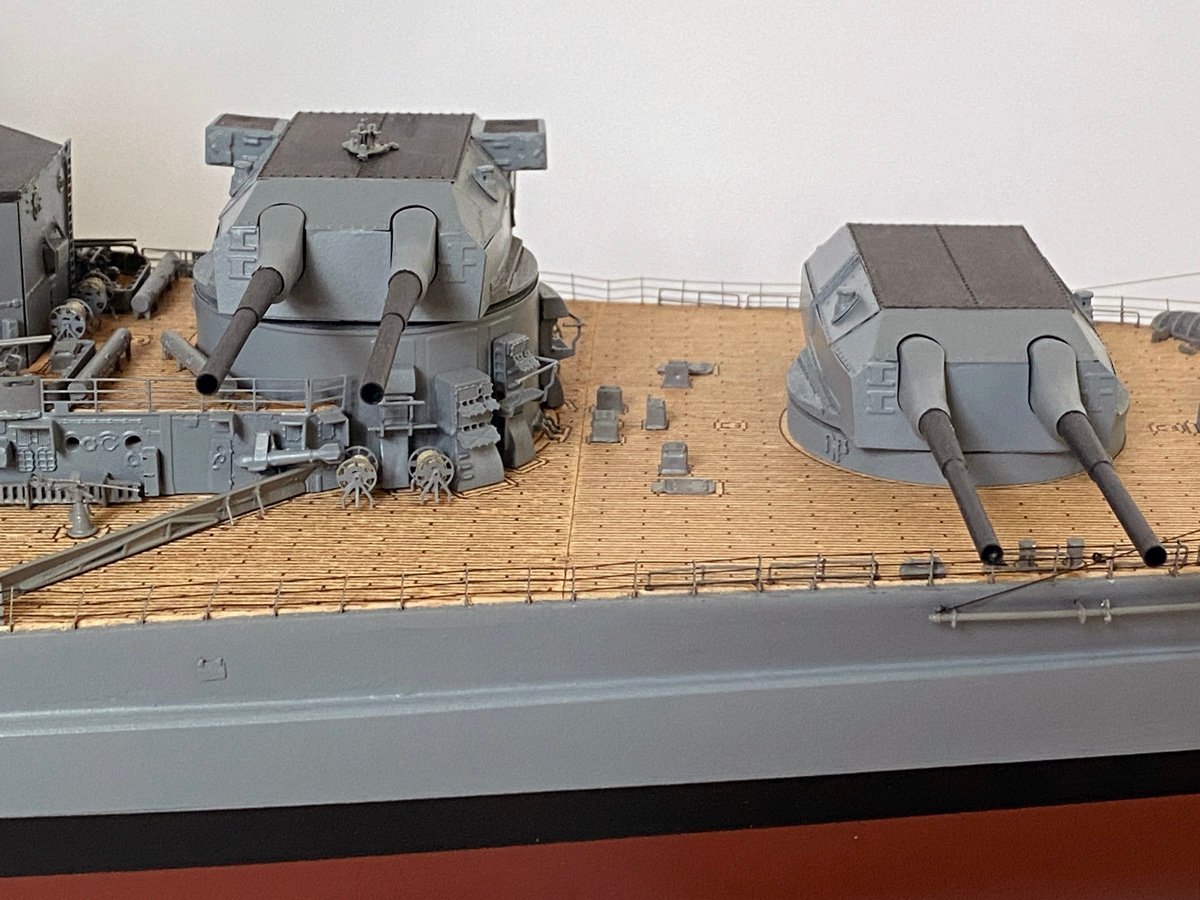
2 hours ago, Ian_Grant said:
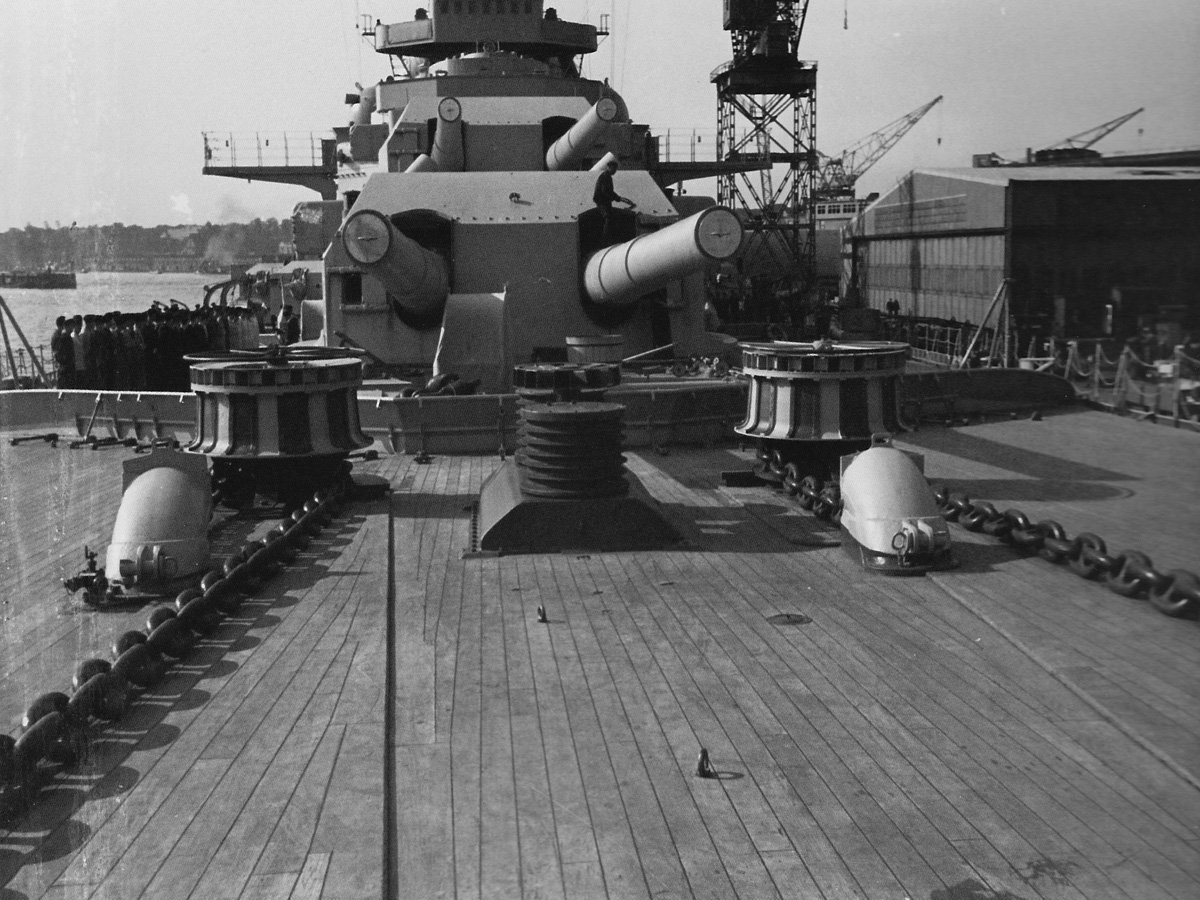
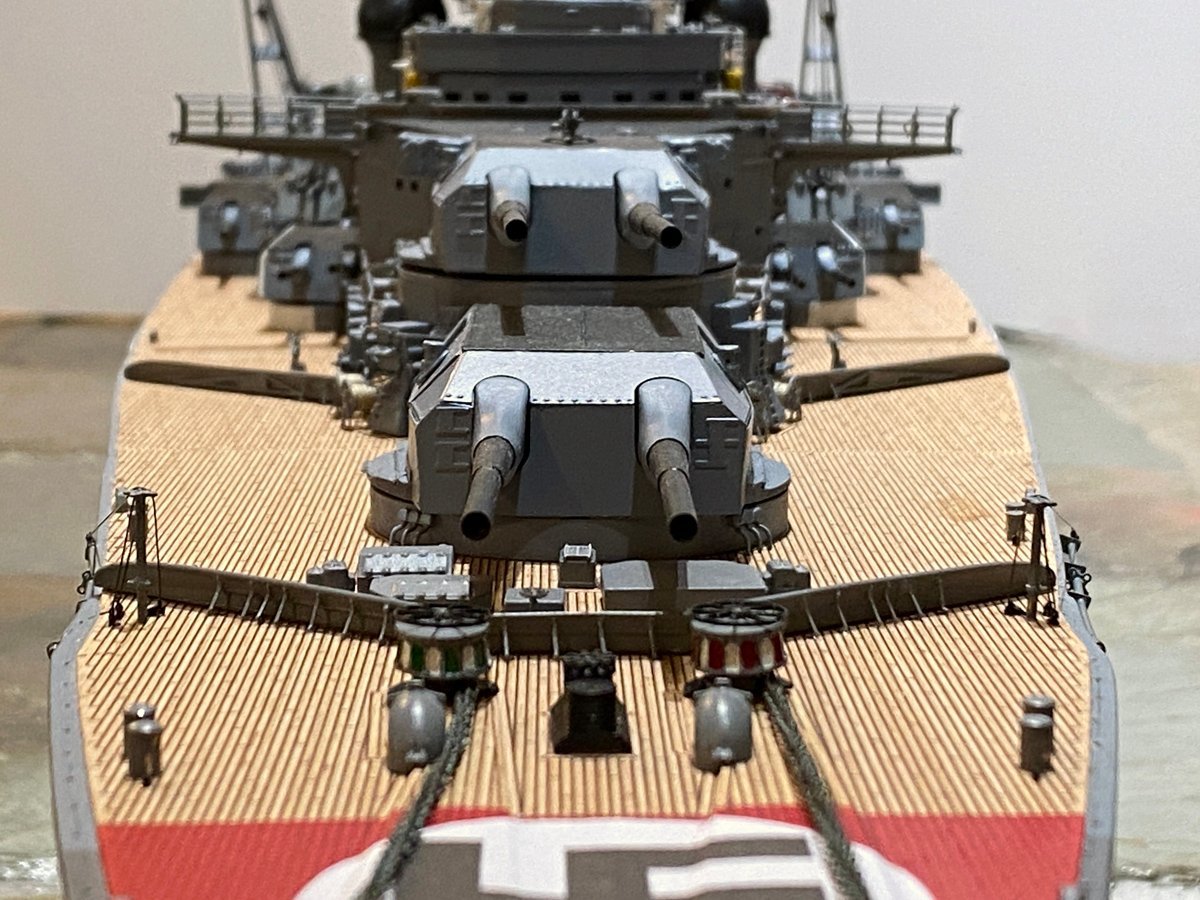
Pardon an uneducated question, but why does the first turret lack the protuberances on the aft sides that the other three sport?
Those protuberances are rangefinders so the gun crew can fire independently of the three main fire control stations. After the ship entered service it was found that the rangefinders on the first turret were frequently flooded with sea water, so they were removed.
- Old Collingwood, Canute, mtaylor and 1 other
-
4
-
19 hours ago, hof00 said:On 6/4/2022 at 11:55 AM, ted99 said:
Harry--In case you decide against painting, I got decals from an Australian company. Custom Hobby Decals. website www.customhobbydecals.com. They are a very heavy gauge--probably because of the size--and a decal setting solution is absolutely necessary. The bow one is particularly difficult to get adhesion because of the anchor chain wear decking. I have completed my move and restarted my build. I'll post a picture of the deck with decals tomorrow. I think that paint is the better solution, but that needed tools I don't have.
Hi Chap,
Thanks for that!!
I could paint these but I don't want to tempt fate, I'd rather have something that I can just "Place" to achieve the desired result.
Just had a look at the site, this might just be the ticket!!🙂
(Australia is not too far away so shipping shouldn't be too costly.)
Could you please detail exactly the item you ordered?
Good to see you back, I was wondering where you had got to.... 🙂
Cheers and Regards,
Harry.
Hi Ted,
Yes, great to see you back! Nothing like moving to spoil a hobby. I'll be following your build with interest.
Rod
- mtaylor, Old Collingwood and Canute
-
3
-
Bismarck by rvchima - Amati - Scale 1:200 - WWII German Battleship - FINISHED
530 Hours, 225 Days
The Bismarck is finished and my bench is cleared off, ready to start a new project. I kept a "diary" of my build, and it took me about 530 hours over 225 days. I took off a couple of weeks around the holidays and all of March, so on average I put in about 3 hours per day. Your mileage may vary.
This is the most expensive kit I've ever bought at close to $700 US. I also spent around $200 for brass props, glue, paints, and pedestals and wood for the base, so my hobby cost about $5 per day. My wife is happy that I'm not into real boats.
This is also one of the nicest kits I've ever built. The wood is excellent, the laser cutting is perfect, and the photo etched parts are superb. The two instruction manuals are the best I've ever seen. The plastic parts were not quite as good. Some had molding cavities that had to be filled, and the many staircases were made from some more flexible plastic that did not glue well. I've made three kits by Amati now - their Bismarck, U-boat 47, and Arno XI Ferrari hydroplane. They were all excellent kits, and I highly recommend any of them.
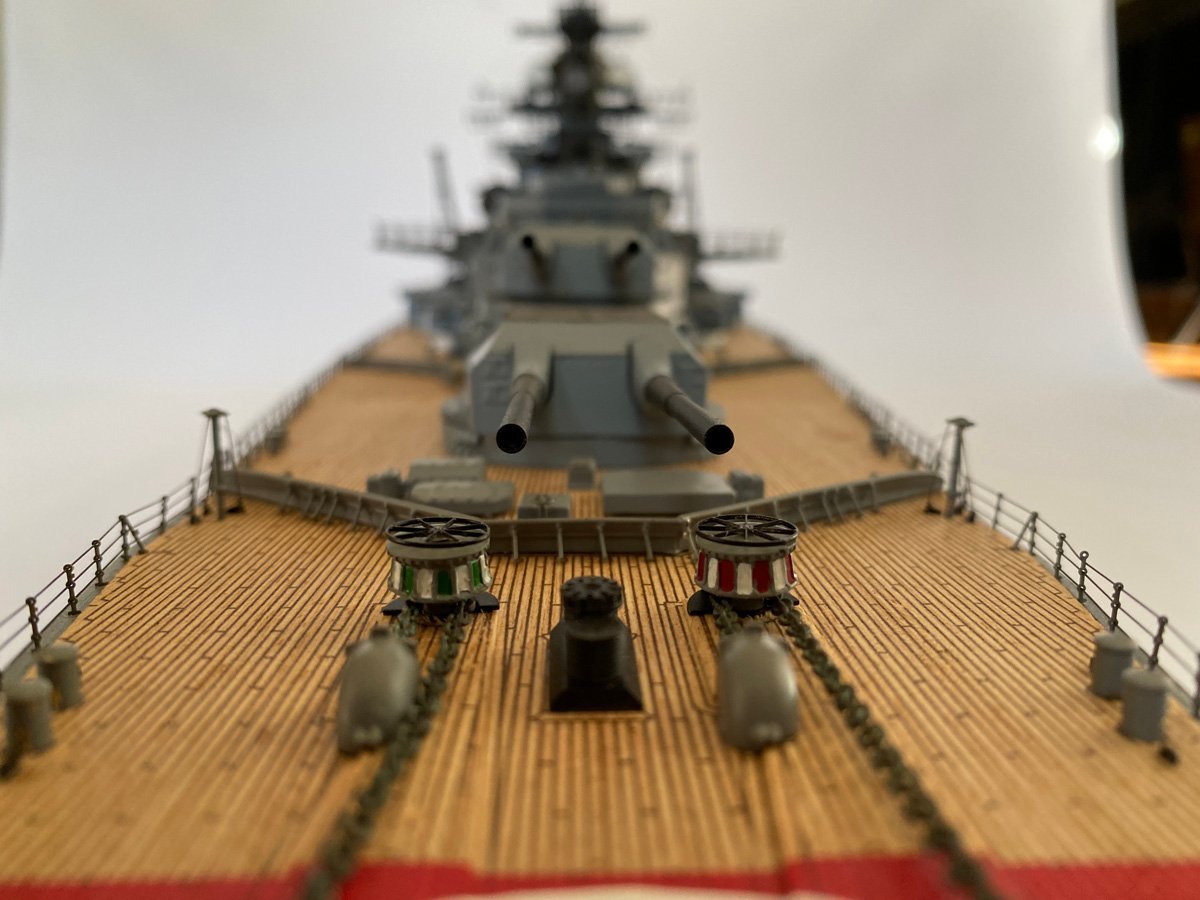
Final Photos
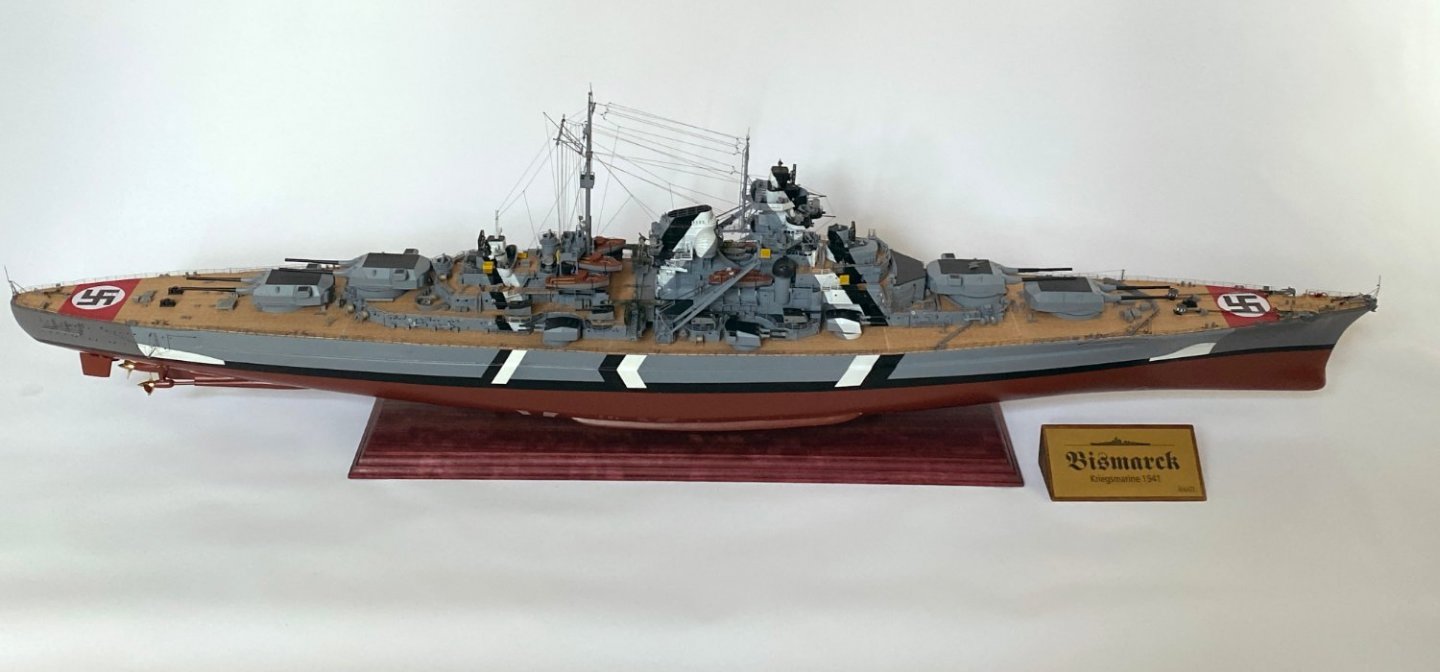
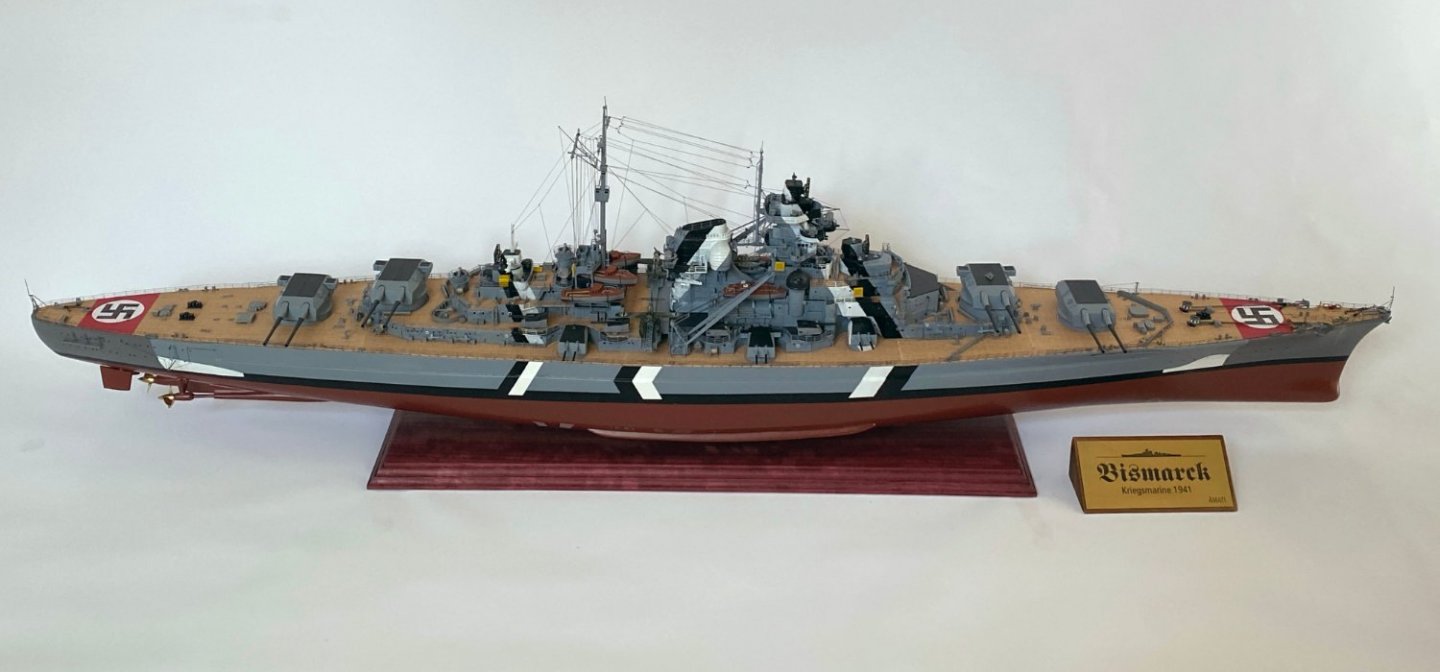
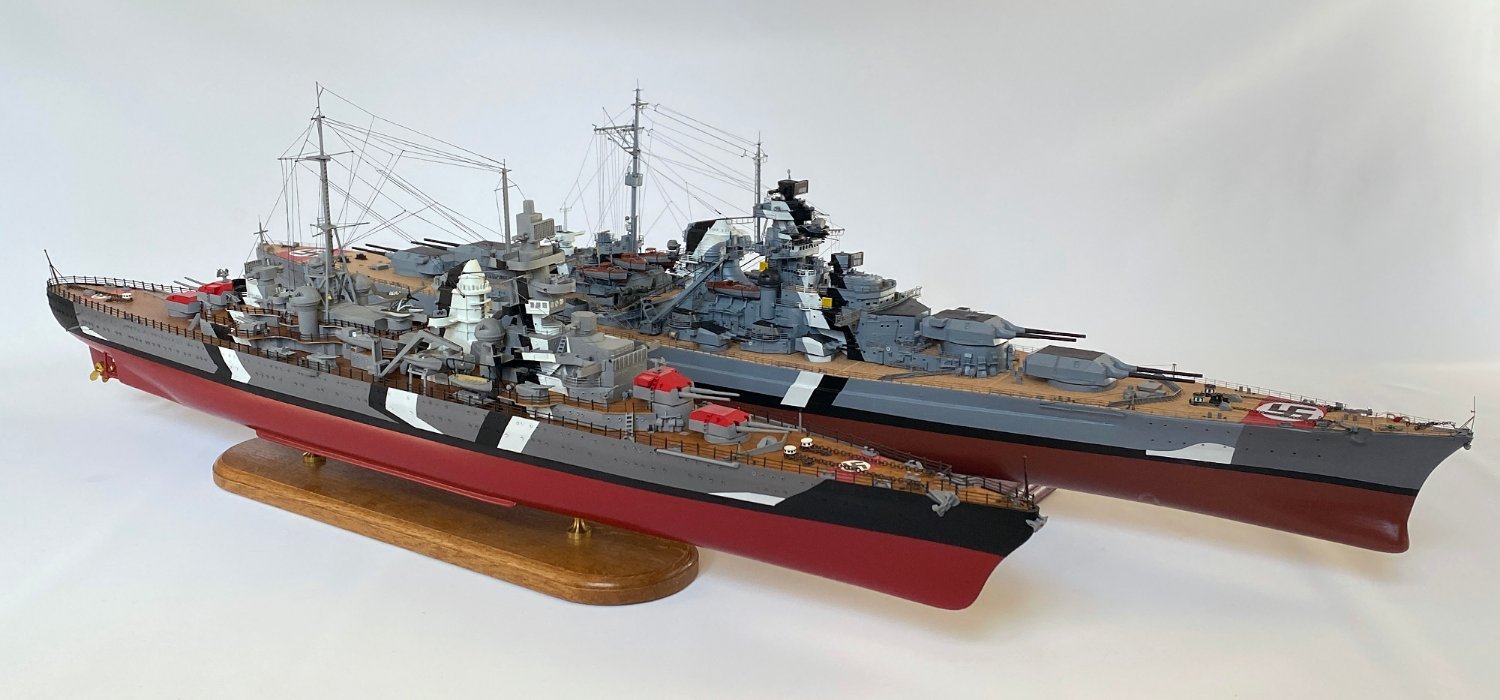
All guns to starboard.

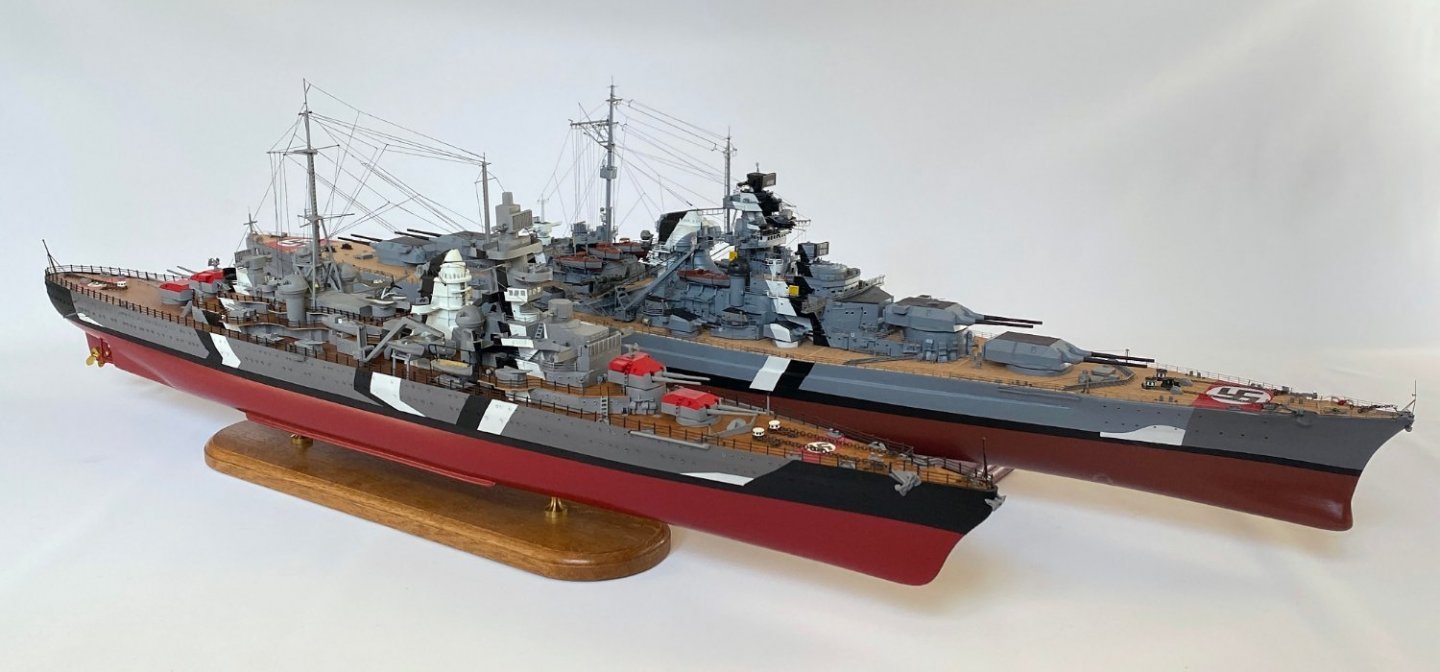
The Bismarck with the Prinz Eugen "light" cruiser by Aeronaut, both at 1/200 scale.
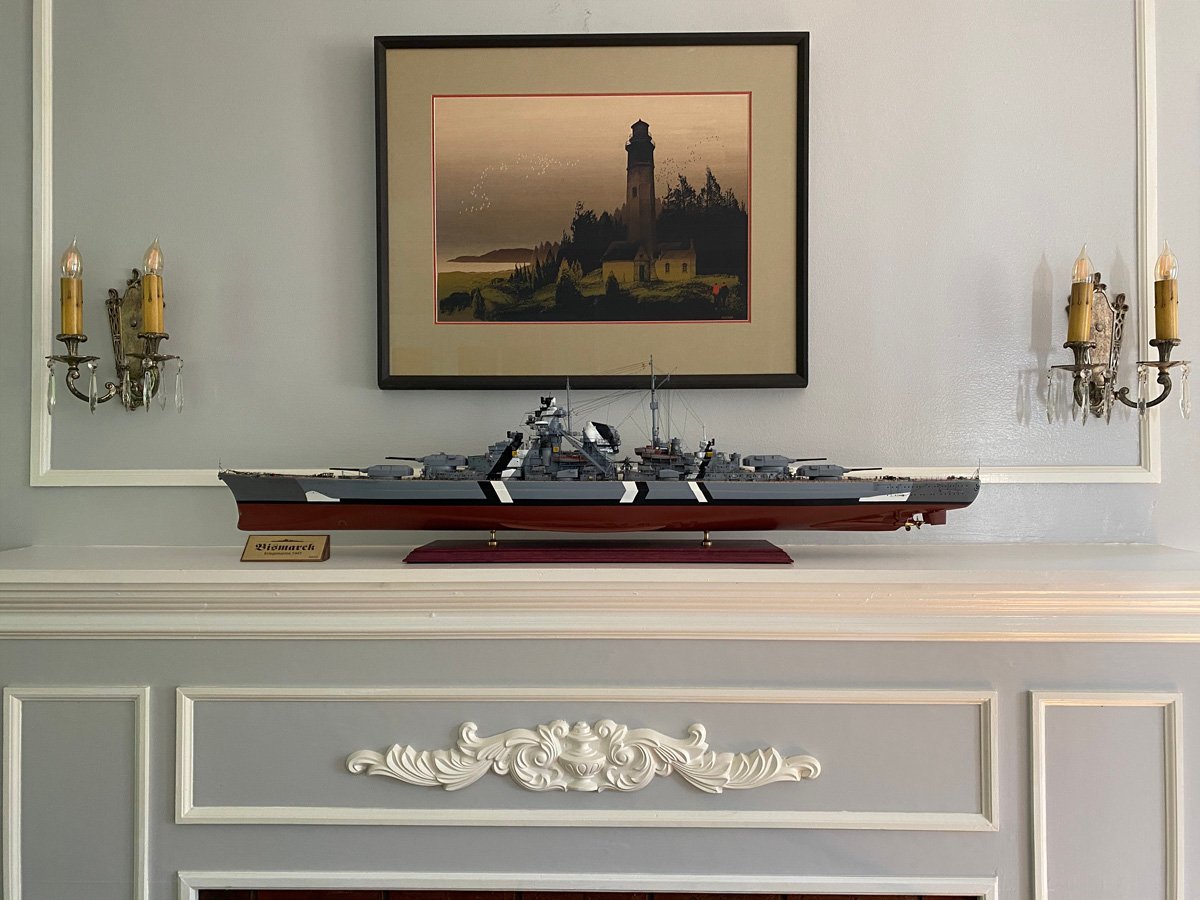
The Bismarck is on the mantle at the moment but won't remain there long. Probably only until my wife comes downstairs.
-
On 5/31/2022 at 4:42 PM, hof00 said:
By Deck Transfers, I am alluding to the Swasticker markings, or, more correctly, Air Recognition" markings.
Were these supplied or did you paint these?
Harry,
I made the markings in Photoshop and sent you the file by private message. You should be able to print them yourself.
- hof00, Canute, Old Collingwood and 1 other
-
4
-
Hi Harry,
Thank you for your kind words. It's been a pleasure "working" with you, and I am keen to see your ship finished too. I will keep up with your build log, but if you have questions just message me directly to make sure that I see them.
What's next?
- My wife has me signed up to build a decorative arbor for the garden.
- A 1:16 Sopwith Camel by Artesania Latina. I've built Model Expo's Fokker Triplane at the same scale.
- A 1:48 scale Seguin tugboat by Bluejacket Shipcrafters. Mostly wood, almost no PE or plastic to fiddle with.
19 hours ago, hof00 said:(I do have another question for you at this time: Where did you procure the Deck Transfers?)
Sorry Harry, I don't know what you meas by "deck transfers."
- Old Collingwood, hof00, mtaylor and 1 other
-
4
-
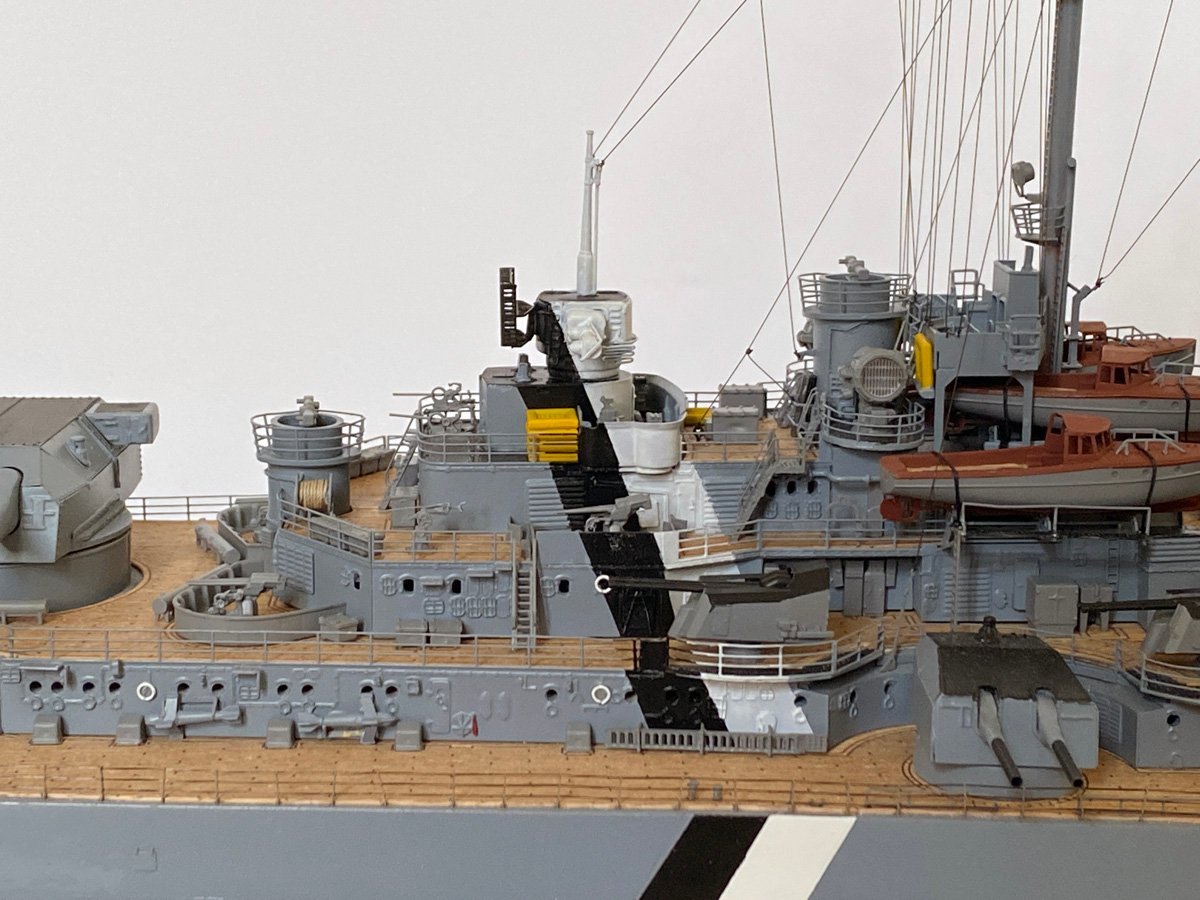
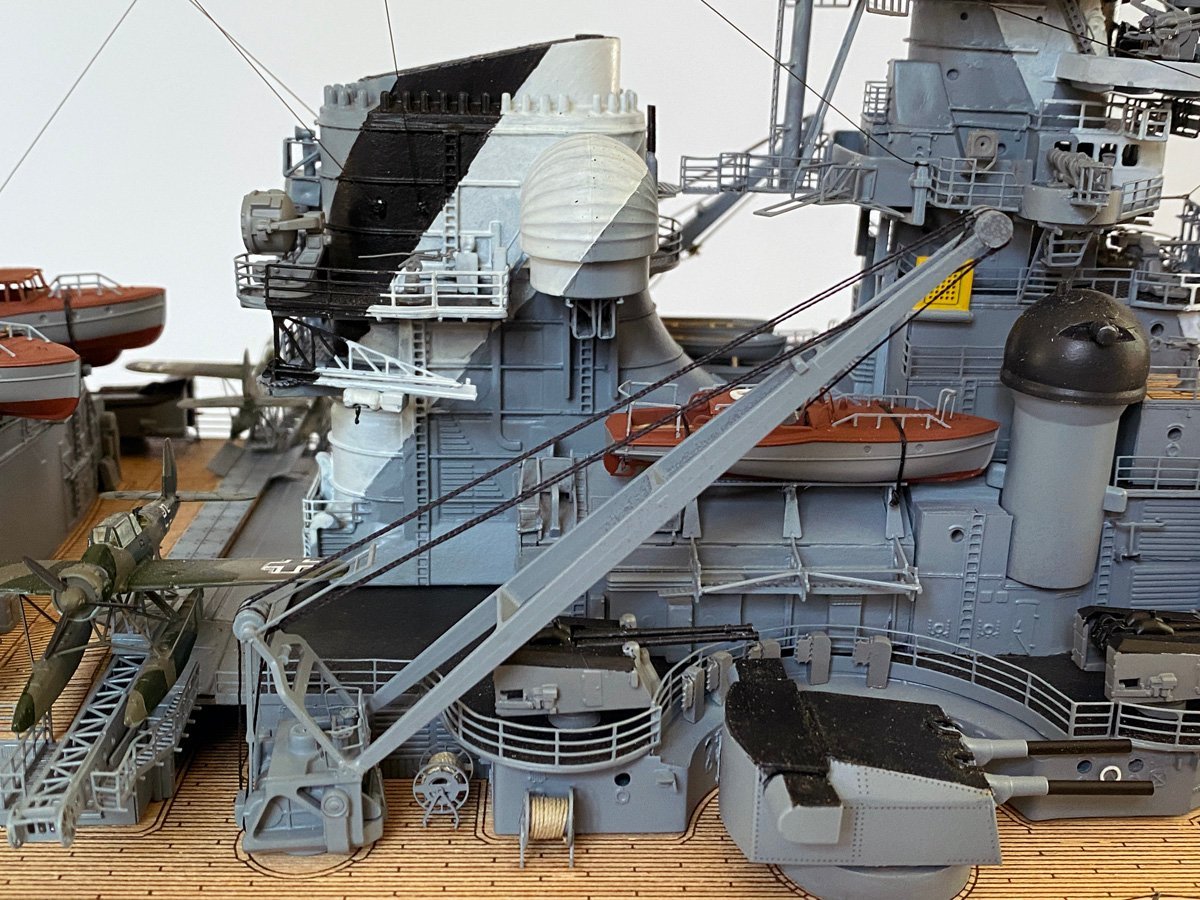
Rigging
I finished the rigging yesterday and am working on the handrails. It's all done with 0.2 mm black monofilament line, which has been a pleasure to work with. It's extremely strong, doesn't kink, and glues solid with a spot of CA.
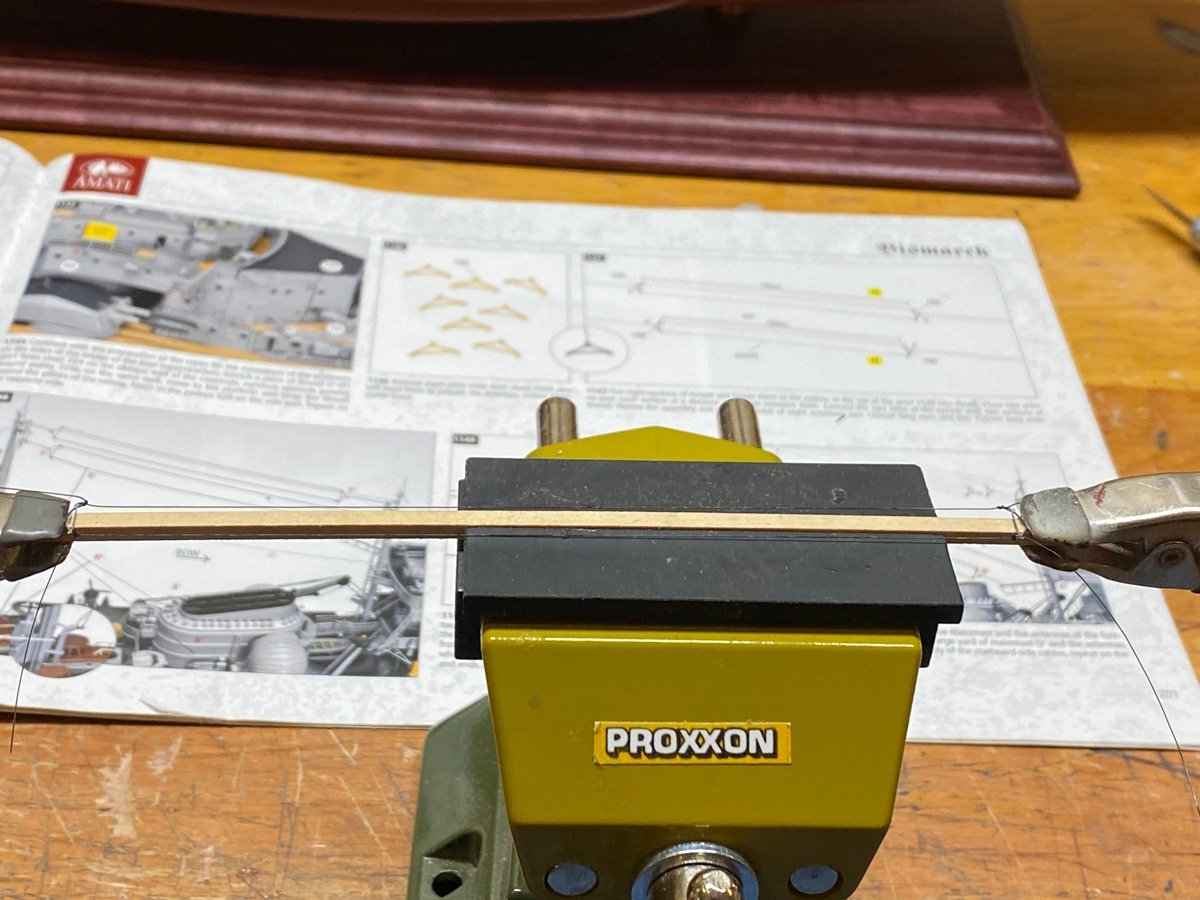
There are 4 double antennas tied to tiny triangular PE pieces. I clamped the pieces to a stick to get the two lines the same length.
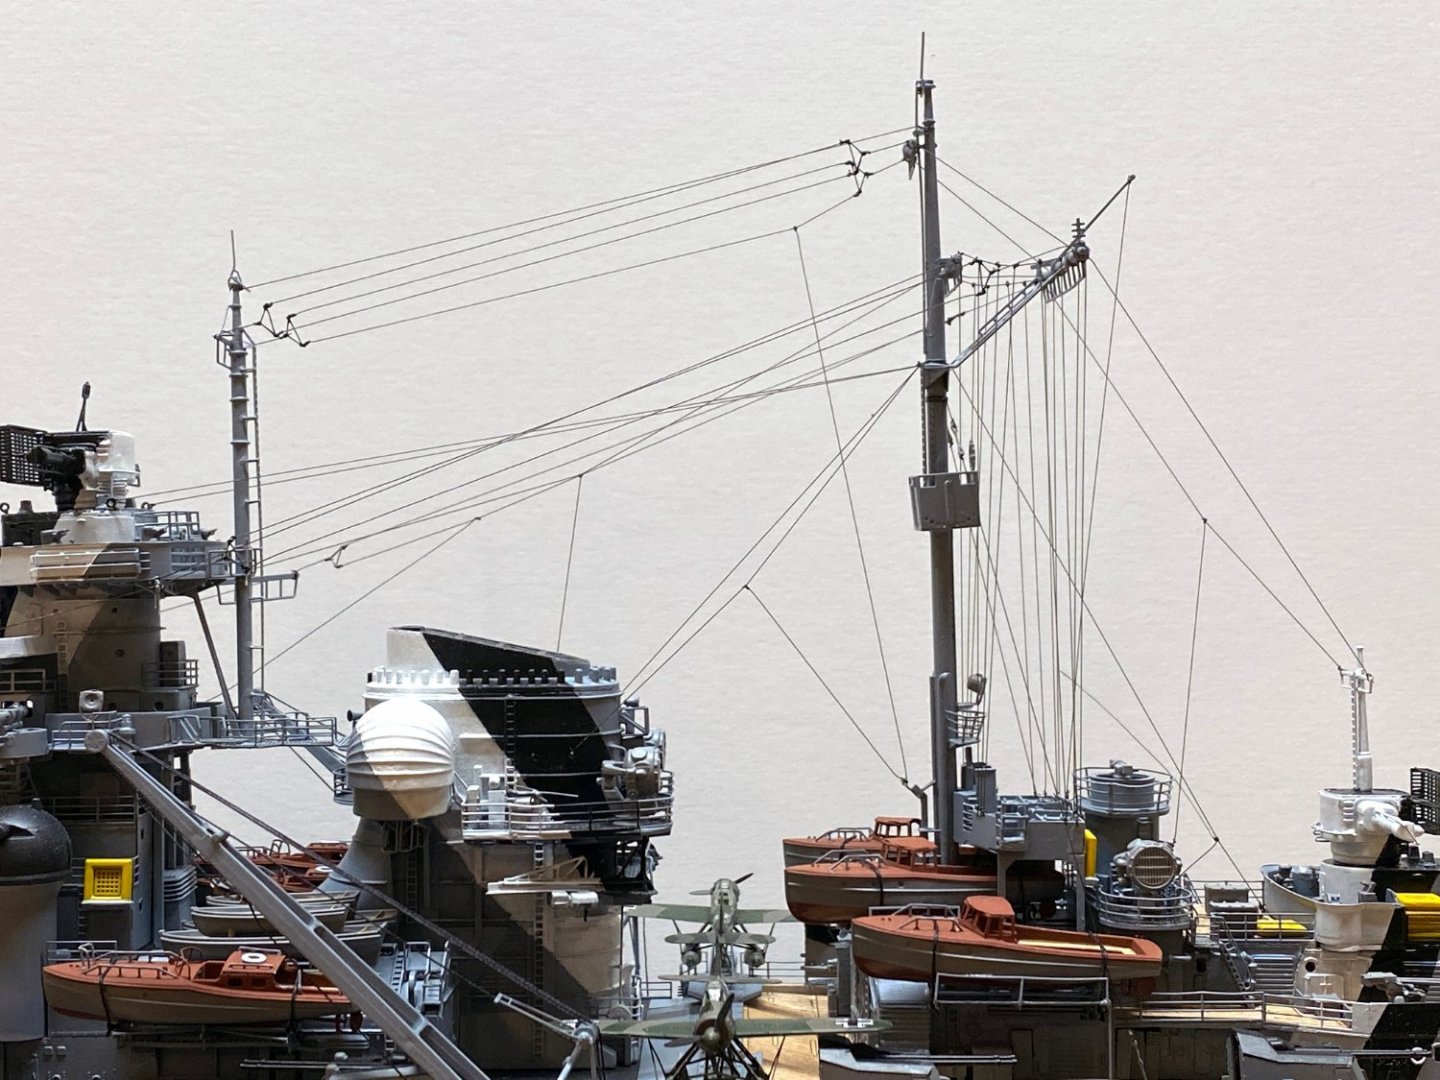
Here's the rigging in all its glory. I left this photo at full resolution so you can see the lines.

The handrails comprise about 150 PE stanchions on each side of the ship threaded with three layers of monofilament line. I was dreading this task, but it's only taking about one hour per line. You can literally pull one end of the line and tighten it the entire length of the ship.
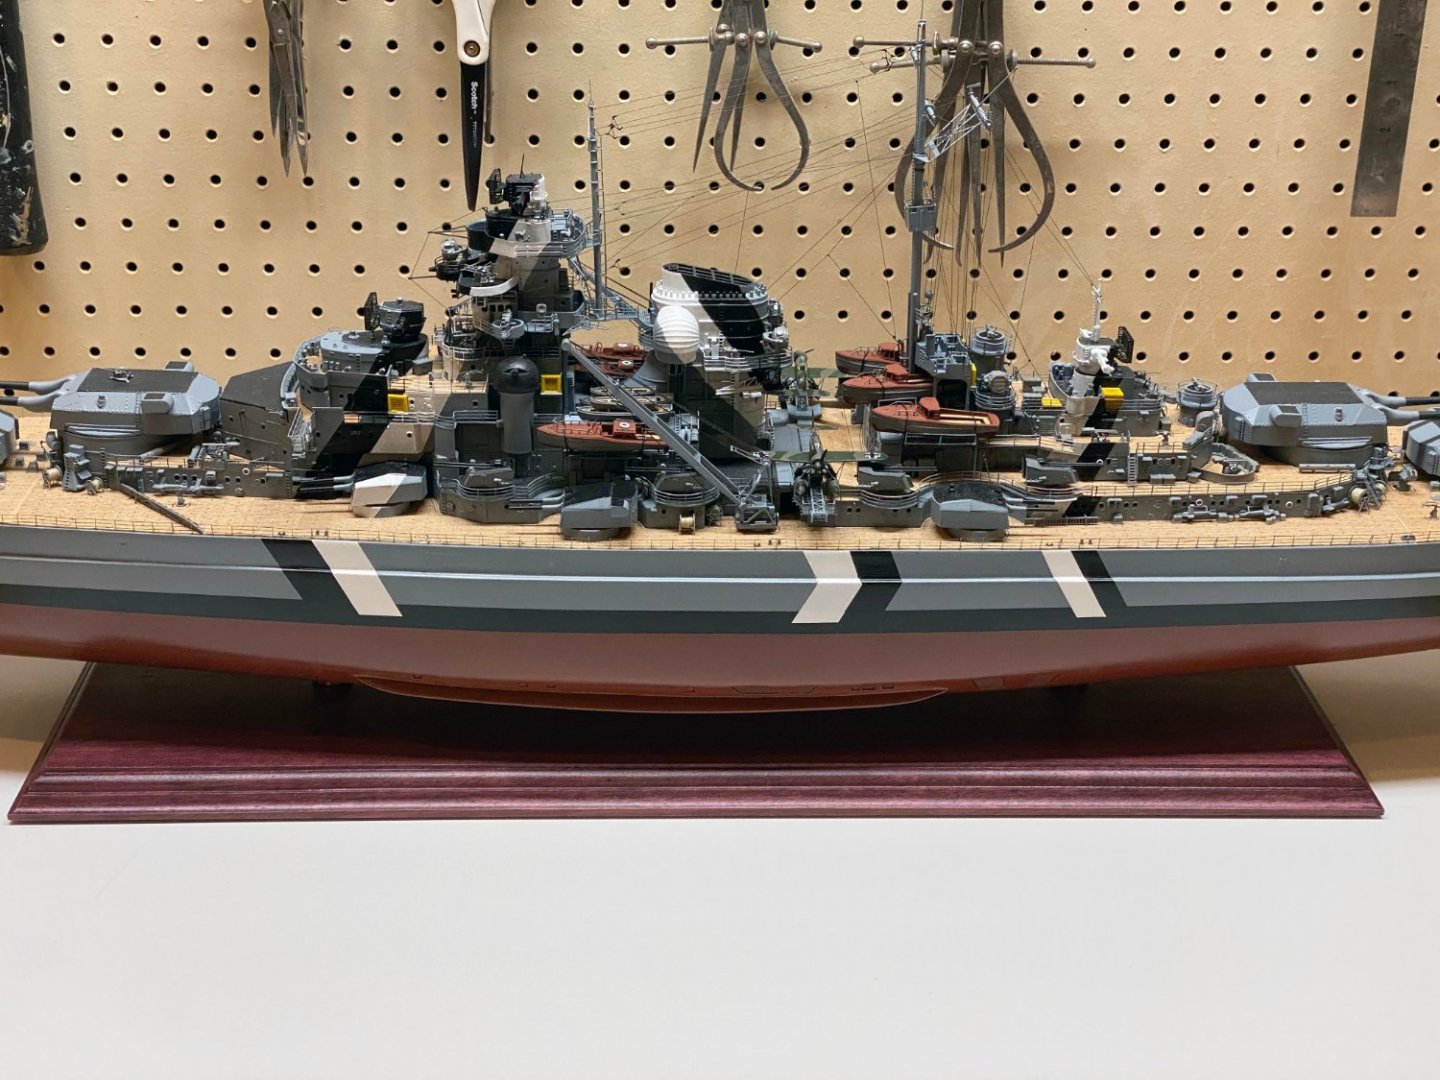
I finally made a new base for the model using purpleheart wood. The color looks good with the anti-rust color of the lower hull, and it will turn a little browner with age.
-
Ken,
I've never had the pleasure of meeting an F-4 pilot before. Thank you for your service, and I hope that you have a relaxing Memorial Day.
I just realized that we're practically neighbors, so you might have guessed that I saw the movie at the Asheville Brewing Company. It might be better on a bigger screen but you can't beat the food and drink.
-
Top Gun Maverick
I saw Top Gun Maverick last night at a local theater/brewery/pizza place. If you liked the original Top Gun in 1986, you will love this sequel. The action scenes are incredible, (maybe a little too incredible at the start of the movie), and the ending is is a fun throwback to the original. They've eliminated some of the sexist scenes and added a diverse cast, while still allowing Tom Cruise to be a maverick. The mission that Cruise and his students fly is a clear reference to X-wing fighters attacking the Death Star in Star Wars. It doesn't get much better than that.
-
On 5/25/2022 at 8:16 PM, pietkm said:
Now up to the perimeter railing, which my old eyes found one of the most difficult parts
of the build. But if you like ratlines you're gonna love this one.
Piet
Hi Piet,
It sounds like you have finished your Bismarck, so congratulations must be in order! We'd all love to see a photo or three if you can borrow a camera.
Rod
-
19 hours ago, hof00 said:
I'm currently working on finishing the Arados, one with folded wings. These are a little problematic in some respects, probably just the builder....
A question here for you,:
Did you use the painted Masking Tape method for the Canopy framework?
My instructions refer to placing strips 1.0mm wide but this just looks too wide....
Harry,
My kit came with a small piece of self-adhesive black tape cut into two strips about 0.5 mm wide x 60 mm long. At first they didn't seem to stick very well and I considered cutting down some Monokote (model airplane covering) trim tape. But I ended up using the tape supplied with the kit and it hasn't come off yet. 😟
I had a similar gap between my superstructure and deck, but I don't remember exactly which piece it was or how I fixed it. I think there was enough flat surface on top that I could put a a couple of big C-clamps between the superstructure and the bottom of the hull. Maybe I just put some weights on top. I used 5-minute epoxy for the joint, so the whole thing was done and forgotten in 5 minutes. Sorry I can't be more specific, but I think I just muscled it into place.
- mtaylor, hof00, Old Collingwood and 1 other
-
4
-
Harry,
A word of advice regarding the PE bridge that surrounds the main mast and covers four boats. You built it back in January. It sits on four thin PE legs. When you attach it, make sure those legs are glued down securely. Use epoxy and scrape any paint from the feet and attachment points. There are about 15 antenna lines that pull vertically on that structure. Mine came off while I was rigging.
I am rigging with the nylon line that came with the kit, and am very happy with it. It is very thin (0.20 mm) and fits through the tiny holes in many parts. It is easy to tie and can be pulled tight with tweezers. My rigging is taut enough that I could play a little tune on it. I glue all the knots with a drop of thin CA. EzLine worked well on the Prinz Eugen but would never go through these tiny parts.
- Canute, Old Collingwood and mtaylor
-
3
-
Harry,
Can you hold the superstructure in one hand and carefully sand the bottom with a sanding block? Try to lower the high spot?
If that doesn't work, glue the superstructure in place and fill the gap with Vallejo plastic putty. It comes in a squeeze tube with a long, thin nozzle. It's acrylic so you can clean up excess with a wet cotton swab. I also like the micro disposable paint brushes for clean up & touch up. Afterwards mask the edge with 1/8" tape and touch up the white putty with your gray paint. It will look fine.
- Old Collingwood, Canute and mtaylor
-
3
-
-
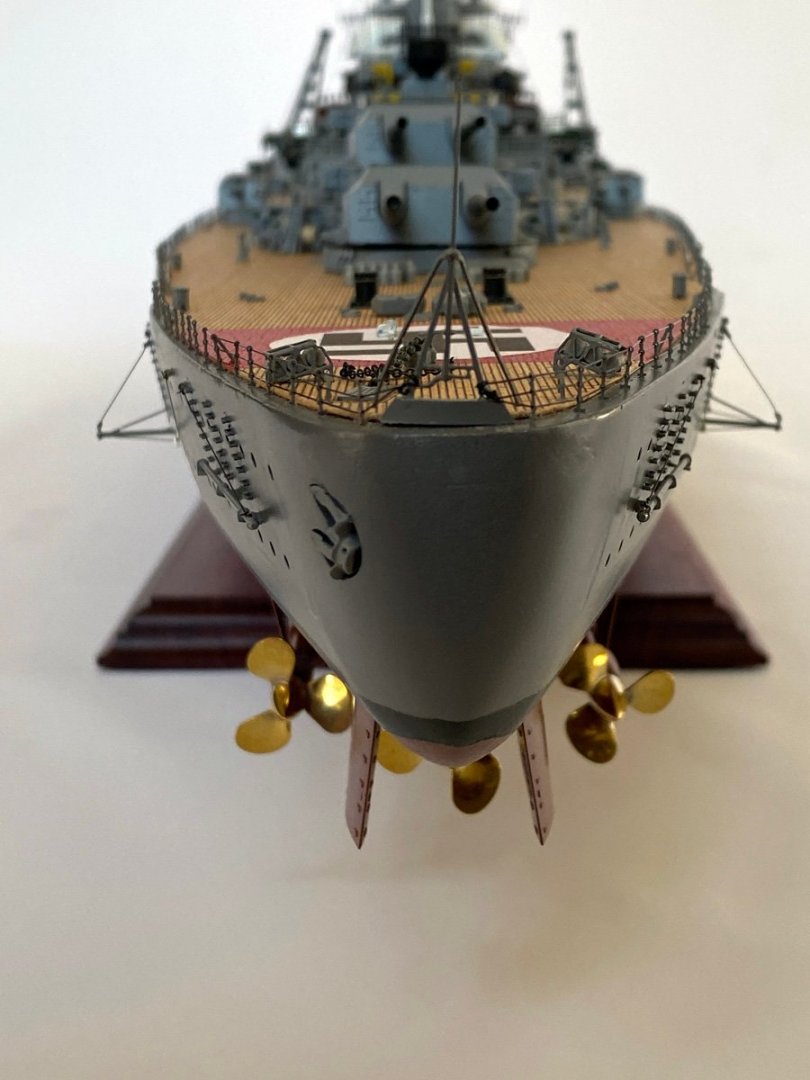
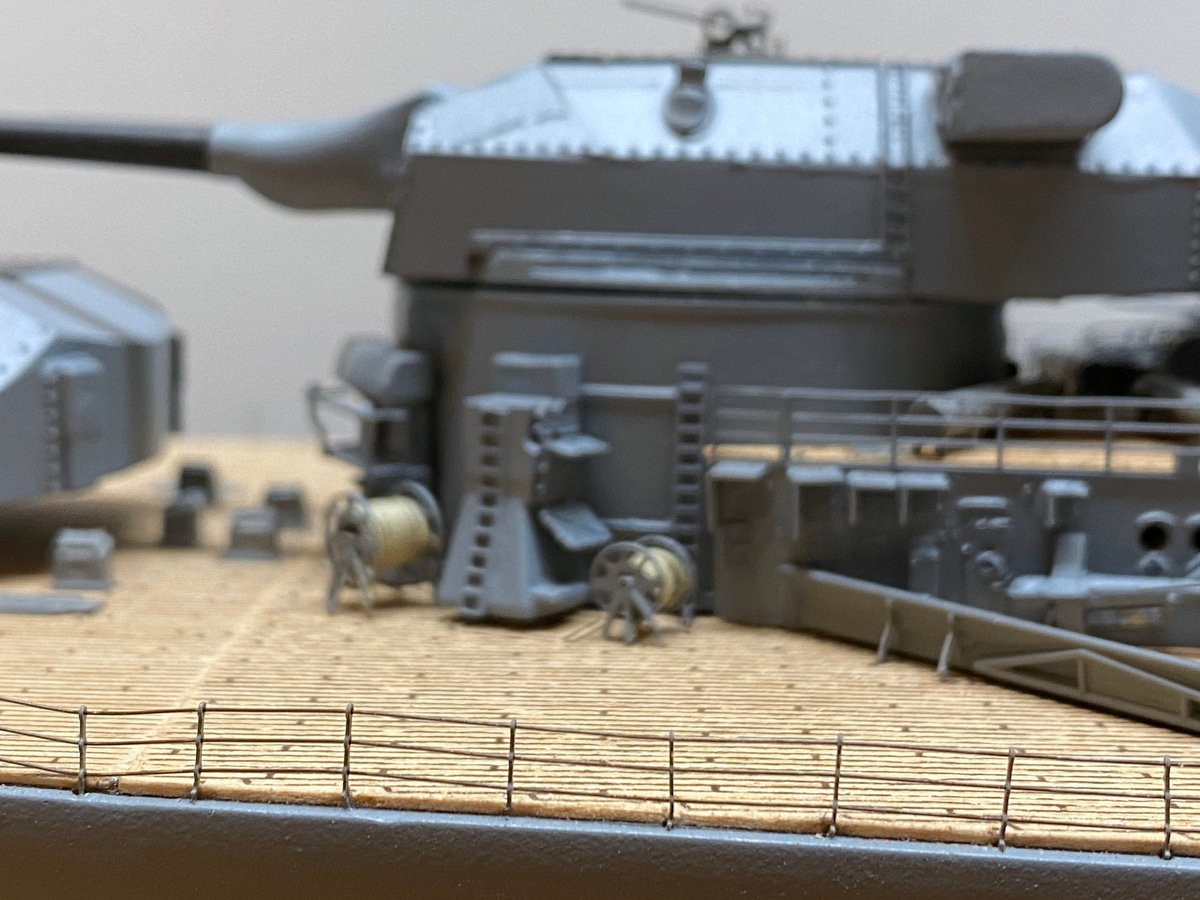
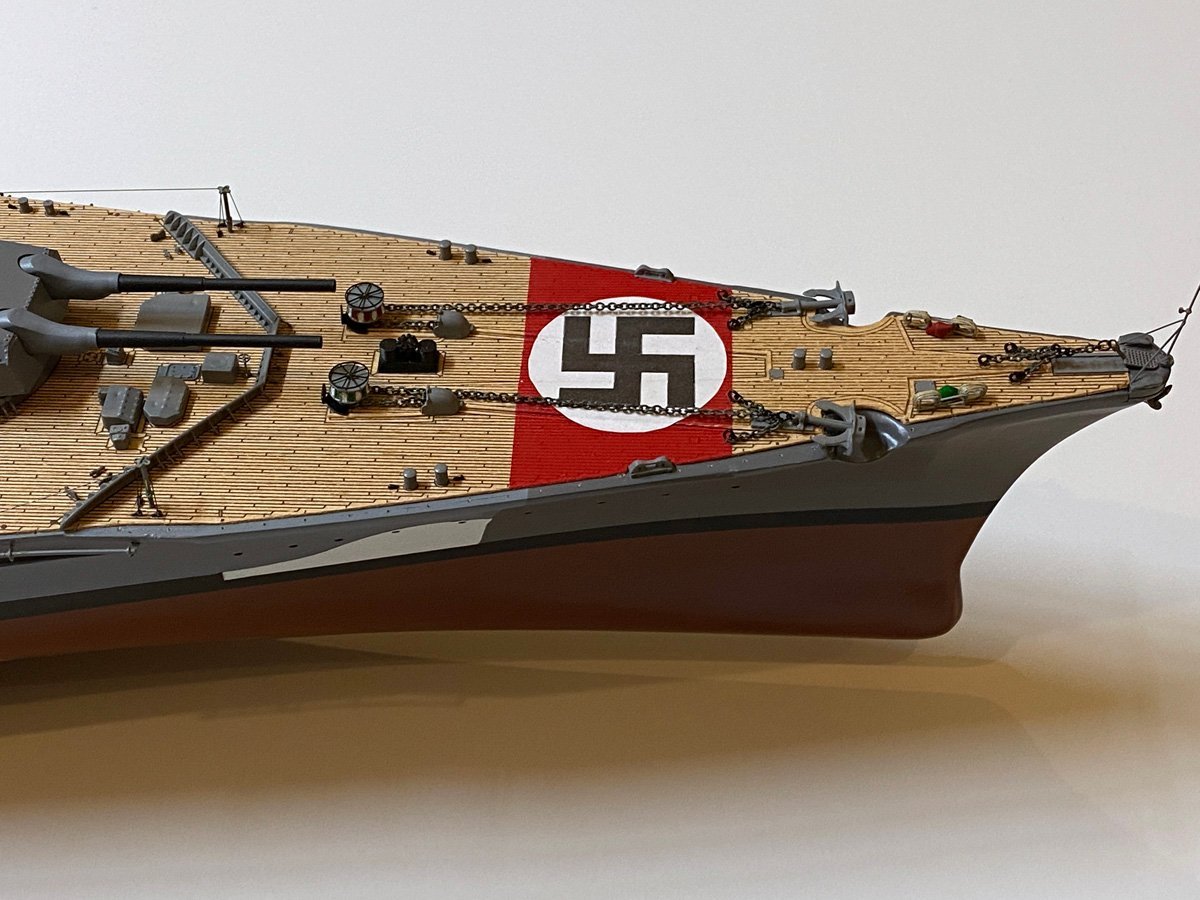
Bow & Stern Details, 500 hours, 217 days
I've been working on the numerous hatches, bars, capstans, anchors, etc. on the bow and stern. They just pushed me over the 500 hour mark on this build.
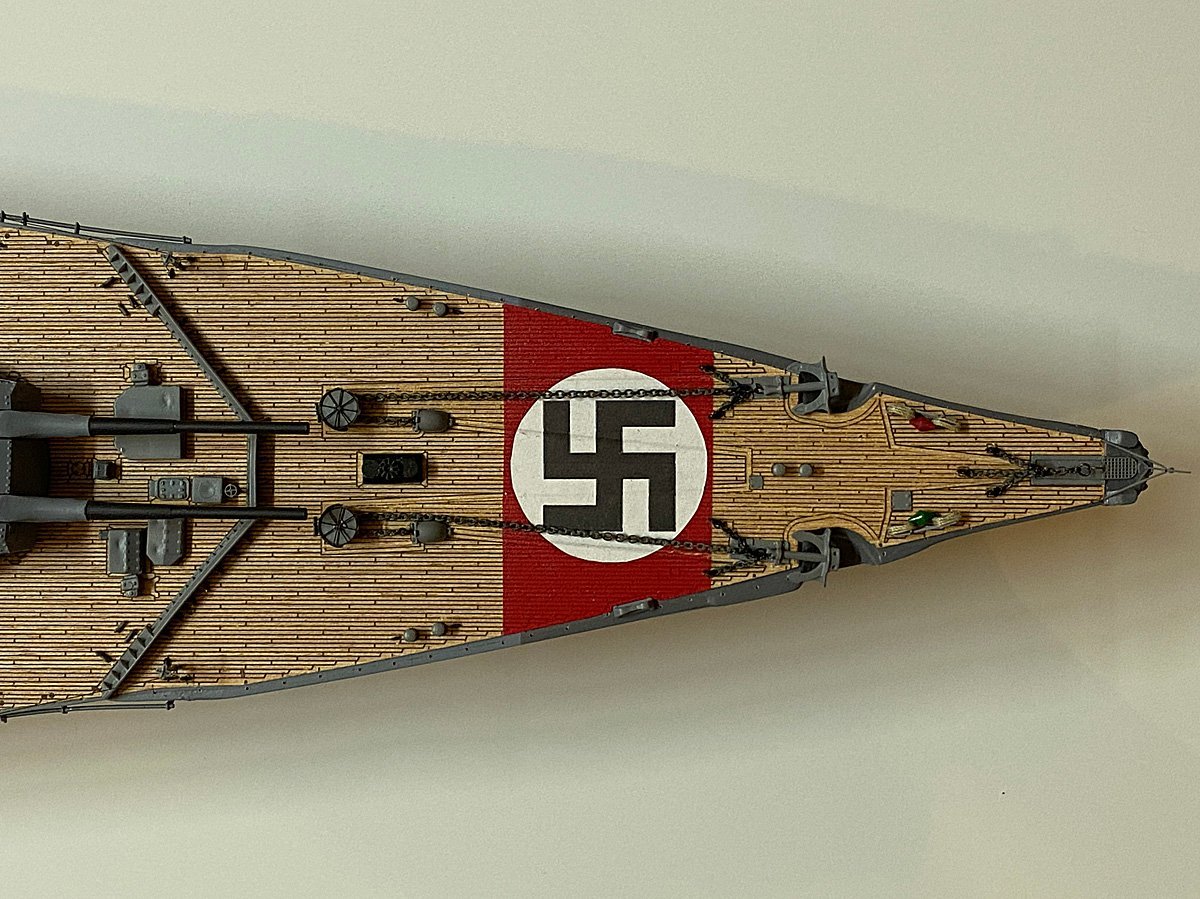
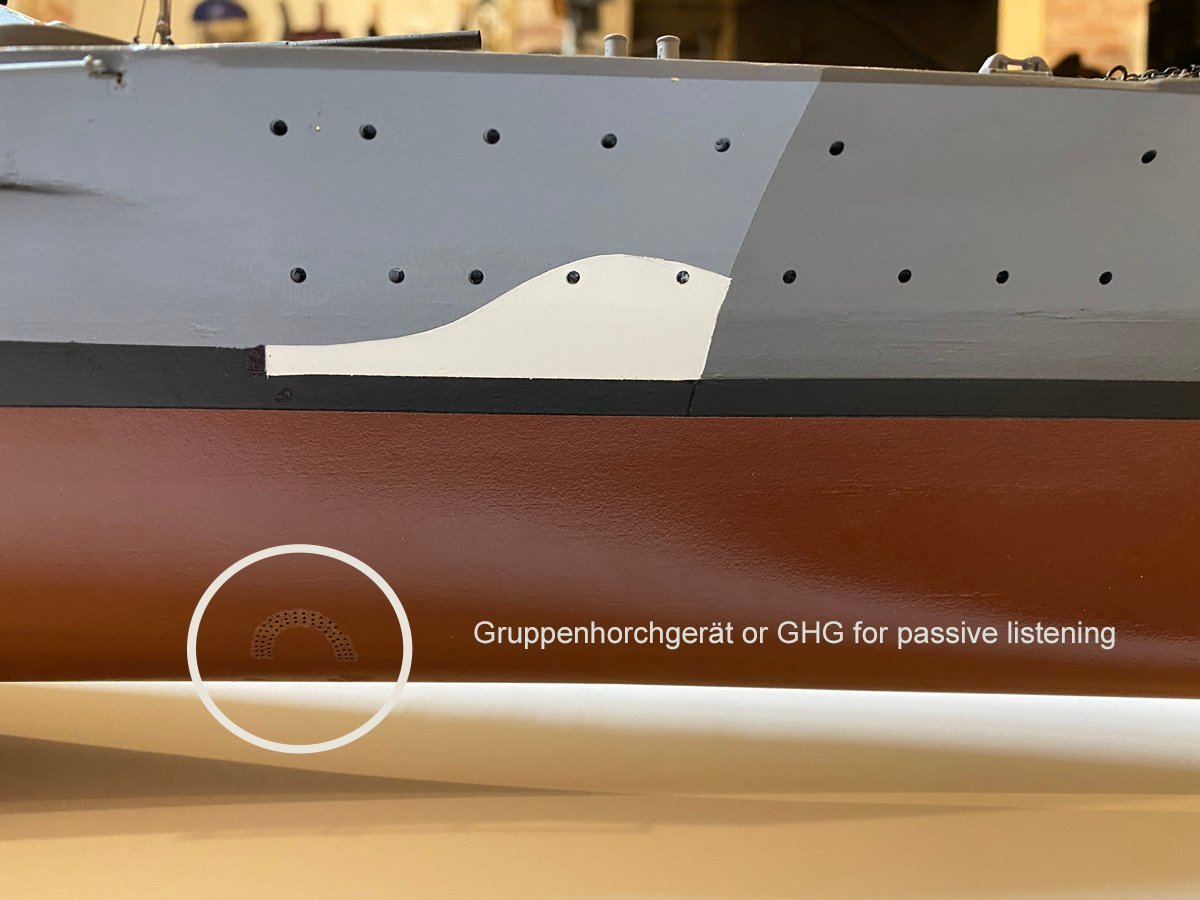
Back in April Joe100 asked about the GHG microphone array on the hull. Amati includes two small decals labeled "sound locator system" that go on the hull under the false bow wave. They aren't too obvious.
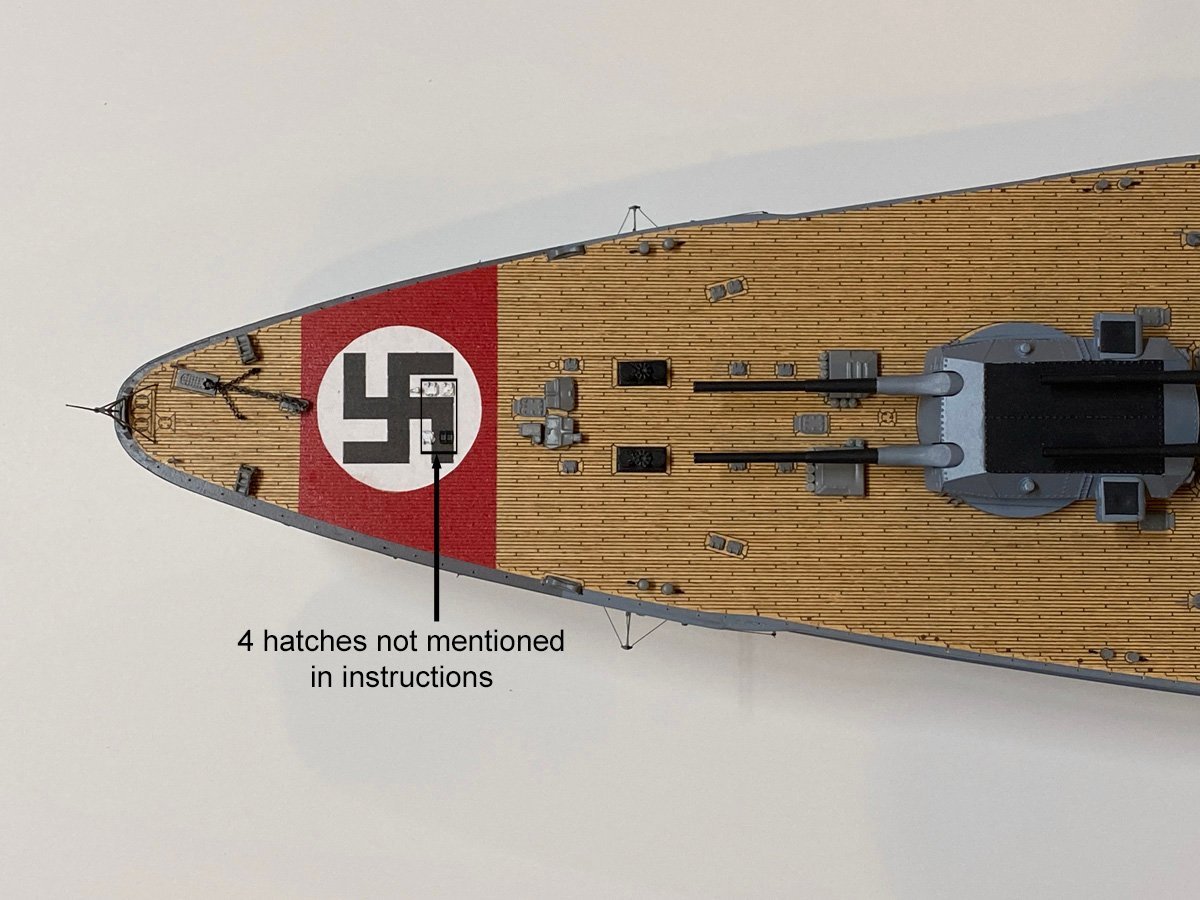
The instructions have you make 10 small hatches for the stern. There are 14 on the PE sheet. I made them all but scratched one and discarded it while installing the 10. Later I saw 4 more over the swastika that are not mentioned in the instructions. I installed the remaining 3, and used a random spare hatch that does not match - the black one.
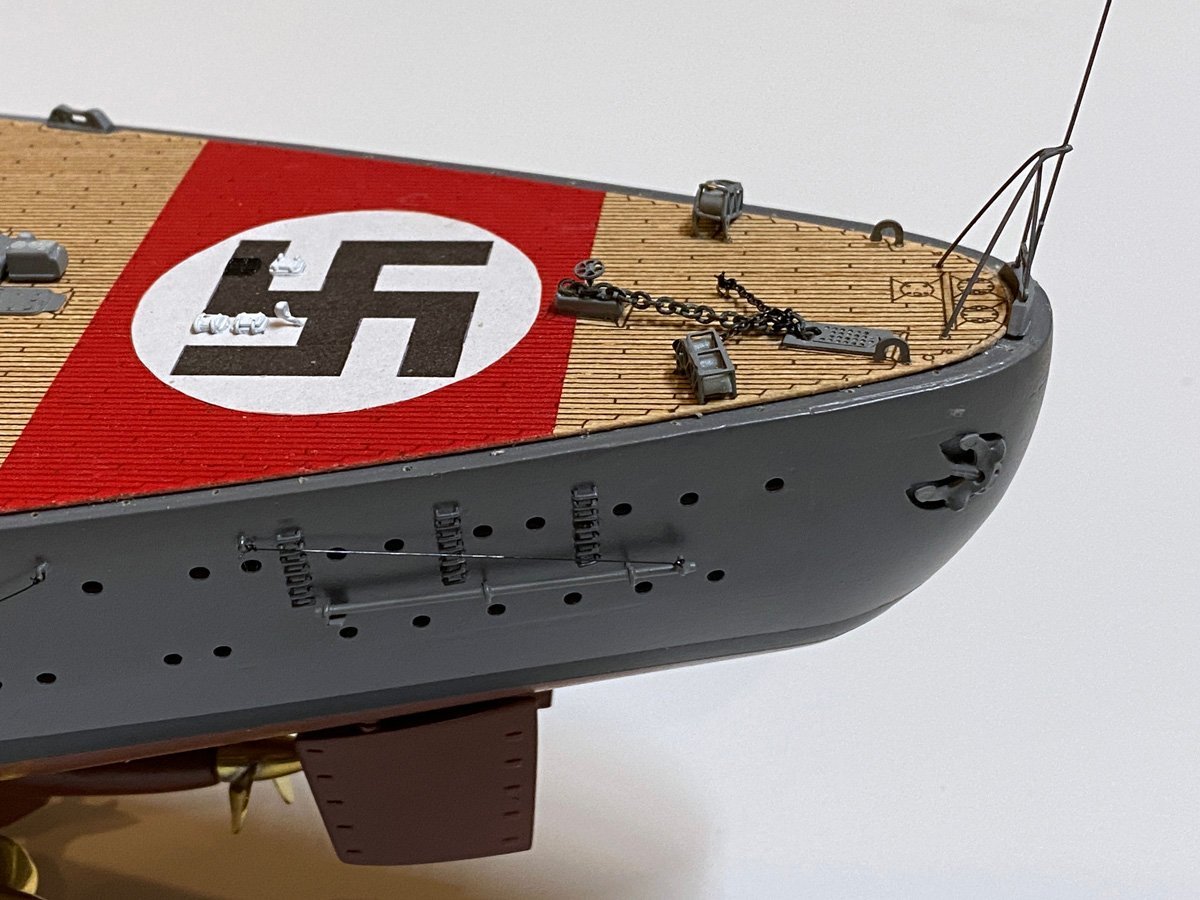
The stern anchor is attached to the outside but does not penetrate the hull. The two little racks hold depth charges.
I just built a new, permanent base for the model and am waiting for the finish to dry. There is still quite a bit of rigging to install, and a handrail around the perimeter. It's getting close.

- king derelict, mtaylor, Ian_Grant and 2 others
-
5
-
Beautiful work on the superstructure Harry. Isn't it nice to see it all coming together?
Good luck with the Arados. Make sure that your holes for the landing gear are a snug fit. I had a rough time getting the floats aligned with the hull while the little brass pieces were falling out. Do your plans show the V struts between the floats and wing? I think that I see them in your PE pack, but my instructions neglected to mention them. -
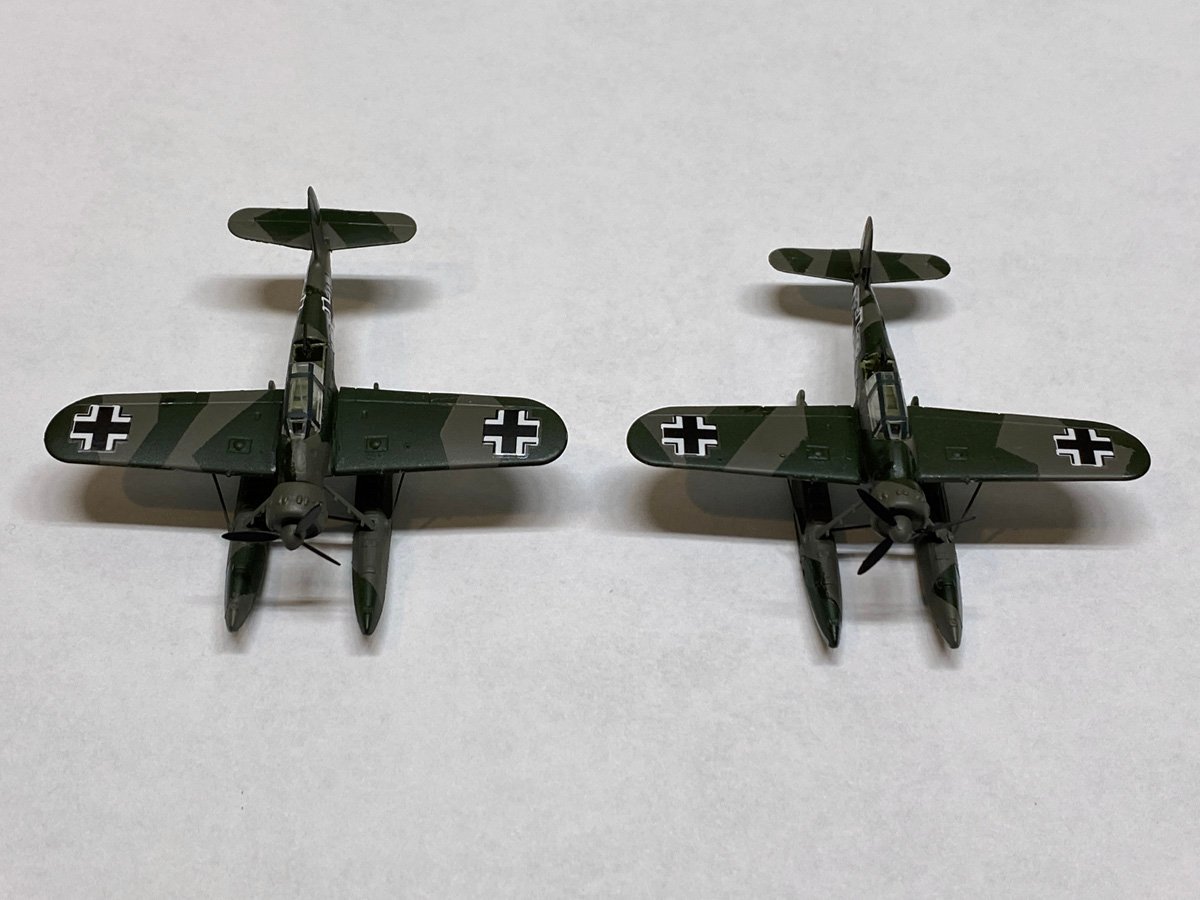
Airplanes Complete
It took about 15 hours to build two airplanes. Now I remember why I don't build plastic models.
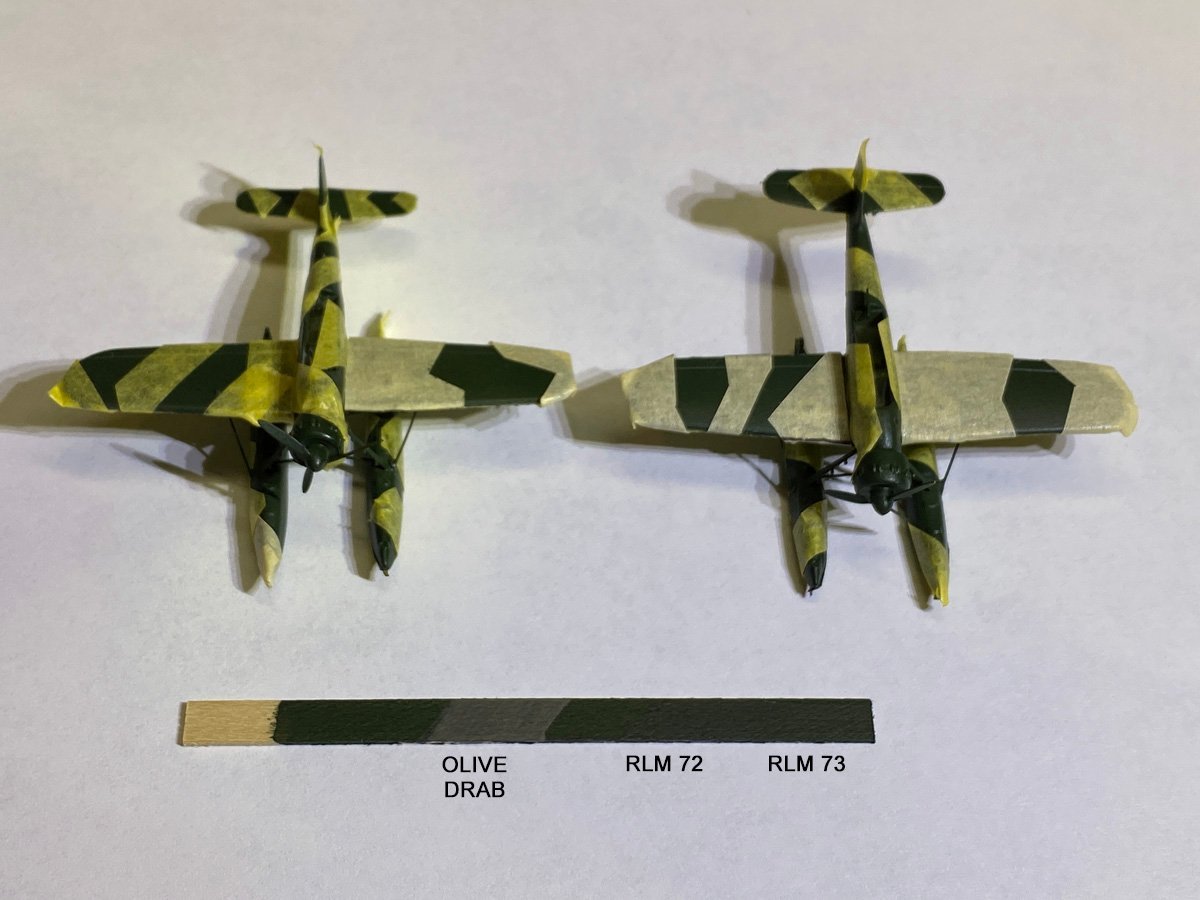
The bottoms of the airplanes are painted sky blue, but no one will ever see them. The tops are RLM 73 (Reichsluftfahrt Ministerium) as per the instructions. The camouflage was supposed to be RLM 72, a slightly darker green. I bought both colors by AK paints in Spain and tested them on a stick. It is painted with RLM 73 first and has a stripe of RLM 72 on top, believe it or not. After spending several hours masking off camouflage, I was NOT going to paint it with a color that no one could see, so I used olive drab instead. Voila!
I had to raise the bottoms of the catapult mount 3.5 mm to get the wings above the small guns.
On 5/8/2022 at 1:47 AM, hof00 said:(Are you intending a folded wing version also?)
The instructions show one airplane with the wings folded back along the fuselage for storage in the hangar. That would have solved the clearance issue, but I like my airplanes with their wings extended.
-
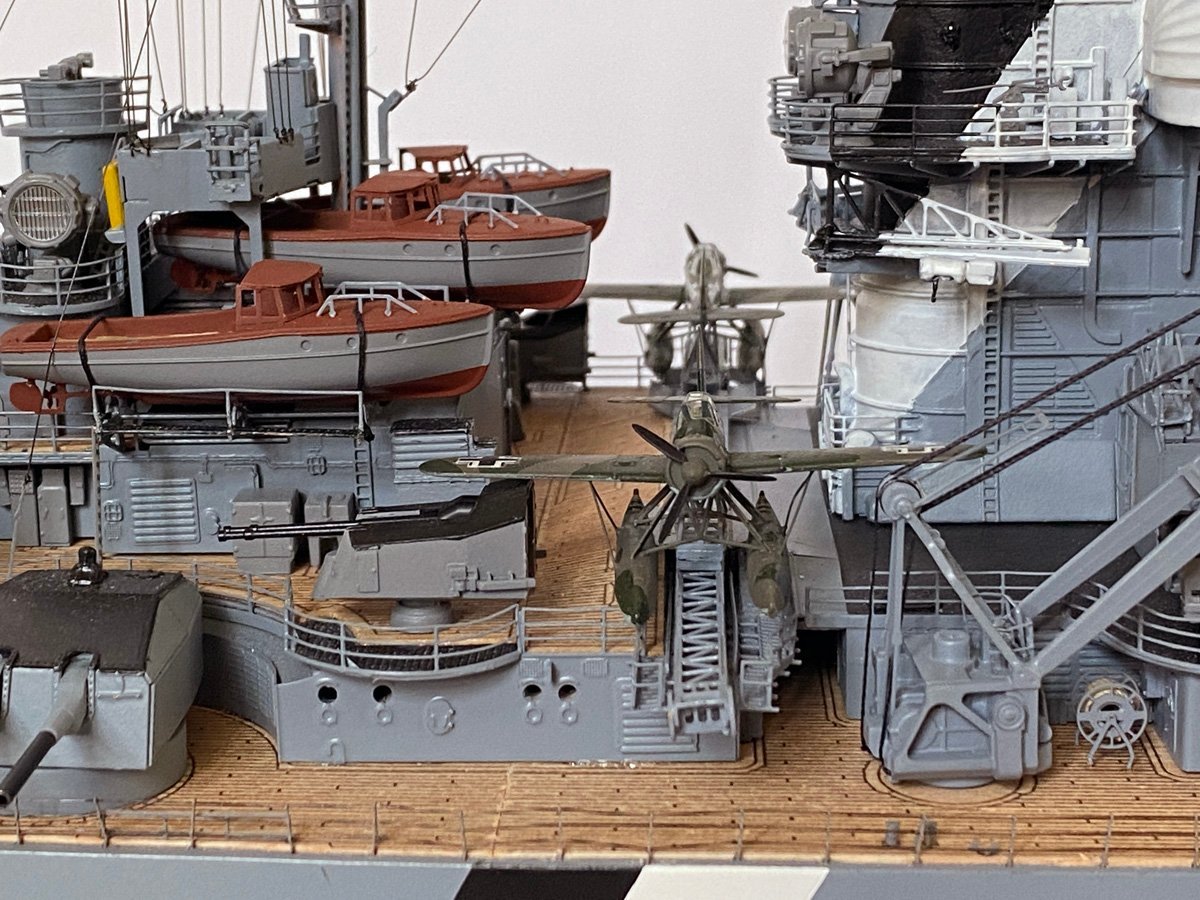
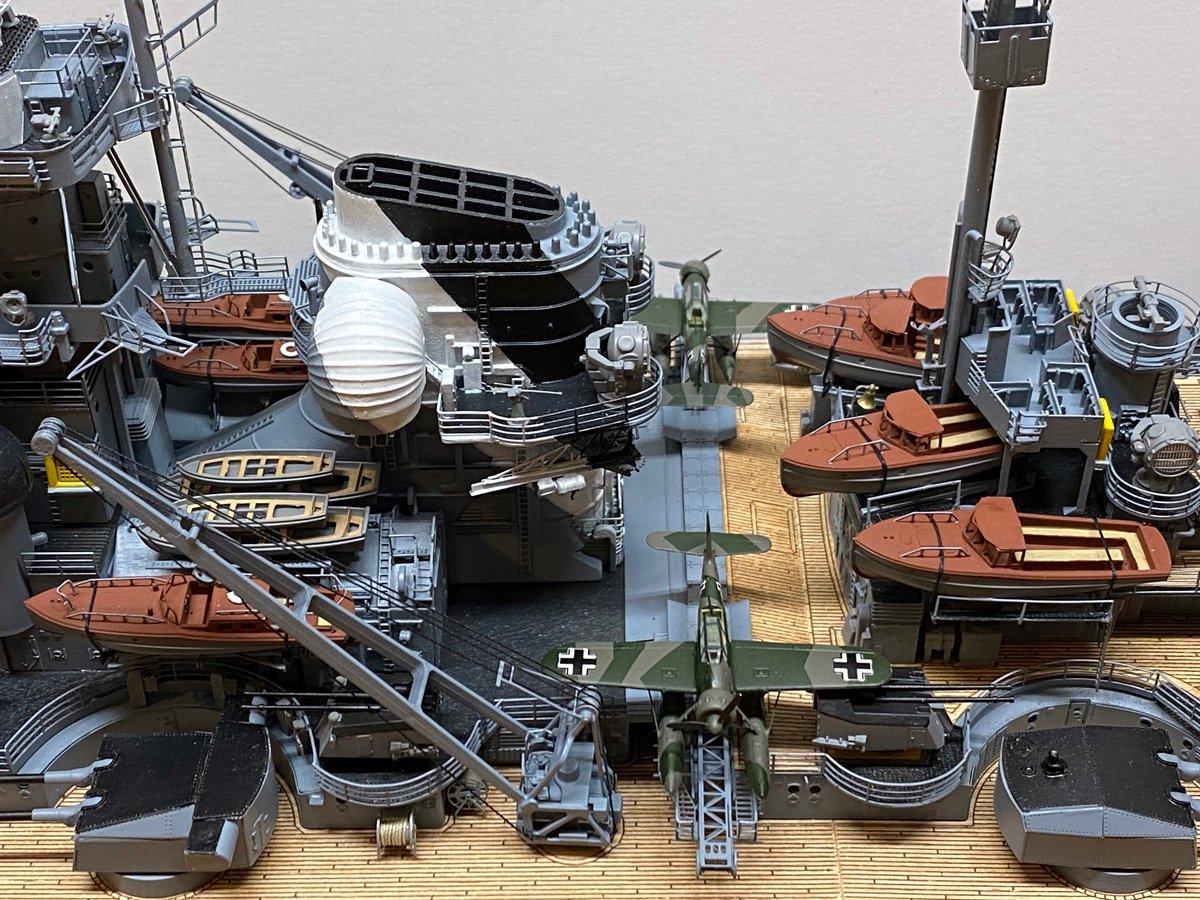
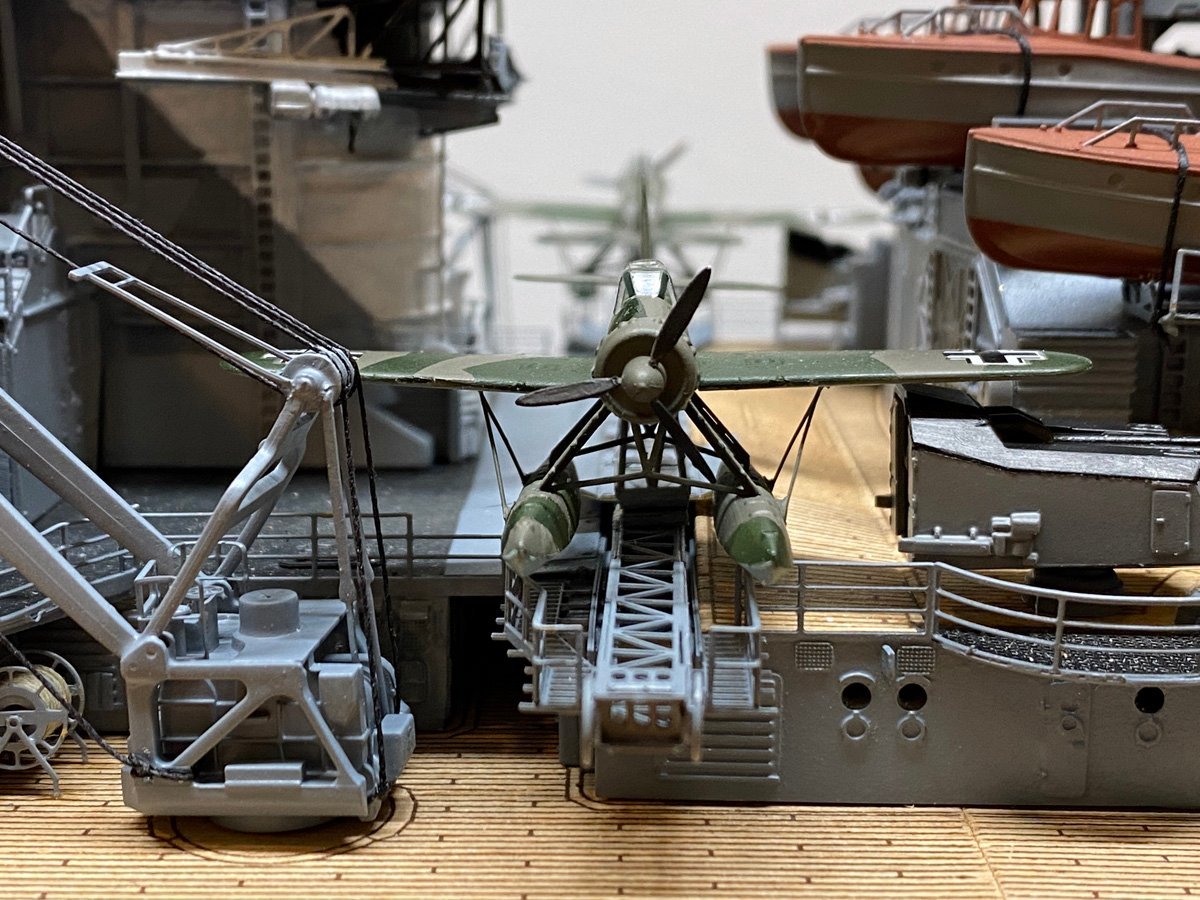
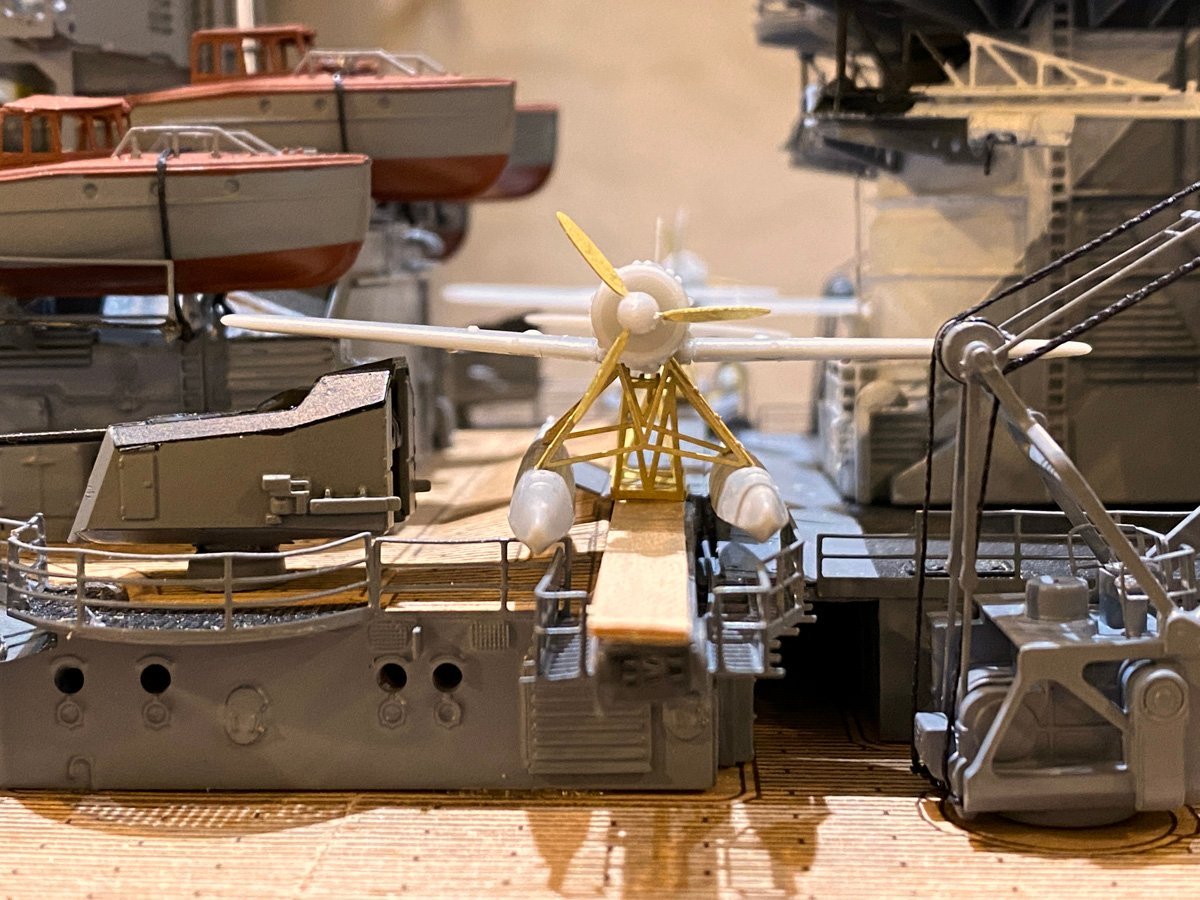
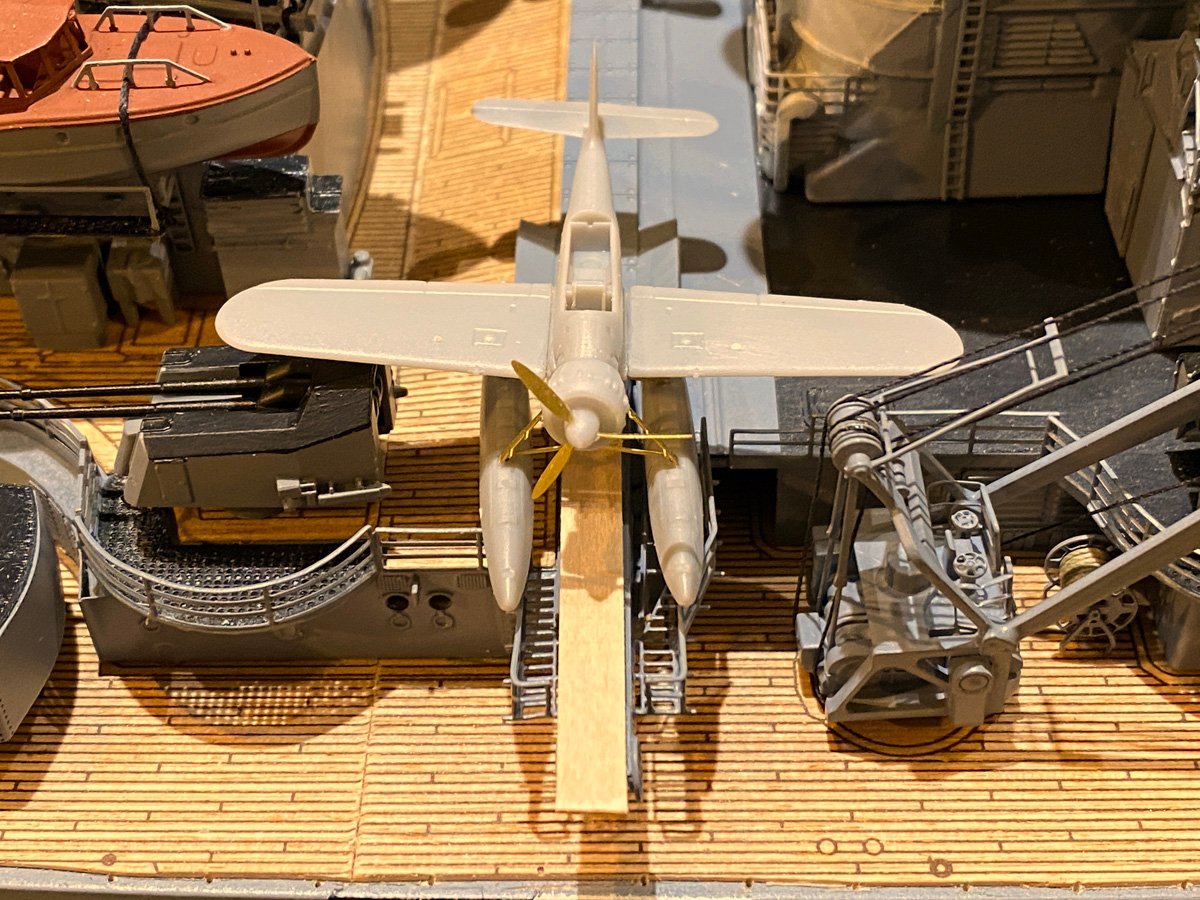
Catapult/Arado Clearance Issues
After partially assembling the two Arado aircraft and their catapult mounts, I checked the fit on the catapults. Either the aircraft mounts are too short, or the floats are too low, or the railings are too high, because the floats hit on the railings. I plan to add a 1 mm thick strip of wood between the catapult rail and the aircraft mount. The strip shown in the photo is extra long to help move the plane around while experimenting with the fit.
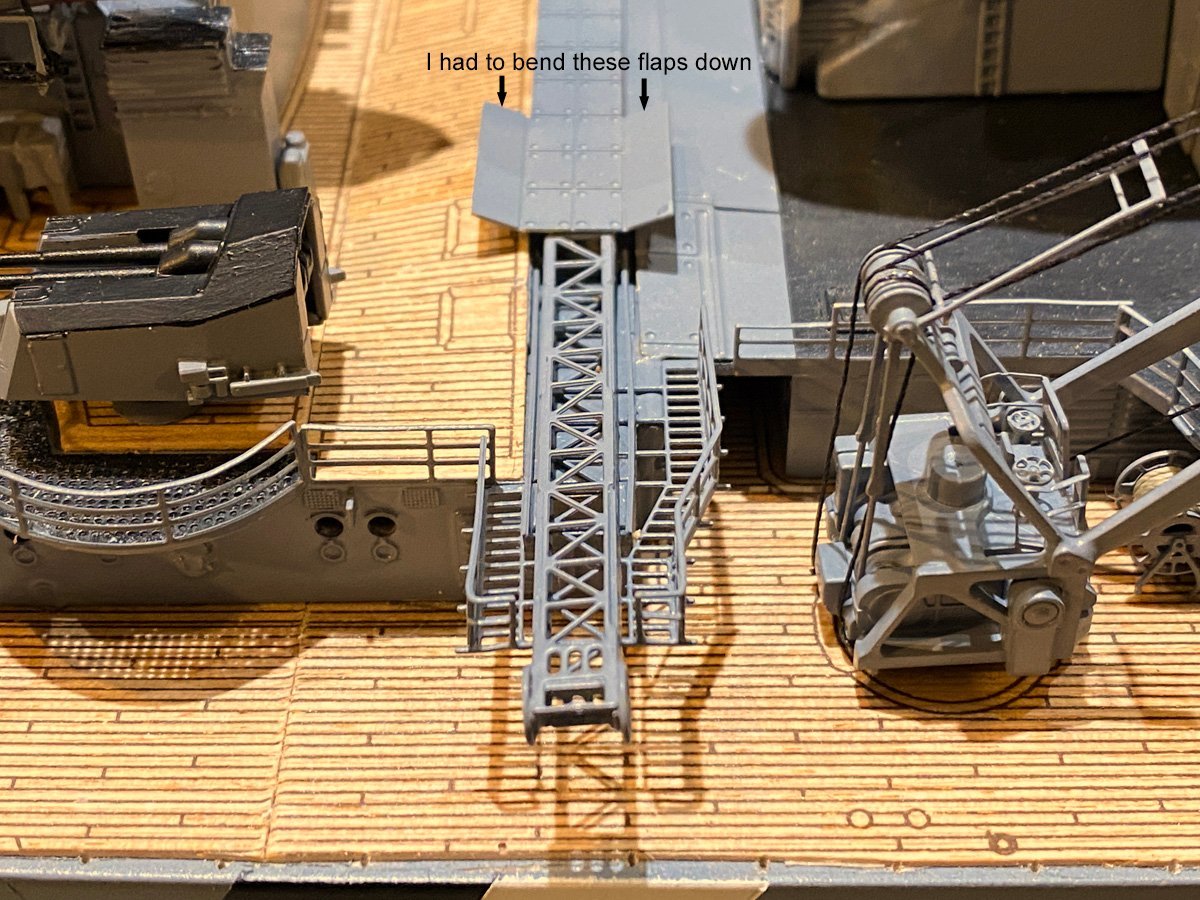
Apparently the cranes had to be collapsed to launch the aircraft, because the wings would totally hit the cranes. Seems like a bad idea when you need the cranes to recover the aircraft later. The instructions show the aircraft attached before the cranes are installed, but the aircraft have to be moved inboard about 1 cm to fit behind the cranes. Then the floats interfere with some upturned ramps that had to be bent downwards.
Finally, the Arado should have V-shaped struts between the wings and floats. They are included on the PE sheet but are not shown in the instructions. I had not attached them when this photo was taken, but they are attached now.
- yvesvidal, king derelict, Canute and 2 others
-
5
-
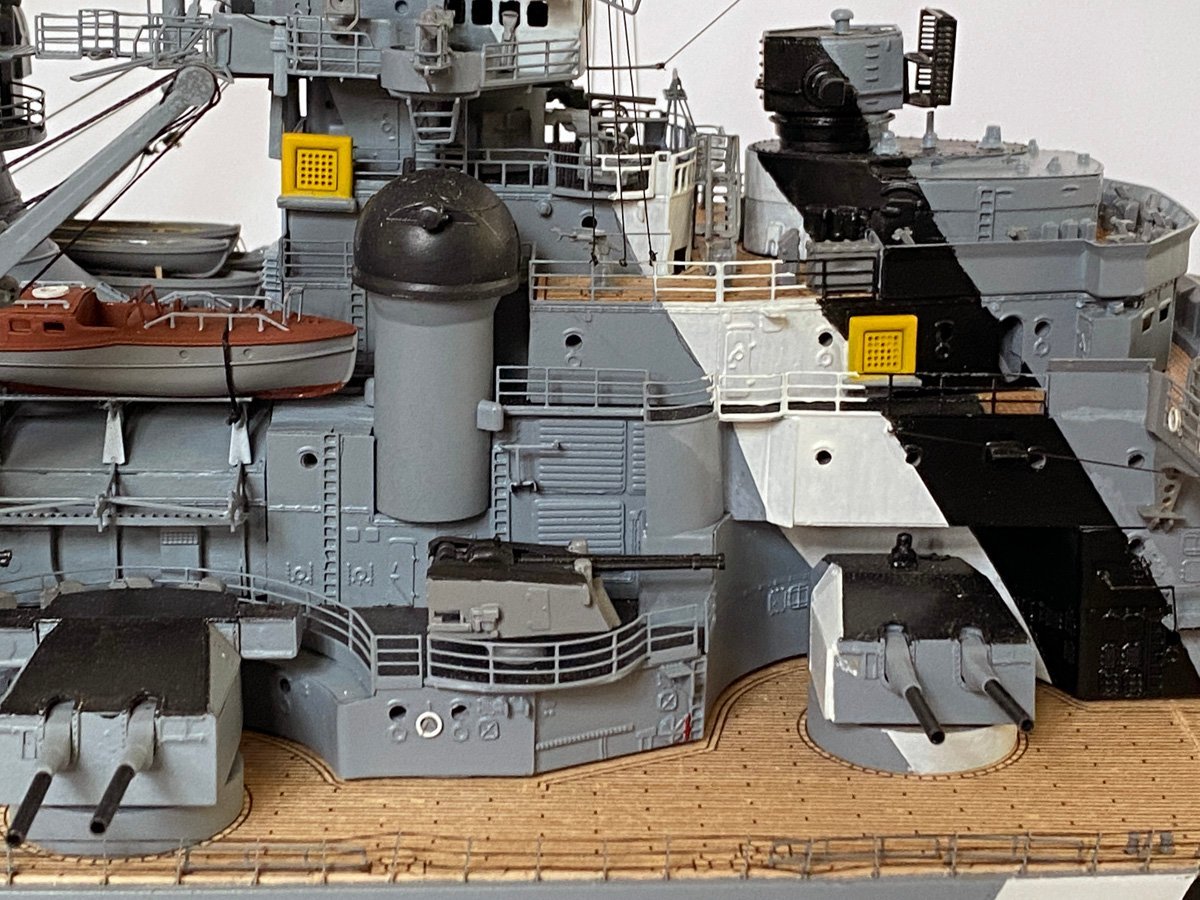
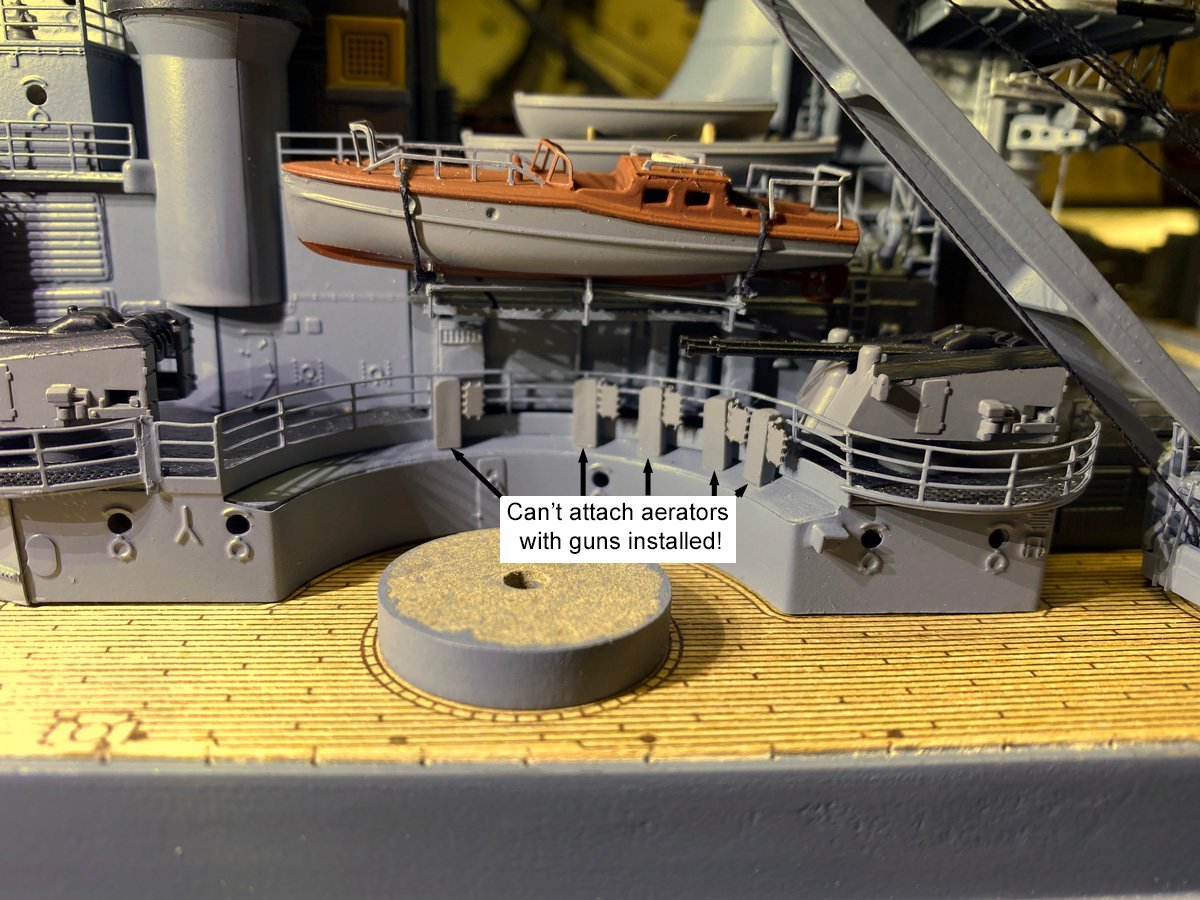
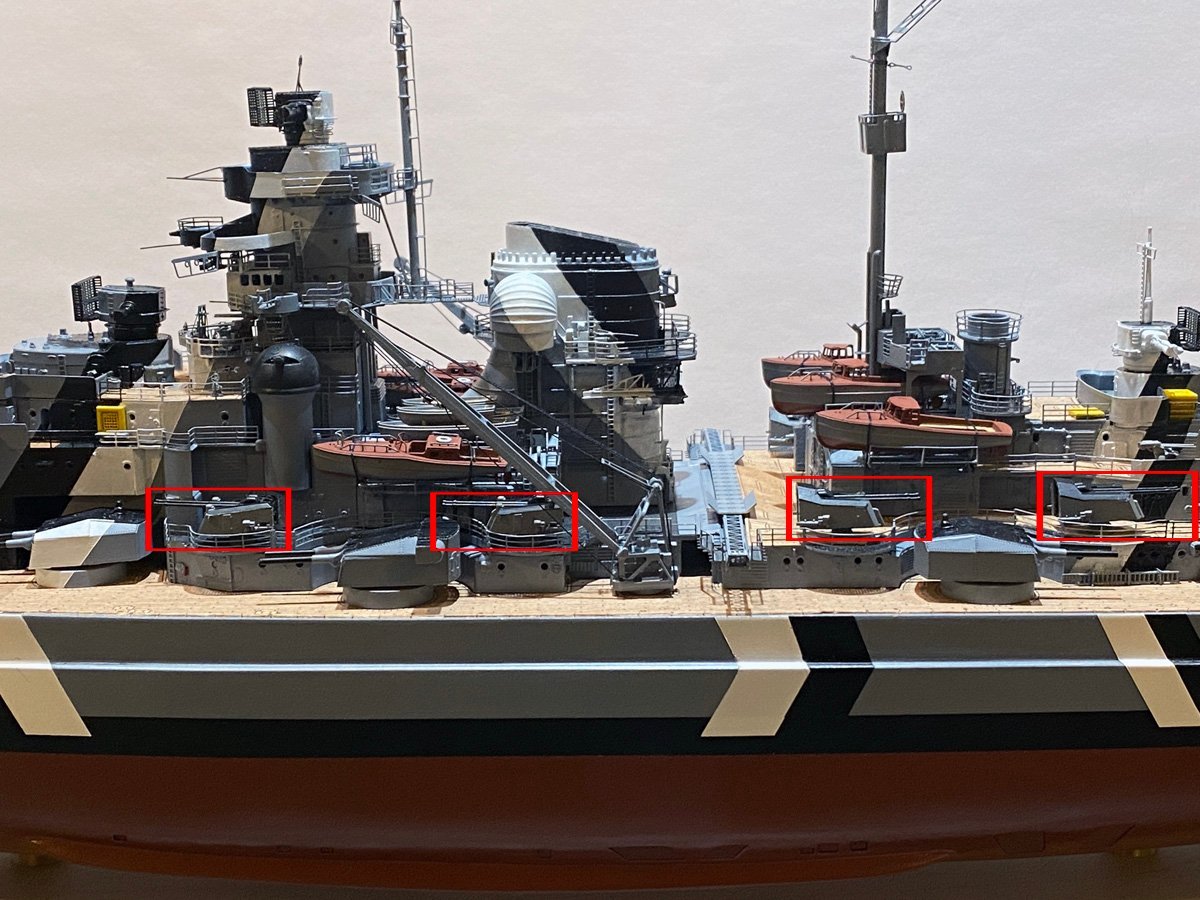
One Reason Not to Work Ahead
While installing some of those little parts, I've discovered that some are supposed to fit behind other parts that I've already installed. Like these aerators (ventilators?) that sit behind the secondary guns. Lucky I made those guns removable so they can be rotated.
- yvesvidal, mikegr, king derelict and 2 others
-
5
-
On 4/28/2022 at 11:35 PM, hof00 said:
I have a couple of questions for you.... What gar do you arrive at between Decking and edge of the Hull? 1.0mm or greater? Do the Stanchions butt up against the Decking? (Thinking ahead for the Stanchions.... )
Frankly, I am dreading the 200 or so stanchions. 😳 My gap ranges from 1.5 mm at mid-deck to 3-4 mm at the bow or stern. The holes are right up against the deck most places.
On 4/29/2022 at 12:18 AM, hof00 said:So, after six or seven hours today, it's time for a break.... 🙂
Aaagrh! You're wearing me out just reading about this. But keep it up - everything is looking great.
-
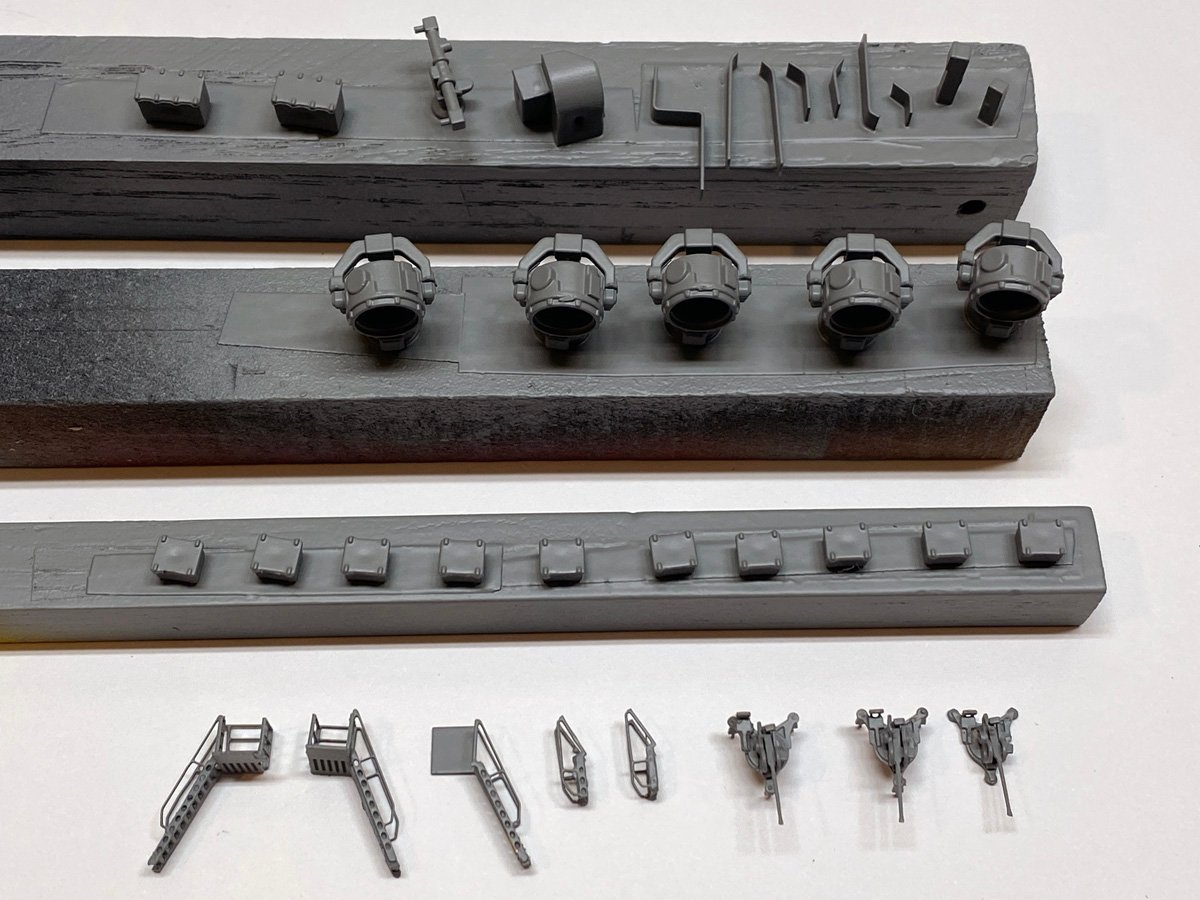
More Little Parts, fresh out of the spray booth
-
-
OcCre Prinz Eugen
I just discovered that OcCre - Ocio Creativo, has announced a 1:200 model of the Prinz Eugen. It has a laser-cut, plank-on-bulkhead hull and lots of photo-etched and cast parts. They are listing it for pre-order at 499,99€, but ModelExpo is taking orders for $399.00 US. It looks like a beautiful model and a perfect companion to the Amati Bismarck. If I hadn't already built the lower-quality Aeronaut kit of the Prinz-Eugen I'd order one today.
- SUBaron, mtaylor, Old Collingwood and 1 other
-
4
-
You need to hide a little treasure inside for some conservator to find 200 years hence.
- yvesvidal, mort stoll, scrubbyj427 and 1 other
-
4


Bismarck by ted99 - FINISHED - Amati - 1:200
in - Kit build logs for subjects built from 1901 - Present Day
Posted
Ted,
I use medium CA on a toothpick to glue parts together or to the deck, then hit the joint with thin CA from a glue looper. Every 5-10 joints the looper gets clogged, so I burn it off with a Bic lighter and wipe the carbon off with a paper towel. I used the same loop for my entire model.
Incidentally, the many plastic bags that all the PE and plastic parts come in make perfect surfaces for holding little puddles of CA ready for the next joint. Just don't rest your arm in it.
Rod