


rvchima
-
Posts
660 -
Joined
-
Last visited
Content Type
Profiles
Forums
Gallery
Events
Posts posted by rvchima
-
-
Planking the Deck
The kit supplies 1x3 mm oak strips for the deck, top and bottom. I stained all the strips first with Watco Natural oil stain. That way if I get a little sloppy with the glue it won't interfere with the stain.
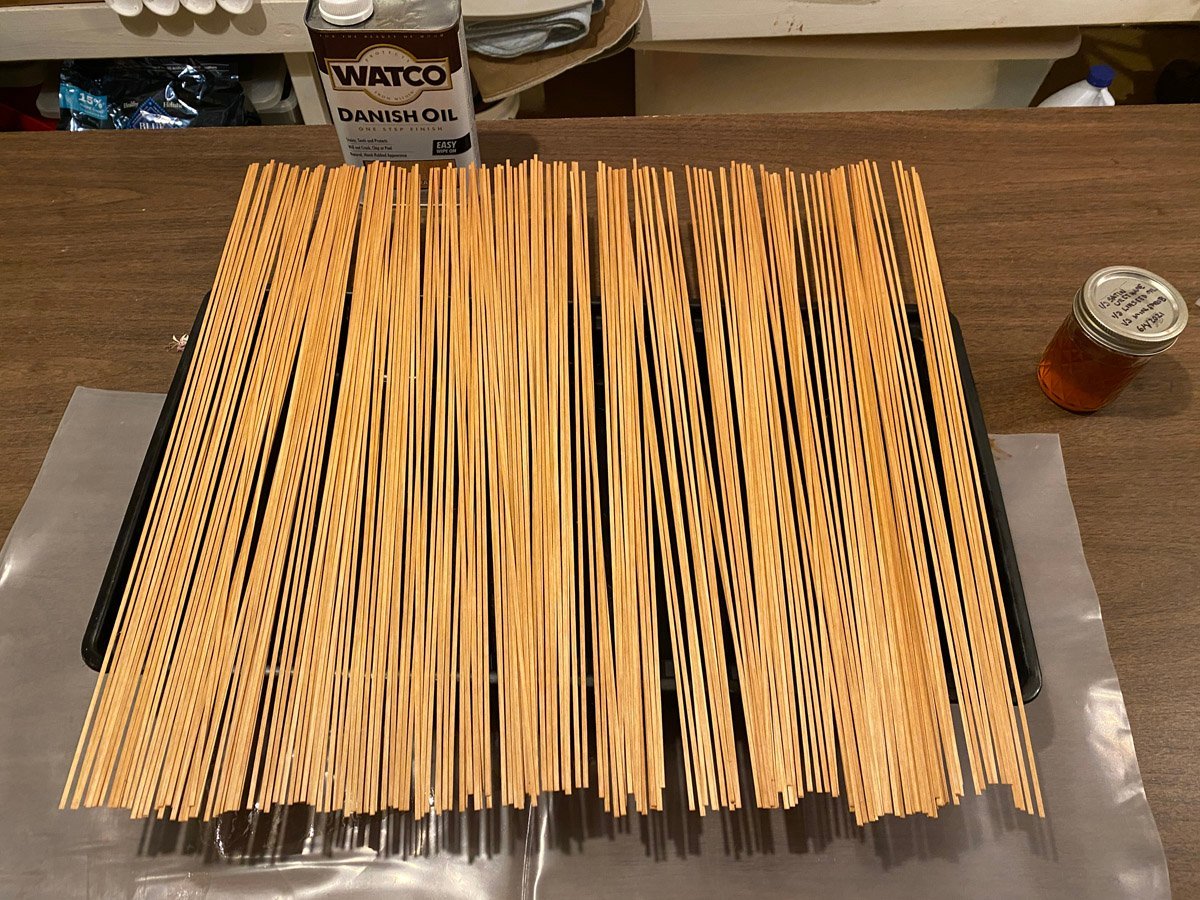
I made the planks 30 mm long, which scales up to 4.5 m or about 15 ft. I don't actually cut all the little planks. I glue down a full strip with CA, then chop the joints between the planks with a sharp chisel. My chisel is much wider than the planks so I do one strip at a time and let the chisel hang over the edge. I staggered the joints over three strips - very convenient 10 mm stagger. After I get some cutoffs I use them instead of full strips.
I coated the completed deck with Famowood wood filler, sanded it smooth, and stained it again with Watco. The whole deck only took a couple of evenings. Here's the final deck with some of the structure on top.
- Nunnehi (Don), GrandpaPhil, hof00 and 3 others
-
 6
6
-
-
Eindride,
I tried to comment a few days ago but it seems like the post did not take.
Your work is beautiful! I love the carving on the bed headboards.
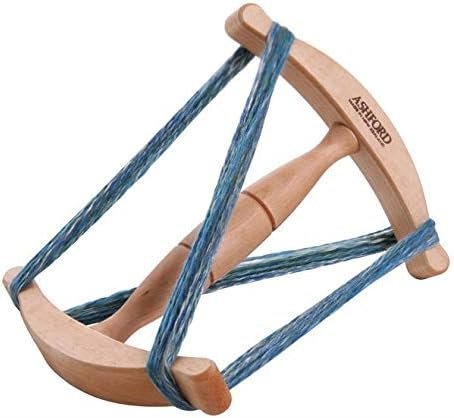
But I think that you have made a mistake on the niddy noddy. The end pieces should be perpendicular to each other and not in the same plane. Then the yarn is wound as in the attached photo. I wonder if the Oseberg niddy noddy was crushed in the burial.
My wife is a (former) hand weaver and spinner, and has done a lot of research on Vikings for a couple of recent novels. She informed me that the small wooden containers in the Oseberg burial contained cannabis seeds.
I built the Billings model of the Oseberg ship a few years ago. There should be a link to gallery photos in my signature file.
-
On 7/7/2023 at 7:22 AM, schooner said:
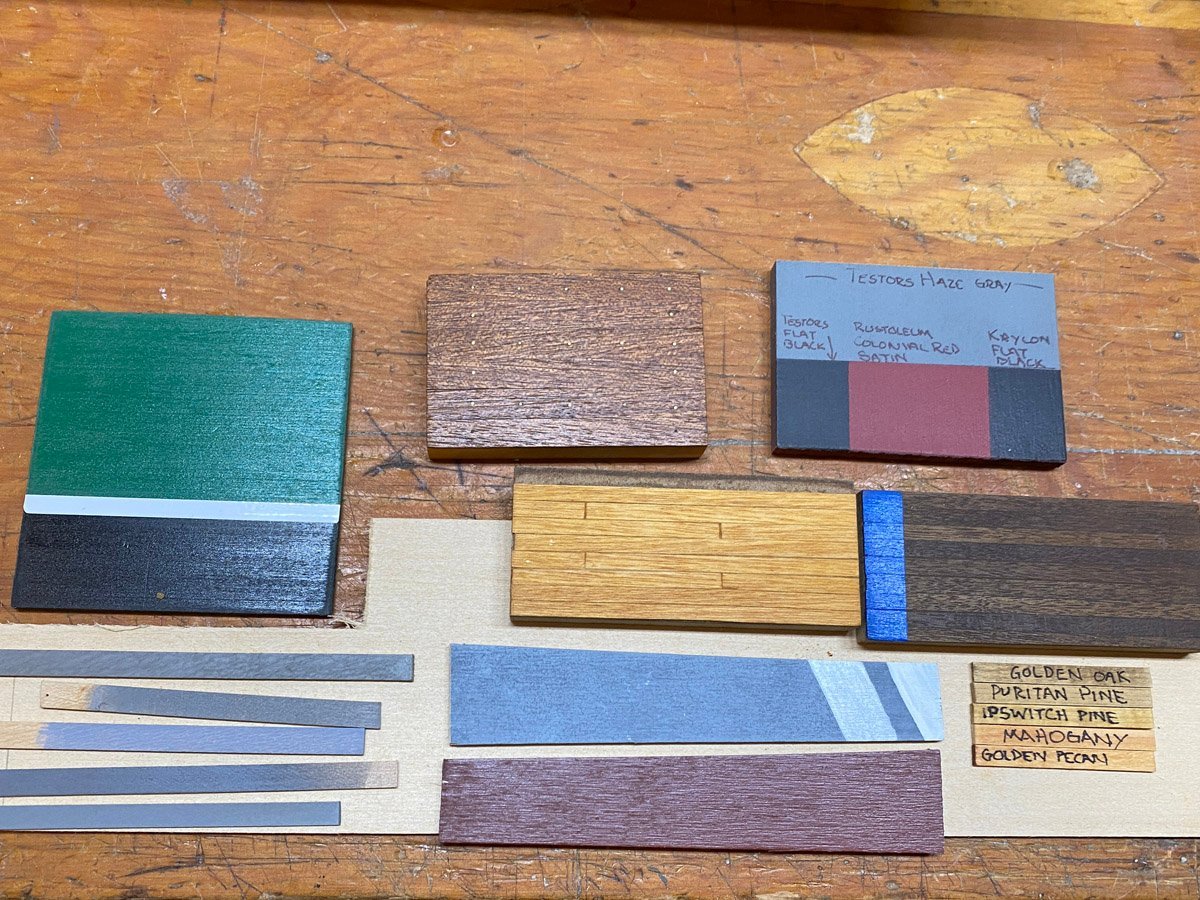
Your photo reminds me of something unexpected I recently learned - the MinWax stains you show in the lower right of your photo match what I've encountered coming straight out of the can but if I stirred them (not shaken) the colors change dramatically, e.g the Ipswich Pine goes from the light transparent yellow to a solid dark-medium brown. The can directions make no mention of either stirring or not stirring it prior to use.
I've decided to leave well enough alone- that way I know that I'll get something that looks like the color on the label.
Tim,
That's an interesting observation. I always stir stain before I use it but for those samples I might have used a quick dip. I probably should redo the Minwax samples.
Rod
-
Next Step, Deck Planking
I've been keeping a bag of paint and stain samples from previous models, all labeled on the back. It really comes in handy when I need to paint or stain a new model. I think I'll try Watco natural (large sample near the center) on the decks of the R. E. Lee.
-
Big Wheels Keep on Turnin'
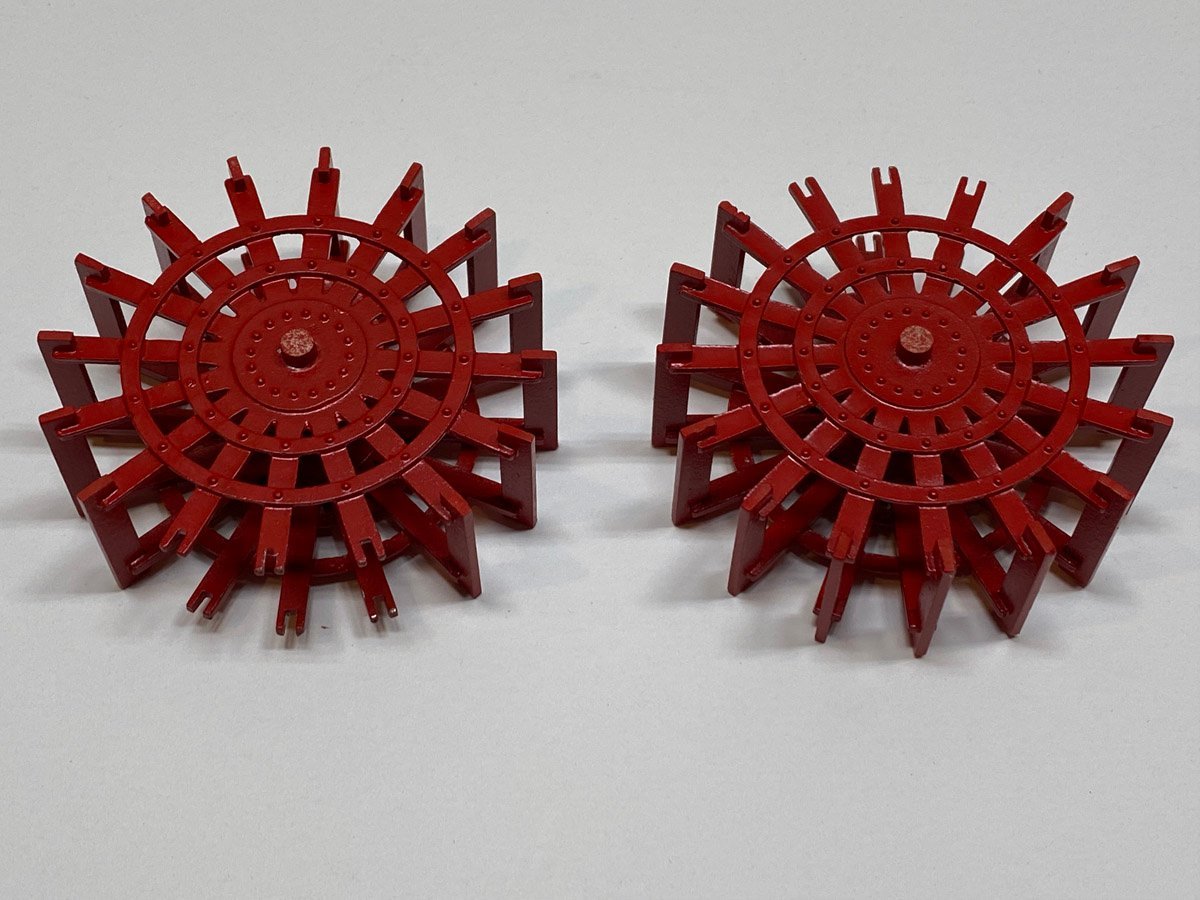
The paddle wheel rims are white metal castings that only required minimal cleanup. The instructions called for the paddles to be cut from 1 mm stock, but the notches in the rims were about 1.7 mm, so I made the paddles out of 3 x 1.7 mm planking left over from an old model. I painted the rims and long strips of planking before assembly, then cut the painted planking to length.
Sorry, no photos of paddle wheel assembly. Here's the gist, all done with CA.
Drill a 5 mm hole in a scrap board to hold the axle, then glue one rim perpendicular to the axle.
Cut 4 paddle spacers to exactly the distance between the rims, and use them to hold the second rim to the axle while gluing.
Cut 2x16 paddles to length and glue 13 of them to each wheel. You have to leave 3 off until the wheels are installed over the wheel brackets some months from now.
Sand and paint the ends of the paddles.
-
-
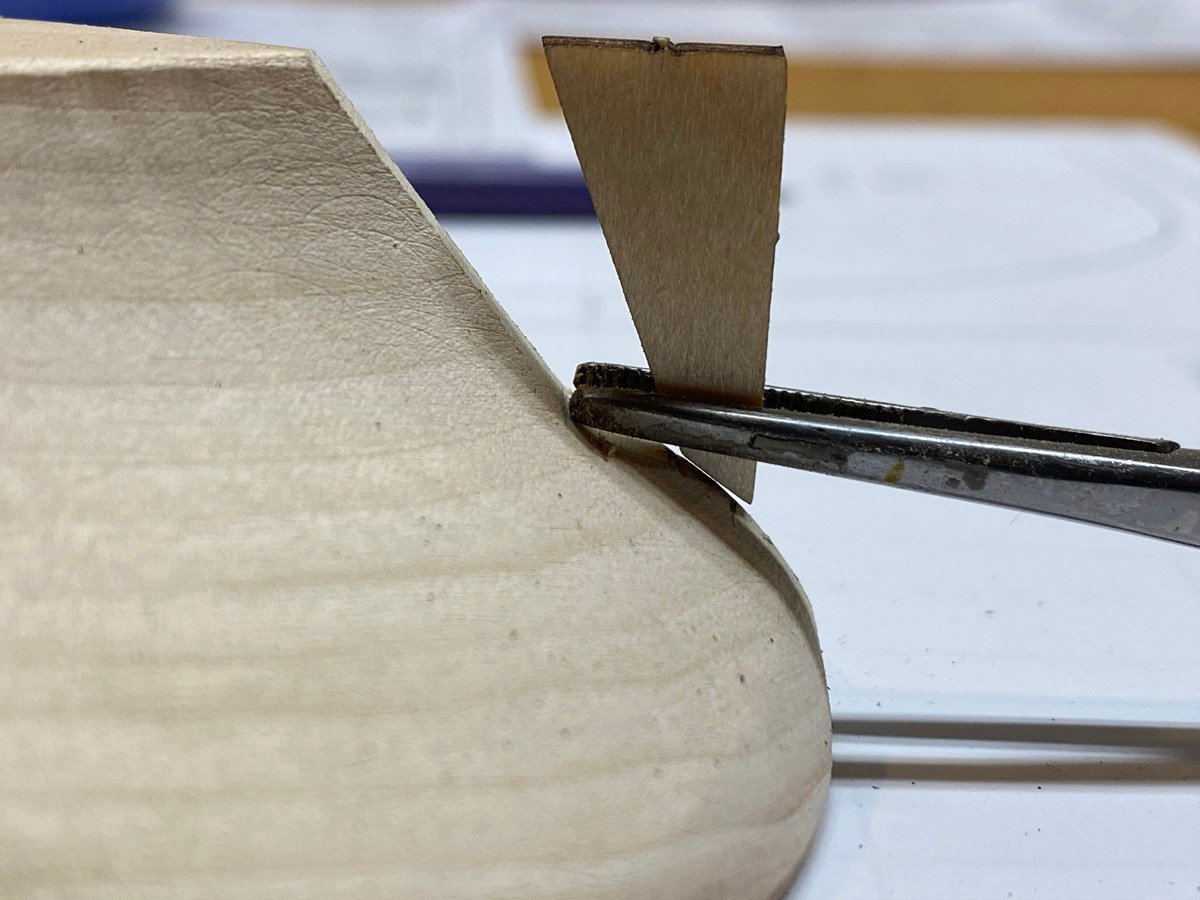
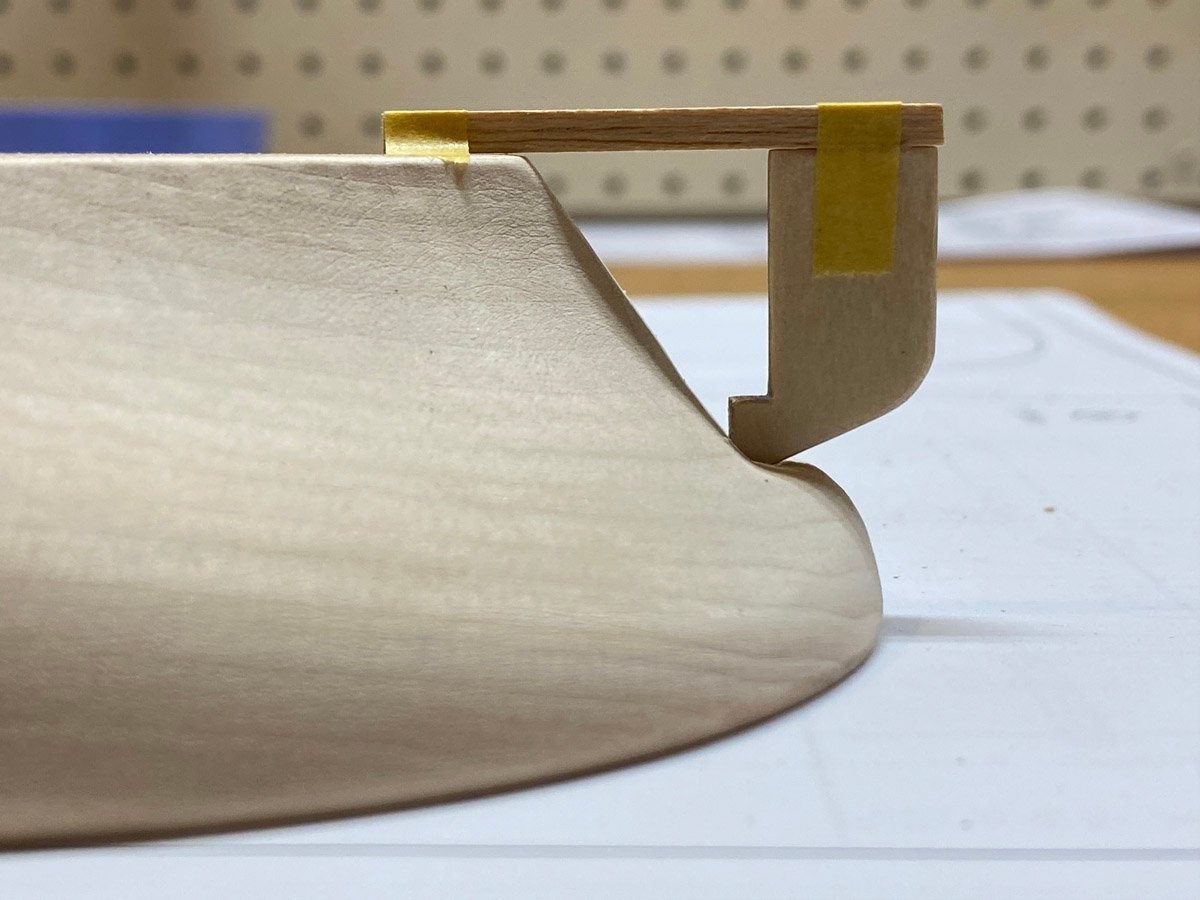
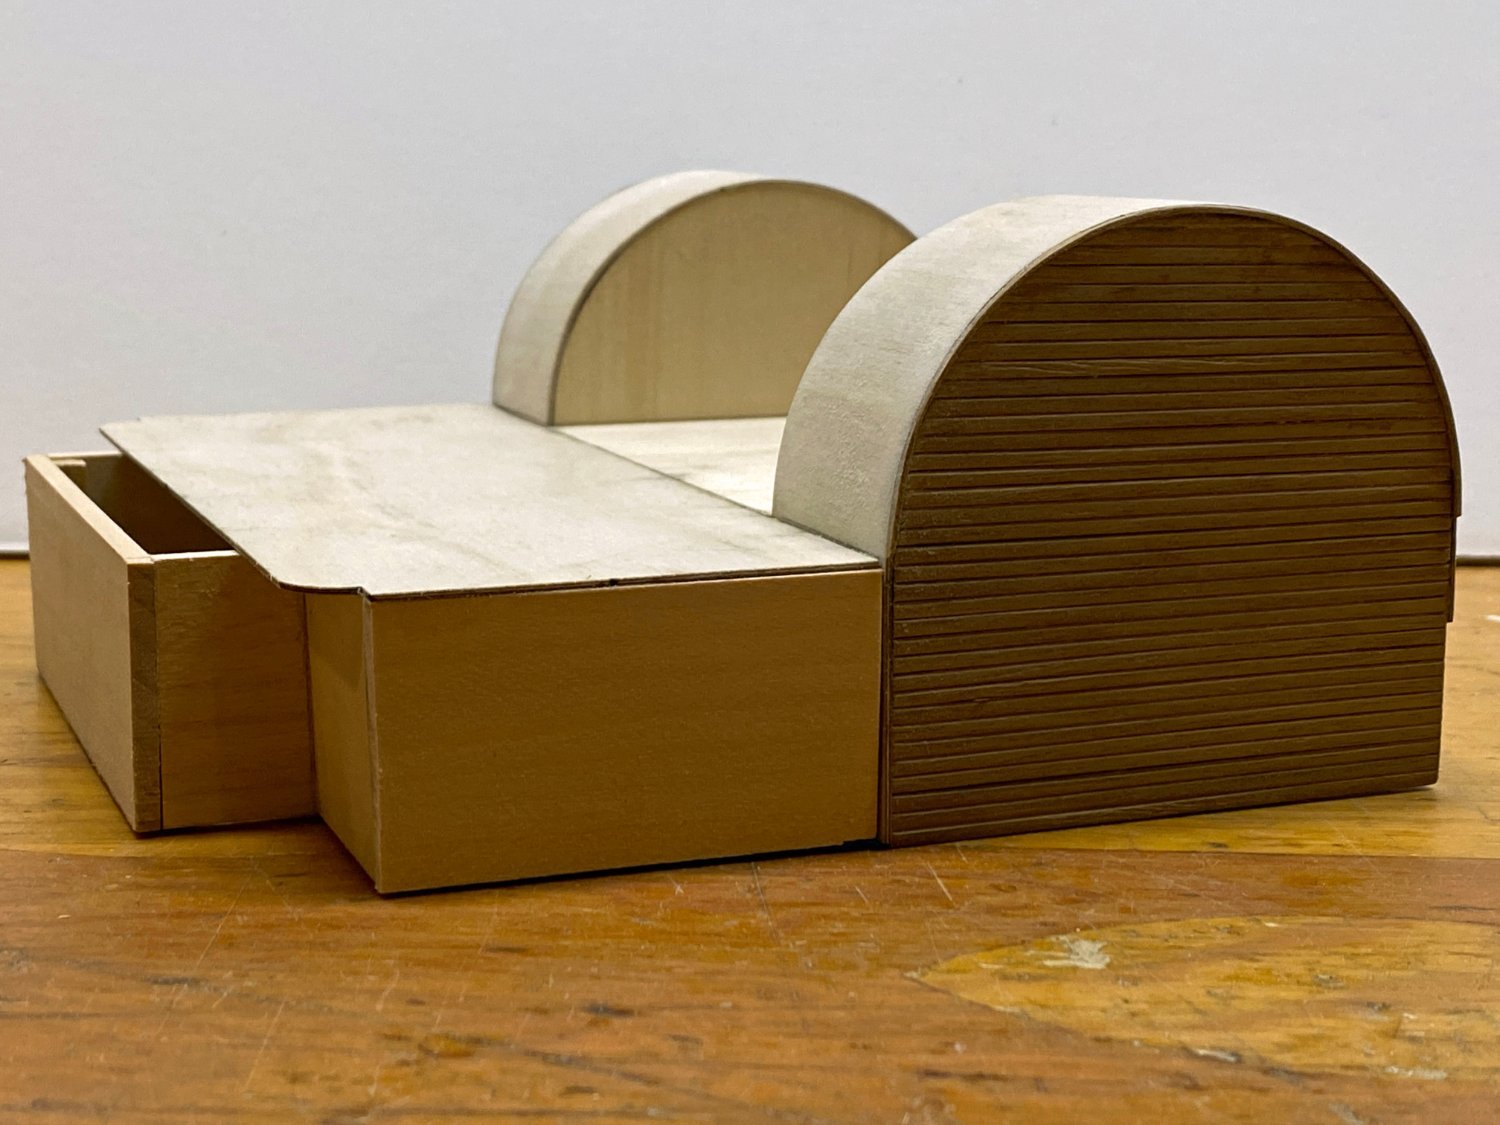
Paddle Wheel Housings
The paddle wheels are white metal castings that I will get to soon. The wooden shafts will be inserted into brackets inside the paddle wheel housings. The plans (which are approximately 94% scale) call for the brackets to be made from 1 mm strip wood. That just seemed too thin to keep the wheels securely in place and allow them to rotate, so I made them from strip about 1.7 mm thick. The paddles will have to be correspondingly smaller.
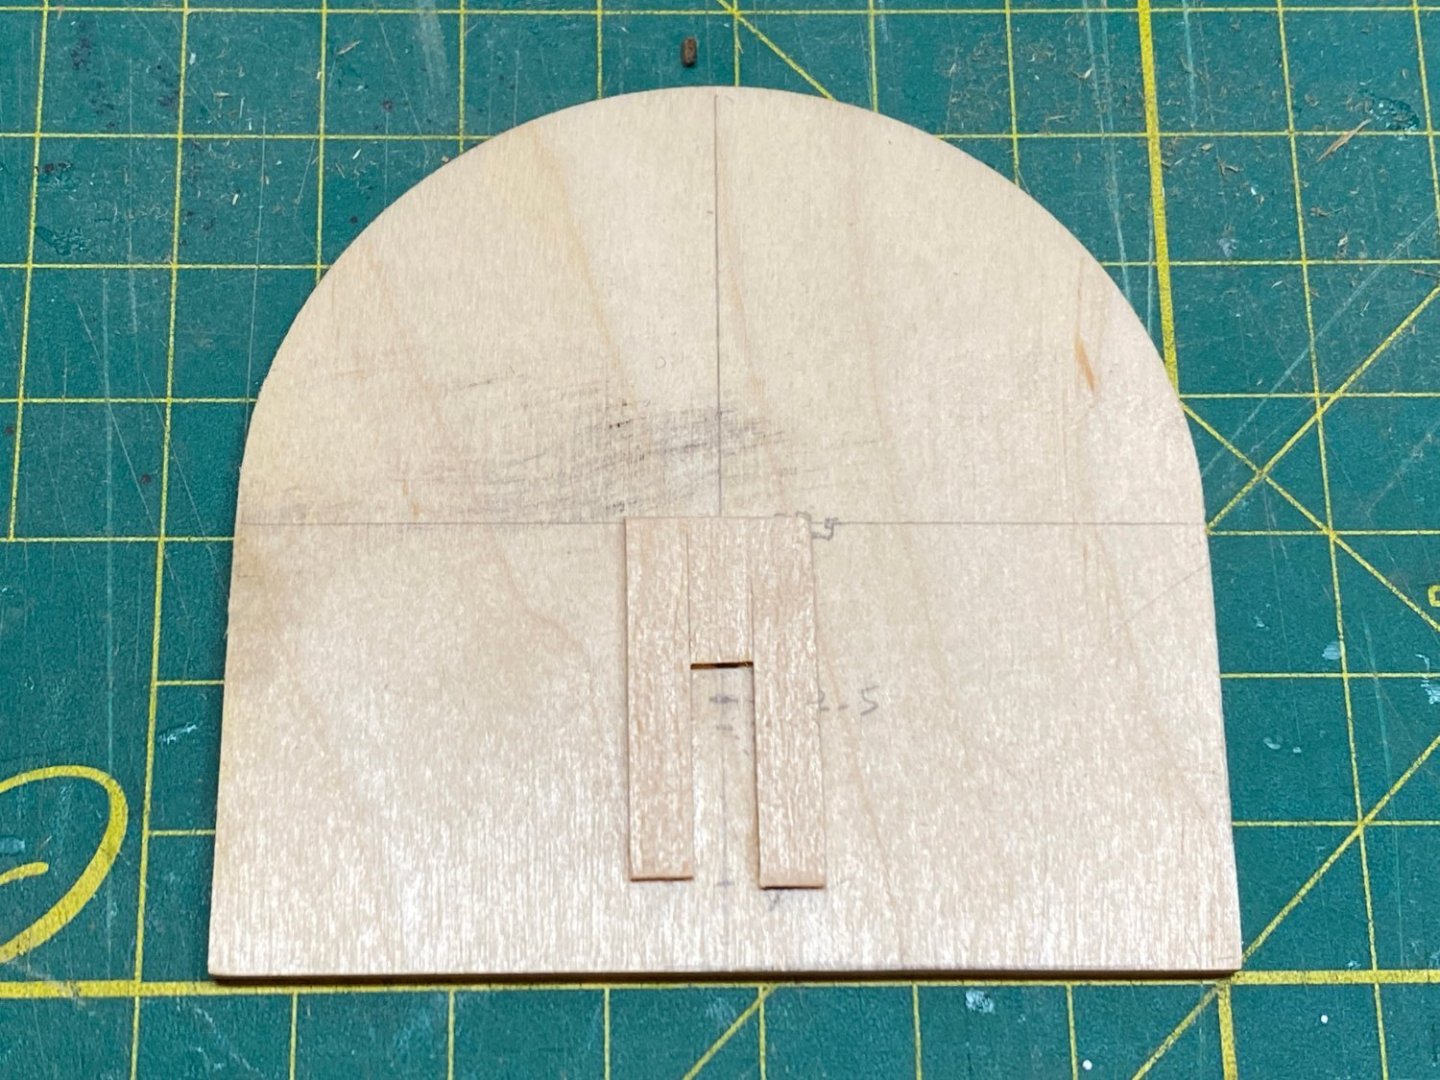
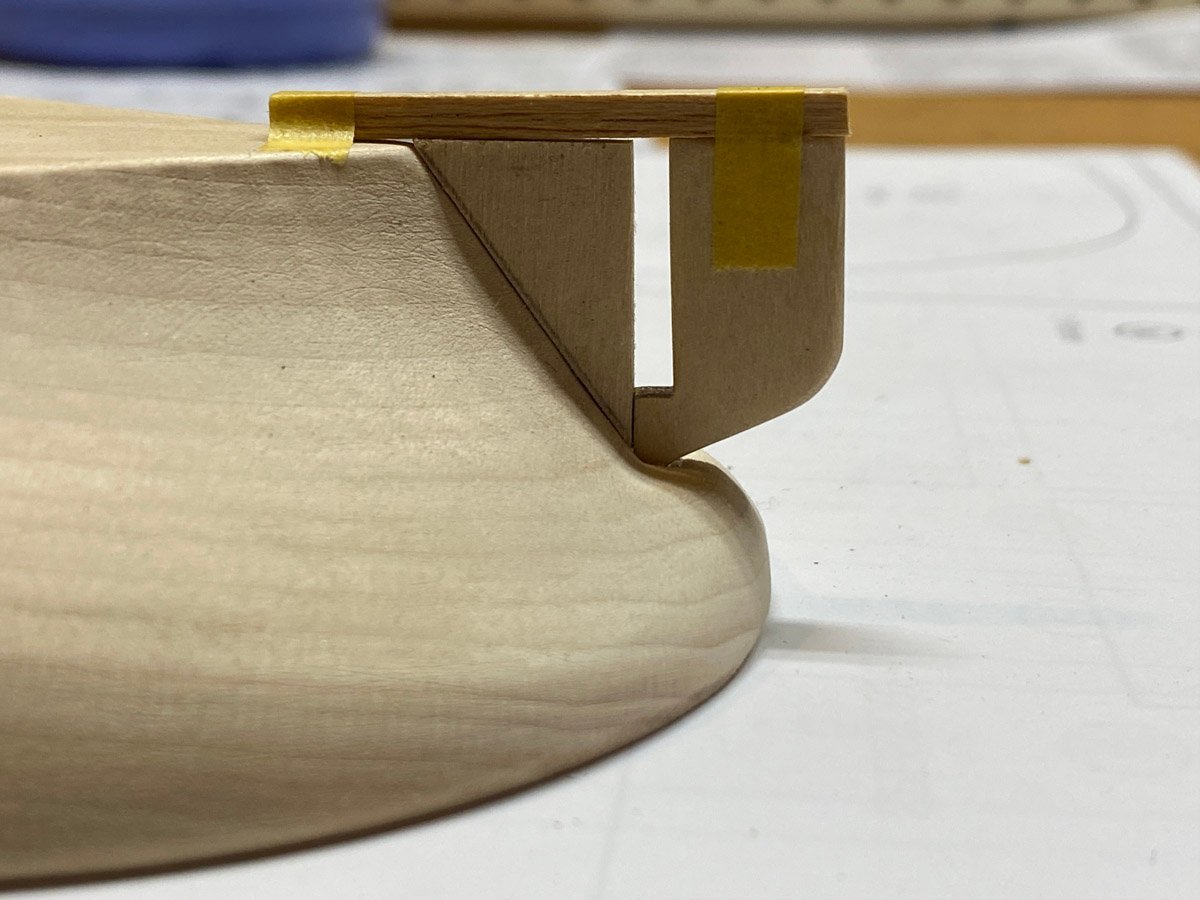
The paddle wheel shaft will fit in this slot and be stopped with another piece.
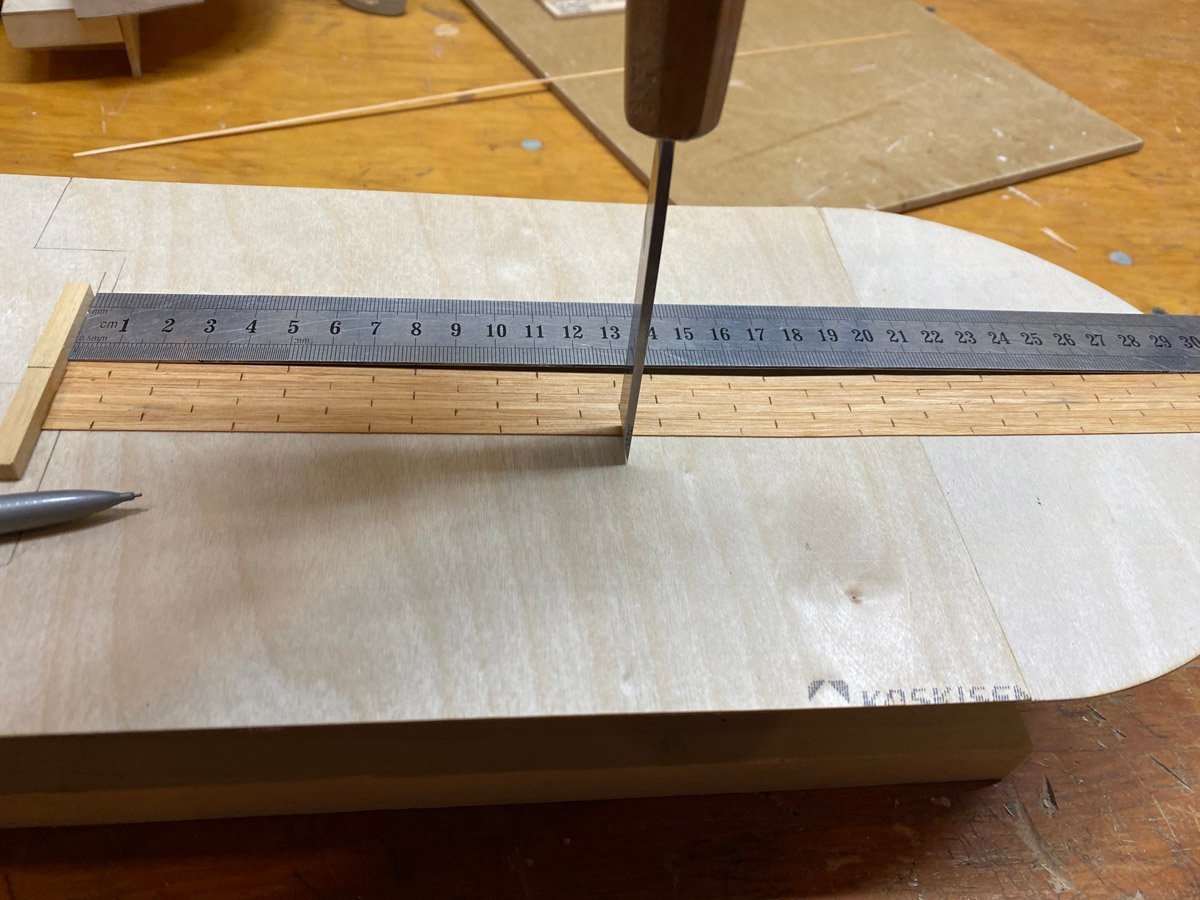
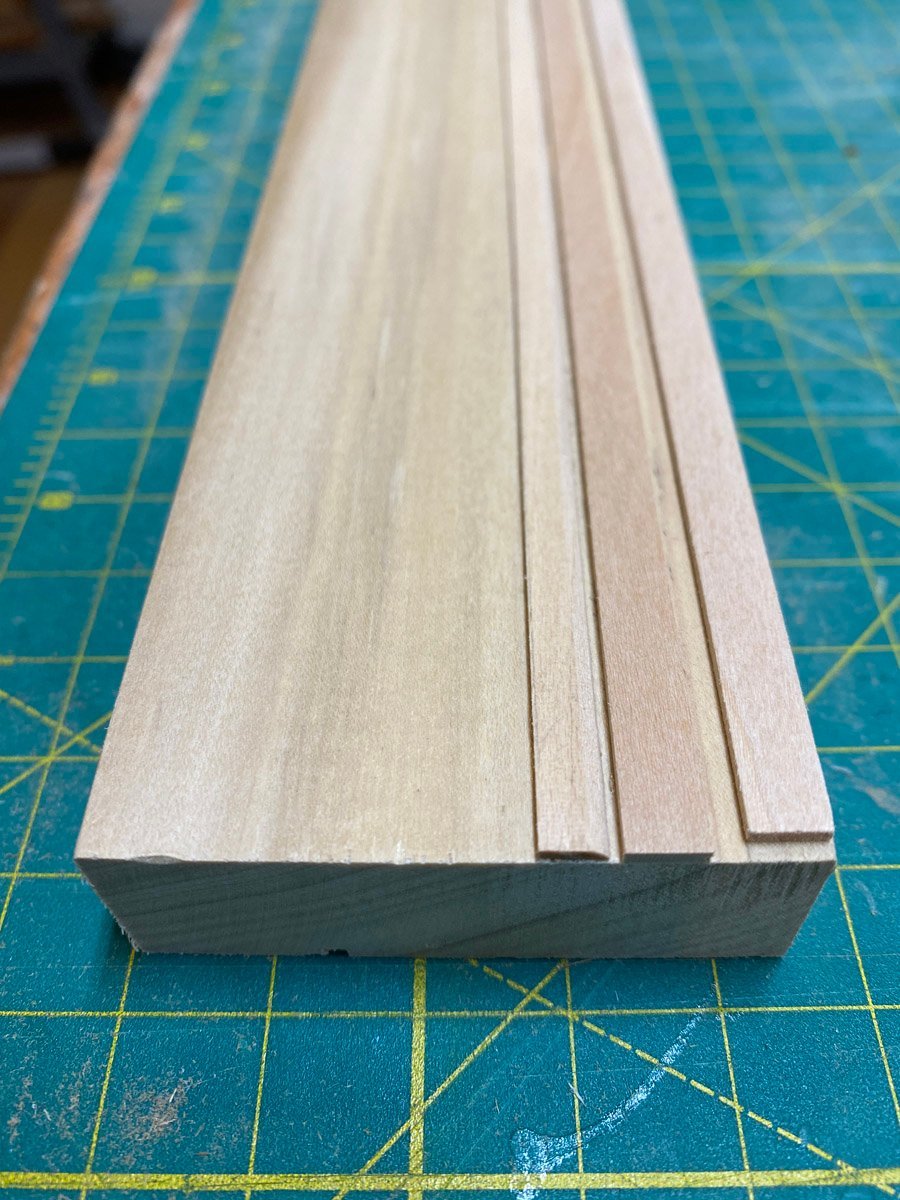
The outside of the wheel covers are planked with 2mm walnut strips. That seems very narrow, but at 1:150 they scale up to 1 ft. boards. That's a big board today, but maybe not in 1866. I borrowed this technique from Rodgerdodger to sand the planks and put a tiny bevel on the edges.

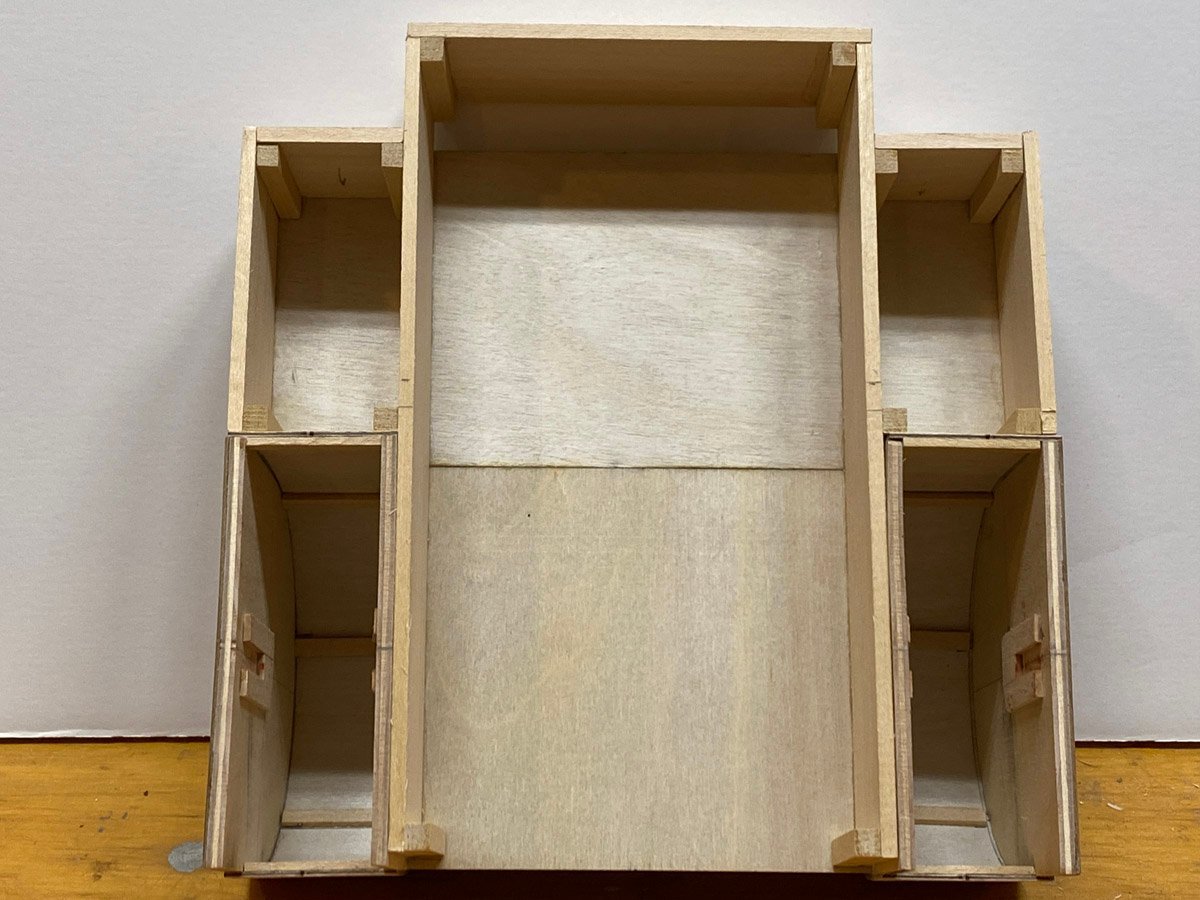
The jig has 2 slots.
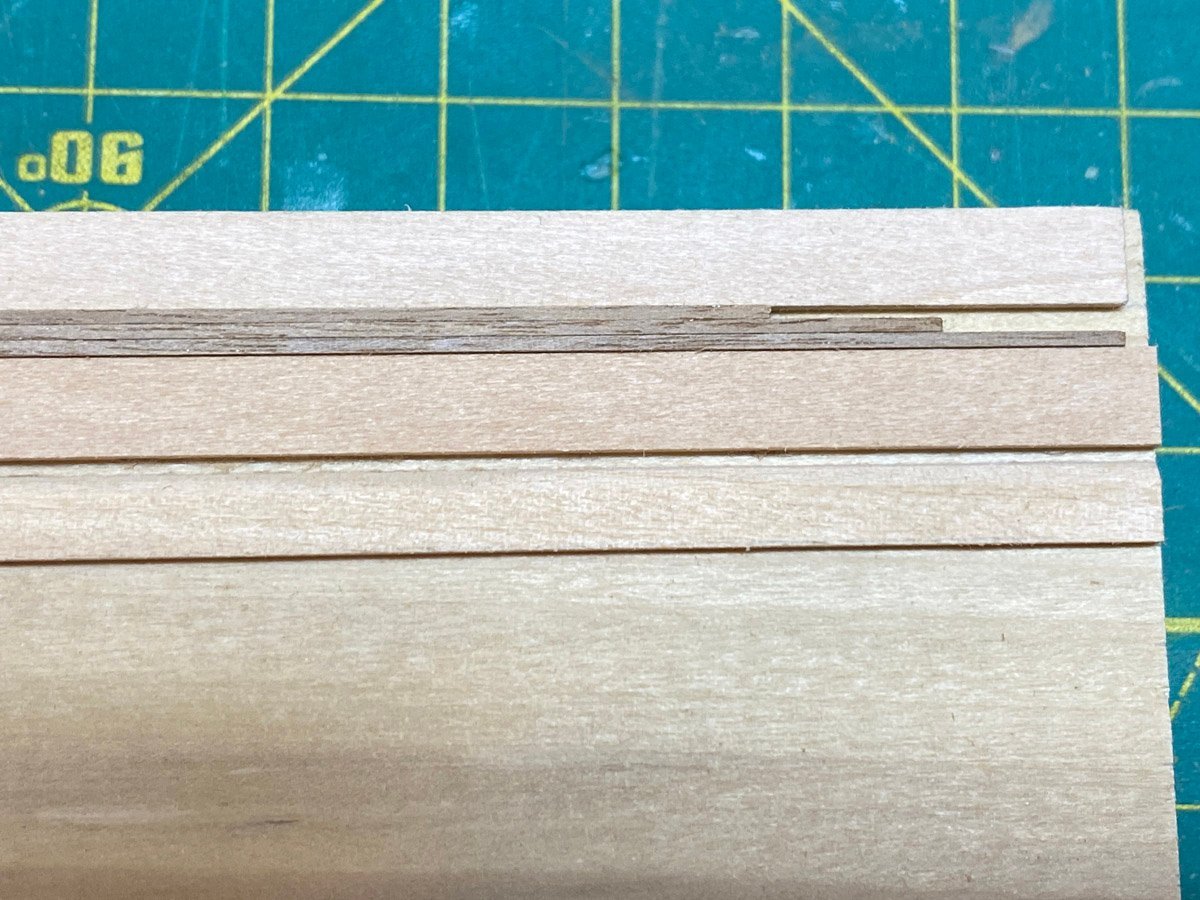
The top slot holds 3 strips while I sand the edges flat.
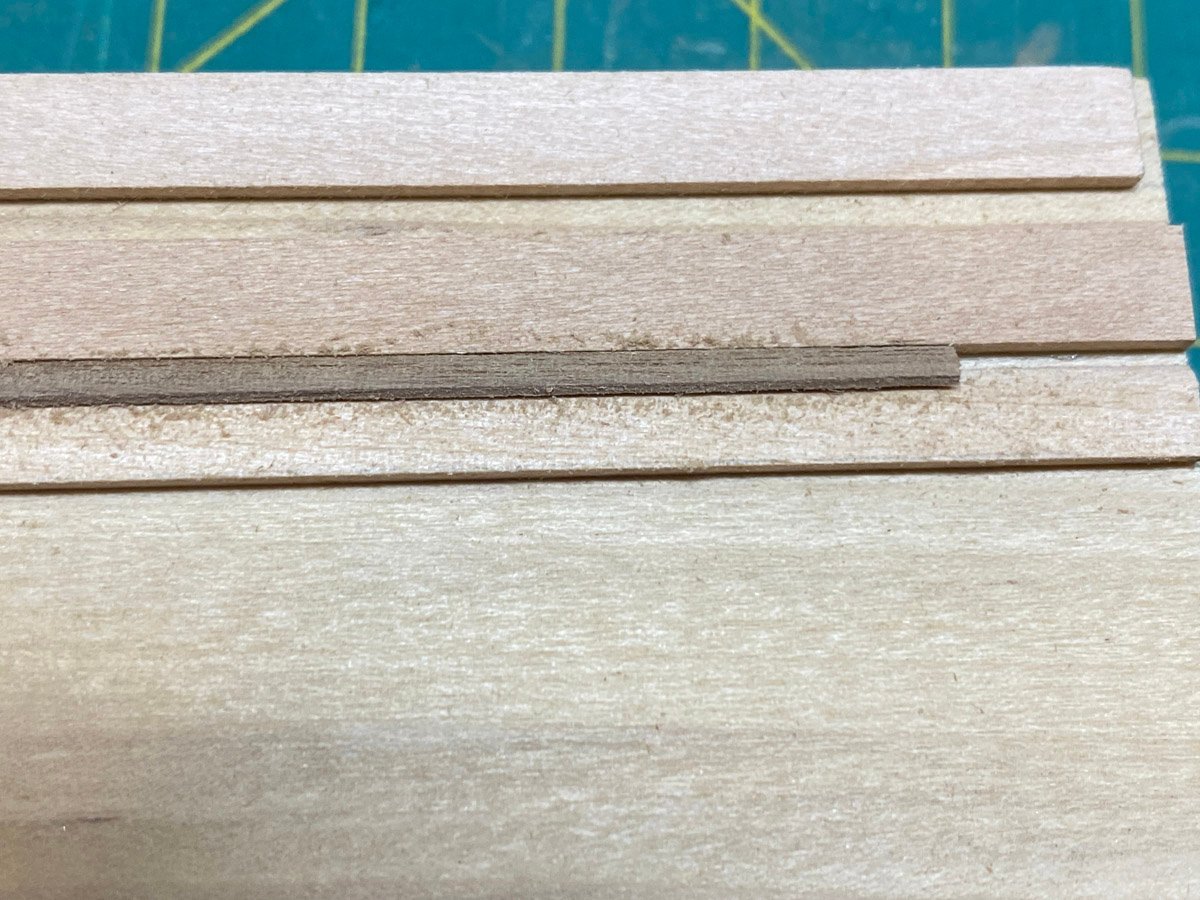
The bottom slot holds 1 plank at a 45 degree angle while I bevel the edges. It seems like a lot of work but I can sand and bevel three 20" planks in 5 minutes.
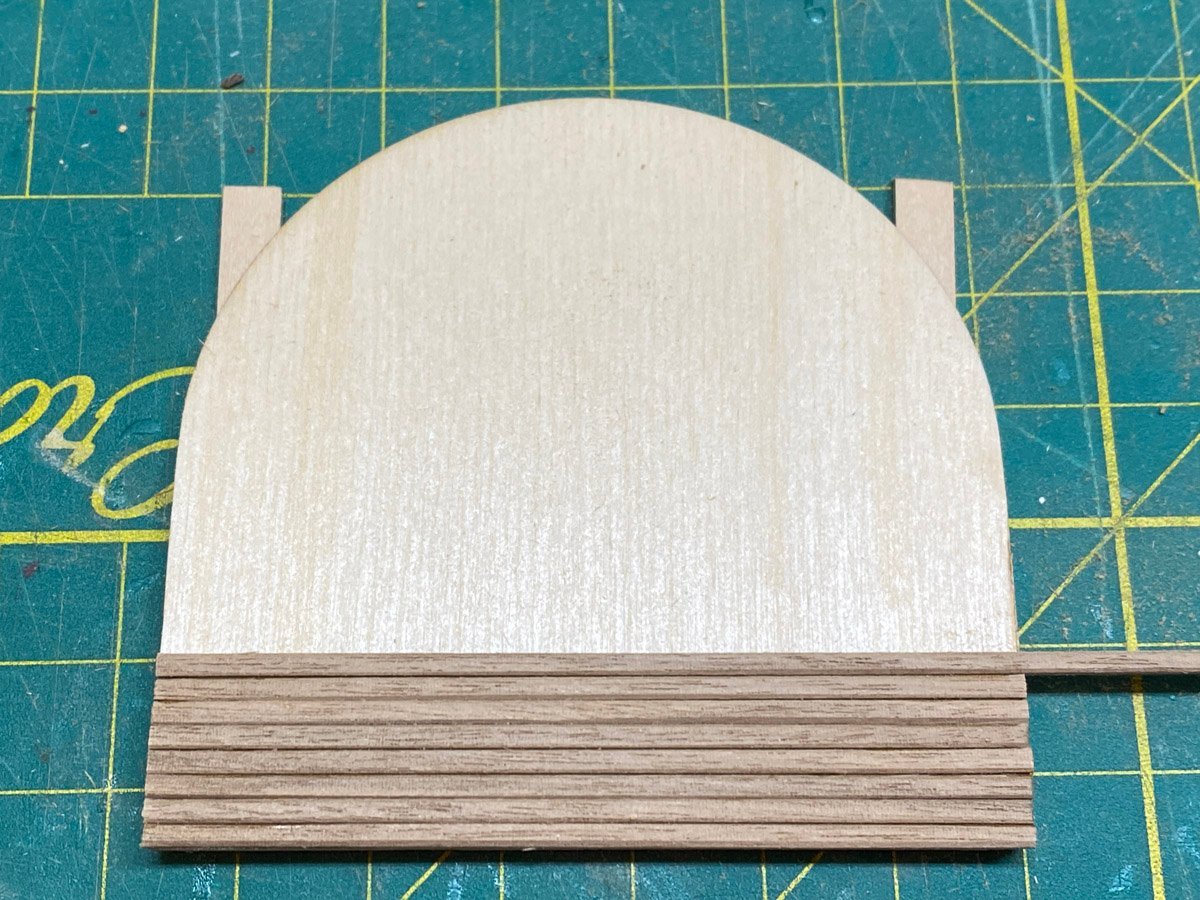
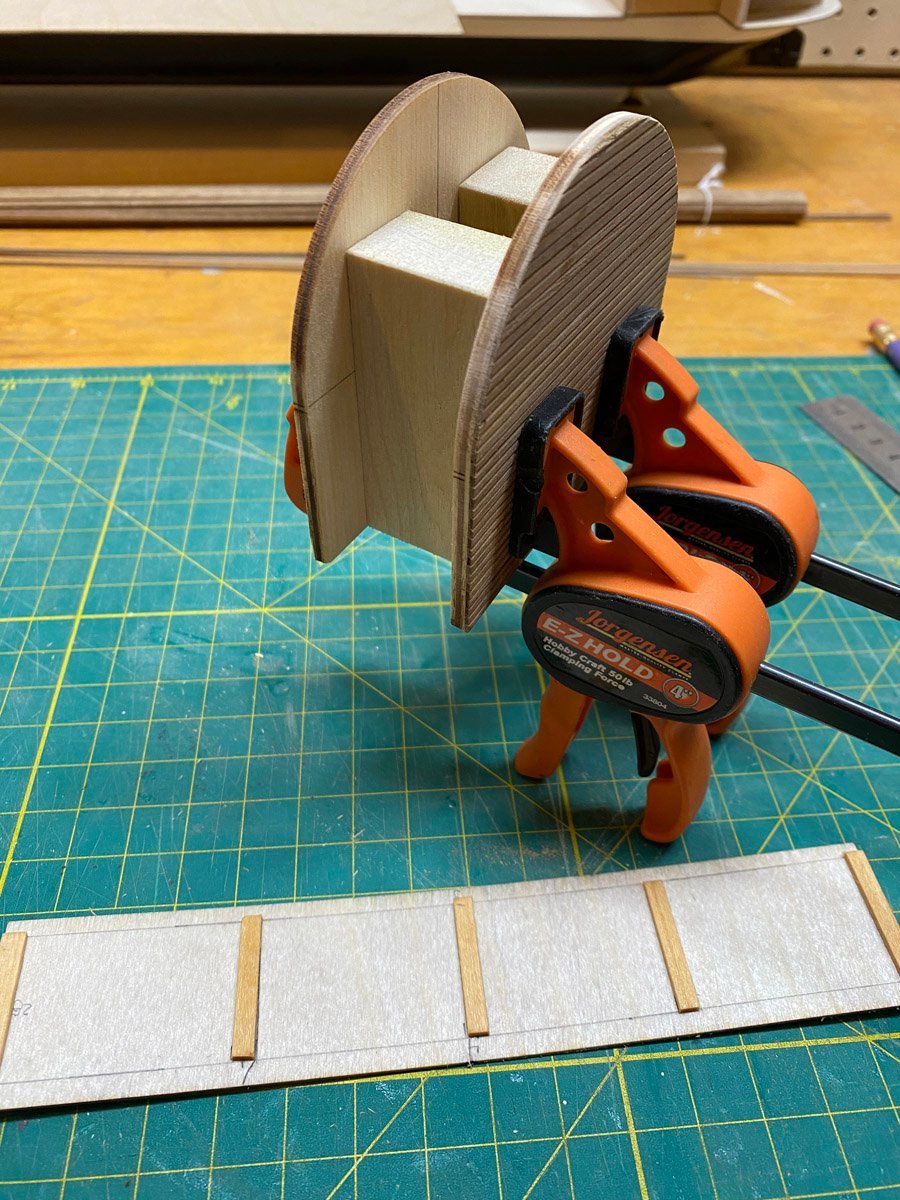
Here are some planks glued to the wheel covers. Using CA I can glue a plank and trim the end with a chisel in a few seconds. I love the look of the beveled planks. These pieces all get painted white, but other cabin walls will be stained natural.

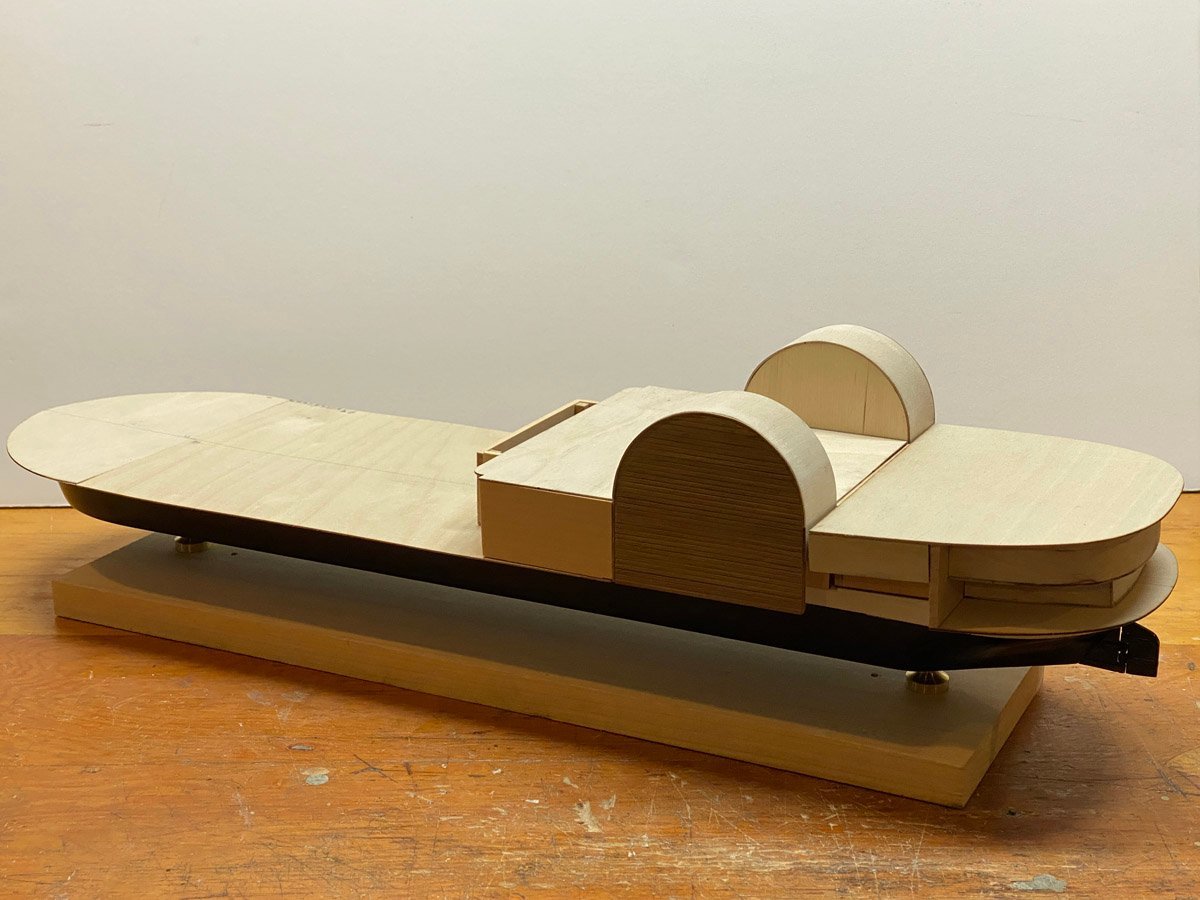
Here two wheel housings, one planked and one plain, are held apart by spacer blocks clamped in place like an ice cream sandwich. The sandwich gets skinned with the 1mm ply sheet at the bottom of the picture glued with CA. The whole assembly took a couple of minutes.
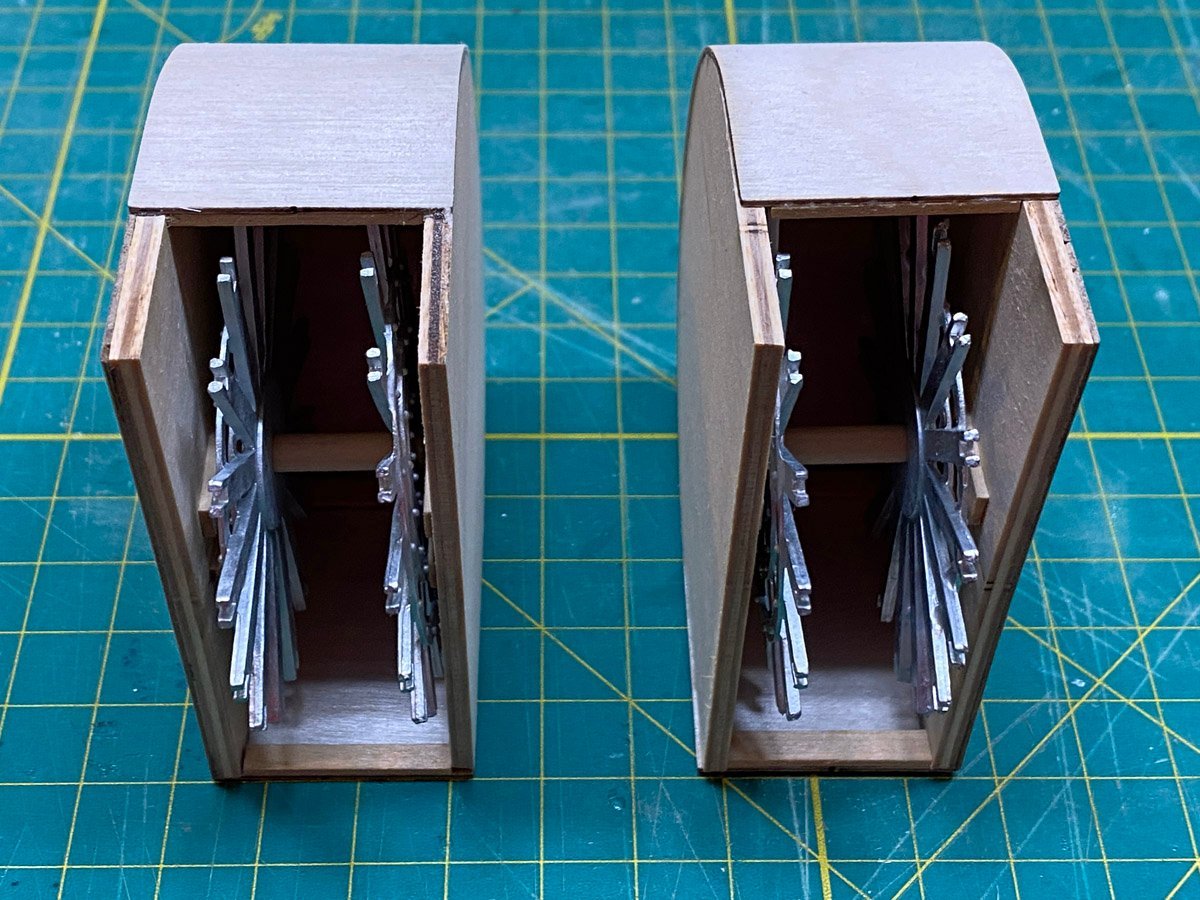
Finally, here are the two wheel housings with the wheel spokes in place to check the fit. The aft skin stops short of the bottom of the housing.
-
Cabins
The build log by rodgerdoger linked above has already been a huge help. Rodger noted several errors in the plans that have already bit me. Parts are mislabeled, drawings are confusing, drawings that are labeled in Italian "Scala 1:1" are actually about 94% full size, and laser-cut decks that should be the same shape don't match.
Cabin structures are built starting from the stern from flat stock attached to the bottom of the next deck piece above, then skinned with laser-cut plywood. First problem, the cabins are mislabeled in the instructions. I've corrected that in red below.
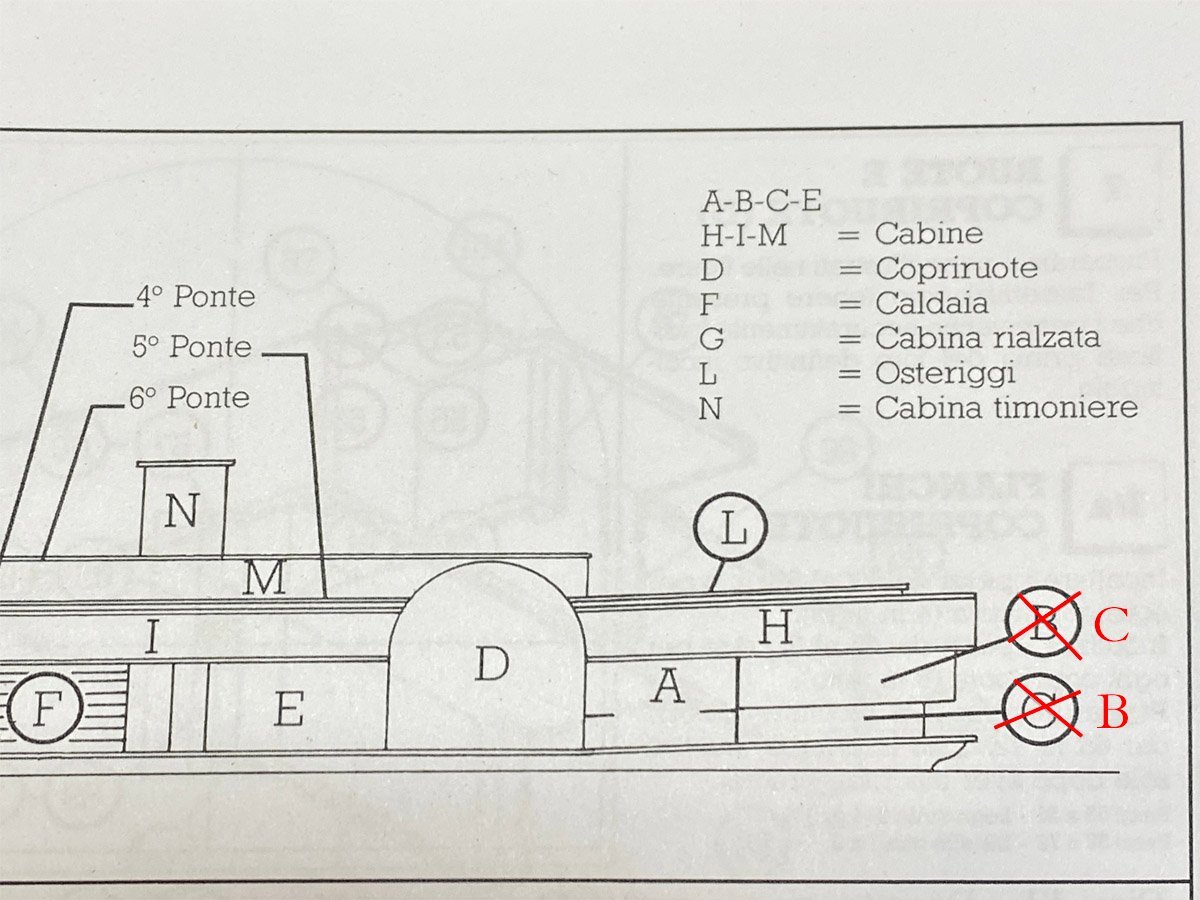
I built the cabins in order, A, B, C. The flat stock for A & B was exactly the right height. The plywood skin for C seemed too wide, so I trimmed off about 4 mm to make it flush with the frame. And then I realized that B+C<A, by about 4 mm.
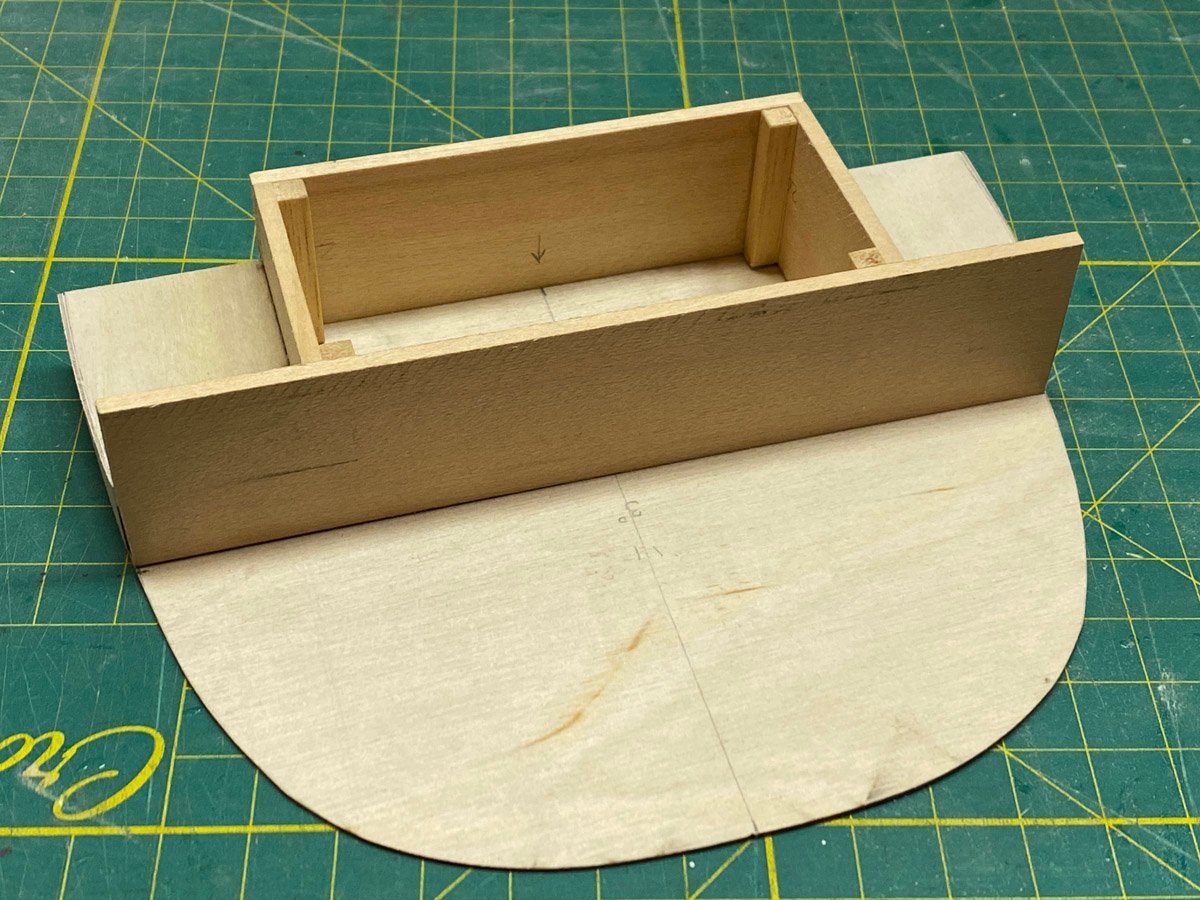
Cabin A.

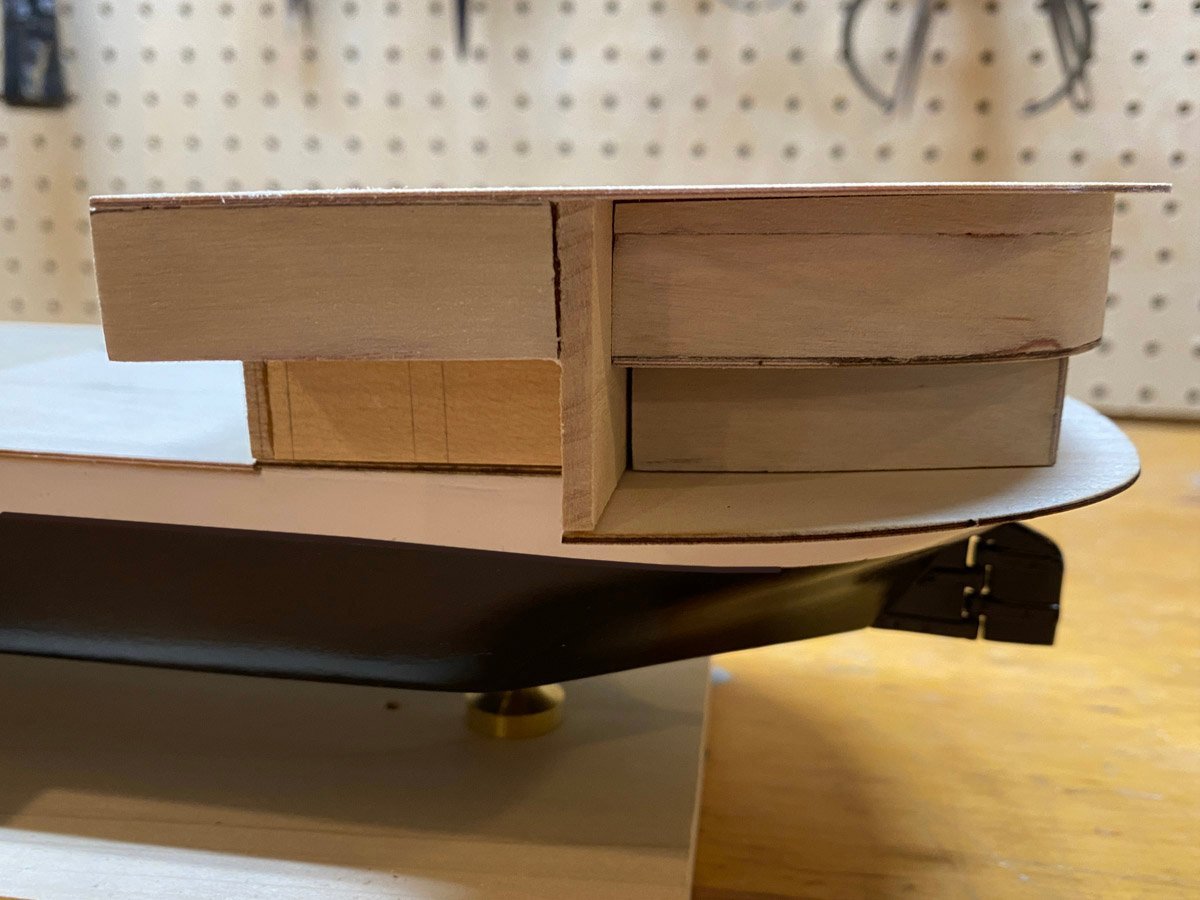
Cabin C skin incorrectly trimmed flush with frame.
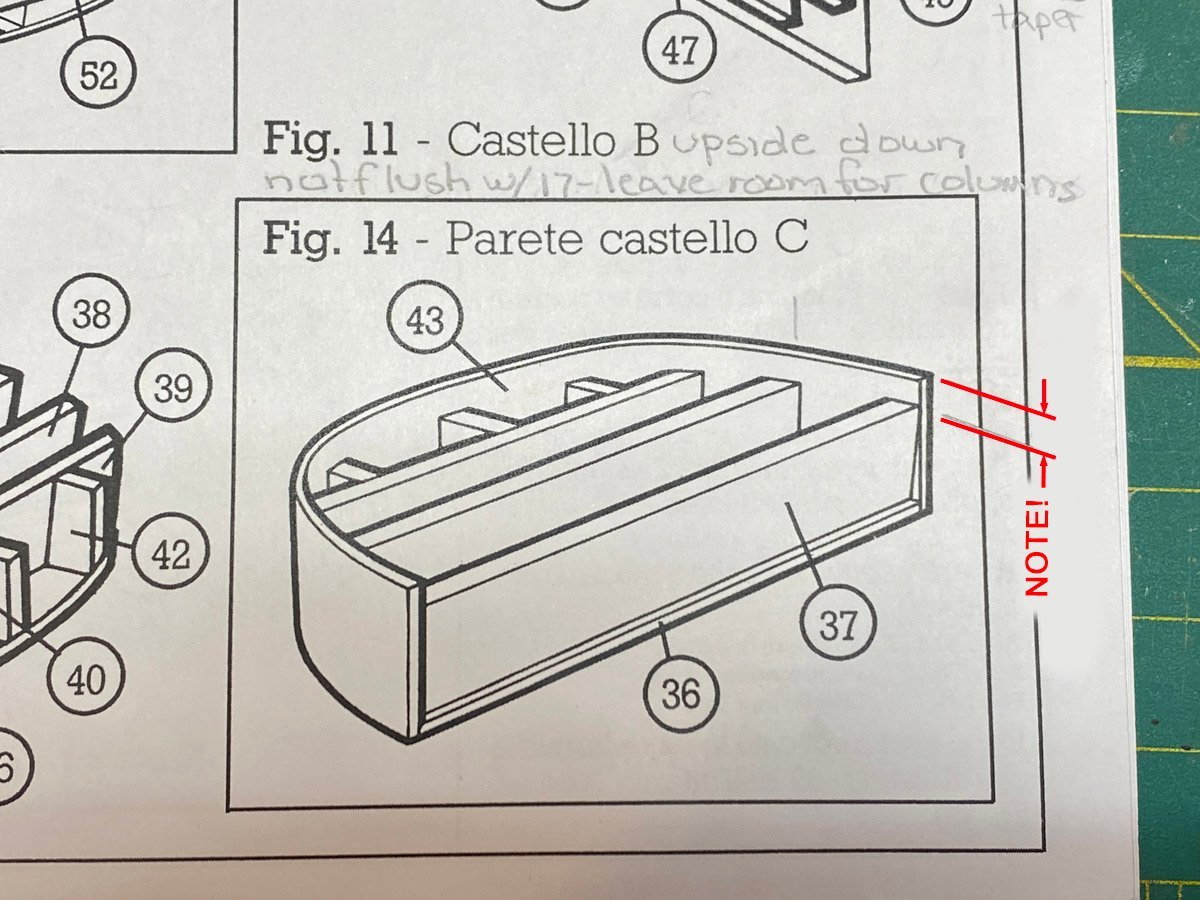
Cabin C plans show skin taller than frame. Luckily I saved the cutoff, so I added some support blocks and glued it back on.
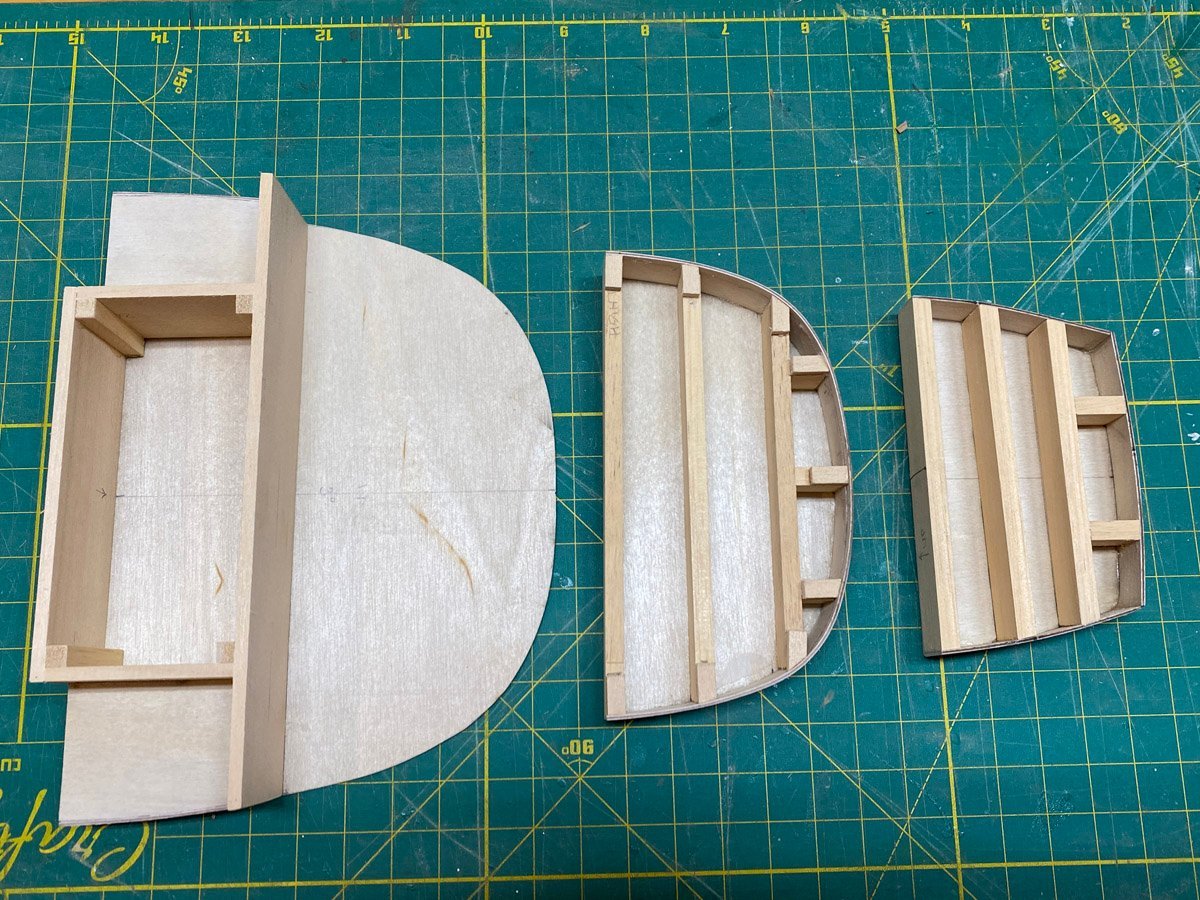
Cabins A, C after repairs, and B.
Now everything stacks up correctly. This will all get covered with doors, windows, and planks eventually.
- yvesvidal, gsdpic, GrandpaPhil and 1 other
-
4
-
Deck Construction
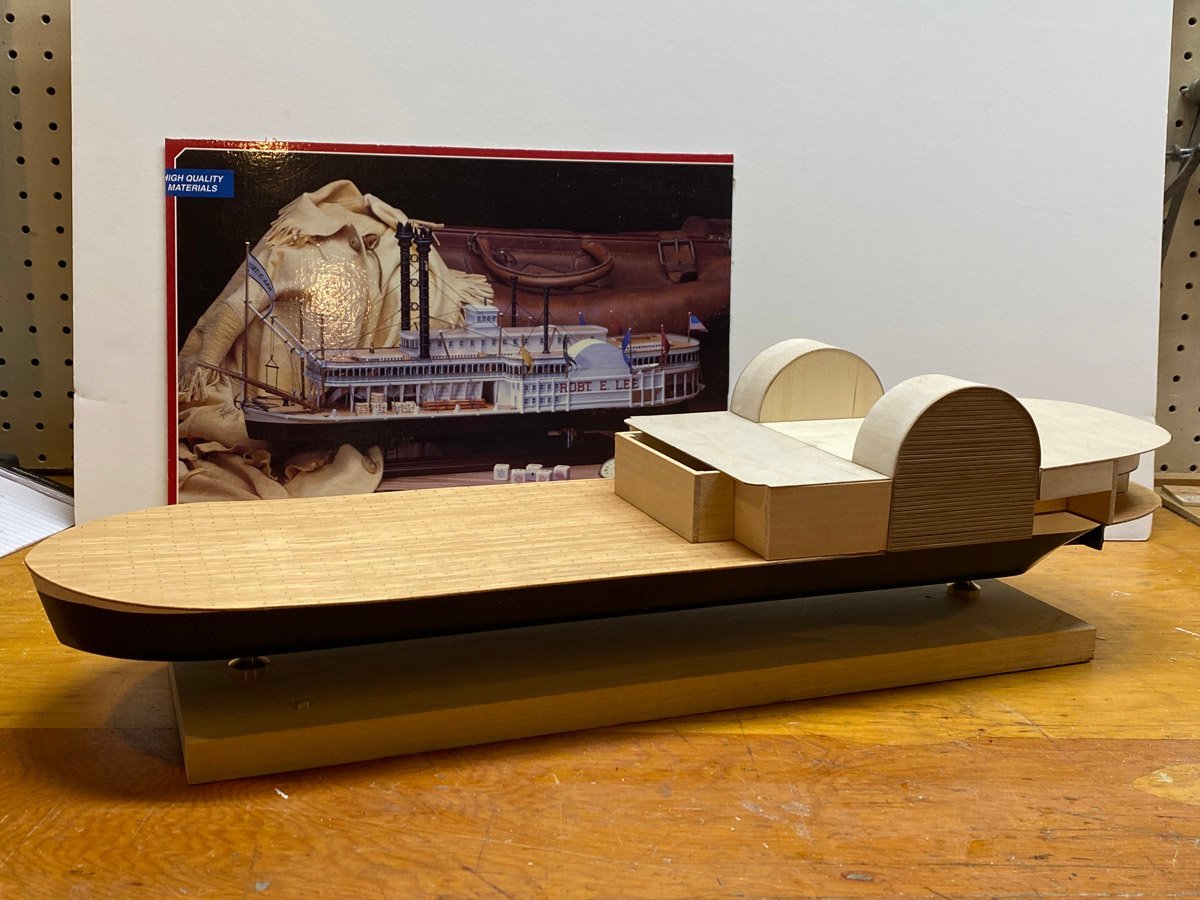
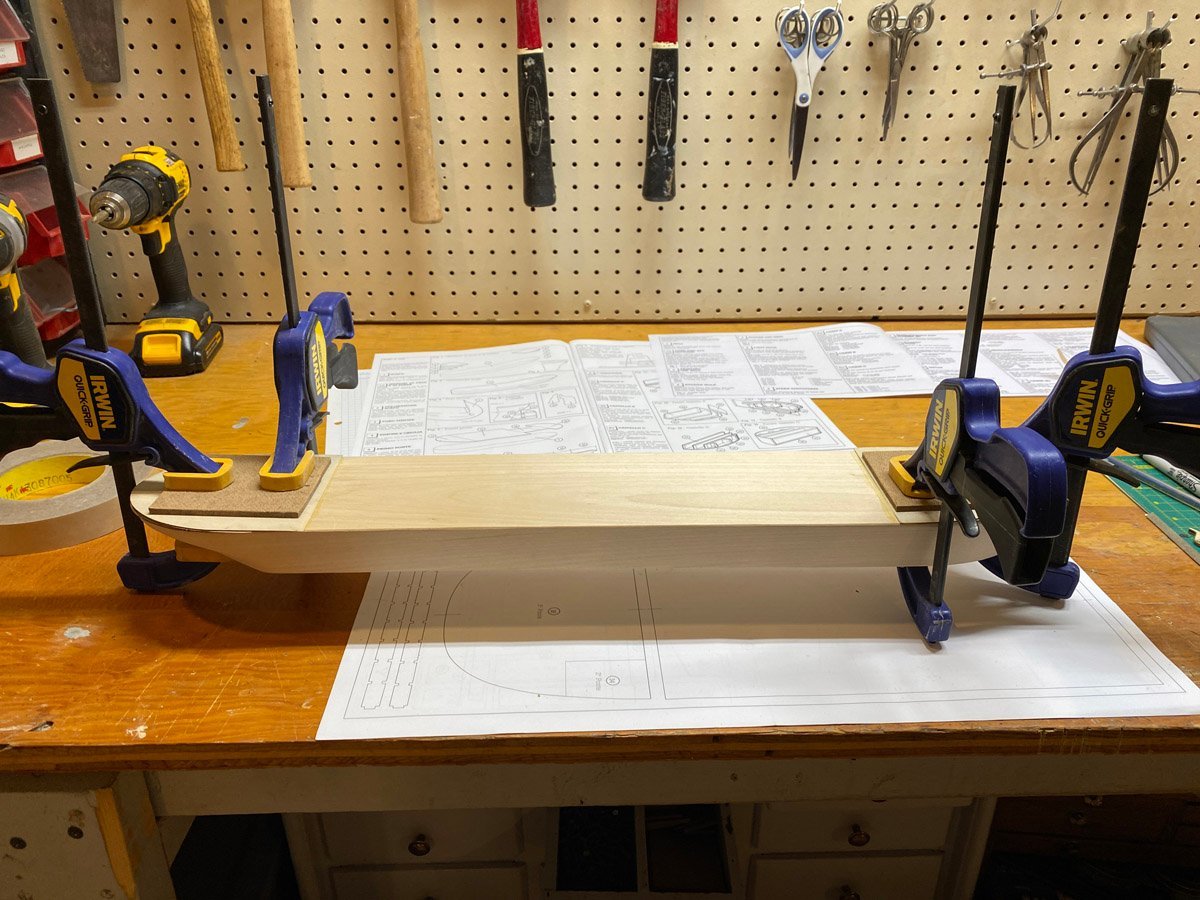
I finished painting the hull and attached it to a temporary stand. I ordered a nice cherry stand and brass pedestals from Bluejacket Shipcrafters but will have to stain and finish it first.
Four thin plywood deck segments get glued to the hull with huge overhang all around. The ship is like a barge with a gymnasium built on top.
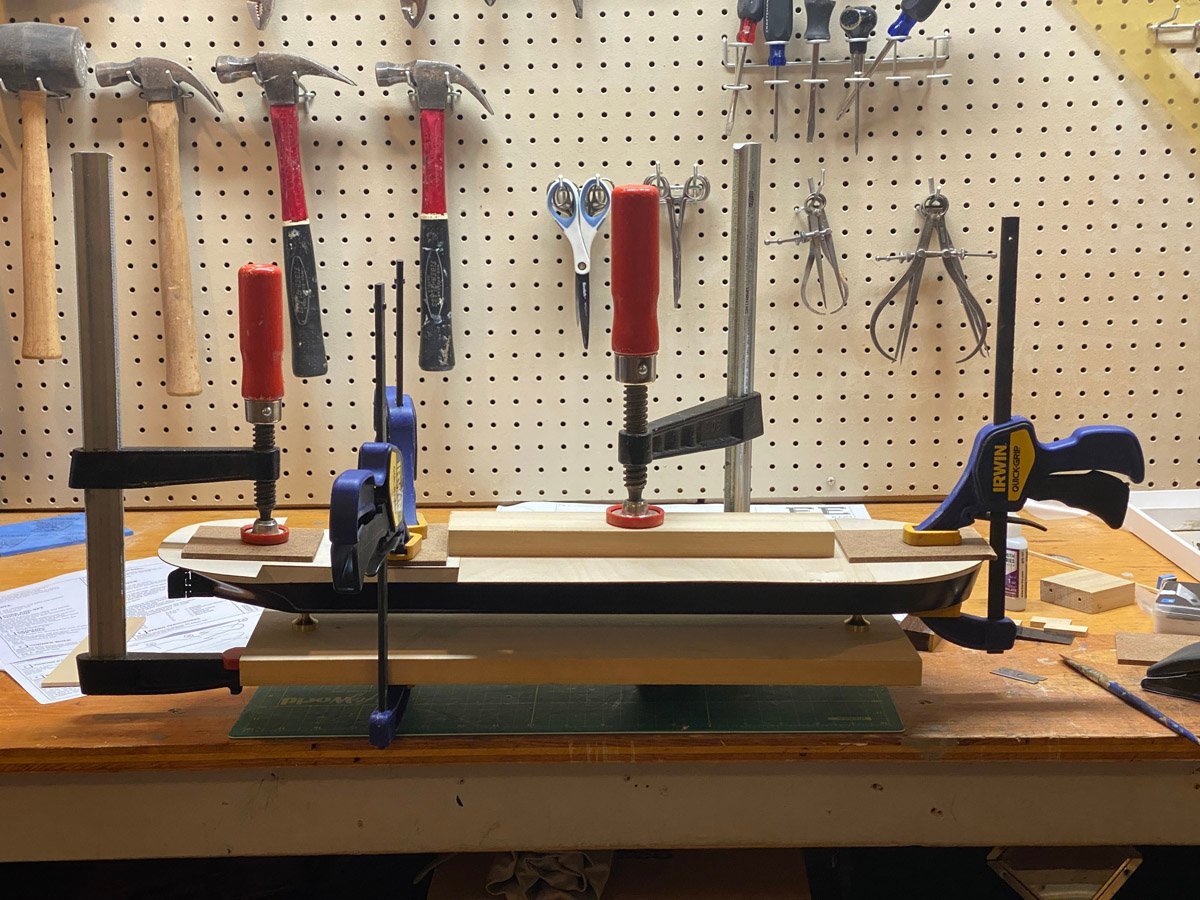
Decks glued and clamped. This is probably one of the few times that I'll use Titebond glue.
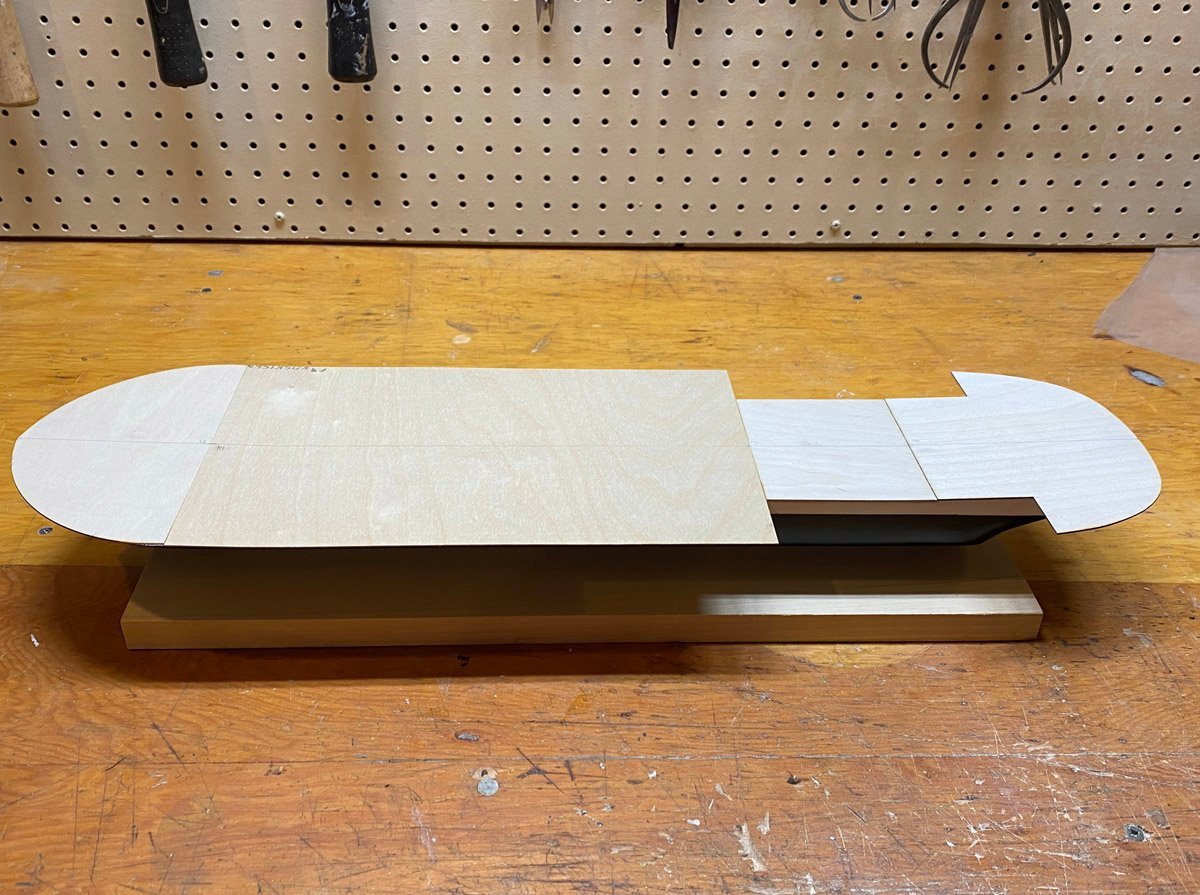
Decks glued in place. No one will ever see the hull.
- GrandpaPhil, schooner and Canute
-
3
-
-
Hull Construction
The hull is pre-built out of 1.5" thick clear white pine. The bow and stern must be slightly raised using pieces of 1mm ply that are stacked, sanded, and glued in place.
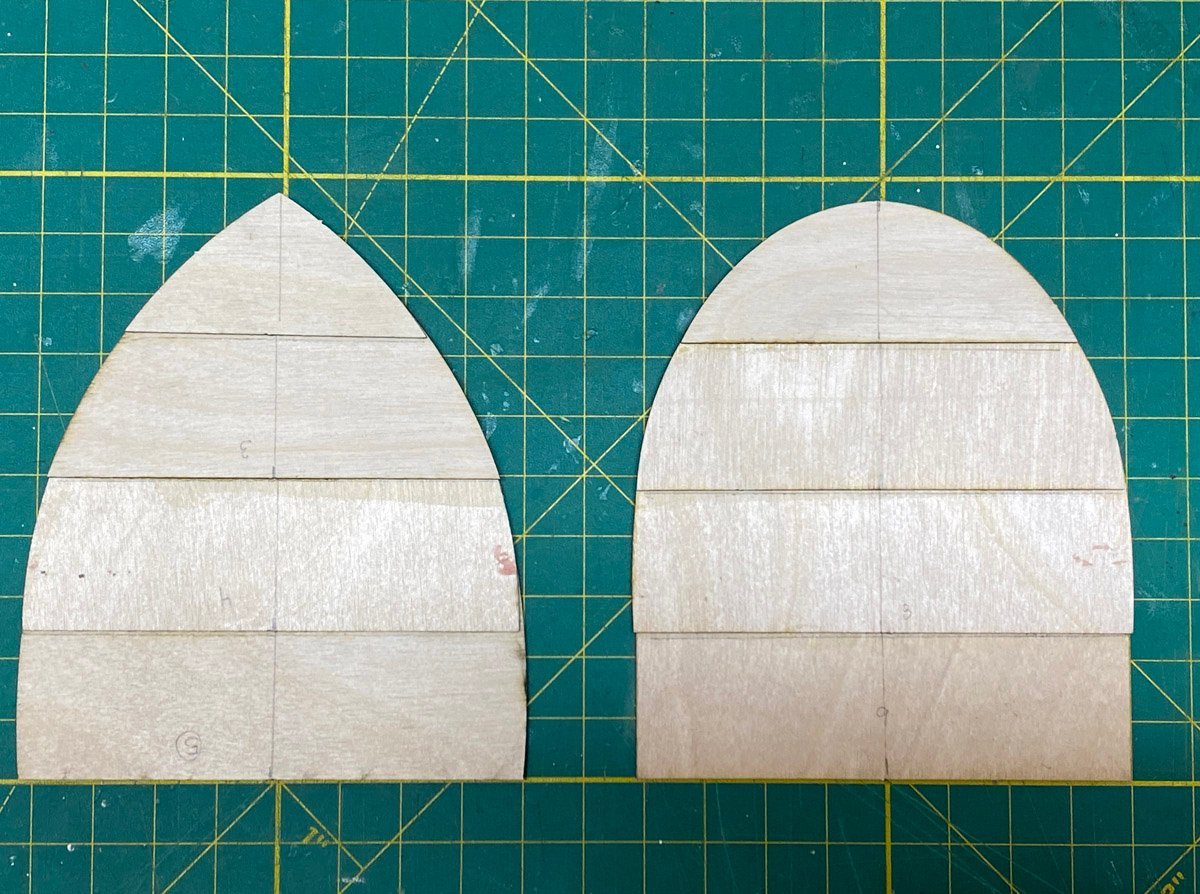
Bow and stern pieces stacked,
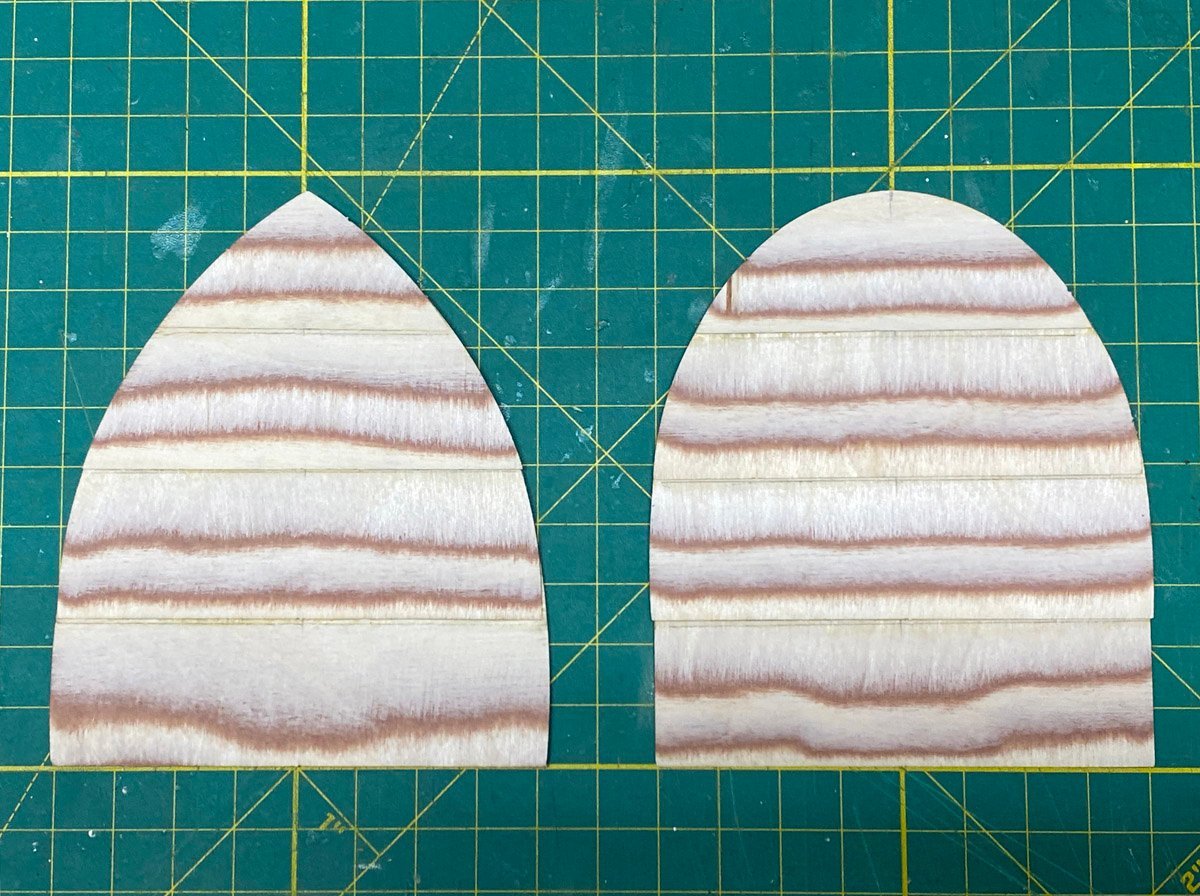
sanded,
and glued in place.
Step 2 - Paint the Hull!
I have never completed a hull so quickly! But after some rare forethought I realized that it might be wise to build the rudder first.
Step 2a - Rudder
The rudder is attached to a keel post that didn't come close to fitting the hull. I had to reshape the hull, drill a hole for the rudder post, and make a new keel to fit.
Original keel
Reshaped hull with rudder in place.
New keel cut to fill the hole.
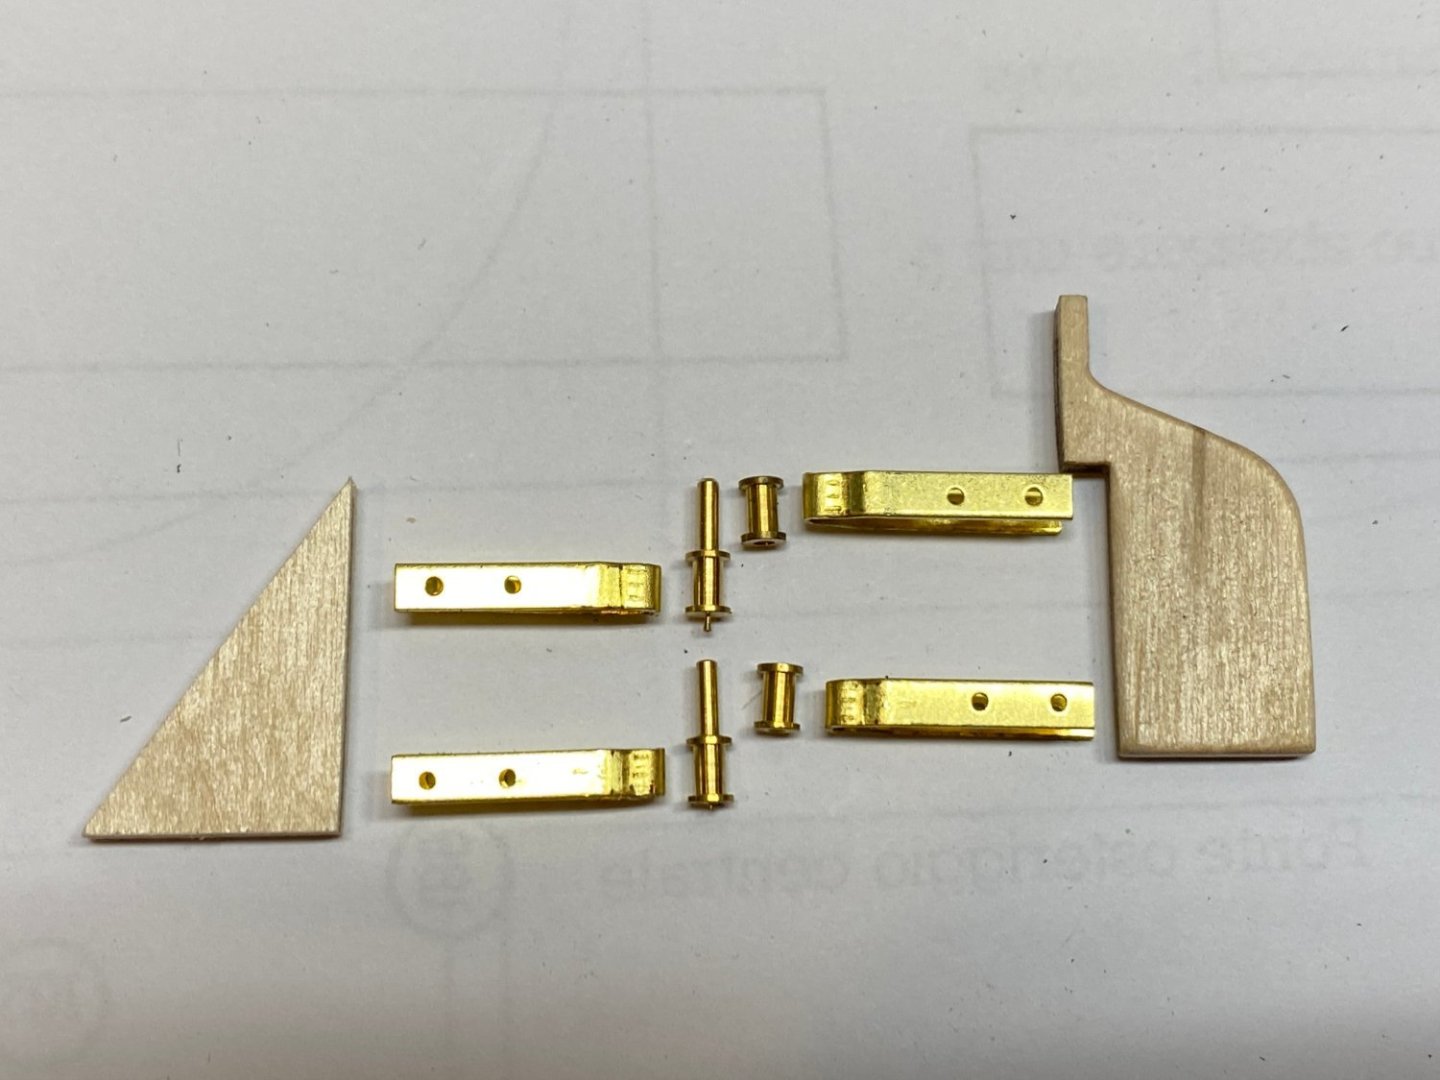
The brass rudder hinges are absolutely beautiful.
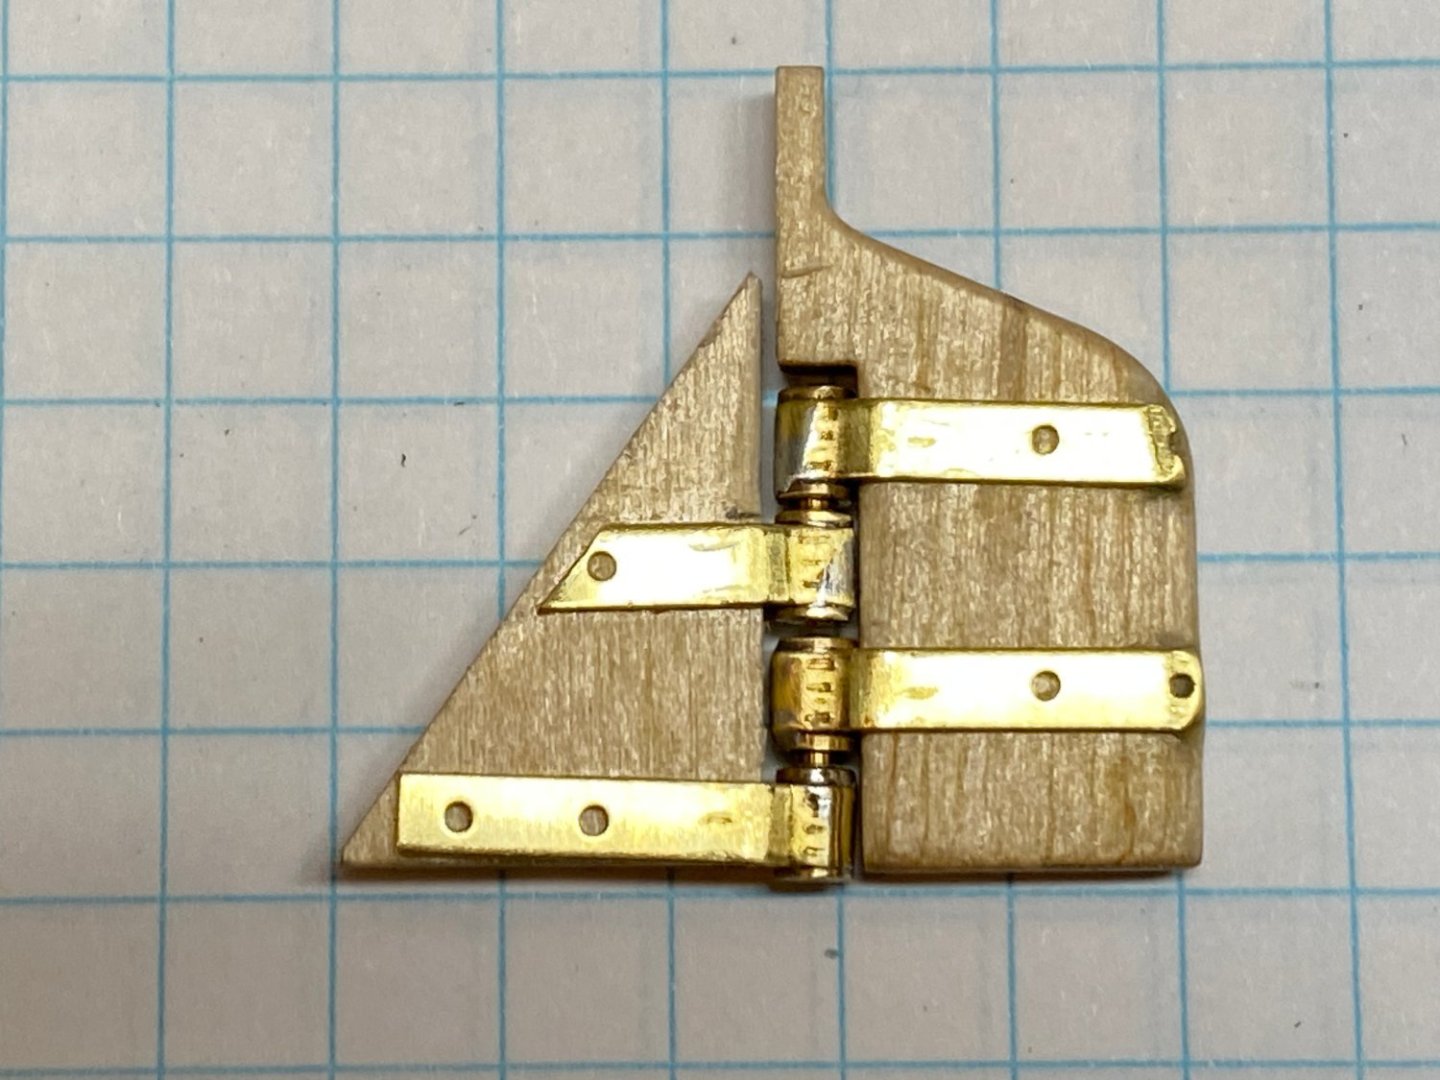
Assembled rudder.
-
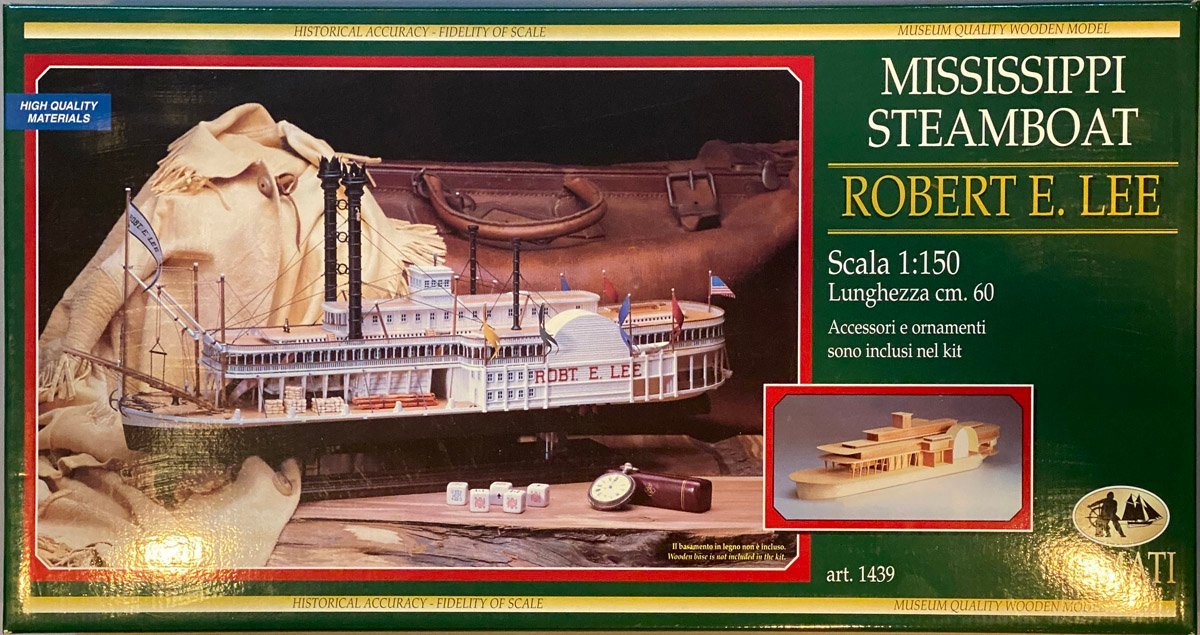
What's in the Box
Amati's kits are packaged like an Apple computer. Absolutely a pleasure to open.
Another view of the box.
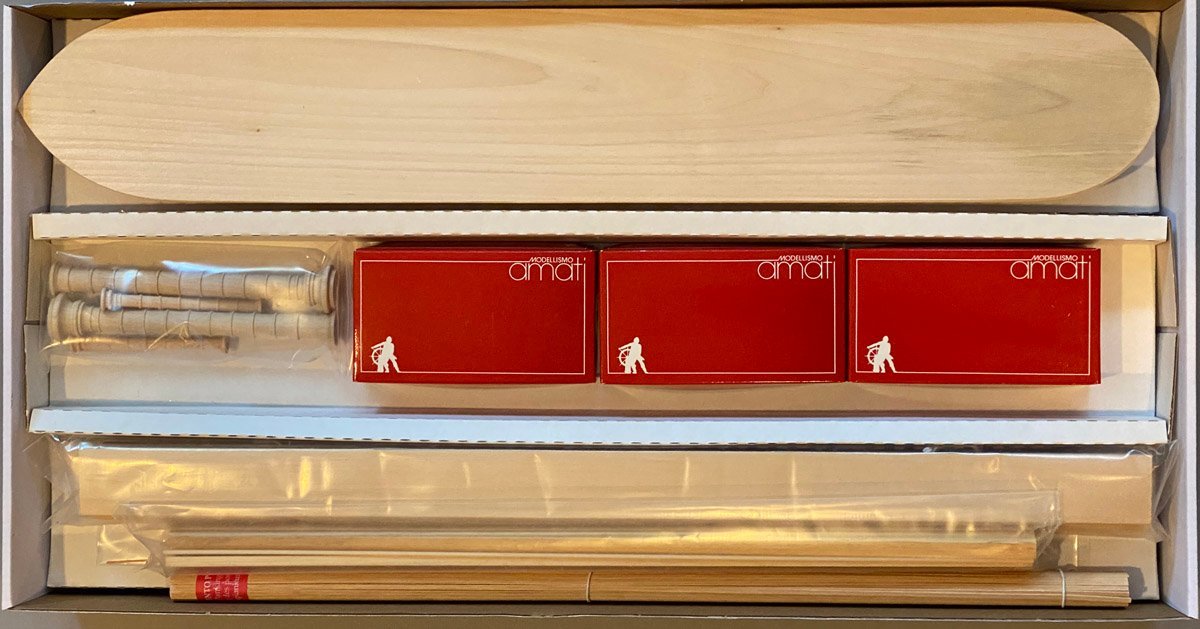
Inside the box. The hull is fully carved from clear white pine about 1.5" thick.
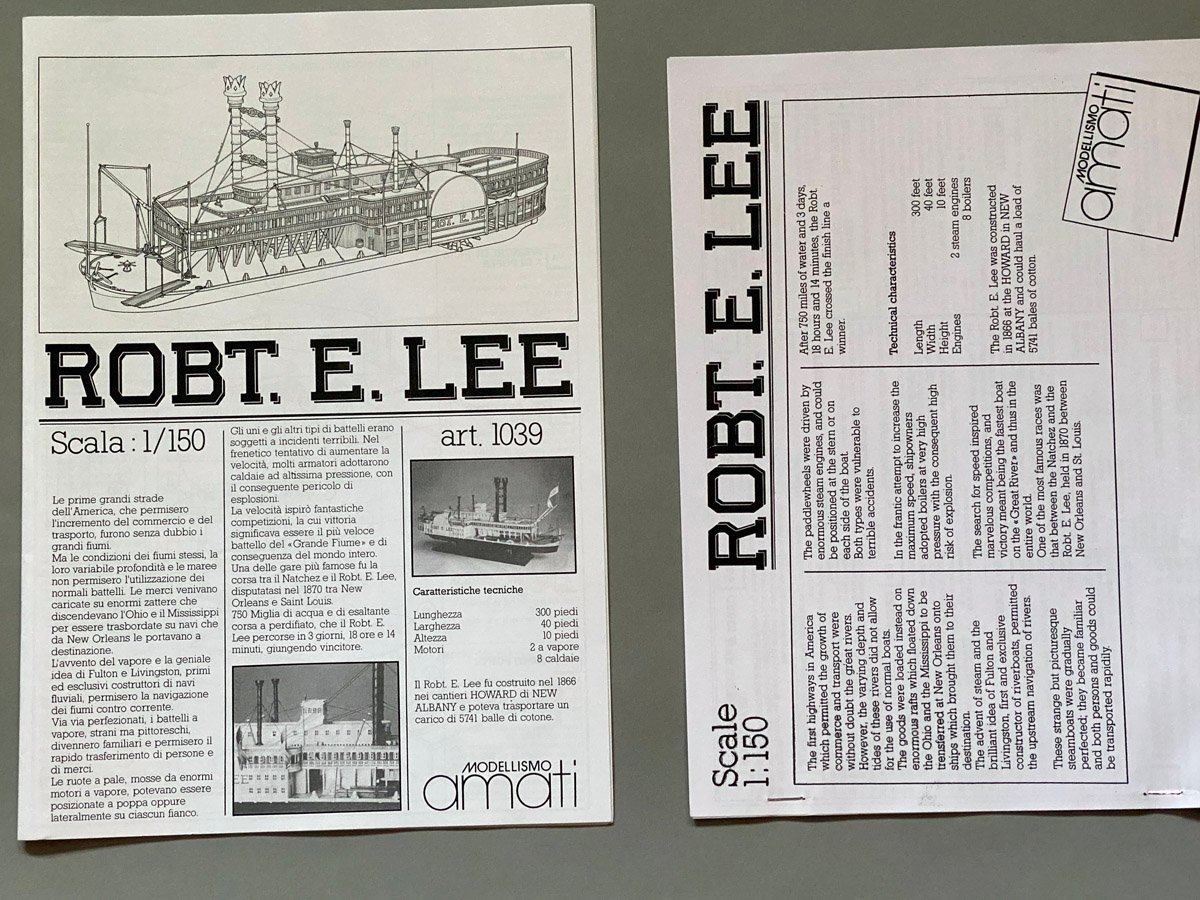
The detailed instructions are in Italian but separate sheets have English translations
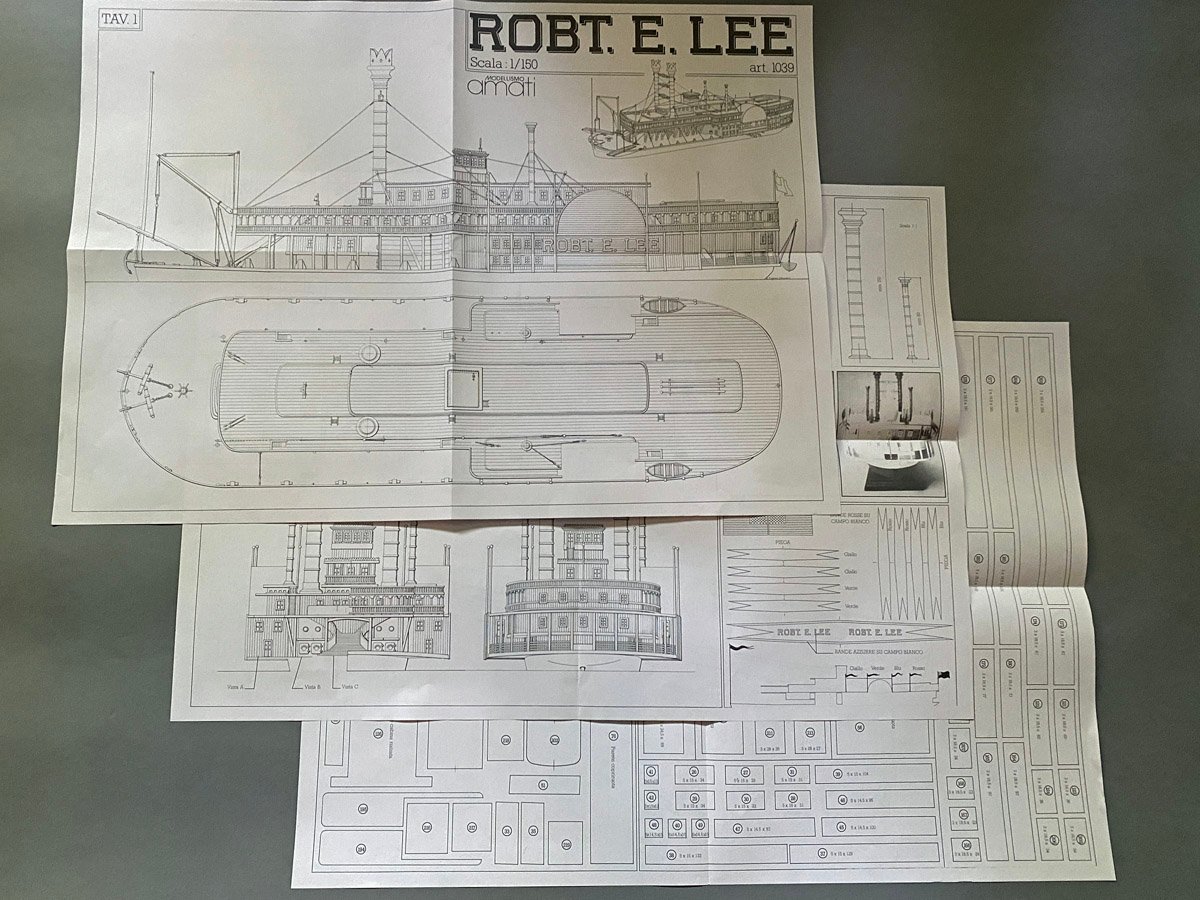
Three sets of plans printed on both sides. Mostly three-views of the ship, but one sheet of full-sized patterns for various parts. The laser-cut parts are not numbered so you need this sheet to identify them.

Hull, lots of beautiful strip wood, and some wires.
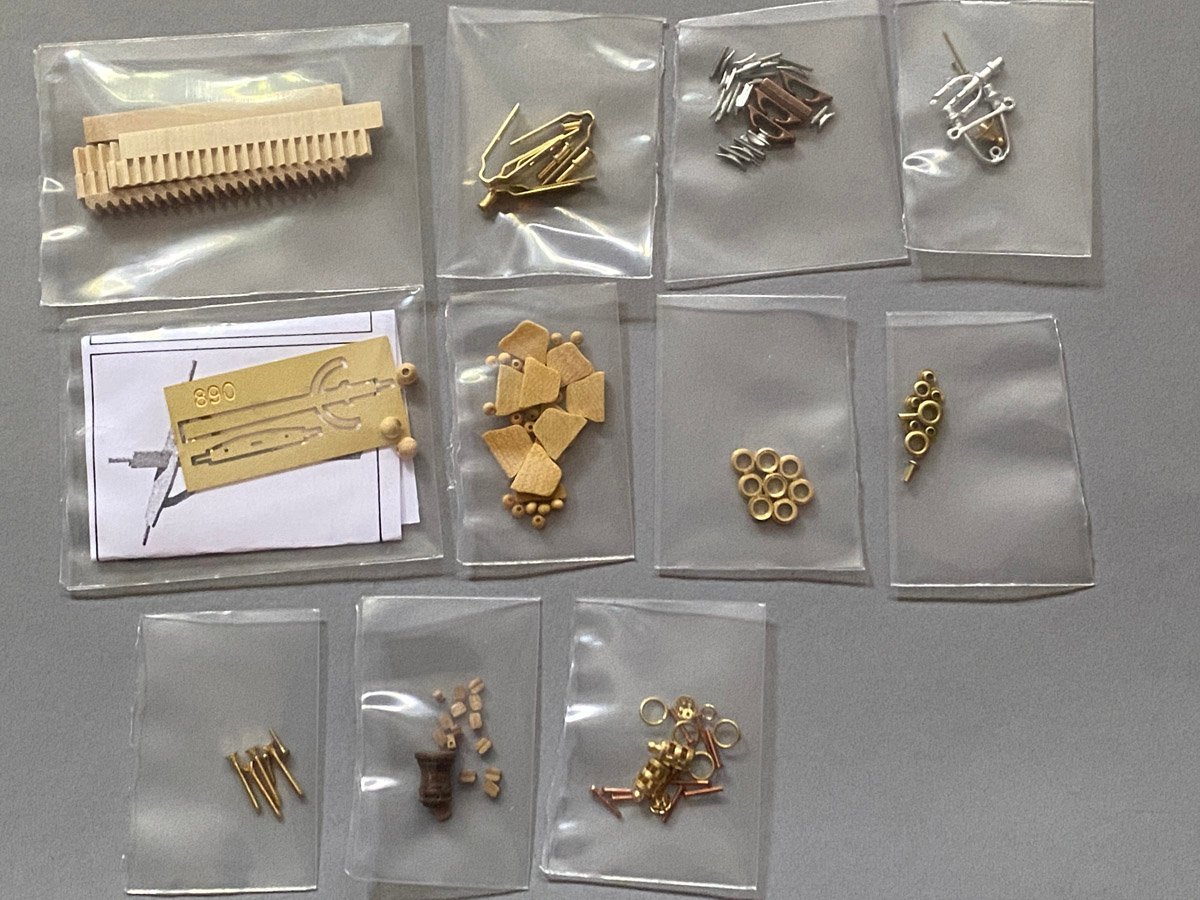
Stairs, hinges, and various cast or machined parts.
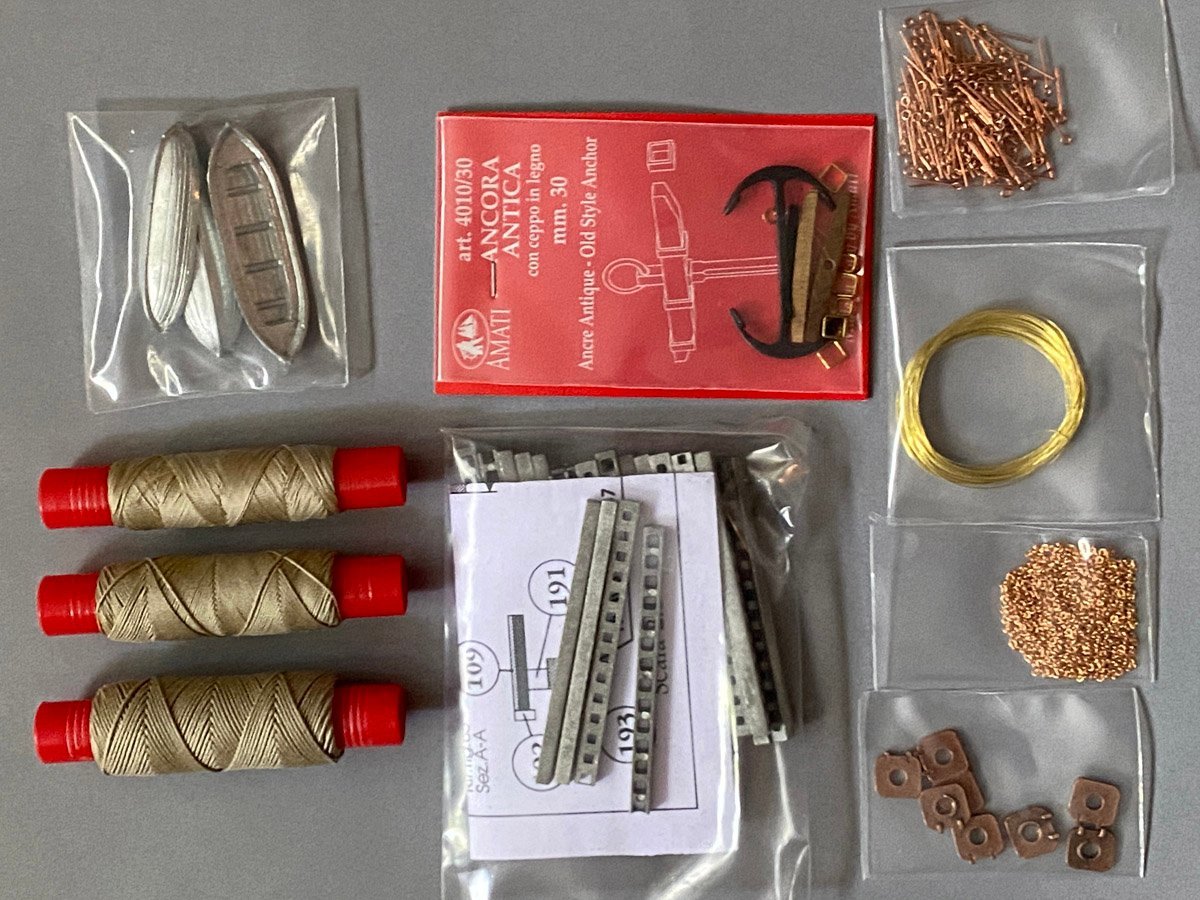
Rigging, lifeboats, anchors, chains, etc. Seems like the rigging should be black?
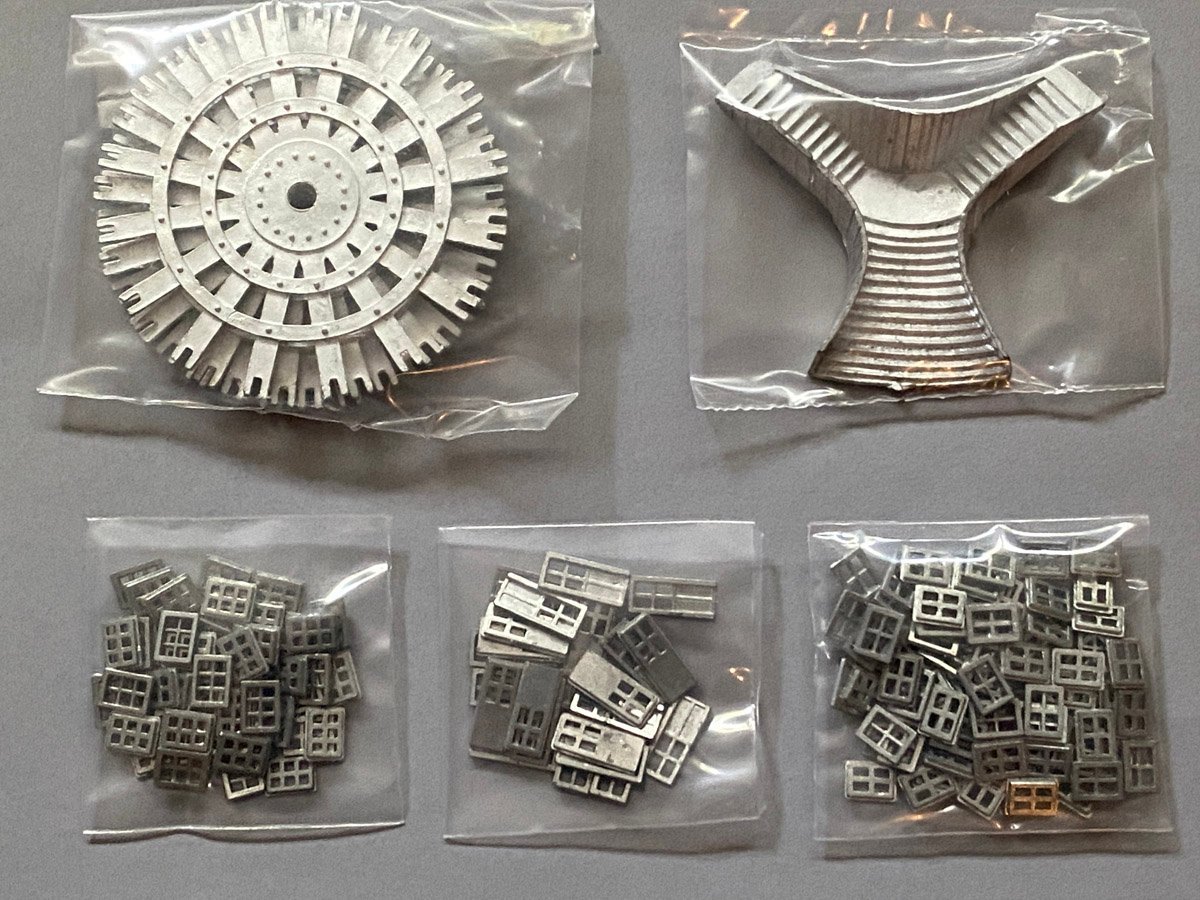
Cast paddle wheels, doors, windows, and the grand staircase.
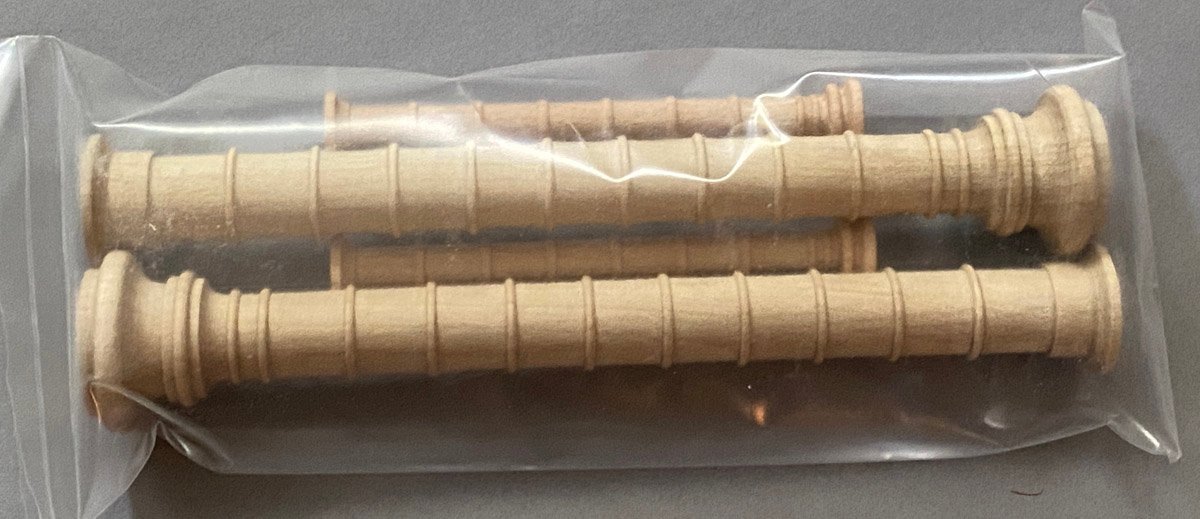
Turned smokestacks.
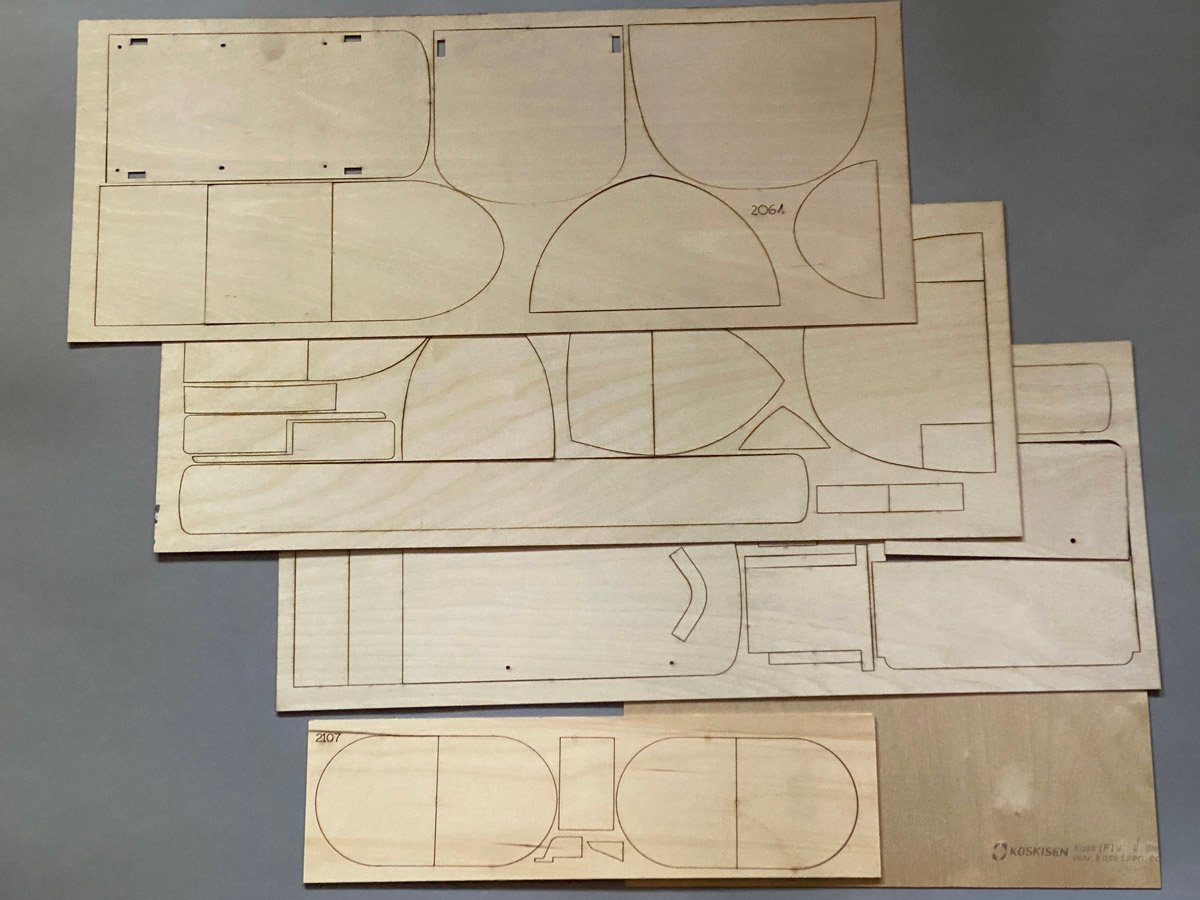
Laser-cut decks in 1mm ply.
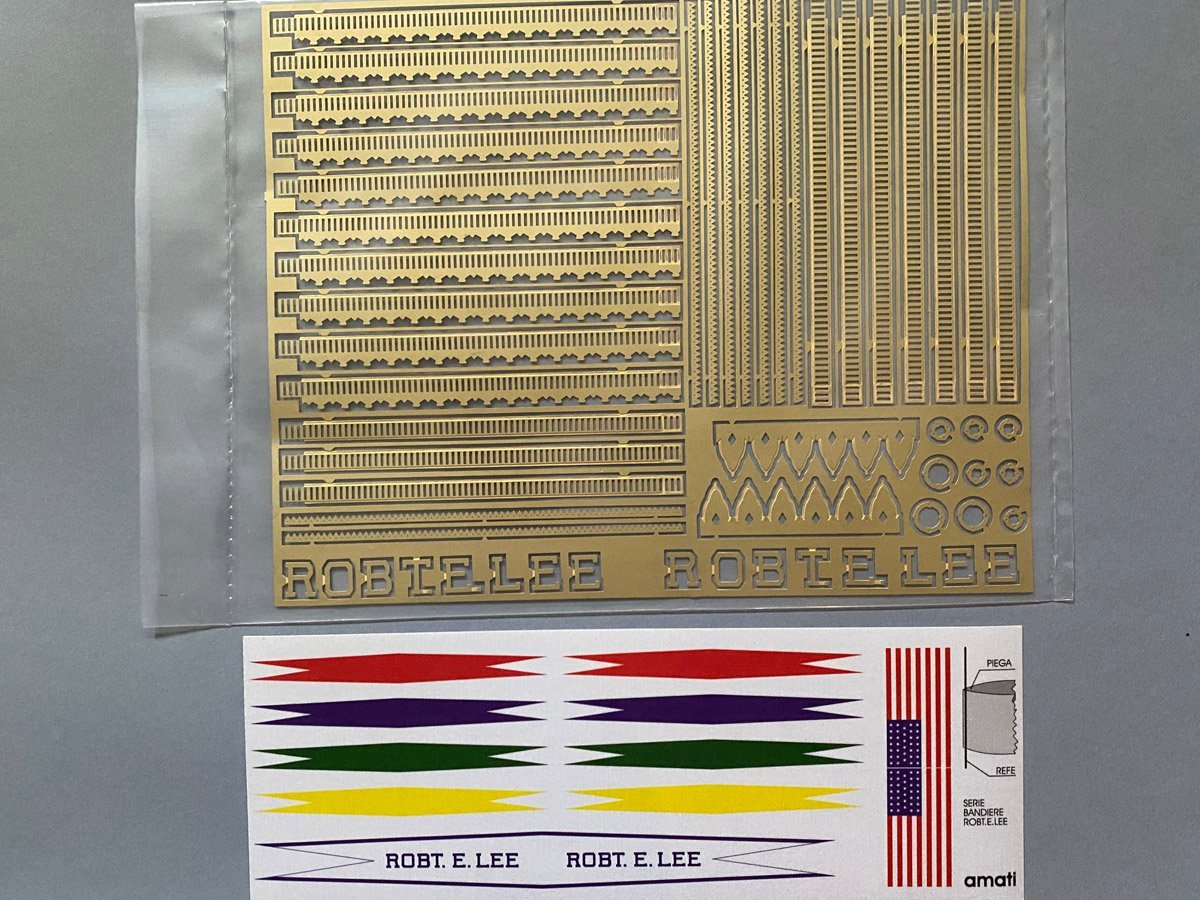
And finally photo-etched filigree and printed flags.
- GrandpaPhil, Canute, yvesvidal and 2 others
-
5
-
Reference Material
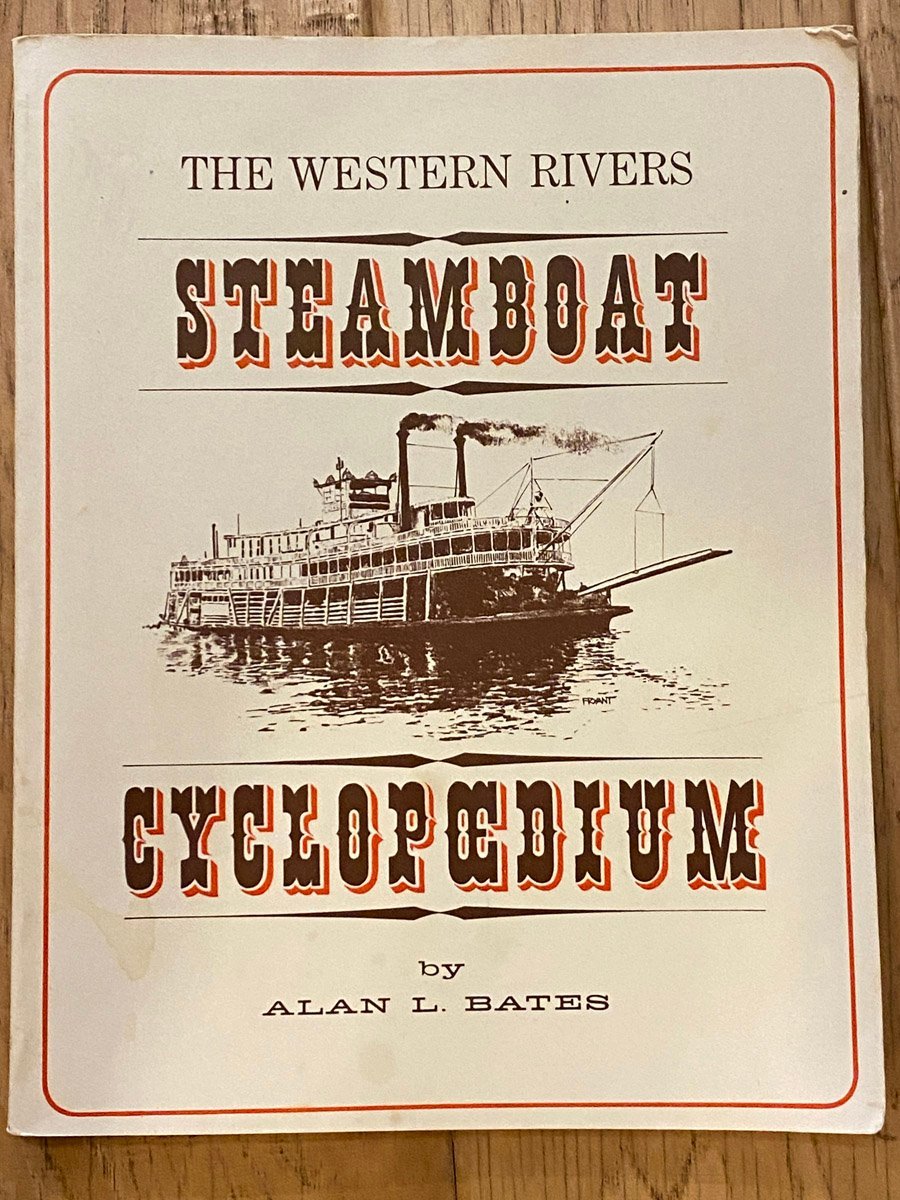
The link above by bcochran has excellent historical information about the Robert E Lee. His link introduced me to this book,
The Western Rivers Steamboat Cyclopaedium, by Alan L. Bates, Hustle Press, Leonia, NJ, 1968 (I was in high school.) I found a perfect copy of the 2nd printing from 1981 on eBay. The author worked on ferry and excursion boats in the 20s, as a deckhand on towboats in the 40s, and finally as mate on the BELLE OF LOUISVILLE in the 60s. He was an architect by trade and the book is filled with his drawings of steamboat construction. I read it cover-to-cover in one sitting and learned so much. For instance,
The hulls were very long, narrow, and shallow, and tended to flex. The engines and wheels were extremely heavy, so the hulls wanted to sag at those points. To keep everything rigid the ships were braced internally with poles, cables, and chains, like a suspension bridge. You can see some poles connected by cables sticking out of the roof of the model on the box top shown above.
The stern-wheelers had two double-acting cylinders connected to the wheel at 90 degrees so there were no dead spots. But the side-wheelers had one cylinder on each wheel, so there were two dead spots. They put big paddles at the max-power spots and tiny paddles at the dead spots so the wheel’s momentum could carry it around. That’s a lot of clever engineering for an old boat.

-
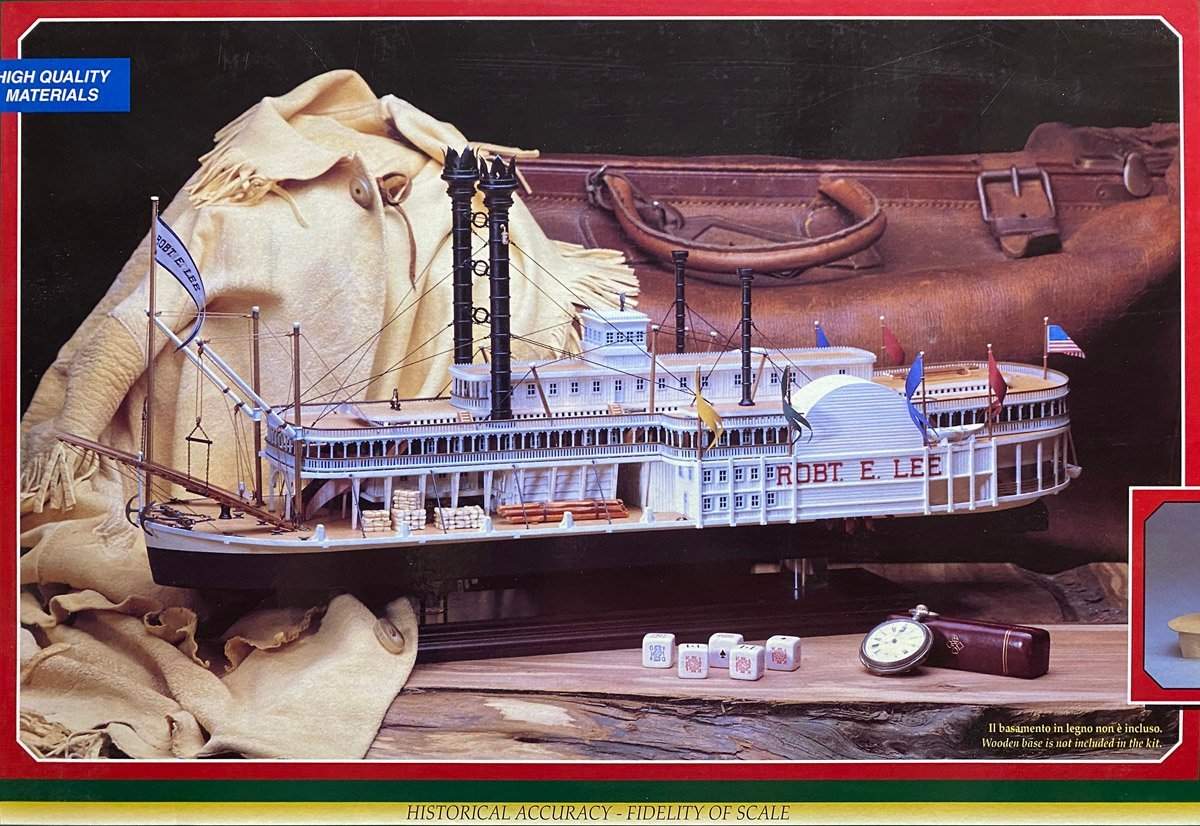
I am starting a build of the Mississippi River Steamboat Robert E Lee. This is something that I don't know much about, and I would appreciate any advice. The kit is by Amati, and the photo of the box top shows the completed model. I have built several Amati kits and know that their attention to detail is superb, so I am confident that this will build up into a beautiful model.
There are a lot of build logs of this kit on MSW and a lot more of other Mississippi riverboats, so I will forego the history lesson and post links to the other build logs. This will help me find them in the near future when I am trying to figure out some complicated assembly. Please let me know if I missed your build.
Mississippi Riverboat Builds on MSW
Robert E. Lee Steamboat by John Ruy - FINISHED - Bluejacket Shipcrafters - 3/32” to 1’ scale 1:128
Beautiful build, vintage kit, good history and discussion.
Robert E Lee by rodgerdodger - FINISHED - Amati
Beautiful build, ~7 months
Robert E Lee by Script - FINISHED - Amati - 1/160 Mississipi RiverboatBeautiful build, incomplete log after system crash
Robert E Lee by lazyguy - Scientific - scale 1/8" = 1.45’Vintage kit finished after 27 years!!
Robert E Lee by Mike Dowling - FINISHED - Constructo
Plank-on-bulkhead hull, hand-built stairs, natural finish, 4 months
Robert E Lee steamboat by bcochran - Pyro - 1/163Vintage plastic model (1961), lots of historical information
King of the Mississippi by john46 - FINISHED - Artesania Latina - scale 1:80Beautiful build, long, detailed log, modeler passed away suddenly when nearly complete
Robert E Lee by Dan Evans - Amati - 1:150Incomplete
- Canute and GrandpaPhil
-
2
-
On 6/5/2023 at 2:06 PM, CDW said:
When canopy glue came out it (a long time ago) was used to glue clear canopies to R/C aircraft models. I learned quickly I had to literally tear/cut a model apart to break the bond between canopy and airframe once it set and cured. A very strong glue and it dries clear.
I am also a big fan of canopy glue, but use CA for almost everything else. However, I've never built a card model. Do you use canopy glue or something else for most of your construction? How do you hold the parts together while the glue dries?
-
On 6/13/2023 at 9:22 PM, ccoyle said:
(I had to delete your tags, though. We don't use tags other than 'done' in this area.)
Thanks for keeping an eye on everything Chris! The site asked for tags so I put some in.
- Egilman, Old Collingwood, mtaylor and 1 other
-
4
-
Thanks everyone. I built my first model airplane with my Dad when I was 8 so I've made a lot of them. I made a couple of model ships in my teens, but no more until I retired. The ships are usually a lot more challenging but it's all fun.
- Old Collingwood, hof00, Egilman and 2 others
-
5
-
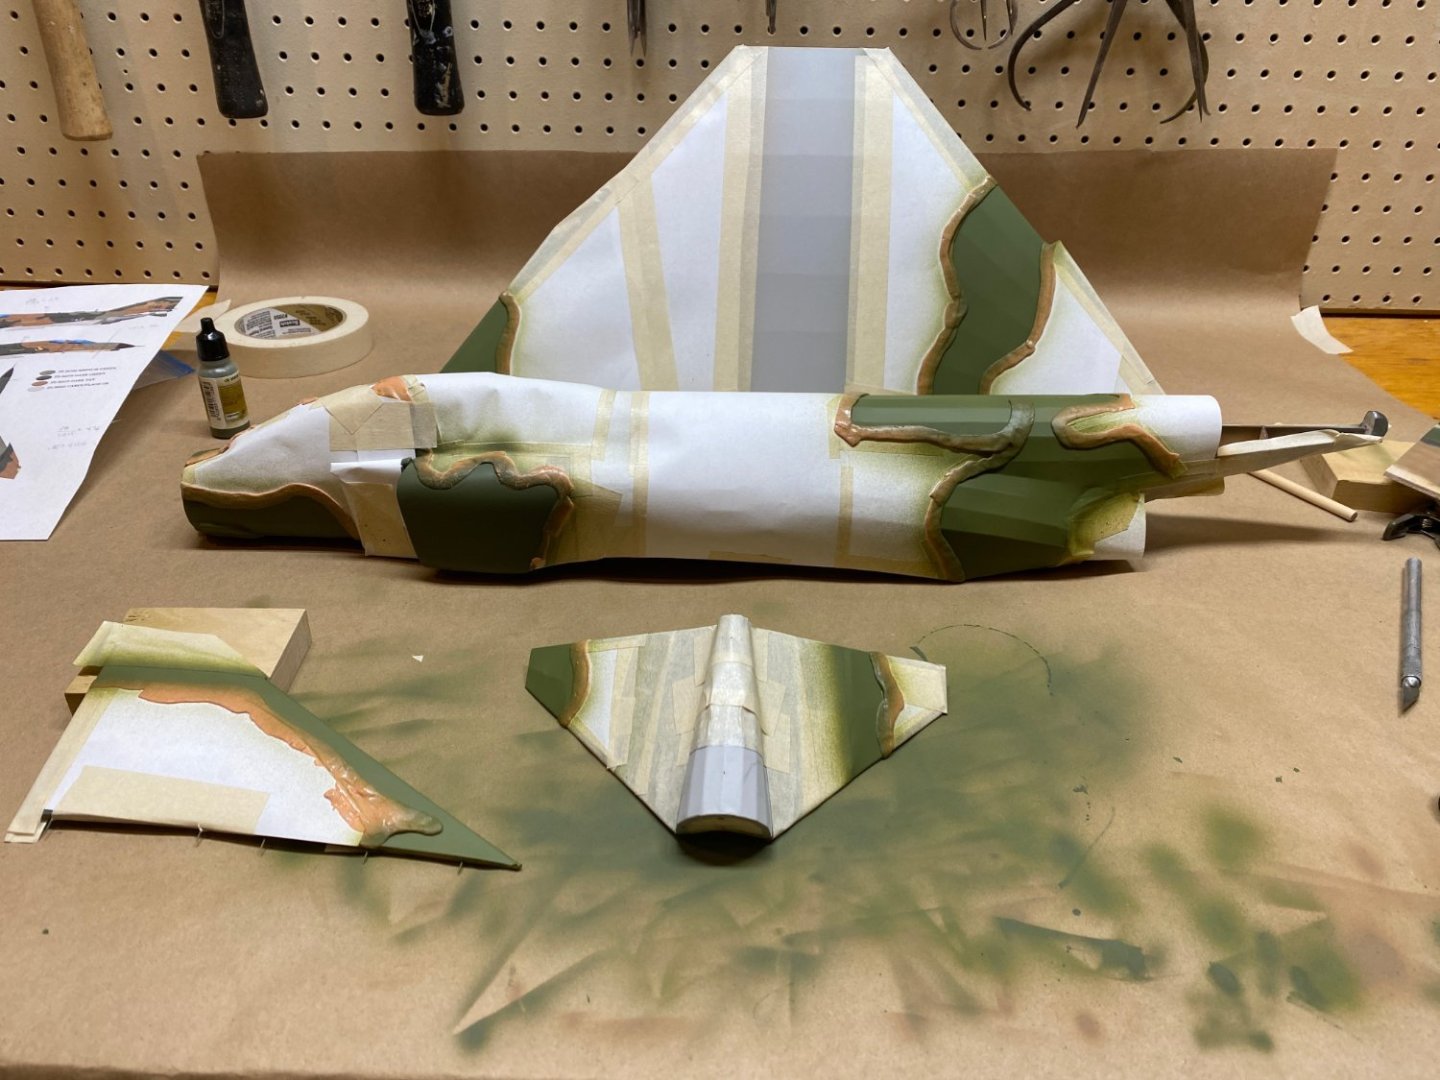
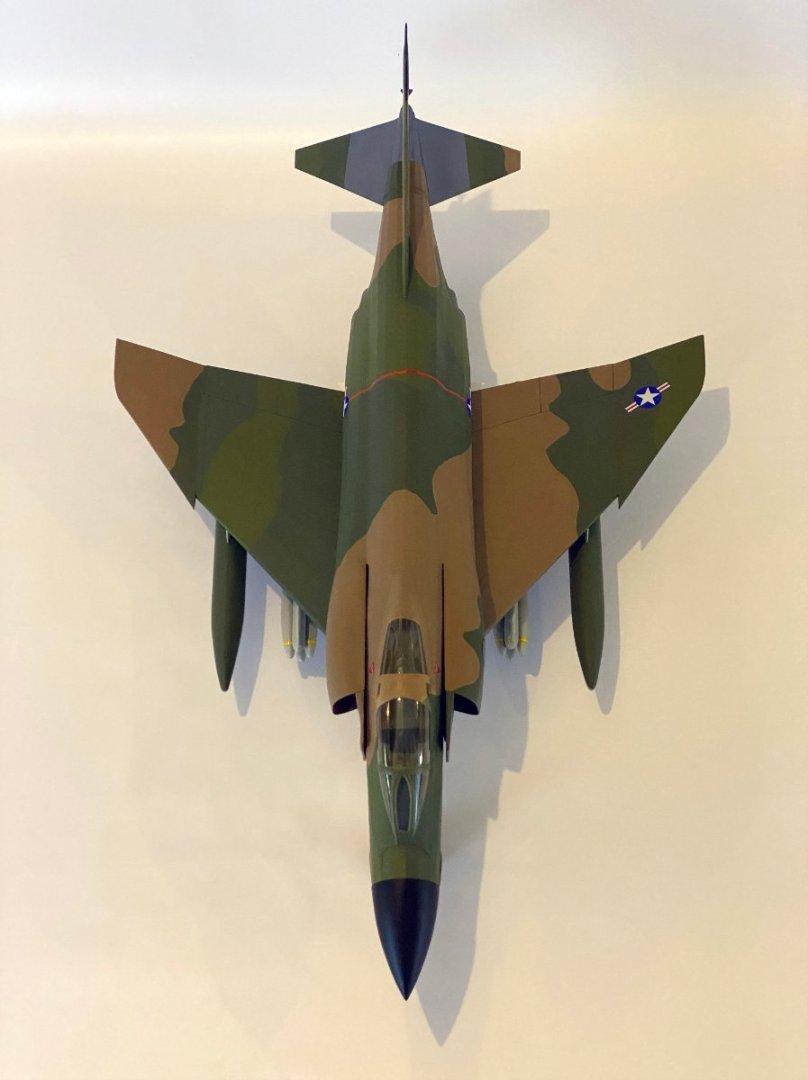
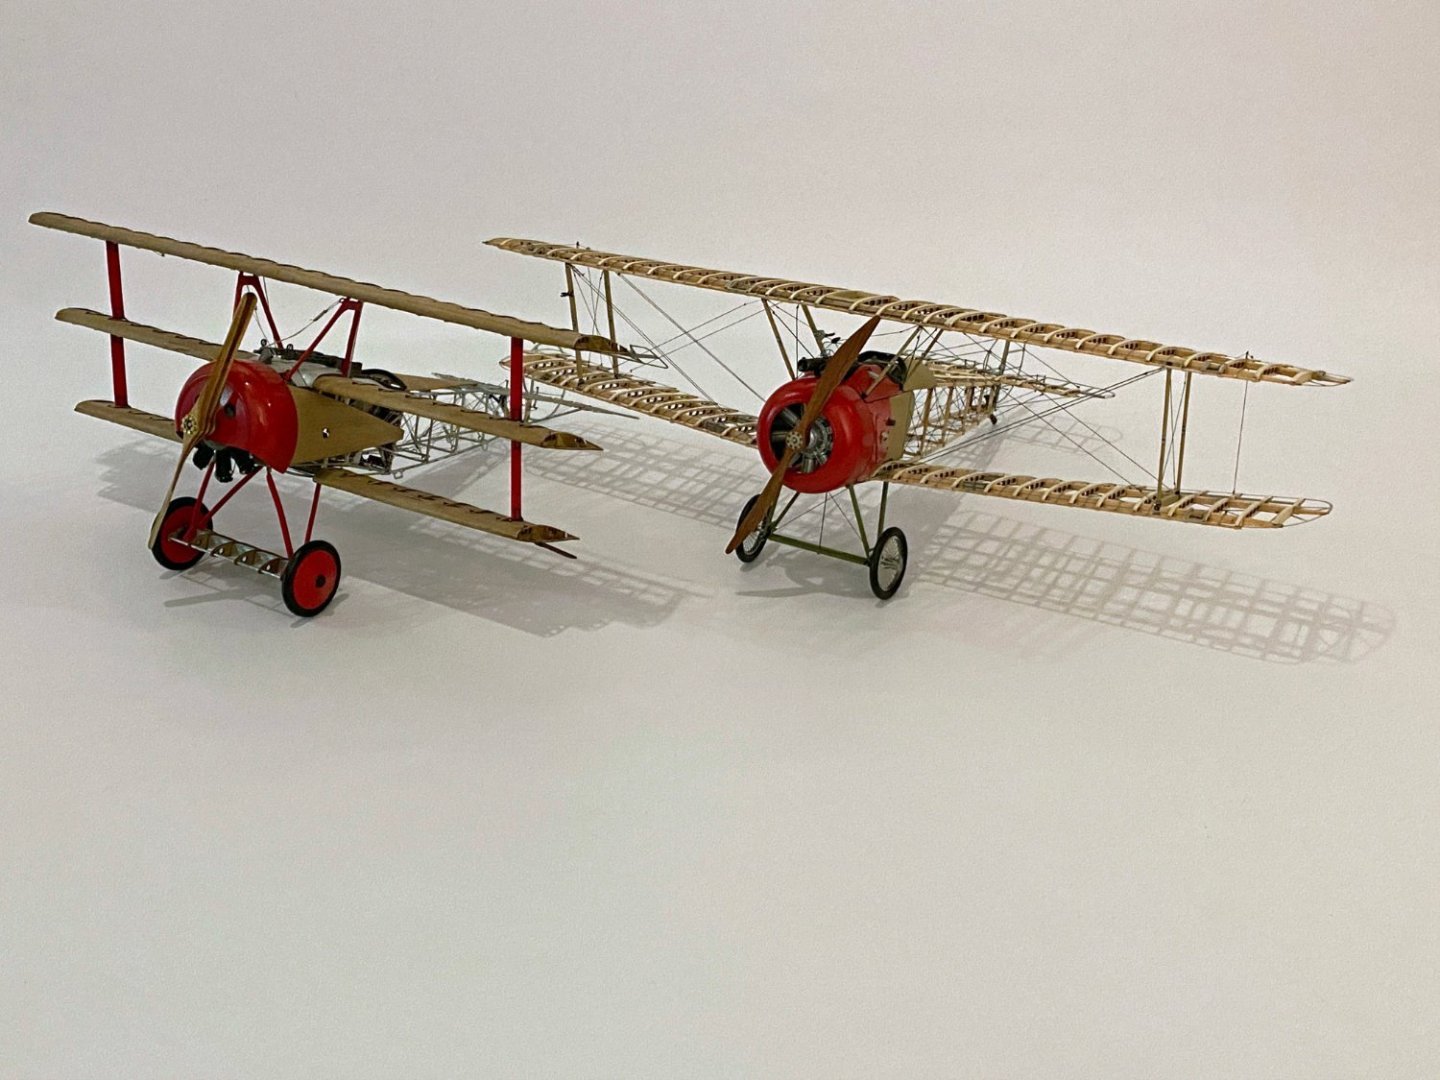
I just finished a "stick and tissue" model of an F4-D Phantom jet in Vietnam camouflage. The kit is made by Dumas Products. They make a nice range of boat kits, rubber-powered aircraft kits, and also a couple of static scale aircraft kits like this one. The kit comes with a nice selection of light-weight balsa, vacuum-formed accessories, and four colors of tissue for covering. Since it will never fly I decided to cover it instead with iron-on Oracote, and since Oracote shrinks very tight I replaced all the stringers with much heavier balsa. Here's the frame before covering:

I air brushed the model with Vallejo acrylics, and used Silly putty to mask the camouflage. There are LOTS of YouTube videos that recommend Silly Putty, but I had a lot of trouble with it. Remember when you were a kid and used Silly Putty to lift images out of comic books? Well if you leave it on acrylic paint overnight it lifts some paint and leaves a darker streak. I had to repaint most of my camo. If you remove it immediately it works OK. Here's the paint job in progress:
The model is 1/25 scale and 28 inches long, basically "drive-by scale." It looks pretty good if you drive by slowly.


-
-
-
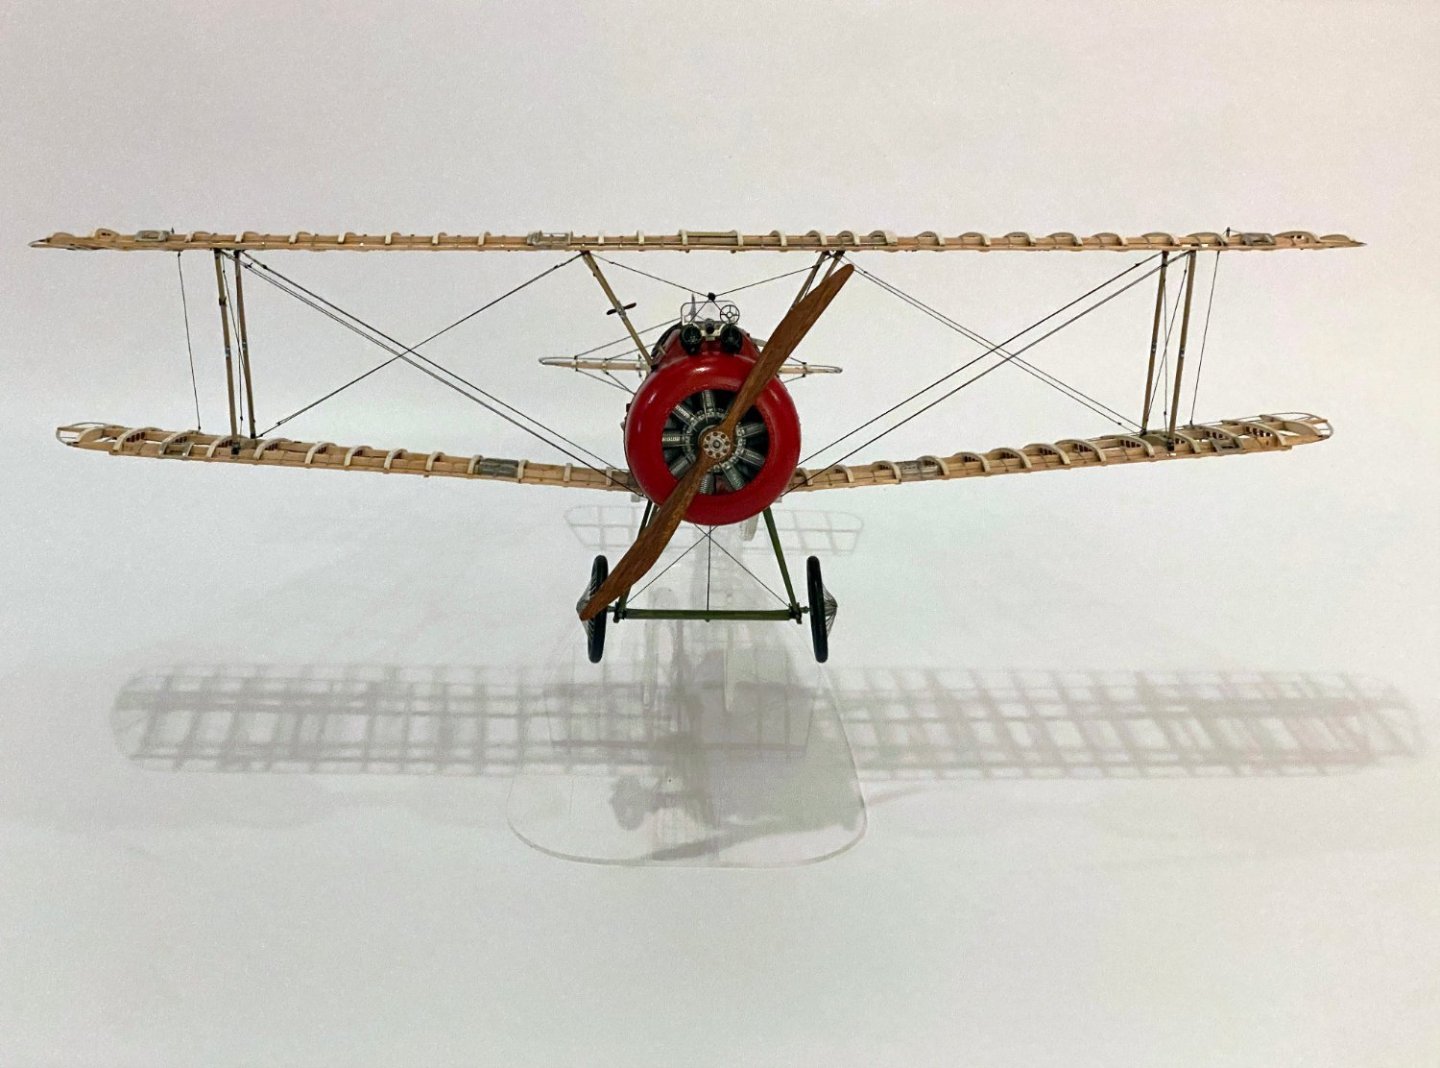
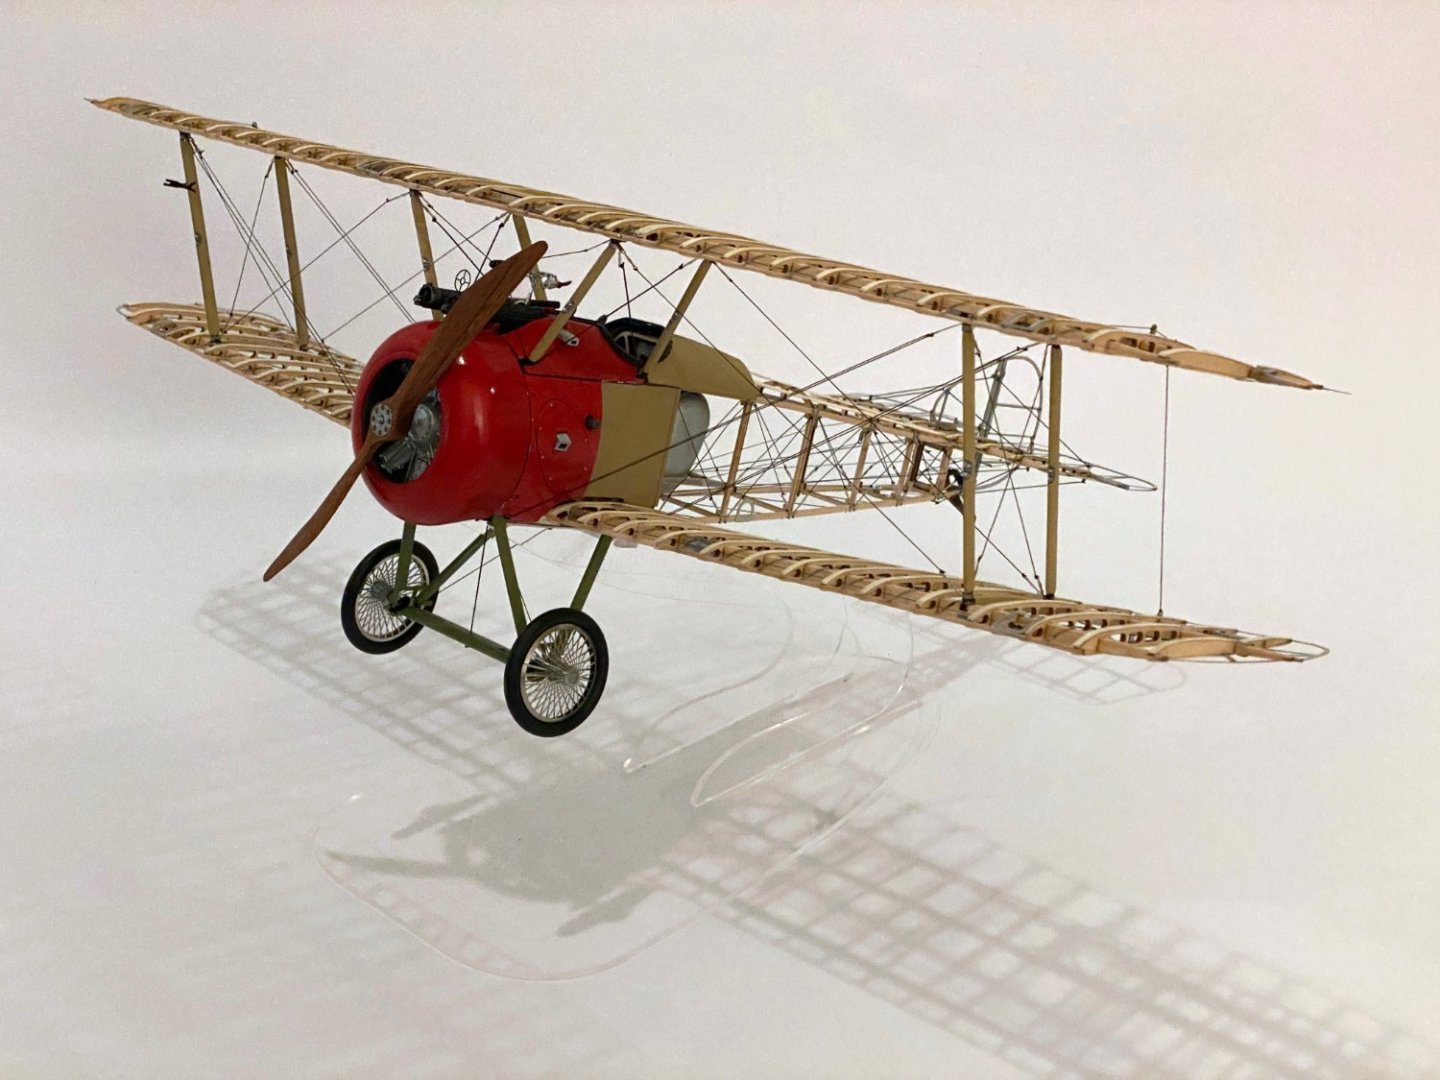
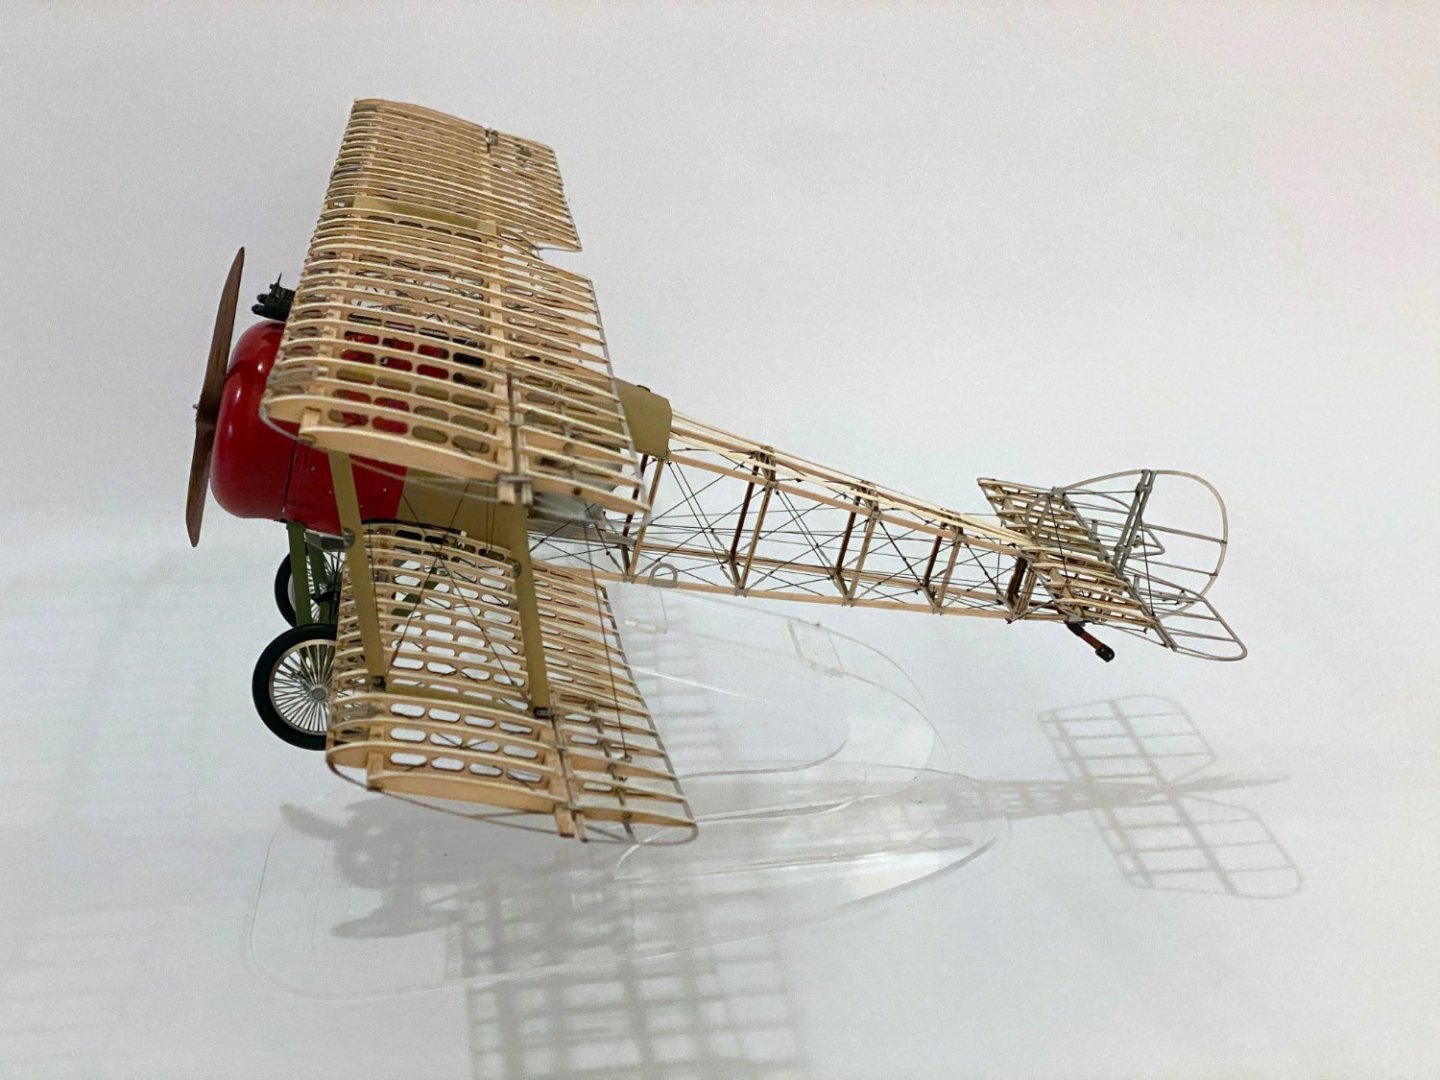
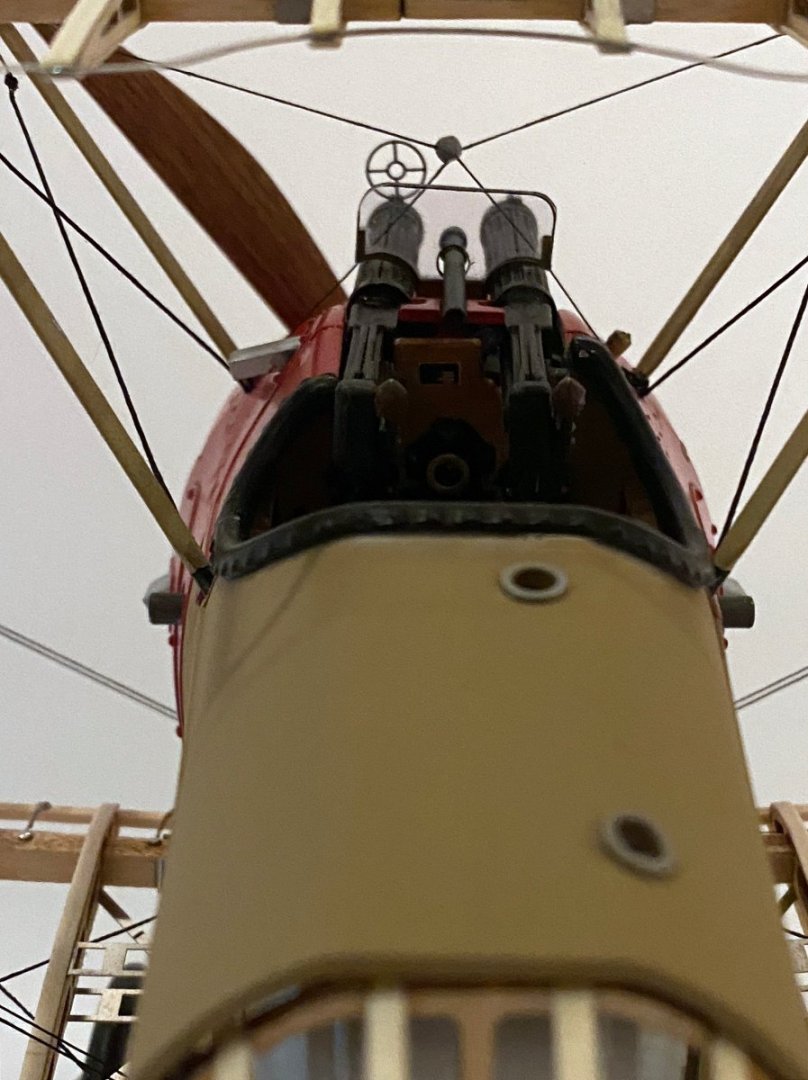
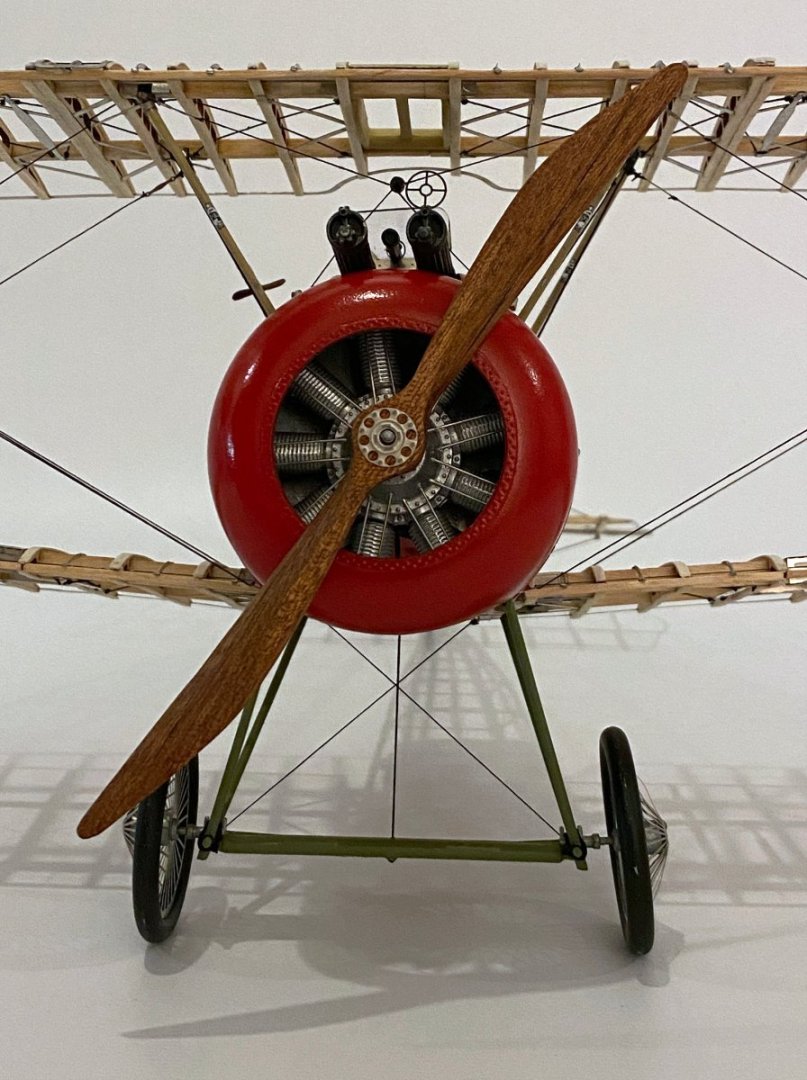
I just finished a "skeleton" model of a Sopwith Camel, you know the one that Snoopy flies. It is a 1/16 scale kit made by Spanish company Artesania Latina. The instruction manual is a pdf file 267 pages long with no text, only photos, so I had to keep my laptop on for 4 months while I built the model. The wood parts are perfectly laser cut. The kit has lots of cast metal parts. The casting is excellent but the parts often don't quite fit together, making it a frustrating build. And it makes me crazy to have cast metal tires, cowling, and wood panels around the cockpit. There are also lots of photo-etched parts like all the turnbuckles that have to be folded in complicated mirror-image shapes. You only get one chance because the parts break if you have to unfold them. The kit came with black monofilament line for the rigging that simply couldn't be tied through the tiny PE parts, and some other fuzzy cotton thread for an unknown use. Luckily I have plenty of spare rigging line.Many years ago I built a similar model of a Fokker triplane "Curse you Red Baron!" but by Model Airways. The models are the same scale and look great together.

-
Ted,
It sounds like an excellent cruise - you can't beat Viking. Please let me know how you like it. One recommendation - take some COVID test kits, bottles of Tylenol and cough syrup, and any other cold and flu meds that you like. If you don't need them you can always replace them with souvenirs at the end. Voice of experience.
Rod
-
Harry's Lady,
Beautiful work on the rigging! Thanks for all your help from all his friends at MSW.
Rod
- mtaylor, Canute, Old Collingwood and 1 other
-
4


Robert E Lee by rvchima - FINISHED - Amati - scale 1:150 - Mississippi River Steamboat 1866 - 1876
in - Kit build logs for subjects built from 1851 - 1900
Posted · Edited by rvchima
Planking the Cabin Walls
The kit supplies 1x2 mm walnut strips for planking virtually every surface of every cabin. The planks have to be fit around approximately 130 cast metal windows and 22 doors. This often involves cutting strips 3-5 mm long for the spaces above and below the windows. Now I know why several people never completed this model!
Much of the model will have white walls and white windows, but the area behind the windows should be black. So I will have to spray paint the walls and windows white, but hand paint inside the window openings black before assembling. The upper cabins will have natural walnut walls which will have to be sanded, edges beveled, and stained before planking.
Here is my first go at cabin walls, with a door and some windows dropped in place.
I am getting better at planking using the following techniques: