HOLIDAY DONATION DRIVE - SUPPORT MSW - DO YOUR PART TO KEEP THIS GREAT FORUM GOING!
×
.jpg.f4fa790b1fa2f0e00e3d149ed7bdd37c.jpg)

shipaholic
-
Posts
540 -
Joined
-
Last visited
Content Type
Profiles
Forums
Gallery
Events
Everything posted by shipaholic
-
 Looking good Dave. I think the main wale should be just rounded off at the stern flush with tops of the stern planks. I can show you pics of how I did mine if it will help. Steve
 -
Thanks Slog, how's your build going? you haven't posted anything for a while, working on the Bismark instead?
-
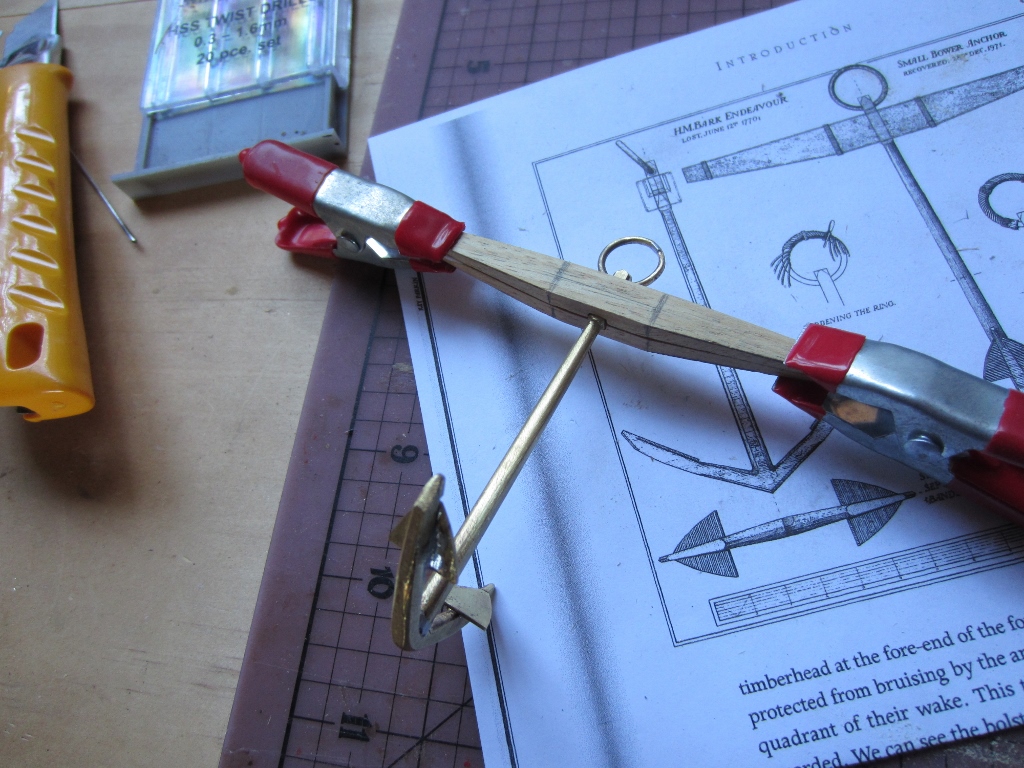
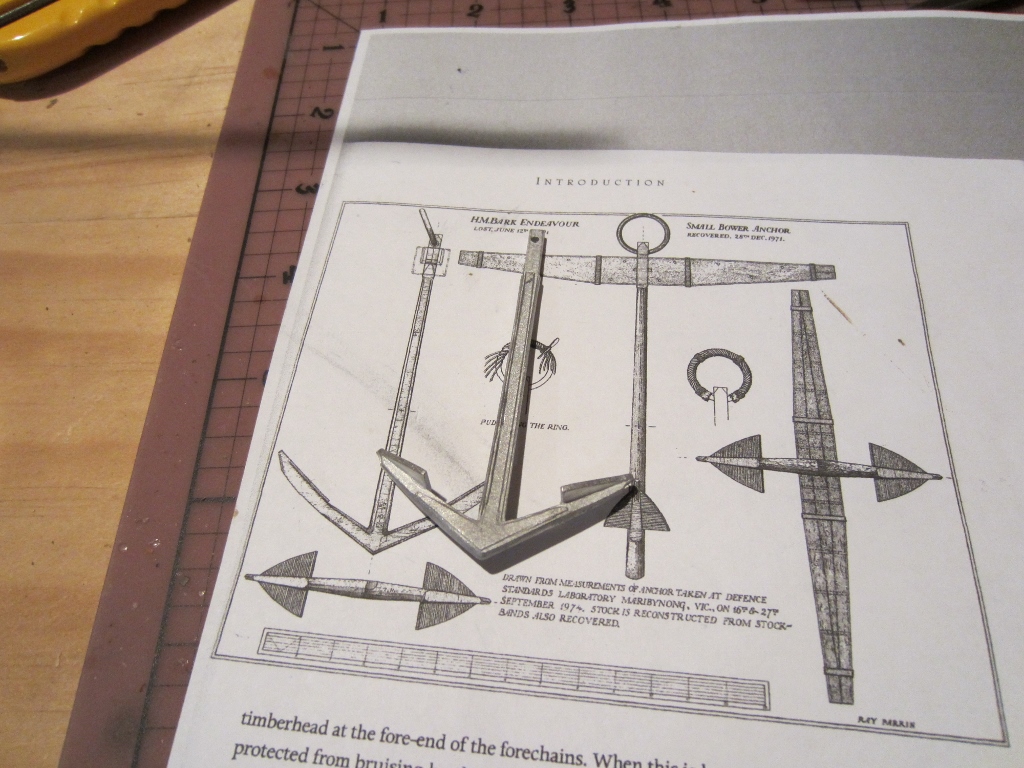
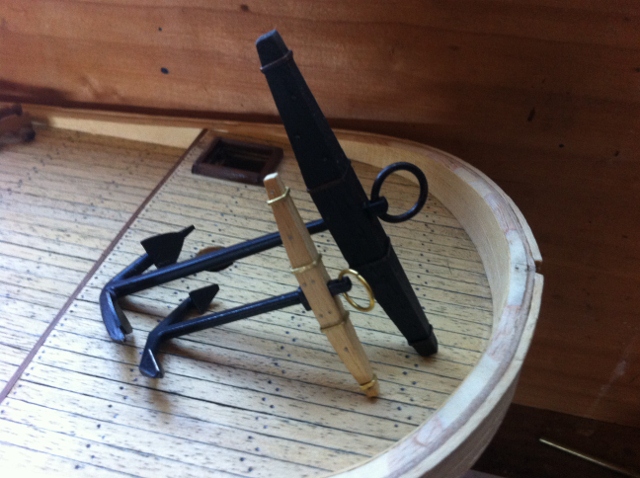
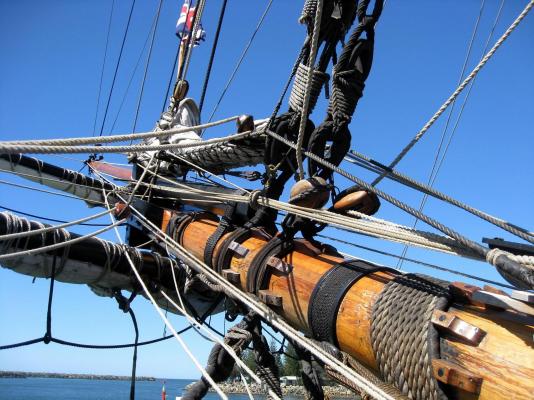
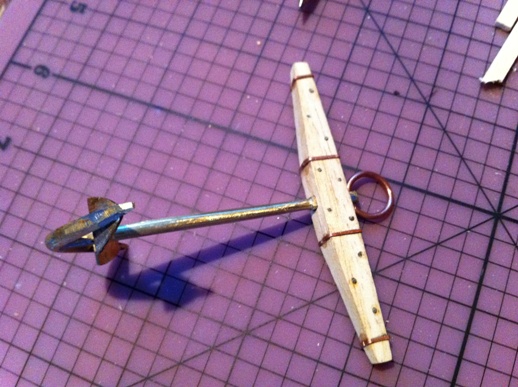
Today I spent a couple of hours making another anchor. I used 5/32" brass rod and some flat brass strip for the palms. Lots of filing to get the shape right and soldered together. When I finish this one I will have the sheet anchor, best bower and small bower. Two to go - the smaller stream anchor and kedge anchor. Cheers Steve
-
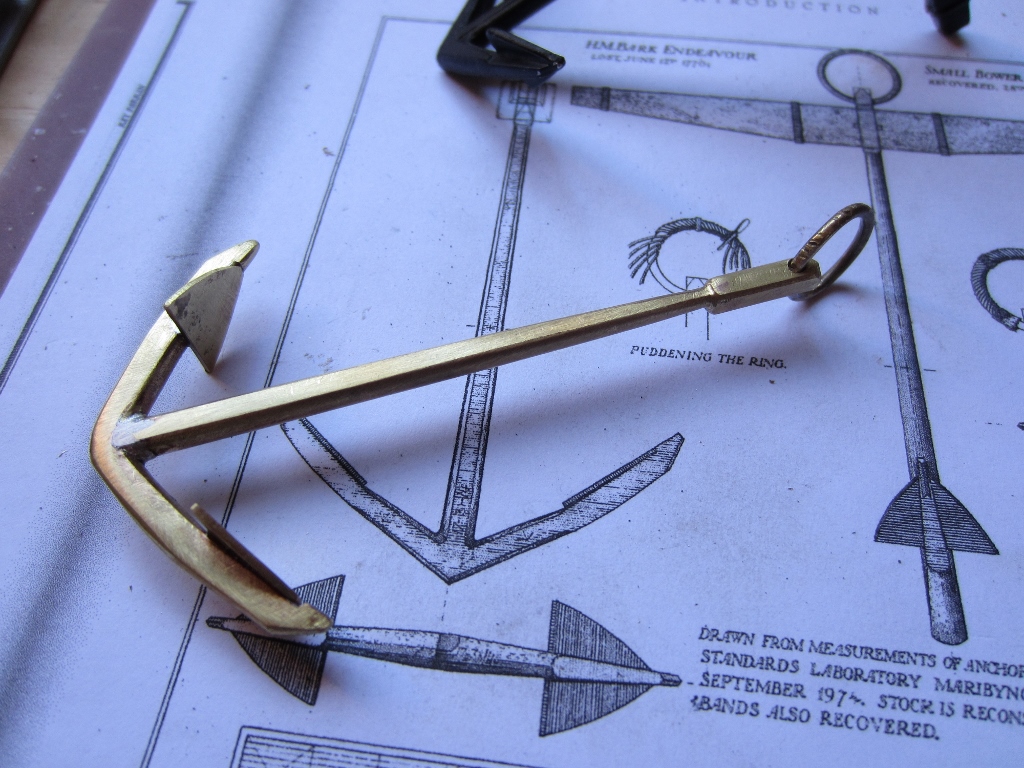
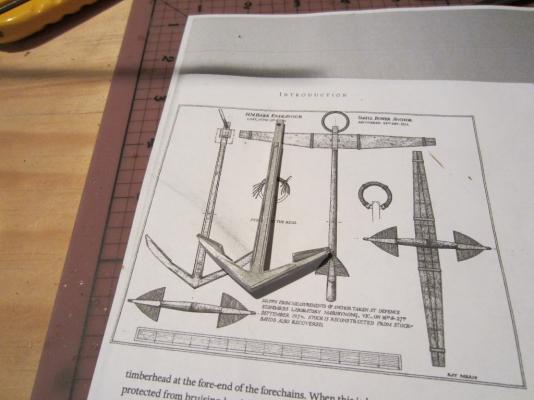
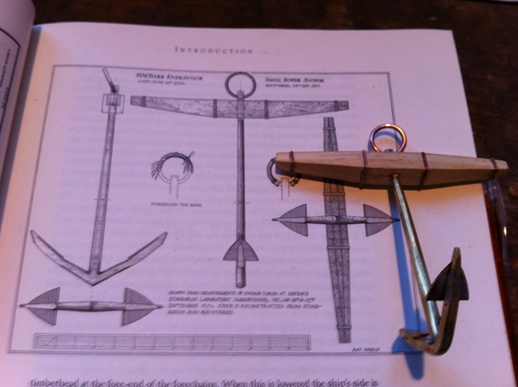
OOPS! made a huge mistake, well not that huge - a couple of mm. I spent a fair bit of time on the weekend making another one of the anchors. I bought a Caldercraft anchor that is 74mm long to use as the small bower anchor, the other anchor I had already made is the sheet or best bower anchor which is slightly larger at 76.5mm long. Then I looked at the drawing in Ray Parkin's book I have been using as a reference and noticed the diagram is of the small bower anchor. So the small bower anchor should be the one that is 76.5mm and the sheet anchor and best bower anchor should be 78.6mm long. So both anchors are a little bit smaller than they should be by a couple of millimetres. I am the only one who will notice so I will leave them as they are.

-
Hi Ron Yeah good work, good to see you didn't follow the instructions with the port lids, they are meant to be flush like gunports, the instructions are a cop-out for simplicity. Steve
-
Hi Dave, Thanks for the compliment. It's a pity all the earlier posts were lost when this site crashed last year, so my log on here now starts when most of the hull work was done. I still have all the earlier pics on my PC so if you want to look at any of the earlier work let me know. This is my second Endeavour, I built the AL endeavour a while ago, and my third wooden ship. You will find plenty of help on this site, if you post a question on your log someone will give you the answer or helpful advice pretty quickly. Actually I'm a beer man! Cheers Steve
-
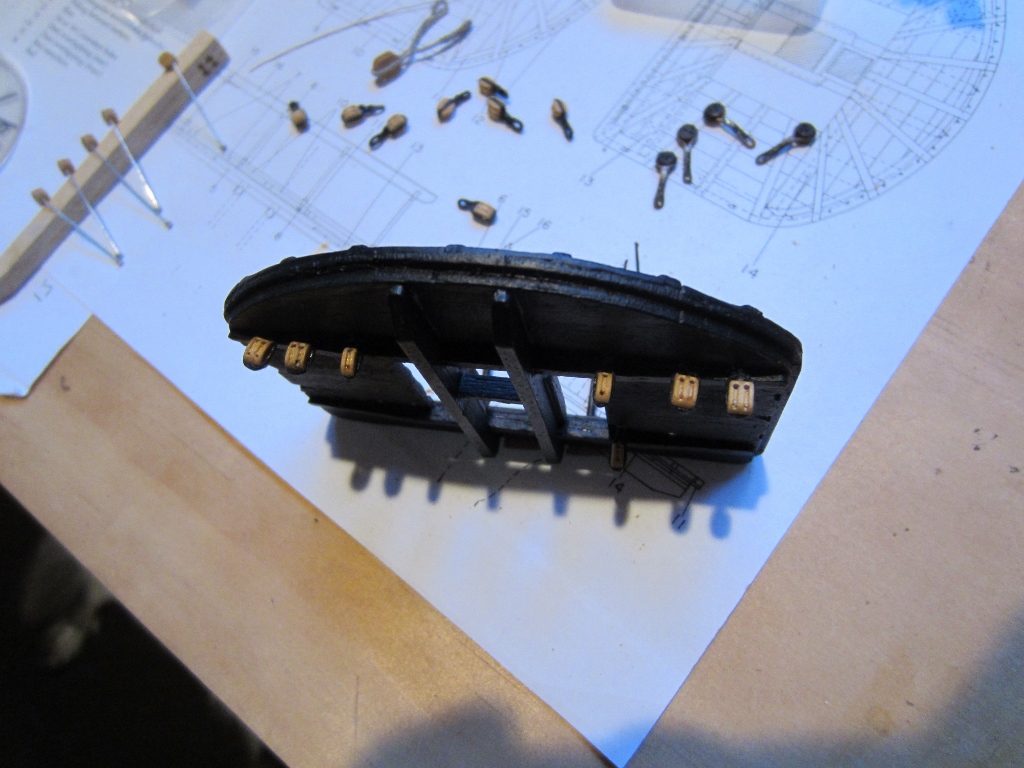
Thanks Greg and Mike, the blocks are 9mm long
-
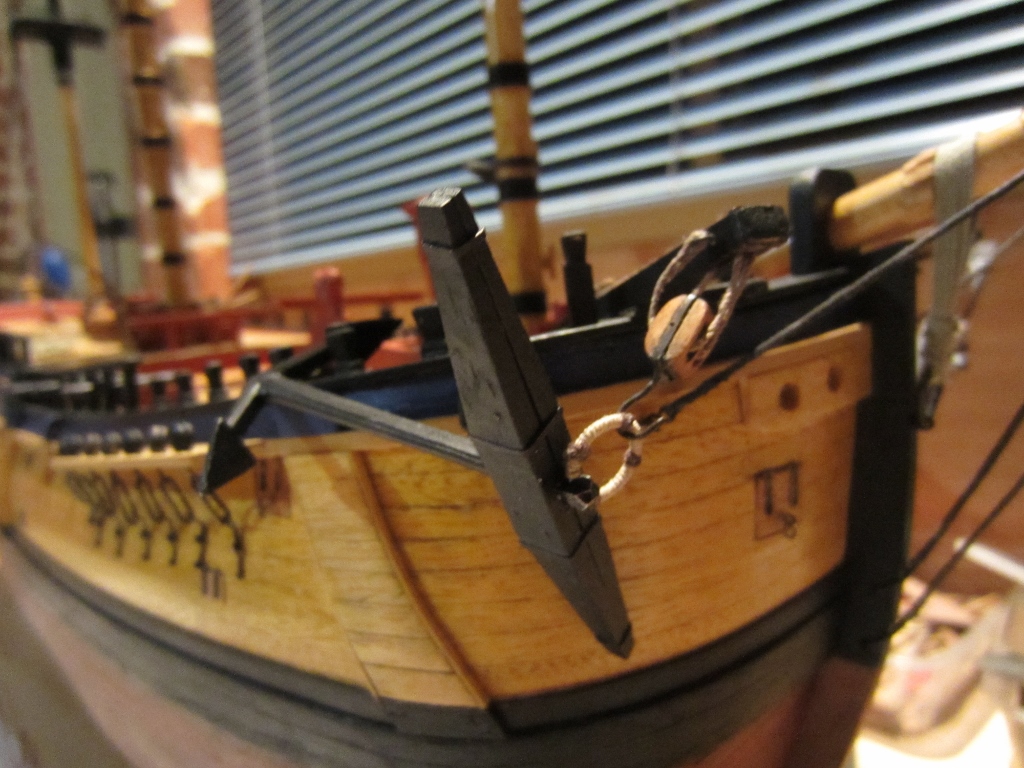
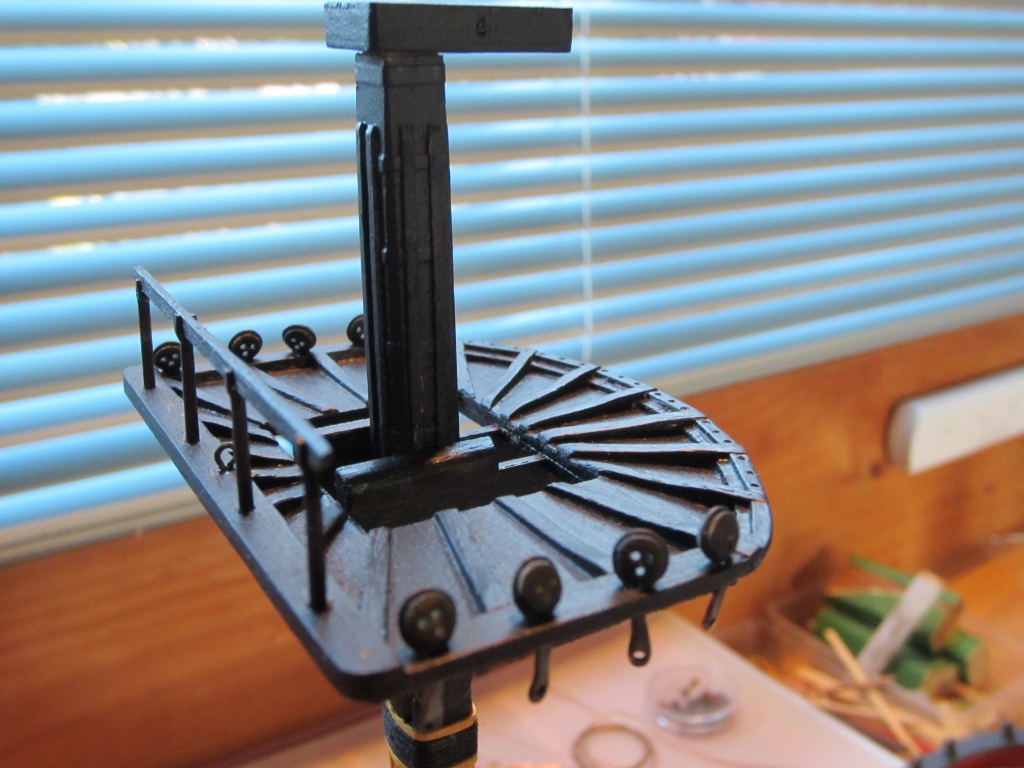
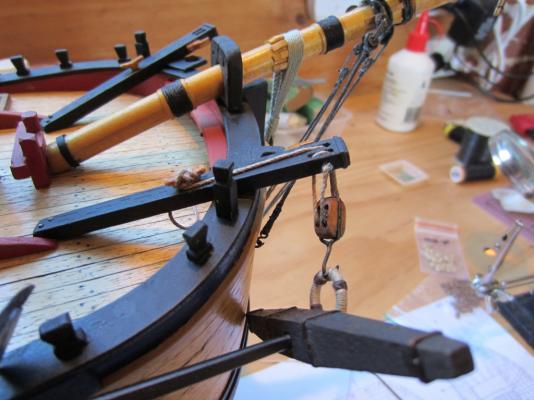
I was able to spend a bit of time on the ship this weekend. I made the cat blocks and I was a bit disappointed that I couldn't figure out a way to simulate the wider centre of the iron band around the block where the sheave pin goes through. I started making the second anchor as well.
- 557 replies
-
- 10
-

-
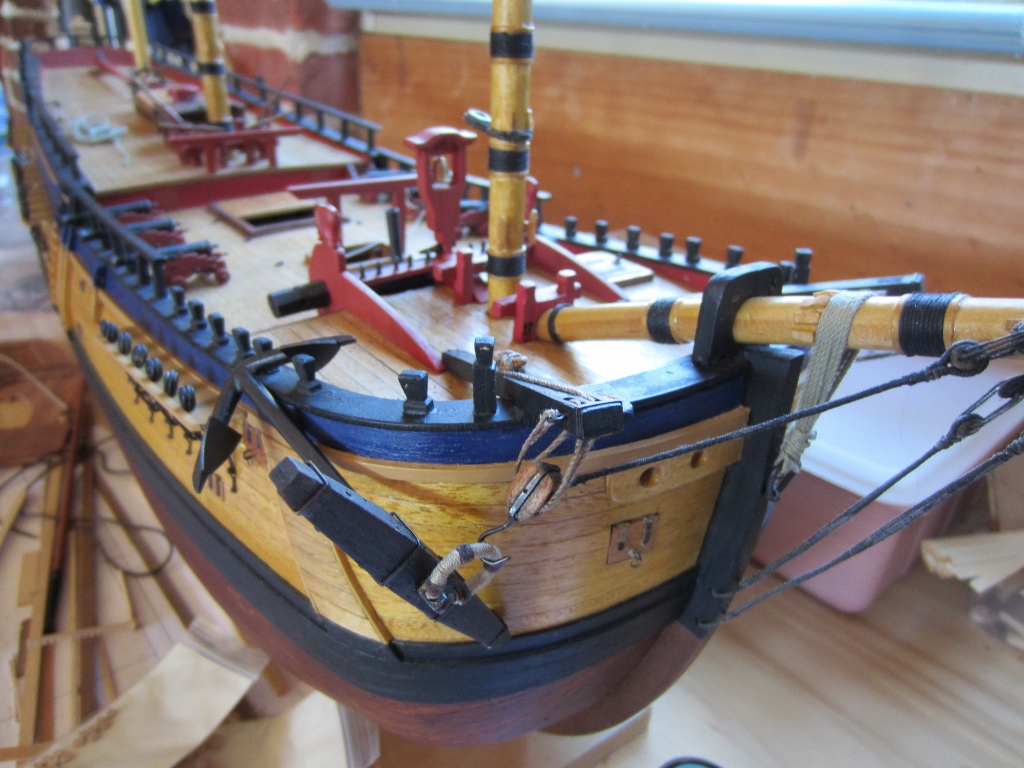
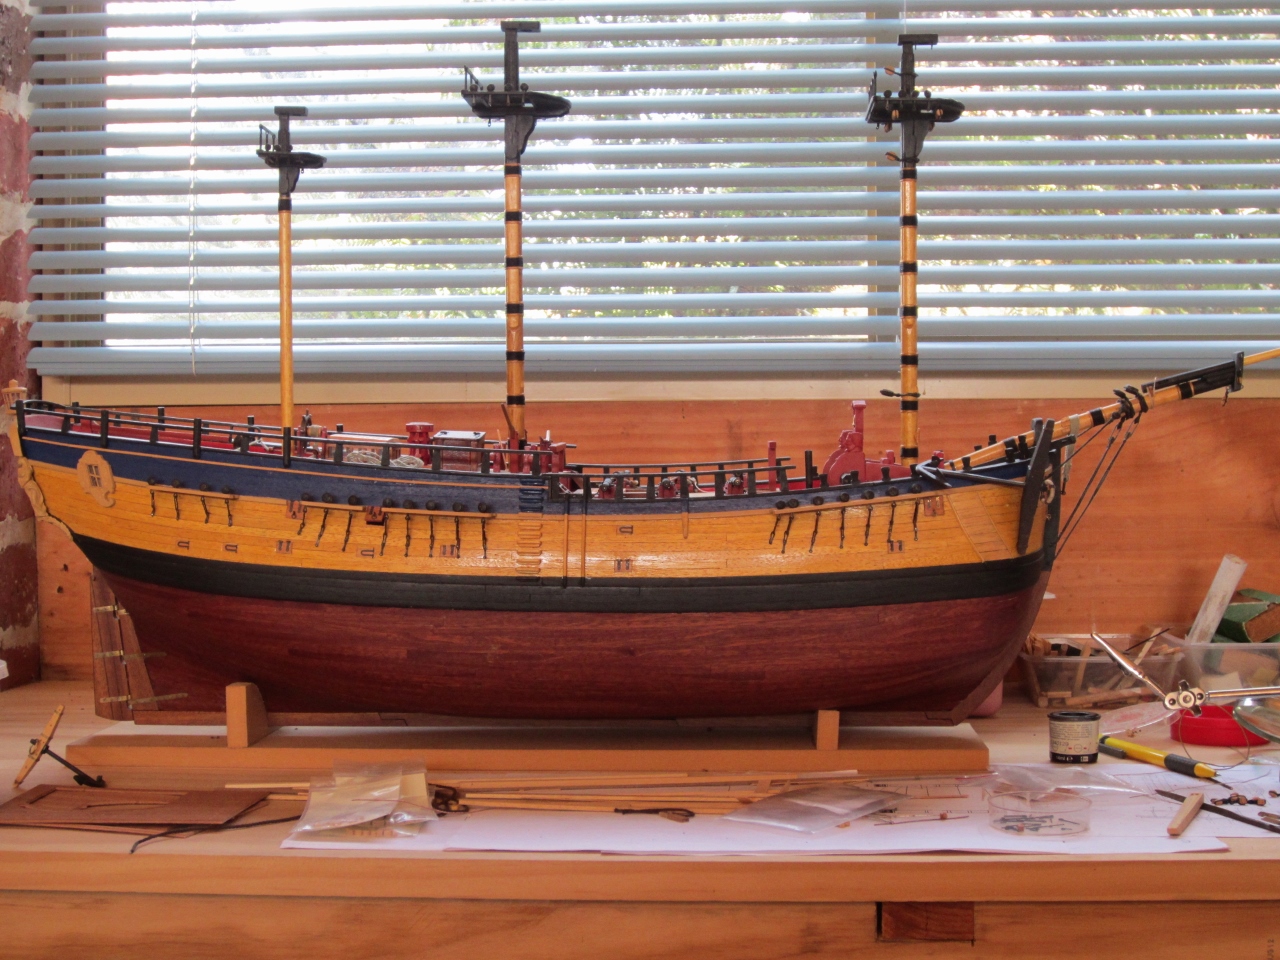
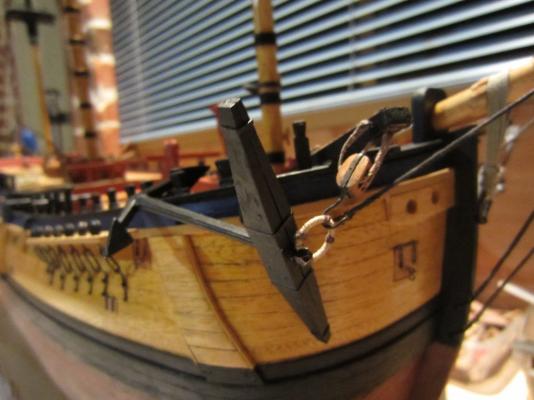
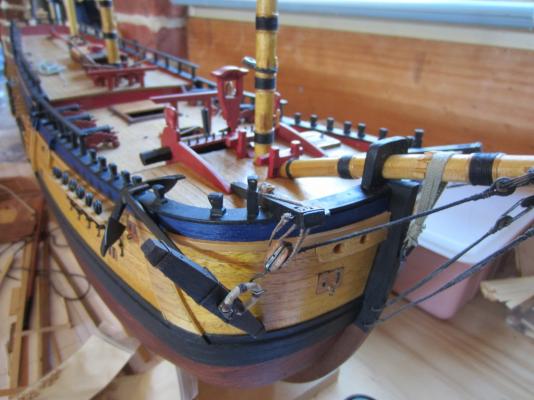
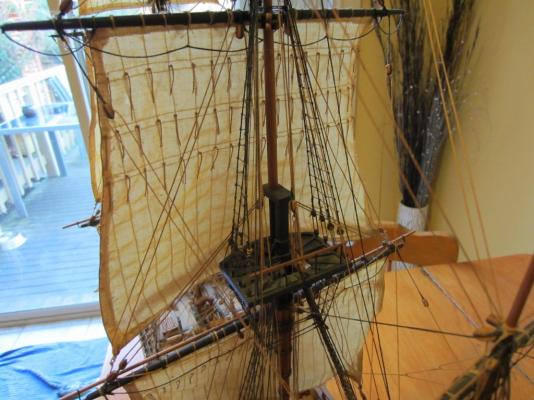
Hi people, been away for a few weeks (holiday in Thailand) hoping to get back into the build this week. Here's a broadside view of how she is at the moment

-
Nice work! your planking is great and you have the run of the planks and wales (curvature) spot-on
-
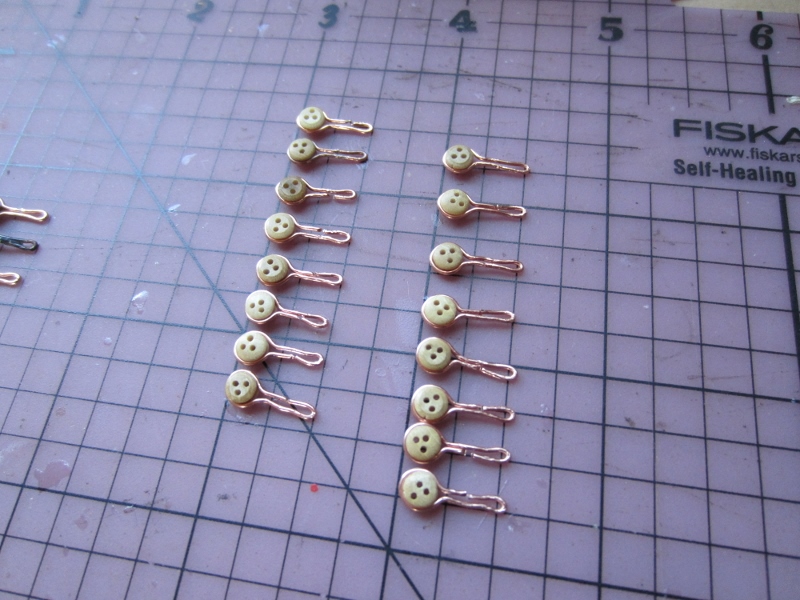
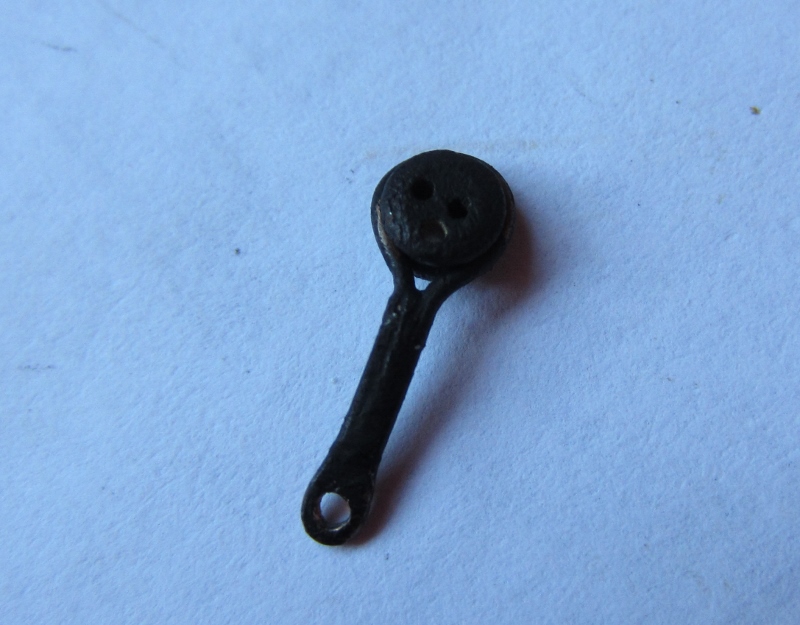
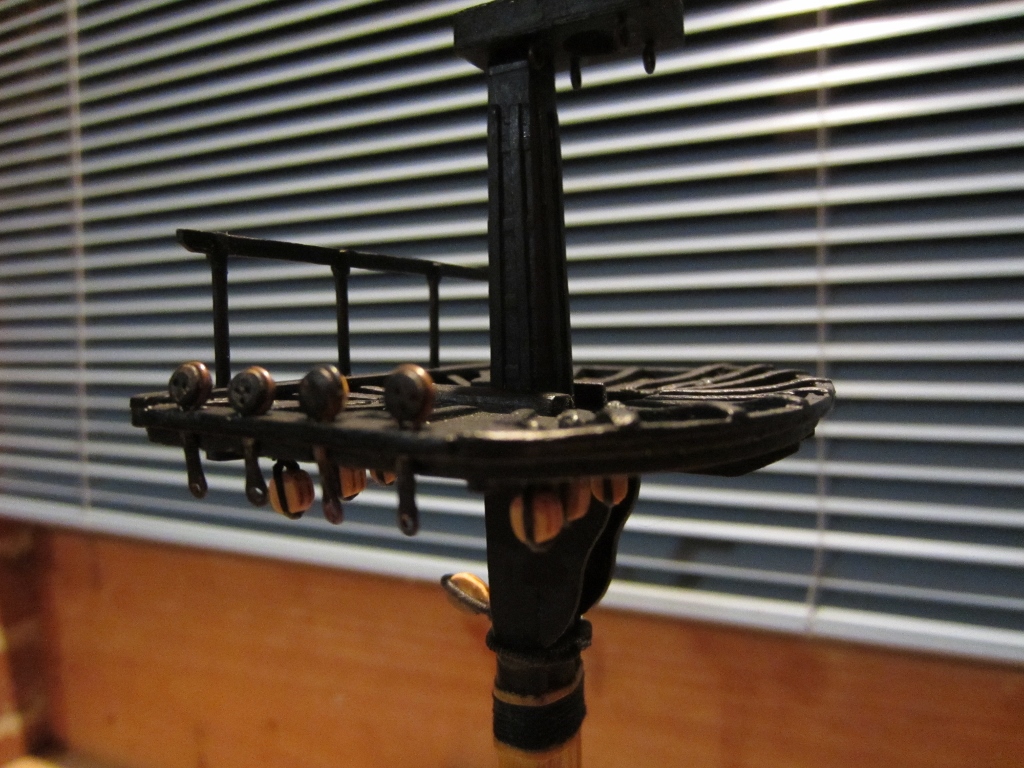
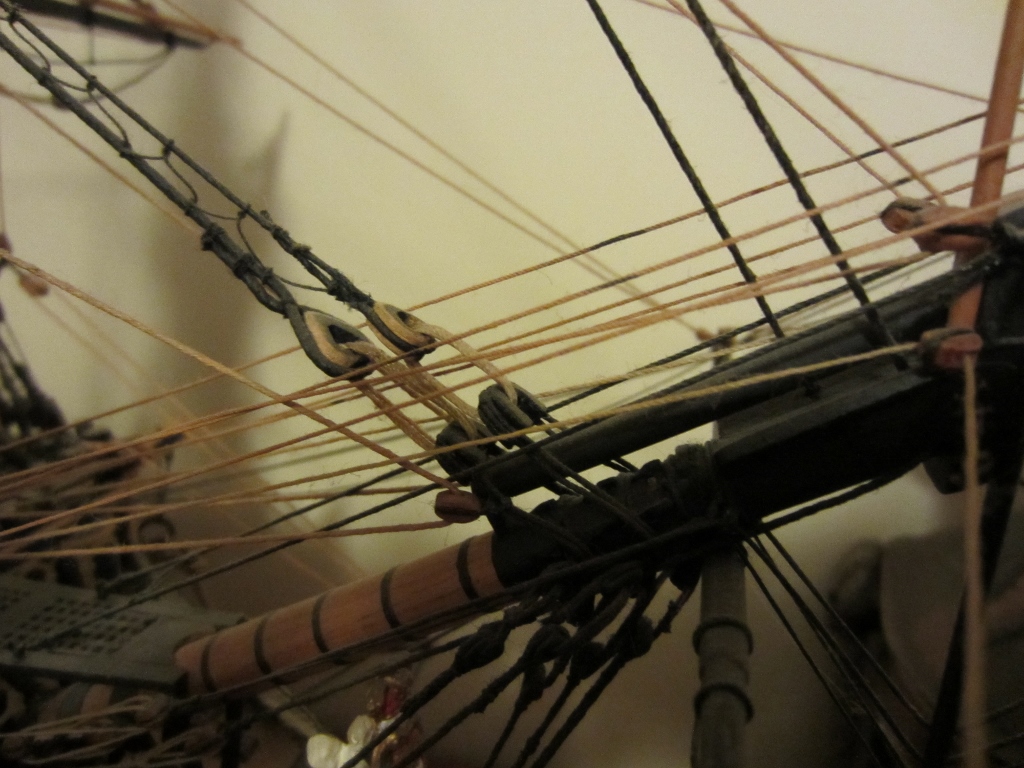
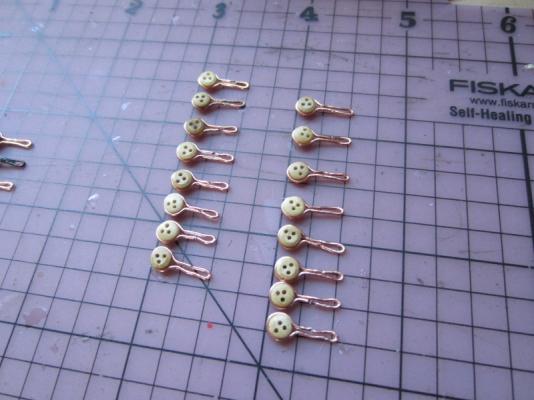
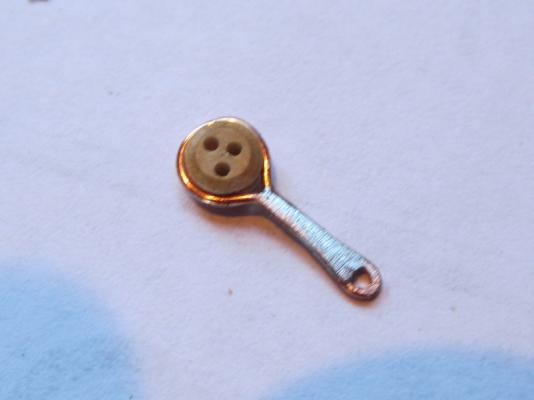
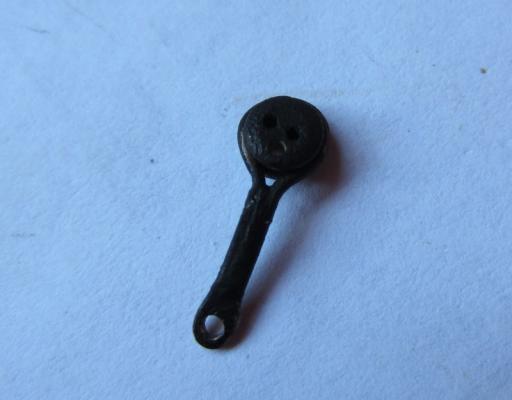
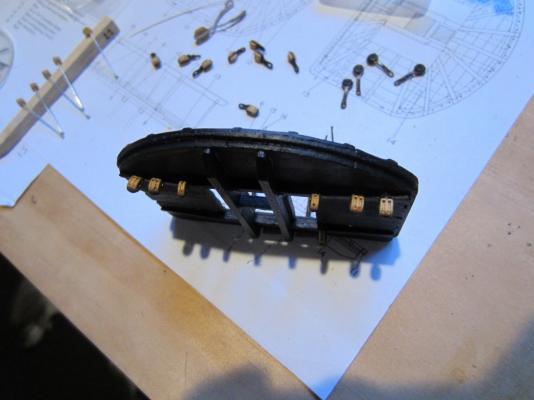
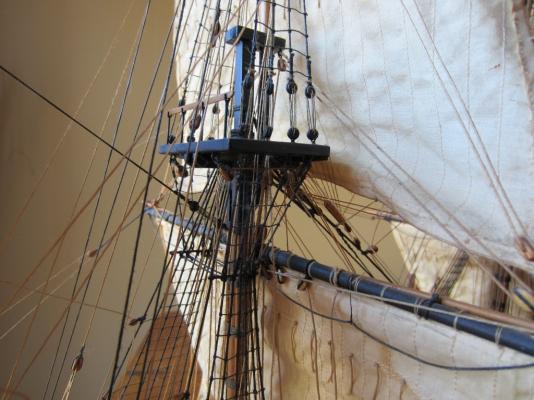
Been busy this weekend made the rest of the futtock deadeyes, I used copper wire to make them then filled them in with solder and filed them flat and drilled the hole for the hook. I finished off the foremast and top, added the block for the main topmast stay. Now to finish the main mast and top.

-
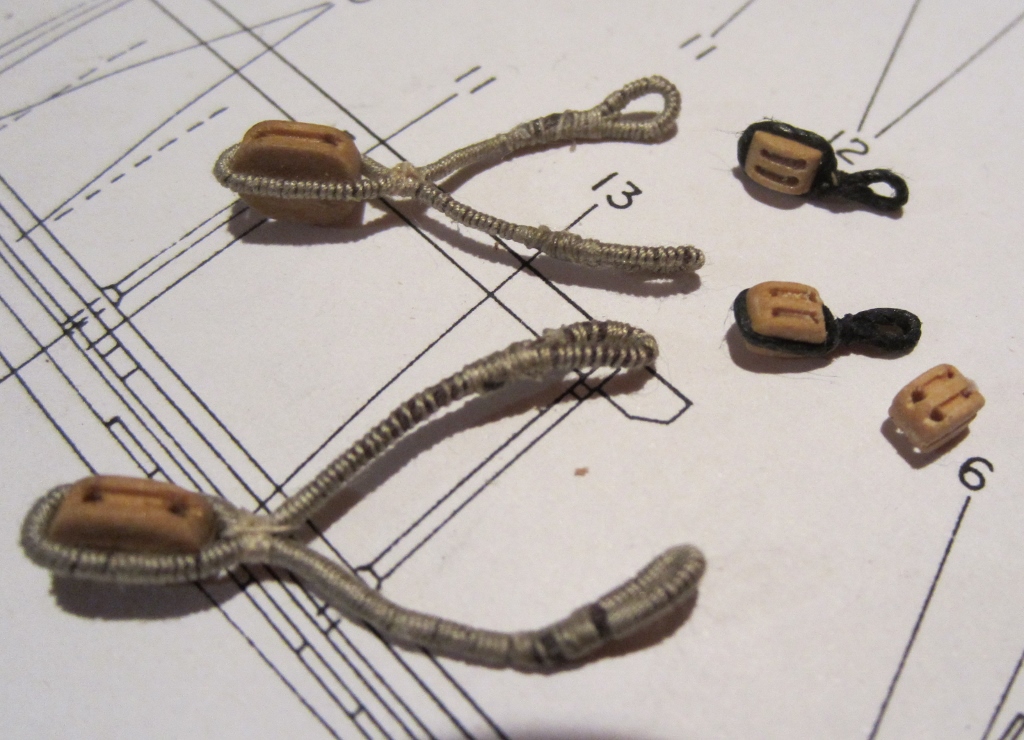
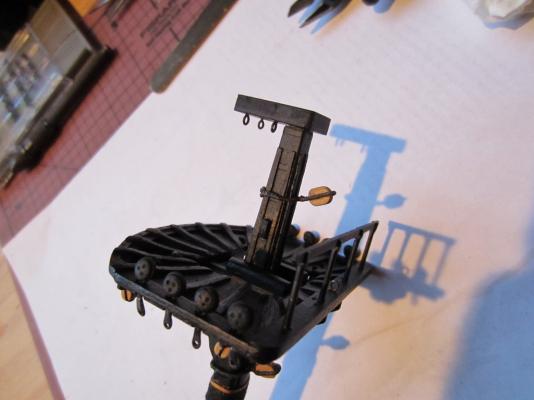
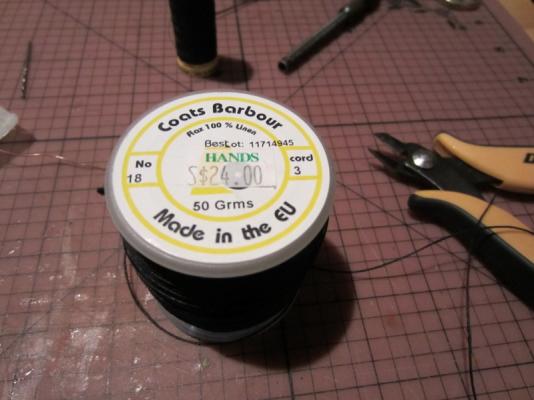
Hi Mike I am not serving the small blocks - too much detail that can't be seen, too difficult to do properly, I use black linen thread (see pic). I am serving the larger blocks and hearts, I have a serving machine that I bought off Alexey Domanoff, it works really good. I just use hemp coloured sewing cotton for serving. Steve
-
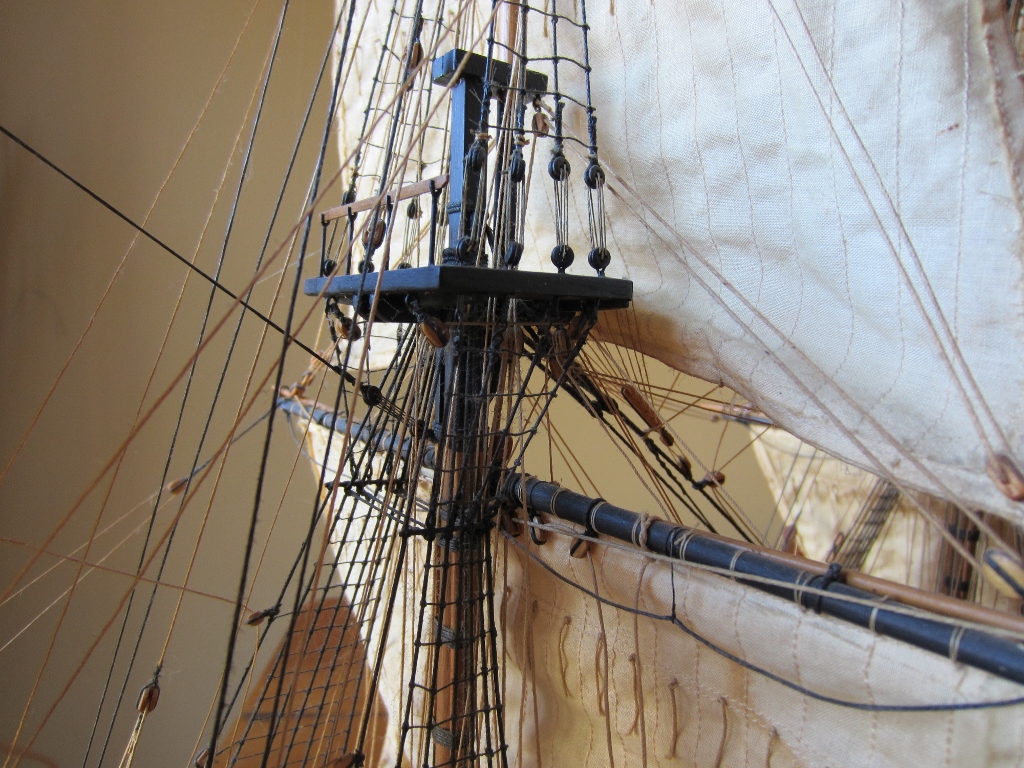
I am working on attaching the various blocks to the masts and tops. I stropped and fitted the block for the main topmast preventer stay. Fitted the blocks on the underside of the fore top.

-
Yes Greg I did the same, I used closed hearts on mine because the replica has them. I posted a good photo of the replica bowsprit on Mikes log. I discovered the reason for open hearts when I was researching it for Mike. Steve
-
Hi Mike I answered your question in your build log. They should be open hearts so that the jib boom can be slid back. Cheers Steve
-
Hi Mike Just found the answer to your question. Open hearts are used where the collar is above the jibboom, like on the Victory (pic of My Vic below) The collars on the Endeavour are not above the jibboom so closed hearts can be used, but they would more likely be open hearts so the jibboom could be slid back if it needed to be. Steve

-
Hi Mike Re your question about the hearts, I couldn't find a definite answer either in my references. Lees in The Masting and Rigging of English Ships of War shows closed hearts for that period, the Endeavour replica has closed hearts also - and it is a well researched ship. So I went with closed hearts on my Endeavour. Steve
-
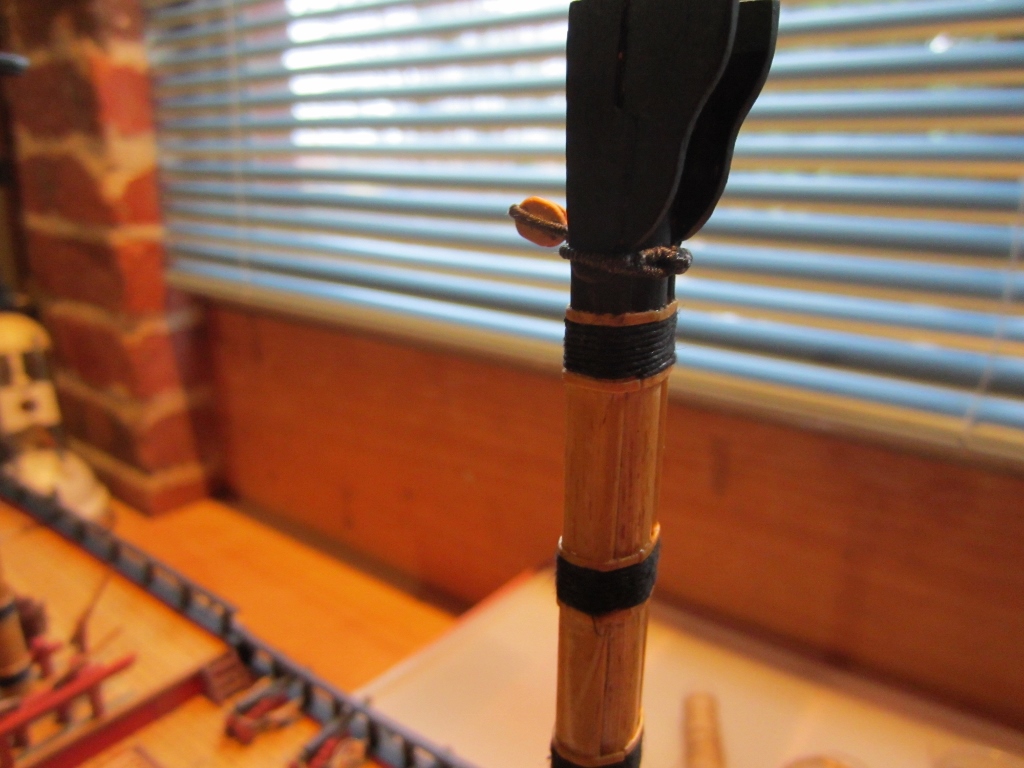
Hi Geoff I used thin wire for the footrope stirrups on my Endeavour. Wire is only way you can get them to "hang" vertical. I used linen thread for the foot ropes. If you crimp the wire stirrup tight around the footrope you can then get the footrope to "sag" by teasing it into shape, wetting the footrope will help also. Here's a couple of pics of the result. Steve
-
Hi Mike I soaked the wood in hot water then made a simple jig with nails in a block of wood to keep it bent until it dried. I'm not sure now whether the bowsprit was actually curved or the curvature shown on the draughts is just the taper, the AOTS shows it as being curved so I did it like that. Its only a slight curve but it really is noticeable. I just saw your comments on Banyan's log. I didn't use the wood supplied by Eaglemoss, you're right its too thick. I went to Bunnings and bought some dowel the correct diameter. Steve
-
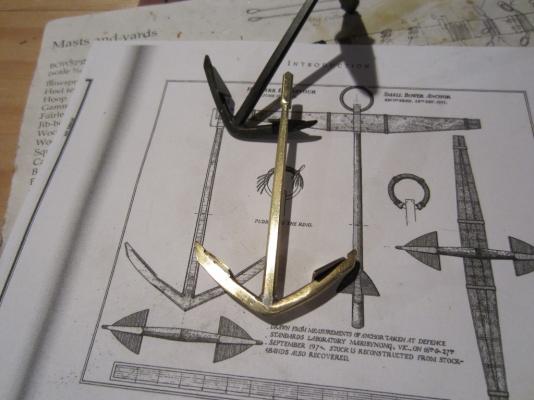
Hi again Mike Here is a pic of the caldercraft 74mm anchor on a 1:51 scaled drawing. Not too bad, about 1mm too long and a little bit thick in places but it should look fine. Steve
-
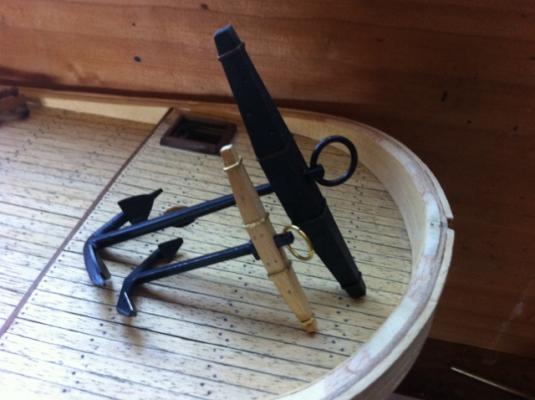
Hi Mike I made the anchor myself out of brass, I need two bower anchors and have since found that Caldercraft have them at the right size so I bought the second one. I won't be using the stock supplied with the Caldercraft one though, its totally wrong. Here's some pics of the first one unpainted, and compared to the ones supplied with the partwork. Cheers Steve
-
Mike, I just bought a Caldercraft anchor for my Endeavour, the correct scale for the ship we are building is the 74mm one. Cheers Steve
-
Thanks Bindy and Nils