.jpg.f4fa790b1fa2f0e00e3d149ed7bdd37c.jpg)

shipaholic
-
Posts
540 -
Joined
-
Last visited
Content Type
Profiles
Forums
Gallery
Events
Everything posted by shipaholic
-
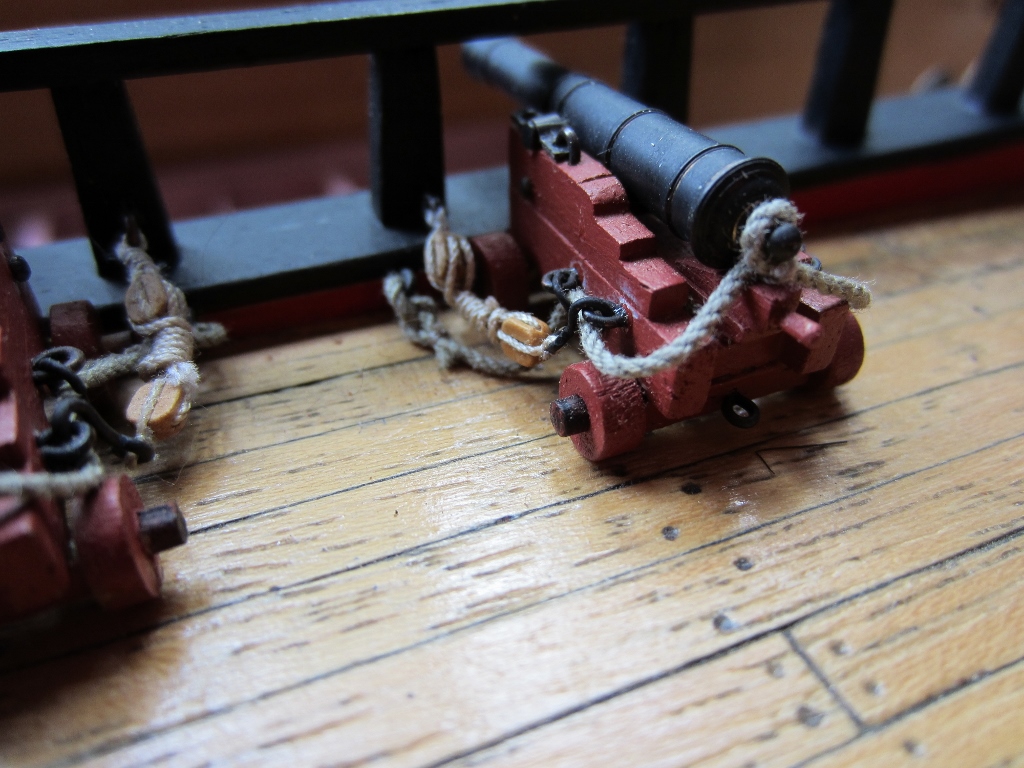
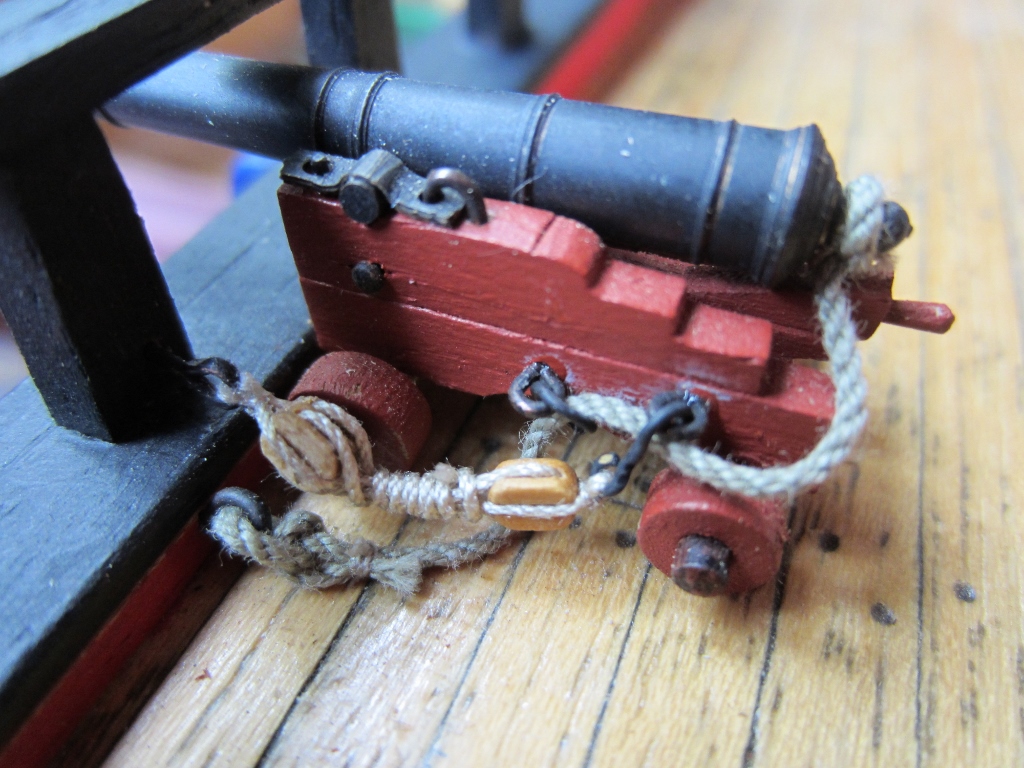
 Rigged another cannon today, I used Caldercraft hooks for this one, they look pretty good.
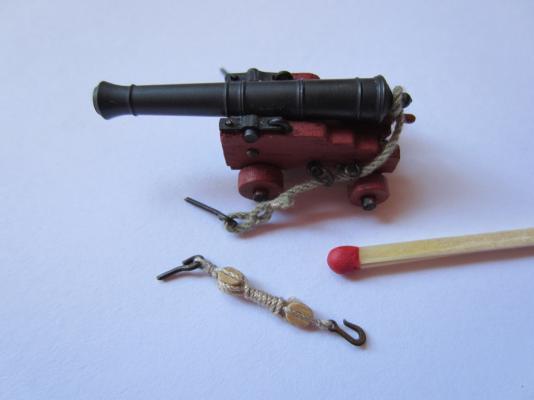
-
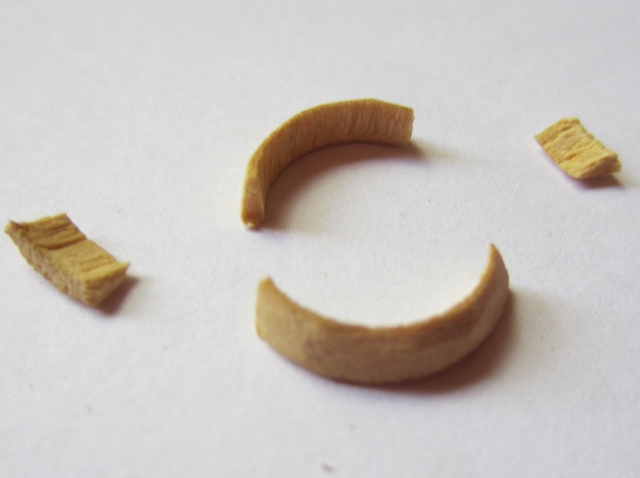
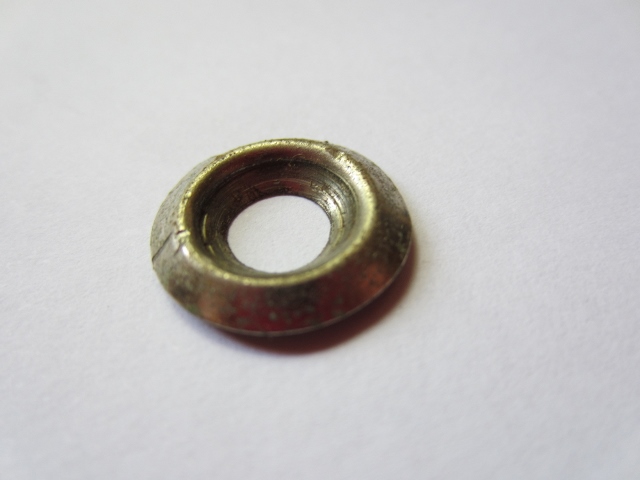
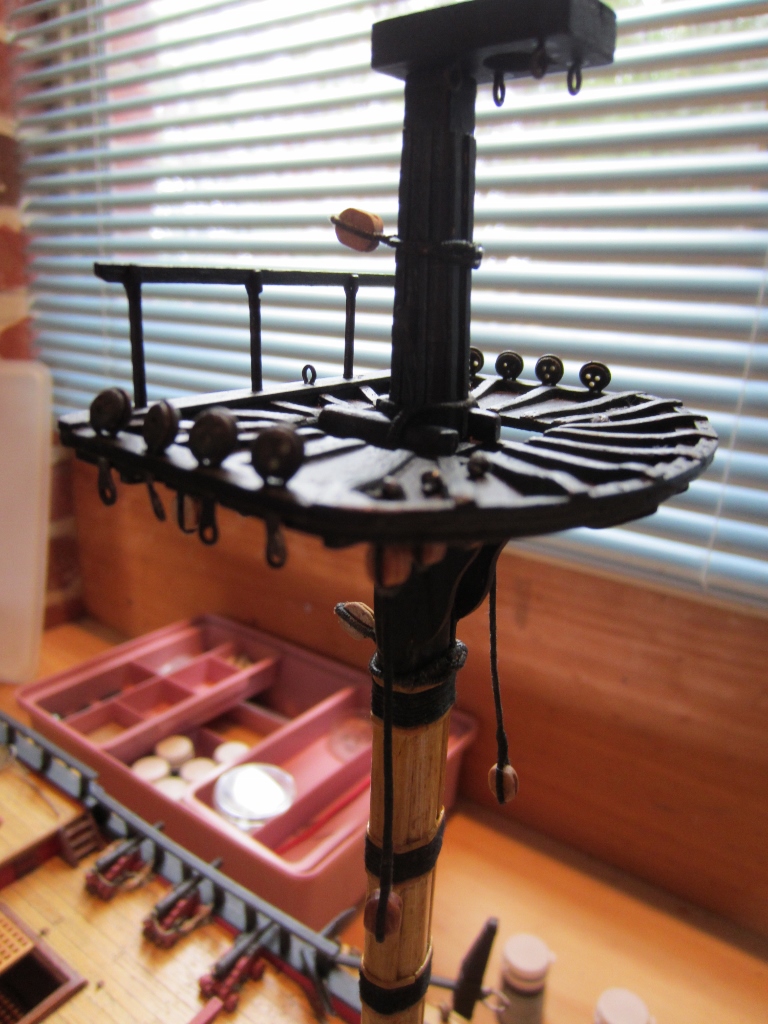
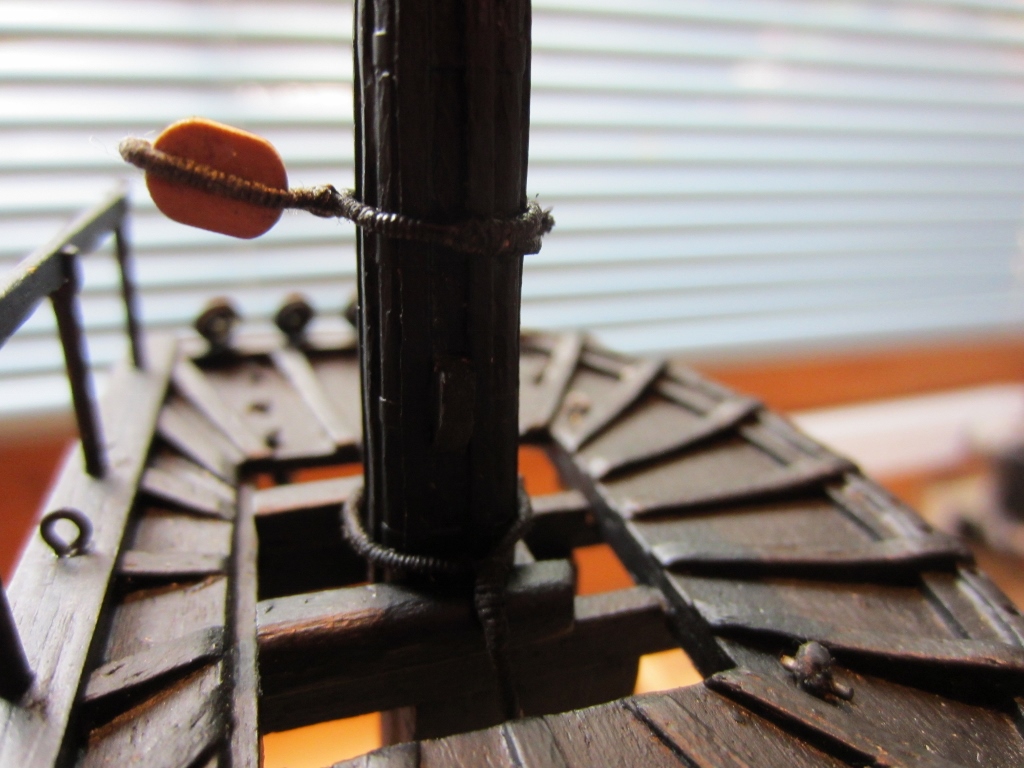
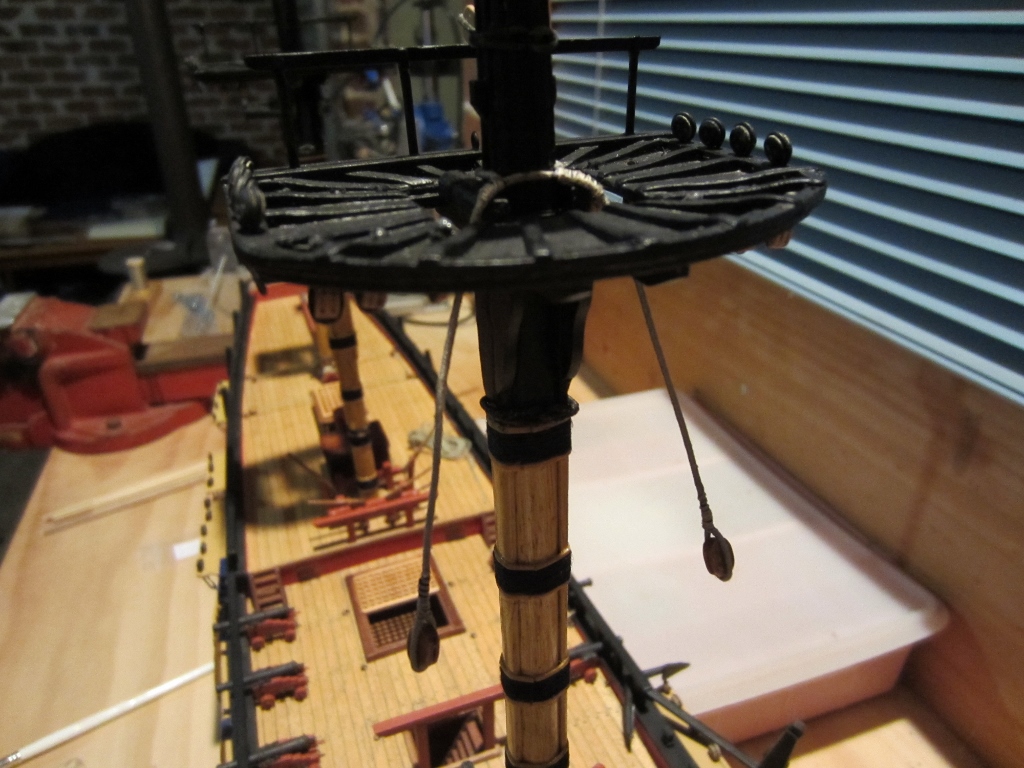
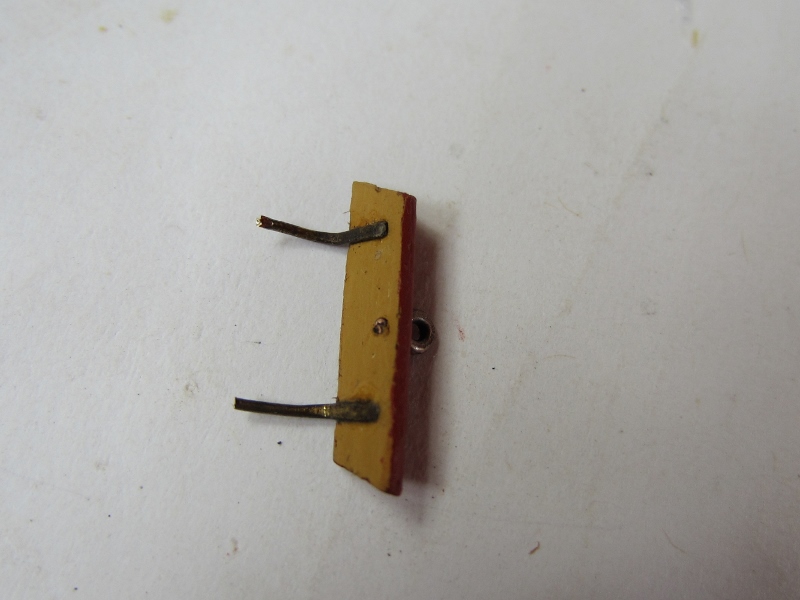
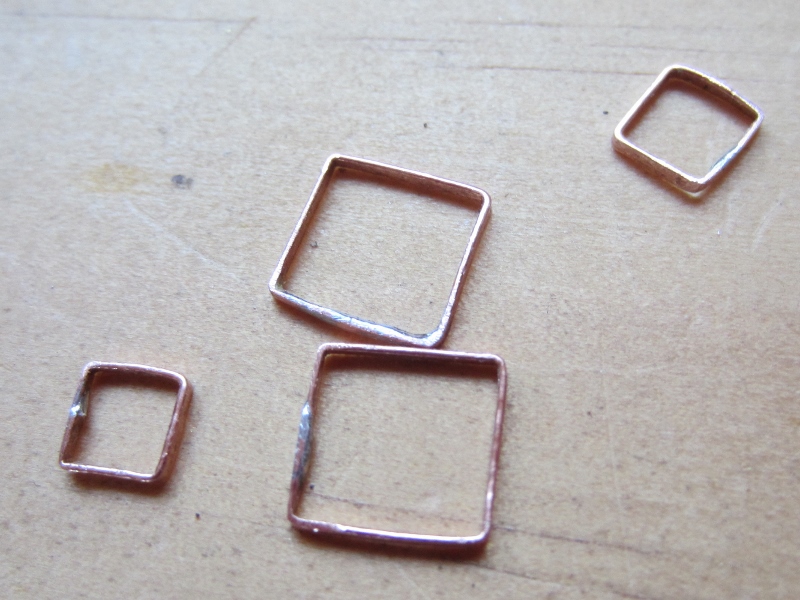
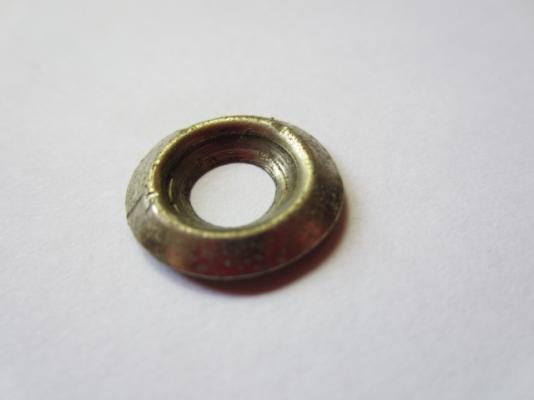
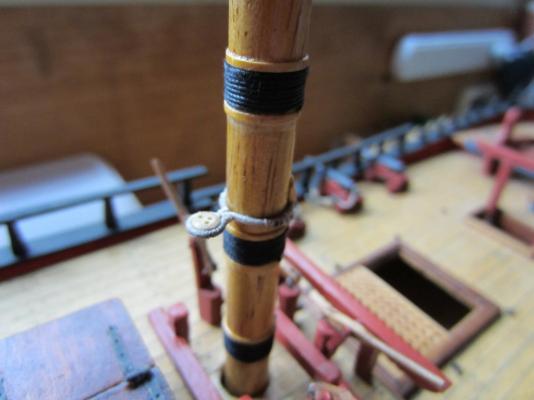
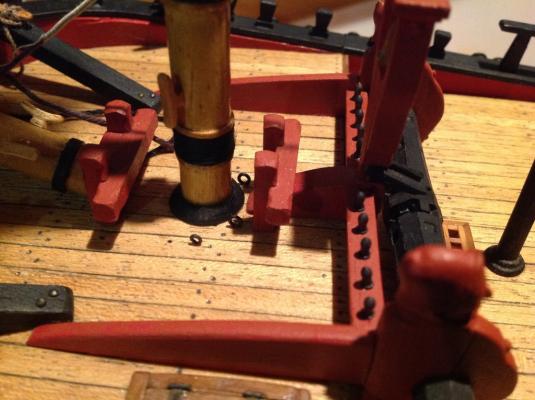
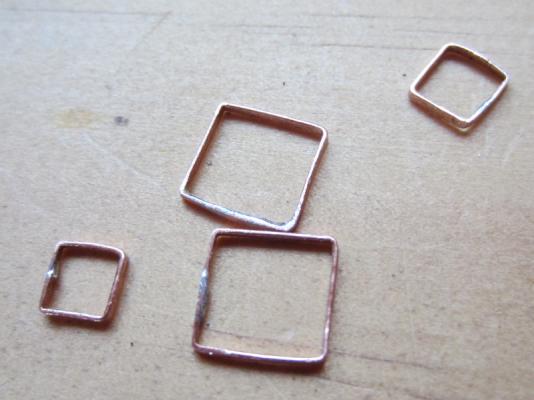
I was fitting the other mast base rings (or simulated boots) and the main mast one supplied with the kit was a bit thin and broke when I sanded it. I had to find something to replace it, I couldn't make one out of wood because I don't have the tools so I hunted around in my stuff and found some old metal grommets, I filed out the centre and it was pretty clost to size I needed, looks pretty similar to the foremast one.


-
I read yesterday that there will not be a 2014 edition. Apparently the long-time editor has stepped down. http://www.conwaypublishing.com/?p=7177
-
Yeah Mike asked the same question on my build log - I measured the angles on the three 1768 draughts I have and they are the same as you indicated Pat
-
Hi Mike On the 1768 draughts the angle of the masts are shown as follows Fore mast 90 degrees to deck Main mast 87 degrees to deck Mizzen mast 83 degrees to deck The forecastle deck is basically level, but the quarterdeck curves upwards towards the stern. The absolute rake of the main mast is 88 deg and the mizzen 87deg. Obviously is easier to measure the angle compared to the deck on a model Cheers Steve
-
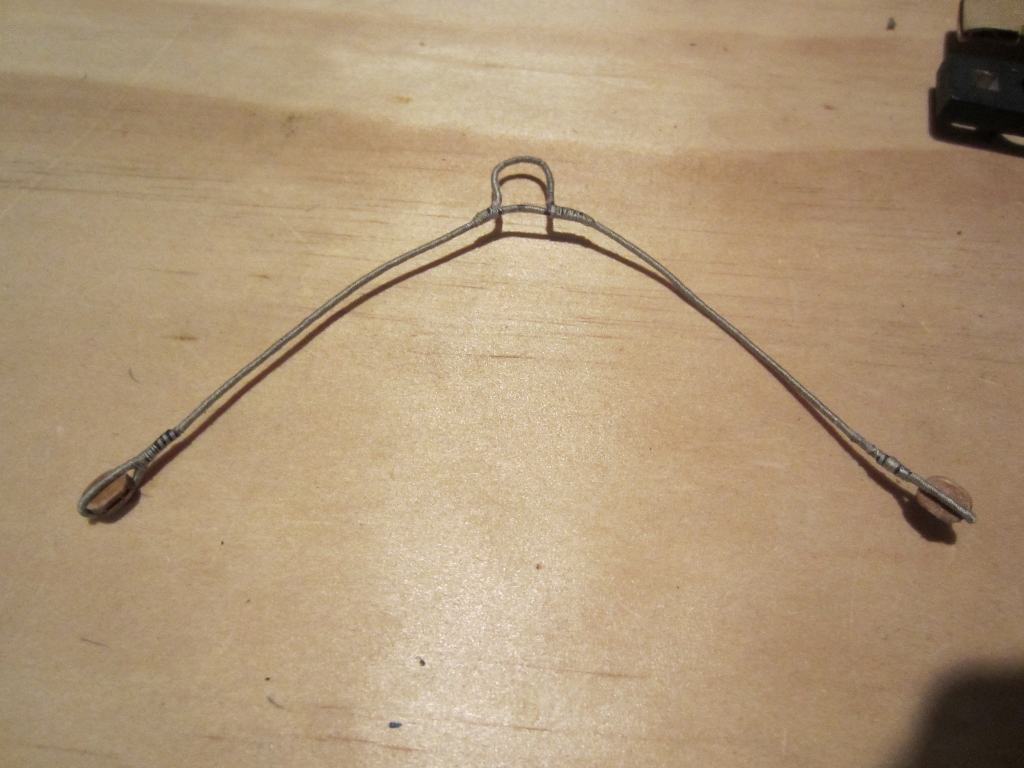
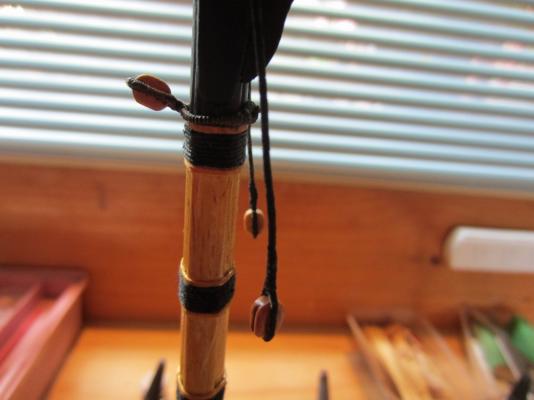
Today I made the other mast tackle, getting better at doing the splices, this one looks a bit neater.


-
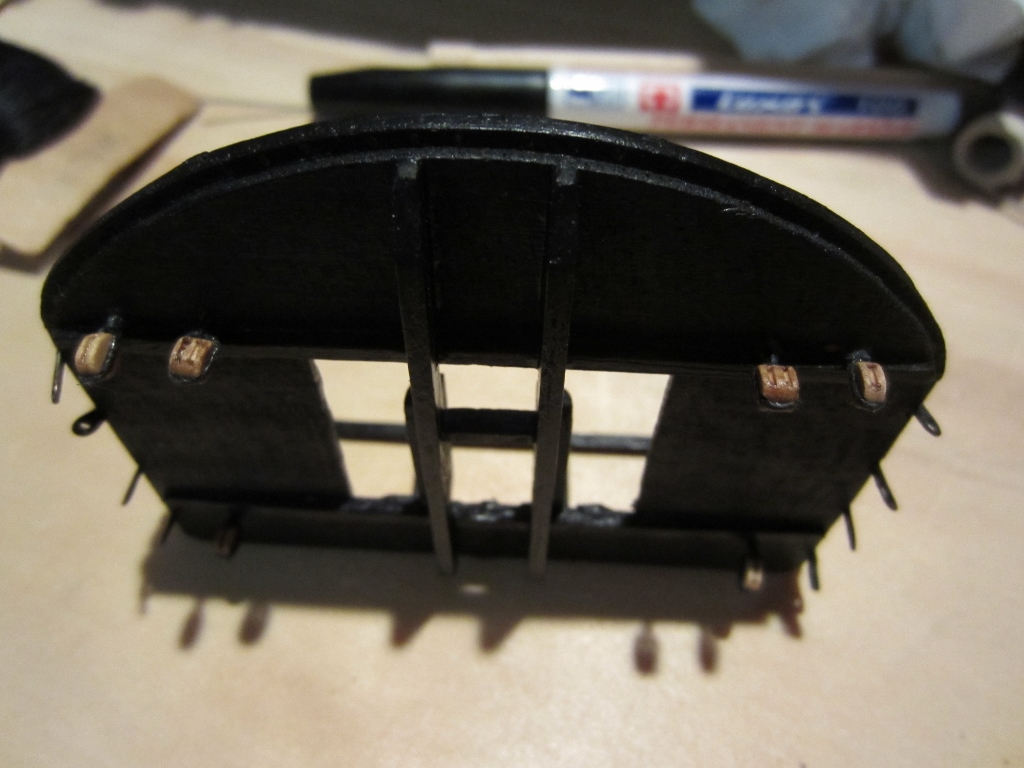
Managed to spend a bit of time on the ship today. Fitted the blocks for the buntlines under the main top. Ready to start on the foremast shrouds but first I had to make the mast tackle which goes over the mast head first. The serving looks a little rough over the splicing but it will be okay once I paint it black. I am not using black cotton for serving because I think it is "too black". Using hemp colour for serving then painting with dilute black paint gives a more realistic look of tarred rope I reckon.


-
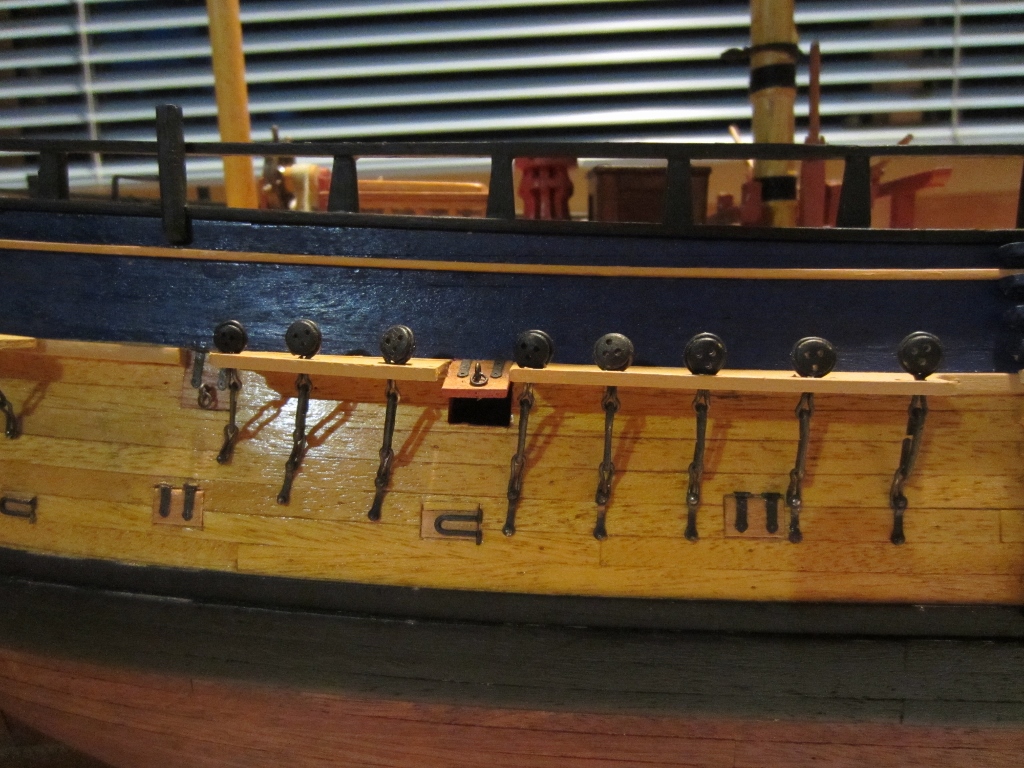
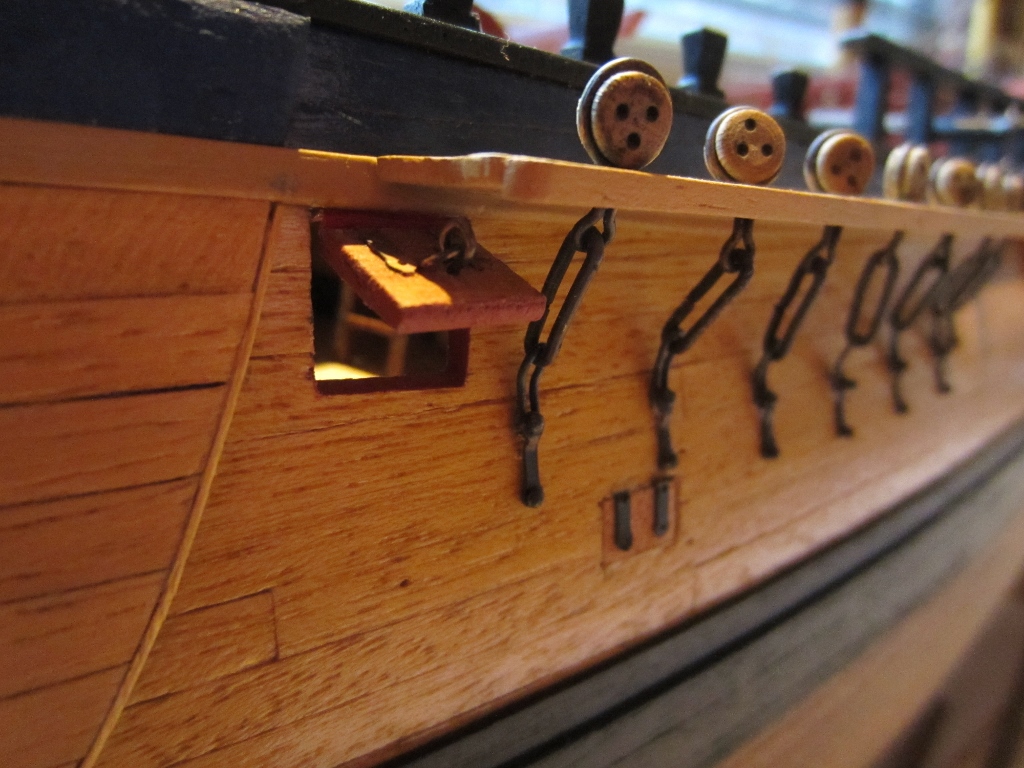
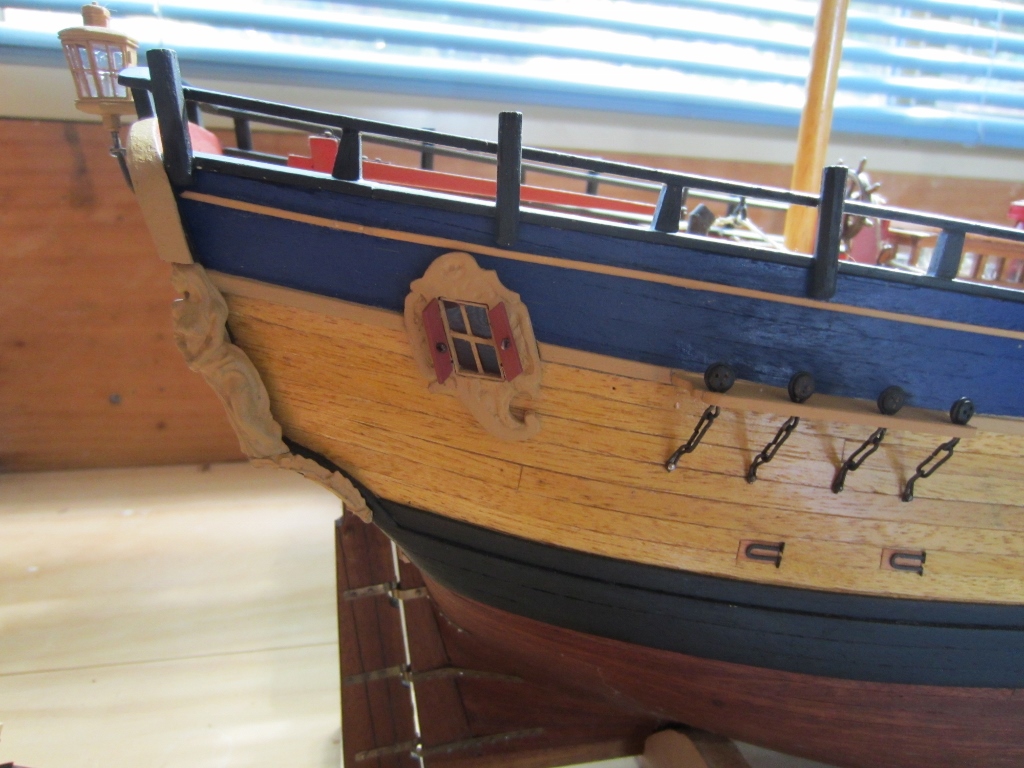
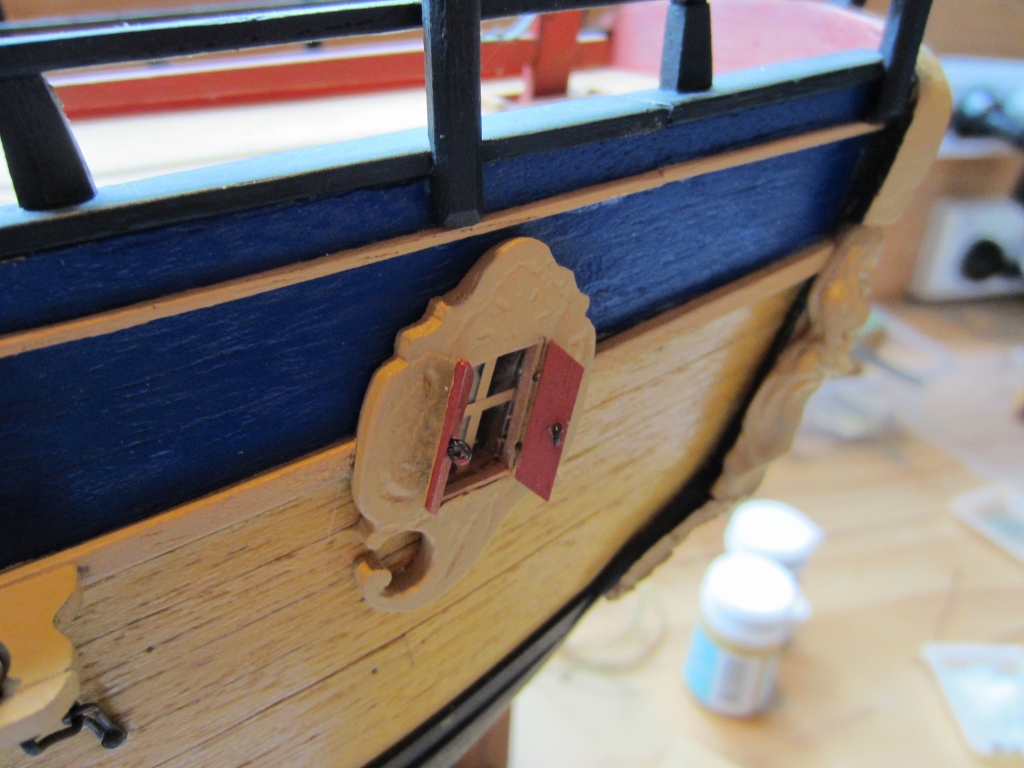
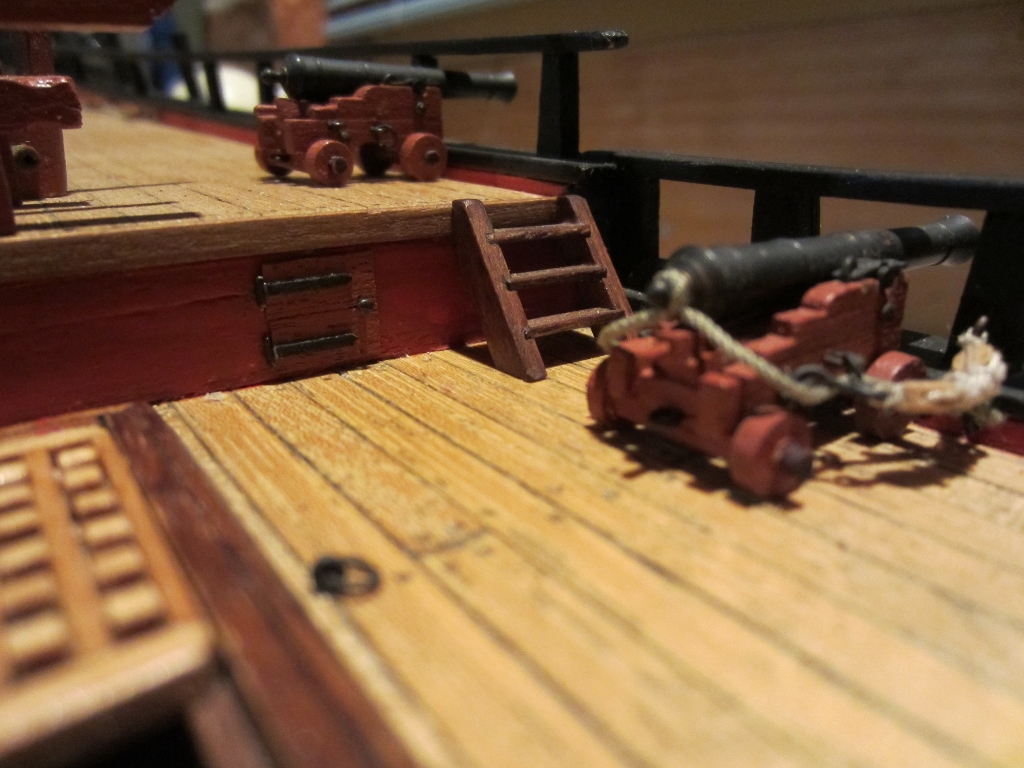
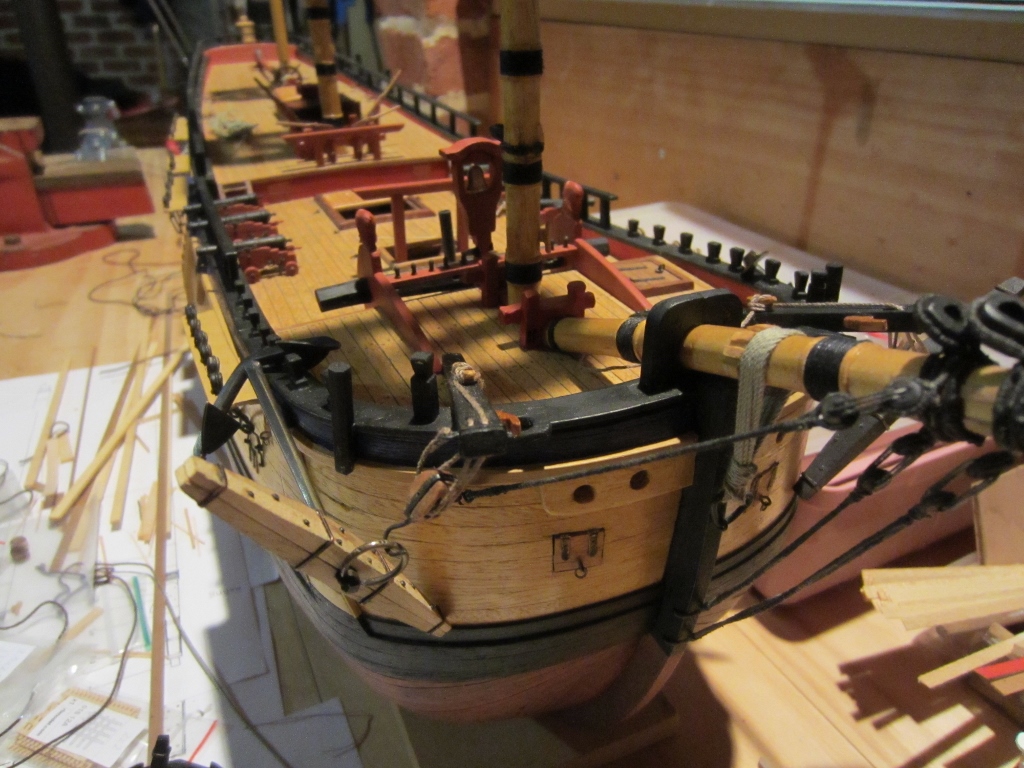
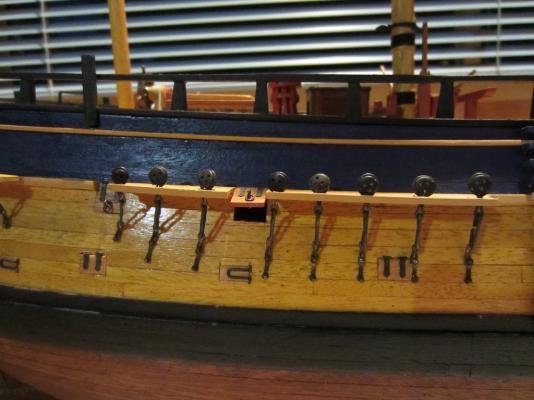
I was talking about opening ports, Kiwiron was asking about angles of chains. Here's a pic of both
-
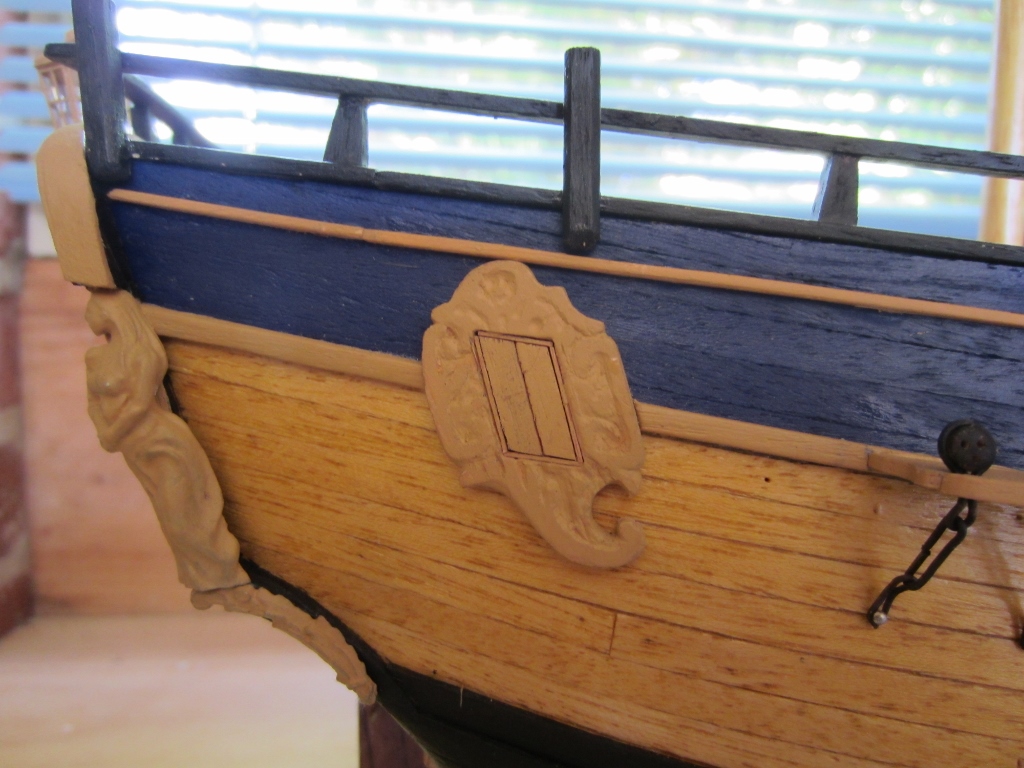
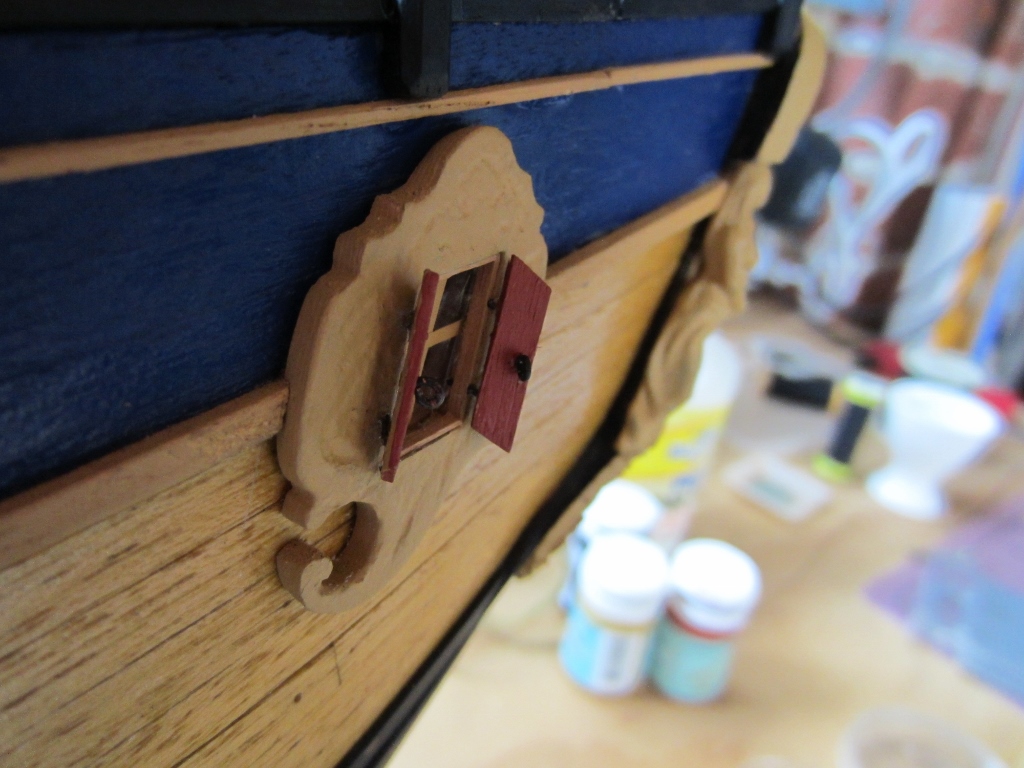
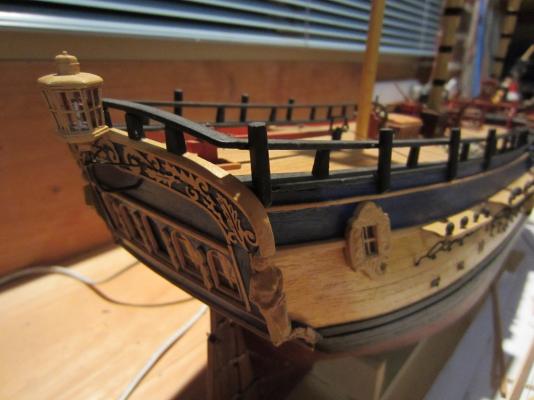
Thanks Dave, the window dead lights are static, they don't close. I did make a couple of the other dead lights so that they open and close (pic below). Hi Mike, yes they do look like bumpkins don't they, and it is that sketch that convinced Karl Marquardt. To me they don't look long enough to provide a benefit over the cathead as far as spread for the fore tack. And I'm still of the opinion that they would interfere with working the anchors. Anyway we could all argue till we are blue in the face but we still won't know. As a matter of interest you should take a pic from the same angle as Parkinson's sketch, like I did, and see if the bumpkins according to Marquardt look the same. Cheers Steve

-
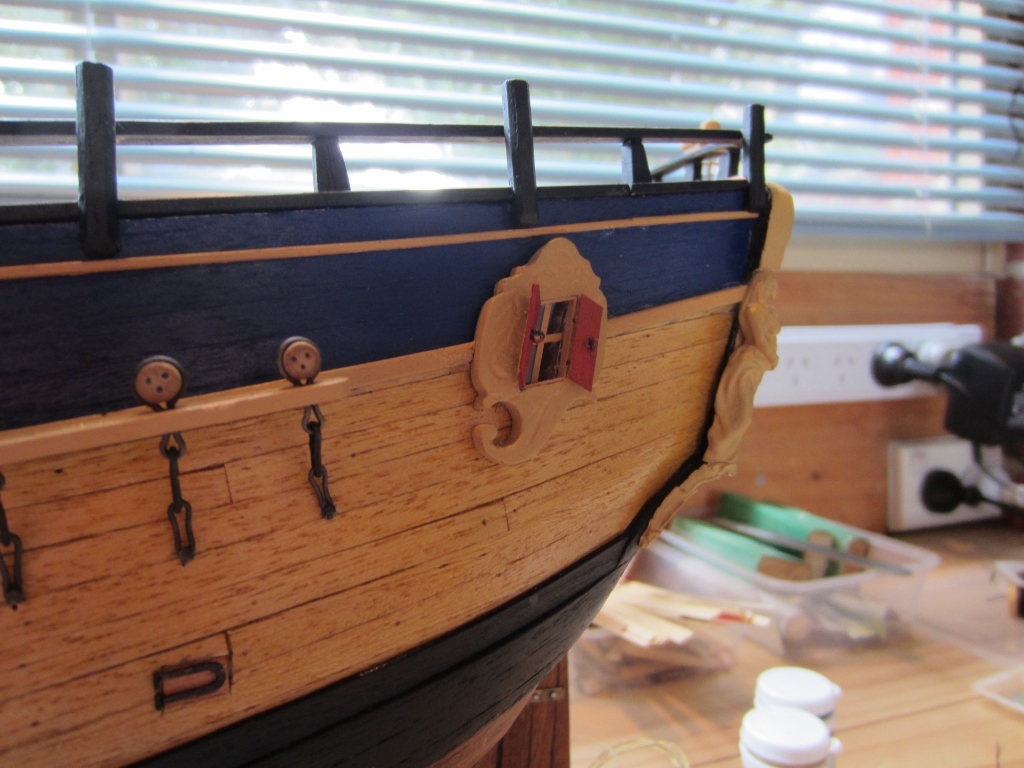
Still on working the window deadlights, doing the other side window today. I made sure the deadlights were the right size and shape by fitting them in place. I made the false hinges with brass wire, flattened so it could be glued on the door.


-
Thanks Slog I painted the outside face of the shutters yellow ochre to match the badges if they are shut Steve
-
I looked through my log and found that many of the photos in earlier posts weren't appearing, so I went in and uploaded them again. Here's a couple more new ones just for good measure :-)

-
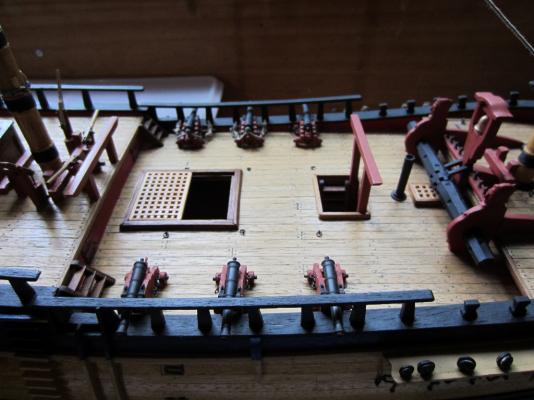
I'm a little bit erratic with my build. I did the gun tackles on one of the guns quite a while ago then moved on to something else. Today I thought I should finish them all off and get that job out of the way, fiddly work though because the blocks are so small. Well I got one more gun done. Gee the camera shows up flaws that you just cant see with the naked eye, like dust and white stains from the CA glue


-
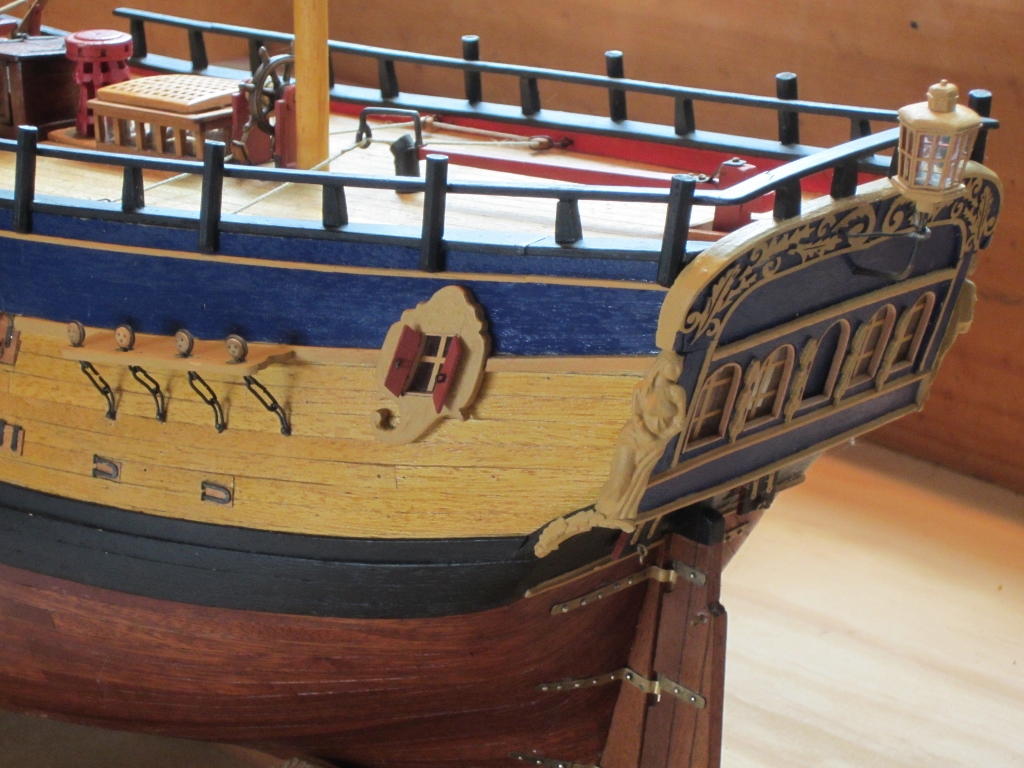
Interesting pic taken from the same angle, everything lines up pretty well. The aft seems to go up higher in Parkinson's sketch but thats just to do with camera lenses versus eyes. Those damn "boomkins" in the sketch are a worry, I still reckon they are not long enough to be boomkins so what are they? Biggest debate in maritime history :-)


-
Hi Dave If this is the Corel Endeavour - I recall seeing pictures of that model in the Corel ads and thinking it looks hardly anything like the Endeavour. I built the Corel Victory a long time ago and it was my first wooden ship and the instructions were terrible, so I can relate to what you are saying about the plans and instructions. Cheers Steve
-
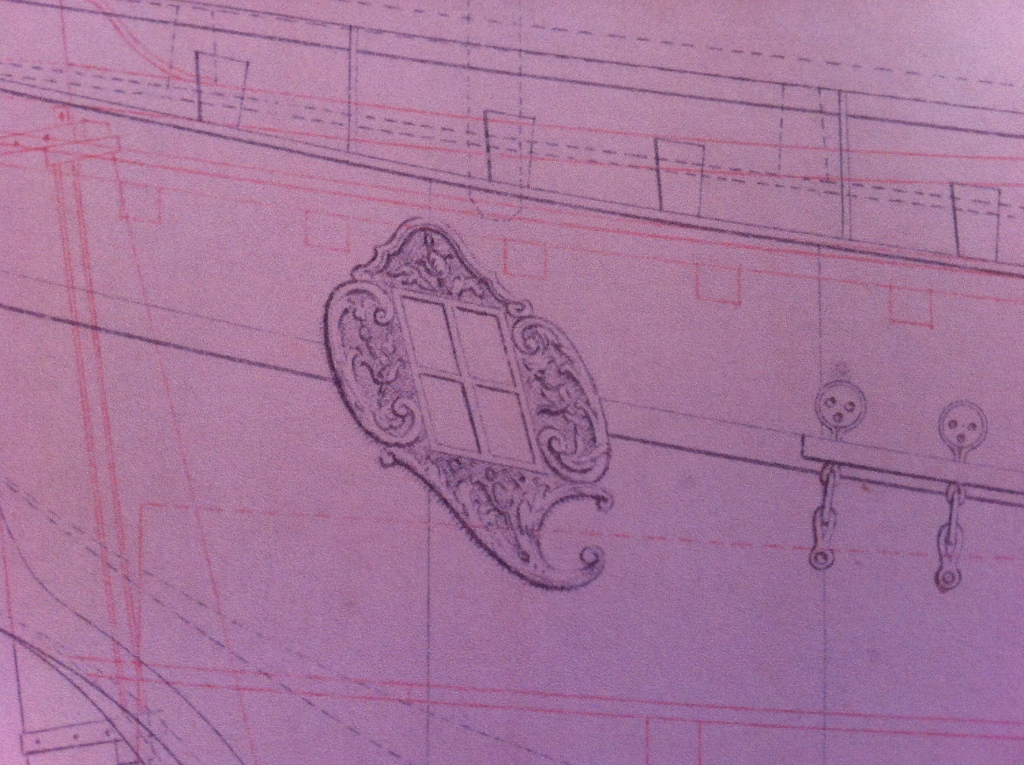
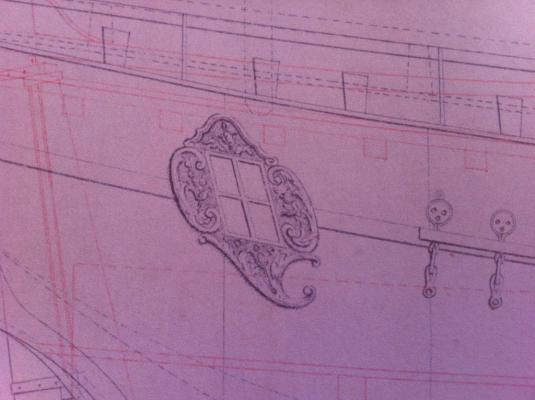
Hi Dave Nice work on those badge windows, they have "dumbed down" the carving work on your plans a fair bit, for obvious reasons, the carving work was pretty intricate on the actual ship and too hard to replicate at 1:60 scale. For your interest, here is a picture taken of the window on plans of the Earl Of Pembroke after purchase by the Royal Navy Cheers Steve
-
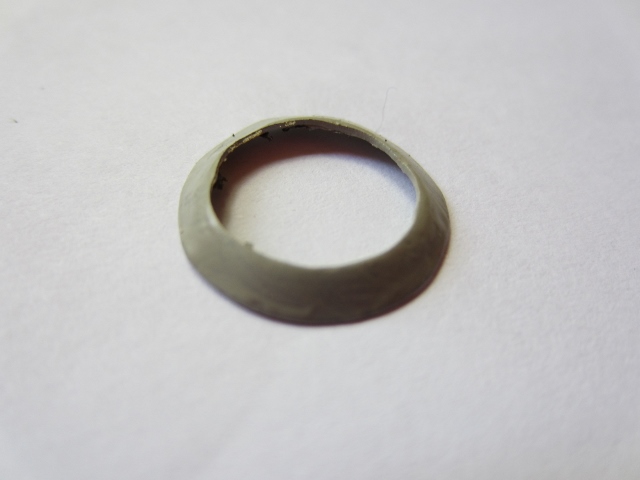
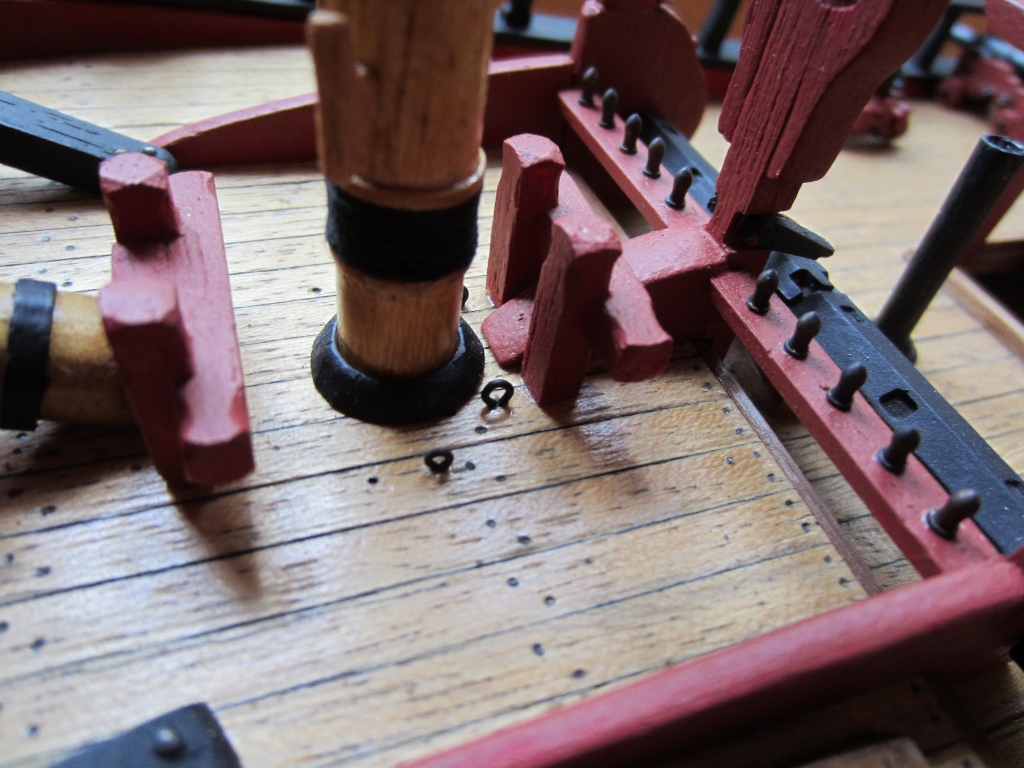
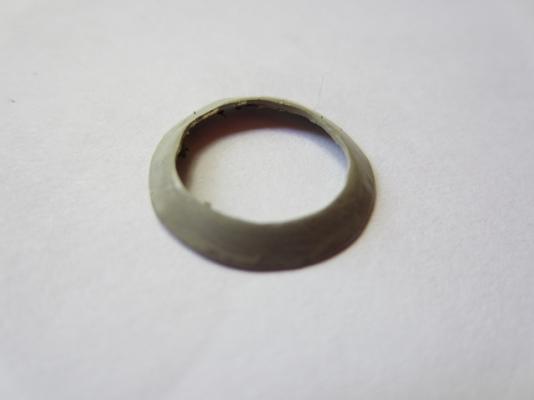
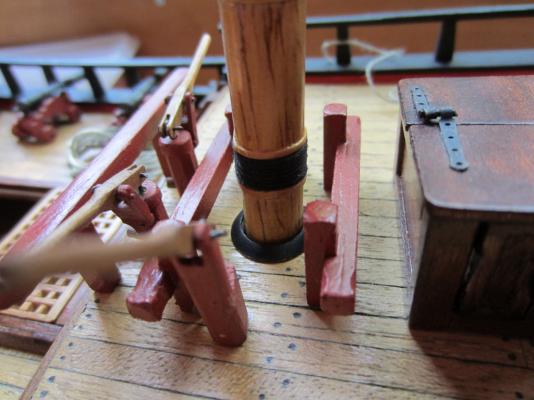
I also made the mast coat for the fore mast, sort of, I used the wood ring supplied, sanded it to an angle, roughly to simulate canvas and painted it black. Enough detail even at 1:51
-
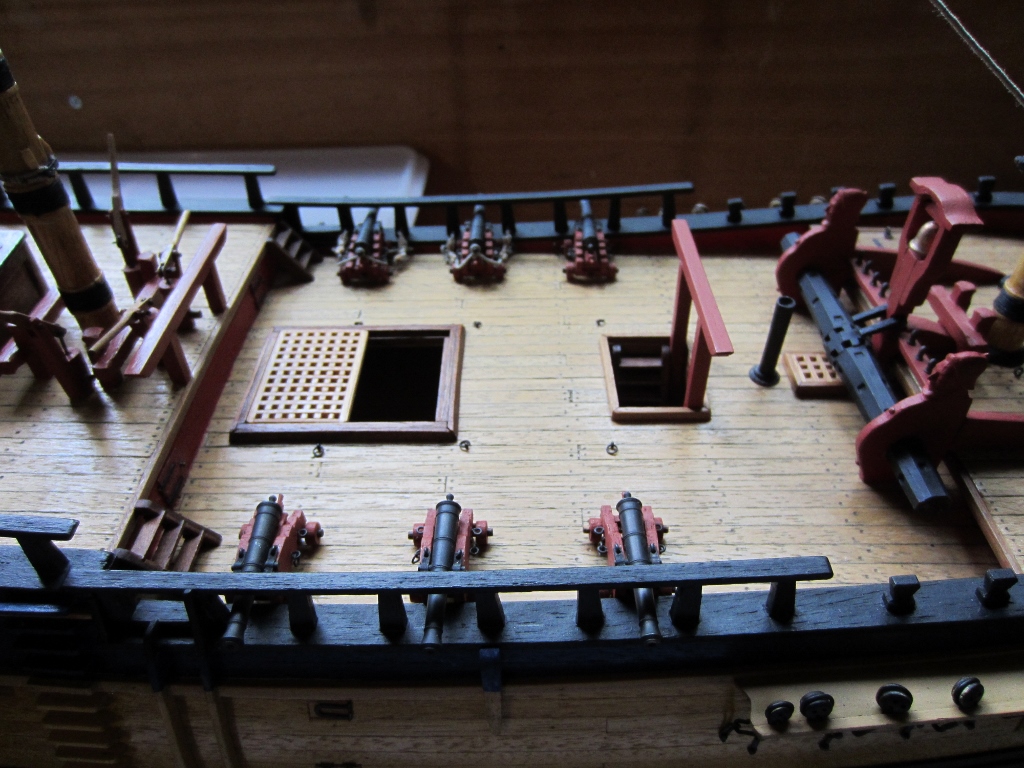
I've been doing a few small bits and pieces. Finally got around to putting the hinges on the hatches on the quarterdeck bulkhead

-
Happy birthday Mike
-
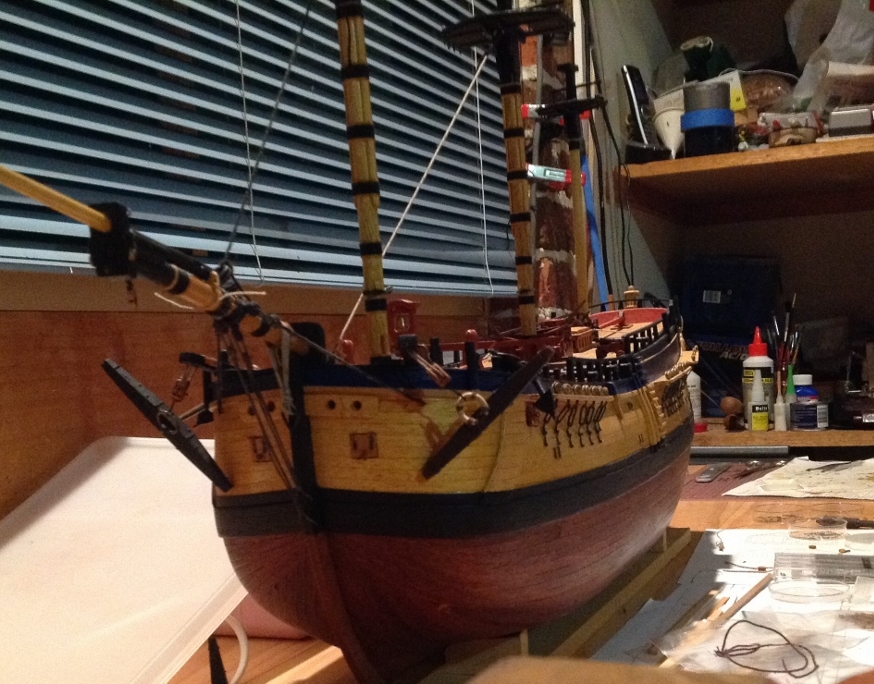
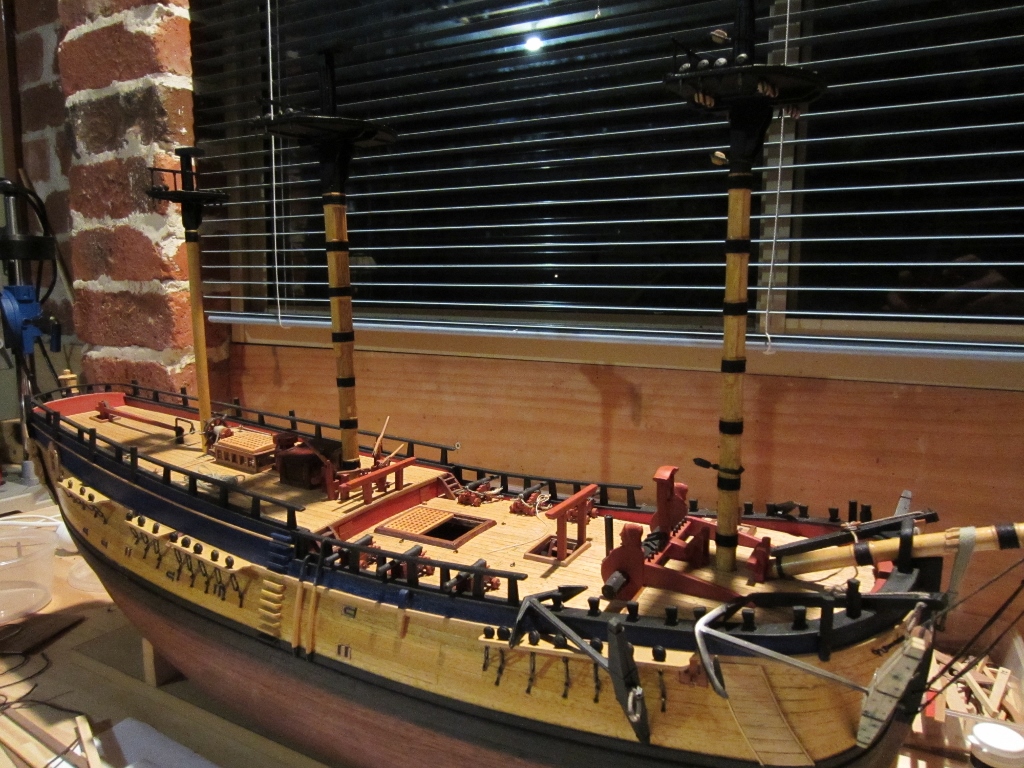
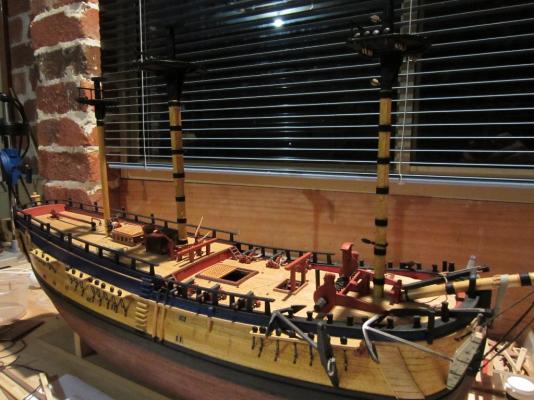
Thanks Greg. Okay lets post a few more pics just to show where I'm up to. Not trying to make it look like the Replica or like AOTS book, or Parkin's. My Endeavour is a combination of all the sources of info on her that I can find, my research project

-
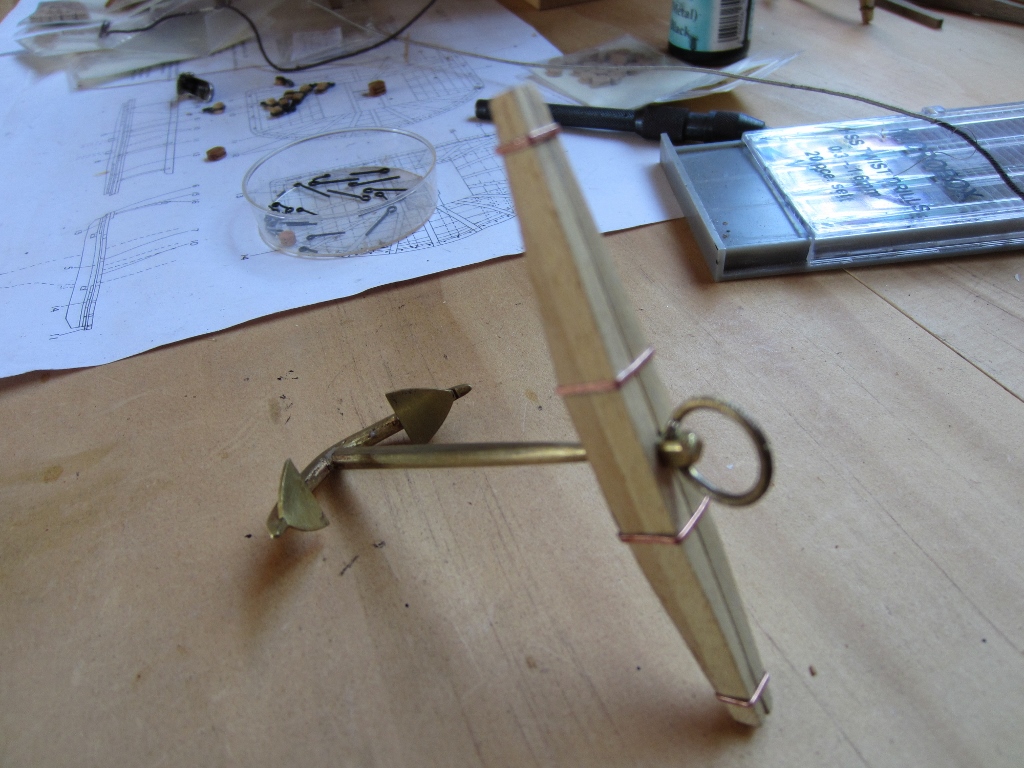
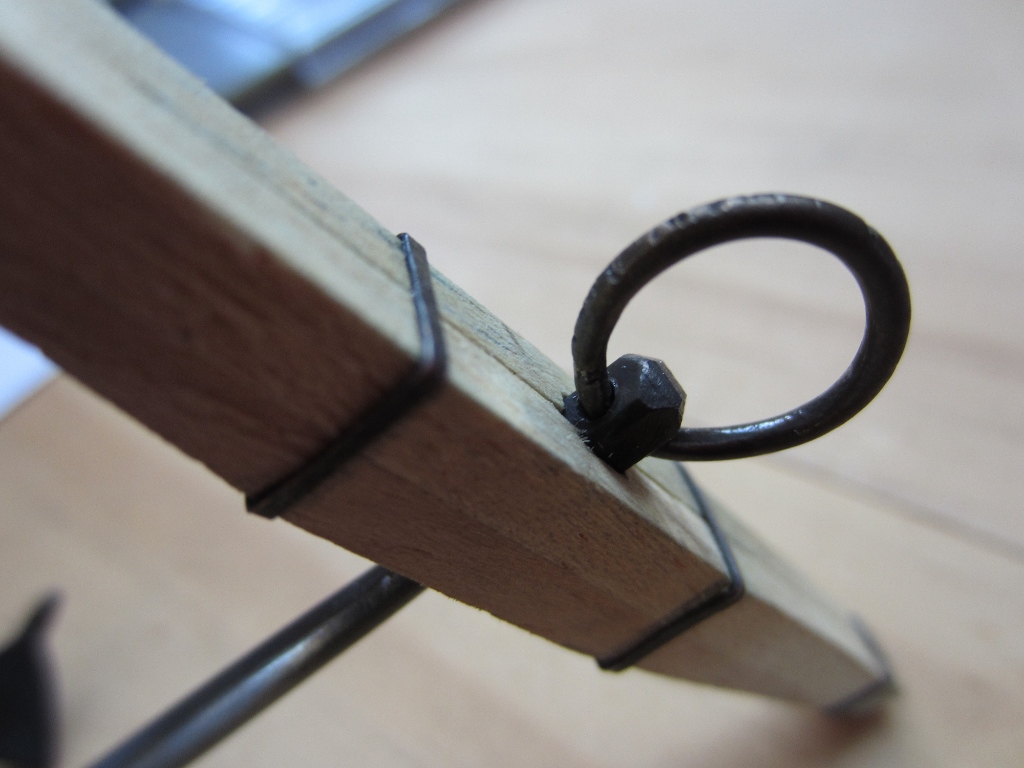
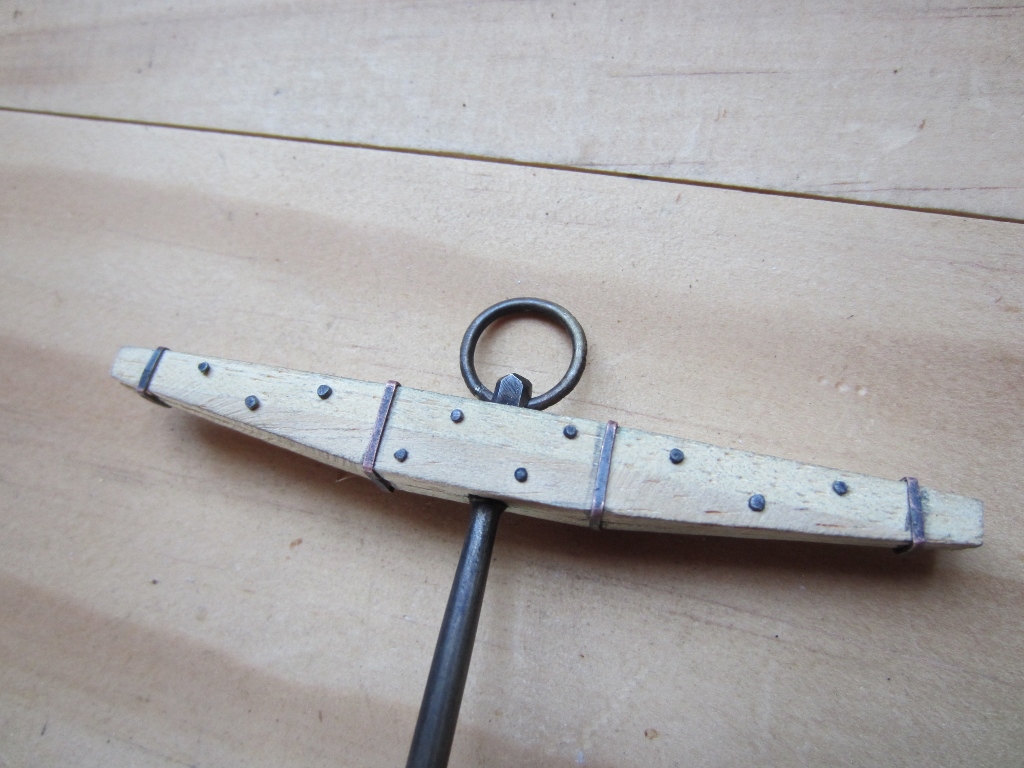
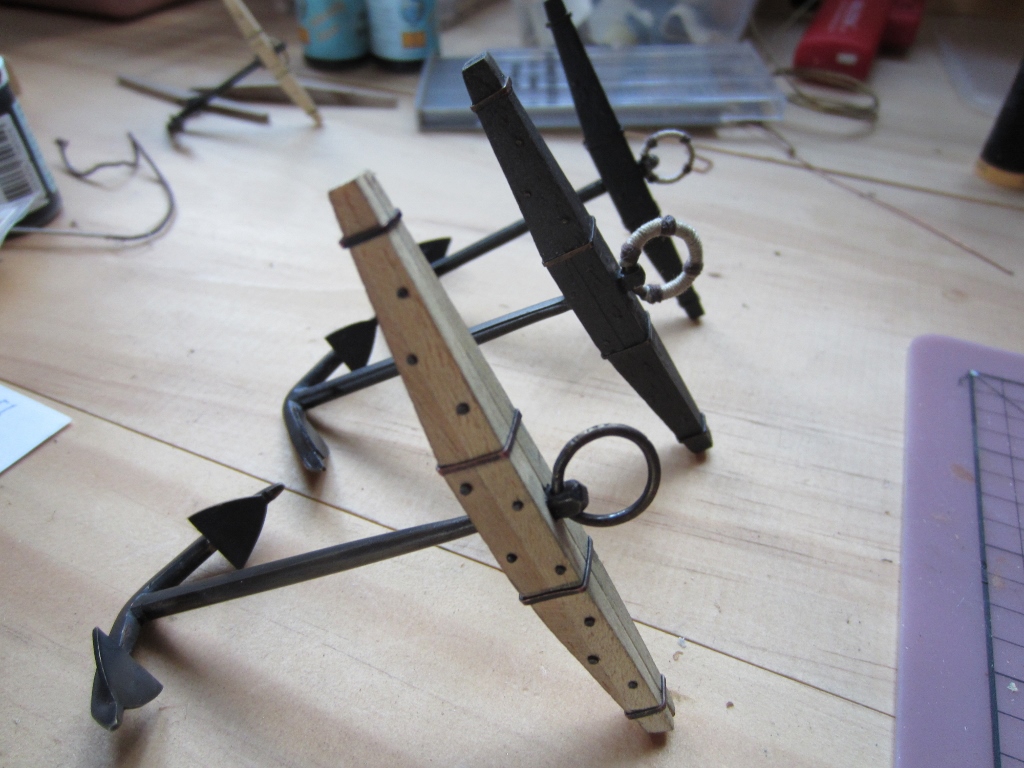
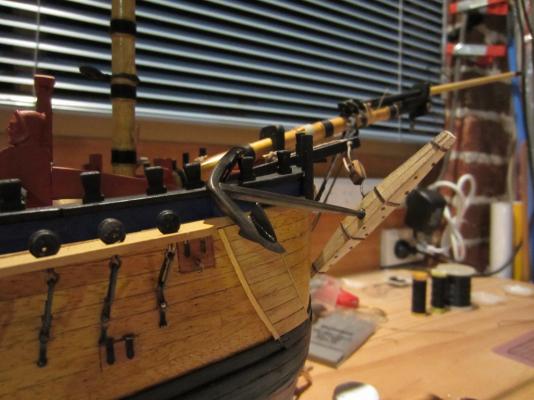
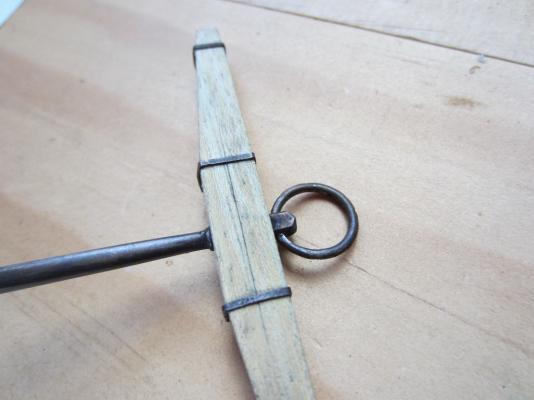
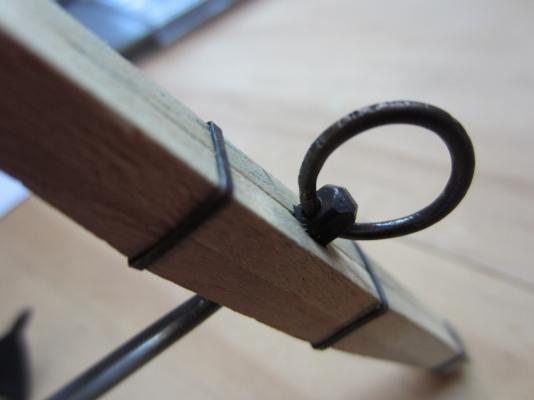
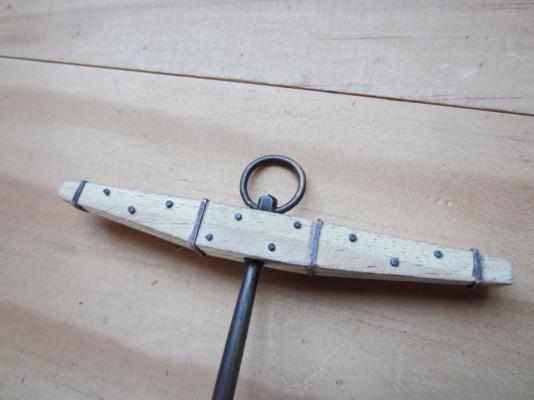
Spent a few hours today finishing off the best bower anchor. The hoops are made from copper wire that I flattened with a hammer then shaped and soldered. For the previous two anchors I used brass rod for the pins this time I used some brass nails. I thought the heads of the nails looked too big so I filed each one smaller. Cheers Steve


-
Hi Rowan I can relate to your frustration with the AL plans and the run if the wales. The AL Endeavour that I built from their plans and instructions has issues with the transom and run of the main wale, which is one of the reasons I wanted to build another Endeavour - to get the lines right. It became a bit of an obsession with my current build so I got hold of all the reference material I could lay my hands on, including the original draughts, and spent hours thinking it through and measuring and looking at all that and paintings and models from the 18th century. I still got the main wale a little bit wrong even though I measured its position so carefully based on the original draughts. It's a pity that the MSW crashed and my earlier posts were lost , I went into great detail on how I got the transom to "work" Anyway keep up the good work, she's looking pretty good Steve