scott larkins
-
Posts
489 -
Joined
-
Last visited
Content Type
Profiles
Forums
Gallery
Events
Everything posted by scott larkins
-
 looking good. The choice of woods is woking well for you.
 -
looking good.
-
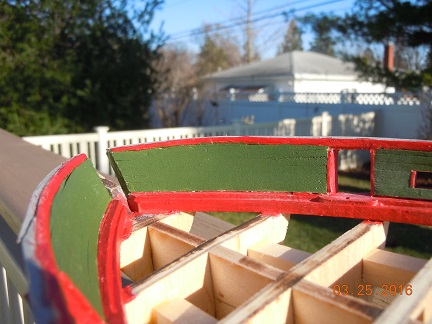
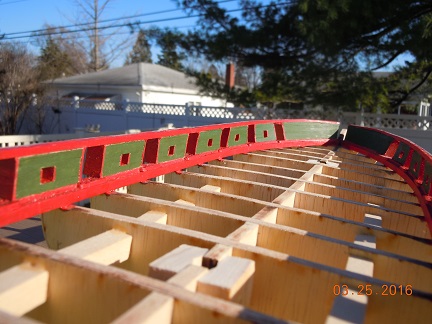
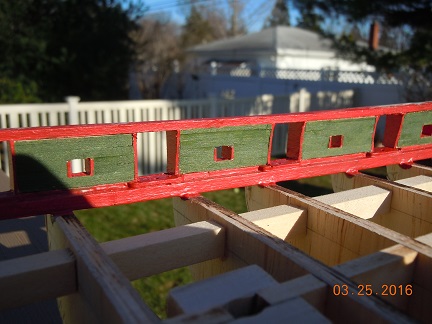
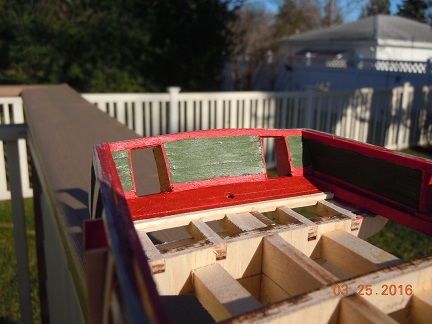
Okay, finally got the bulwarks finished. Repainted the red because as I said, I thought the paint I purchased from the modeler was too washed out and too thick. The paint kind of clumped on instead of painted on. My opinion at least. I used insignia red and medium green from testers. Anyways here are my pics. I took them outside so I could see a "truer" color.
-
Nice pics texxn5. I saved a couple for reference points. My bucket list included getting to see the Niagara in port. I just went out today and purchased new paints. I did not like how the MS paints were almost "dull" in color. Not sure if they were going for a realistic time frame color or what I like my colors a little more "rich" So I am now repainting insignia red and medium green. Close matches but richer in color. I'll post pics when I'm done.
-
Thanks for the tip. I"ll look into that.
-
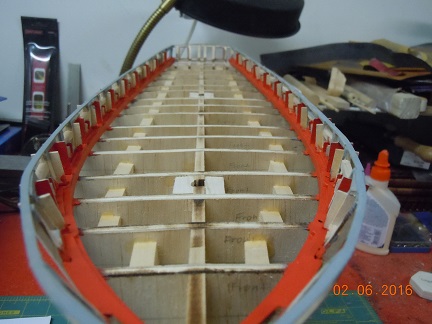
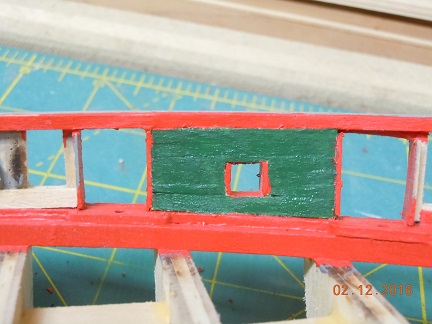
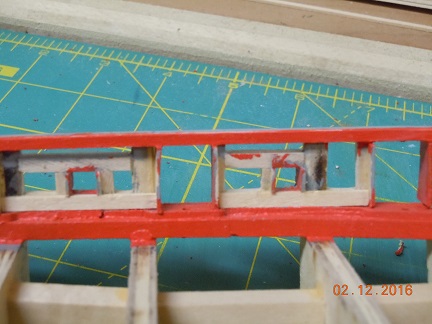
Sorry for the long time between postings. Been busy with putting together my next cosplay costume, computer games and slow build on the ship. But here is where I am. Here are the planksheer and water piece. Looks like it has a pretty good bend with the ship. Yes, I too had to add wood to the outside of the planksheer. Like others it did not go all of the way out to the outer edge of the ribs. A closer look. Yes, I made the cannon port side planks a little larger then needed. I'll shape those down better once I put in the ceiling planks. Here is my first attempt at the ceiling planks. This was my test area. You may notice that the lowest plank is a bit larger than the other planks. According to the plans it is supposed to be a little wider so that it fits as one unaltered piece below the oar ports. The dark green paint looks a little darker here in the pic than it actually is. Notice how I did shape down the sides of the gun ports here and painted them accordingly? These will be my next ceiling pieces to work on. I'm going to work from the bottom up in case I messed something up with the measurements. I figure the top plank can be a little altered since it will eventually be a little hidden by the top rail piece and the numerous other added pieces in the future. LOL. See how wide that bottom plank is? Always trying to think ahead. LOL

-
Looking fantastic. Looks like you are almost done there.
- 974 replies
-
- 1
-

-
- rattlesnake
- mamoli
- (and 1 more)
-
Thanks for the tip, good idea. Just finished gluing the water way and corrinod pieces to the ribs. Going to prime and paint soon,
-
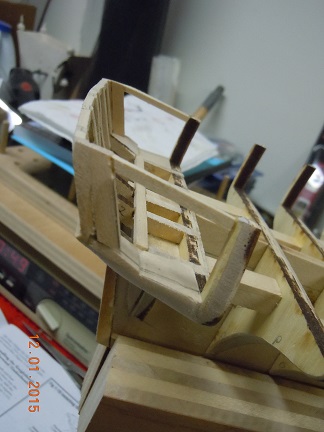
Sorry for the long delay in posting. Been busy with house items and working on a cosplay constume for next May's Detroit comic con. But here are some updates. First let me say that I have never worked with more brittle wood in my life. I have broken numerous bulwark ribs and stern pieces than I care to count, and I was being really careful too. As a matter of fact, I broke those stern pieces so many times that after numerous regluings that they ended up not in the right place any longer. So for those following along, all I can say is be very careful with the pieces of wood sticking up. Twice I broke a piece off simply by rubbing up against it. Below are my pics of the stern mess up and my fixes. Here is how bad the stern pieces looked after numerous gluings. I felt a little defeated. After various shims on both sides of the stern pieces I was able to line things back up. And now I was able to add those other wood pieces across the top and making sure the two cannon ports were the correct dimensions. Ironically by regluing those stern pieces I actually straightened up the gun port sides so I only had to add wood to make sure the dimensions were correct. I guess sometimes it's better to be lucky than good. LOL And finally the side of the stern work. I think it all came out pretty good with all of the mess ups. Let me finish by saying this. Getting those stern filler blocks right took a lot of work. It was almost like working in 4D. There are a lot of angles to consider back there. Front to back, side to sides, up and down and the angles between those.


-
coming along well I see.
-
Isn't it something else at how many ropes are at the front of the bow sprit?
-
thanks for the tip
-
riks, Nothing taken seiously at all mate. Thanks for following me.
-
riks, Yes your are right but remember, the computer controlled laser cutter is only as good as the data put into it. LOL Just part of the ship building process. I was not surprised when I put a plank on to see this. I, like so many others, just dealt with it. Thanks for following along.
-
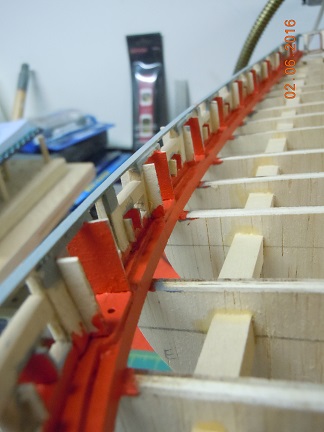
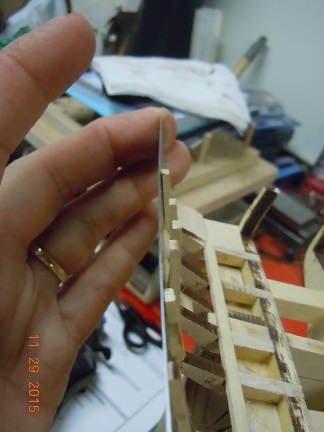
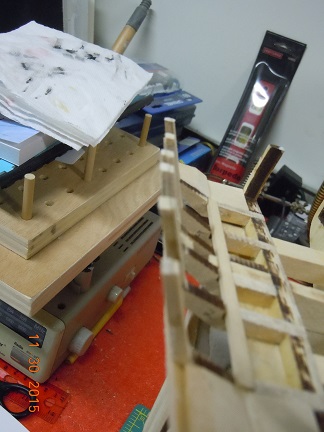
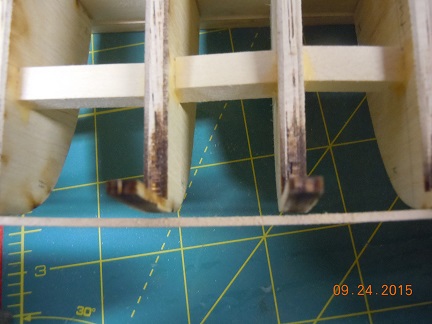
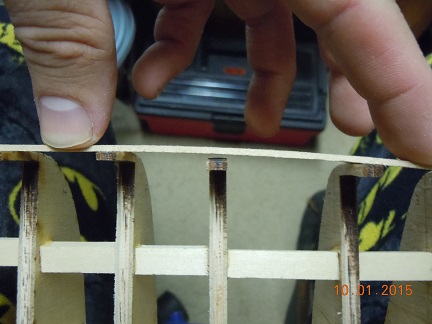
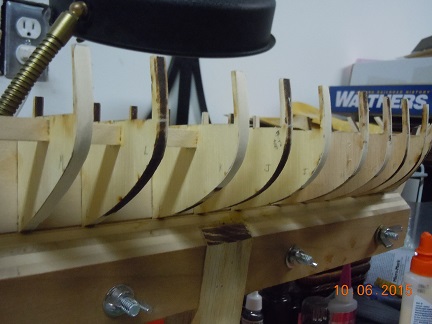
Sorry it's been so long. Trying to remind myself that this is not a race and to slow down and review our blogs and my own to get things right the first time. So below are a series of pics showing some of the ribs being too small from the laser cutting process. I took my own advise from my Rattlesnake and photocopied each rib piece to make sure it was symmetrical on the center keel slot. Luckily there were. So one less thing to worry about. So I clued the ribs on, which if I had followed my own build log I would have waited until I made sure the ribs were in line. See pics below, because they weren't. I filed the too big ones down and had to build the thin ones up. You will notice the last pics show where I added wood, notice the laser burned wood and the clean wood. I still managed to make it work though. Lucky me. I just had to make sure to be careful not to brake the gunwale pieces. Oops, messed that up. Broke one. MAN! So a few weeks later I am now ready to add the bow and stern filler blocks.
-
I continue to be amazed with your build. I understand the frustration from not bein able to find all of the lines "anchor" points on your build. Even during my Rattlesnake build I found a couple of times where the top yard lines were not shown on the plans. I simply found an open spot or ended up making one by tying directly on to something else like a rail instead of a pin or cleat. Just make your best guess and keep it clean. In all honesty, no one who has not built the ship would know. And I bet even people who have built the ship would not know if you didn't say anything. Don't lose sleep over it.
- 440 replies
-
- 6
-
-
- niagara
- model shipways
- (and 1 more)
-
Make sure you put that bow sprit in before you put in the forecastle. Once that forecastle is in it is damn near impossible, I found. I put my bow sprit in early and was happy I did so.
- 481 replies
-
- 1
-
-
- rattlesnake
- model shipways
- (and 1 more)
-
Coming along really nice. Yes, I too found out that the more lines you added to the yard arms the stronger they got. I too also noticed the inconsistancy in the block holes. Some times a block was not drilled at all, and for the most part I ended up drilling bigger holes anyways just to get the required ropes through the block. I found it tedious and did slow things down but I had to remind myself that I was not in a hurry and the frustration of trying to put a rope in to a narrow hole was far more frustrating than taking a few seconds to drill a bigger hole. Because every time I tried to put that big rope through a small hole it ended up unraveling the rope. Which ended up setting me off even more. My advise, slow down, drill the hole now and save your sanity later.
- 440 replies
-
- 4
-
-
- niagara
- model shipways
- (and 1 more)
-
Looking really nice. Speaking from experience you might want to think 4 - 5 steps ahead. I'm not kidding.
- 440 replies
-
- 1
-
-
- niagara
- model shipways
- (and 1 more)
-
Coming along really well. Your skill is so good.
-
Awesome work. I can only hope mine looks half as good as yours.
- 440 replies
-
- 2
-
-
- niagara
- model shipways
- (and 1 more)
-
Thank you everyone, I would not have been able to do my first real wood ship without the help of you guys and this site. Hopefully I learned enough to make my Niagara even better.
-
Can you show a picture of the very bow area where those two pieces come together? Up there by the king pieces. I suspect there may be some sort of a gap there but I can't make a suggestion without seeing it. The port side looks pretty good but the starboard, as you say, does come in. It may be as simple as a little sanding up front there on that one piece. It also looks like the gun port between B and C rib may be a little twisted. You don't want the twist, you want a curve that mimics the curve that the hull planking would take. Maybe even a little between B, C and D on the starboard side. Try to back through any of our blogs to see how we others did it. Don't give up, you can do this. I would work on the ports first before messing with that laser cut piece. That is difficult to make the same way. It looks like you did a little rib mending. Not uncommon for this model. I would suggest you also take some time with one plank piece and wrap it around that bow area the best you can. Don't bend it to much as the plank will break if it is not soaked or steamed. You may have to rock the planking back a forth a little to see how it fits. As so many people told me, and I said the same in my blog. Getting these ribs right is worth all of the time put into it. Get them right now because they really to make the ship. Review, review, review our other blogs. Believe me, if I can do this, and you really want to take the time to make your own Rattlesnake, you can do this. I've only built one other wood ship prior to this. I learned a lot but it took my 20 months and 1 week. Other did it faster, others longer. There is no rush. You get out what you put in. Good luck!